
Welcome to Siarum Communications Technical Support Portal
How-To Documentation
Apps
The ‘Apps’ section will provide an overview of gloCOM editions usage per Extension. It will enable users to use ‘Templates’ to apply predefined gloCOM editions permissions per ‘Departments’ or to use ‘Batch Mode’ to set up gloCOM edition’s permissions to a certain number of Extensions.
Overview
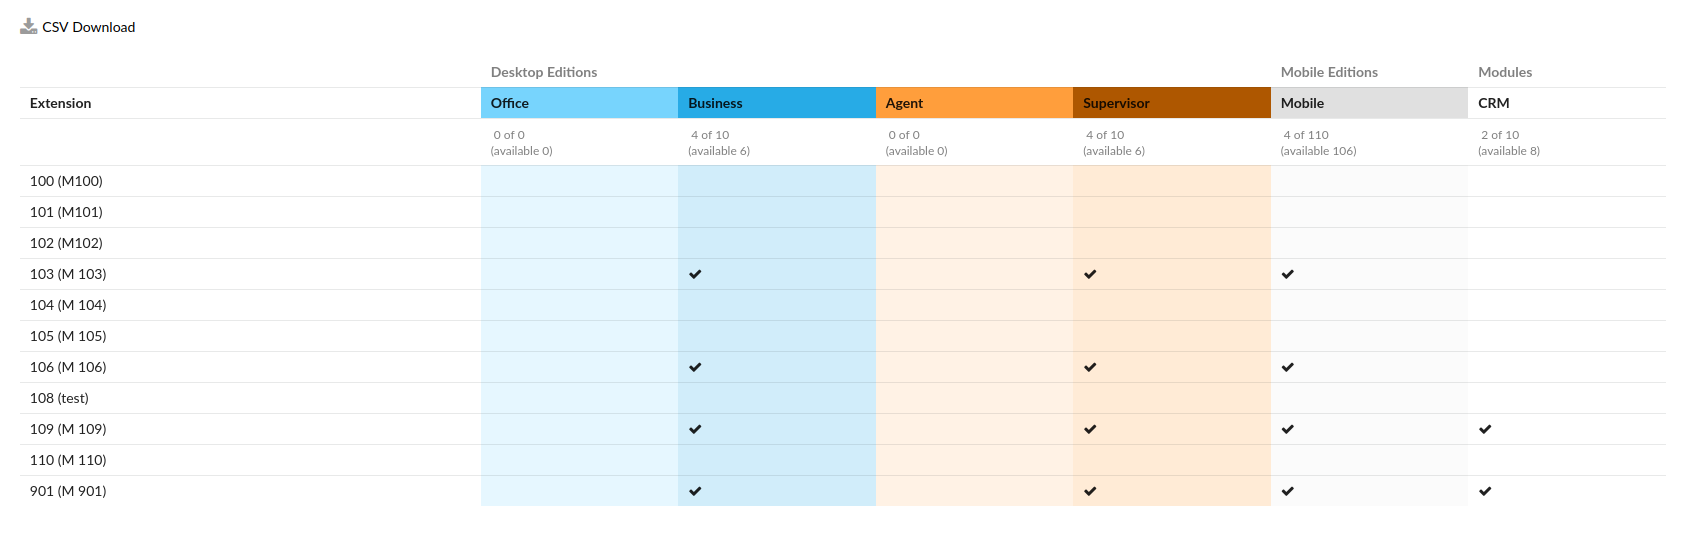
The ‘Overview’ page displays a full list of Extensions on PBXware and assigned gloCOM editions. This page is used to make the management of edition administration easier in case users need to switch permissions among Extensions.

Click this button to download a CSV file with the information from the ‘Overview’ page.
The implementation of the gloCOM Editions and Modules feature first introduced in PBXware 4.x solved many problems with the gloCOM licensing procedure. With this improvement, users are able to prevent other users from switching to gloCOM editions that were not meant to be used with their position in the company. One example is switching from the ‘Business’ edition to ‘Agent’ or ‘Supervisor’. However, this major feature also created a potential problem with migration from older PBXware versions to v4.x. We were not able to simply disable all editions for all Extensions on the system and make administrators resolve issues immediately after deployment in a very short time. This scenario would most likely cause service downtime for bigger systems, which was unacceptable. Due to this, permissions had to be set to the default ‘ALL’ value allowing gloCOM apps to connect to PBXware in the same manner as before and allowing administrators to sort permissions accordingly.
NOTE: Users are able to see mobile devices available on the system as one group of mobile devices. Both “iOS” and “Android” options are merged as a single “Mobile Apps” option. In this way, a customer buys the “Mobile Apps” subscriptions and connects his/her mobile apps regardless of the platform.
Because of this, users should not be concerned in case they see that their license counter for the ‘Business’ edition is showing 4 of 10 (available 6). Please refer to the screenshot. This will change to normal values once users sort out permissions on all of the Extensions.
Setting gloCOM edition’s permissions for one Extension at a time would be a time-consuming process, so we decided to create two options for adding permissions to multiple Extensions at the same time. To do this, you can use the ‘Templates’ page and ‘Batch Mode’ page.
NOTE: It is possible for the chat history to be available even if an Extension is deleted. With this improved change, all deleted Extensions will have their data archived, which will ensure that users do not lose the chat history logs but can access them accordingly.
NOTE: In order to provide additional data privacy for all users, the system has undergone a change. Users with newly created Extensions that share the same previously used Extension number should be able to see CDRs in OSC (Online Self Care) only from the date/time their Extension was created.
(E.g. A user has an Extension ‘100’ and s(he) can easily access CDR in OSC. After some time, the Extension ‘100’ is deleted, and if a new user creates an Extension with the same number ‘100’, s(he) will not be able to see old CDRs of the previous Extension in OSC.)
This privacy improvement will ensure that data and CDRs that once belonged to a specific user stay private and protected. The new user may only refer to his/her current CDRs and avoid confusing it with the previous information.
Templates
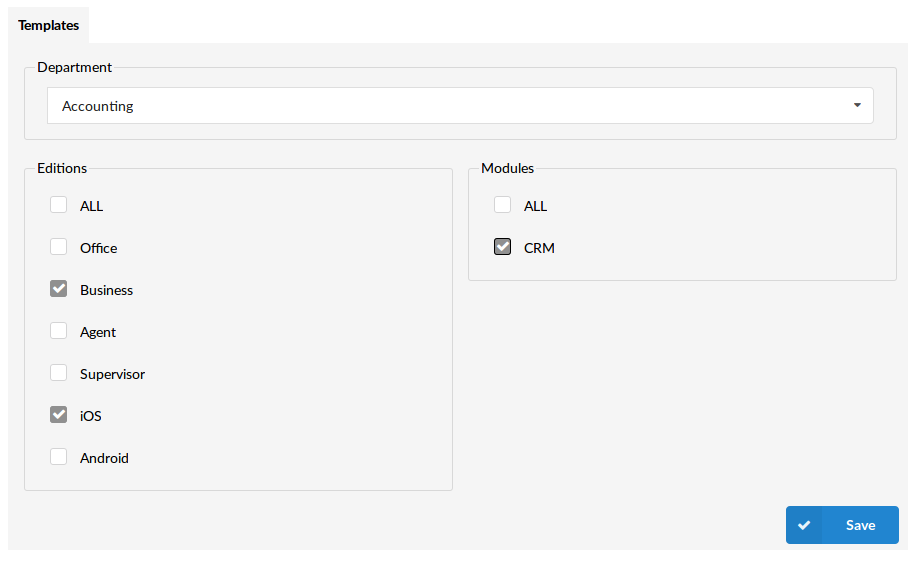
Templates page gives you option to predefine gloCOM editions per Department, and to apply them to all extensions that are members of selected department.
For example, in case you would like to enable all extensions that are members of Sales department to use Business and iOS editions of gloCOM along with CRM module, Select Sales department from the drop down list, uncheck ALL checkboxes in Editions and Modules sections, and select checkboxes for Business and iOS editions, as well as checkbox for CRM module.
Saving these settings will apply these permissions to all extensions that are members of Sales department. In case some of these extensions need additional permissions, you can edit permissions from extension edit page.
NOTE: Saving permissions for selected departments will apply these values to all extensions that belong to that department. Extensions that might have their permissions changed manually after department template was applied will be excluded from future changes made in this manner. If you need to reapply template to some of these extensions, you can do it from Batch Mode page.
- Department
From the drop down list select department you would like to apply new permissions for.
- Editions
Select checkboxes for specific gloCOM editions to allow members of selected department to use them, select ALL to apply no restrictions to editions usage.
- Modules
Select checkboxes for specific gloCOM module to allow members of selected department to use them, select ALL to apply no restrictions to modules usage.
At the moment, CRM is only available module we plan to introduce many new modules in the future.
Batch Mode
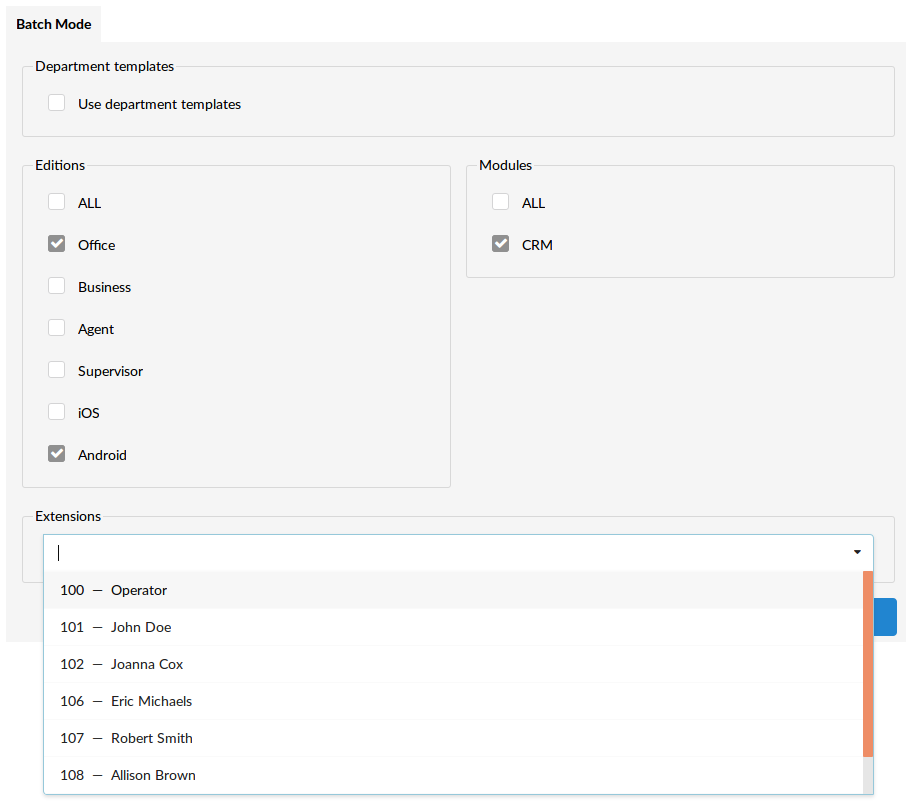
Batch Mode page allows you to add selected set of permissions to specific extensions only, regardless of their department membership. This can be used in situations where selected department members need to use additional gloCOM editions.
There are two distinct scenarios where you could utilize Batch Mode:
- To reapply department templates to one or more extension that had their permissions manually changed after department template was applied.
- To apply specific set of permissions to multiple extensions, regardless of their department membership.
To apply department specific templates to one or more extensions that are members of several different departments, you can select checkbox next to Use department templates and add a list of extensions you would like to set permissions for in Extensions field. Once you click Save rules should be applied to all extensions from your list.
The only difference in scenario where you do not want to use department templates is that you would create wanted set of rules for editions and templates, add extensions to the list and click save. Make sure Use department templates is disabled as otherwise you will not be able to make selection.
Devices
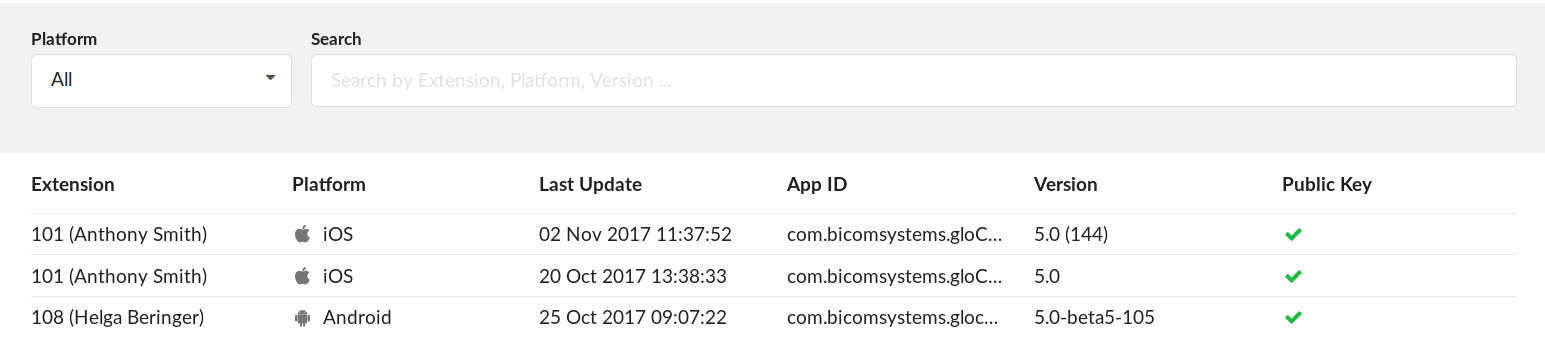
Devices page displays full list of all registered devices on your PBXware.
- Platform
Select to search devices by platform
(E.g. Android, iOS)
- Search
Search by Extension, Platform, Version
- Extension
Name and number of extension using device
(E.g. 101(Anthony Smith))
- Platform
Which platform is device using
(E.g. iOS, Android)
- Last Update
Time and date when device was last time registered
- App ID
Unique ID of application
- Version
Version of registered application
(E.g. 6)
- Public Key
Permissions
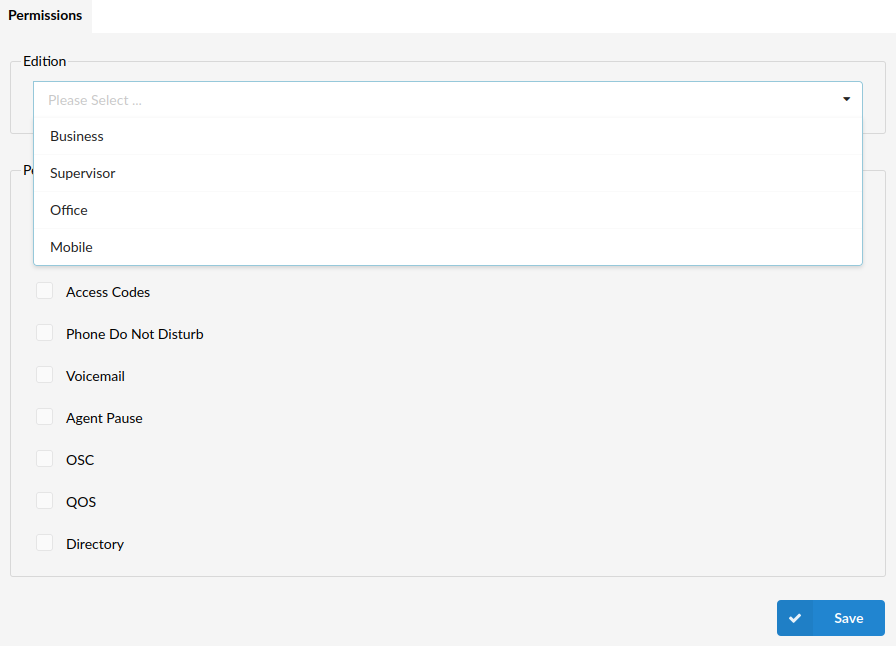
The ‘Permissions’ section allows an administrator to control gloCOM features per Slave Tenant and per edition. Once a certain Edition is selected, the permissions can be set accordingly.
For example, if the ‘Mobile’ edition is selected, an administrator can give or deny permissions for the chat (the Android and iPhone versions of gloCOM GO) by (un)ticking the suitable check box. Please refer to the screenshot:
- Edition:
Select the specific Edition
(Business, Supervisor, Office, Mobile)
- Permissions:
Enable or disable permissions for the selected edition.
- ALL
- Chat
- Access Codes
- Phone Do Not Disturb
- Voicemail
- Agent Pause
- OSC
- QOS
- Directory
.
Custom Statuses

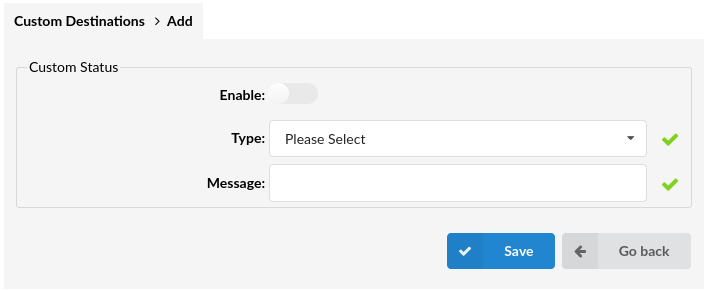
This feature allows users to create Custom Statuses tailored specifically to their needs. By enabling this feature, users may select any of the preferred Types as well as customize their messages to provide even more details regarding their Status Type.
(E.g. Enable: Yes, No)
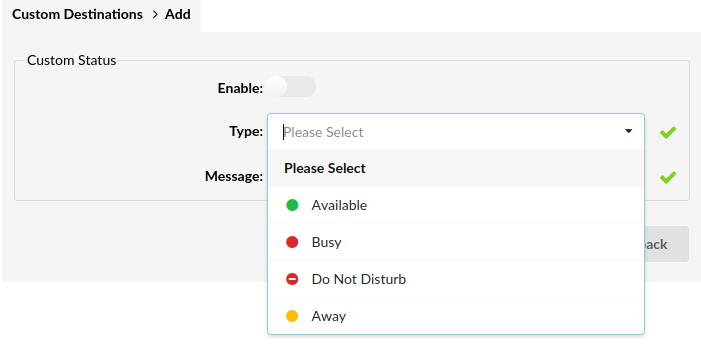
When creating Custom Statuses, users may select one of the following Status Types:
- Available
- Busy
- Do Not Disturb
- Away
gloCOM Android
Logging in
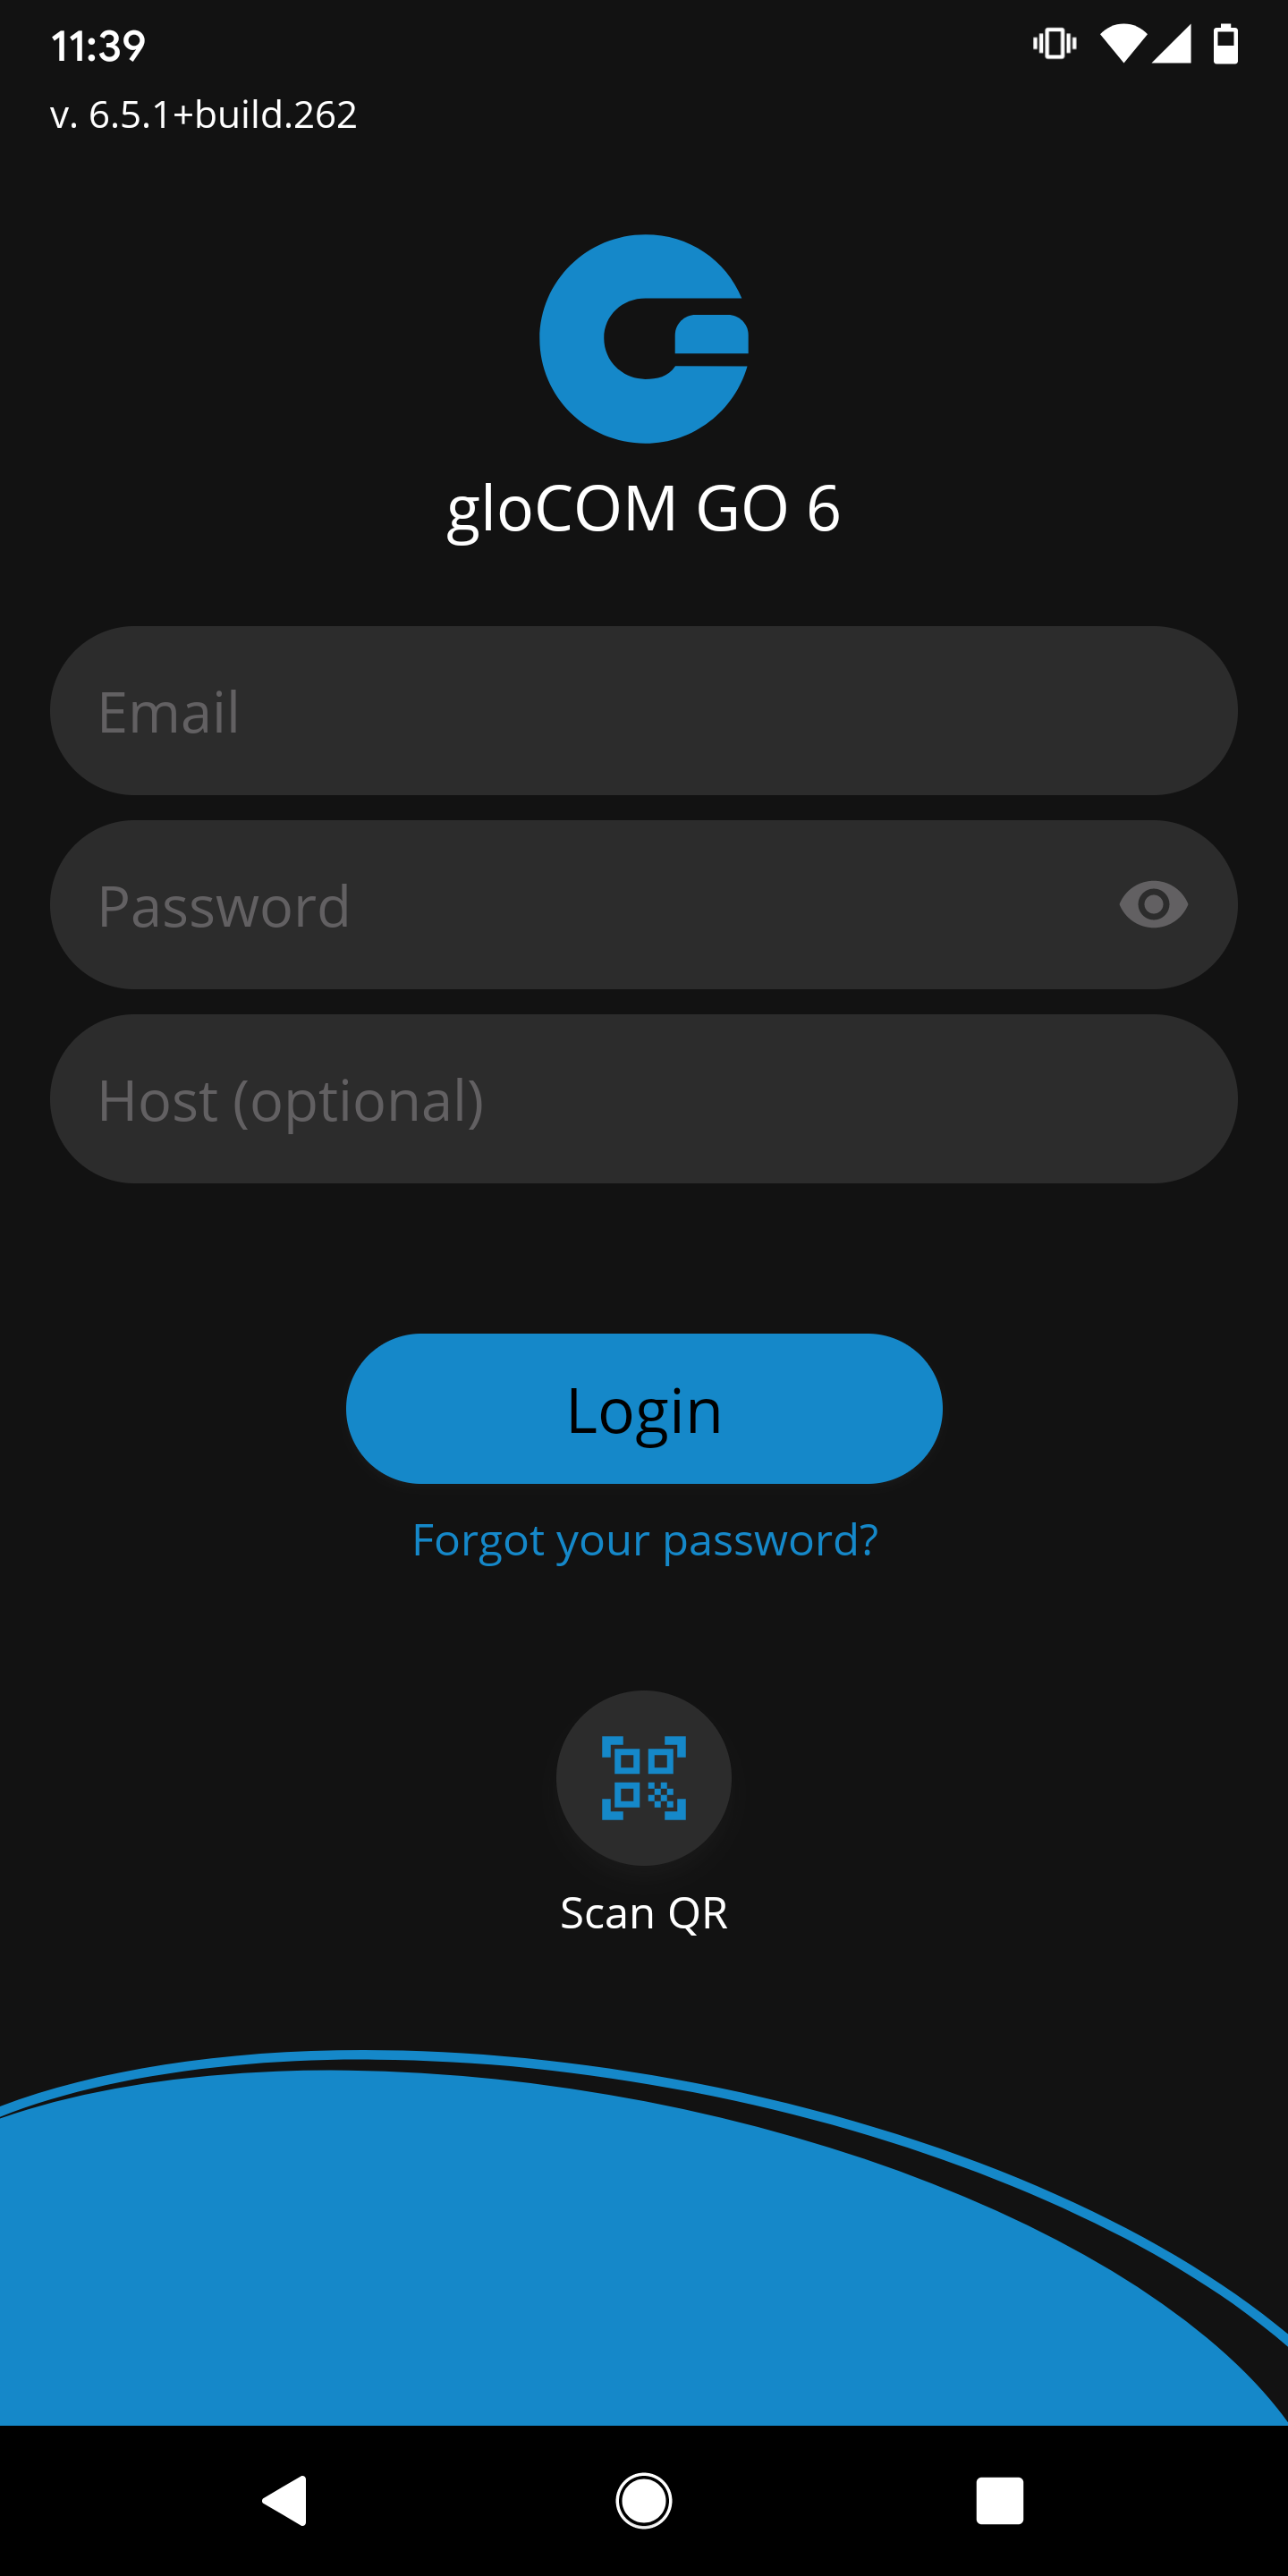
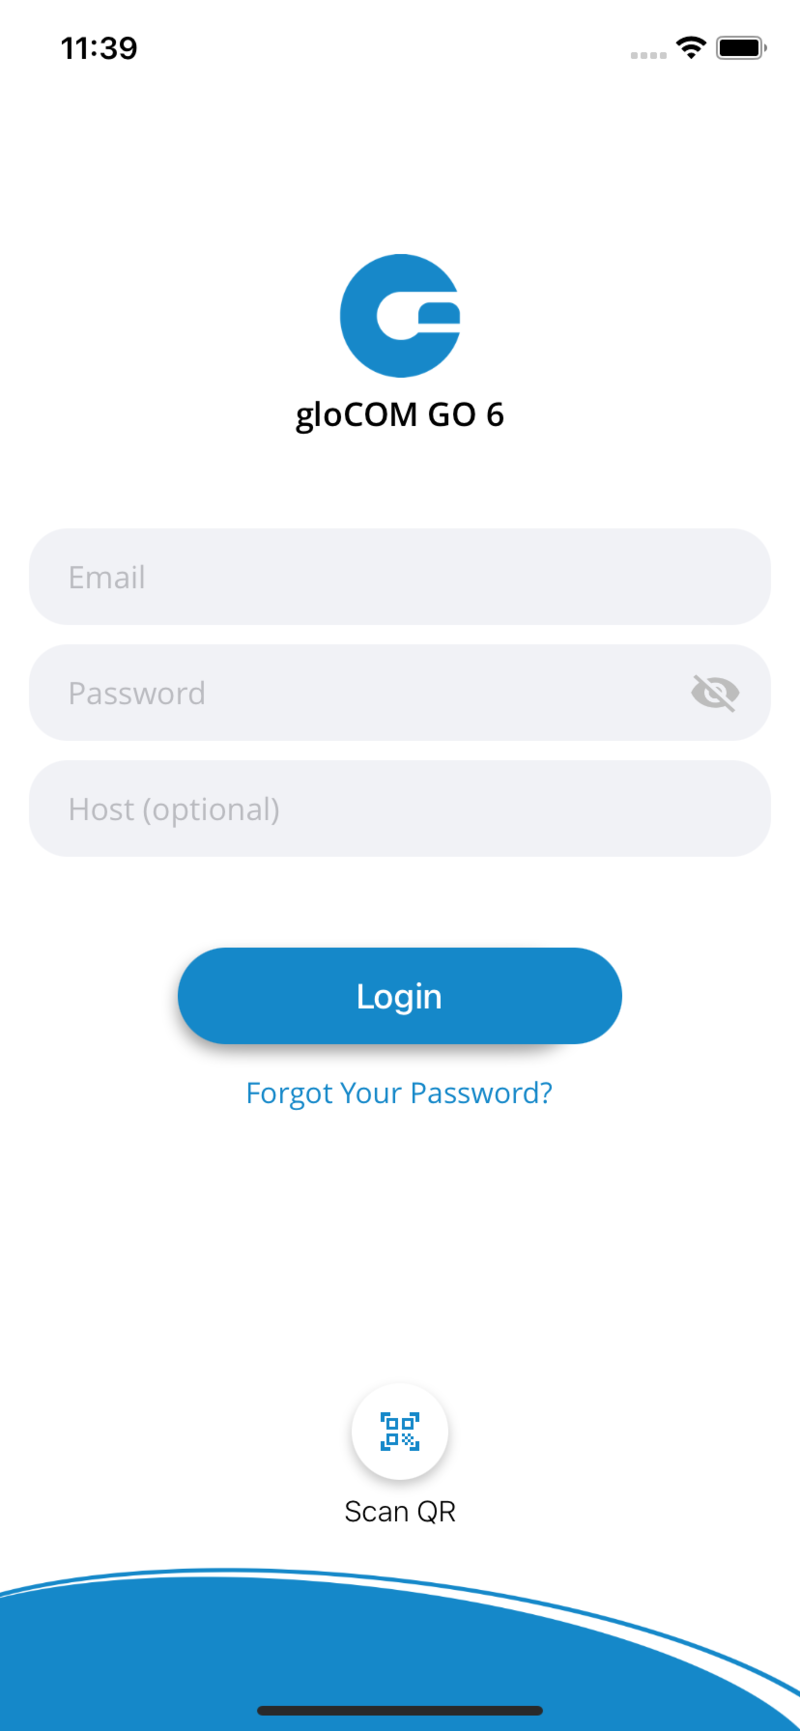
gloCOM GO 6 requires an email address and password for login. Additionally, a server address may be needed if it cannot be resolved through a DNS record based on the email address.
Users that have incompatible versions of mobile app and PBXware will not be able to connect to the system.
In case users have a DNS server, by adding a DNS SRV record for email domain, mobile, and desktop clients will make gloCOM login much easier for end-users as they will only have to provide their email address and User password associated with their PBXware extension and click Log In.
If users are unable to set DNS SRV or if DNS resolution fails, they will receive notification ”’DNS resolution failed”’ and users will have to enter PBXware hostname or IP address into the ”’Host”’ field when logging in with their gloCOM GO 6 client.
DNS SRV record that needs to be configured to point to PBXware is: _pwproxy._tcp.domain. 86400 IN SRV 0 5 10009 pbxserver.domain.
NOTE: For this feature to work, all email addresses must use the company domain (i.e., siarum.com).
Enter the email address associated with the user’s account. This is used as the username for gloCOM GO 6 login.
- Password
To authenticate gloCOM GO 6 with the PBXware server, users will also need to provide a user password generated on their account.
- Host
This field allows users to enter the address of PBXware they would like to register to. If the DNS SRV record is set up (as previously explained), this field does not have to be populated.
- SCAN QR CODE
This button opens a camera preview for QR code scanning.
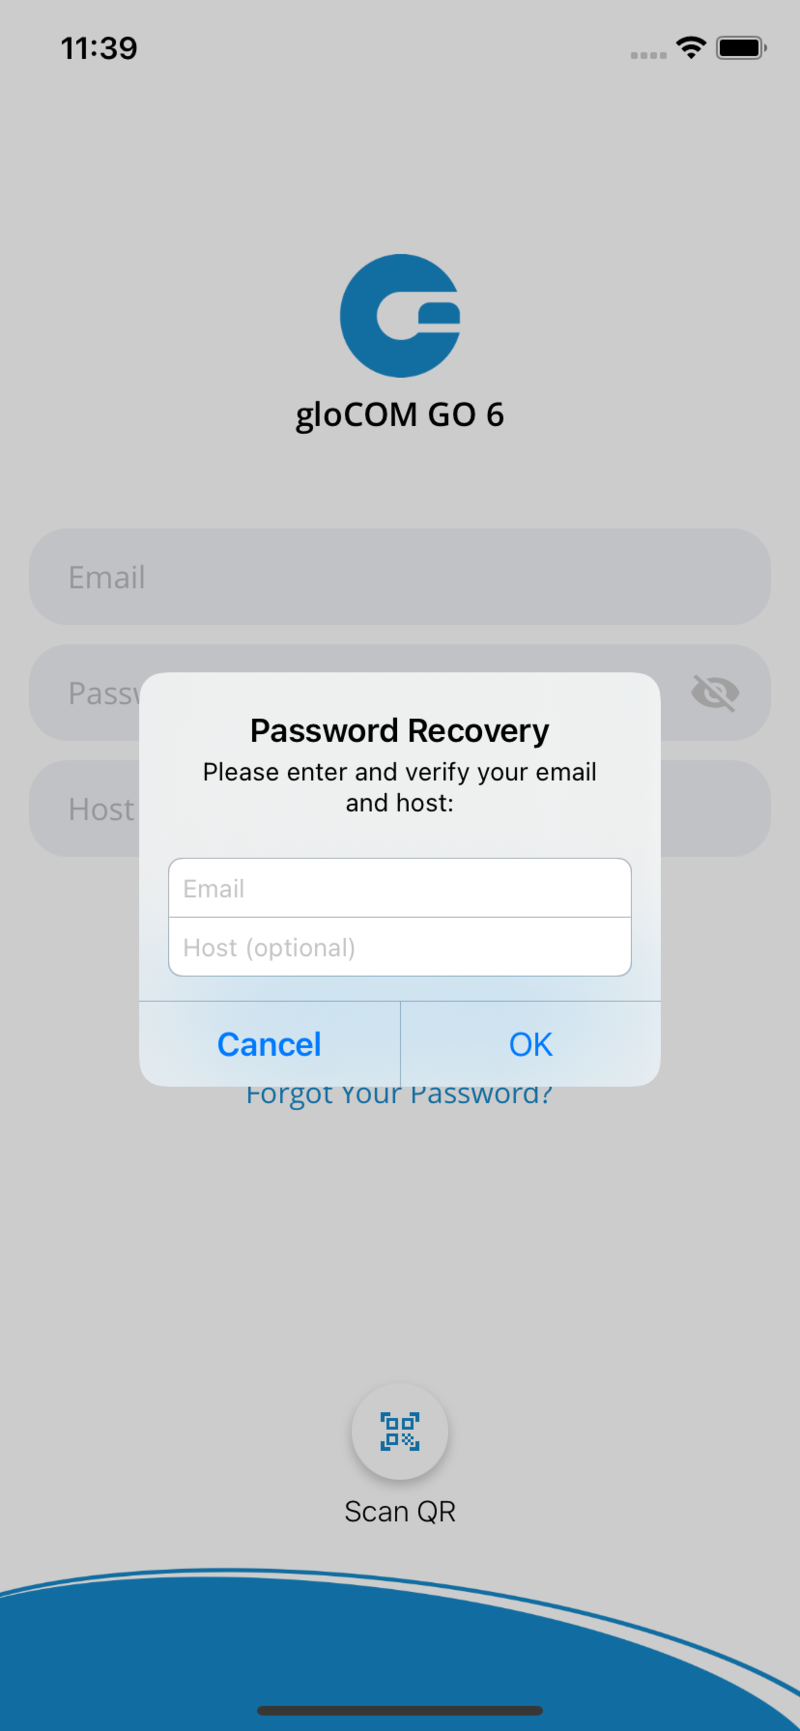
- FORGOT PASSWORD
Open a confirmation dialog for password resetting by clicking this button. Email and optionally server address fields need to be filled out before attempting a password reset.
Logging in using QR code
It is possible to login in to gloCOM GO 6 using a specially created QR code. This is often used and helpful when users log in with gloCOM GO 6 for the first time.
When the administrator creates users’ accounts, they will be assigned a long, automatically generated user password on email, and typing it into gloCOM GO 6 can be error-prone. With this feature, users can scan the QR code attached to the extensions credentials email by pressing the SCAN QR CODE button and pointing their phone camera at the monitor. Once the QR code image is detected gloCOM GO 6 will fill out all the fields necessary for login.
NOTE: Before users can use this feature, the PBXware Administrator must make some settings changes on PBXware; otherwise, the Address (hostname) in the field will be empty, and users will not be able to register their clients.
Login to PBXware GUI and navigate to:
Settings – Servers/Tenants and edit Server/Master tenant
Click Show Advanced Option and once users do that, they will be able to see the QR Code Server option. This field must be populated with the server’s IP address or domain name.
Once entered, save changes, and QR Code login should be ready for use.
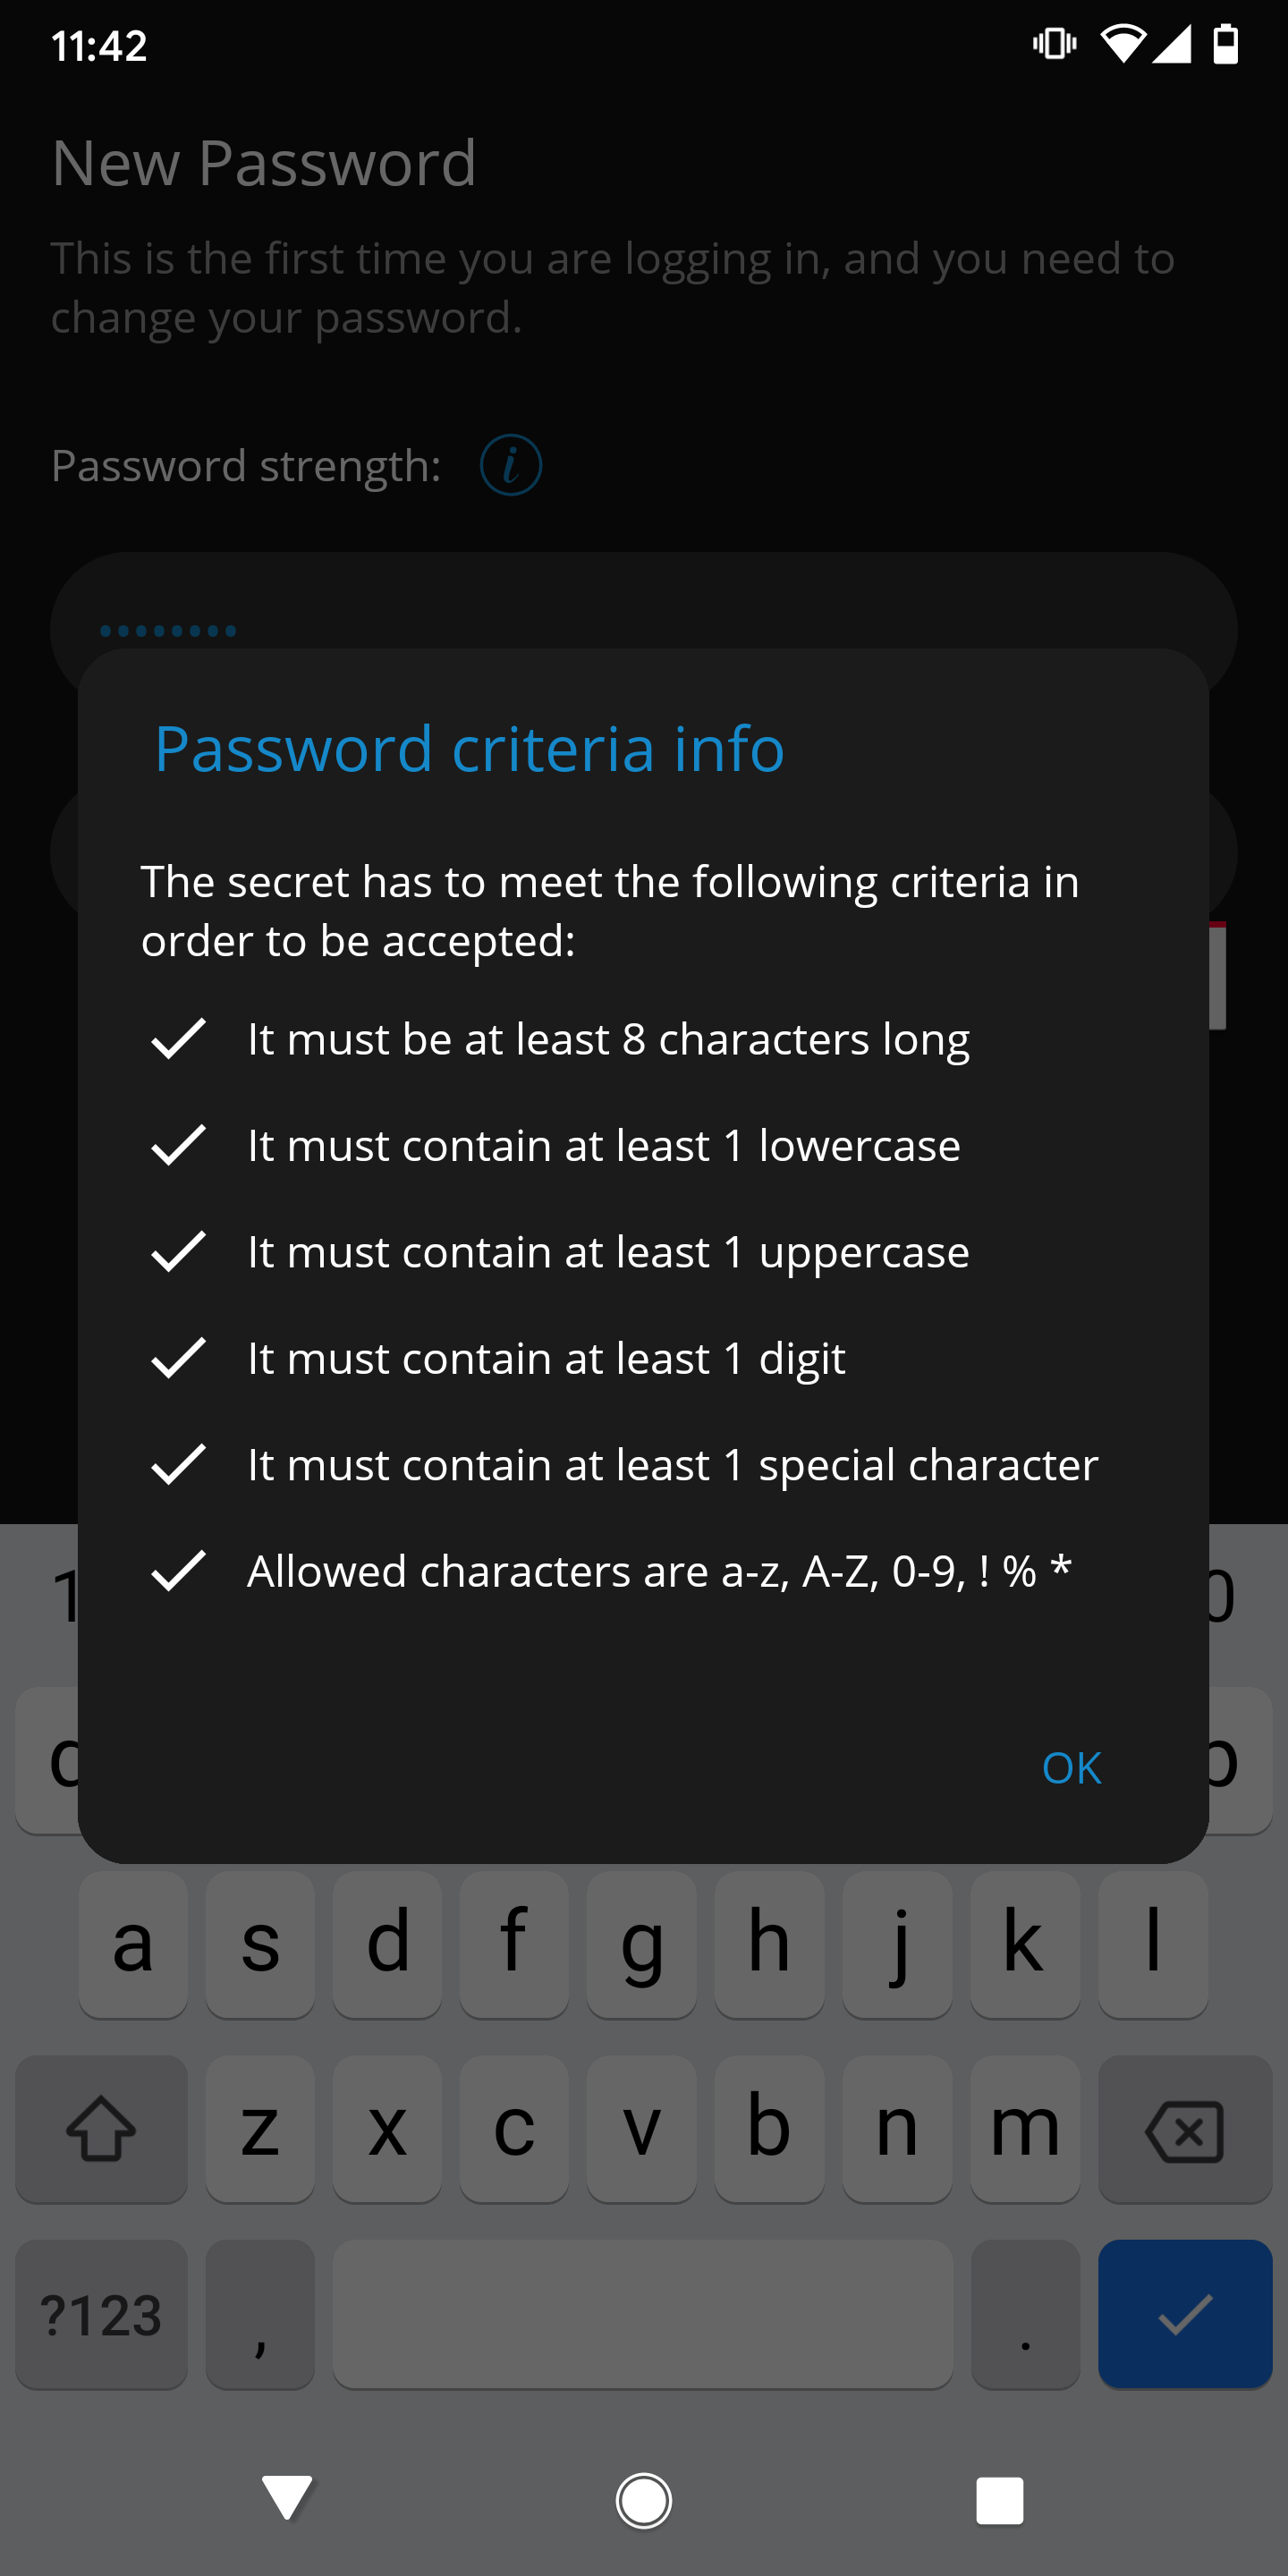
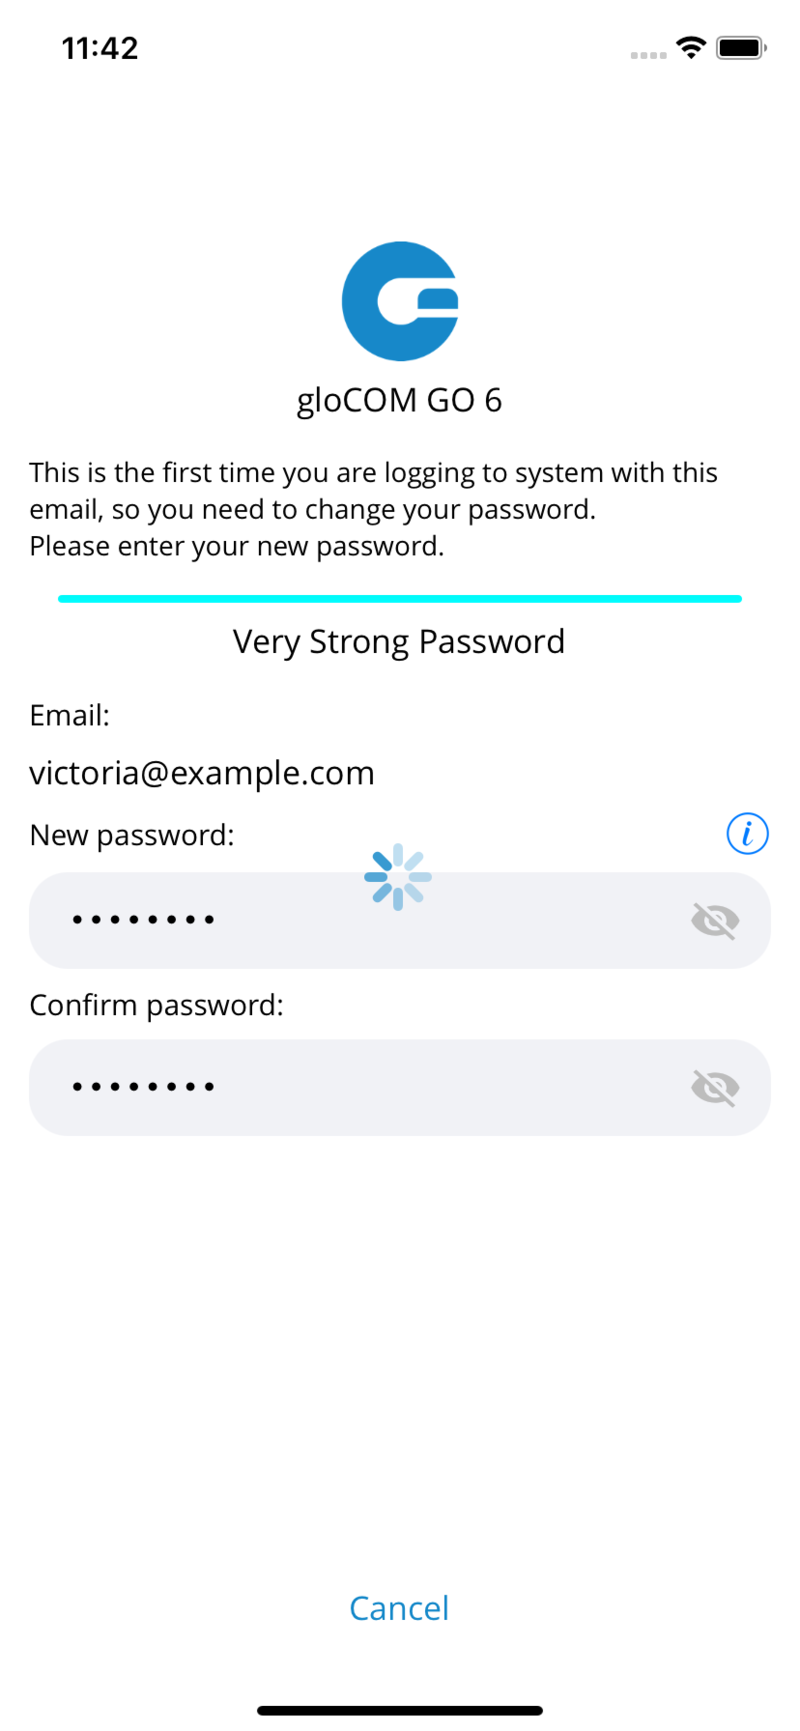
Setting new password after logging in for the first time
When users log in to the gloCOM GO 6 for the first time, they will be asked to change the password. They will have to enter a new password and retype it to confirm it. If users make a mistake, so password entries do not match, or if the password is not strong enough, the ”’NEXT”’ button will stay disabled. Once the password matches our strength criteria, users will be able to log in.

Changing avatar
Users can change their avatar by opening the main drawer menu and clicking the avatar icon above the name and extension, as shown below.
Click on the avatar icon brings options for changing the avatar image. After taking a picture with a camera or choosing one from a gallery, users will have to crop the image.
-
Press and hold inside the blue rectangle to move it
-
Press and hold blue edges to resize
-
Done button finishes cropping and sets the avatar
-
Cancel button cancels cropping
![]()
![]()
![]()
Avatar rotation
Users can manage their avatar (rotate, flip, crop) in the gloCOM GO 6. Open gloCOM GO 6 and go to Profile, click the Edit icon to the right of the user avatar and choose one of the two options:
-
Take the picture using the camera
-
Choose a picture from the gallery
After taking a photo with a camera or choosing the photo from the gallery, the image will appear in the gloCOM GO 6 “Move and scale” screen.
Drag the crop tool to the desired part of the photo. The part of the photo within the boundaries of the crop tool (the square) will be used as a profile image. Resize the square by dragging the corner dots in or outward. Some advanced options are available in the hamburger (three dots) menu in the top right corner, such as: “Flip horizontally” and “Flip vertically.”
When ready, click on SAVE in the top right corner of the screen. The cropped image now replaces the previous profile photo.
![]()
![]()
![]()
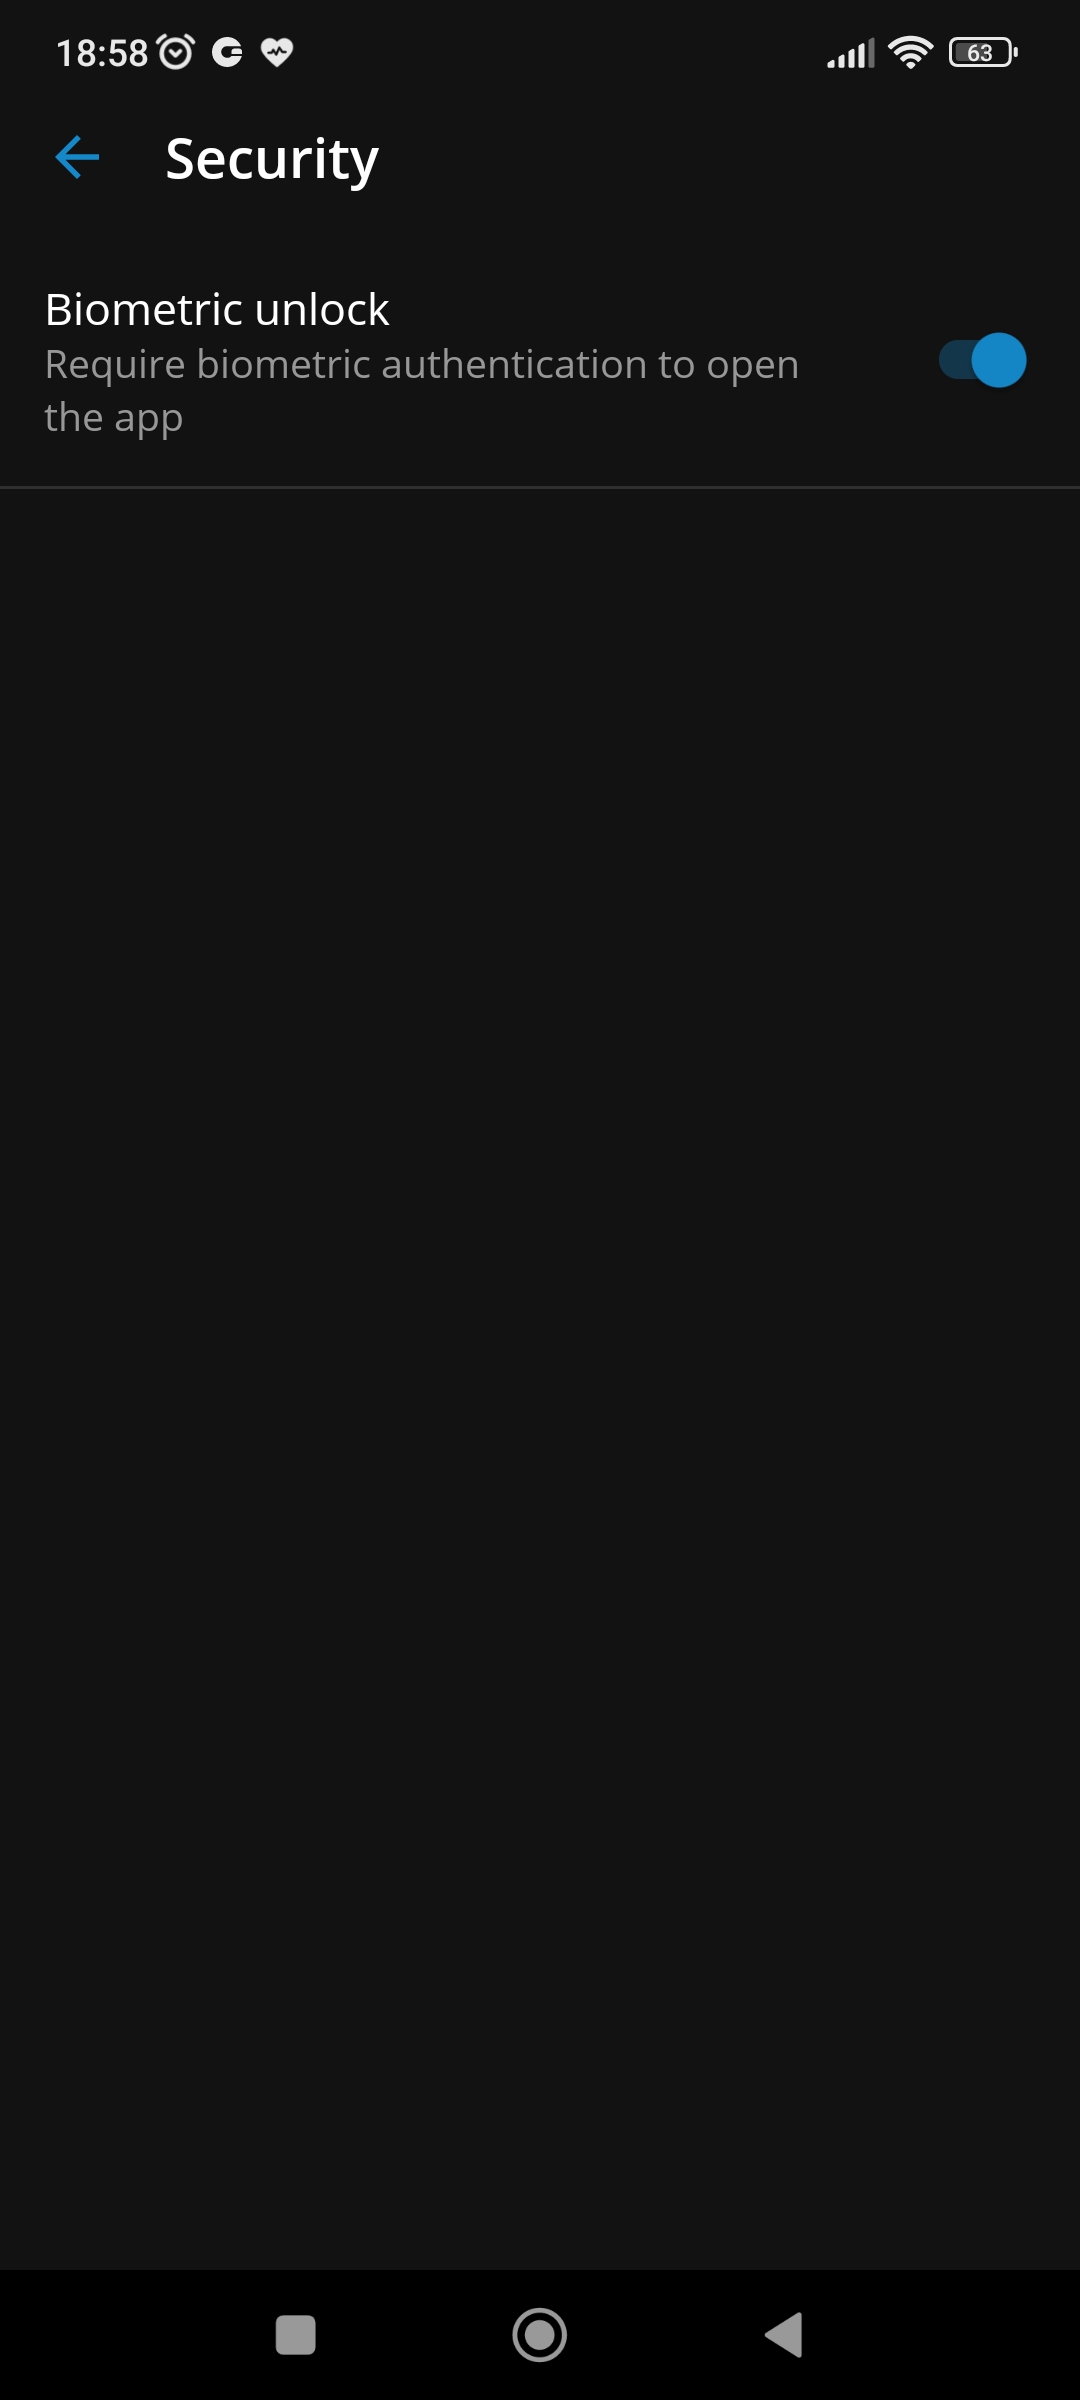
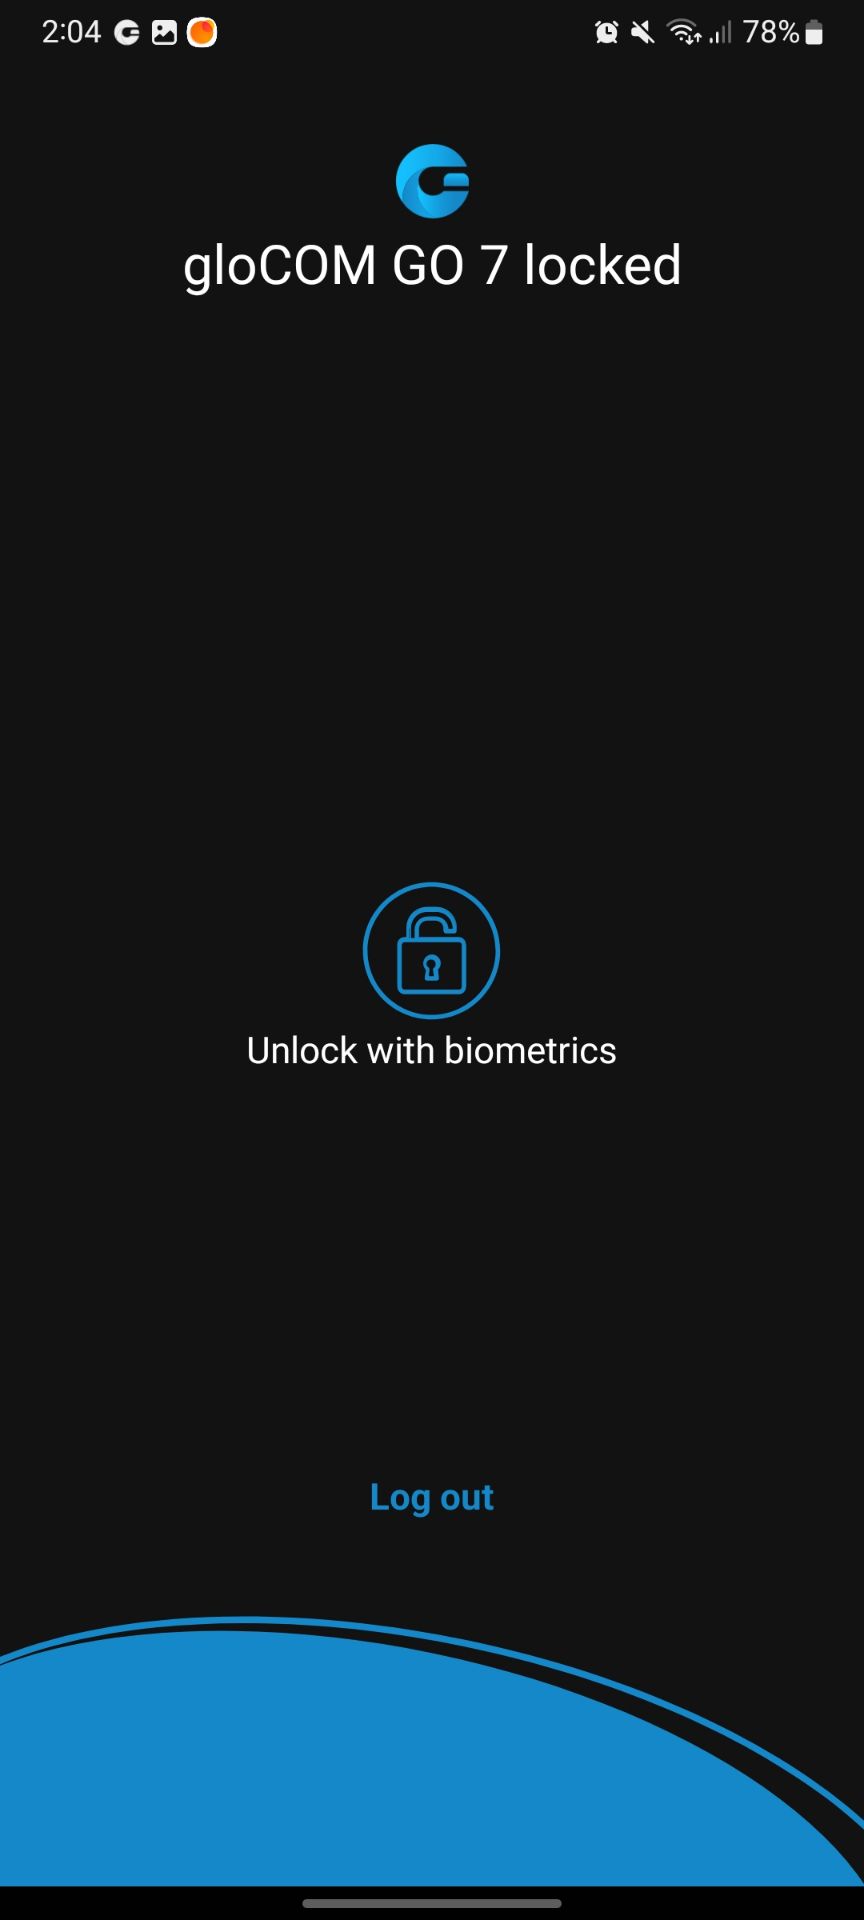
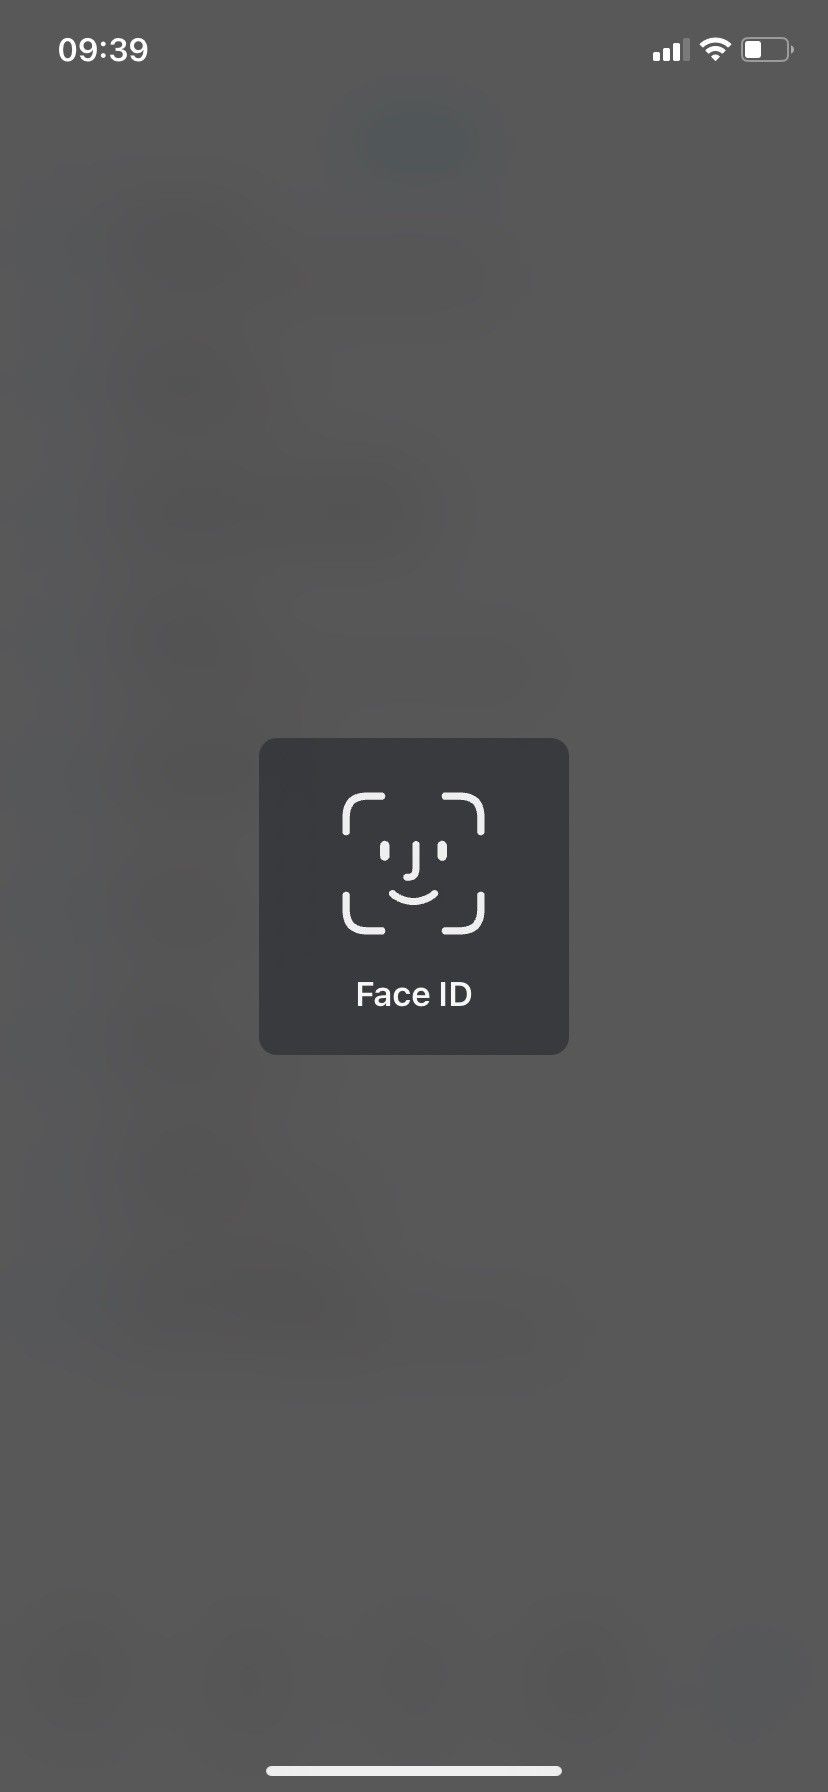
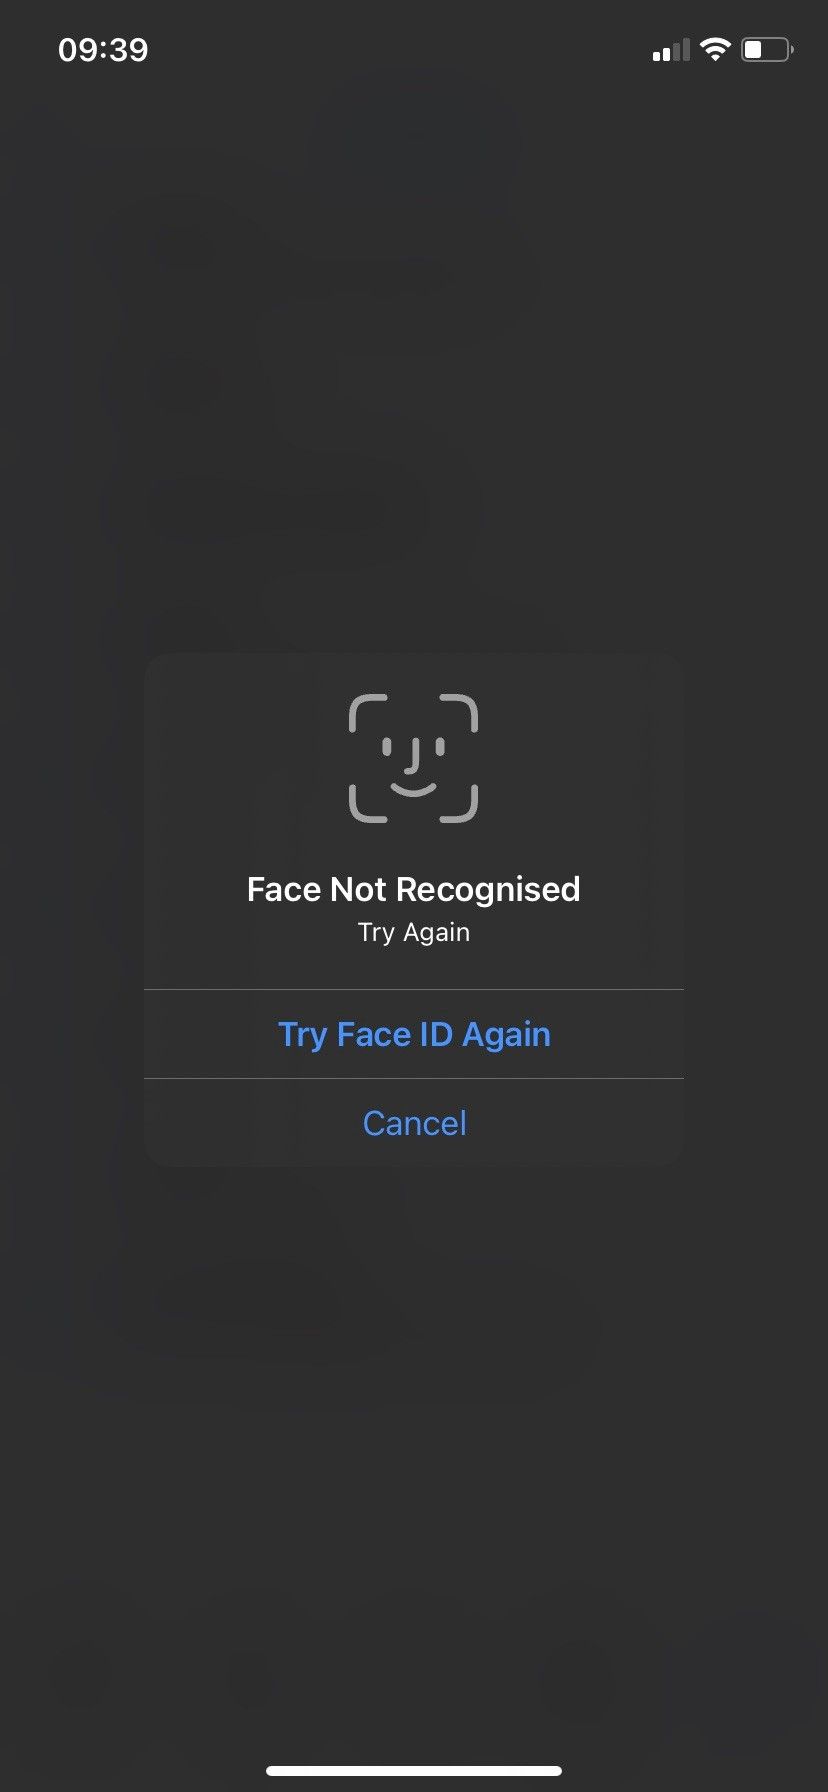
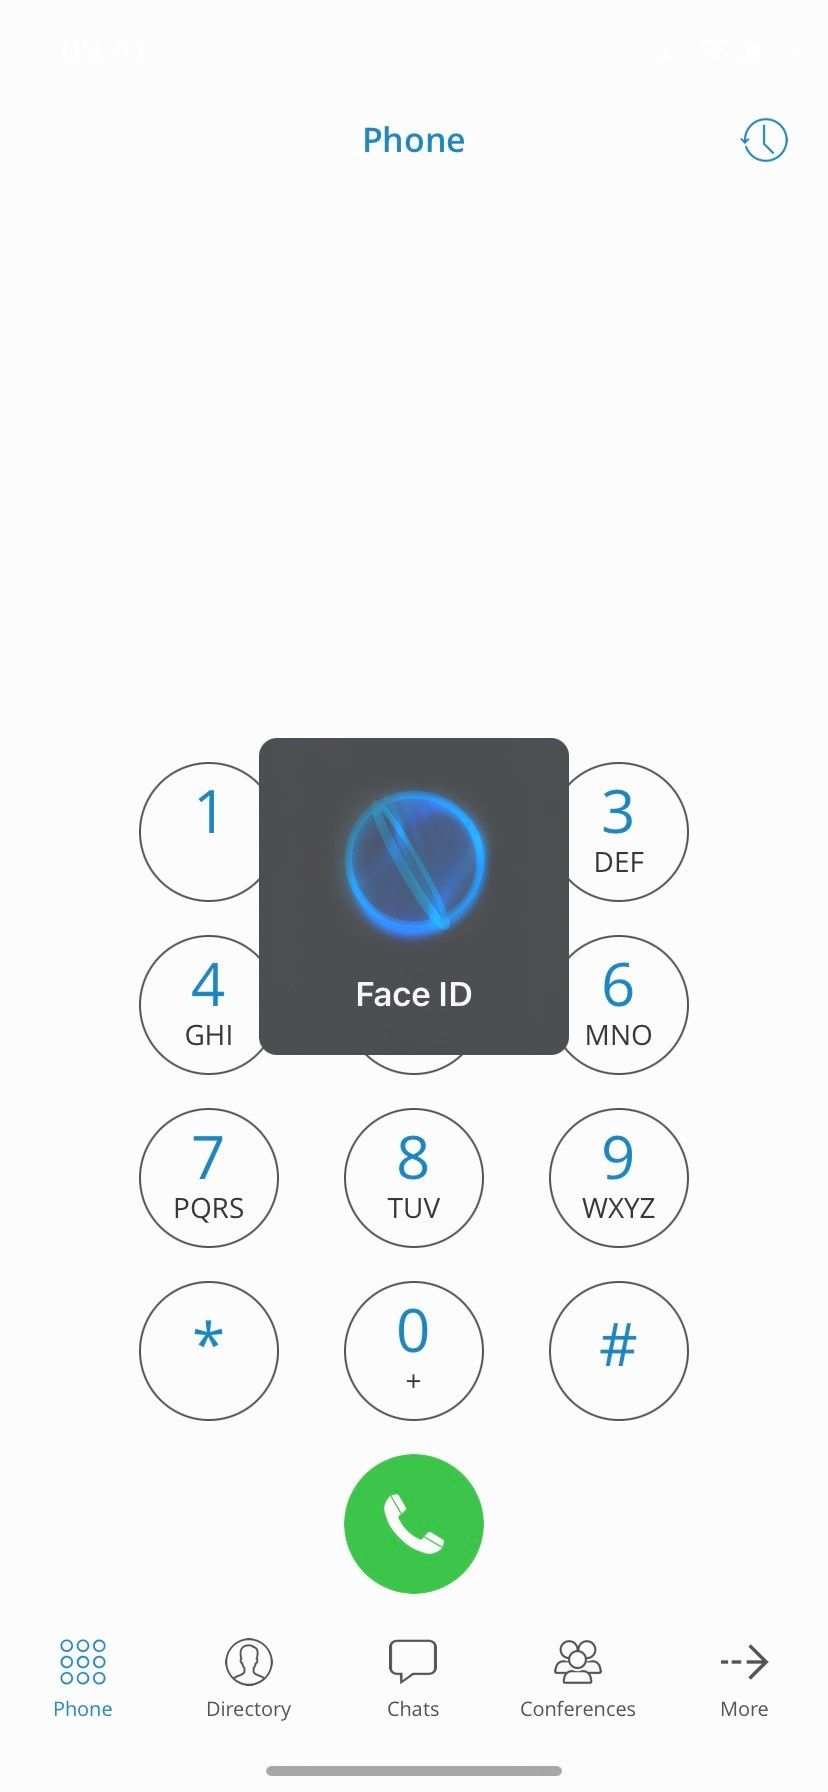
Biometric Authentication
Users can use an option to unlock gloCOM GO 6 by using biometric authentication as an additional layer of security for using the app.
Users can enable it by using fingerprint and face recognition.
This feature must be enabled on the device and application options to function. This option can be found inside the Security section on the Settings screen.
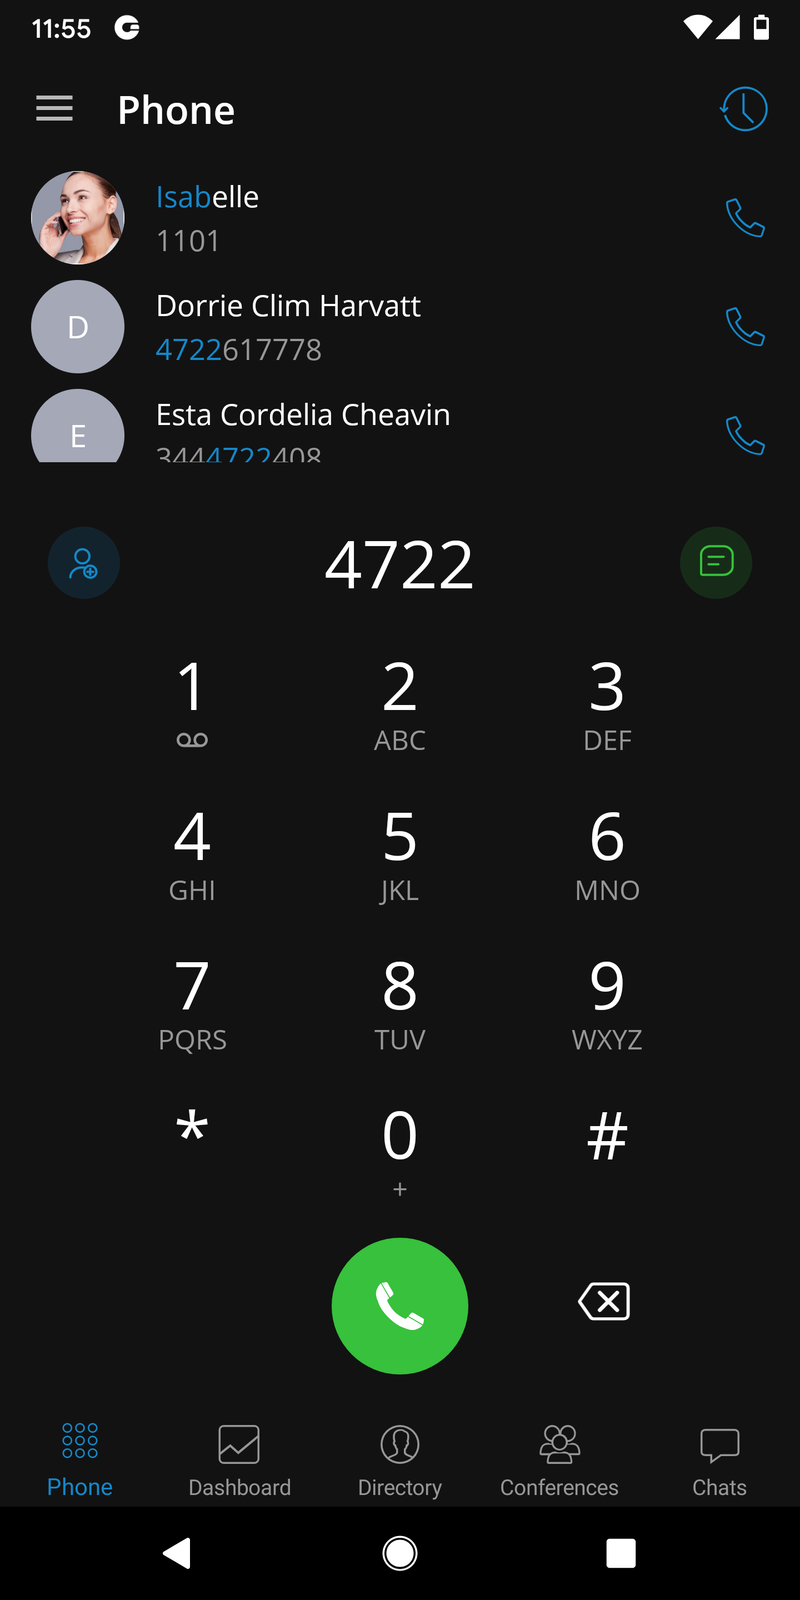
Phone
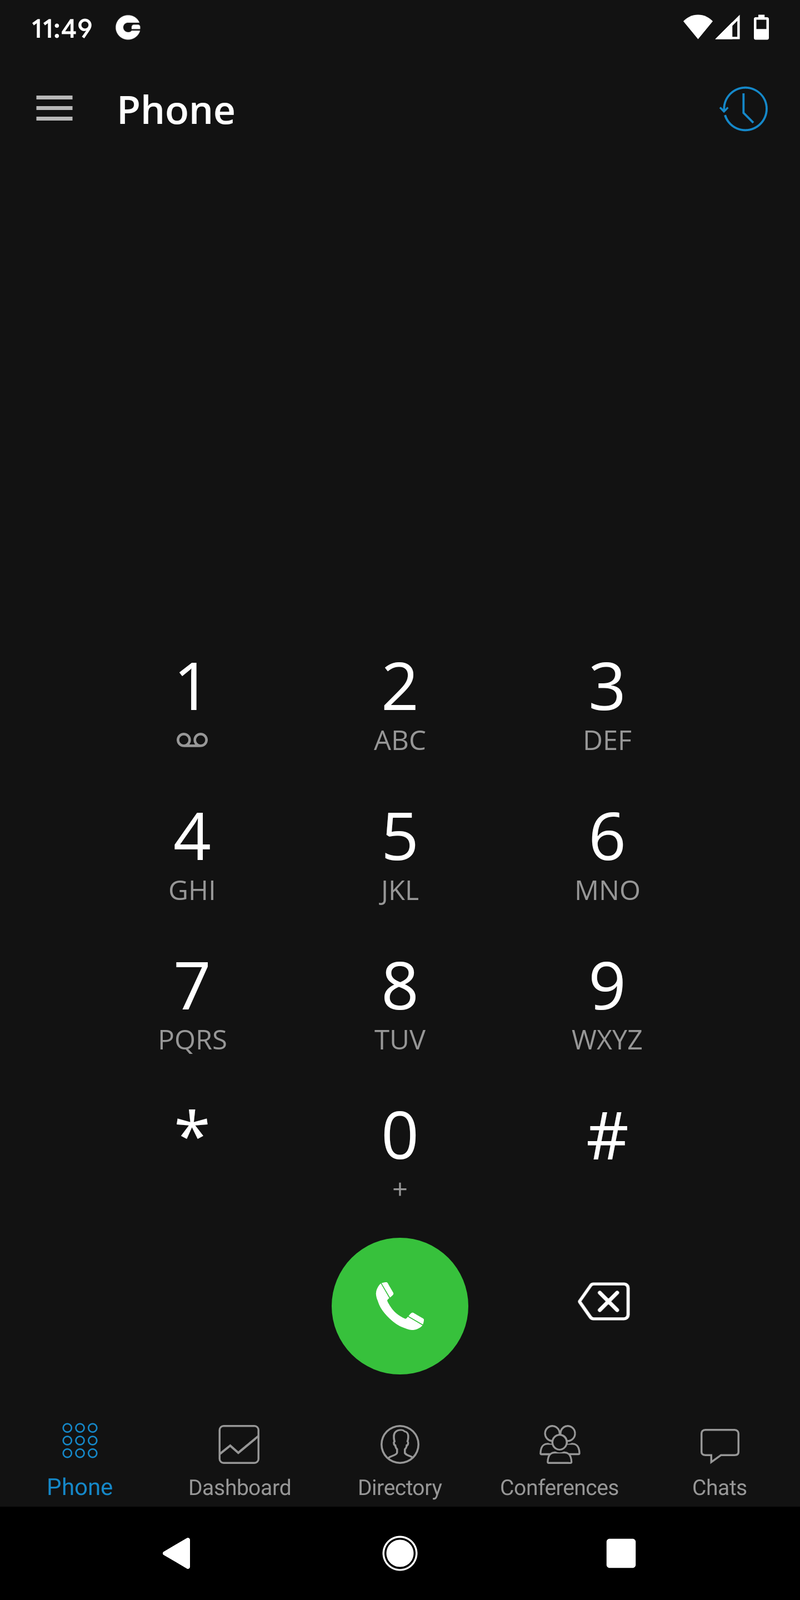
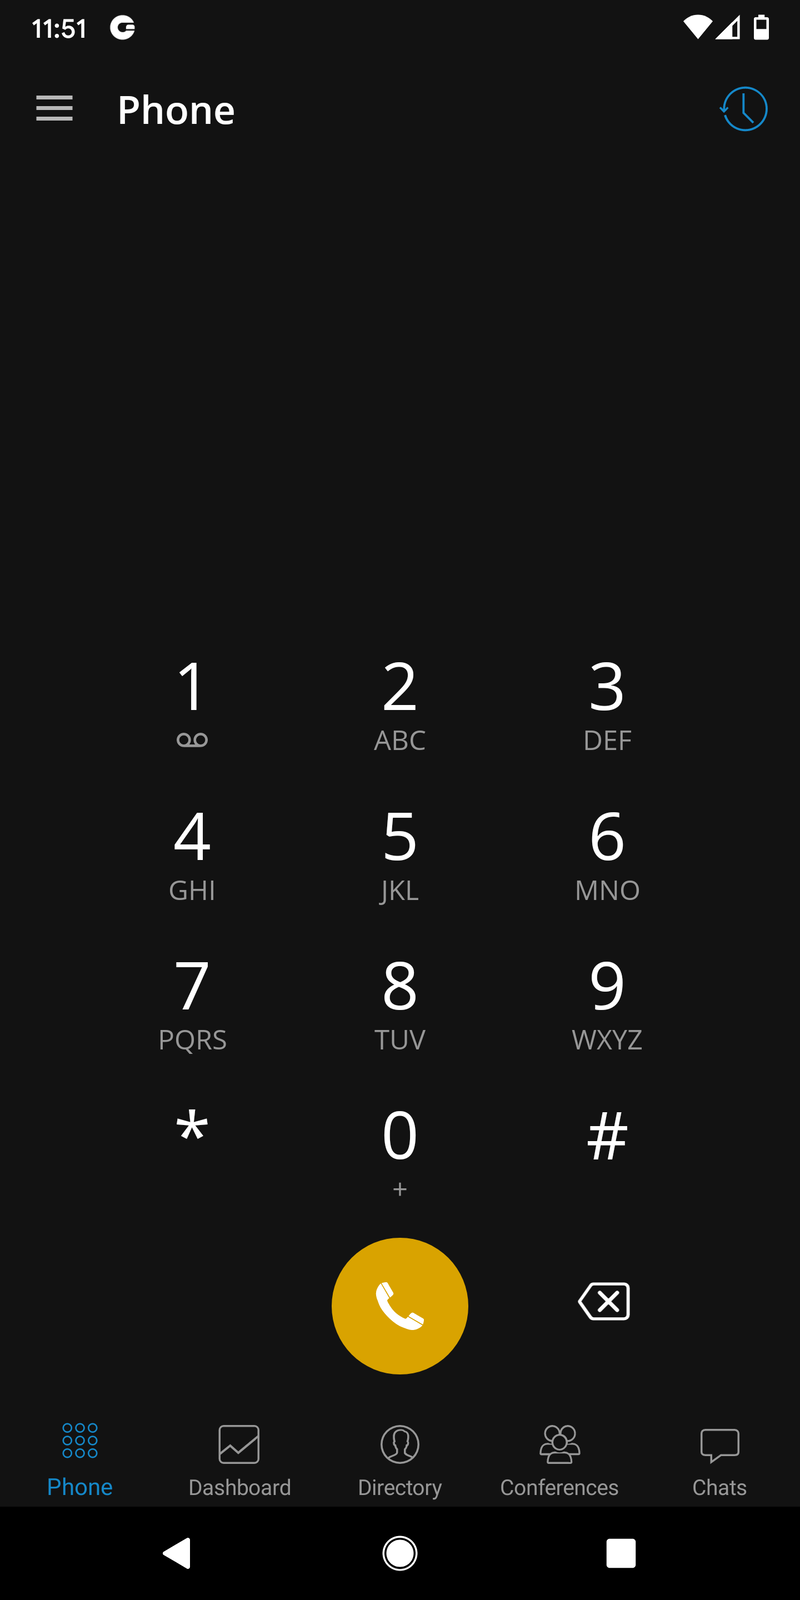
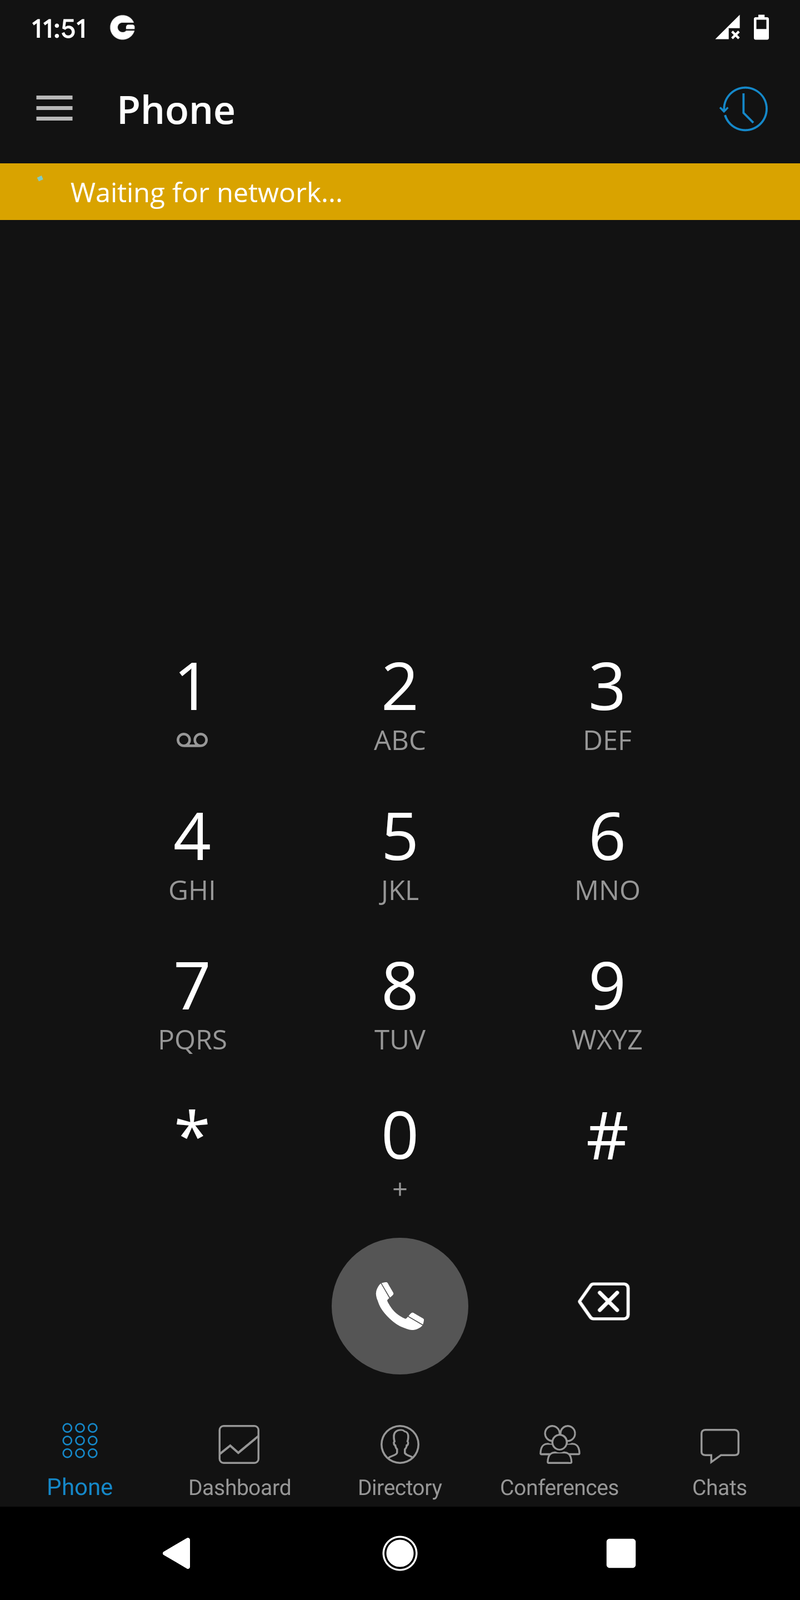
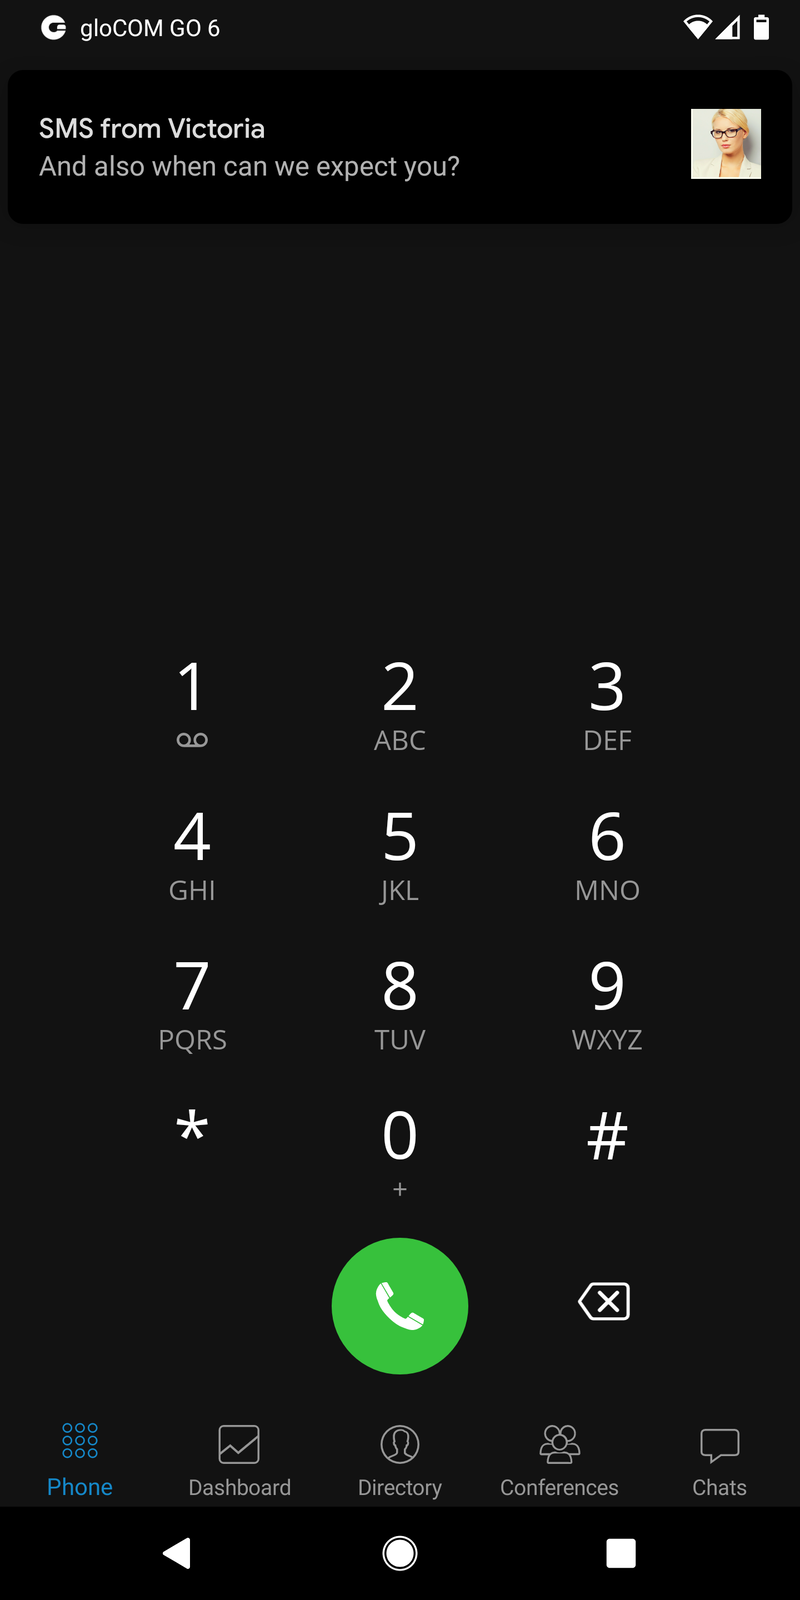
The default dialer screen is displayed once gloCOM GO 6 is started.
The call button on the dialer screen has three states depending on the softphone registration status and connectivity status.
If the softphone is not registered and the button is yellow, calls can still be made if the callback option is configured.
There are three states gloCOM GO 6 dialer can be in:
Green – Call can be made over SIP protocol (WiFi and Mobile Data Networks)
Yellow – A call can be made with the Callback module (Mobile Data Networks)
Gray – Call can not be made (No Network Connections)
Editable dial number
The entered number inside the dialer of the gloCOM GO 6 Android can be modified before placing a call.
Long pressing on a dialer call button will start a callback call to the entered number. The long press gesture also works with any call button in the app.
If number to dial is empty, pressing on the call button will result in populating the number to dial with last called number.
Predictive Dialer
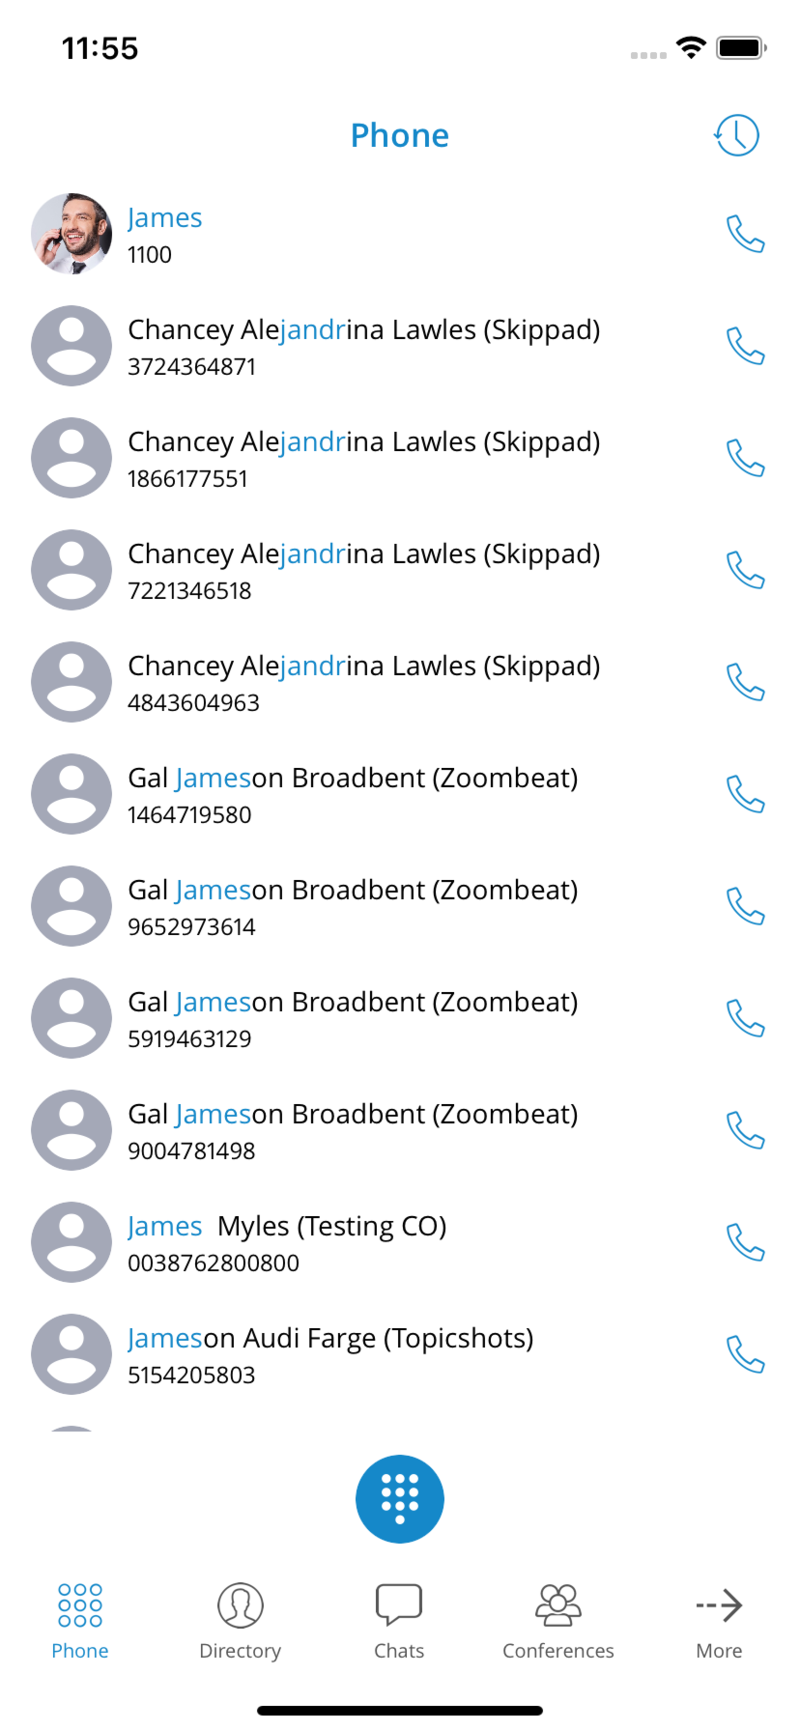
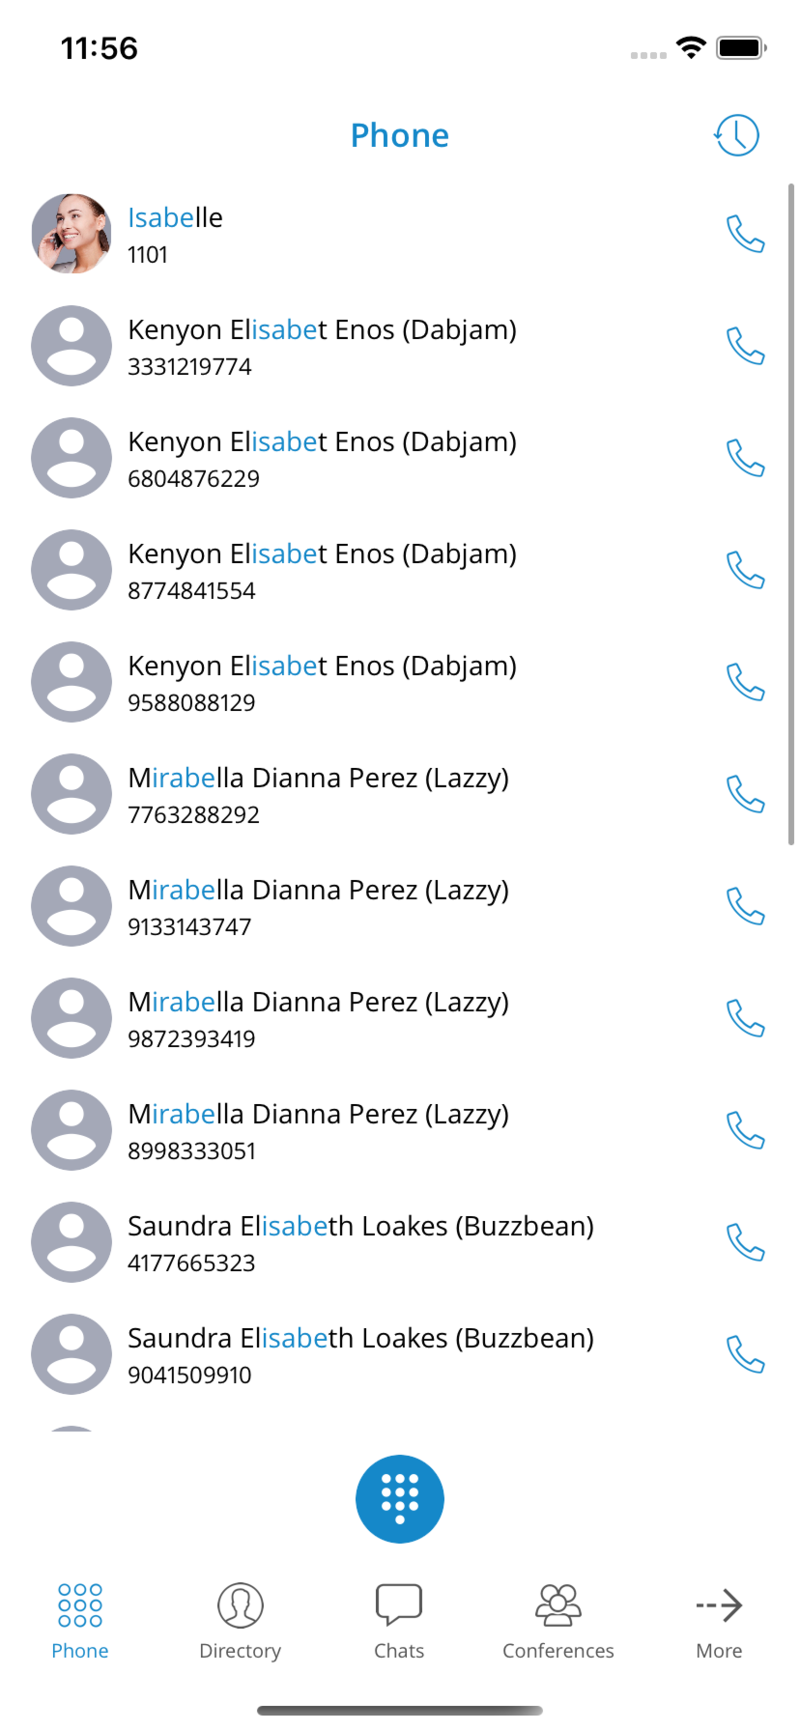
Predictive Dial (alphabet and numerical mode) is used to quickly find a contact or a number and place a call.
When on the phone screen, users are now able to search by phonewords (mnemonic phrases represented as alphanumeric equivalents of a telephone number). For example, if users type “34”, they will be presented with contacts that have 34 in their number, as well as contacts whose name contains a combination of letters [DEF][GHI].
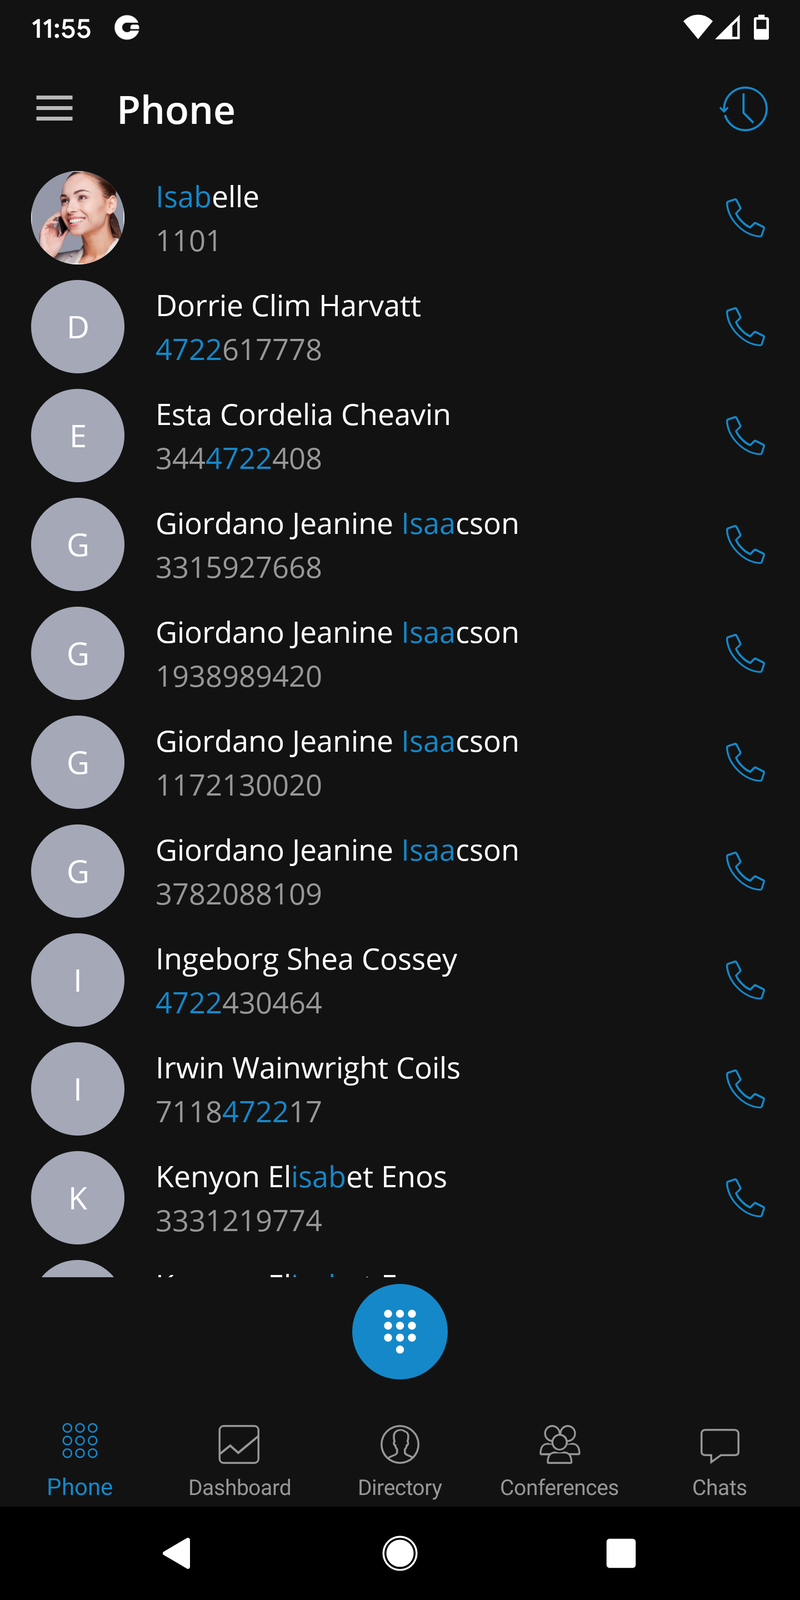
Contacts search will include contacts from Extension Directory, Device/System Phonebook, and Central Phonebook in that order.
Once users have entered the phonewords on the dialpad, and all of the contacts that match the criteria are listed, users can hide the dialpad by swiping down. Once the dialpad is hidden, users can see the contact list on the entire screen and can scroll the contact list.
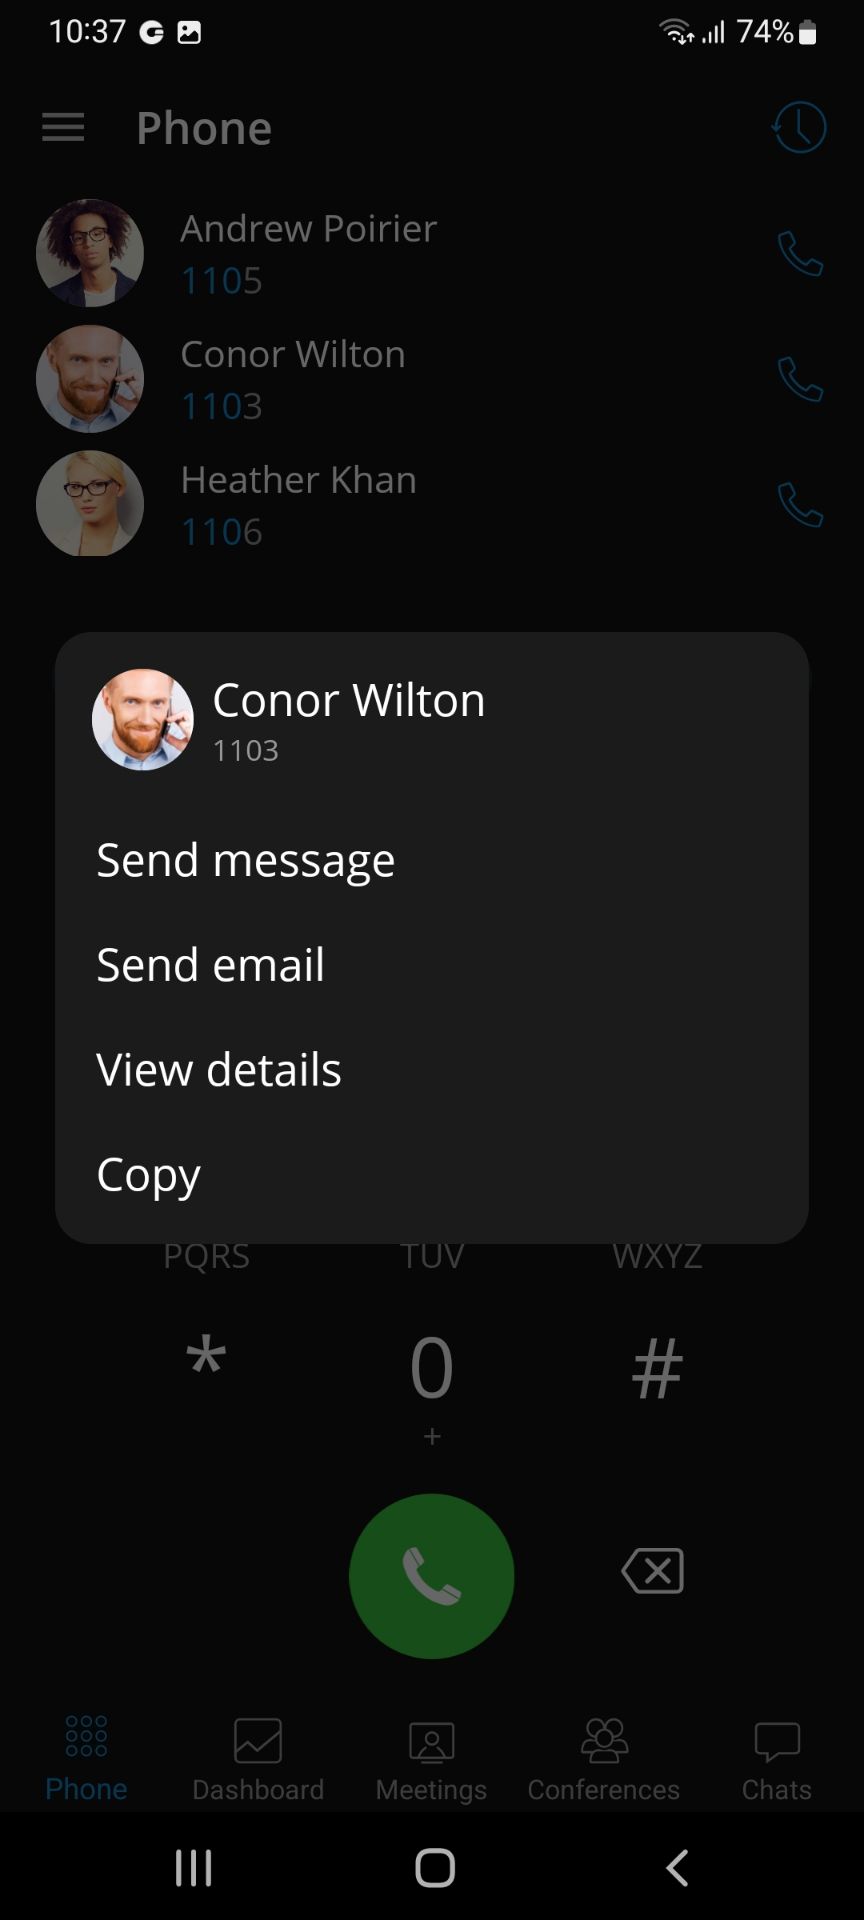
Predictive dialer popup menu
By long pressing on the contact in the predictive dialer contact list, a popup menu appears with 4 provided options:
- Send message – Start a chat conversation with the selected contact.
- Send email – Redirects the user to the default mail client with the e-mail address prefilled (if the e-mail address is provided for the selected contact).
- View details – View details about selected contact.
- Copy – Copy the contact’s number.
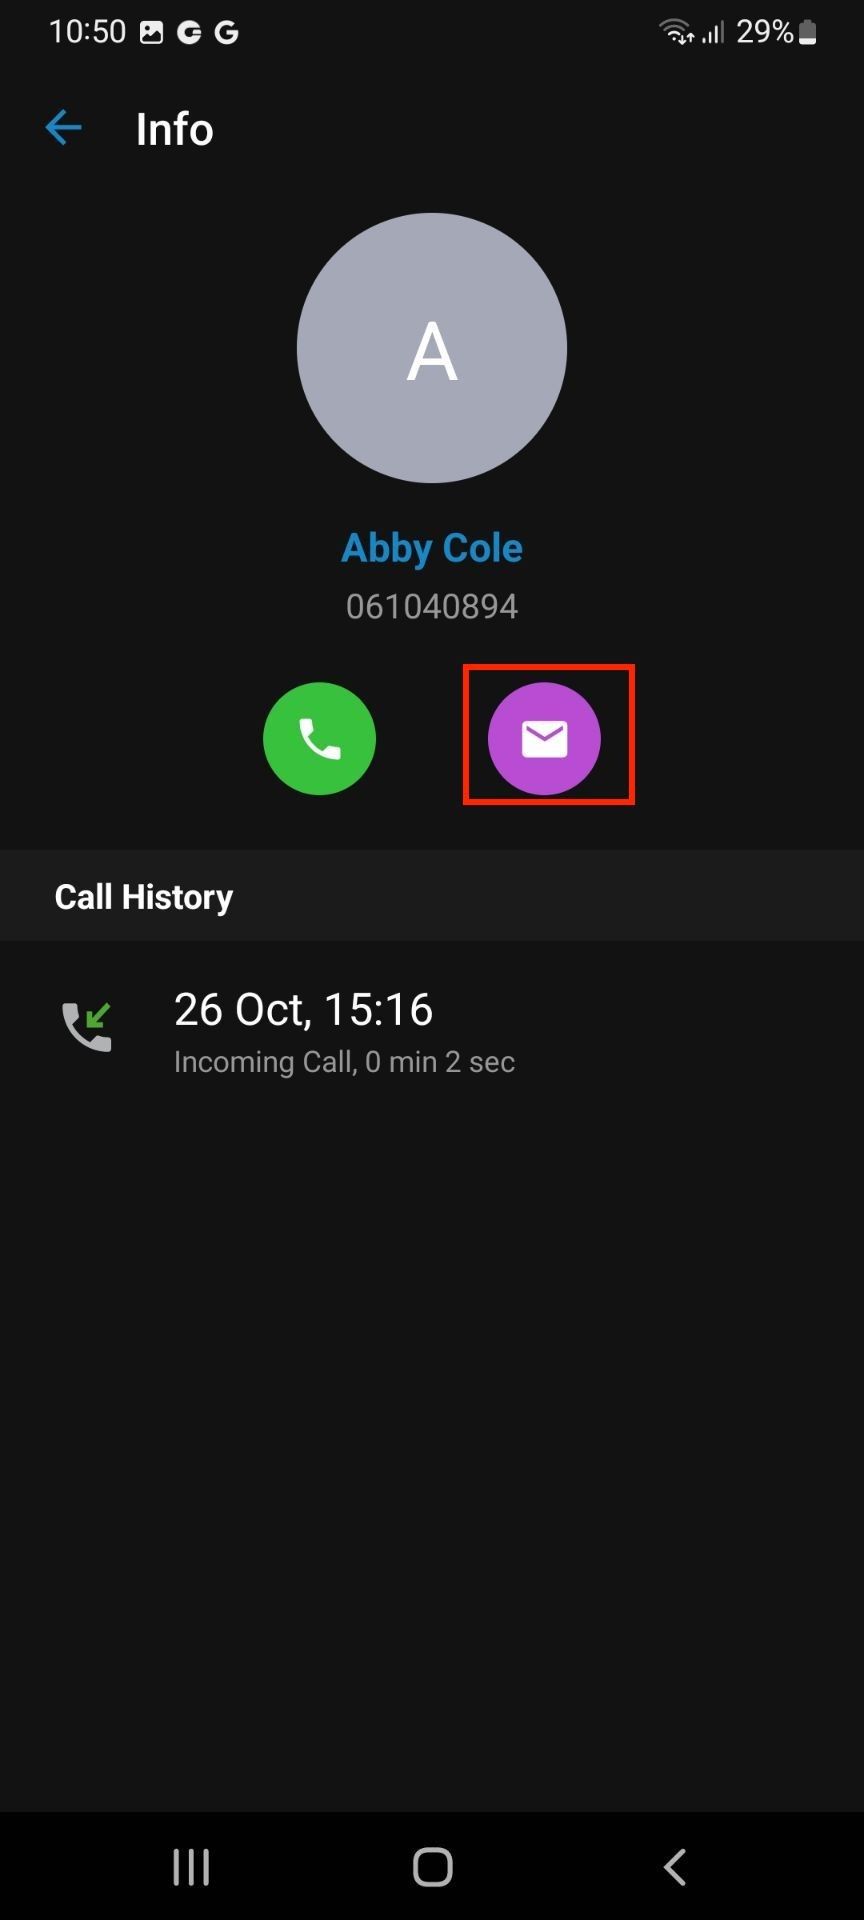
Send email from the predictive dialer, recent list & recent info screens
gloCOM GO now offers several new ways to send emails from the predictive dialer, recent list, and recent info screen:
- Long press on contact in the predictive dialer
- Long press on contact in the recent calls list
- Pressing on the email button in the recent info screen
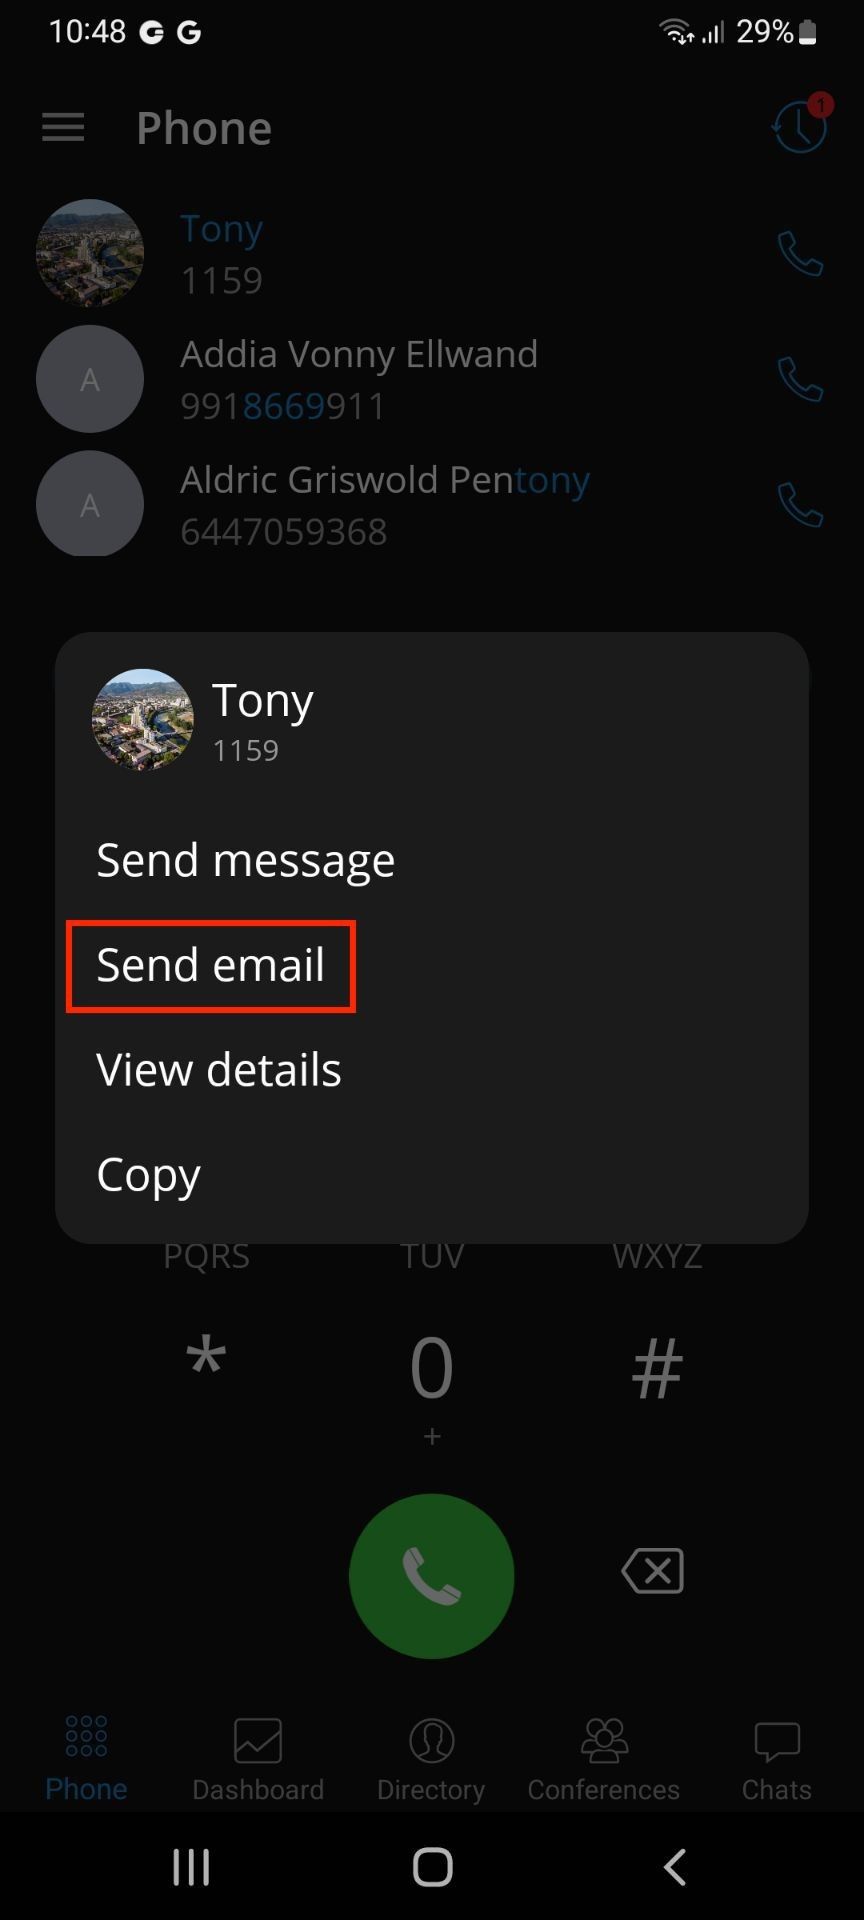
For contacts that have no email address provided these options won’t be displayed, and for the contacts that have multiple email addresses, the user will be presented with a list of emails available for this contact.

Opus
Opus is an excellent codec for lossy audio compression, and that’s why Opus codec has the highest priority when making calls by default. Users can customize the order of codecs priority in gloCOM GO 6 Settings.
Opus is an audio coding format designed to efficiently code speech and general audio in a single format and handle a wide range of interactive audio applications while remaining low-latency enough for real-time interactive communication. It is distinguished from most high-quality formats by having a low delay and supporting high audio quality.
To ensure that Opus is used for all calls, users will need to add Opus as a first codec in Extension settings on PBXware.
Calls
In gloCOM GO 6, calls can be made over SIP protocol, which is a primary option, or using the Callback calls.
Call scenarios may vary and will depend on the network connection (WiFi, Mobile Data, No Connection), service availability and value for option SIP over mobile internet.

The table above displays the order in which gloCOM GO 6 will try to establish calls in different scenarios.
If we, for example, take the first scenario for WiFi where the order is:
-
SIP Call
-
Callback Call
-
No Success
This means that in a scenario where the device is connected through the WiFi, the app is connected to the SIP Server, and the Callback Module is available on PBXWare, gloCOM GO 6 will first try to make a SIP Call; if unsuccessful, it will then try to make a call using Callback, and if this fails, it will display the message that the call could not be established.
SIP Calls
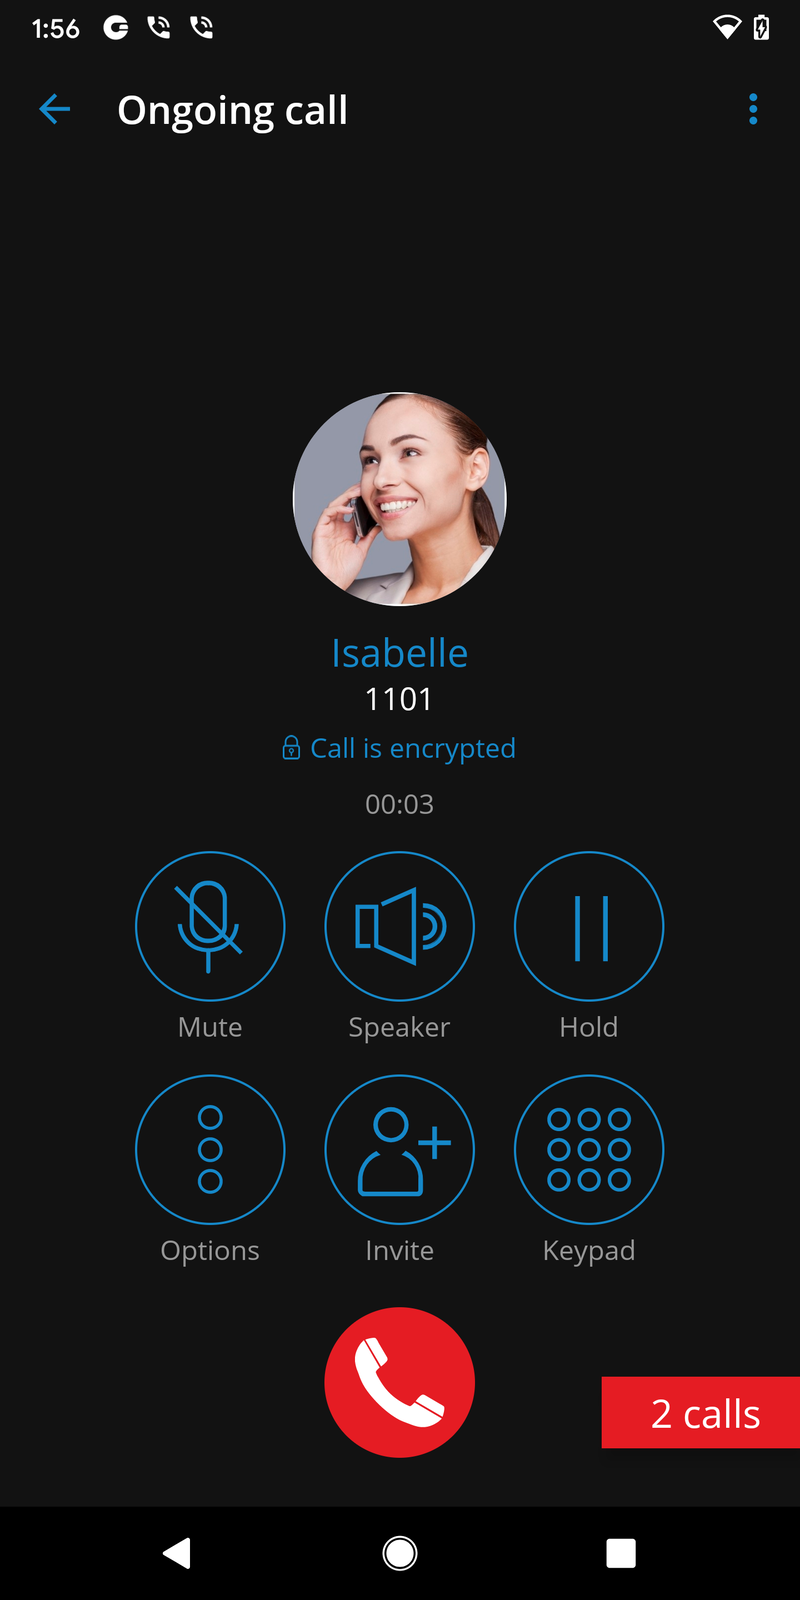
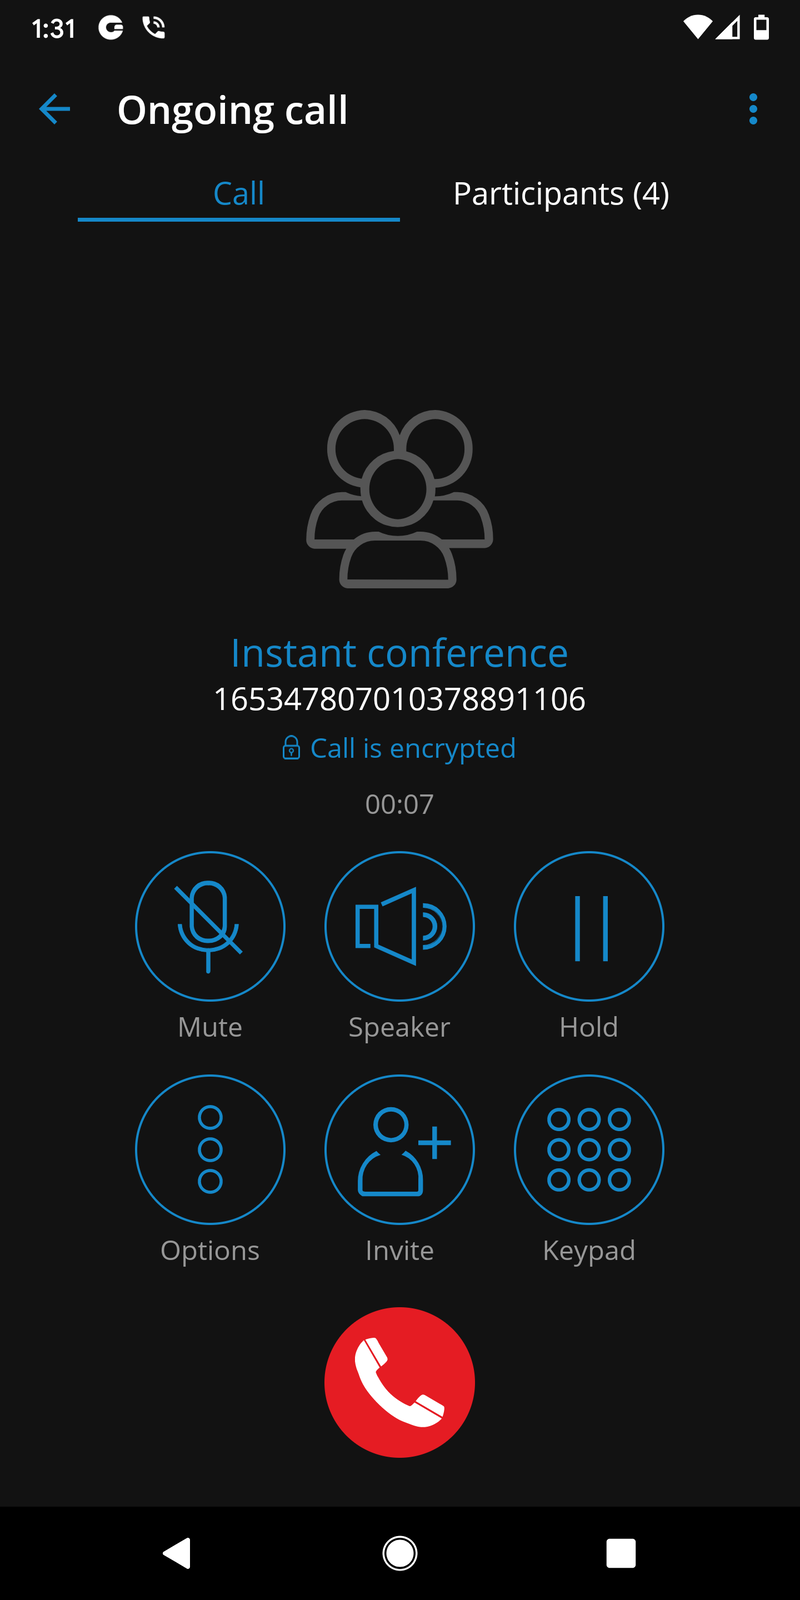
SIP Call Screen appears when the user initiates or receives a call through PBXware.
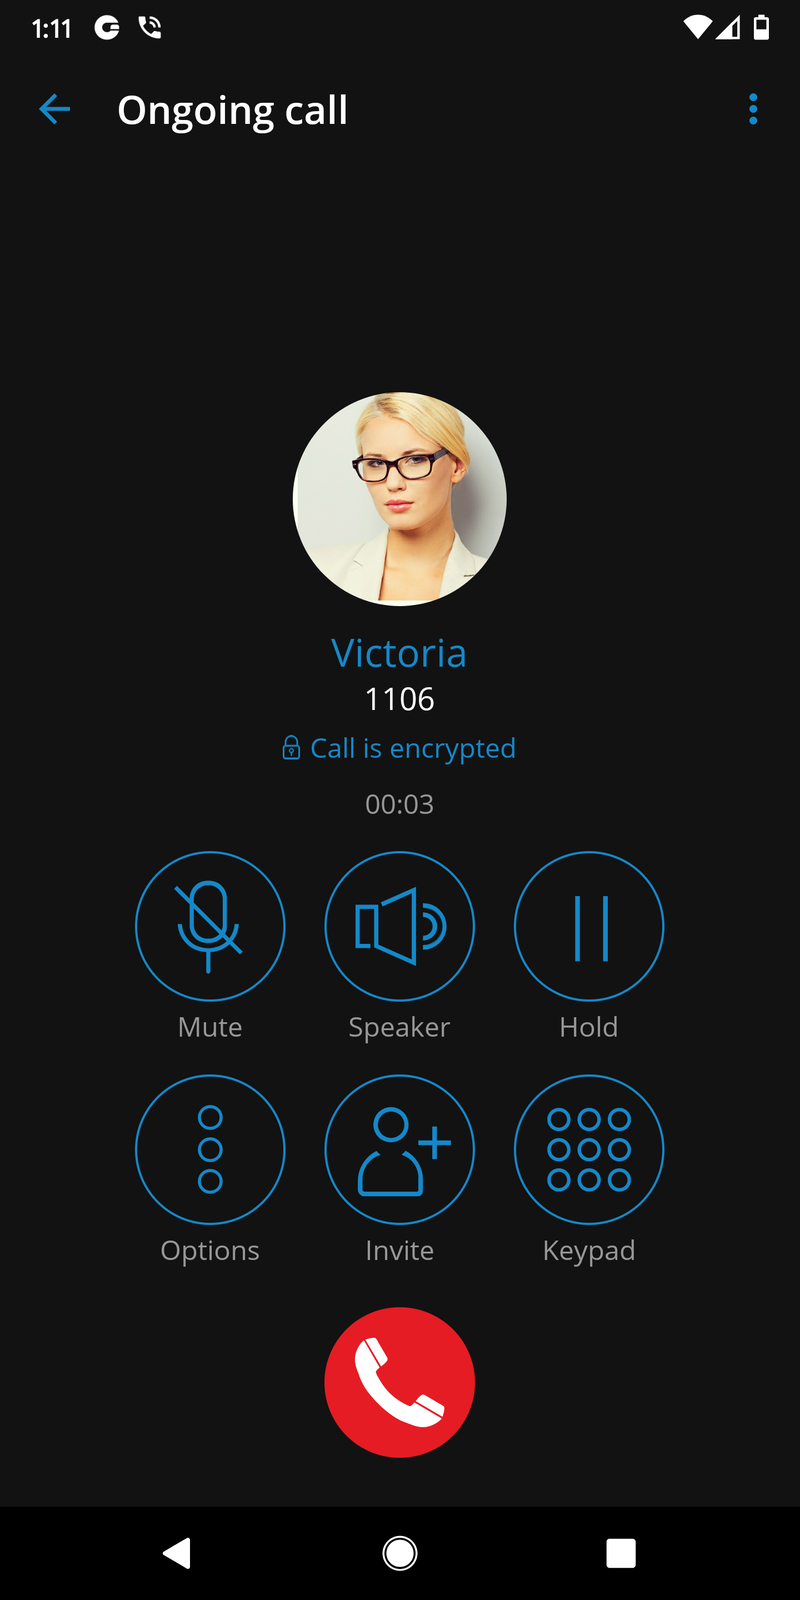
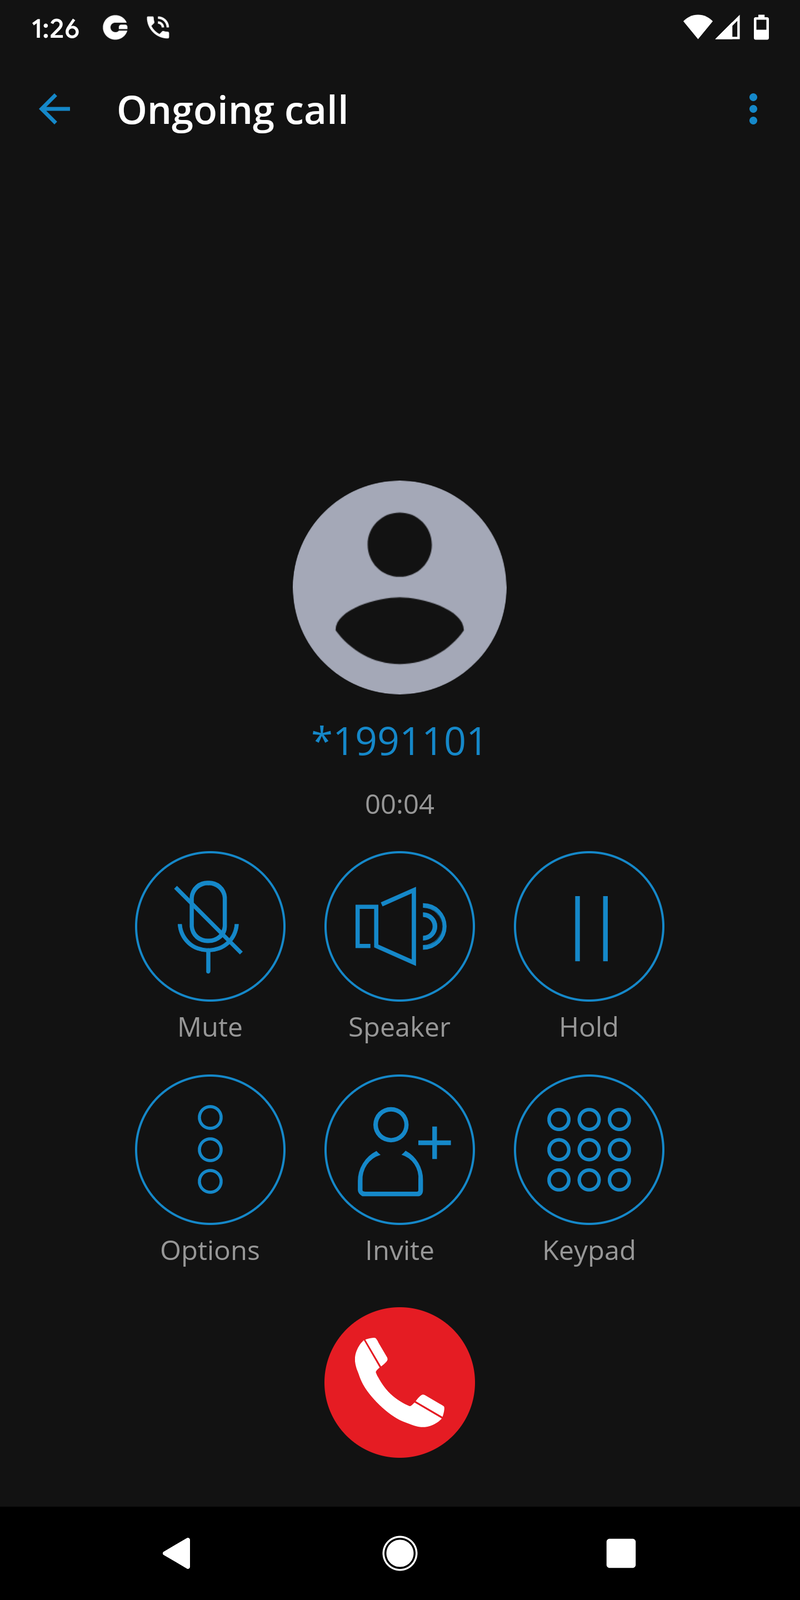
Once the call is connected gloCOM GO 6 allows users to perform several actions:
- Mute
Mute allows users to disable the microphone on the device, preventing any unwanted communication on the user’s side from being transmitted to the other side of the call.

- Speaker
Press the Speaker button to put the device in speakerphone mode, allowing users to continue without holding the device in the ear or to allow other persons in the room to join the conversation through a single device.
- Hold
Hold option will put a caller on hold and play Music on Hold until Hold is pressed again or the call is transferred to another destination.
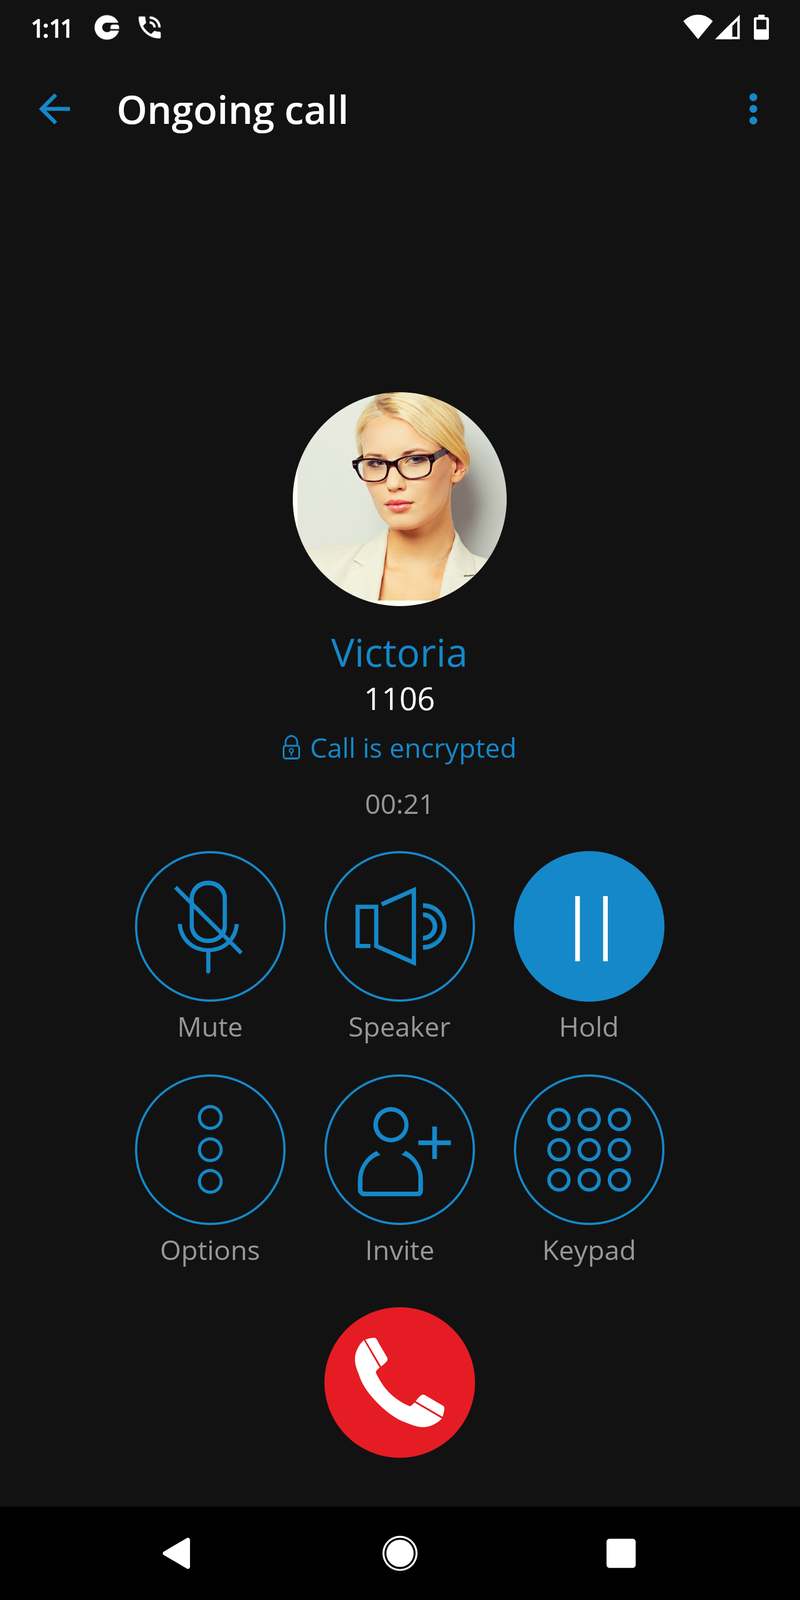
- Options
By pressing the Options button, users can perform multiple actions.
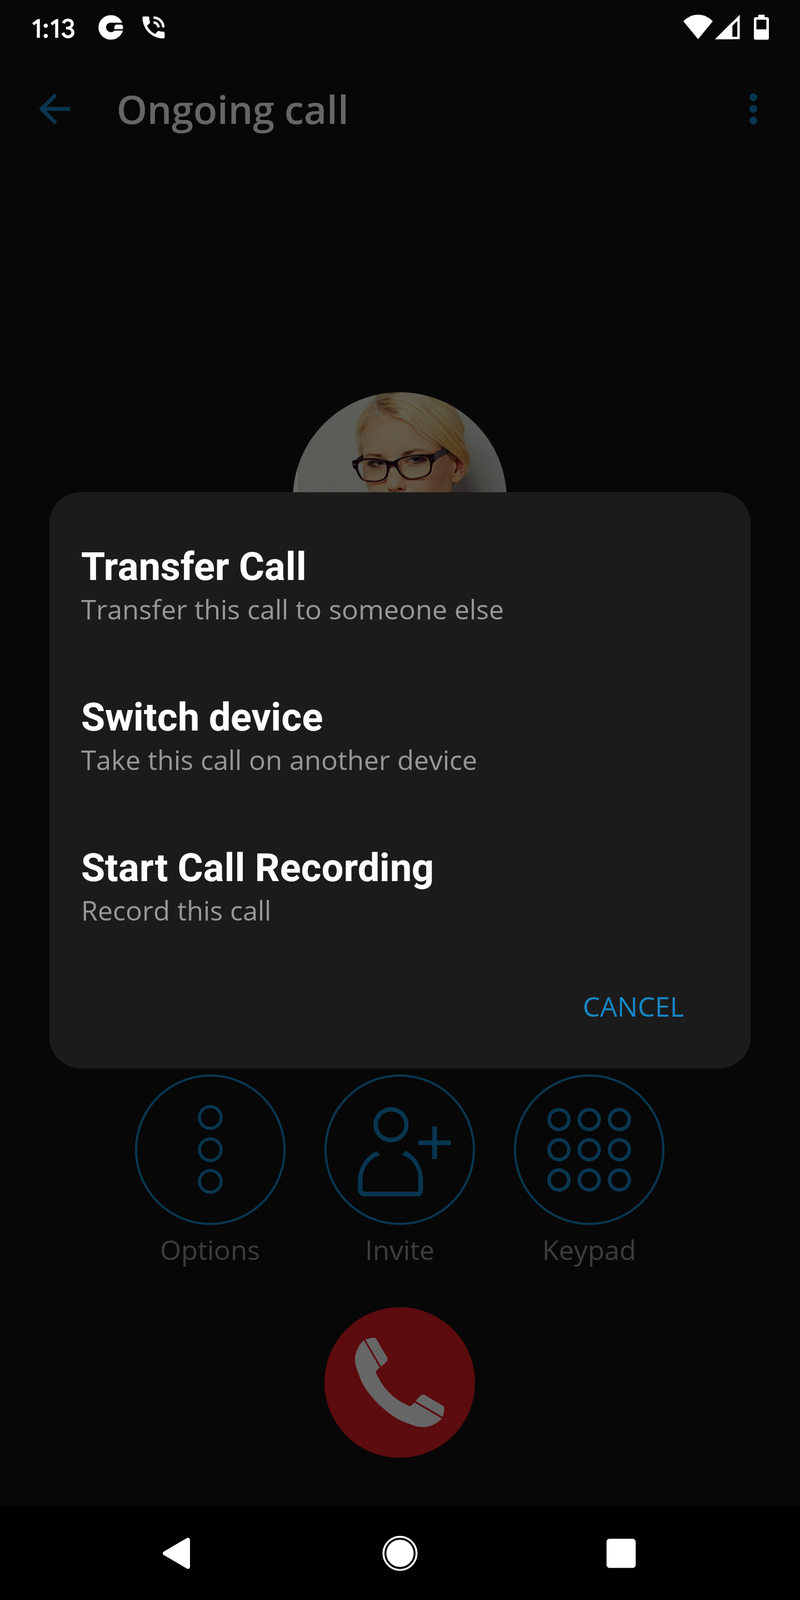
Transfer Call
The transfer button allows users to initiate a direct or supervised transfer to a PBXware extension or outbound number.

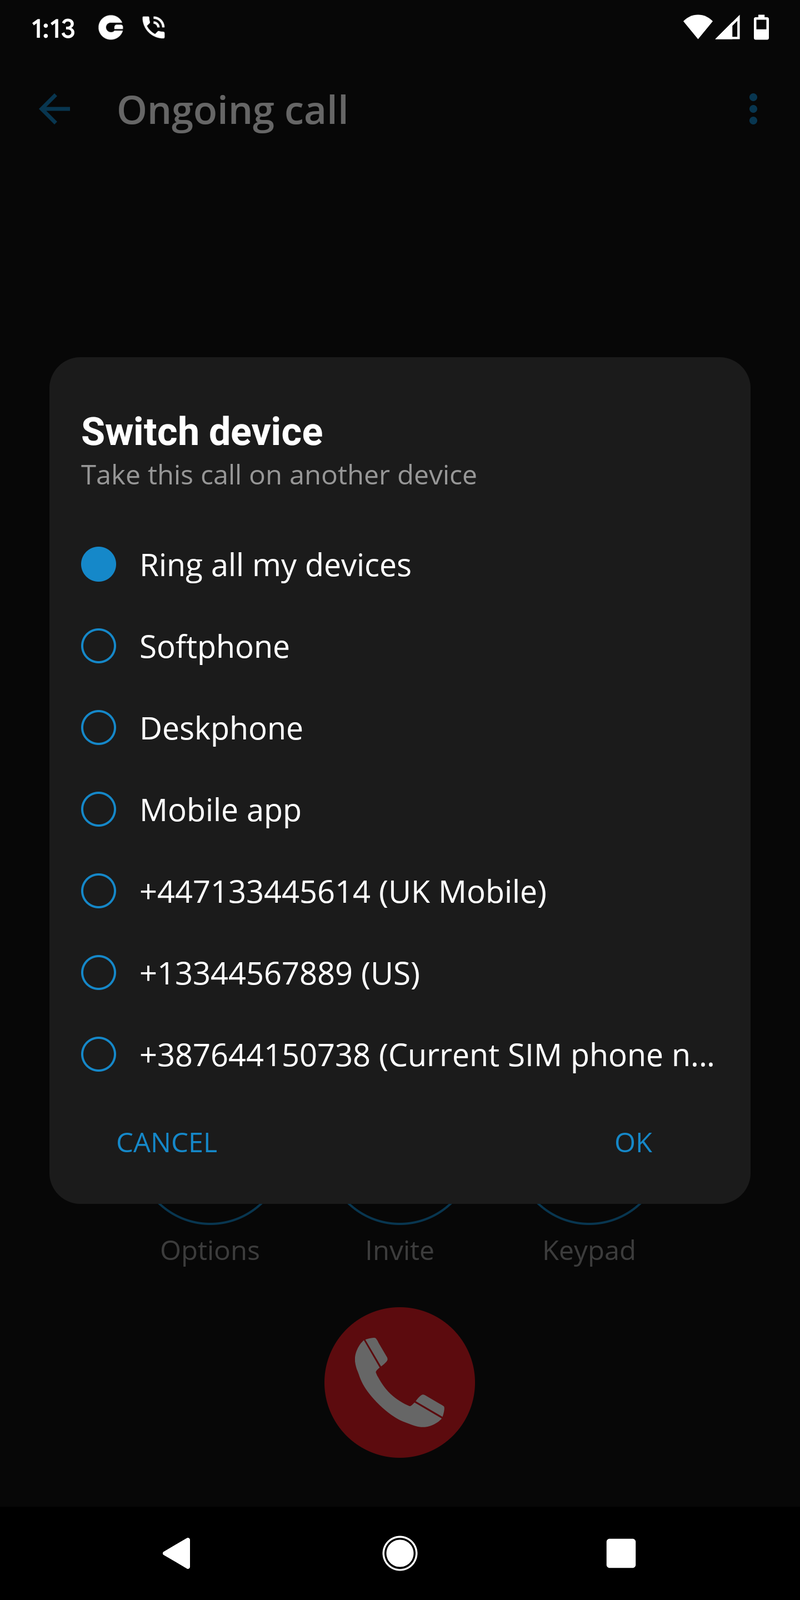
Switch Device
Switch Device allows users to resume the call on other devices, such as deskphone, softphone, mobile app, or via callback using predefined phone numbers from the My Phone numbers feature.
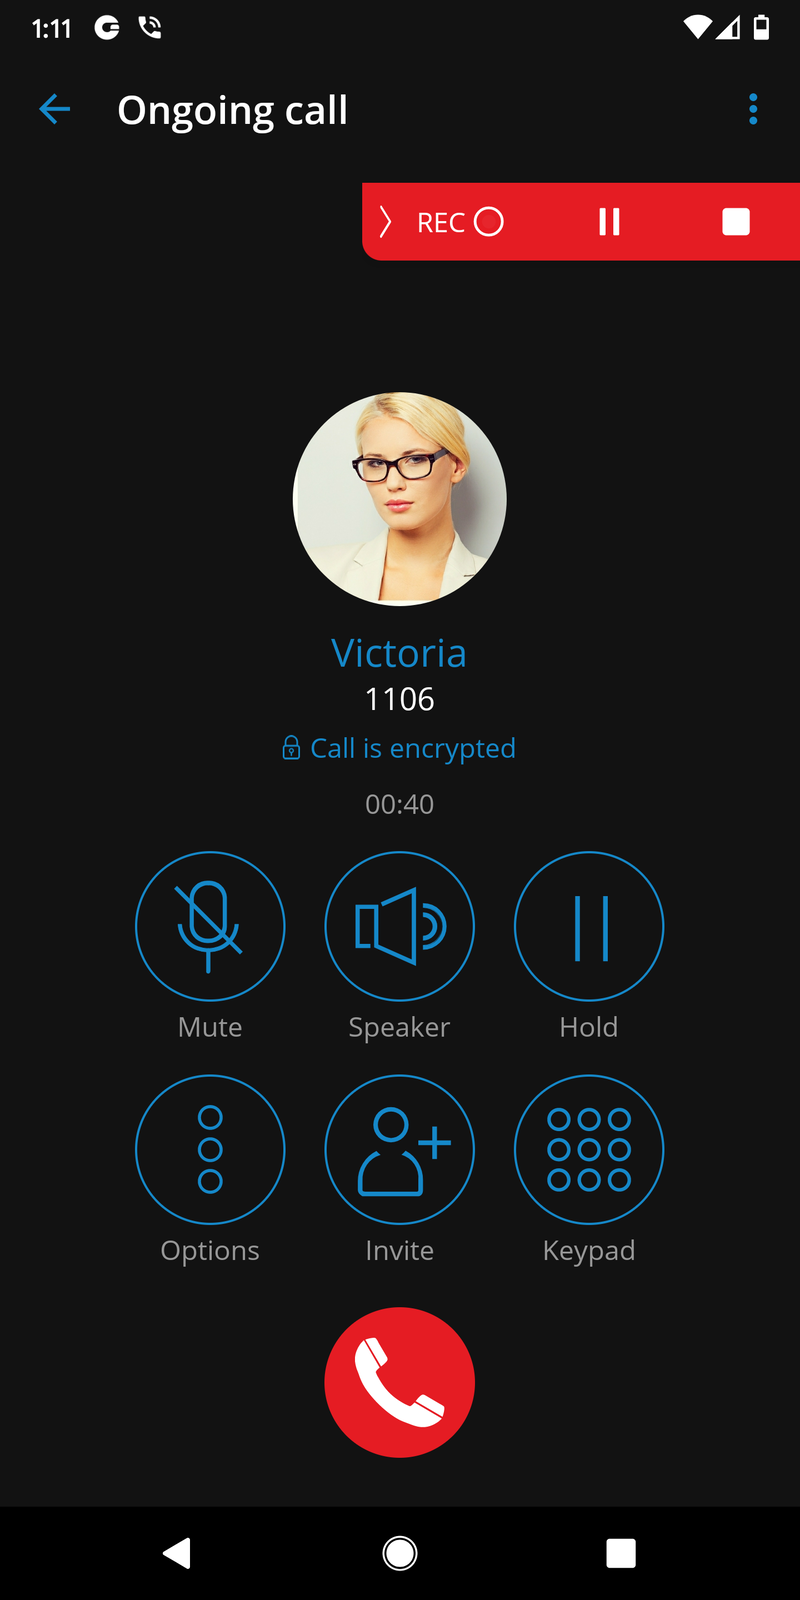
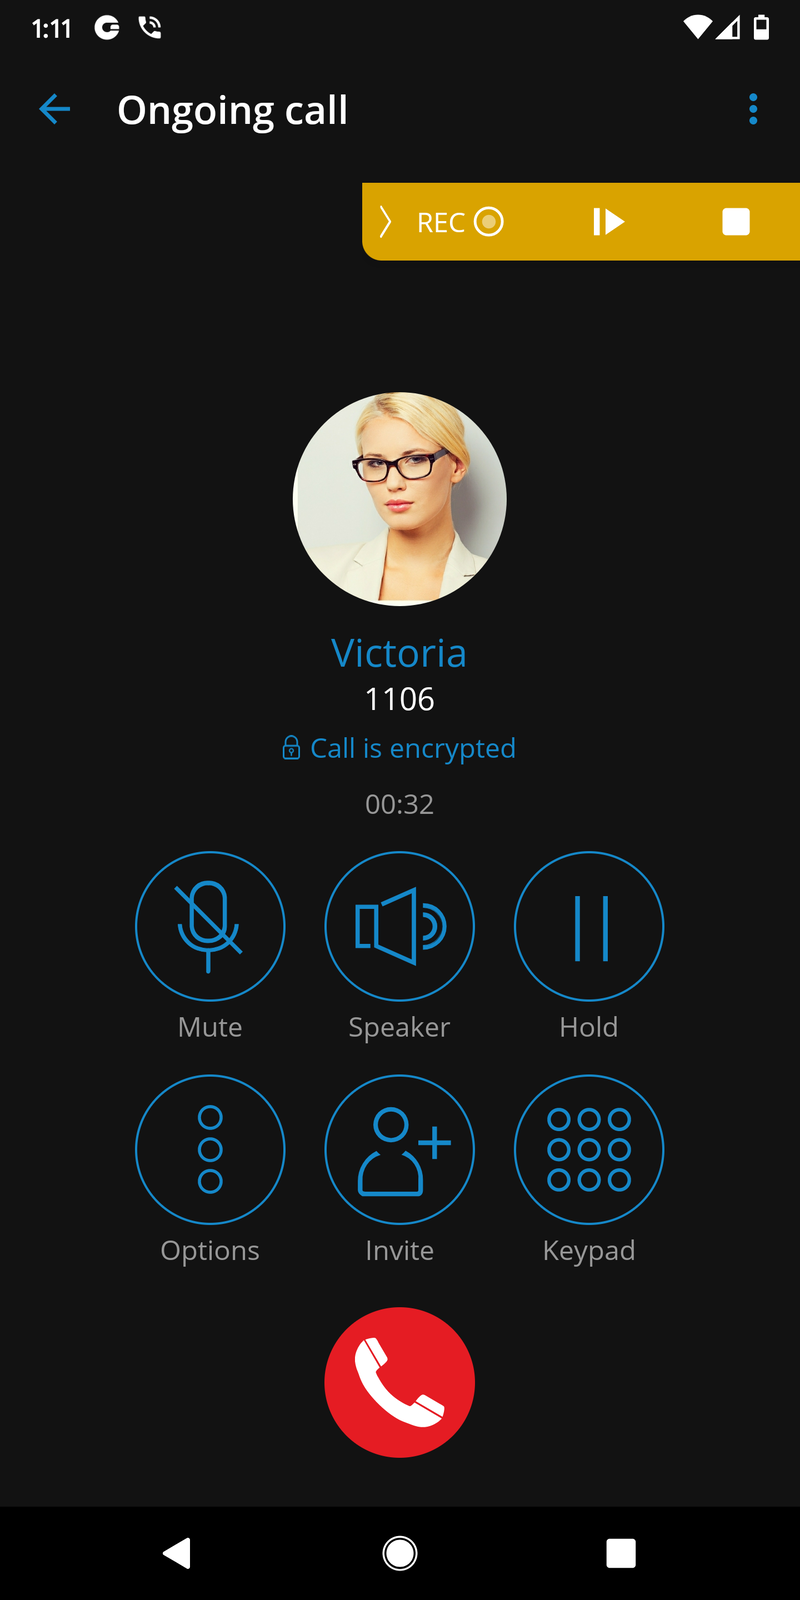
Start Call Recording
Start Call Recording is only available if enabled in Enhanced Services for the user’s Extension in PBXware.
Once the call recording is started for a call, the indicator on the ongoing call screen is visible, showing that the recording is active.
Users are also able to pause/unpause and stop the recording.
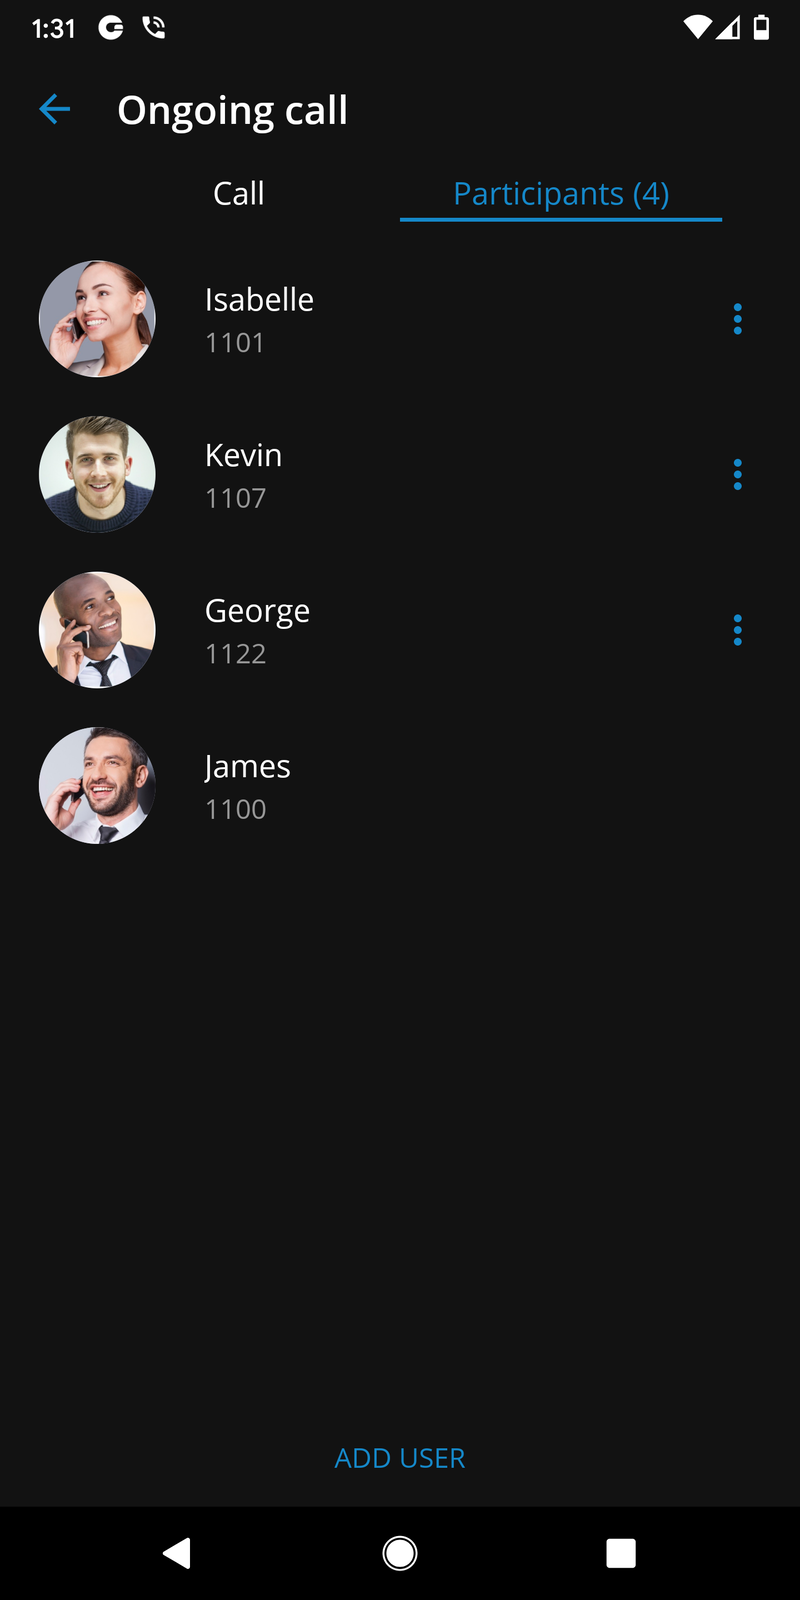
Invite
The invite option allows users to create an Instant conference by adding one or more people to an ongoing call. With this option, users can add PBXware extensions or any number available from their contact list.
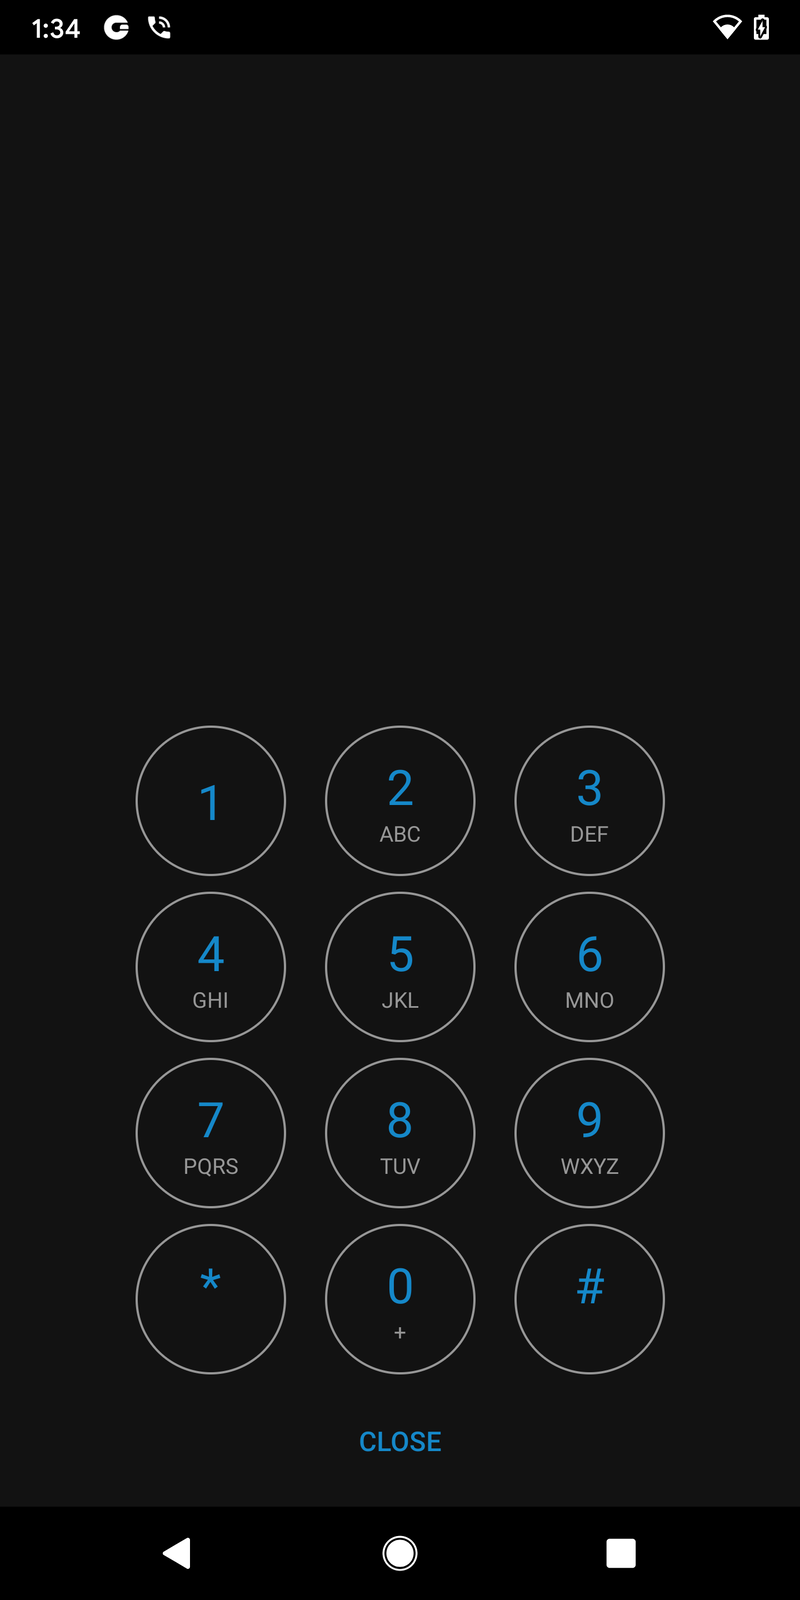
Keypad
Use the Dialpad to generate DTMF signals to provide information to IVRs, voicemail management, etc.
Multiple SIP Calls
gloCOM GO 6 offers an option to handle two calls at the same time.
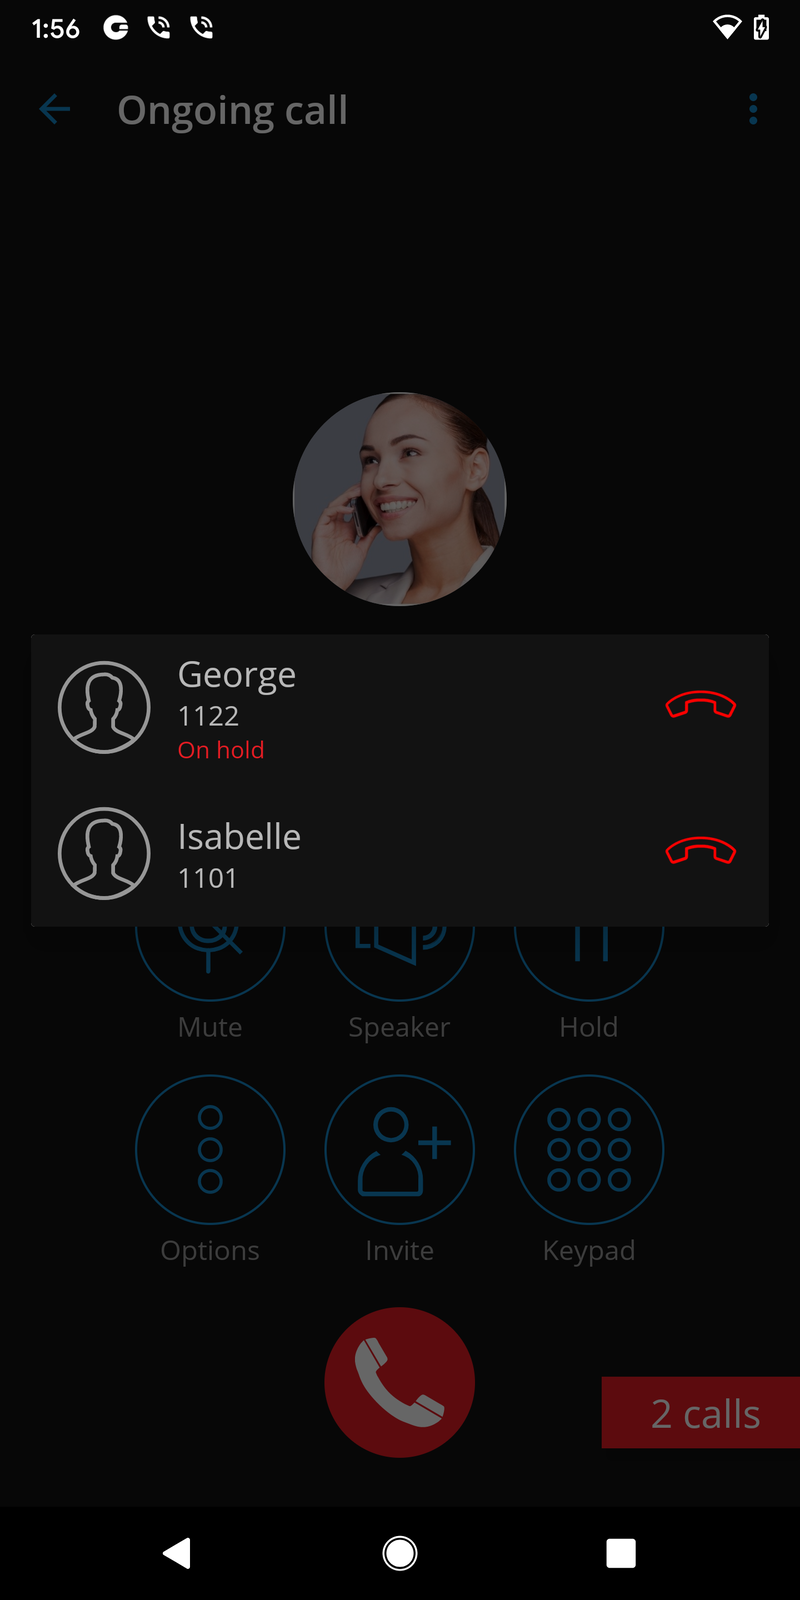
If there is one SIP call in progress and users receive another call, it will be presented to the user on the SIP Call Screen. If answered, gloCOM will set one call on hold. gloCOM will exit from the Multiple SIP Calls state if one of the calls is finished.
Indicator for disabled microphone
The app shows an indicator on the call screen if the microphone is disabled, so users know if other parties can not hear them.
The microphone button on the call screen would be disabled if the user did not give permission previously.
By pressing on the message banner or the disabled microphone button, users will be prompted to allow the microphone permissions.
Call Recording Indicator
Once the call recording is started for a call, the indicator on the ongoing call screen is visible, showing that the recording is active.
Users are also able to pause/unpause and stop the recording.
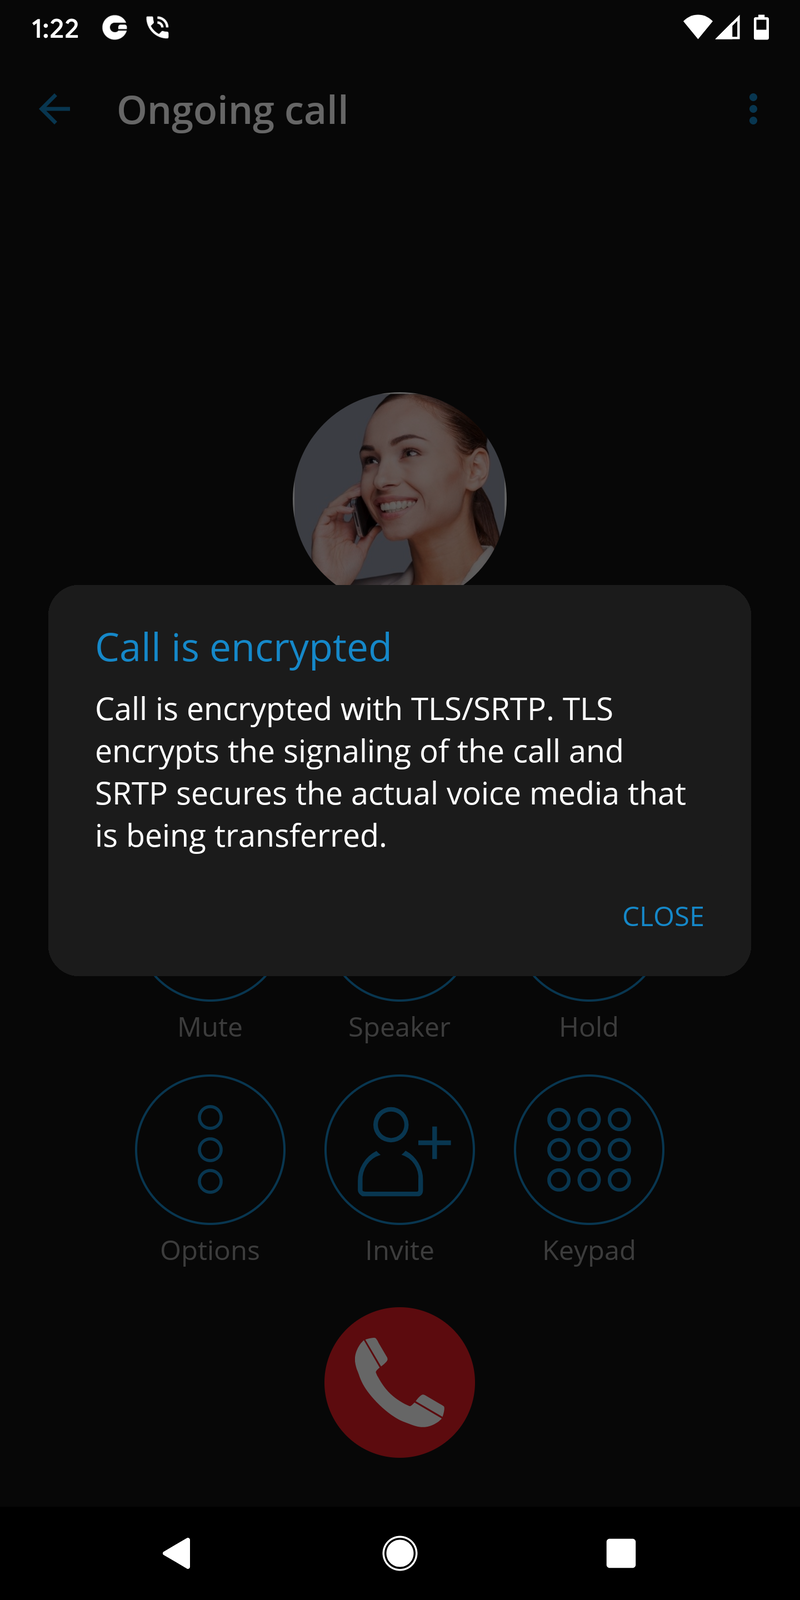
Call Encryption Indicator
An indicator shows a call encryption message during an ongoing call if a call is encrypted.
The indicator should only be present when the TLS encryption is enabled. Pressing it will bring a pop-up message explaining the encryption.
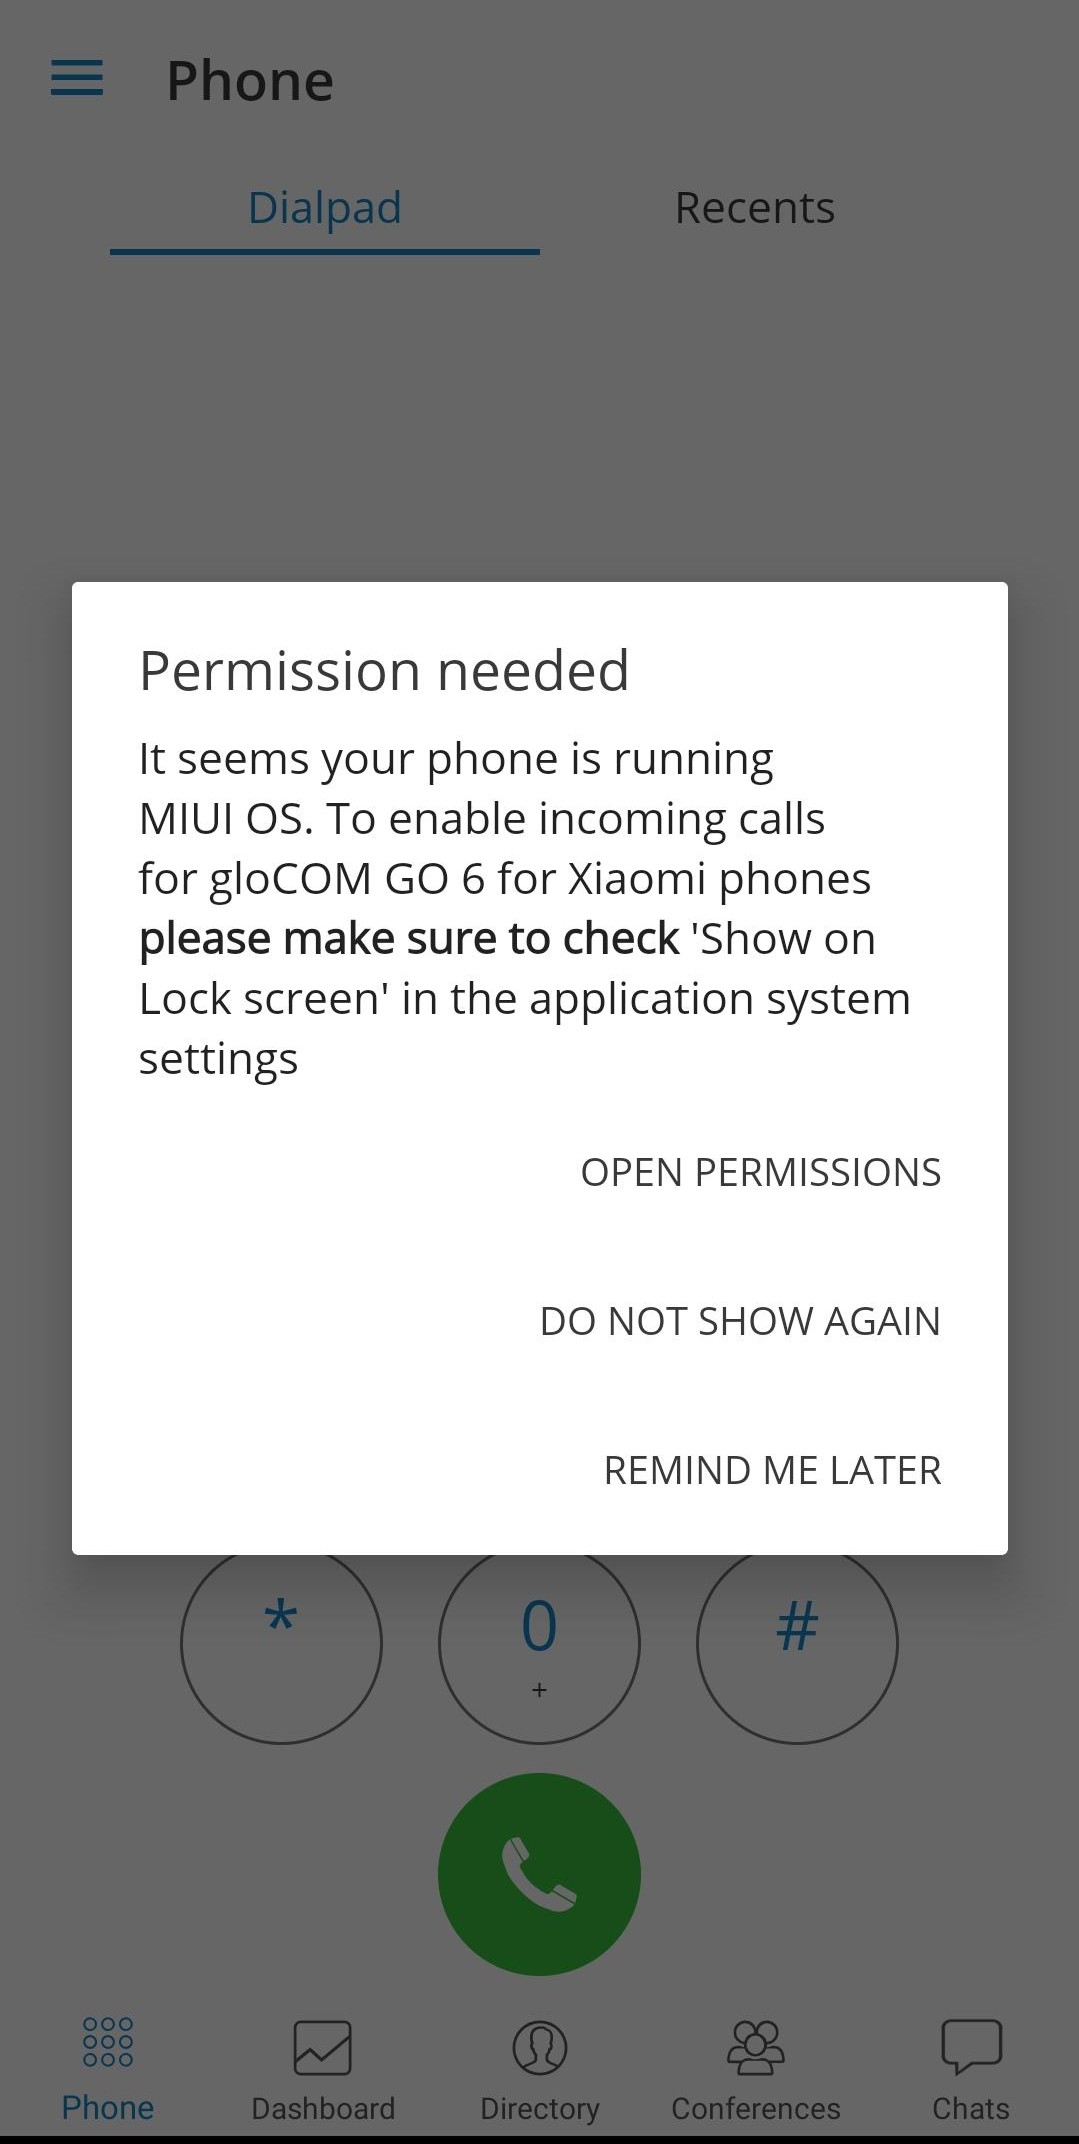
Xiaomi devices permissions
Users of the Xiaomi devices could have a problem with incoming calls on the full screen.
After login, the app should show the dialog “It seems your phone is running MIUI OS. To enable incoming calls for Xiaomi phones, please check ‘Show on Lock screen’ in the application system settings.
The dialog should have three buttons:
-
Open permissions – will open the phone settings window with the ‘Show on Lock Screen’ option
-
Remind me later – will just close the dialog
-
Do not show again – will store shared preference that warning has been displayed
Also, users can enable permission that has to be enabled to work properly from the device system settings.
Settings → Manage Apps → APP → Other permissions → Show on Lock screen
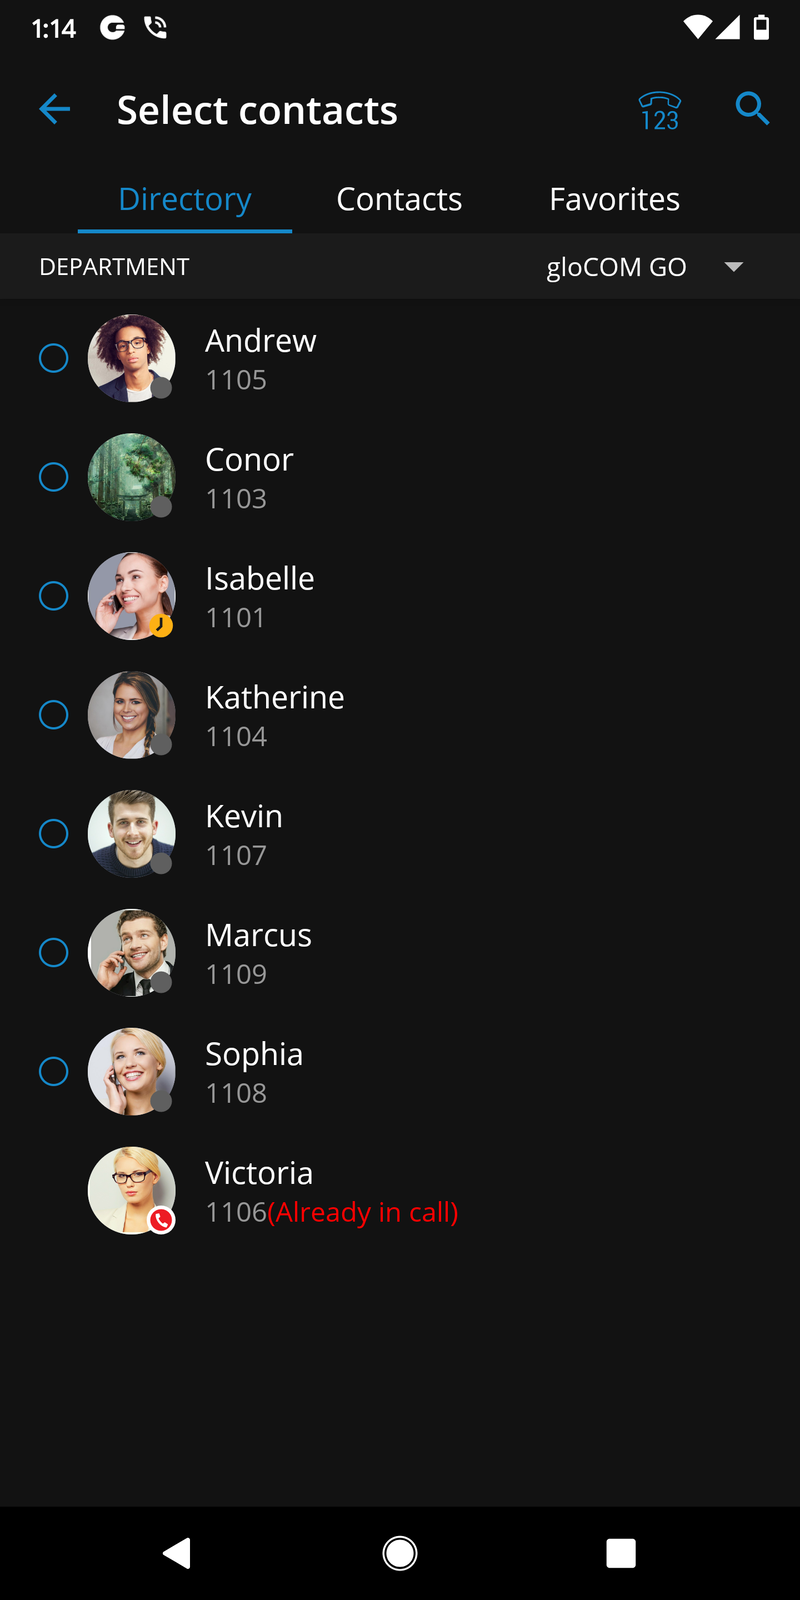
Call transfer
Users can transfer a call by pressing the transfer icon from the call options menu.
The user will be able to transfer the call to two destinations:
- Select a contact
Pressing Select a contact brings up a screen with favorites, users, and phone book contacts to choose someone to transfer the call to.
- Enter a number
Users can enter the number directly without selecting from the contact list.
After selecting the contact or entering a number, users have to select to make a Direct or Supervised transfer to initiate it.
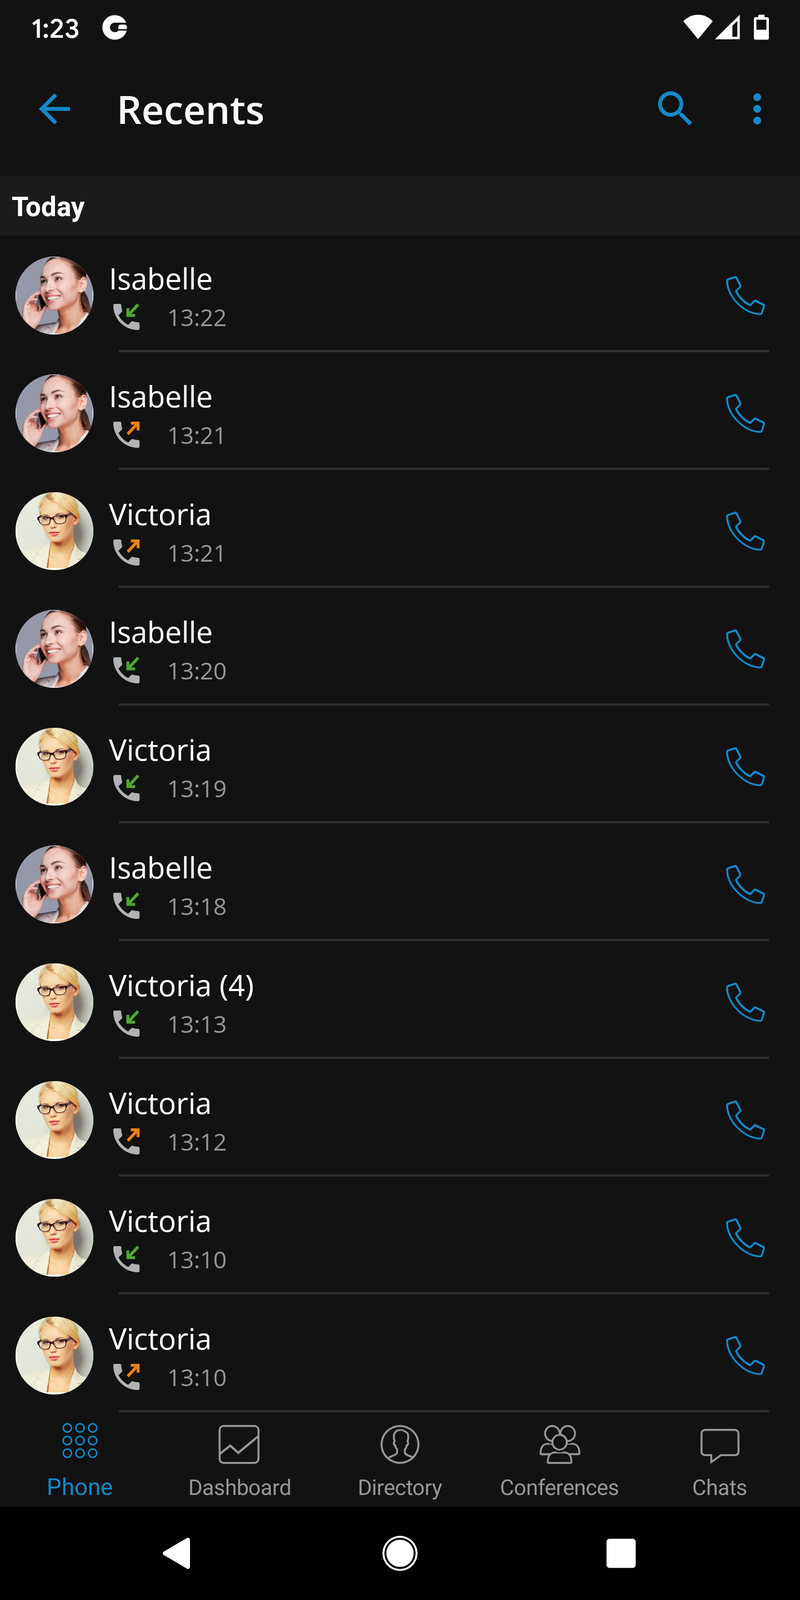
Recent Calls
The recent calls screen will be entered when the user presses Recents Tab button from Header Bar on the Phone Screen and a list of the recent calls will be displayed.
In the recent calls screen, there is a search icon in the top bar, which can be used to filter recent calls by number and name.
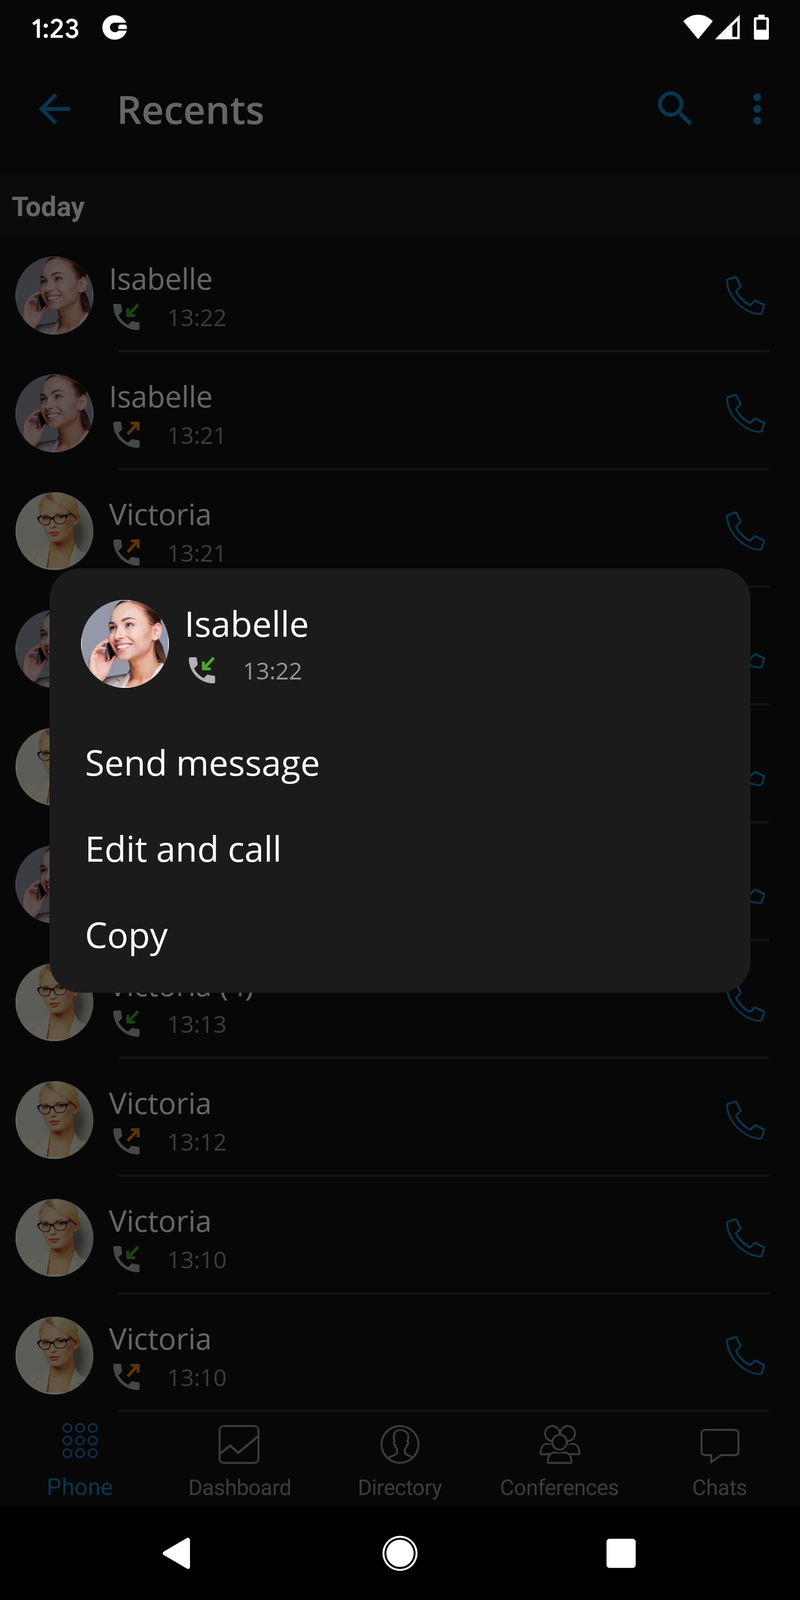
Pressing on the avatar of some contact from recent calls opens an info screen containing additional information about that contact.
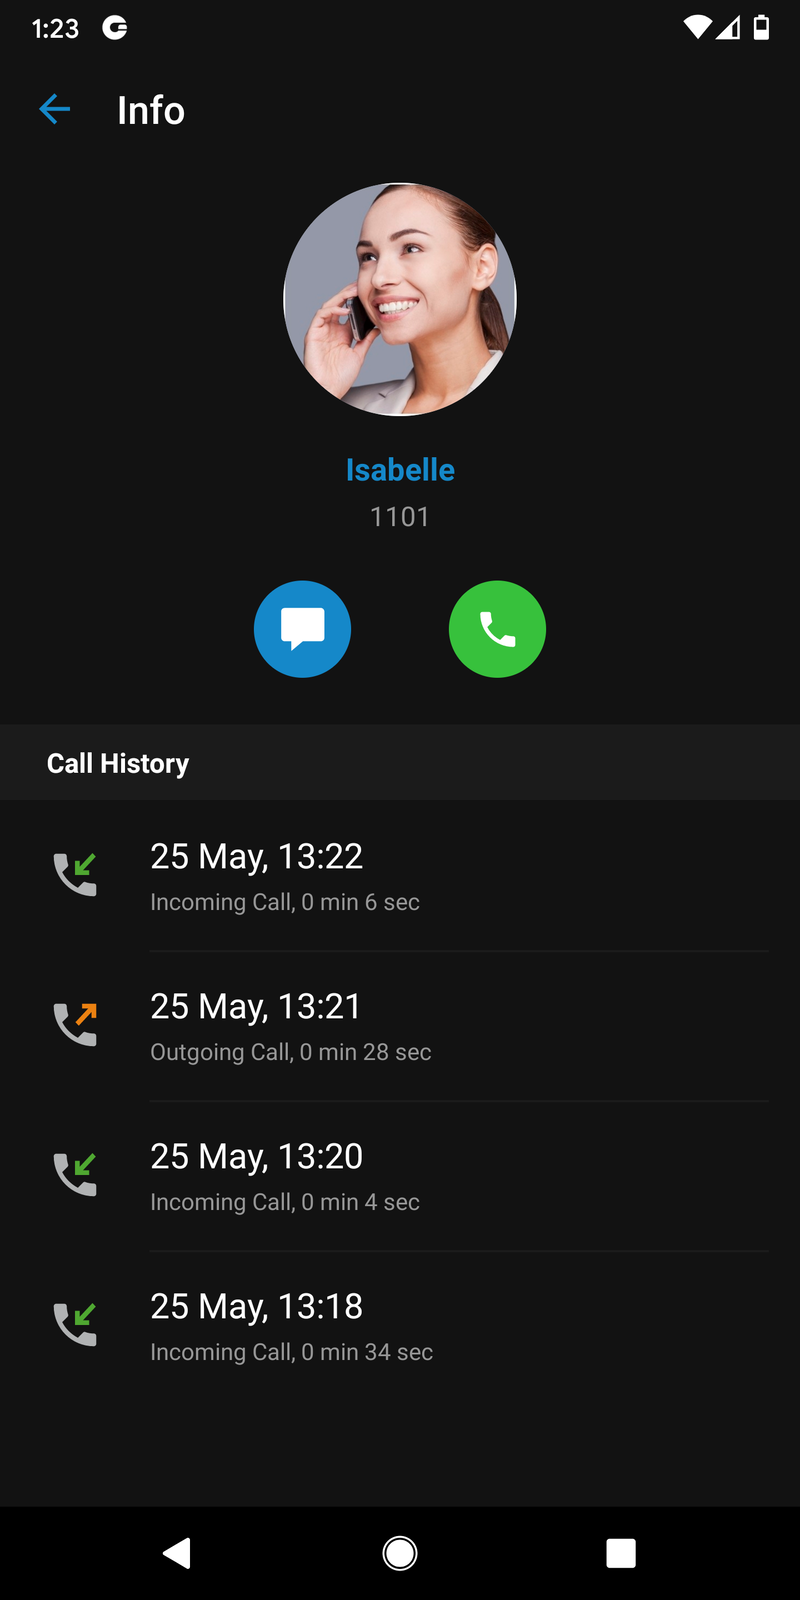
Pressing on the avatar of some contact from recent calls opens an info screen containing additional information about that contact.
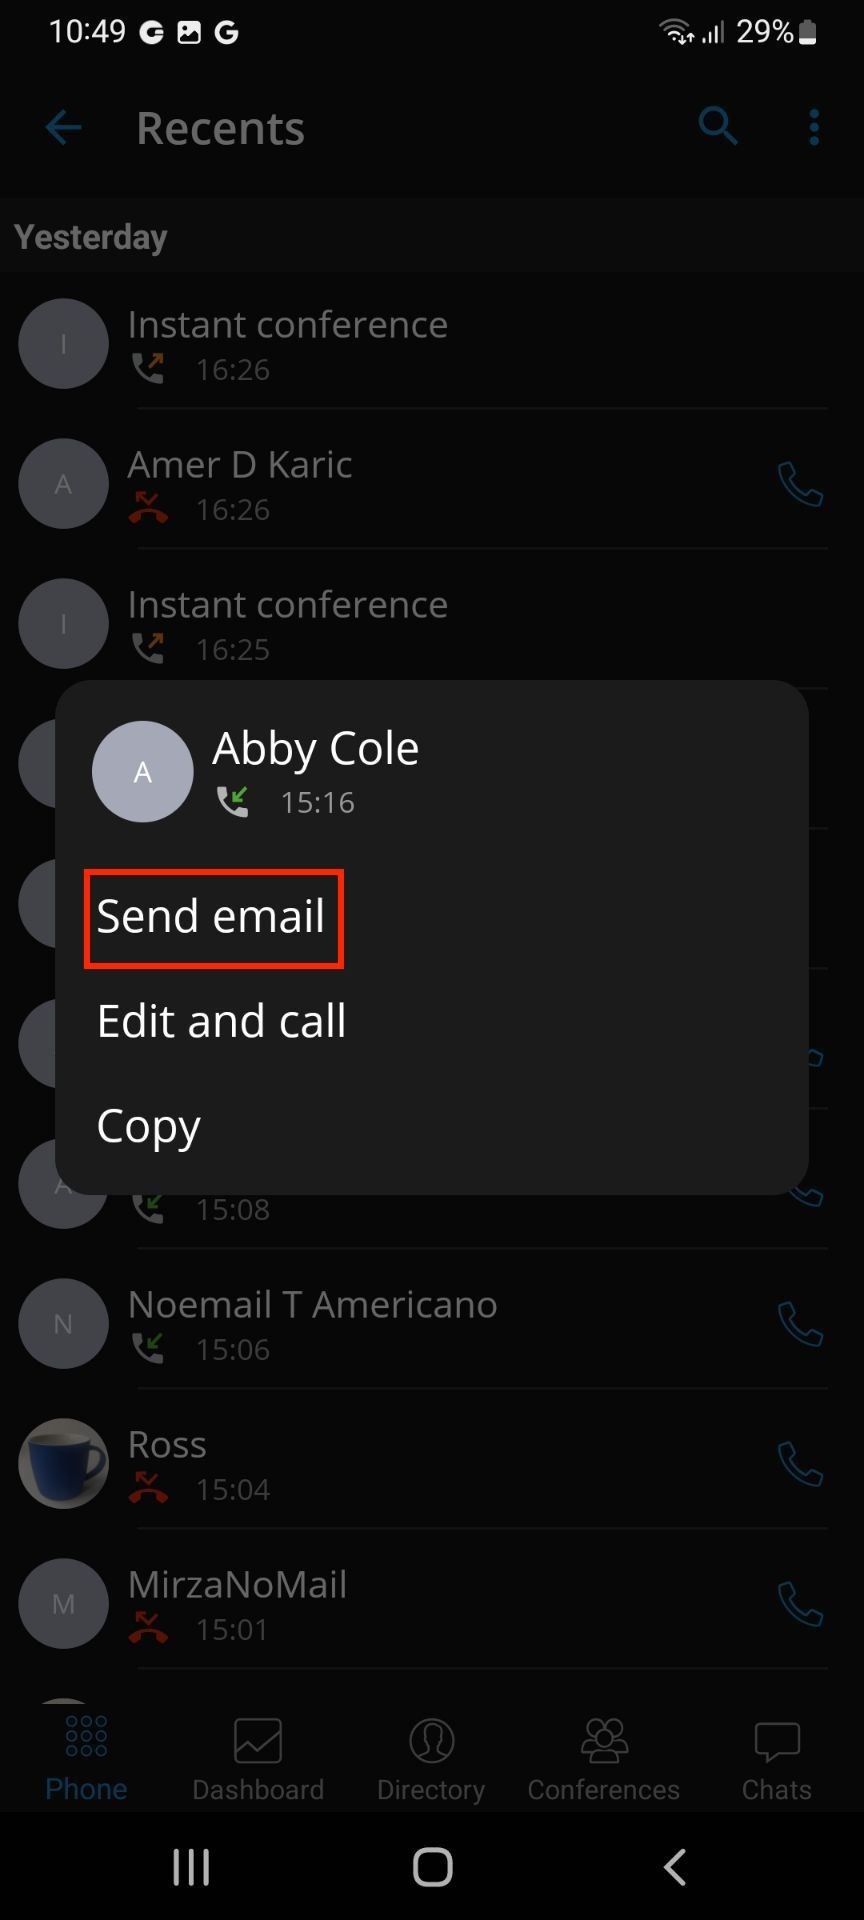
By long pressing on the contact in the recent calls list, a popup menu appears with 3 provided options:
-
Send message – Start a chat conversation with the selected contact.
-
Send email – Redirects the user to the default mail client with the e-mail address prefilled (if the e-mail address is provided for the selected contact).
-
Edit and call – View details about selected contact.
-
Copy – Copy the contact’s number.
Call History Sync
With the call history sync feature, users will be able to access their recent calls history from all gloCOM apps (Desktop, Mobile, and Web).
Each call users make on the desktop will be reflected on the mobile devices. If users mark a missed call as seen on their mobile device, it will now be marked as seen on their desktop and other mobile devices. If users delete call history on one device, it will be synced and deleted on all of the devices.
When logging into the device, gloCOM GO 6 will sync up to hundreds of previous calls no older than a month.
Technical information about an ongoing call
While in a call, users can show technical information about it by pressing the info icon. This can be useful for diagnosing problems with call quality.
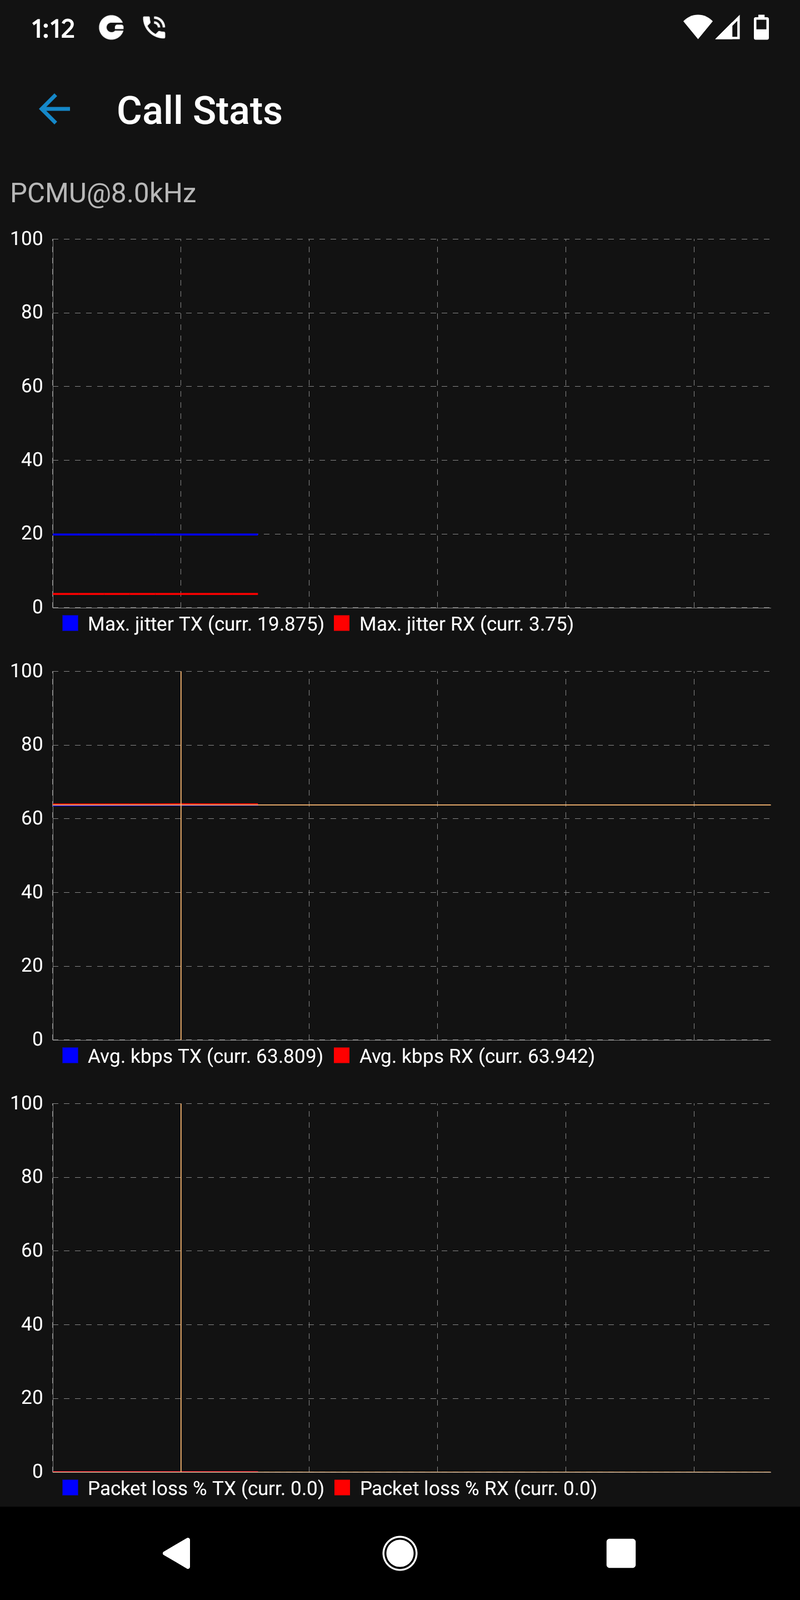
High packet loss and high jitter, both RX and TX indicate that call quality suffers due to network quality and usage.
RX stands for reception (incoming traffic) and TX for transmission (outgoing traffic).
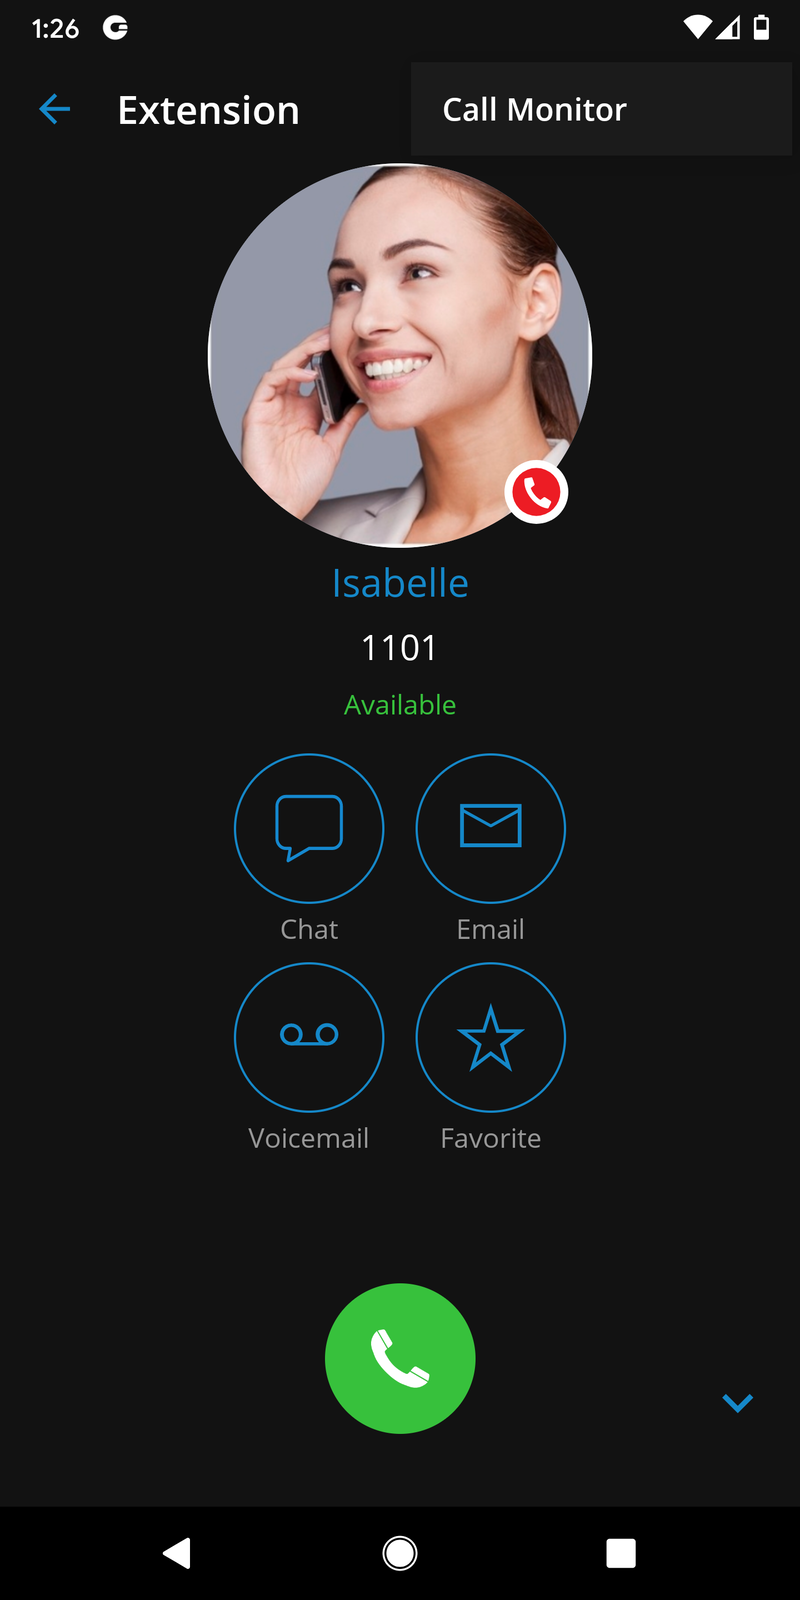
Call monitor
The call monitor feature enables the users to listen or participate in calls for extensions configured in the call monitor enhanced service settings on PBXware.
When call monitoring is enabled in the Enhanced Services on the user’s account, users will see a three dots menu inside the extension profile. When pressed, the call monitoring feature will be available. If users do not have call monitoring enabled on the extension, they will not be able to see that option.
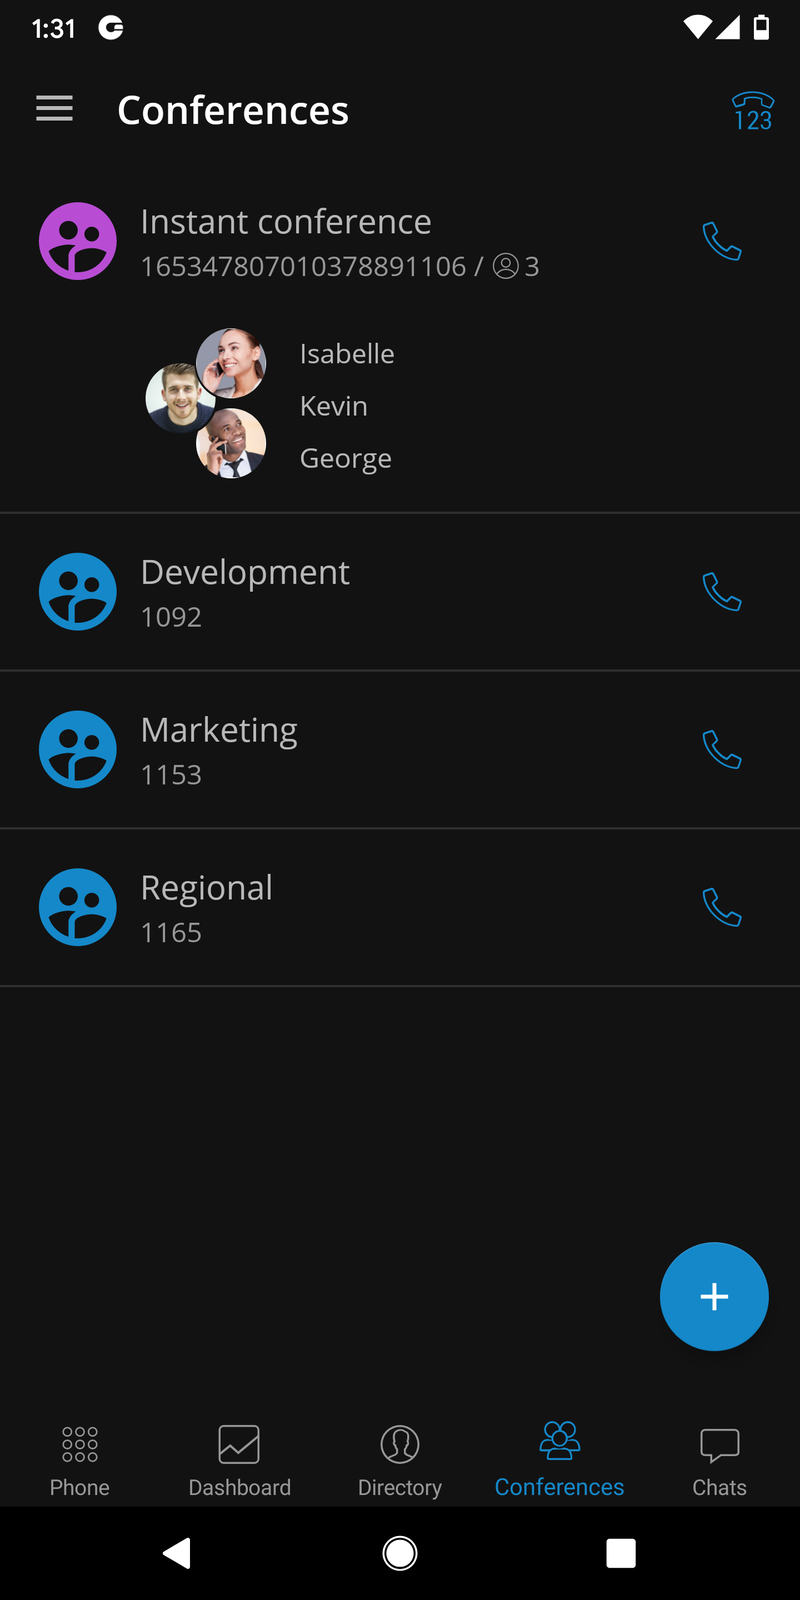
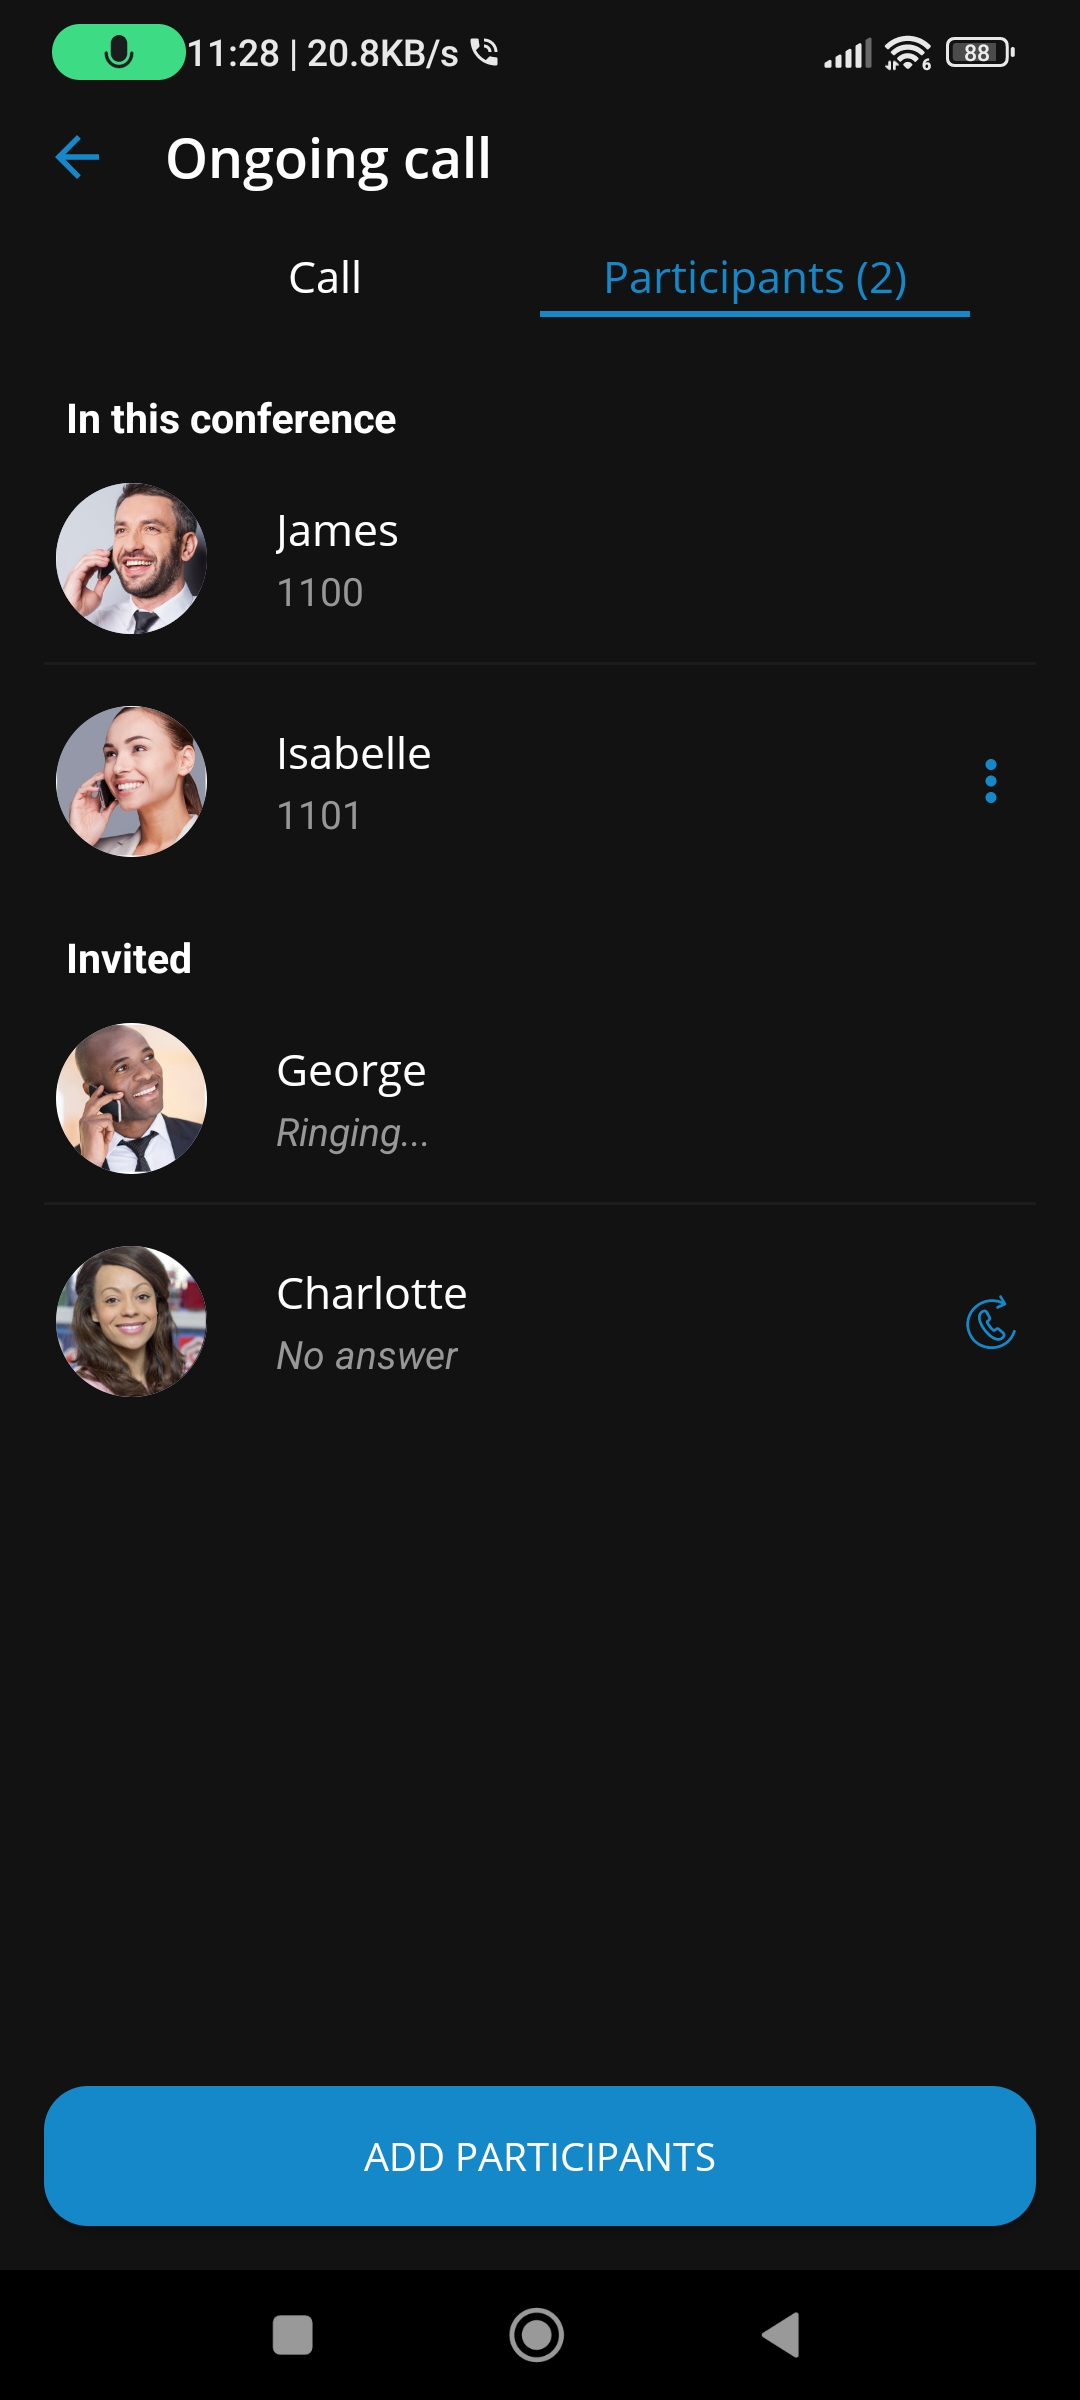
Conference calls
Conference calls enable the users to make calls with more than one participant (external or internal).
There are two types of conference calls:
-
Instant (dynamic) conferences: Users can create a conference call by adding one or more people to an ongoing call or through the conference section. With this option, the user can add contacts or any number available from their contact list. If the user missed the conference call, they could still join it from the Call History tab, provided that a conference call still exists, by clicking on the Dial button.
-
Static conferences: Users can join predefined conference rooms and add other participants. A conference number is next to the conference name within the conference list for the static conference call. Static conferences can be added to PBXware by the PBXware administrator.
Selecting an ongoing conference on the conferences list screen will display a list of participants and the “Join this conference” button at the bottom, allowing users to join the selected conference. The list of participants is updated in real-time as users join or leave the conference room.
Start Dynamic conference from Recent calls
If there is a missed call from a conference in recent calls, users can press the call button for that call and join the instant conference only if that conference is still active.
Conference list screen
gloCOM GO 6 has a conference screen list, which offers more information and a better user experience for ongoing conferences that have participants. Active conferences that have participants are visible on top of the Conference list screen. Also, in an active conference with participants, names and avatars (if available) of 3 participants (or 2 if only 2 are left) will be visible on top of the Conference list screen. Besides the Active conference name, the number of conference participants is also visible on the screen, as well as the conference number and the button to join the conference.
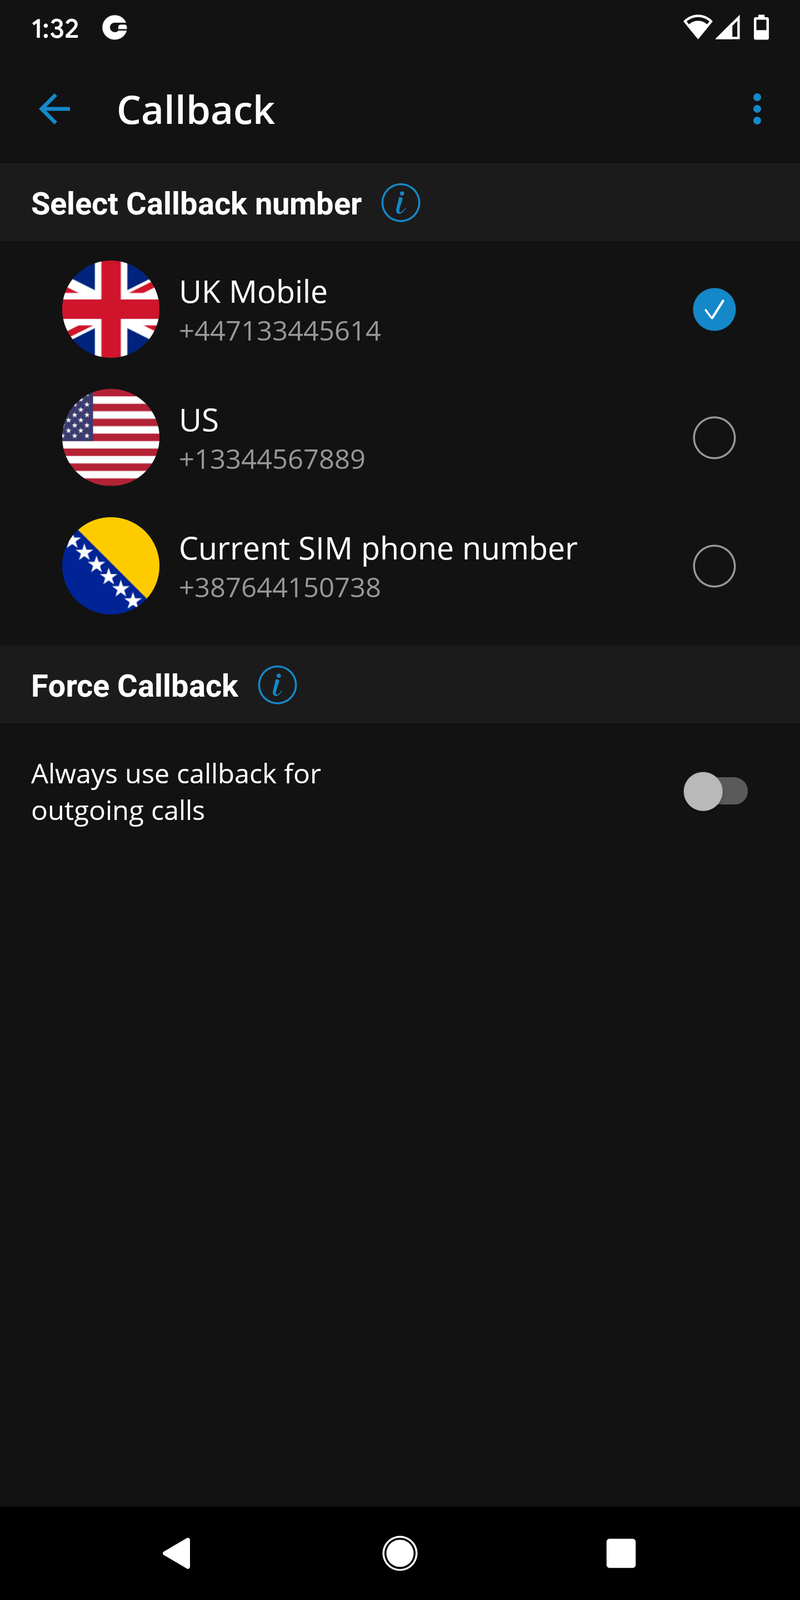
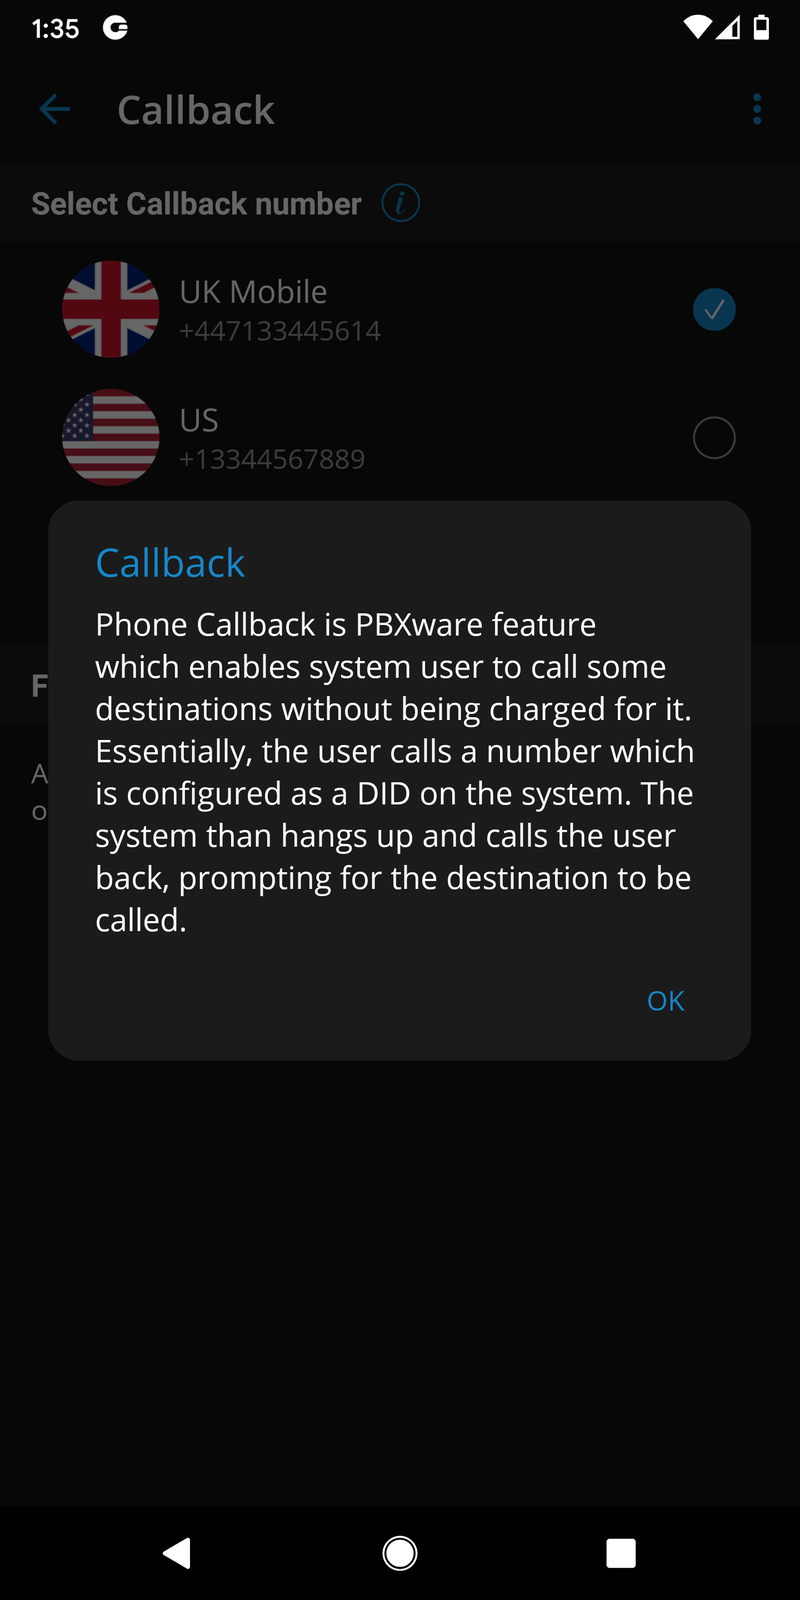
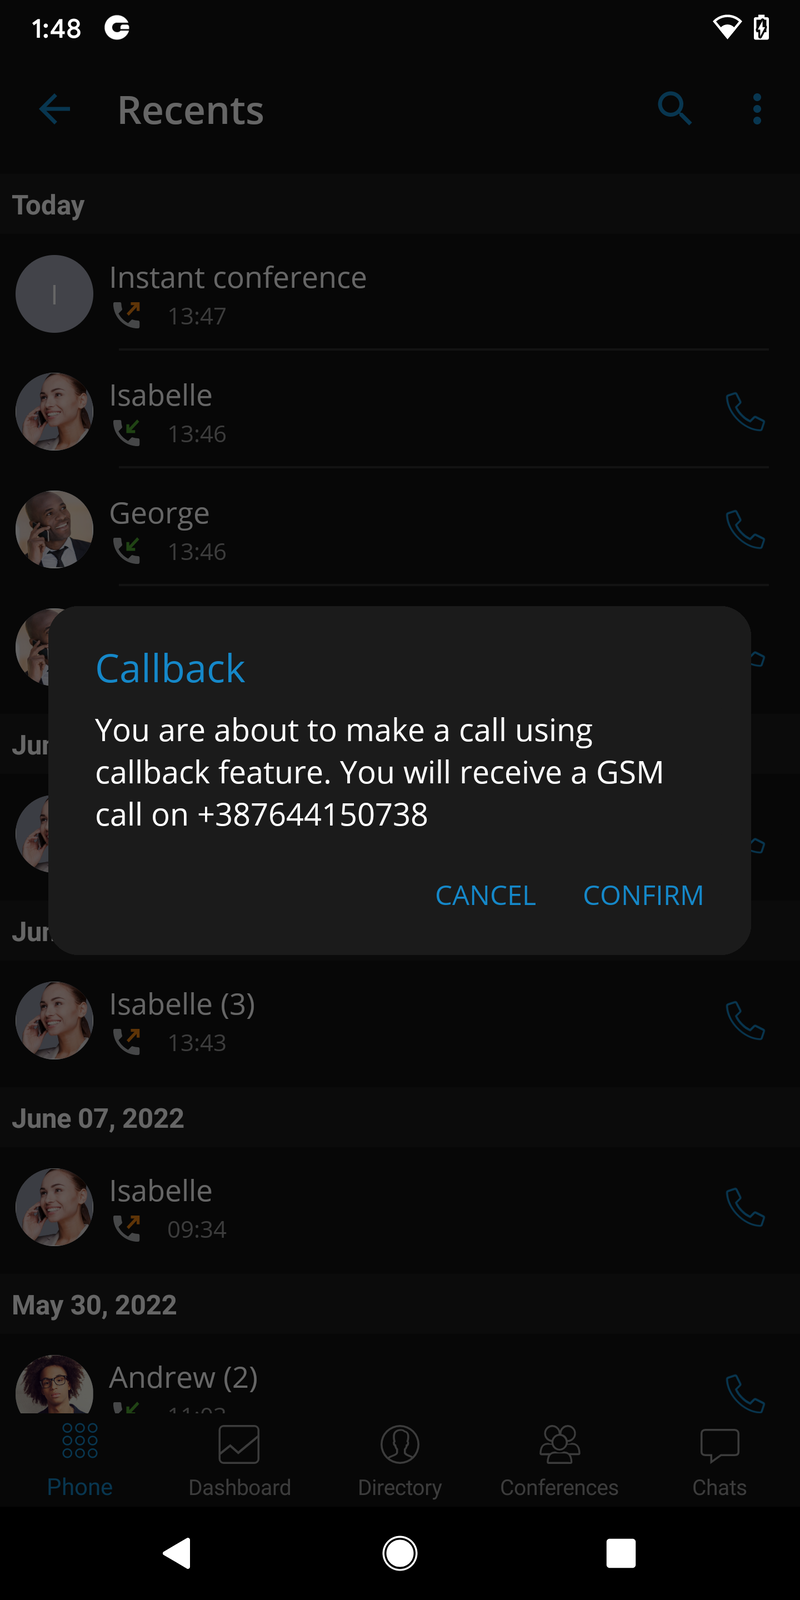
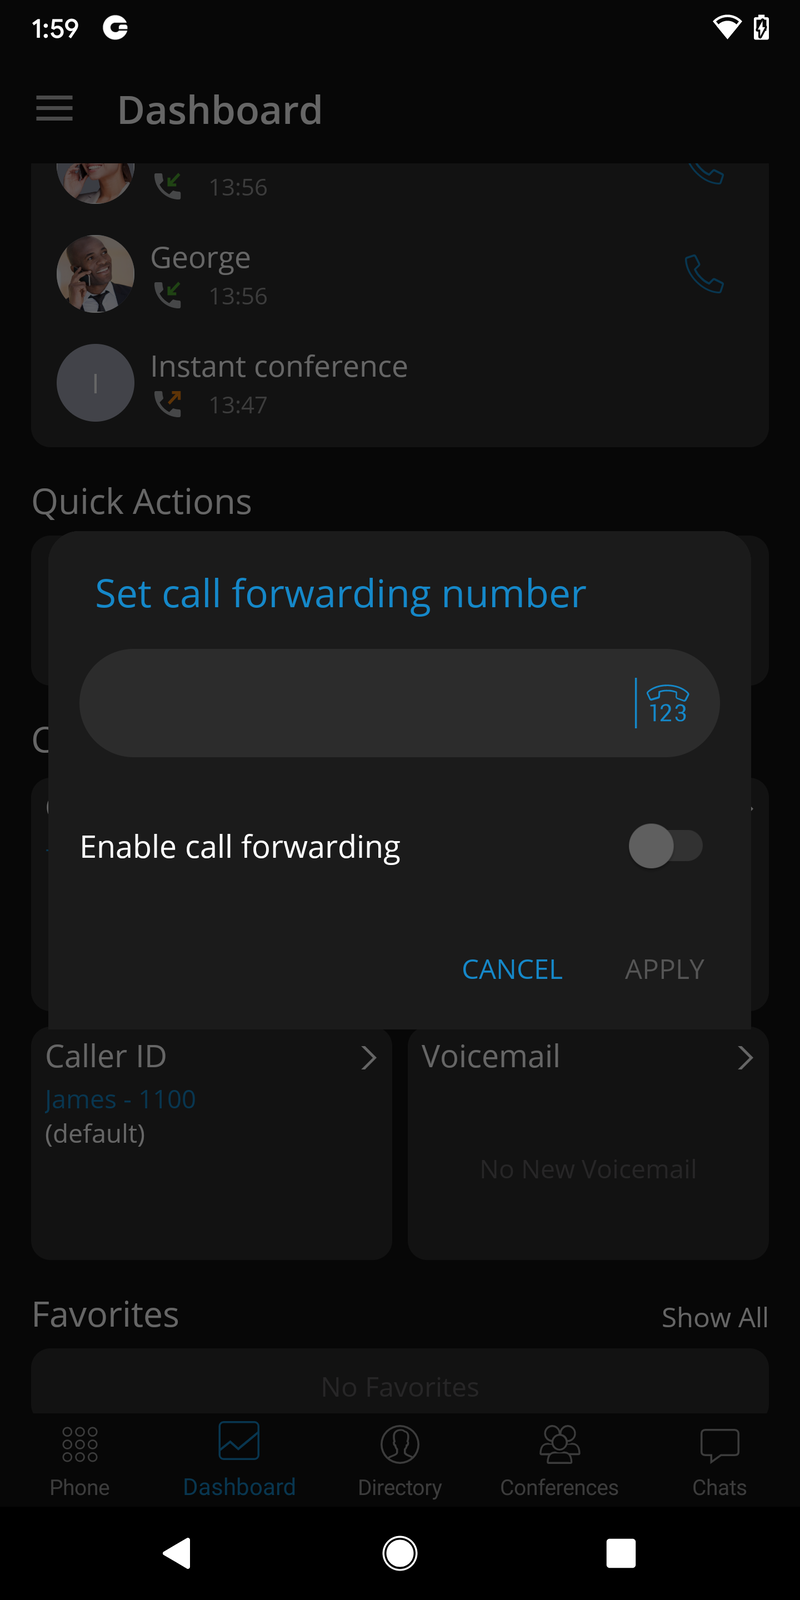
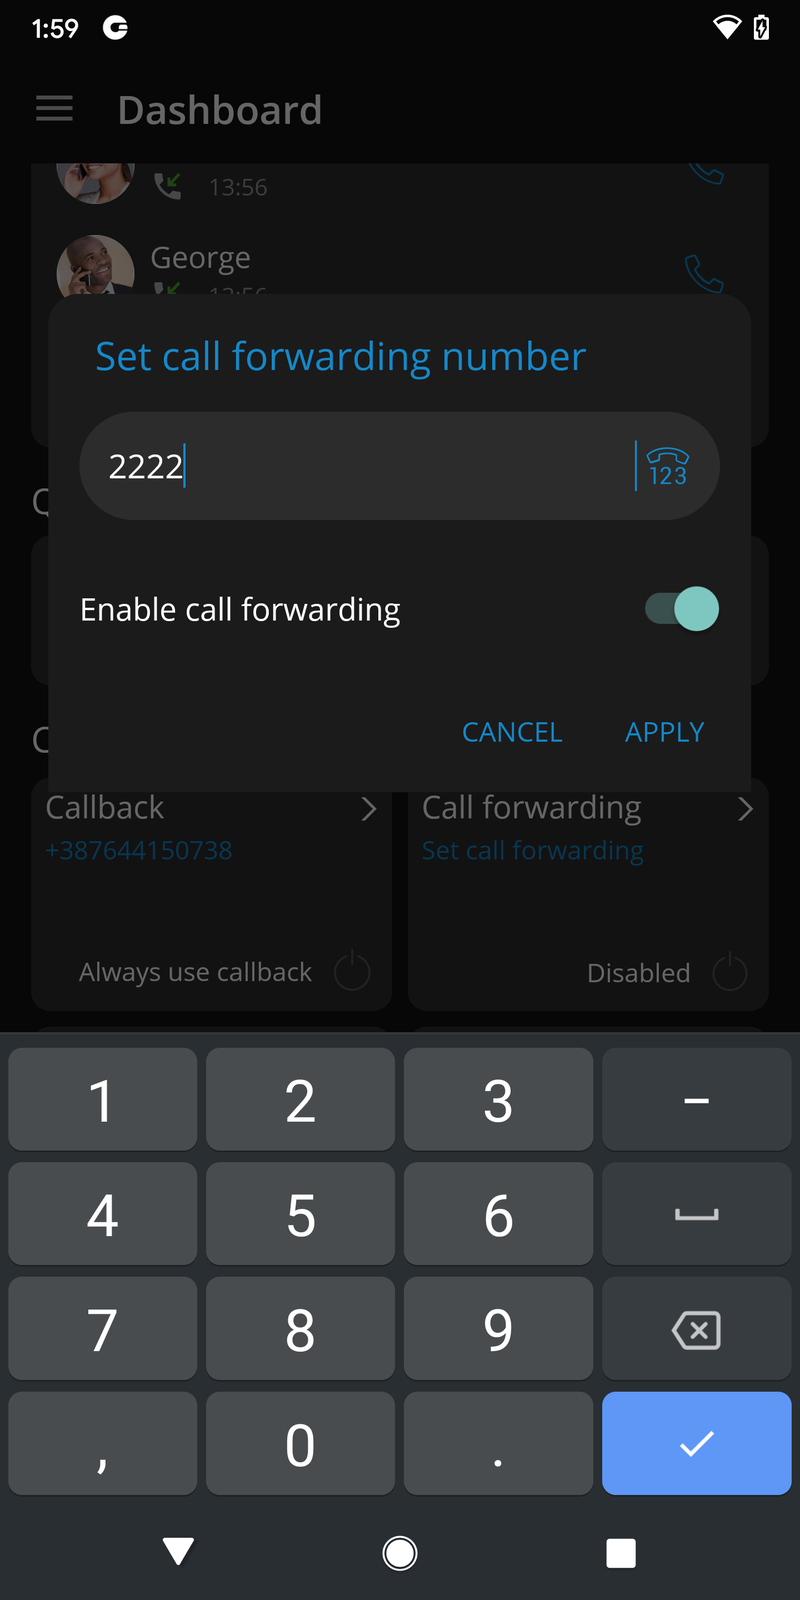
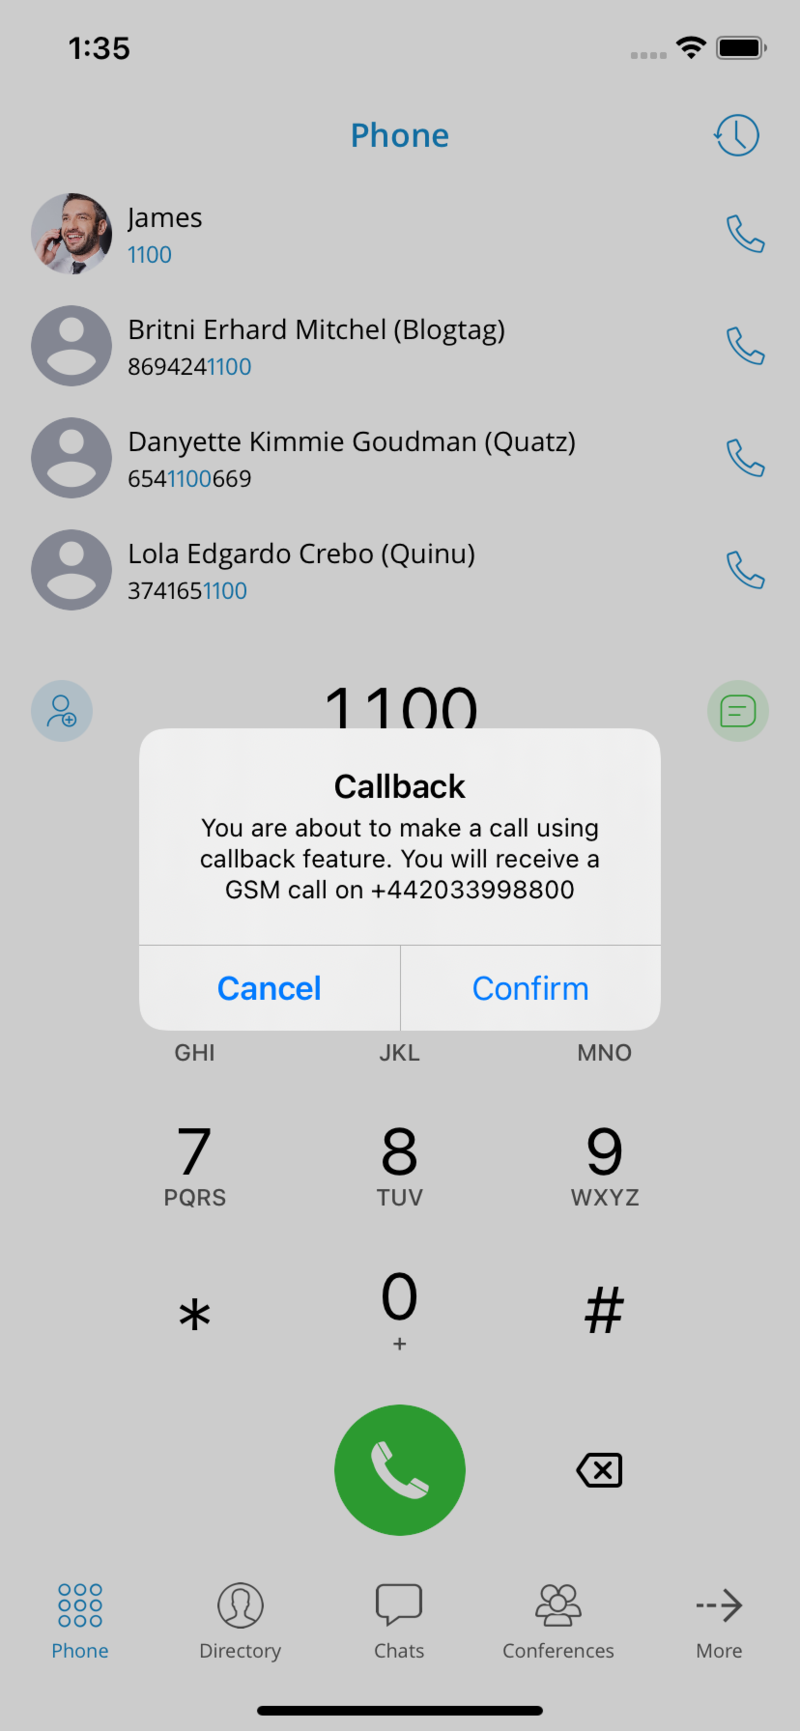
Callback calls
Callback calls are helpful when a softphone cannot be registered due to some error or when poor network quality impacts call quality.
When using a callback, gloCOM GO 6 tells the server to call the users callback mobile number via a GSM network. VoIP will connect the other call party, if possible, or GSM. For the callback feature to work, users need to select a number in the app Callback settings where they will receive GSM calls.
When starting gloCOM GO 6 for the first time, users will see a tip about callback as below.
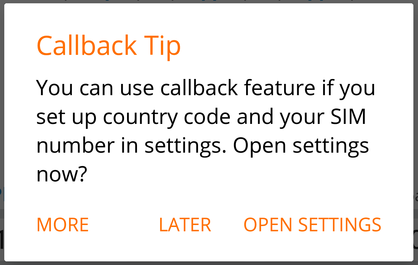
- MORE
By pressing this button, additional information about callback functionality will be displayed.
- LATER
Press this button to dismiss the Callback Tip dialog.
- OPEN SETTINGS
OPEN SETTINGS button opens the Callback settings screen.
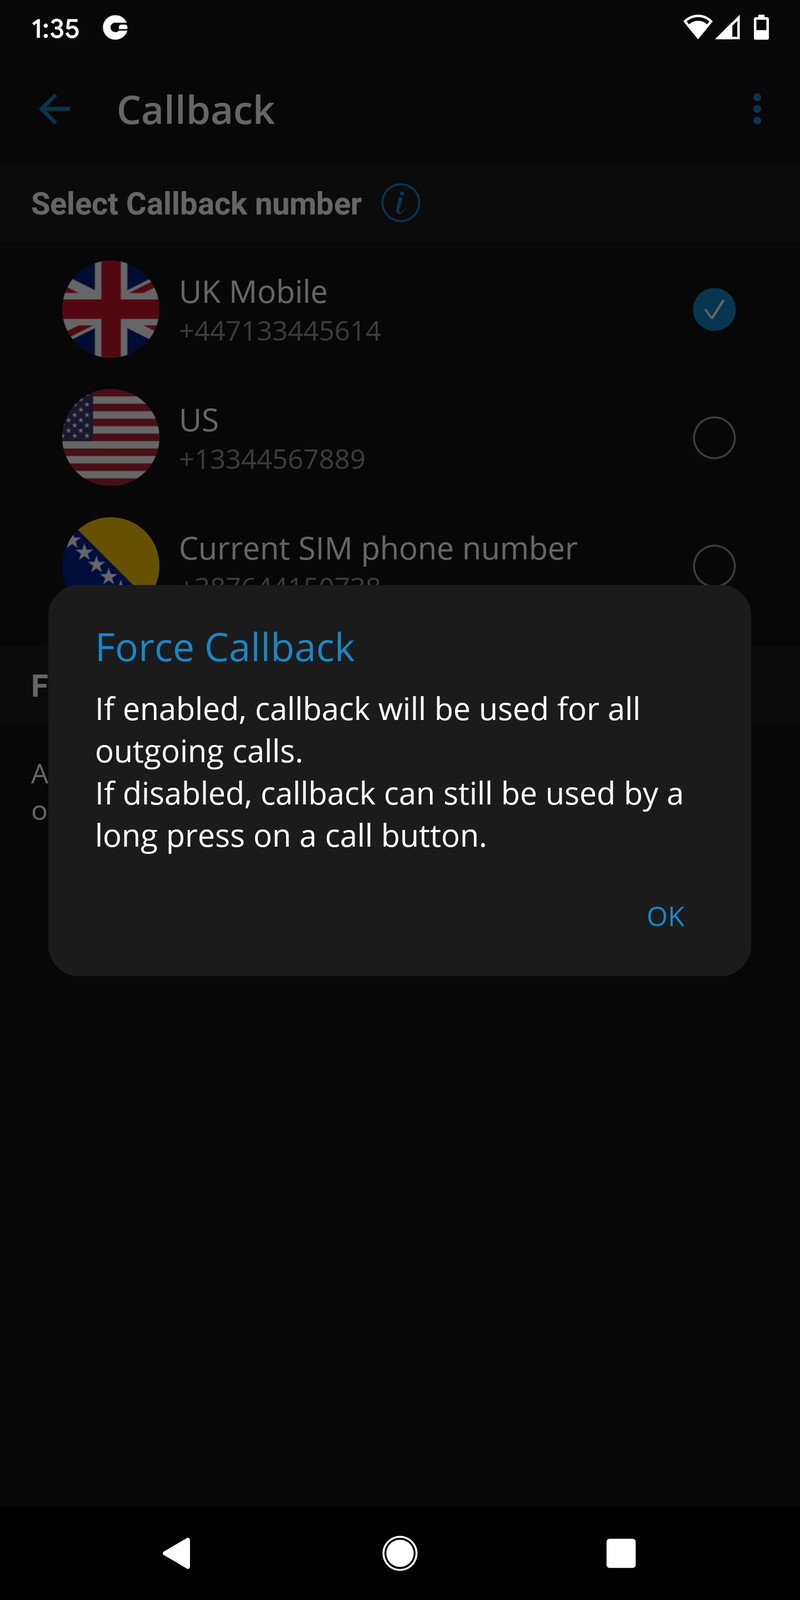
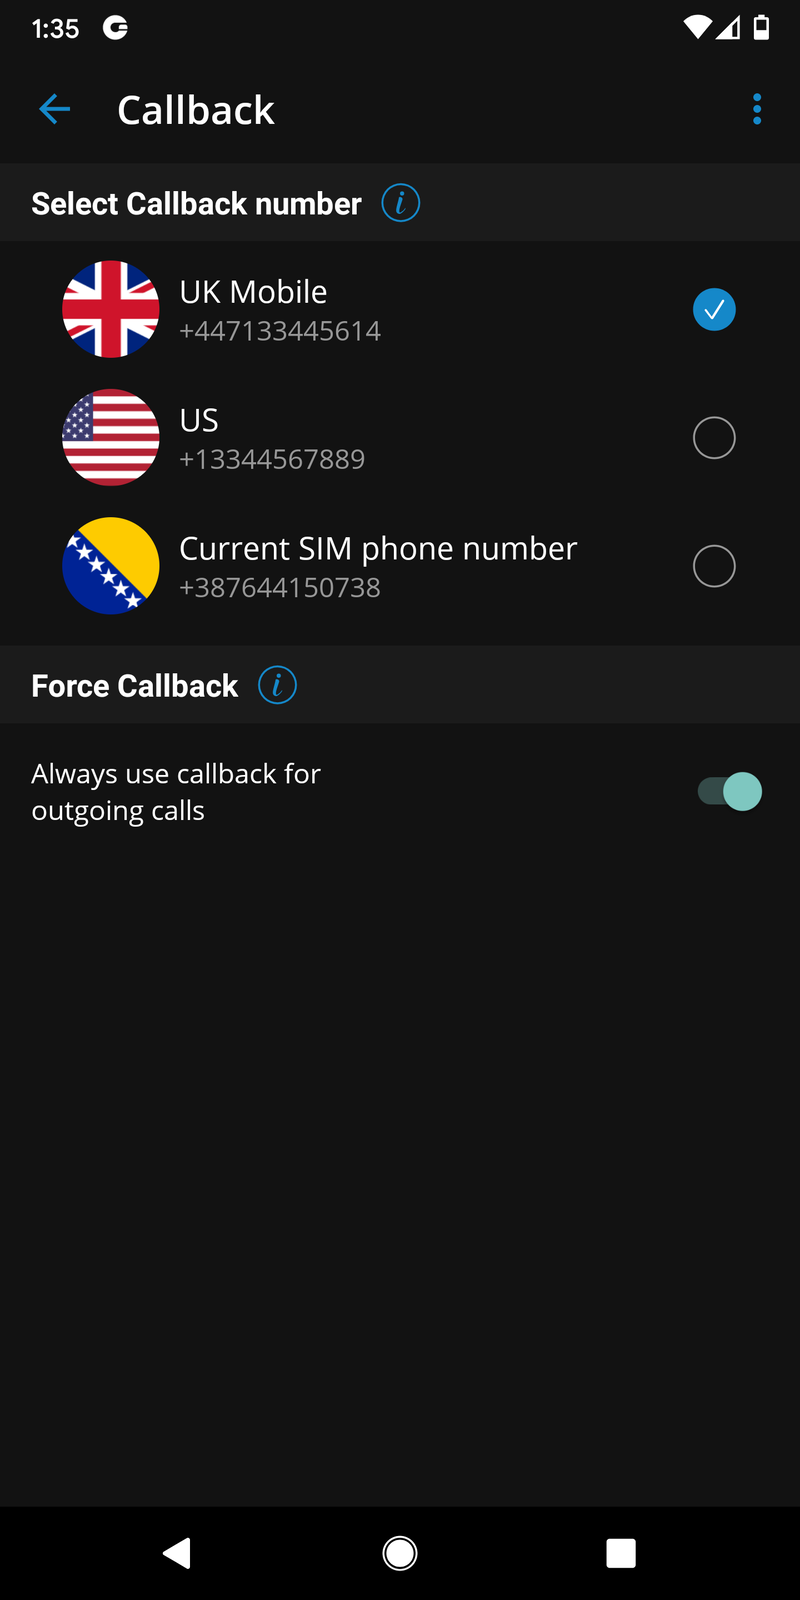
Users can use the callback feature for all outgoing calls by enabling Force callback in the Callback settings screen.

Long-press icon for one time Callback activation
A long-press can start the callback on a call icon from wherever a call icon is in the interface.
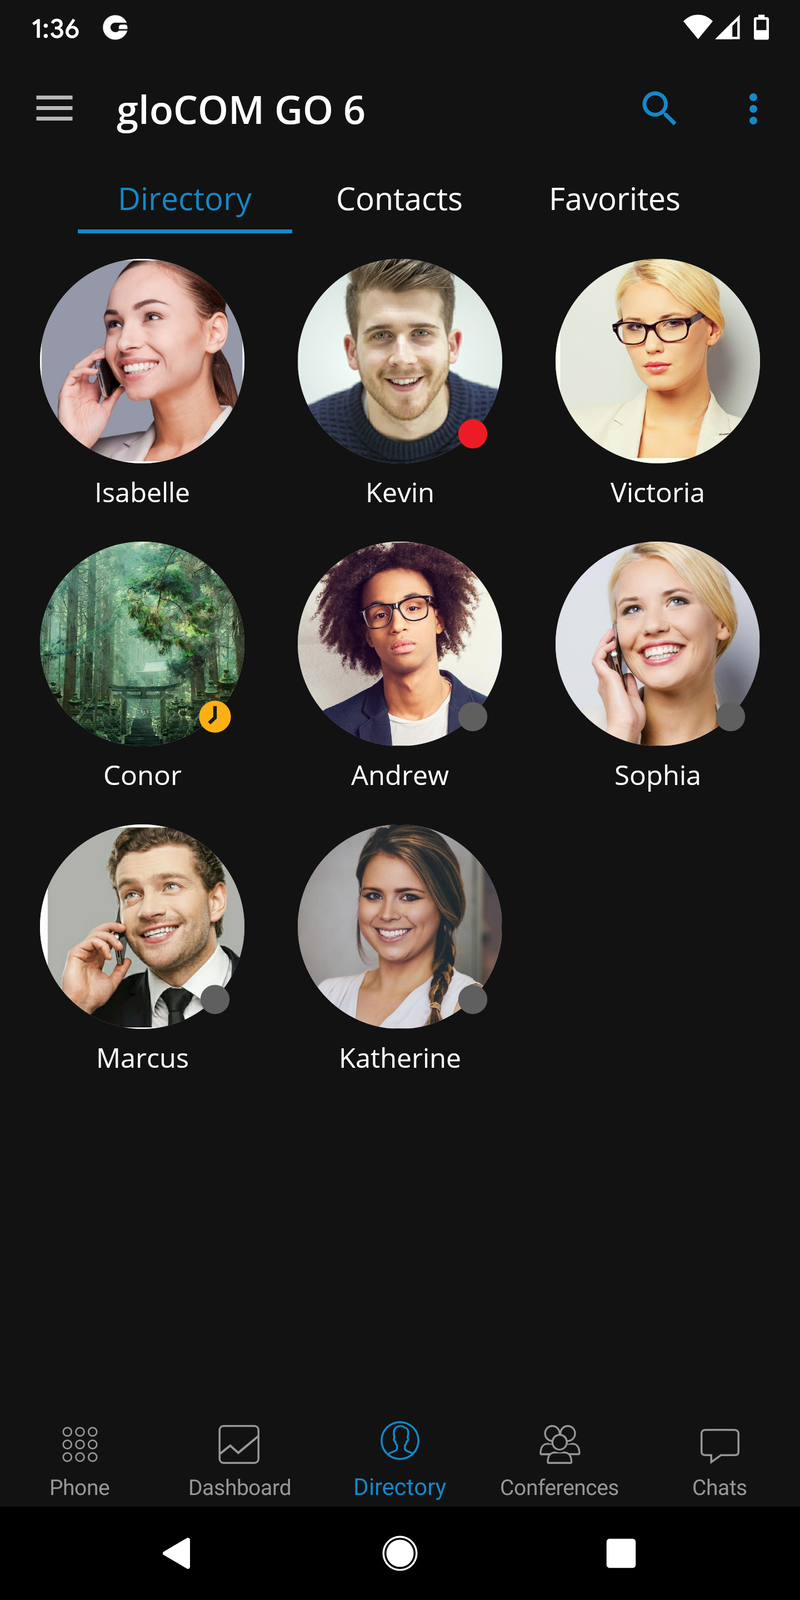
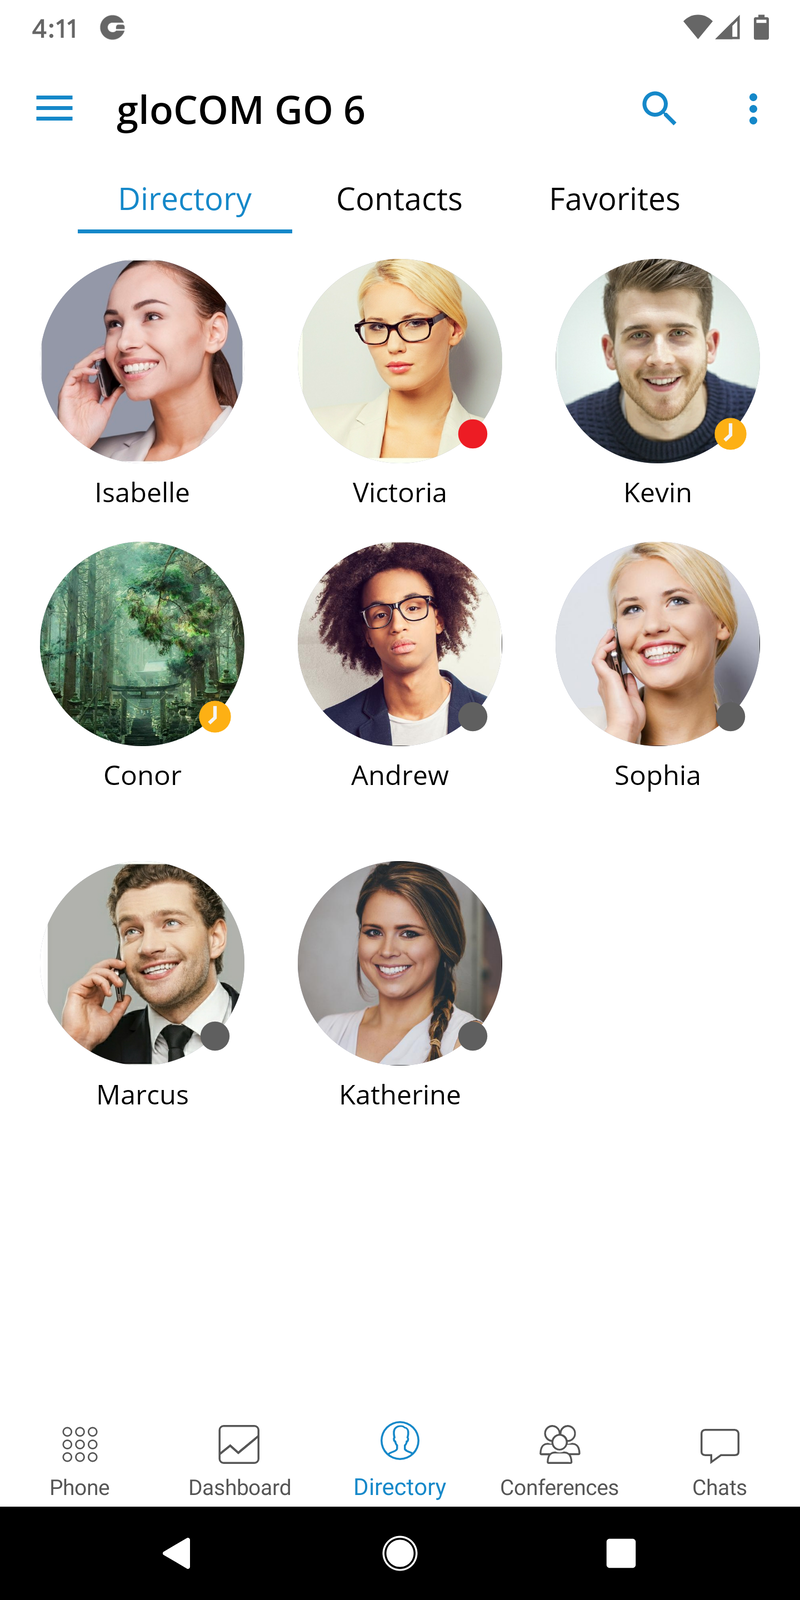
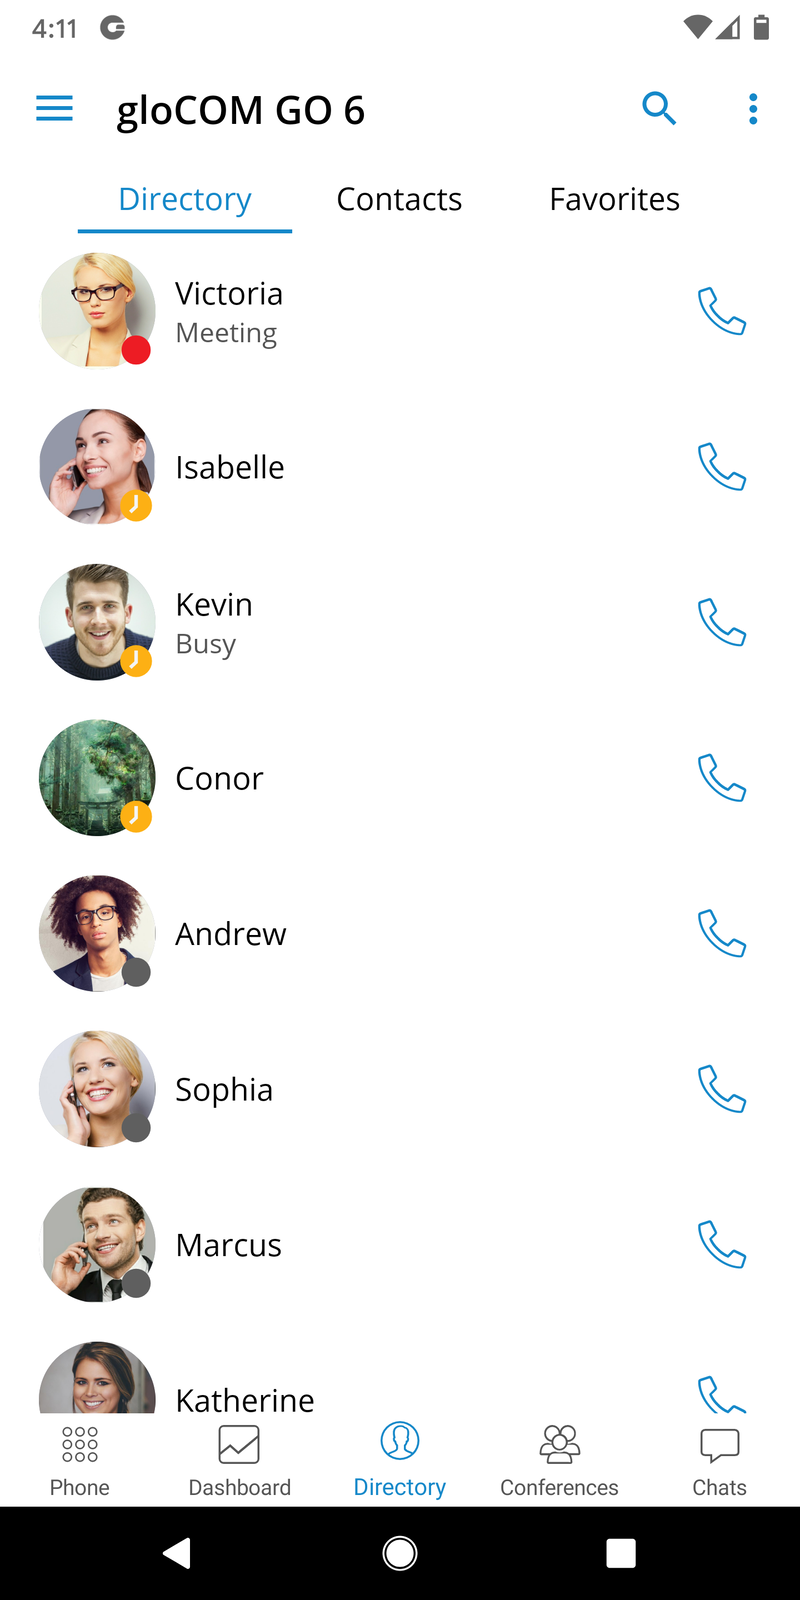
Directory
The directory tab contains users, device contacts, central phonebook contacts, and favorites from the system. Users can be displayed in the grid (default) or list order.
Users can be sorted according to their presence and department.
The default order for users is ordering them by their presence. Online users will be sorted alphabetically at the top of the list, followed by away (recently online) users and then offline users.
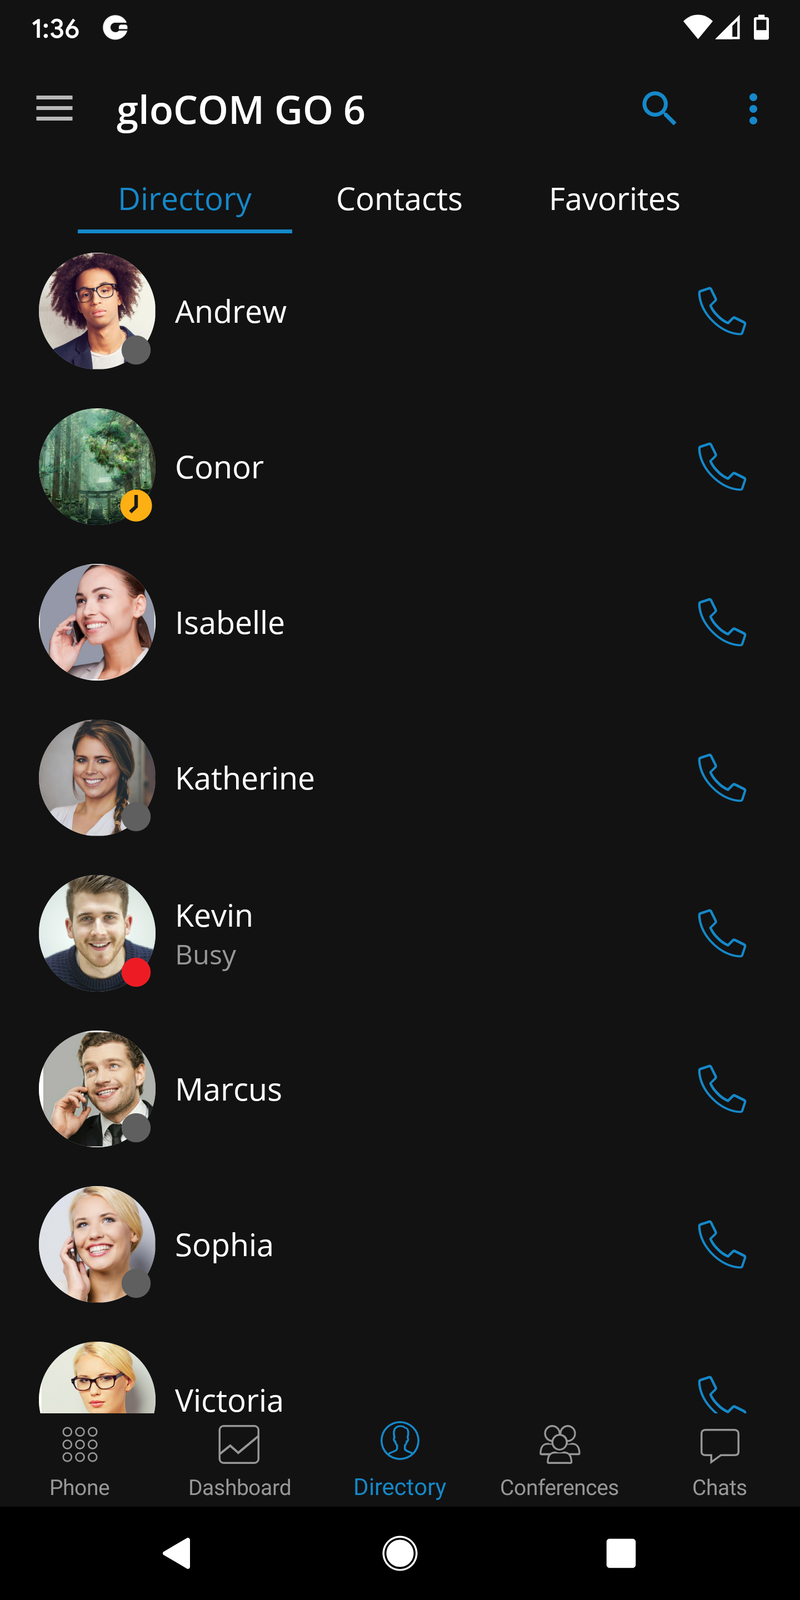
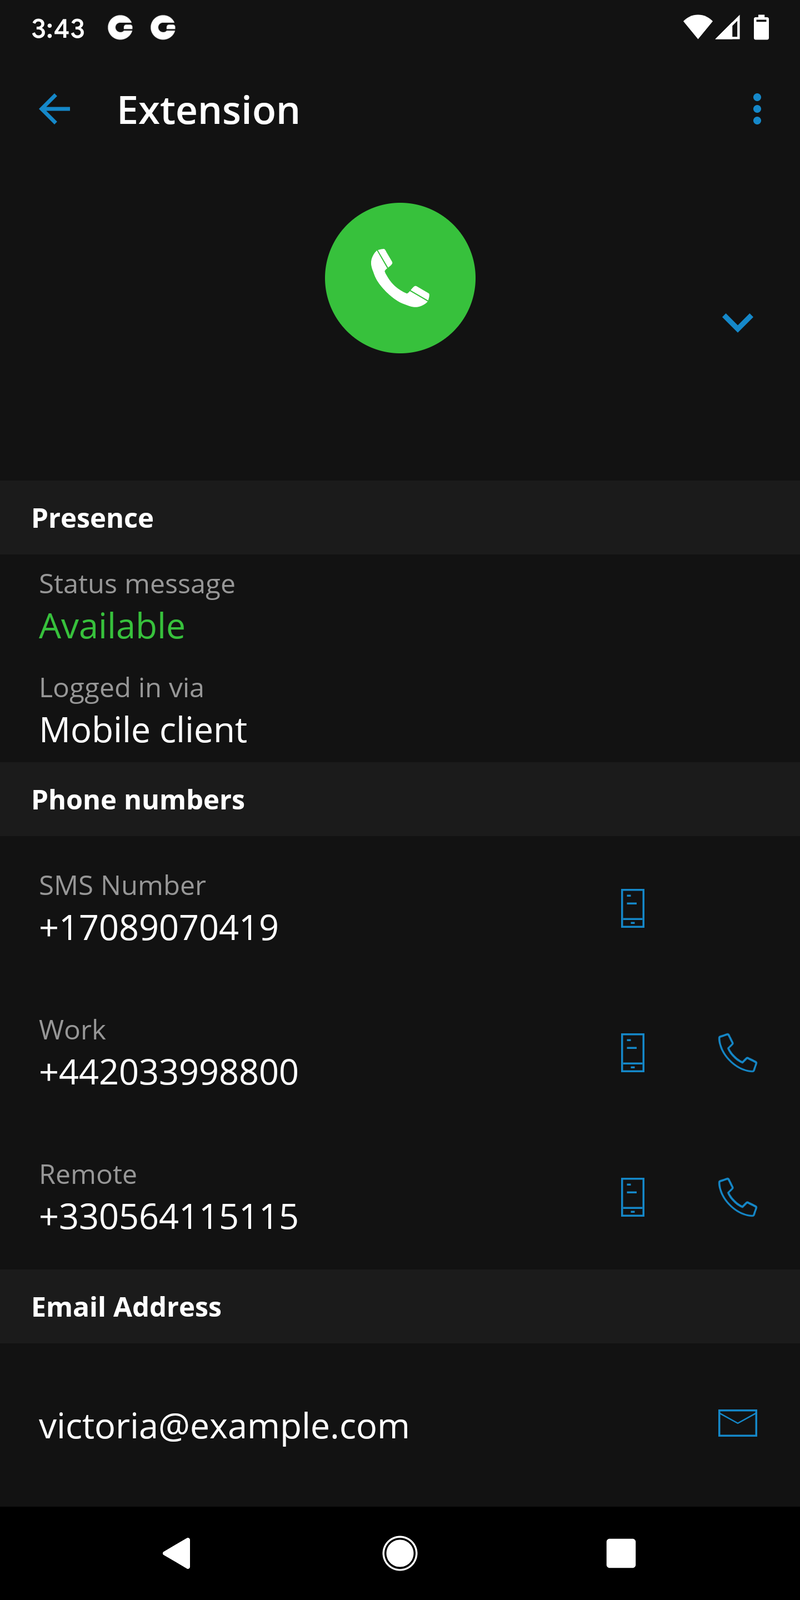
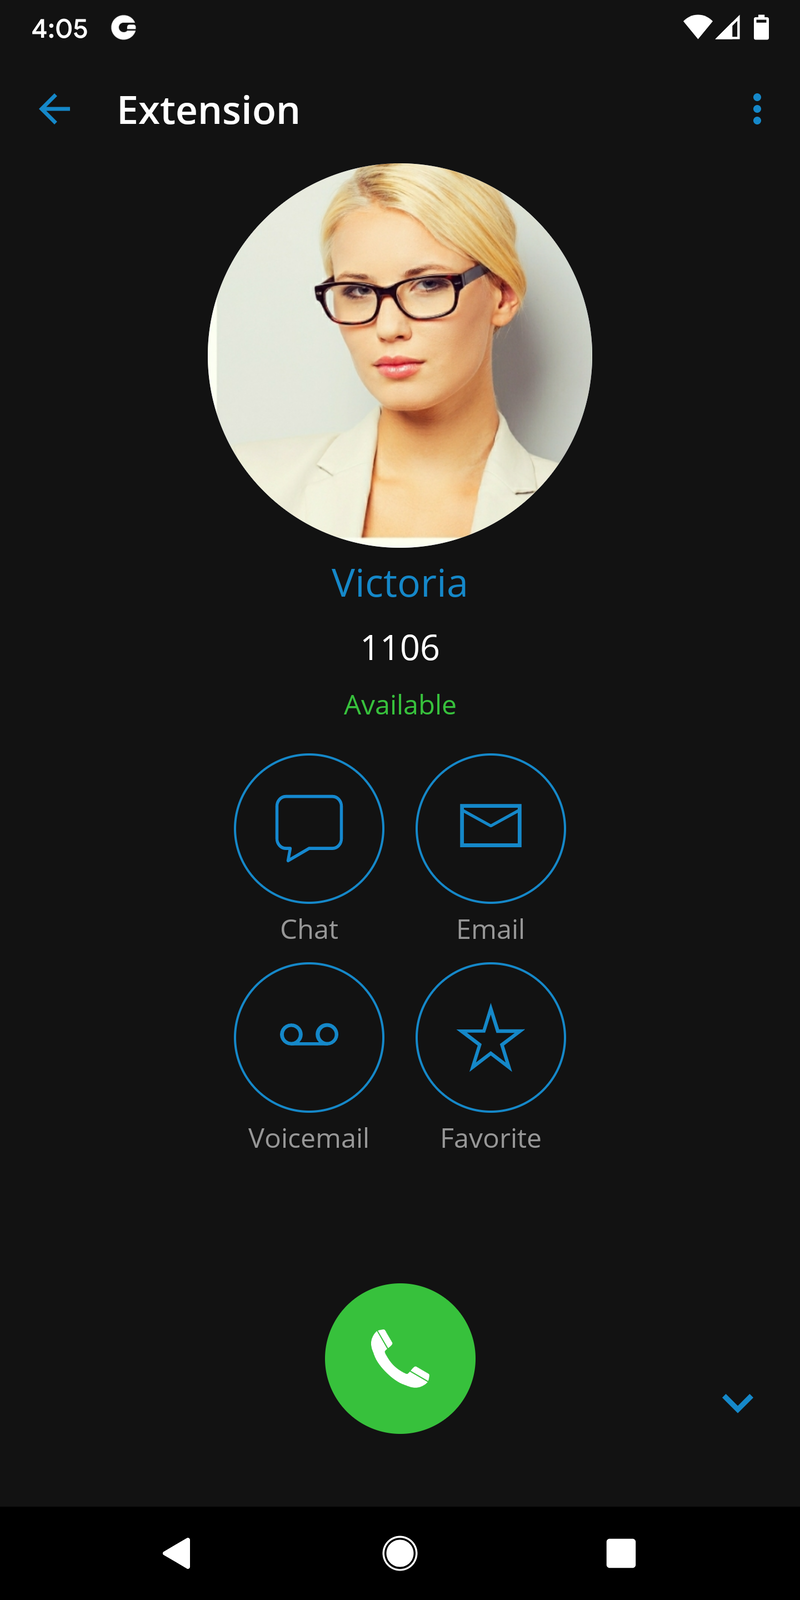
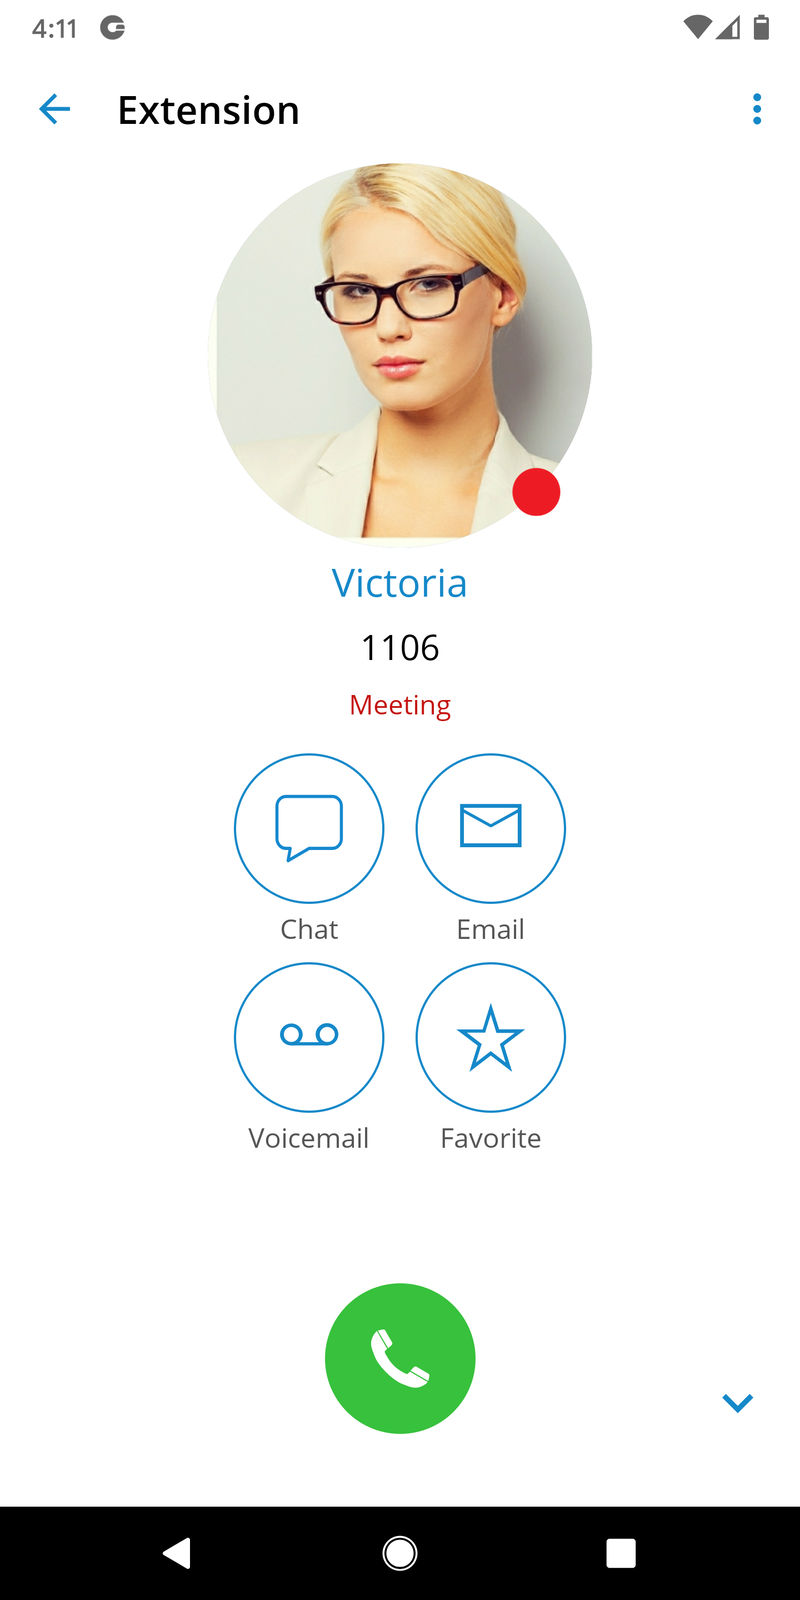
Pressing on a user’s name or avatar will open up the user’s details screen that contains information such as email, presence status, and message, user’s numbers. Users can also call the selected user from this screen, start a chat, send a voicemail, or add to favorites.
If the user associated additional phone numbers with their account, these numbers will be listed as well, and they will be able to dial them by simply pressing the number.
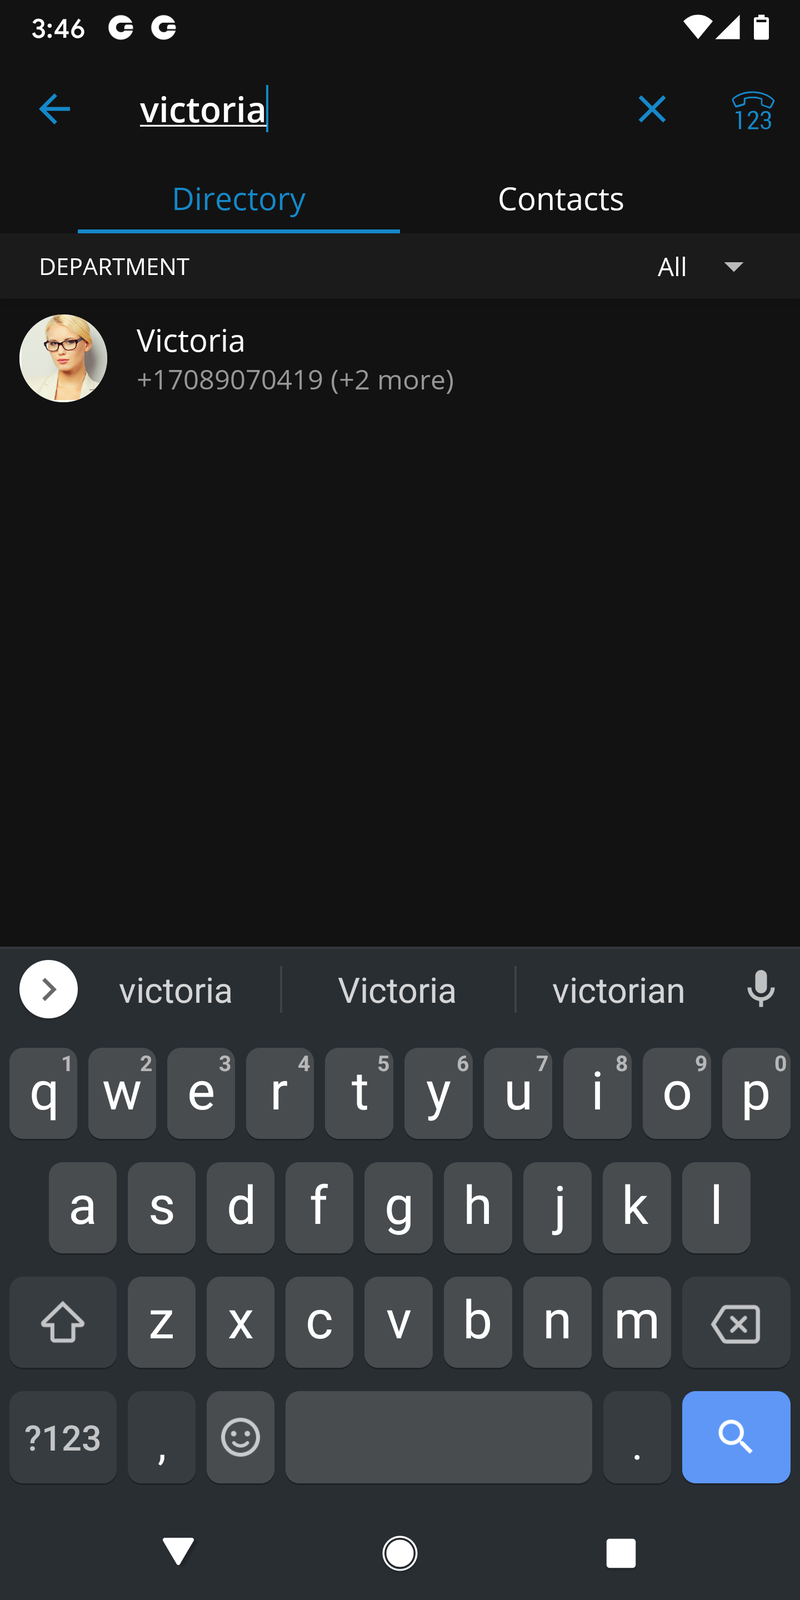
Contacts Search
To search gloCOM GO 6 contacts, users can press the search icon in the upper right corner. After pressing the search icon search field will be displayed. Search is performed by contact name or number.
Synchronize Central Phonebook contacts from the PBX
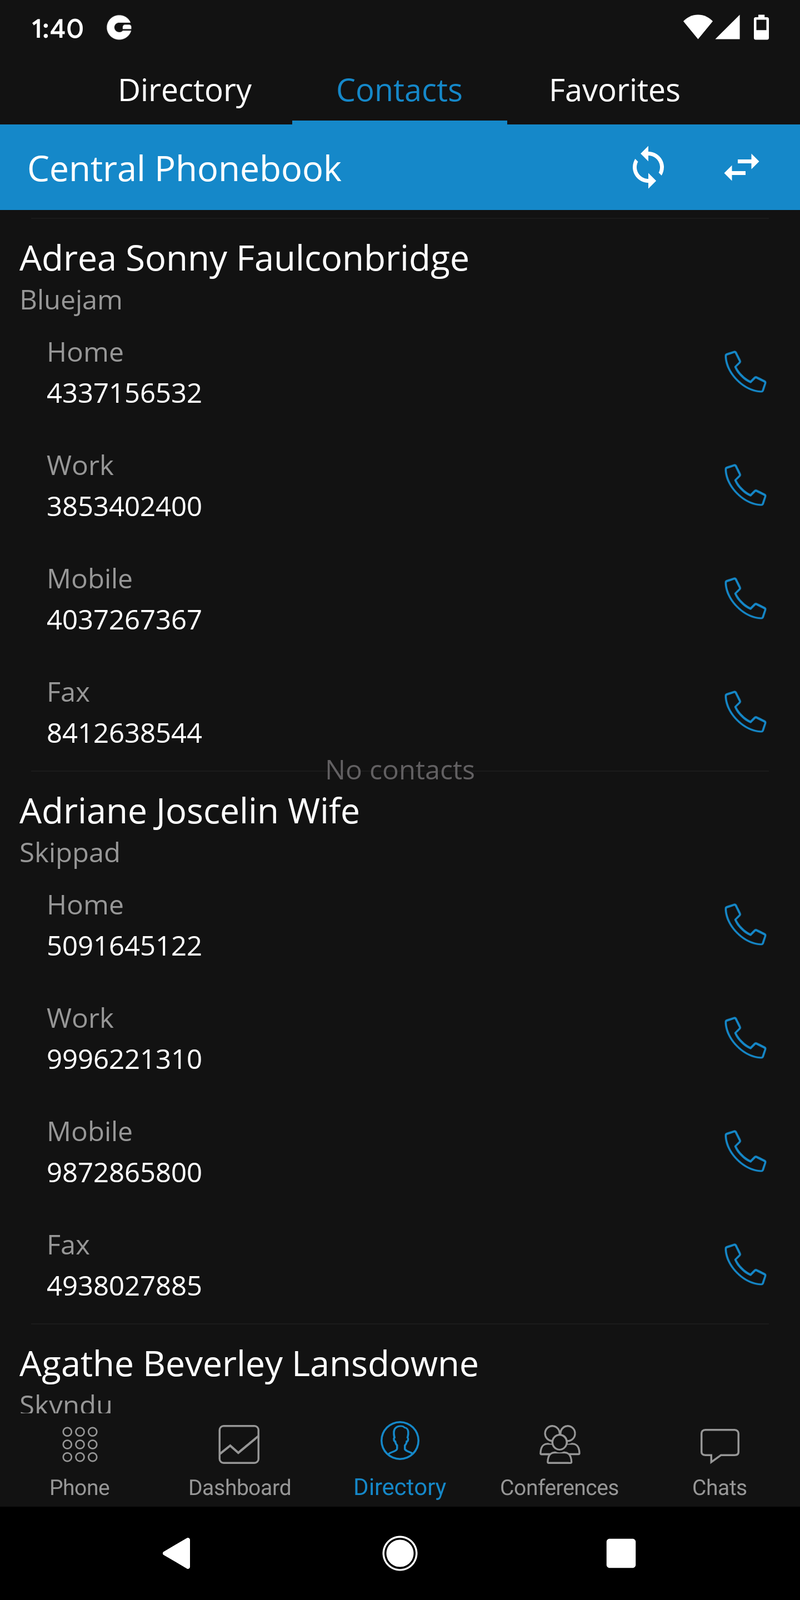
Central Phonebook is a collection of contacts that all users of one system share.
When users navigate to the directory from the bottom bar and then to the contacts screen from the three tabs in the top part of the screen, they will see the Contacts screen.
The Local Phonebook looks mostly like it did before except for the top part, which has a banner with the name of the Phonebook and a button to change the Phonebook type.
In addition to having the button that changes the Phonebook type, the Central Phonebook blue banner has a button to refresh the contacts.
Each contact item in this Phonebook has a name, company name, and a list of number labels and numbers.
Favorites
Users can add other users and contacts from the phonebook to favorites to have them in one place and show up first while performing an action, e.g., transferring a call.
Users can be added/removed from favorites by pressing Add to Favorites or Remove from Favorites on the user’s details screen as shown in the pictures below.
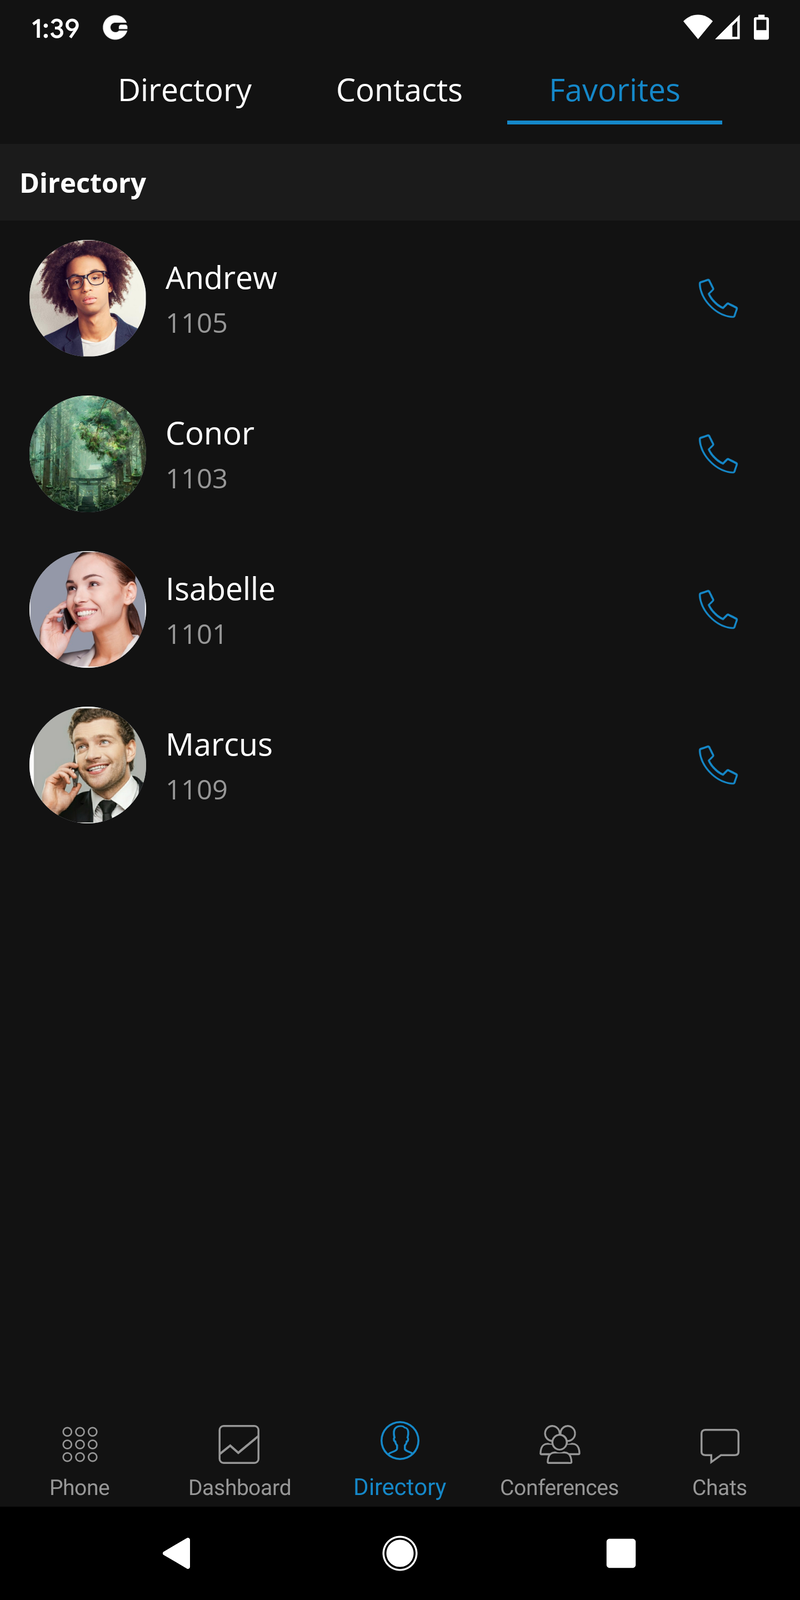
Contacts from the phonebook can also be added or removed from Favorites by pressing on their numbers and choosing Add to Favorites or Remove from Favorites.
The favorites list can be accessed from the Directory tab by choosing the ”’Favorites”’ section in the top bar.
Meeting
gloCOM GO meeting provides an option to meet with multiple users simultaneously while offering:
- Video Conferencing (in a grid and speaker view)
- Audio Conferencing
- Screen Sharing (specific application or whole screen sharing)
- Remote Control when screen sharing
- Group chat
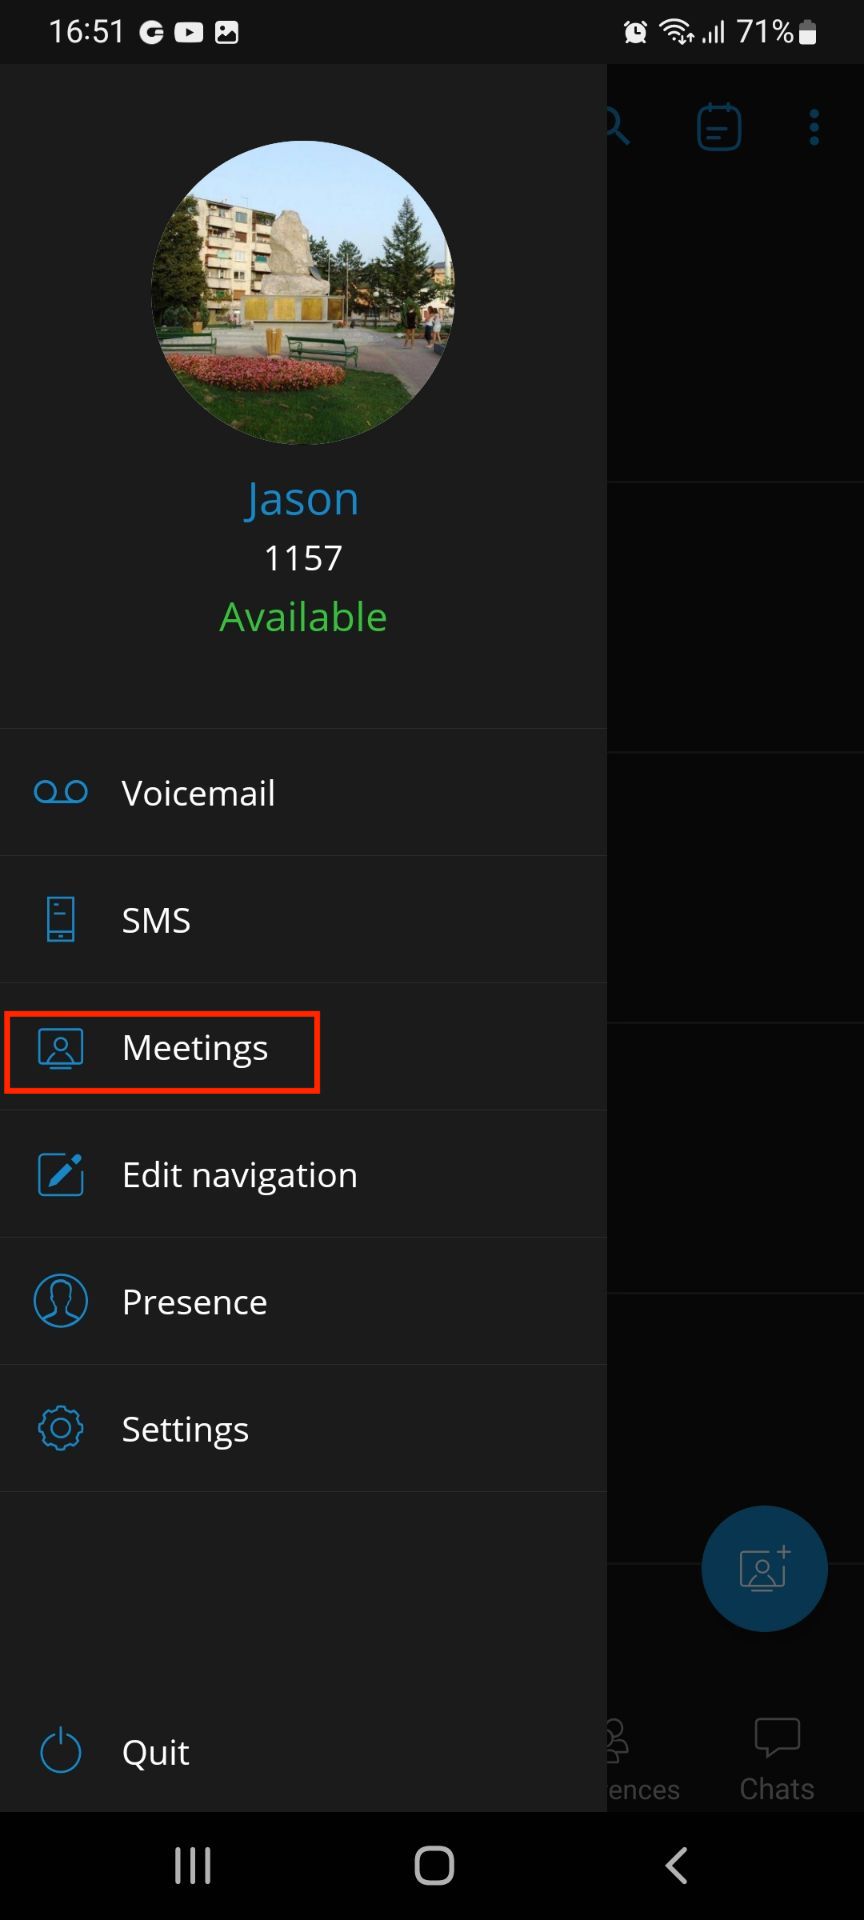
The meeting management within the gloCOM GO app gives a user the ability to create an instant meeting, schedule a meeting, or join an existing meeting. To access the meeting screen, a user should press the Meetings icon within the navigation bar. When a meeting is started, the gloCOM GO app redirects the user to the Meeting GO app.
If the meeting is disabled on the license, all meeting-related screens will be disabled.
Main meeting screen
On the main meeting screen, the user has an overview of scheduled meetings sorted by date.
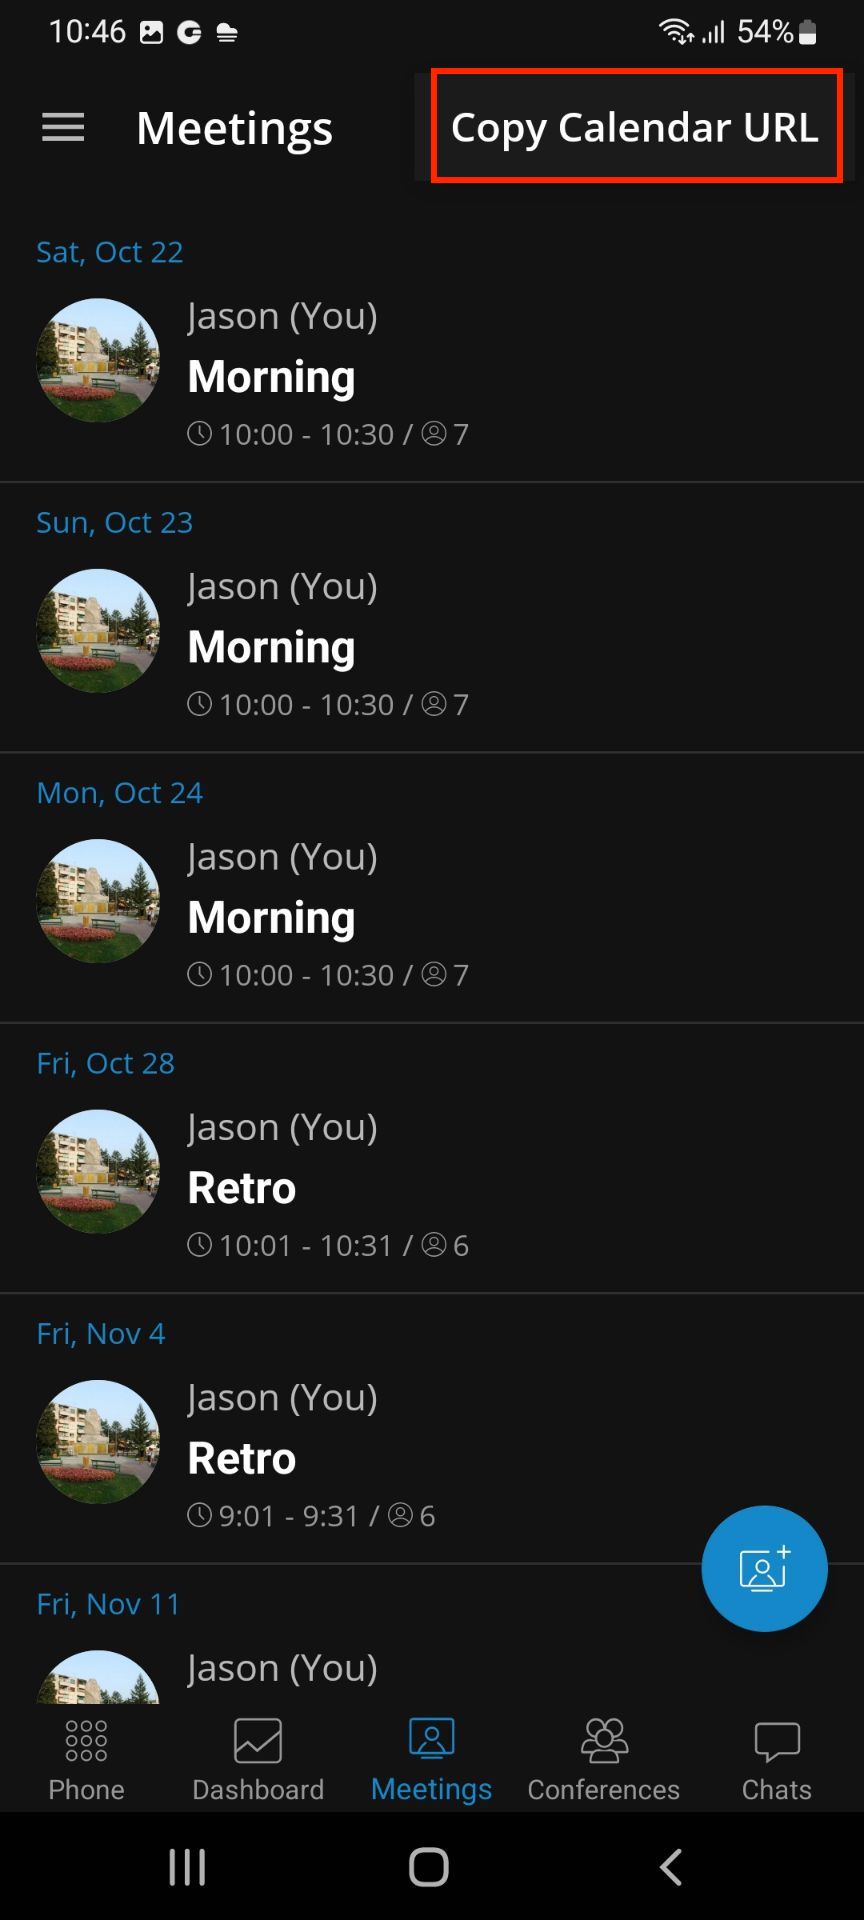
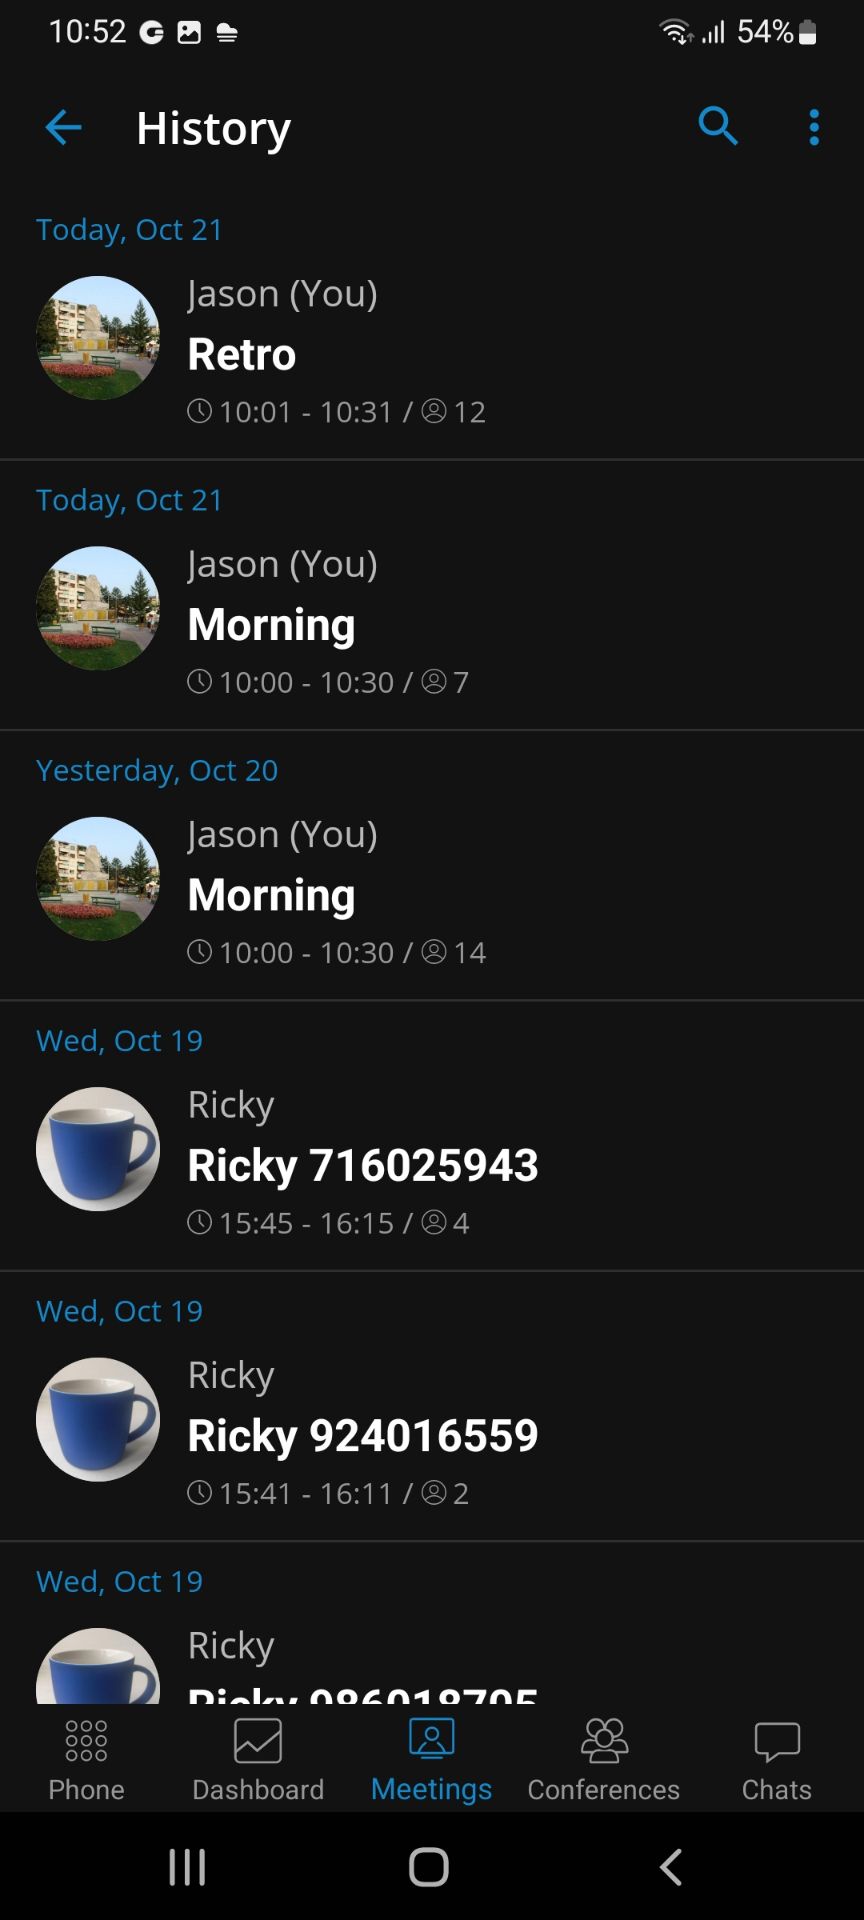
There is an “In progress” indicator in the upper right corner for the meeting currently running. Pressing on a meeting inside the list opens the meeting info screen. Meetings in the list can be filtered by name or by meeting number with the search option that can be found at the top of the screen. Next to the search button is a history button that opens the list with the previous meetings. In the additional options, there is an option to Copy Calendar URL, which allows the user to copy the Meeting calendar into their calendar software.
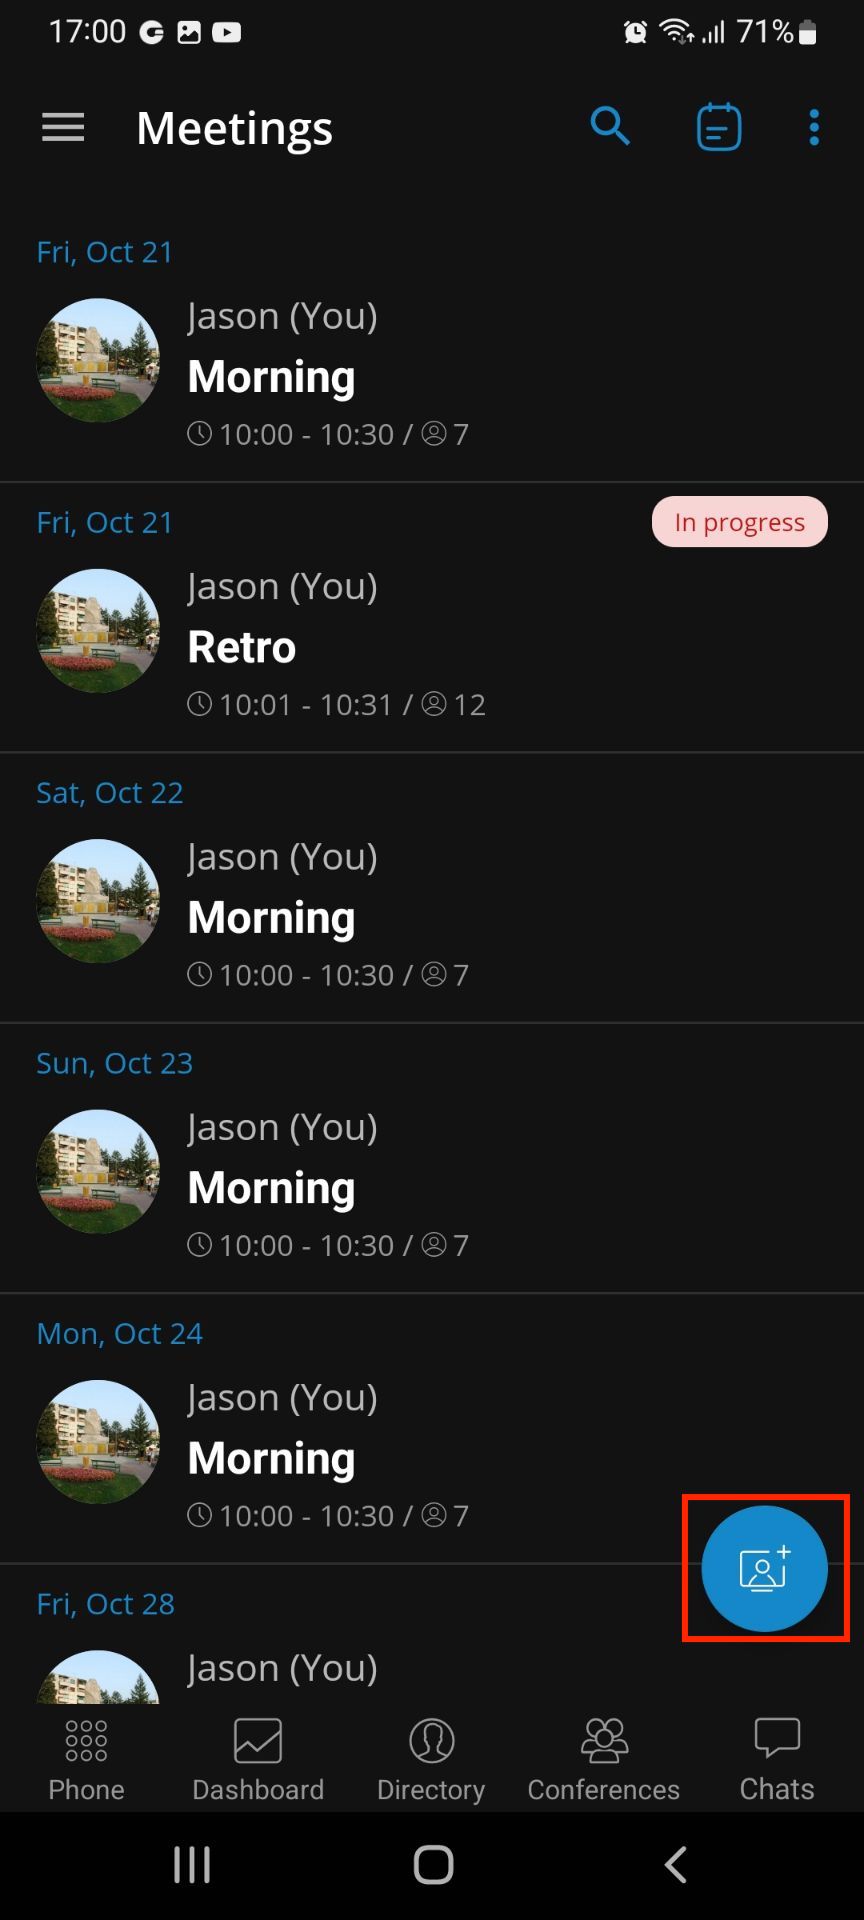
At the bottom of the screen there is a floating button that, when pressed, offers three options:
• Join an active meeting – gives the user the ability to join the existing meeting by entering the meeting number. After entering the meeting number and clicking the Join button, the user will be redirected to the gloCOM Meeting GO app.
• Create an instant meeting – opens the instant meeting screen where the user can set a meeting to be public or private, add participants from the directory or add external participants by entering their email address.
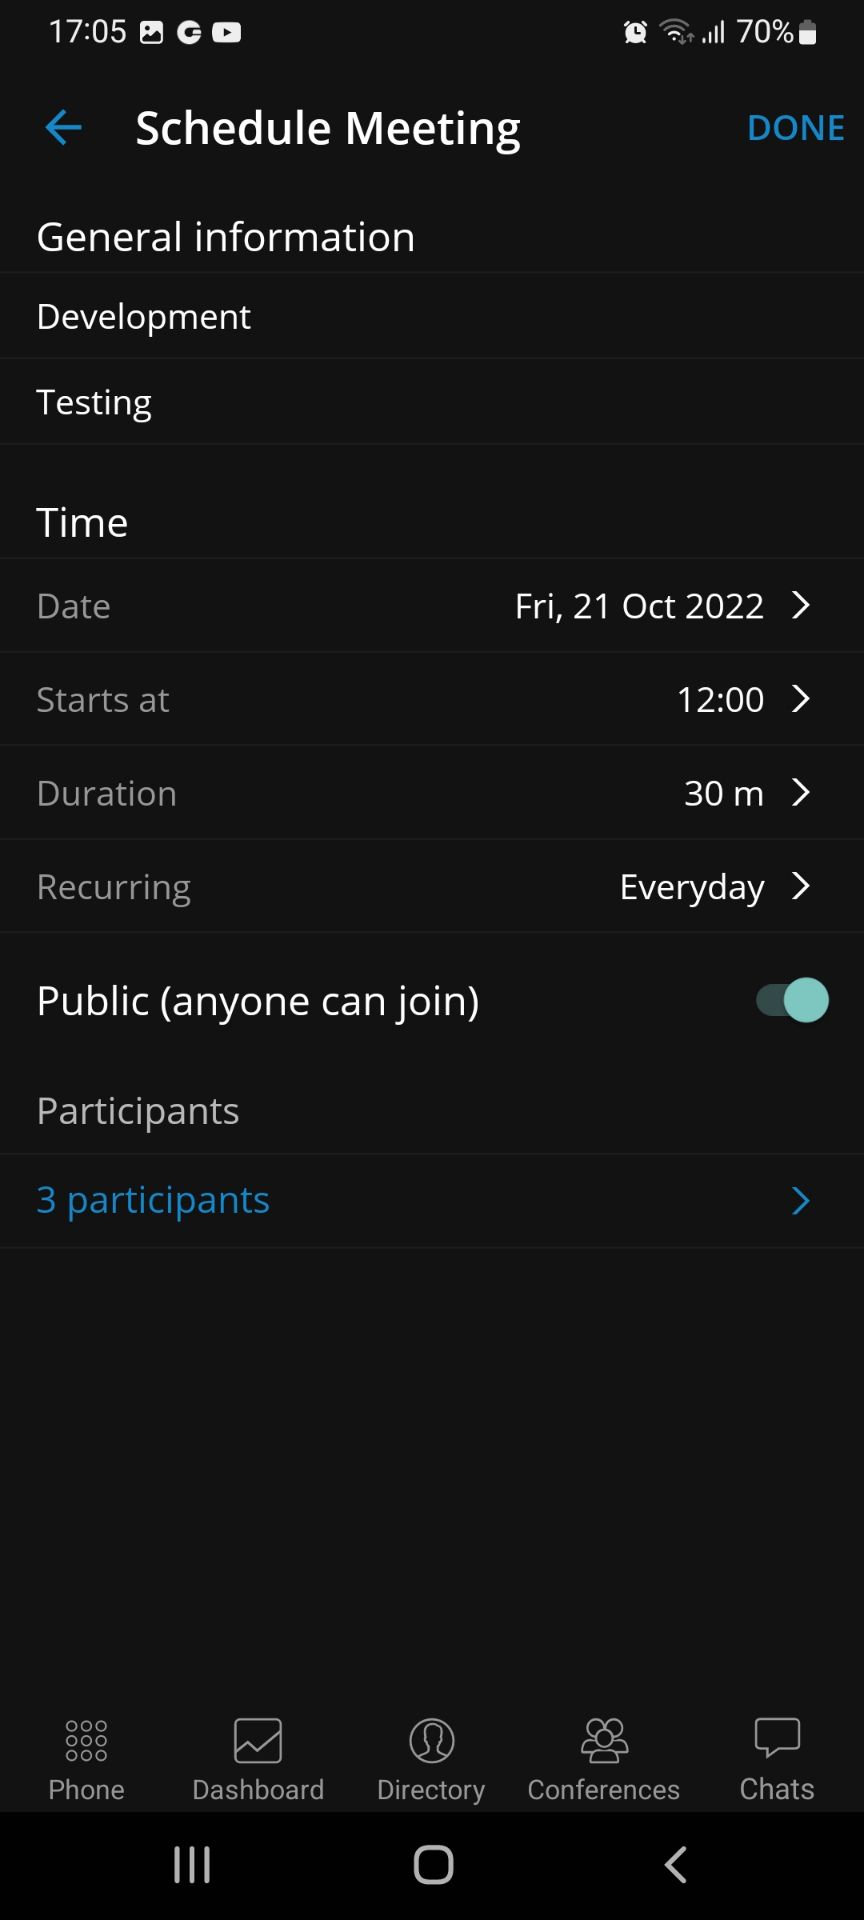
• Schedule a meeting – opens the schedule meeting screen where the user can schedule a meeting beforehand. in order to schedule a meeting, the user has to enter certain data in the provided fields:
◦ Title (meeting title)
◦ Description (meeting description)
◦ Date (date of the meeting)
◦ Starts at (meeting start time)
◦ Duration (duration of the meeting)
◦ Recurring – in case a user clicks on a Recurring option a dialog with the following options will appear:
▪ Never (meeting occurs only once (set by default for the new meetings))
▪ Every Day (meeting recurring every day at the selected time)
▪ Custom (opens the screen with custom recurring options)
◦ Participants
◦ External participants
◦ Public/Private switch
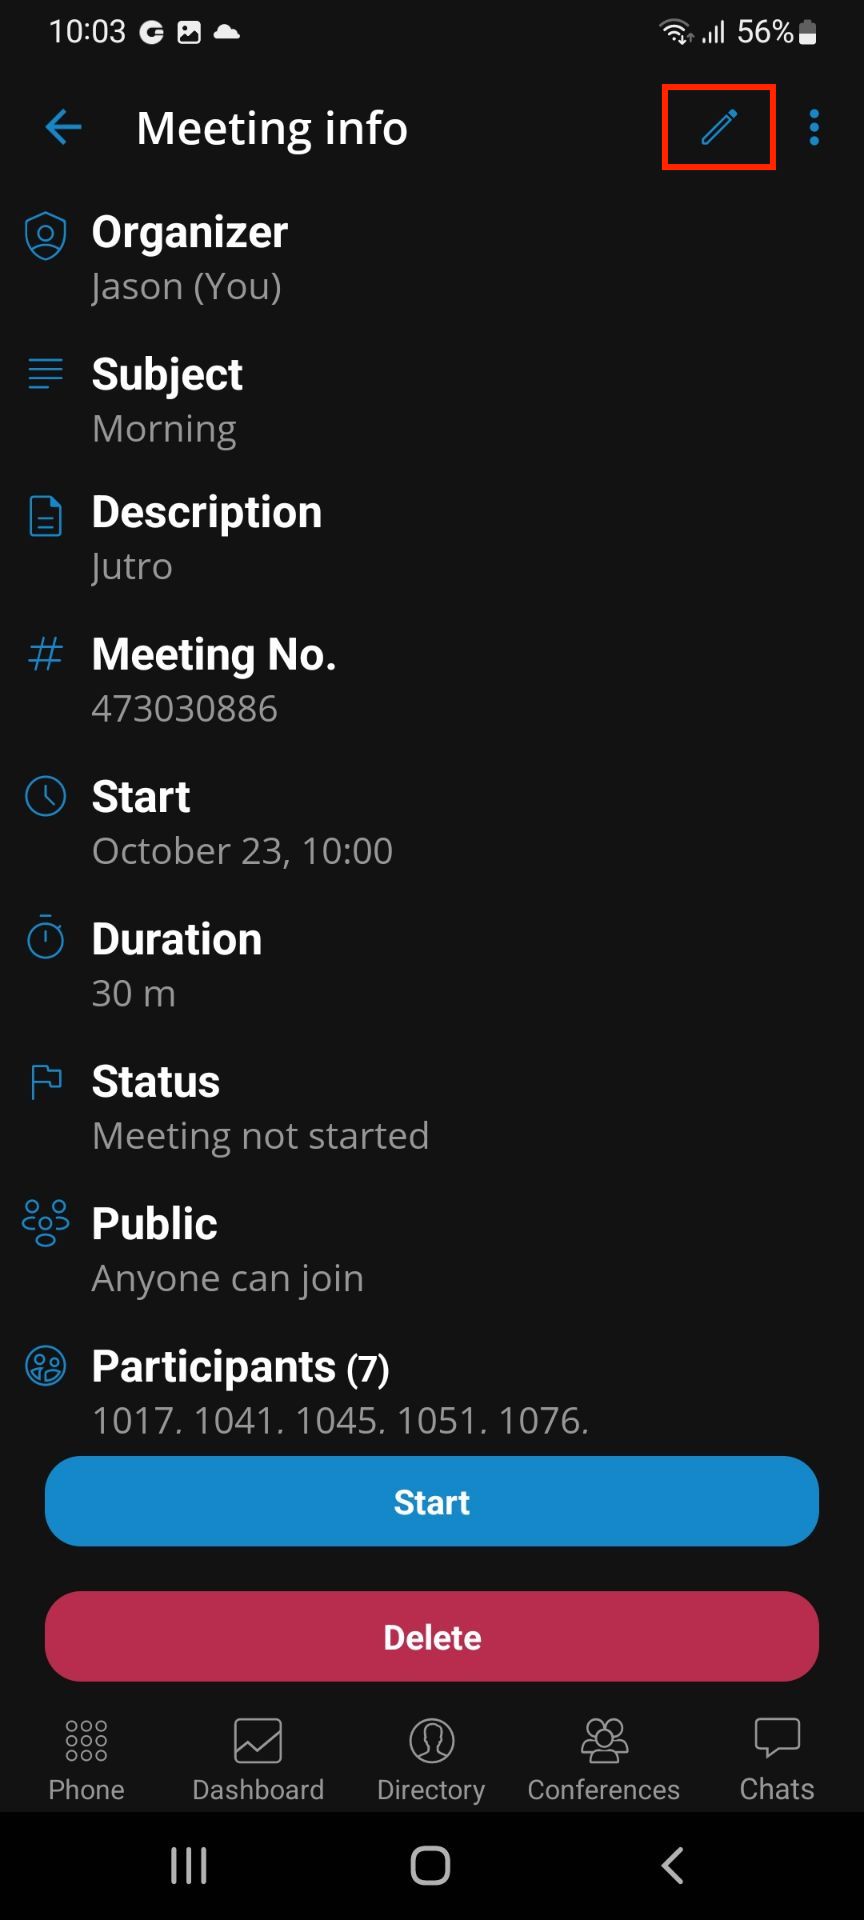
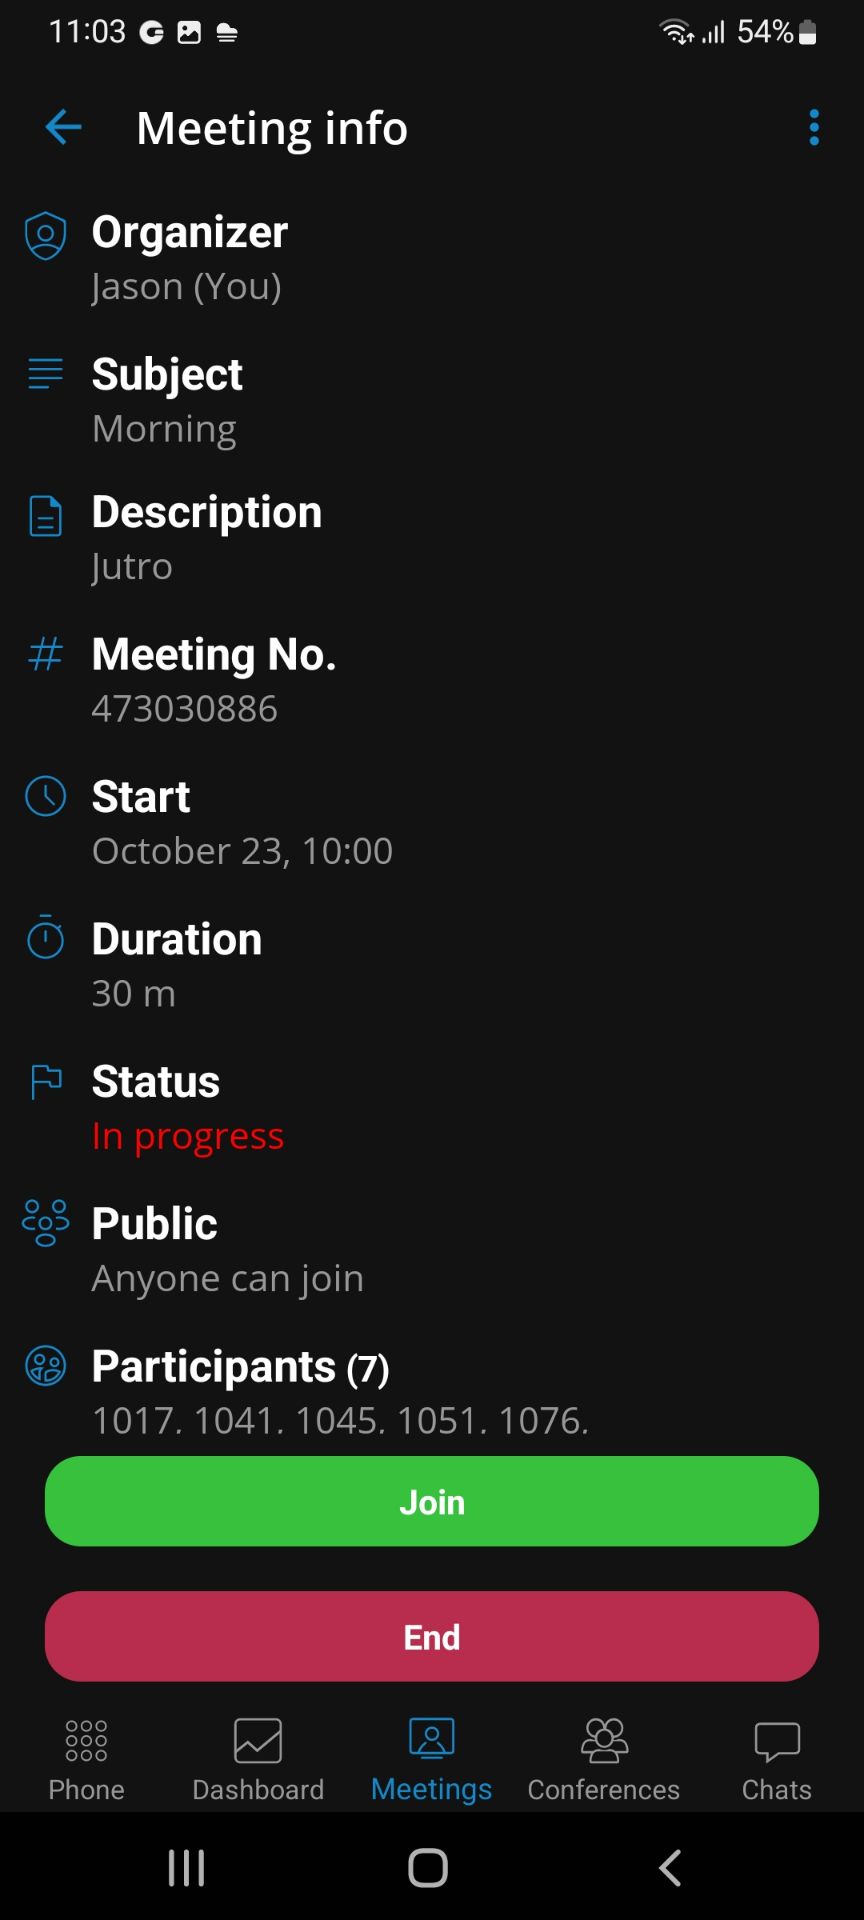
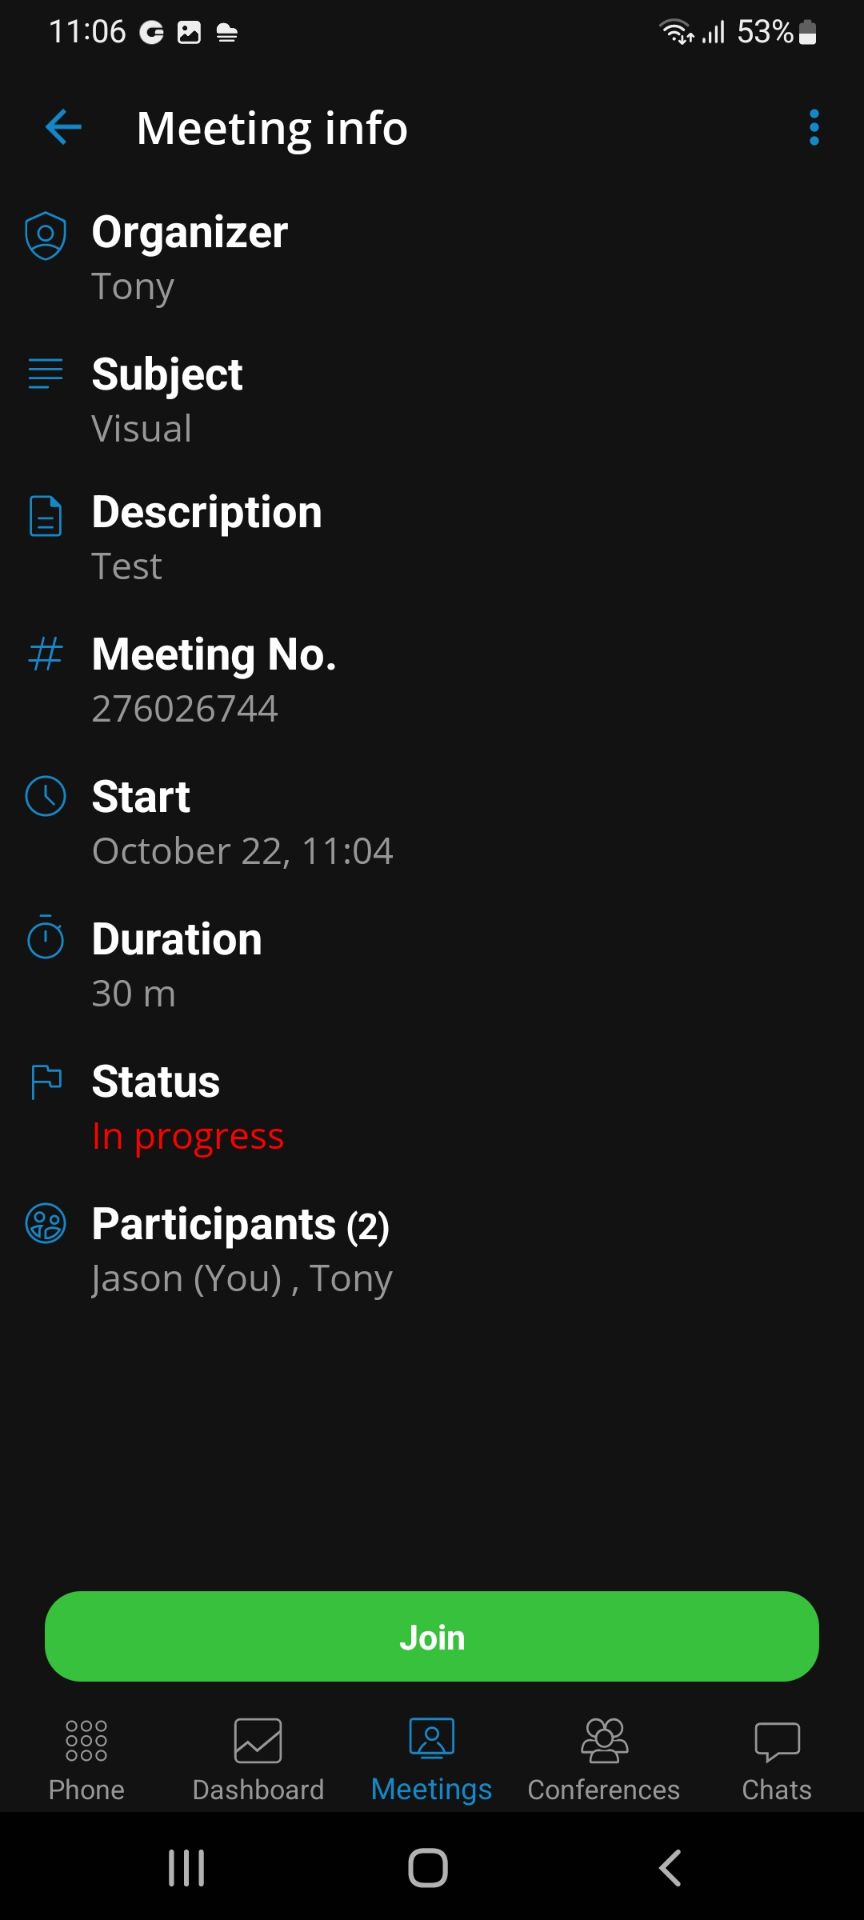
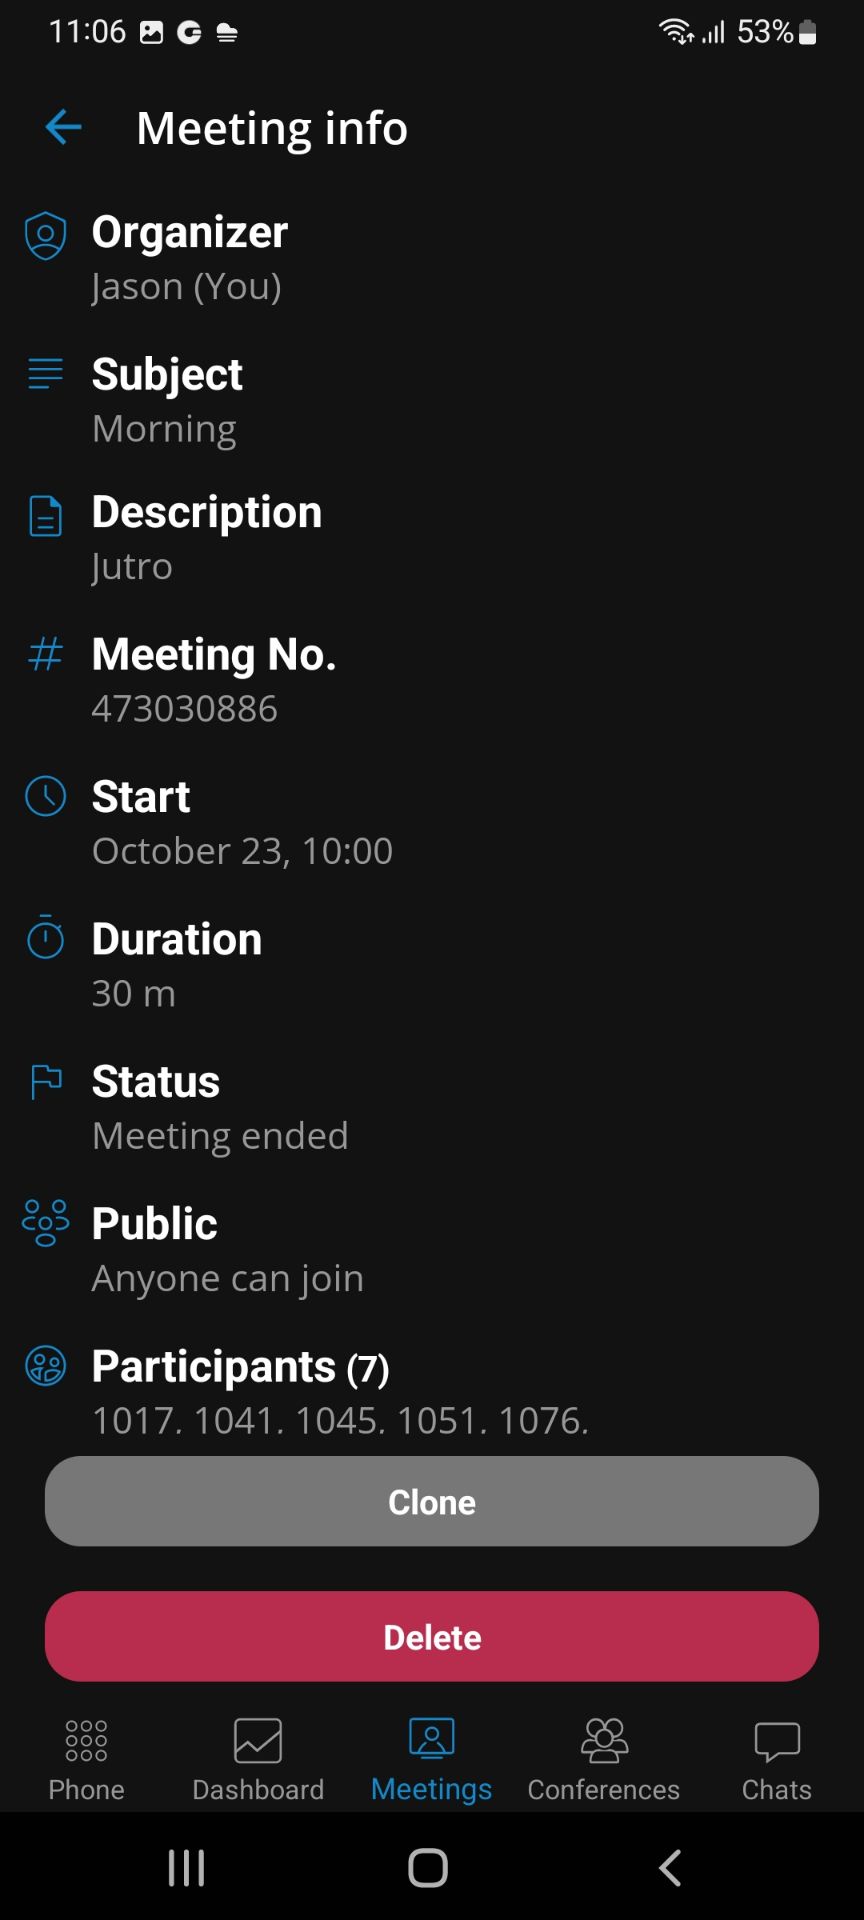
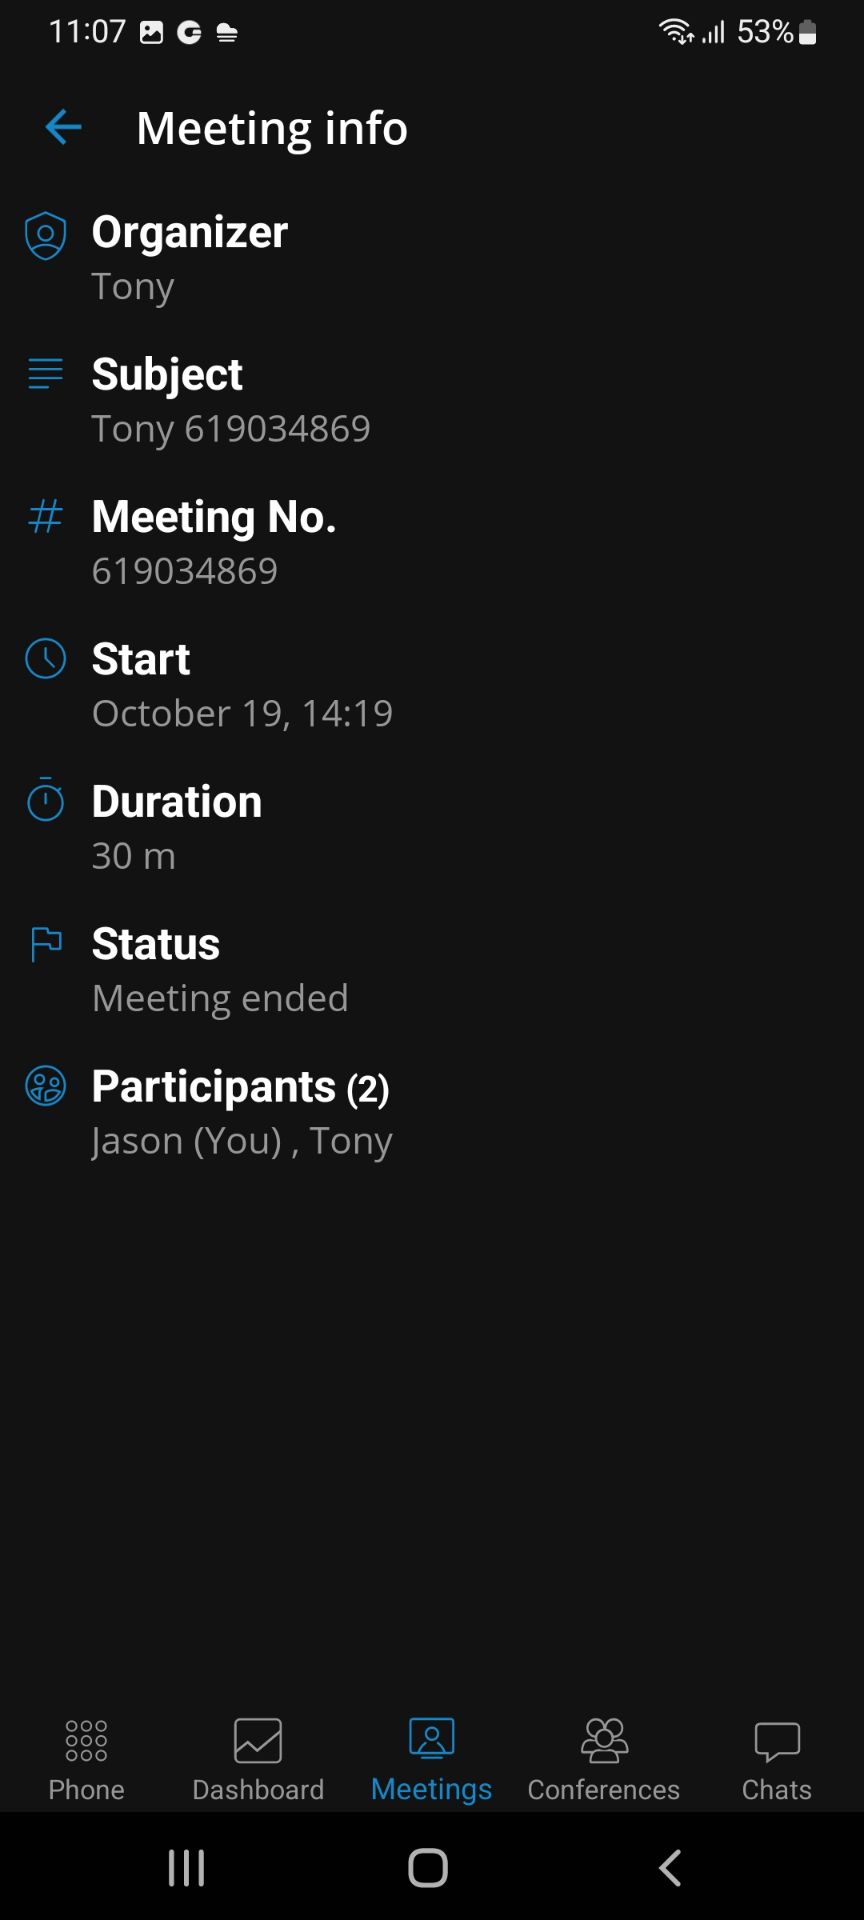
Meeting info screen
By selecting one of the meetings from the scheduled meeting list or history, the meeting info screen opens and shows the details of the selected meeting:
- Organizer
- Subject
- Description
- Meeting number
- Start time
- Duration
- Status
- Public
- Participants list

For a meeting that is scheduled but not started yet an organizer has the option to update the meeting details by clicking on the edit button in the upper right corner.
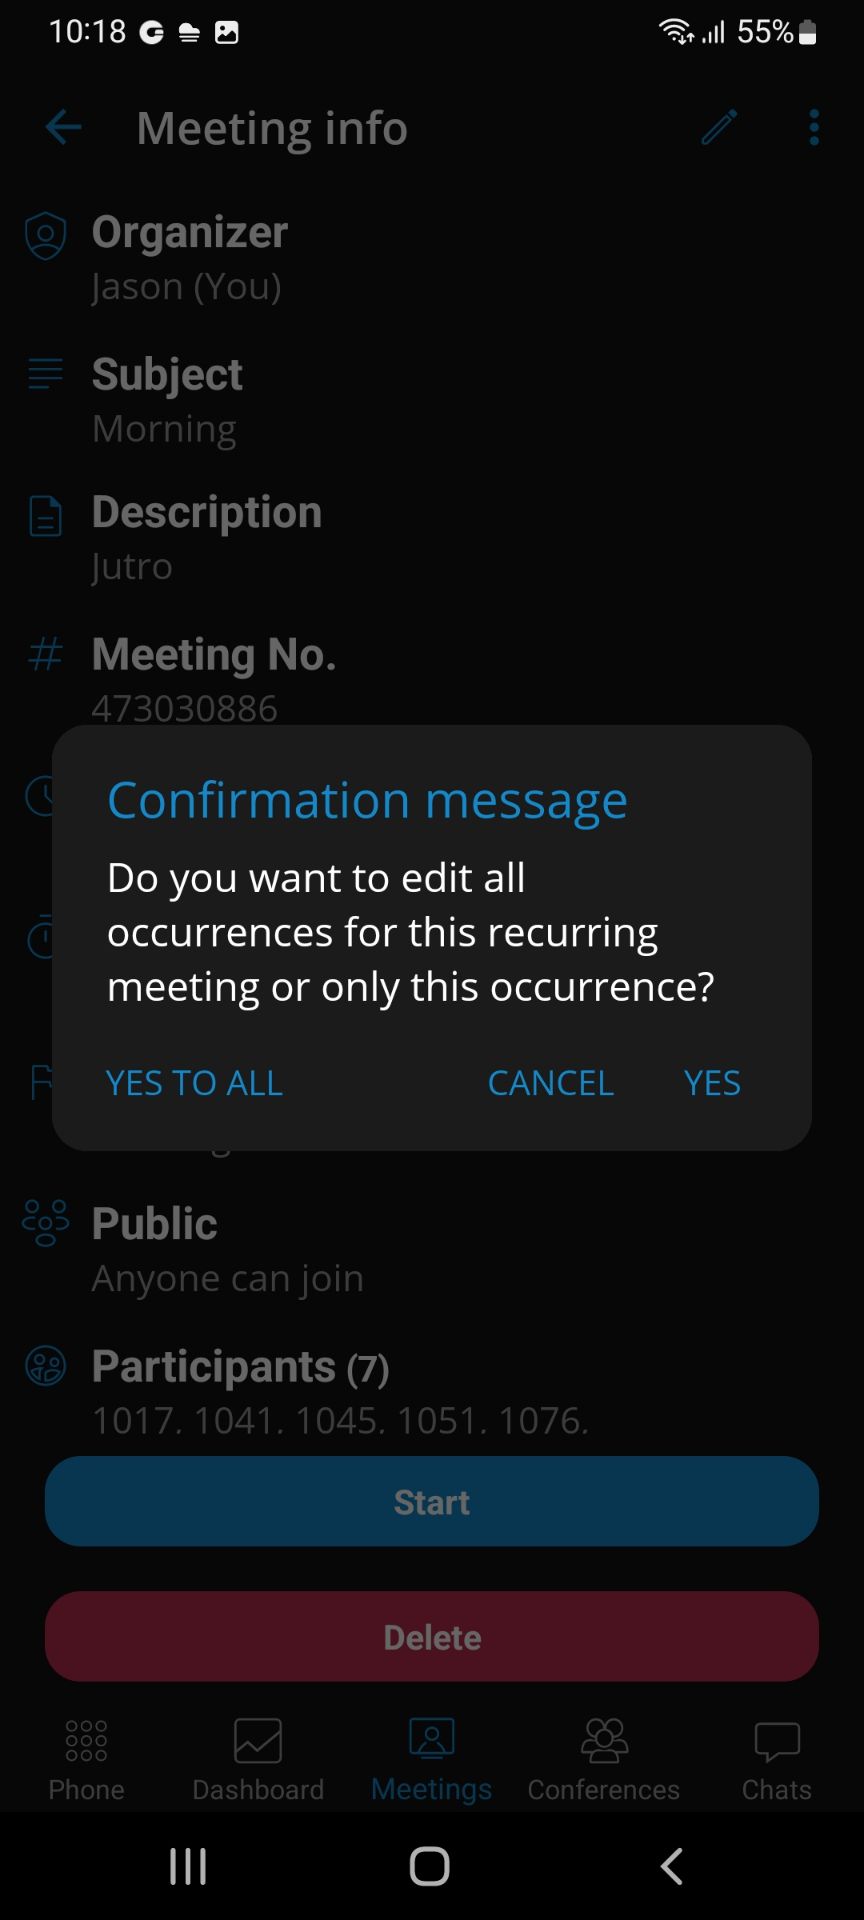
In case the selected meeting is recurring, the user will be presented with a confirmation message: “Do you want to edit all occurrences for this recurring meeting or only this occurrence?” with three options provided:
- Cancel (to cancel editing)
- Yes (to edit only a selected instance of a meeting)
- Yes to all (to edit all of the occurrences of the selected meeting)
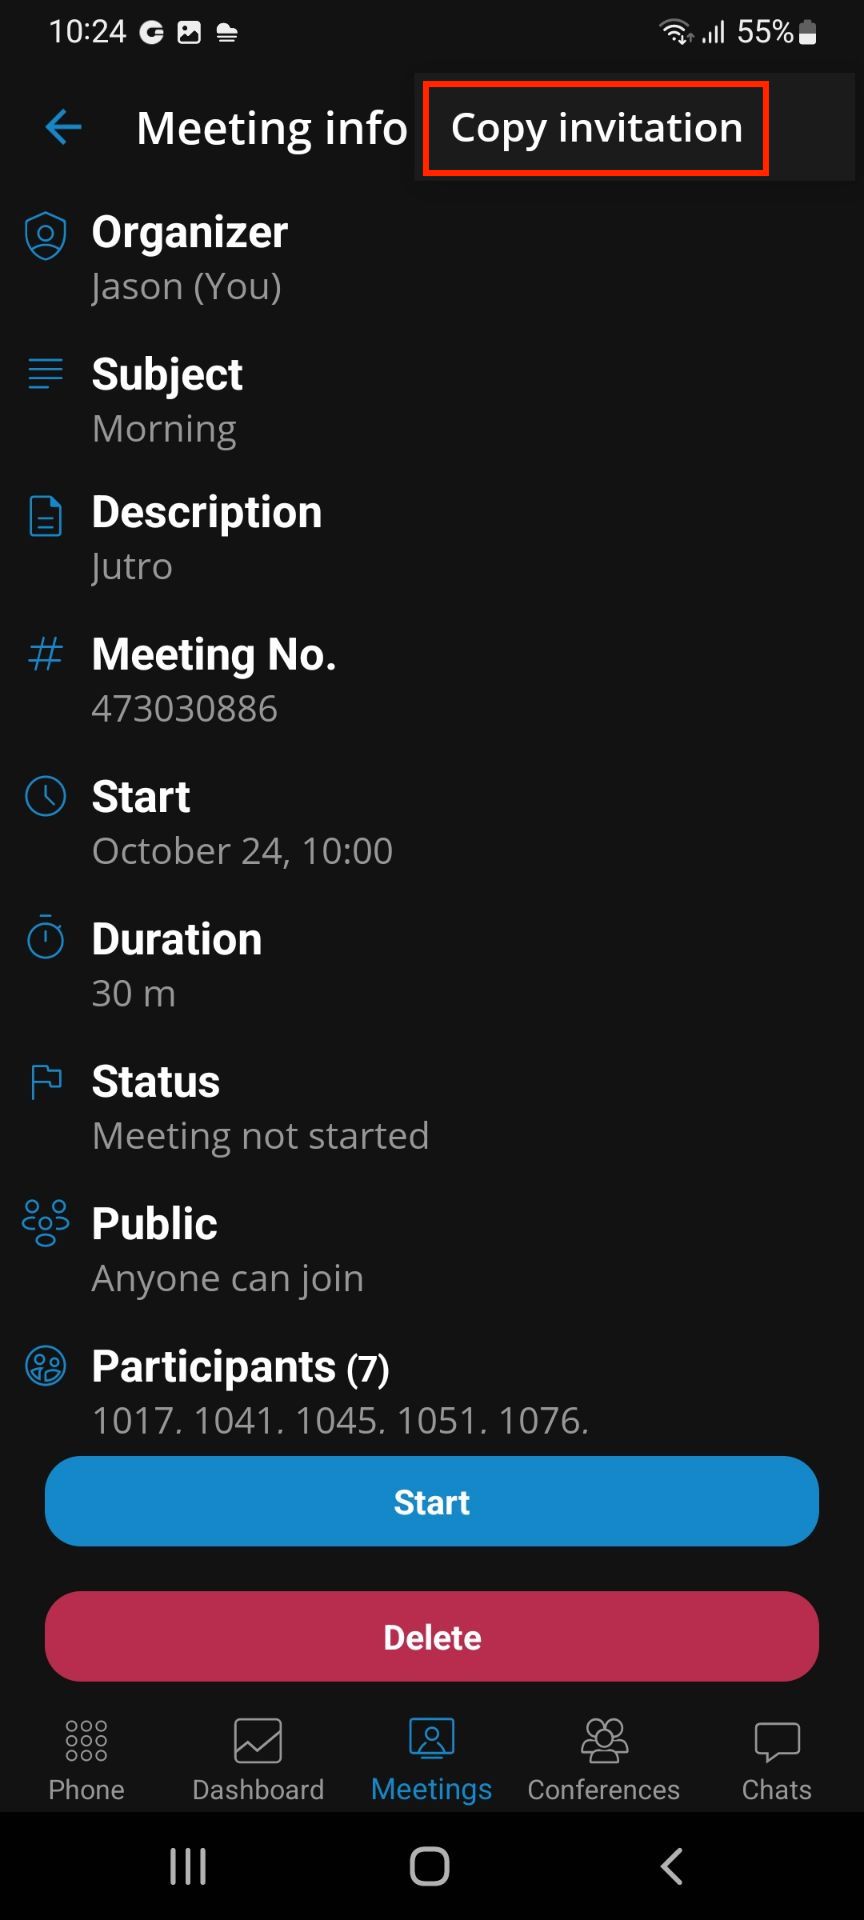
For meetings that are scheduled, or in progress, there is an option to copy the meeting invitation in the clipboard by clicking on additional options at the top bar.
Based on the different scenarios, the user will have different buttons at the bottom of the screen:
• If a meeting is scheduled and the user is the organizer:
◦ Start (starts a scheduled meeting)
◦ Delete (deletes a scheduled meeting)
• If a meeting is in progress and the user is the organizer:
◦ Join (joins the ongoing meeting)
◦ End (ends the ongoing meeting)
• If a meeting is in progress and the user is not the organizer:
◦ Join (joins the ongoing meeting)
• If a meeting is finished and the user is the organizer:
◦ Clone (opens a “schedule meeting” window with name, description, and participants pre- filled)
◦ Delete (deletes the ended meeting)
• If a meeting is finished and the user is not the organizer, no options will be available.
Meeting dashboard panel
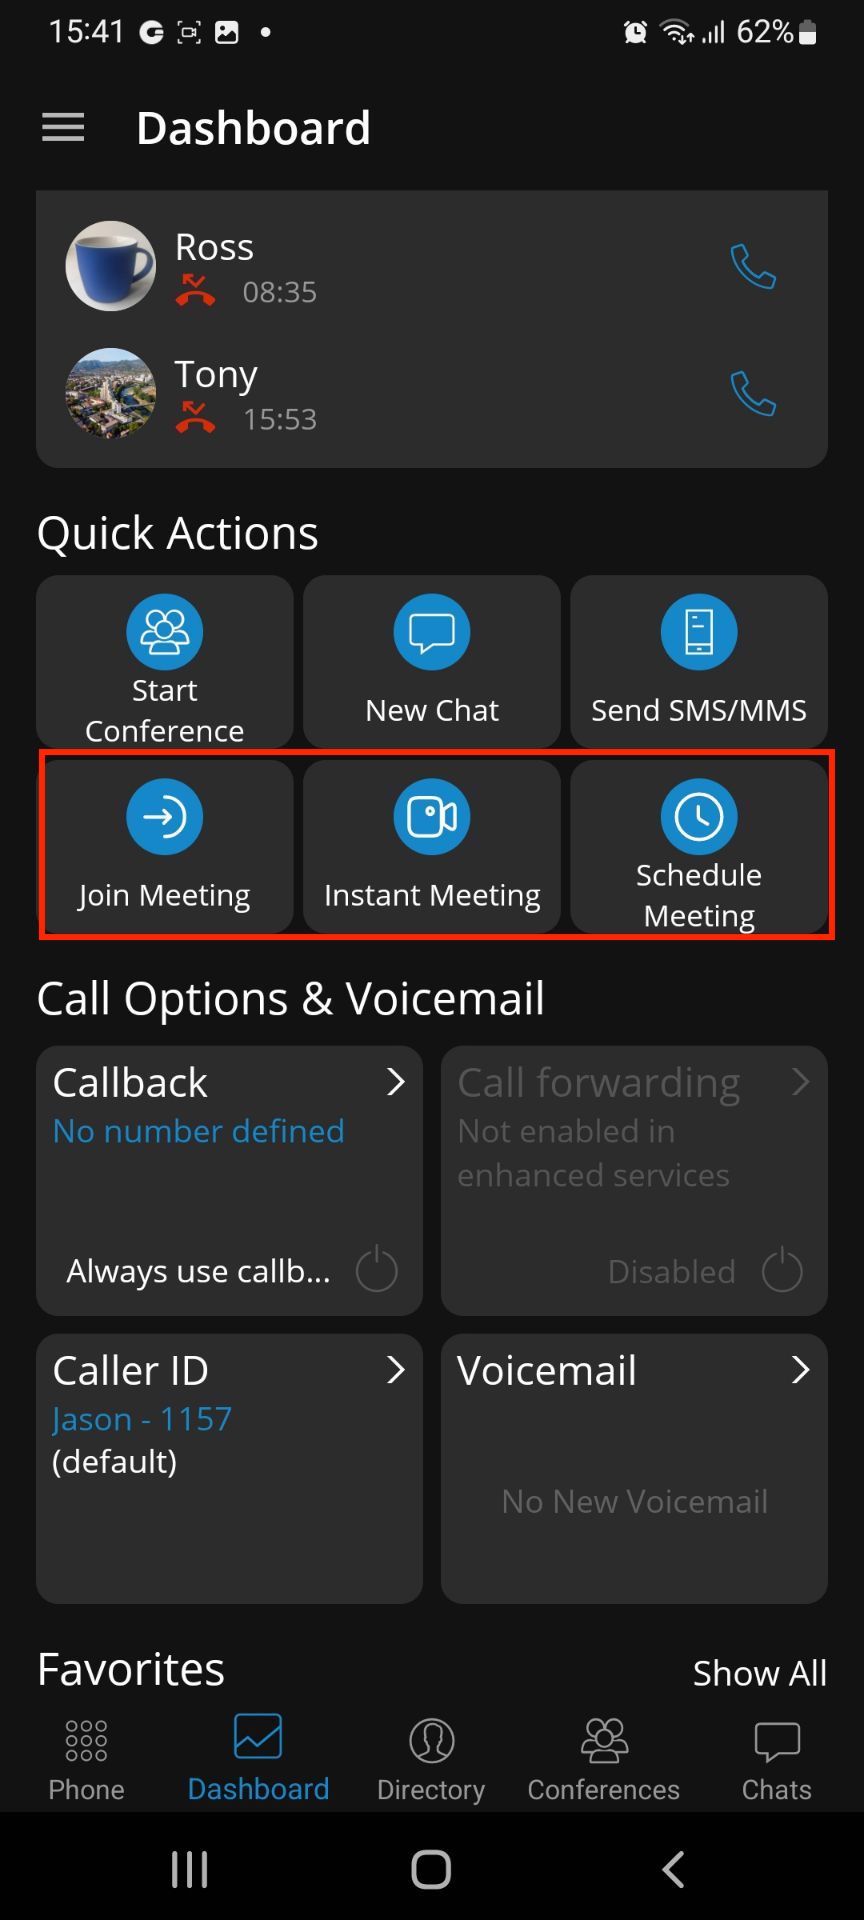
The user has the ability to start/join/schedule a meeting from the dashboard. In the quick actions panel, there are 3 options available:
- Join Meeting
- Instant Meeting
- Schedule Meeting
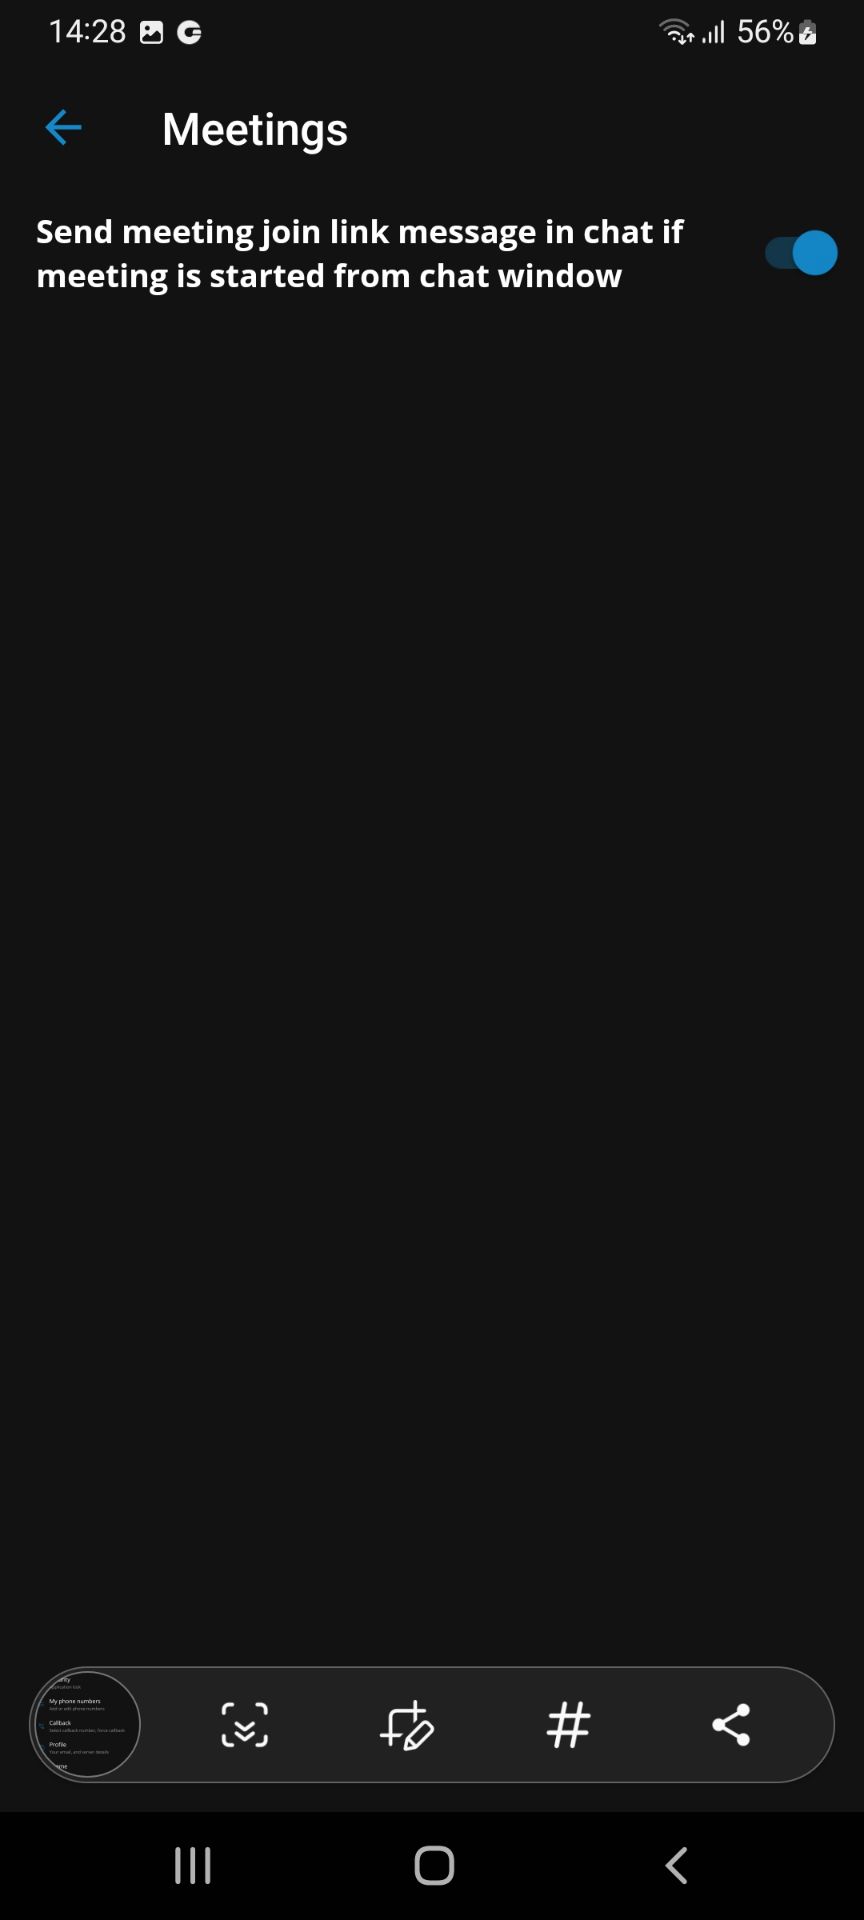
Meeting settings
The user can change meeting integration options by pressing on the meeting screen in the settings.
It’s possible to enable/disable sending of the meeting link as a chat message if a meeting is started from the chat window.
Chat
Chat is one of the main features of gloCOM GO 6.
Chat conversations are synced between all of gloCOM.
Users can start a chat in two ways:
-
Via chats item in the bottom menu and pressing on a + icon (one-to-one or group chat)
-
Via user information display screen (one-to-one chat with the user you are previewing)


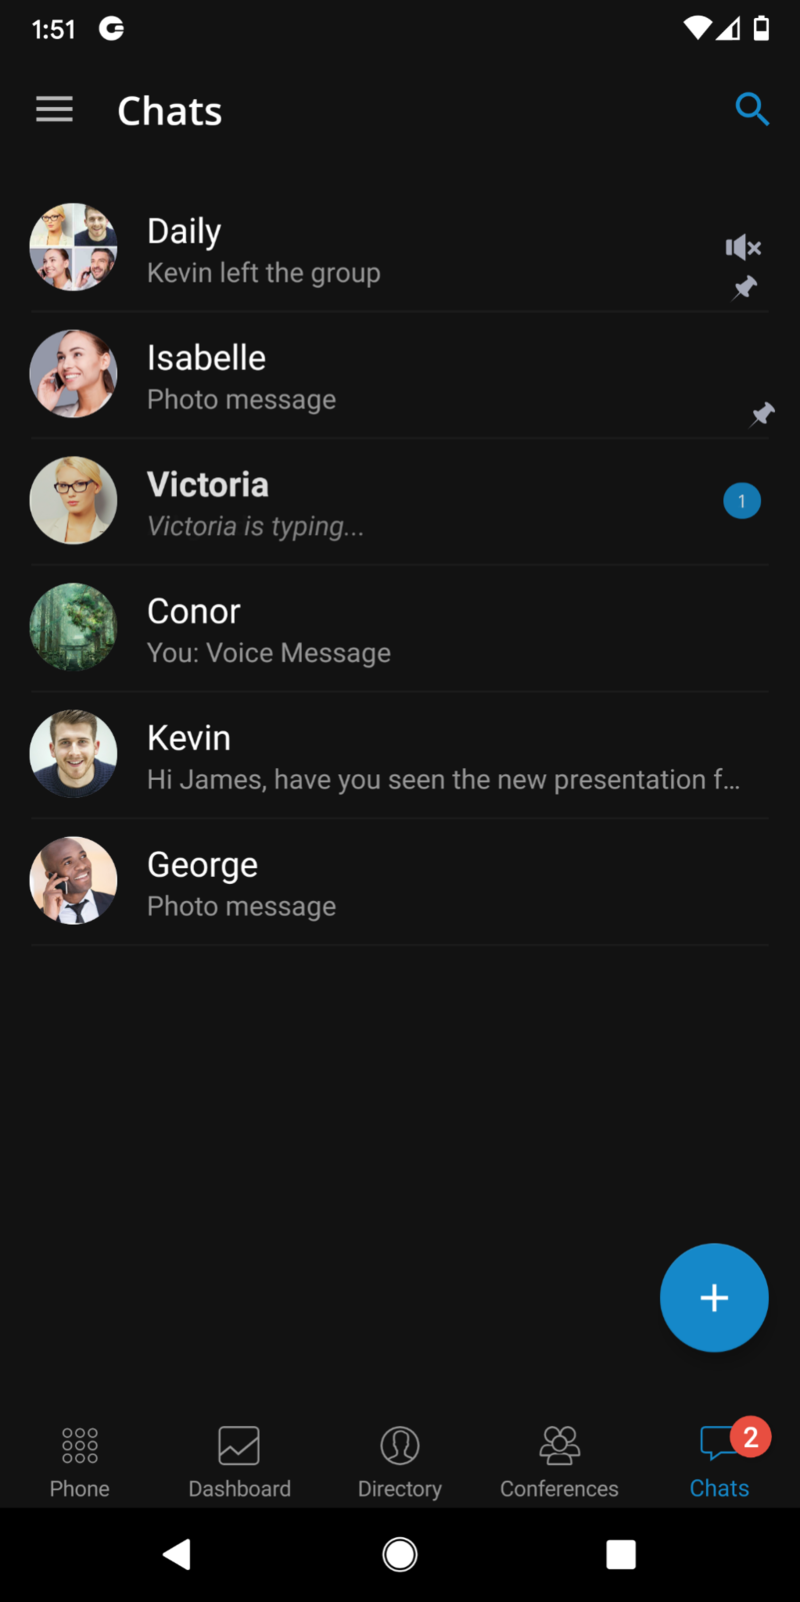
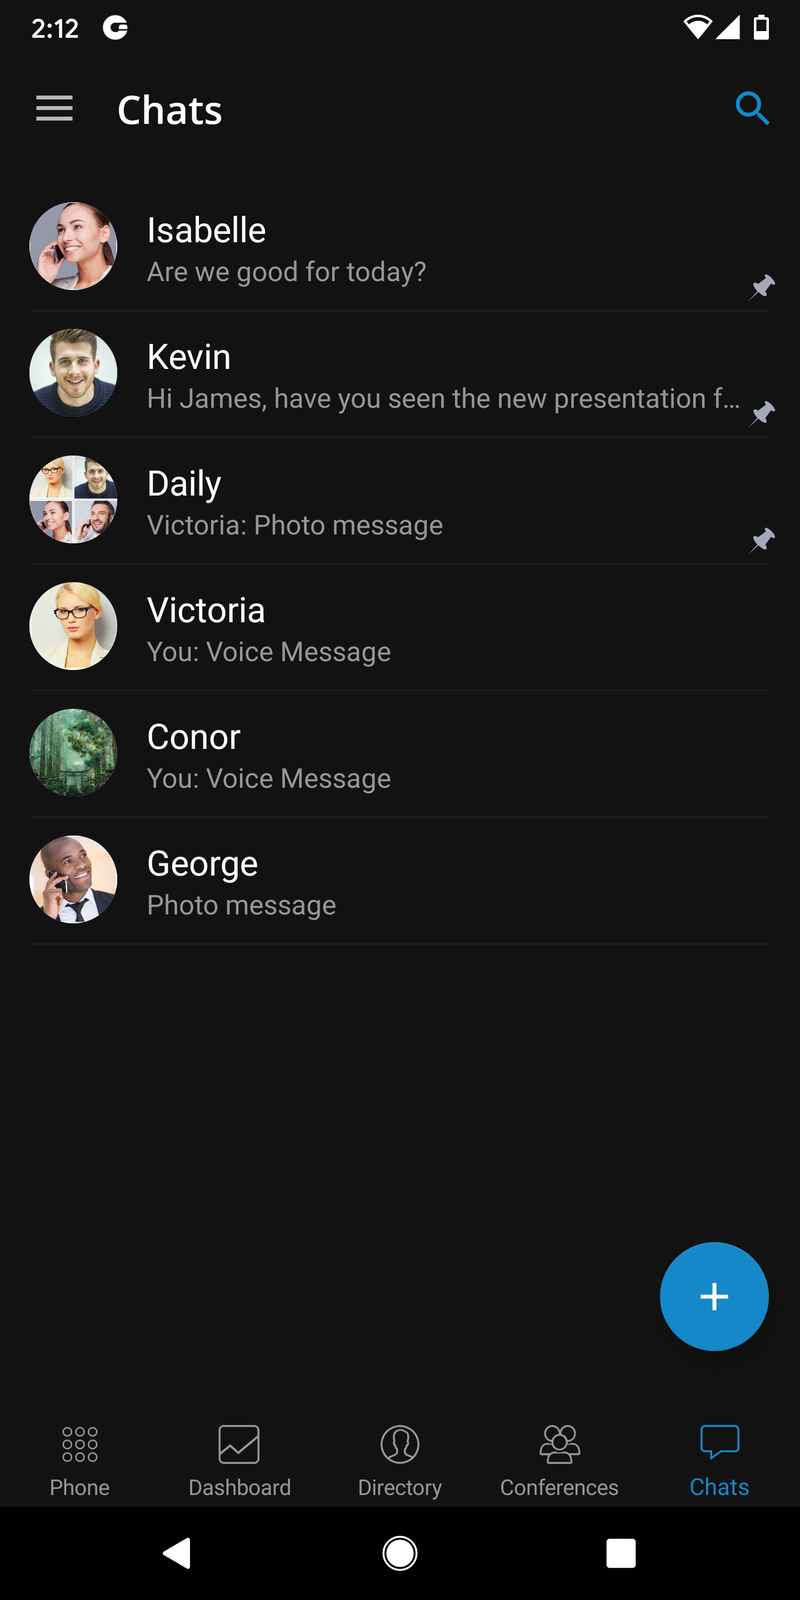
All chat sessions can be found in the Chats icon in the bottom menu with a number of unread messages for that chat session and the last message for that chat session.
Users can also search chats by pressing a search bar in the Chats feature. Chats can be searched by group or user name.
If a user does not have a chat session with another user, that other user will be displayed when the user searches for it in the Chats tab of the app. When the user presses on a user that he does not have the chat session, the chat session will be created, and the user can start chatting.
The total number of unread messages is always displayed on the bottom icon of the Chats section. This number reduces as the user reads the unseen messages.
When chat messages or sessions are syncing from the server, the app will display a yellow indicator below the navigation bar. The app is fully synced with the server when the loading indicator disappears. If the user logs in with a mobile app for the first time, it could take seconds to sync the recent chat sessions.
If chat is not enabled for a user on the PBXware, then the app will not display the Chats module for that user.
Banner message to indicate that the chat server is down
A yellow banner will be shown on the chat list and chat screens to indicate that the server is unavailable.
One-to-one chats
One-to-one chats are chat sessions between two participants that are users of one PBXware.
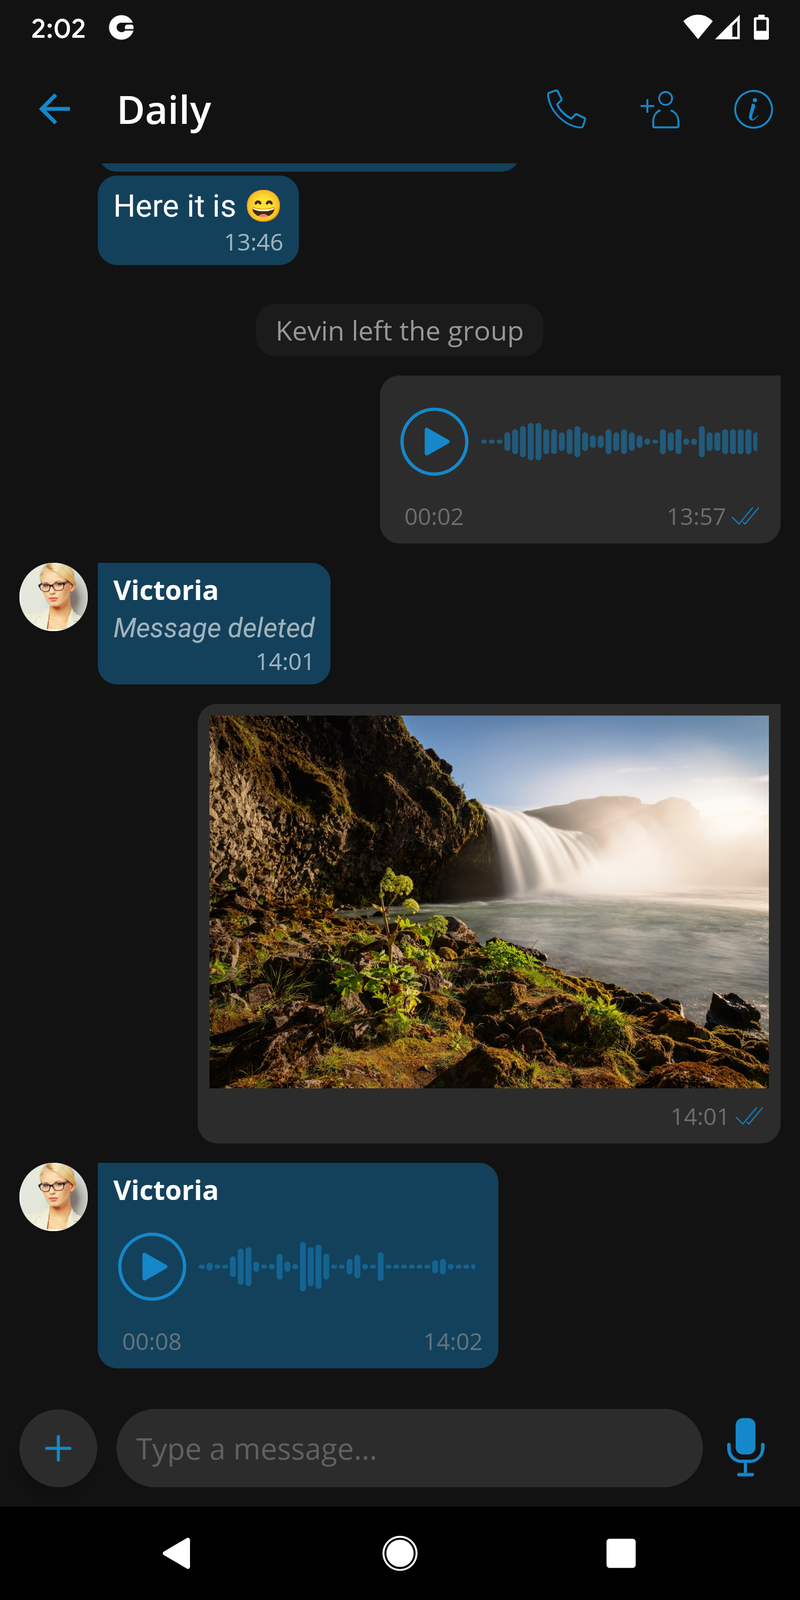
When users enter a chat on the bottom bar can type a message just like on any messaging app. It is also possible to send files with gloCOM GO 6. The default file size limit is 50 MB, which can be changed in PBXware.
On the navigation bar, users can see the user’s name they are chatting with and their Presence status. On the right, users can find the Call button that will start a call with the extension and the Info button that will open the screen containing chat information and options.
In the chat info screen, there is an option to create a group chat from one-to-one chat. This will create a new group chat with a clean history.
Chat can also be deleted from the chat info screen. The deletion of the chat will only be visible to the user that deleted it.
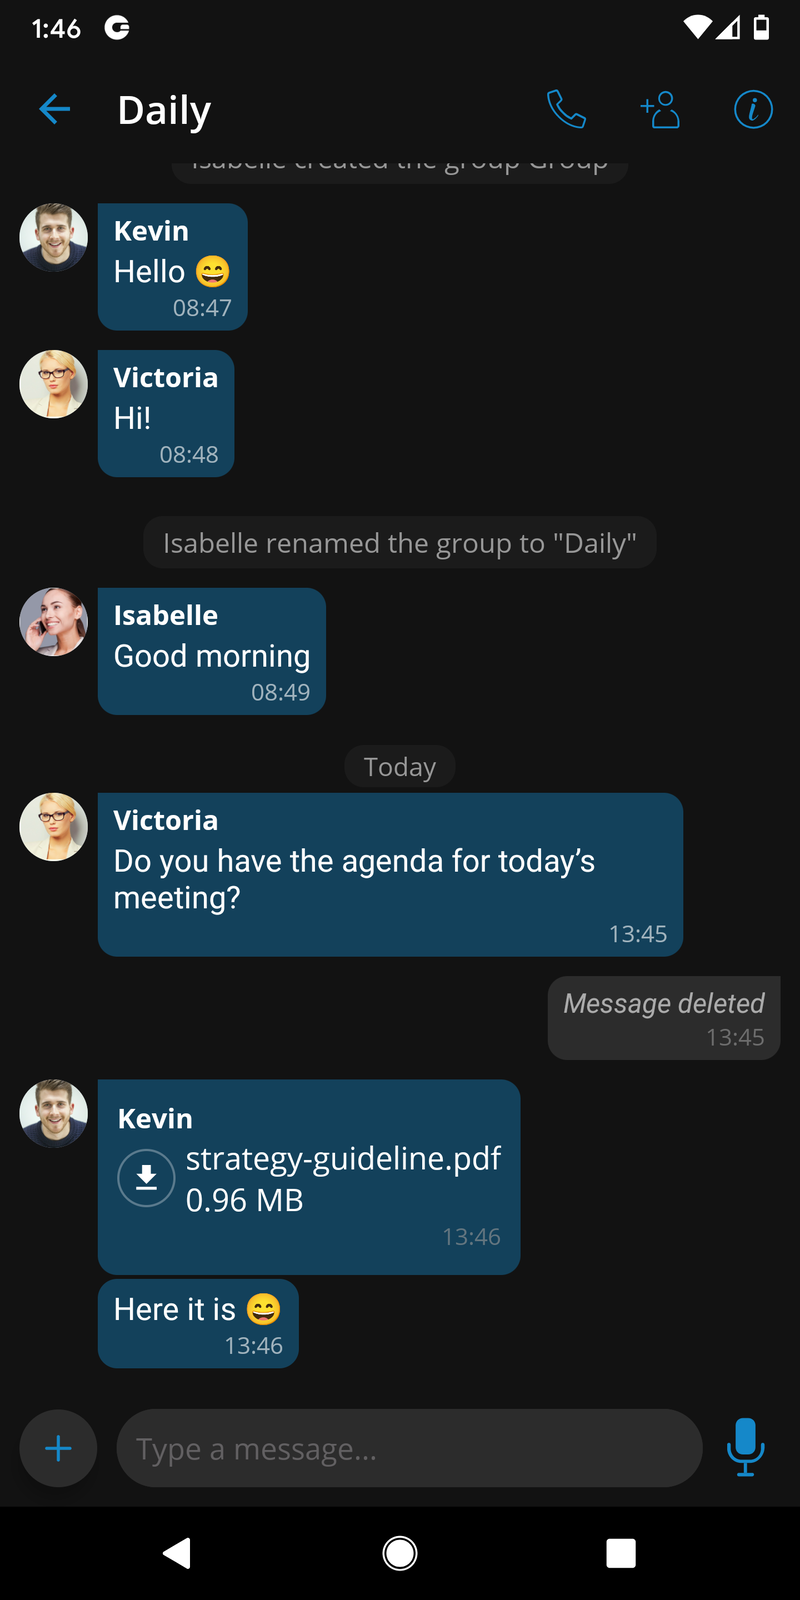
Group chats
Users can start a group chat by pressing a + icon on a Chats item in the bottom menu or by creating a new group chat from one-to-one chat on the chat info screen.
The group chat user interface is the same as for one-to-one chat. The call button has a different function, and in group chat, it will start a dynamic conference with group members. If there are more than 20 group members, calls will be disabled.
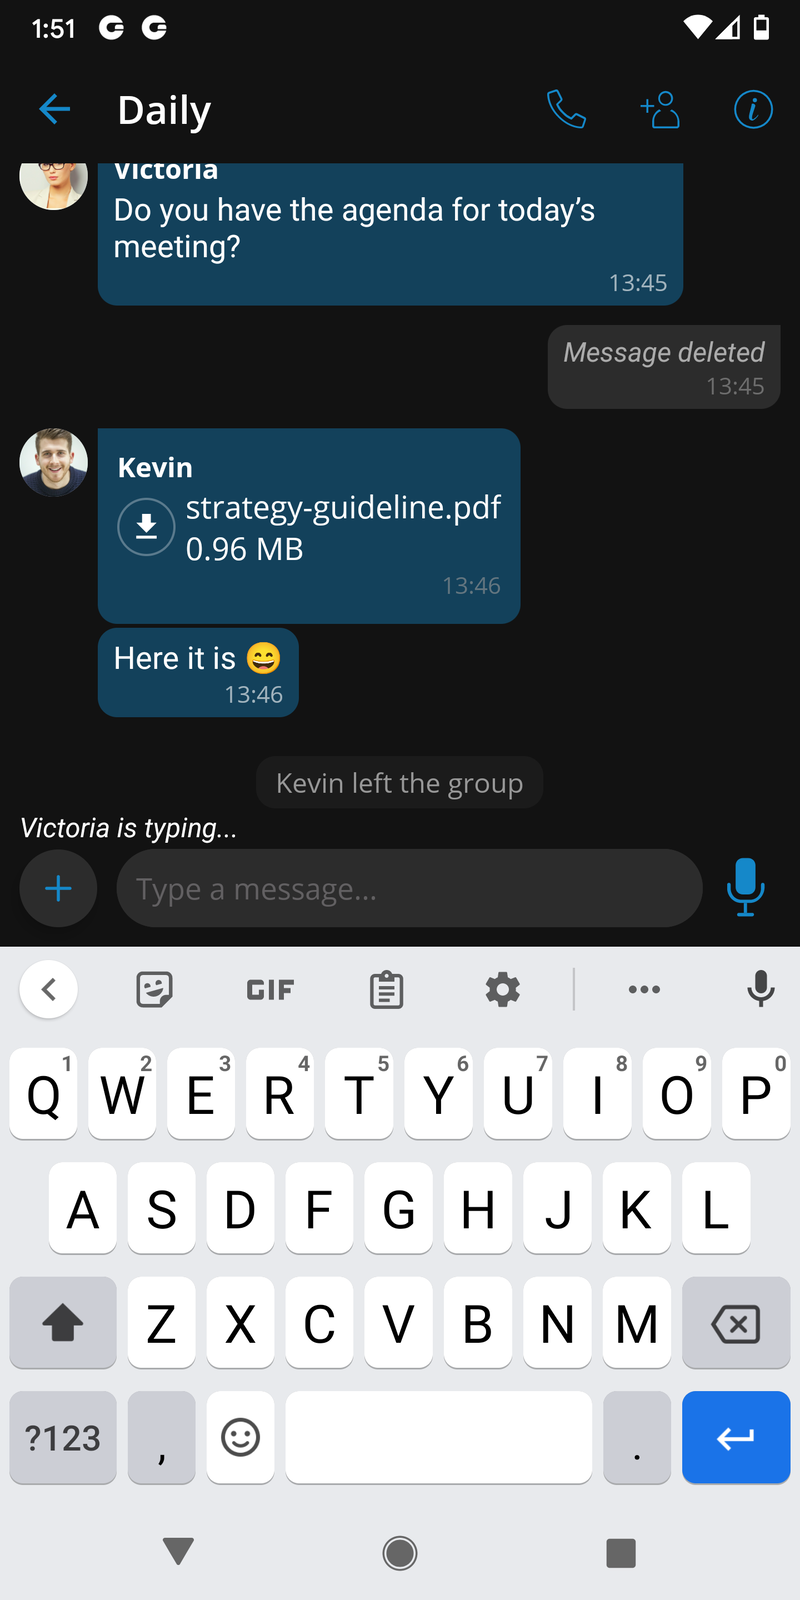
Group chats have events informing users that the chat name has been renamed or some users joined or left the chat.
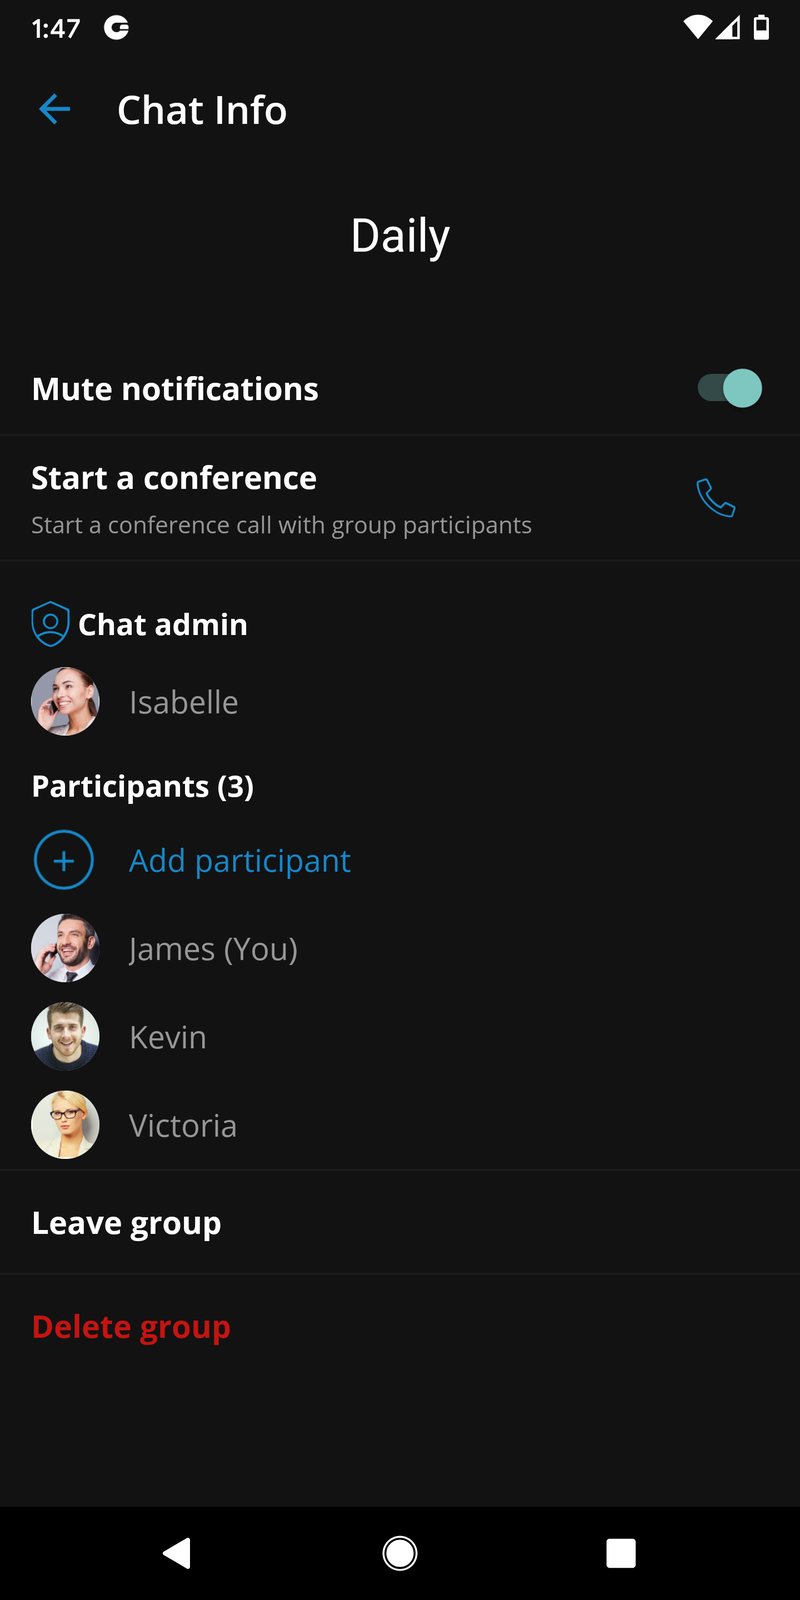
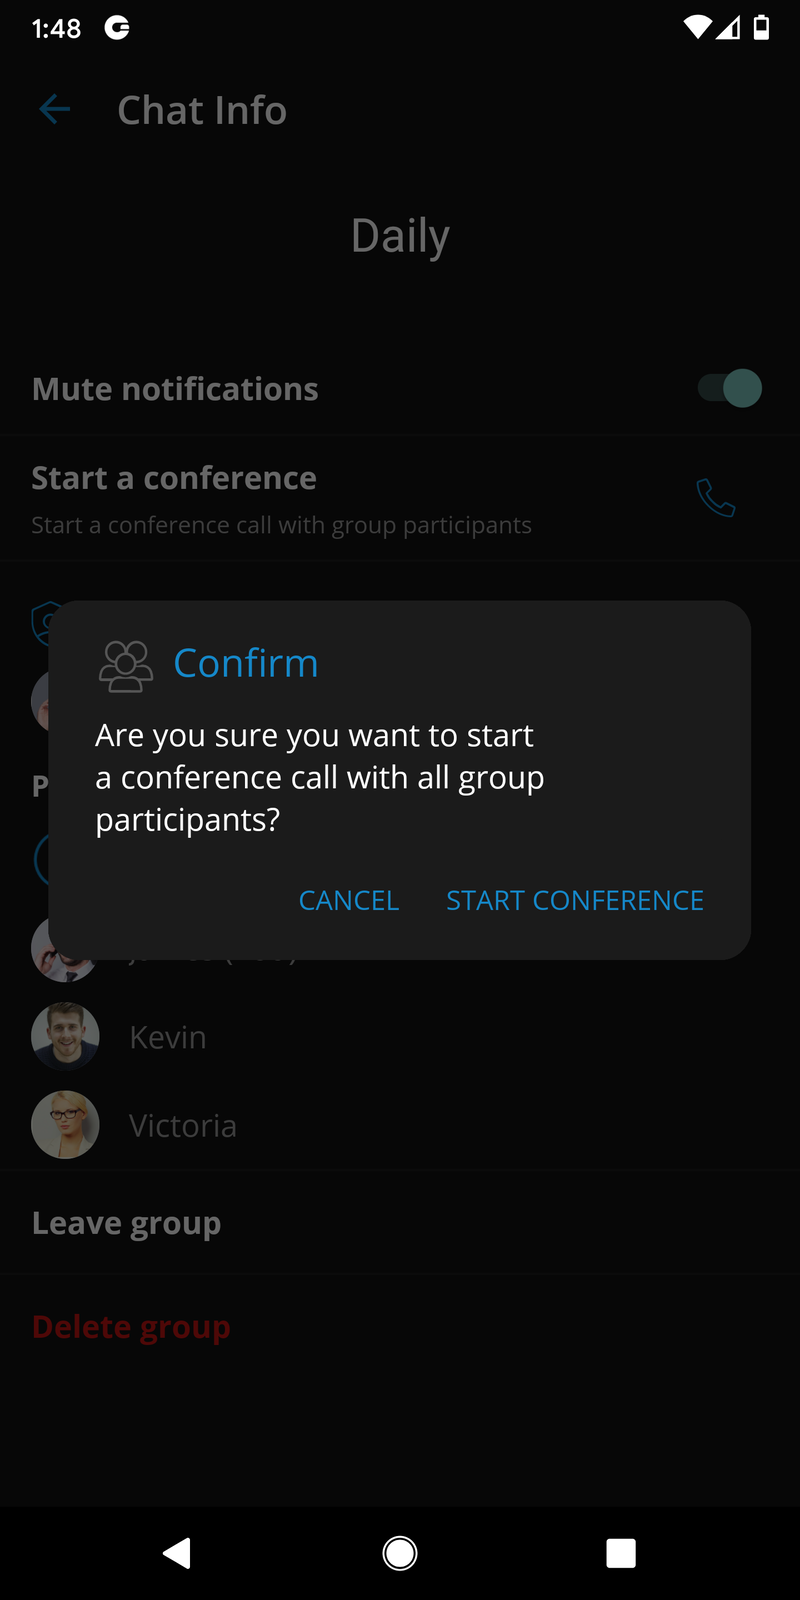
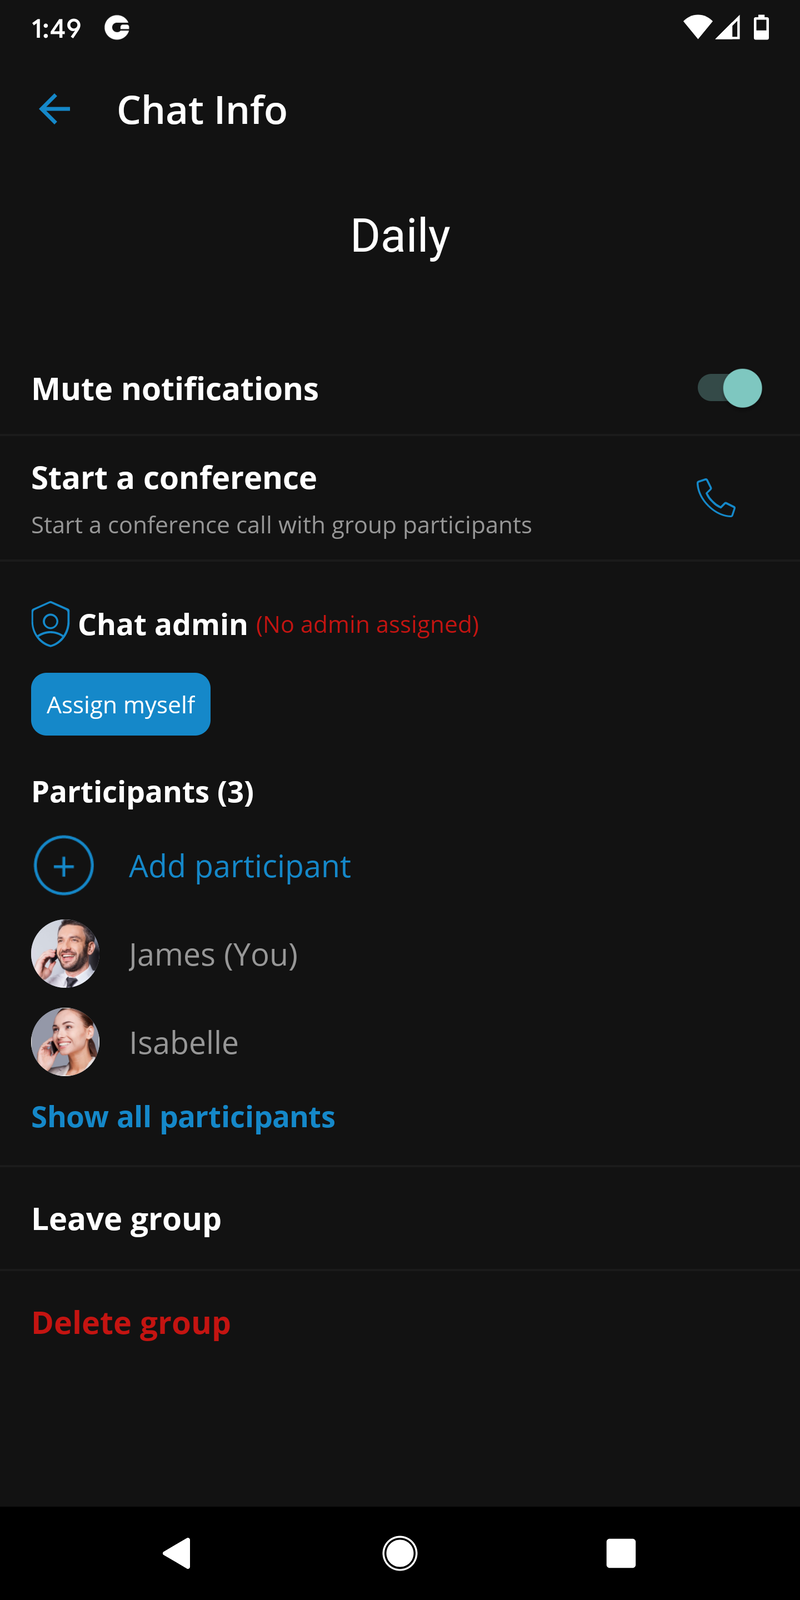
The chat info screen for a group is different than a one-to-one chat info screen. On the chat info screen for a group, users can add more participants to the group, see all of the group participants, mute group notifications, and start a dynamic conference for that group. The group administrator also has an option to rename the group chat.
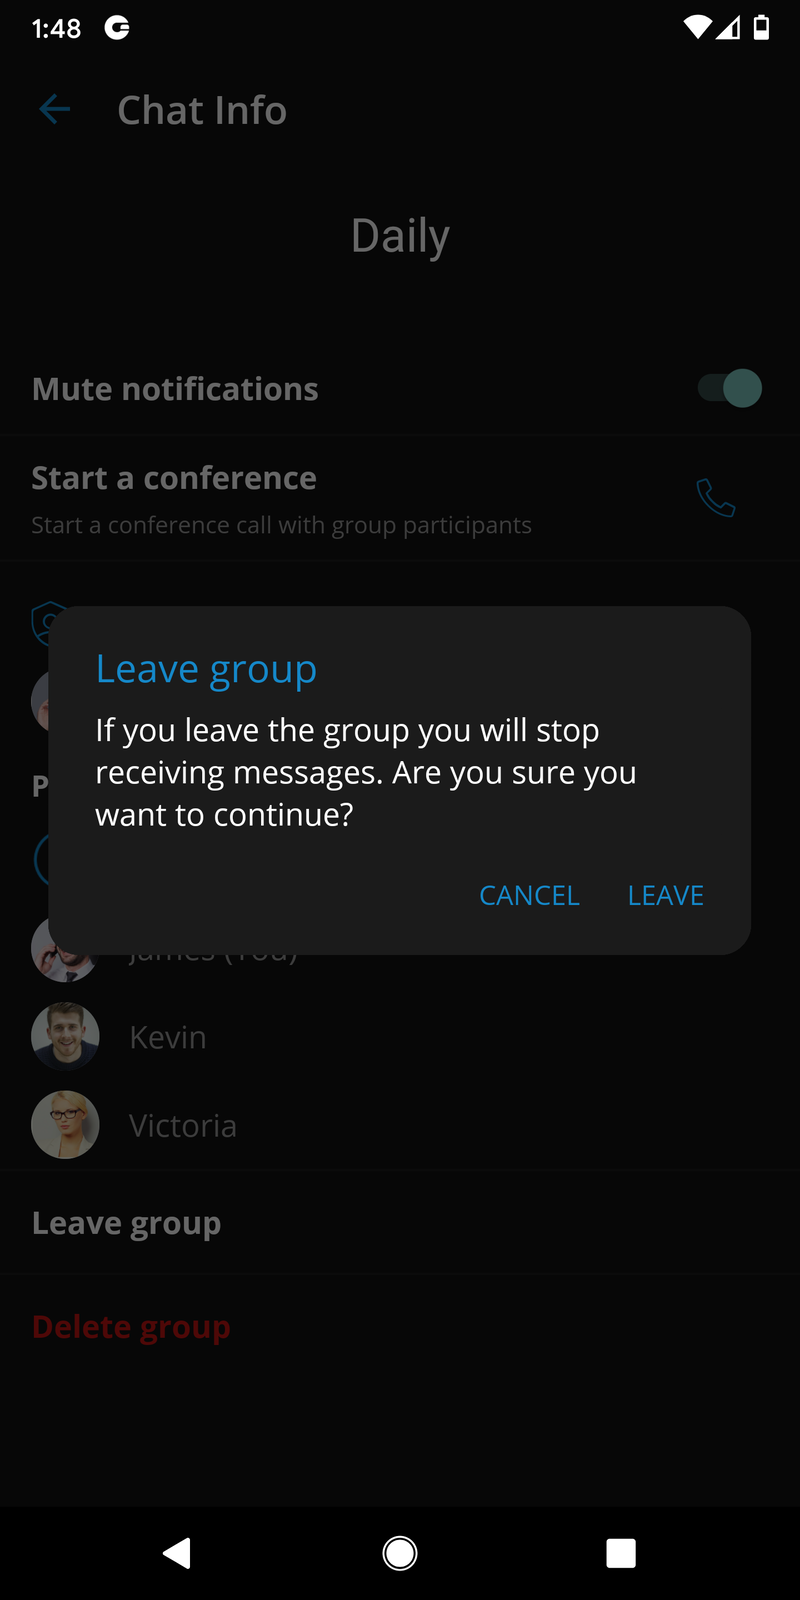
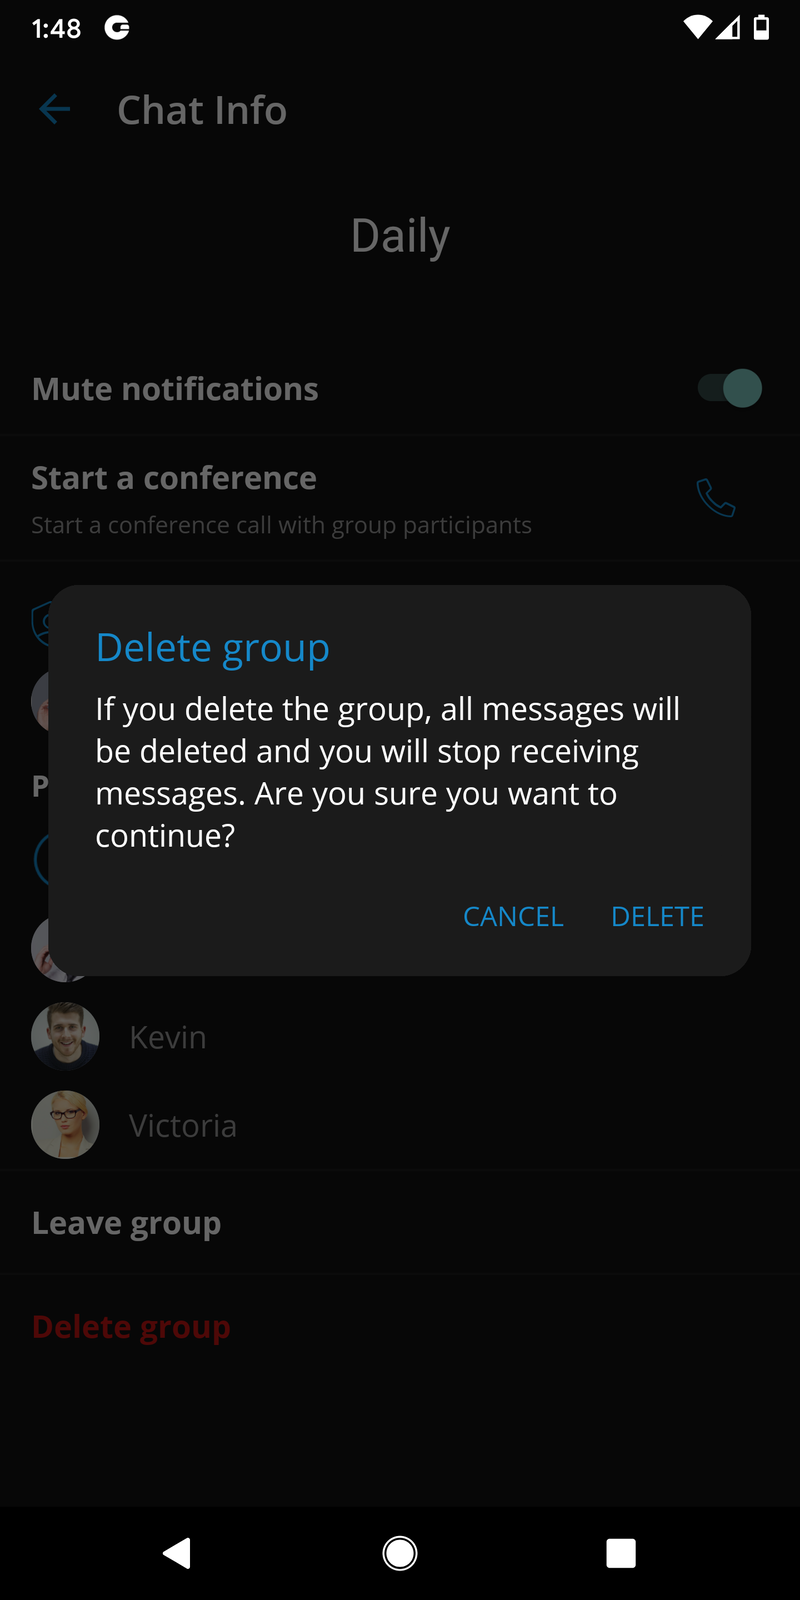
It is also possible to leave the group, meaning that the history of all messages until the user has left the group will be synced by client apps. Another possibility is to delete the group, and then the history will not be visible, and the group chat will be deleted for that user.
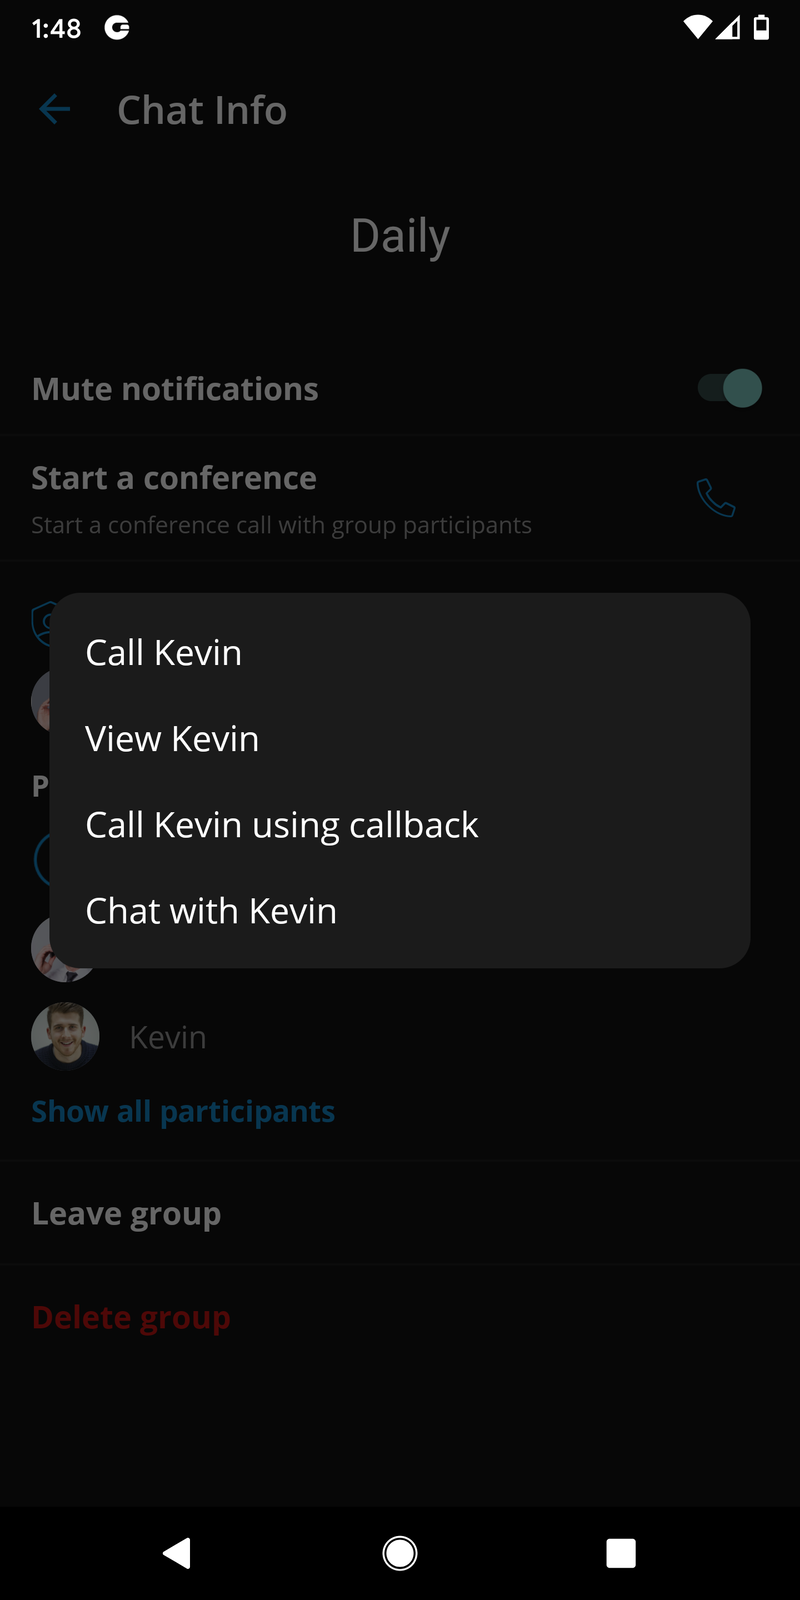
When pressing a chat participant in the chat info screen, users can view their user profile, call them or start a one-to-one chat. Group administrators also can assign participants as group administrators or remove them from the group chat.
When the group chat session is muted, users will not receive notifications (push and in-app) for that chat session. The mute option is synced between all users’ devices.
A muted chat session will have a mute icon in the chats list indicating that the session is muted.
Shared Groups
Users can create a shared group in which all group history will be visible for newly added participants.
When creating a new group chat, the user can set the group name, and enable the Allow full history visibility option. After enabling this option, a popup window will inform the user that the chat history will always be visible to newly added participants.
Group chat info will indicate that the full chat history is visible to all new participants.
Mention
Mention is a great way to get someone’s attention in a group chat conversation. Only group participants can be mentioned in a message. When mentioned, the user will receive a push notification which will override any mute action that the user has set for the group.
Mentions start with the @ symbol followed by a name. When the @ character is typed in the input field, a suggestion list of participants will appear. The mention feature brings support for smart auto-completion based on user input.
Clicking on a mention link has the same functionality as clicking on a user avatar inside a chat conversation.
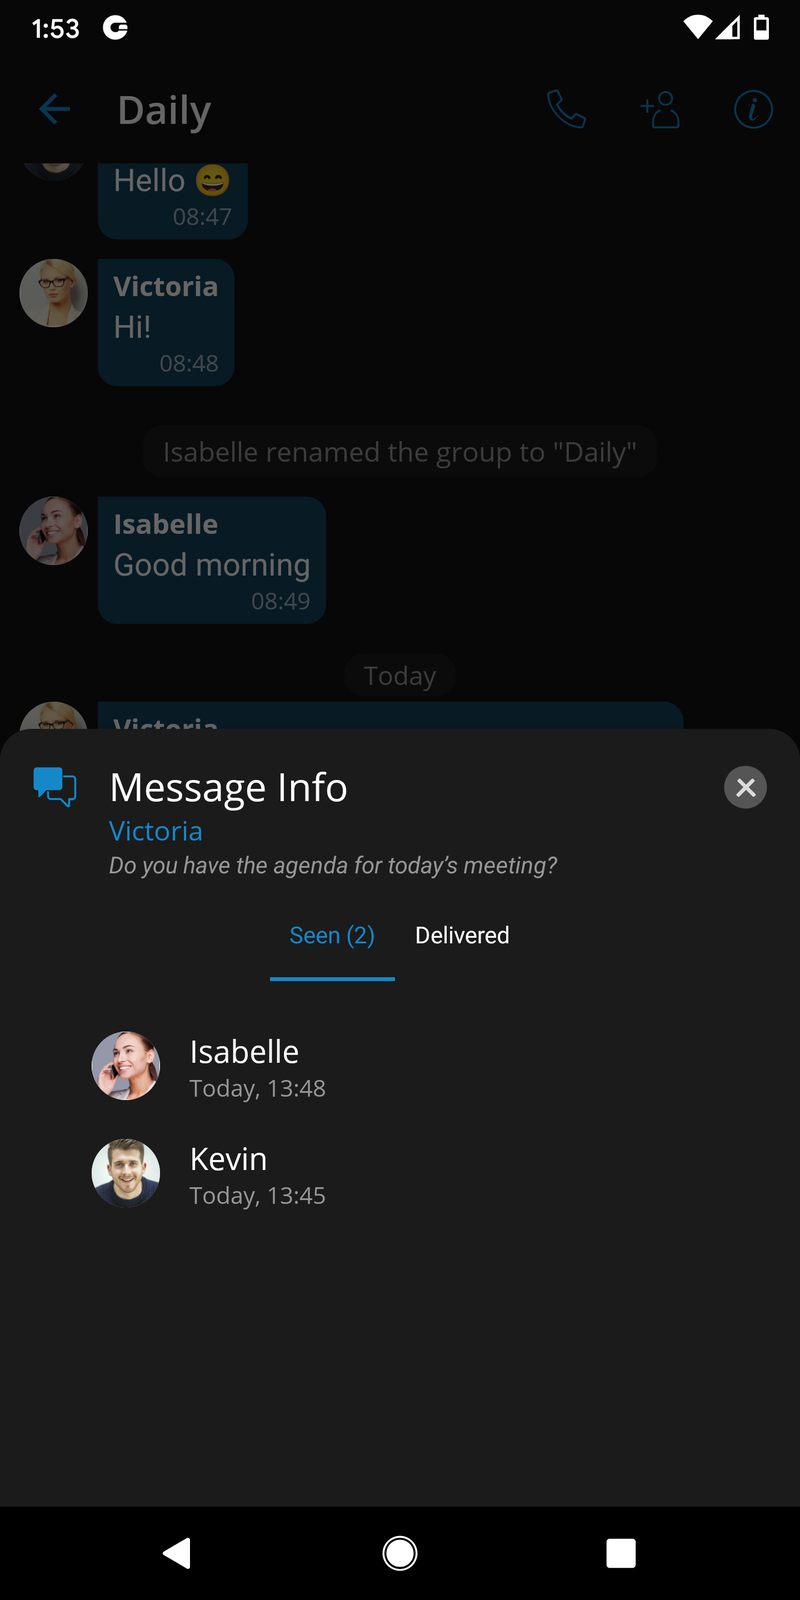
Chat message status info
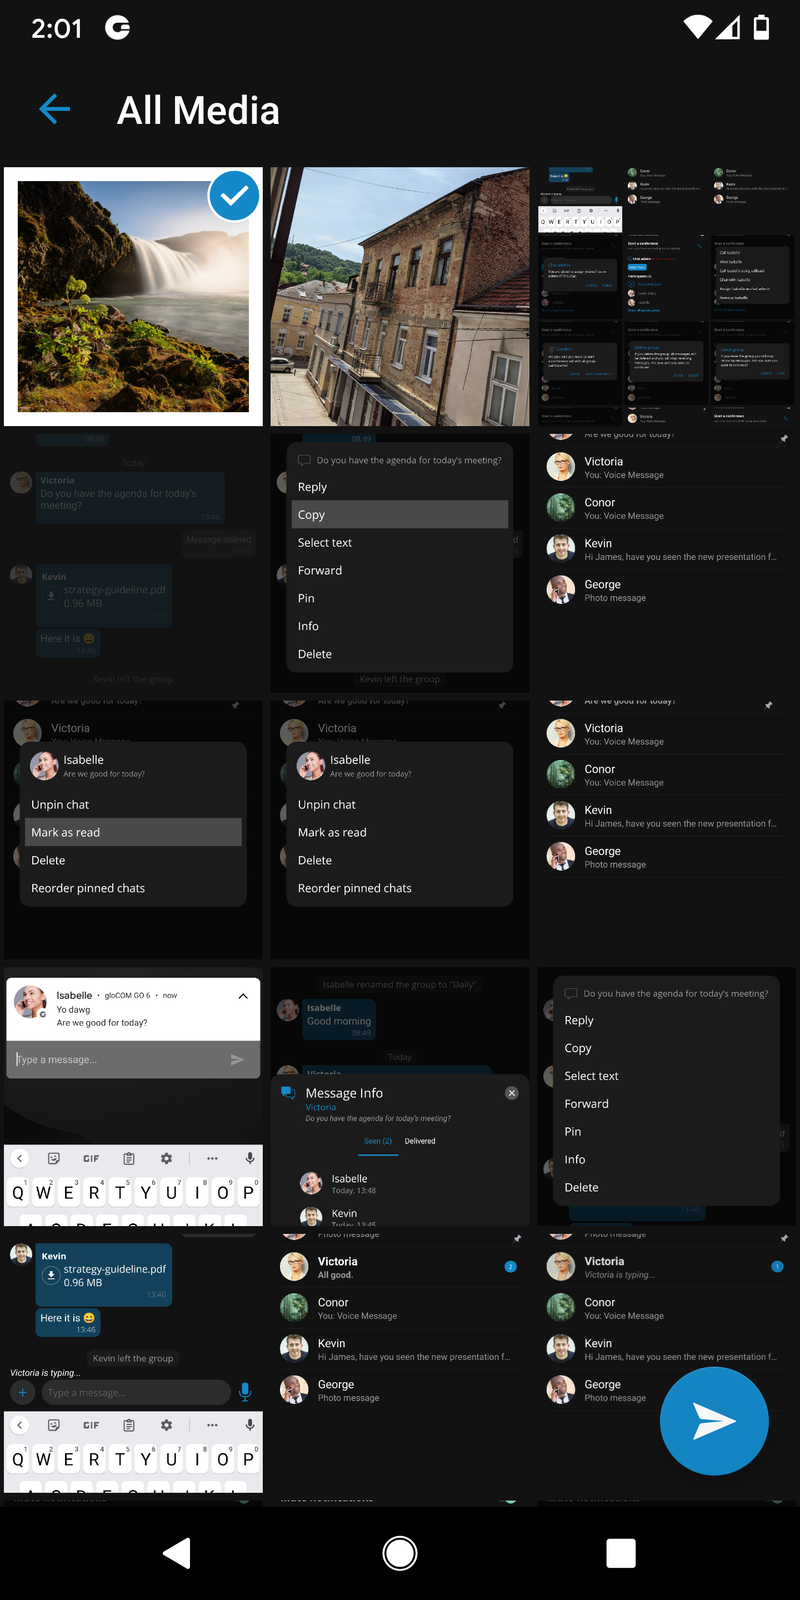
Message info allows users to see delivery and seen reports for messages. The message info window can be accessed by long-pressing on a message and then selecting info in the context menu. The message info option is only available in group messages.
The message info window opens from the bottom of the screen and takes up a small portion of the screen. It is possible to expand the message info window to full screen by dragging the window up or collapse it by dragging the window down. The window can be closed either by tapping outside the message info window or by pressing the close button in the top right corner of the message info window.
The message info screen is arranged so that it shows the name of the person who sent the message, the content of the message, and two tabs. The seen tab and the delivered tab. By selecting the seen tab you will see a list of users that have sent the seen report. The users will have their name and time, when they have sent the report, printed out. Respectively by selecting the delivered tab, you will see a similar list, but in this case, users that have sent the delivered report. In case any one of the tabs is empty, it will show an appropriate message.
If the info window is opened on a device connected to an earlier version of the server, a message will appear in the message info window stating that the action is not supported.

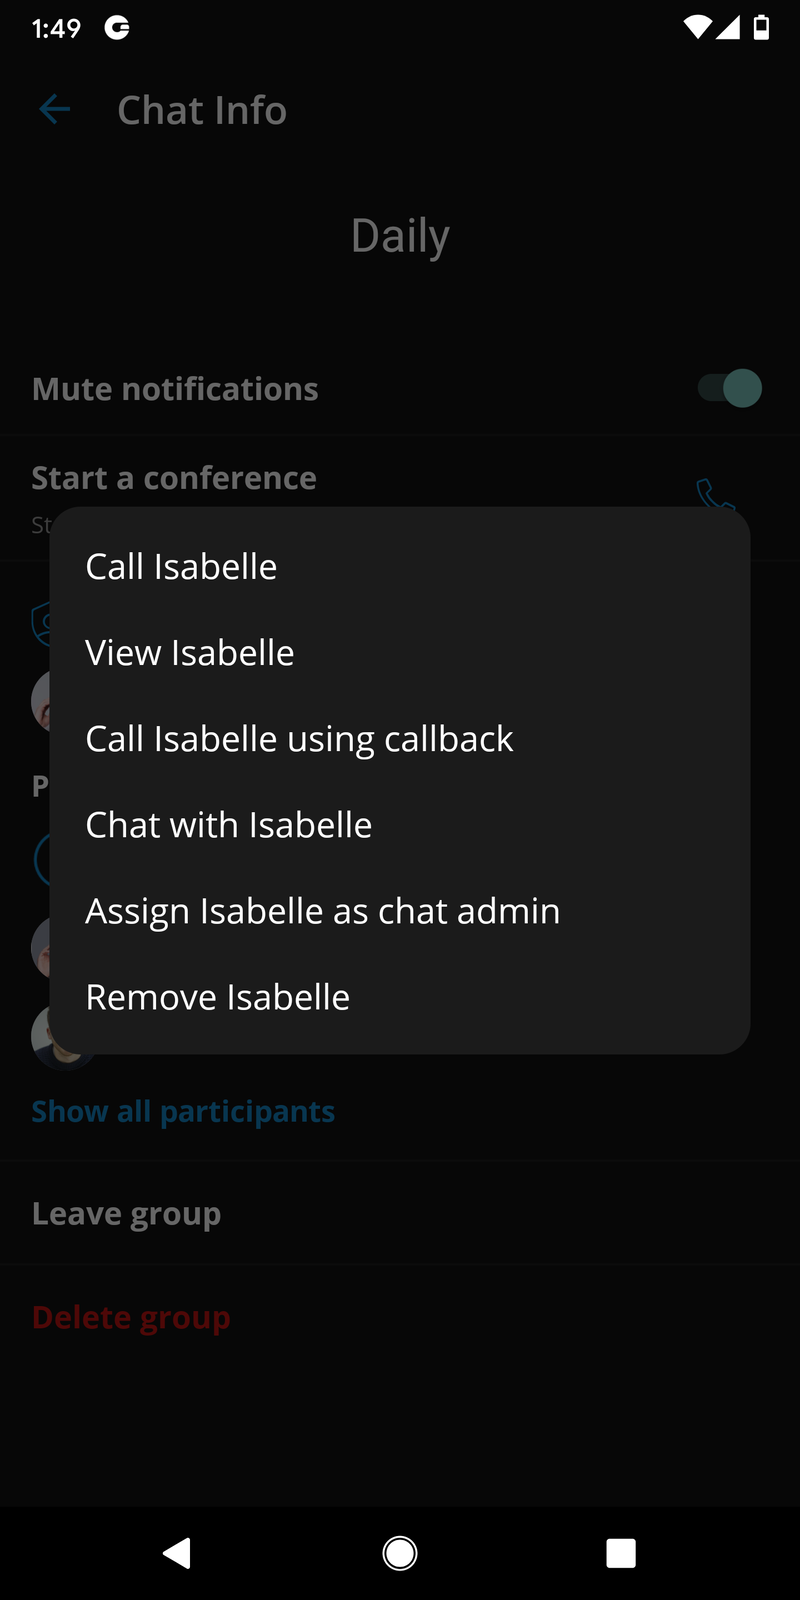
Admin transfer in group chat conversations
Group chat conversations now have a new feature-admin transfer. It offers the chat admin to assign one of the group chat participants as a new admin of group conversation. Pressing on an active participant of the group chat, a dialogue will appear offering the current admin to assign the selected active group chat participant as a new admin.
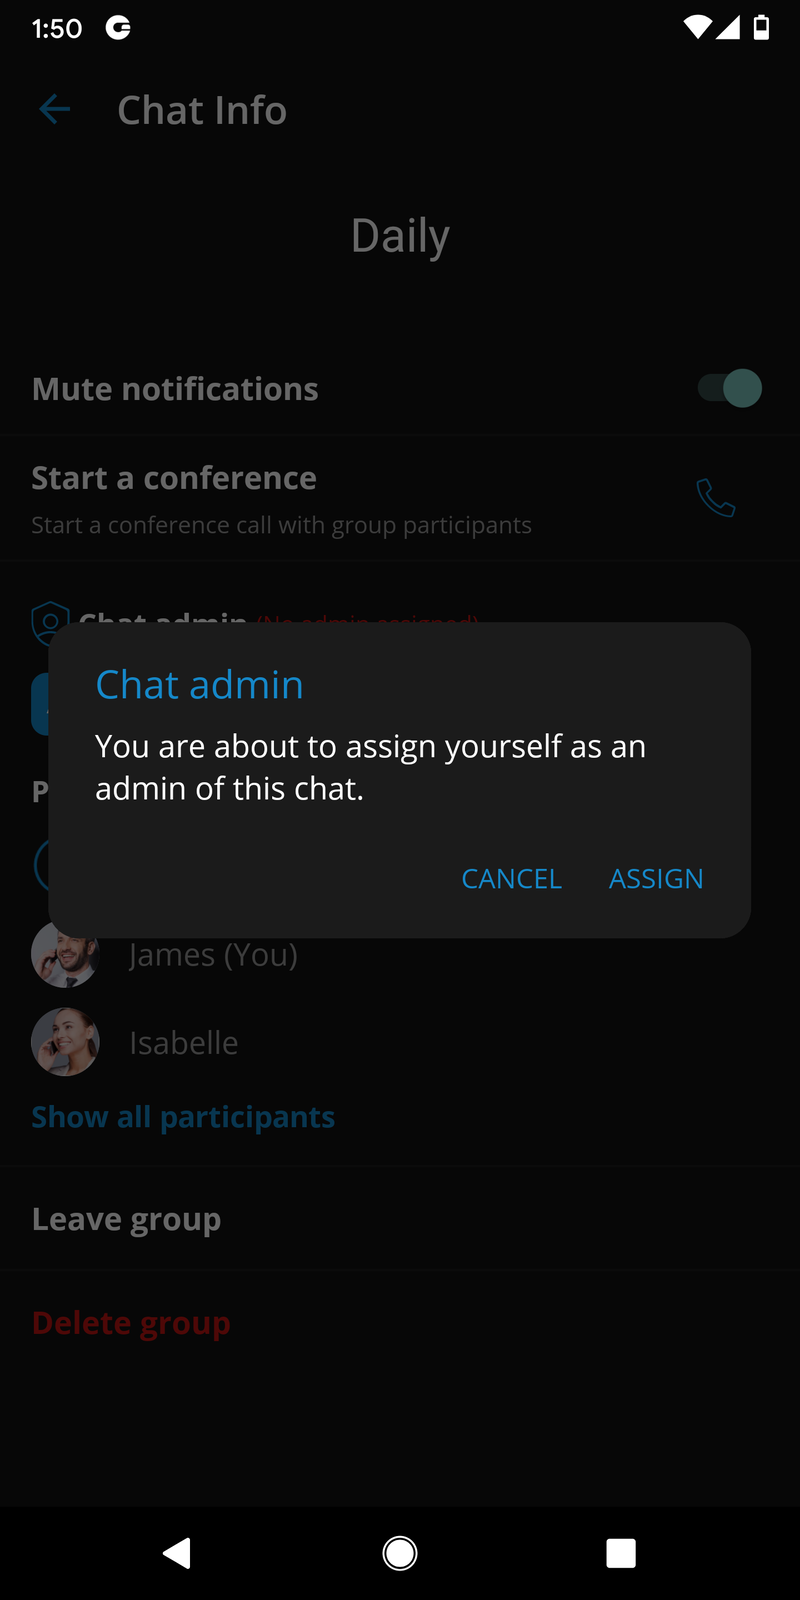
One of the group chat participants can also request to become an admin of that chat conversation after the previous admin has left. Once the group chat admin leaves, chat info will indicate that there is no admin assigned to the group chat. The remaining group chat participants can request to become admin by pressing the Assign myself button in the chat info.
If this feature is not available on older servers, a notification message will appear, informing the user that this action is not yet supported and instructing them to contact their system administrator for more information.

Draft messages
Unsent messages will be remembered inside the app as draft messages.
Users can safely close the app, go to another screen, and the message that they were composing will be saved.
Reply from notification
Users can reply to a message directly from the system notification bar without going to the chat screen.
Mark Chat Conversation as Read/Unread
This feature offers a possibility to mark any conversation as Read/Unread. When choosing the conversation as Unread, the Unread indicator will be displayed for this conversation in the chats list screen.
With any action taken within that conversation, the Unread status will be removed. Also, opening that conversation or marking it as read will remove the unread indicator.
Ability to send messages to myself
Users can send a message to themselves in case they wish to keep notes or transfer some messages between gloCOM apps.
Typing indicators for single and group chat
Typing indicator at the bottom of the chat screen shows that someone is typing within the chat session.
In group chats, multiple participants can type simultaneously, so the notification will show a message: ”3 participants are typing” (when 3 participants are typing simultaneously).
Users can also see when someone is typing a message from the chat list screen.
Remove user from the group chat session
This feature allows the group administrator to remove a participant from the group chat.
Once a participant is removed, all other participants receive a notification that this person is removed from the group, including the removed participant.
The removed participant can enter the group chat and view all messages until the moment of removal but will not be able to write, send files, or see new messages from other active participants.
Messages
There are three types of messages:
-
Text messages
-
Voice messages
-
File messages (photo, video, gif, pdf, zip, etc.)
Every message that is sent to the server has one of the three states:
-
Sent (message is sent to the server)
-
Delivered (message is delivered to the recipient)
-
Seen (recipient has seen the message)
Messages can also be in the waiting or failed state, depending on network conditions.
If the text message contains a URL, users can press it to open it.
All waiting messages will try to be resent to the server on the next app start. Failed messages will not be automatically resent.
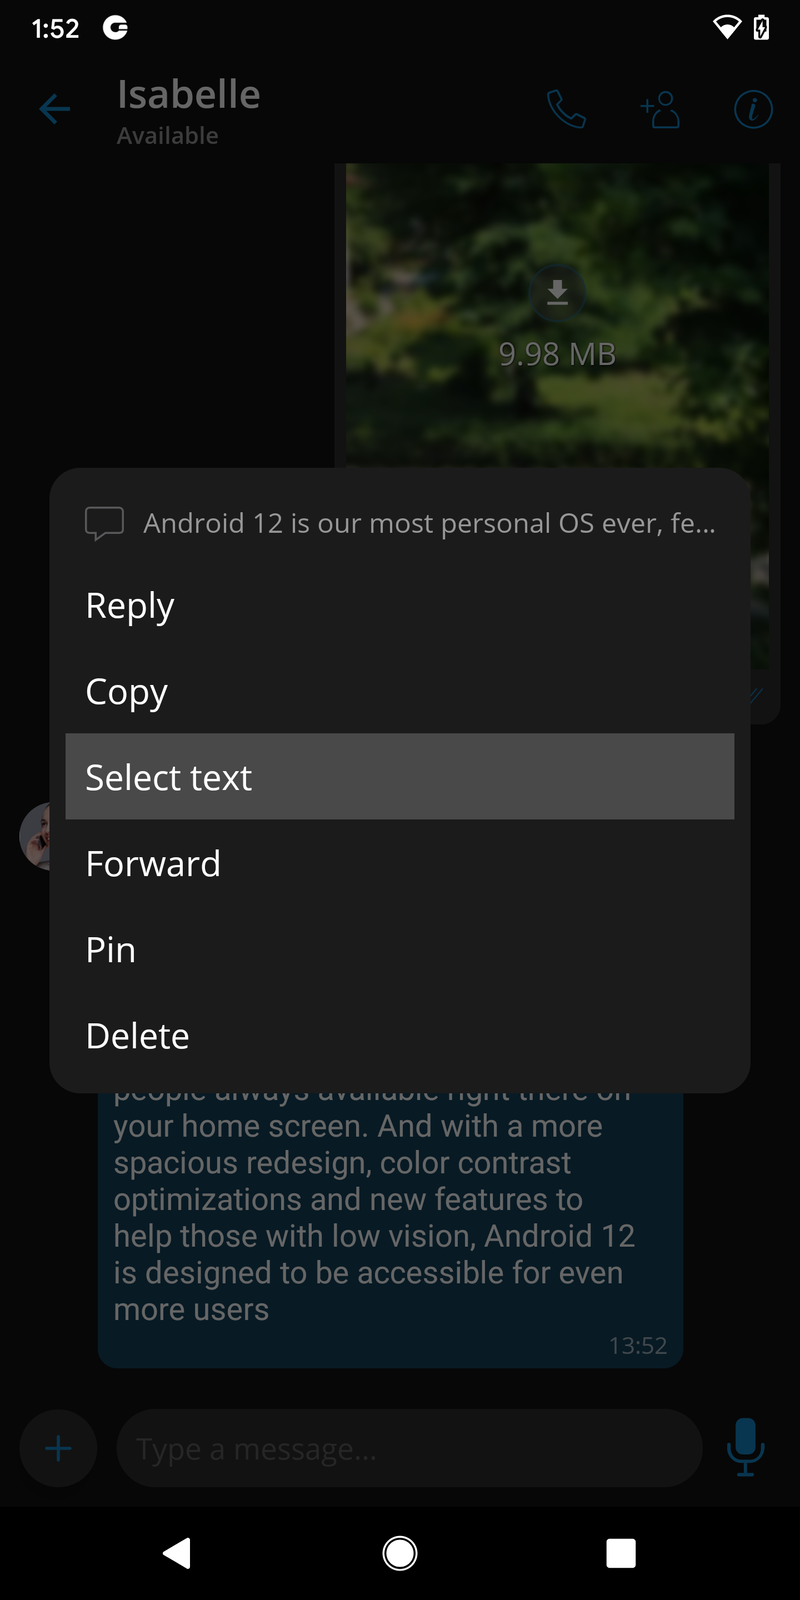
With a long press on a message, you can copy its contents.
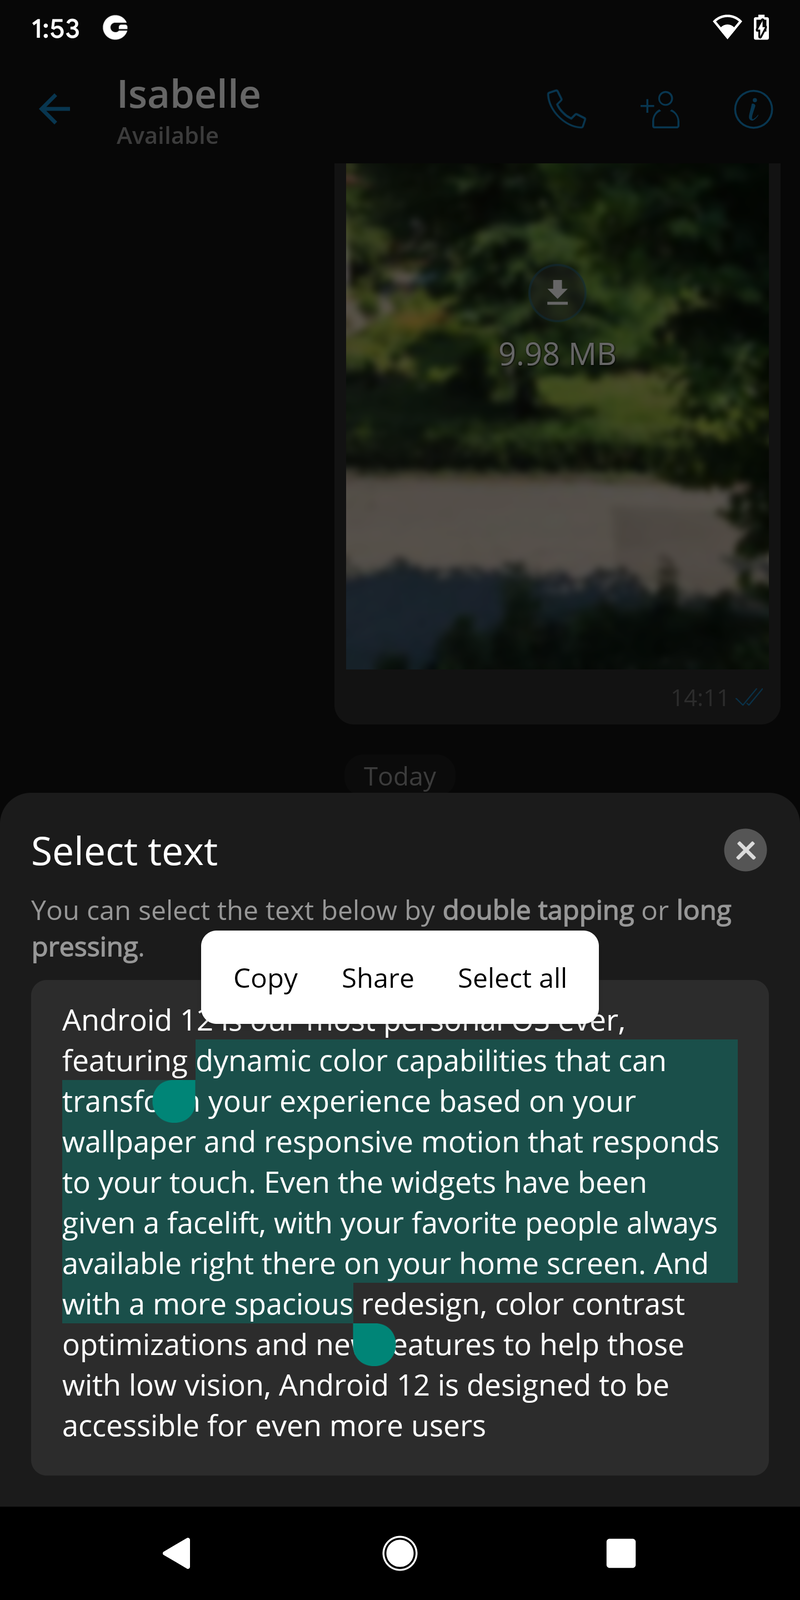
Select Text
Users can copy only the portion of text messages by using the Select Text option that can be selected by long-pressing a text message and pressing on it in the context menu.
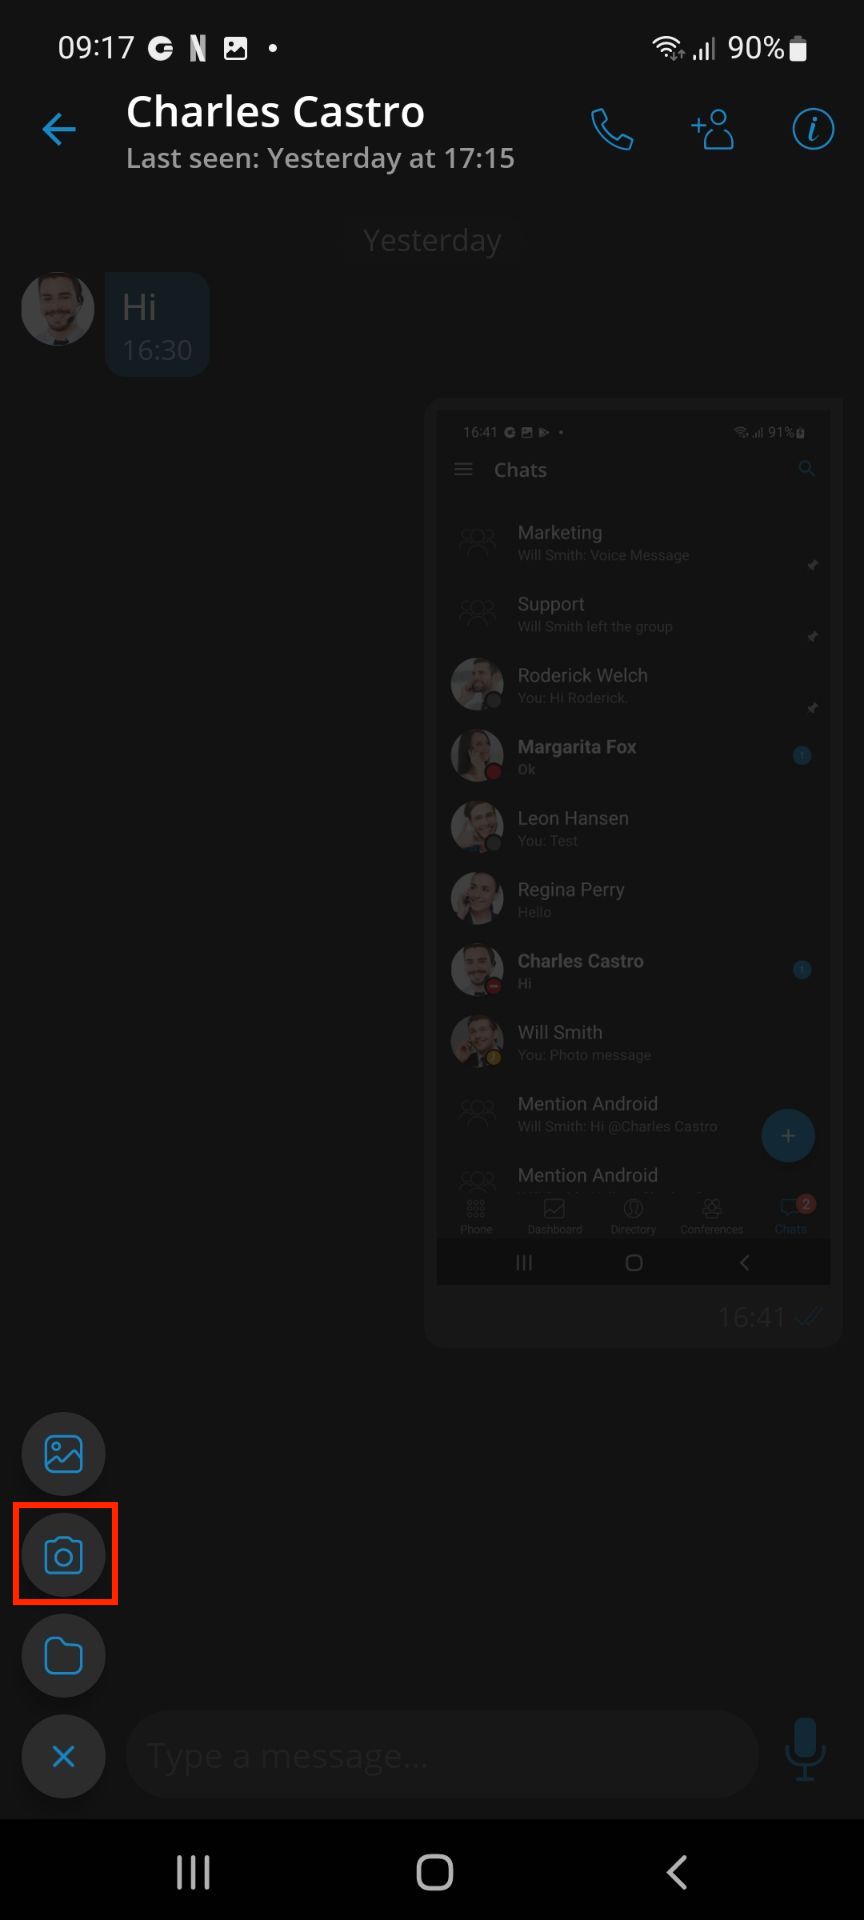
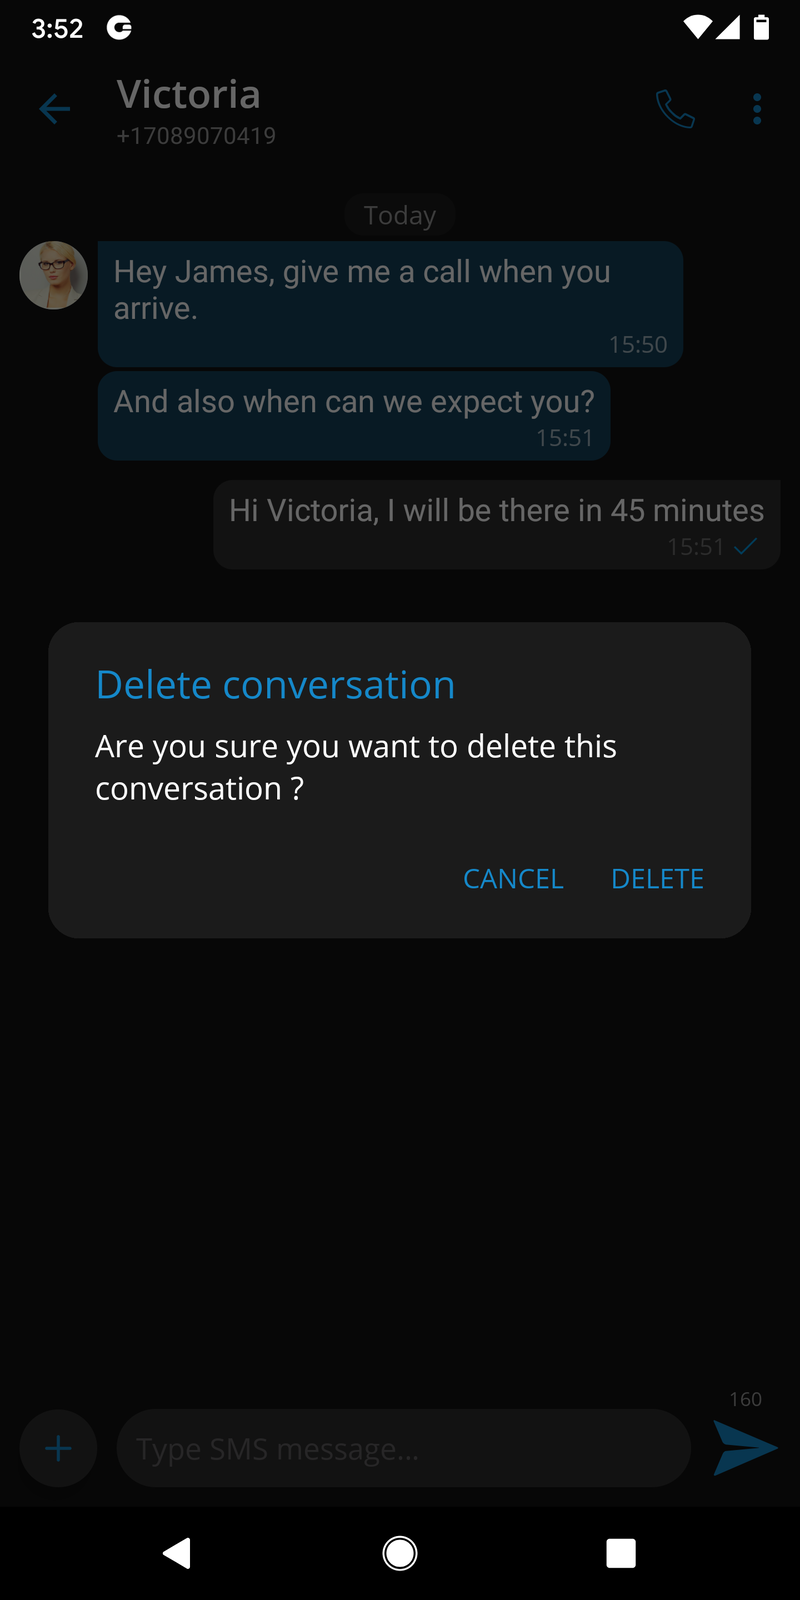
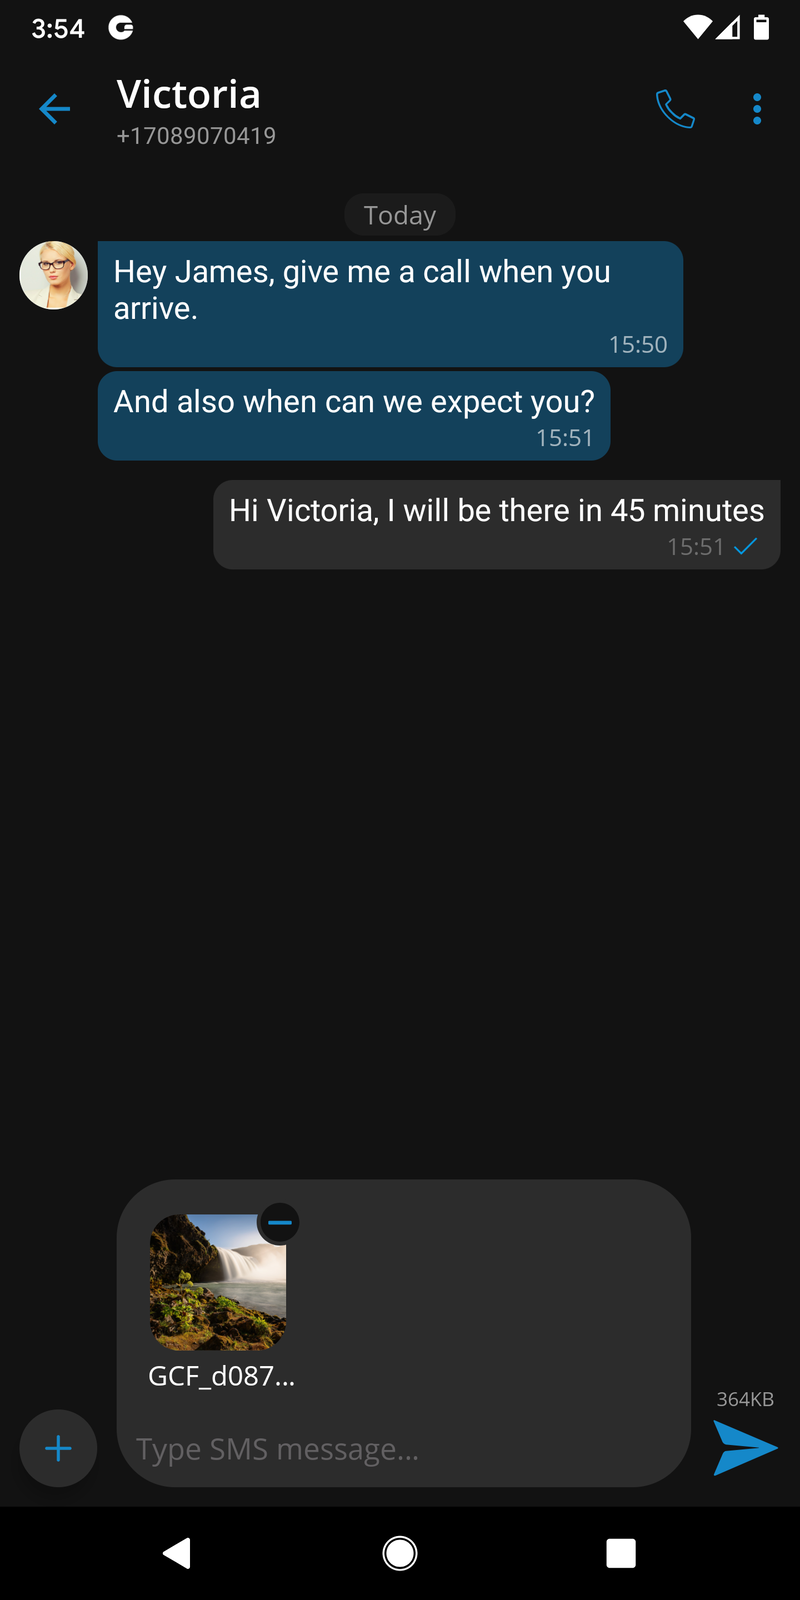
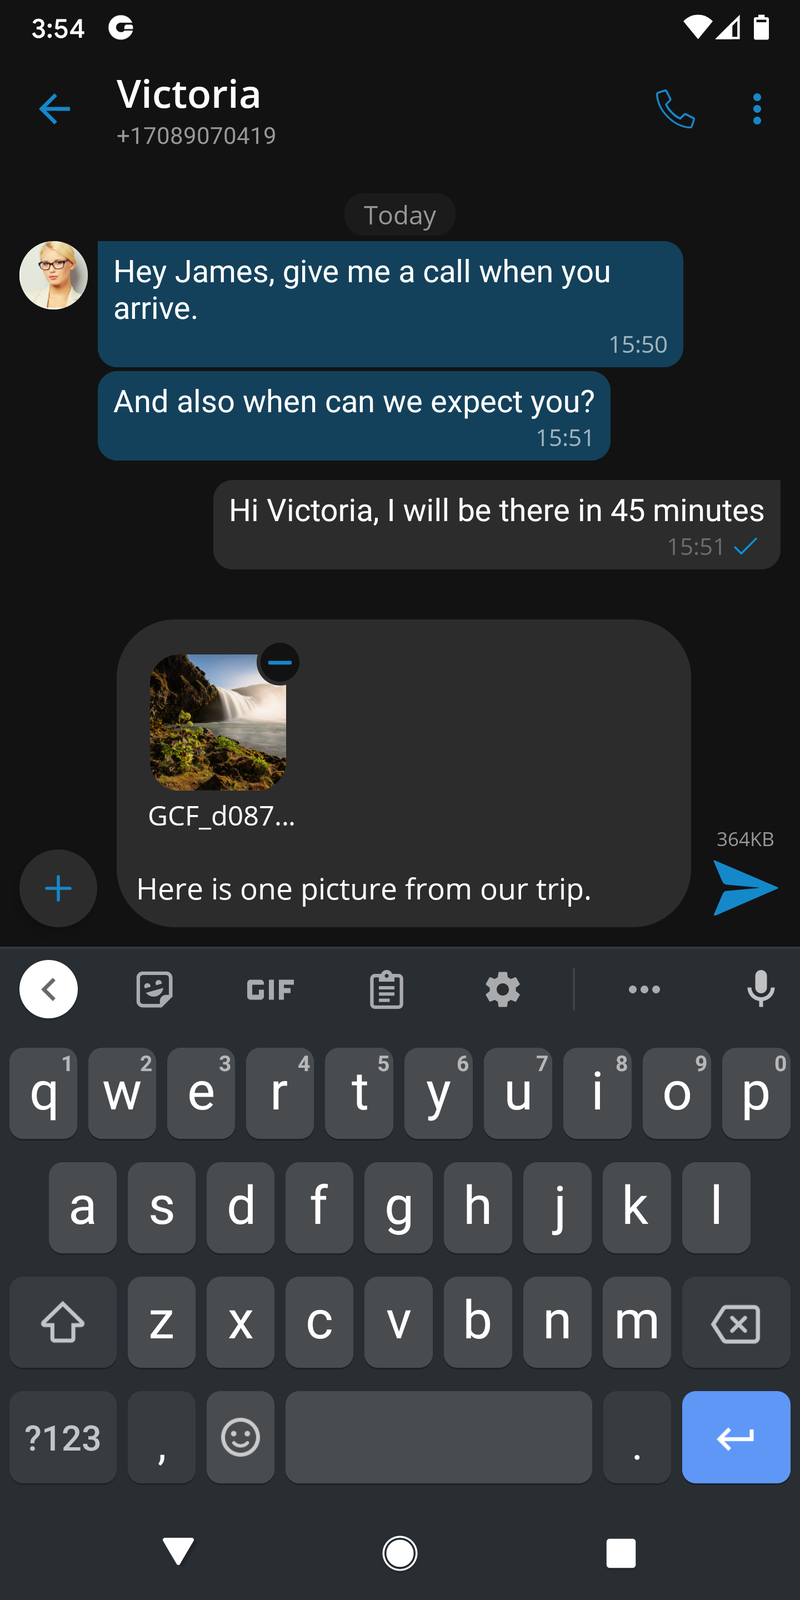
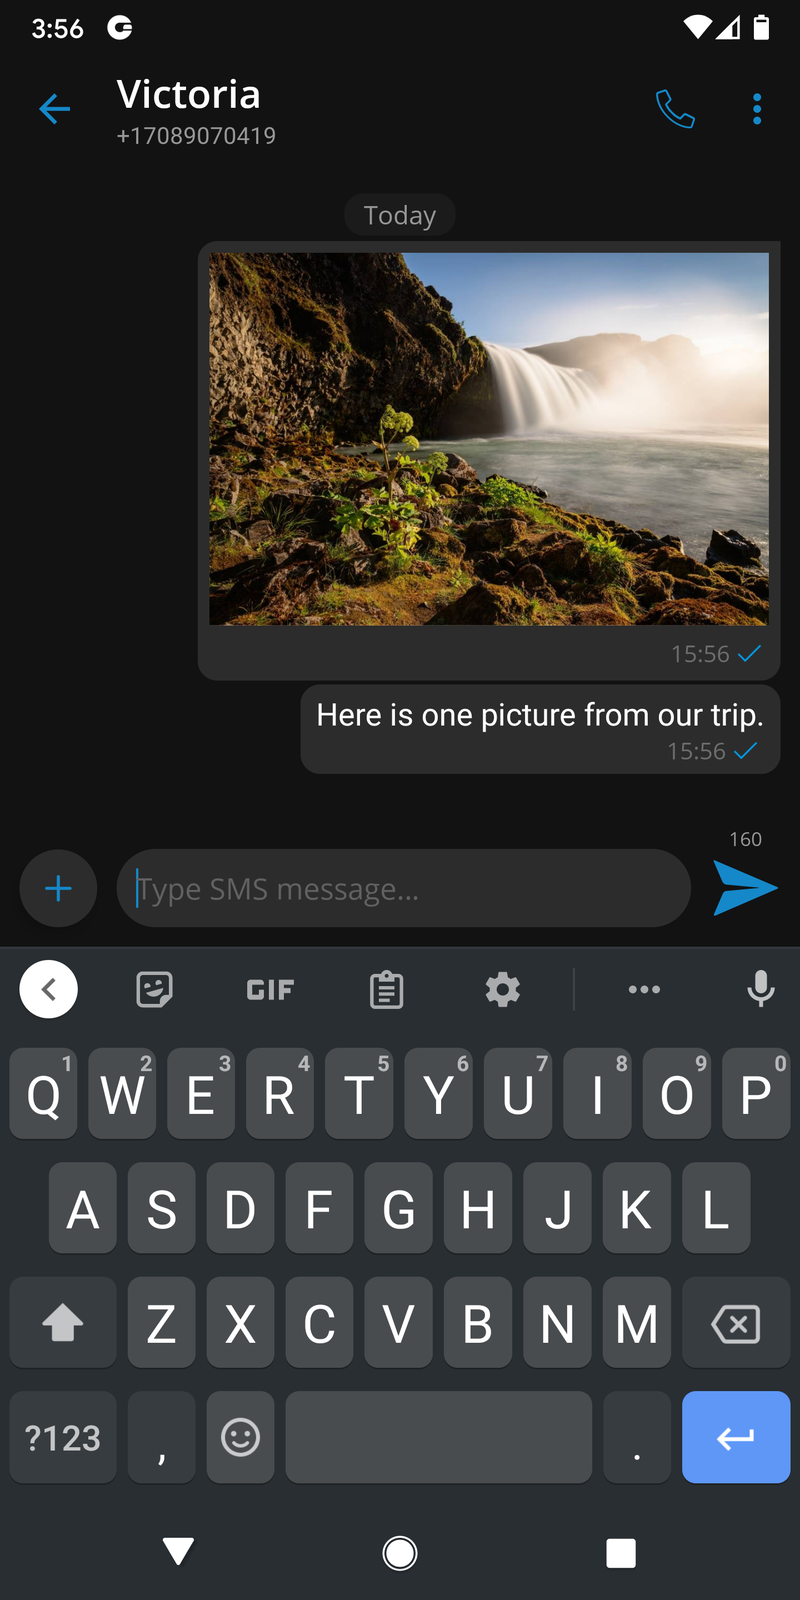
File messages
To send a photo or a video from the Gallery app, users can press the + button and then the Gallery icon on the chat screen. After the file has been selected, it will be compressed (to preserve bandwidth) and sent to the chat server.
To send any document, press the + button and then the document icon, which will open the document browser.
The progress of the uploads or downloads can be seen in the chat view. It is possible to cancel the transfer of the file message by pressing the X button.
Downloaded photos, videos, or documents will be saved to a local gallery or file system.
Files smaller than 500kB will be automatically downloaded if users are connected to WiFi and not to mobile data.

Send more than one file at once
When pressing the gallery or file explorer button a window will appear where the user can select multiple images or files.
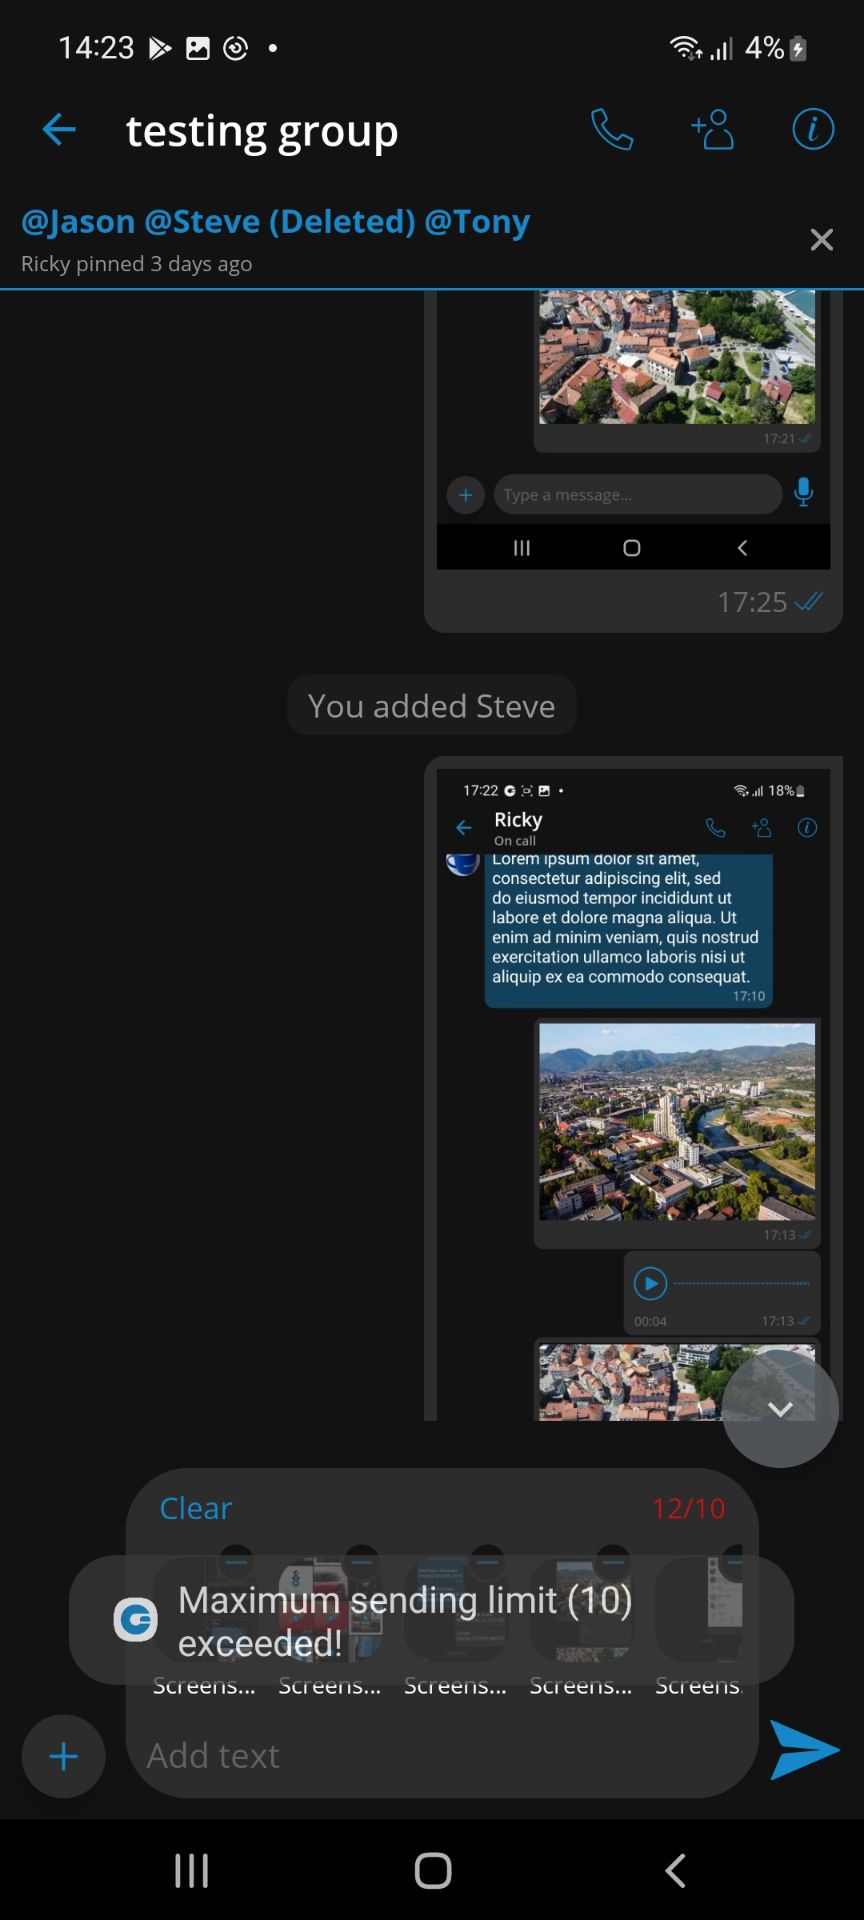
In the bottom right corner, a button will allow the user to confirm the current selection. There is also a counter that shows how many files have been selected. After pressing the button, the user will return to the chat screen and there will be a file counter above the type text field where the user can preview the selected images or files. The user can put multiple files in that preview but there will be a label with the limit on how many files can be sent. If the user exceeds the limit and tries to send, the system will prompt the user with a message that the limit has been exceeded.
If at least three media files have been selected the preview will have a clear button in the top left corner. Pressing the button will clear all selected files in the preview.
Chat media preview screen with orientation support
User has an option to rotate the screen on chat media preview screen. Chat media preview screen can be opened by pressing on any downloaded file message.
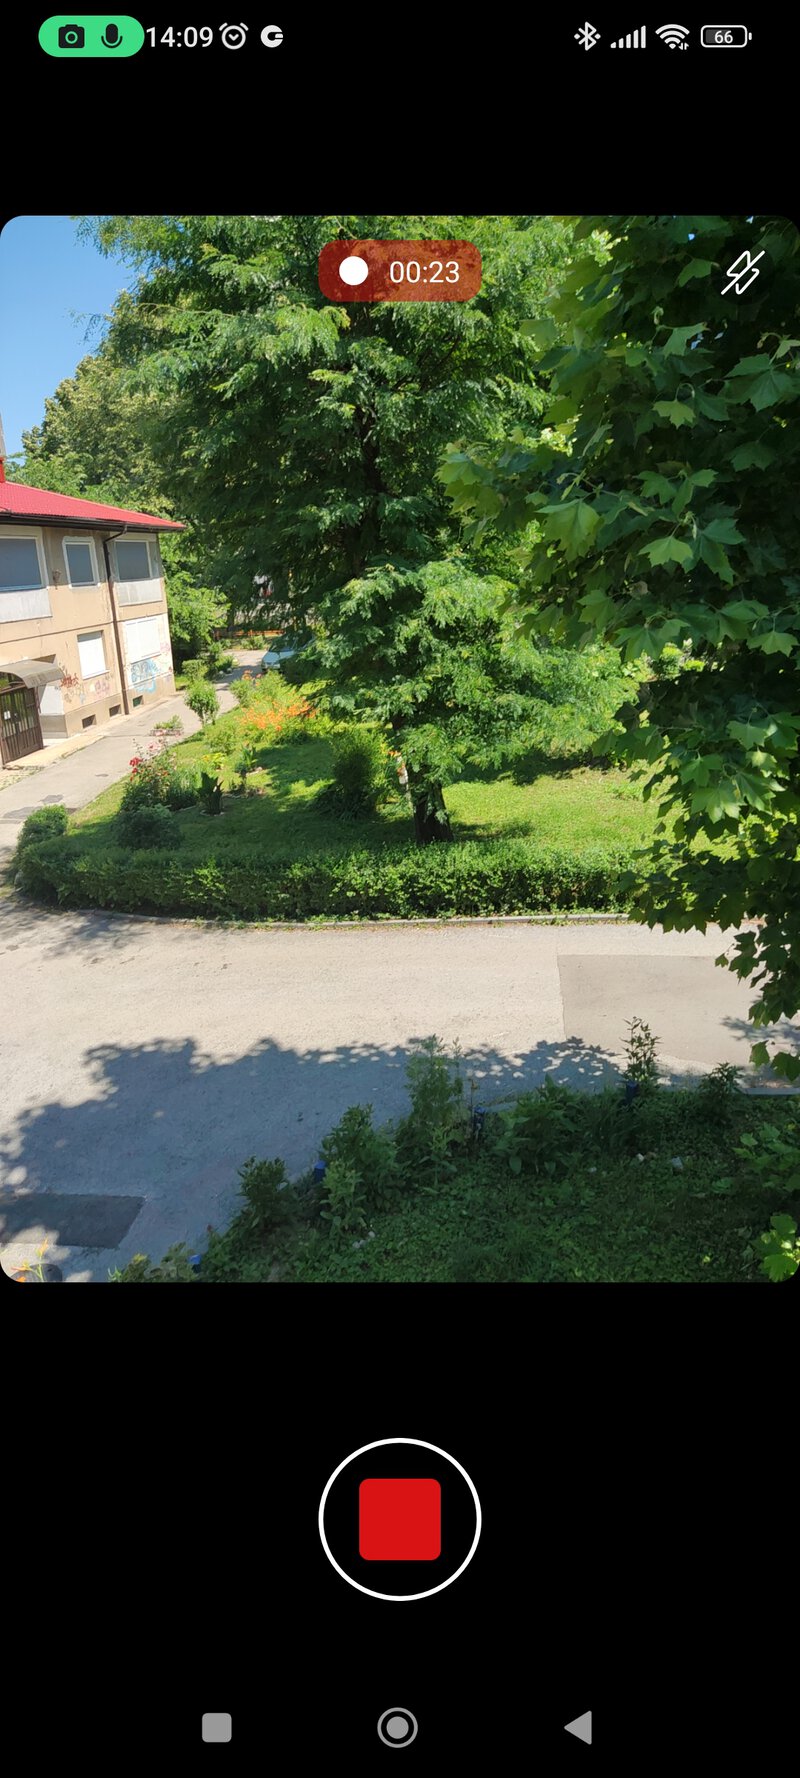
Take pictures and videos with camera inside chat conversation
In addition to sending media files from the gallery, there is an option to take a photo or record a video inside the chat conversation screen to give users a better chat experience. By pressing a + button, the user has an option to click on the camera button that opens a camera screen to take a photo or record a video. After taking a photo or recording a video, the user can choose whether to save the file to the gallery, discard it or send it in the chat.

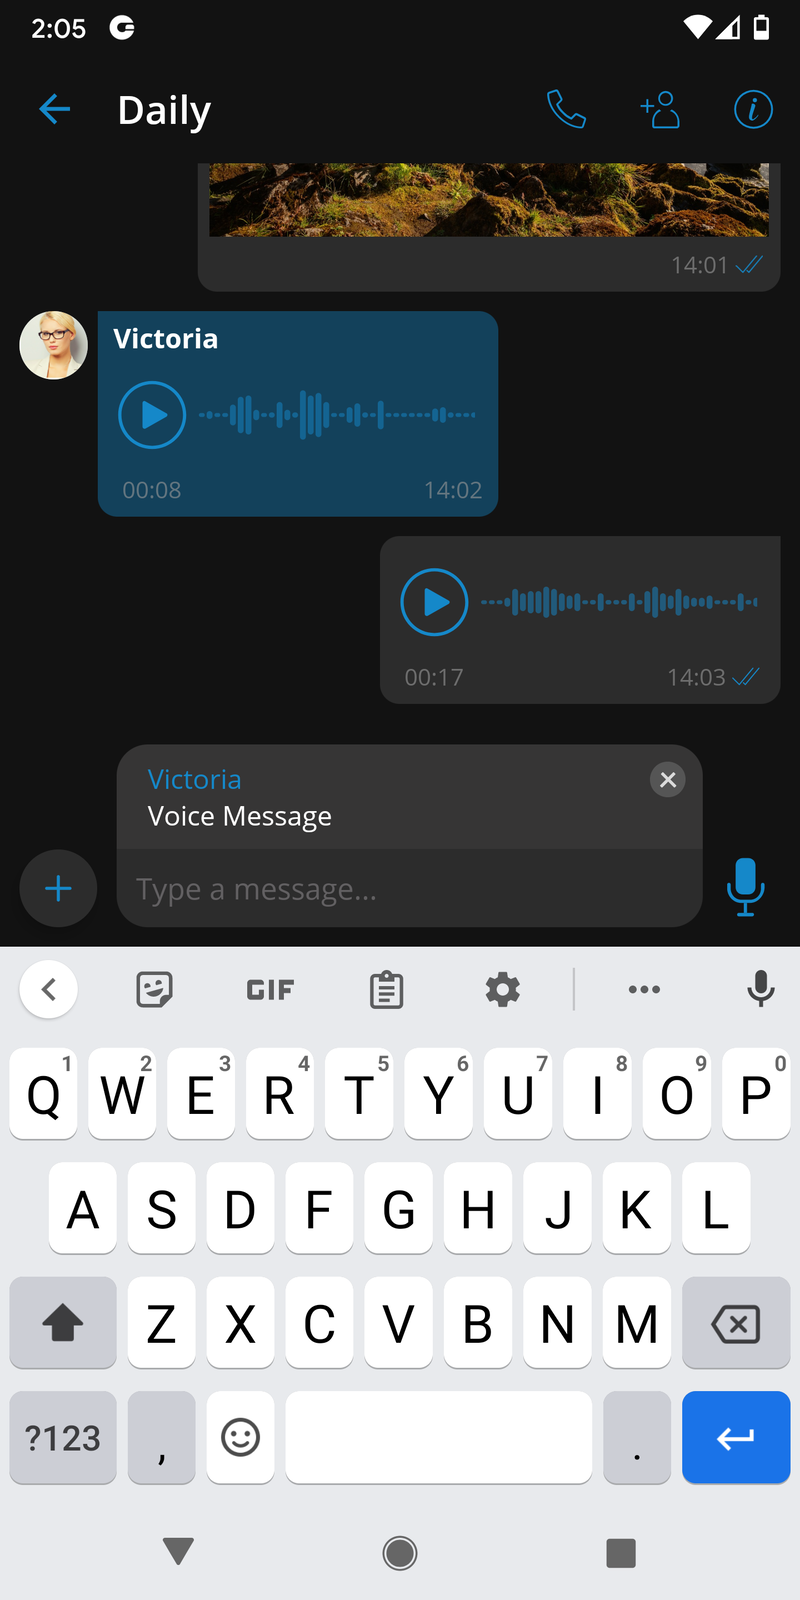
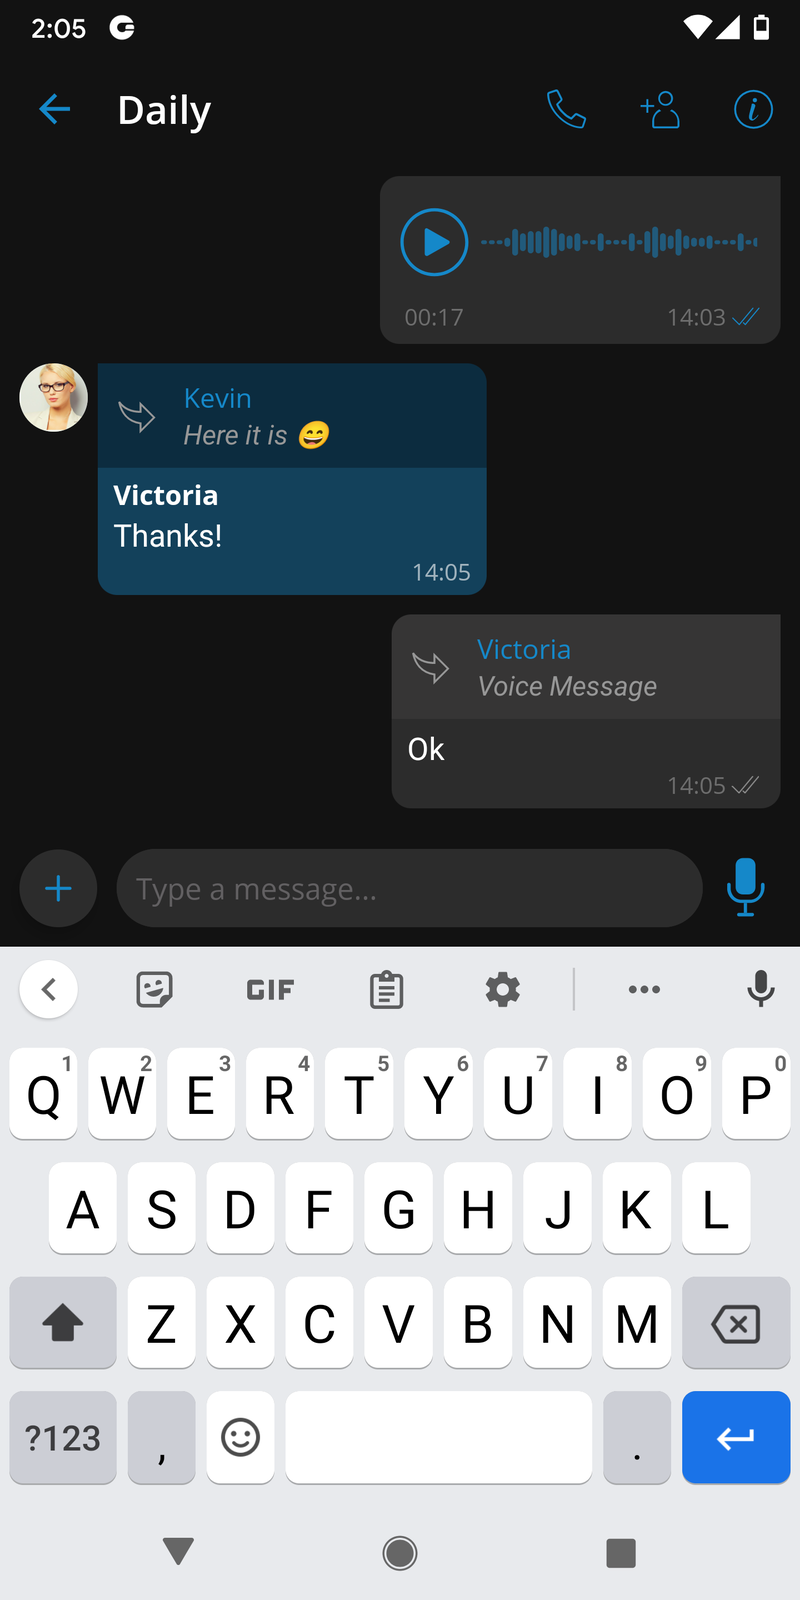
Voice messages
gloCOM GO 6 users can send a chat voice message when they cannot type. The maximum duration of the recorded chat voice message is 2 minutes.
An automatic screen lock will be disabled during the recording of the voice message. While recording, if the back button or the screen lock is pressed intentionally, or if the user switches to another app, an active chat voice recording will be canceled.
When listening to the recorded voice message, if the user goes back to the chat list, the recording playback will be stopped.
During playback of received chat voice message, the user will have visible control buttons in the notifications even when switching to another app, because of media player integration. This offers users the flexibility to still listen to the playback, even when switching to another app, or home screen.
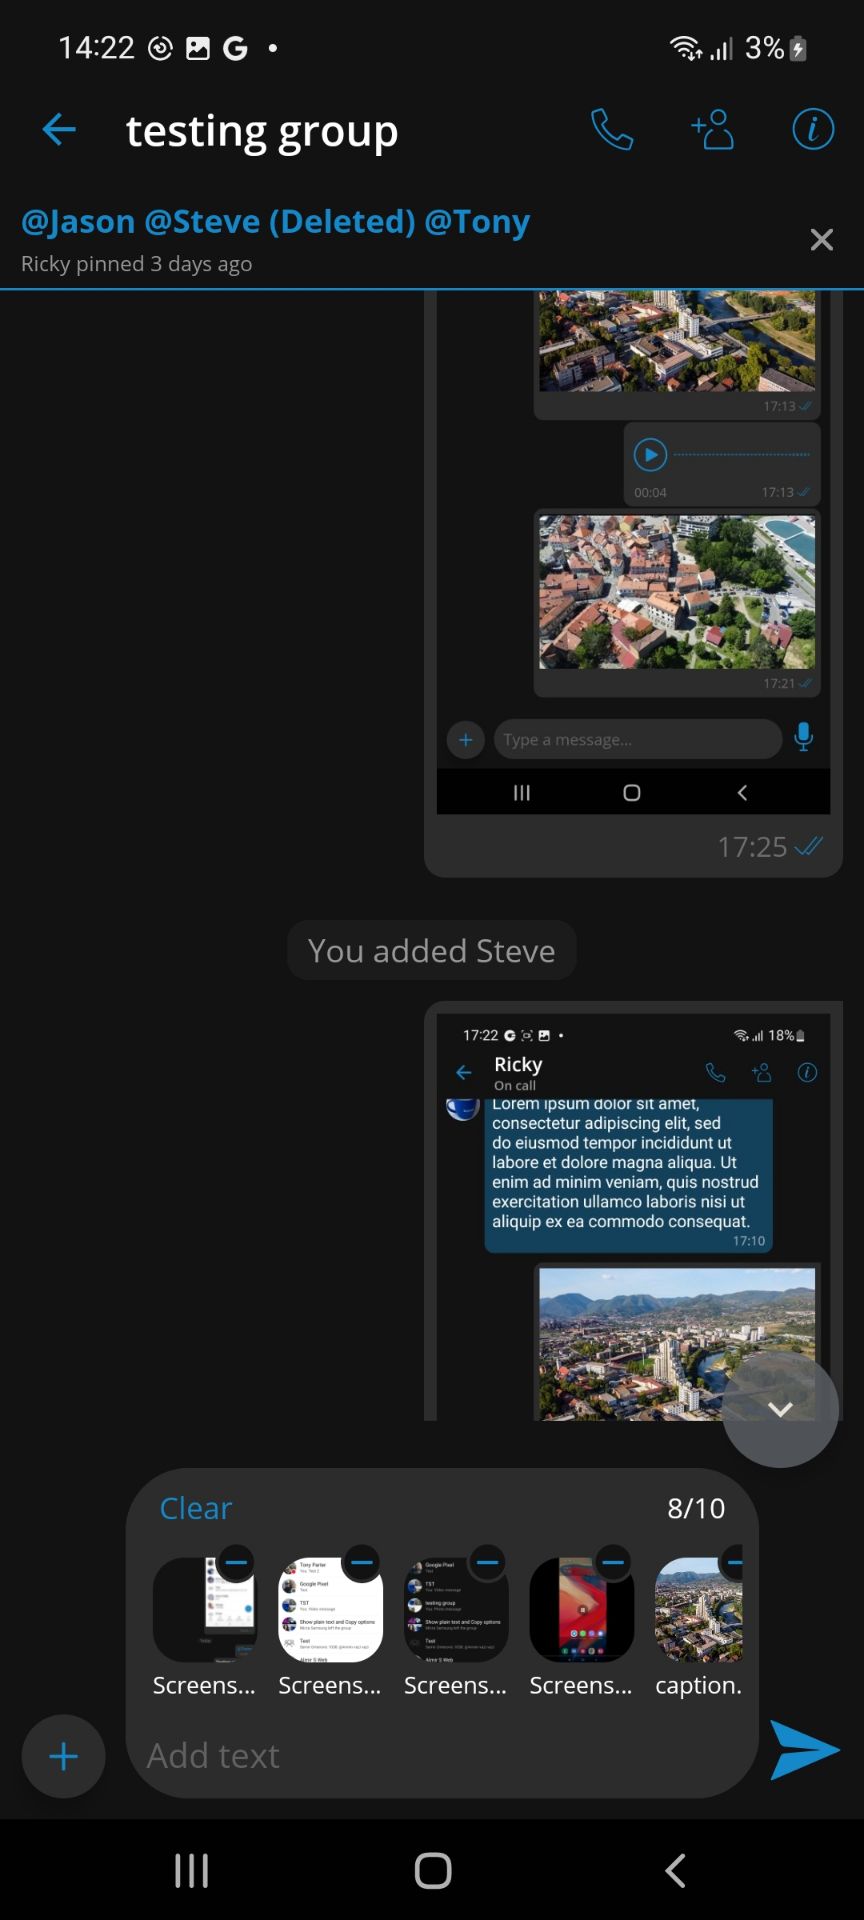
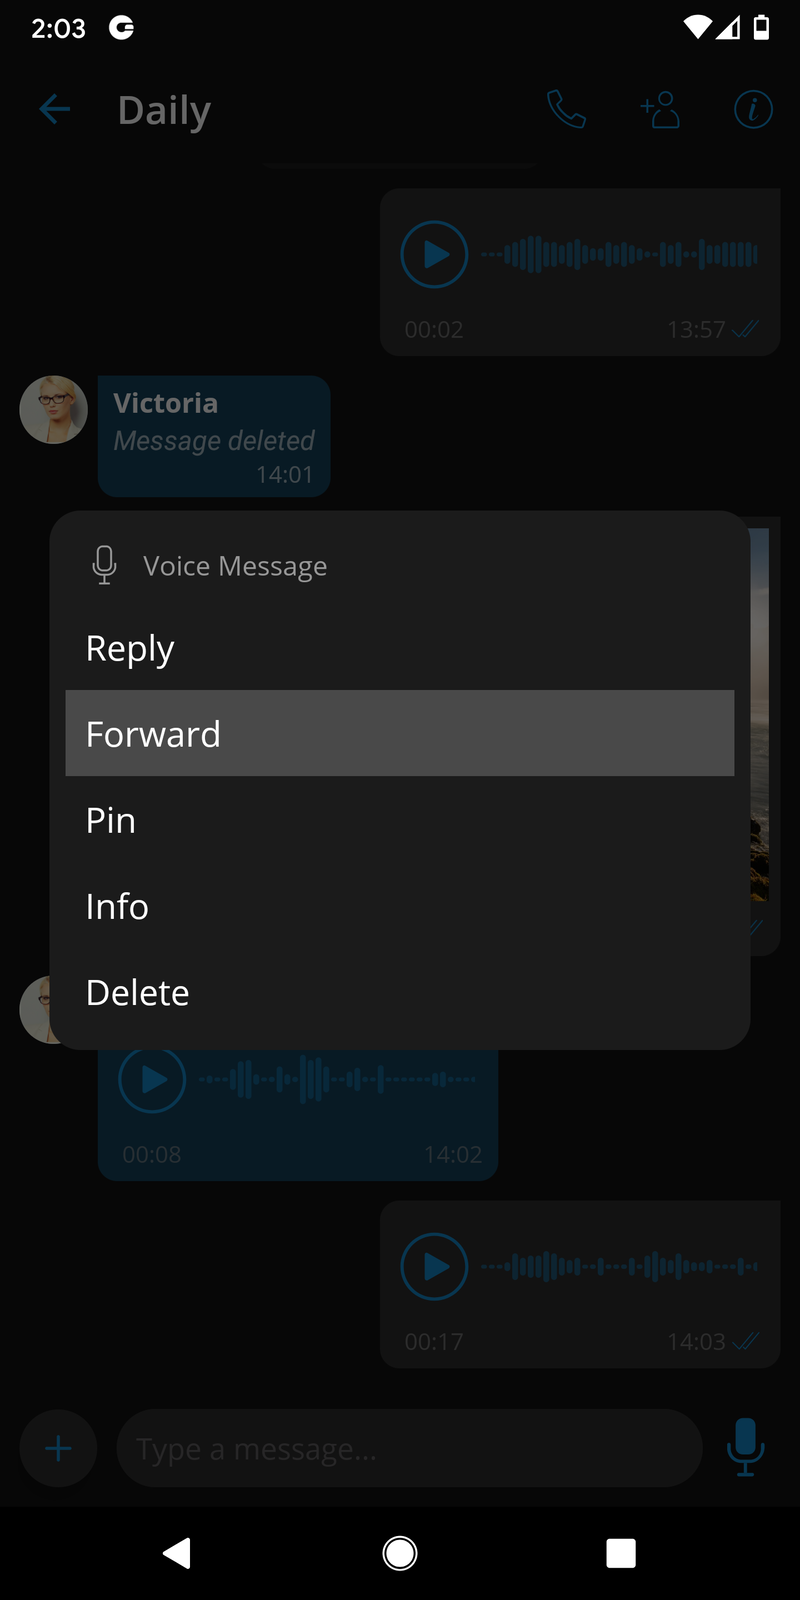
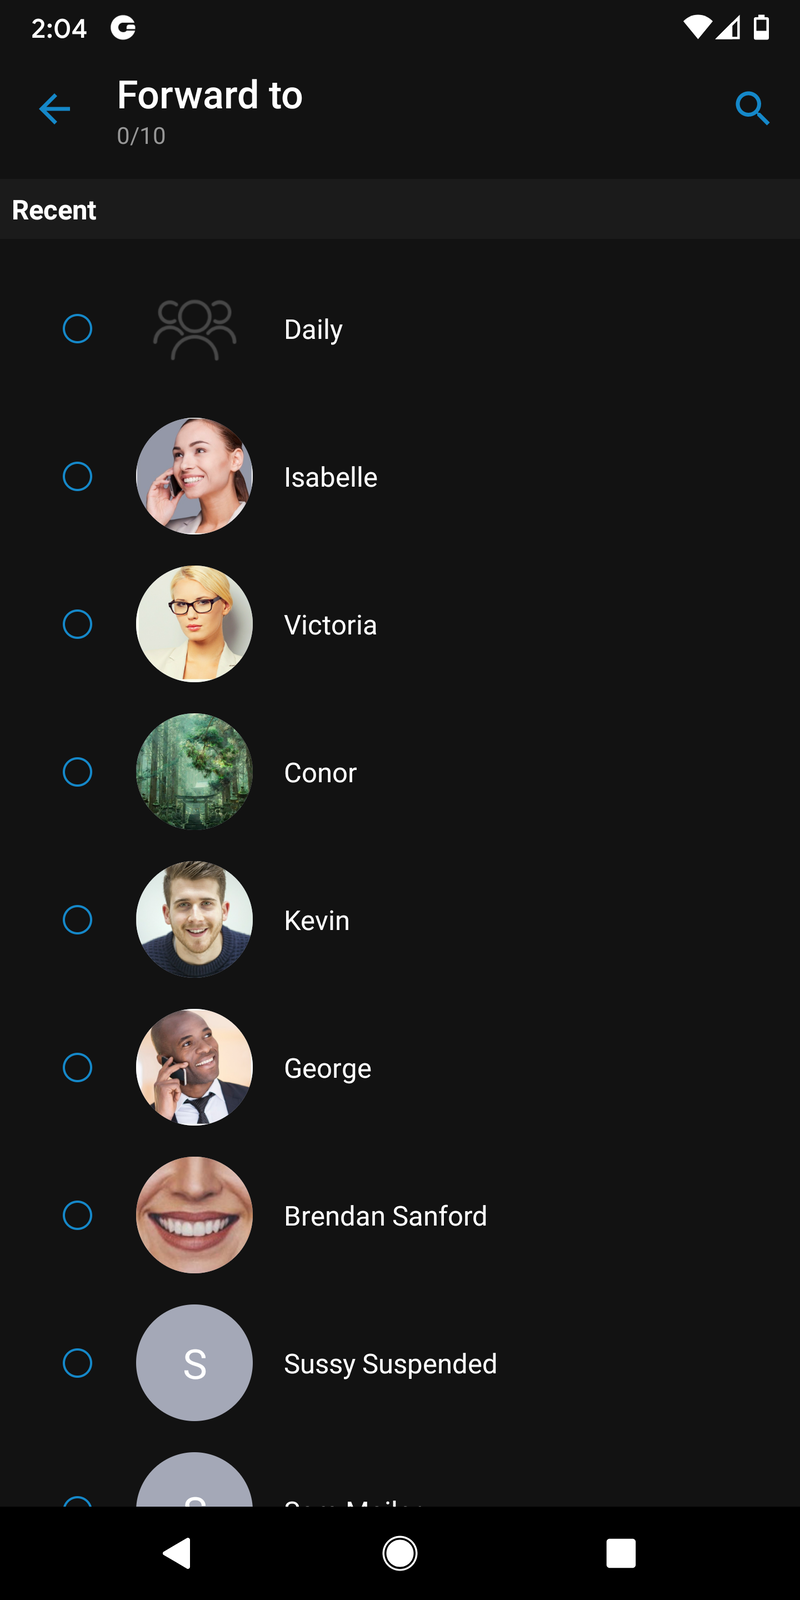
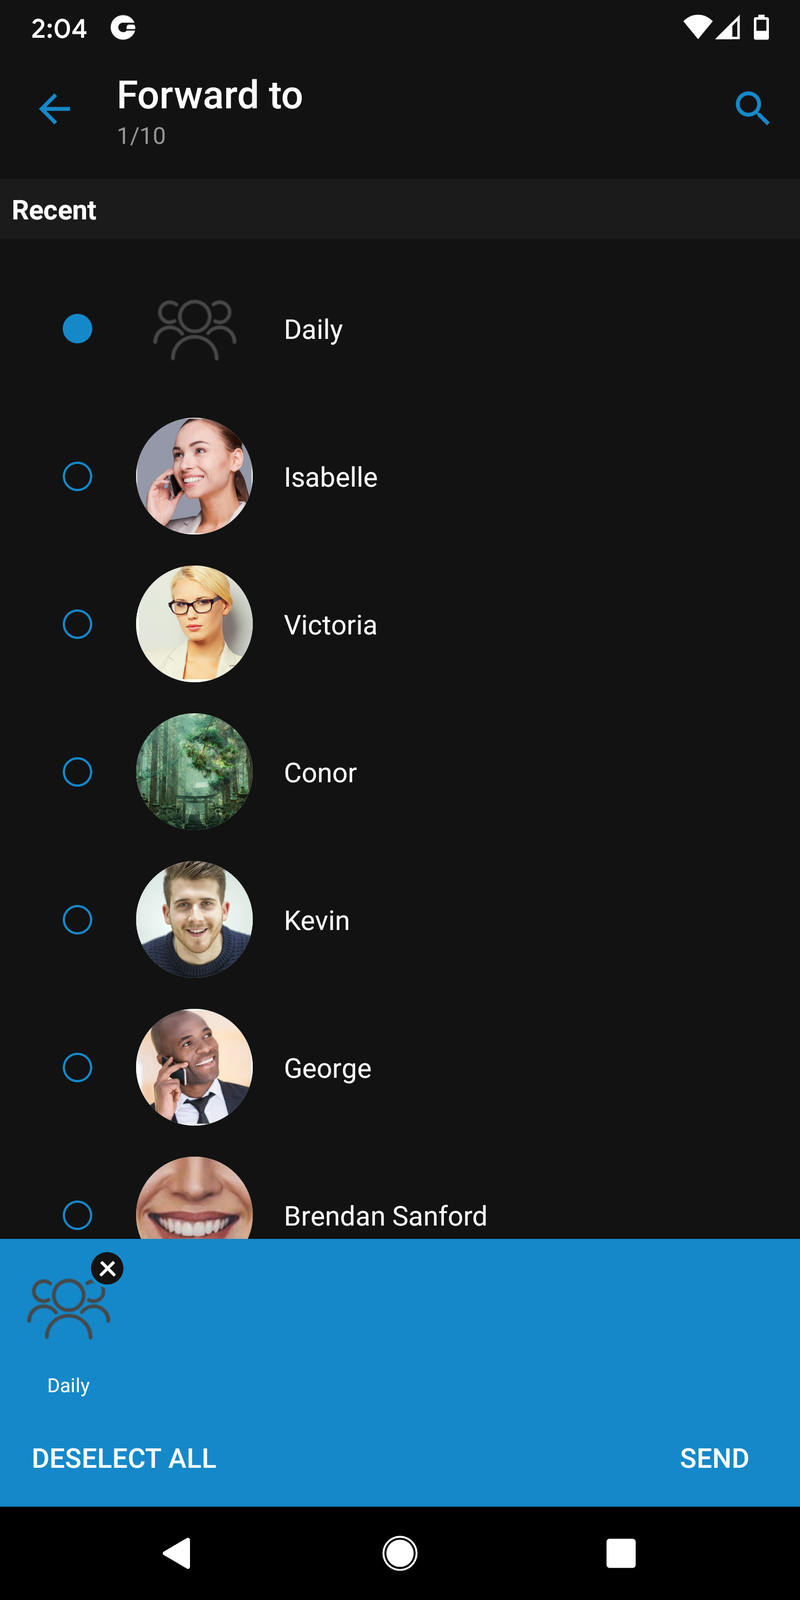
Forward chat messages
Users can forward the message or file up to 10 conversations/contacts at the same time.
By long-pressing on the message, a menu will appear with an option to forward the message.
After pressing the forward option, a chat picker will open, and users can choose which contacts they wish to forward the message to.
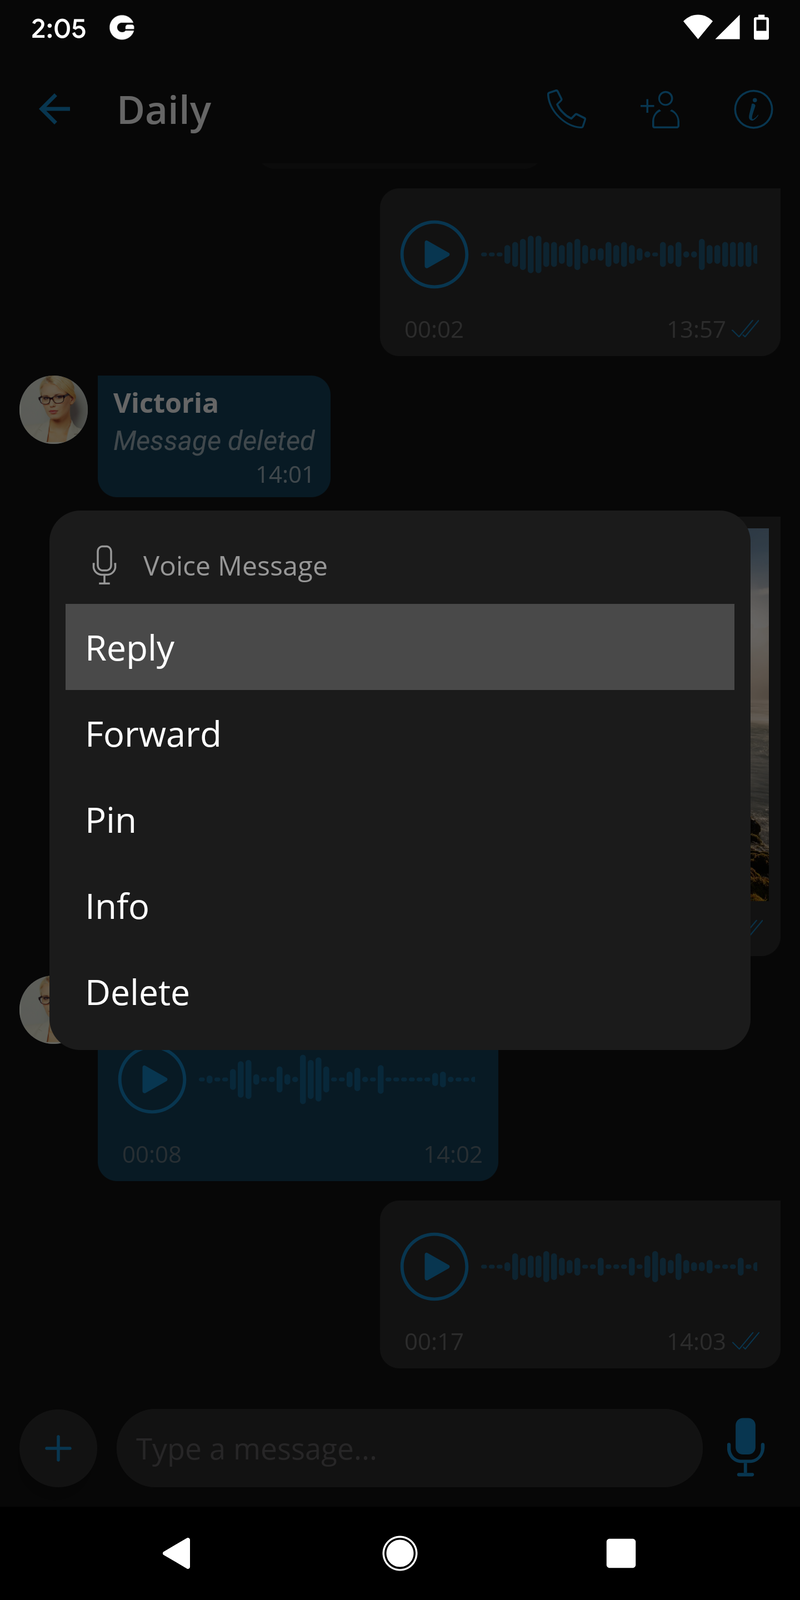
Chat messages reply mode
The reply option allows users to reply to a specific message. To reply to a message, users need to long-press on the message they wish to reply to and select the ”’reply”’ option from the menu.
As a result, the message to which the user wants to reply will appear above the message input field. Another way to reply is to swipe right on the message the user wishes to reply to.
Pressing on the reply part of the message in the chat will take the user to the original message.
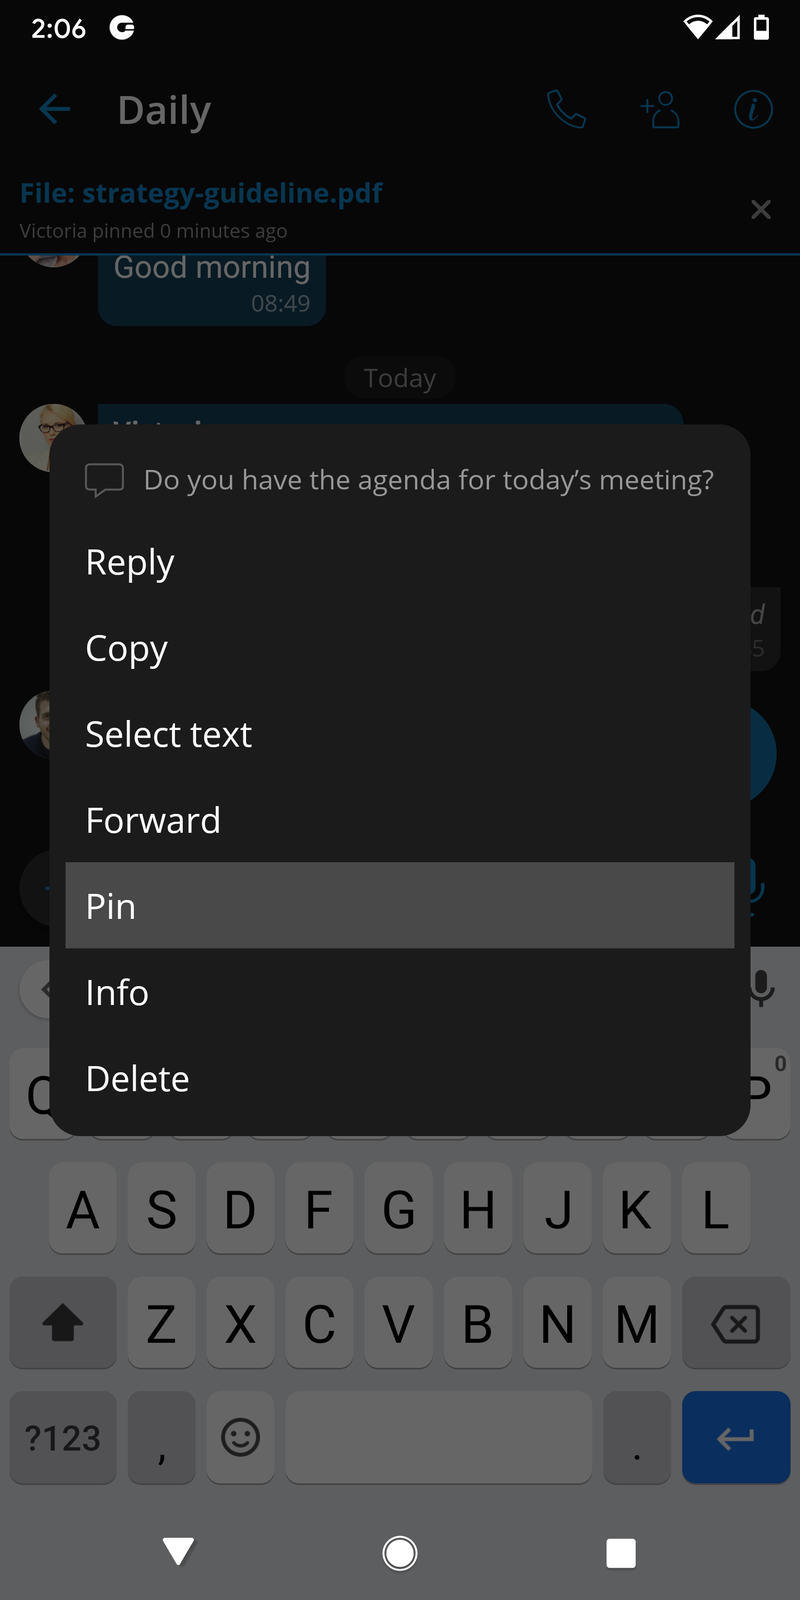
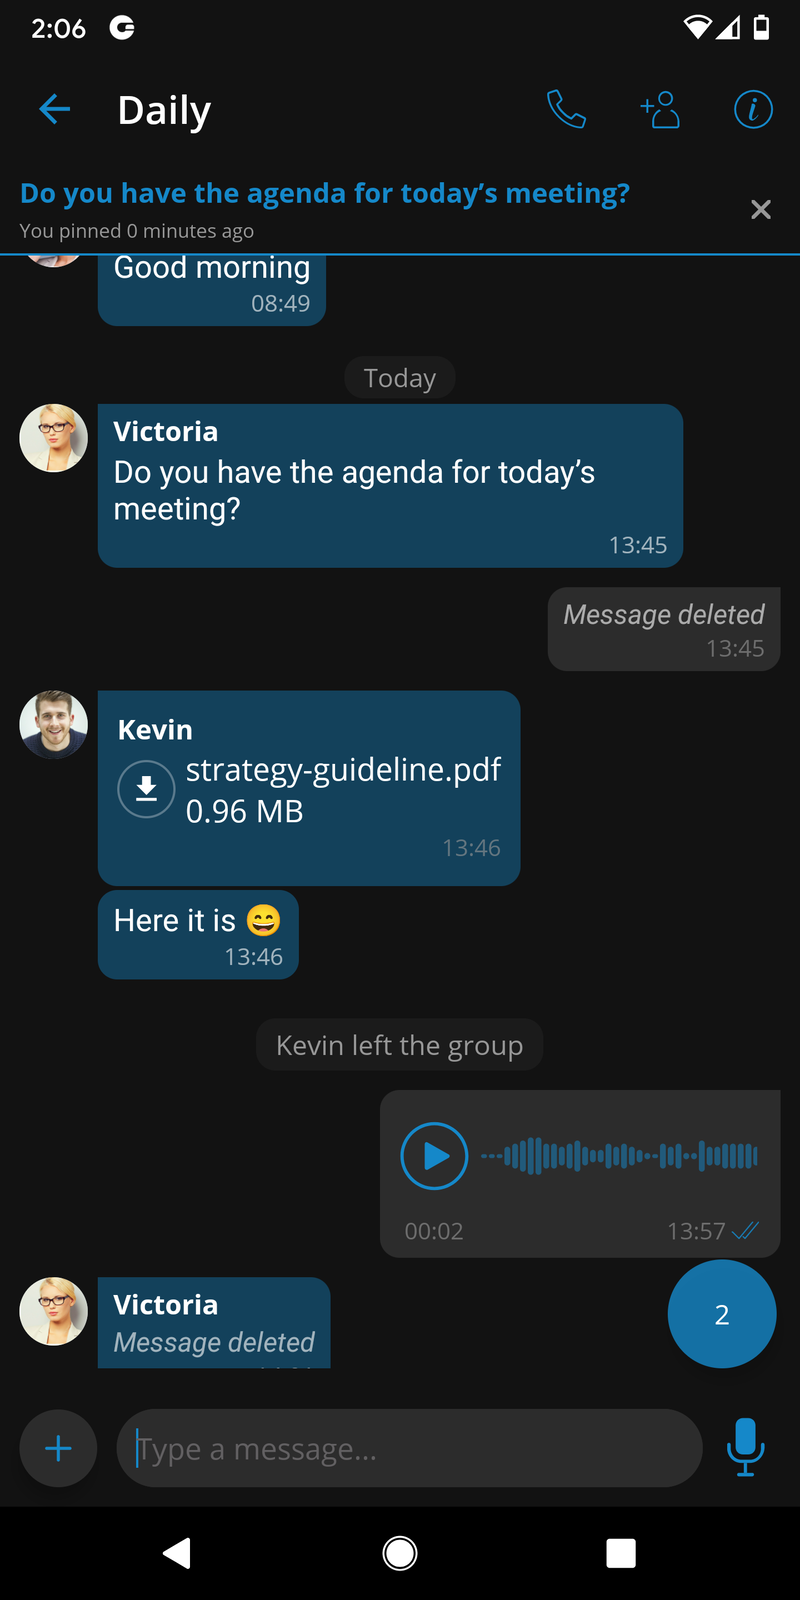
Pin messages for single and group sessions
All messages in single and group conversations can be pinned. Pinned messages are synchronized across all of gloCOM apps. Users can long-press a message and select the ”’Pin”’ option on the menu to pin a message.
After pinning the message, the pinned message indicator will show at the top of the screen, and by pressing on that indicator, users can scroll to the message that is pinned. Pressing the ”’x”’ button on the pinned message indicator will unpin that message.
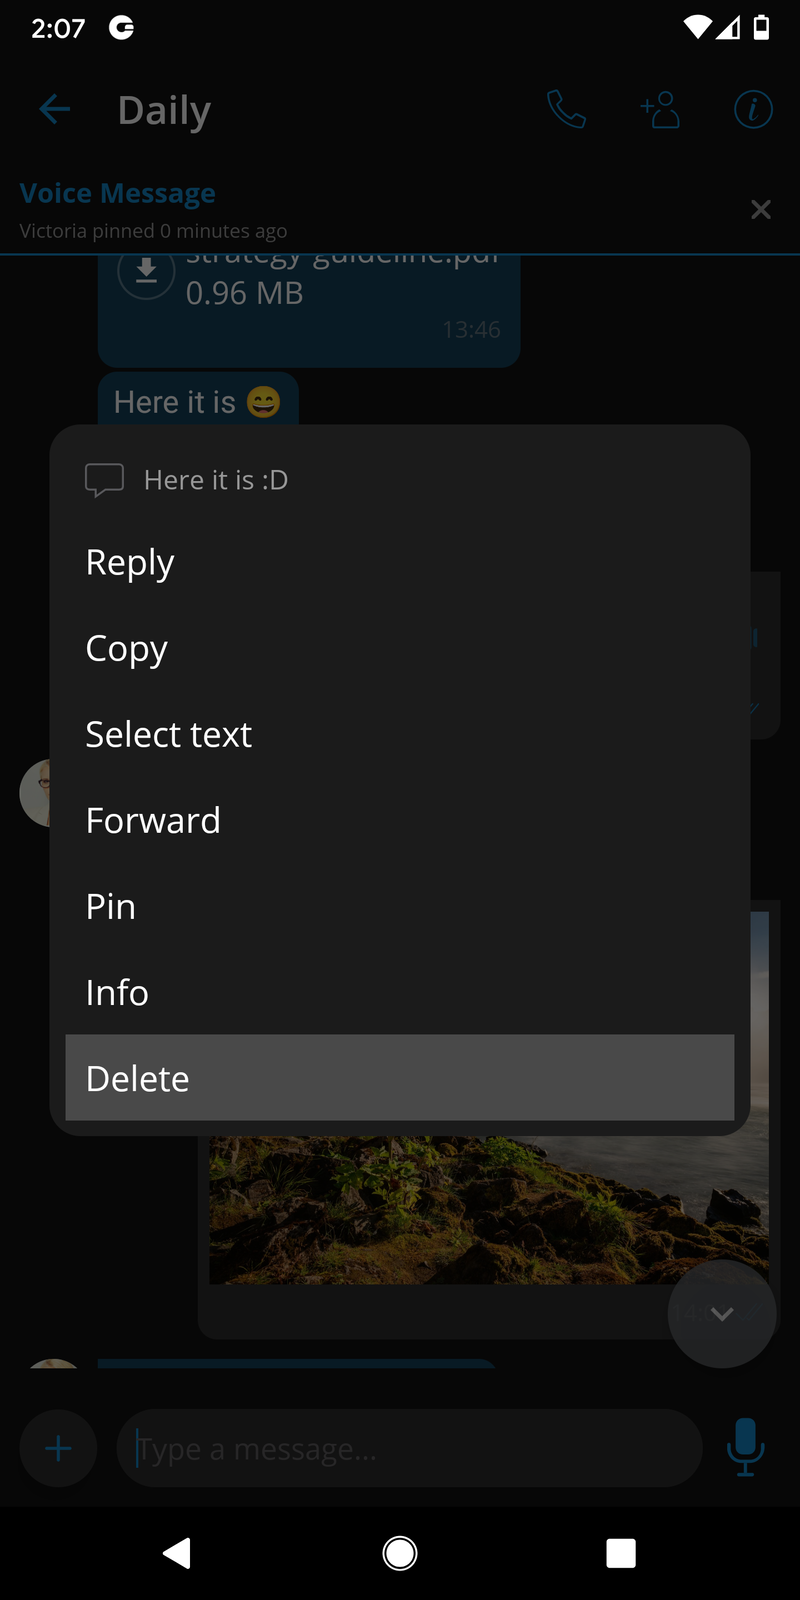
Delete Chat Messages
This option allows users to delete chat messages. To delete the desired message, long press on the message and select ”’delete”’ from the menu.
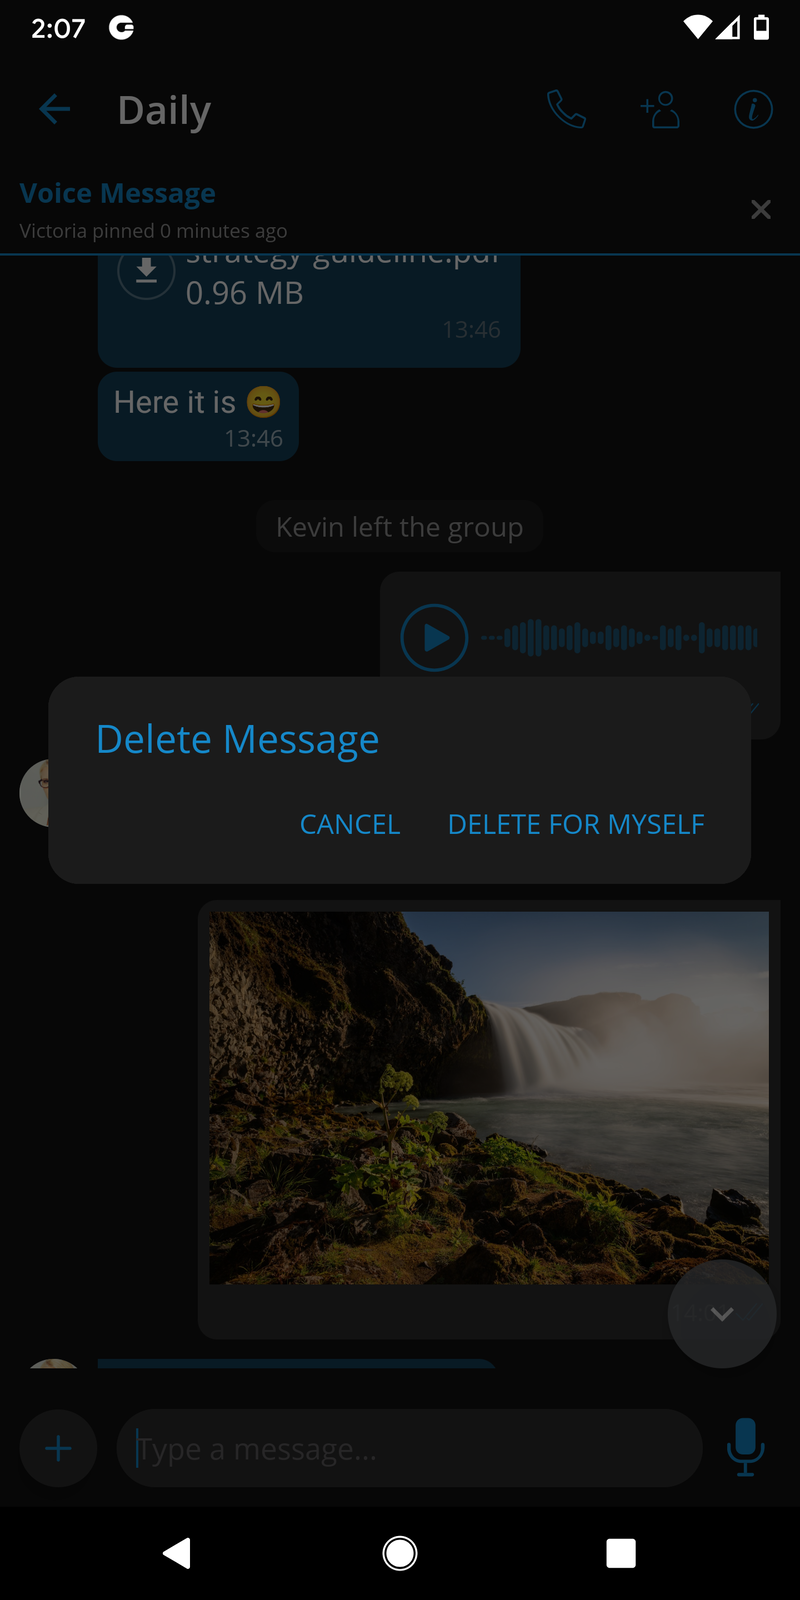
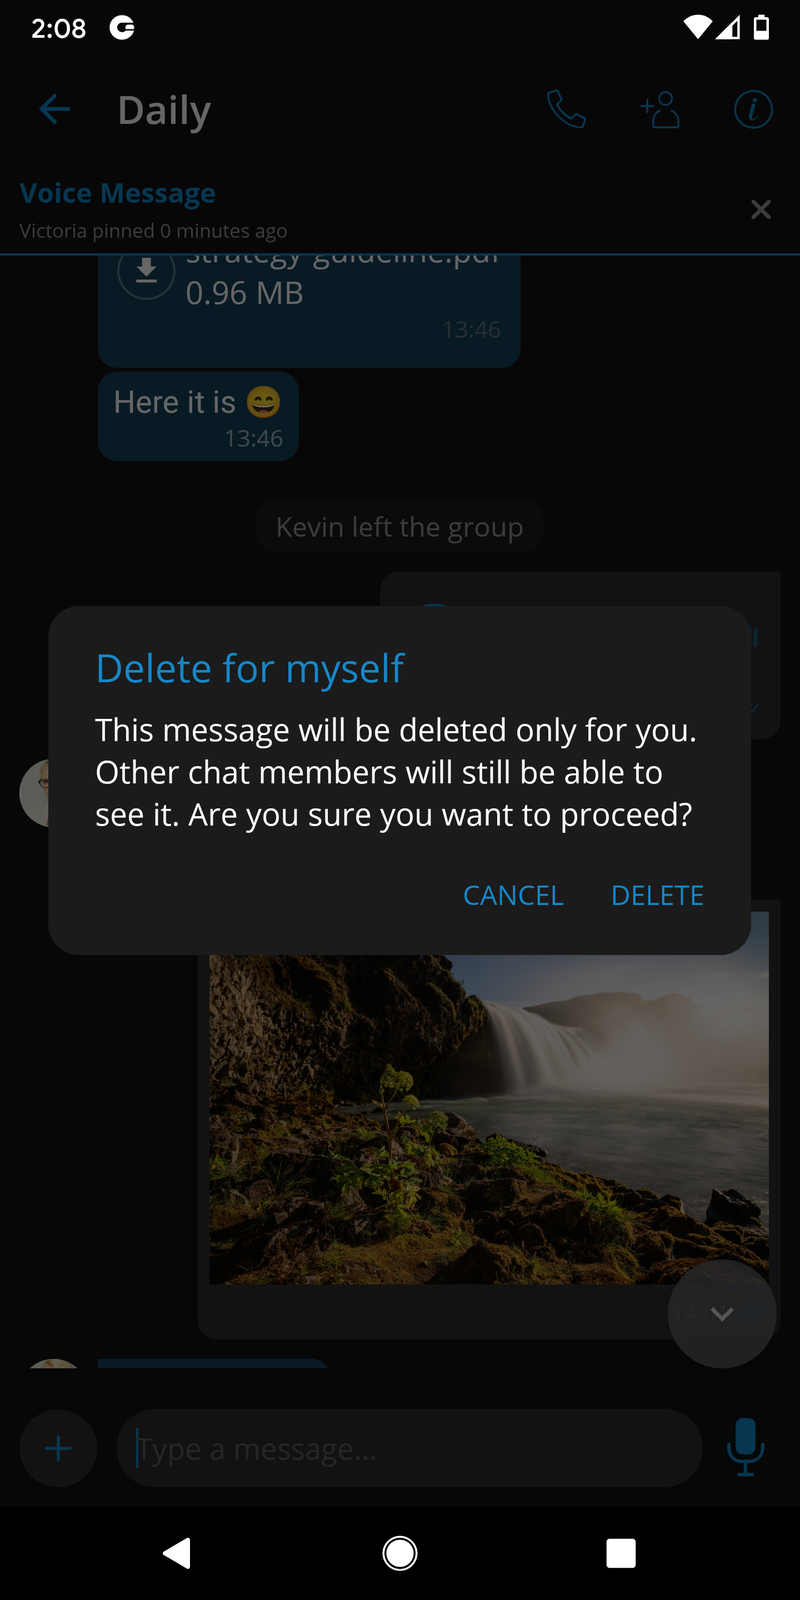
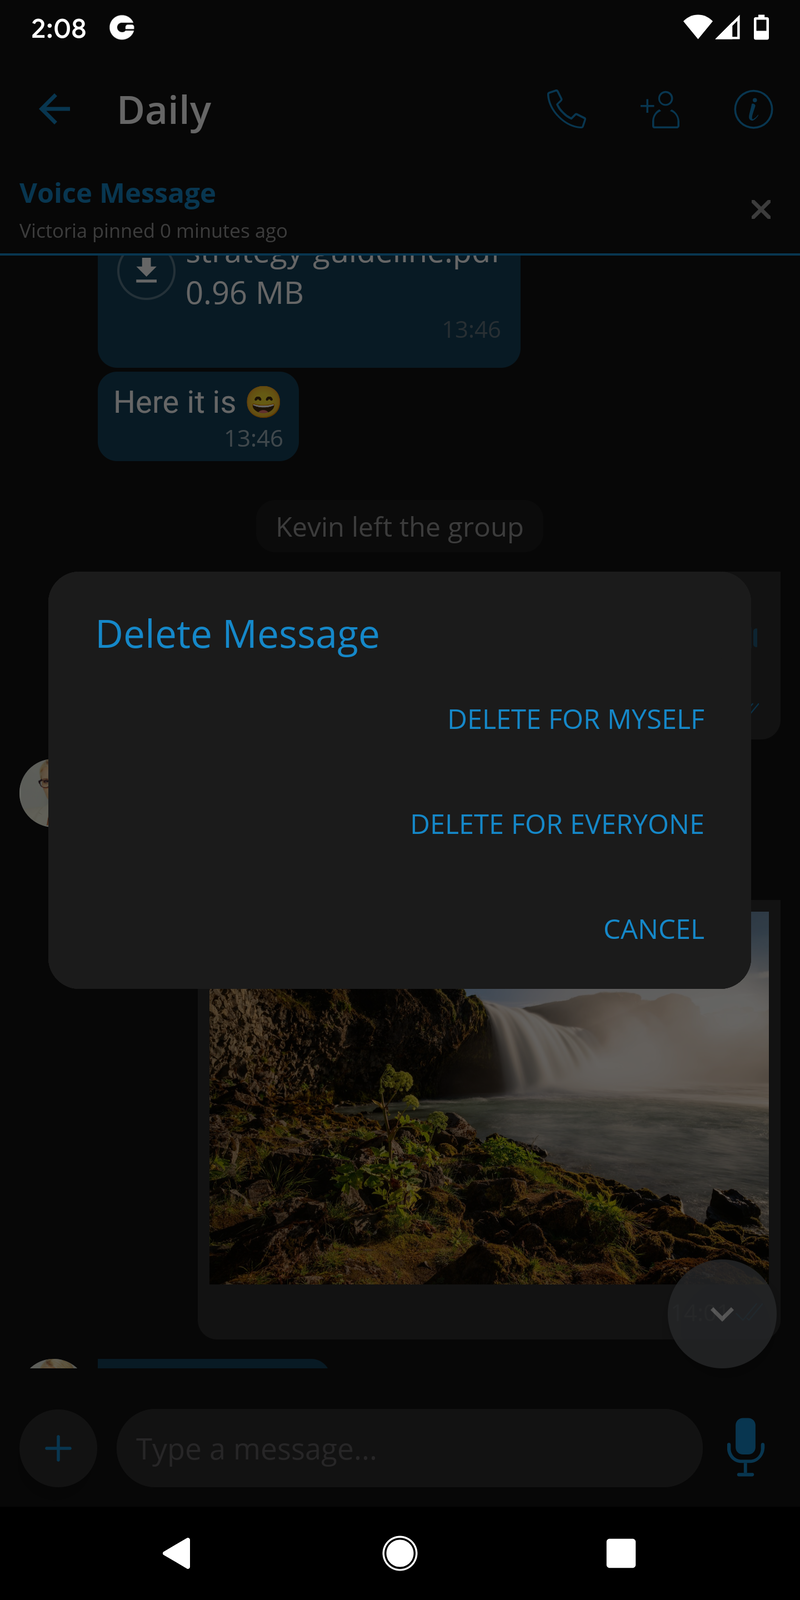
After pressing the delete action, the confirmation dialog will show up with two options for outgoing messages:
-
Delete for myself with the following sub-content: This message will be deleted only for you. Other chat members will still be able to see it. Are you sure you want to proceed?
-
Delete for everyone will automatically delete the message for all participants without additional confirmation dialogue.
For incoming messages, there is only one option:
- Delete for myself with the following sub-content: This message will be deleted only for you. Other chat members will still be able to see it. Are you sure you want to proceed?
After deleting the message, the message interface will be displayed with the ”deleted message” indicator.
Share files and text from other apps
Share files and text from other apps to gloCOM GO 6, by simply selecting gloCOM GO 6 in the system’s share dialog.
App chat picker will open with recent chats where users can select multiple chats that will receive the file or text.

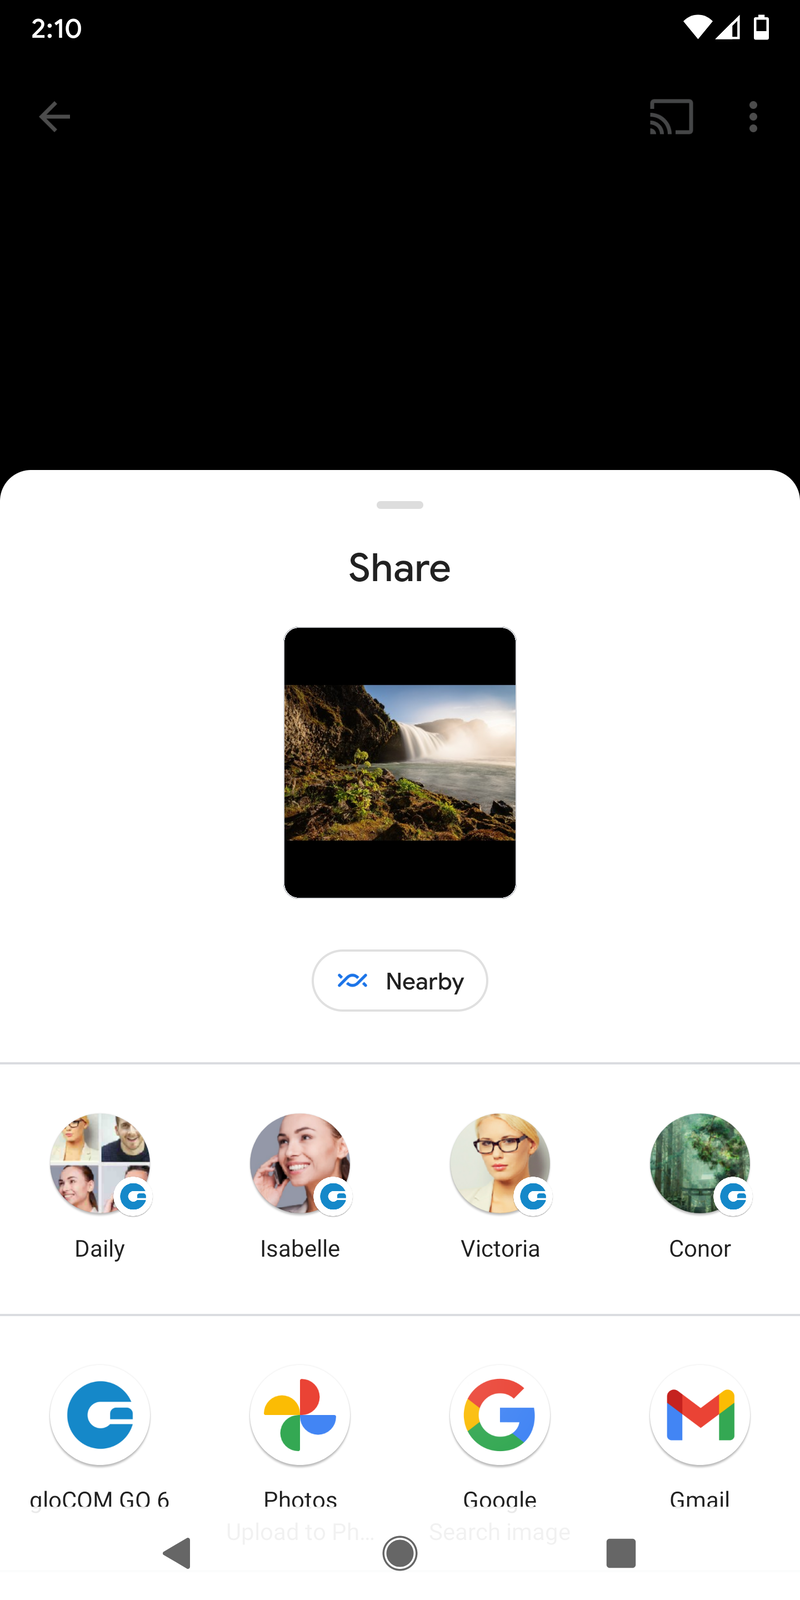
Direct share
In addition to standard share functionality with direct share, users can now share text, files, videos, and images from other apps directly to conversations. This means that when a user wants to send text/file/video/image from another app, the most recent conversations will pop up in the share menu, from where the user can choose to directly share the conversation without any additional steps.
Direct share is available on devices that run Android 10 and higher.
Contact share from other apps
gloCOM GO users have an ability to share contact details from phonebook or any other application to gloCOM GO.
Contact sharing displays contact data as a chat message to the selected {software} user.
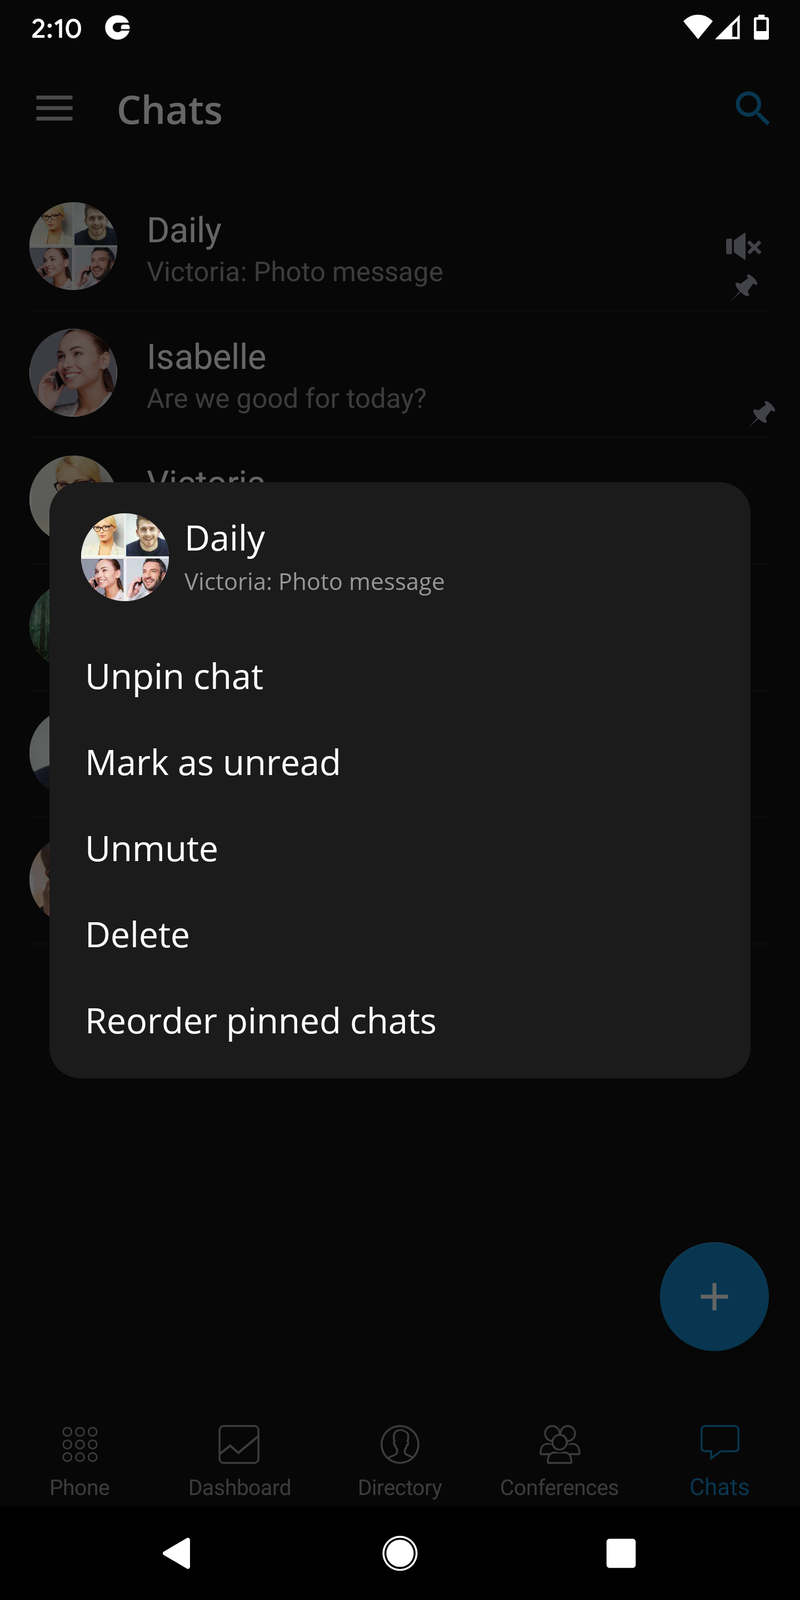
Quick actions for chats on chats list
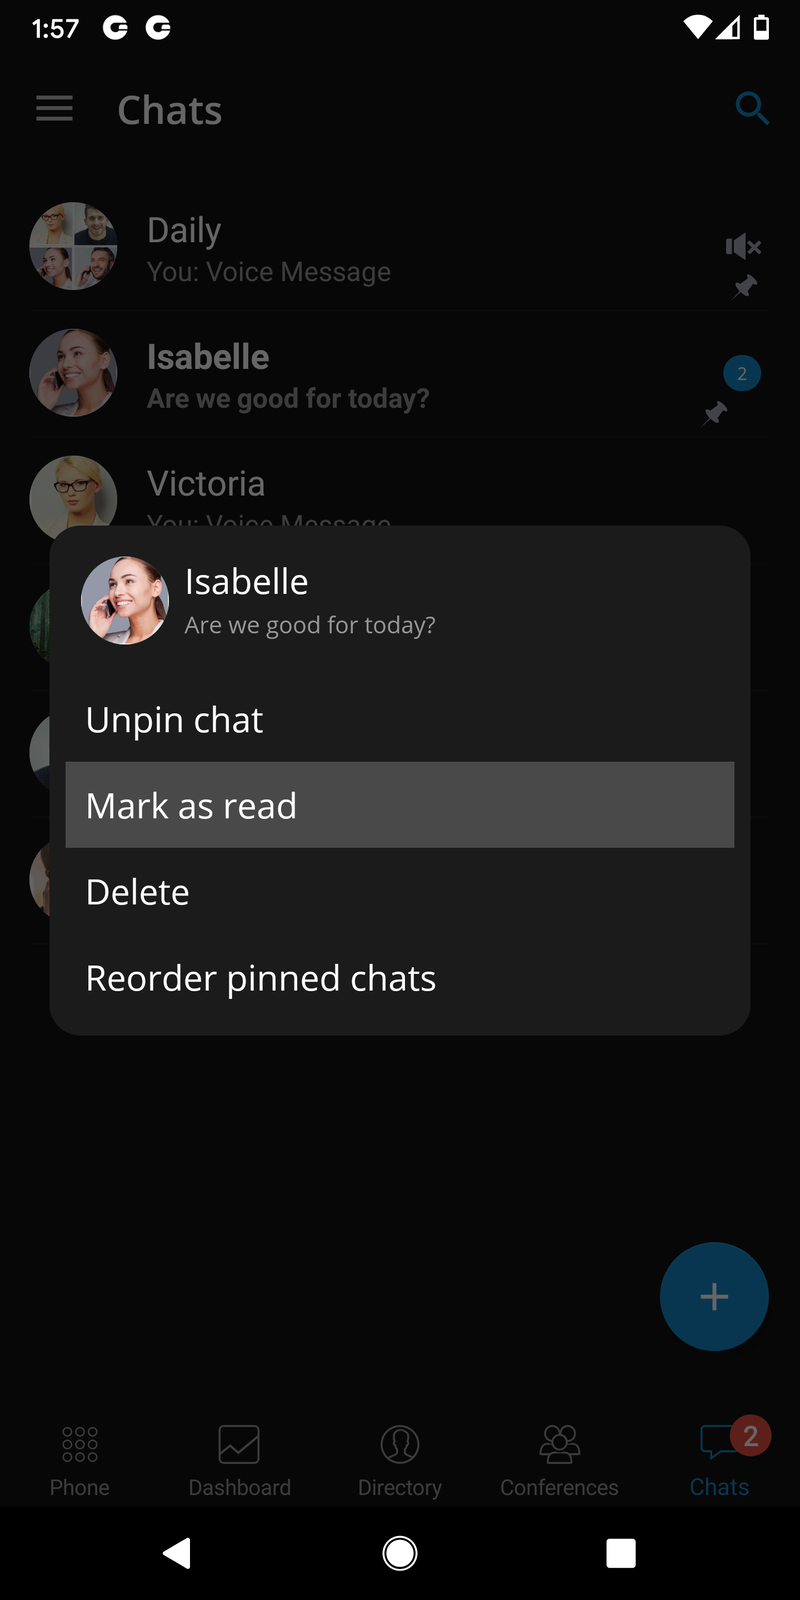
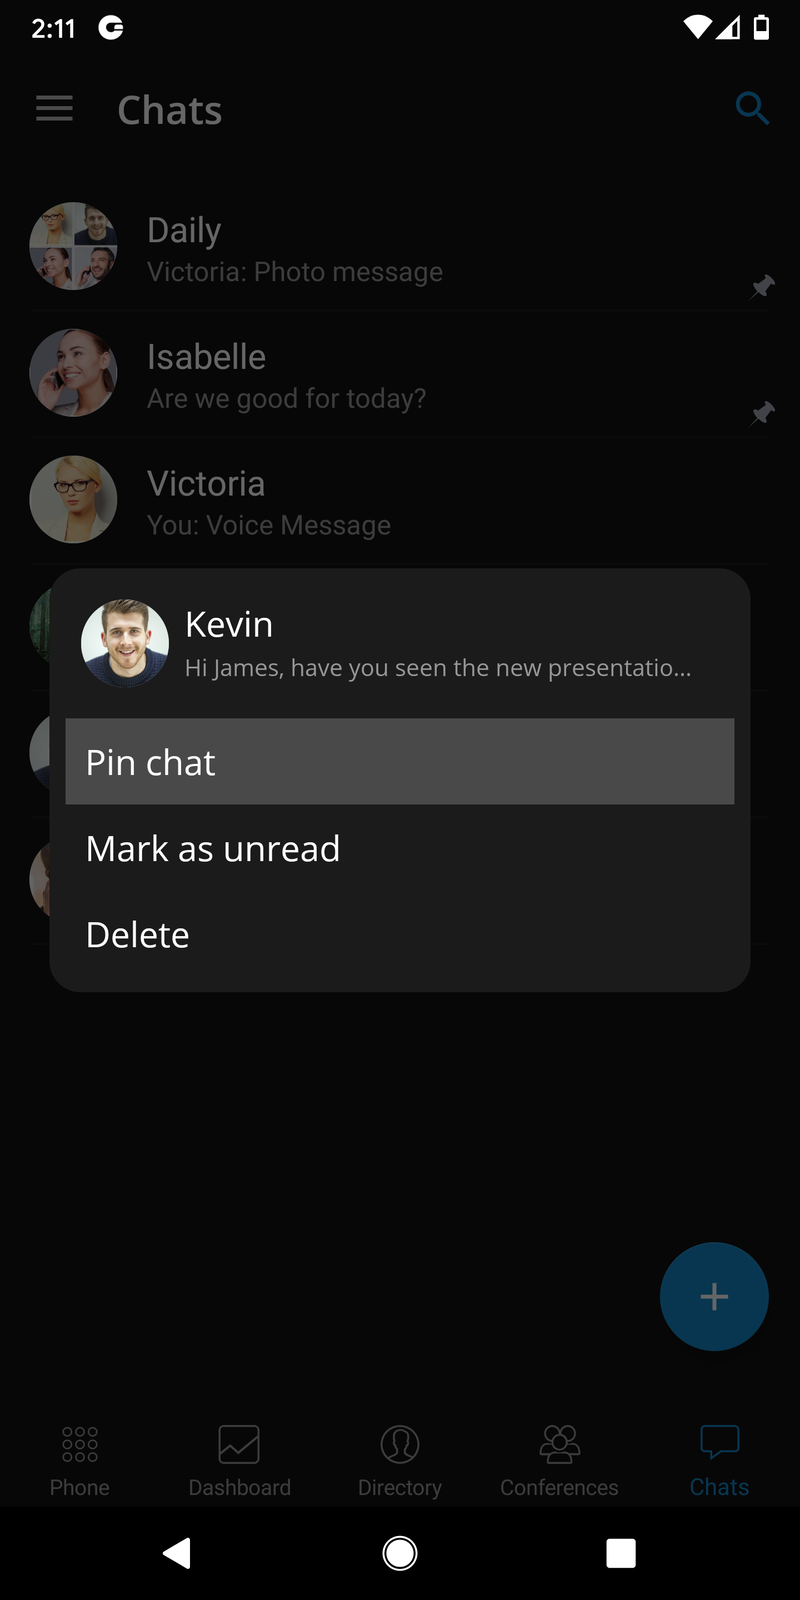
Users can perform multiple actions for chats by long pressing on the chat in the chats list screen:
-
Pin – Pins or unpins the chat sessions
-
Reorder pinned chats – Opens a new screen that will allow users to reorder pinned chats
-
Mute – Mutes or unmutes the group chat session
-
Delete – Deletes the chat session
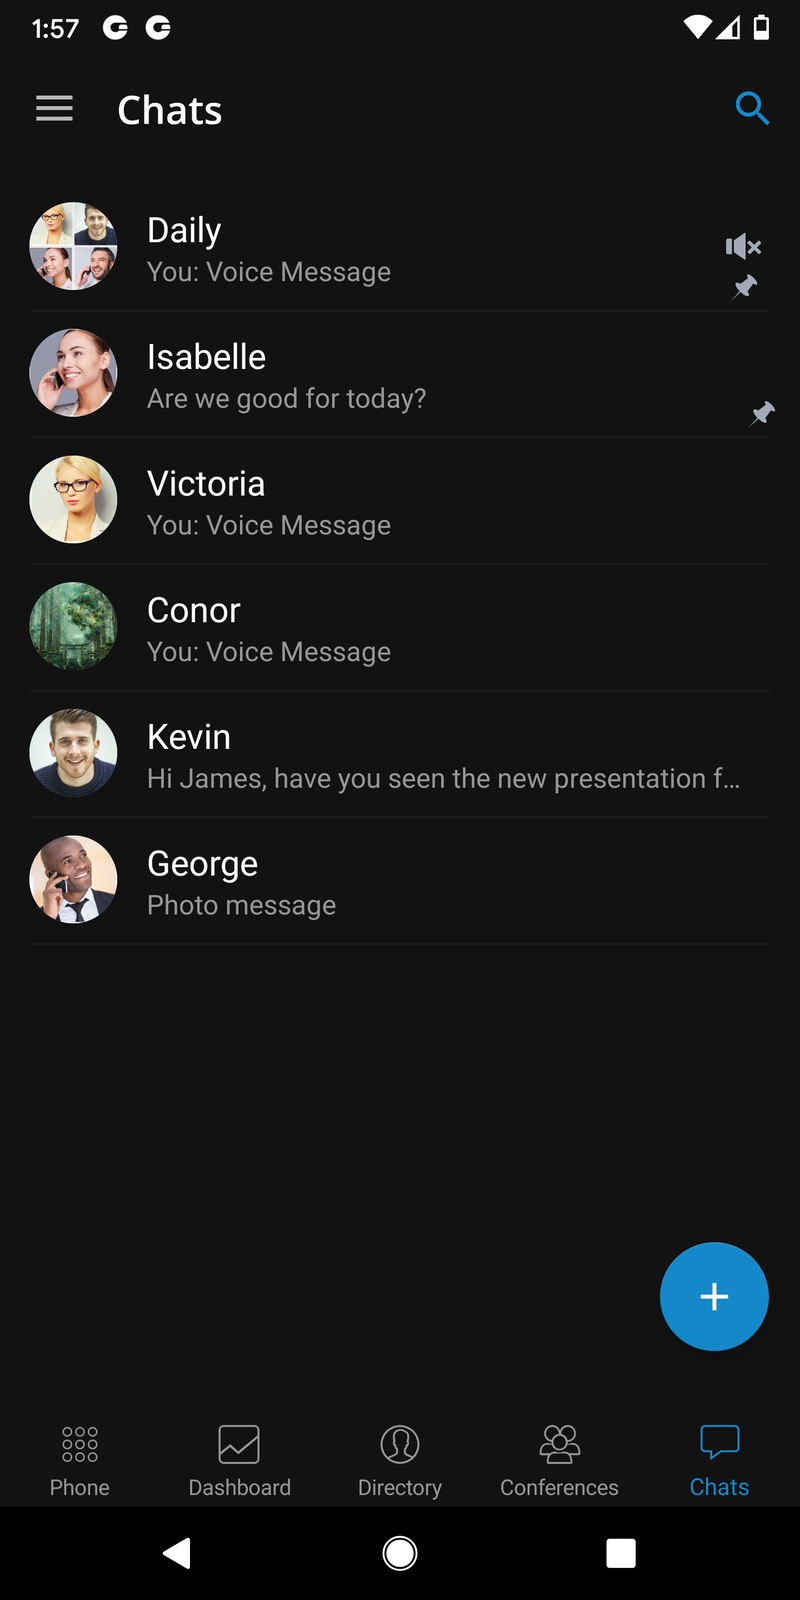
Pin chat sessions
gloCOM GO 6 allows users to pin their most essential and frequently used chat sessions to the top of the chat list screen.
This will help users find groups or contacts they chat with most often quickly.
When users long press on the chat session they wish to pin, a menu will open with the option to pin or unpin the chat session.
Once the chat session is pinned, it will be moved to the top of the screen and remain there even when users receive new messages from chats that are not pinned.
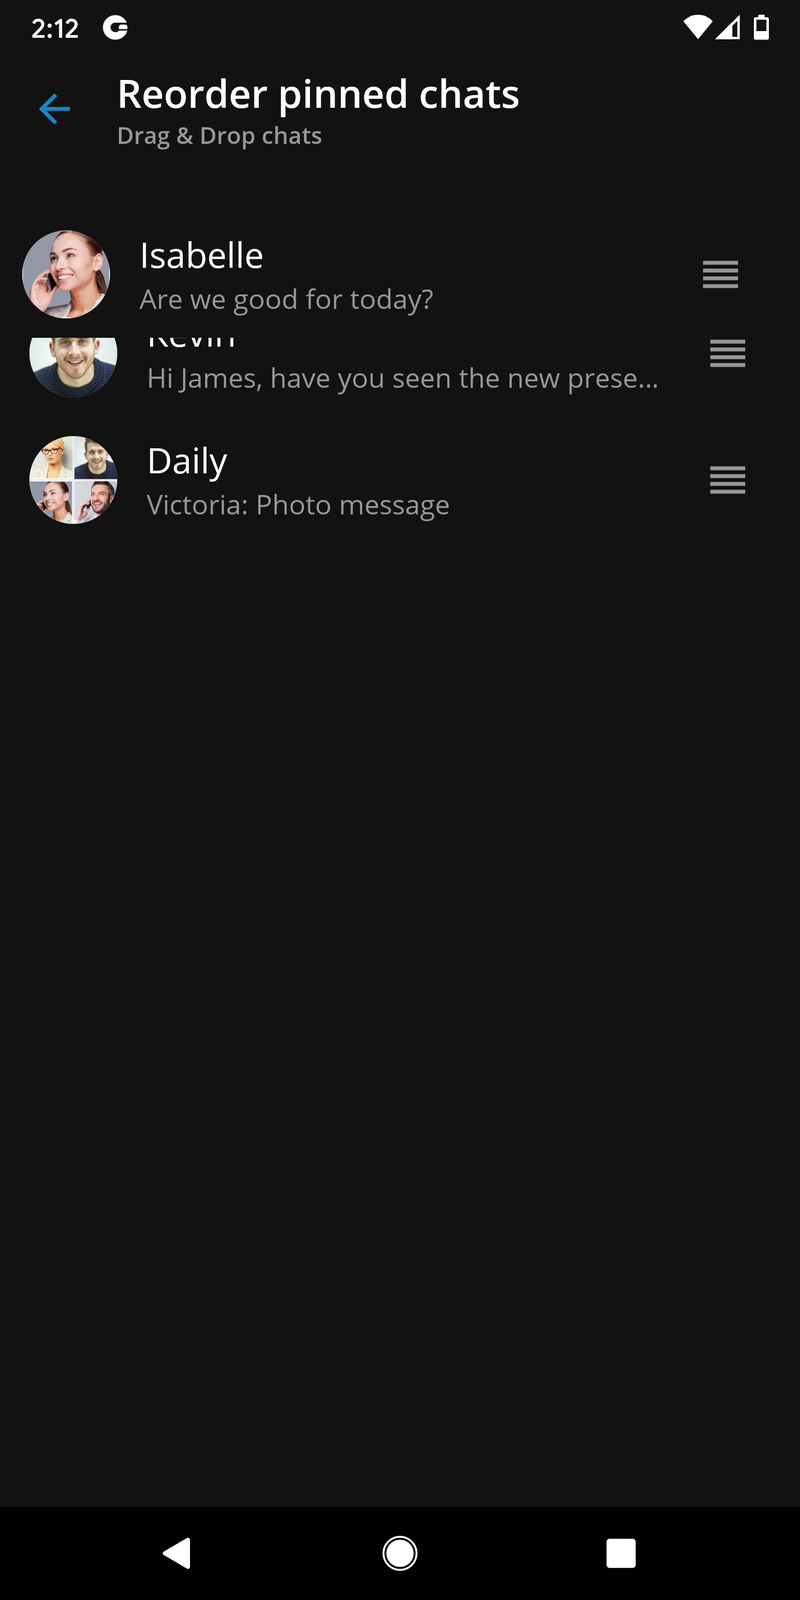
Reorder pinned chat sessions
Users can rearrange pinned conversations by long-pressing on an already pinned chat session and pressing the Reorder pinned chats option.
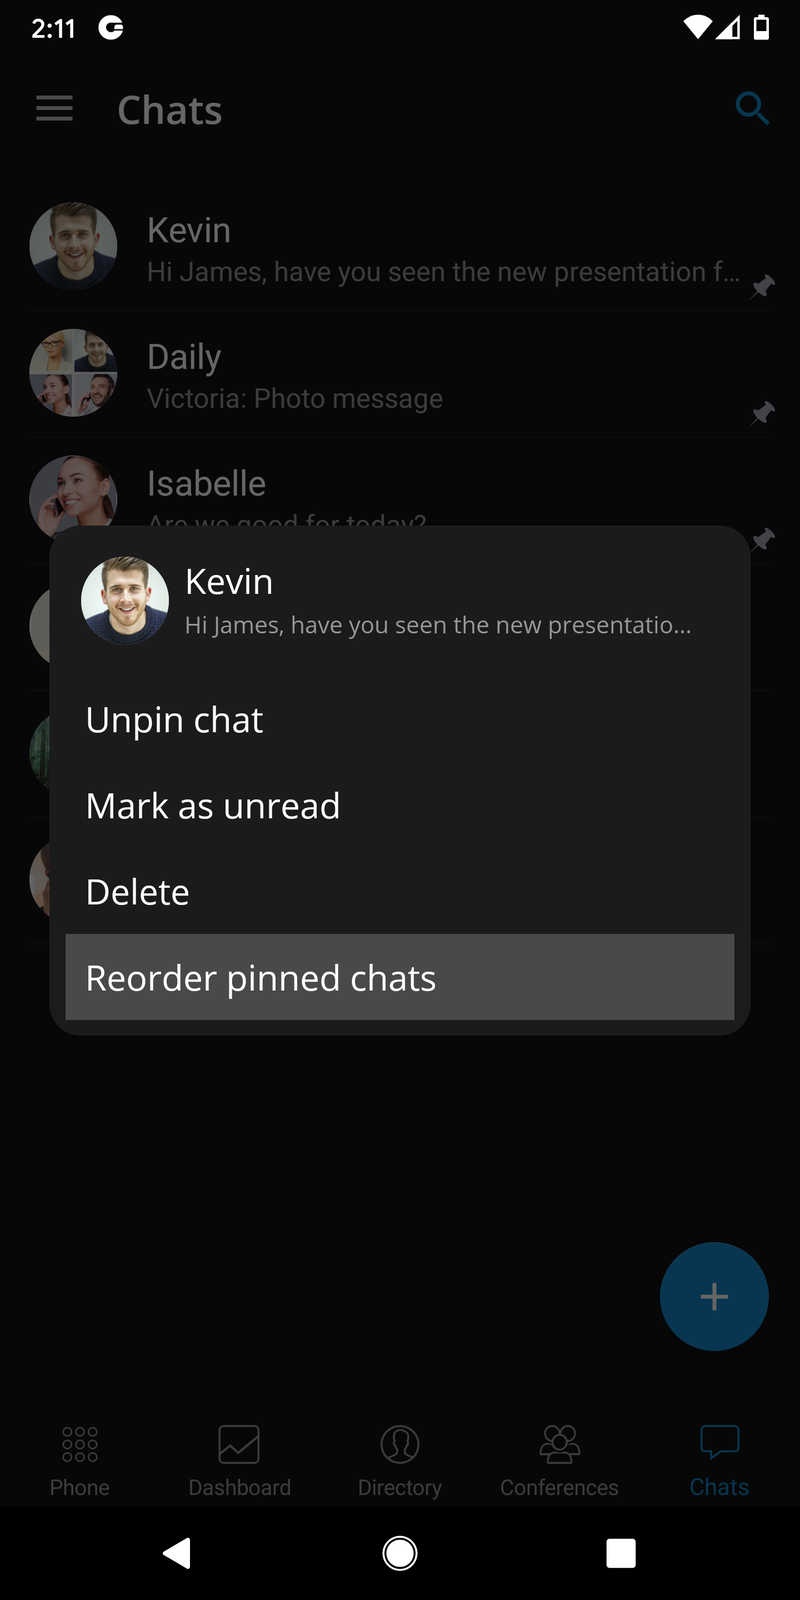
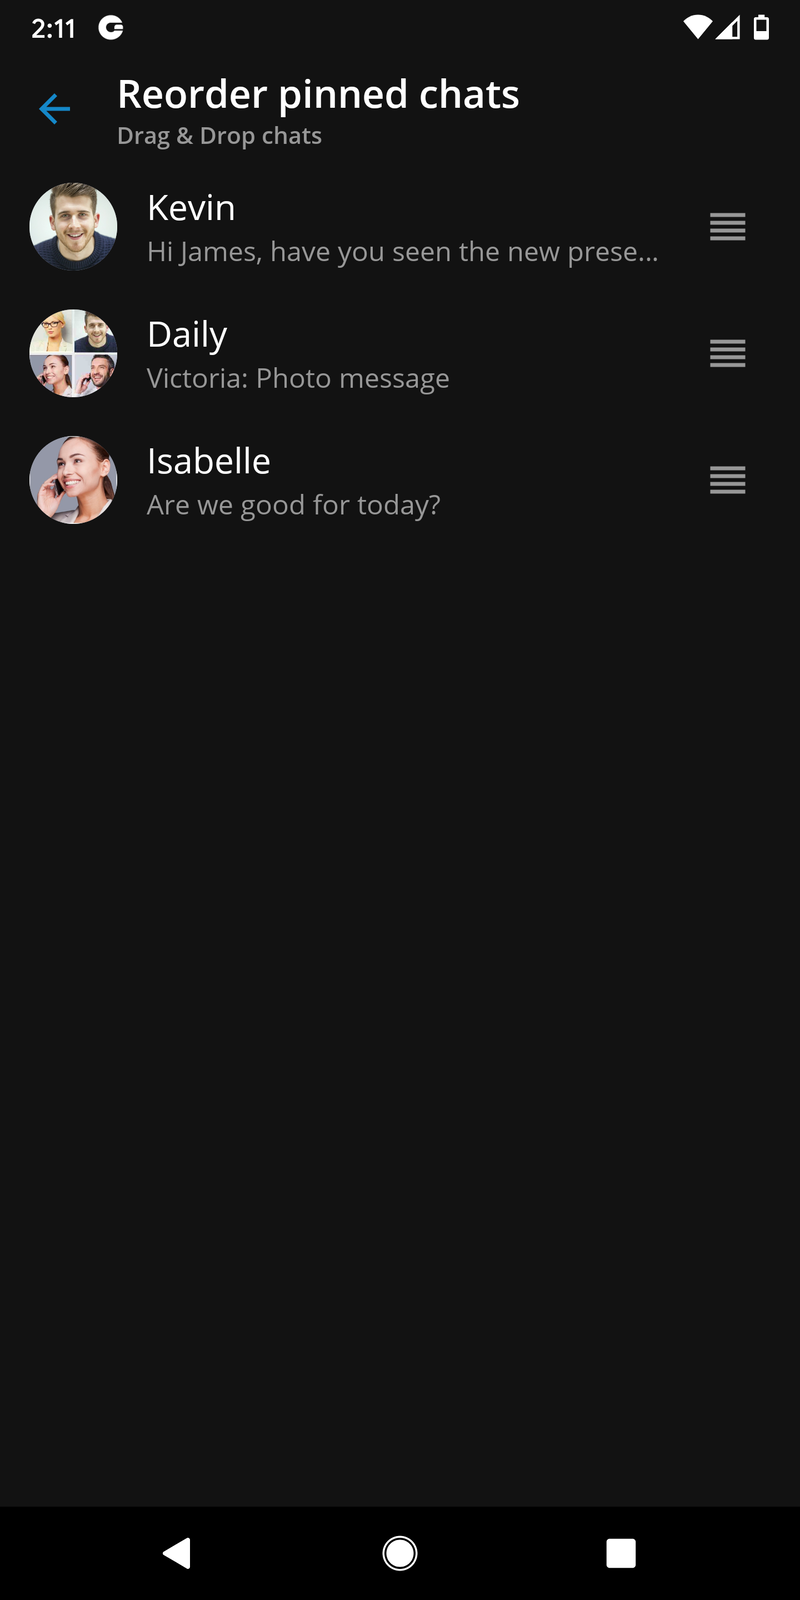
Users can move pinned conversations by using drag and drop. This allows users to prioritize pinned conversations.
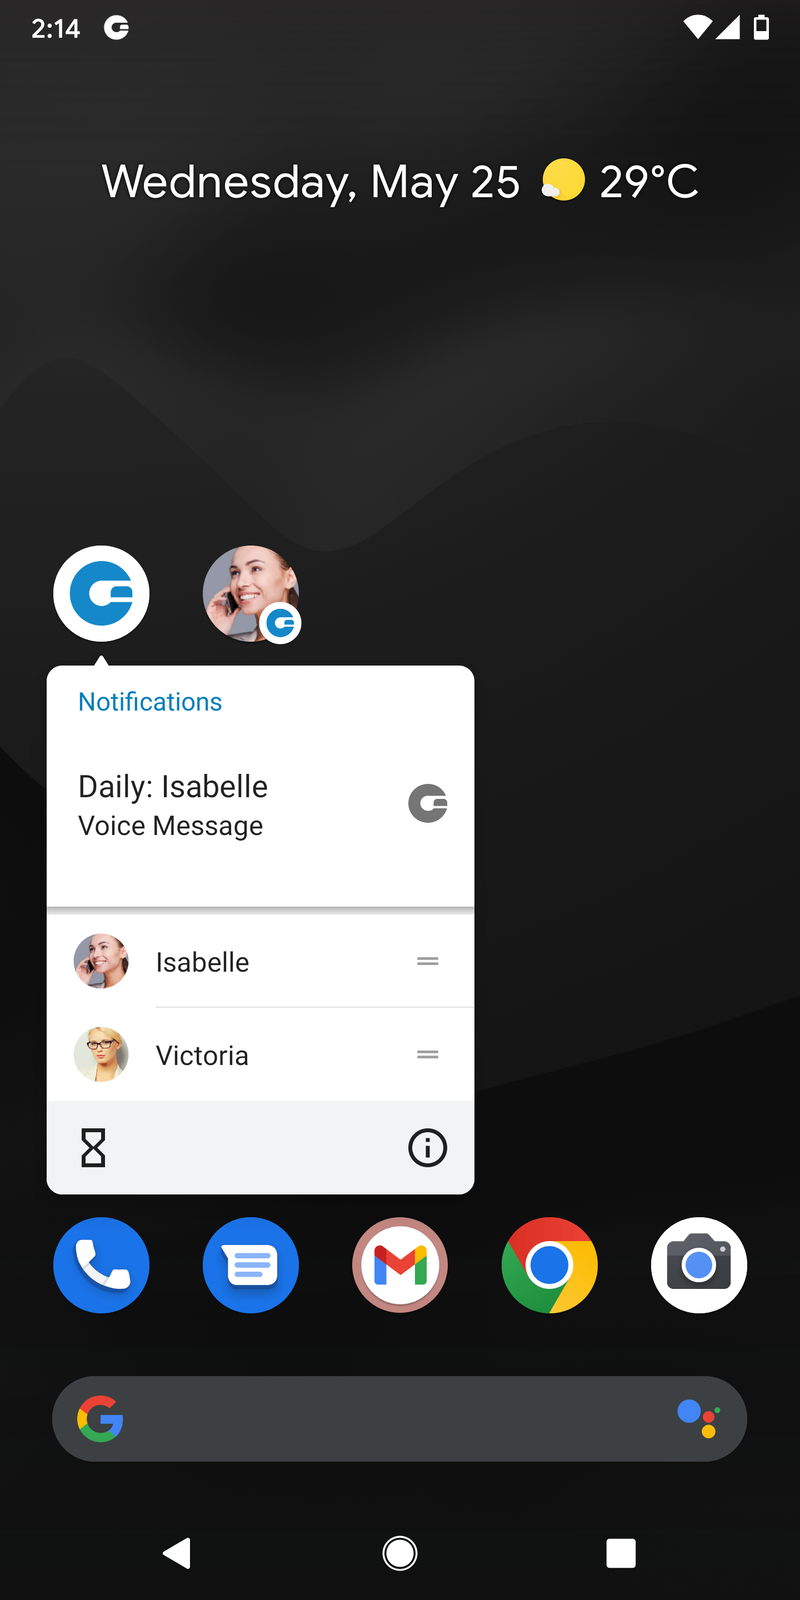
Notifications
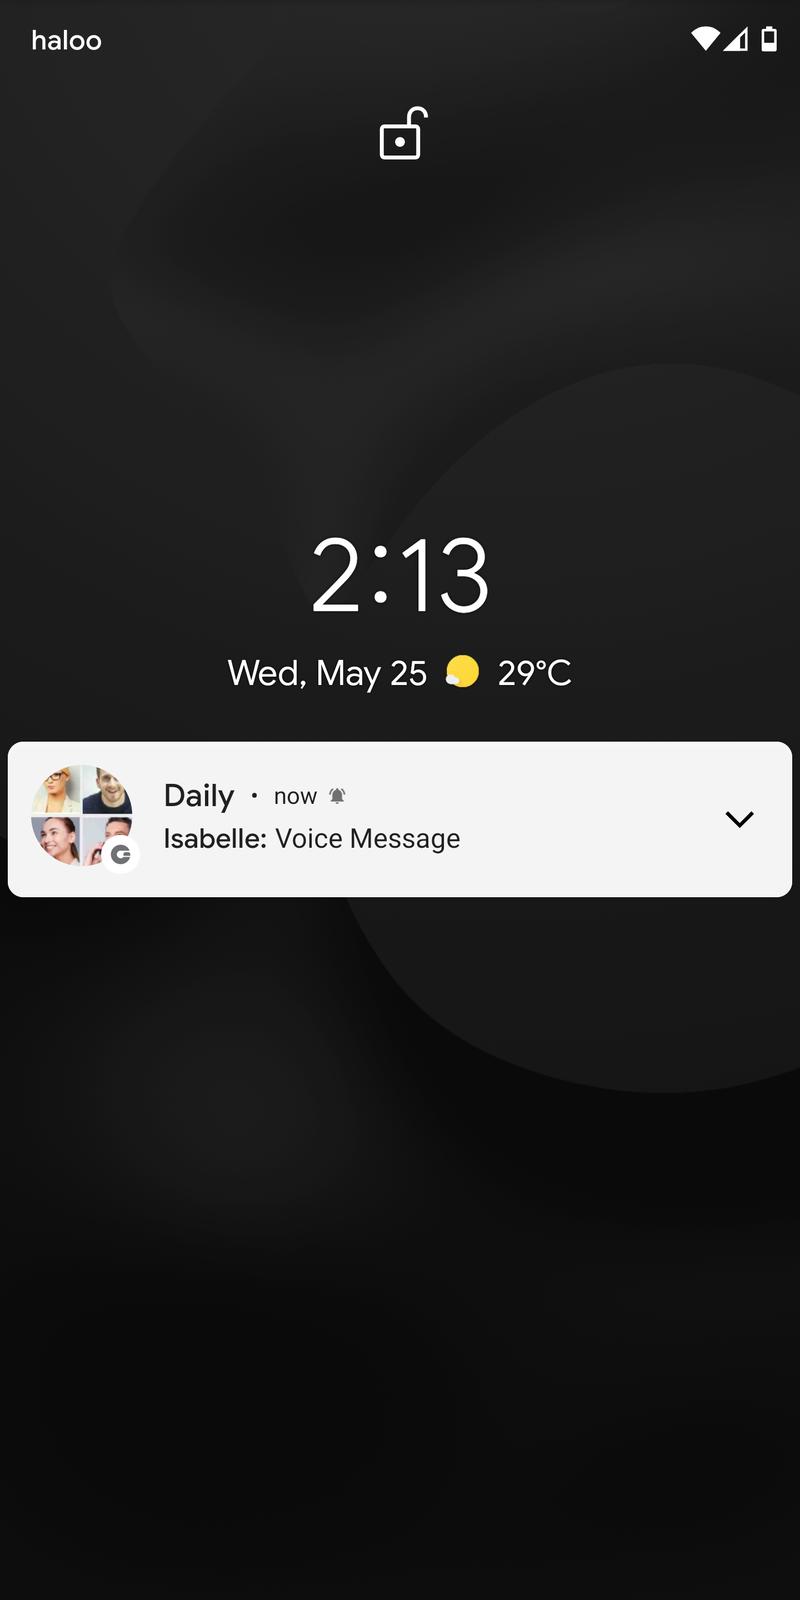
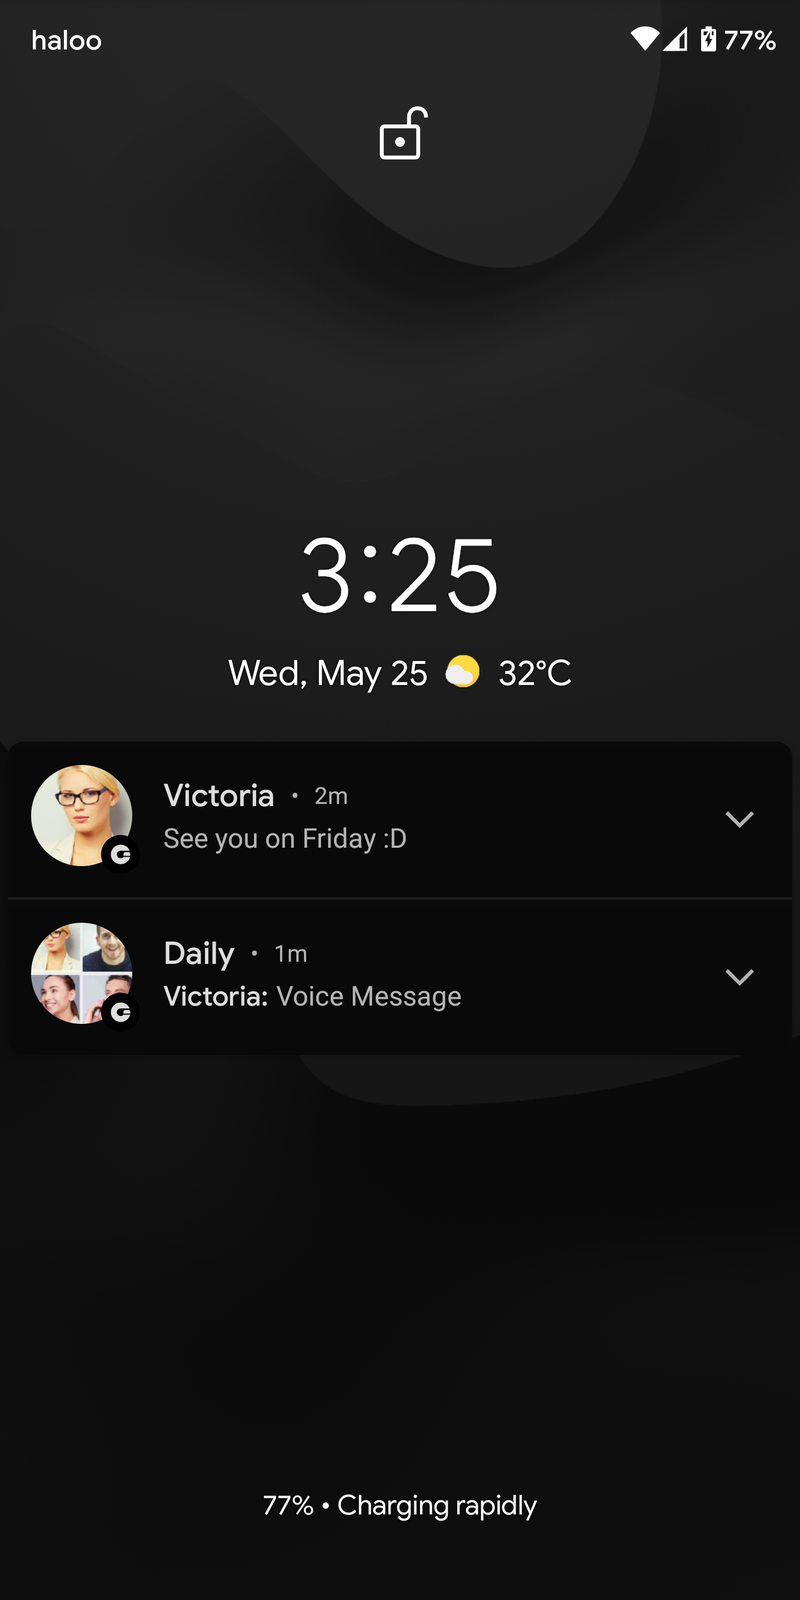
For new messages or group events, users will be notified with a notification. Pressing a notification will open a chat session associated with that notification.
The system’s user interface groups notifications for the same chat session.
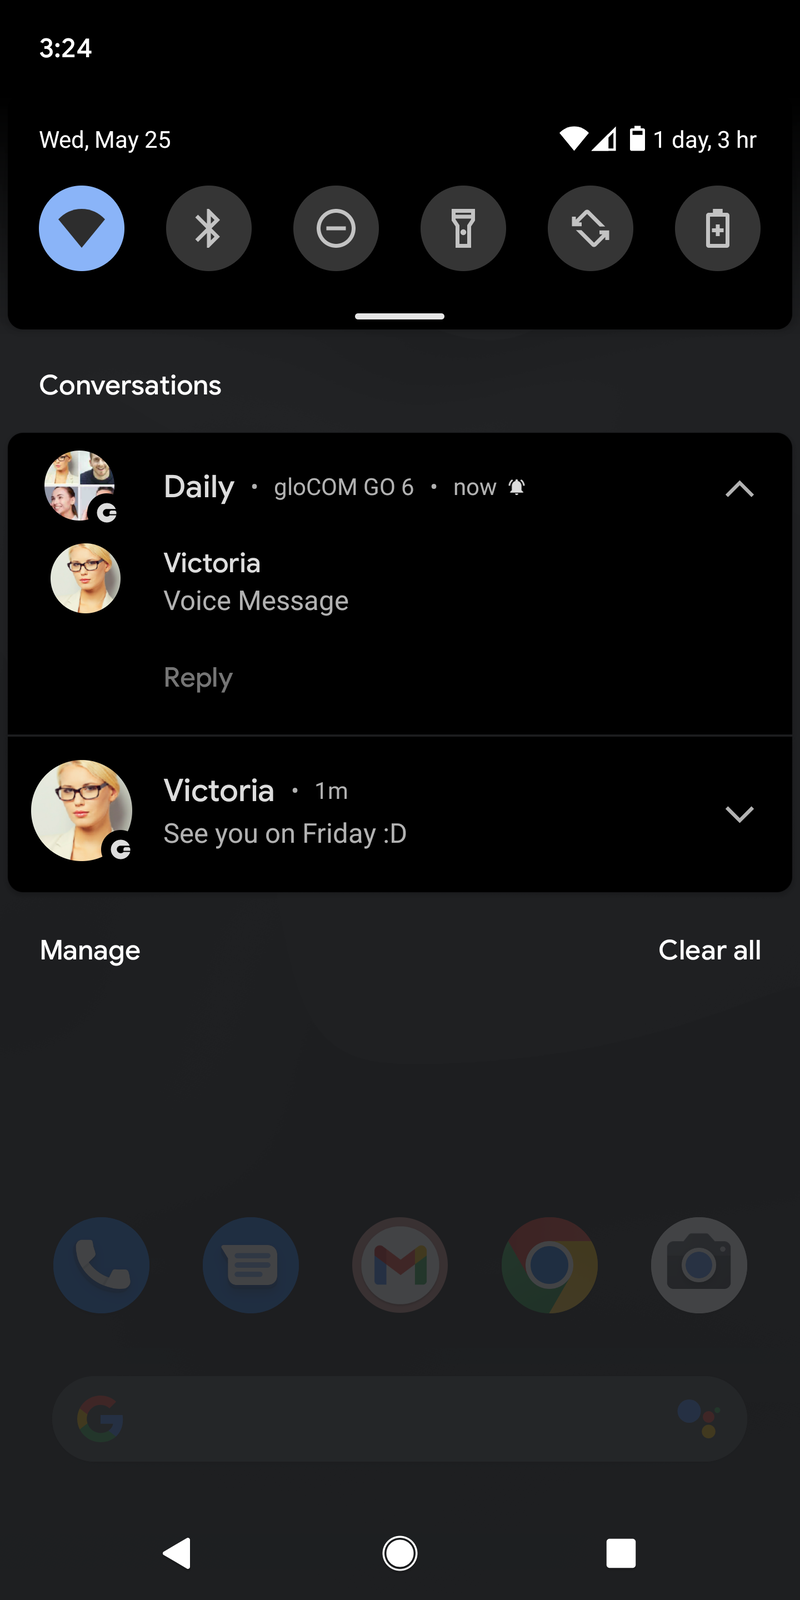
Chat notifications use messaging style notifications. With this style, notifications for group conversations are much more descriptive with every message in the conversation having the sender’s name and avatar attached. Unlike notifications for group conversations, one-to-one conversations are slightly changed.
On devices that run Android 11 or android 12 conversations, notifications will appear under the conversations tab which is displayed higher in the notifications drop down.
Depending on the device’s android version, notifications will look different.
Shortcuts for conversations
Shortcut for conversations allows users to quickly and easily access the most recent chats. They are created when a user opens up a chat list screen or receives a chat notification.
Shortcuts are accessible from the pop-up menu which opens by long press on the app icon. Users can also drag shortcuts directly onto the home screen from the pop-up menu.
A single press on the shortcut opens up a chat conversation immediately.
Archived users and Chat history
Deleted users will be marked as archived, and users will not lose chat sessions with those users. The user will not be able to start new chat sessions or start new calls with archived users.
Deleted users will be labeled with a ”(Deleted)” message at the end of their names.
Feature Flagging – Enabling/disabling chat features based on server settings
Some chat features that are described above can be enabled/disabled depending on the server settings.
Failover Support
gloCOM GO 6 supports SIP and server failover. This feature will enable the users to stay connected at all times. gloCOM GO 6 queries the DNS for SRV records while connecting to PBXware and SIP service.
If the primary host as defined in the SRV records is not working or it is stopped, the gloCOM will try to connect to the next host ordered by defined priority in the SRV records. Timeout between connections is 6 seconds.
To enable this feature DNS records should be configured like this:
* _pwproxy._tcp.domain. 86400 IN SRV 0 5 10009 pbxserver.domain.
* _pwproxy._tcp.domain. 86400 IN SRV 0 10 10009 pbxserver.domain.
If the primary server starts working after the downtime, the app will connect to it the next time it is resumed from the background.
If users connect to the SIP service hosted on the same PBXware, the SIP service will also support failover. To support this kind of SIP service failover, there should not be any IP address added to PBXware in fields that are sent to the gloCOM clients (e.g., in PBXware field gloCOM SIP Proxy).
SIP service failover
If the users connect to the SIP service using SBCs or proxies that are not hosted on the same machine as the PBXware, the failover must be correctly configured.
For SIP failover to be enabled, a new field is added to PBXware that indicates if SRV resolve will be used for the SIP proxy.
The new field is called gloCOM Use DNS SRV Lookup, and it can be found in the Servers options for a master or specific tenant(s). If the value is set to, No or Not set the gloCOM GO 6 will use the value from gloCOM SIP Proxy Address when connecting to the SIP service. SIP host and SIP proxy values will be equal.
If the value is set to Yes on gloCOM Use DNS SRV Lookup field, and an IP address or IP address: port is entered into the SIP proxy address field. In that case, the app will use the hostname of the currently connected PBXware as a SIP host, and the value of the SIP proxy will be the IP address:port combination.
If the value inside the SIP proxy address field is a hostname or hostname:port, the app will query the DNS for SRV records. The protocol used for SRV querying is defined on the PBXware Protocols page.
SMS
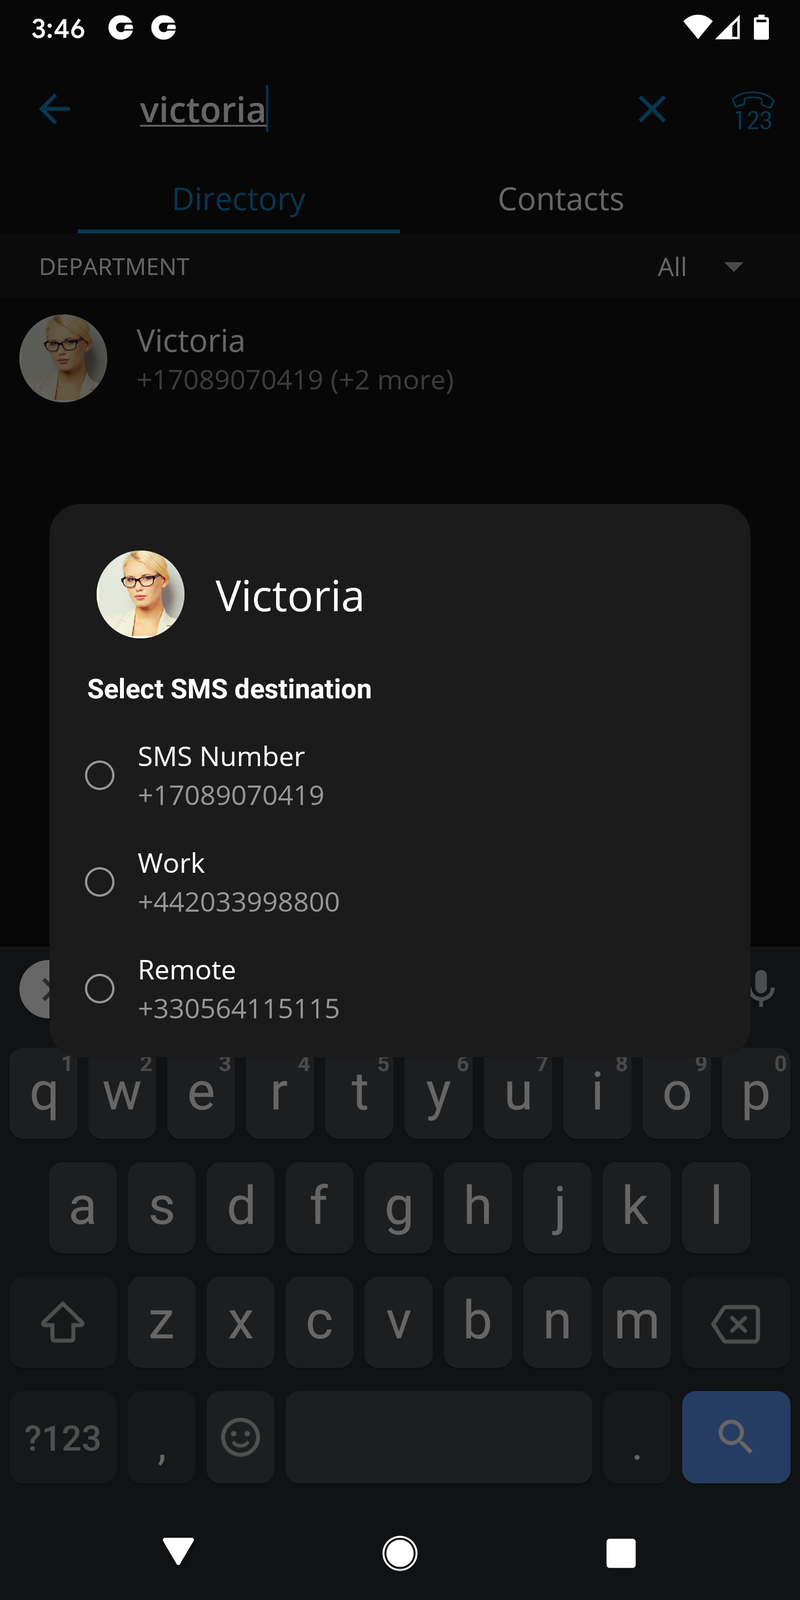
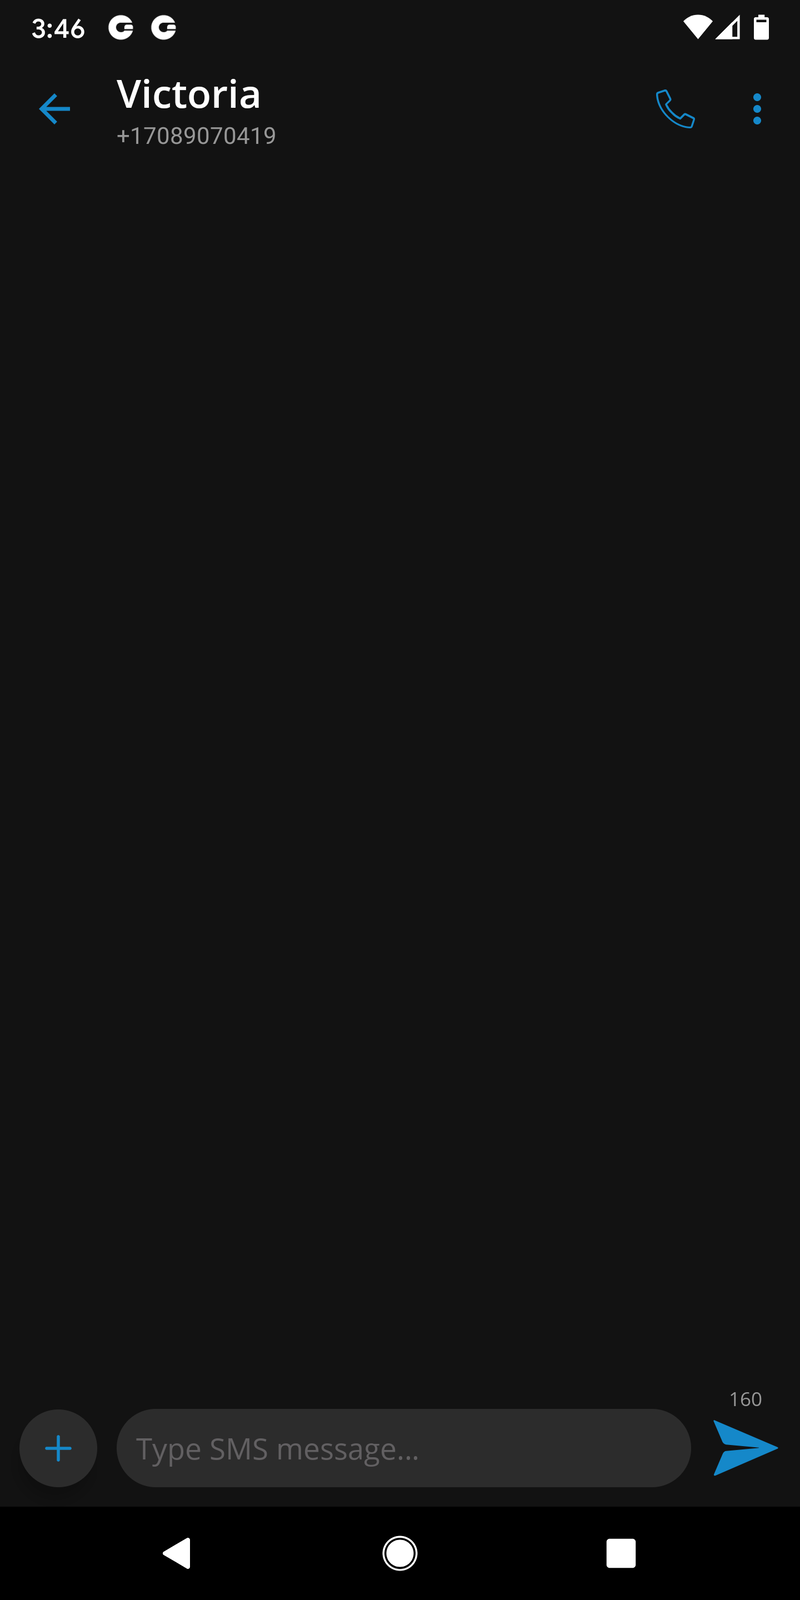
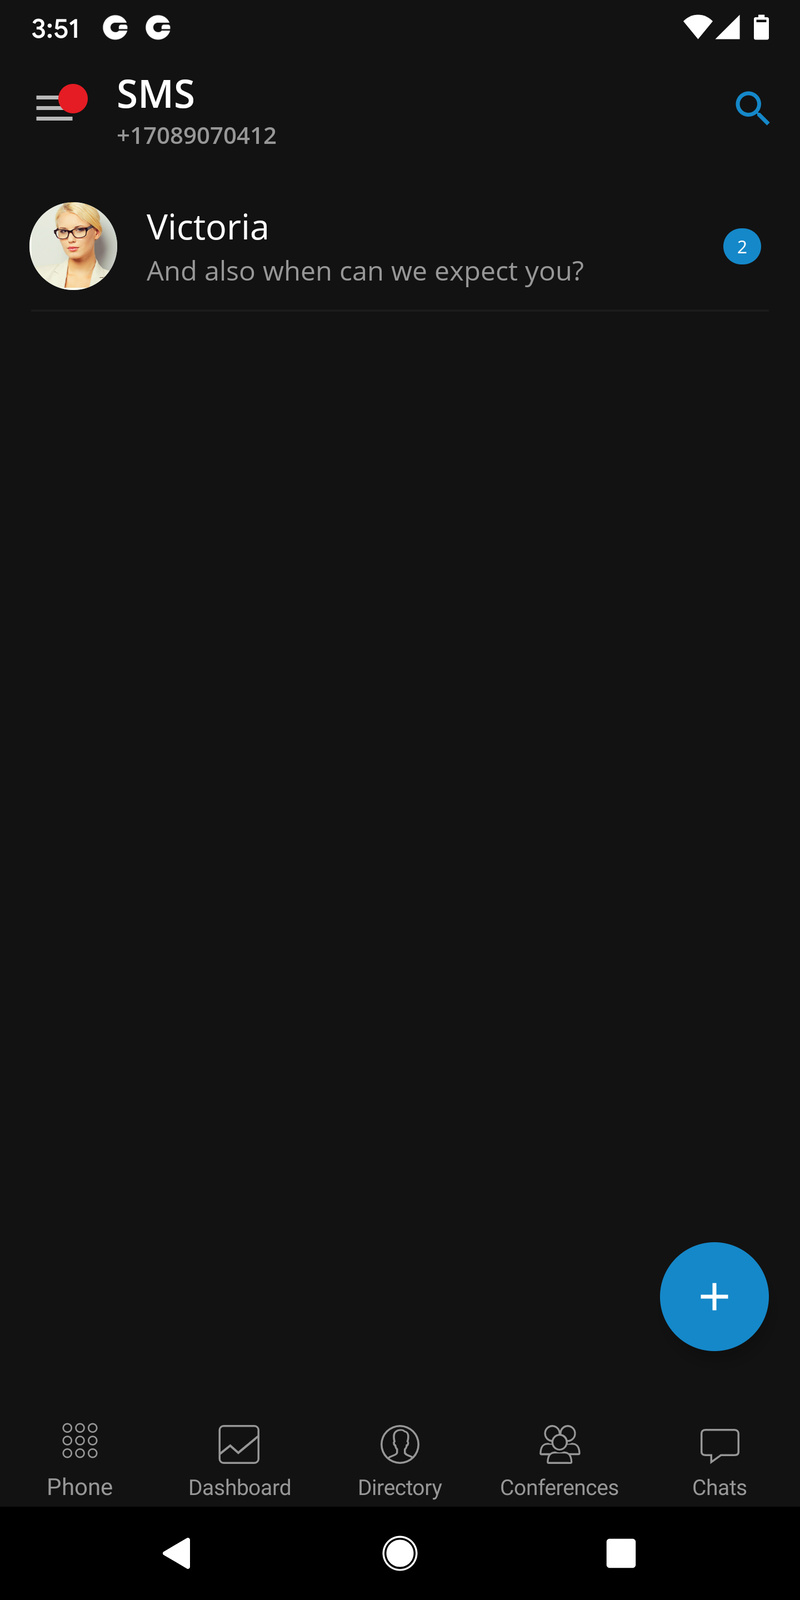
SMS feature allows users to send and receive SMS or MMS messages using gloCOM GO 6. SMS needs to be enabled in the PBXware license, and the user using the gloCOM GO 6 needs to have an SMS number associated with their account.
Users can start an SMS conversation from:
-
SMS icon at the Menu toolbar
-
User info screen by selecting the recipient’s number
-
Entering a phone number in the Phone dialpad and pressing on send SMS icon
Users can start SMS conversations on the SMS tab by pressing the + button located at the bottom right of the screen. Users can then select recipients from Directory, device Contacts, or enter a phone number manually for numbers not stored in contacts.
In cases when a user has more than one number entered in their numbers list, a pop-up window will appear, allowing users to choose which number to send the SMS to.
The maximum number of SMS messages sent at once is 4. The SMS counter is located next to the send button at the bottom of the screen.

Receiving SMS messages
When users receive an SMS message, a pop-up notification will appear on the top of the screen. In case when users are offline, the pop-up notifications will appear after the sync is completed on the next app login. Currently, there is no support for push notifications for SMS messages.
SMS unread count badge will be visible in the SMS icon in the Main menu displaying the number of unread messages.
Search existing SMS conversations
The search bar in the SMS conversations list screen allows users to search messages by name or phone number.
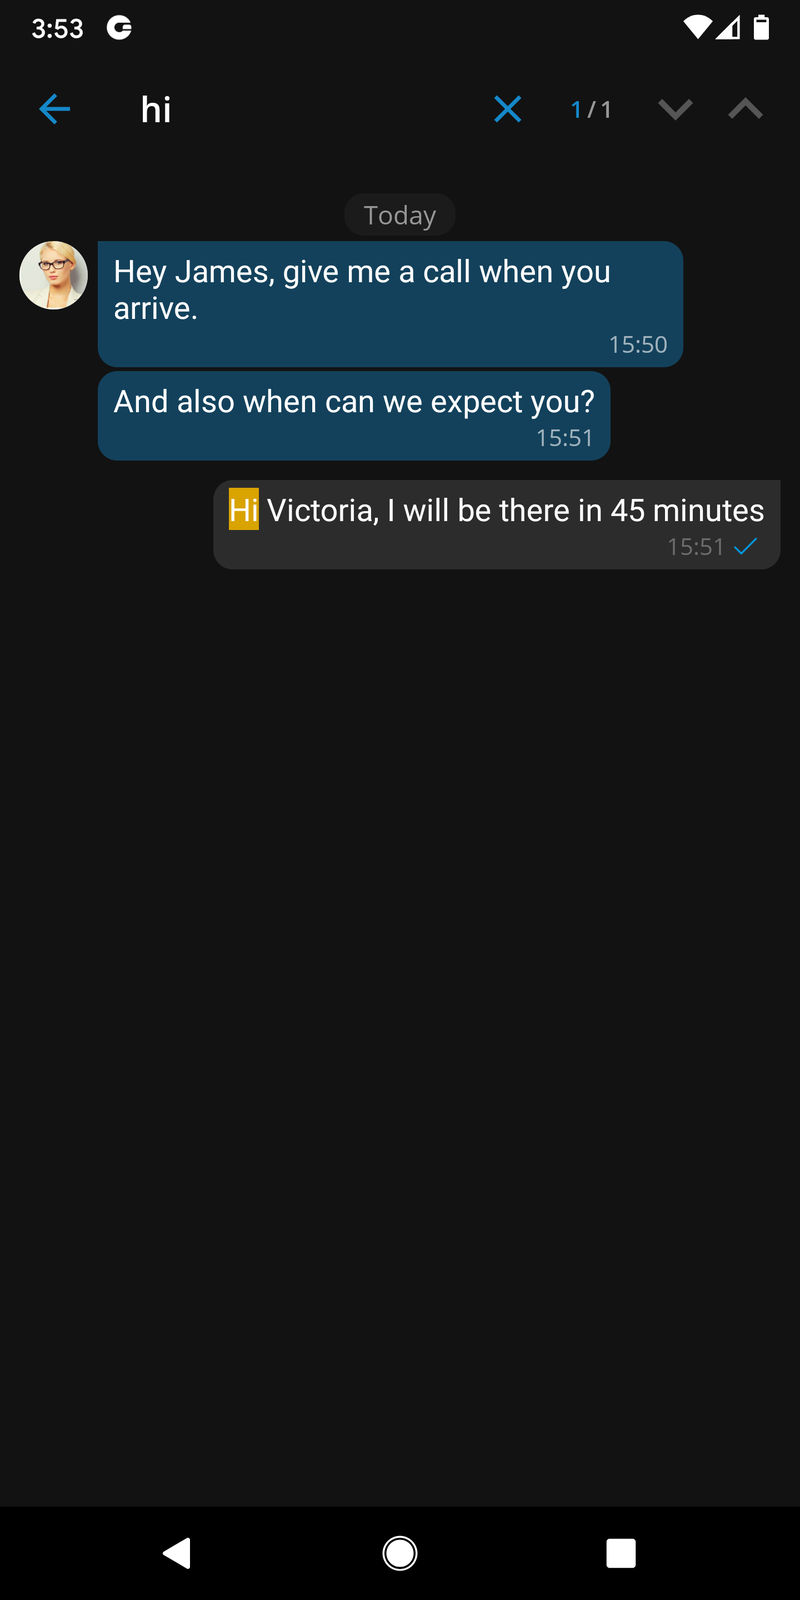
Full-text search for SMS messages
Full-text search can be done by entering an existing SMS conversation and by pressing on the Search icon in the upper right corner of the screen. After entering the search query, users can move up and down between search results using the arrow buttons at the top of the screen.
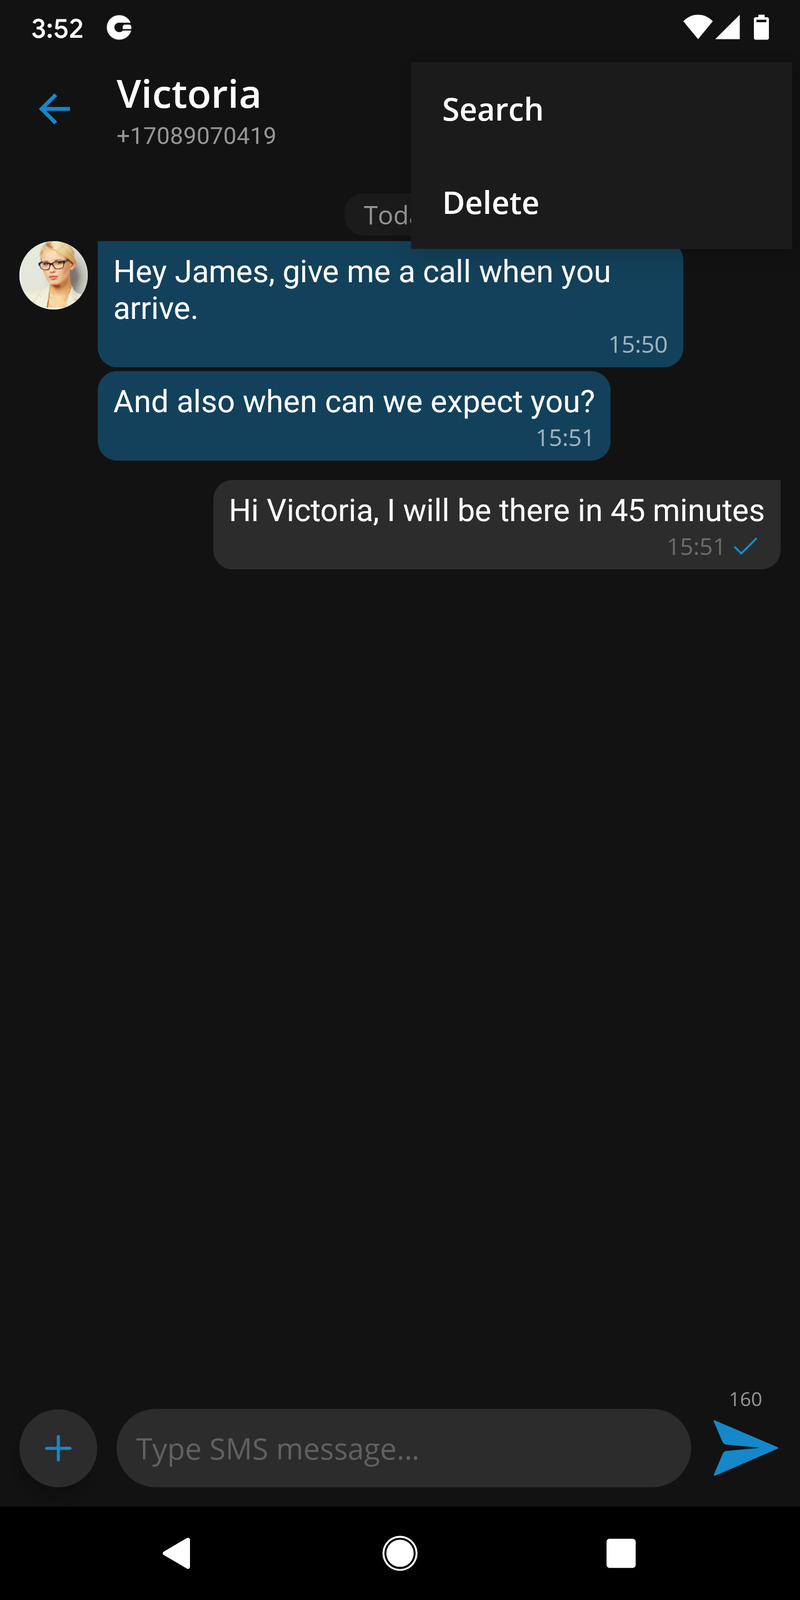
Delete SMS conversations
Users can delete already existing SMS conversations directly by long pressing on a conversation in the SMS conversations list or by selecting the delete option from the upper right corner when they are inside the conversation.
MMS
The MMS message is an enhancement to the standard SMS message. The main difference between SMS and MMS messages is that the users can send multimedia and other files in their messages. It includes media such as videos, pictures, audio clips, GIFs, and much more.
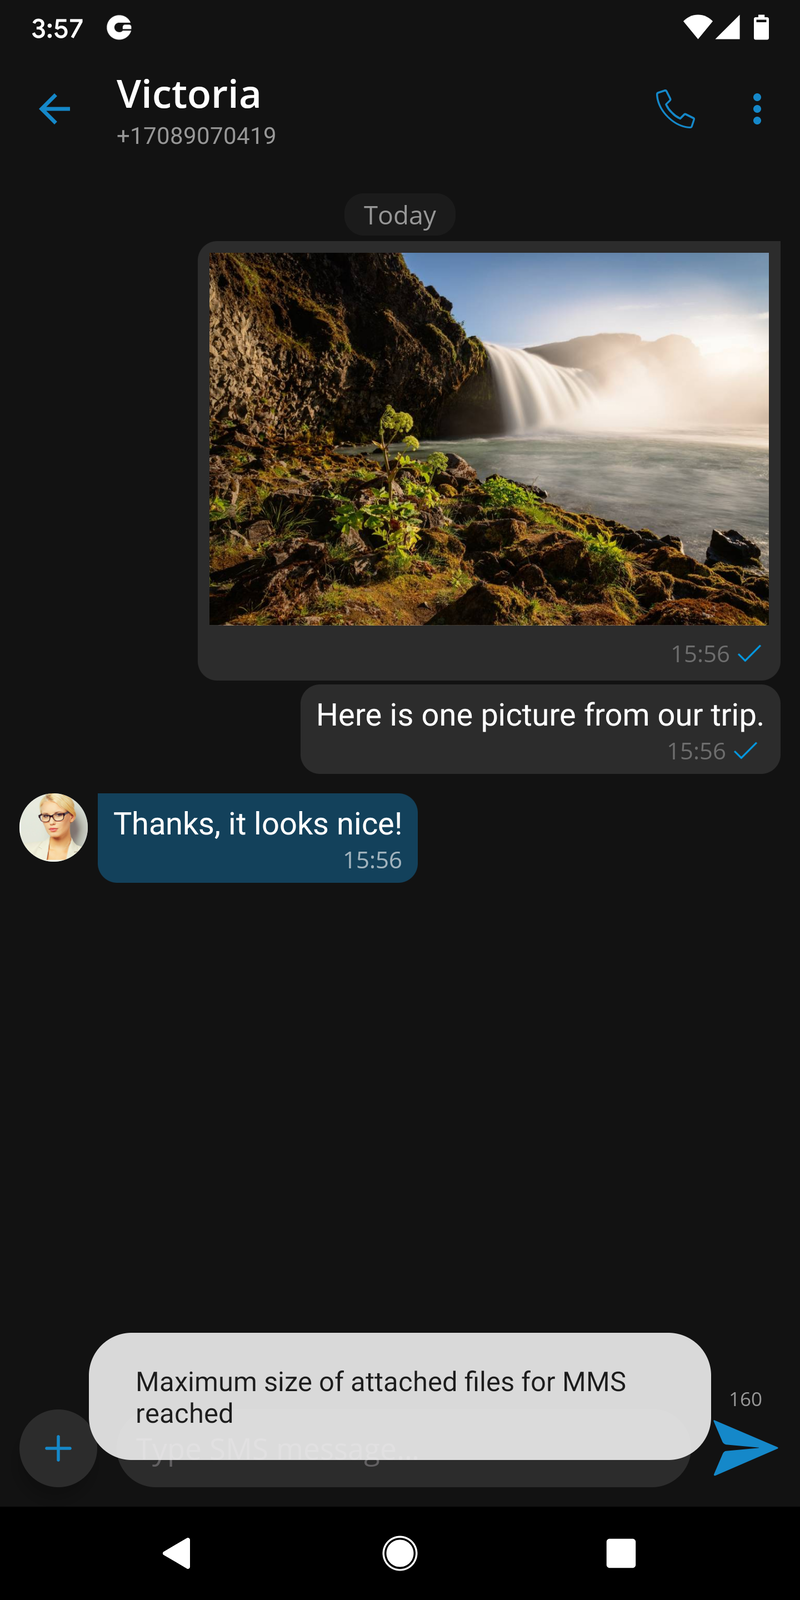
The maximum size of uploaded files is 500 KB or up to ten (10) files per message. Additionally, MMS allows up to 1000 characters of text in the message. MMS notifications have the same behavior as chat notifications – when the MMS message is received, a notification pops up.
The + button is used to send files, and it can be found on the bottom left side of the SMS screen. Pressing the button opens up a dialog where the users can pick files to be sent to the currently selected conversation.
If users select data exceeding 500kB or if more than ten (10) files are selected, a pop-up message will appear displaying: Maximum size of attached files for MMS reached. All files that exceed the previously mentioned limits will be discarded.
Please note that supported MMS files are as follows:
-
Image Files – jpeg, png, gif
-
Audio Files – MP3, OGG, AMR
-
Text Files – PDF, Vcard, txt
-
Video Files – mp4
If a file is selected, an SMS message becomes an MMS message, which can be seen on the right side of the Send SMS/MMS button as the counter of the remaining kilobytes is displayed instead of the character counter.
After selecting the files, a thumbnail with the file name for each selected file will be displayed above the text area within the input field. Also, it is possible to remove selected files from the MMS message by pressing the – icon in the top right corner of the file.
The gloCOM will automatically download all files smaller than 500kB when connected to WiFi.
Voicemail management
With gloCOM GO 6 users can listen to new and archived voice messages and archive or delete one or many messages. Users can also call other users’ voicemail directly.

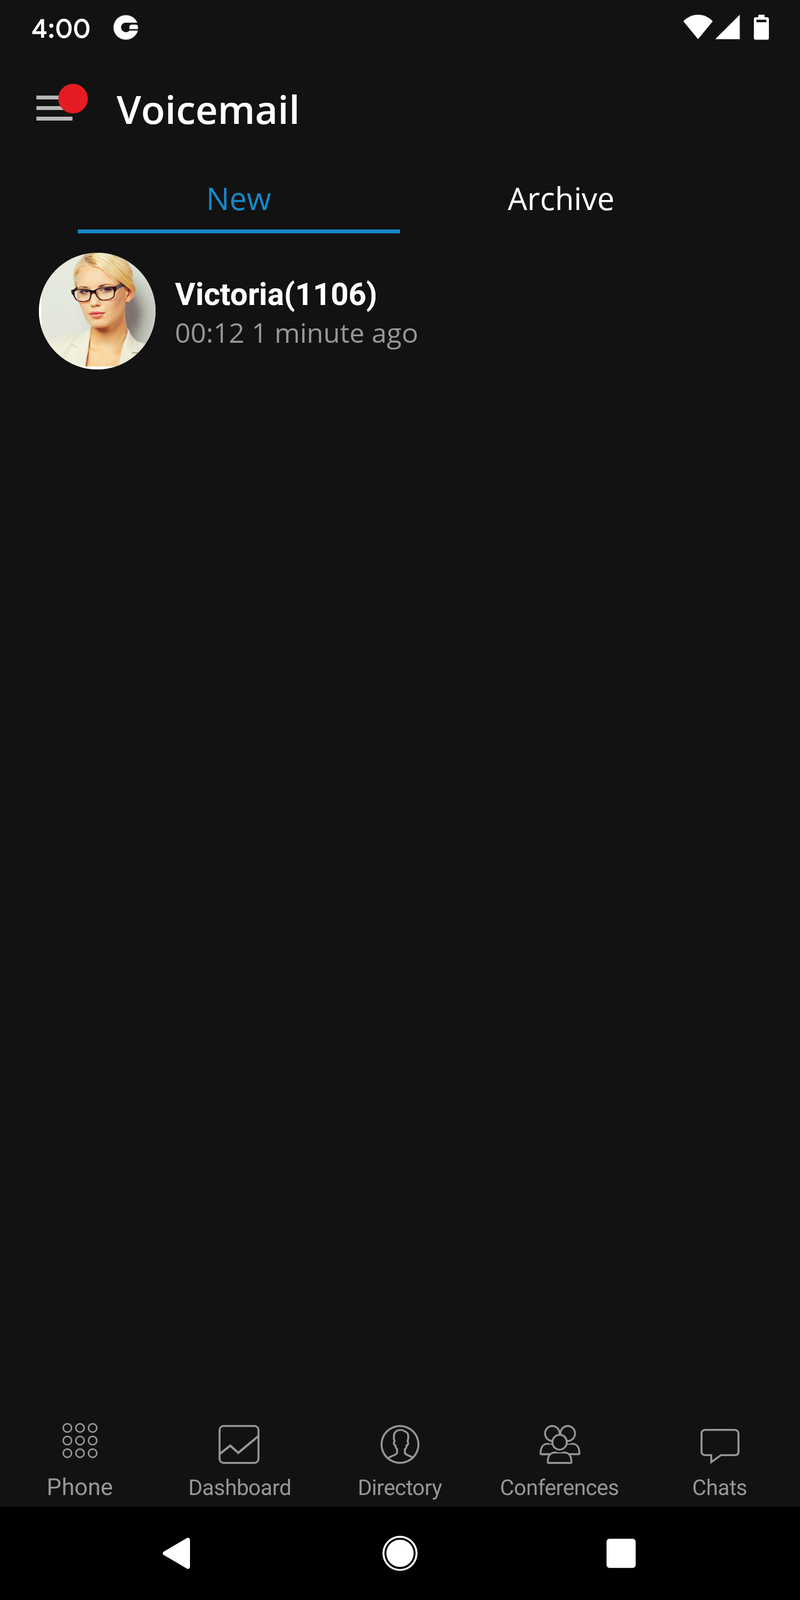
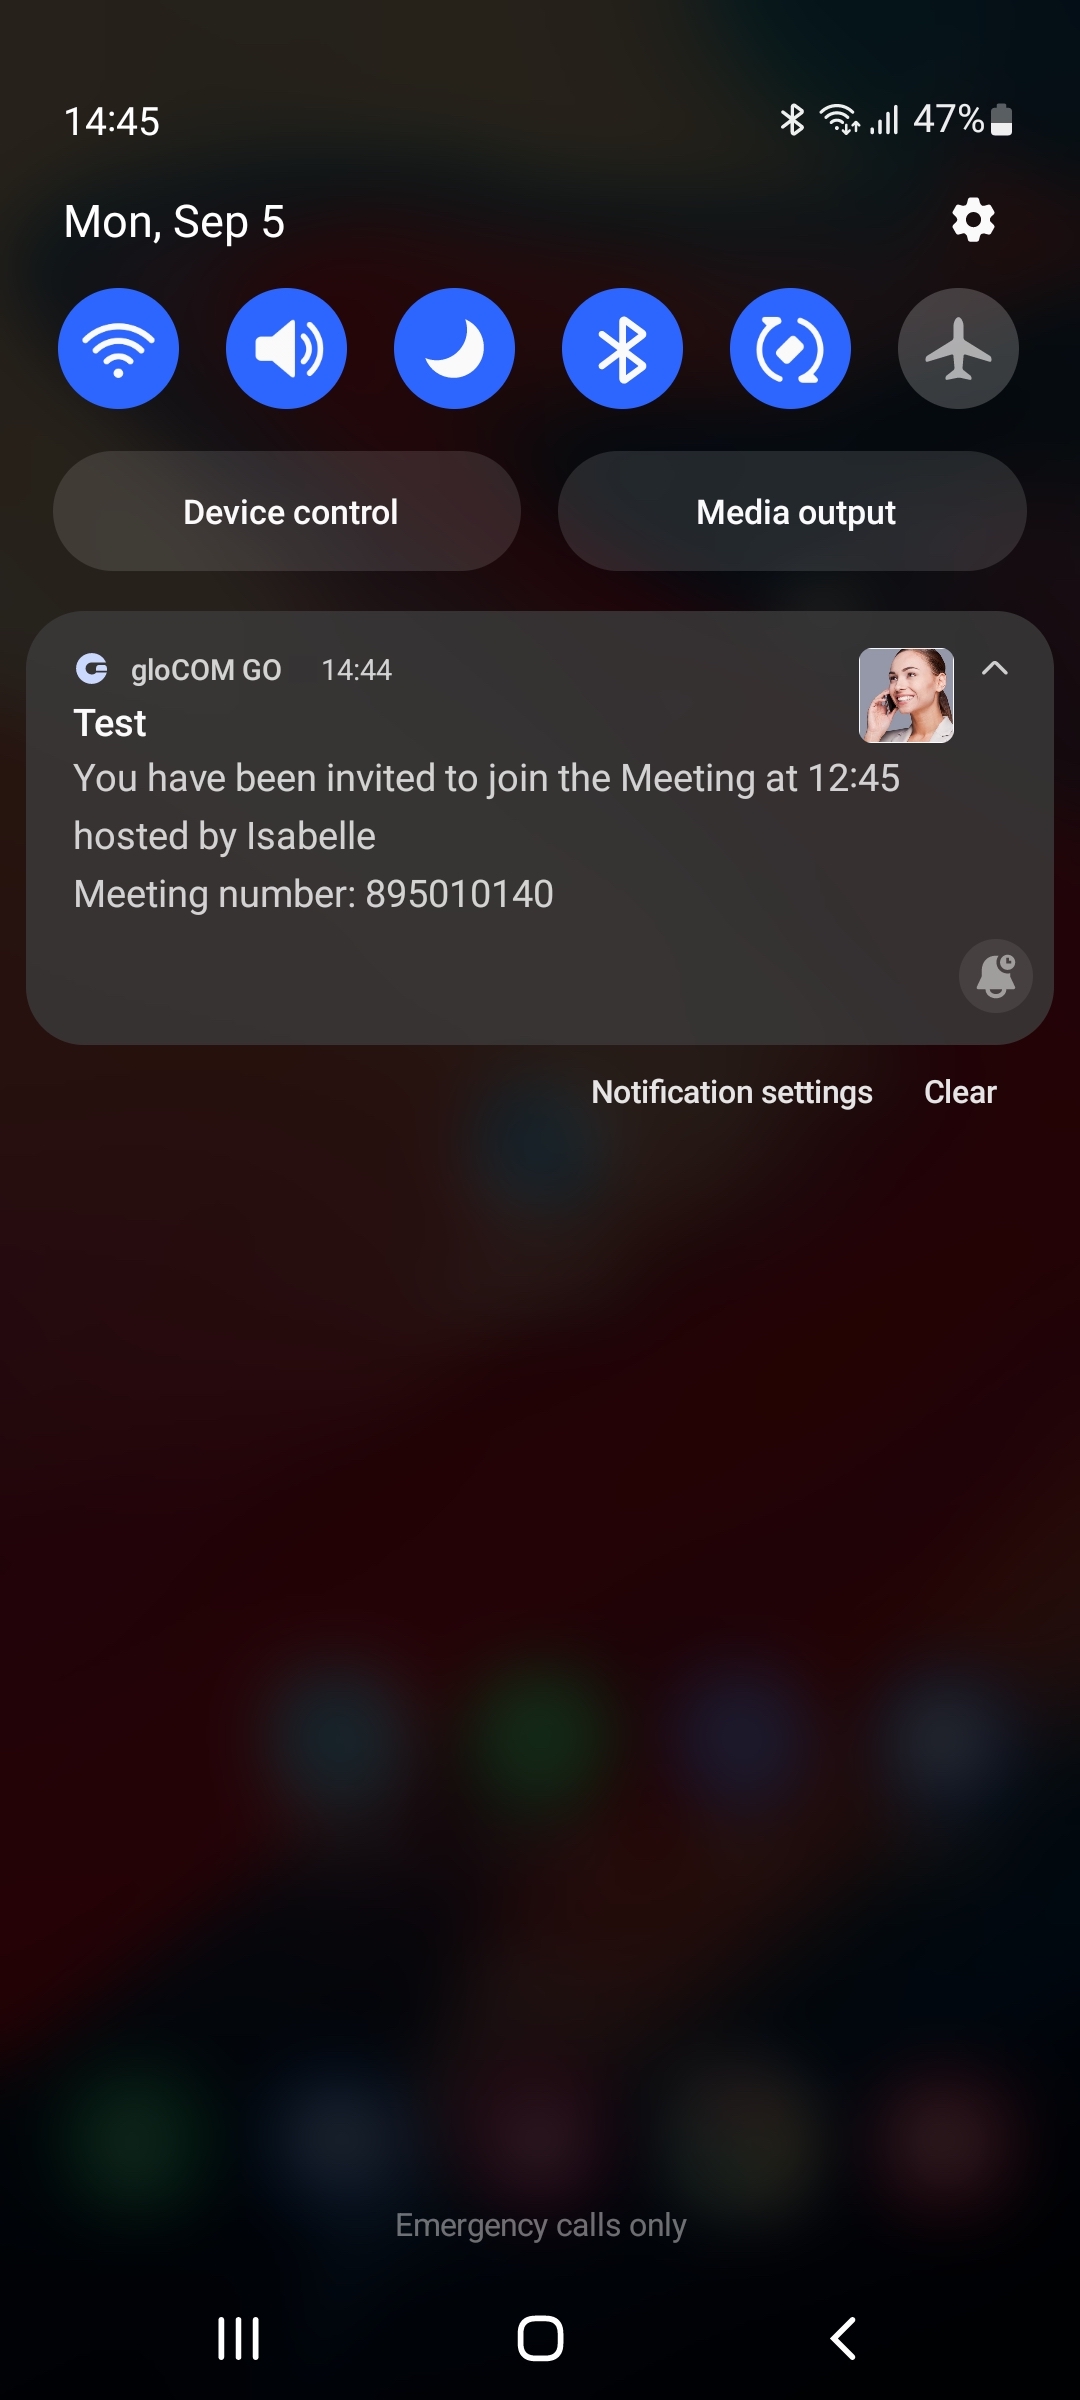
Notifications are shown for new voice messages, as shown below.
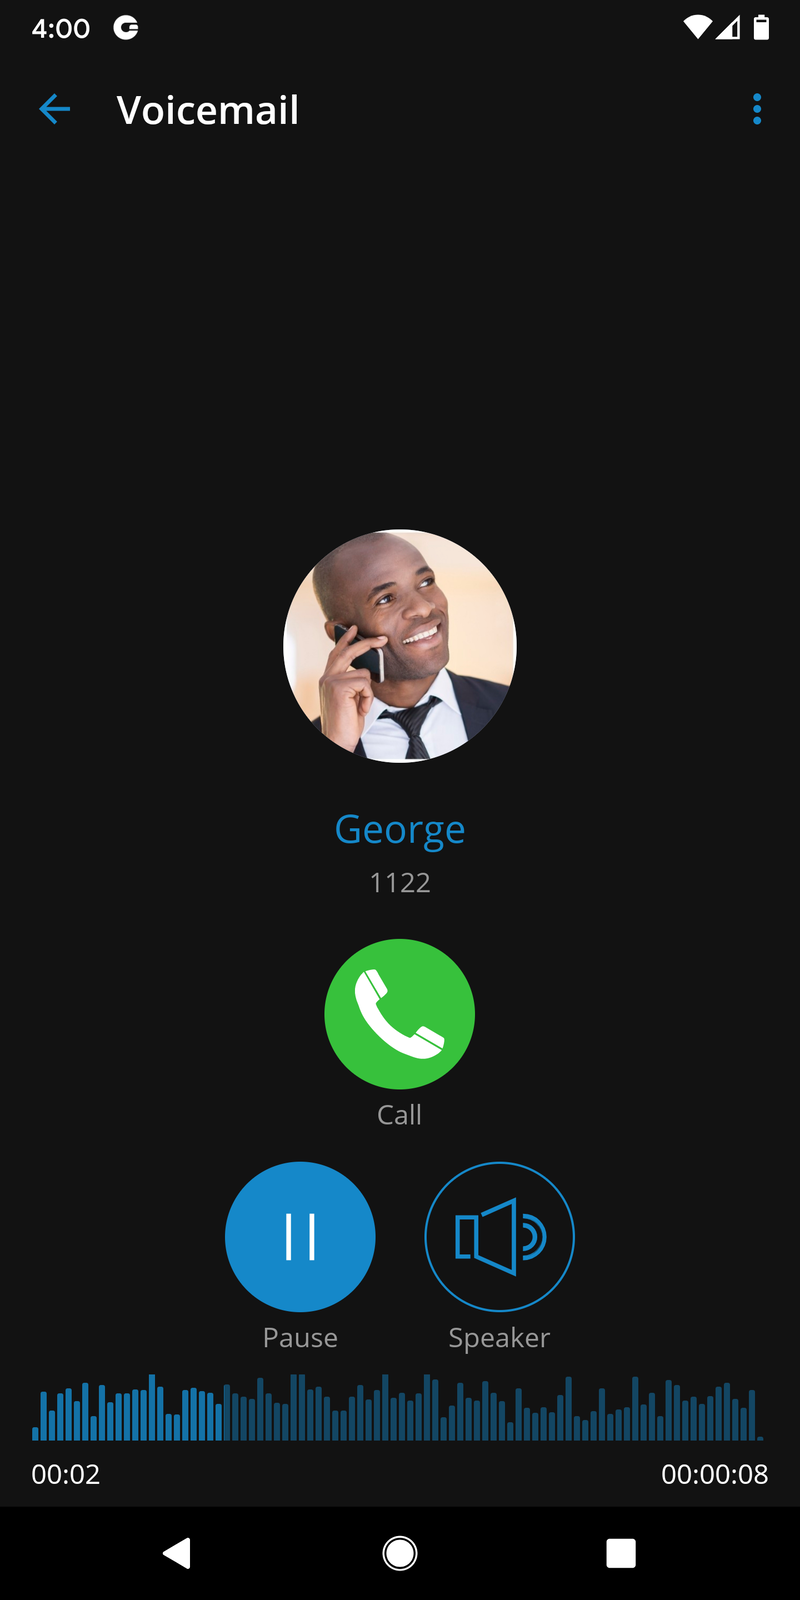
Playing voicemail messages
Messages can be played by selecting them in the list and then playing them.
If the message is not downloaded when play is pressed, a progress dialog will be shown, and once the download is done message should start playing.
Deleting and archiving voicemails messages
Users can delete or archive individual messages by opening them and then pressing the delete icon or archive icon after opening the menu from the navigation bar.
Users can also select more messages and delete or archive them by long-pressing a message from the list and pressing the delete icon or archive icon in the toolbar.
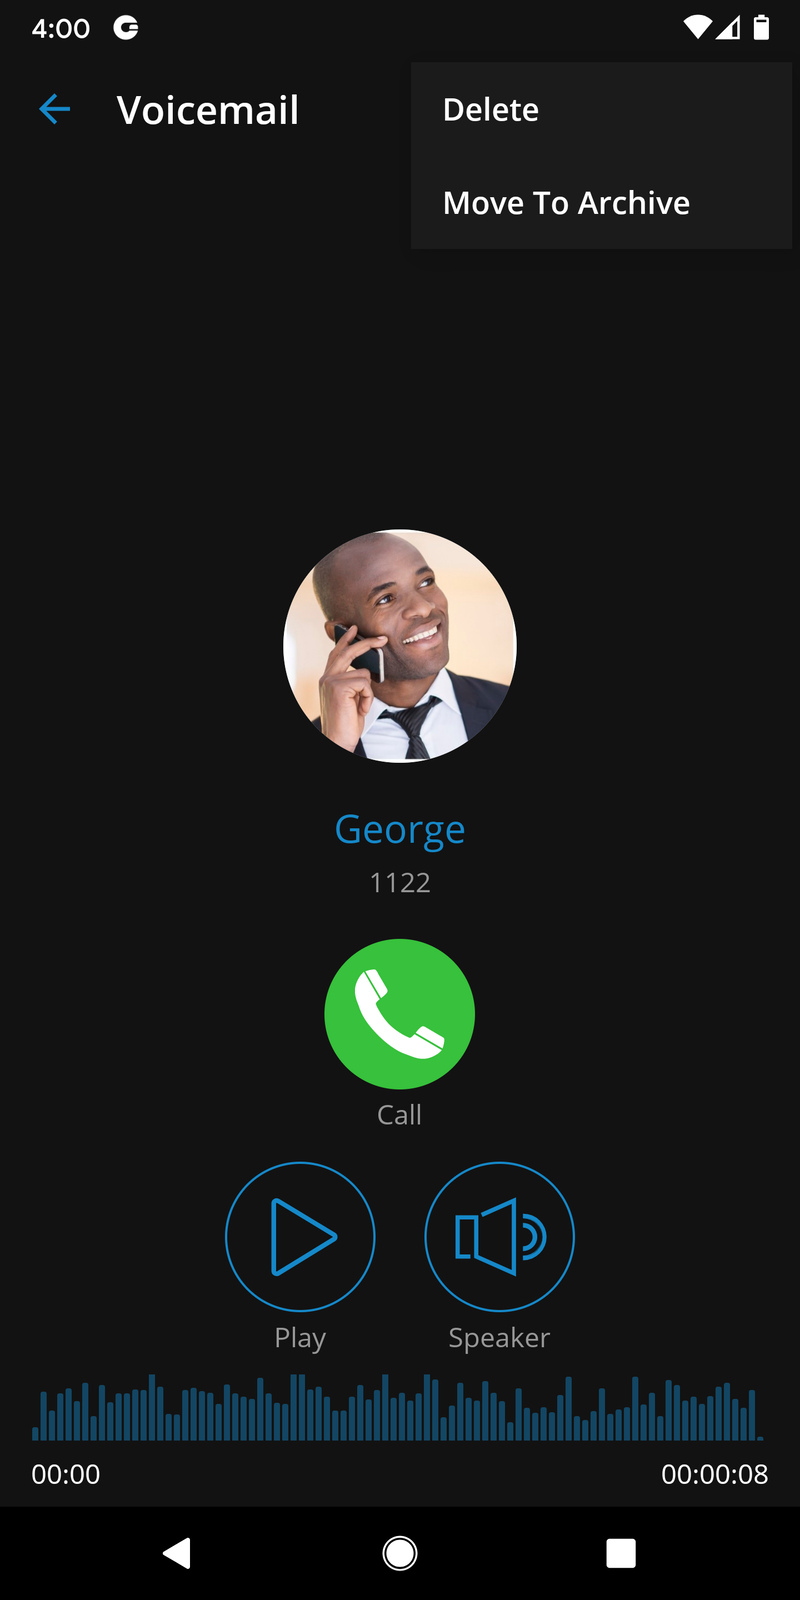
Calling other voicemail boxes directly
Users can open the user’s details screen and press the voicemail button to call the voicemail directly.

Presence
With the Presence feature, users’ status is visible. Users can also see which users are online, busy, away, or offline. This feature also provides information when other users were last seen on the system.
The users’ presence can be seen on the system in the Directory tab at the bottom menu. By default, the Directory is sorting online users at the top, alphabetically. Next on the Directory screen are users that recently went away, and then completely offline users.
Presence can be seen in the Grid or List view on Directory.
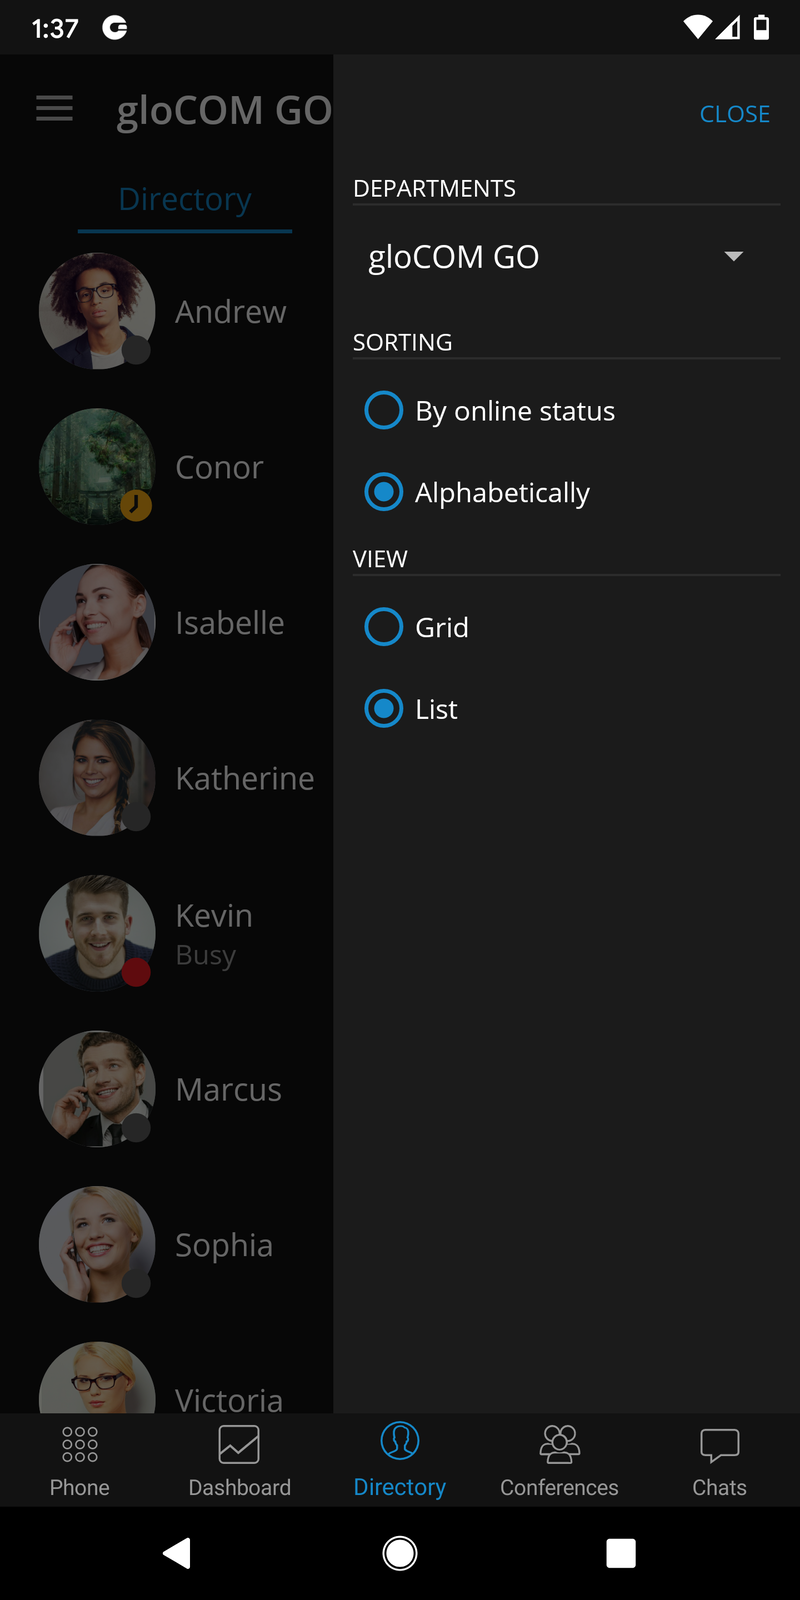
If users prefer alphabetical sorting instead of sorting by Presence, they can change that by pressing the icon with three lines in the top right corner of the screen in Directory.
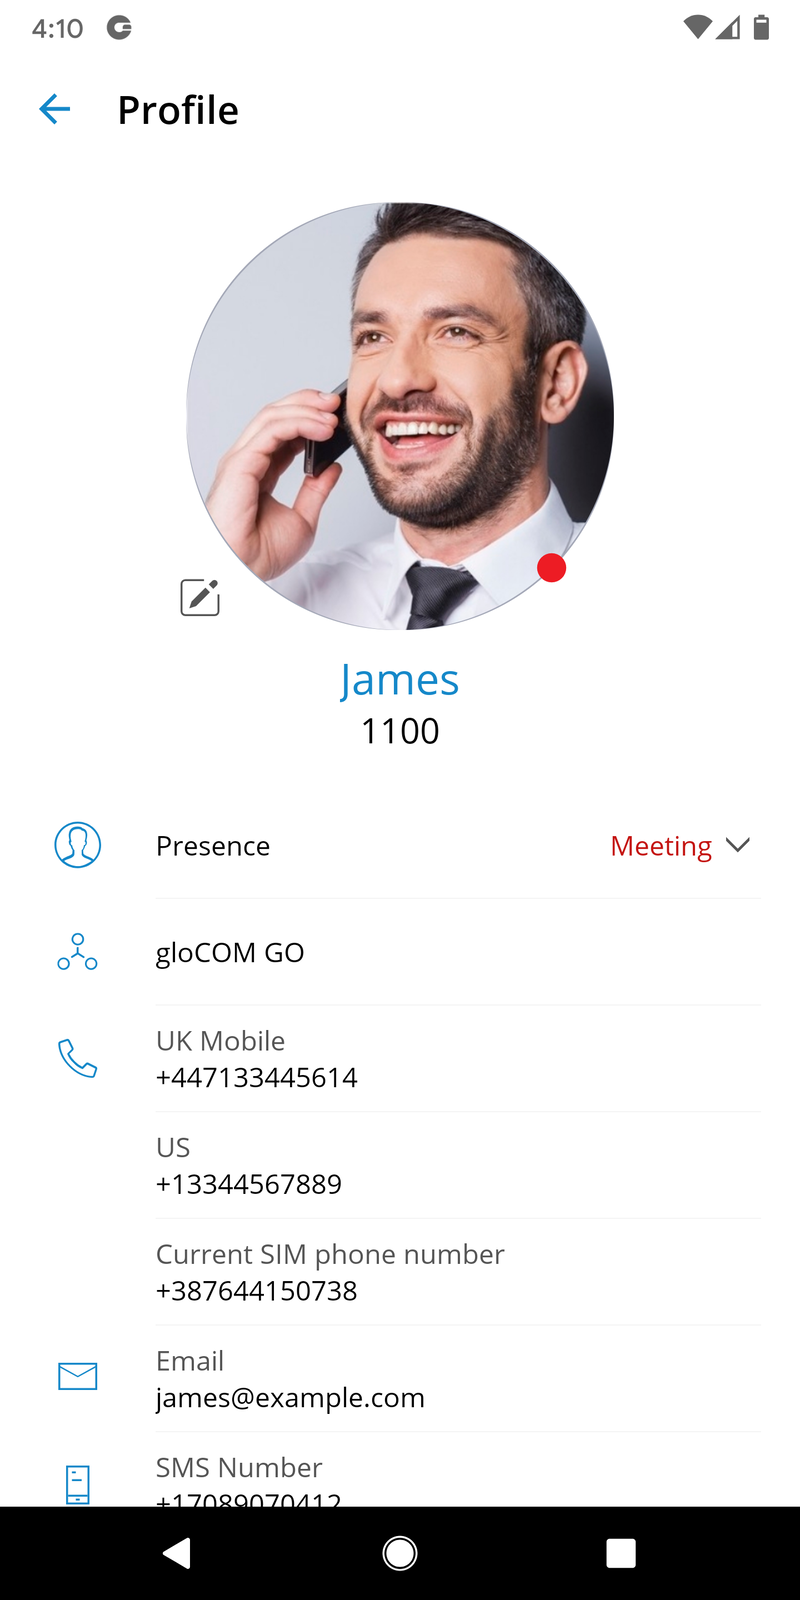
Pressing the user’s avatar on Directory and opening the user’s info screen, more presence information is available.
Presence change or update can be done by going to the Profile item on the bottom bar. If users can not see the Profile item, they can click on More and find it there.
Users can change their personal presence status by pressing on their current status or on the icon of an arrow pointing downwards. A dialog screen will open with three fields: Status, Message, and the display status (for the duration of chosen status).
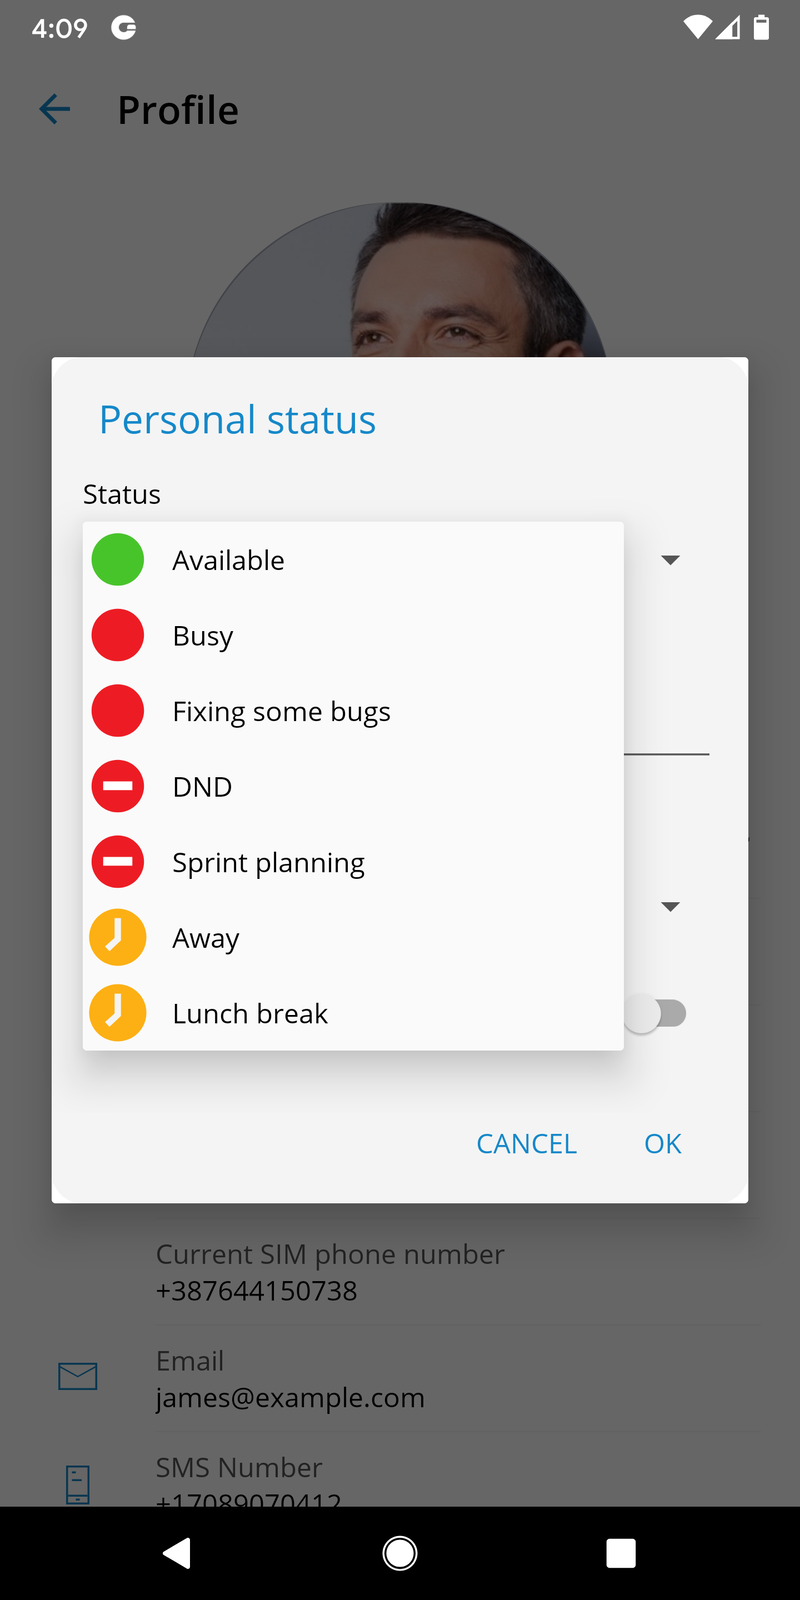
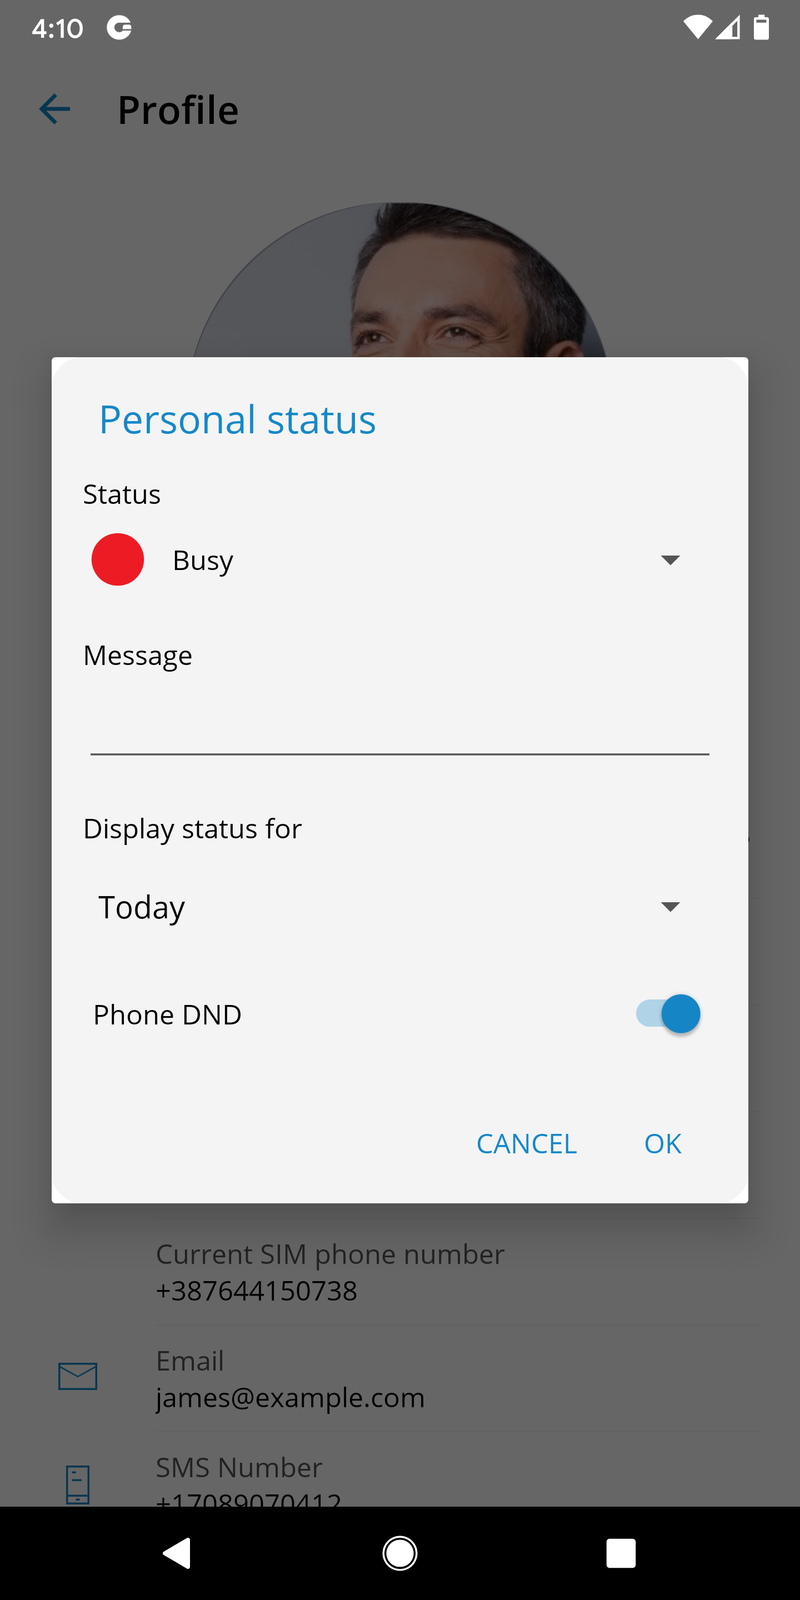
Default statuses are:
-
Available (green icon)
-
Busy (red icon)
-
DND – Do not disturb (red icon with a rectangle)
-
Away (yellow icon with a clock)
Users can create predefined statuses by adding them to PBXware.
For default statuses, users cannot enter a custom message, but for predefined statuses, they can associate a message that will be displayed to other users with the selected status.
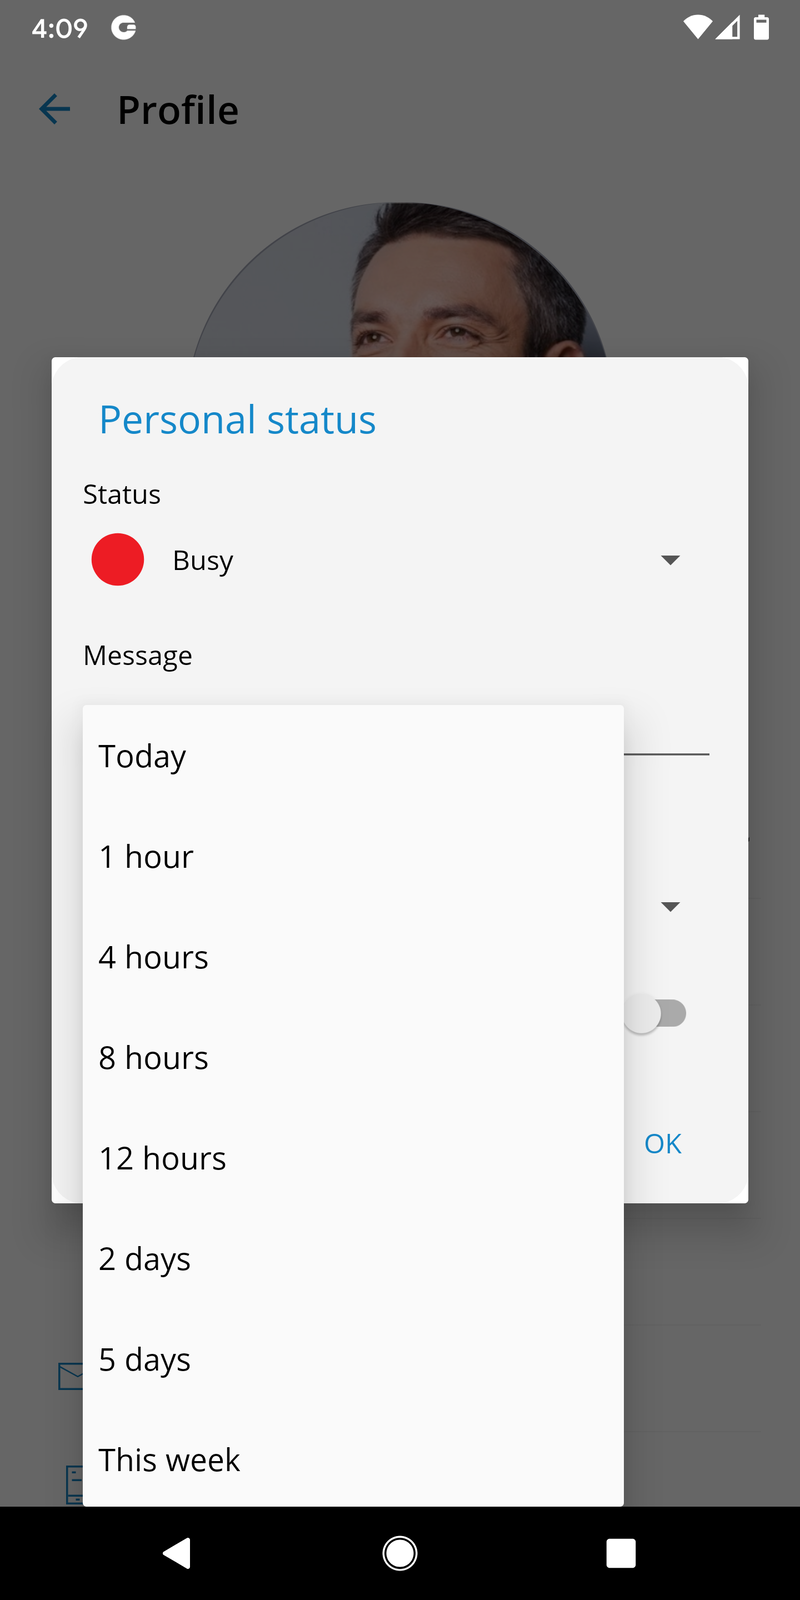
The last option in the Presence dialog is how much time the new Presence status will last.
Available values are:
-
Today
-
1 hour
-
4 hours
-
8 hours
-
12 hours
-
2 days
-
5 days
-
This week
-
Always
Presence status in the chat list
The chat list presence status provides information about the availability of other users. It is displayed with the corresponding icon in the bottom right corner of the user’s avatar.
Presence on the chat screen
The information about the availability of the user is also visible in the top left corner of the chat screen.
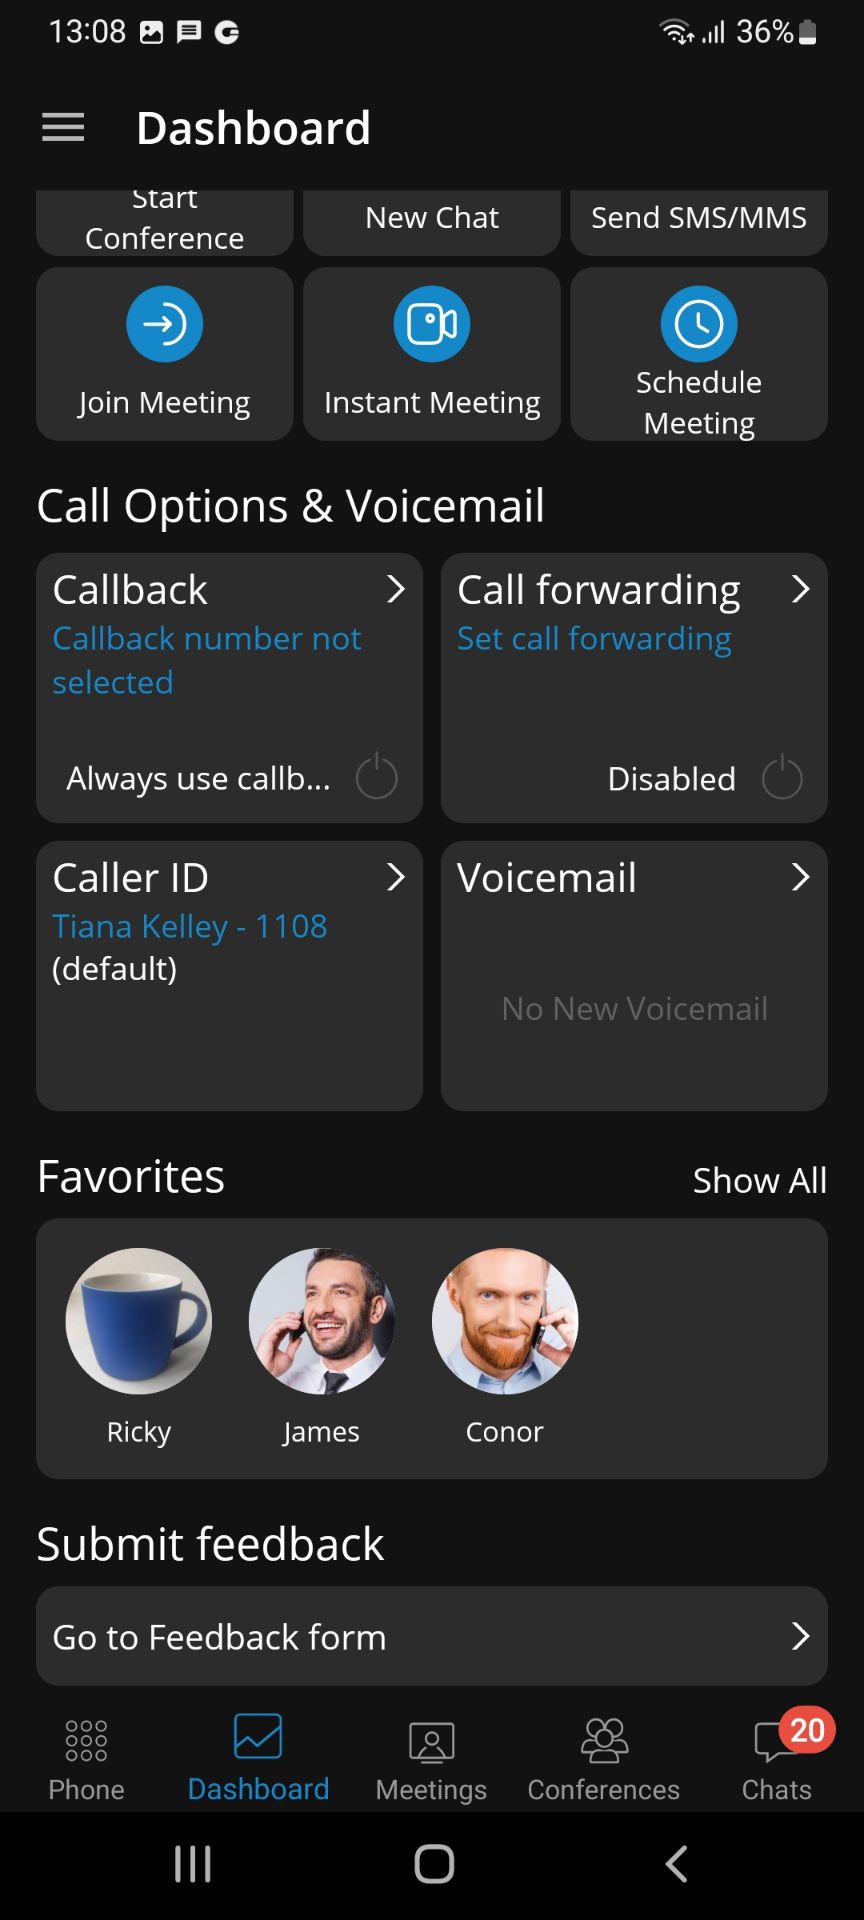
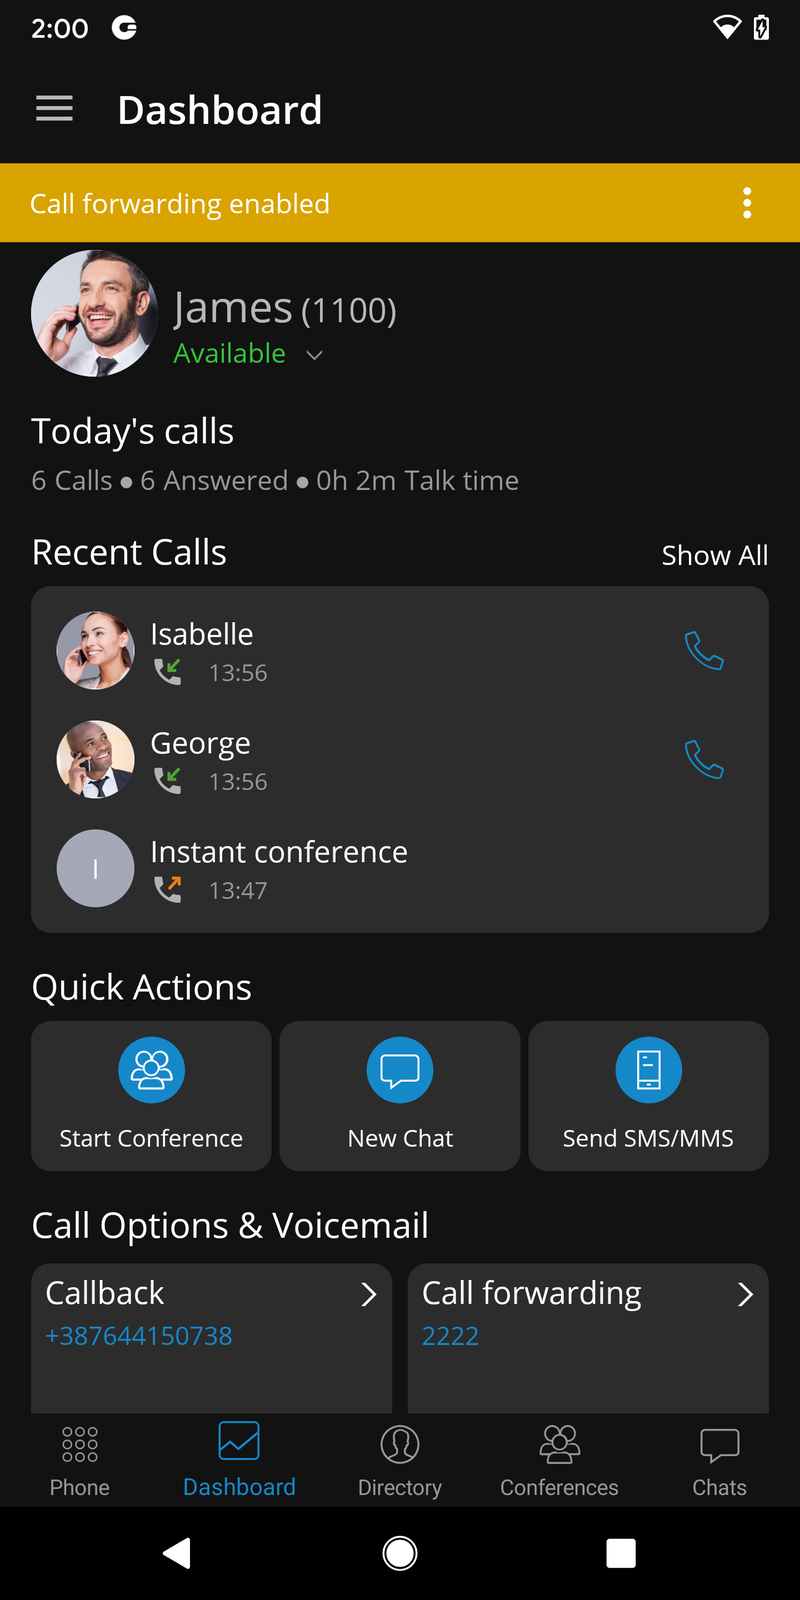
Dashboard
gloCOM GO 6 dashboard incorporates call information and easy control of Enhanced Services.
The dashboard contains easy access modules for Profile info, today’s calls stats, Recent calls, Call options & Voicemail, Favorites, and Quick actions.
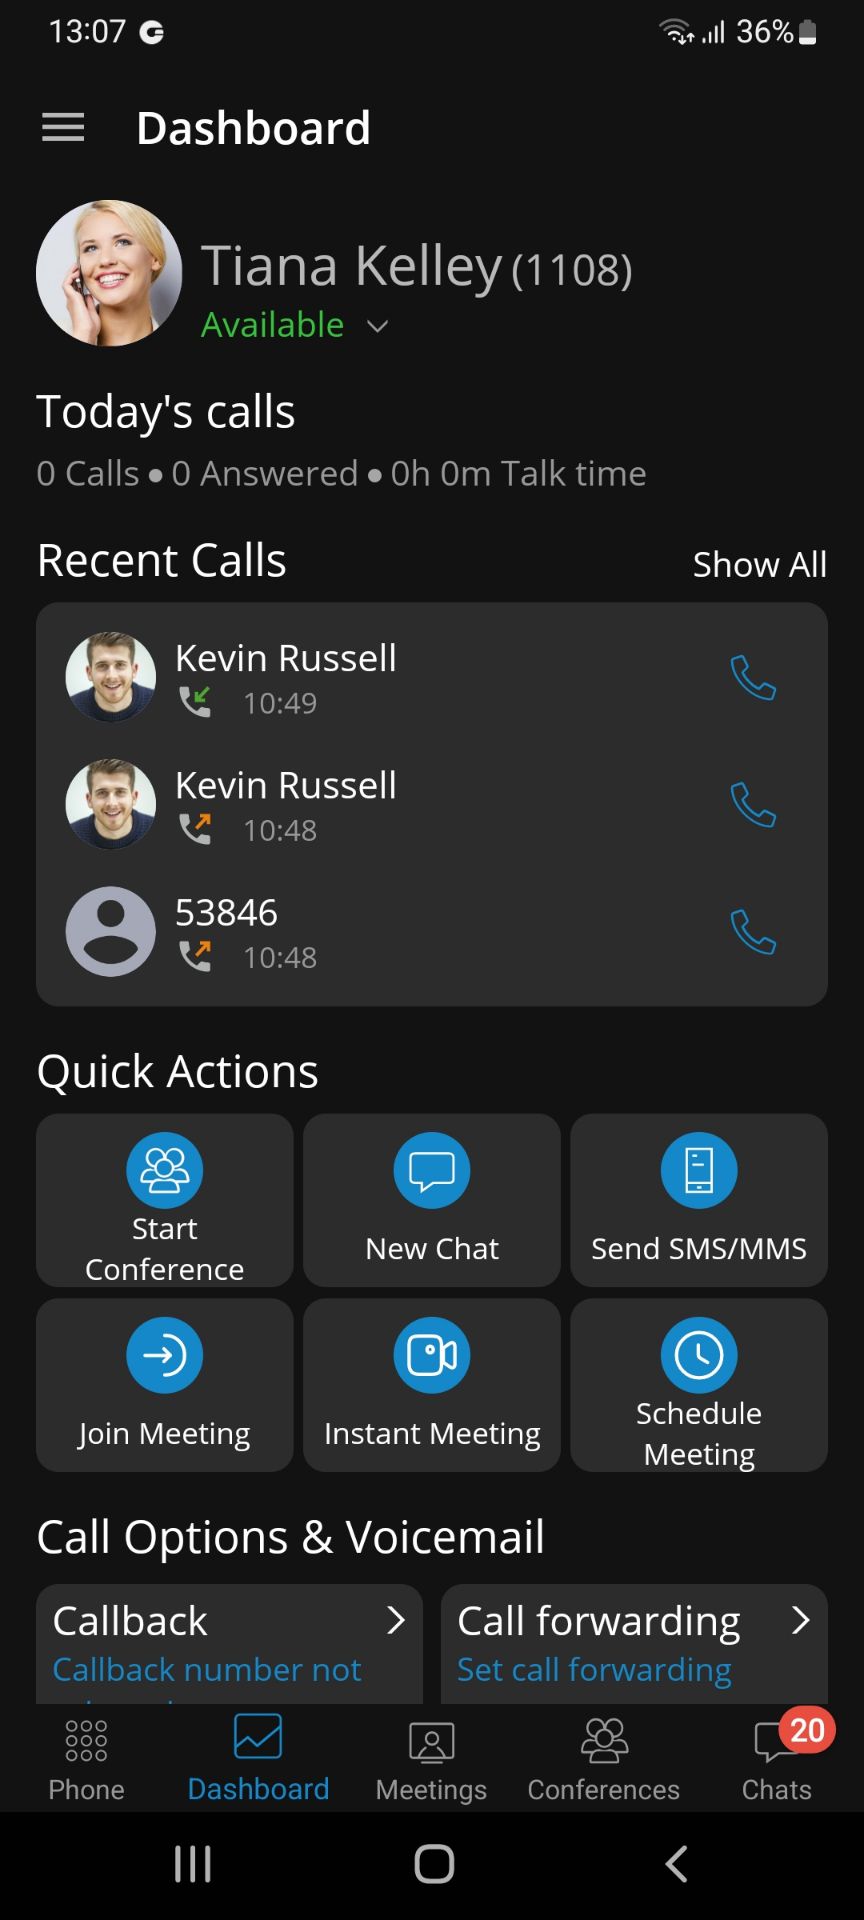
The profile info module displays the username, extension, avatar, and personal status. Today’s calls module displays stats about calls that are made today.
The Recent calls module displays the last three calls and allows interaction with them. The quick actions module will enable users to start a conference quickly, create a new chat, send SMS/MMS and join/schedule/create an instant meeting.
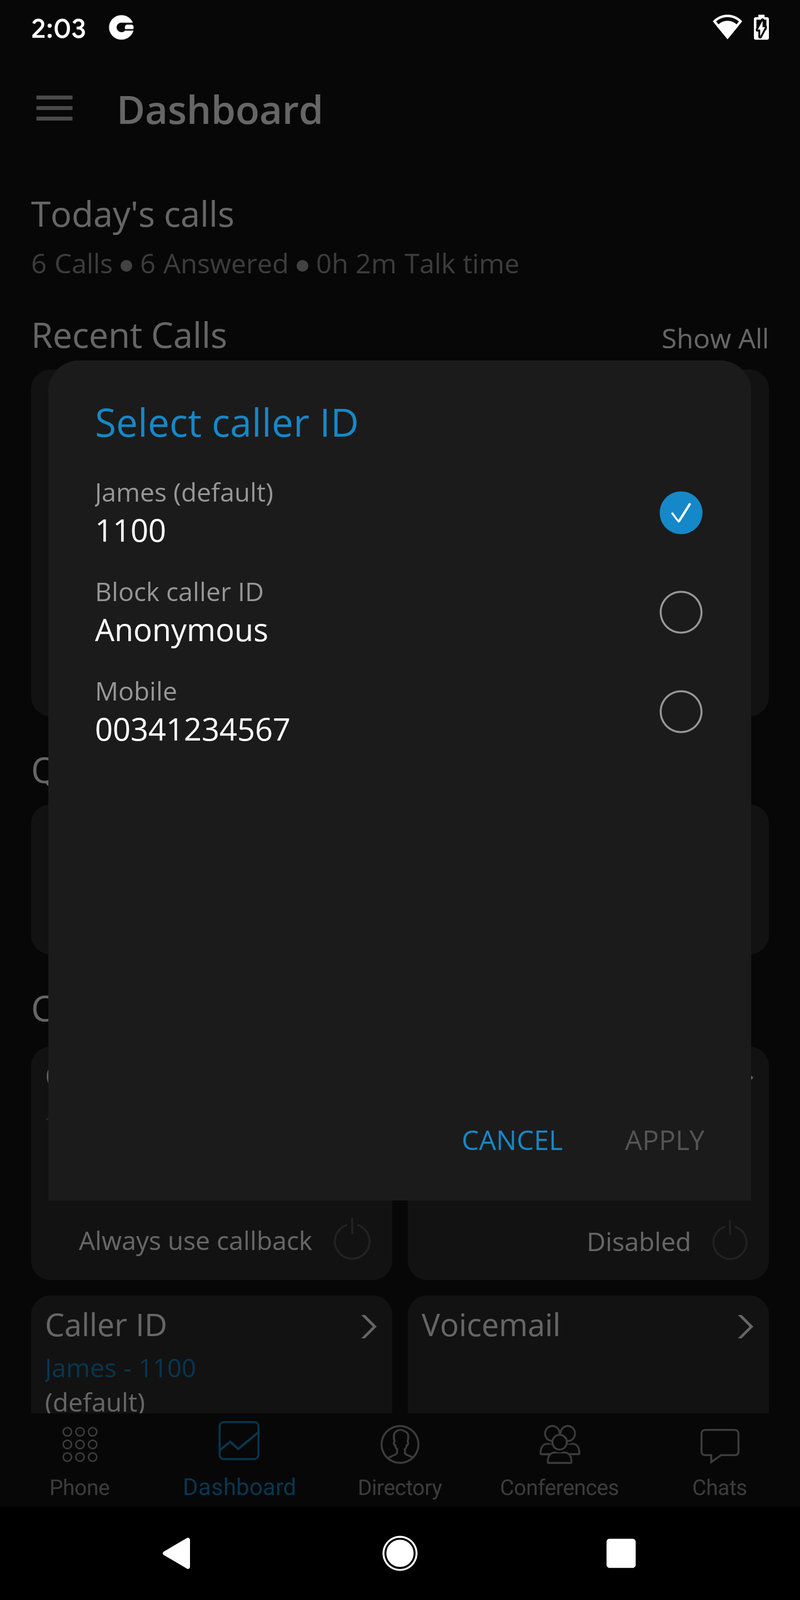
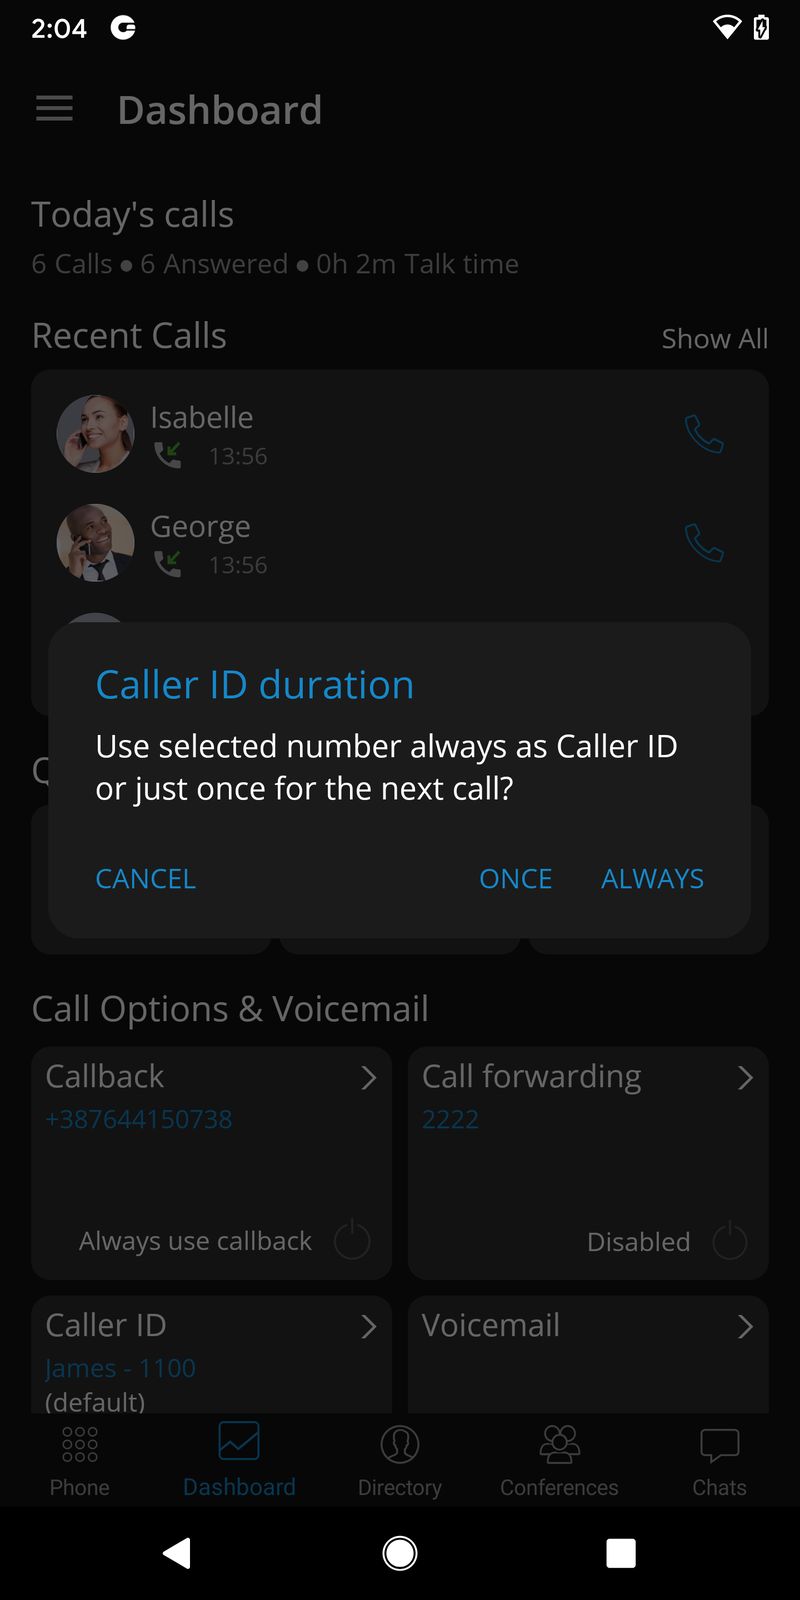
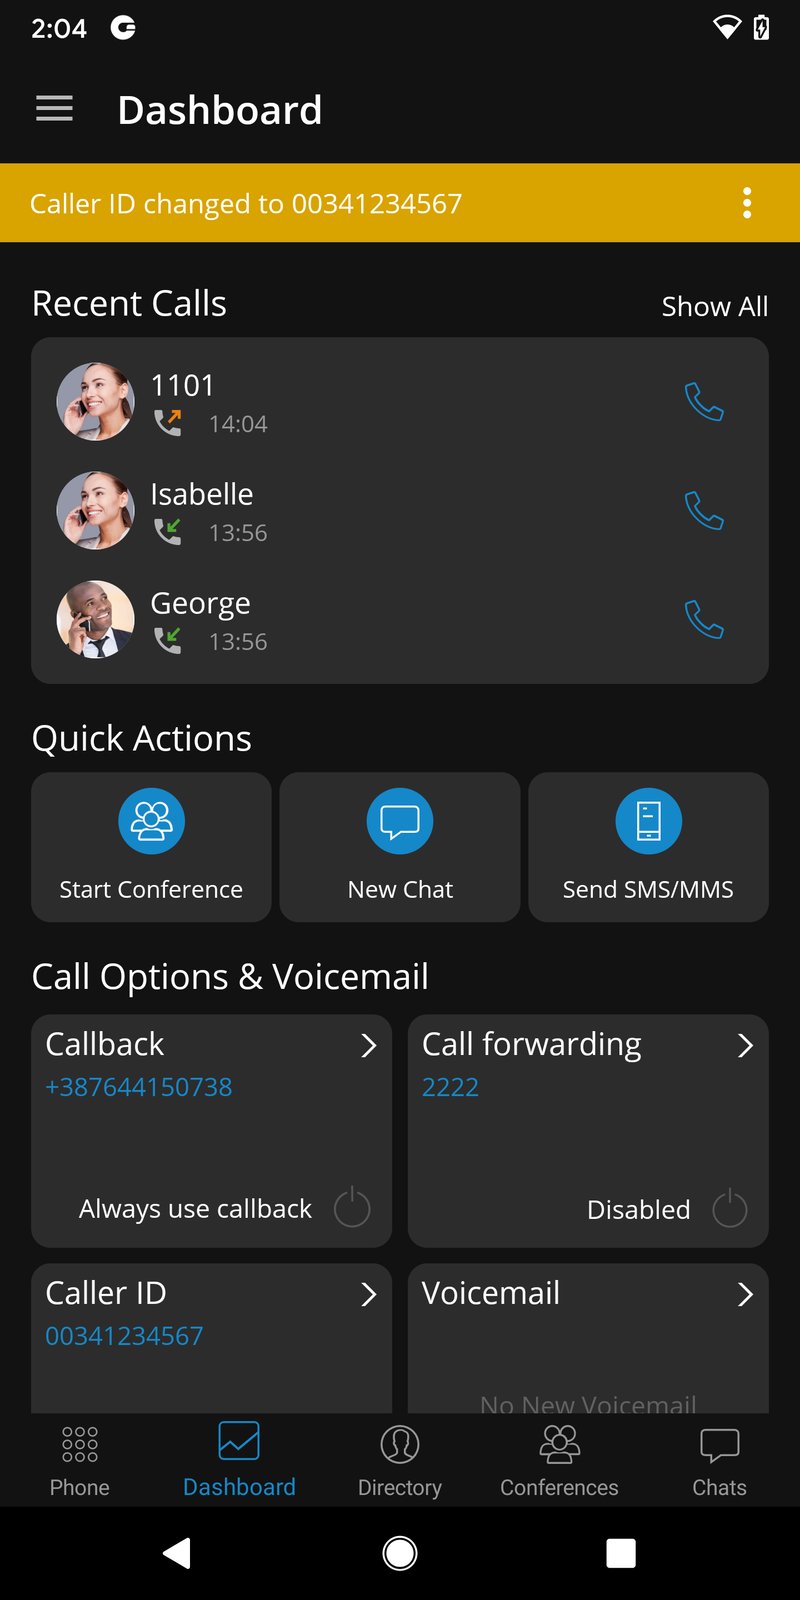
The call options & voicemail module allows users to access settings for call forwarding, callback, caller id, and open voicemail screen.
The Favorites module displays ten favorite contacts and allows interaction with them.
At the bottom of the Dashboard screen, users can express their opinion about gloCOM GO 6 by selecting Feedback.
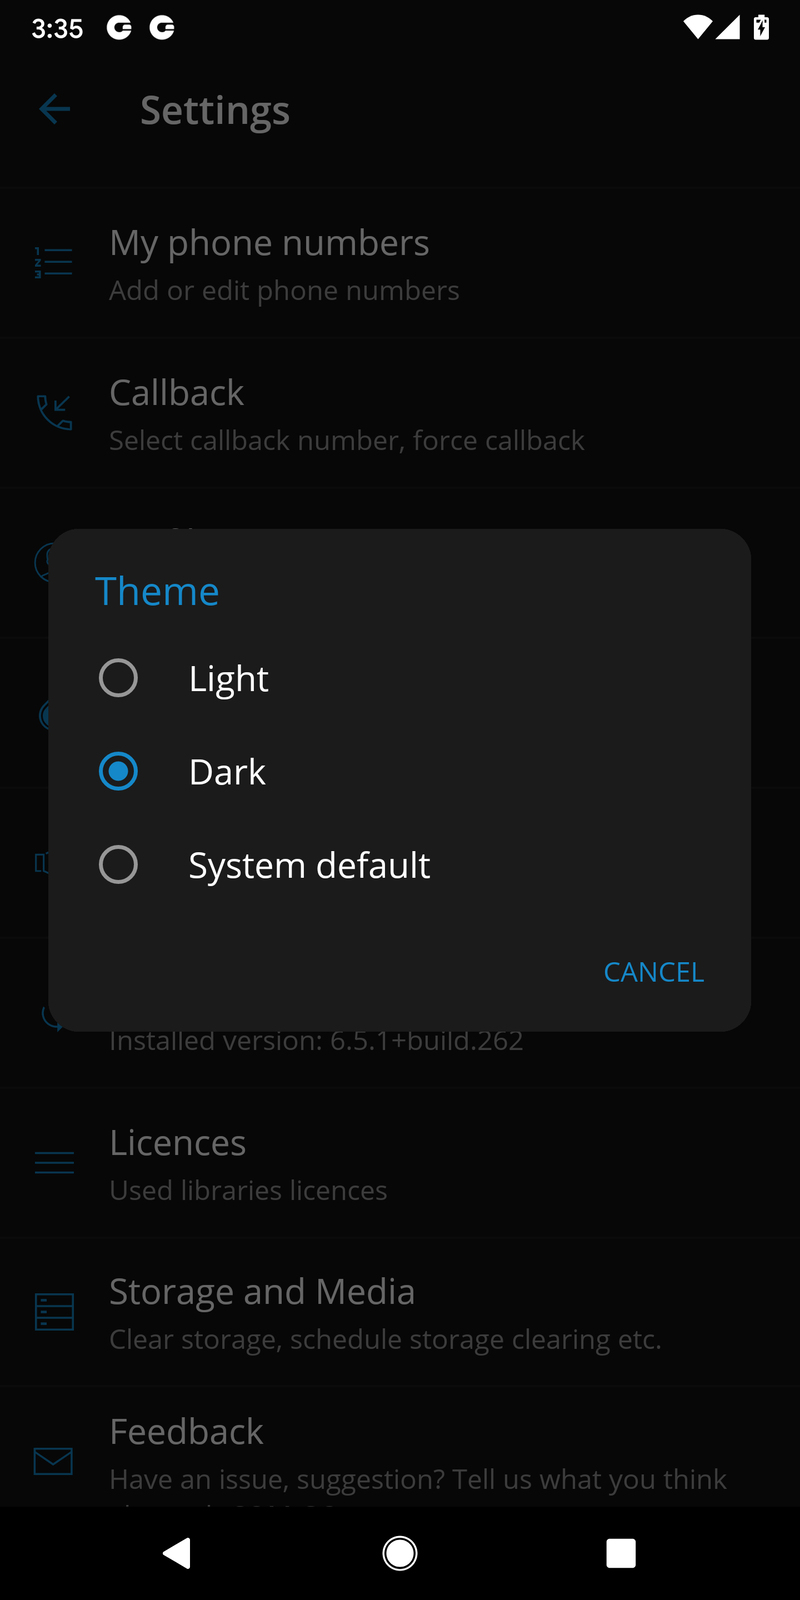
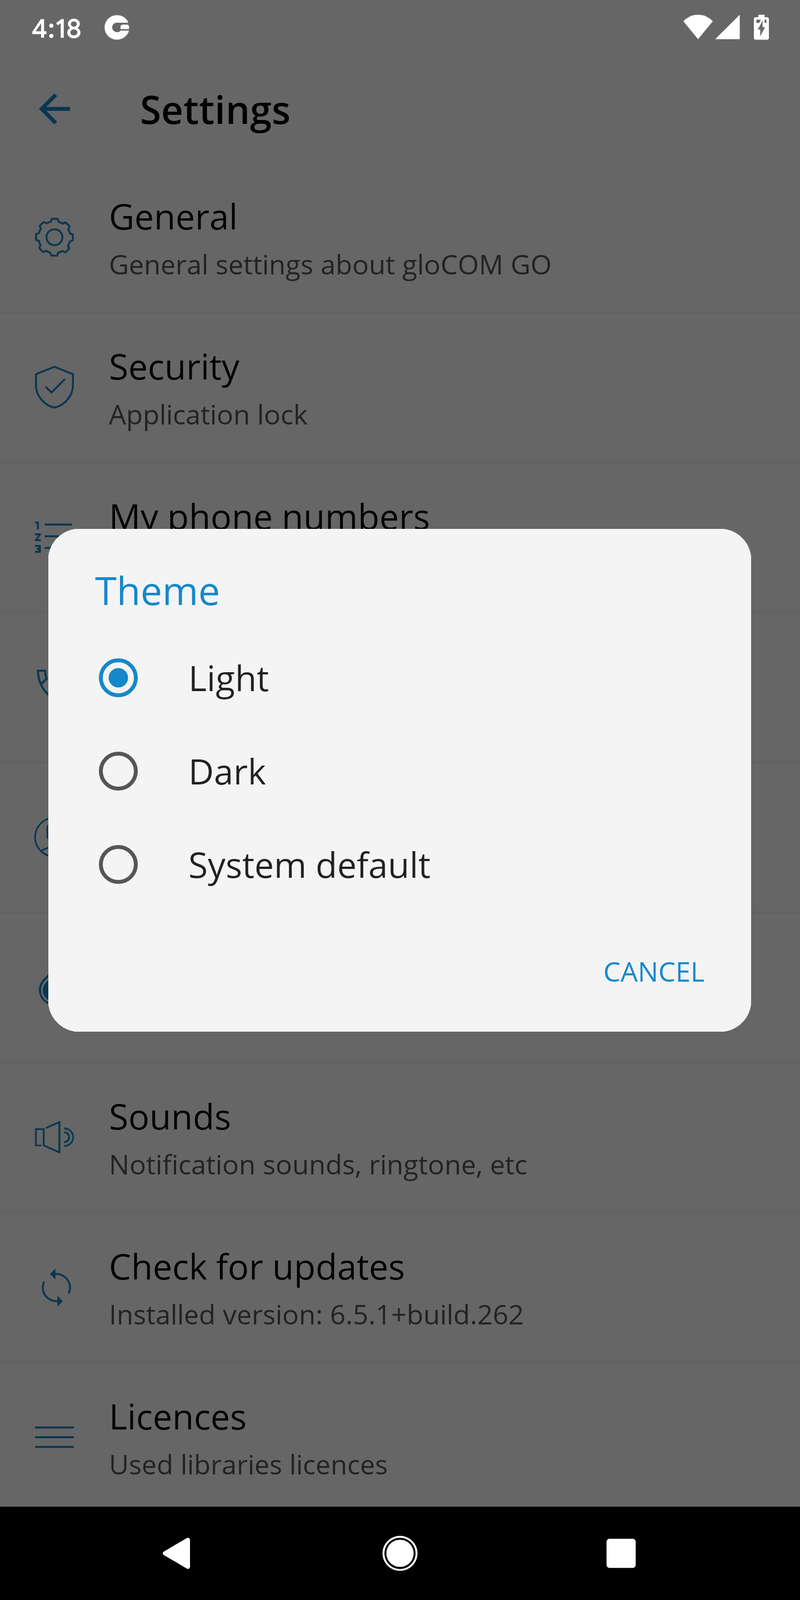
Dark Theme support
gloCOM GO 6 users can select light theme, dark theme or system default.
Dark Mode will follow the system options if Dark Mode is selected in the device system.
In order to select a light, dark, or system default theme, users press on Theme in Settings, and select the preferred theme from the pop-up menu. Once the preferred theme is selected, it will change immediately.
In order to select a light, dark, or system default theme, users press on Theme in Settings, and select the preferred theme from the pop-up menu. Once the preferred theme is selected, it will change immediately.
Localisations (translations)
gloCOM GO 6 is available in different languages. The app detects the system language and applies the translations if that language is supported.
The gloCOM GO 6 has been translated to Italian, Portuguese and German languages, so our international gloCOM GO 6 users can explore the benefits of the gloCOM GO 6 in their native language.
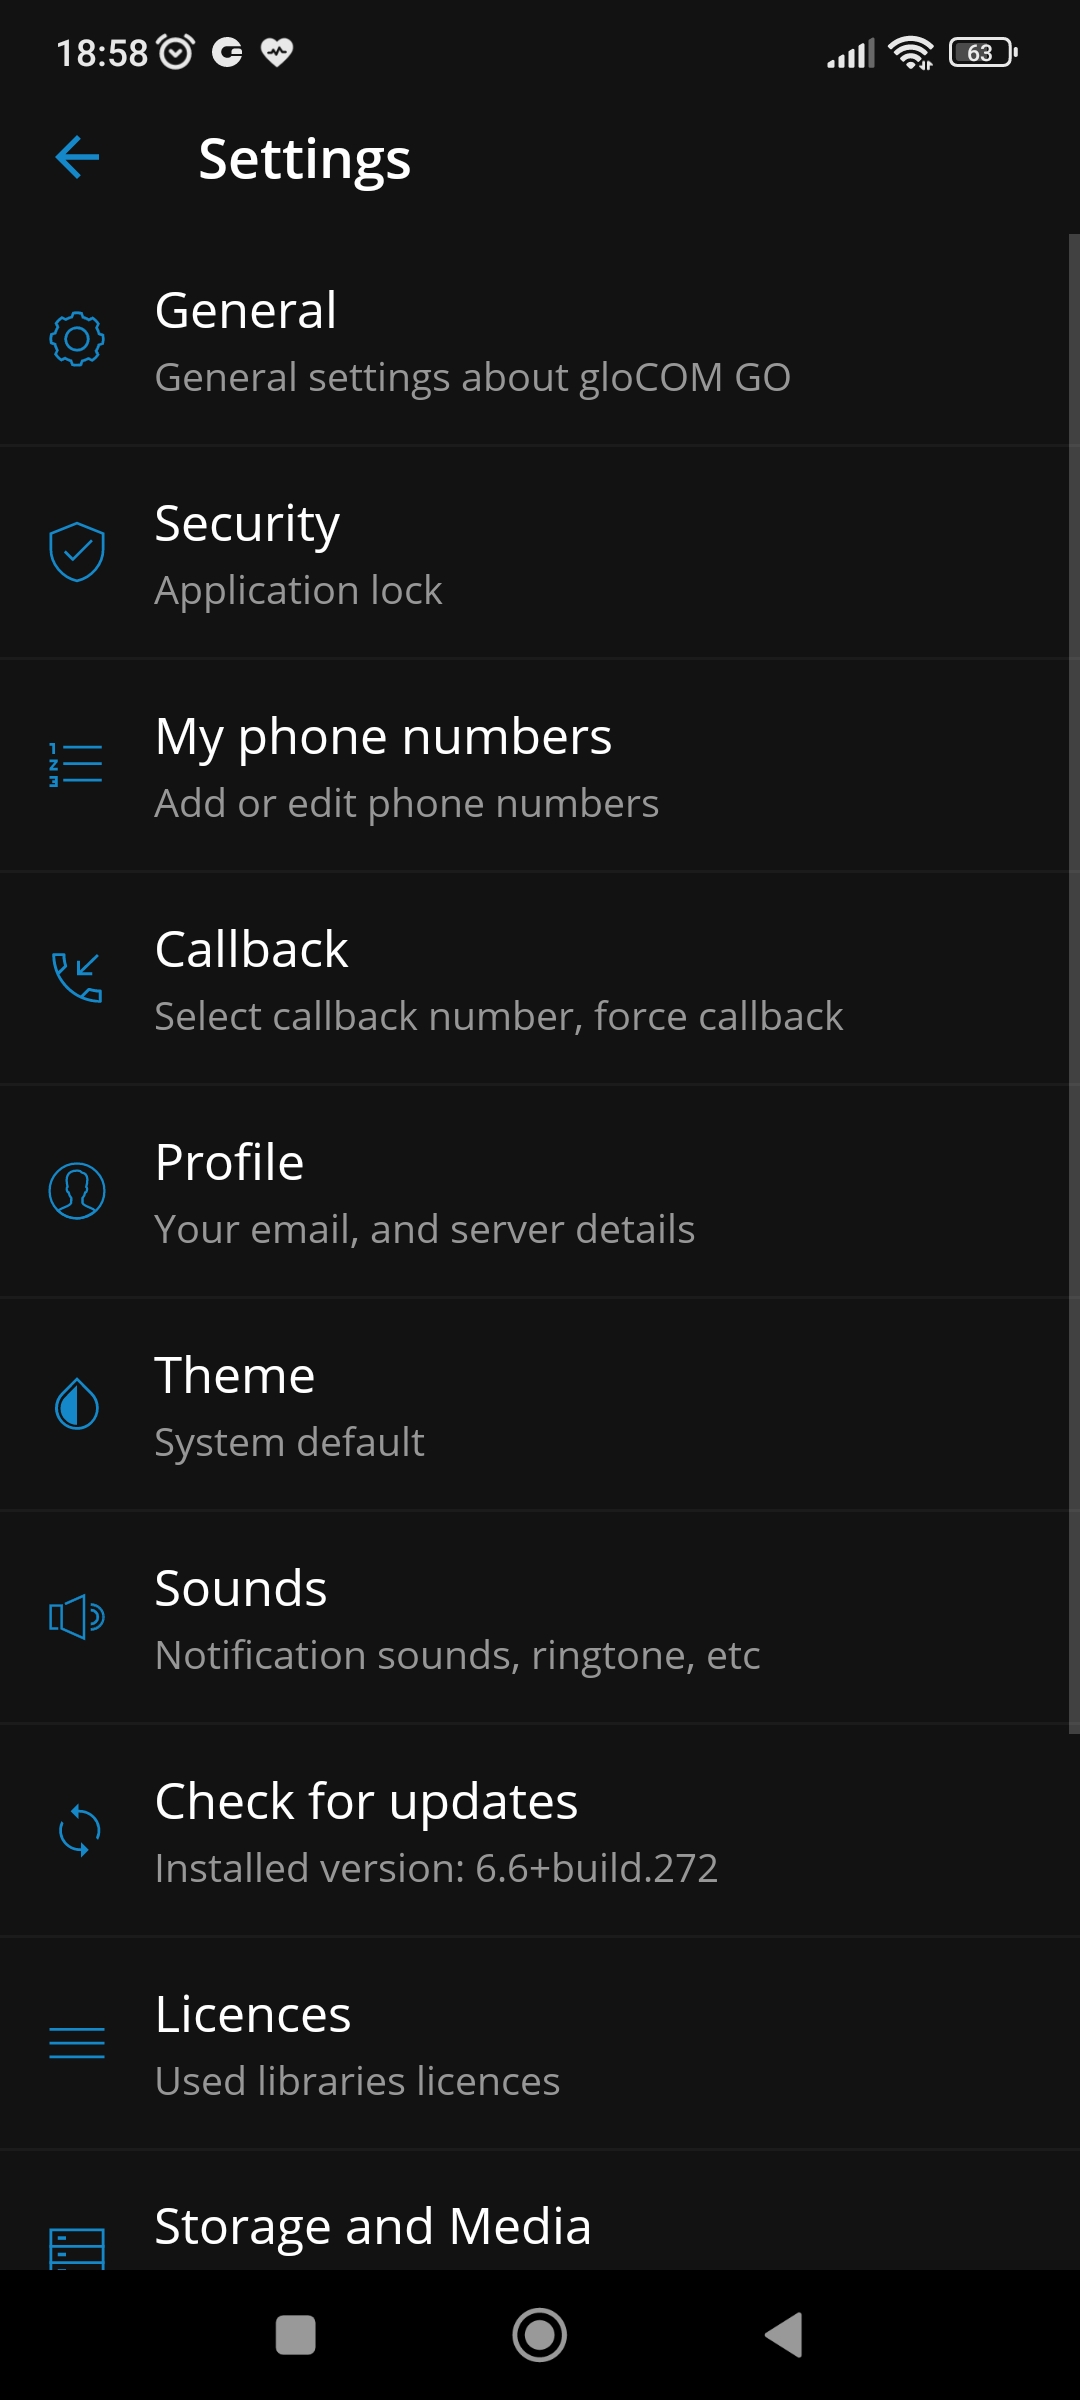
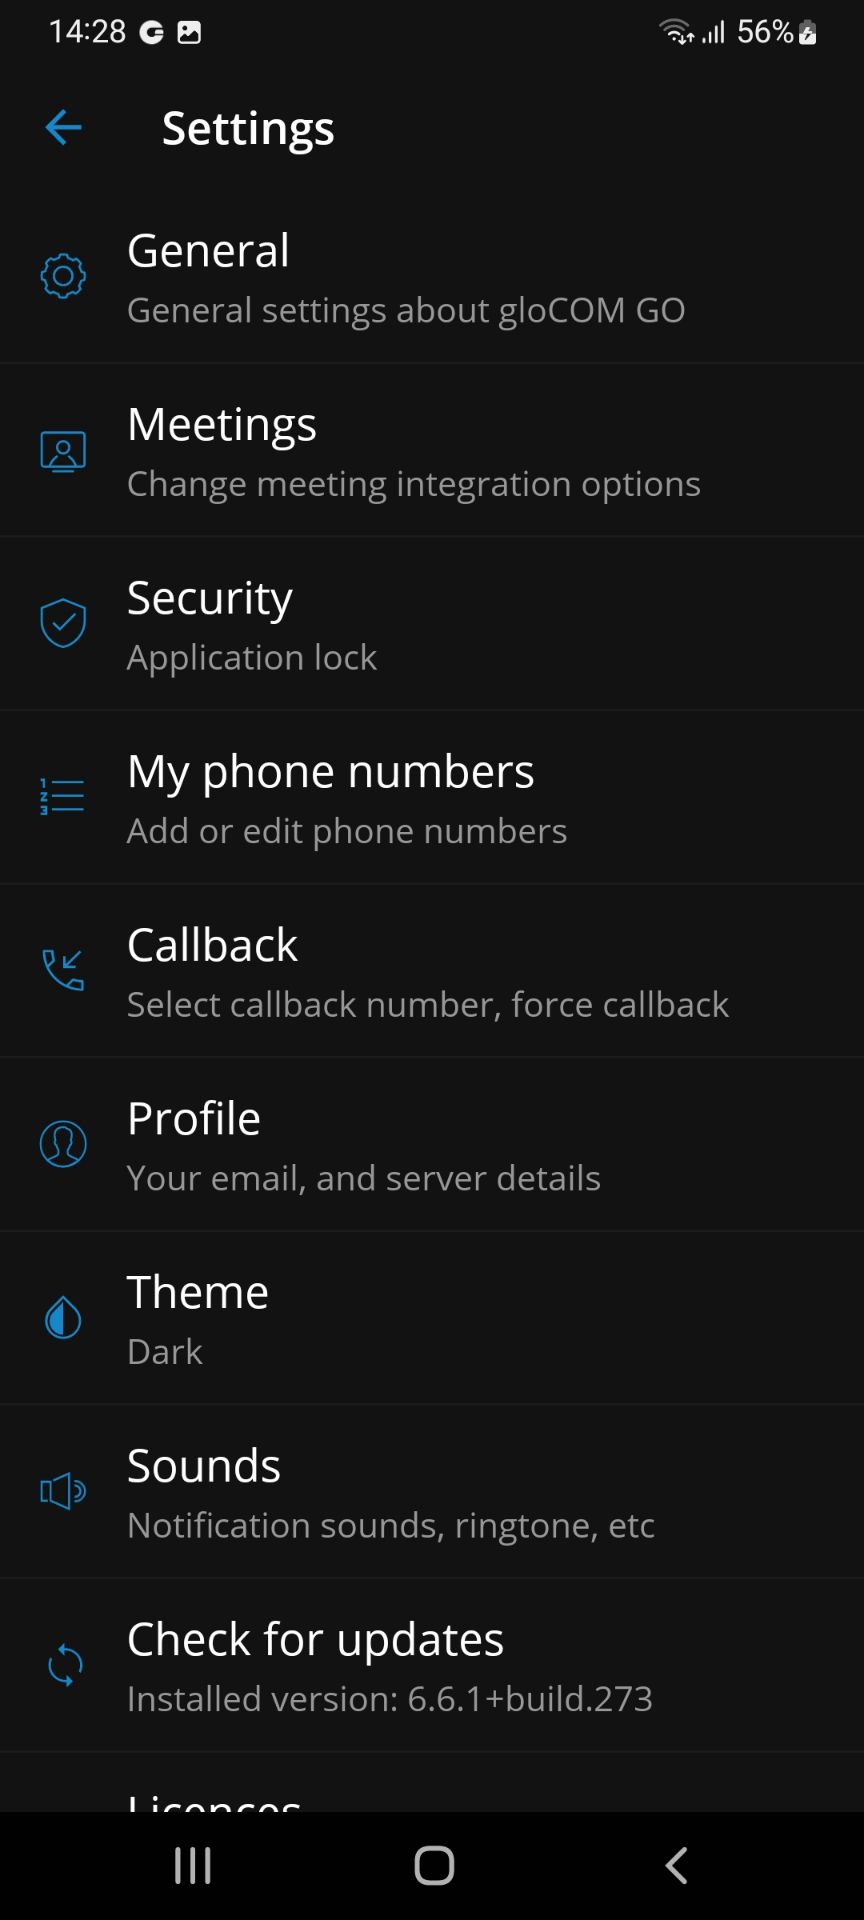
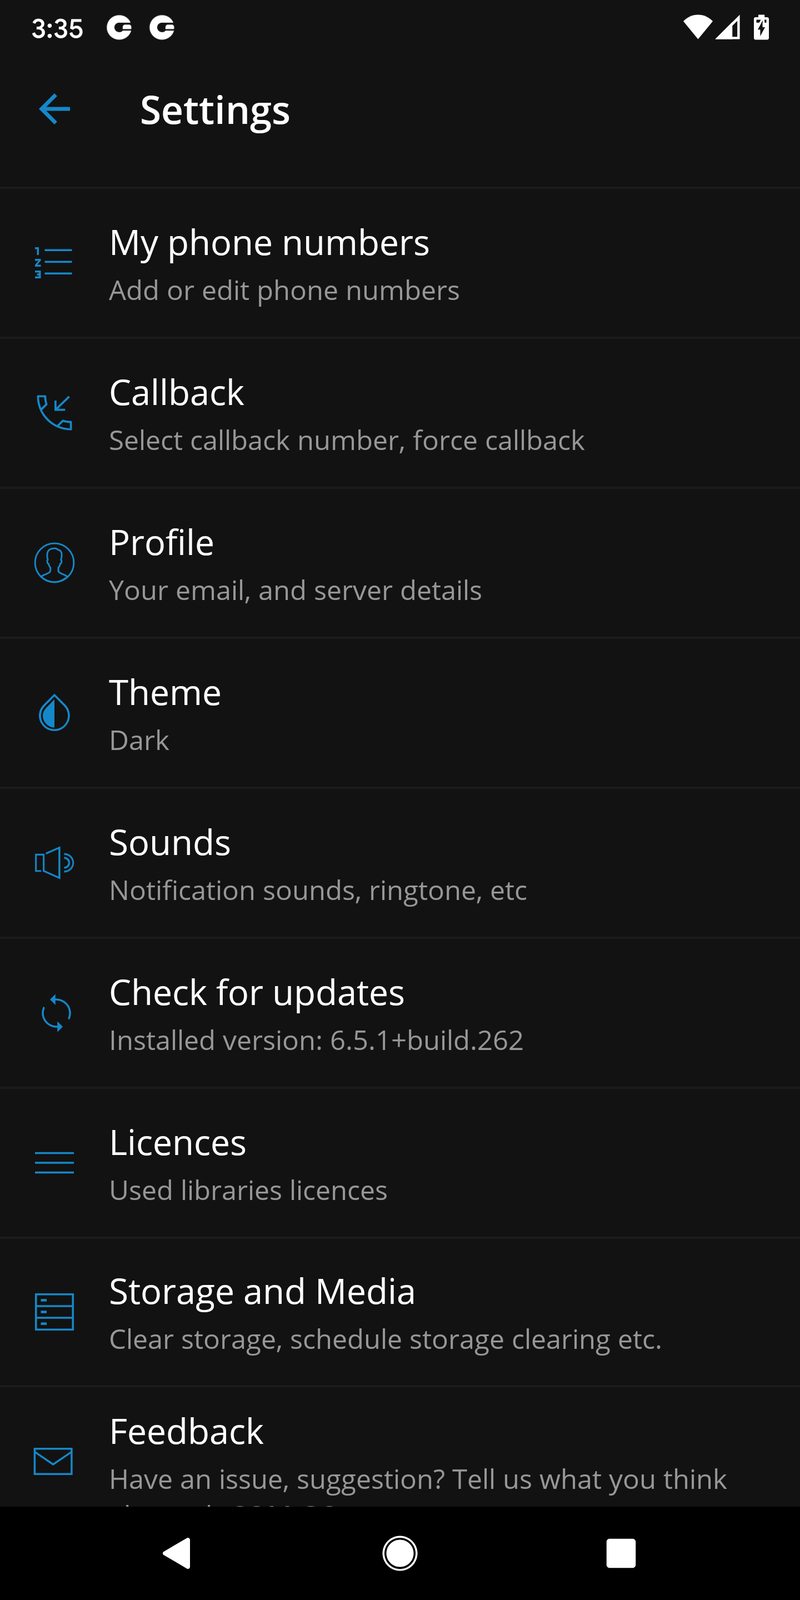
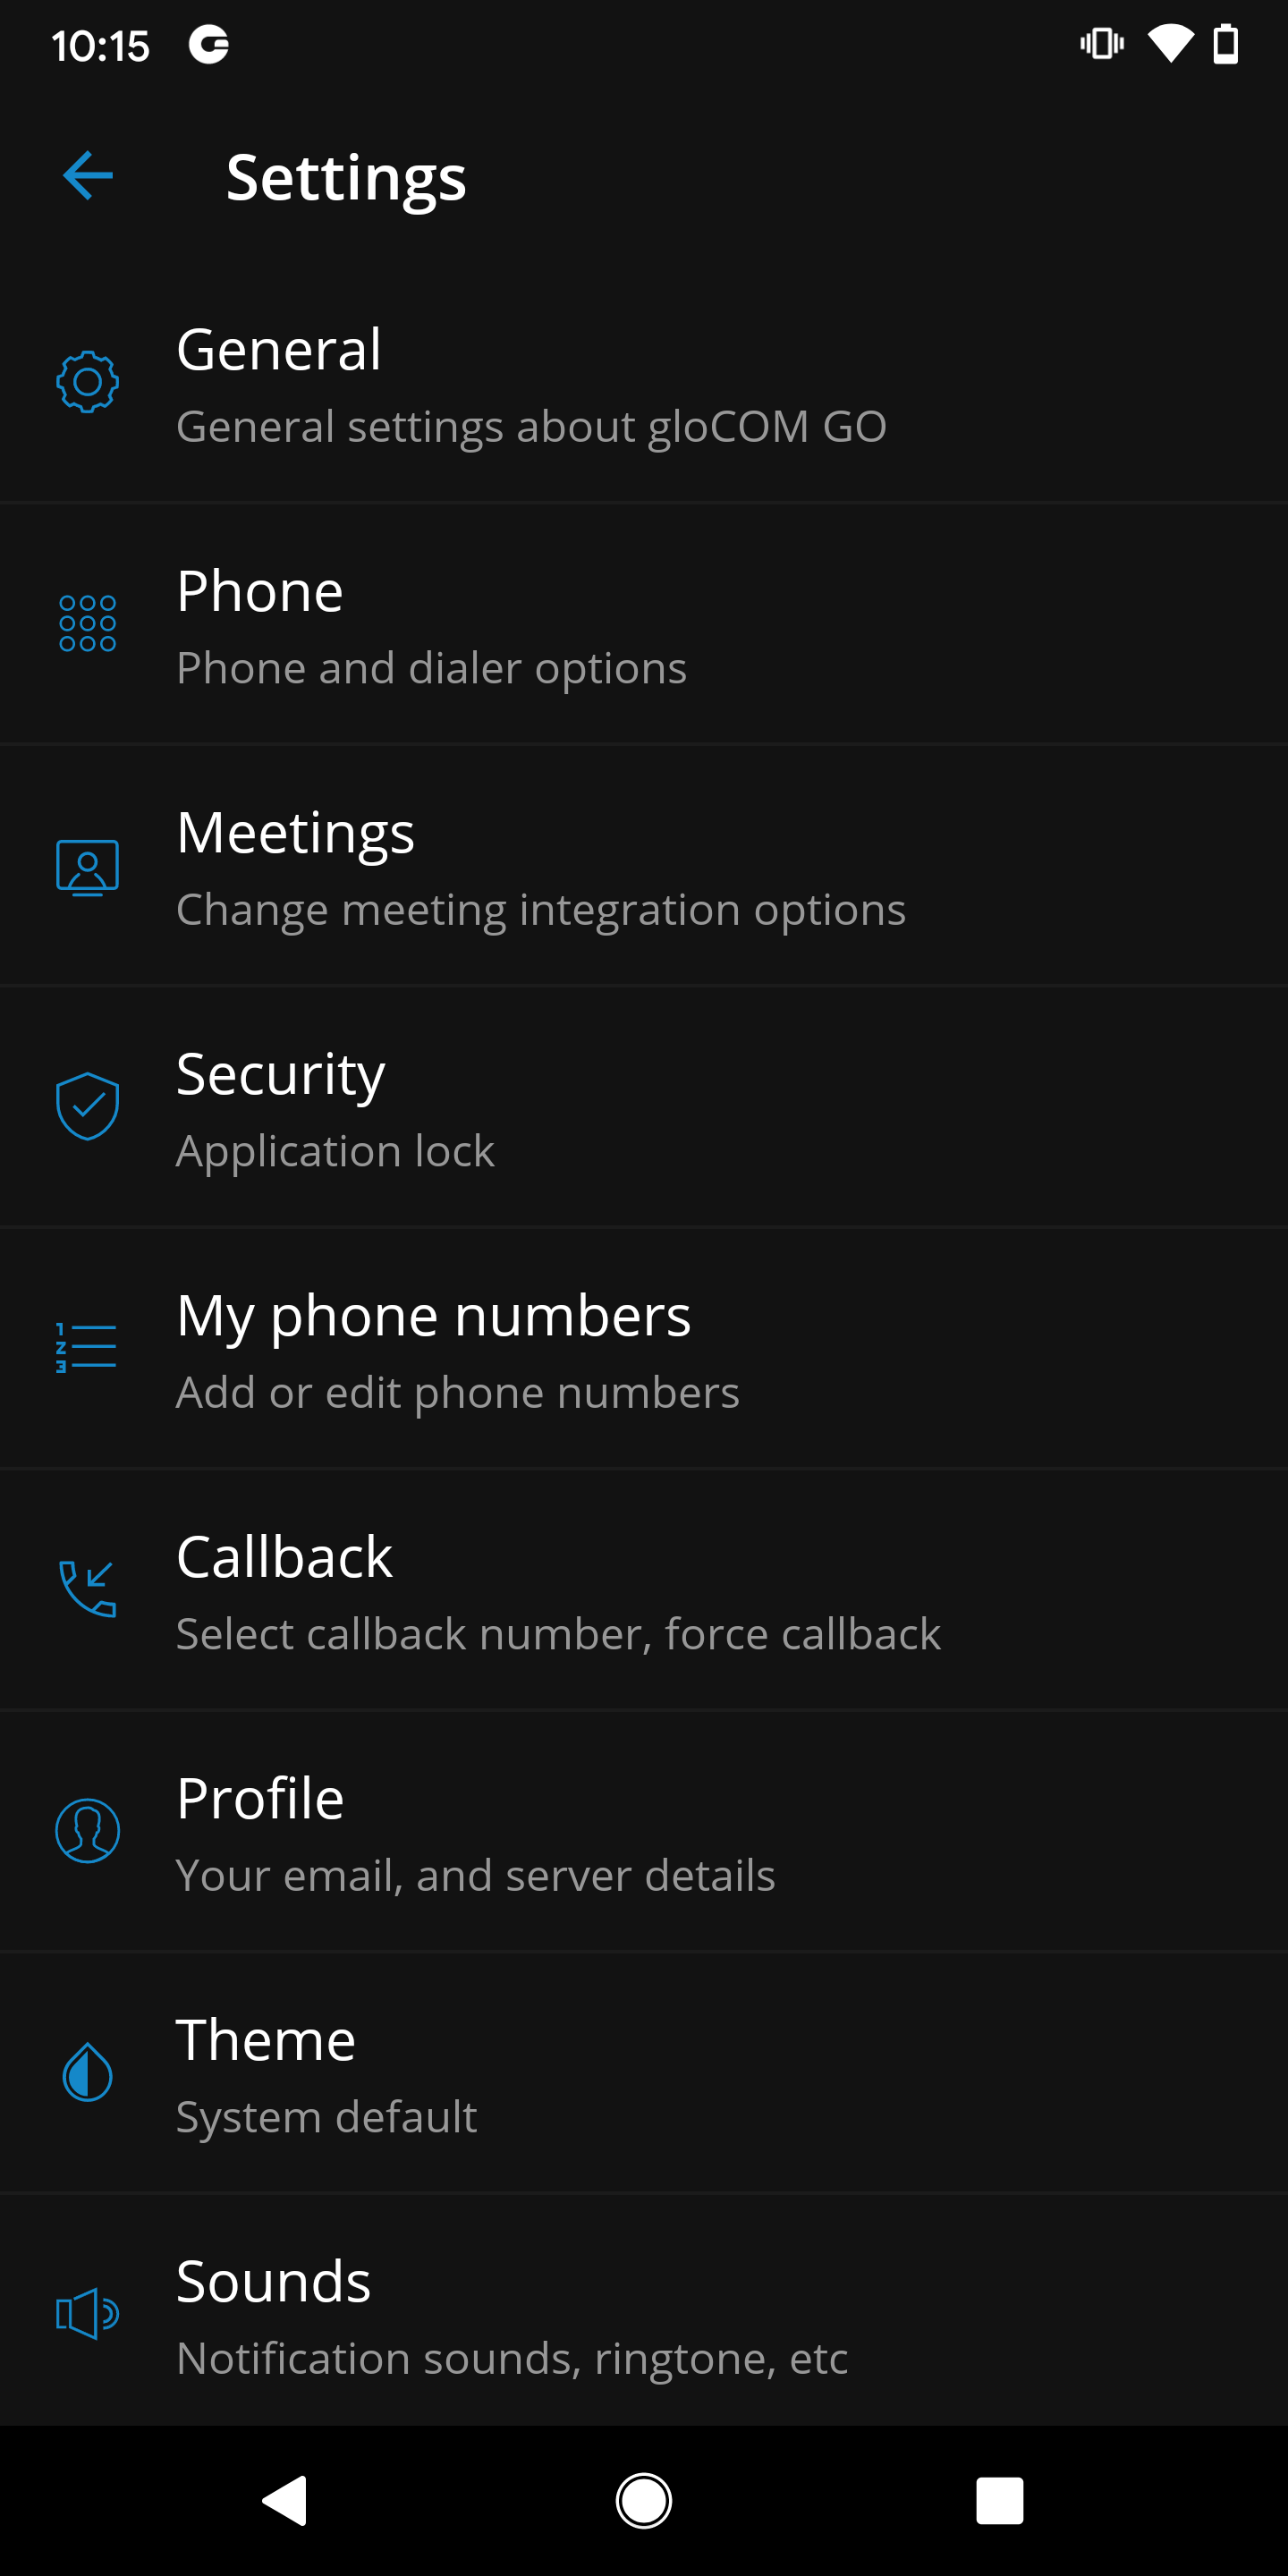
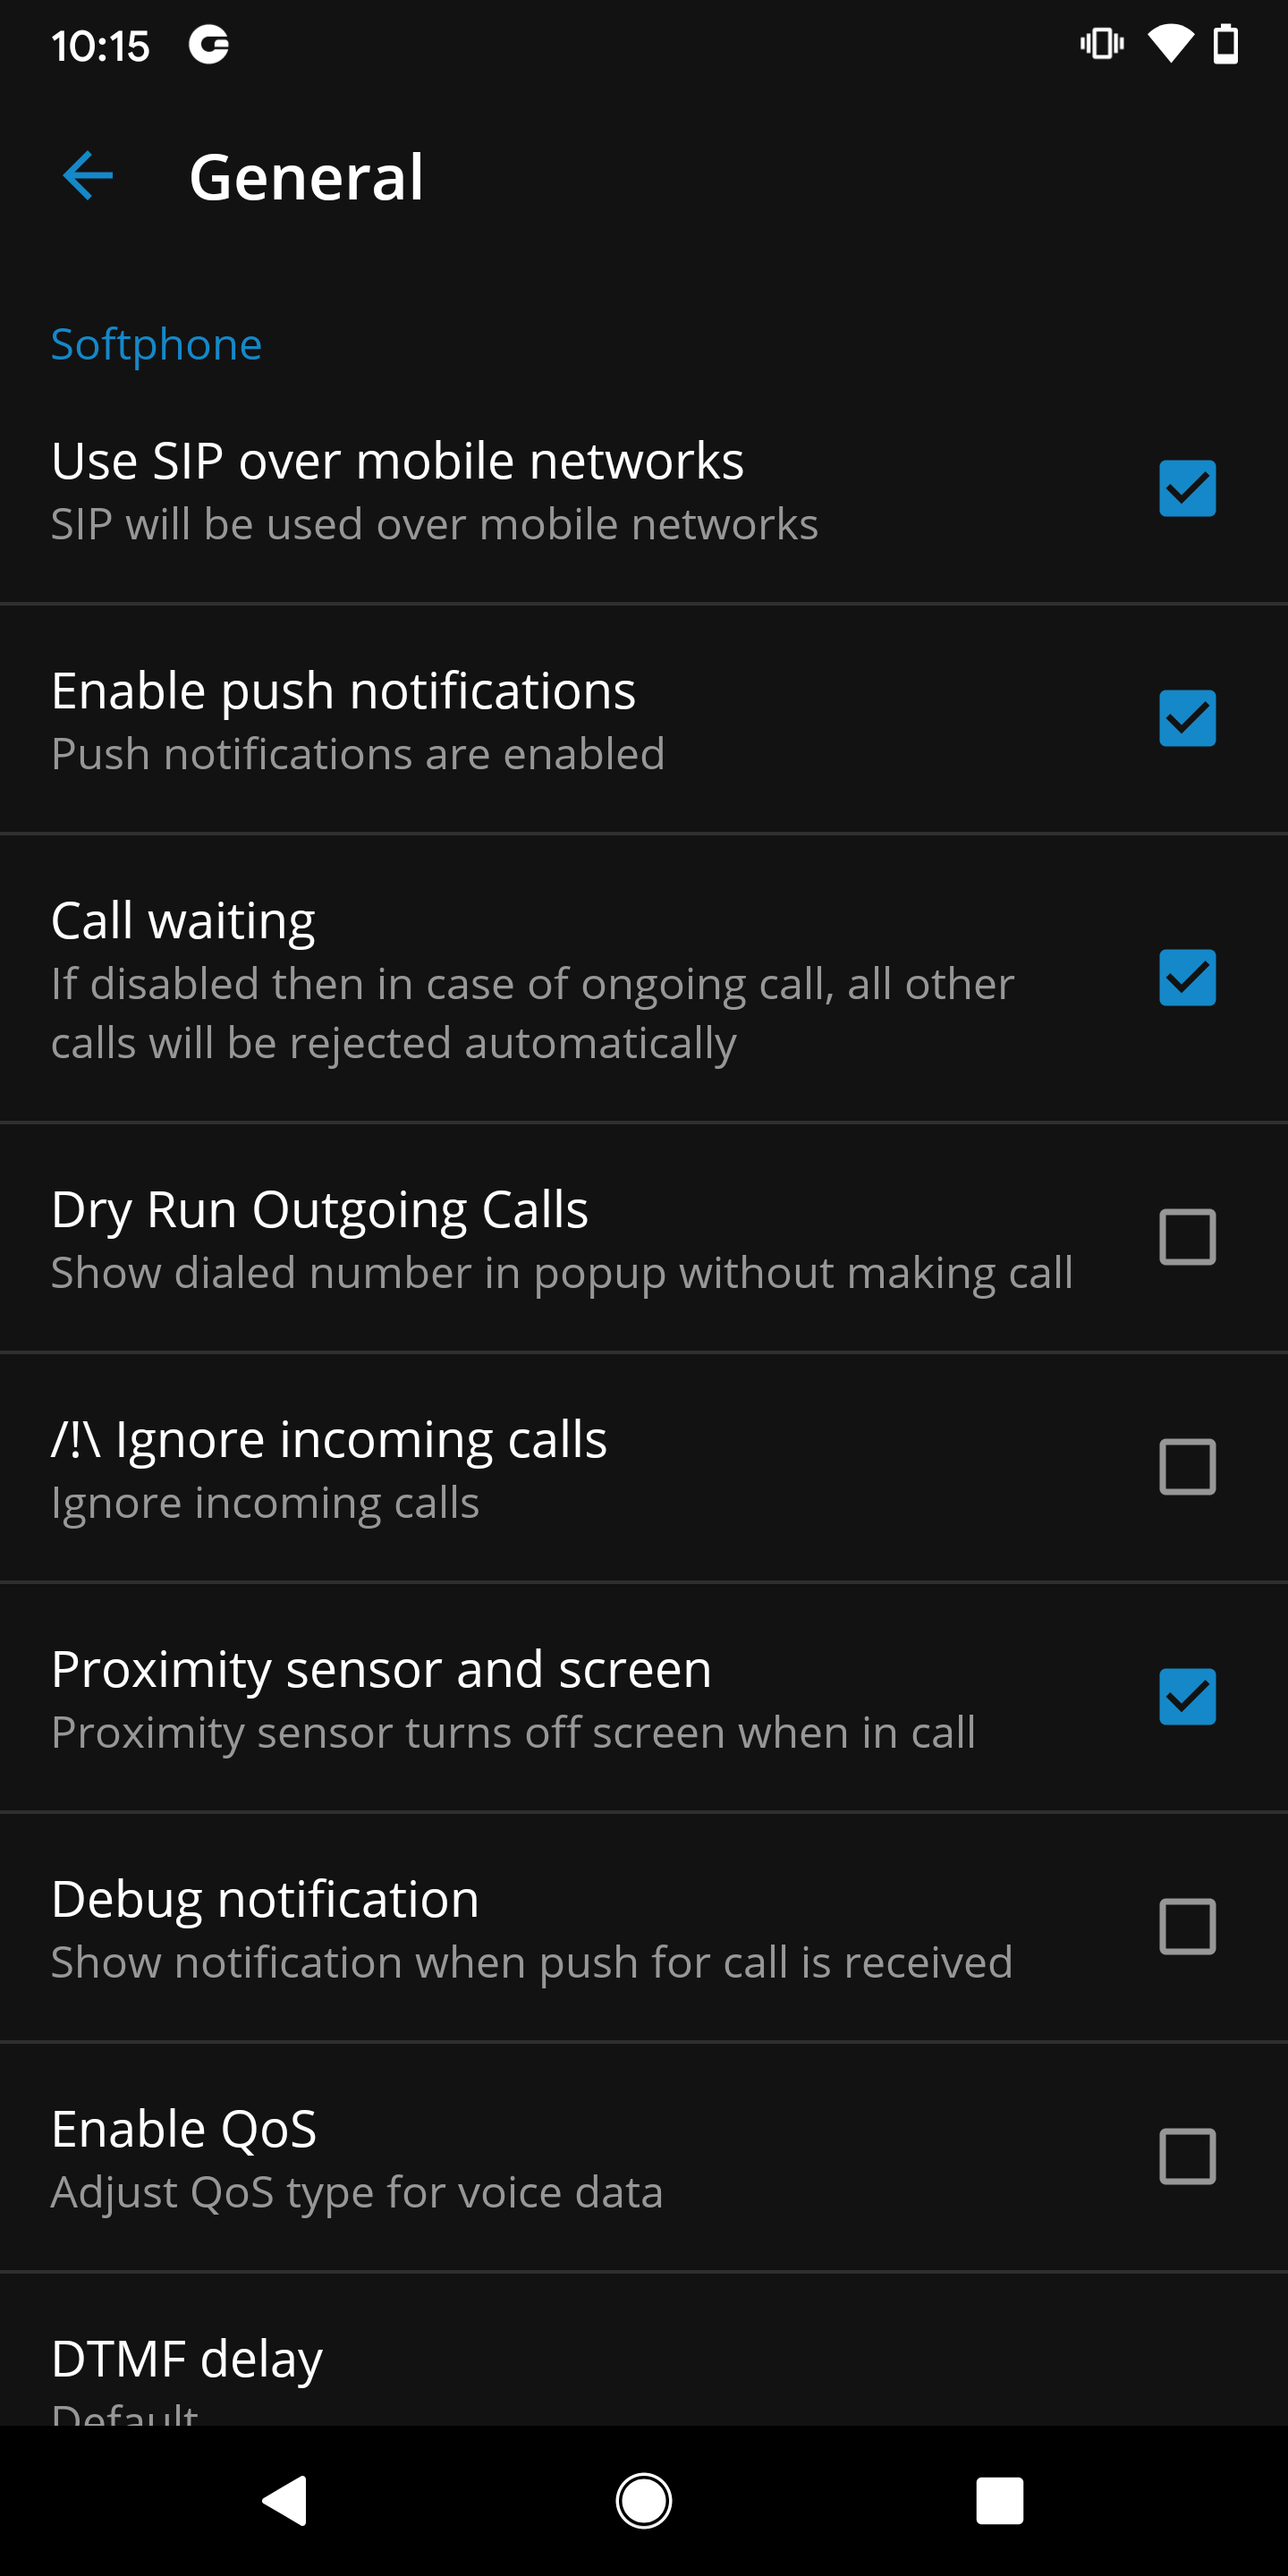
Settings
General – option shows a screen with general settings for gloCOM GO 6.
Phone – shows a screen where it is possible to change phone and dialer options.
Meetings – shows a screen where it is possible to change meeting integration options.
Security – offers users to enable Biometrics security for gloCOM GO 6.
My phone numbers – shows a screen with settings for Country, SIM number, add, edit or delete a phone number, and phone numbers associated with the user’s account.
Callback – screen with settings for a Callback feature.
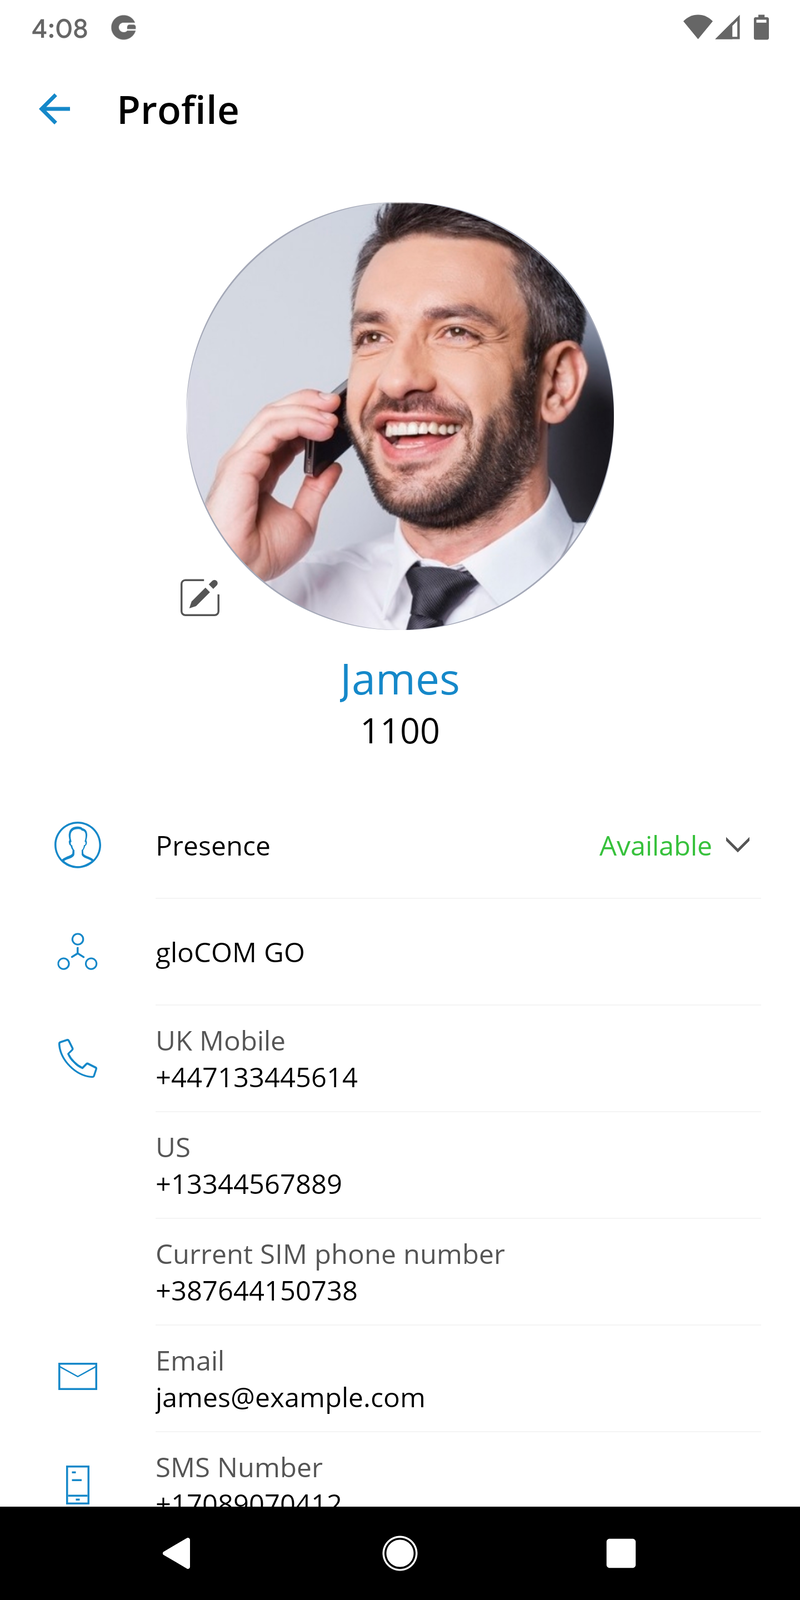
Profile – shows details about the user’s account (e.g., Department, E-mail, avatar).
Theme – screen with settings for the gloCOM GO 6 theme (dark, light or system default).
Sounds – offers an option to select a ring tone for incoming calls and to Enable/Disable dialpad sounds.
Licenses – shows a screen with a list of the gloCOM GO 6 libraries.
Storage and Media – a storage option in which users can clear all the media files or schedule clearing the media files.
Send Feedback – launches integrated feedback submission form.
About – will display gloCOM GO 6 about page with version number and contact information.
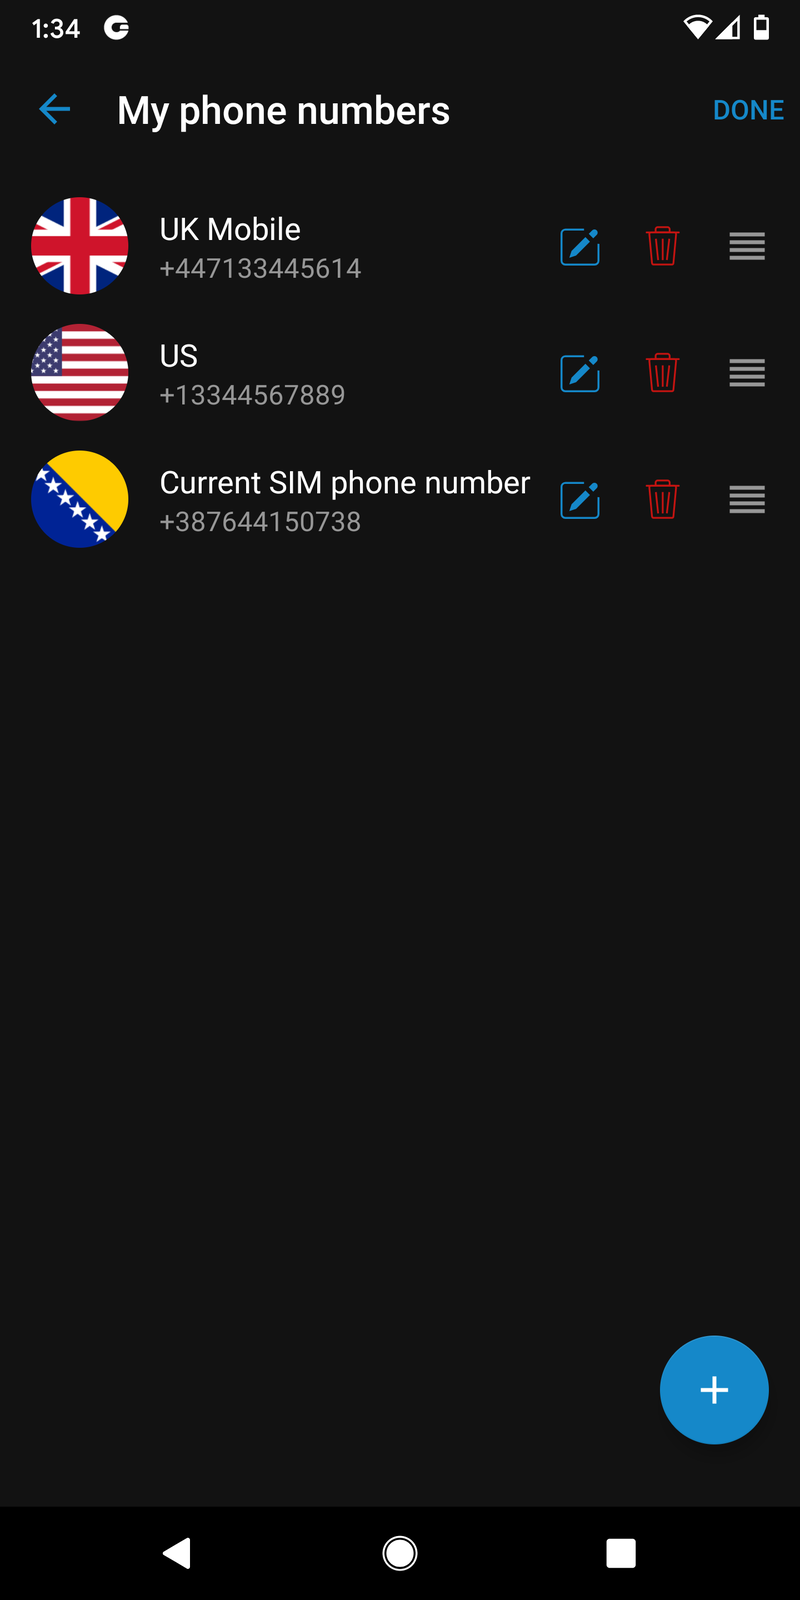
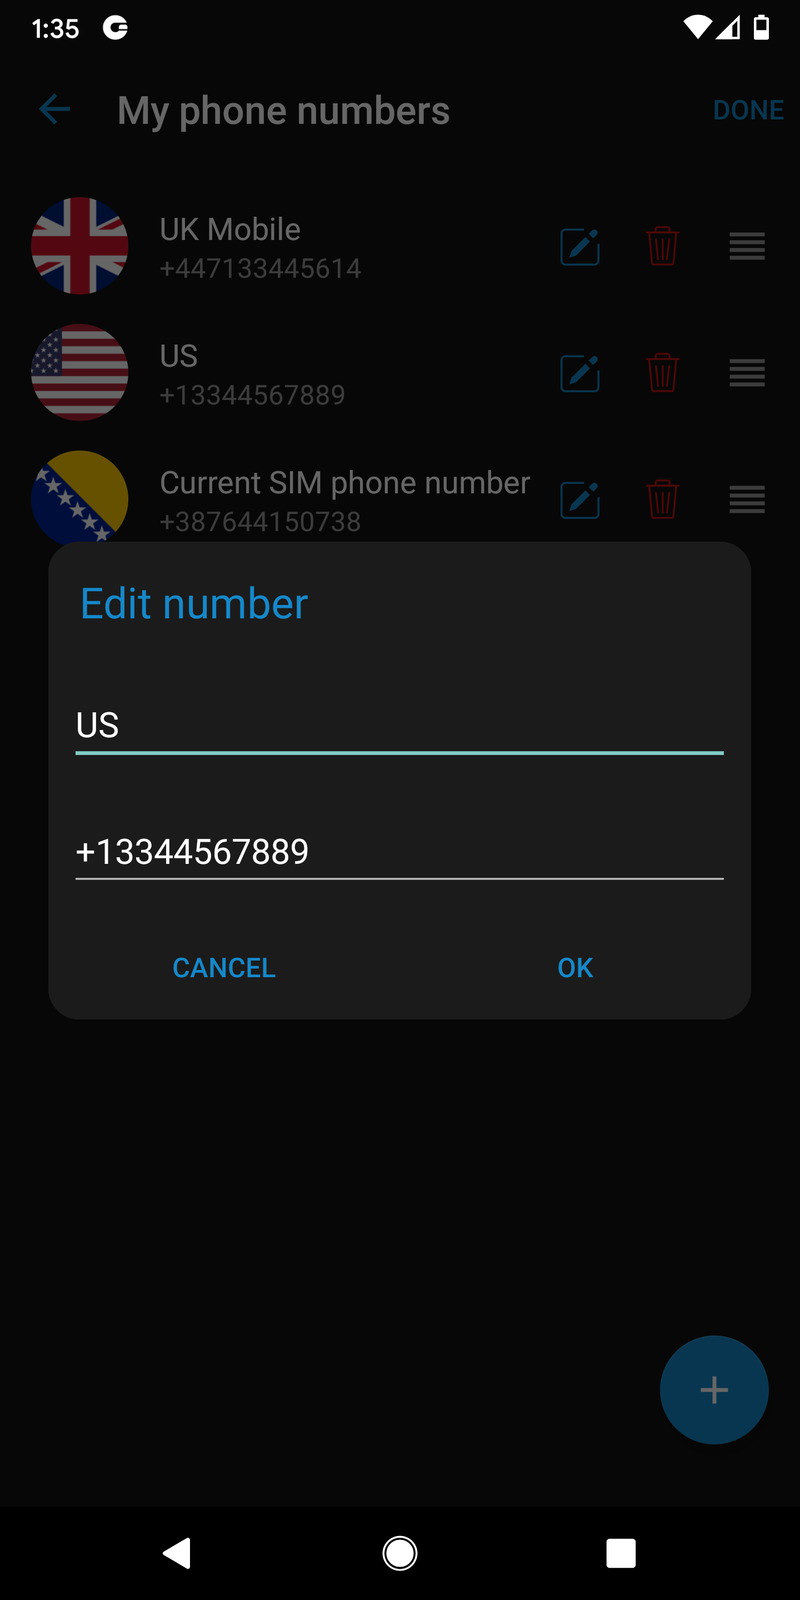
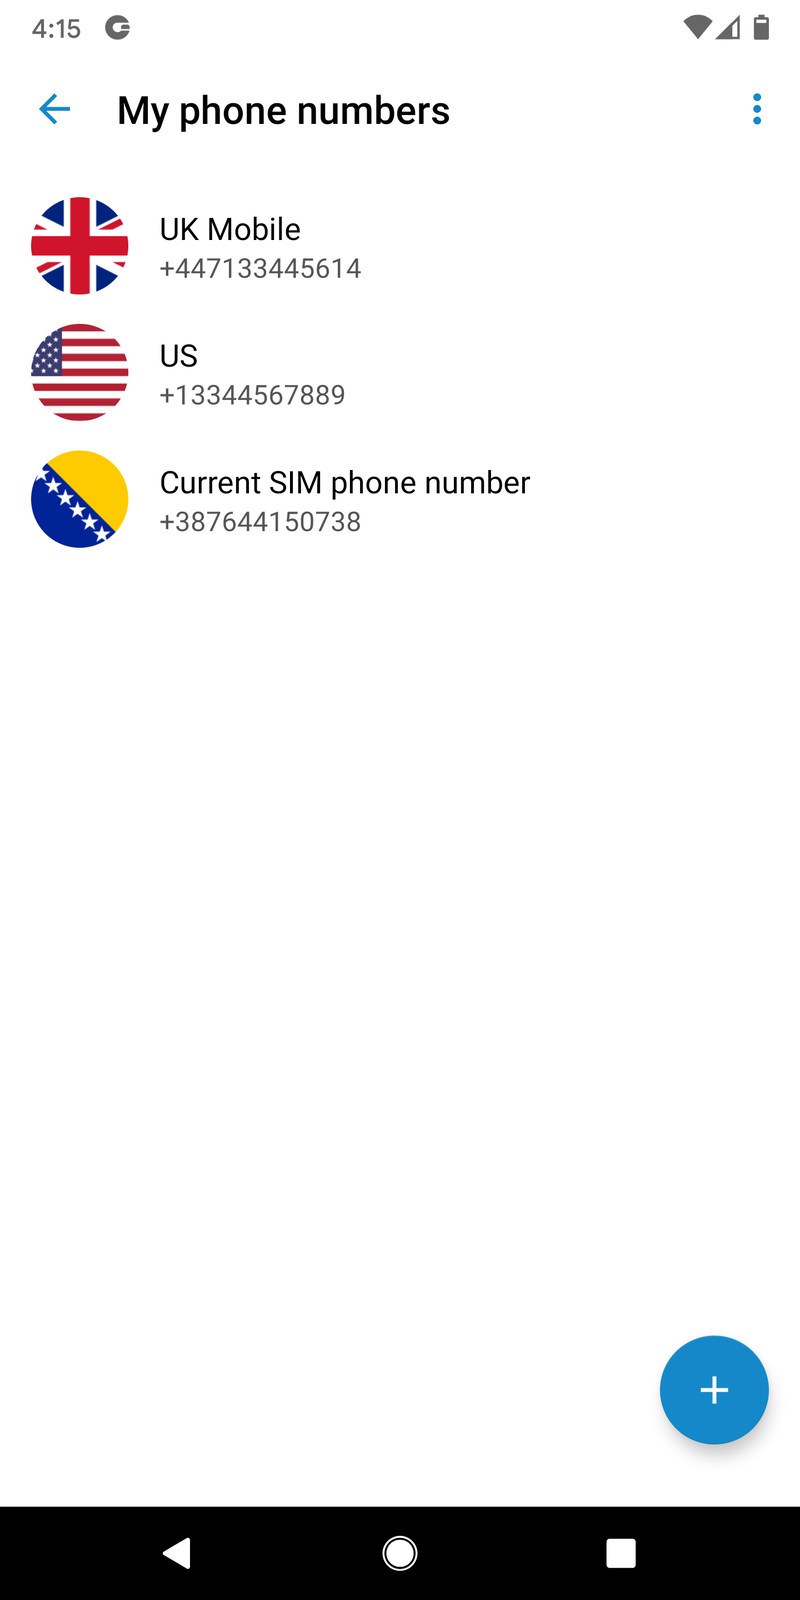
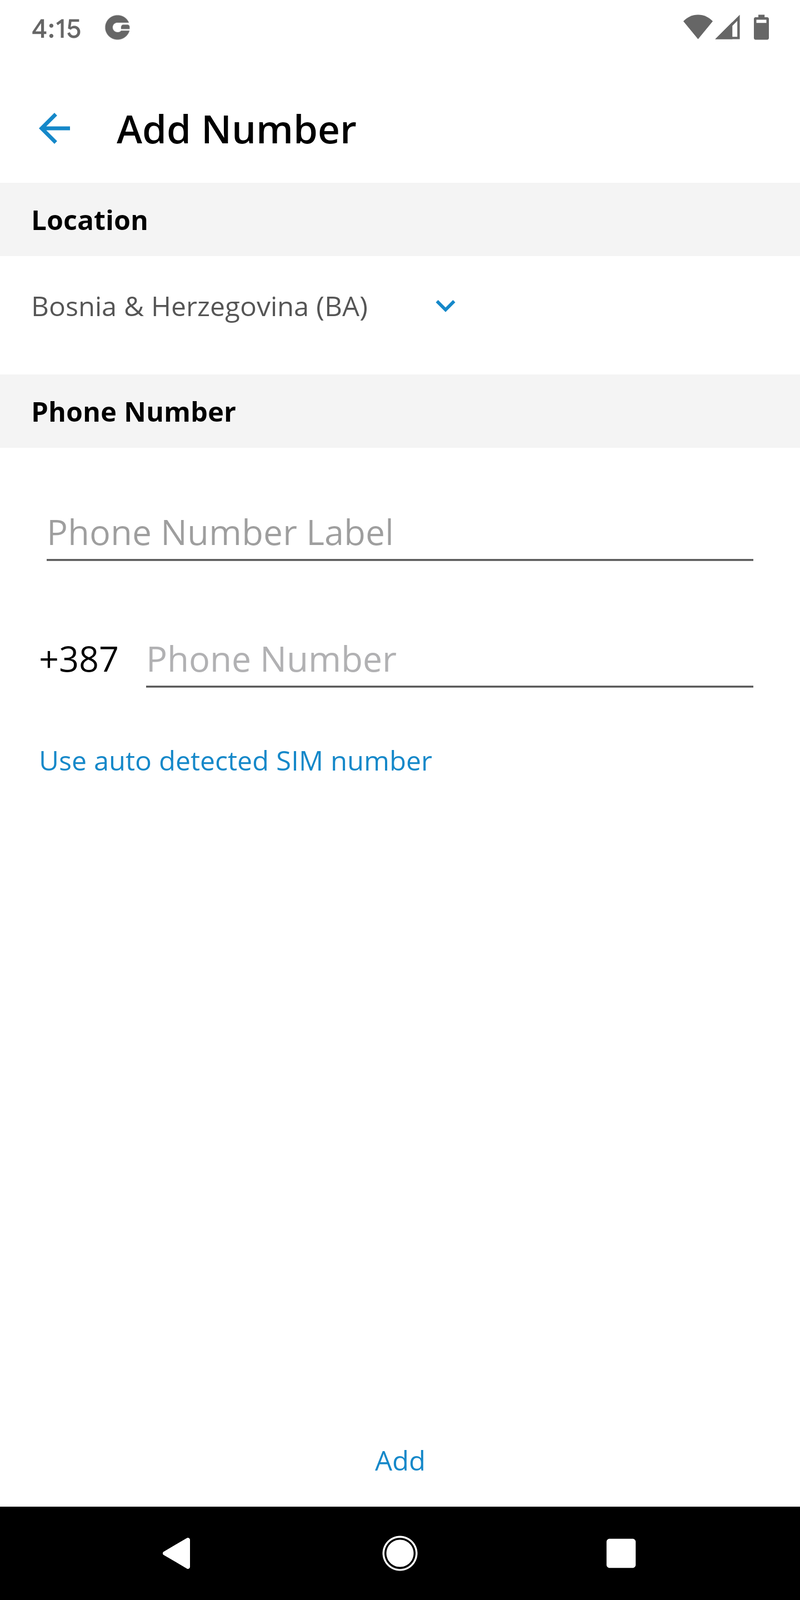
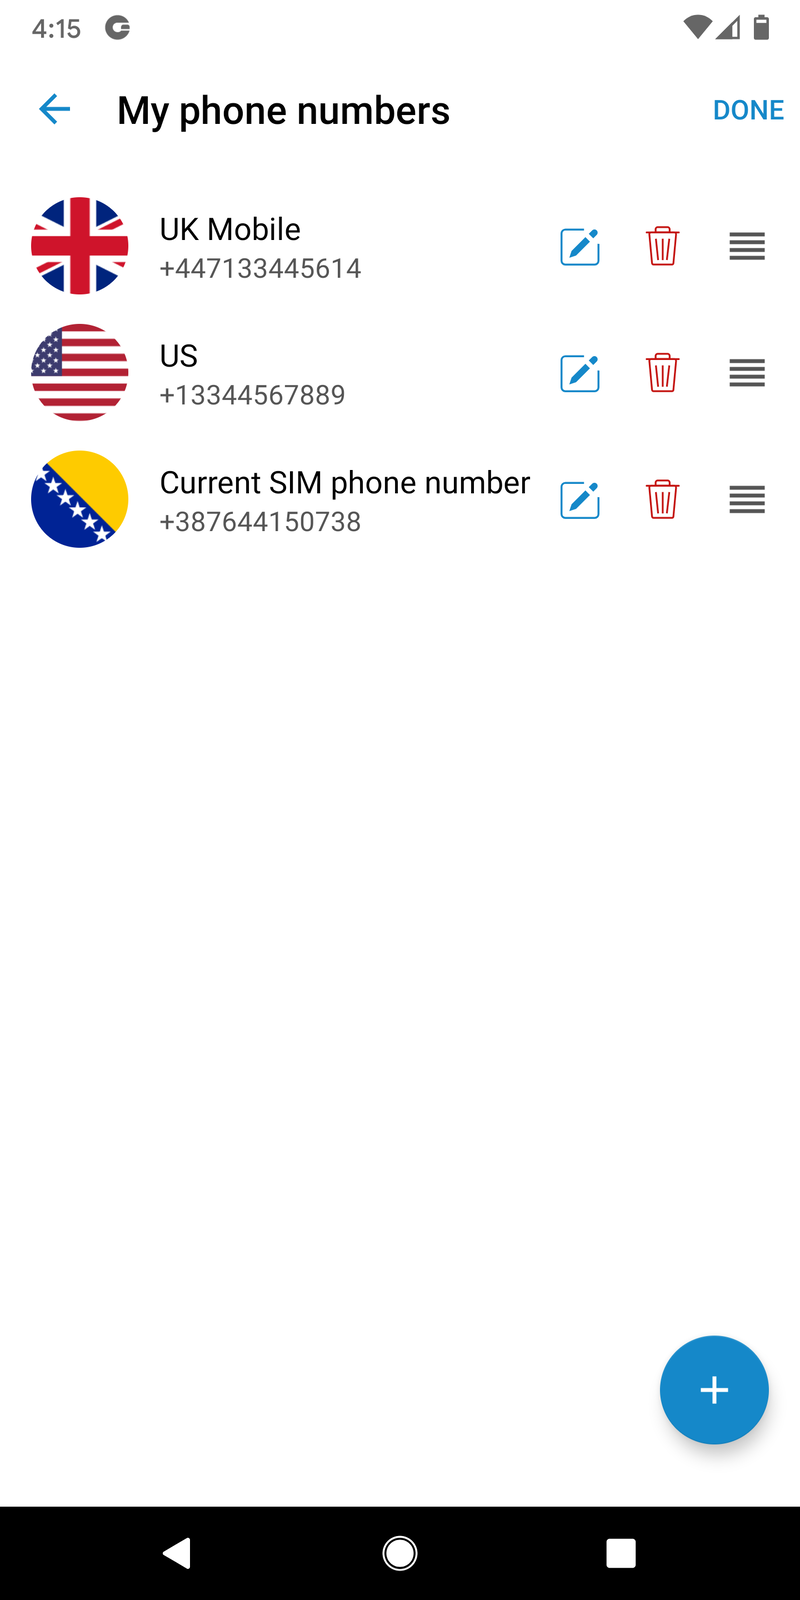
My phone numbers
This section contains numbers defined by the user’s account. Users can add more numbers by using the ADD NEW NUMBER button and sort them by priority using the drag option on the right side of the number and label. These numbers appear in a list of numbers associated with the user’s account when someone tries to call them from gloCOM GO 6 or gloCOM.
Feedback
Feedback can be submitted by pressing ”’Settings”’ and then ”’Feedback”’ which will allow users to send feedback from the gloCOM GO 6.
Feedback text needs to be longer than ten characters for the ”’Send”’ button to be enabled. Users will be notified about successful or failed feedback submissions.
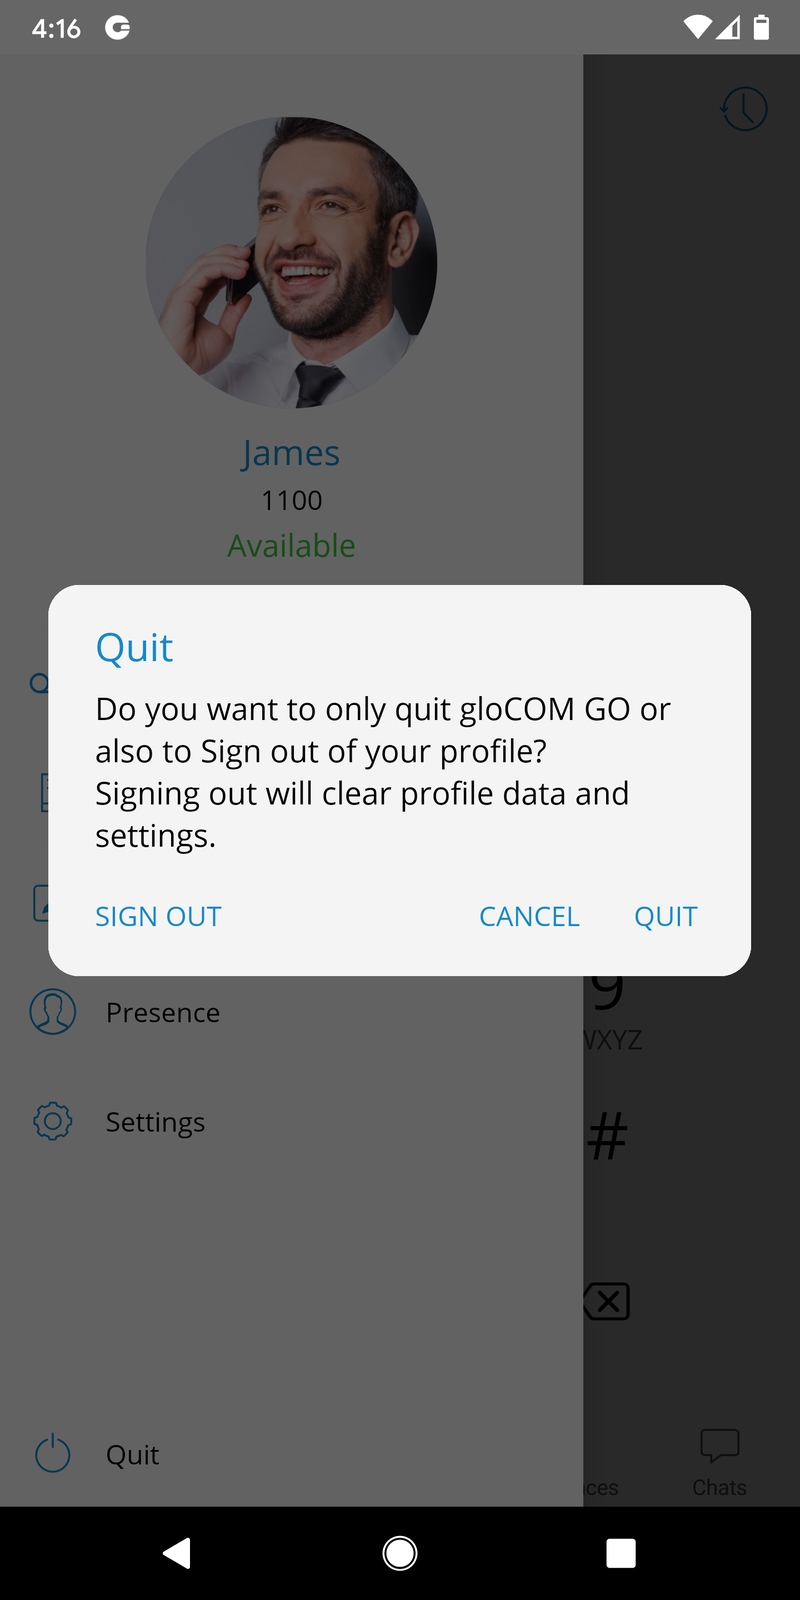
Signing out and Quitting gloCOM GO 6
There are two ways to quit gloCOM GO 6 when users press Quit from the main drawer menu.
Sign Out will clear profile data, and users will be asked to provide a password next time they start gloCOM GO 6.
Users also can use to Quit the application. This exits gloCOM GO 6 leaving all profile data and settings untouched. Next time when users start gloCOM GO 6, they will not be asked for a password. Quit will also disable push notifications, and they will be automatically enabled next time the users enter the gloCOM GO 6.
gloCOM IOS
Logging in
gloCOM GO 6 requires an email address and password for login. Additionally, a server address may be needed if it cannot be resolved through a DNS record based on the email address.
Users that have incompatible versions of mobile app and PBXware will not be able to connect to the system.
In case users have a DNS server, by adding a DNS SRV record for email domain, mobile, and desktop clients will make gloCOM GO login much easier for end-users as they will only have to provide their email address and User password associated with their PBXware extension and click Log In.
If users are unable to set DNS SRV or if DNS resolution fails, they will receive notification DNS resolution failed and users will have to enter PBXware hostname or IP address into the Host field when logging in with their gloCOM GO 6 client.
DNS SRV record that needs to be configured to point to PBXware is: _pwproxy._tcp.domain. 86400 IN SRV 0 5 10009 pbxserver.domain.
NOTE: For this feature to work, all email addresses must use the company domain (i.e., siarum.com).
Enter the email address associated with the user’s account. This is used as the username for gloCOM GO 6 login.
- Password
To authenticate gloCOM GO 6 with the PBXware server, users will also need to provide a user password generated on their account.
- Host
This field allows users to enter the address of PBXware they would like to register to. If the DNS SRV record is set up (as previously
explained), this field does not have to be populated.
- SCAN QR CODE
This button opens a camera preview for QR code scanning.
- FORGOT PASSWORD
Open a confirmation dialog for password resetting by clicking this button. Email and optionally server address fields need to be filled out before attempting a password reset.
Logging in using QR code
It is possible to login in to gloCOM GO 6 using a specially created QR code. This is often used and helpful when users log in with gloCOM GO 6 for the first time.
When the administrator creates users’ accounts, they will be assigned a long, automatically generated user password on email, and typing it into gloCOM GO 6 can be error-prone. With this feature, users can scan the QR code attached to the extensions credentials email by pressing the SCAN QR CODE button and pointing their phone camera at the monitor. Once the QR code image is detected gloCOM GO 6 will fill out all the fields necessary for login.
NOTE: Before users can use this feature, the PBXware Administrator must make some settings changes on PBXware; otherwise, the Address (hostname) in the field will be empty, and users will not be able to register their clients.
Login to PBXware GUI and navigate to: Settings – Servers/Tenants and edit Server/Master tenant
Click Show Advanced Options and once users do that, they will be able to see the QR Code Server option. This field must be populated with the server’s IP address or domain name.
Once entered, save changes, and QR Code login should be ready for use.
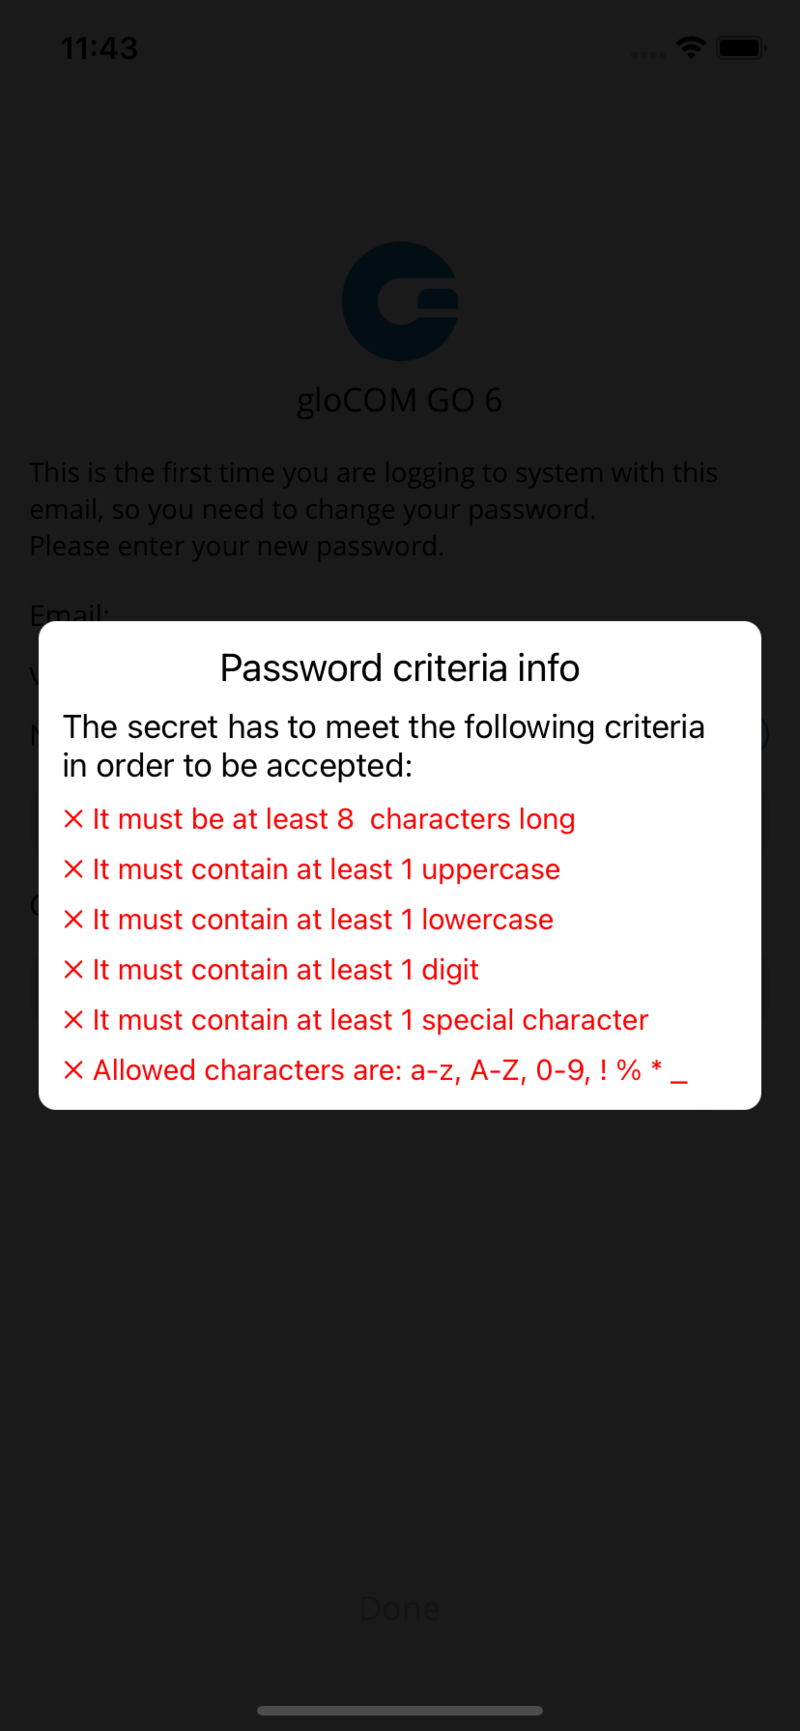
Setting new password after logging in for the first time
When users log in to the gloCOM GO 6 for the first time, they will be asked to change the password. They will have to enter a new password and retype it to confirm it. If users make a mistake, so password entries do not match, or if the password is not strong enough, the NEXT button will stay disabled. Once the password matches our strength criteria, users will be able to log in.

Changing avatar
Users can change their avatar by opening the Profile screen and pressing the avatar icon above the name and extension, as shown below.
Pressing on the avatar icon brings options for changing the avatar image. After taking a picture with a camera or choosing one from a
gallery, users will have to crop the image.
-
Press and hold inside the blue rectangle to move it
-
Press and hold blue edges to resize
-
Done button finishes cropping and sets the avatar
-
Cancel button cancels cropping
![]()
![]()
Avatar rotation
Users can manage their avatar (rotate, flip, crop) in the gloCOM GO 6. Open gloCOM GO 6 and go to Profile, click the Edit icon to the right of the user avatar and choose one of the two options:
-
Take the picture using the camera
-
Choose a picture from the gallery
After taking a photo with a camera or choosing the photo from the gallery, the image will appear in the gloCOM GO 6 “Move and scale” screen.
Drag the crop tool to the desired part of the photo. The part of the photo within the boundaries of the crop tool (the square) will be used as a profile image. Resize the square by dragging the corner dots in or outward. Some advanced options are available in the hamburger (three dots) menu in the top right corner, such as: “Flip horizontally” and “Flip vertically.”
When ready, click on SAVE in the top right corner of the screen. The cropped image now replaces the previous profile photo.
![]()
![]()
![]()
Biometric Authentication
Users can use an option to unlock gloCOM GO 6 by using biometric authentication as an additional layer of security for using the app.
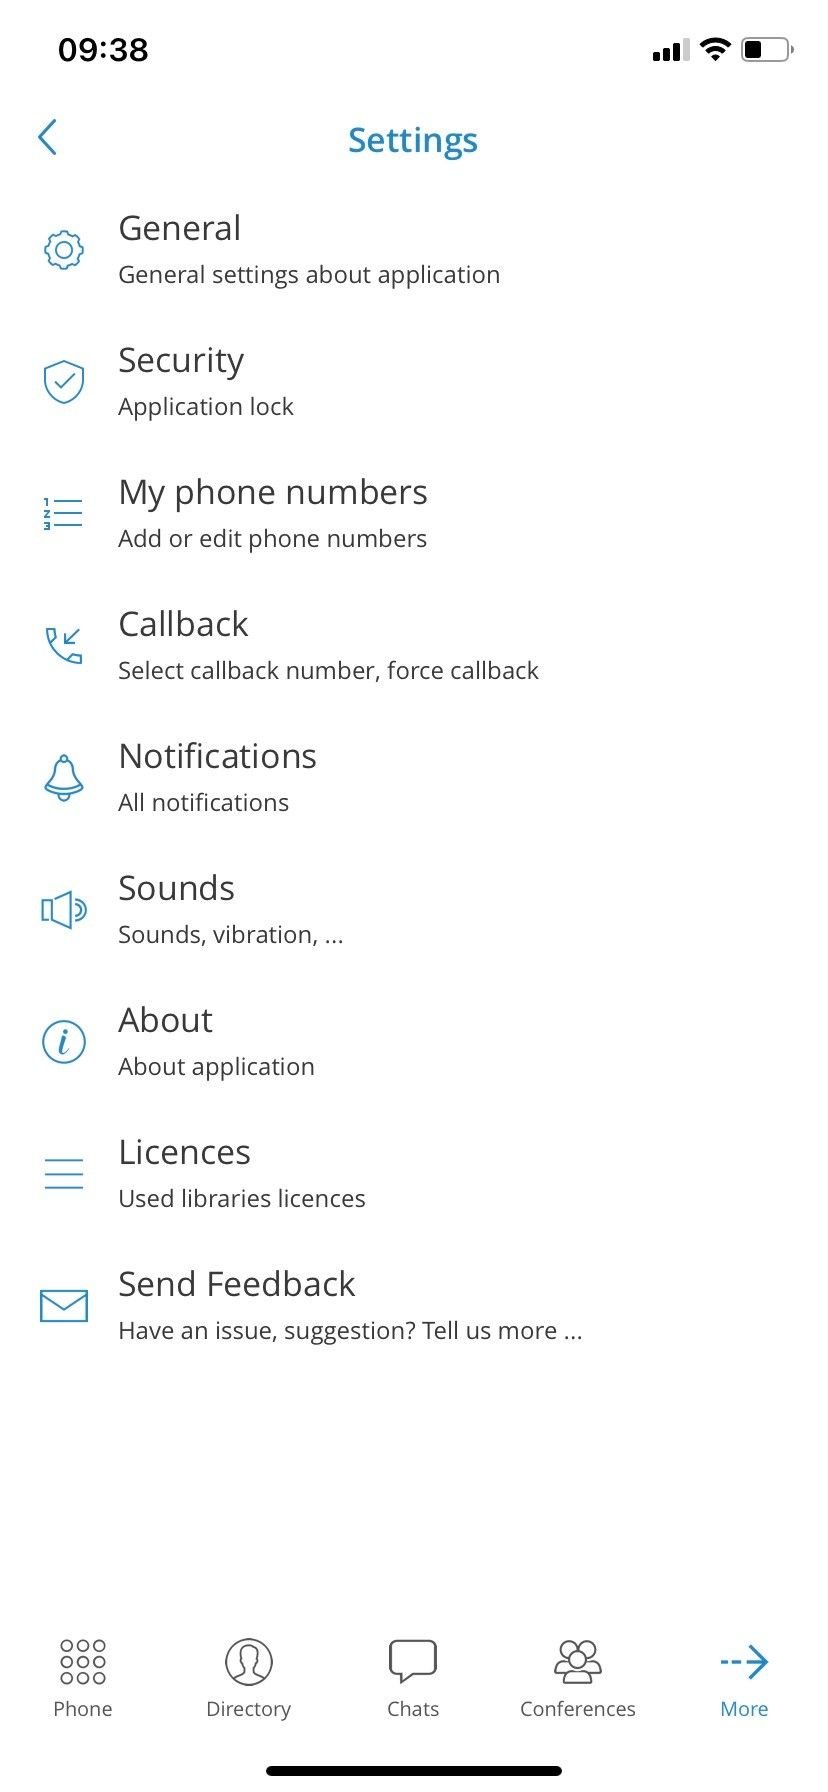
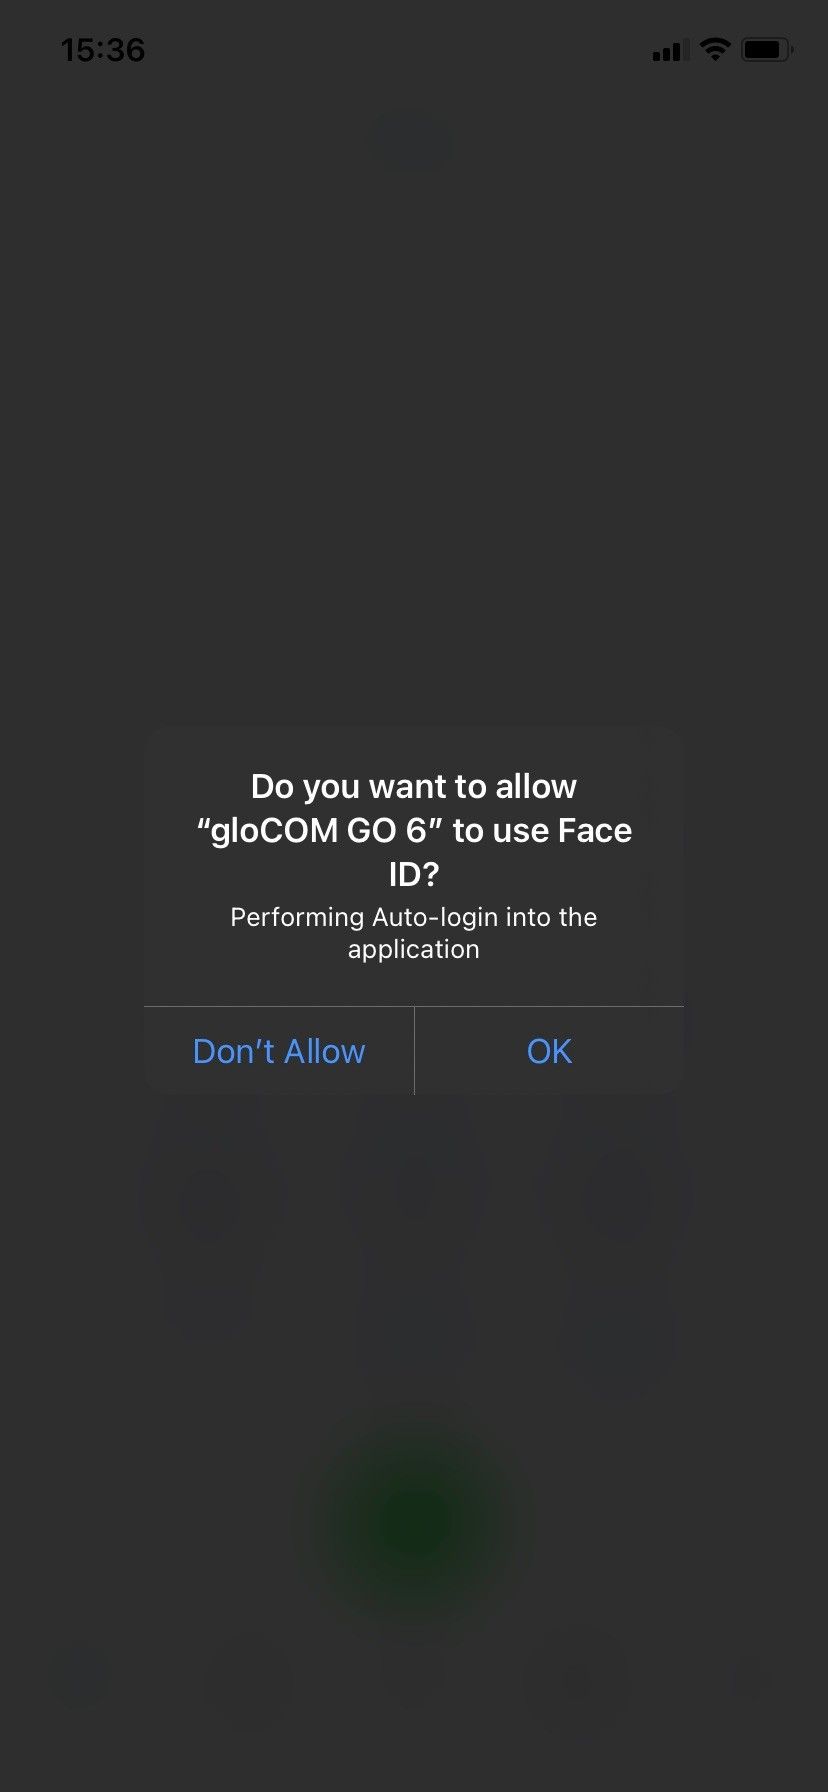
Users can enable it by using fingerprint and face recognition. This feature must be enabled on the device and application options to function. This option can be found inside the Security section on the Settings screen.
Phone
The default dialer screen is displayed once gloCOM GO 6 is started. The call button on the dialer screen has three states depending on the softphone registration status and connectivity status. If the softphone is not registered and the button is yellow, calls can still be made if the callback option is configured. There are three states gloCOM GO 6 dialer can be in:
Green – Call can be made over SIP protocol (WiFi and Mobile Data
Networks)
Yellow – A call can be made with the Callback module (Mobile Data
Networks)
Gray – Call can not be made (No Network Connections)
Long pressing on a dialer call button will start a callback call to the entered number. The long press gesture also works with any call button in the app.
If number to dial is empty, pressing on the call button will result in populating the number to dial with last called number.
Editable dial number
The entered number inside the dialer of the gloCOM GO 6 iOS can be modified before placing a call.
Predictive Dialer
Predictive Dial (alphabet and numerical mode) is used to quickly find a contact or a number and place a call.
When on the phone screen, users are now able to search by phonewords (mnemonic phrases represented as alphanumeric equivalents of a telephone number). For example, if users type “34”, they will be presented with contacts that have 34 in their number, as well as contacts whose name contains a combination of letters [DEF][GHI].
Contacts search will include contacts from Extension DIrectory, Device/System Phonebook, and Central Phonebook in that order.
Once users have entered the phonewords on the dialpad, and all of the contacts that match the criteria are listed, users can hide the dialpad by swiping down. Once the dialpad is hidden, users can see the contact list on the entire screen and can scroll the contact list.

Predictive dialer popup menu
By long pressing on the contact in the predictive dialer contact list, a popup menu appears with 3 provided option:
-
Send message – Start a chat conversation with selected contact.
-
Send email – Redirects the user to the default mail client with the e-mail address prefilled (if the e-mail address is provided for the selected contact).
-
View details – View details about selected contact.
-
Copy – Copy the contact’s number.
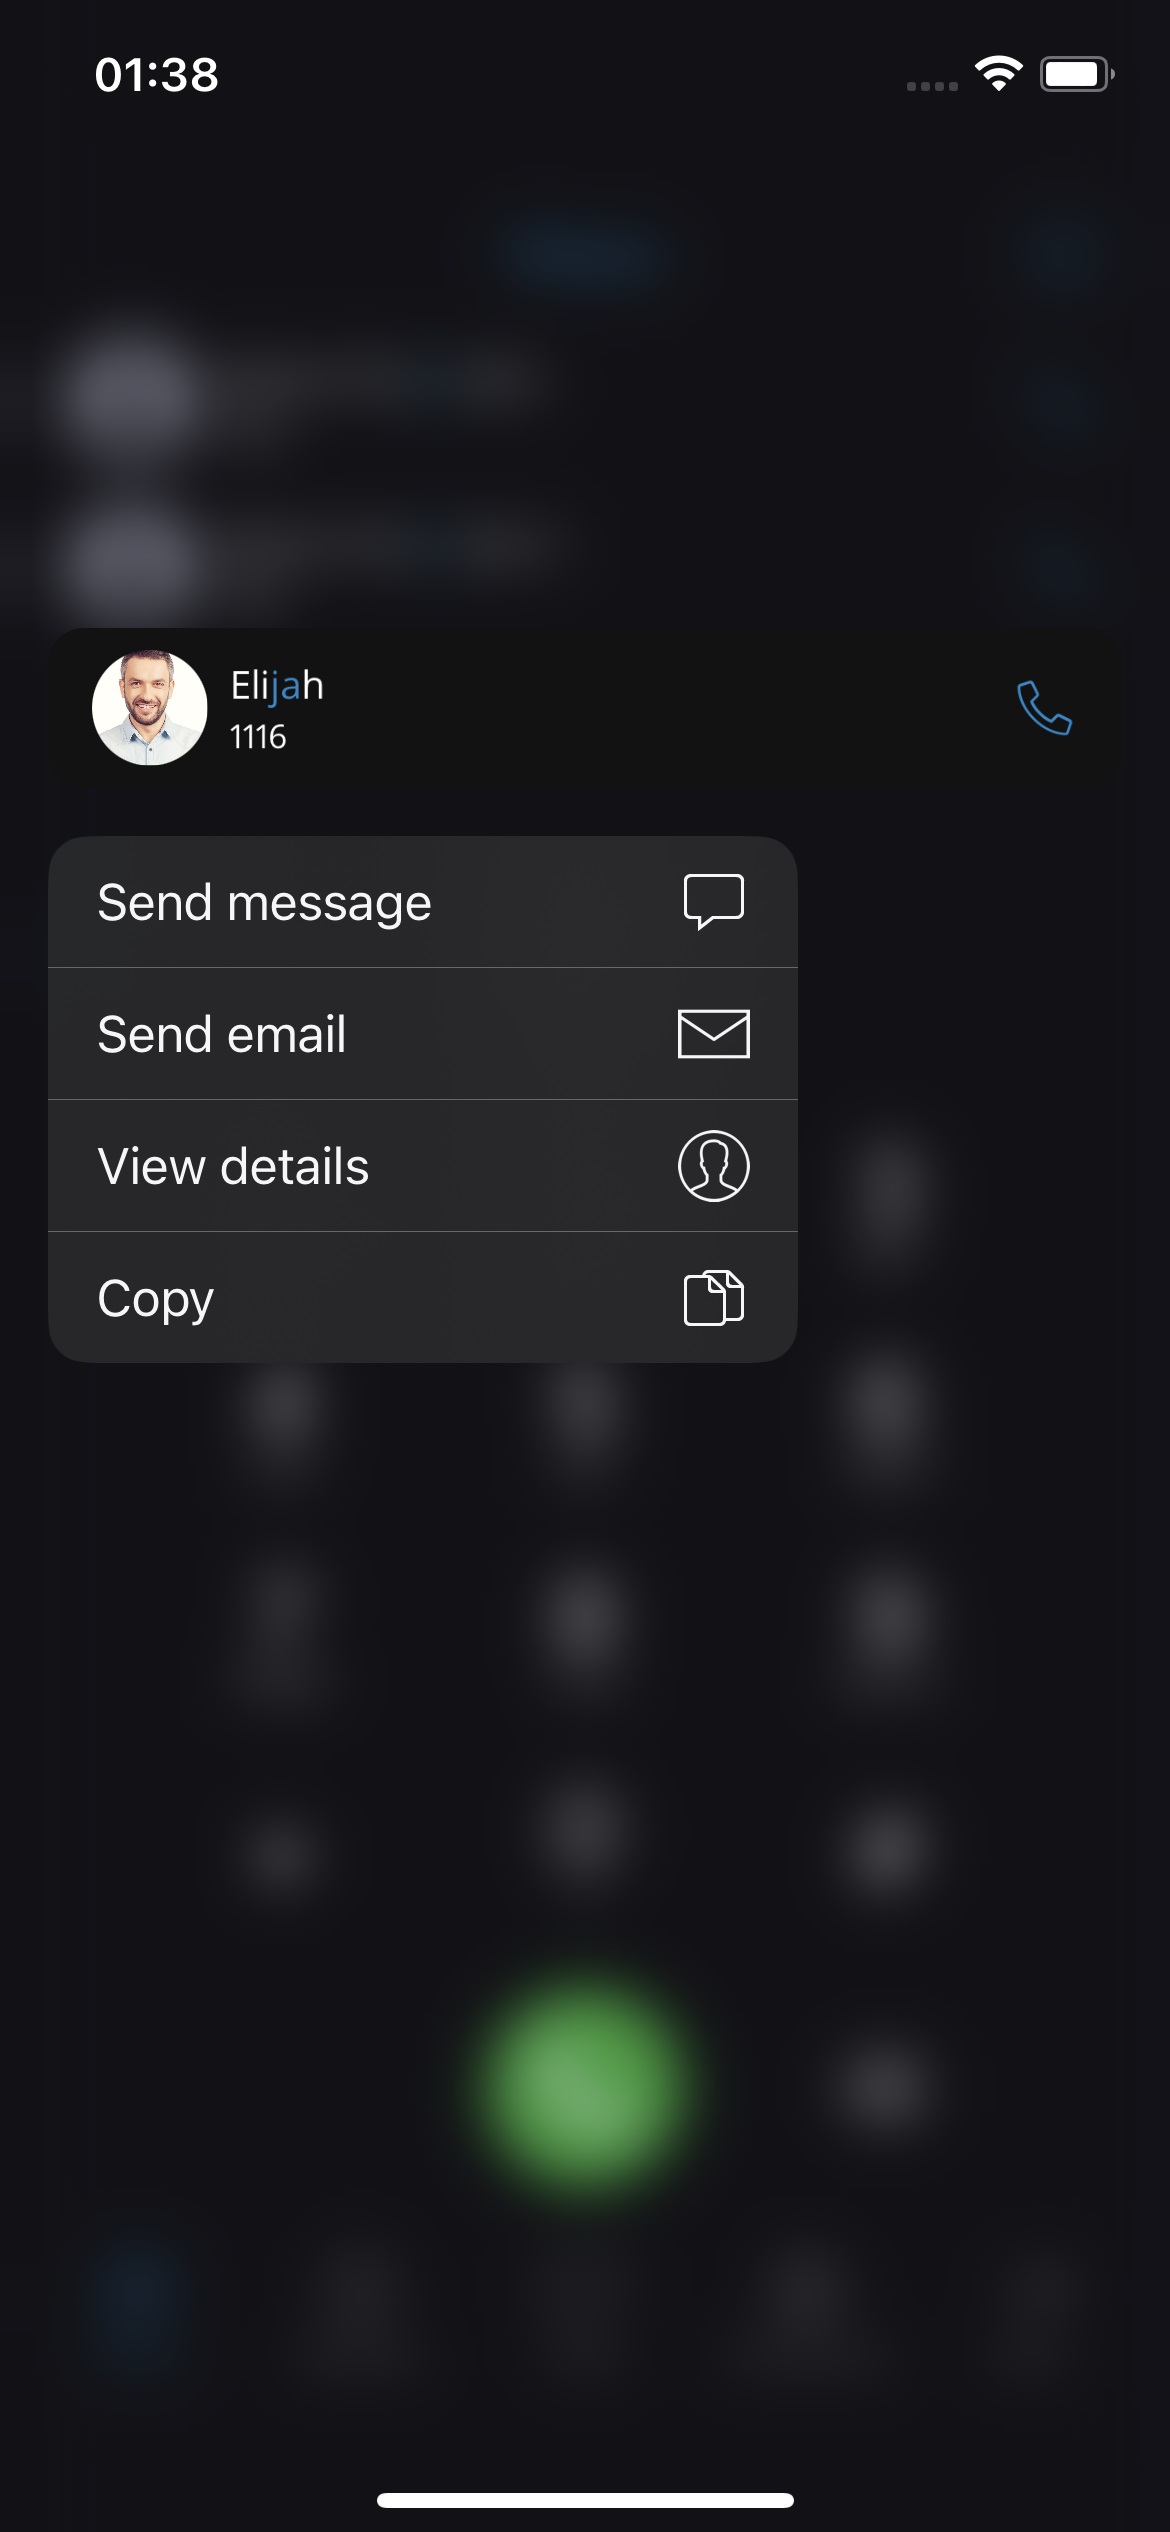
Opus
Opus is an excellent codec for lossy audio compression, and that’s why Opus codec has the highest priority when making calls by default. Users can customize the order of codecs priority in gloCOM GO 6 Settings.
Opus is an audio coding format designed to efficiently code speech and general audio in a single format and handle a wide range of
interactive audio applications while remaining low-latency enough for real-time interactive communication. It is distinguished from most high-quality formats by having a low delay and supporting high audio
quality.
To ensure that Opus is used for all calls, users will need to add Opus as a first codec in Extension settings on PBXware.
Calls
In gloCOM GO 6, calls can be made over SIP protocol, which is a primary option, or using the Callback calls.
Call scenarios may vary and will depend on the network connection (WiFi, Mobile Data, No Connection), service availability and value for option “SIP over mobile internet.”
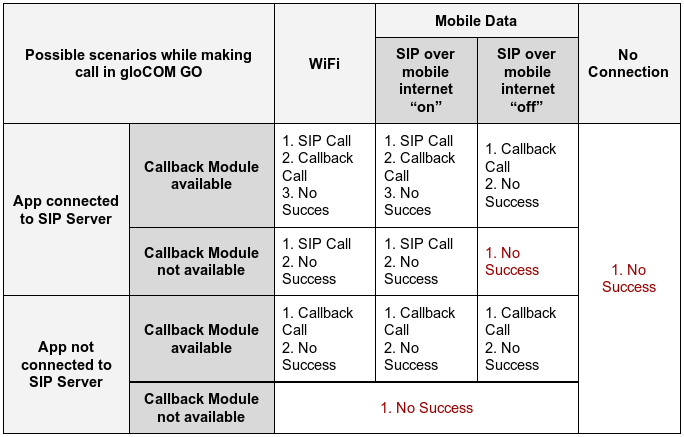
The table above displays the order in which gloCOM GO 6 will try to establish calls in different scenarios.
If we, for example, take the first scenario for WiFi where the order is:
-
SIP Call
-
Callback Call
-
No Success
This means that in a scenario where the device is connected through the WiFi, the app is connected to the SIP Server, and the Callback Module is available on PBXWare, gloCOM GO 6 will first try to make a SIP Call; if unsuccessful, it will then try to make a call using Callback, and if this fails, it will display the message that the call could not be established.
SIP Calls
SIP Call Screen appears when the user initiates or receives a call through PBXware.


Once the call is connected gloCOM GO 6 allows users to perform several actions:
- Mute
Mute allows users to disable the microphone on the device, preventing any unwanted communication on the user’s side from being transmitted to the other side of the call.
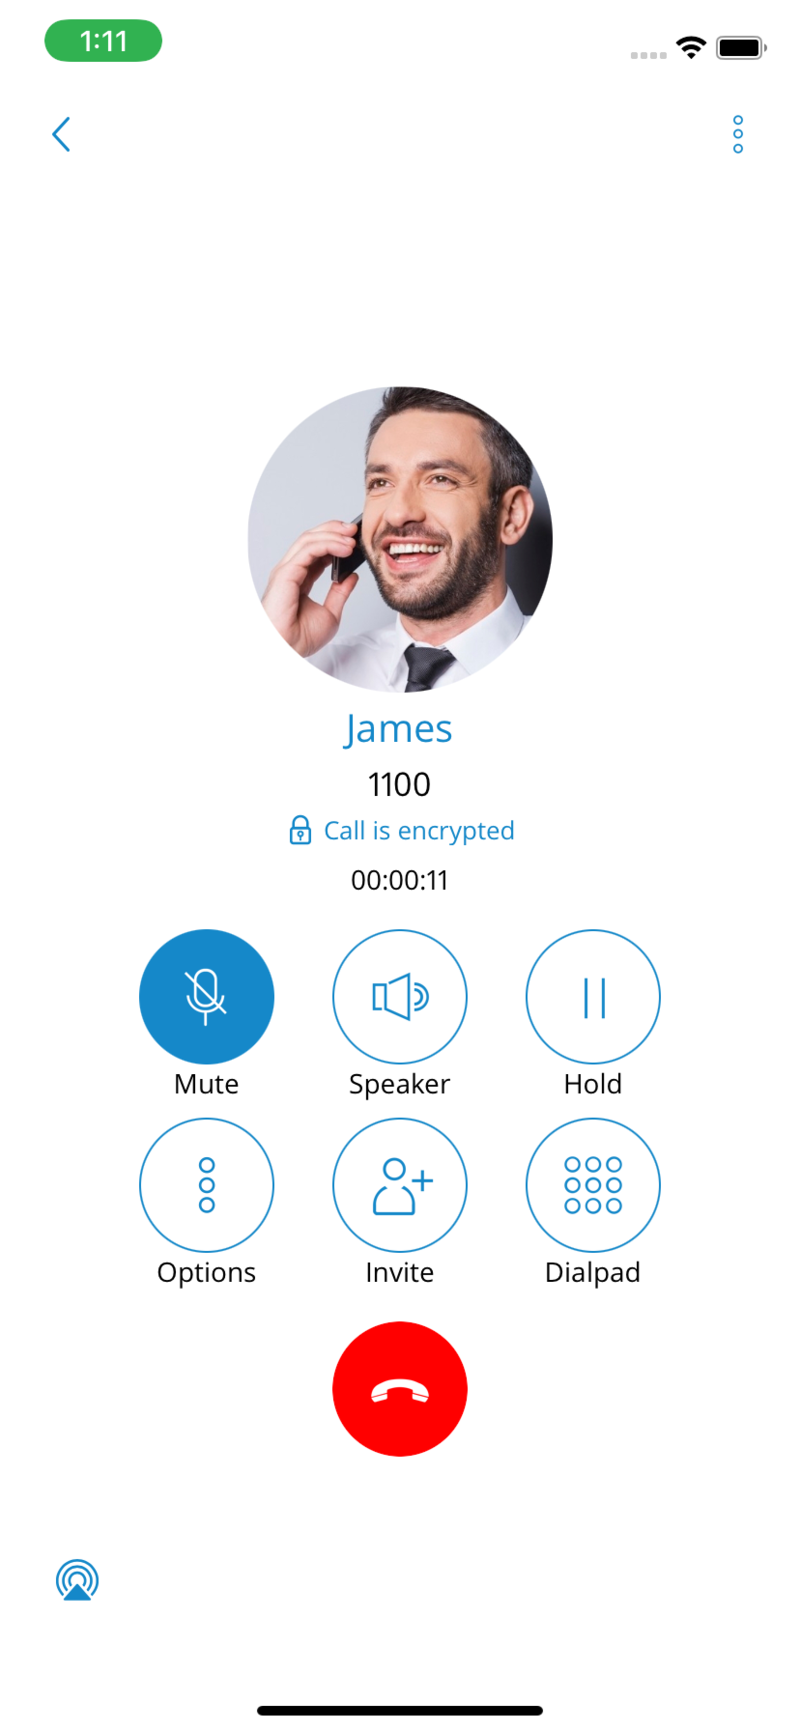
- Speaker
Press the Speaker button to put the device in speakerphone mode, allowing users to continue without holding the device in the ear or to allow other persons in the room to join the conversation through a single device.
- Hold
Hold option will put a caller on hold and play Music on Hold until Hold is pressed again or the call is transferred to another destination.
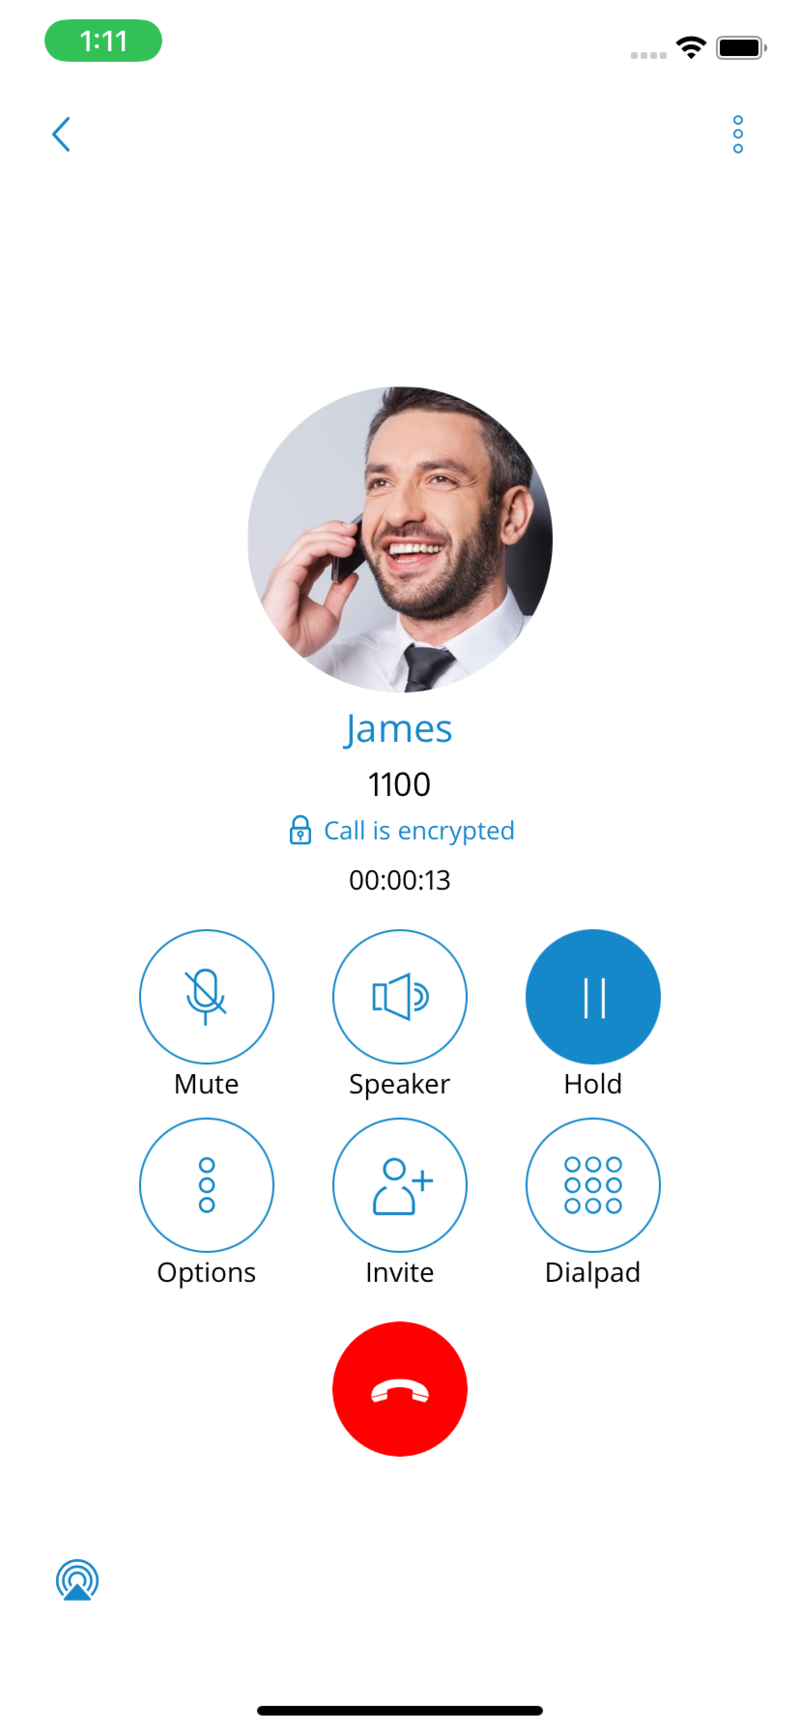
- Options
By pressing the Options button, users can perform multiple actions.
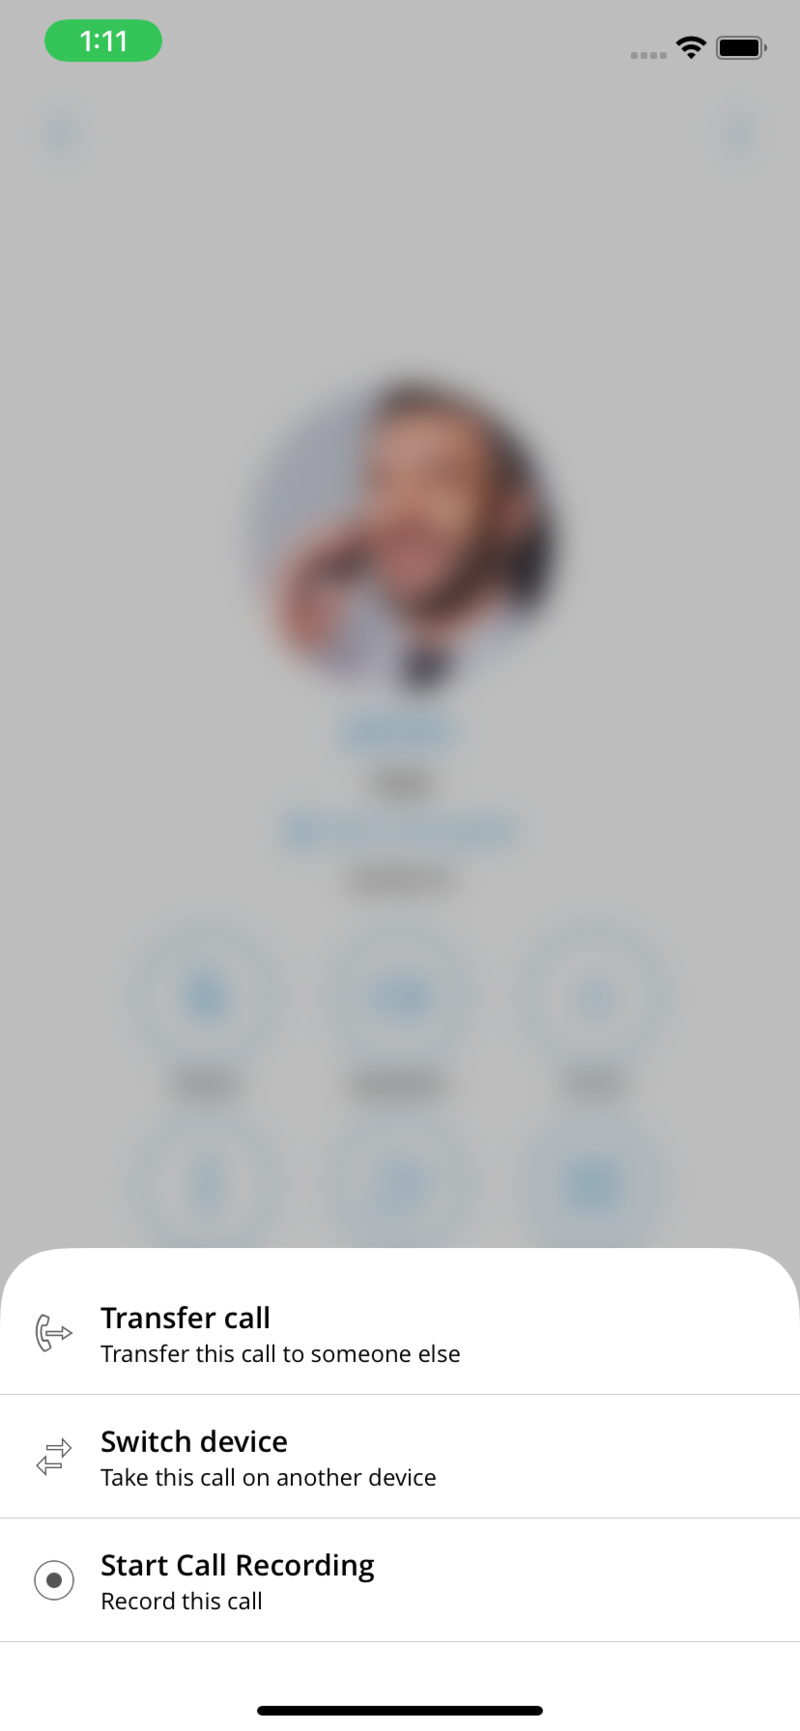
- Transfer Call
The transfer button allows users to initiate a direct or supervised transfer to a PBXware extension or outbound number.
- Switch Device
Switch Device allows users to resume the call on other devices, such as deskphone, softphone, mobile app, or via callback using
predefined phone numbers from the My Phone numbers feature.
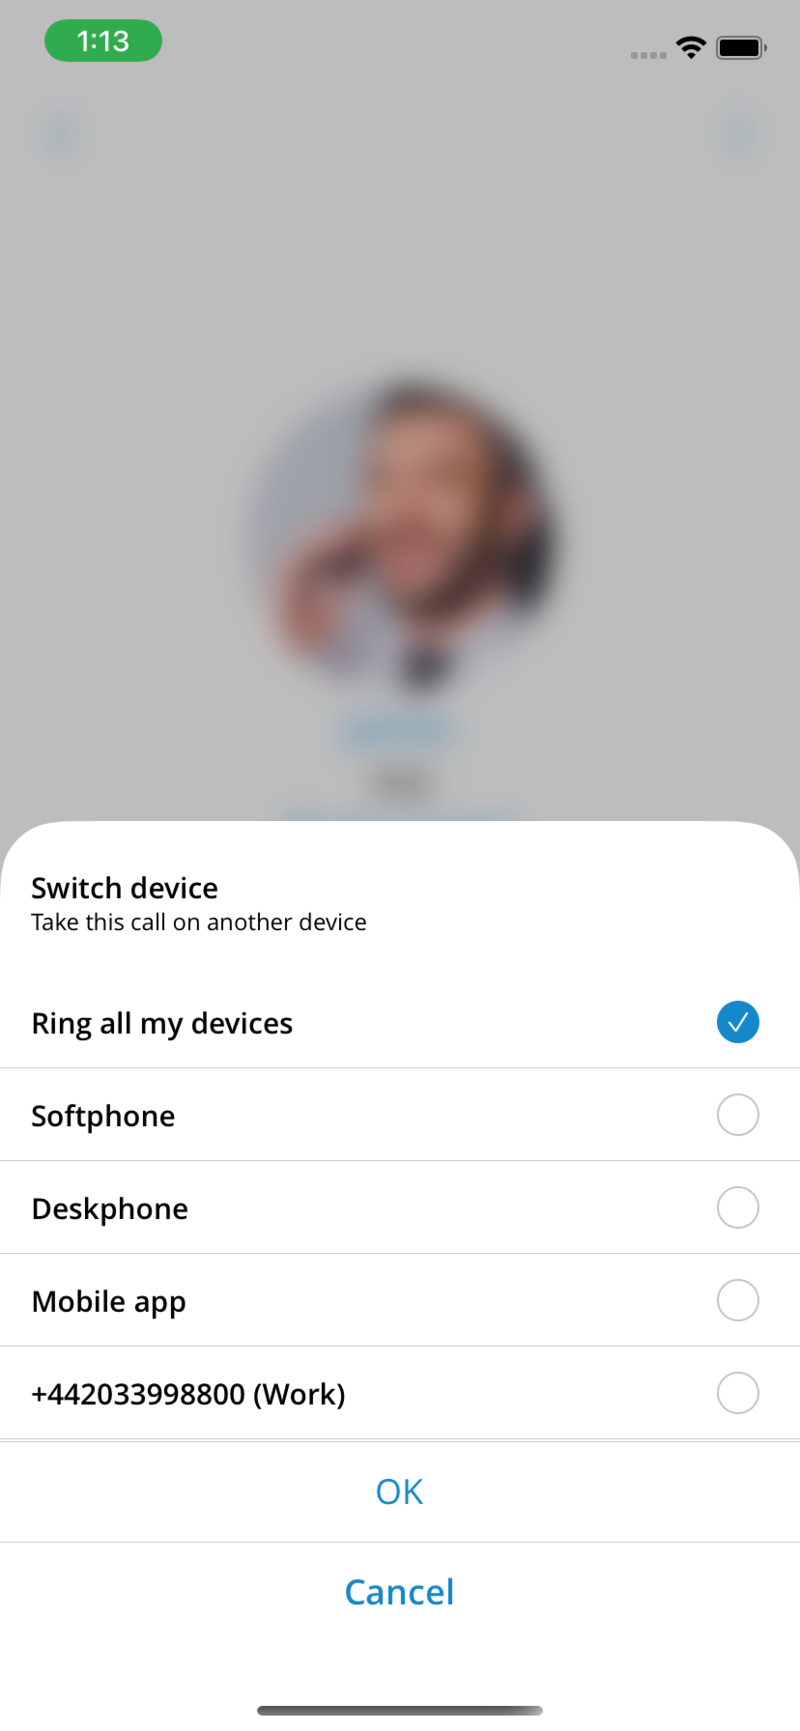
- Start Call Recording
Start Call Recording is only available if enabled in Enhanced Services for the user’s Extension in PBXware. Once the call recording is started for a call, the indicator on the ongoing call screen is visible, showing that the recording is active. Users are also able to pause/unpause and stop the recording.
- Invite
The invite option allows users to create an Instant conference by adding one or more people to an ongoing call. With this option, users can add PBXware extensions or any number available from their contact list.
- Keypad
Use the Dialpad to generate DTMF signals to provide information to IVRs, voicemail management, etc.
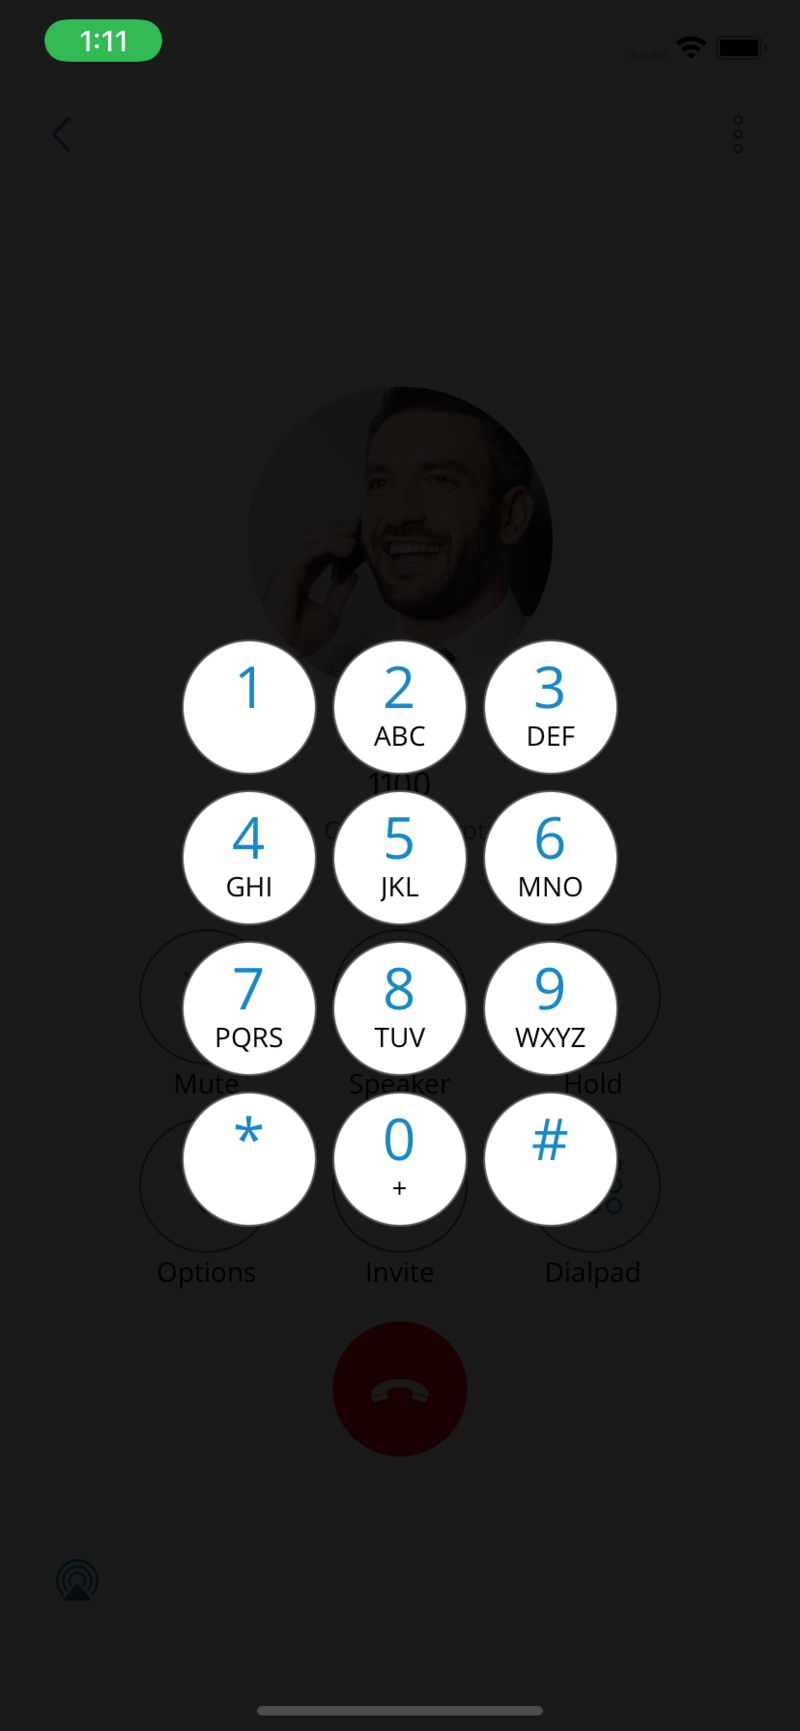
Multiple SIP Calls
gloCOM GO 6 offers an option to handle two calls at the same time. If there is one SIP call in progress and users receive another call, it will be presented to the user on the SIP Call Screen. If answered, gloCOM will set one call on hold. gloCOM will exit from the Multiple SIP Calls state if one of the calls is finished.
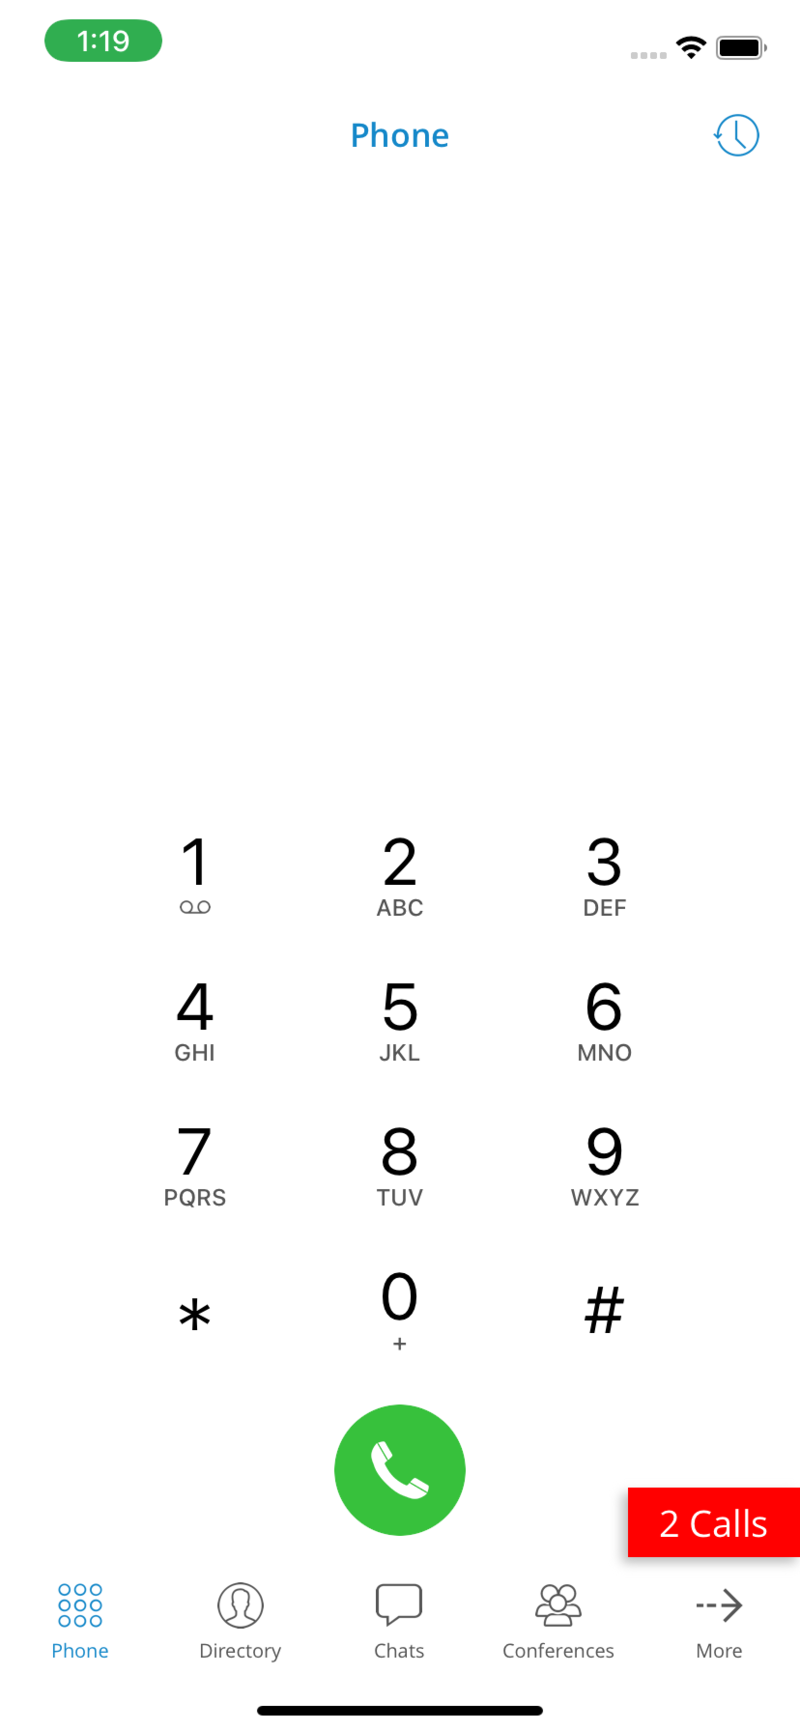
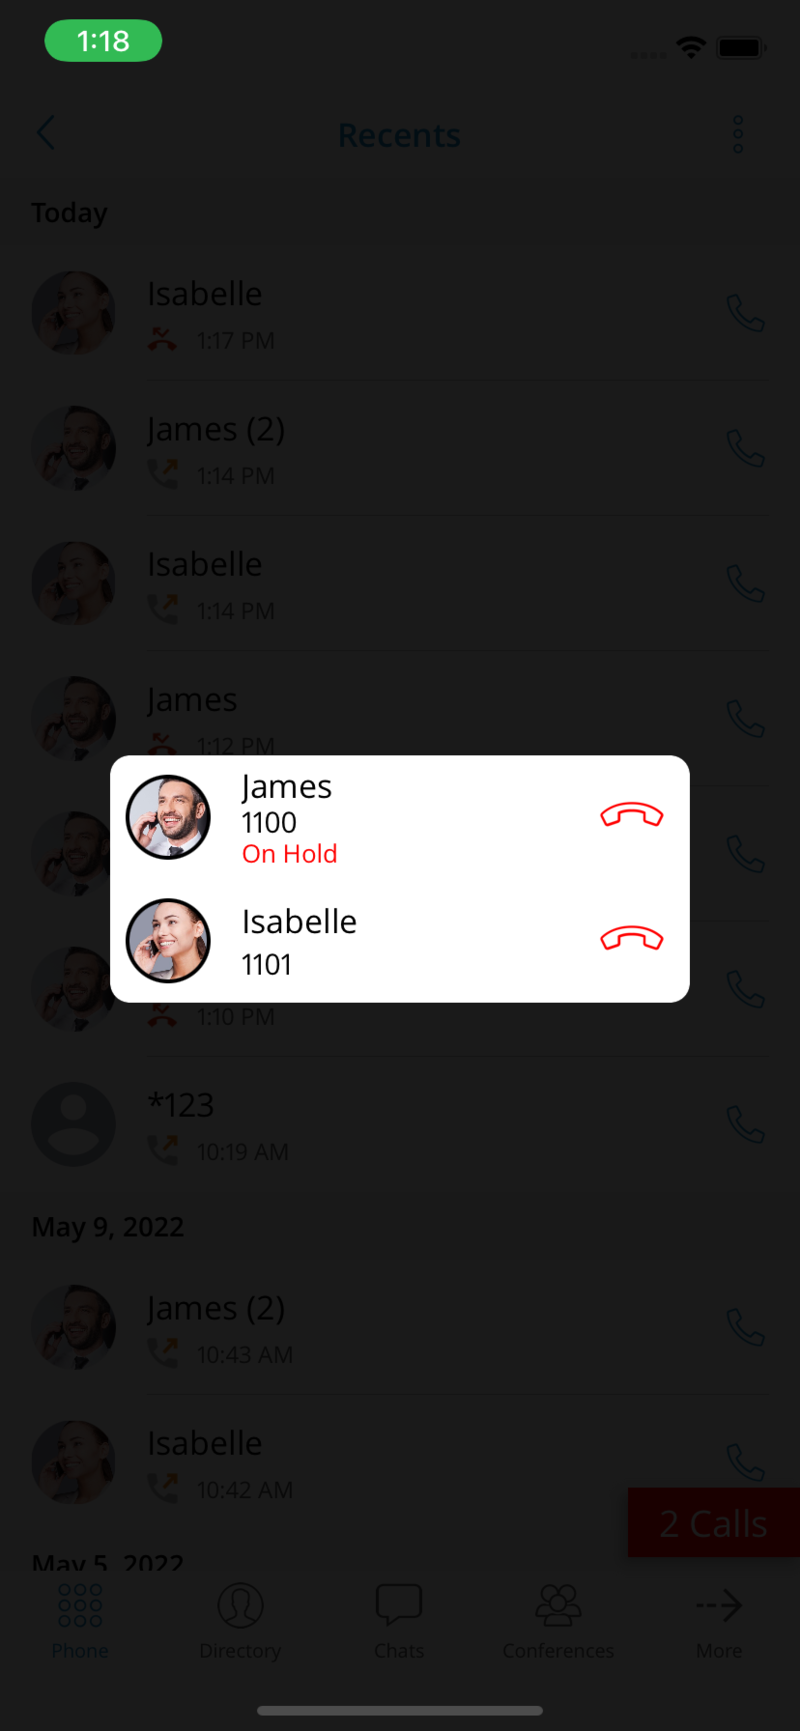
Indicator for disabled microphone
The app shows an indicator on the call screen if the microphone is disabled, so users know if other parties can not hear them.
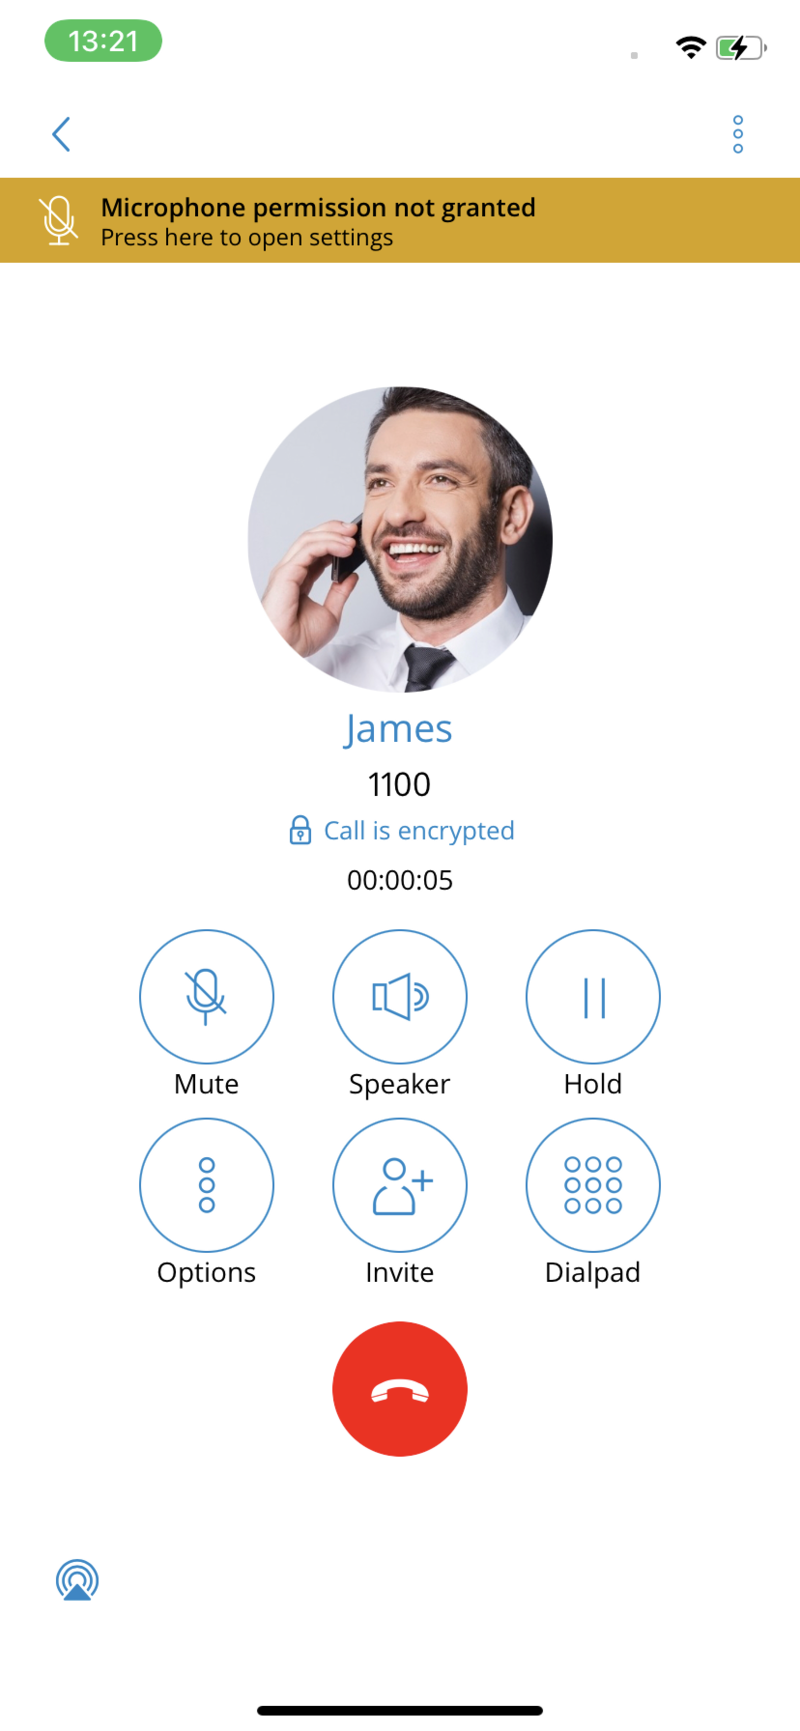
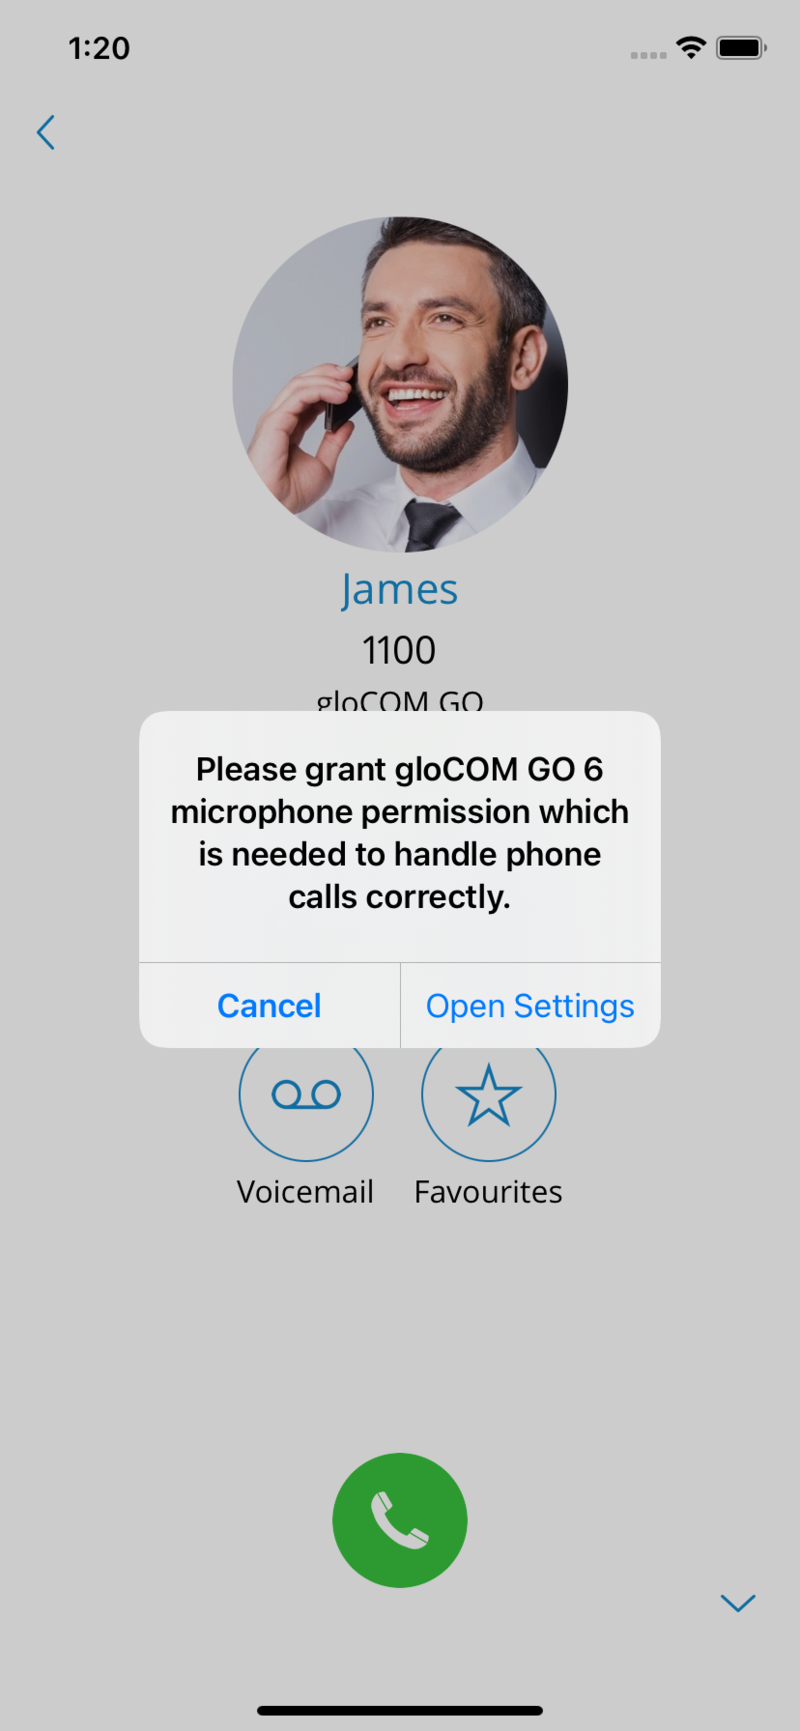
The microphone button on the call screen would be disabled if the user did not give permission previously.
By pressing on the message banner or the disabled microphone button, users will be prompted to allow the microphone permissions.
Call Recording Indicator
Once the call recording is started for a call, the indicator on the ongoing call screen is visible, showing that the recording is active. Users are also able to pause/unpause and stop the recording.
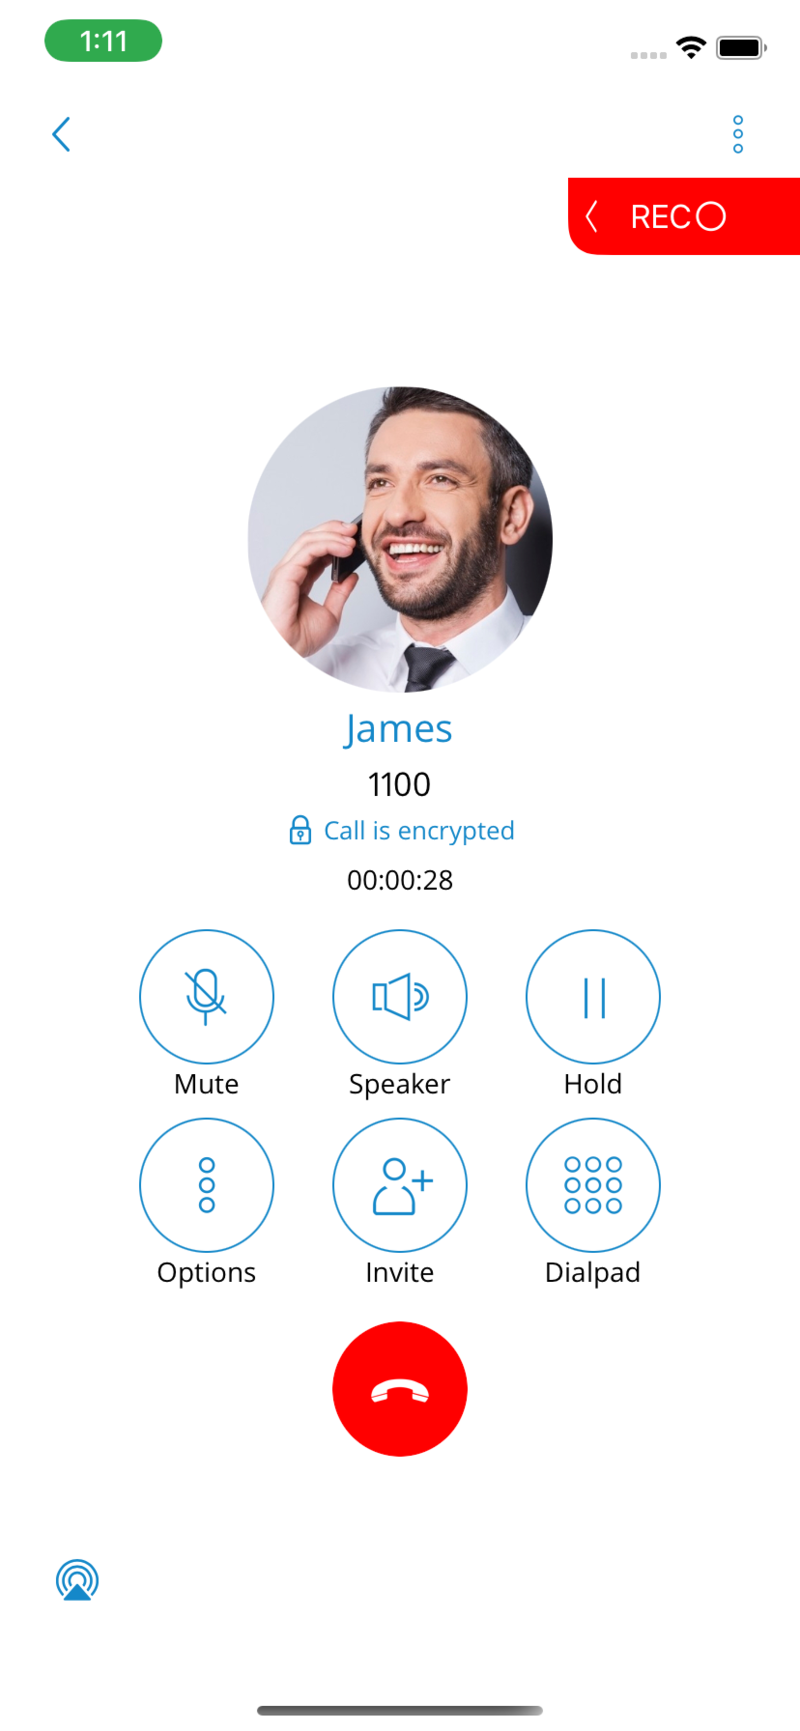
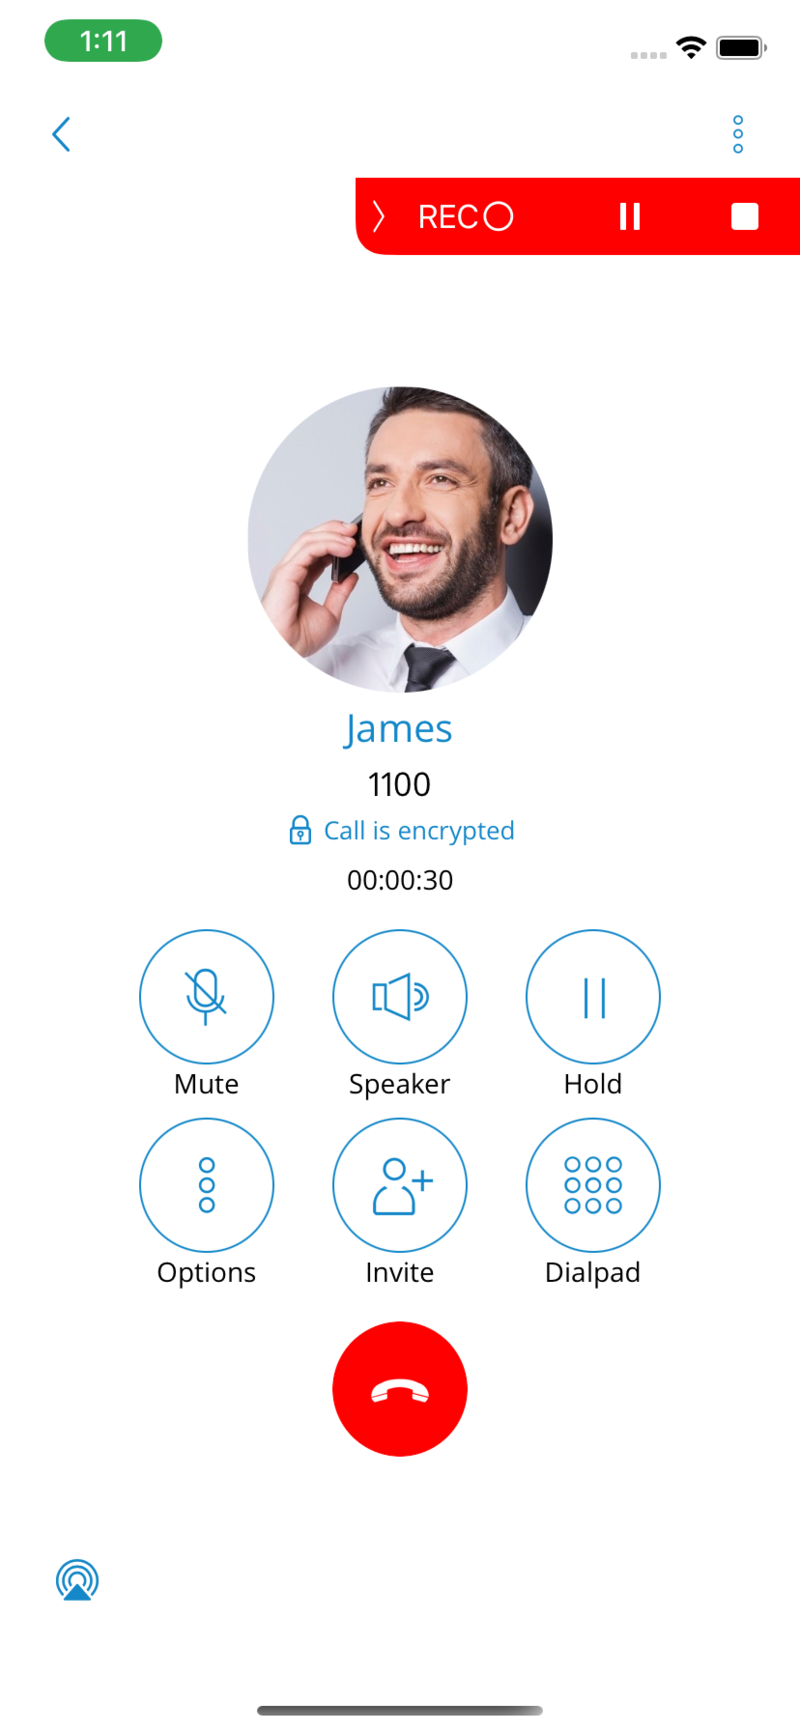
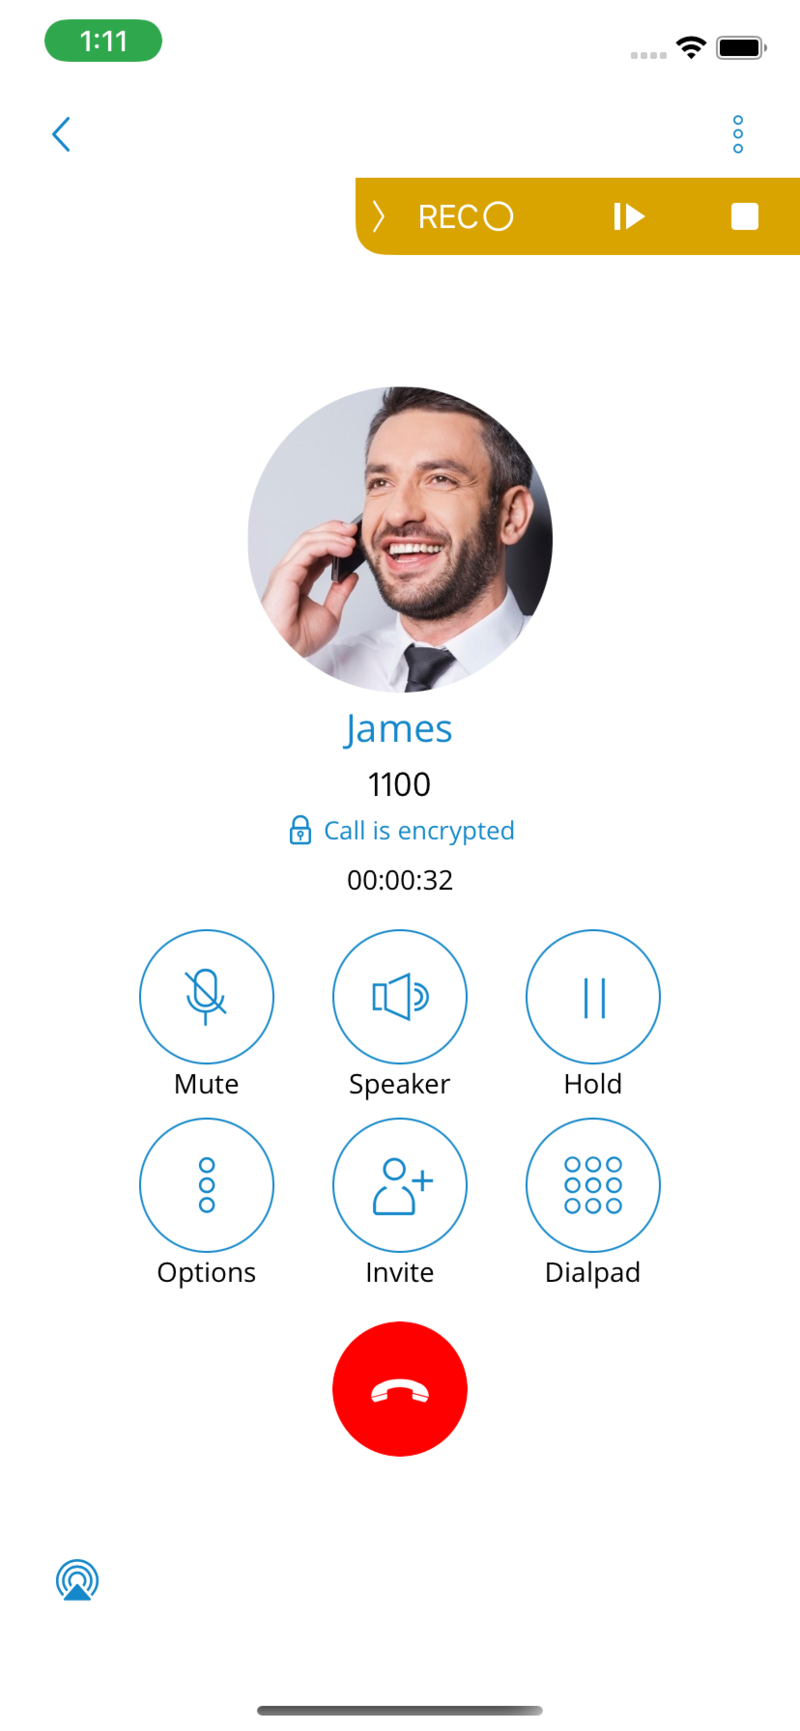
Call Encryption Indicator
An indicator shows a call encryption message during an ongoing call if a call is encrypted. The indicator should only be present when the TLS encryption is enabled. Pressing it will bring a pop-up message explaining the encryption.
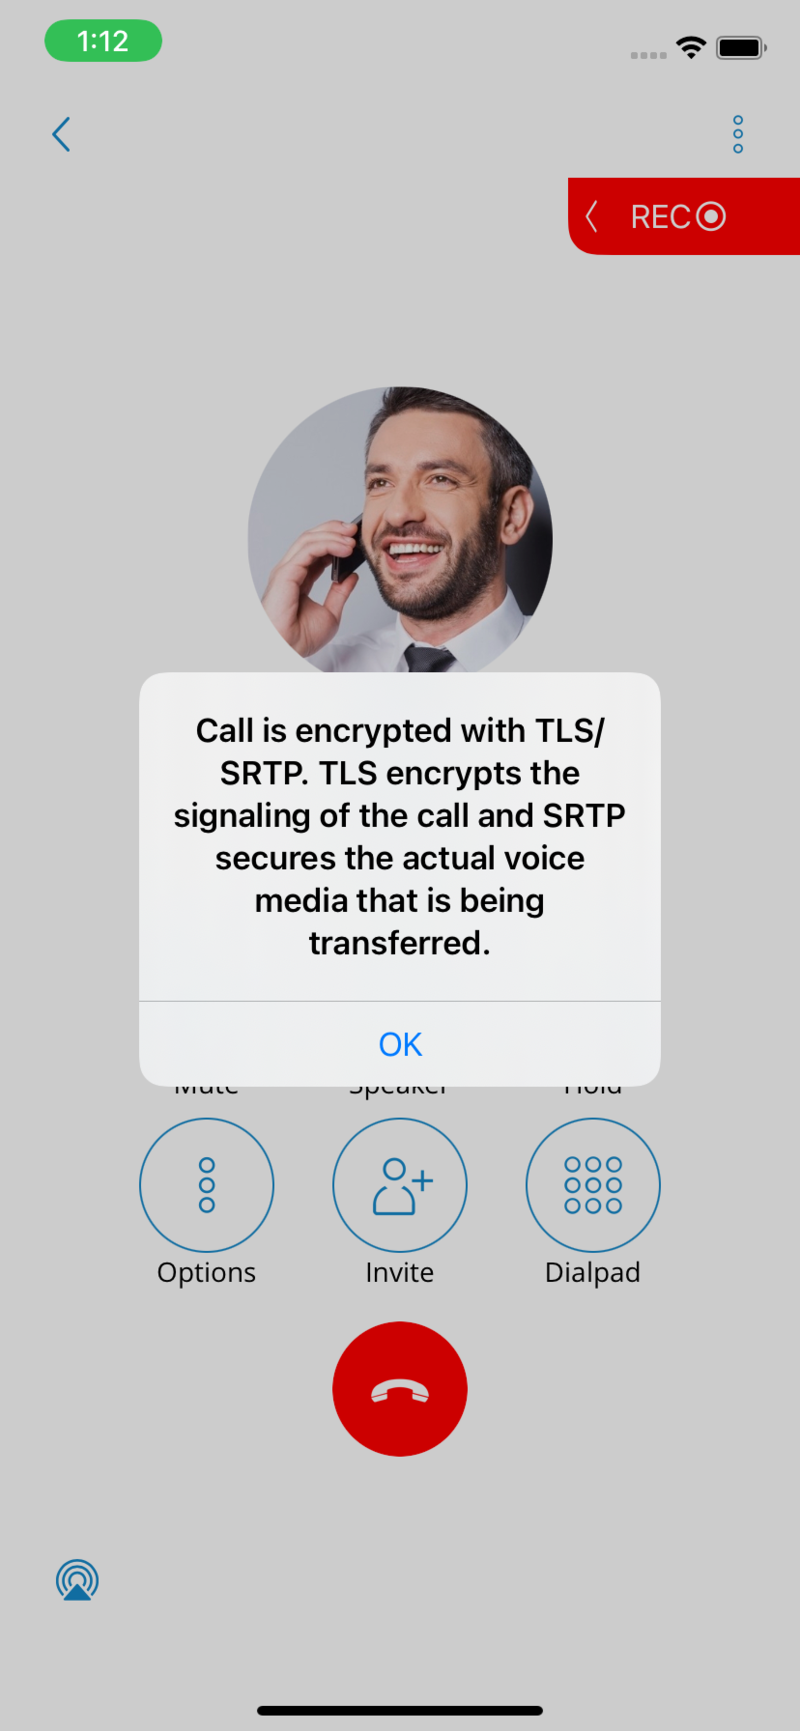
Call transfer
Users can transfer a call by pressing the transfer icon from the call options menu. The user will be able to transfer the call to two destinations:
- Select a contact
Pressing Select a contact brings up a screen with favorites, users, and phone book contacts to choose someone to transfer the call to.
- Enter a number
Users can enter the number directly without selecting from the contact list. After selecting the contact or entering a number, users have to select to make a Direct or Supervised transfer to initiate it.

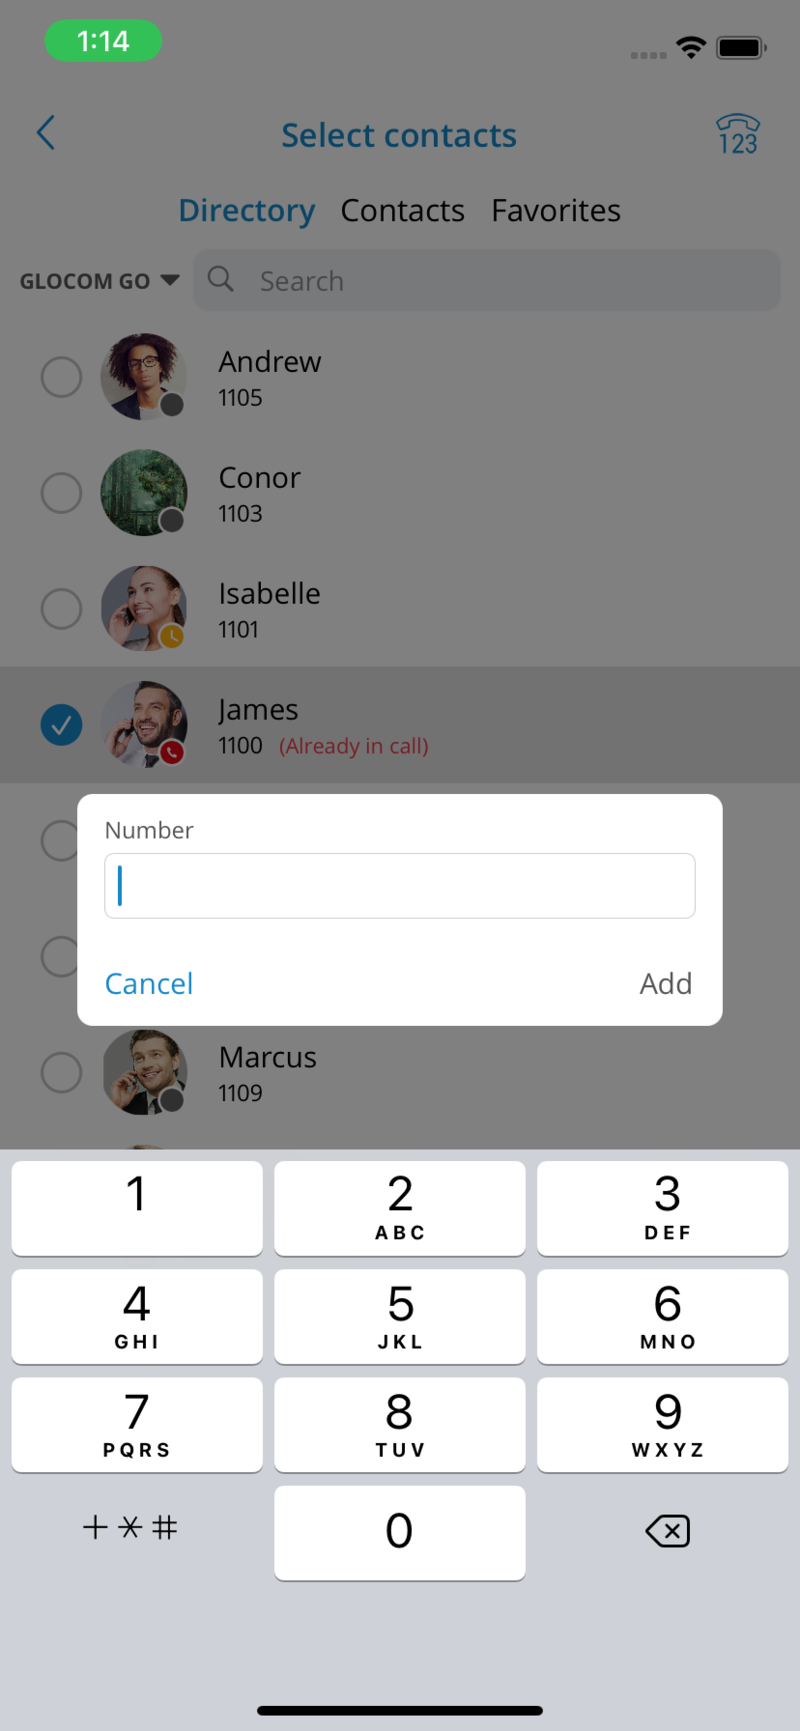
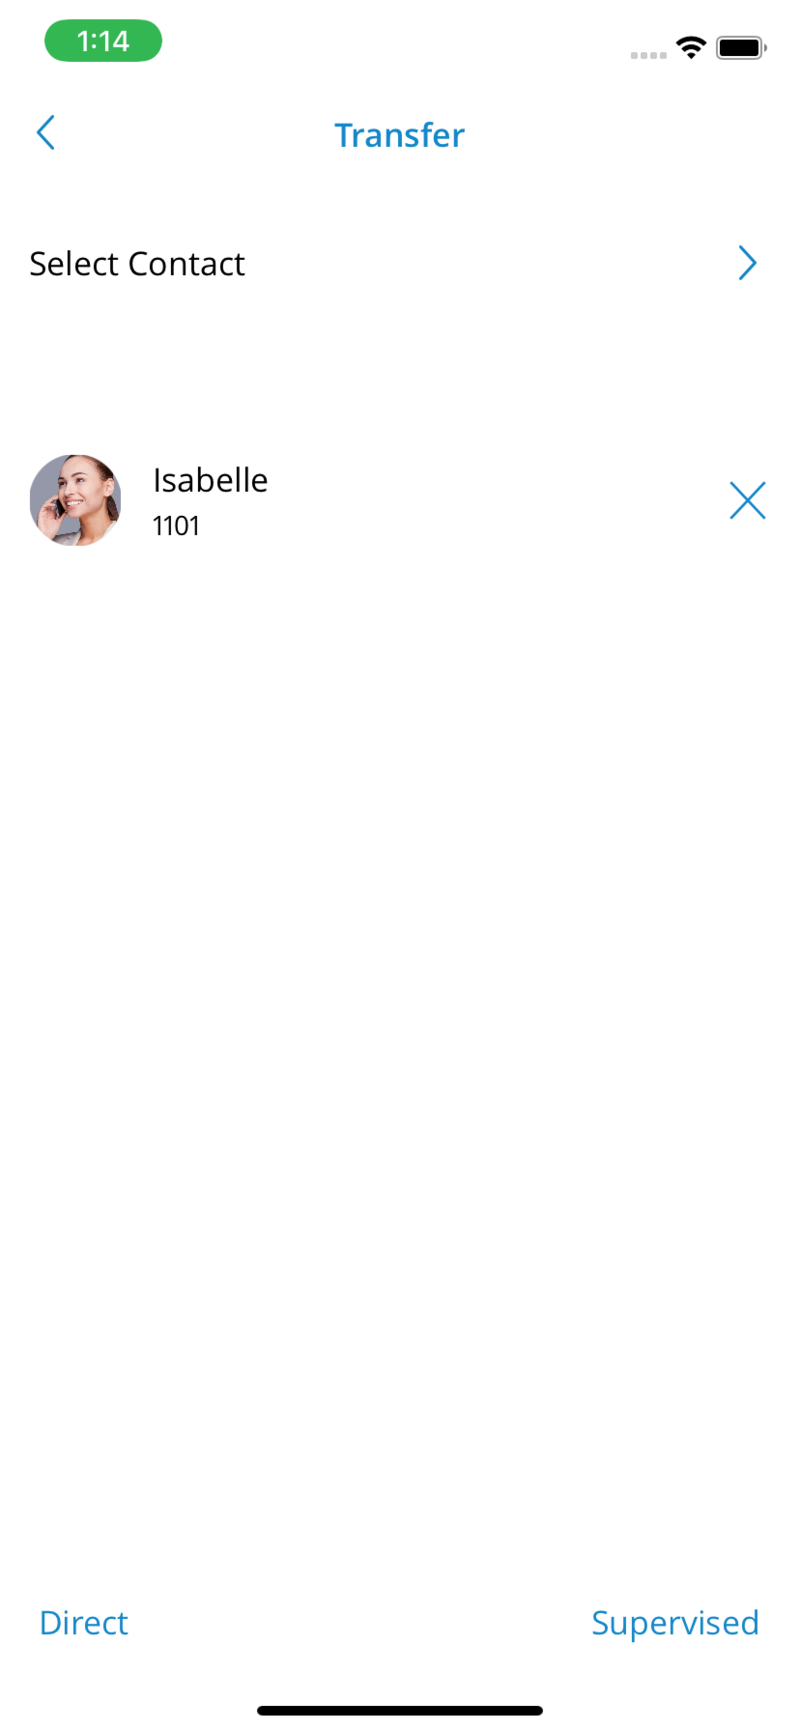
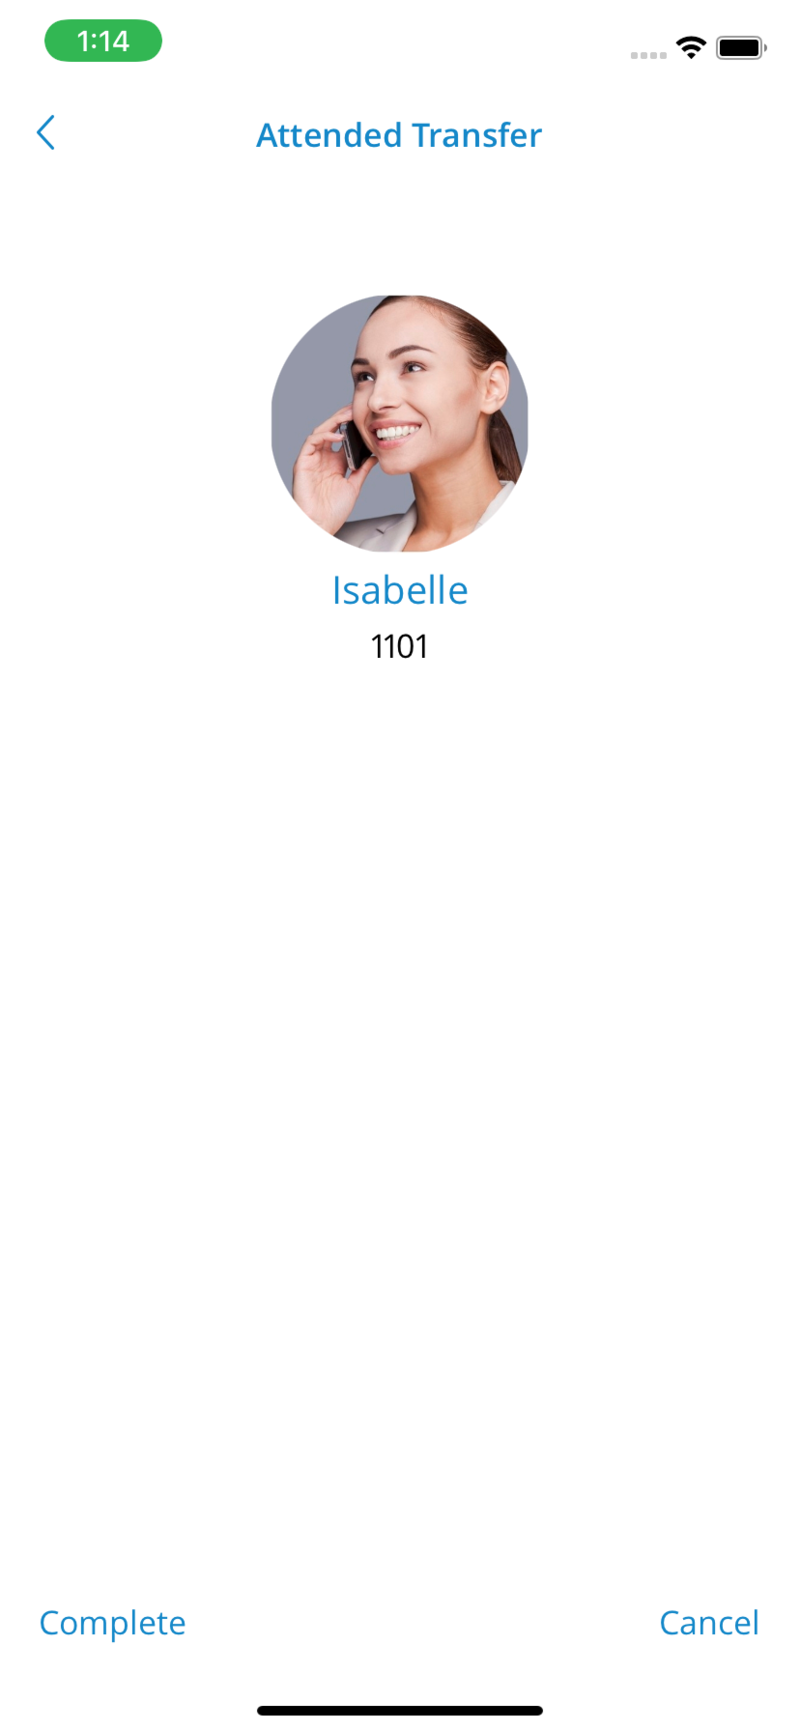
Recent Calls
Recents screen will be displayed when the user presses Recents Tab from Header Bar on the Phone Screen and a list of the recent calls.
Pressing on the recent calls screen, there is a search icon in the top bar, which can be used to filter recent calls by number and name.
Pressing on the avatar of some contact from recent calls opens an info screen containing additional information about that contact.
Additional options on long-press of one item in recent calls, so it is much easier to send a message or an email or to copy/edit a number.
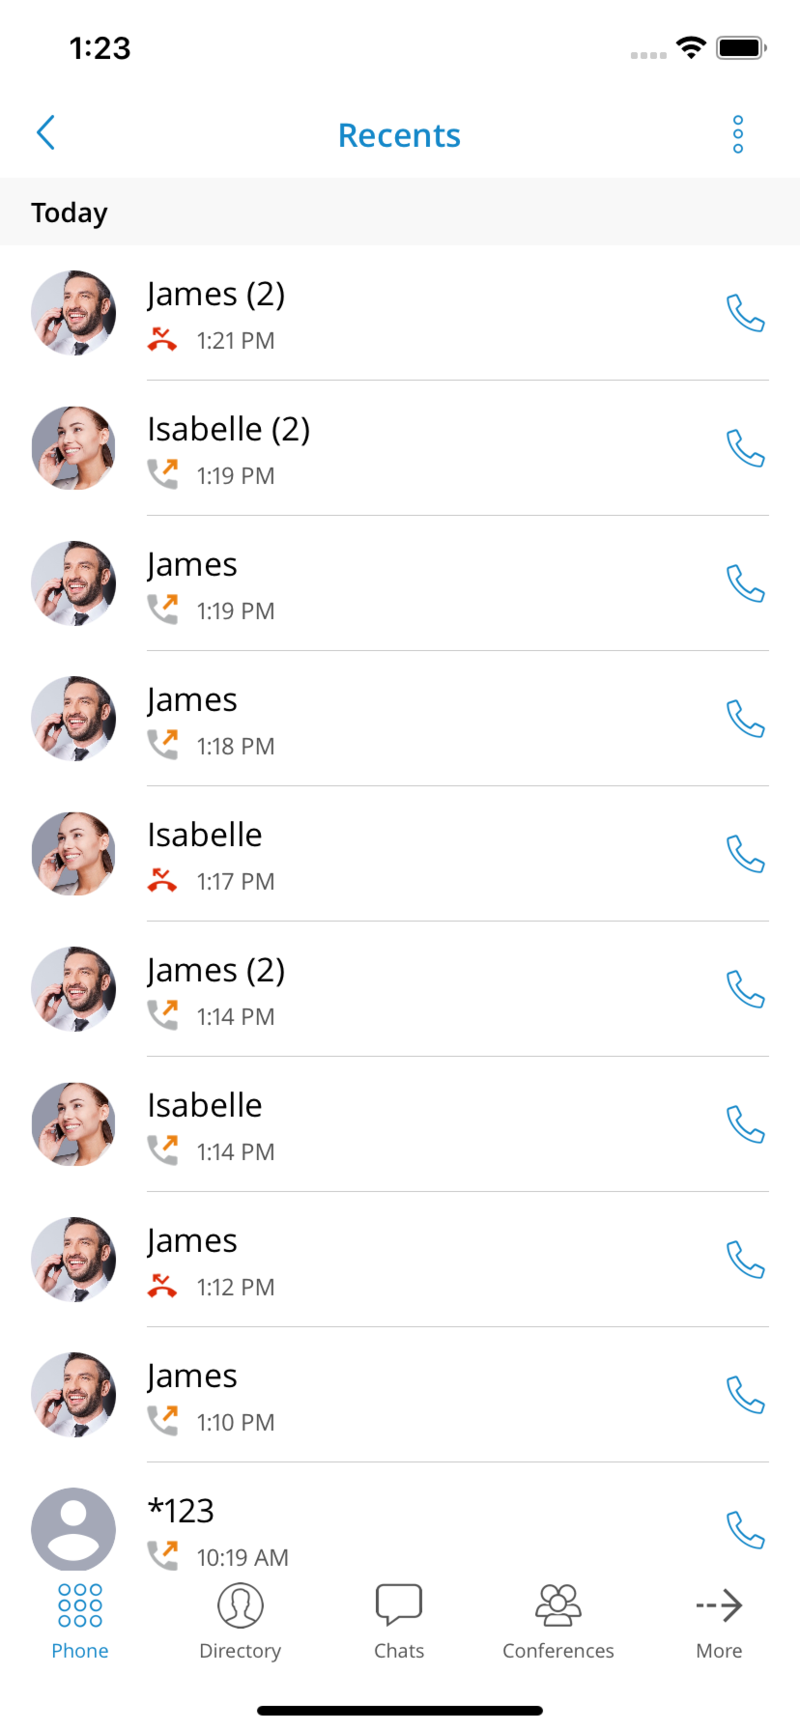
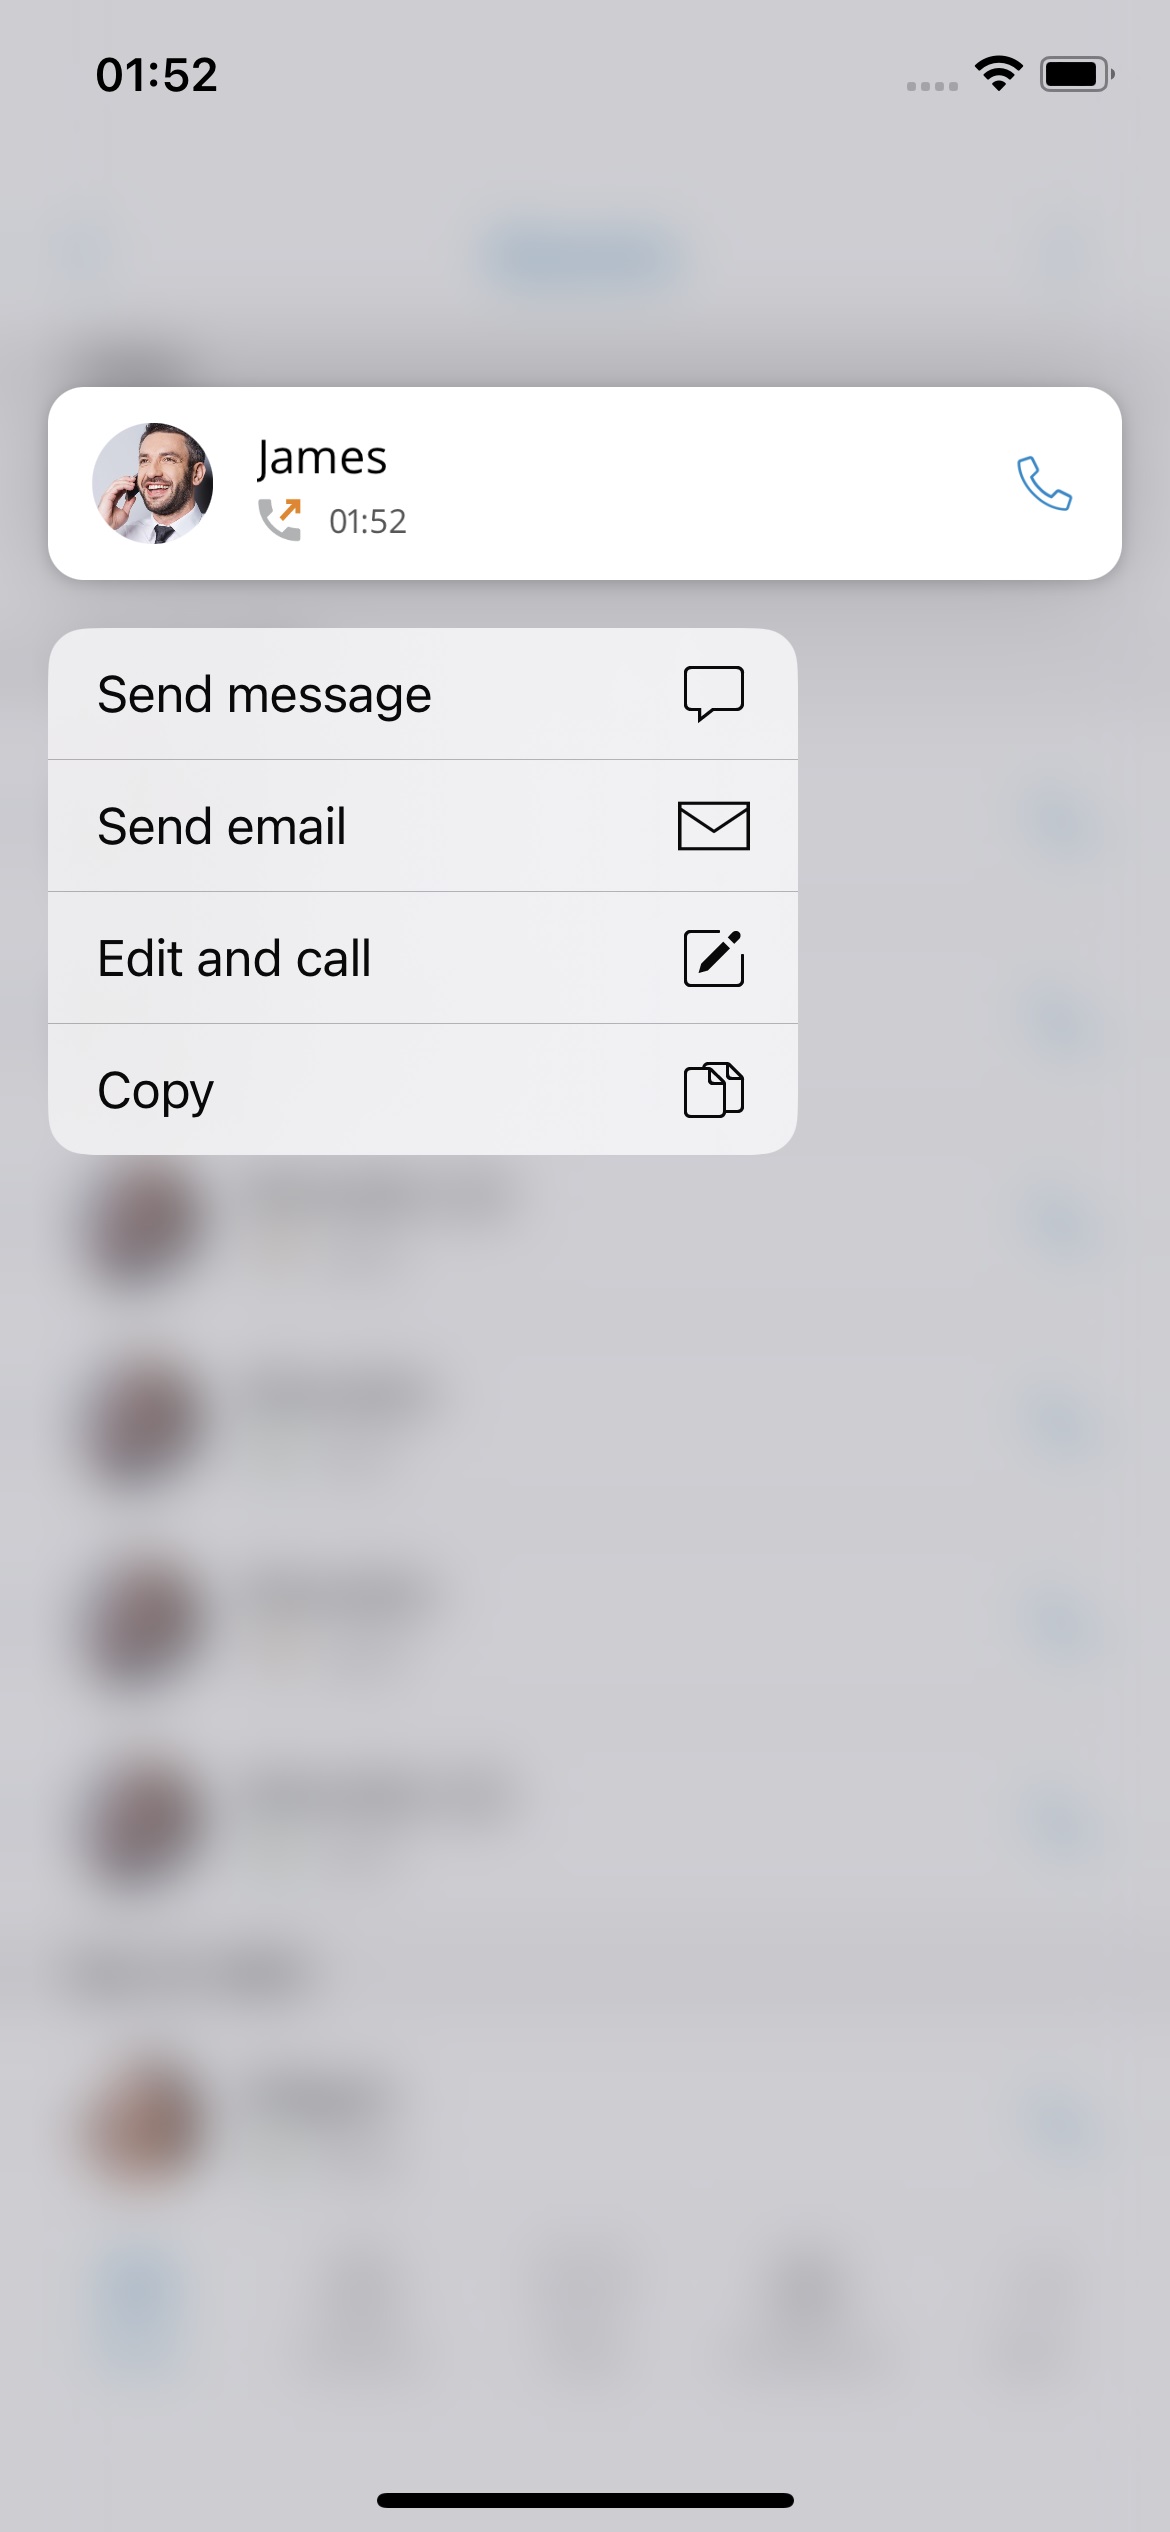
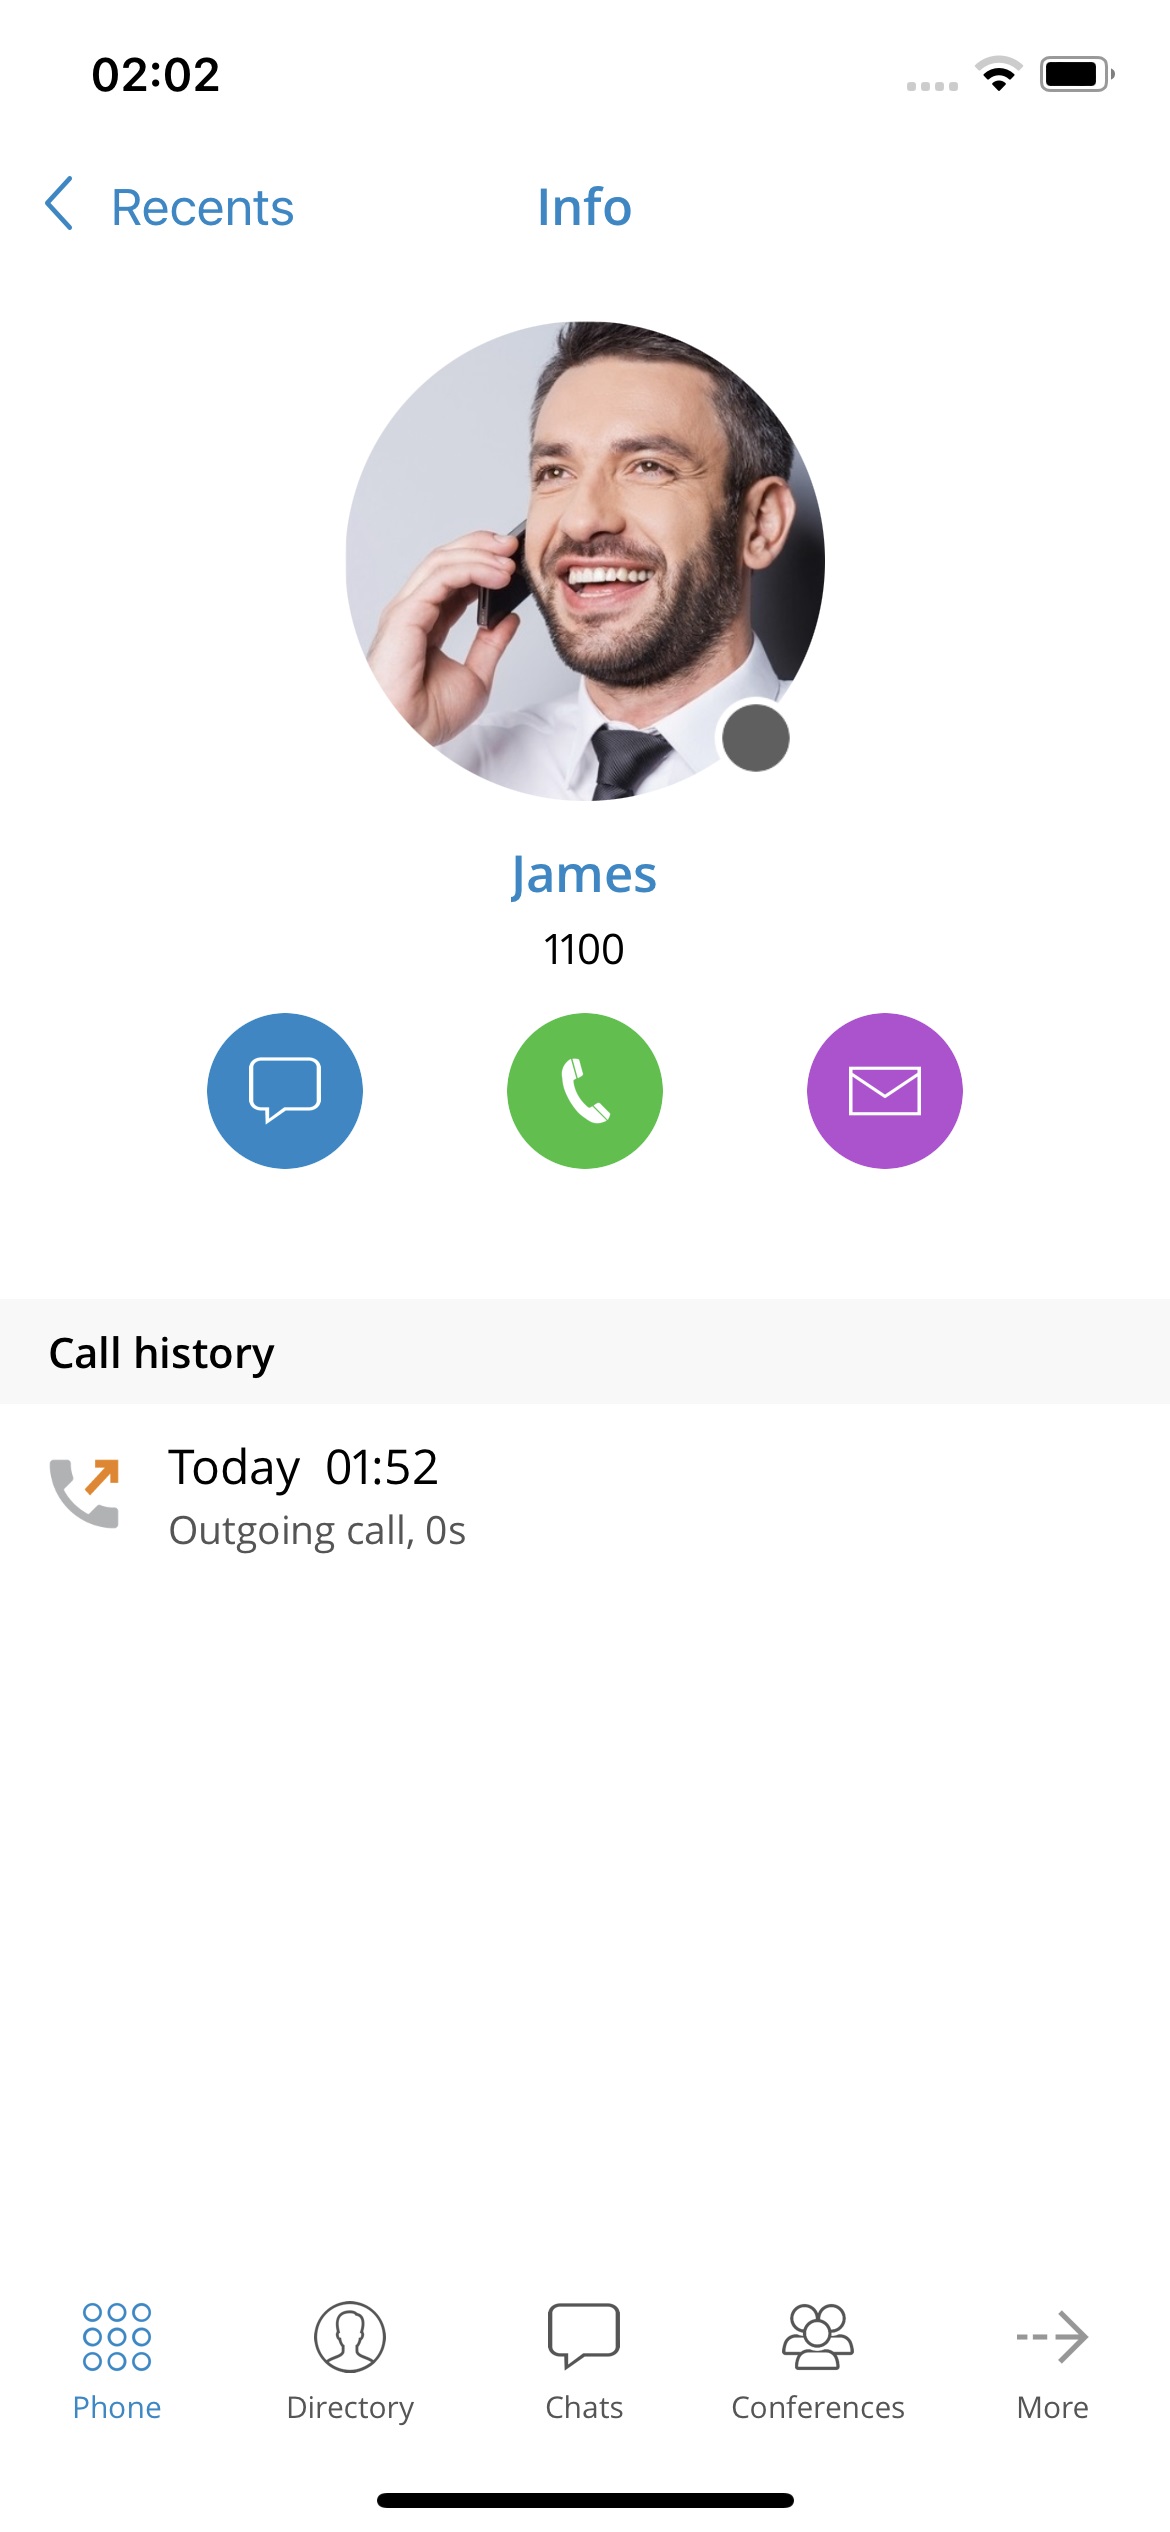
Call History Sync
With the call history sync feature, users will be able to access their recent calls history from all gloCOM apps (Desktop, Mobile, and Web).
Each call users make on the desktop will be reflected on the mobile devices. If users mark a missed call as seen on their mobile device, it will now be marked as seen on their desktop and other mobile devices. If users delete call history on one device, it will be synced and deleted on all of the devices.
When logging into the device, gloCOM GO 6 will sync up to hundreds of previous calls no older than a month.
Technical information about an ongoing call
While in a call, users can show technical information about it by pressing the info icon. This can be useful for diagnosing problems with call quality.
High packet loss and high jitter, both RX and TX indicate that call quality suffers due to network quality and usage.
RX stands for reception (incoming traffic) and TX for transmission (outgoing traffic).
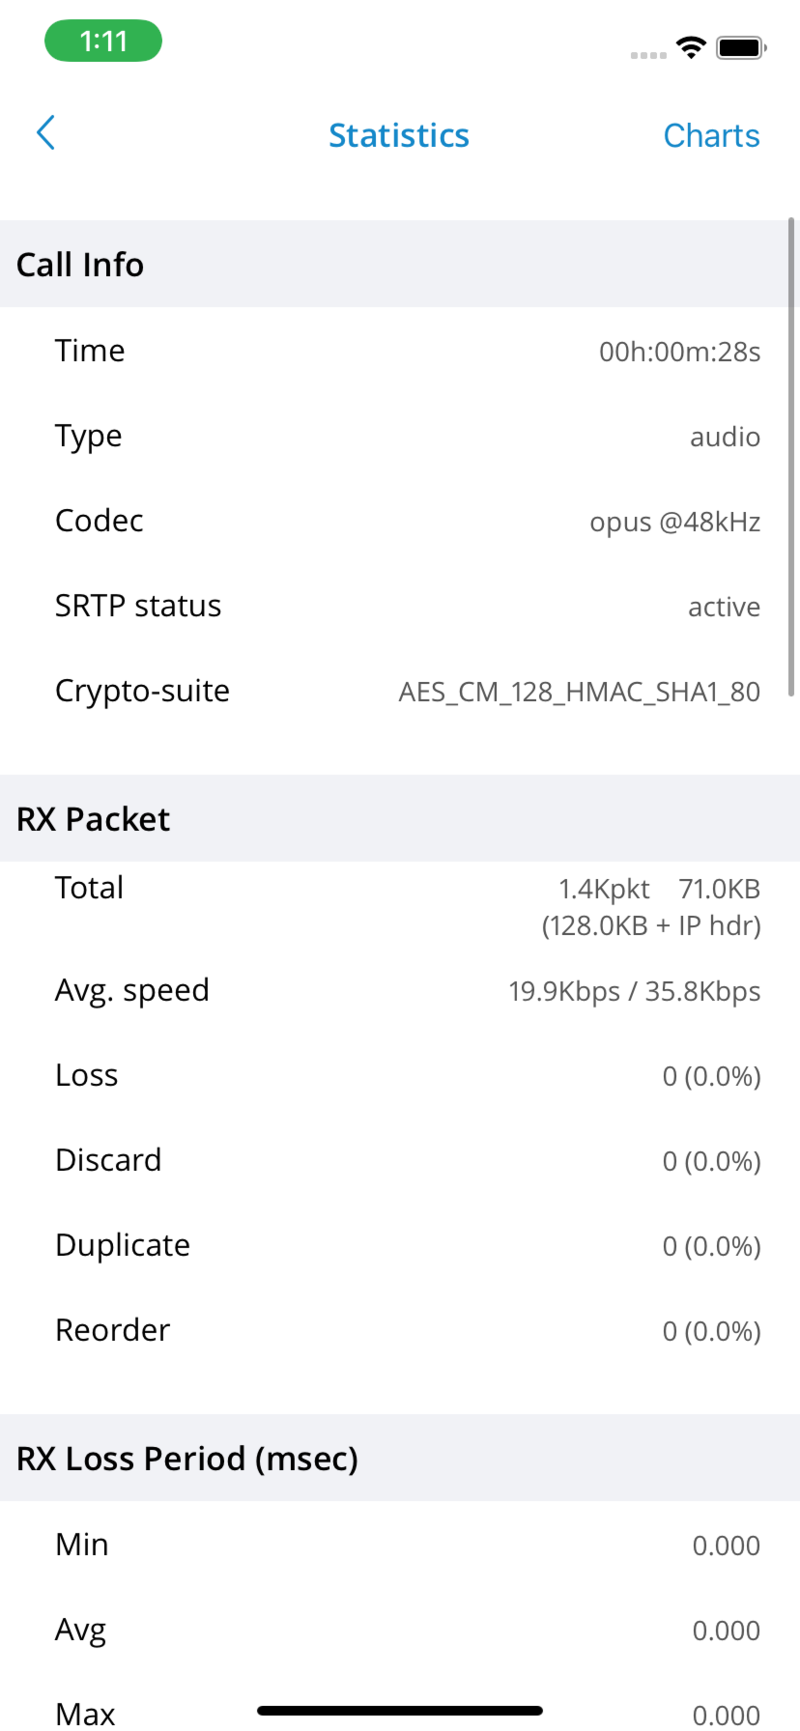
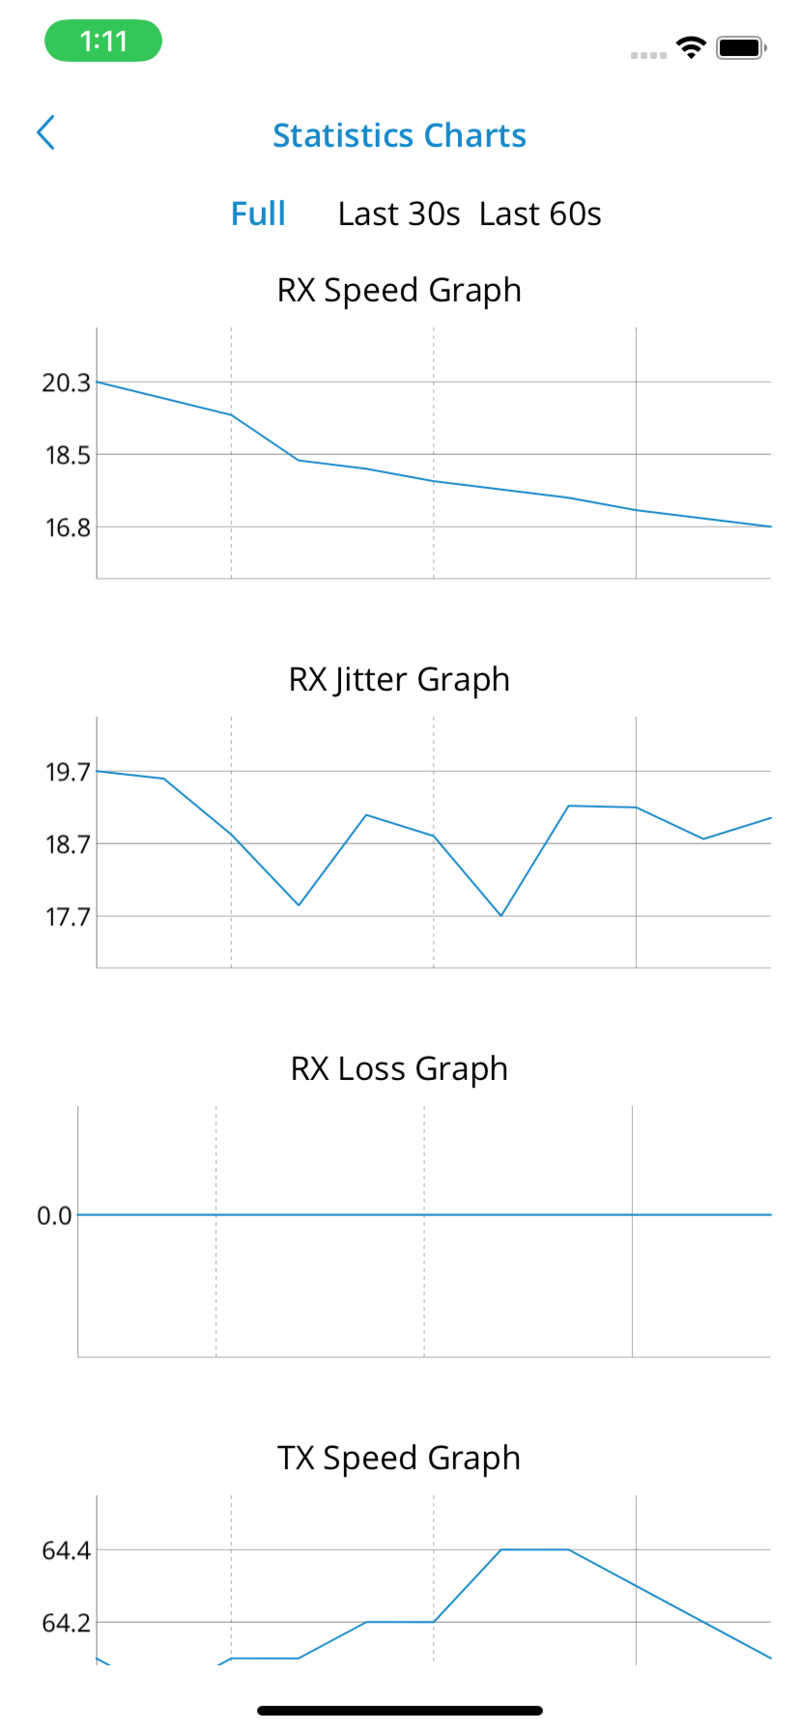
Call monitor
The call monitor feature enables the users to listen or participate in calls for extensions configured in the call monitor enhanced service settings on PBXware.
When call monitoring is enabled in the Enhanced Services on the user’s account, users will see a three dots menu inside the extension profile. When pressed, the call monitoring feature will be available. If users do not have call monitoring enabled on the extension, they will not be able to see that option.
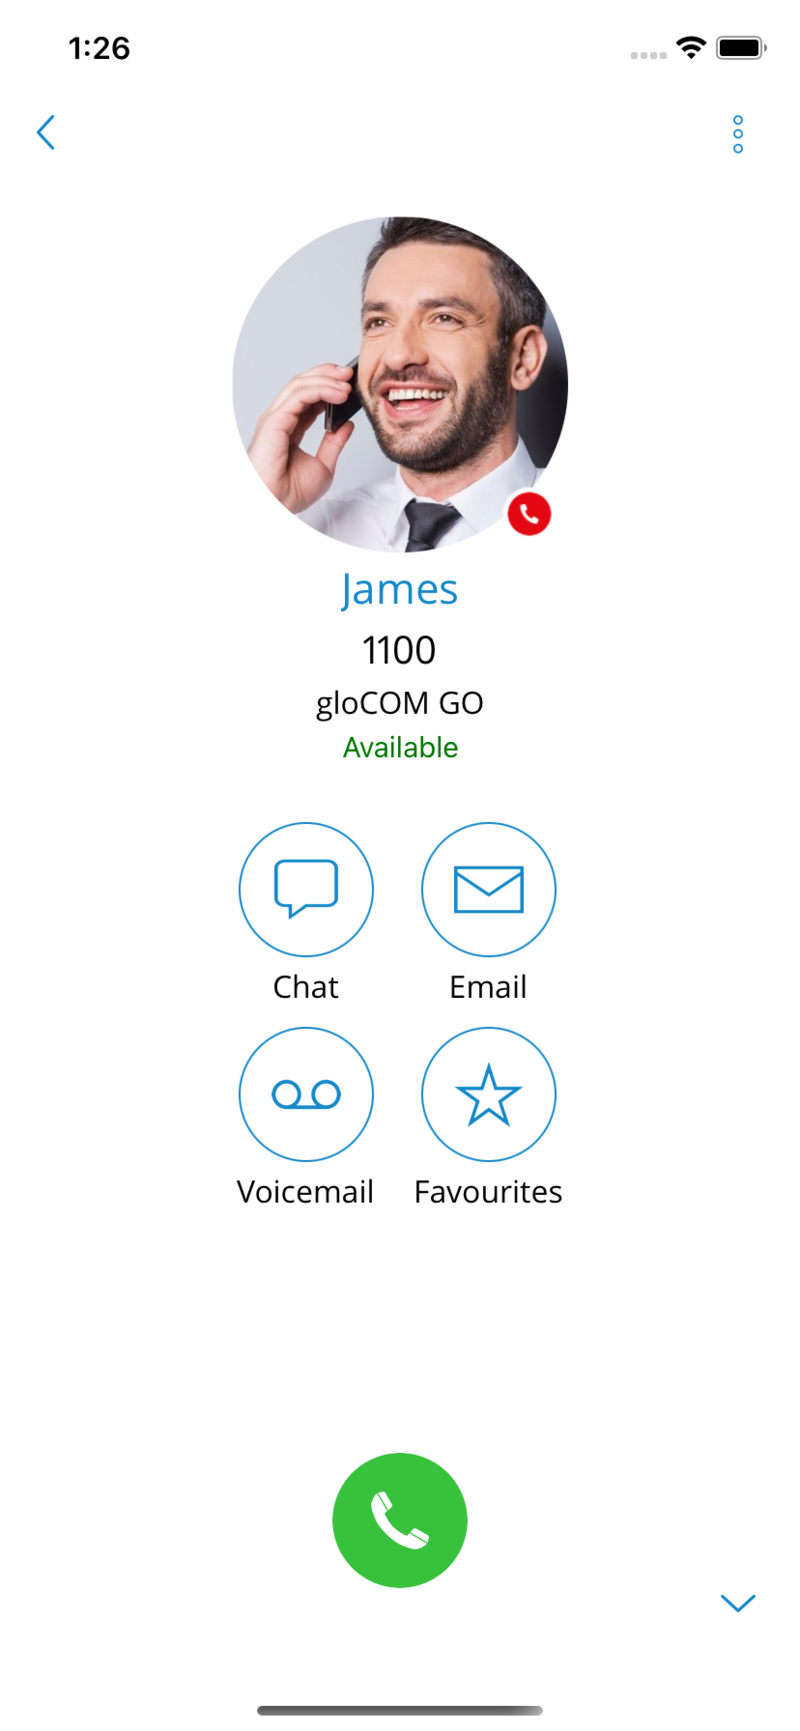
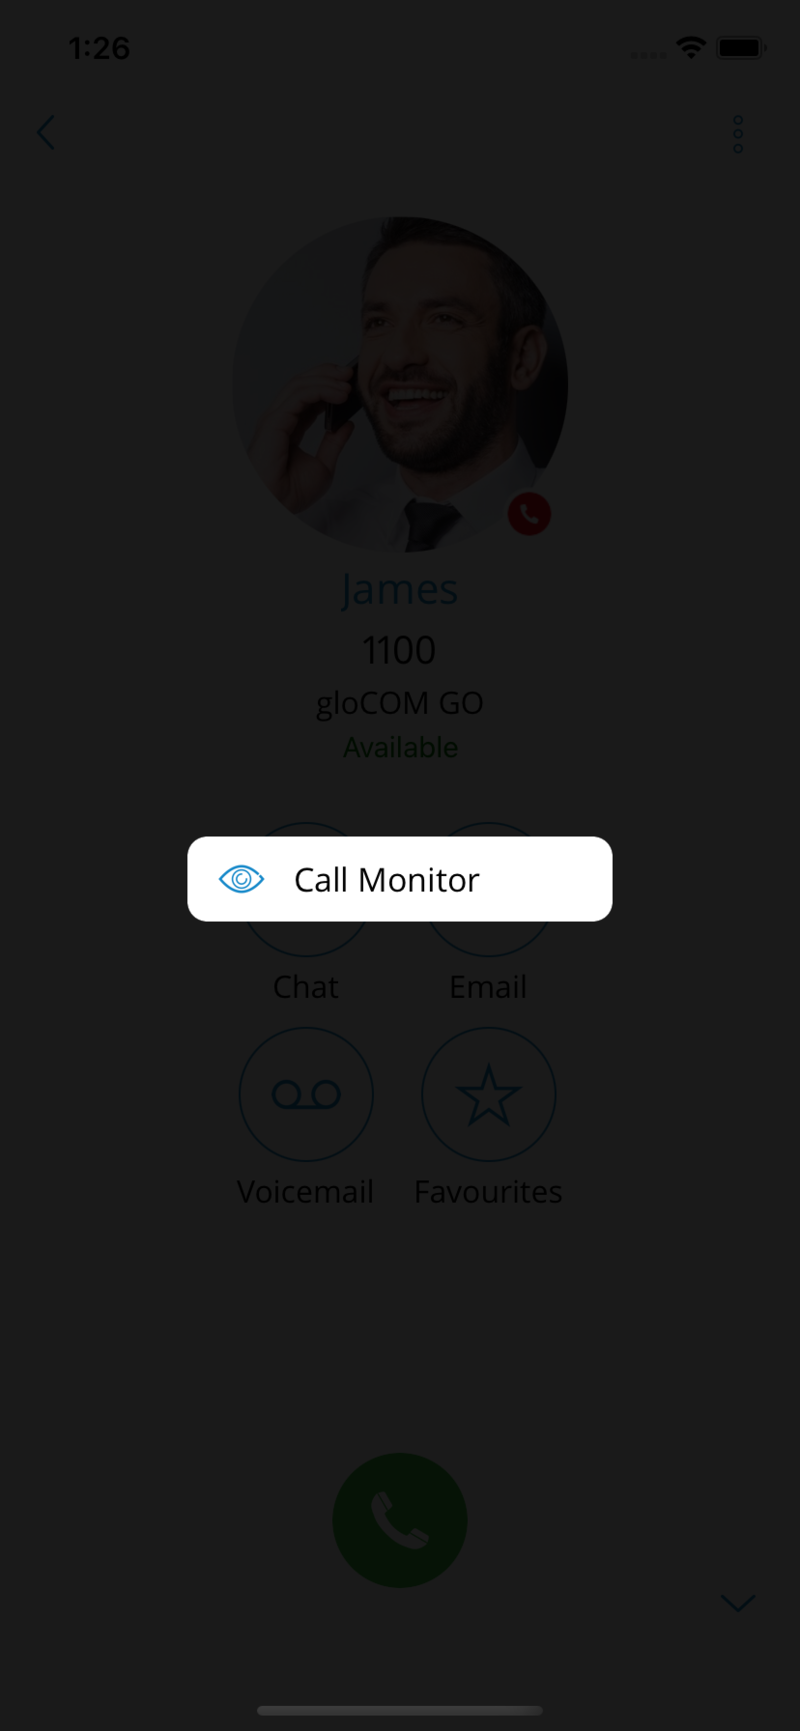
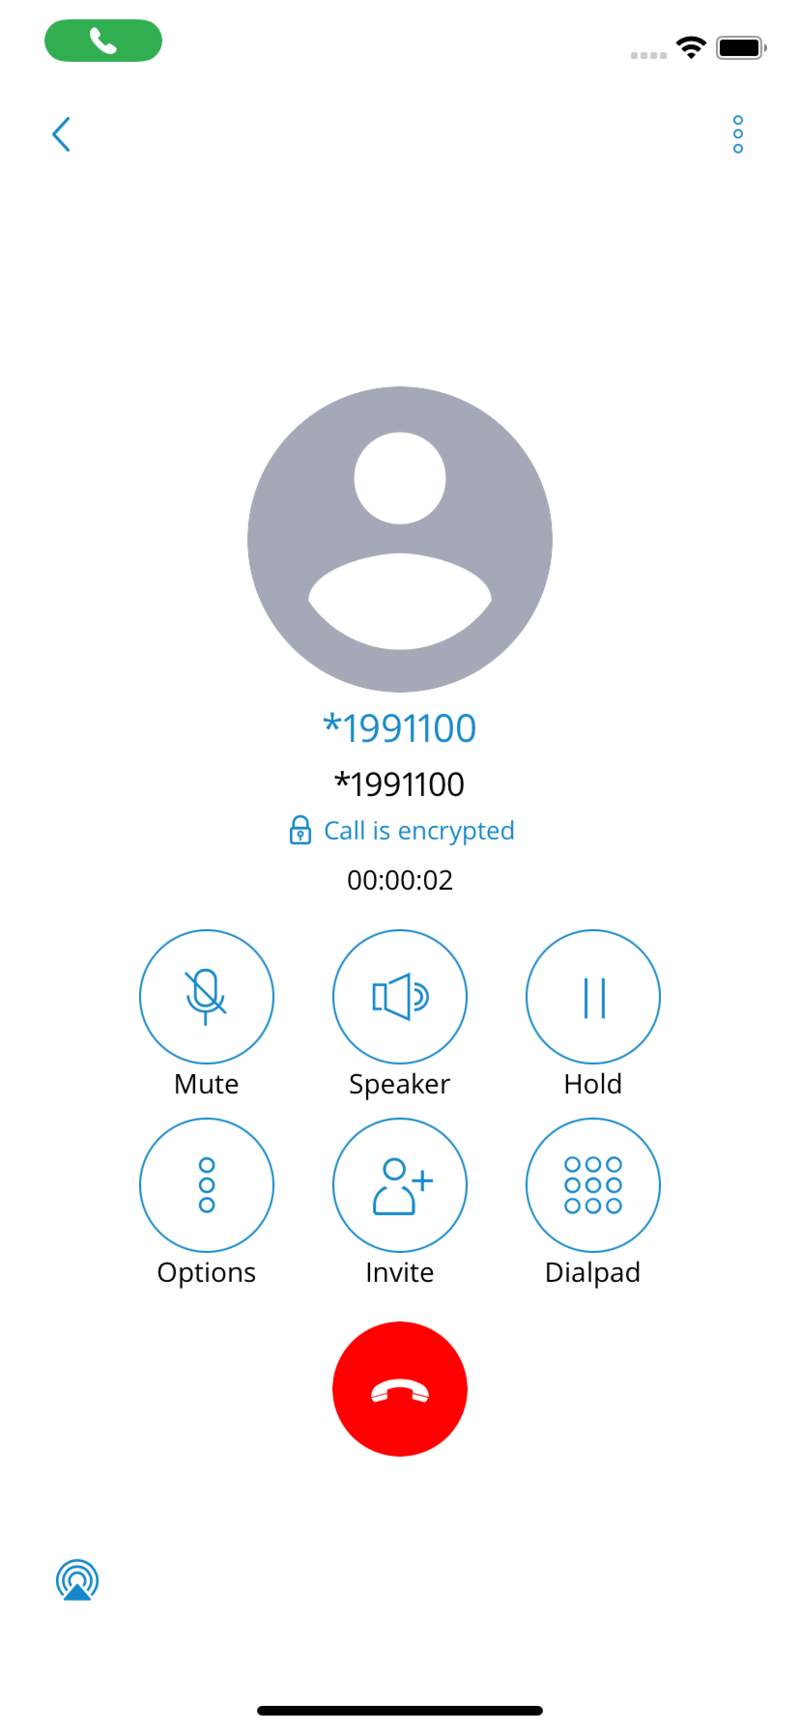
Integrated Calling to Enable or Disable Saving Calls to System History
With Integrated calling feature users can enable or disable saving recent calls to the system’s call history. When disabled, the history will only be available in the gloCOM GO 6.
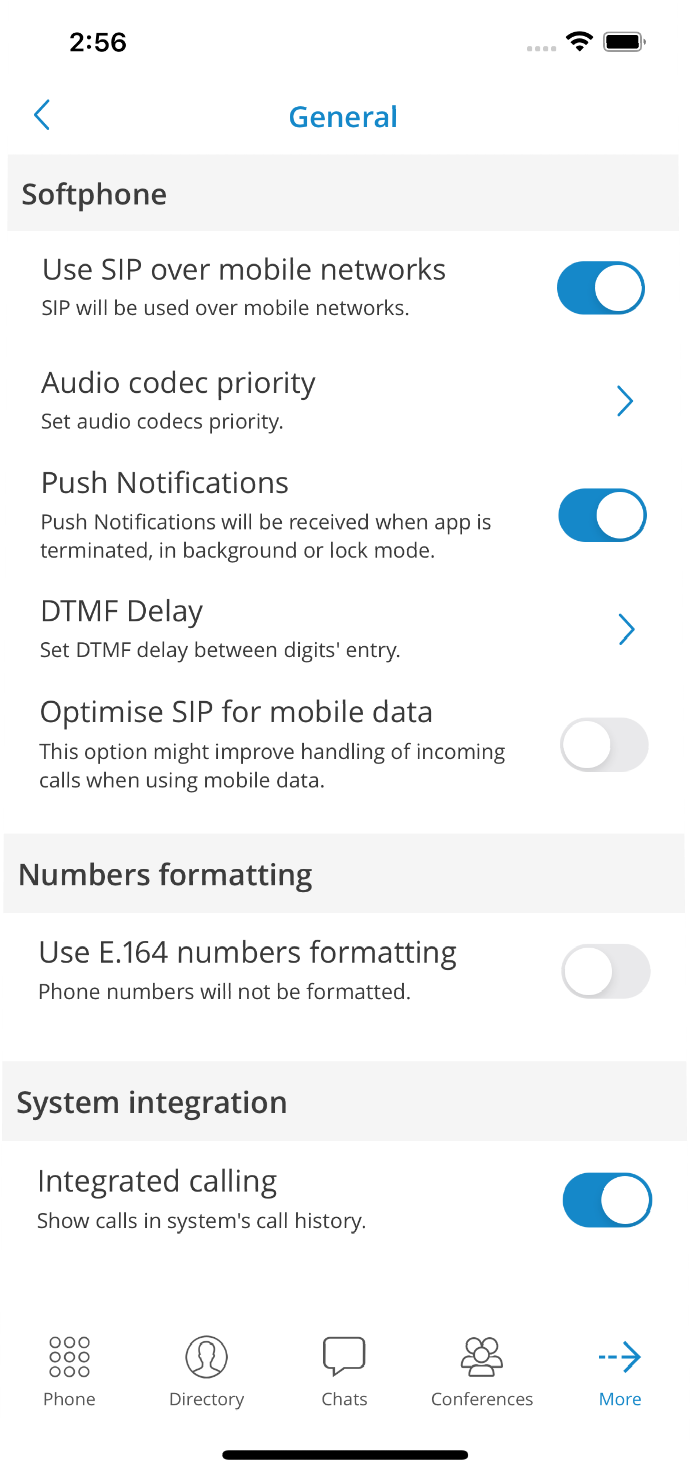
Conference calls
Conference calls enable the users to make calls with more than one participant (external or internal).
There are two types of conference calls:
-
Instant (dynamic) conferences: Users can create a conference call by adding one or more people to an ongoing call or through the conference section. With this option, the user can add contacts or any number available from their contact list. If the user missed the conference call, they could still join it from the Call History tab, provided that a conference call still exists, by clicking on the Dial button.
-
Static conferences: Users can join predefined conference rooms and add other participants. A conference number is next to the conference name within the conference list for the static conference call. Static conferences can be added to PBXware by the PBXware administrator.
Selecting an ongoing conference on the conferences list screen will display a list of participants and the “Join this conference” button at the bottom, allowing users to join the selected conference. The list of participants is updated in real-time as users join or leave the conference room.
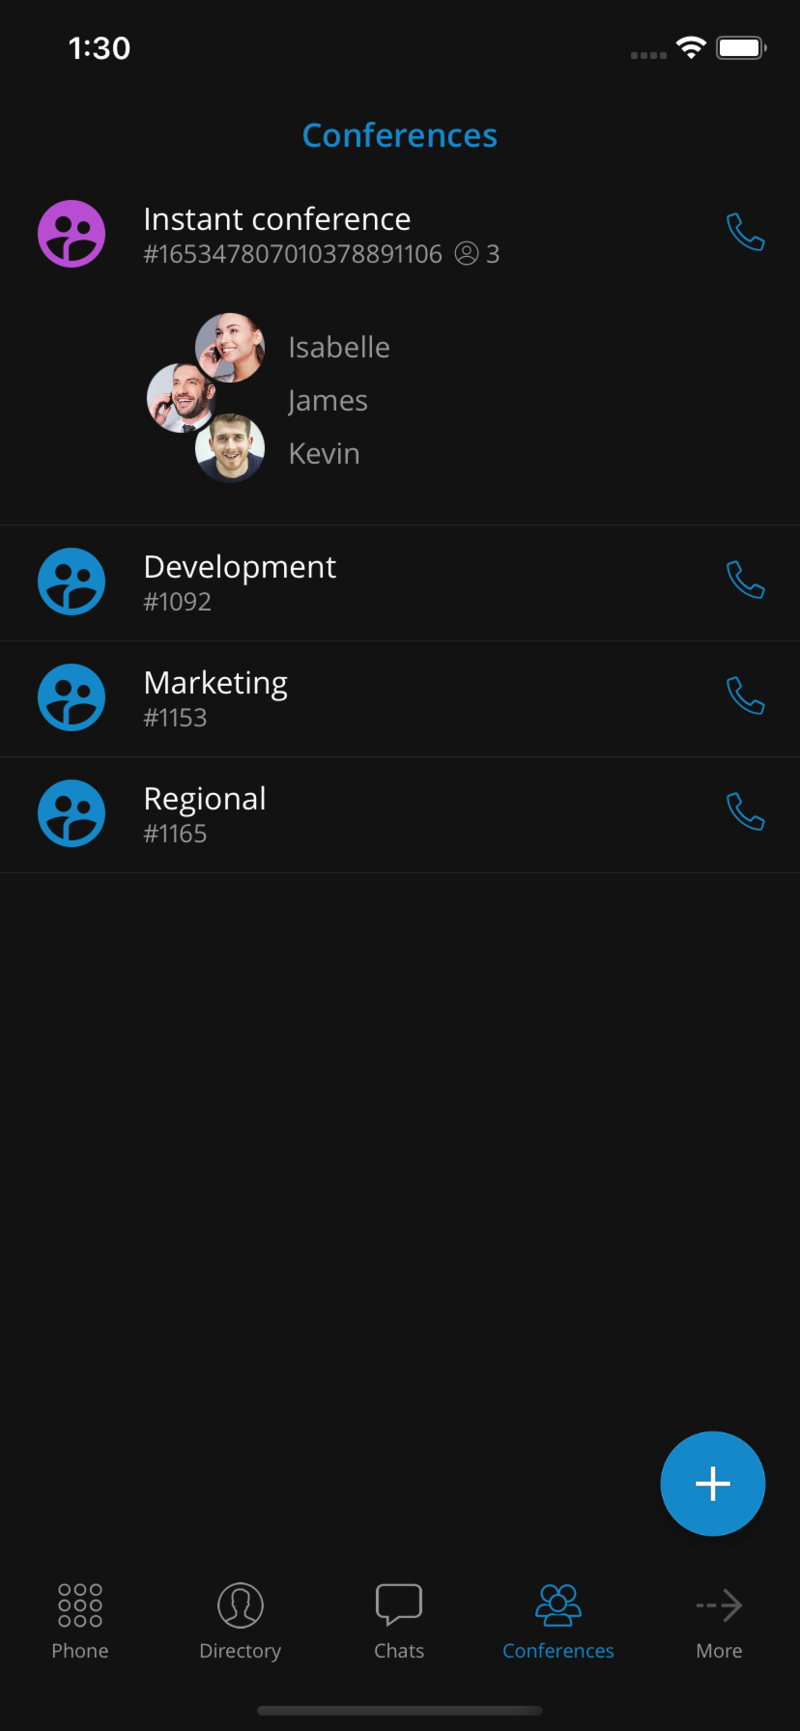
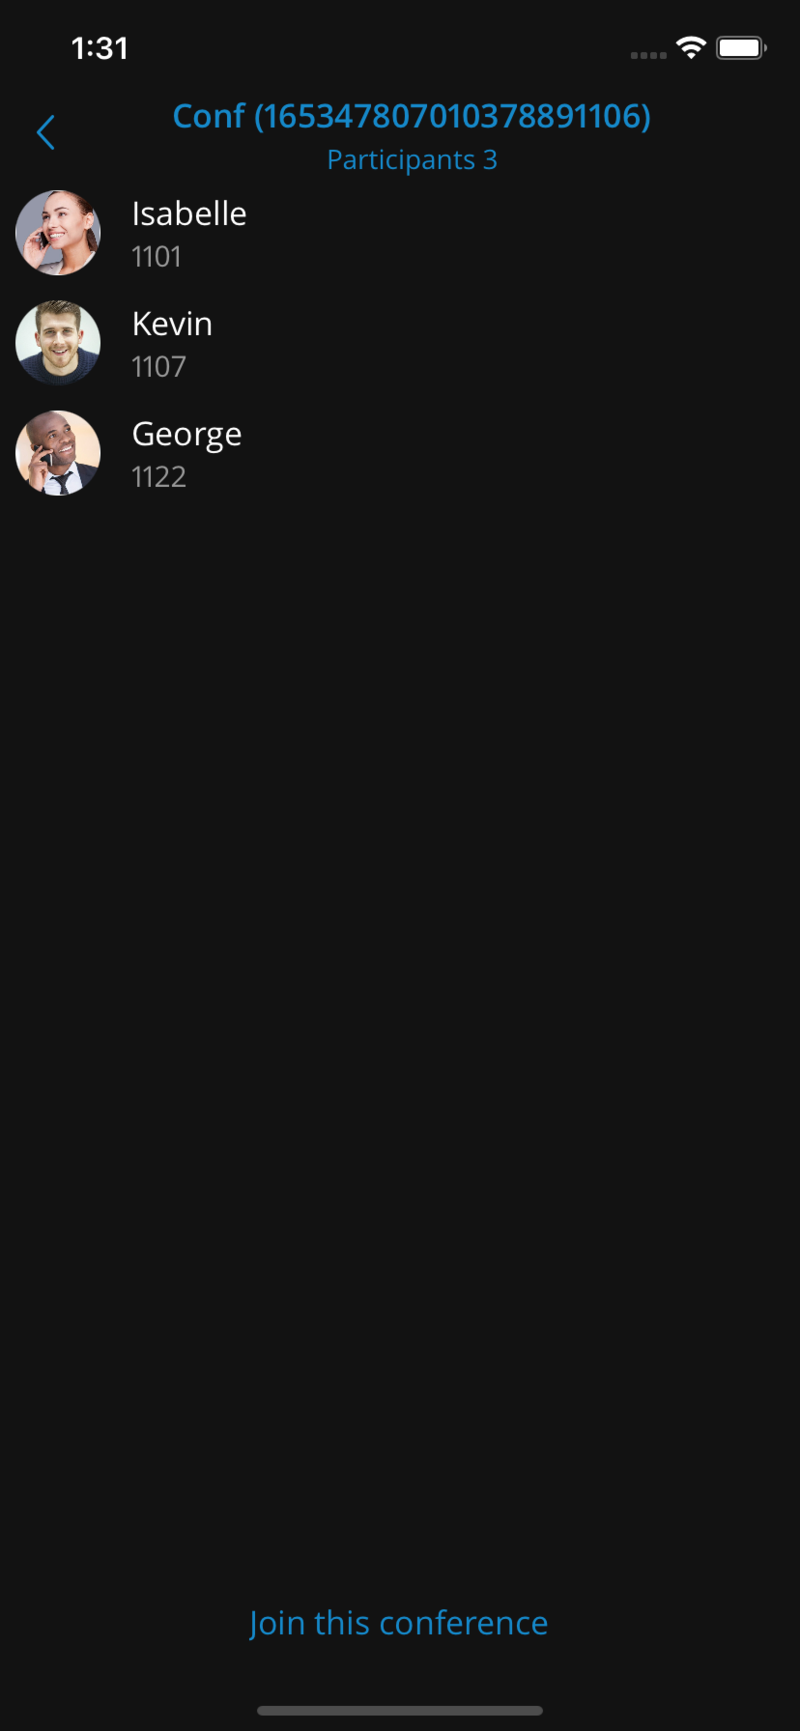
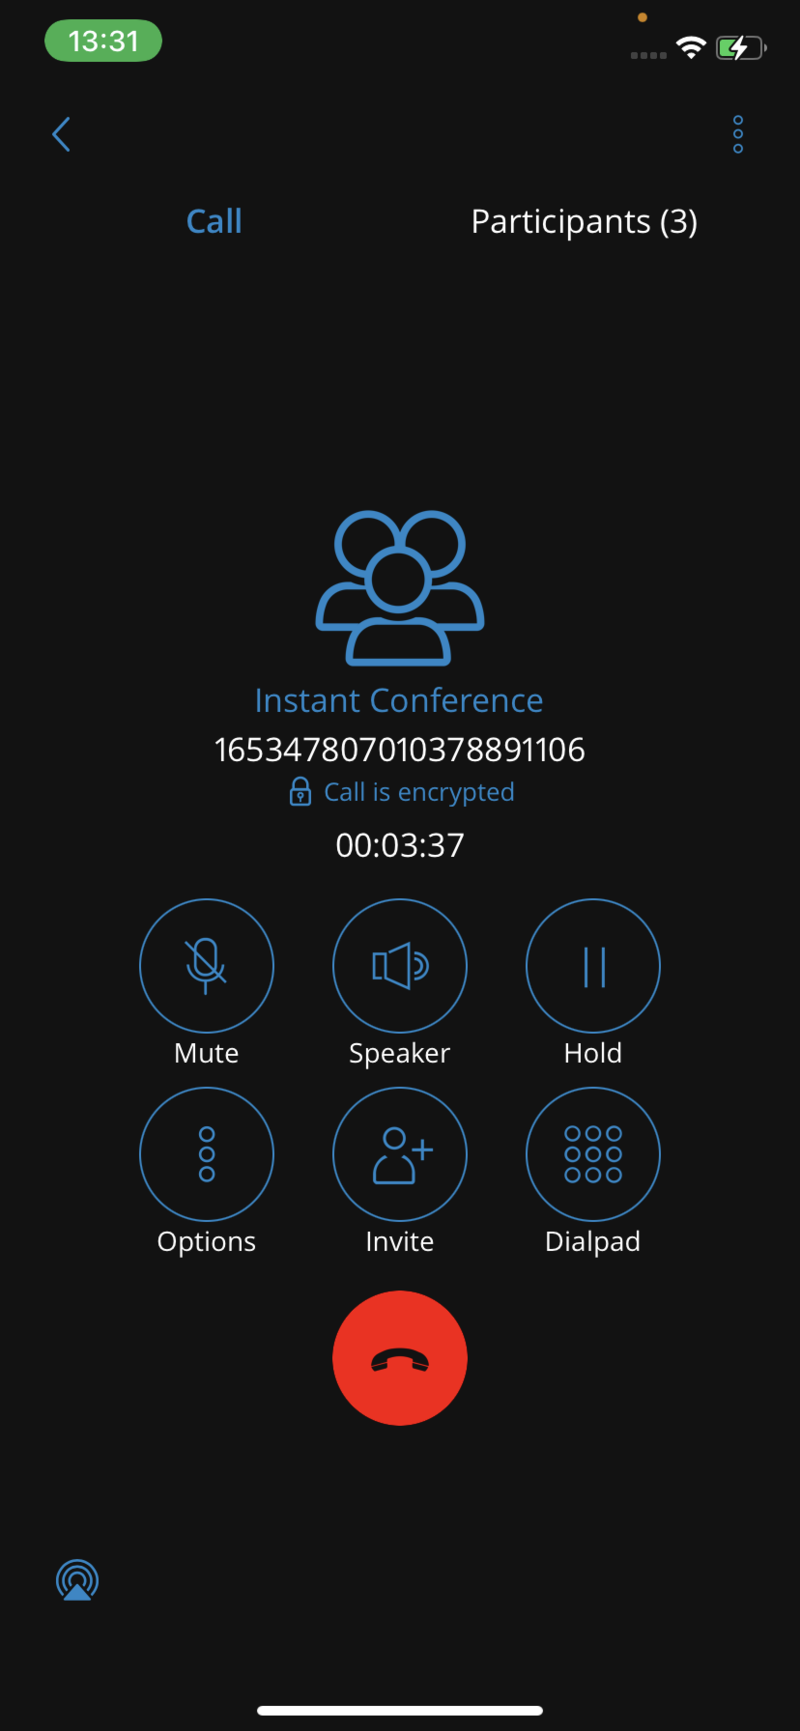
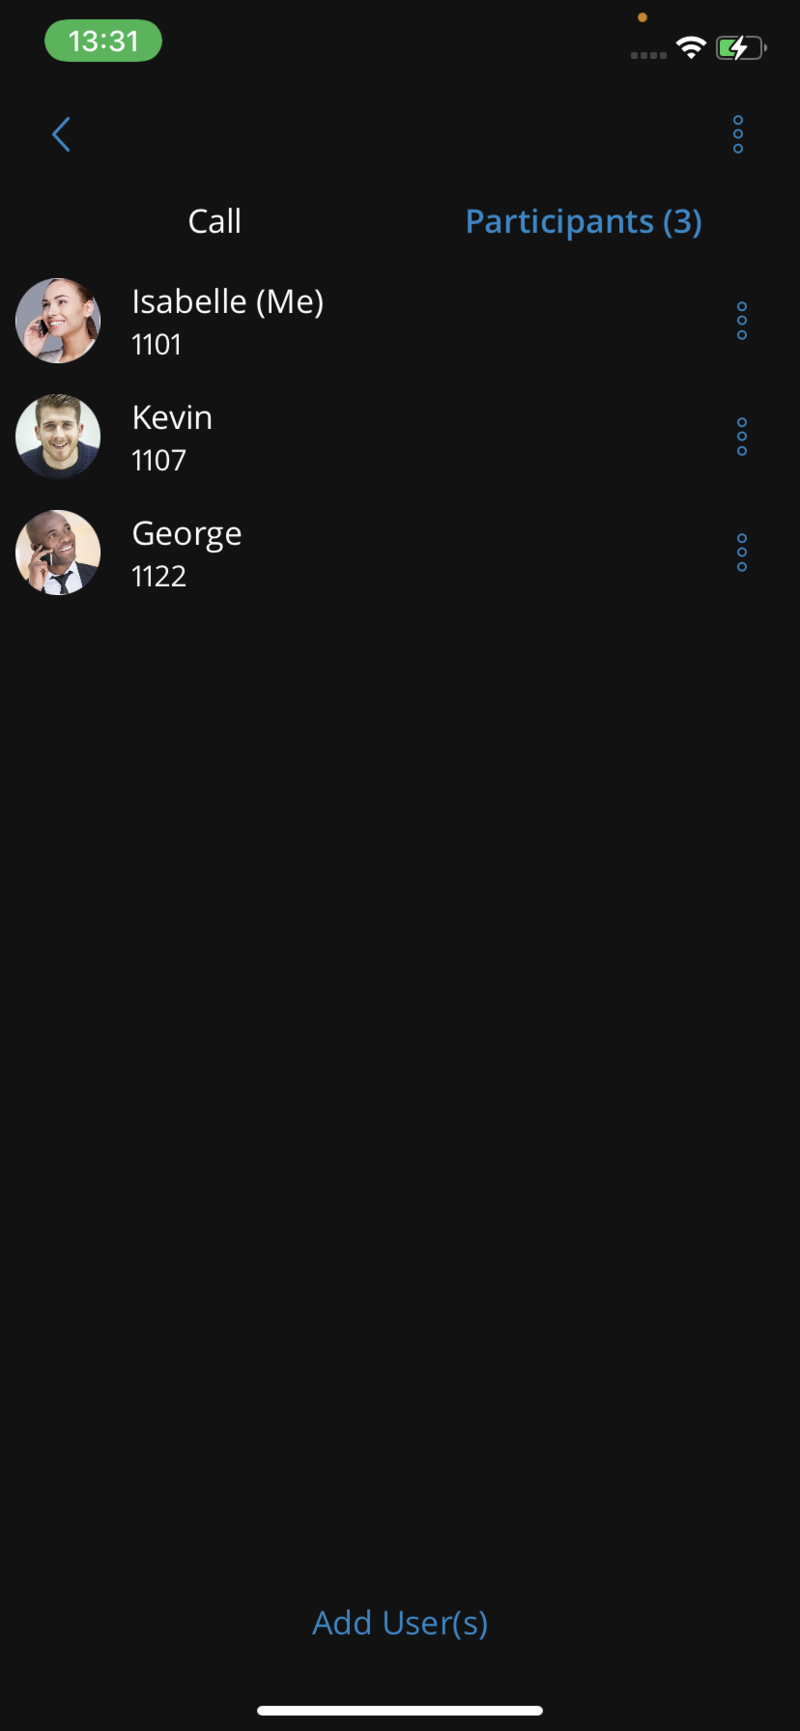
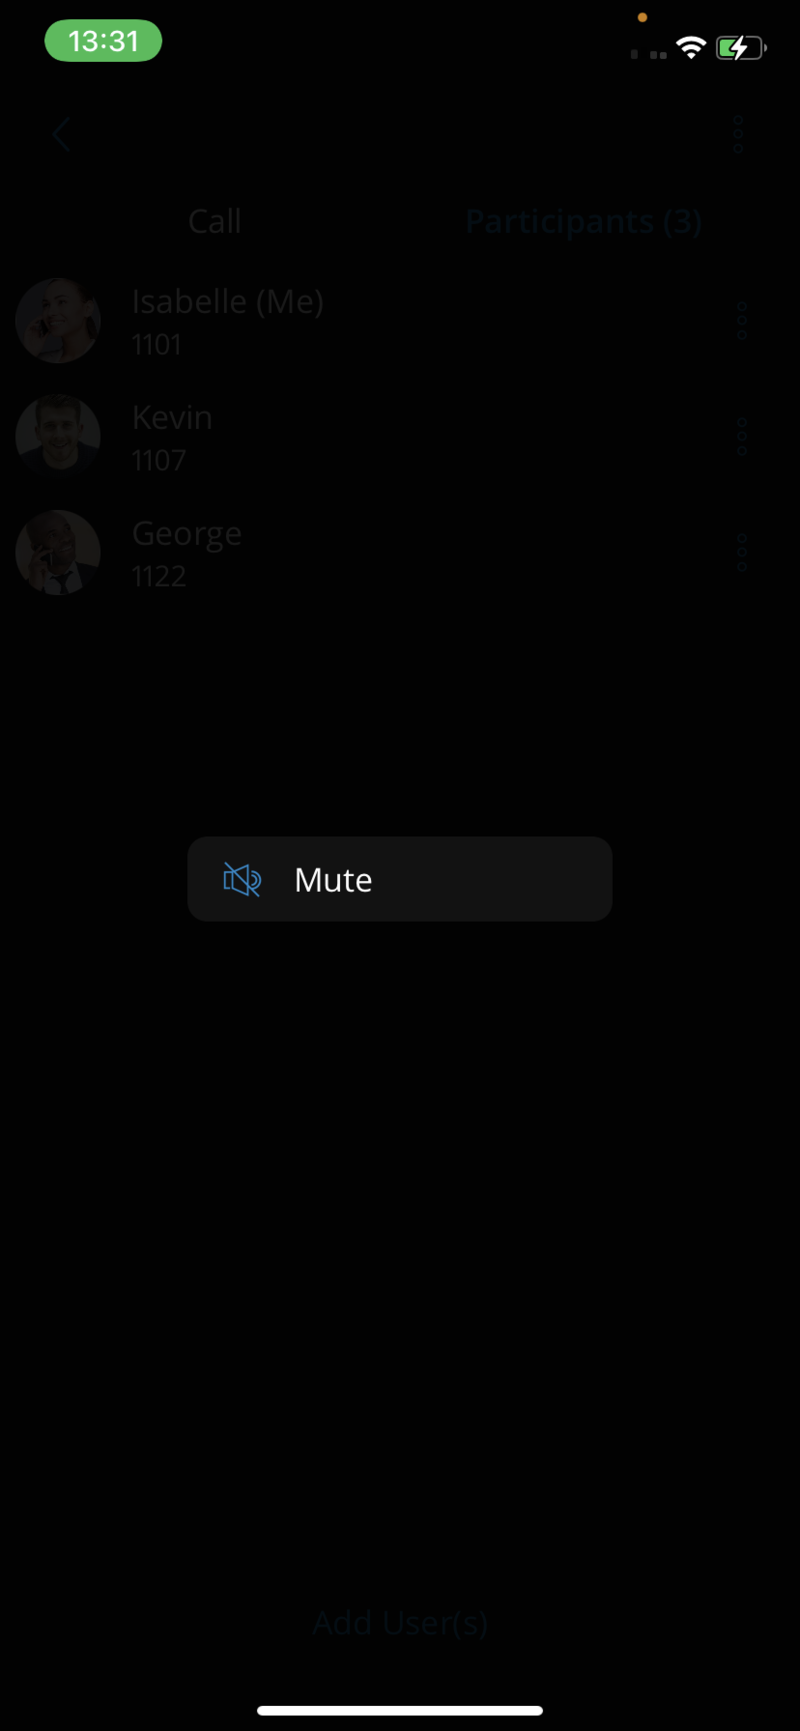
Start Dynamic conference from Recent calls
If there is a missed call from a conference in recent calls, users can press the call button for that call and join the instant conference only if that conference is still active.
Conference list screen
gloCOM GO 6 has a conference screen list, which offers more information and a better user experience for ongoing conferences that have participants. Active conferences that have participants are visible on top of the Conference list screen. Also, in an active conference with participants, names and avatars (if available) of 3 participants (or 2 if only 2 are left) will be visible on top of the Conference list screen. Besides the Active conference name, the number of conference participants is also visible on the screen, as well as the conference number and the button to join the conference.
Callback calls
Callback calls are helpful when a softphone cannot be registered due to some error or when poor network quality impacts call quality. When using a callback, gloCOM GO 6 tells the server to call the users callback mobile number via a GSM network. VoIP will connect the other call party, if possible, or GSM. For the callback feature to work, users need to select a number in the app Callback settings where they will receive GSM calls.


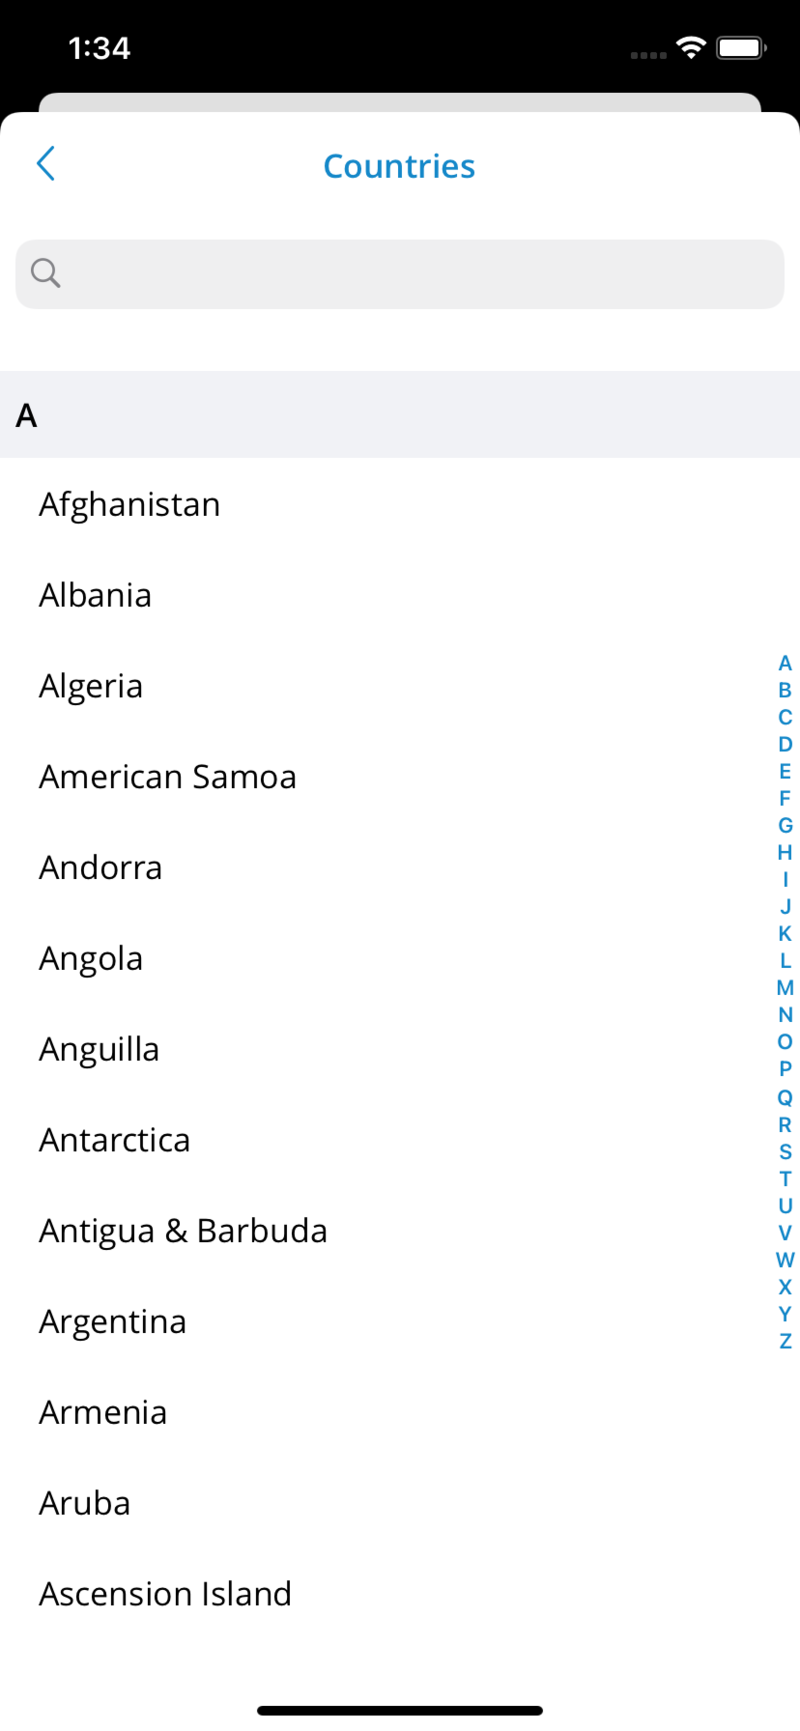
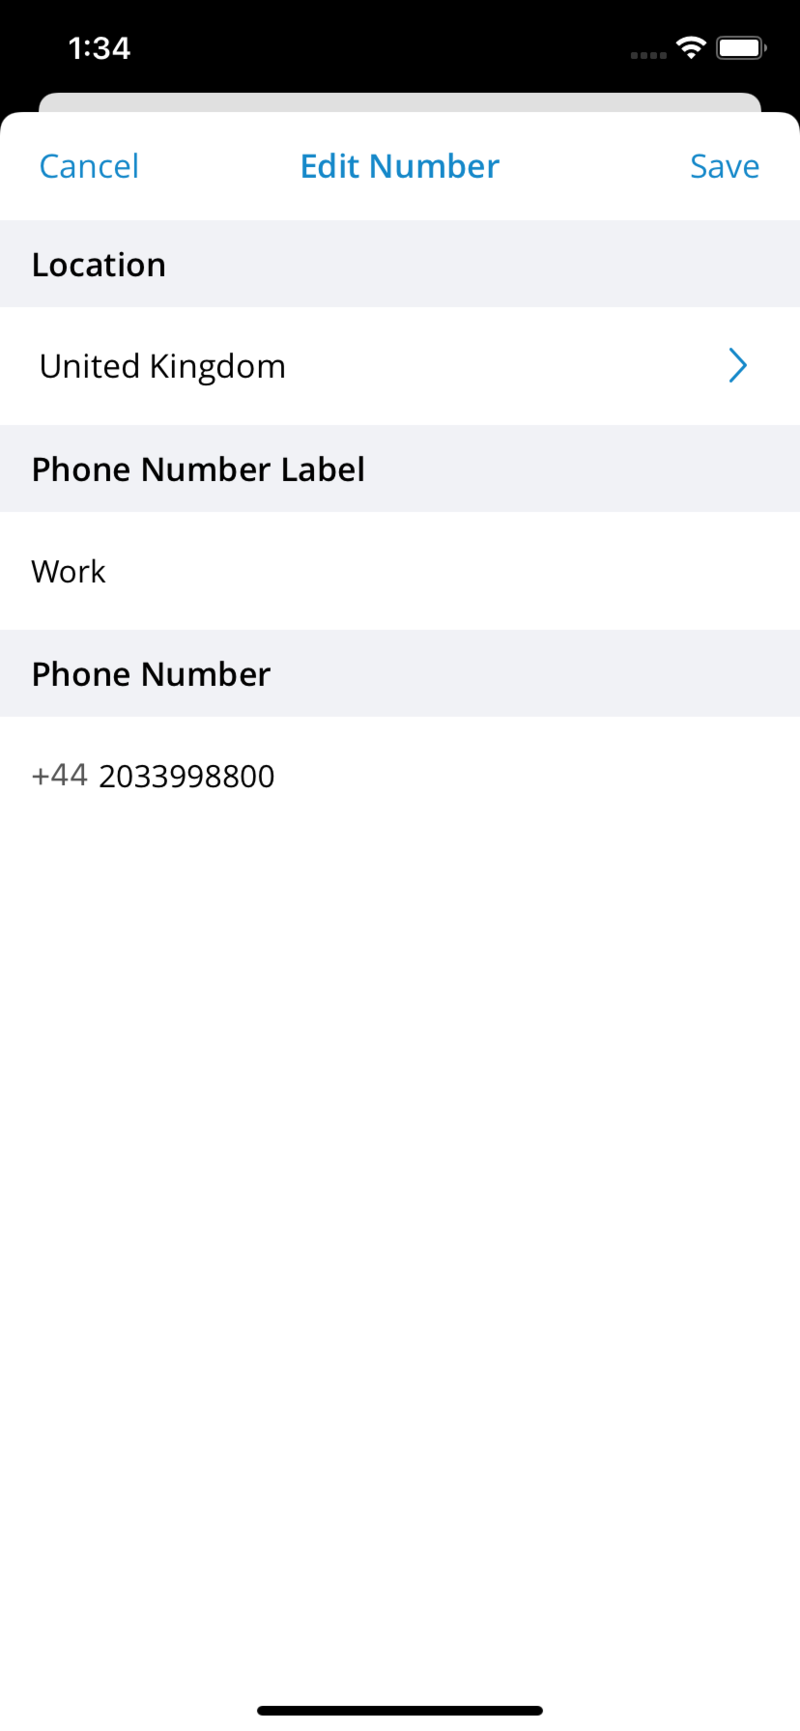
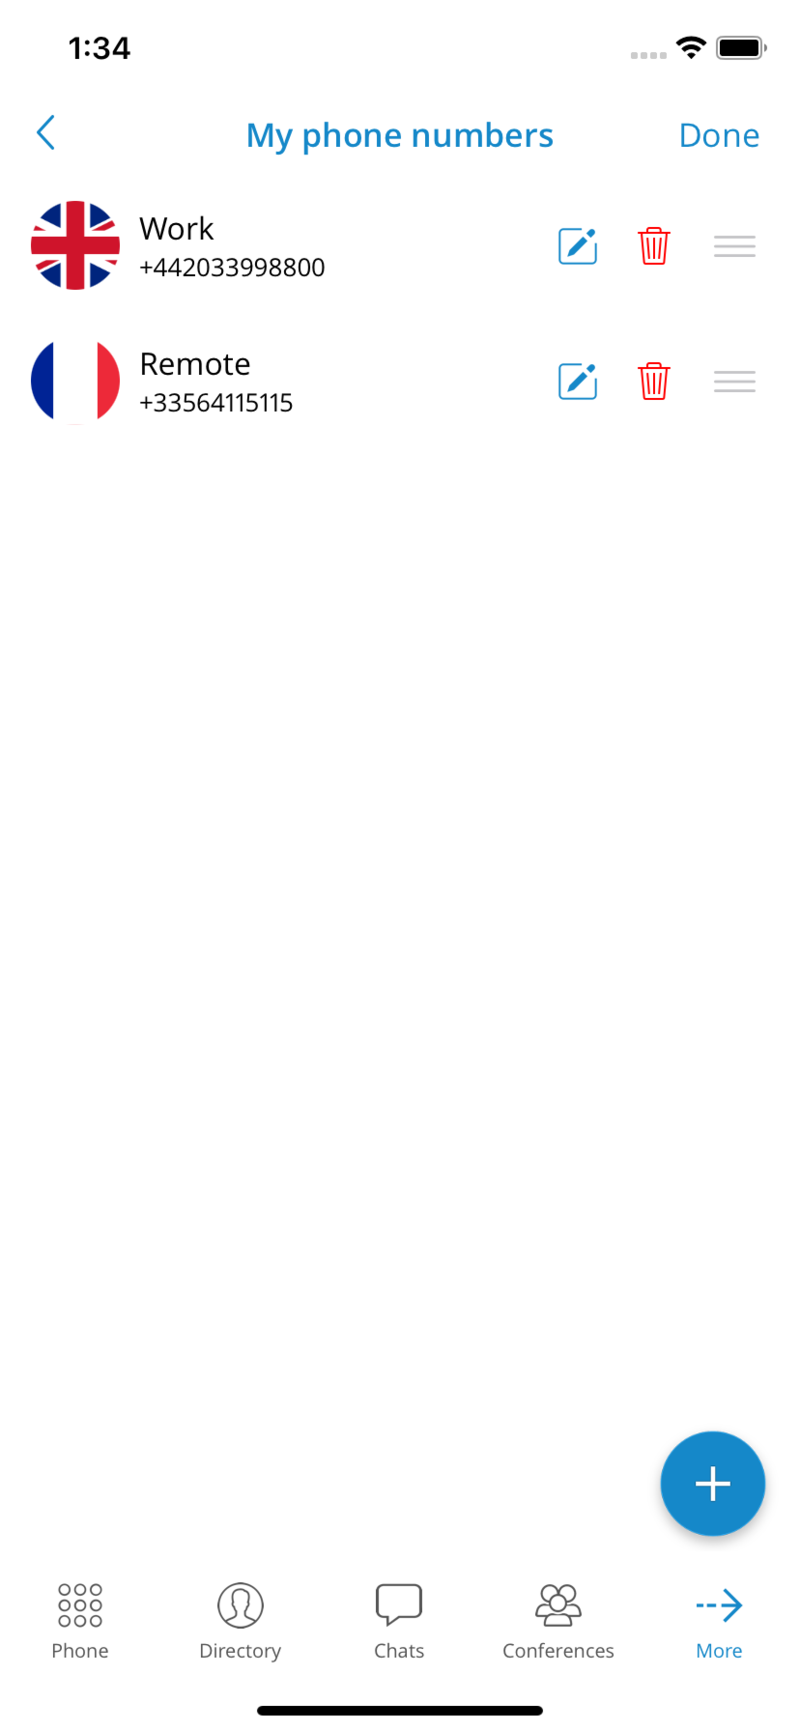
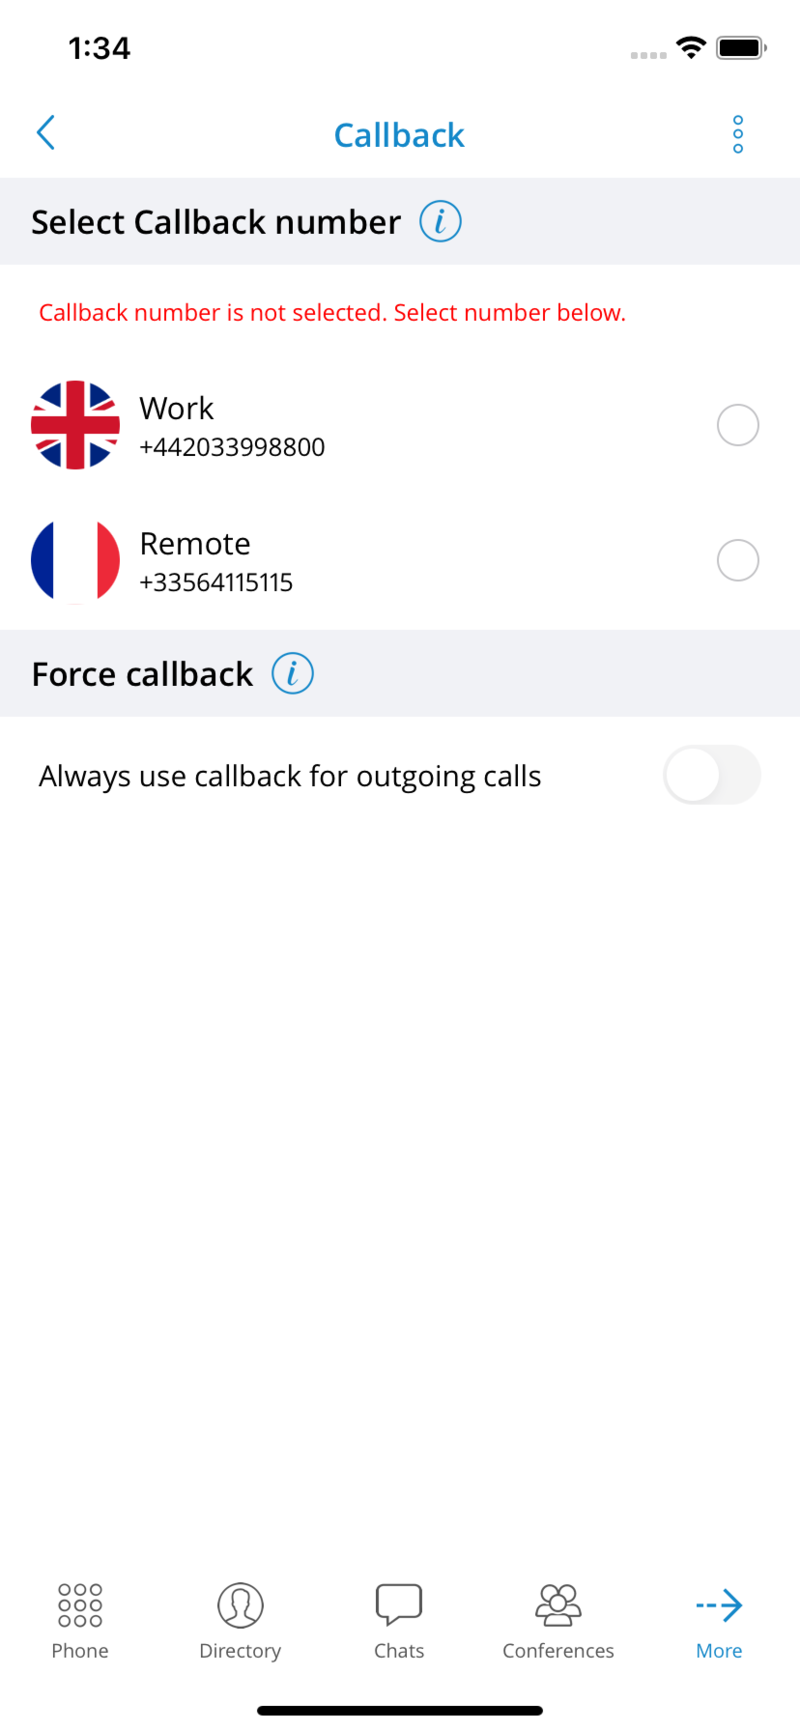
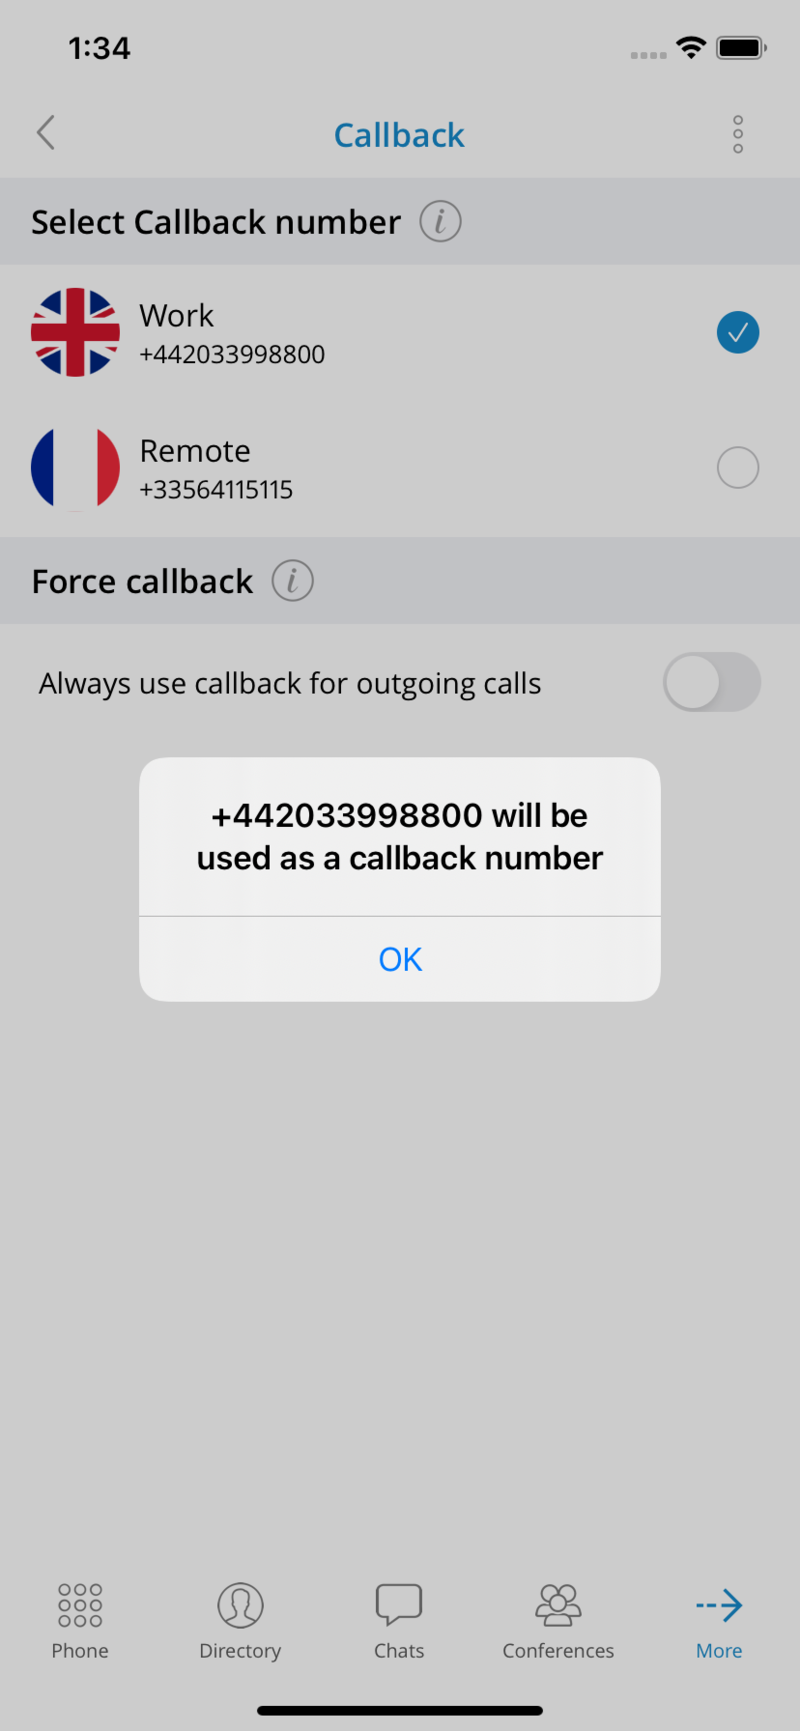
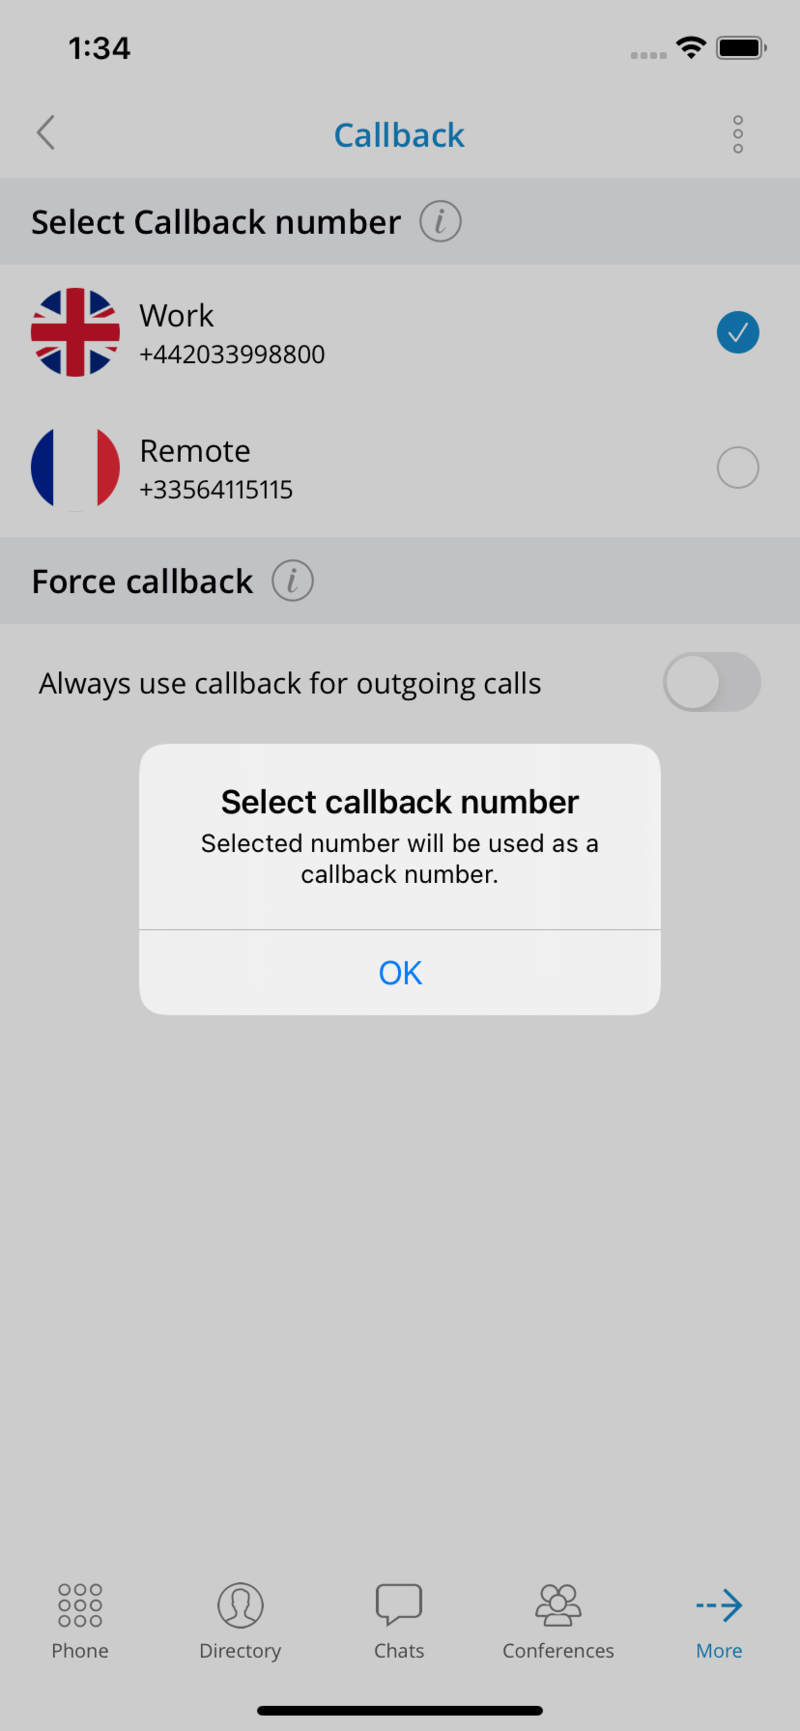

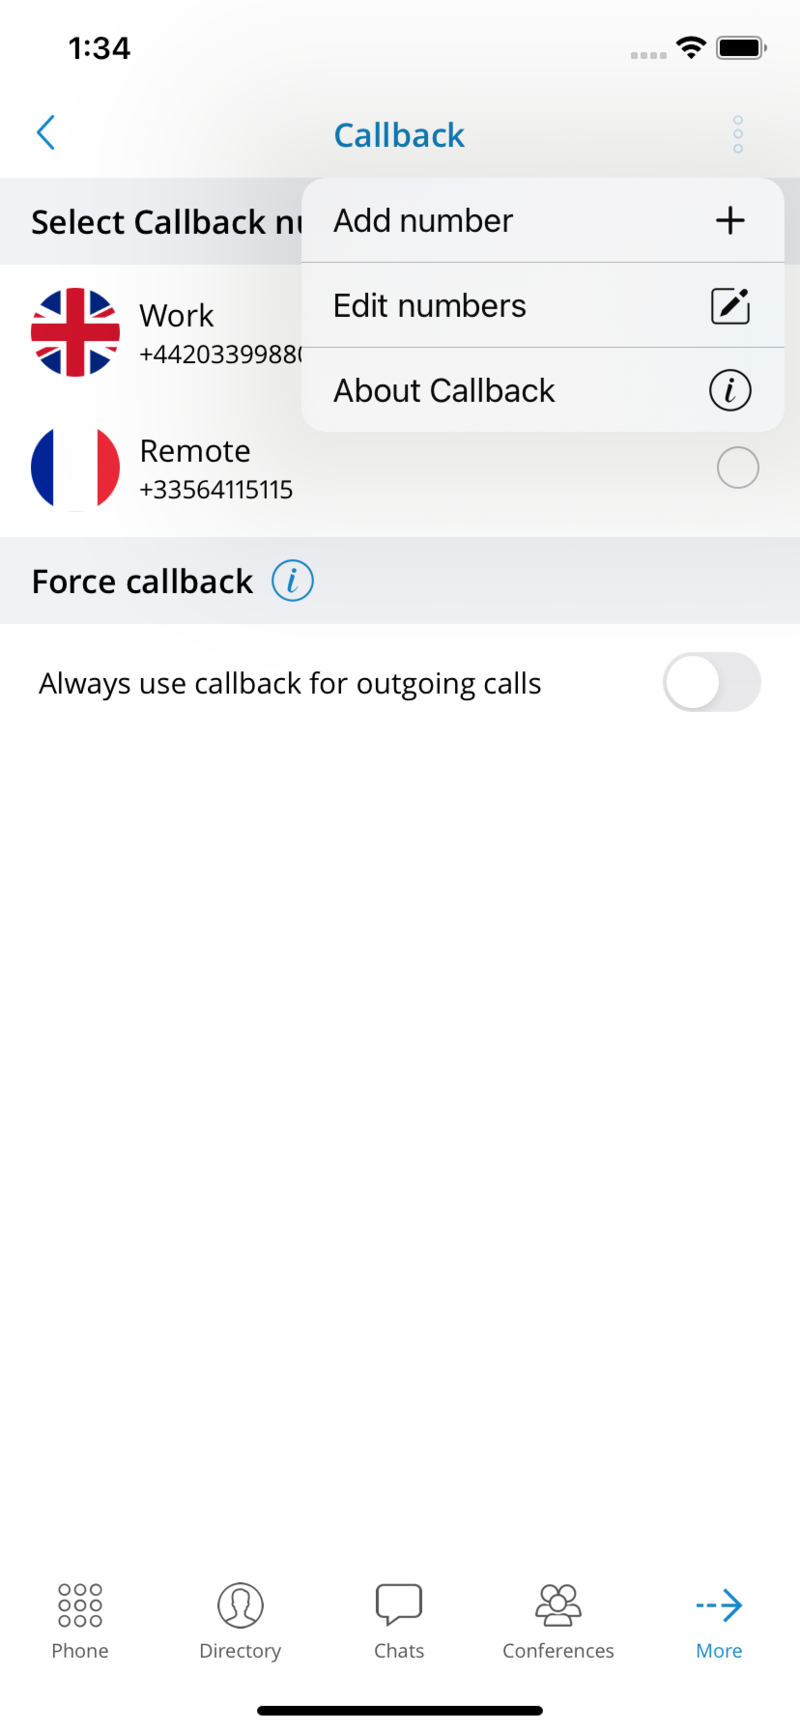
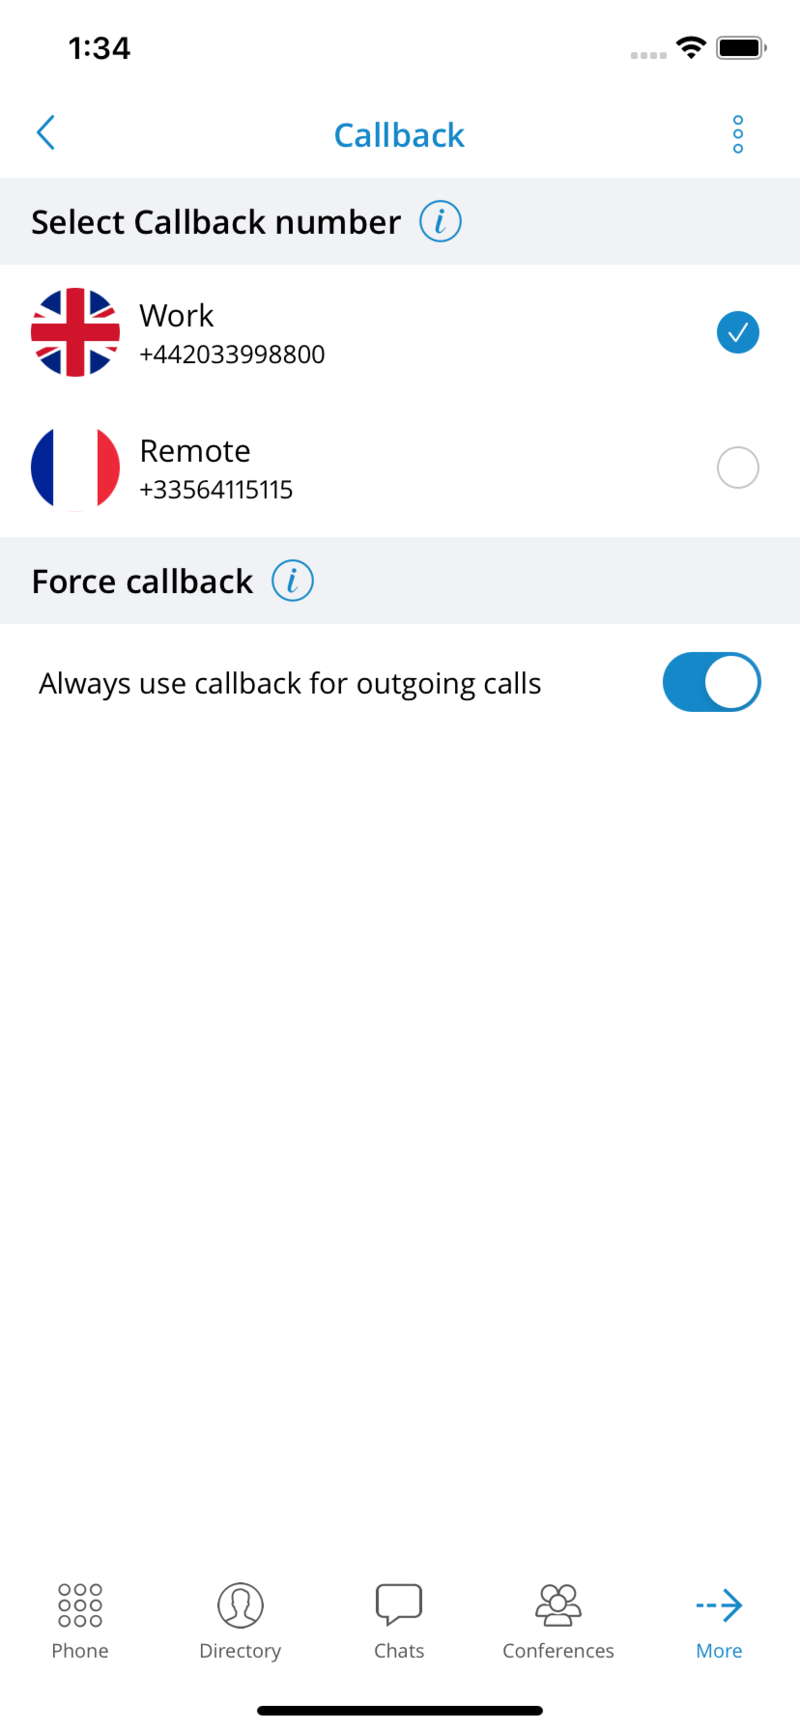
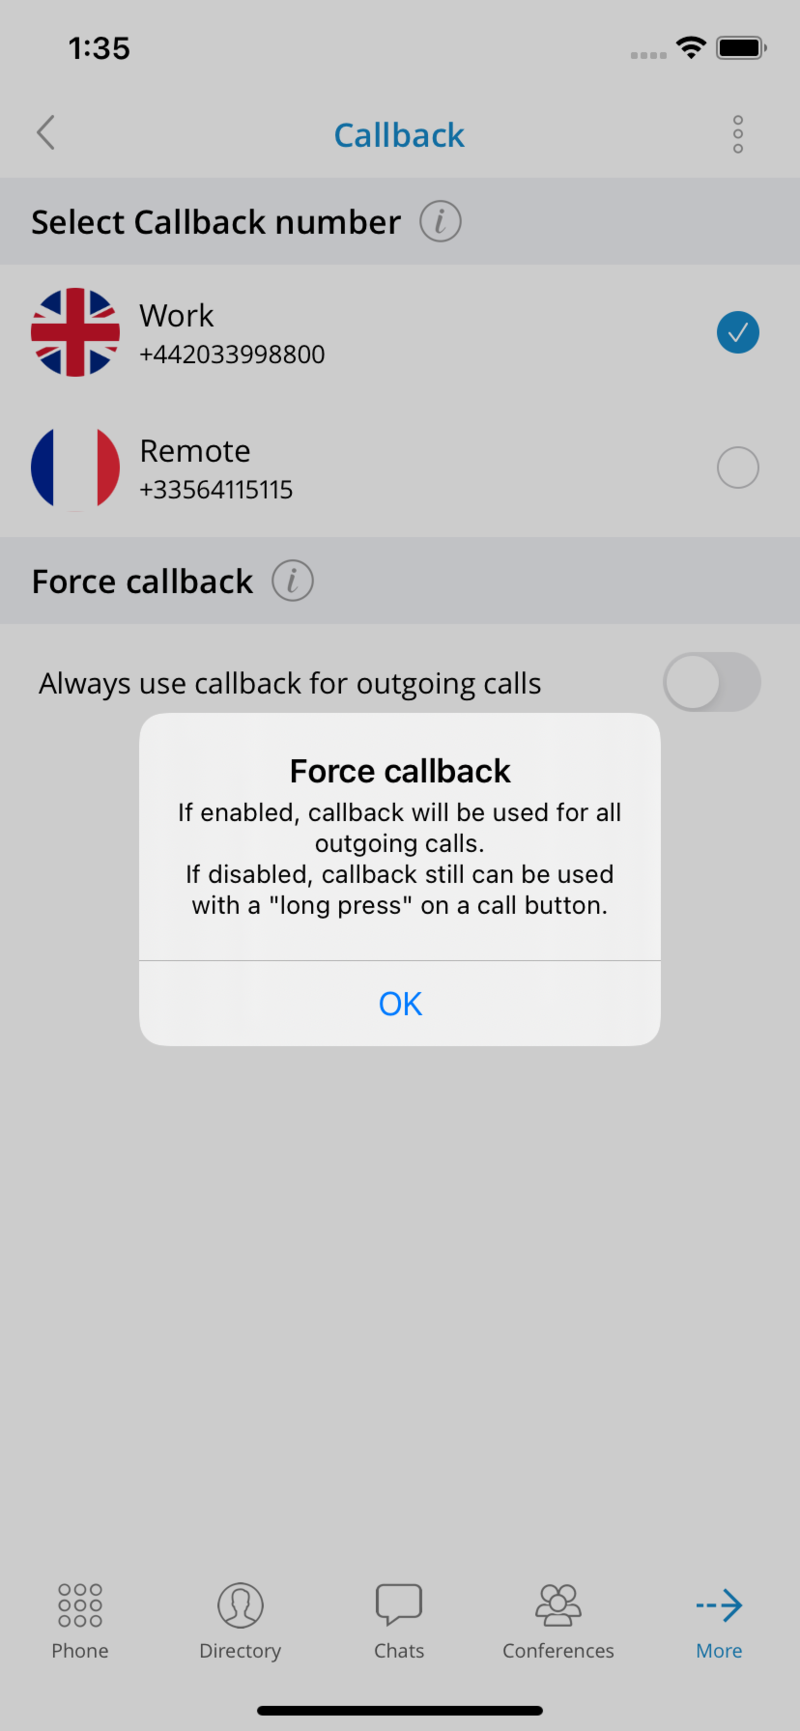
Long-press icon for one time Callback activation
A long-press can start the callback on a call icon from wherever a call icon is in the interface.
Directory
The directory tab contains users, device contacts, central phonebook contacts, and favorites from the system. Users can be displayed in the grid (default) or list order. Users can be sorted according to their presence and department. The default order for users is ordering them by their presence. Online users will be sorted alphabetically at the top of the list, followed by away (recently online) users and then offline users.
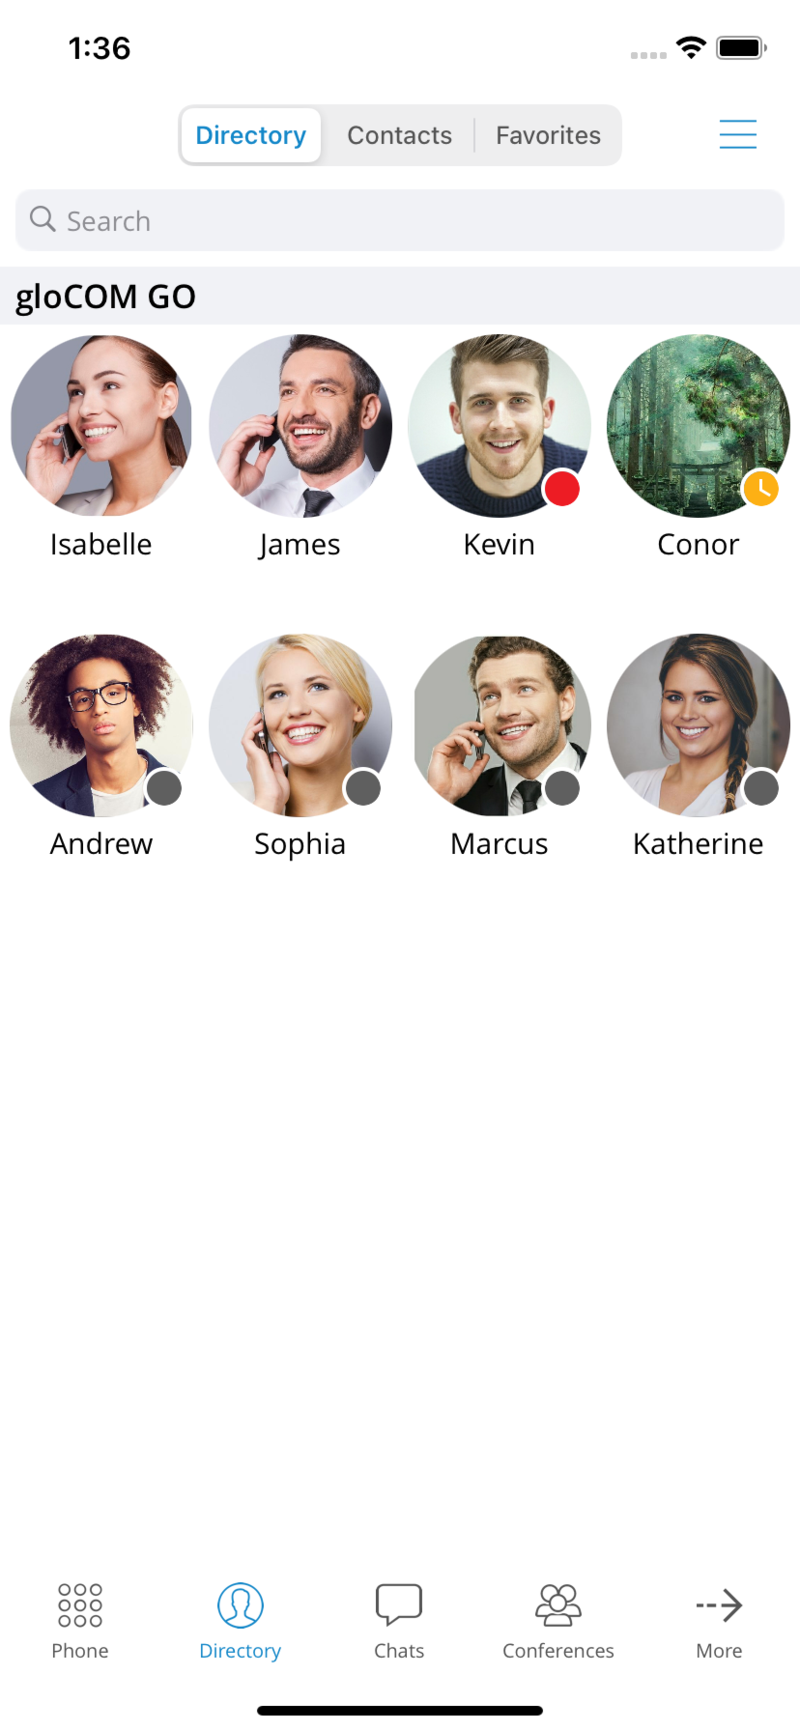

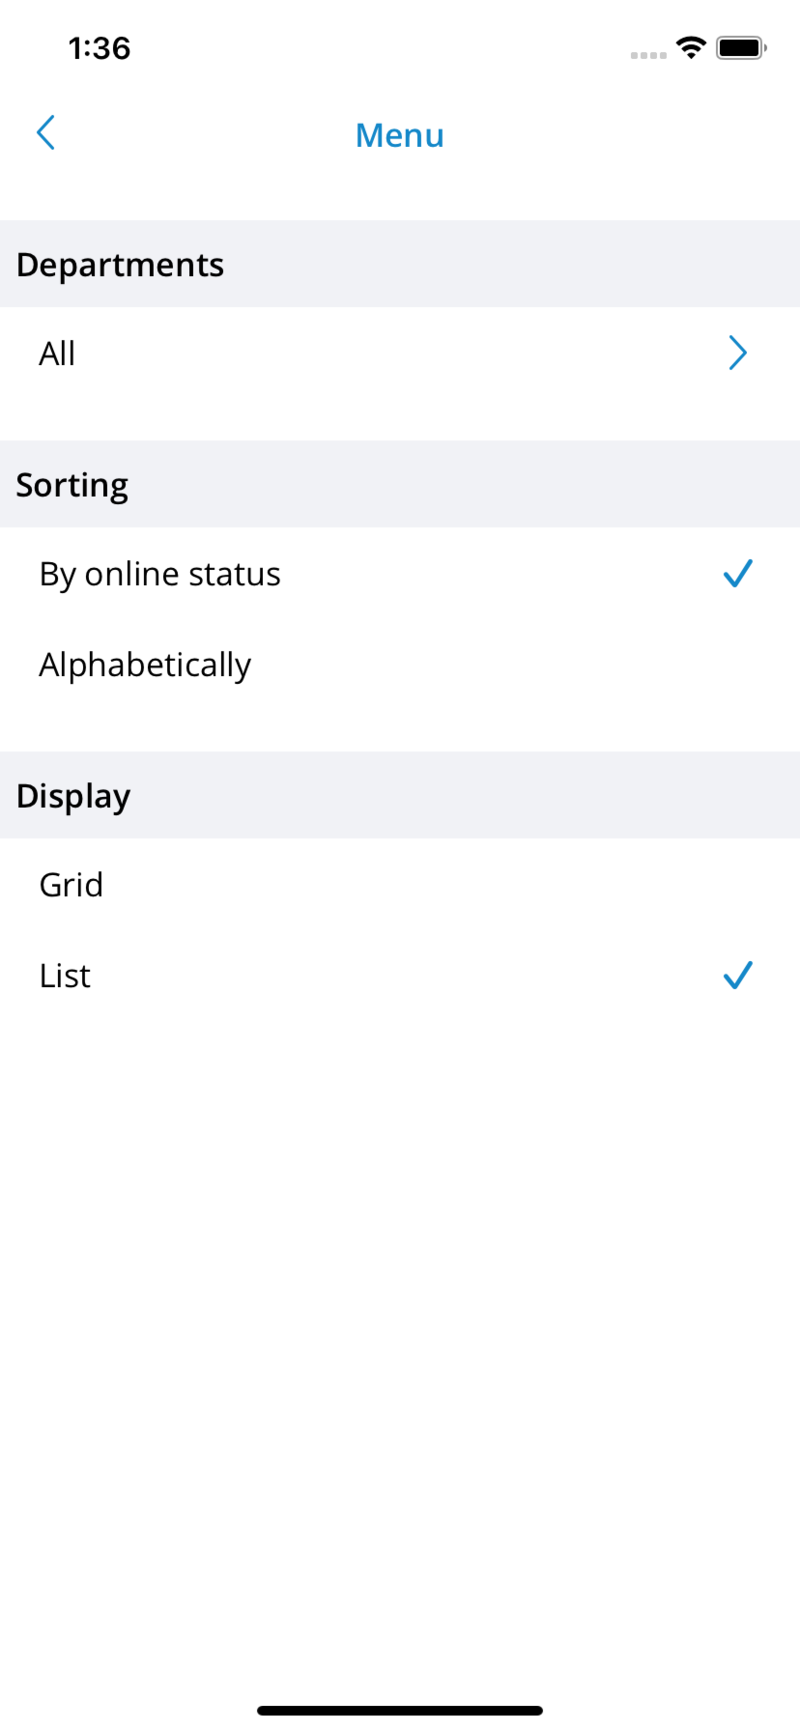
Pressing on a user’s name or avatar will open up the user’s details screen that contains information such as email, presence status, and message, user’s numbers. Users can also call the selected user from this screen, start a chat, send a voicemail, or add to favorites. If the user associated additional phone numbers with their account, these numbers will be listed as well, and they will be able to dial them by simply pressing the number.
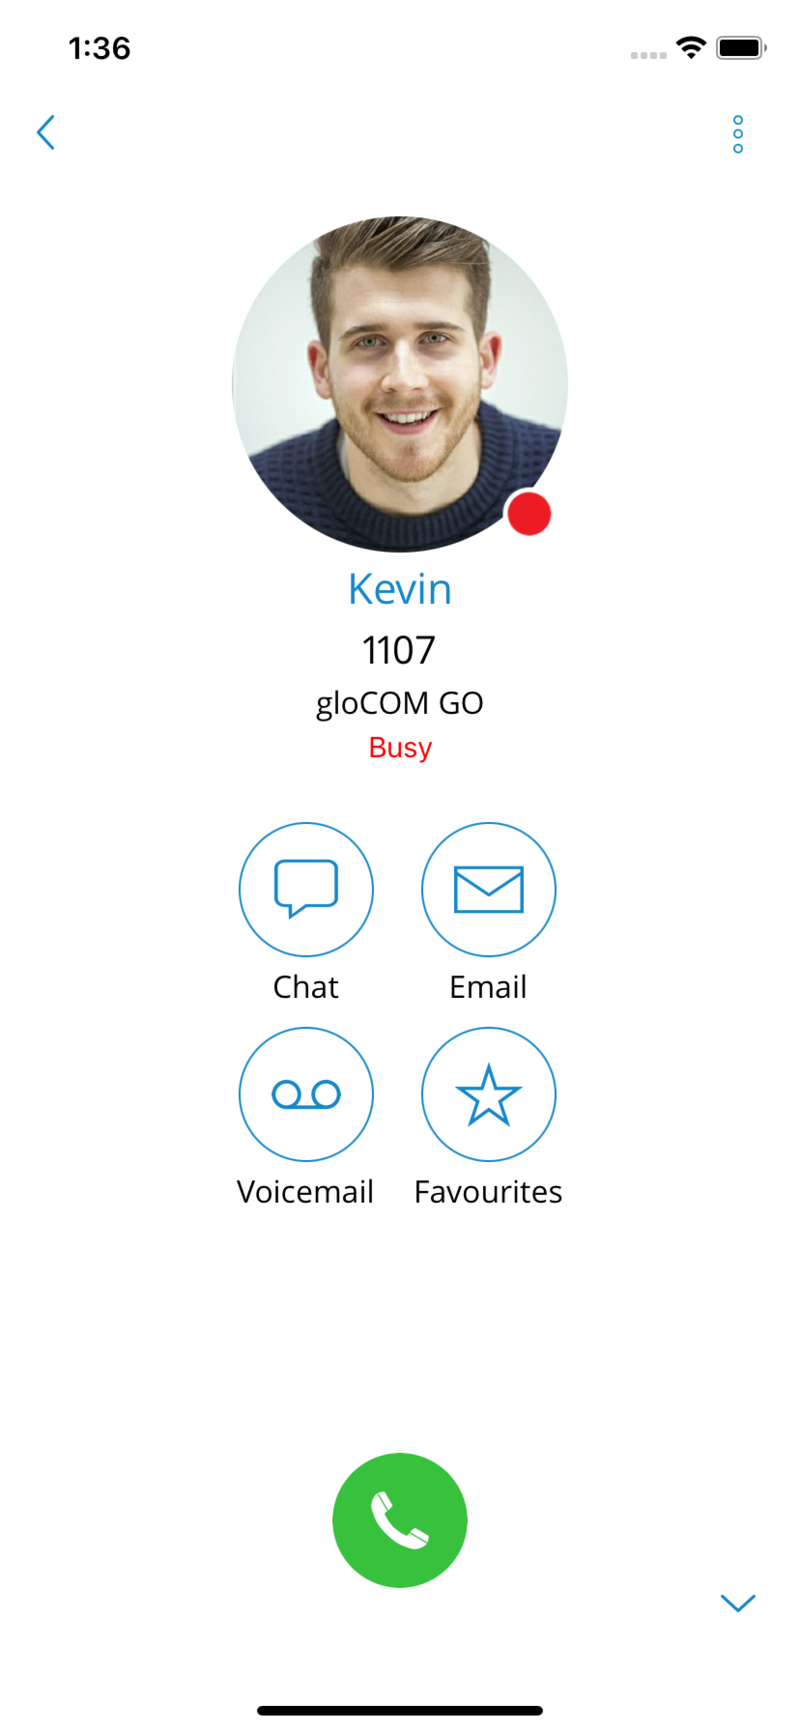
Contacts Search
To search gloCOM GO 6 contacts, users can press the search icon in the upper right corner. After pressing the search icon search field will be displayed. Search is performed by contact name or number.
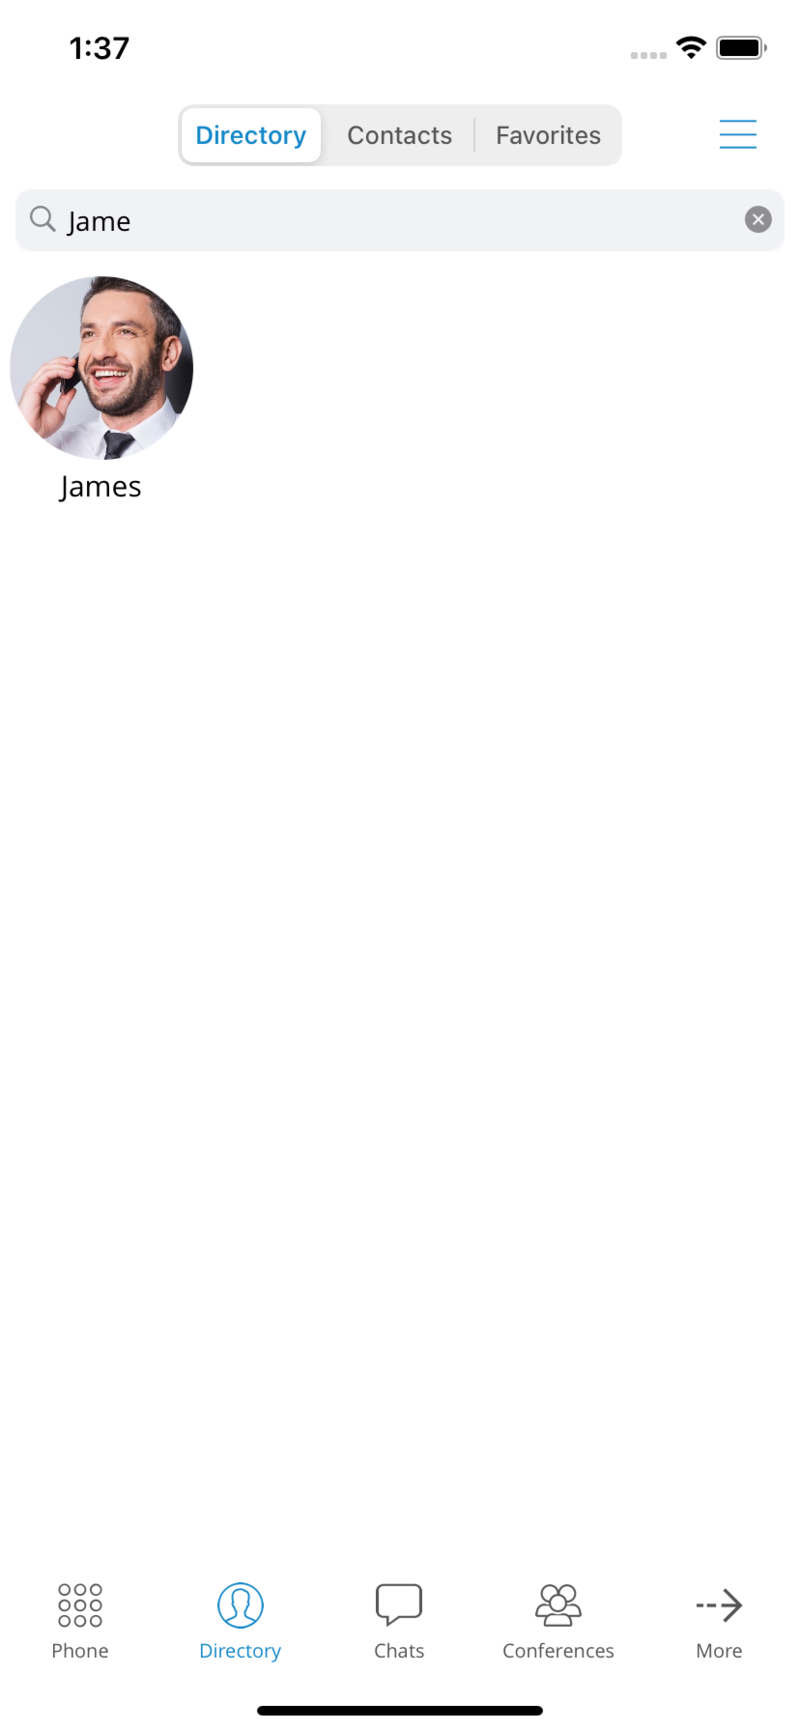
Synchronize Central Phonebook contacts from the PBX
Central Phonebook is a collection of contacts that all users of one system share. When users navigate to the directory from the bottom bar and then to the contacts screen from the three tabs in the top part of the screen, they will see the Contacts screen. The Local Phonebook looks mostly like it did before except for the top part, which has a banner with the name of the Phonebook and a button to change the Phonebook type.
In addition to having the button that changes the Phonebook type, the Central Phonebook blue banner has a button to refresh the contacts. Each contact item in this Phonebook has a name, company name, and a list of number labels and numbers.
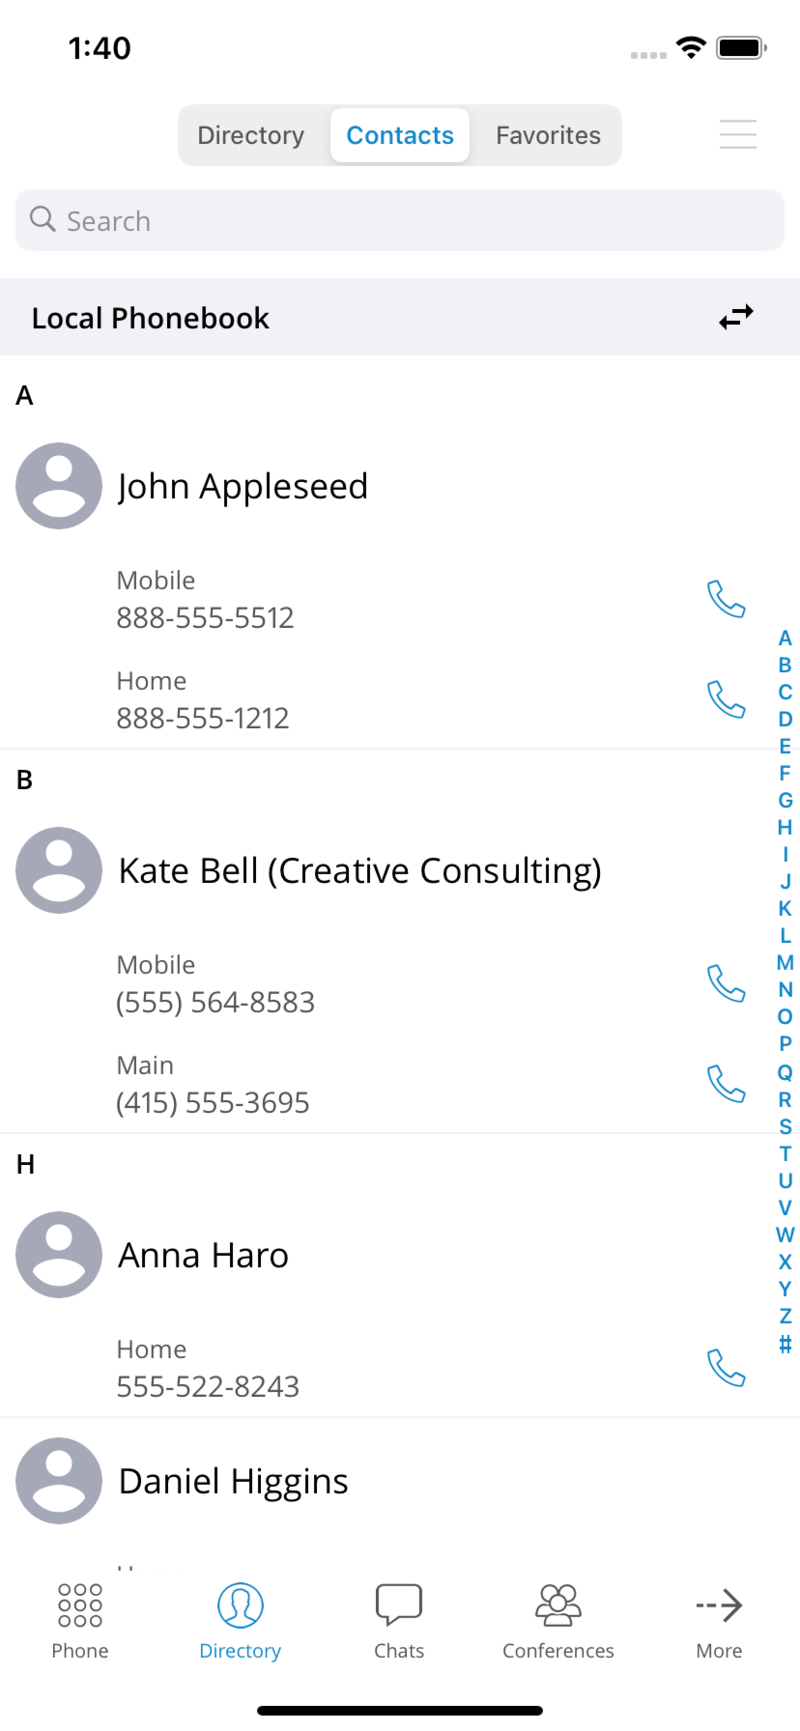
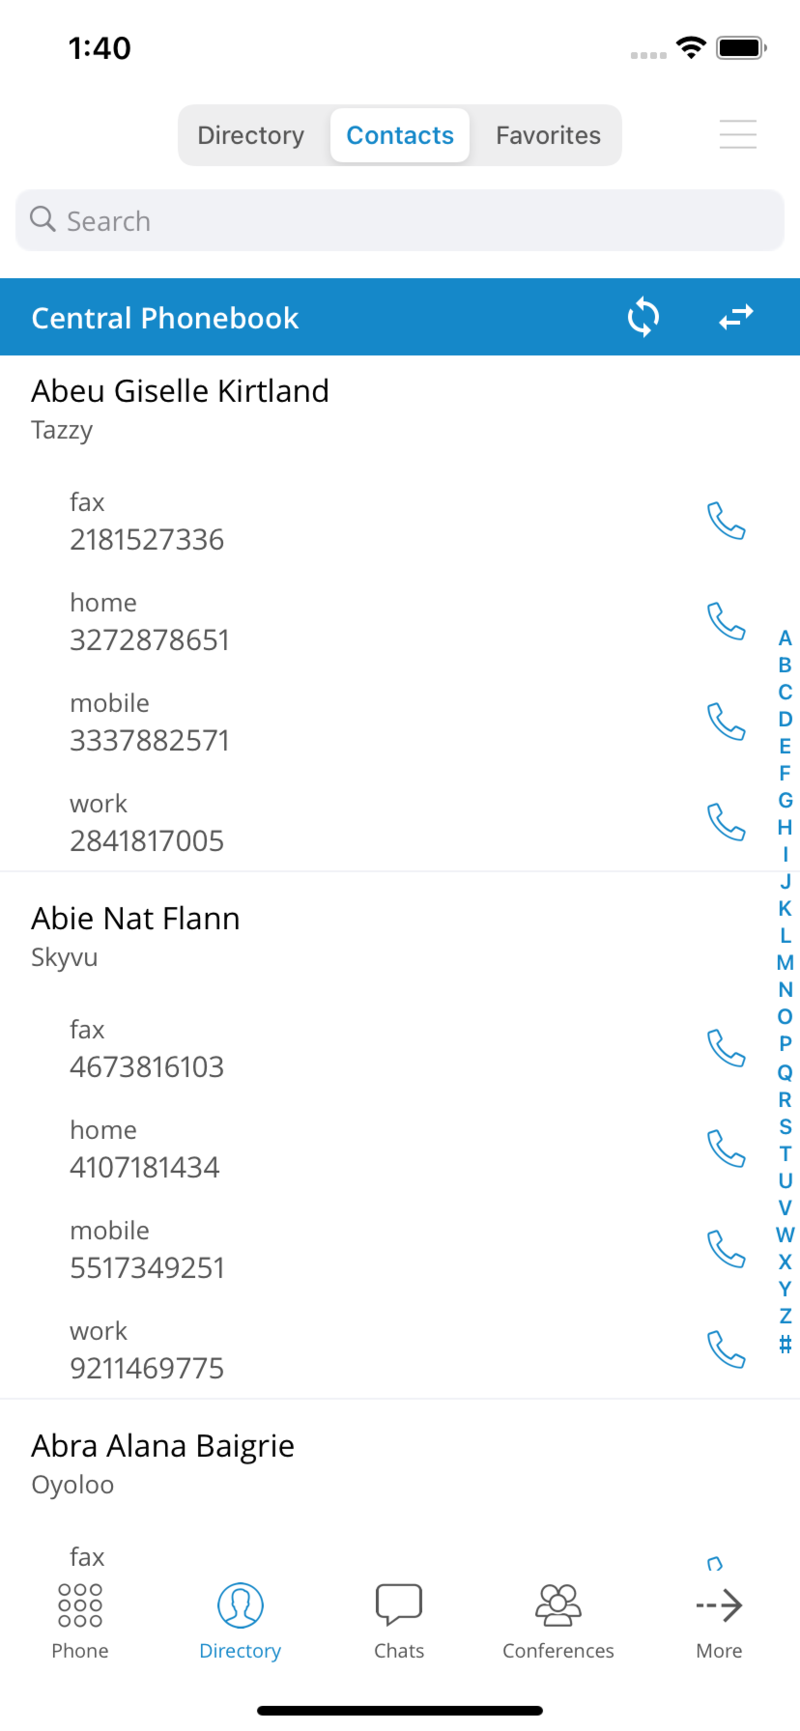
Favorites
Users can add other users and contacts from the phonebook to favorites to have them in one place and show up first while performing an action, e.g., transferring a call. Users can be added/removed from favorites by pressing Add to favorites or Remove from favorites on the user’s details screen as shown in the pictures below.
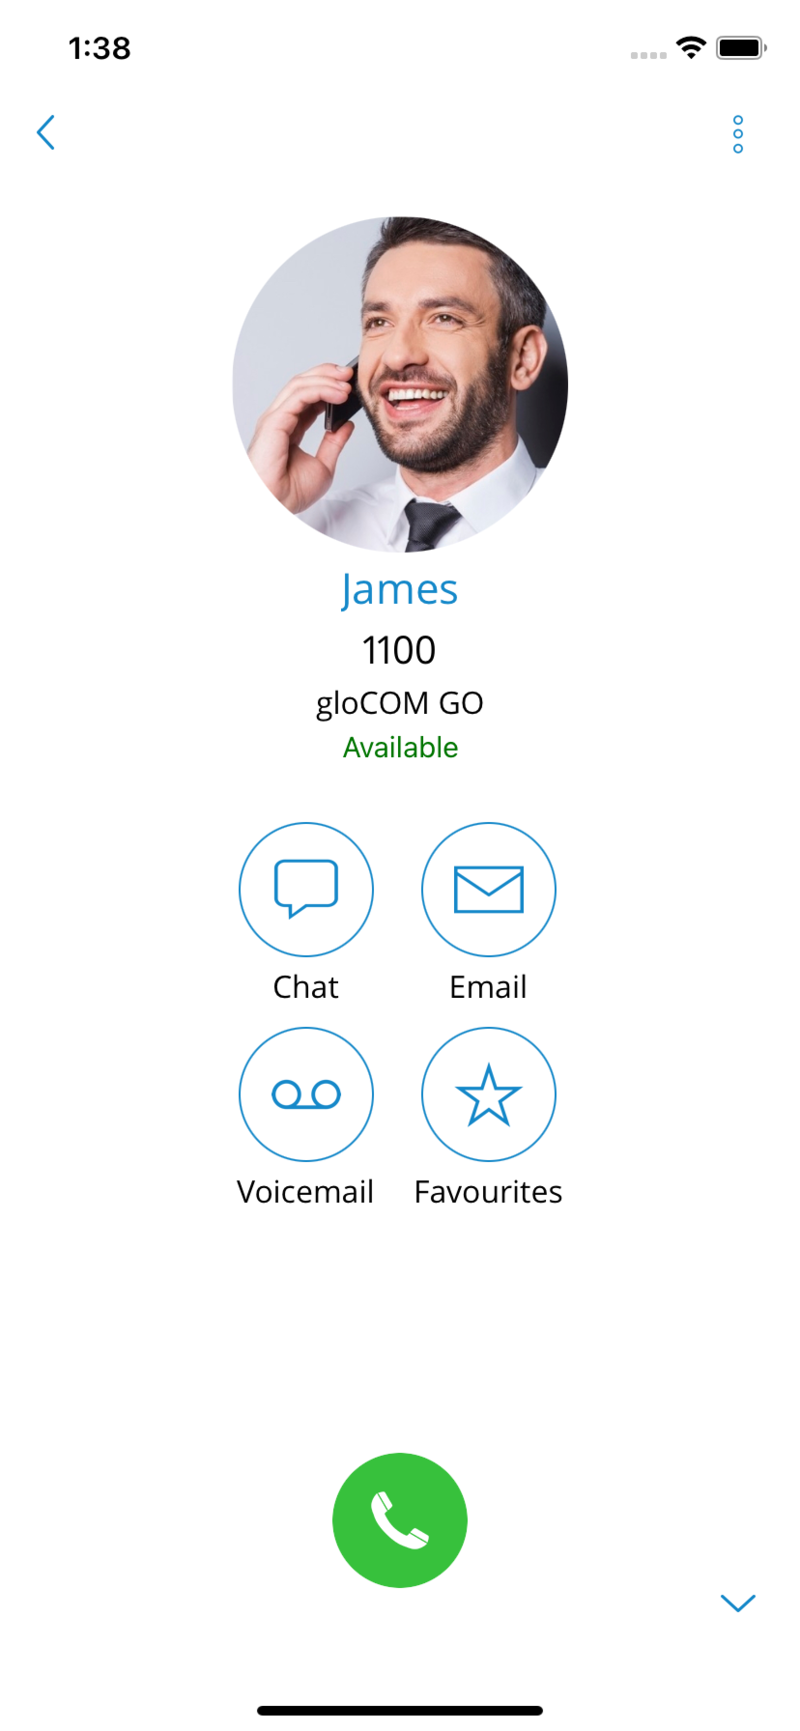
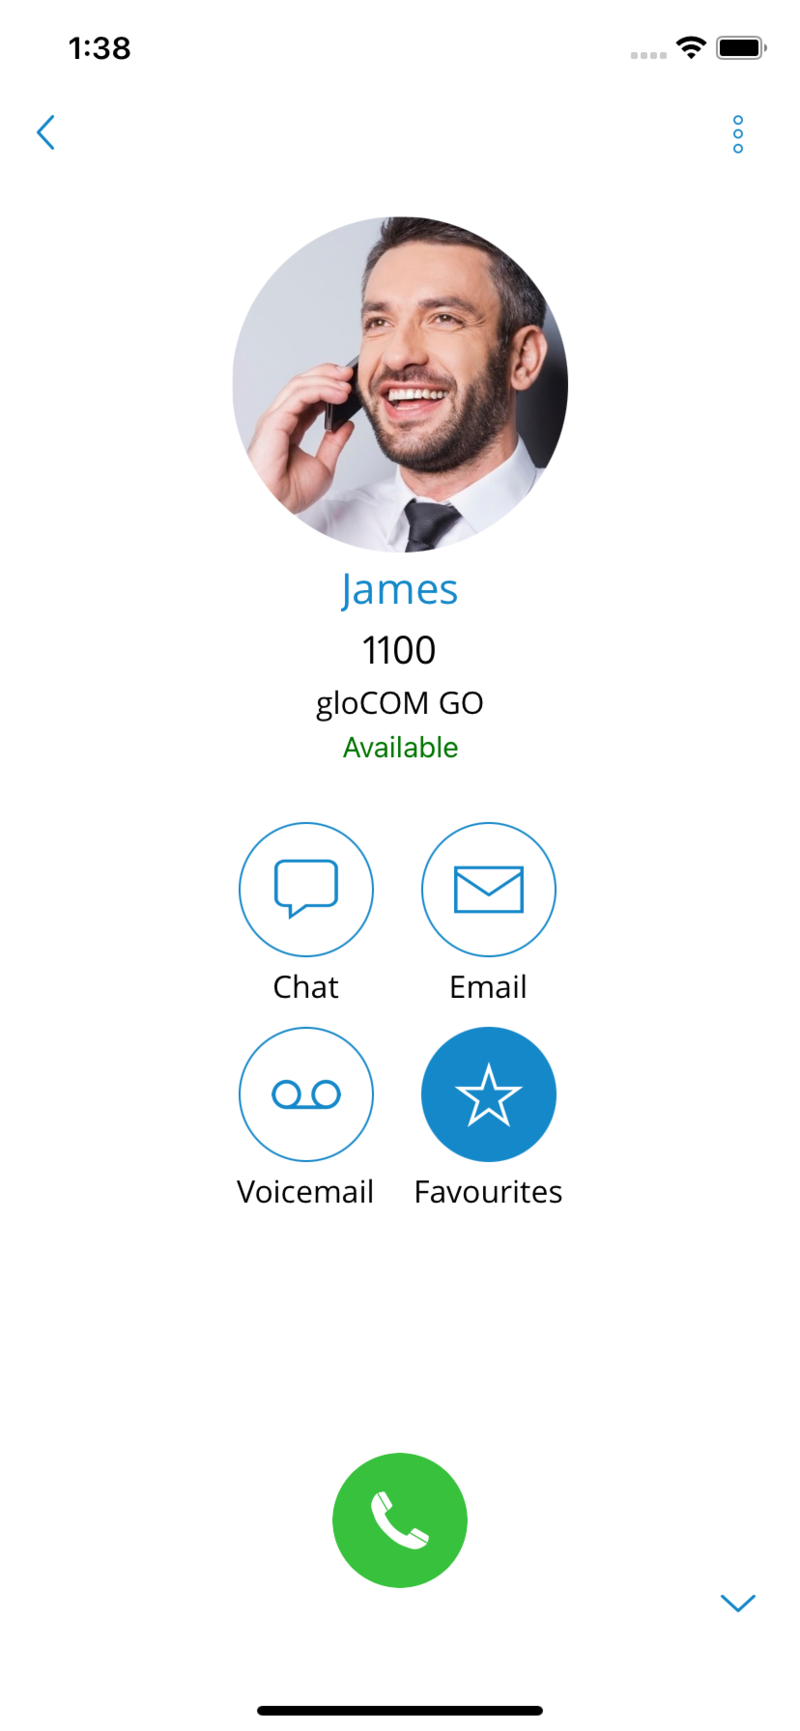
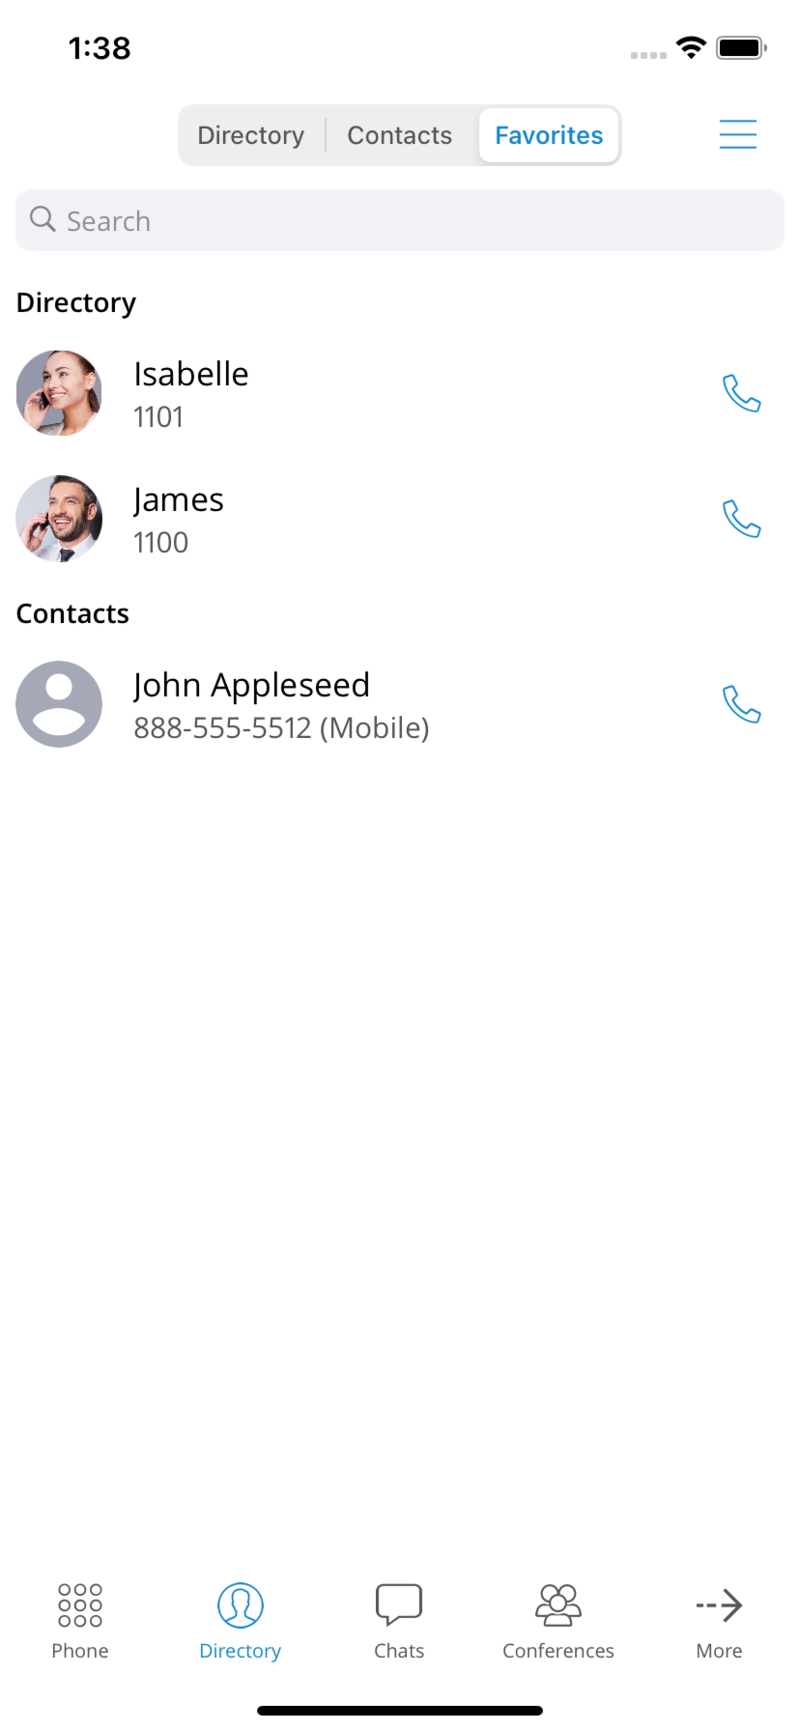
Contacts from the phonebook can also be added or removed from Favorites by pressing on their numbers and choosing Add to Favorites or Remove from Favorites. The favorites list can be accessed from the Directory tab by choosing the Favorites section in the top bar.
Meeting
gloCOM meeting provides an option to meet with multiple users simultaneously while offering:
• Video Conferencing (in a grid and speaker view)
• Audio Conferencing
• Screen Sharing (specific application or whole screen sharing)
• Remote Control when screen sharing
• Group chat
The meeting management within the gloCOM GO 6 app gives a user the ability to create an instant meeting, schedule a meeting, or join an existing meeting. To access the meeting screen, a user should press the Meetings icon within the navigation bar. When a meeting is started, the gloCOM app redirects the user to the gloCOM Meeting GO app.
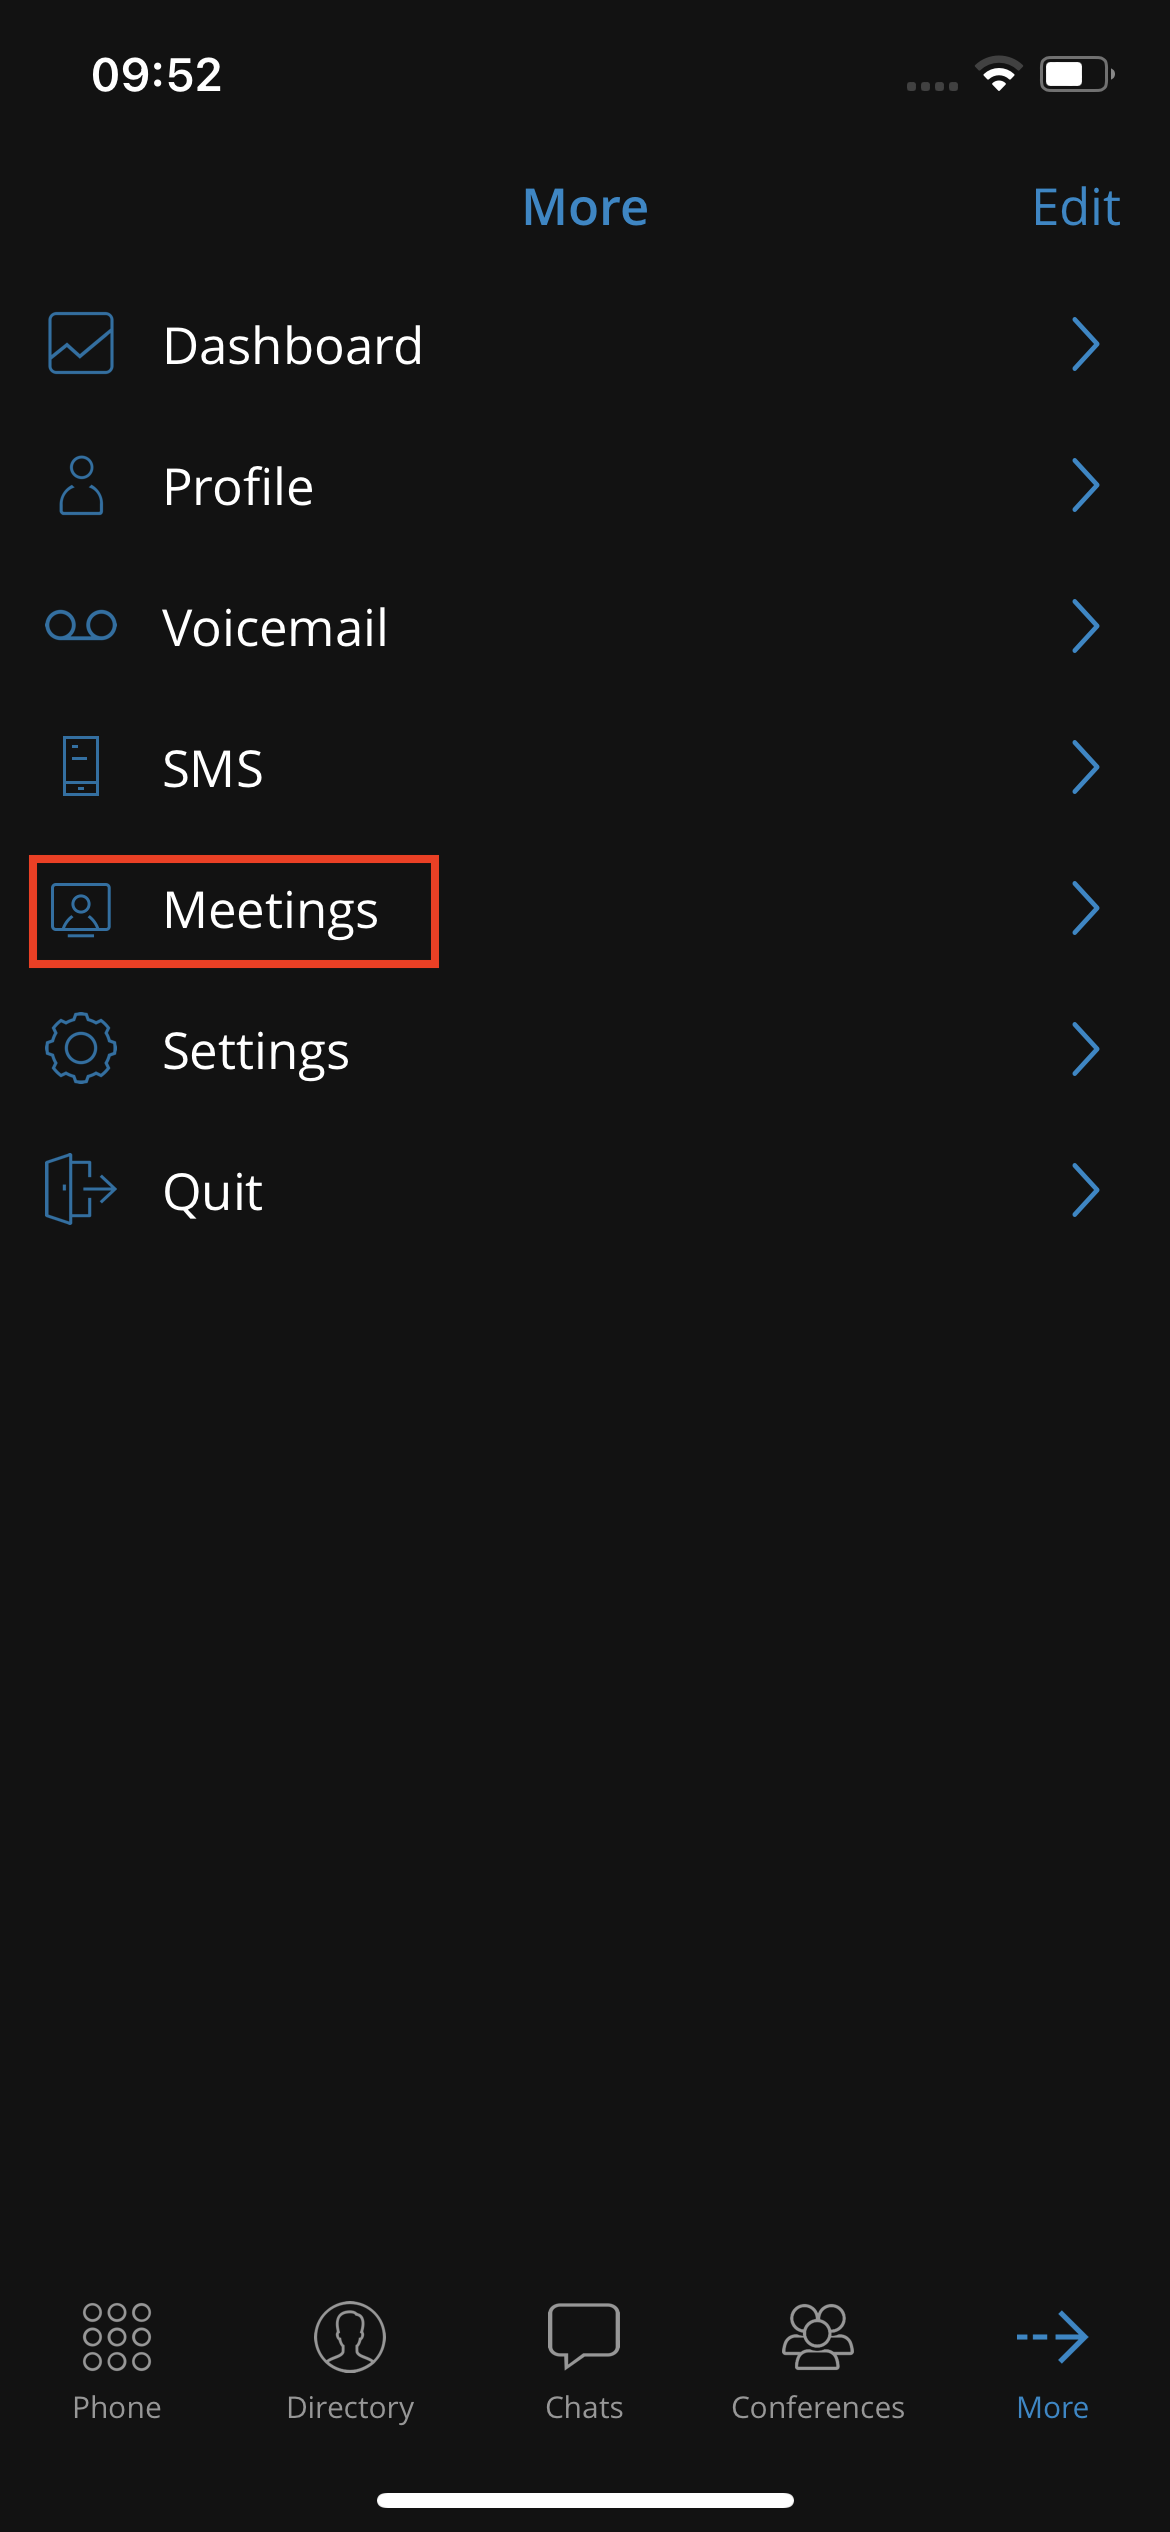
For every meeting invitation, the user will receive a notification.
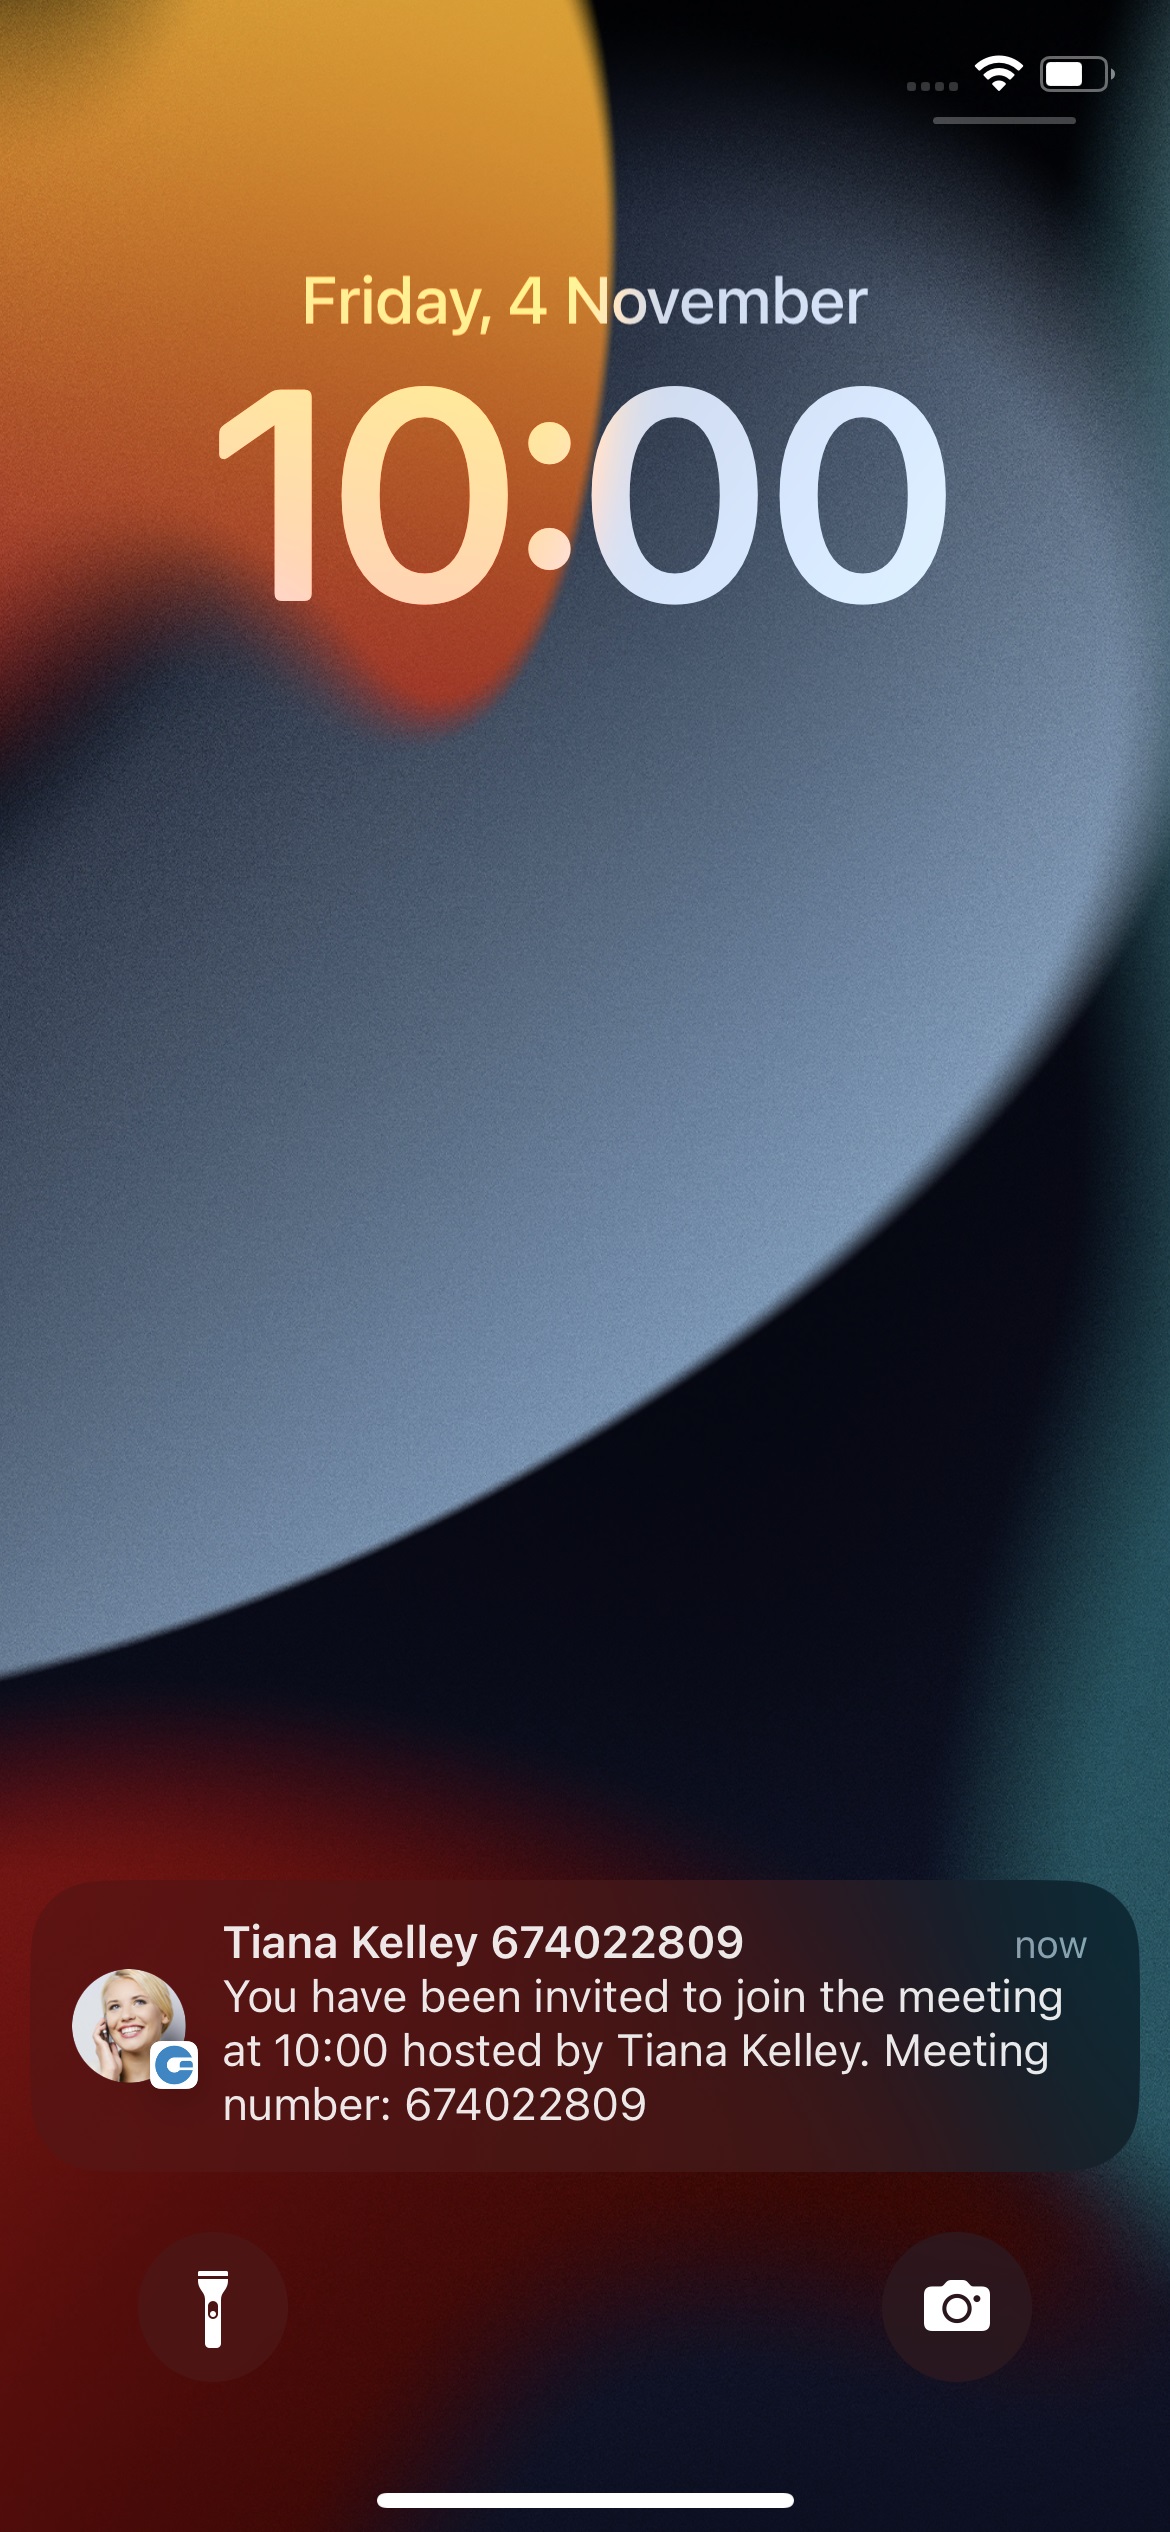
If the meeting is disabled on the license, all meeting-related screens will be disabled.
Main meeting screen
On the main meeting screen, the user has an overview of scheduled meetings sorted by date. There is an “In progress” indicator in the upper right corner for the meeting currently running. Pressing on a meeting inside the list opens the meeting info screen. Meetings in the list can be filtered by typing the name or meeting number in the search field. Above the search field is a history button that opens the list with the previous meetings. In the additional options, there is an option to Copy Calendar URL, which allows the user to copy the Meeting calendar into their calendar software.

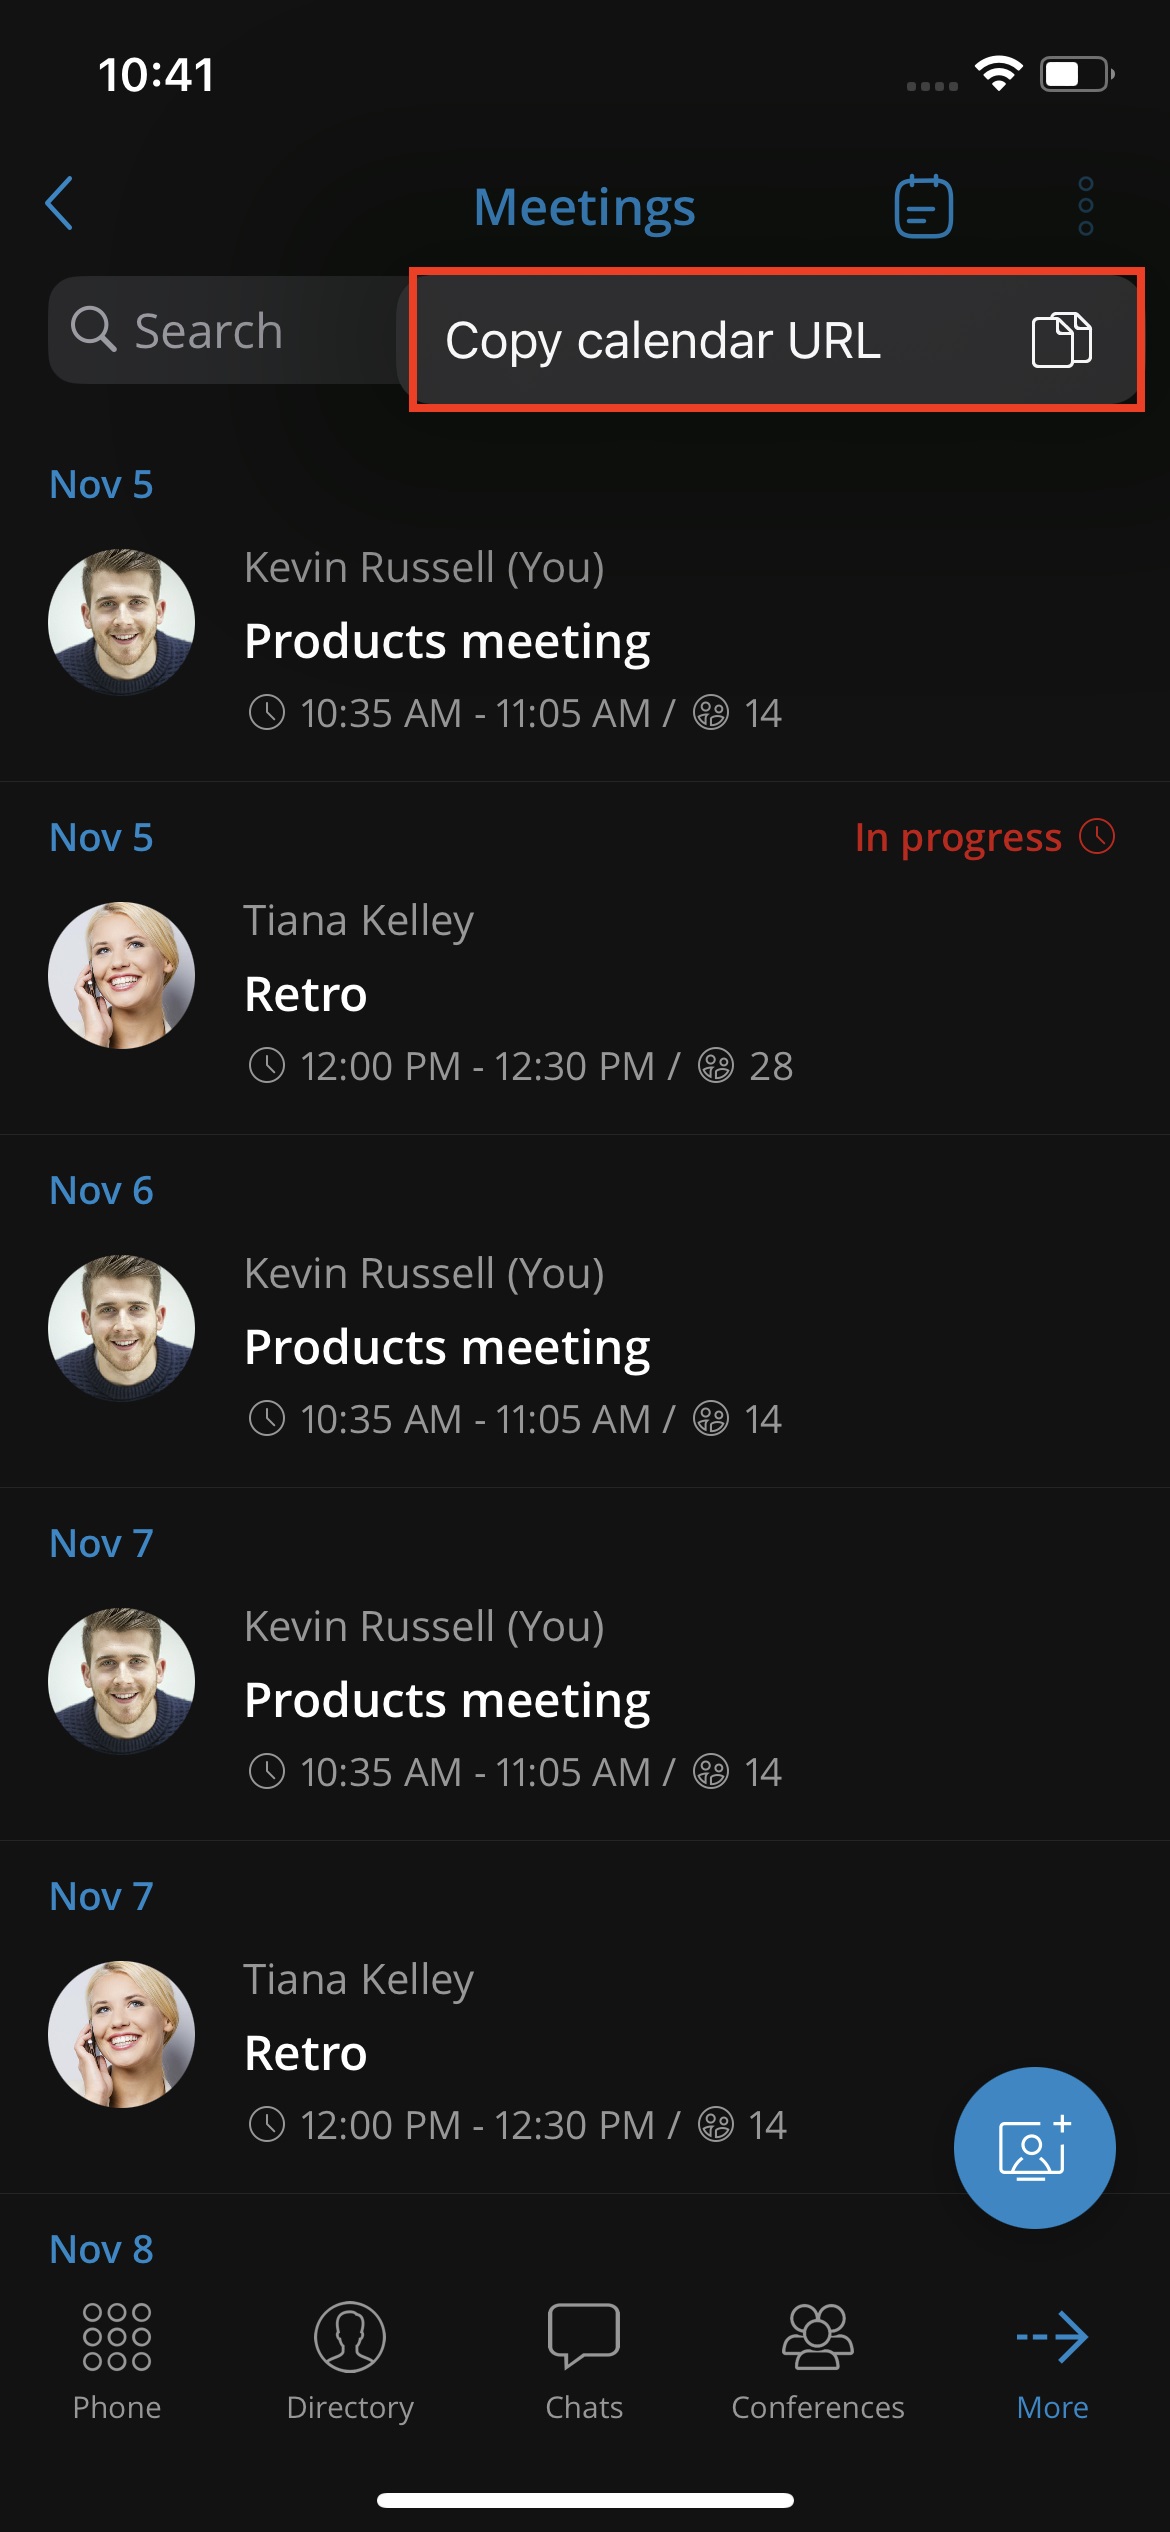
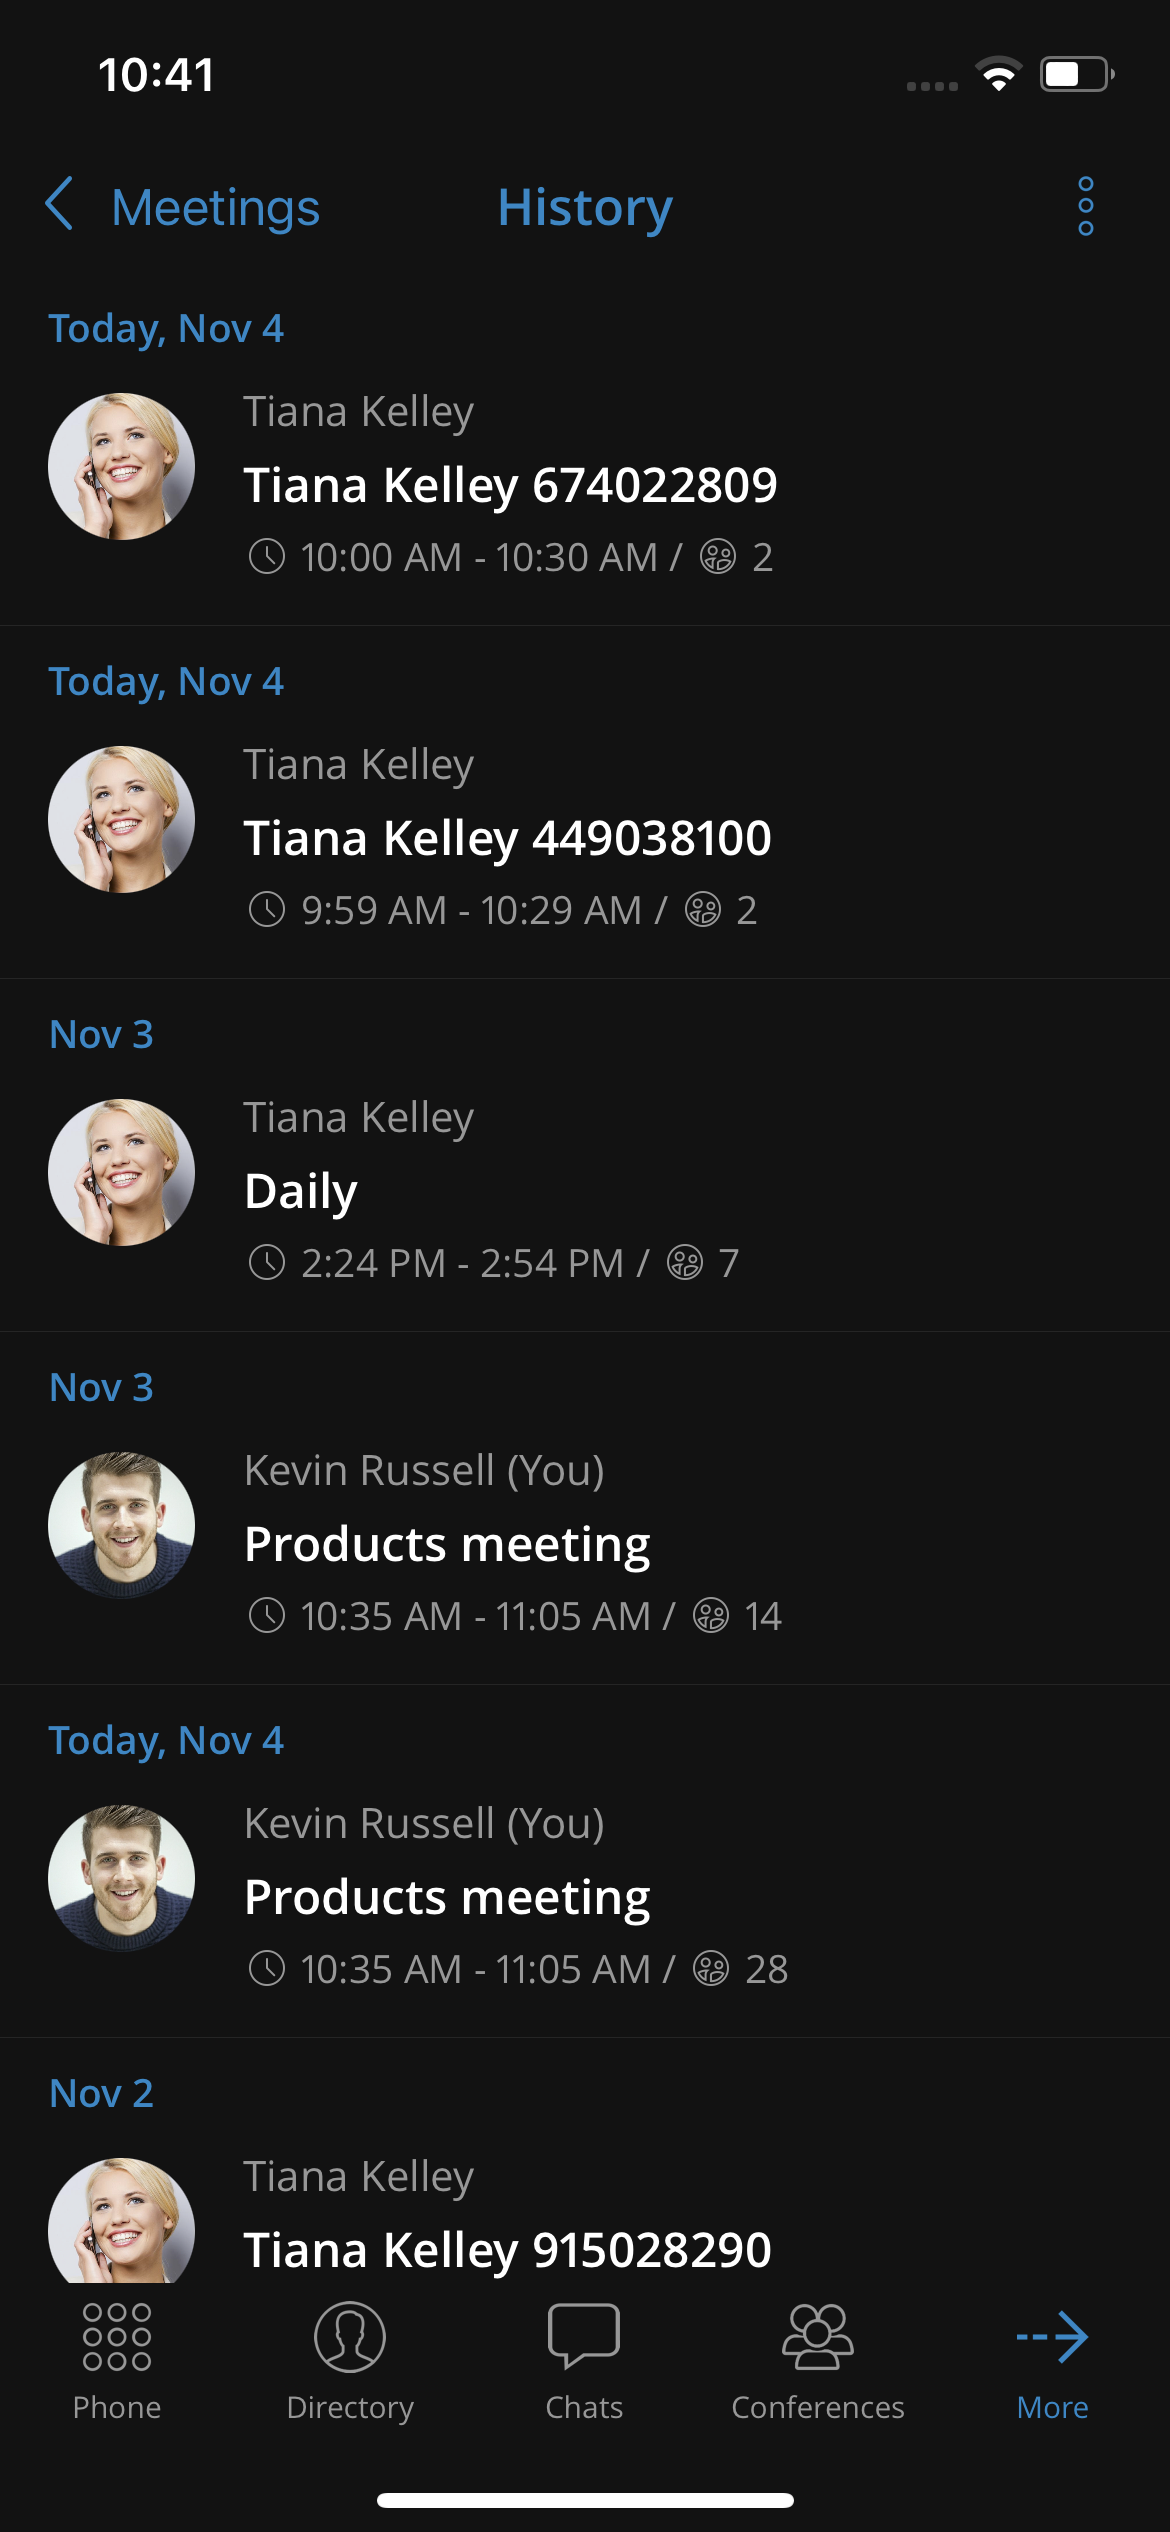
At the bottom of the screen there is a floating button that, when pressed, offers three options:
• Join an active meeting – gives the user the ability to join the existing meeting by entering the meeting number. After entering the meeting number and clicking the Join button, the user will be redirected to the gloCOM Meeting GO app.
• Create an instant meeting – opens the instant meeting screen where the user can set a meeting to be public or private, add participants from the directory or add external participants by entering their email address.
• Schedule a meeting – opens the schedule meeting screen where the user can schedule a meeting beforehand. in order to schedule a meeting, the user has to enter certain data in the provided fields:
◦ Title (meeting title)
◦ Description (meeting description)
◦ Date (date of the meeting)
◦ Starts at (meeting start time)
◦ Duration (duration of the meeting)
◦ Recurring – in case a user clicks on a Recurring option a dialog with the following options will appear:
▪ Never (meeting occurs only once (set by default for the new meetings))
▪ Every Day (meeting recurring every day at the selected time)
▪ Custom (opens the screen with custom recurring options)
◦ Participants
◦ External participants
◦ Public/Private switch
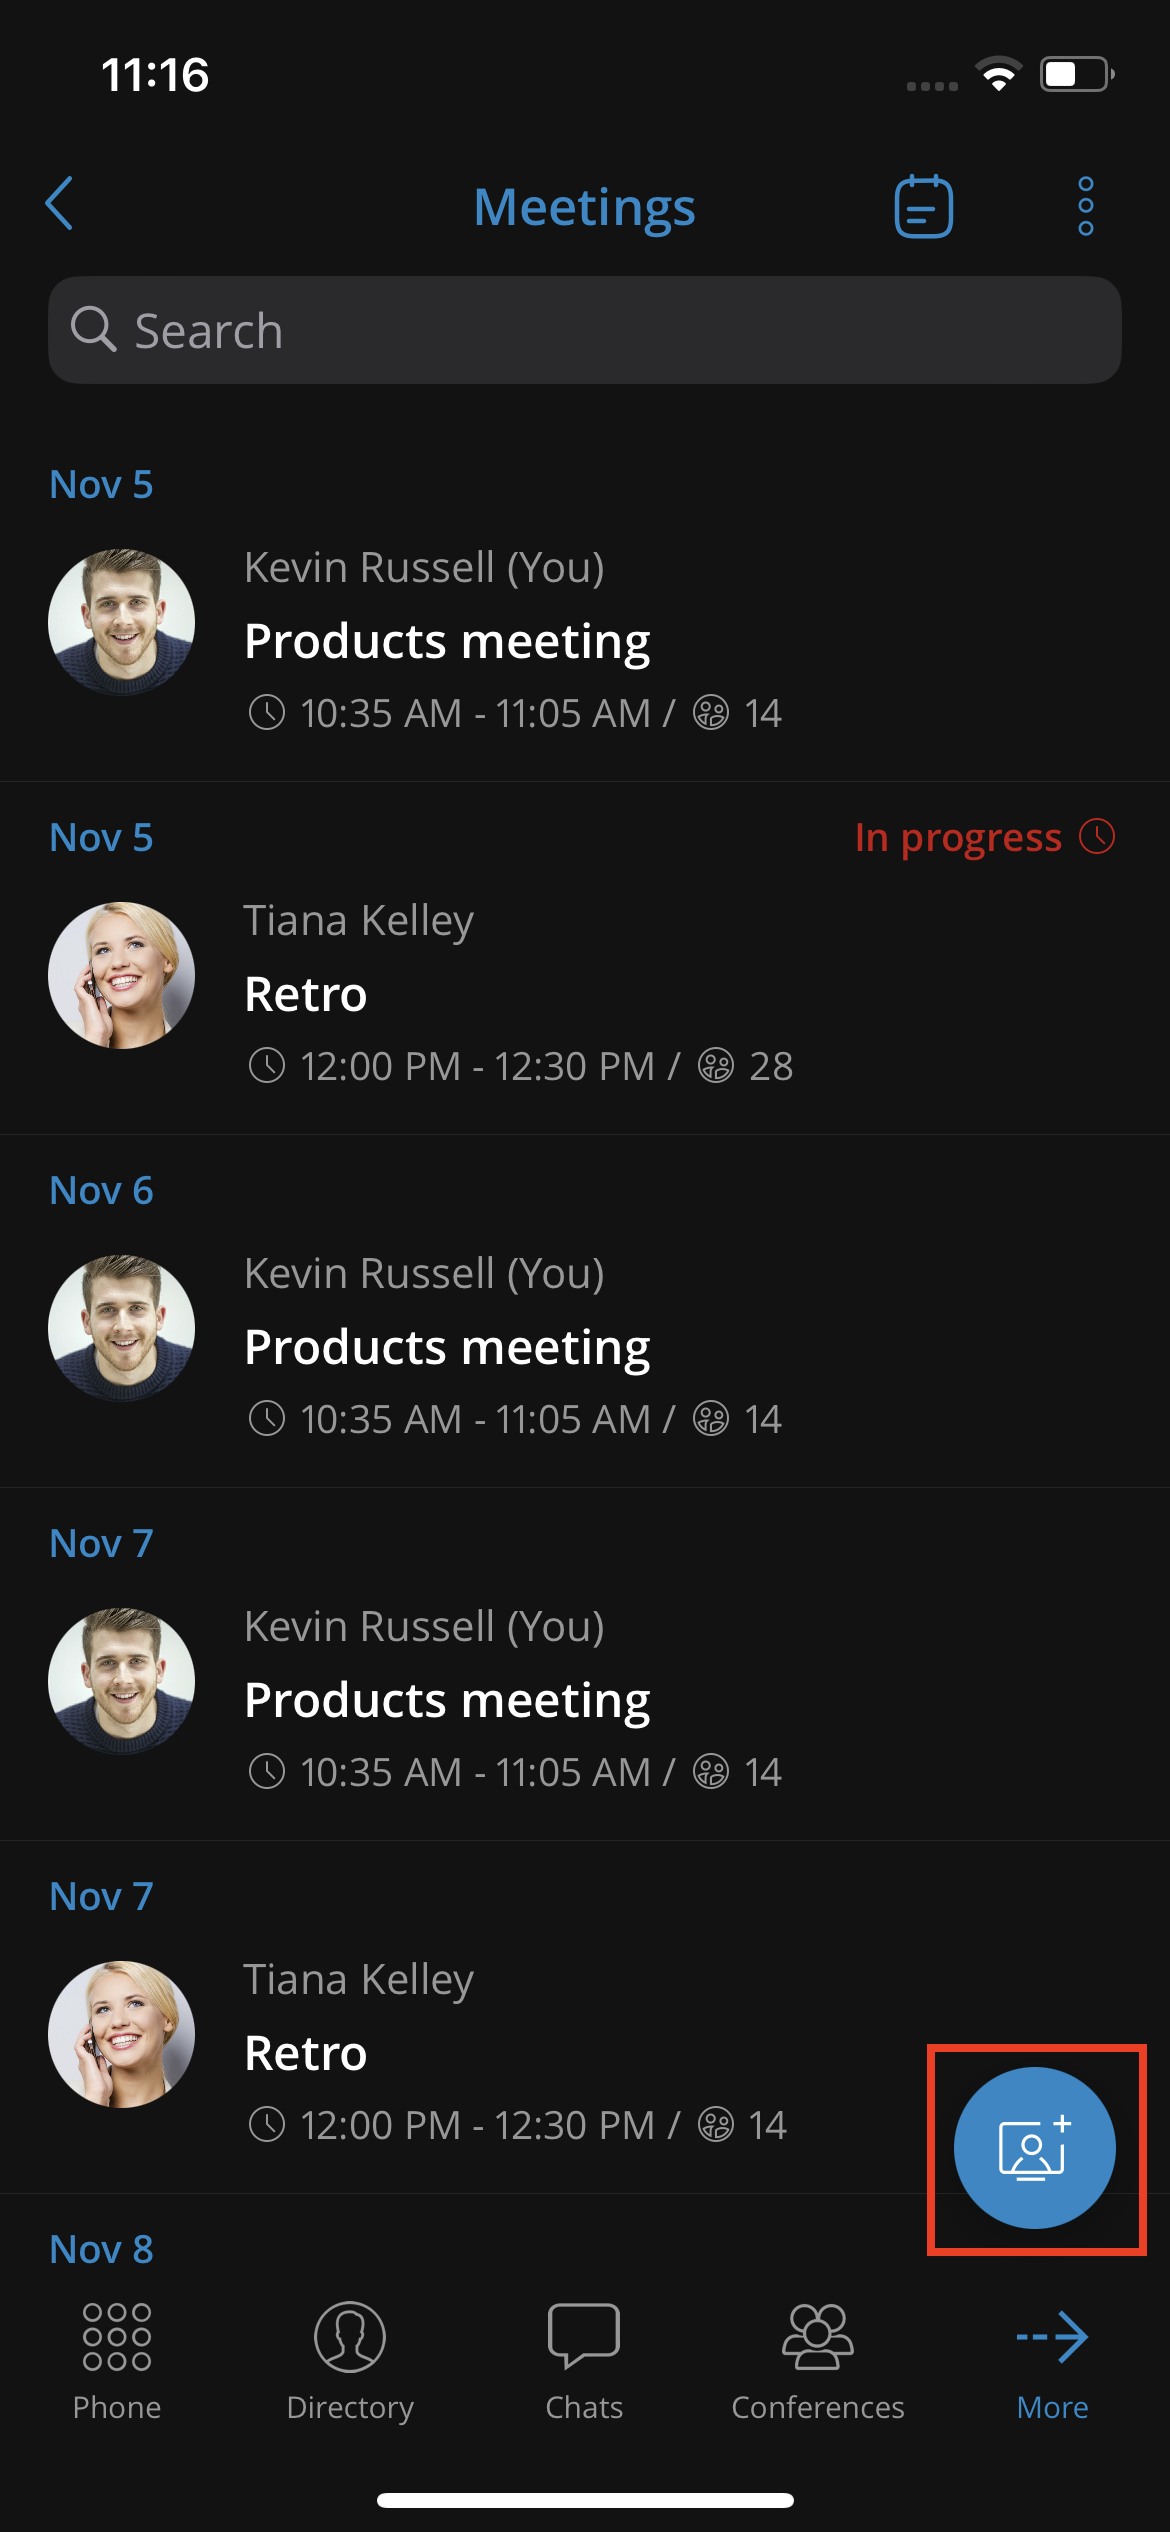
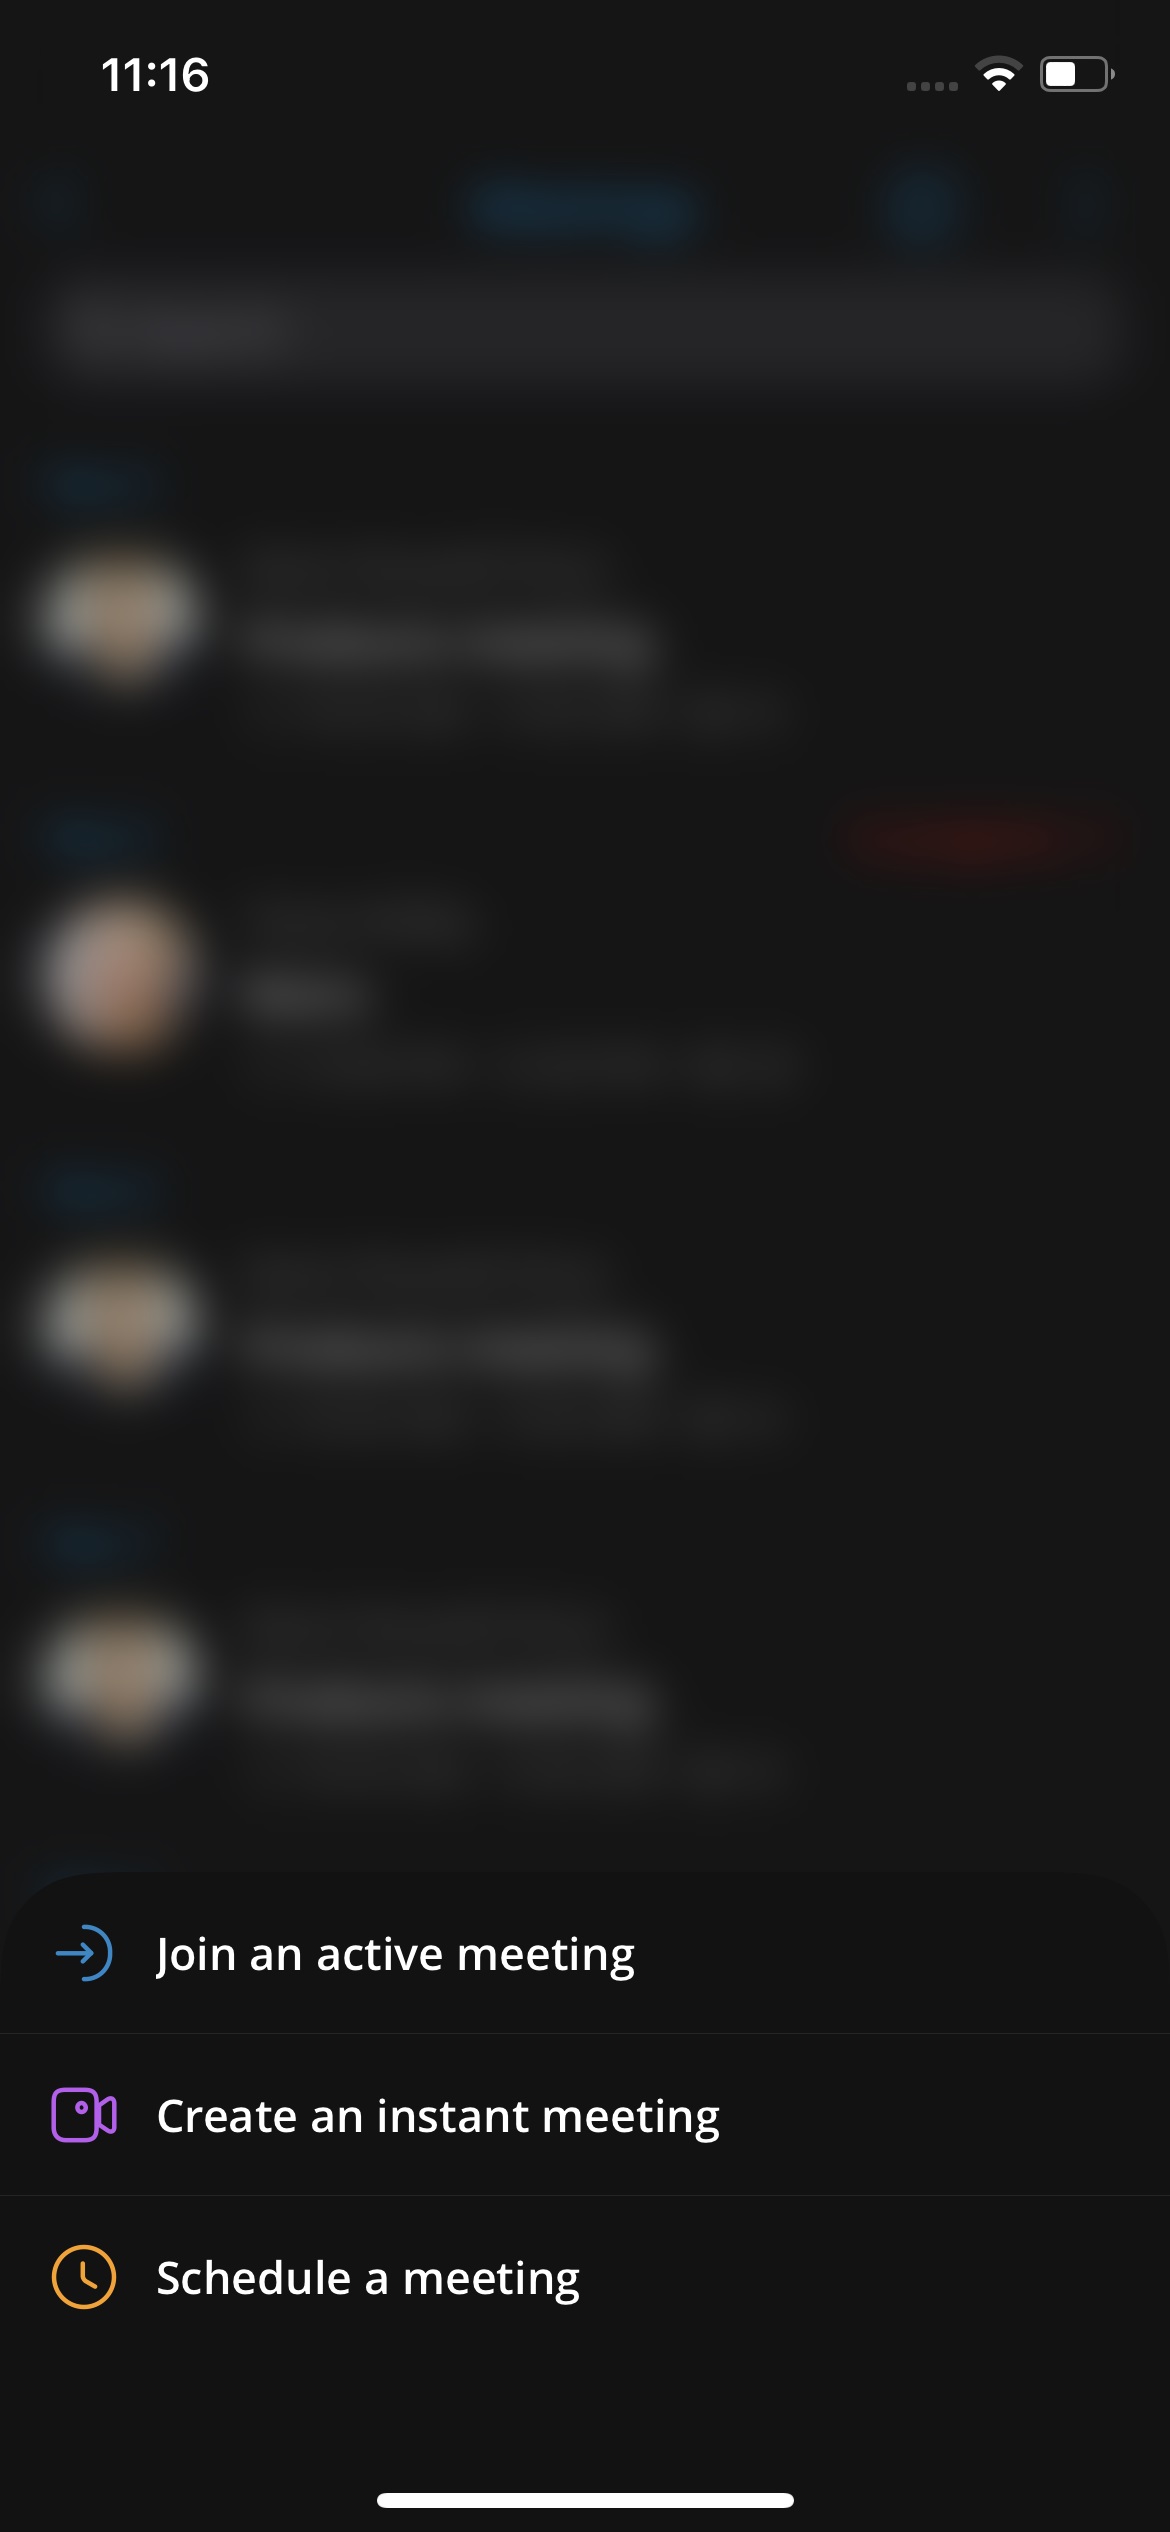
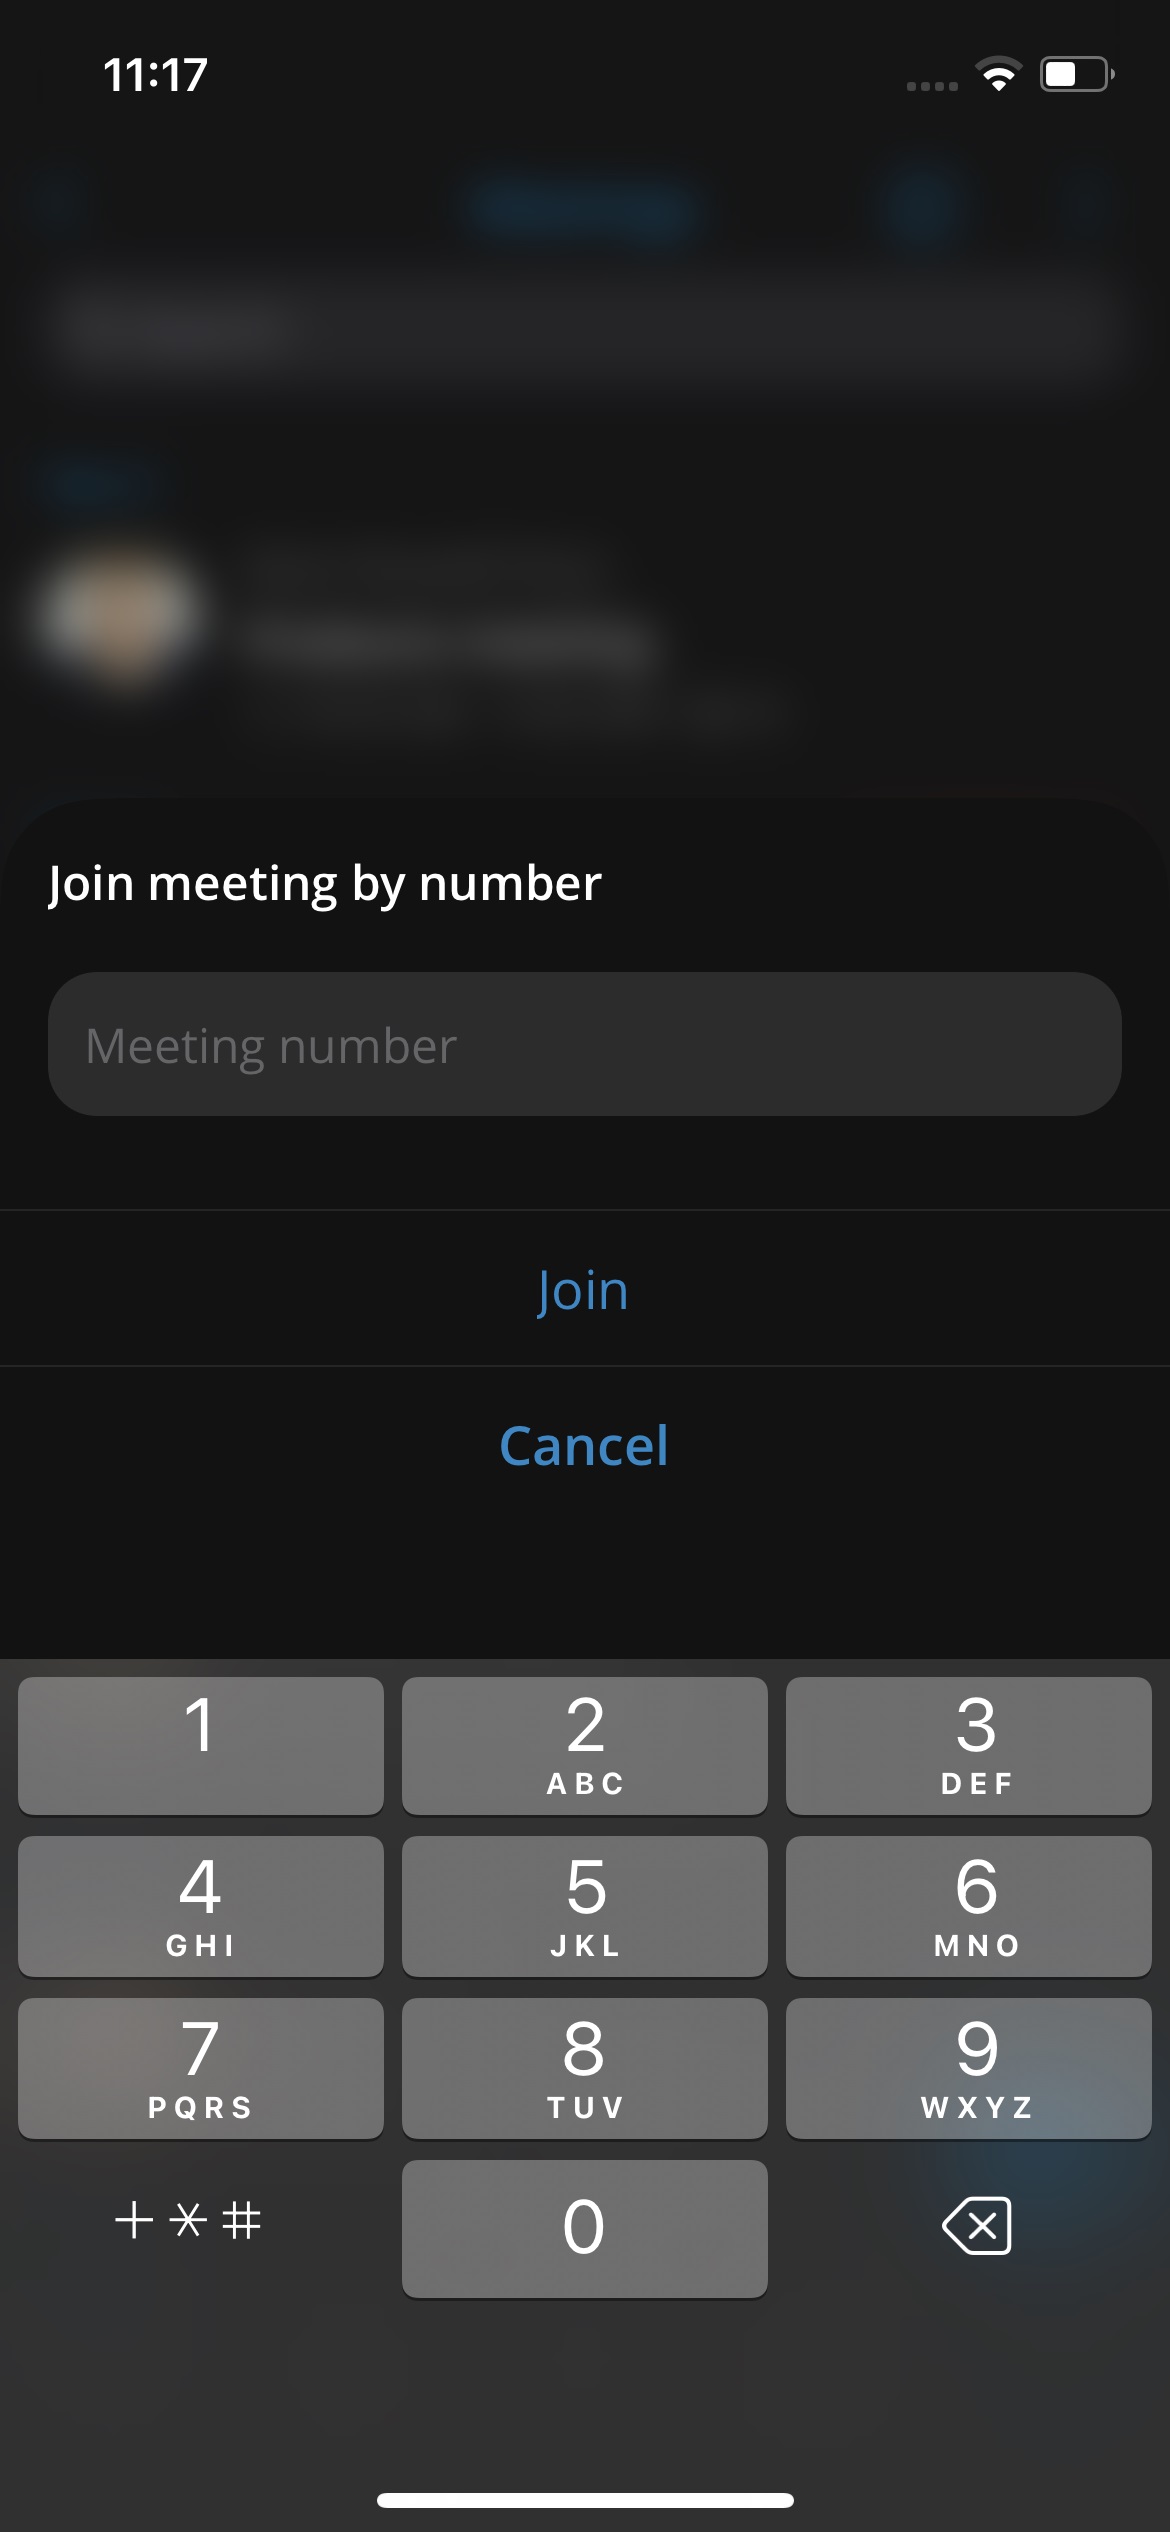
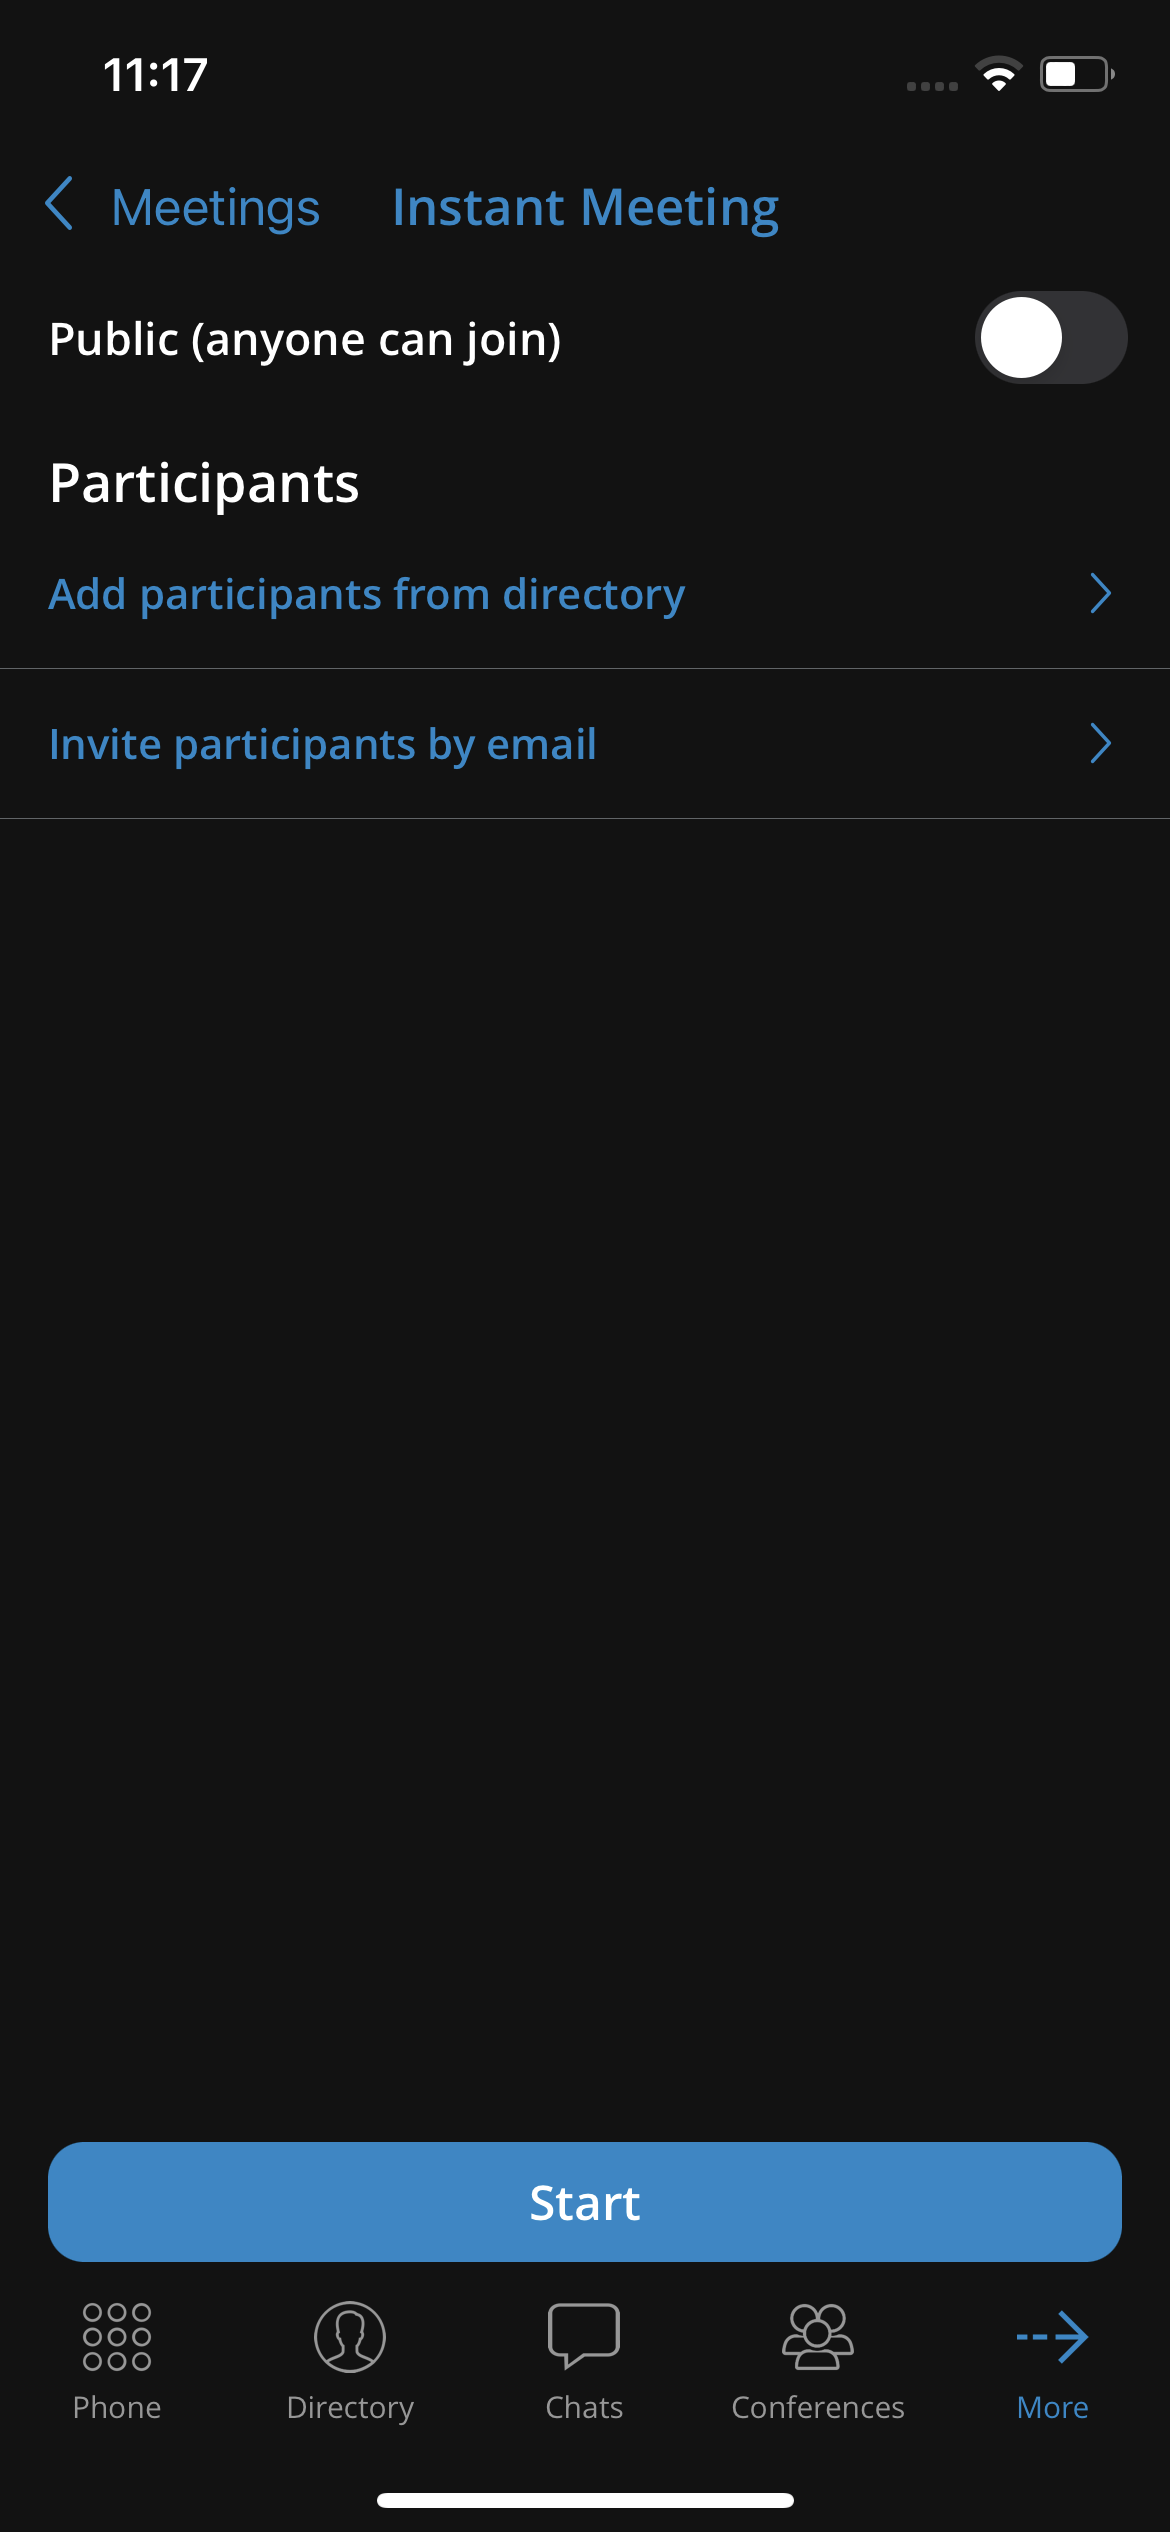

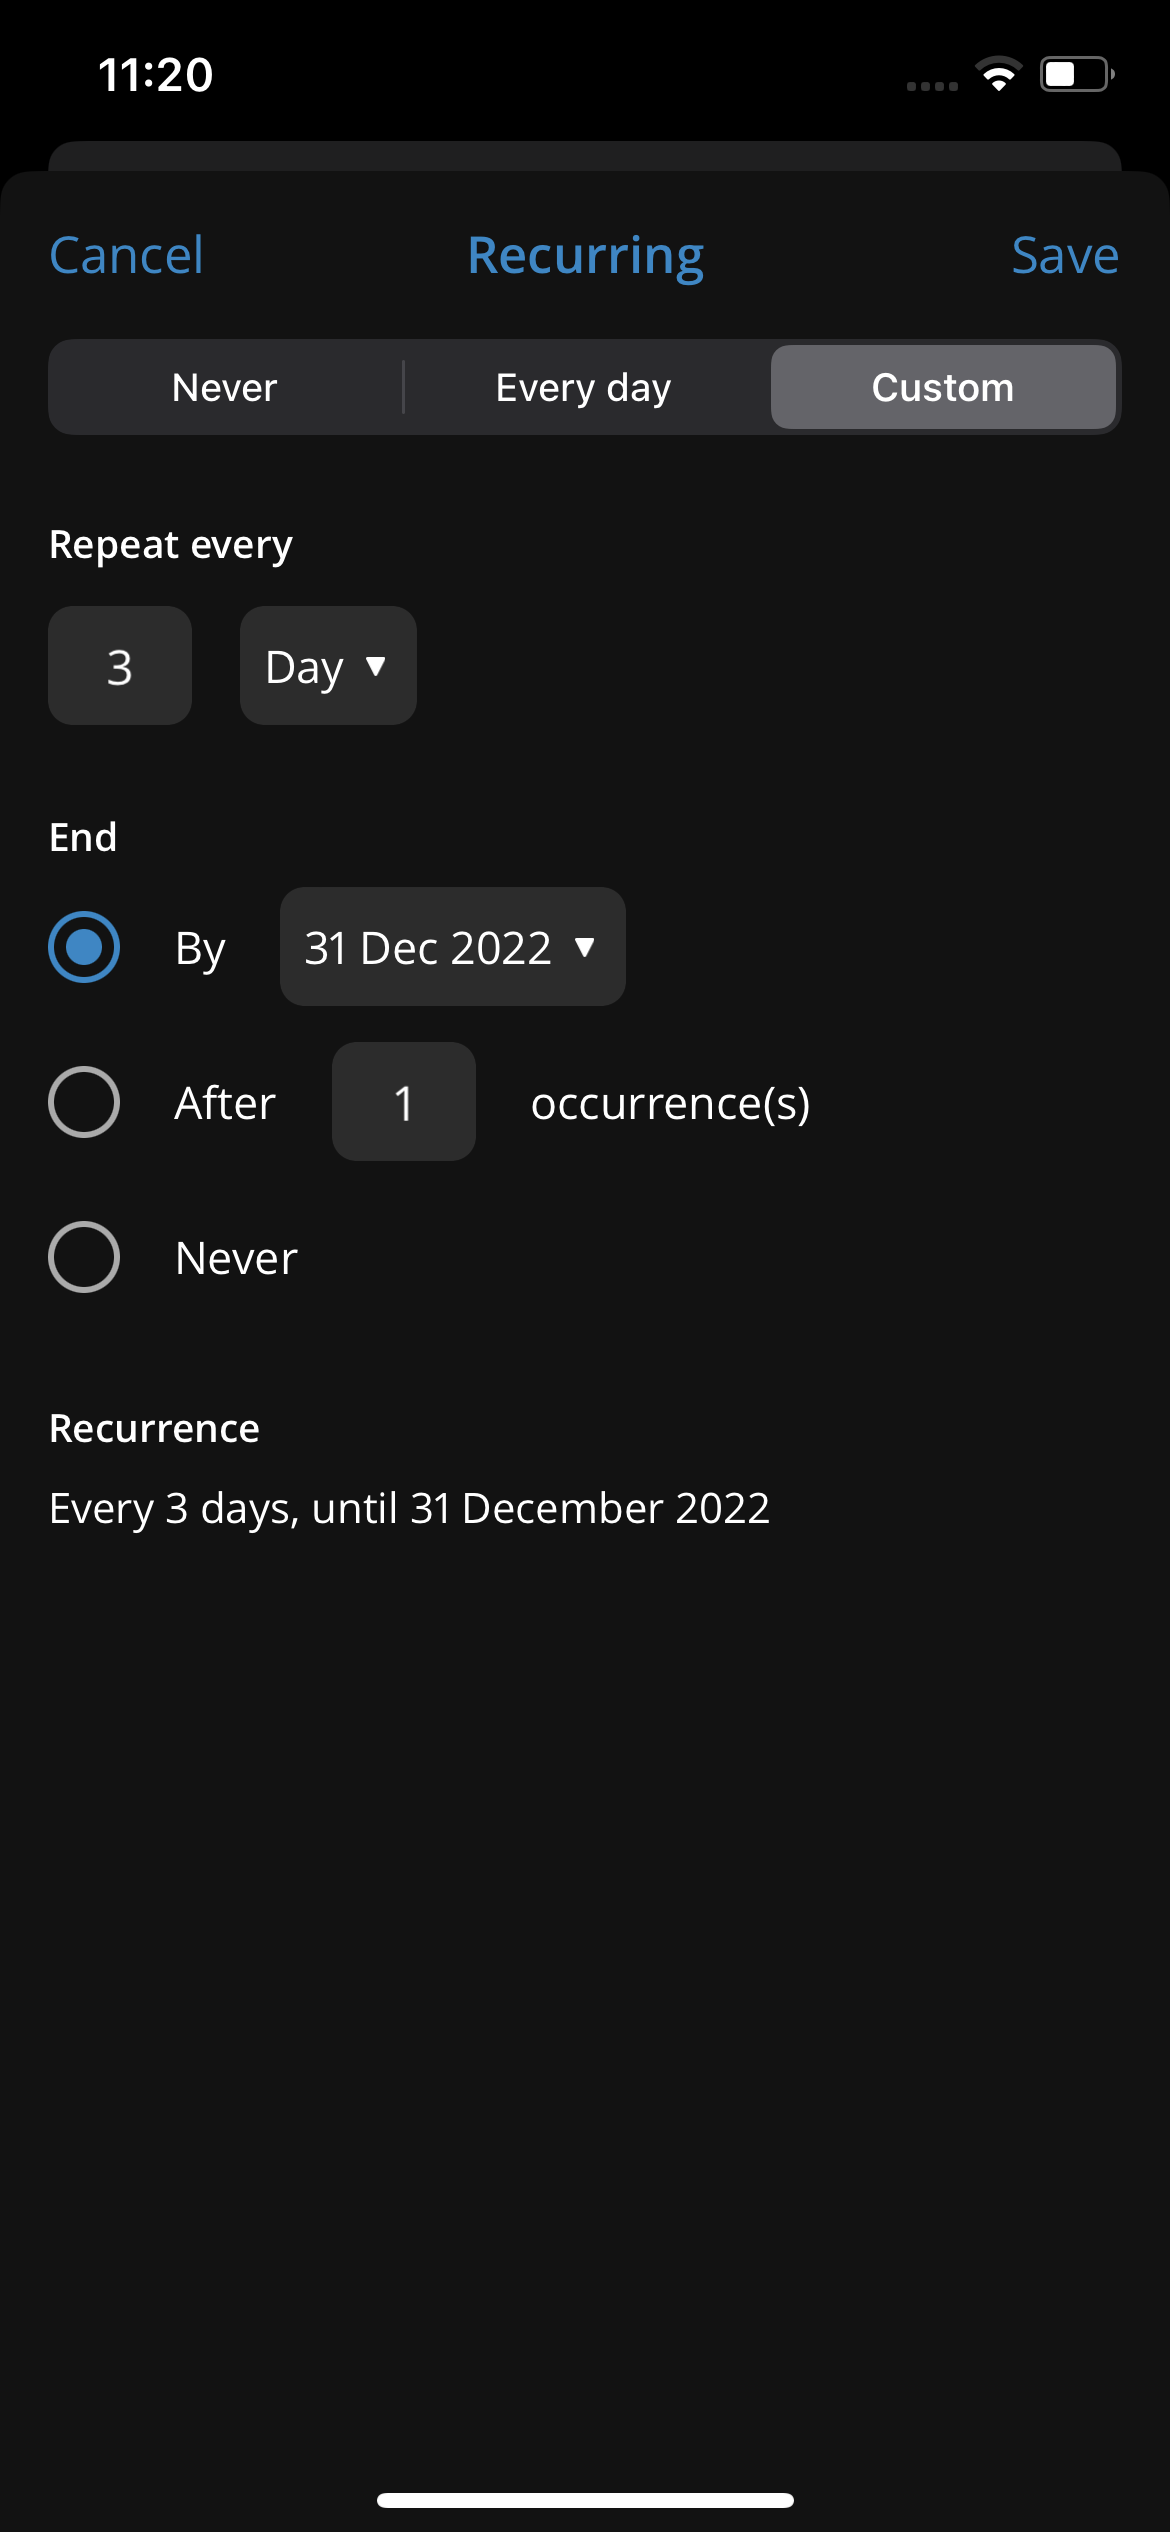
Meeting info screen
By selecting one of the meetings from the scheduled meeting list or history, the meeting info screen opens and shows the details of the selected meeting:
• Organizer
• Subject
• Description
• Meeting number • Start time
• Duration
• Status
• Public
• Participants list
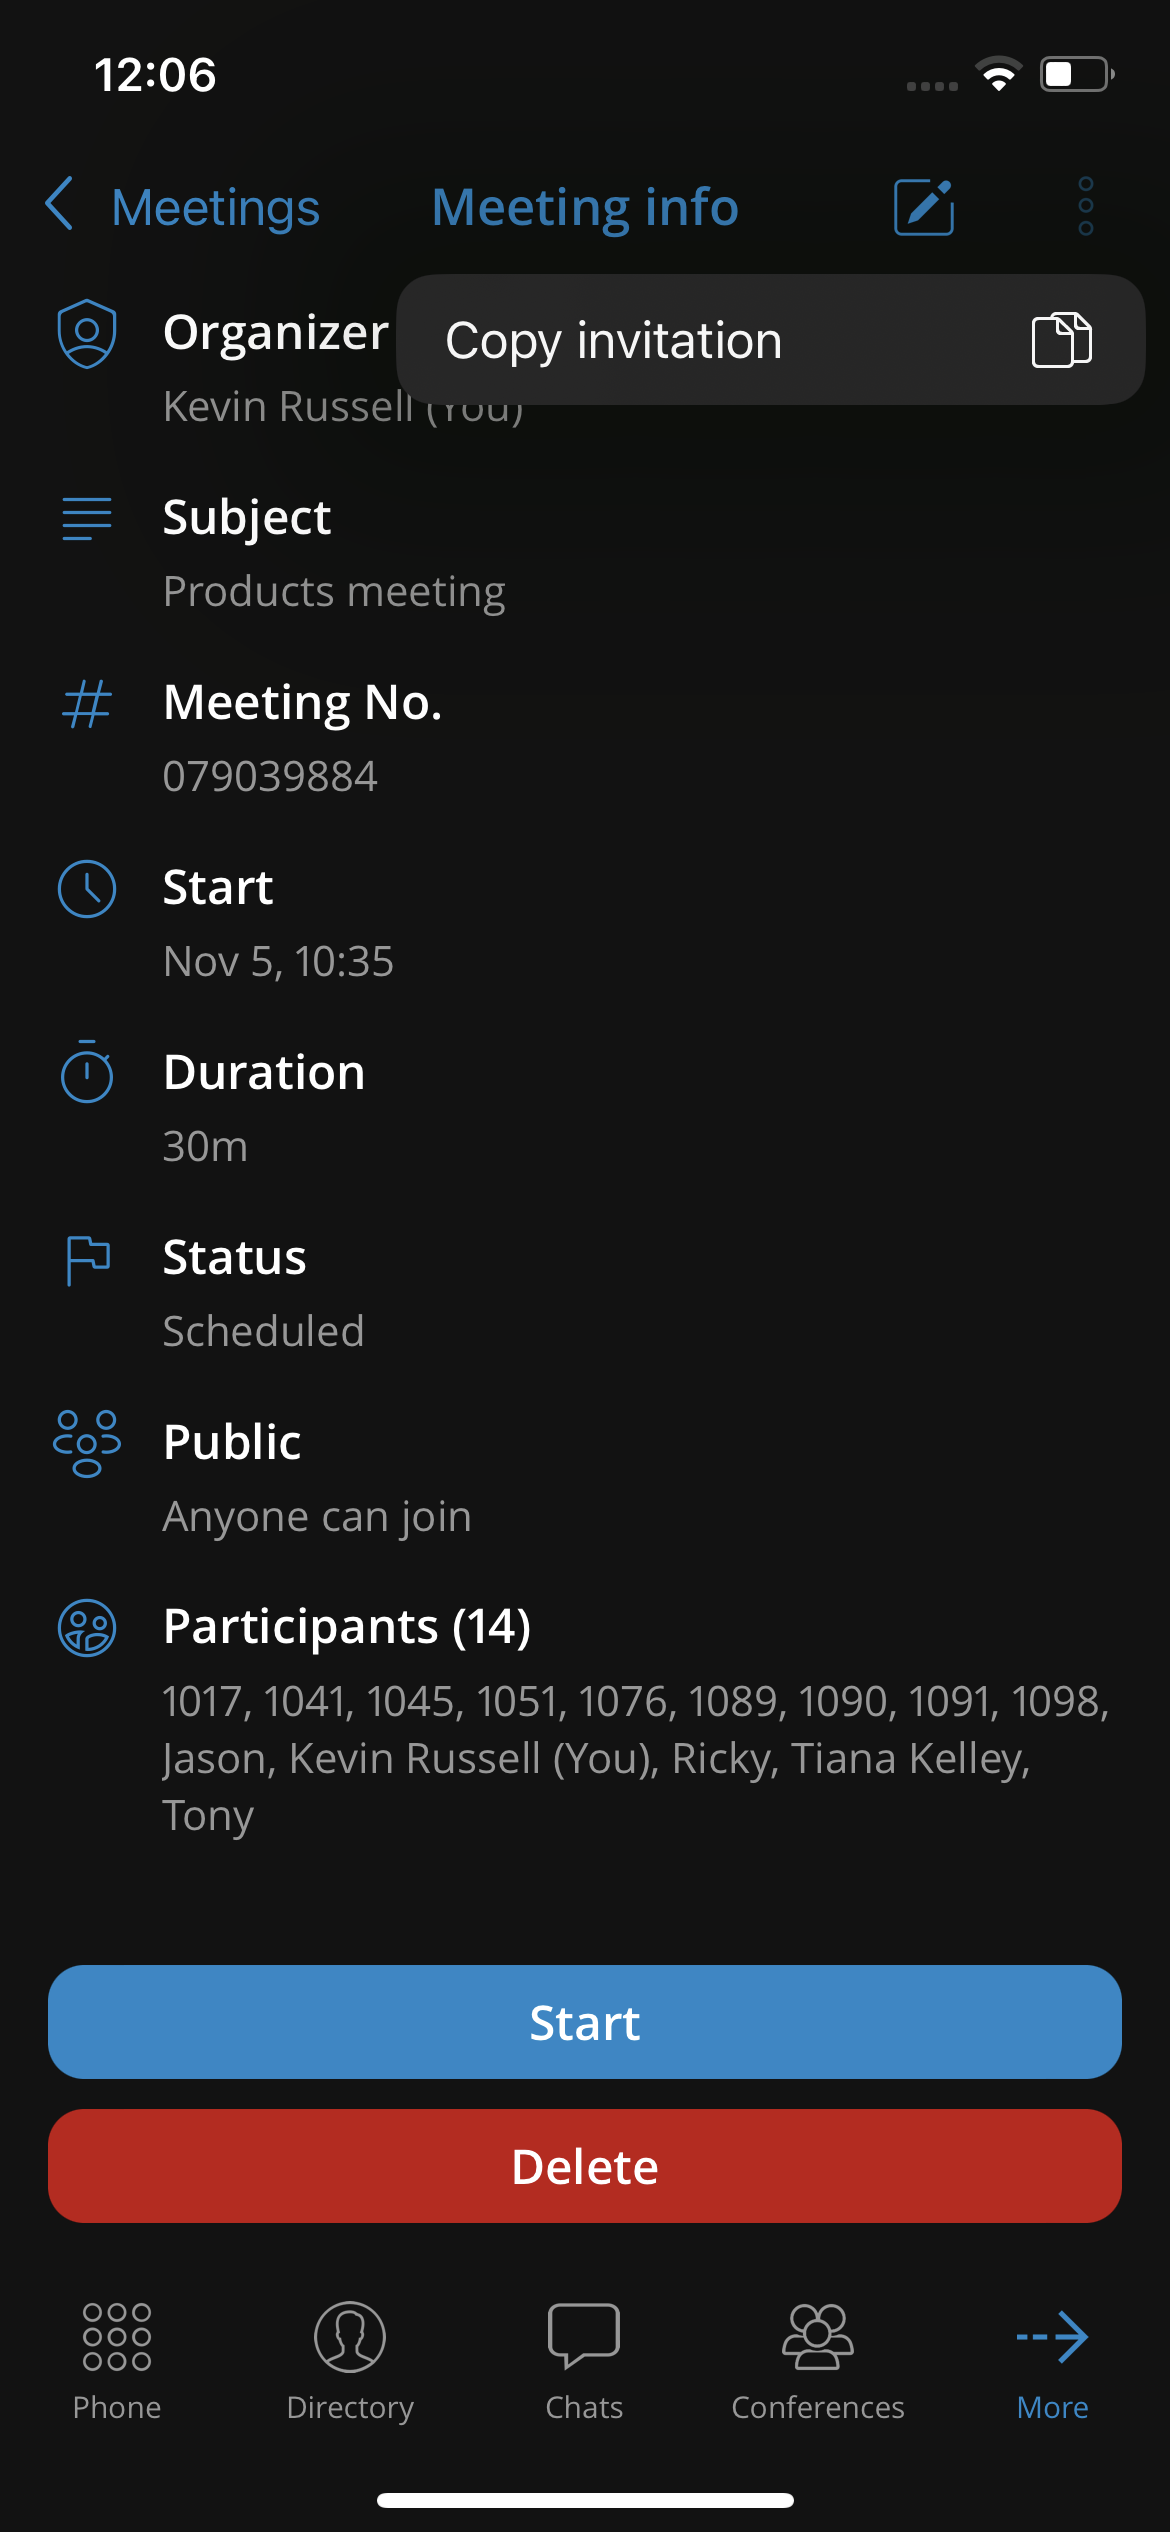
For a meeting that is scheduled but not started yet an organizer has the option to update the meeting details by clicking on the edit button in the upper right corner.
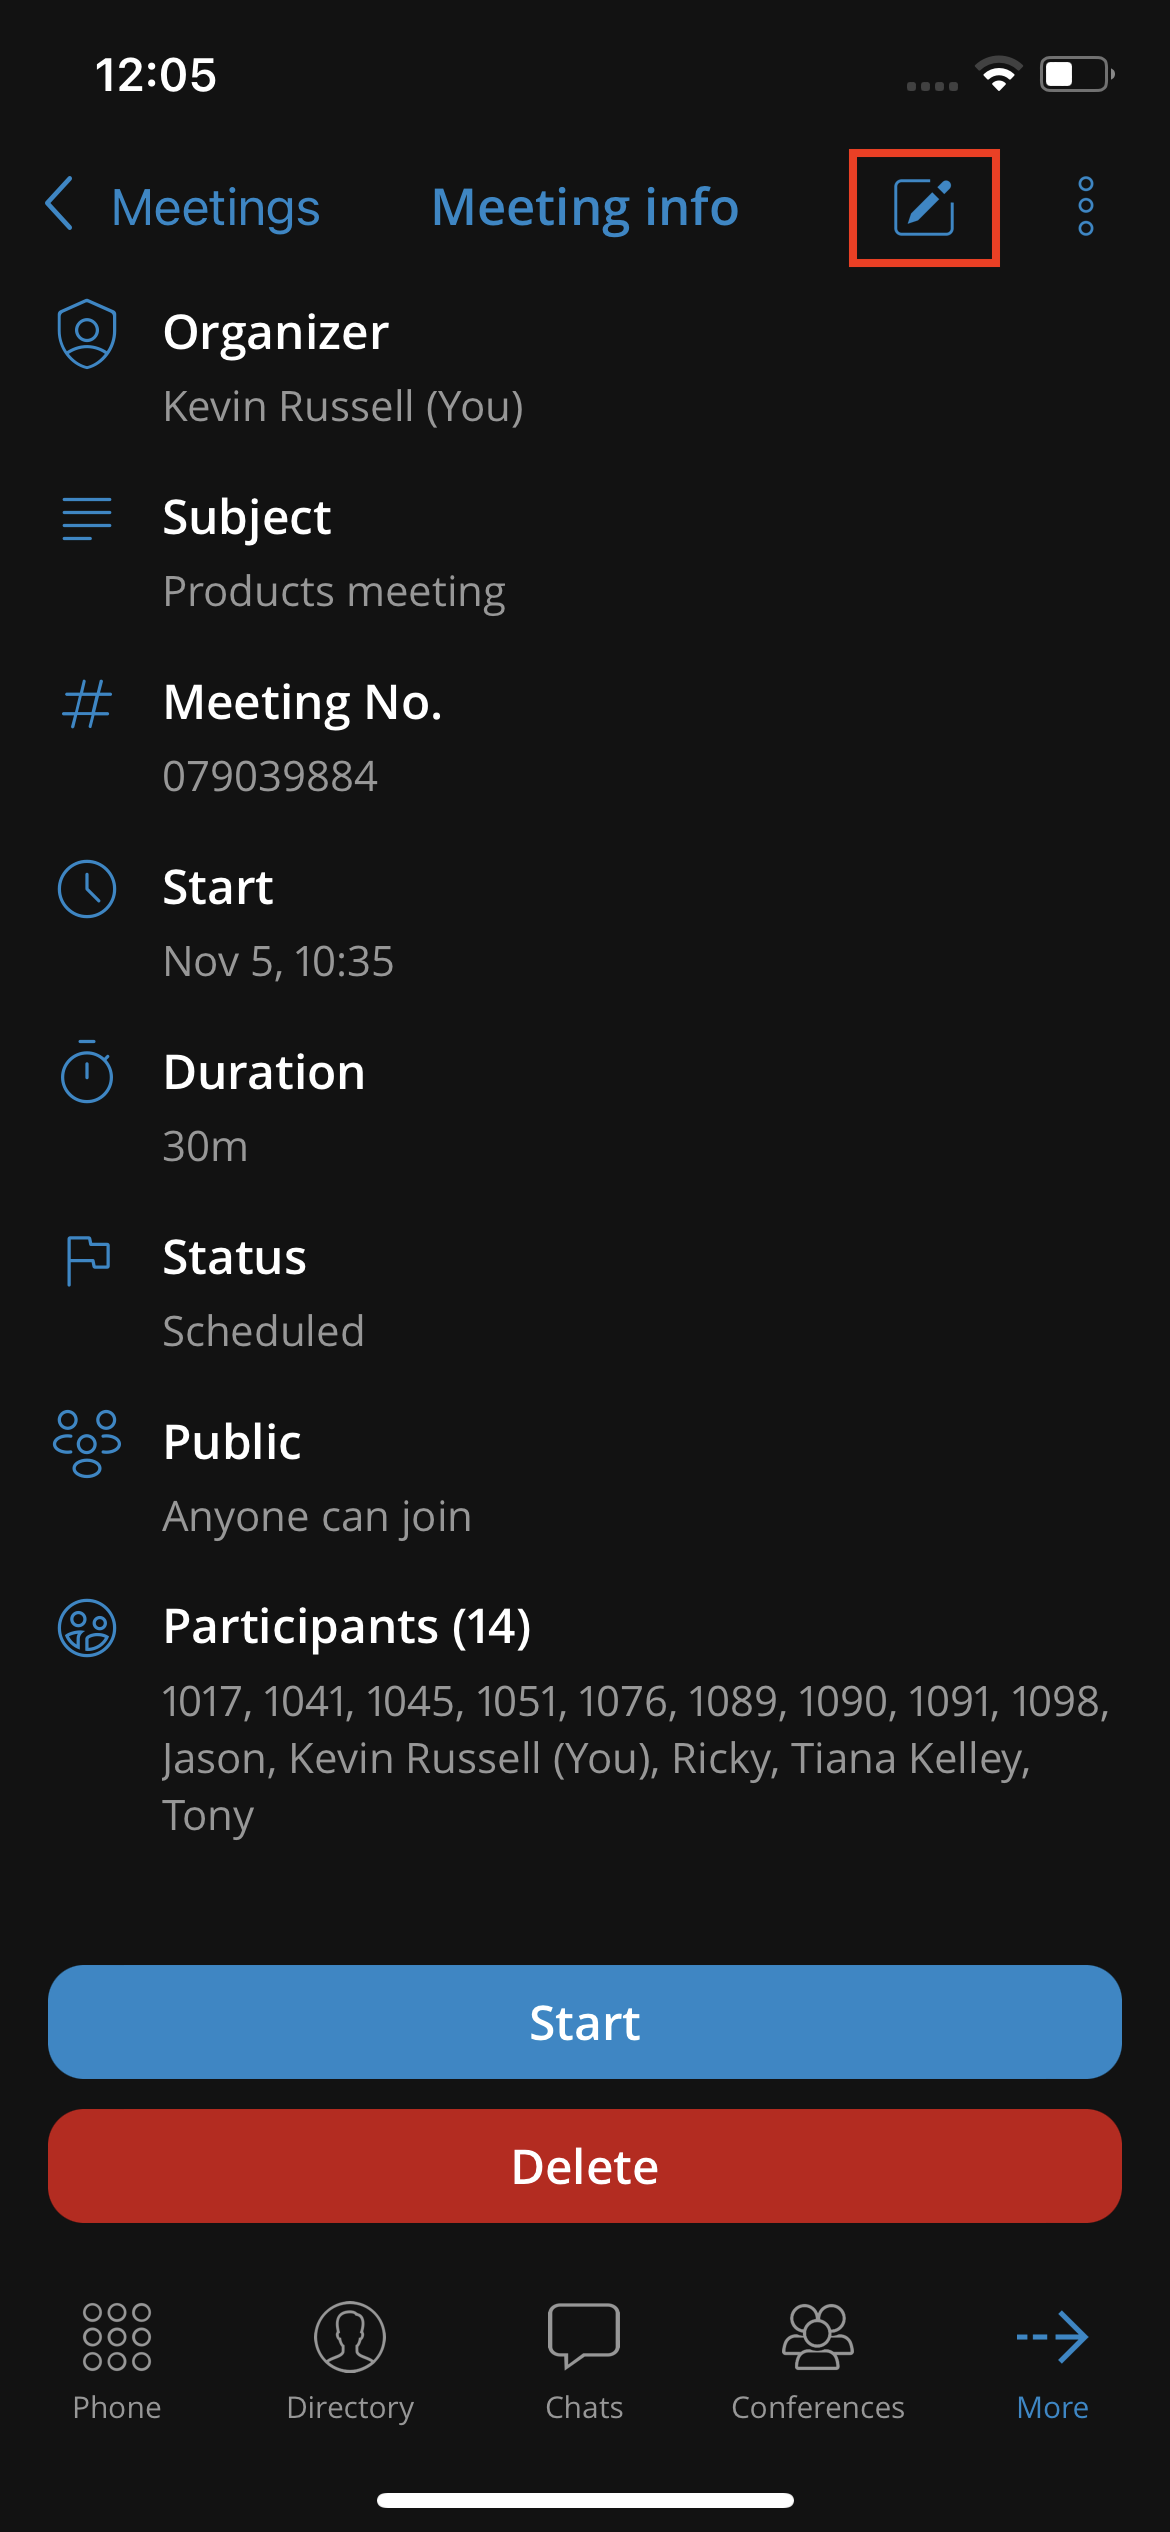
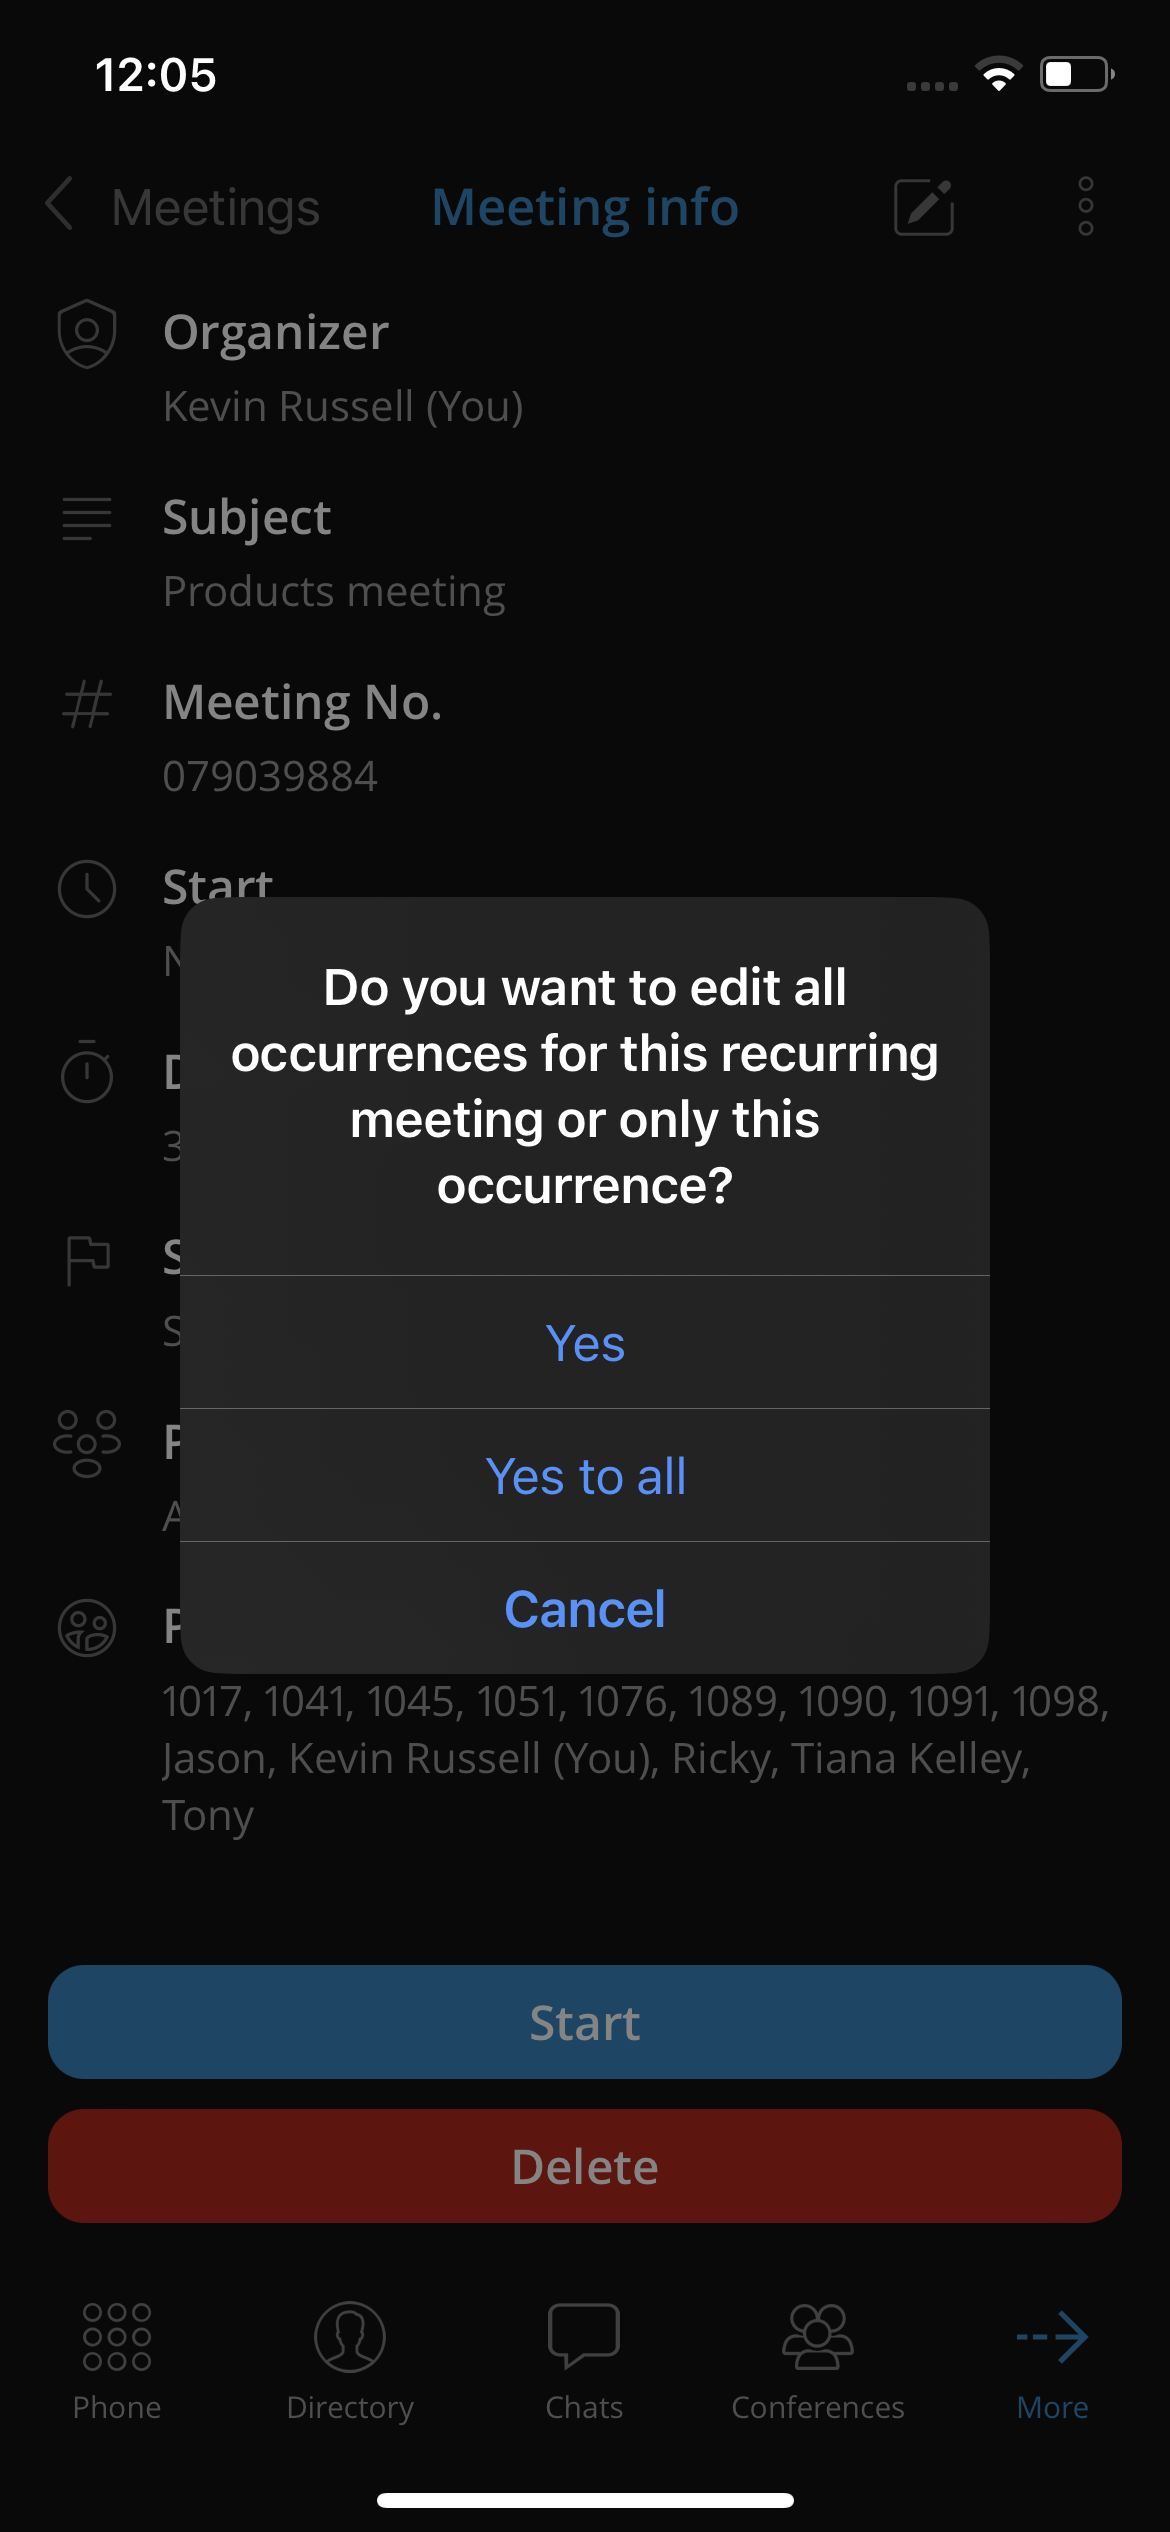
In case the selected meeting is recurring, the user will be presented with a confirmation message: “Do you want to edit all occurrences for this recurring meeting or only this occurrence?” with three options provided:
• Cancel (to cancel editing)
• Yes (to edit only a selected instance of a meeting)
• Yes to all (to edit all of the occurrences of the selected meeting)
For meetings that are scheduled, or in progress, there is an option to copy the meeting invitation in the clipboard by clicking on additional options at the top bar.
Based on the different scenarios, the user will have different buttons at the bottom of the screen:
• If a meeting is scheduled and the user is the organizer:
◦ Start (starts a scheduled meeting)
◦ Delete (deletes a scheduled meeting)
• If a meeting is in progress and the user is the organizer:
◦ Join (joins the ongoing meeting)
◦ End (ends the ongoing meeting)
• If a meeting is in progress and the user is not the organizer:
◦ Join (joins the ongoing meeting)
• If a meeting is finished and the user is the organizer:
◦ Clone (opens a “schedule meeting” window with name, description, and participants pre- filled)
◦ Delete (deletes the ended meeting)
• If a meeting is finished and the user is not the organizer, no options will be available.
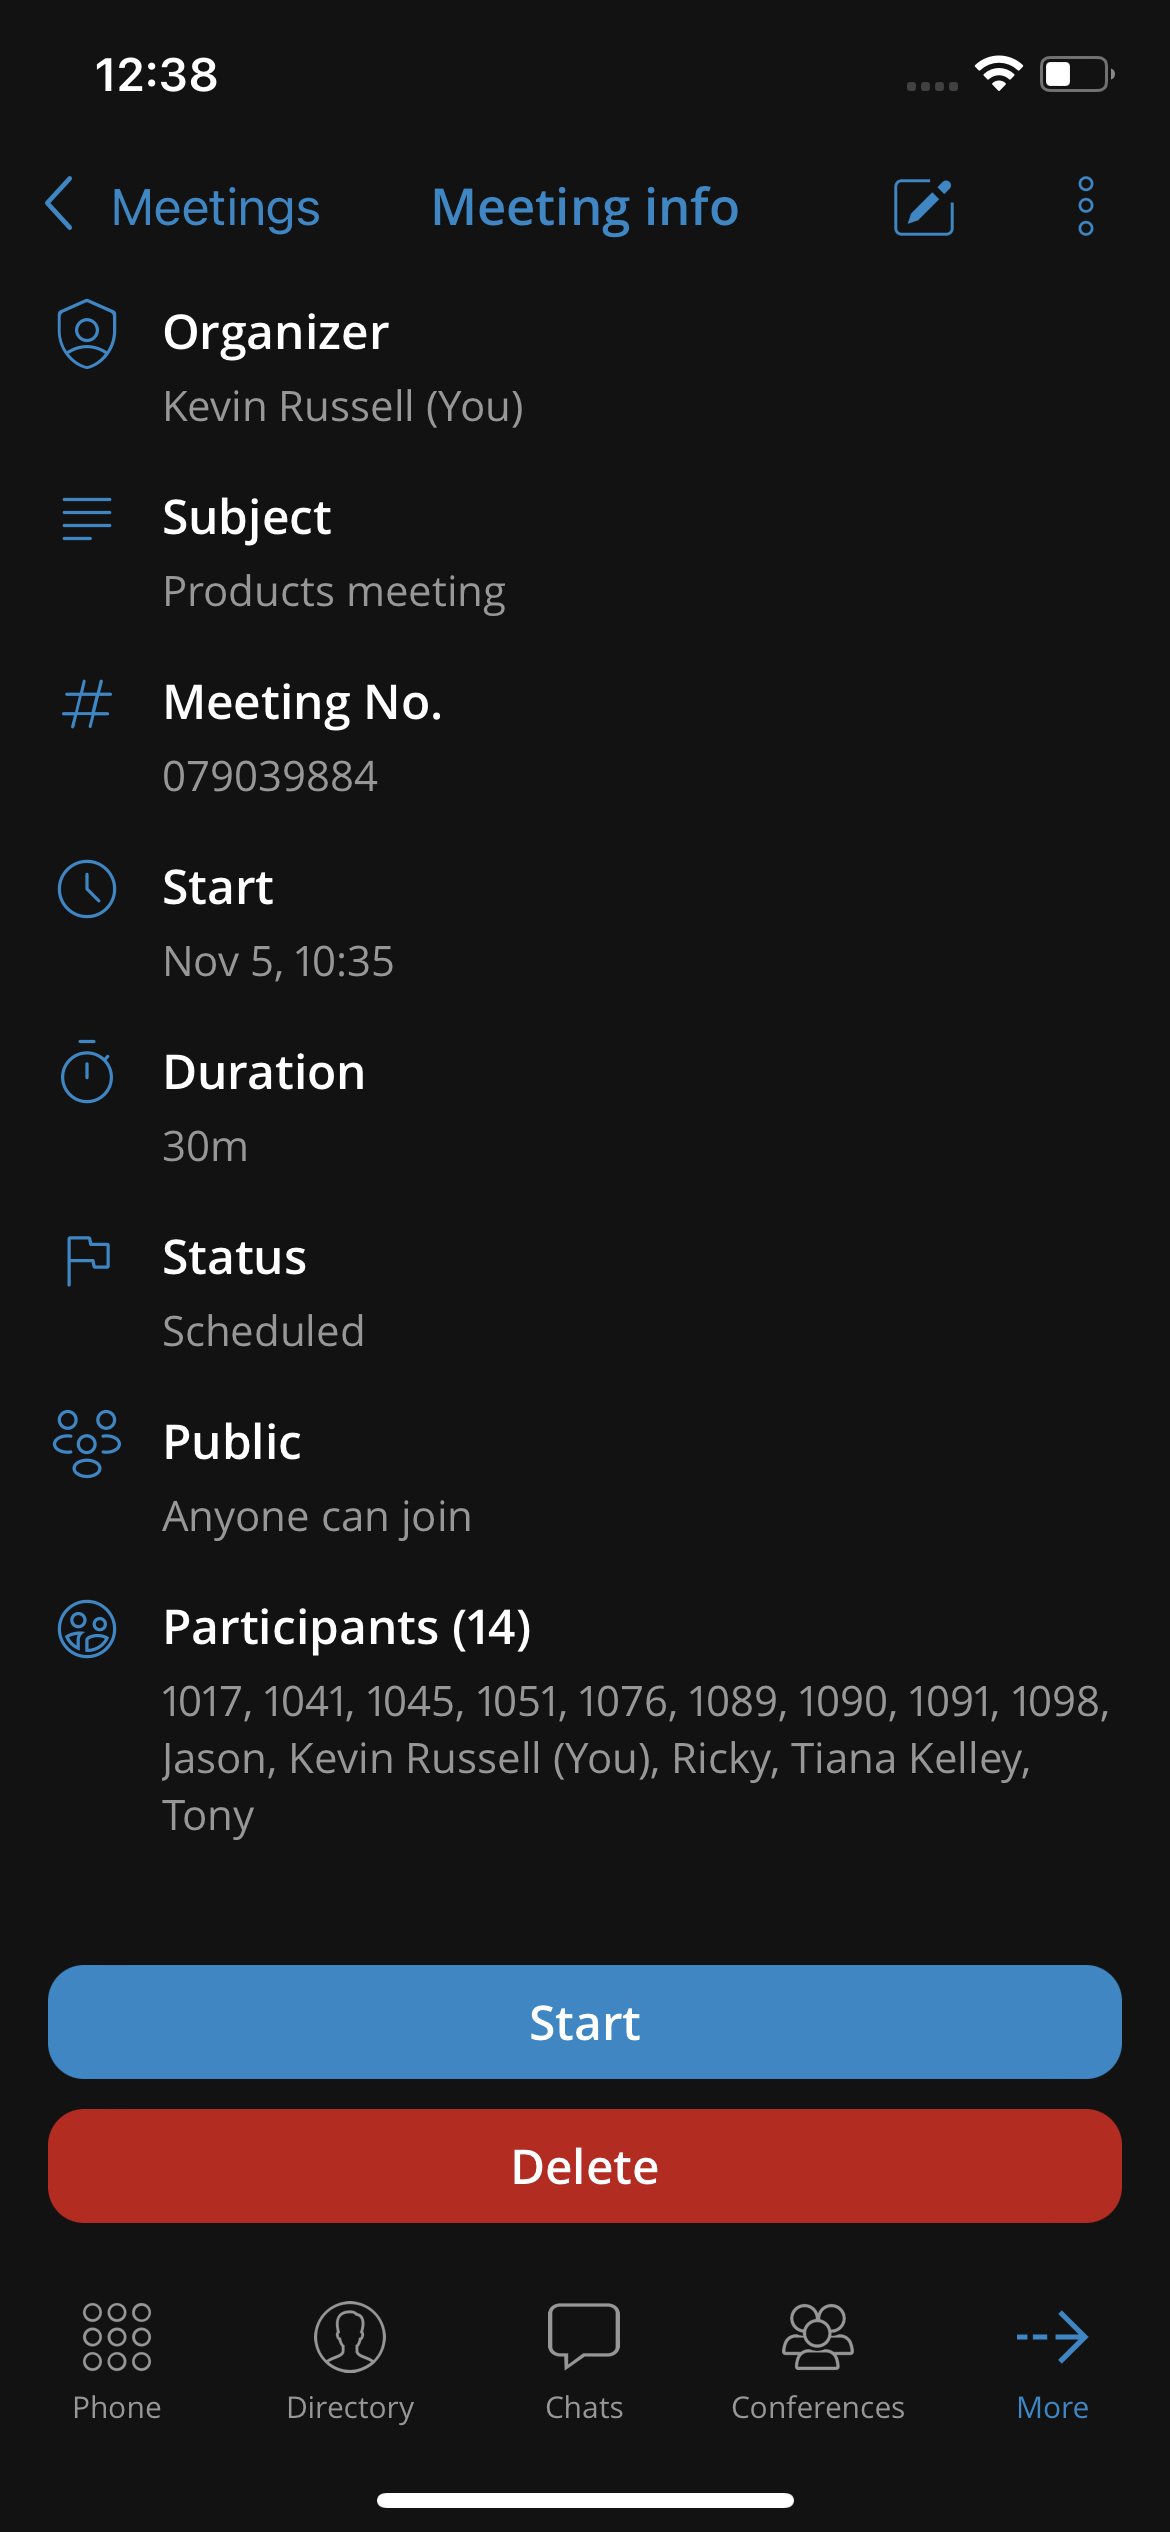
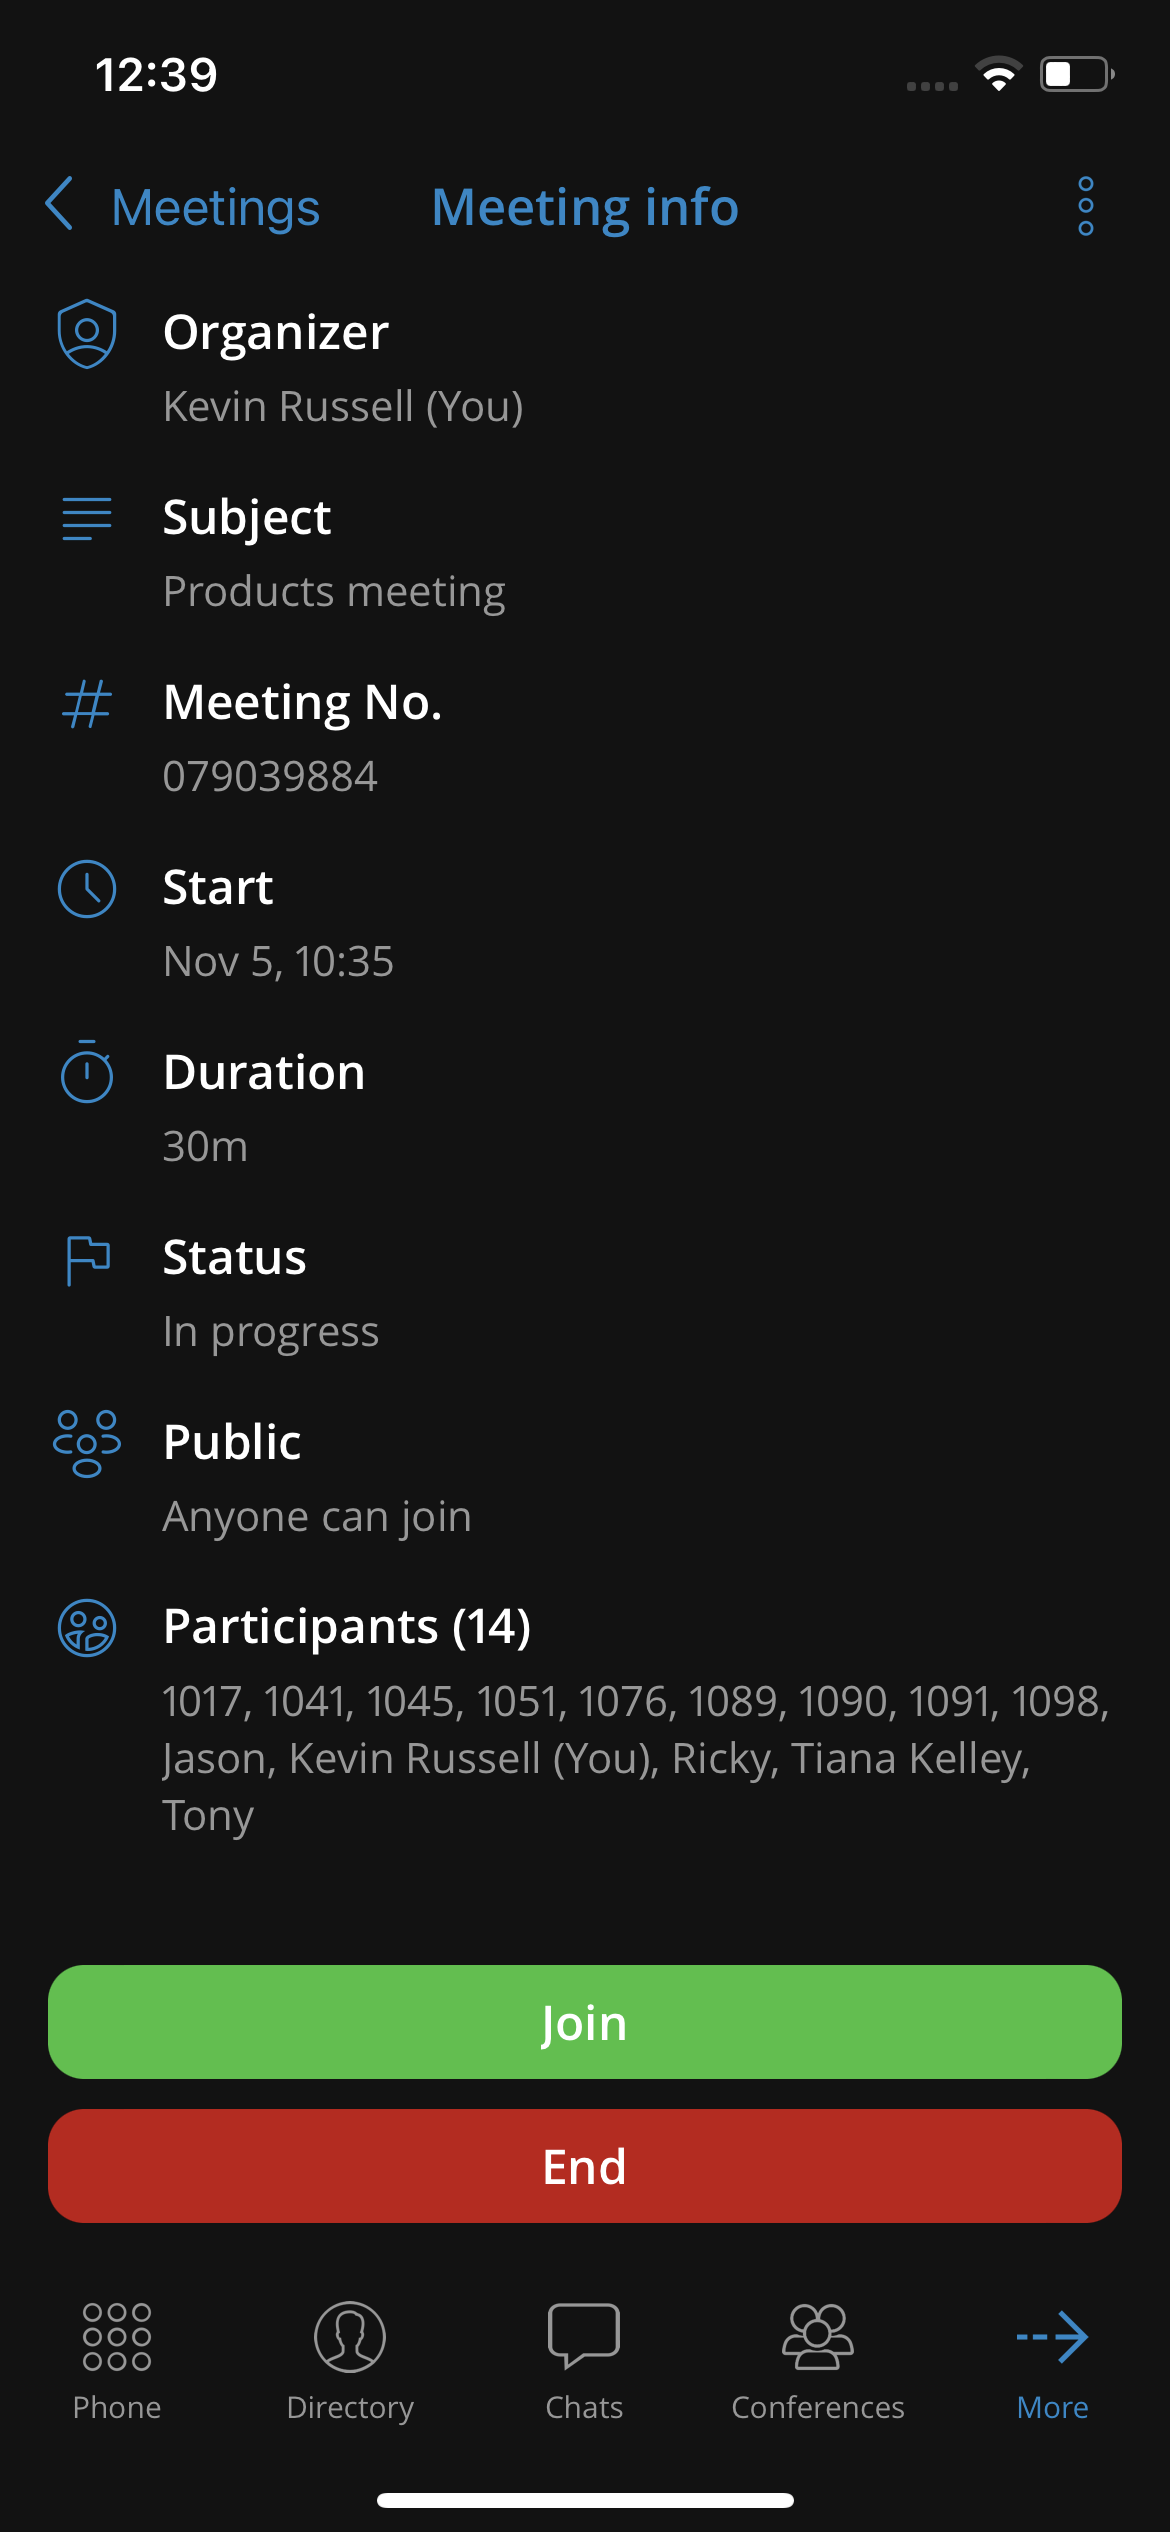
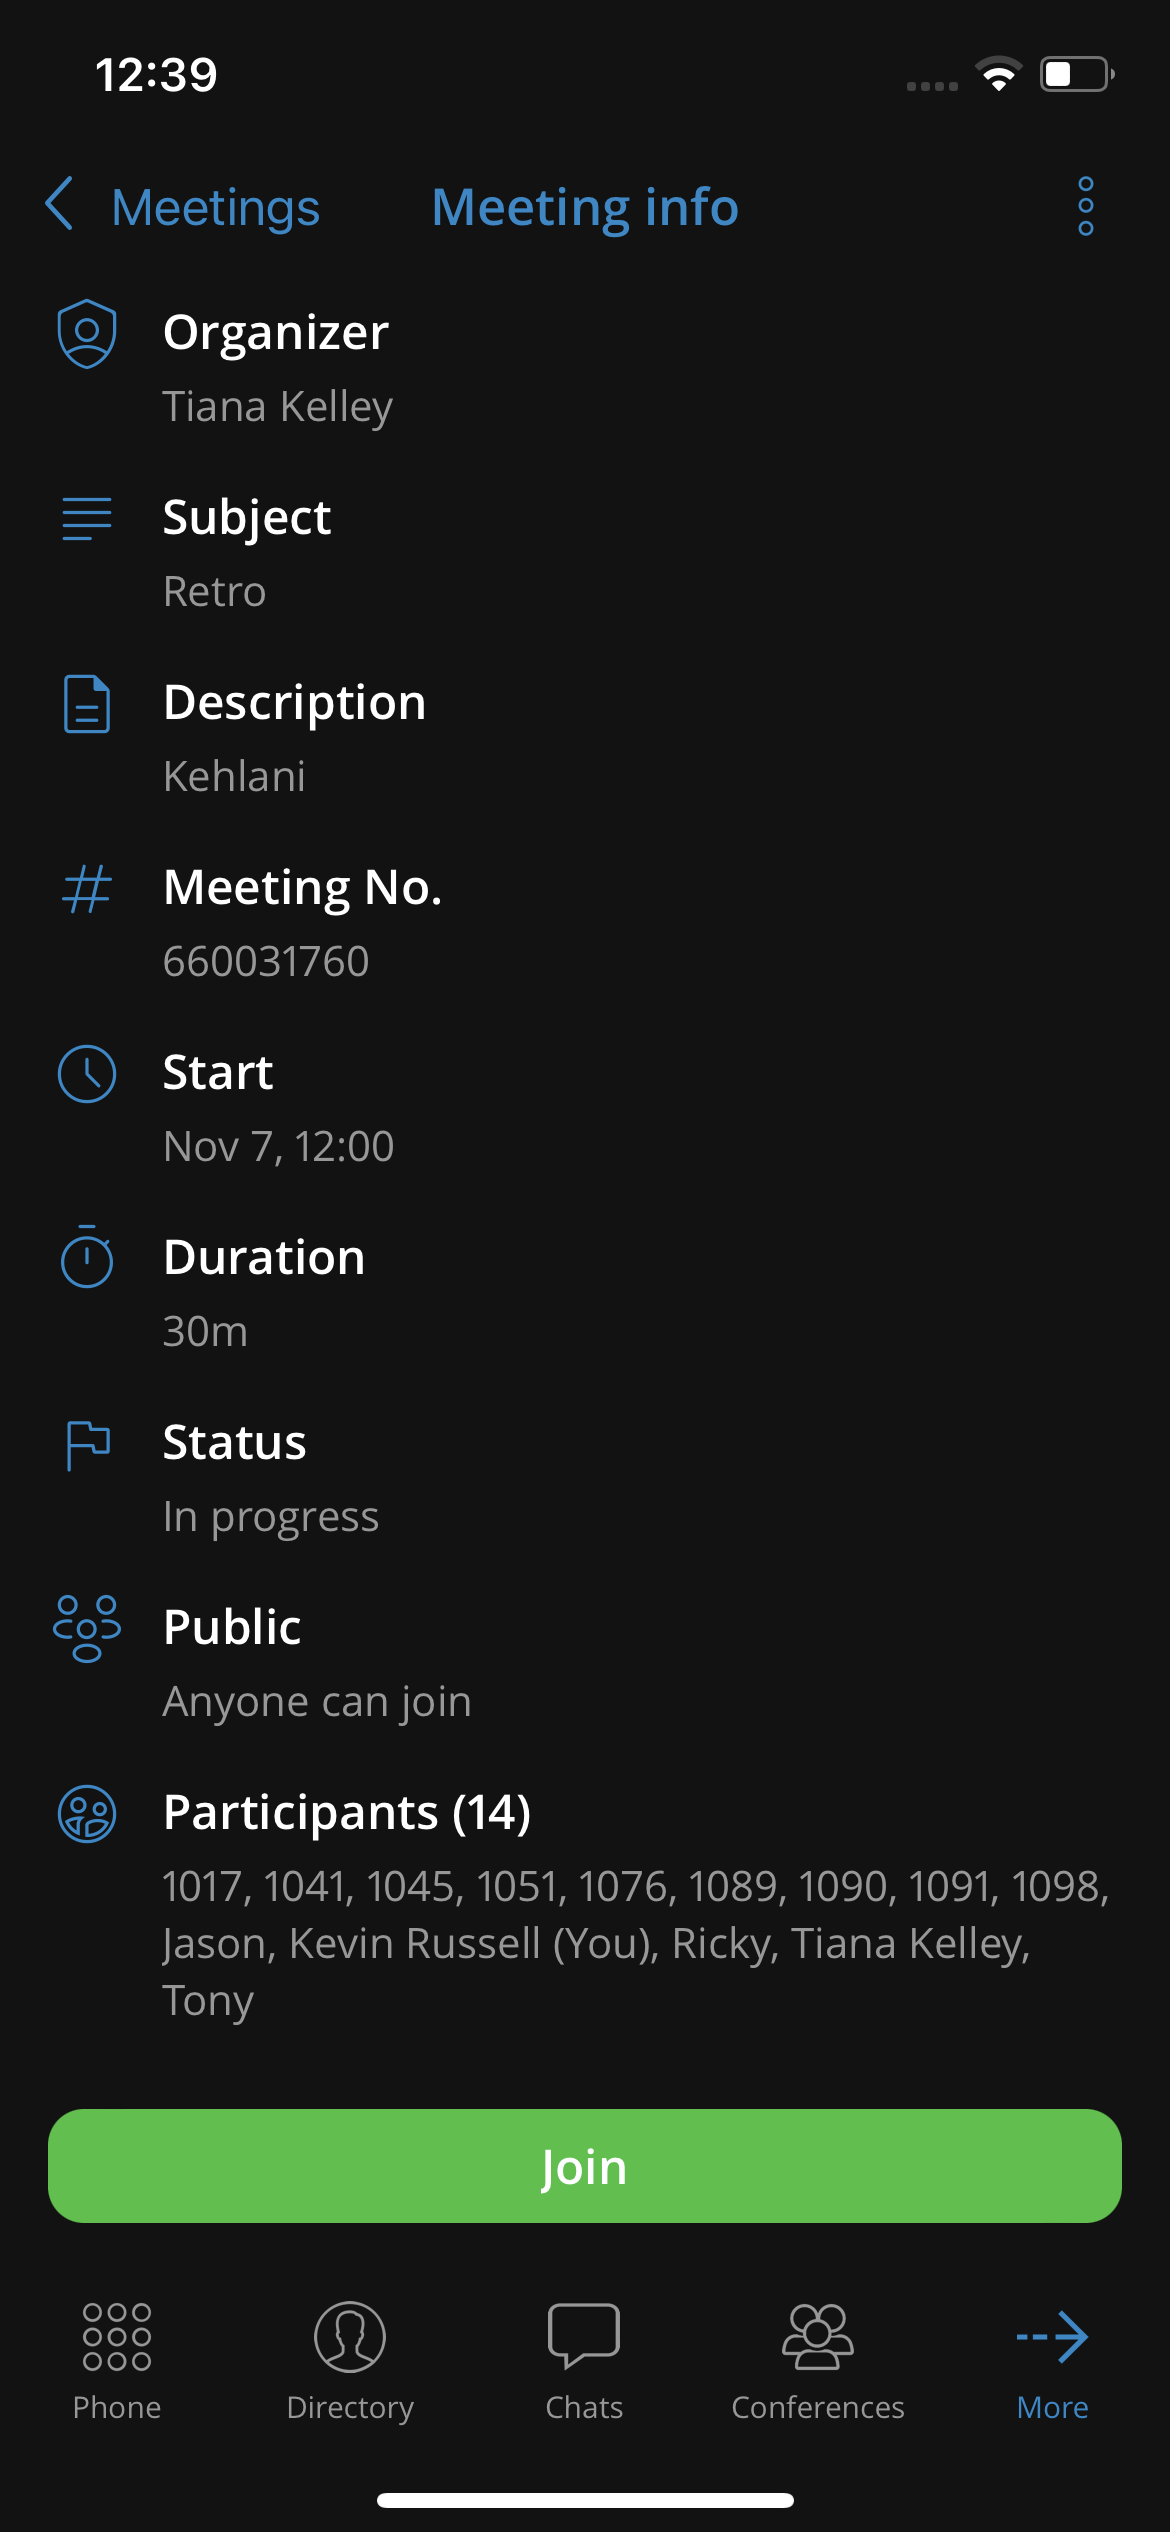
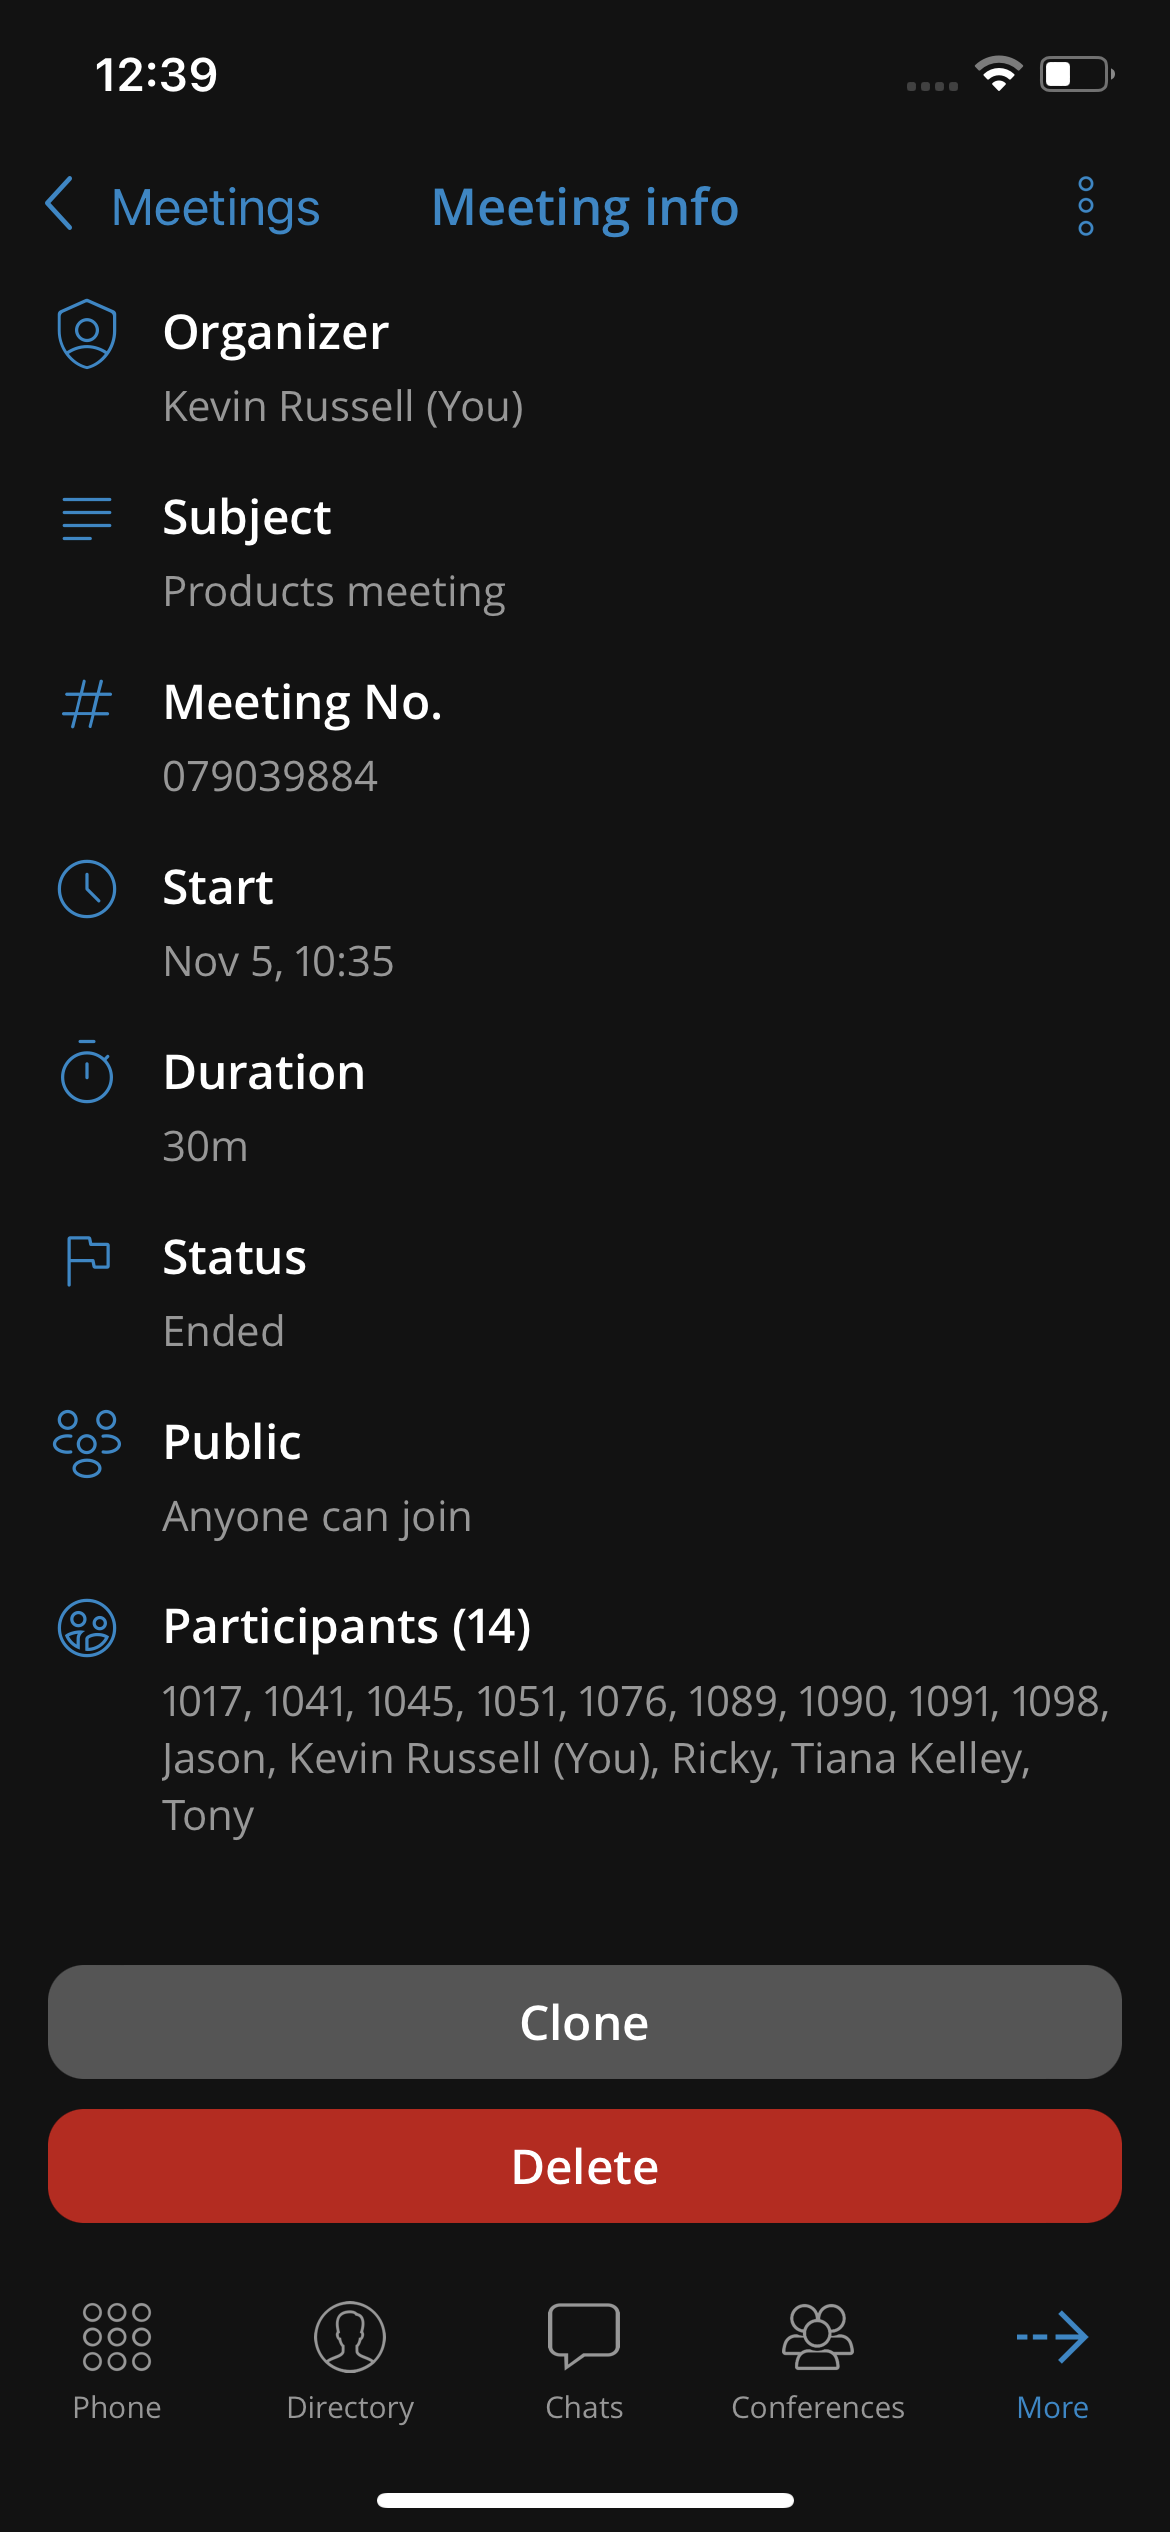
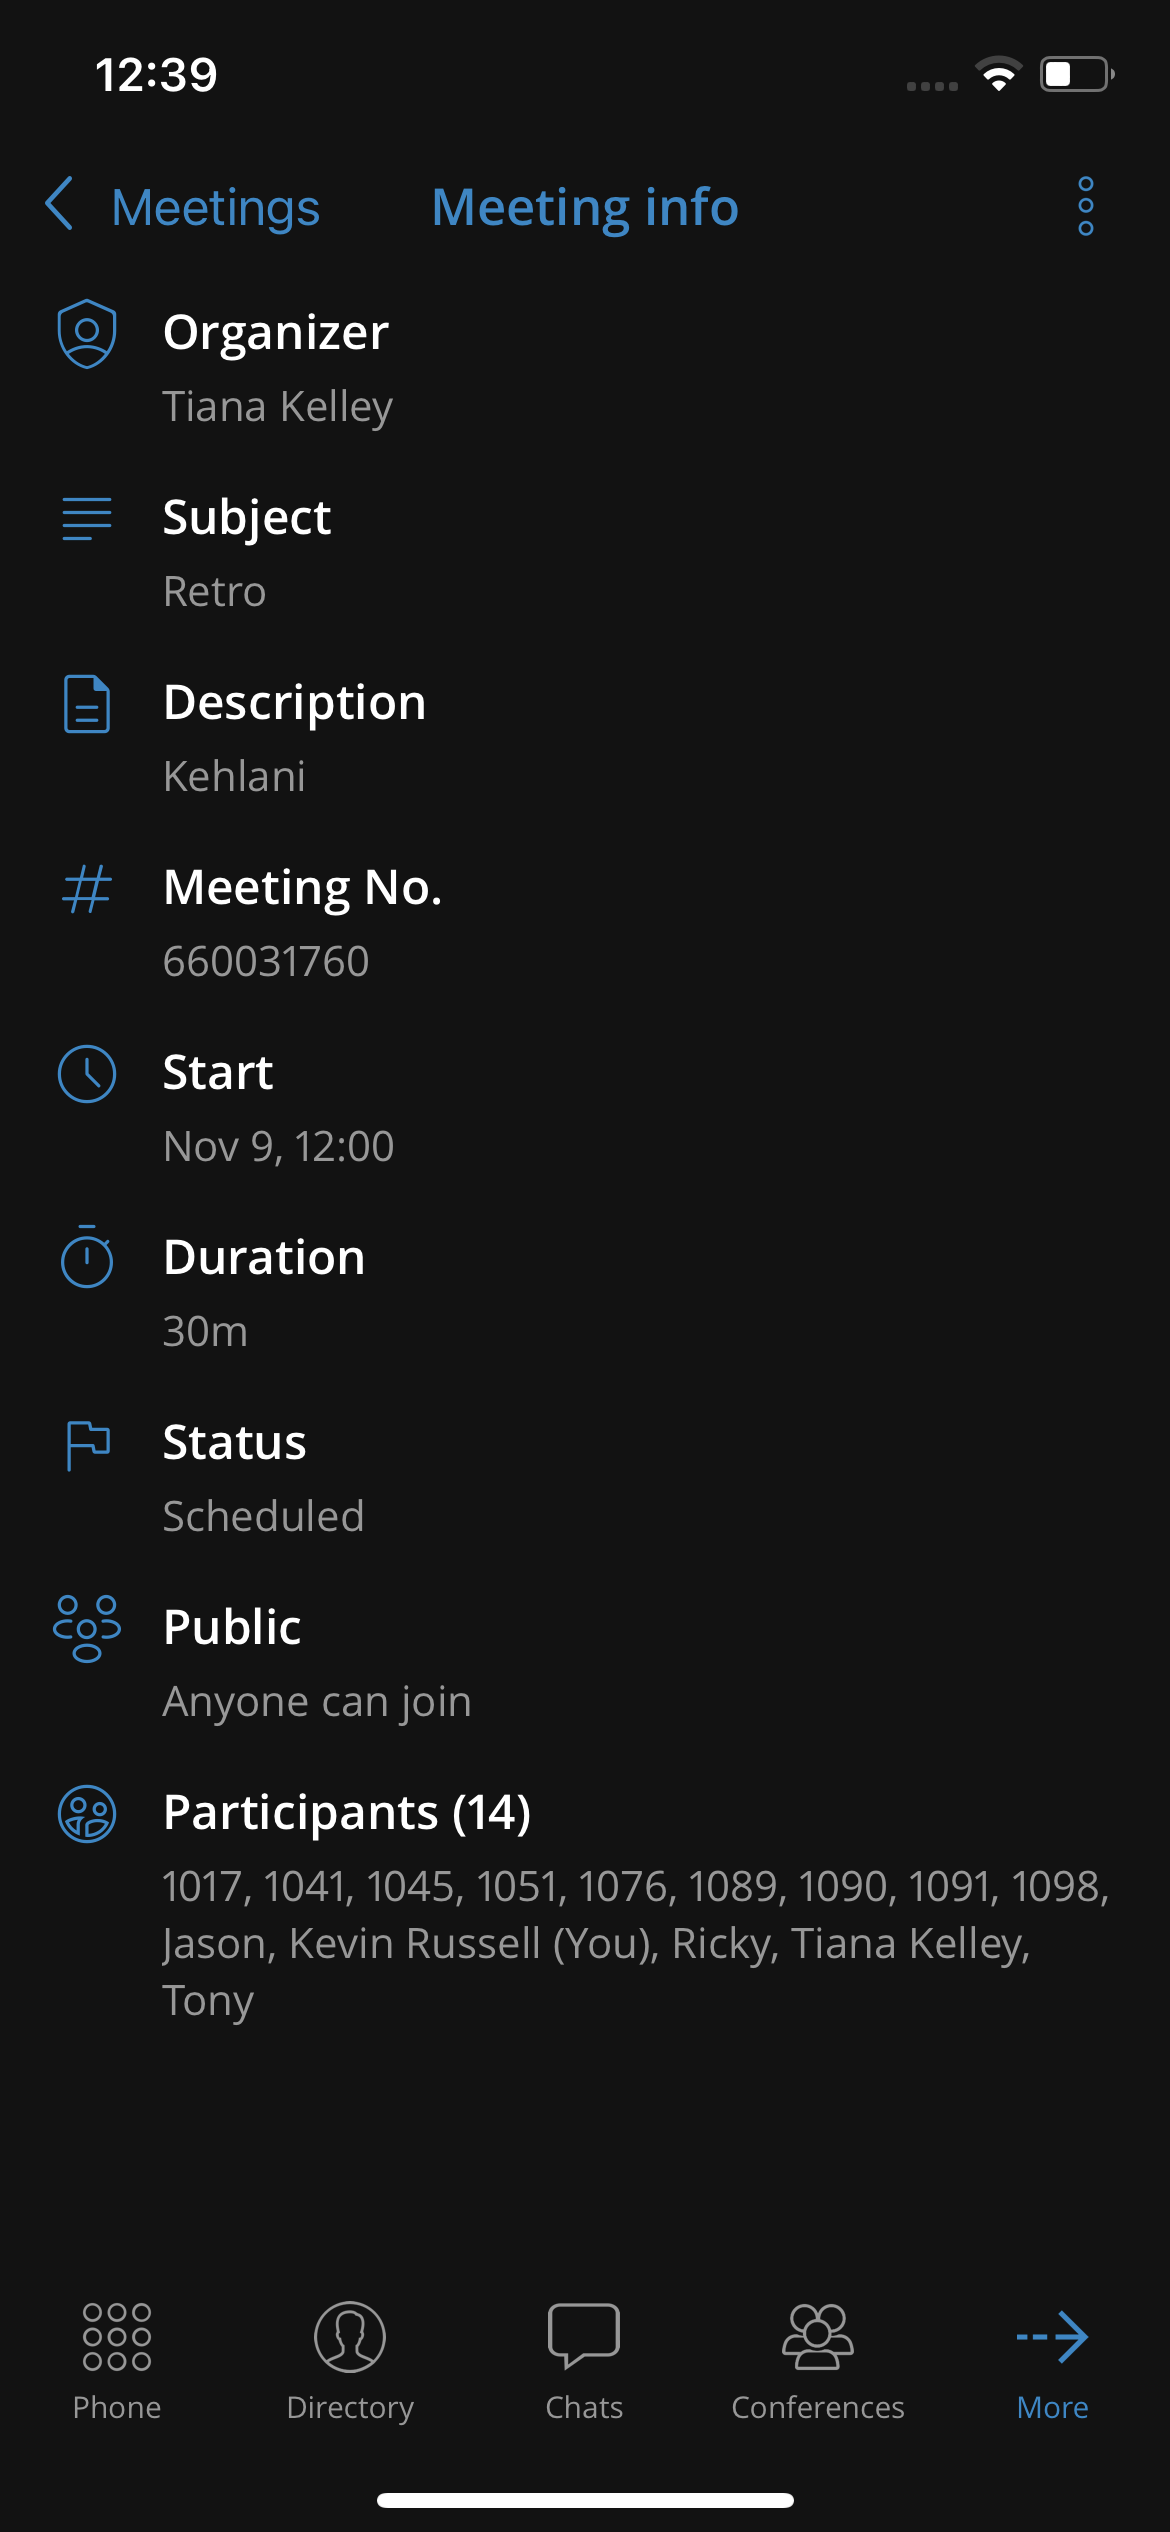
Meeting dashboard panel
The user has the ability to start/join/schedule a meeting from the dashboard. In the quick actions panel, there are 3 options available:
• Join Meeting
• Instant Meeting
• Schedule Meeting
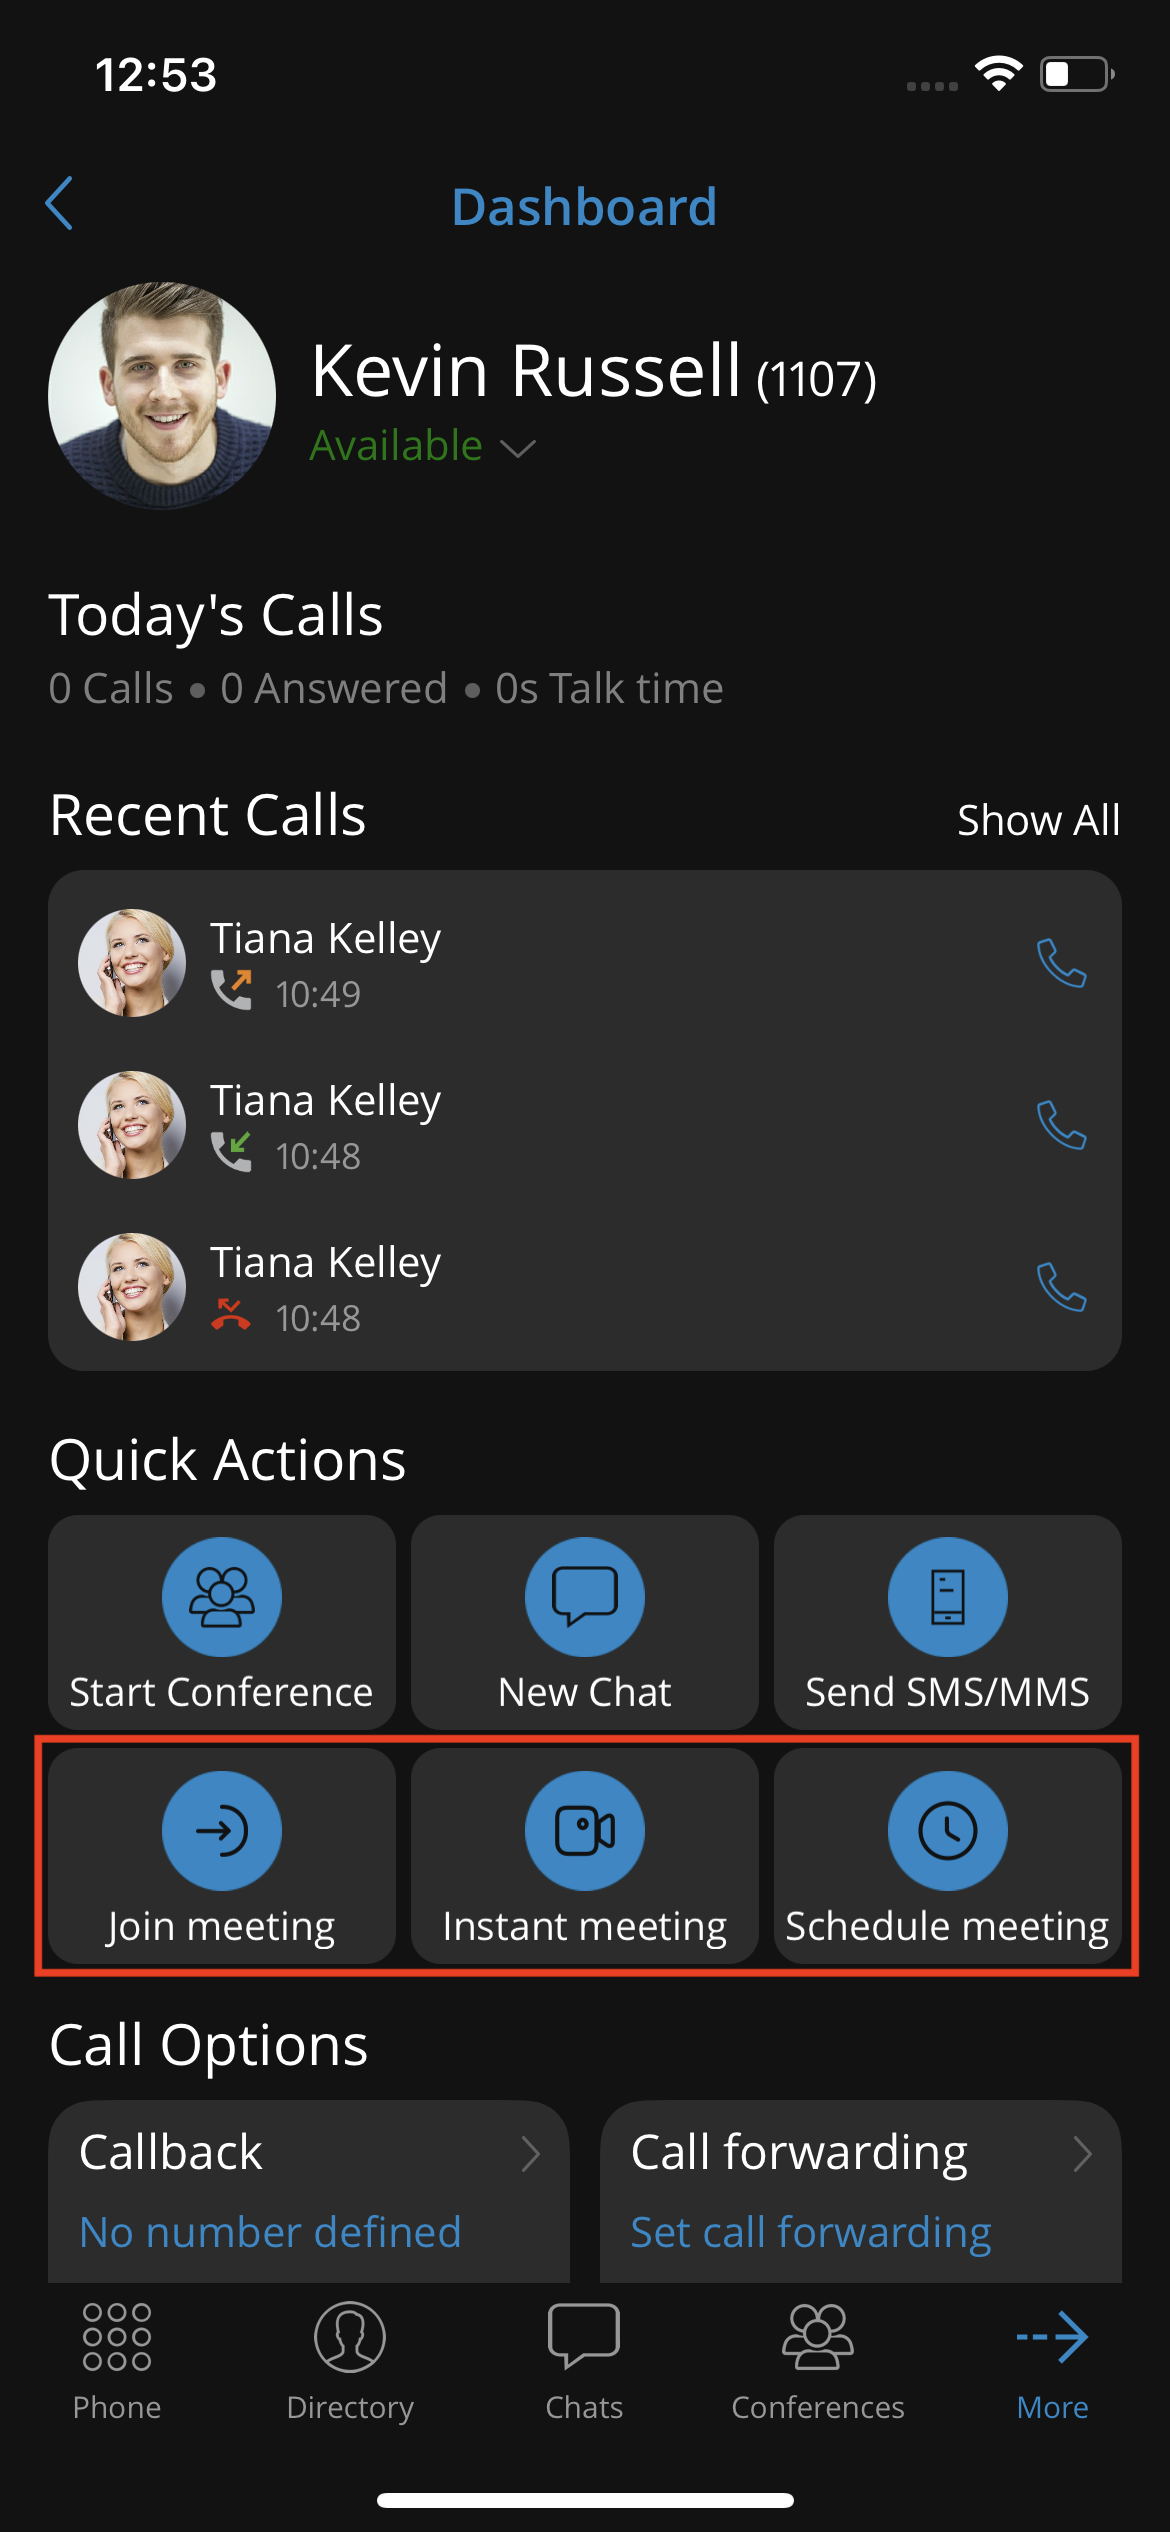
Meeting settings
The user can change meeting integration options by pressing on the meeting screen in the settings. It is possible to enable/disable sending of the meeting link as a chat message if a meeting is started from the chat window.
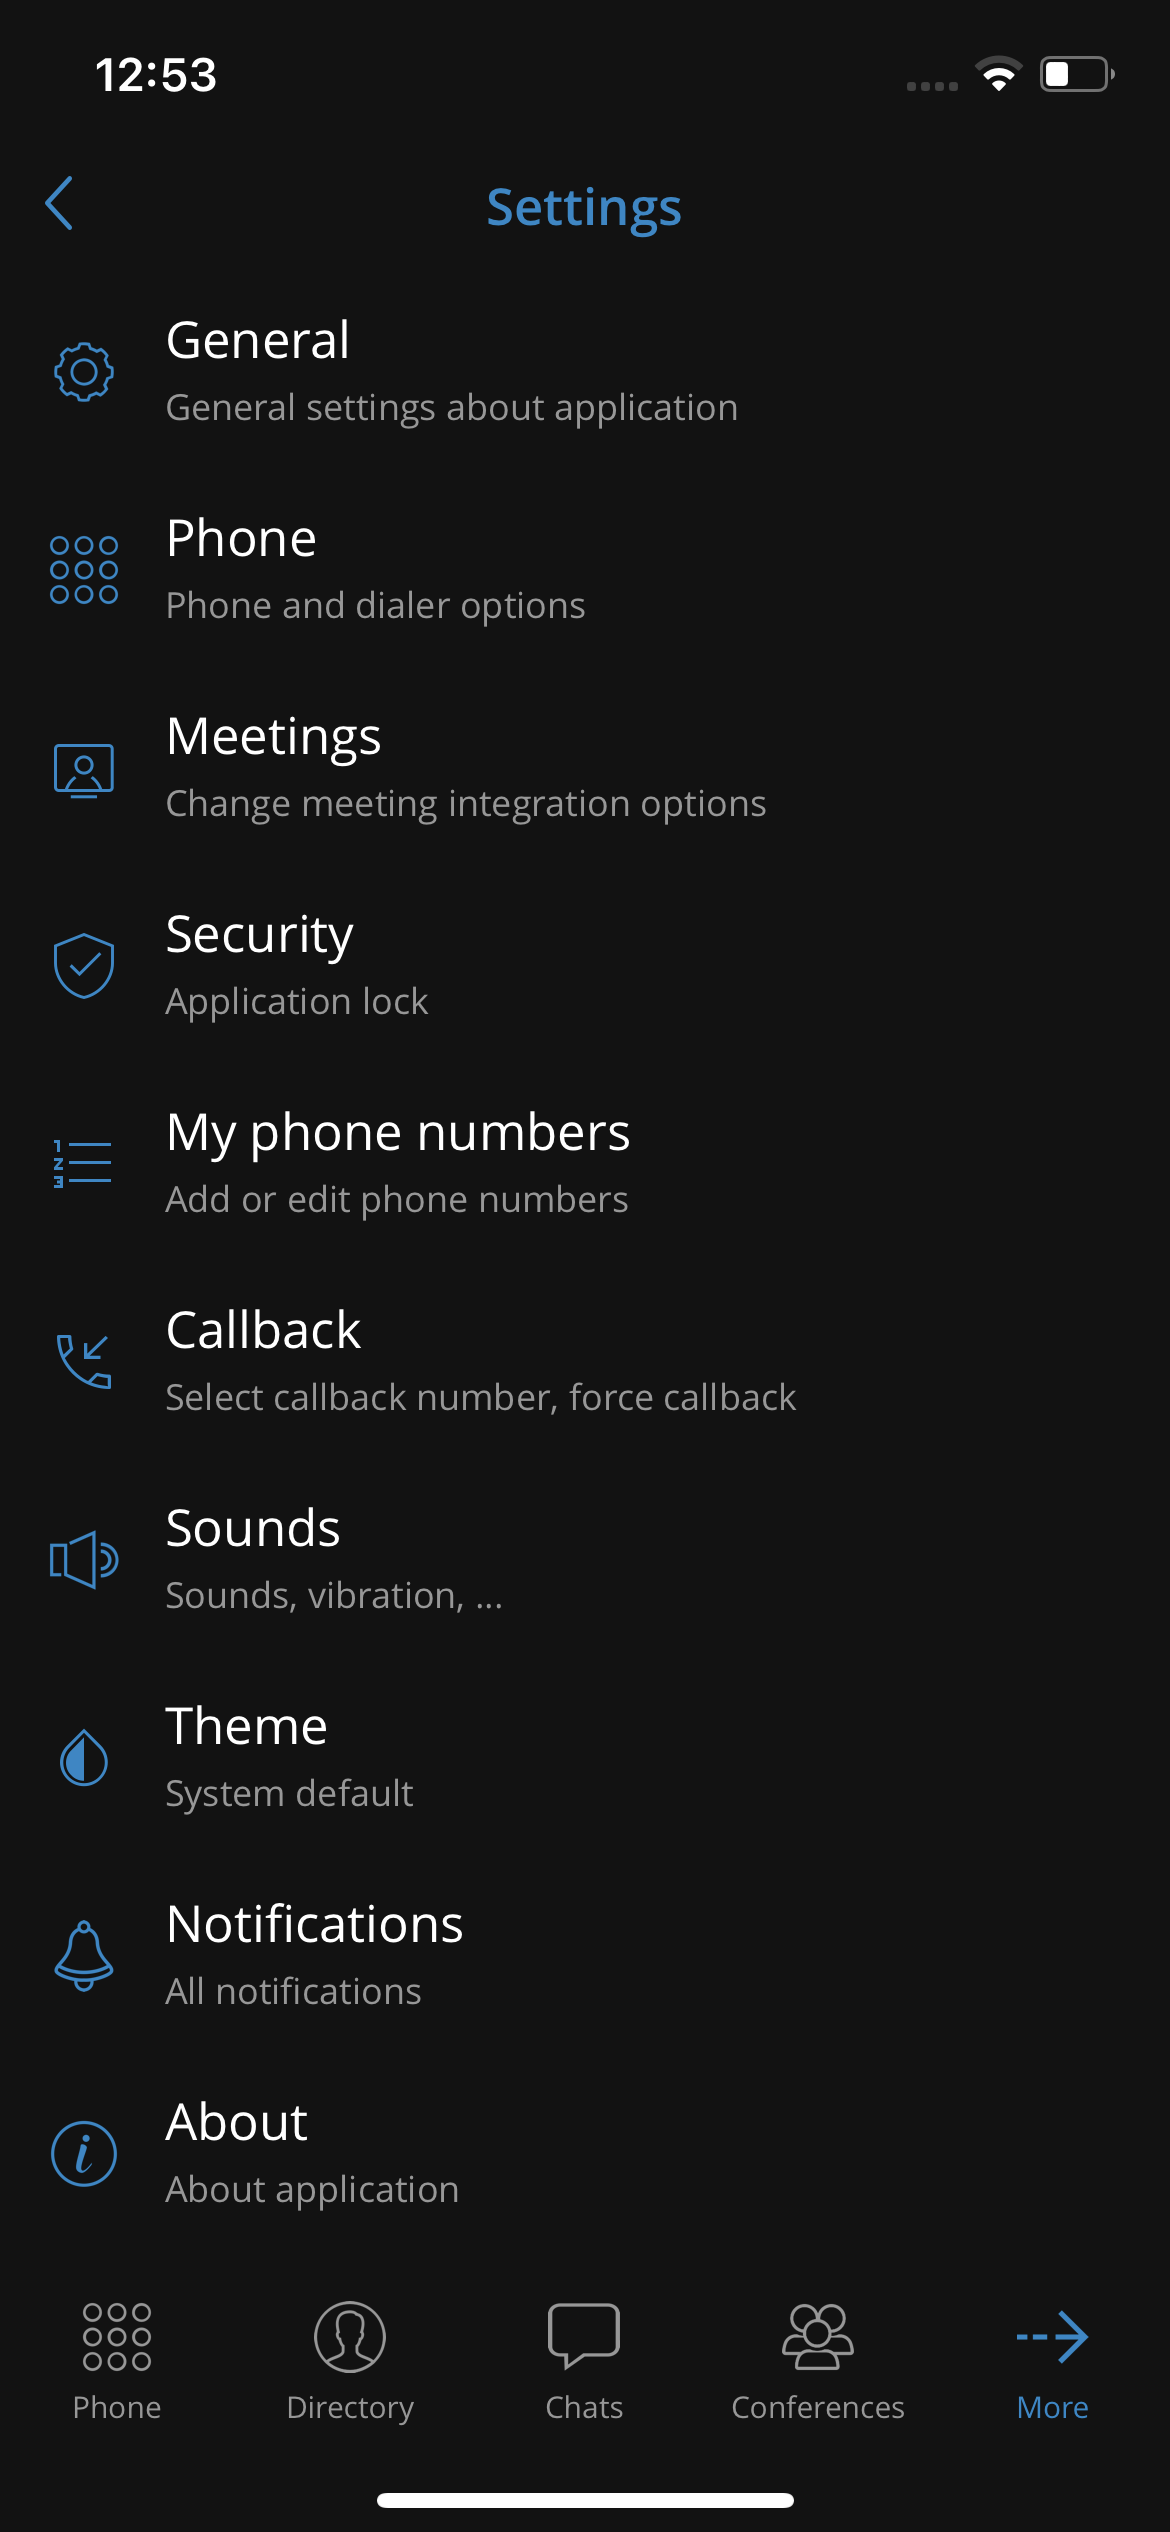
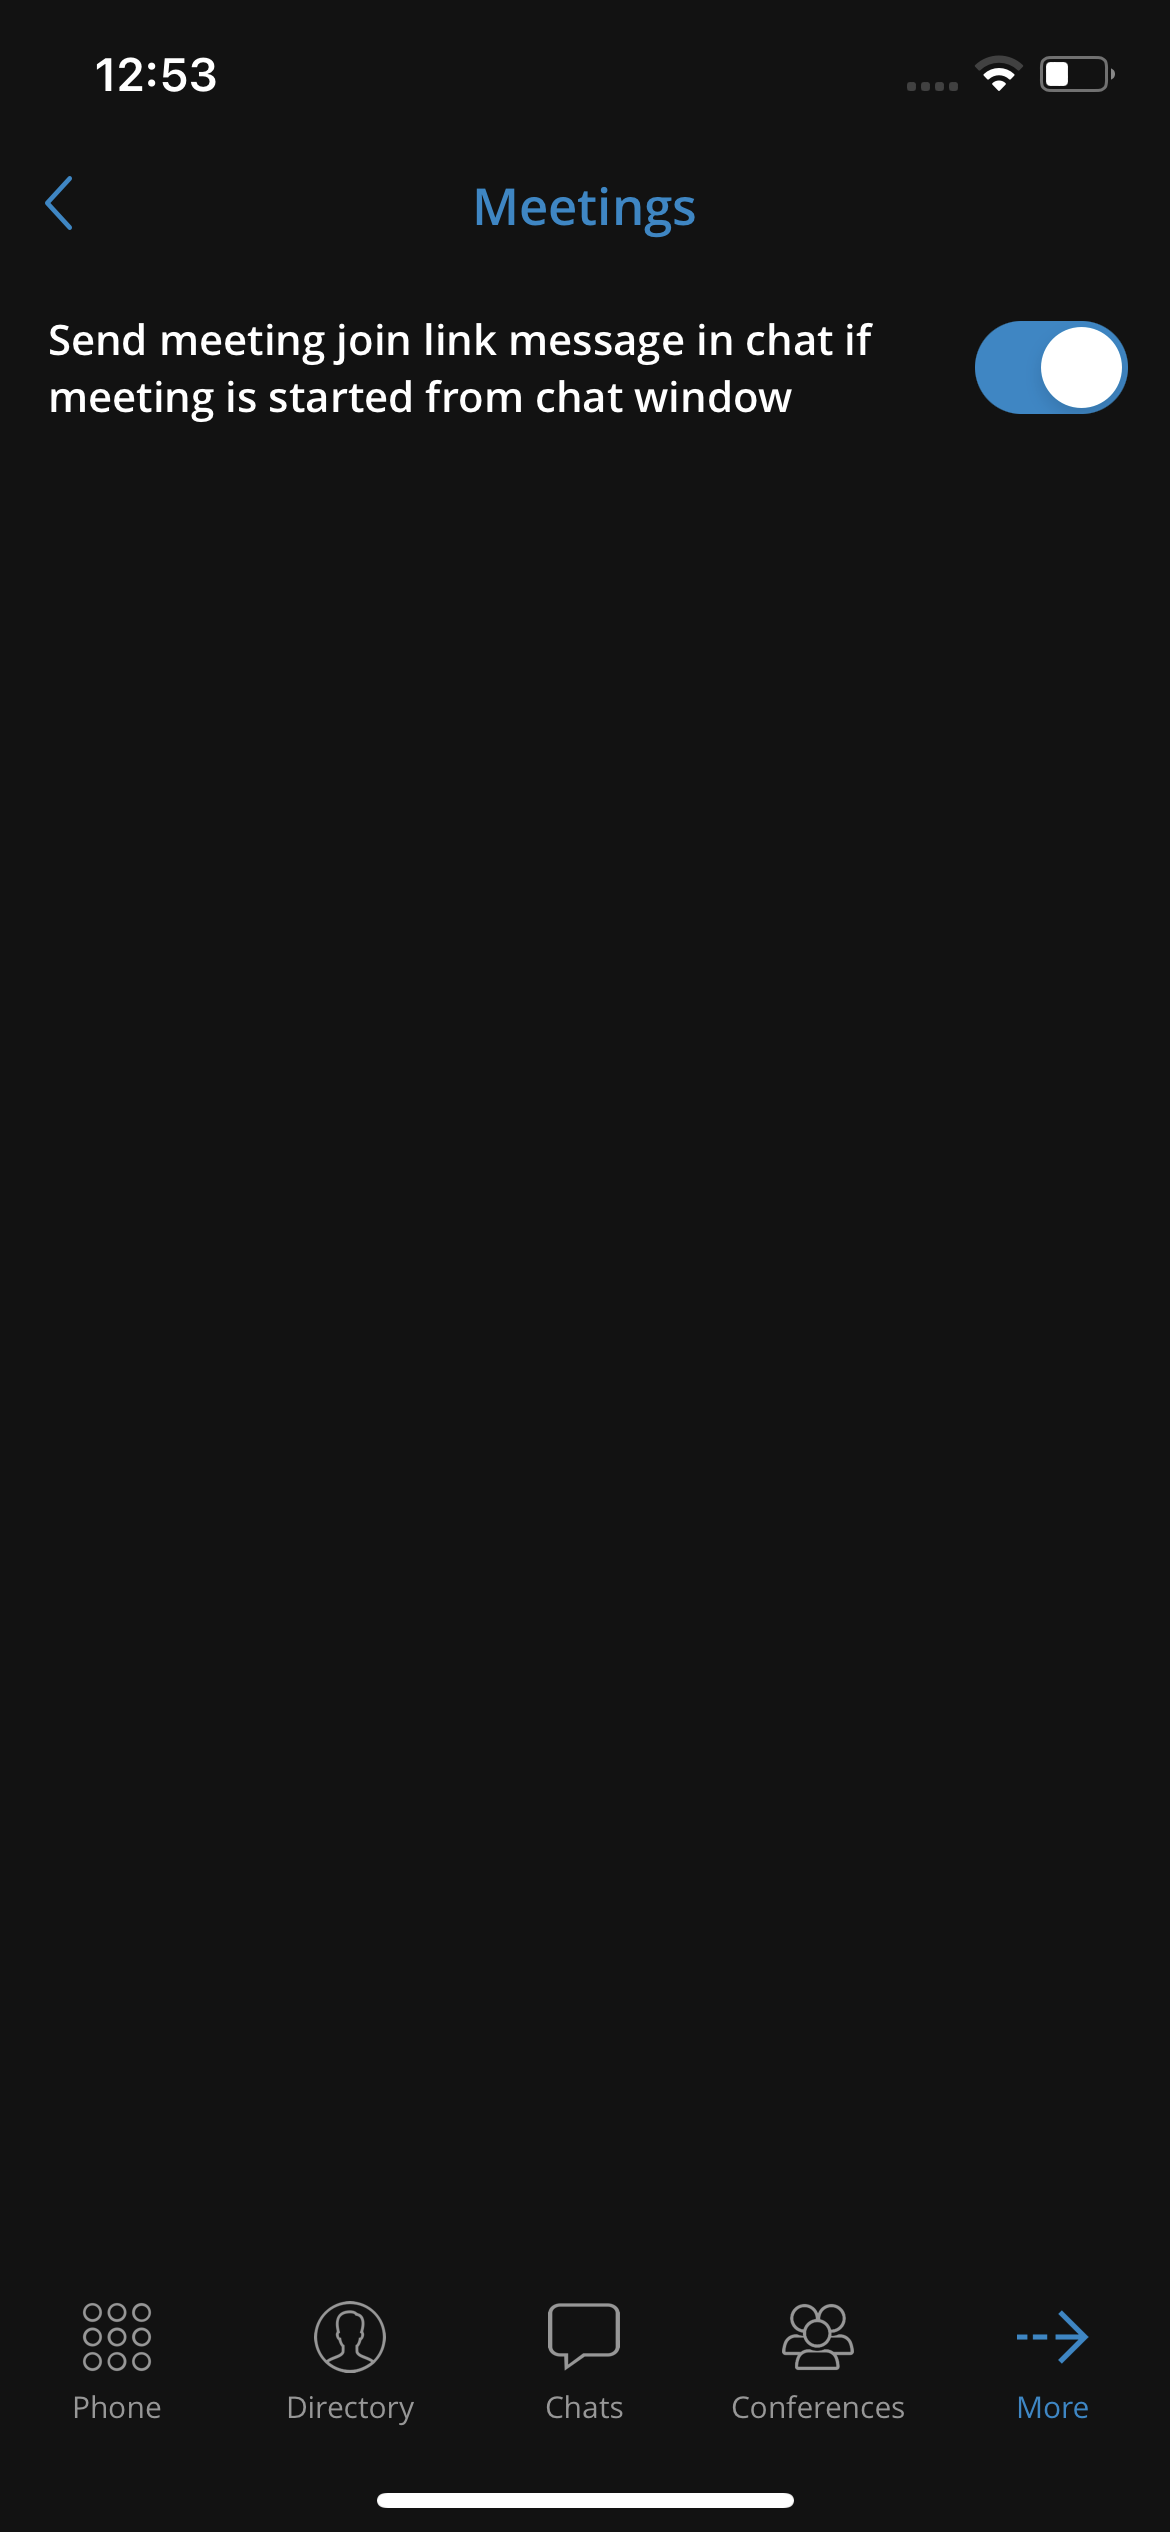
Chat
Chat is one of the main features of gloCOM GO 6. Chat conversations are synced between all of the gloCOM apps.
Users can start a chat in two ways:
-
Via chats item in the bottom menu and pressing on a + icon
(one-to-one or group chat) -
Via user information display screen (one-to-one chat with the user
you are previewing)
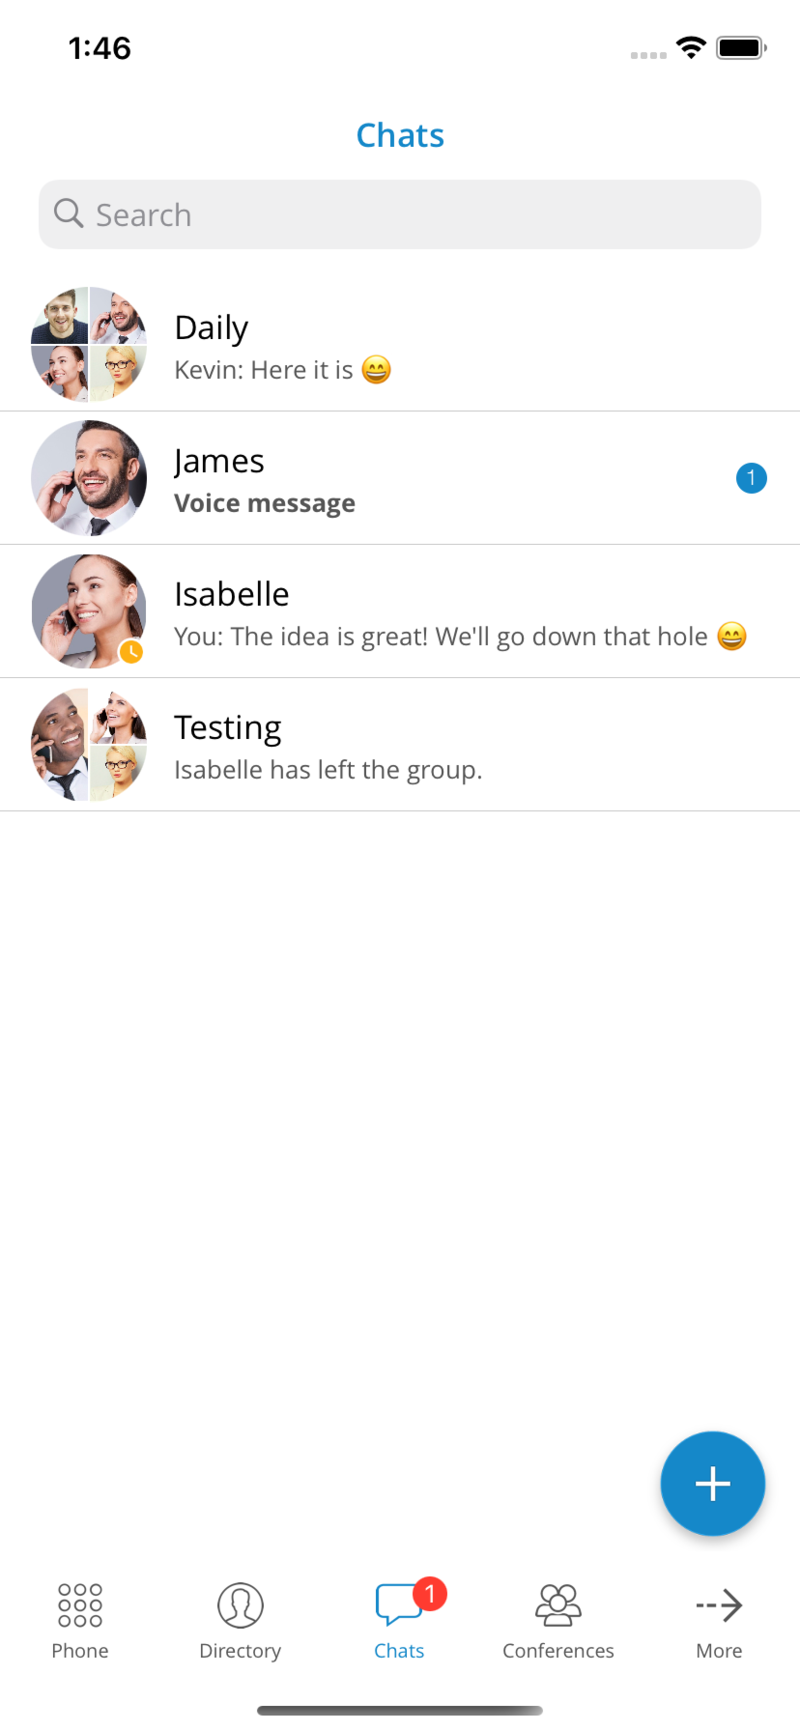
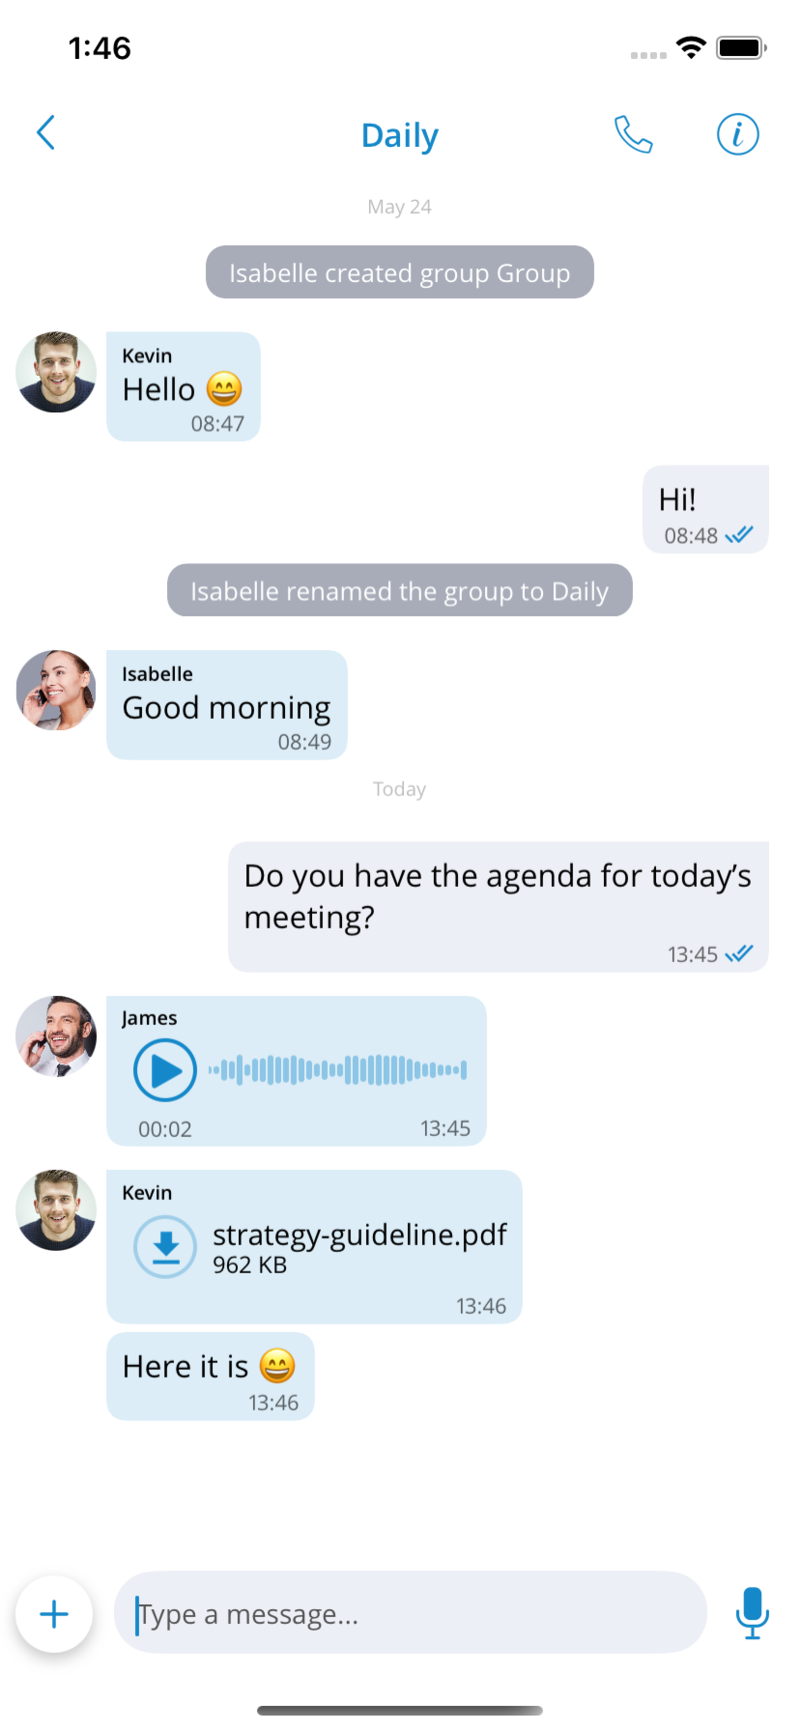
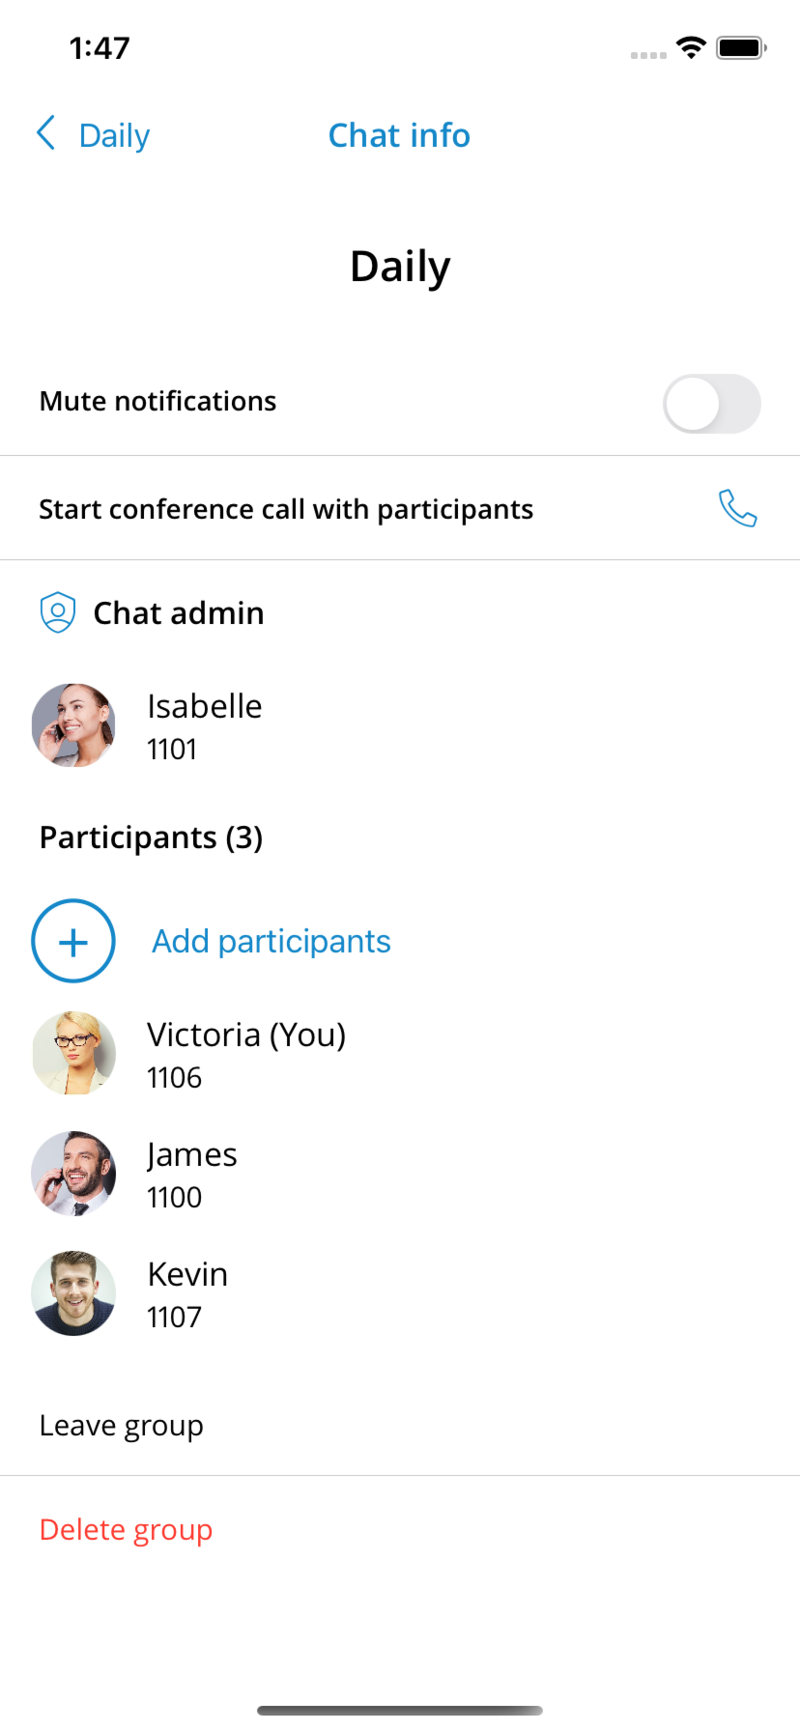
All chat sessions can be found in the Chats icon in the bottom menu with a number of unread messages for that chat session and the last message for that chat session. Users can also search chats by pressing a search bar in the Chats feature. Chats can be searched by group or user name. If a user does not have a chat session with another user, that other user will be displayed when the user searches for it in the Chats tab of the app. When the user presses on a user that he does not have the chat session, the chat session will be created, and the user can start chatting.
The total number of unread messages is always displayed on the bottom icon of the Chats section. This number reduces as the user reads the unseen messages.
When chat messages or sessions are syncing from the server, the app will display a yellow indicator below the navigation bar. The app is fully synced with the server when the loading indicator disappears. If the user logs in with a mobile app for the first time, it could take seconds to sync the recent chat sessions.
If chat is not enabled for a user on the PBXware, then the app will not display the Chats module for that user.
Banner message to indicate that the chat server is down.
A yellow banner will be shown on the chat list and chat screens to indicate that the server is unavailable.
One-to-one chats
One-to-one chats are chat sessions between two participants that are users of one PBXware. When users enter a chat on the bottom bar can type a message just like on any messaging app. It is also possible to send files with gloCOM GO 6. The default file size limit is 50 MB, which can be changed in PBXware.
On the navigation bar, users can see the user’s name they are chatting with and their Presence status. On the right, users can find the Call button that will start a call with the extension and the Info button that will open the screen containing chat information and options.
In the chat info screen, there is an option to create a group chat from one-to-one chat. This will create a new group chat with a clean history. Chat can also be deleted from the chat info screen. There is also an option to start a meeting from the chat info screen. The deletion of the chat will only be visible to the user that deleted it.
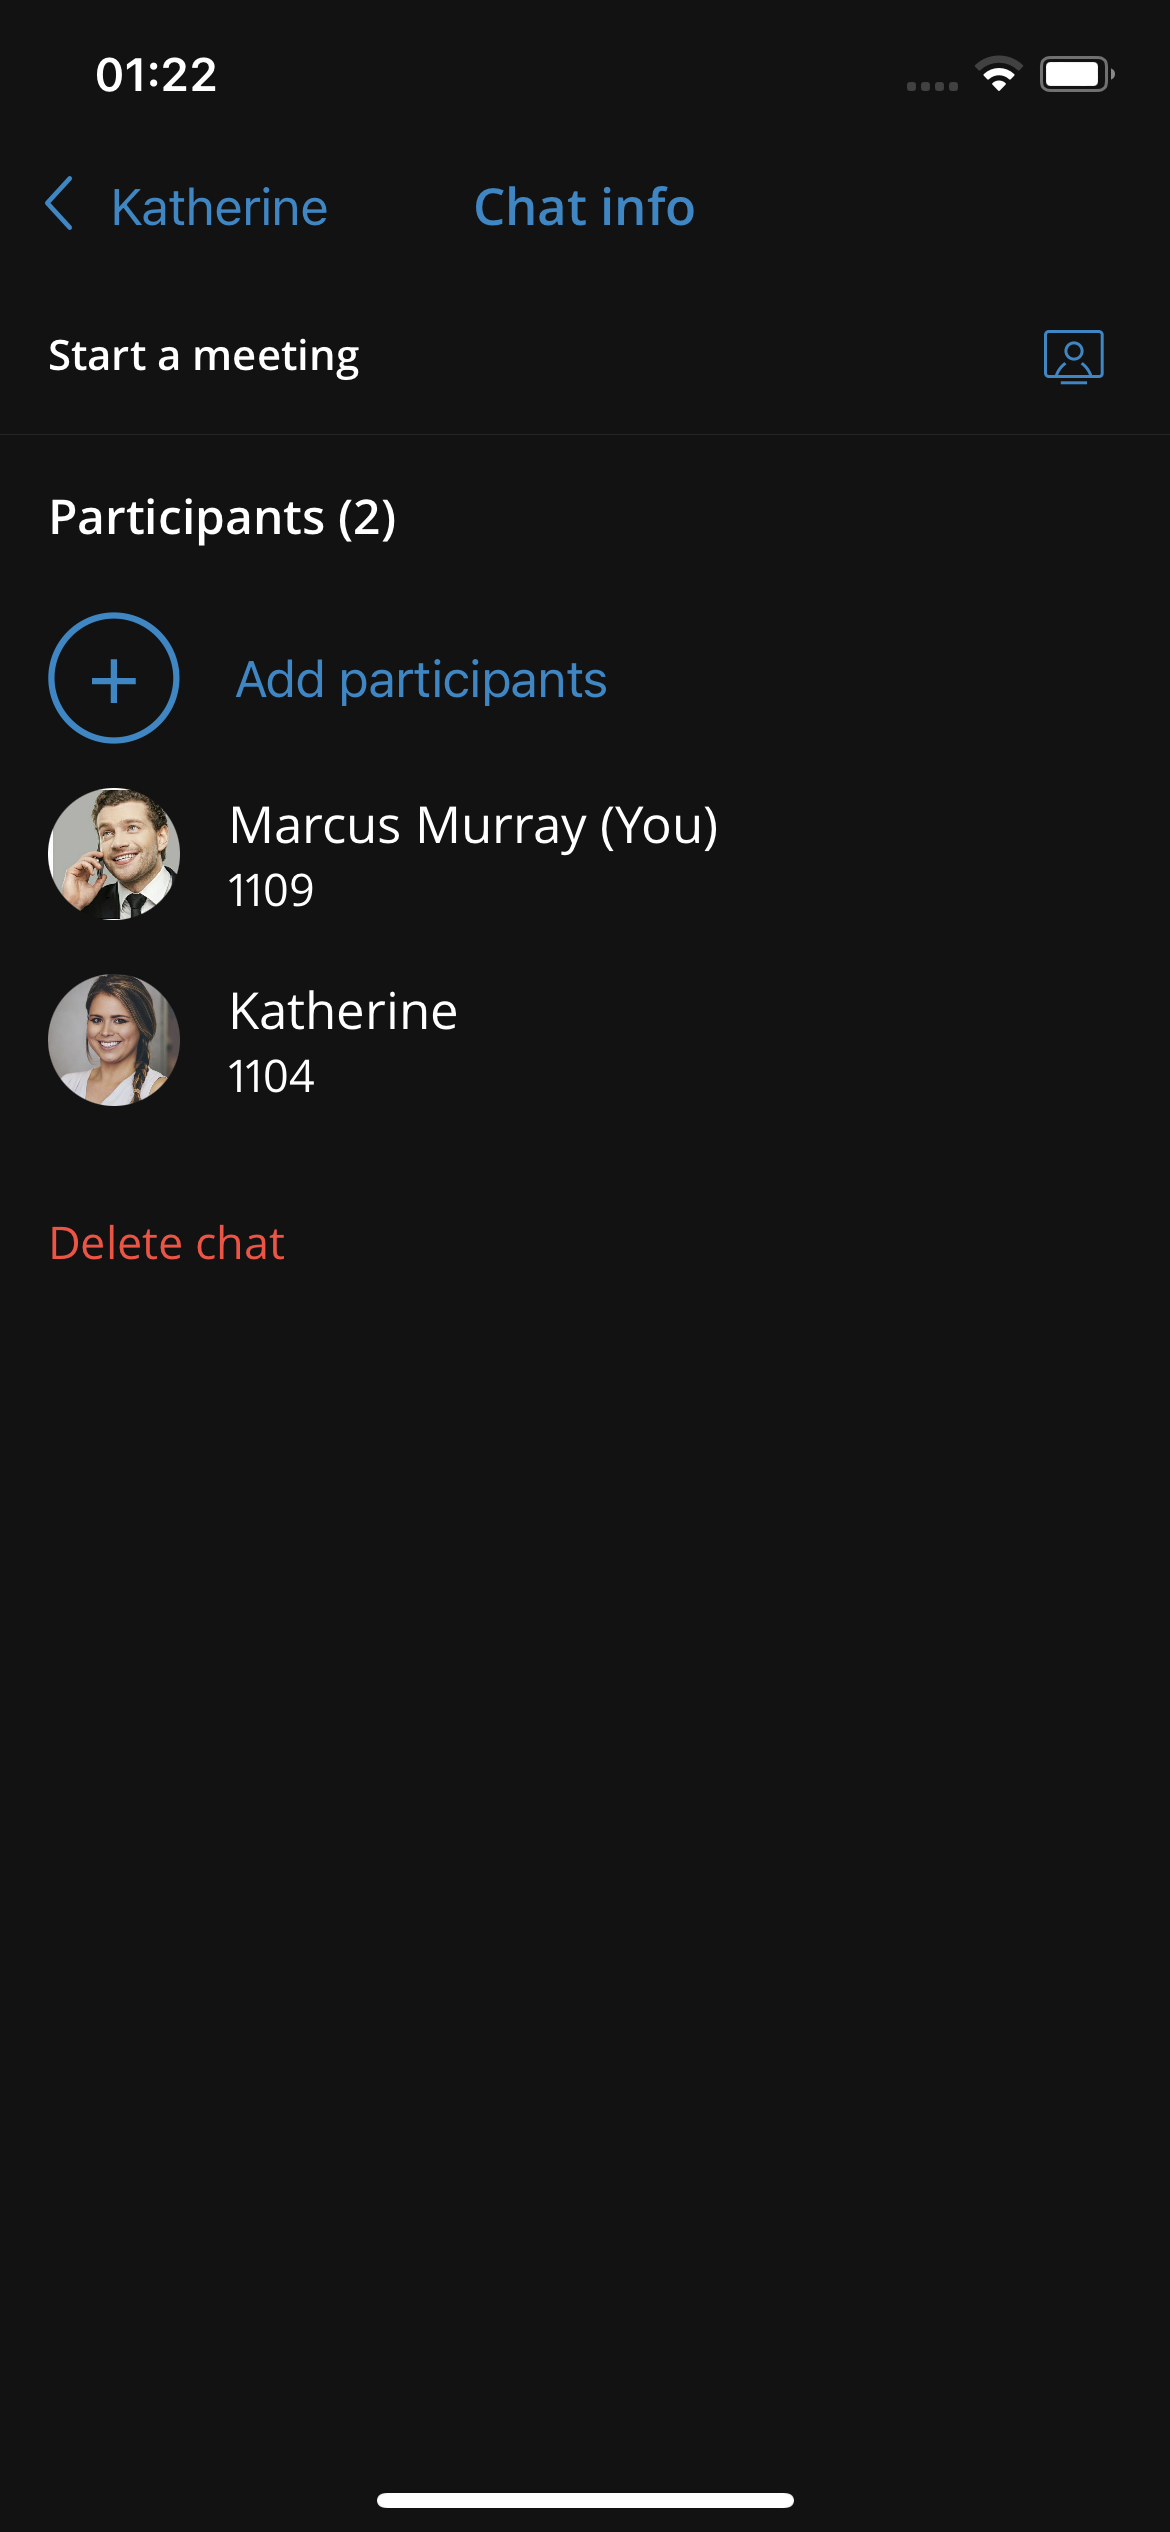
Group chats
Users can start a group chat by pressing a + icon on a Chats item in the bottom menu or by creating a new group chat from one-to-one chat on the chat info screen.
The group chat user interface is the same as for one-to-one chat. The call button has a different function, and in group chat, it will start a dynamic conference with group members. If there are more than 20 group members, calls will be disabled.
Group chats have events informing users that the chat name has been renamed or some users joined or left the chat.
The chat info screen for a group is different than a one-to-one chat info screen. On the chat info screen for a group, users can add more participants to the group, see all of the group participants, mute group notifications, and start a dynamic conference for that group. The group administrator also has an option to rename the group chat.
It is also possible to leave the group, meaning that the history of all messages until the user has left the group will be synced by client apps. Another possibility is to delete the group, and then the history will not be visible, and the group chat will be deleted for that user.
When pressing a chat participant in the chat info screen, users can view their user profile, call them or start a one-to-one chat. Group administrators also can assign participants as group administrators or remove them from the group chat.
When the group chat session is muted, users will not receive notifications (push and in-app) for that chat session. The mute option is synced between all users’ devices. A muted chat session will have a mute icon in the chats list indicating that the session is muted.
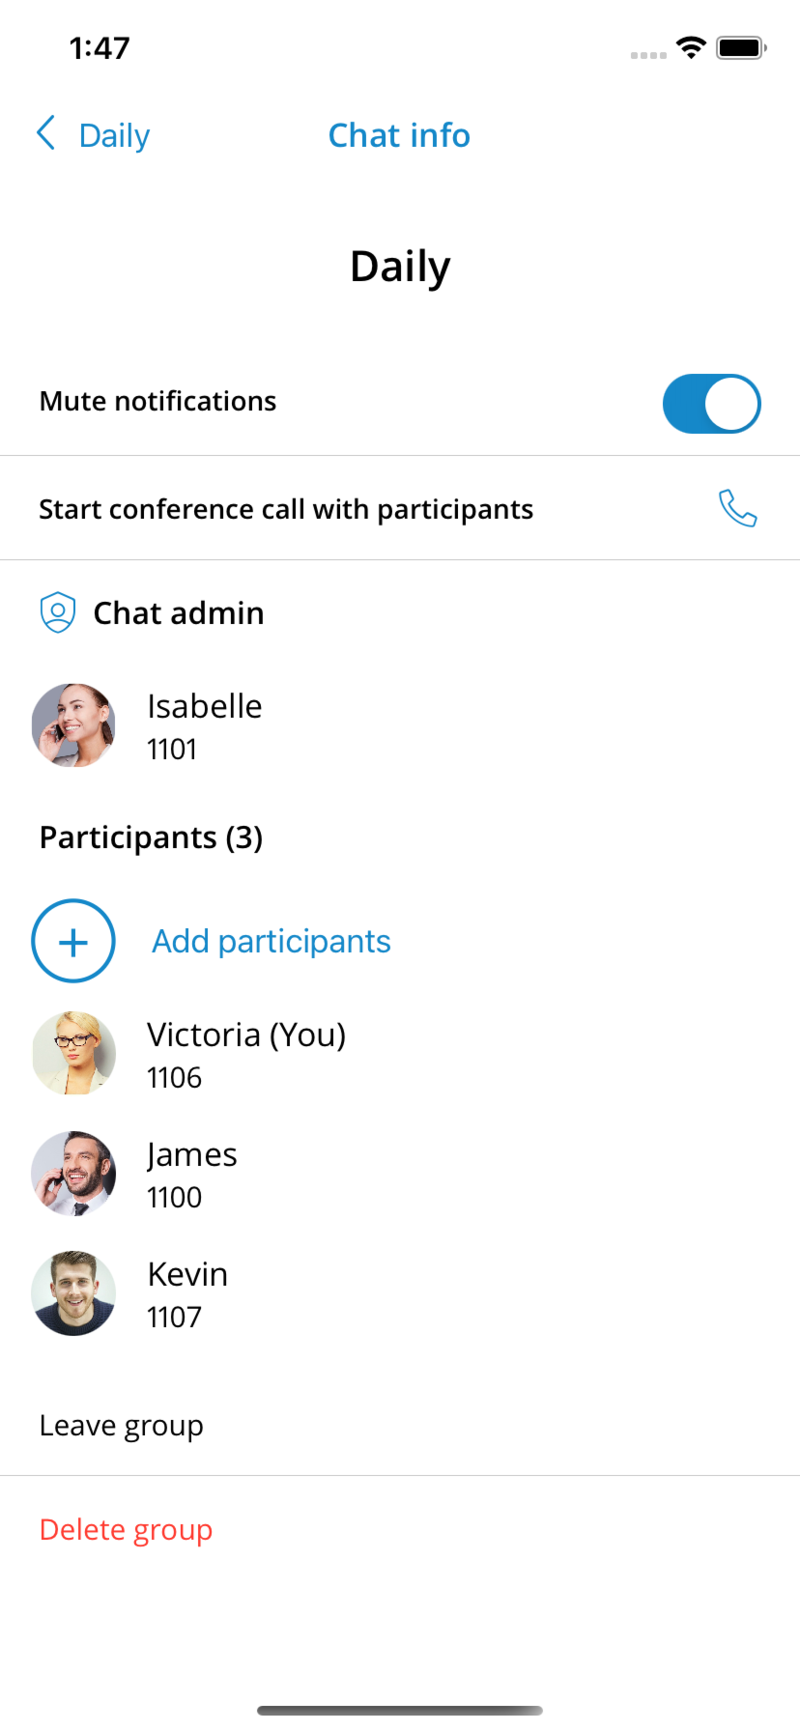
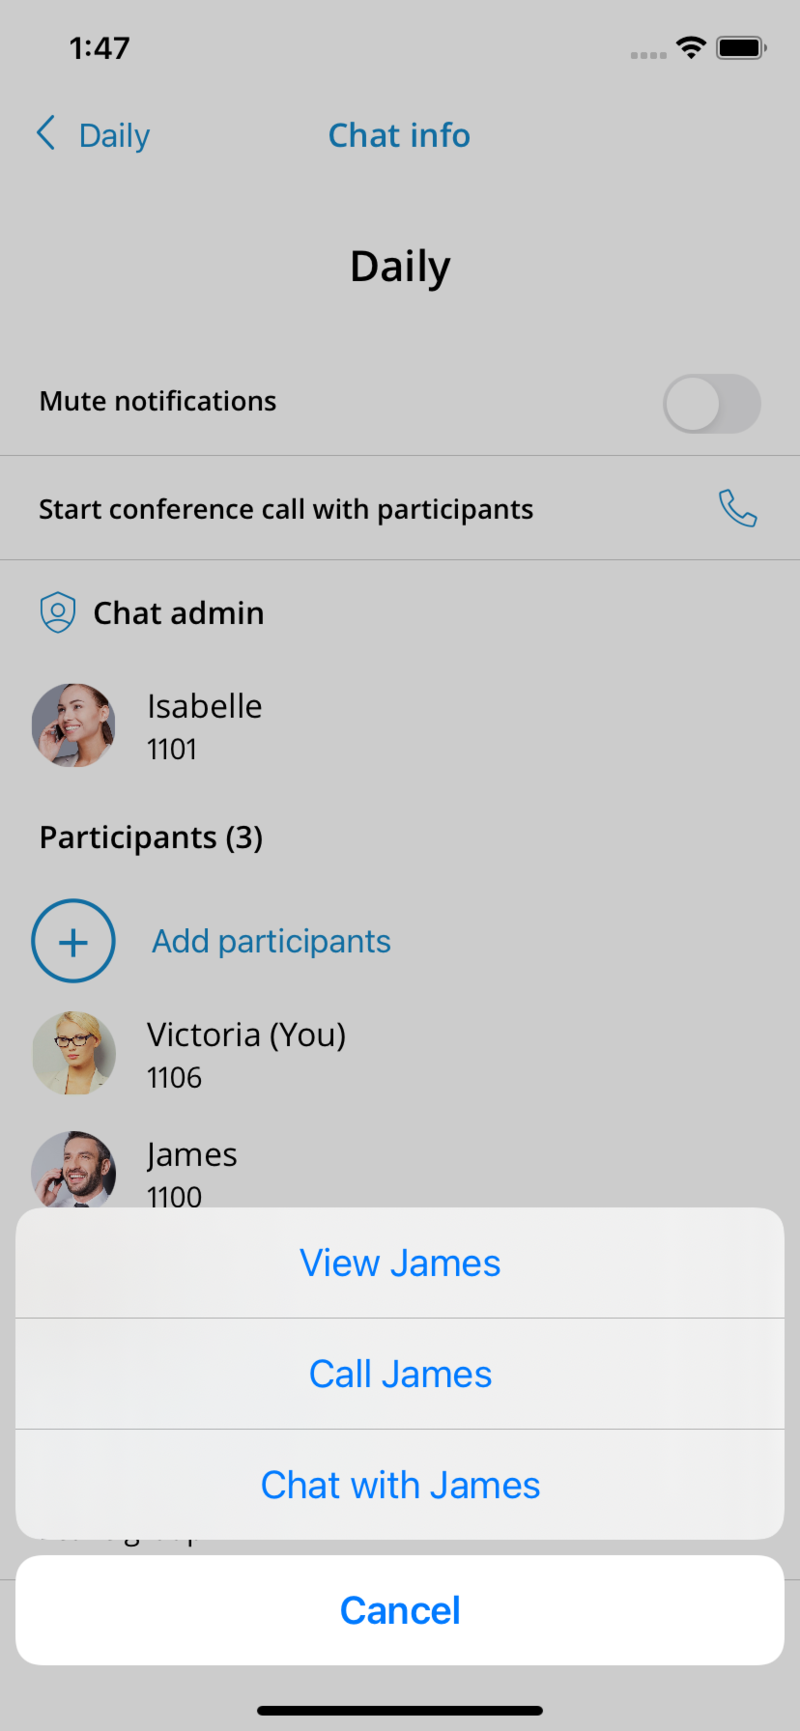
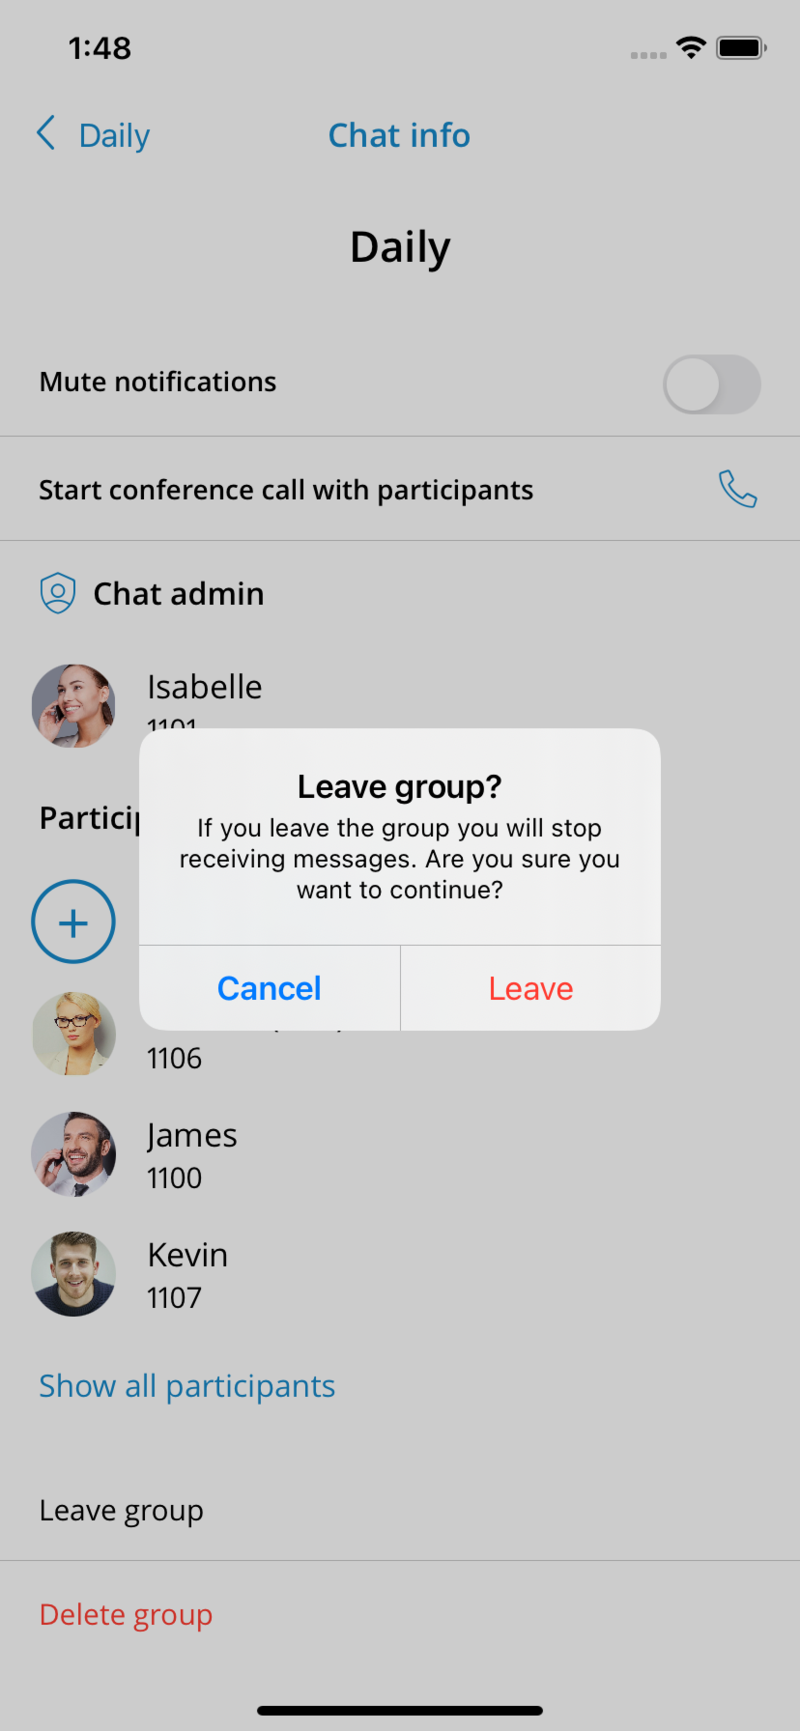
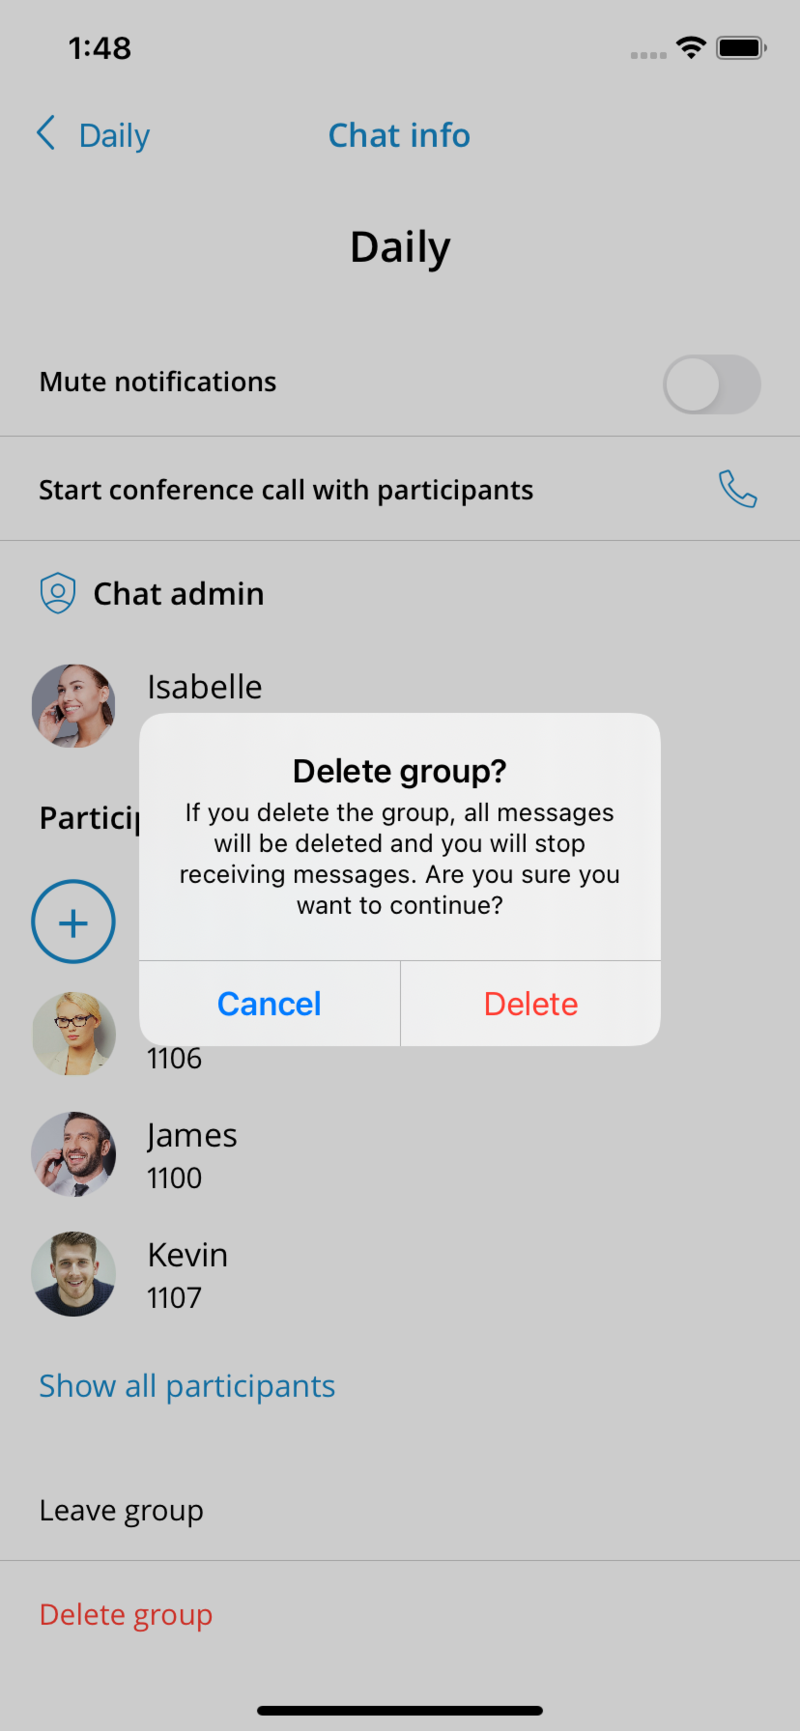
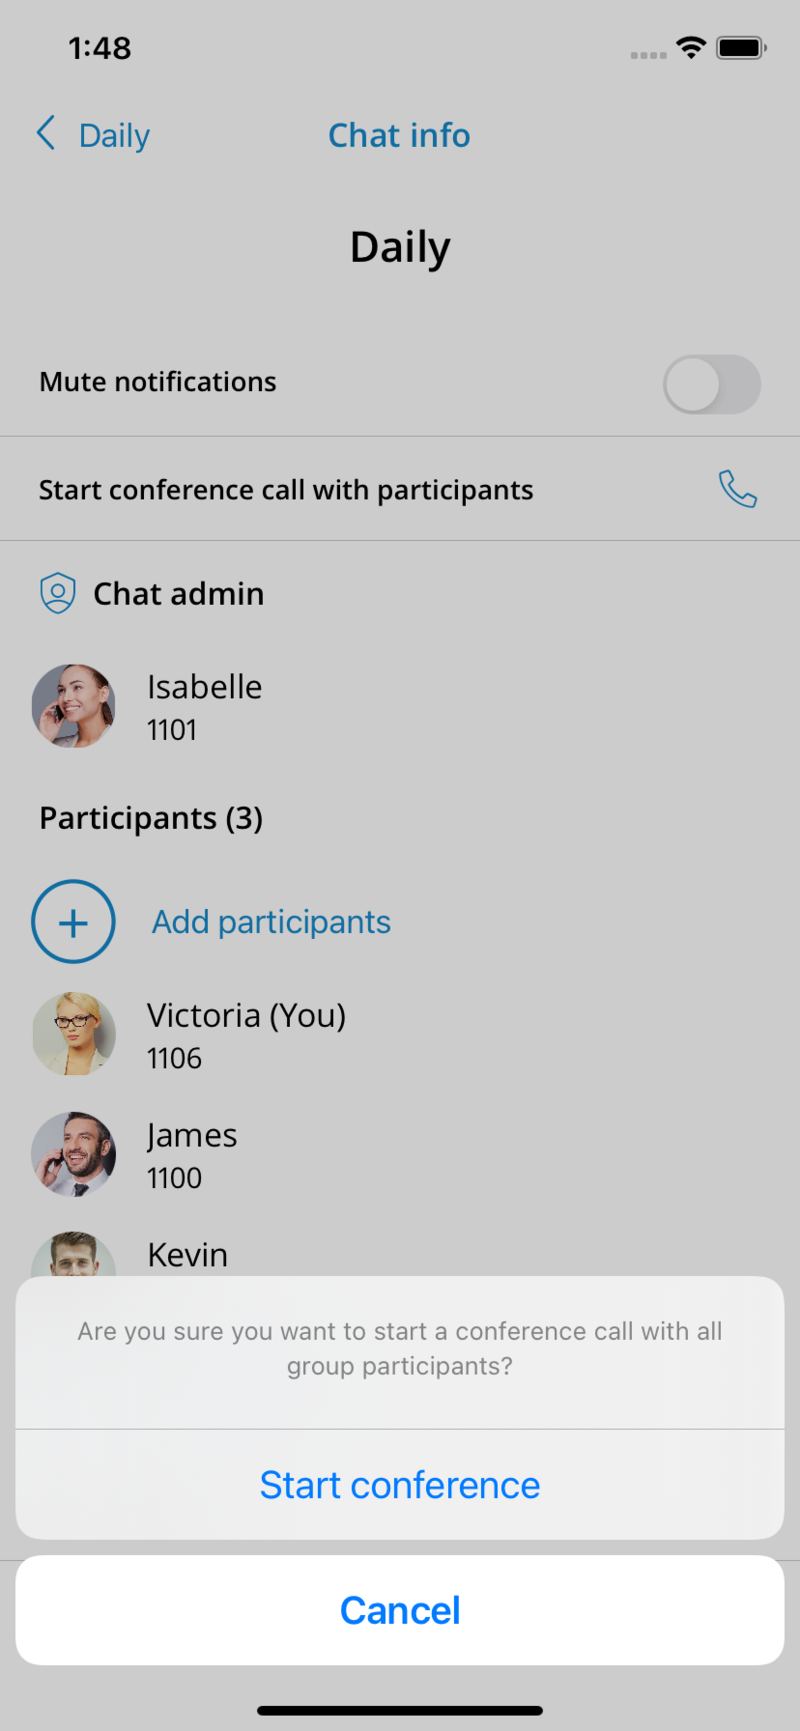
Shared Groups
Users have the option to create a shared group in which all group history will be visible for newly added participants.
When creating a new group chat, the user can set the group name, and enable Allow full history visibility option. After enabling this option, popup window will inform user that the chat history will be always visible to newly added participants.
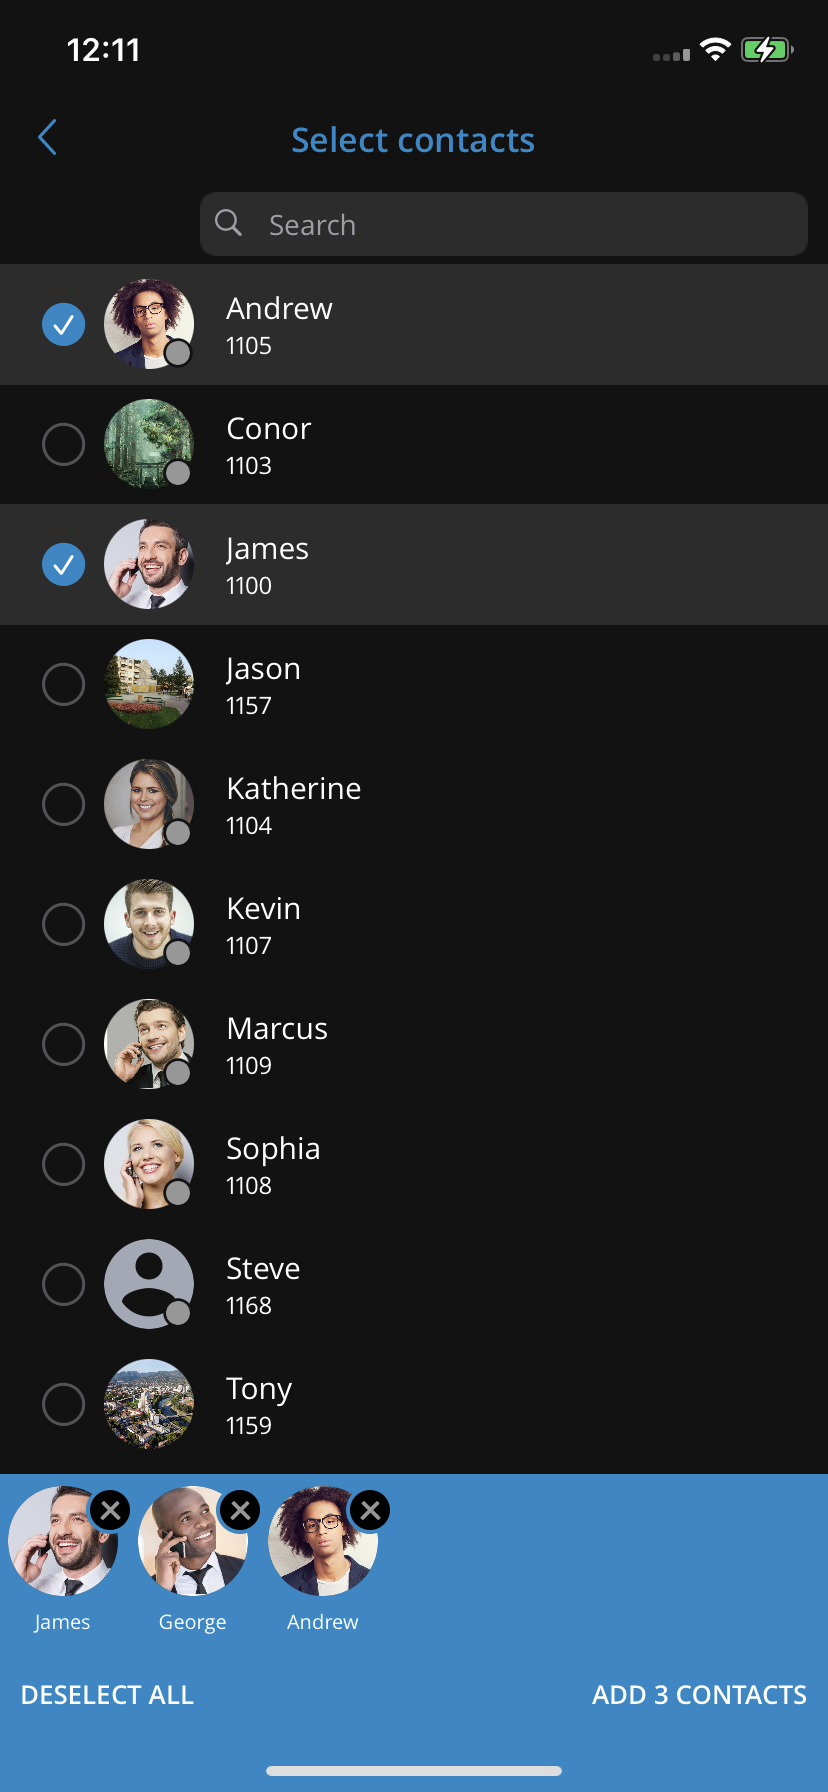
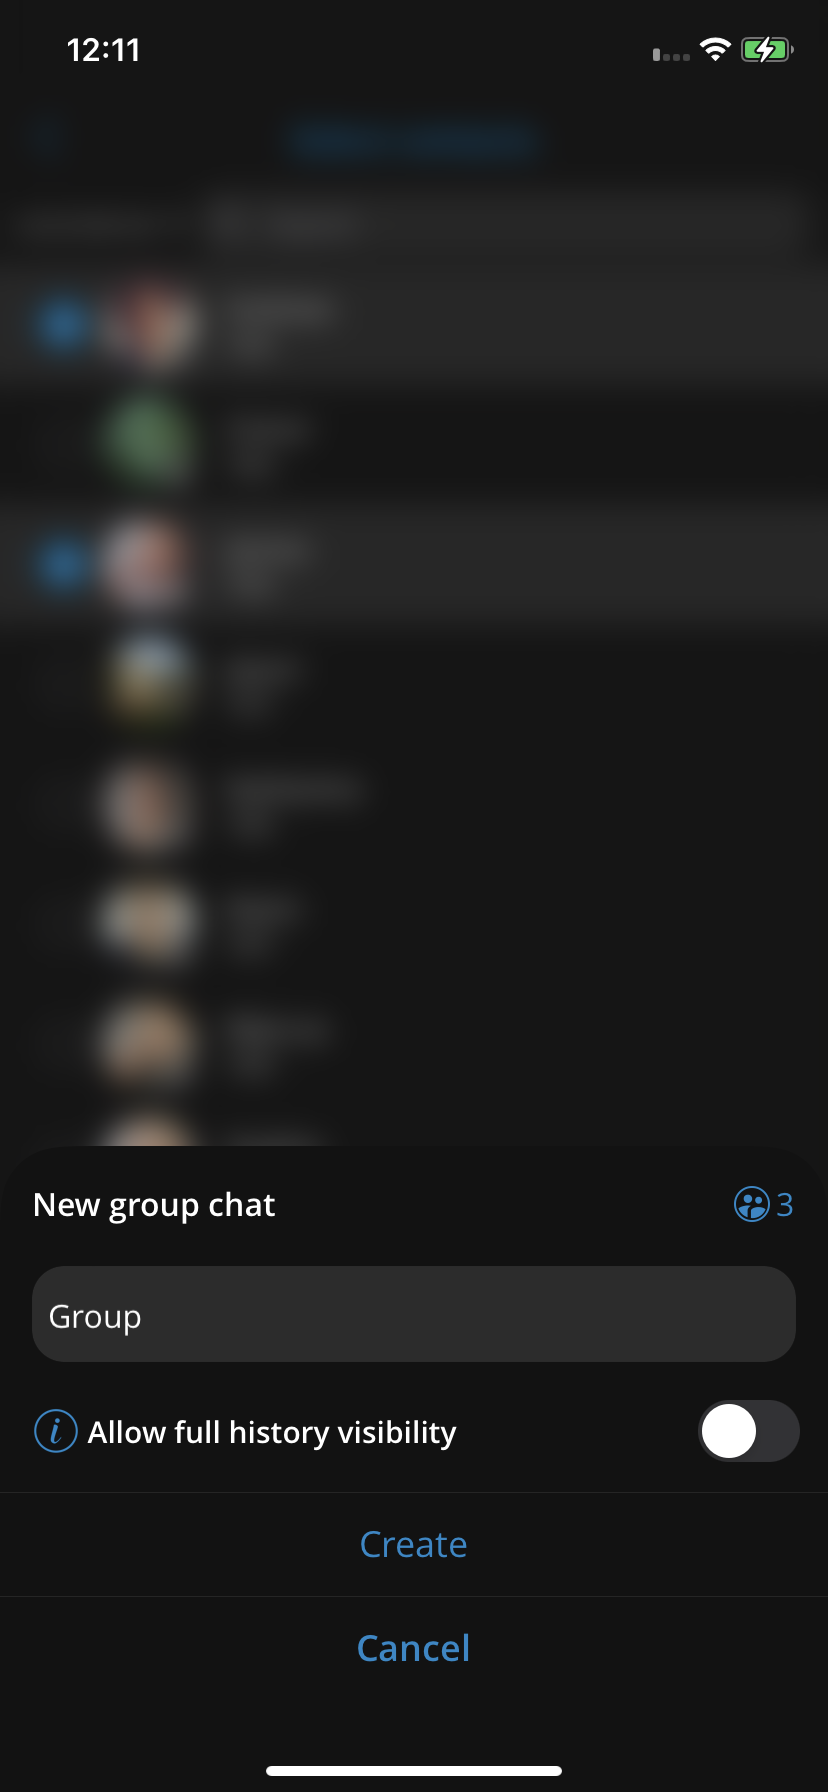
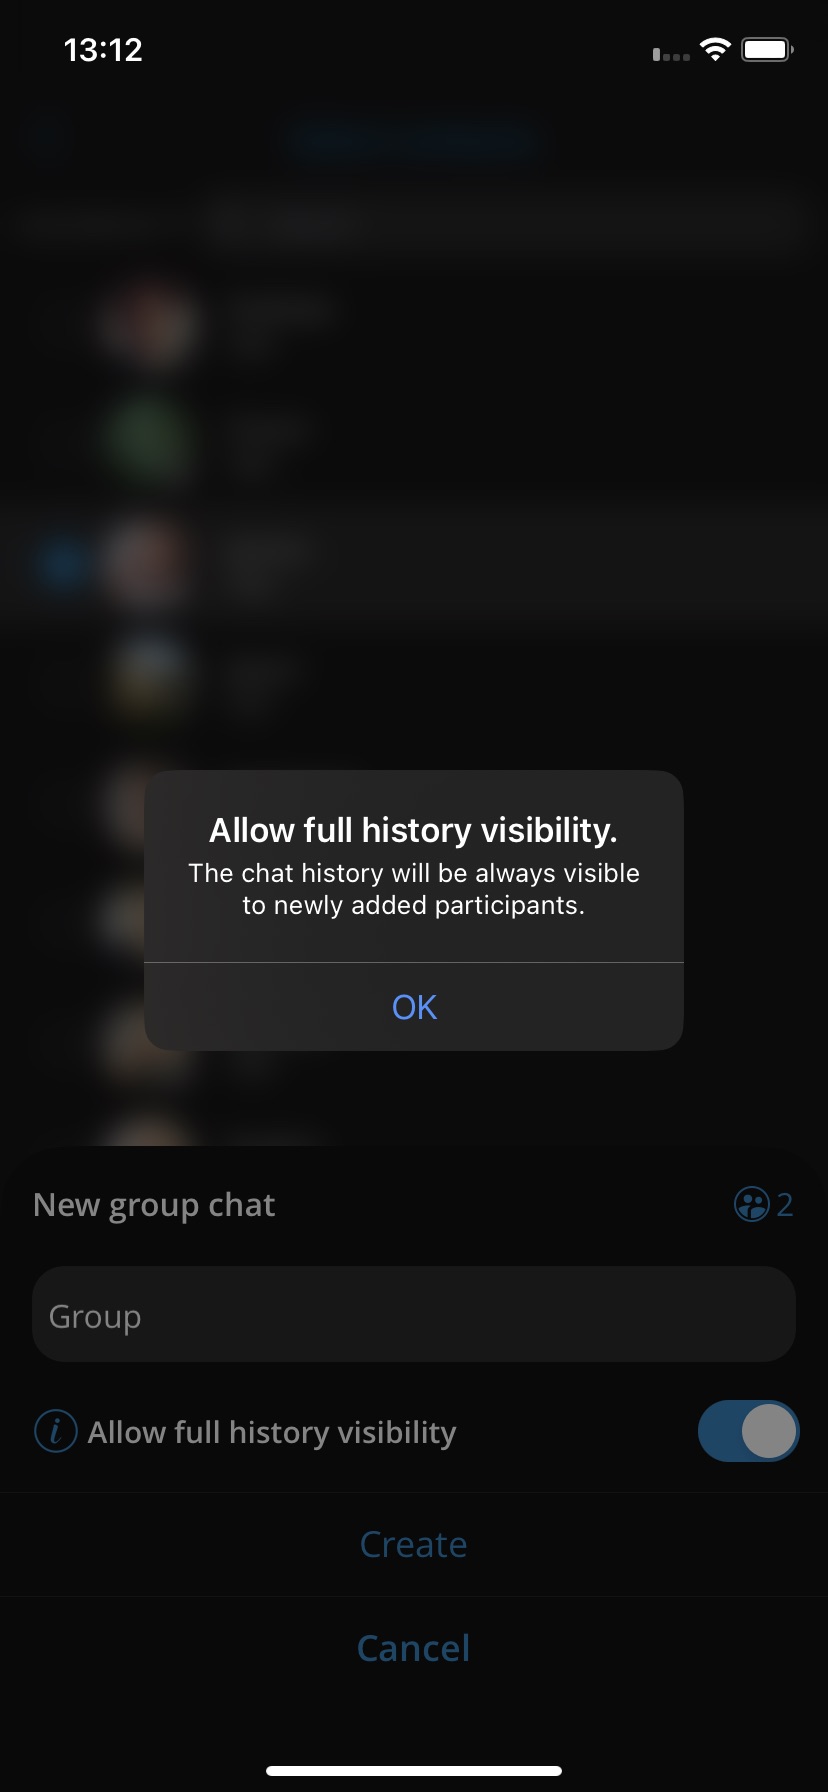
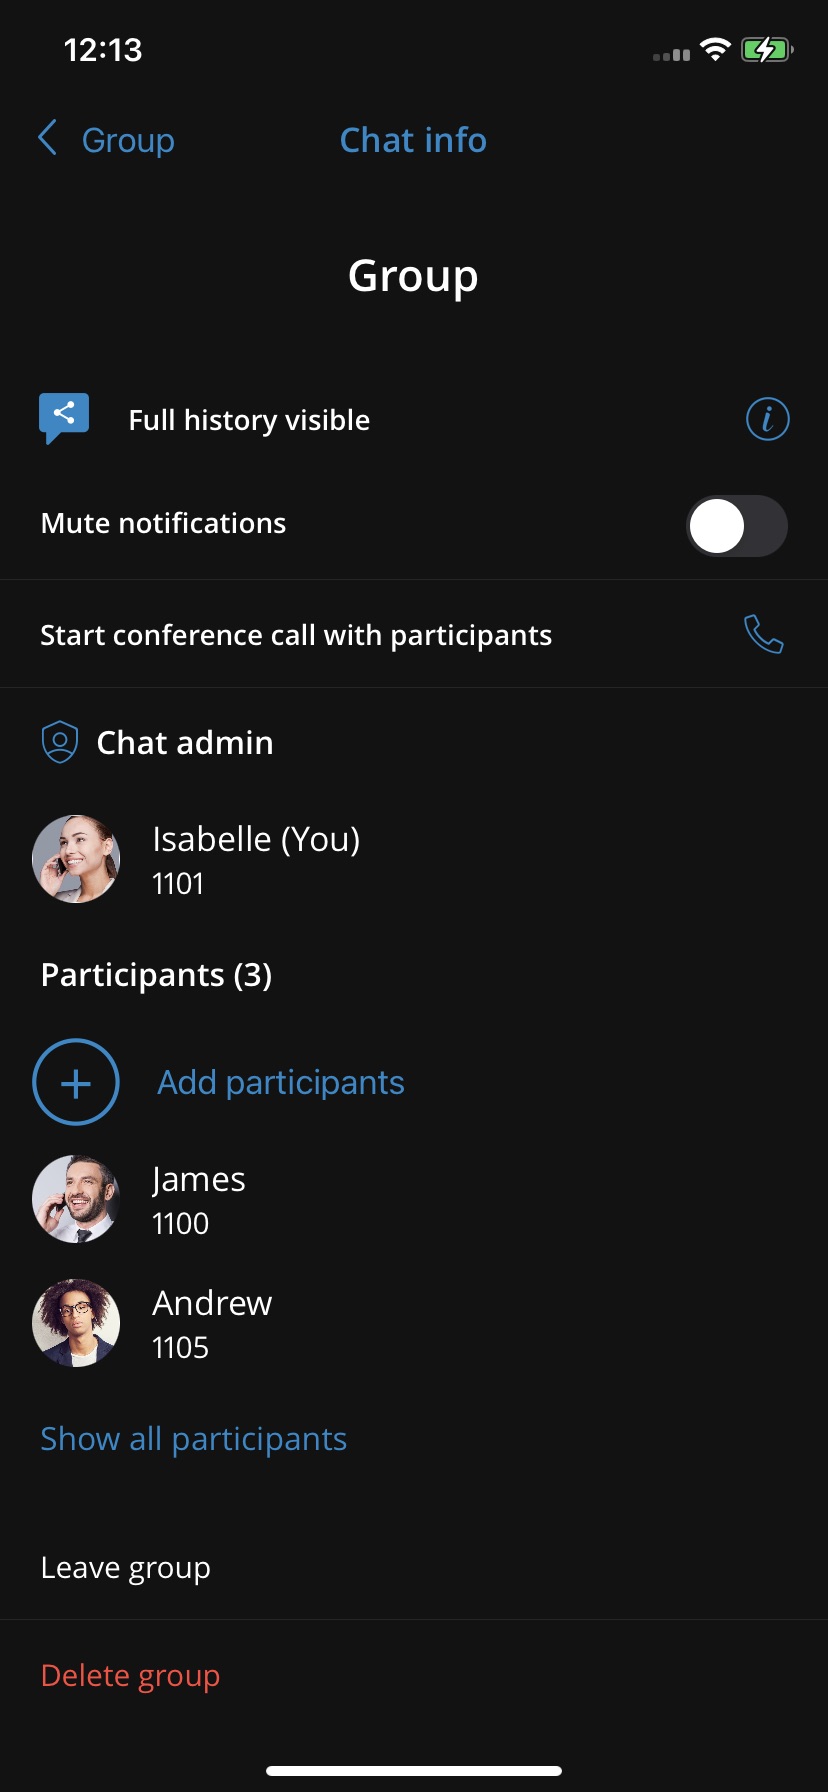
Every chat participant who is later added to that group chat will have access to all of the chat history since the Shared group was created.
Group chat info will also indicate that the chat history is visible for all new participants.
Mention
Mention is a great way to get someone’s attention in a group chat conversation. Only group participants can be mentioned in a message. When being mentioned, the user will receive a push notification which will override any mute action that the user has set for the group. Mentions start with the @ symbol followed by a name. When @ symbol is typed in the input field, a drop-down menu will appear with a list of participants. The mention feature brings support for smart autocompletion based on user input.
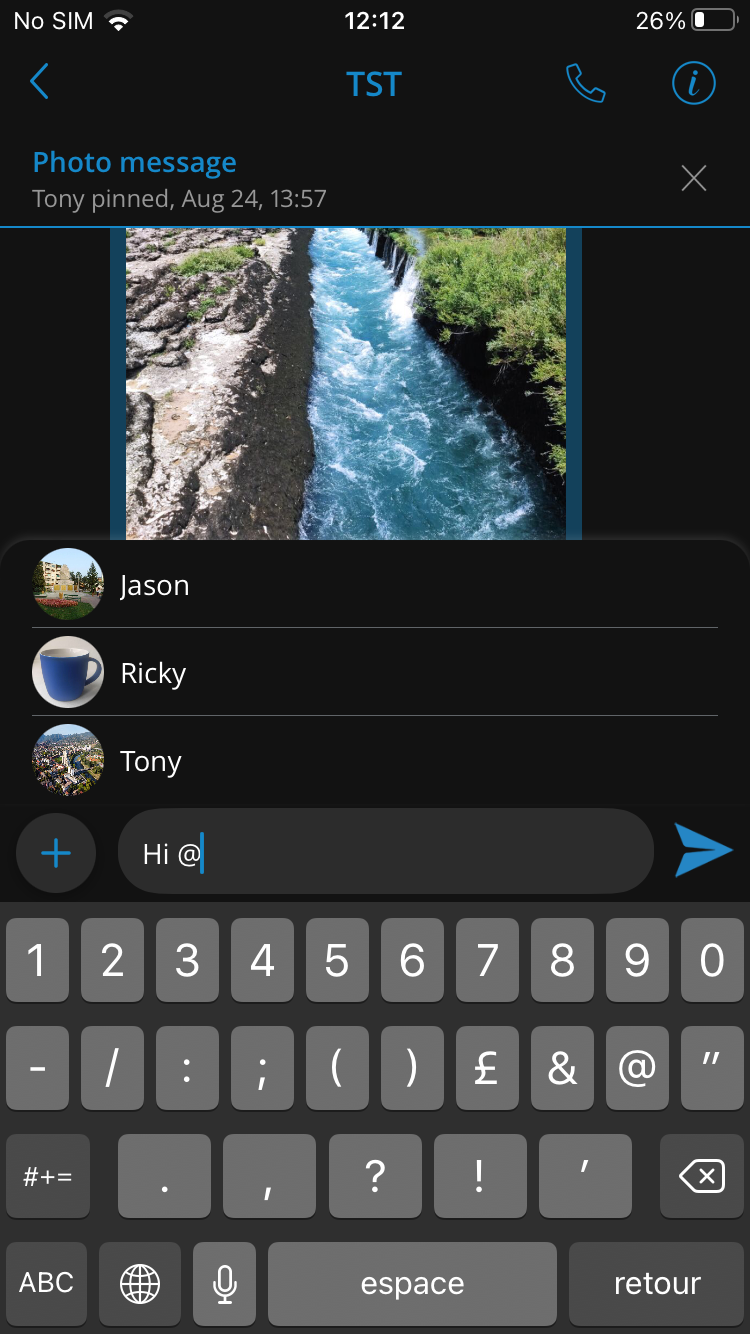
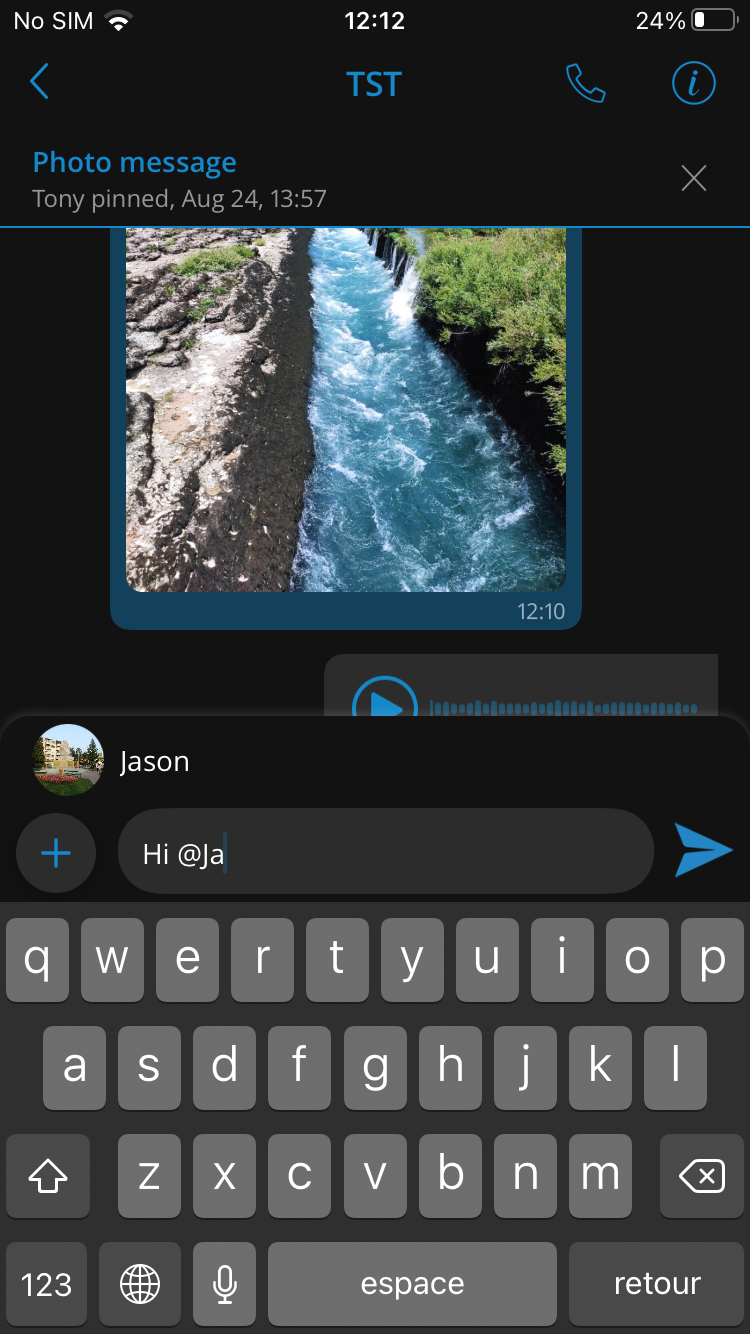
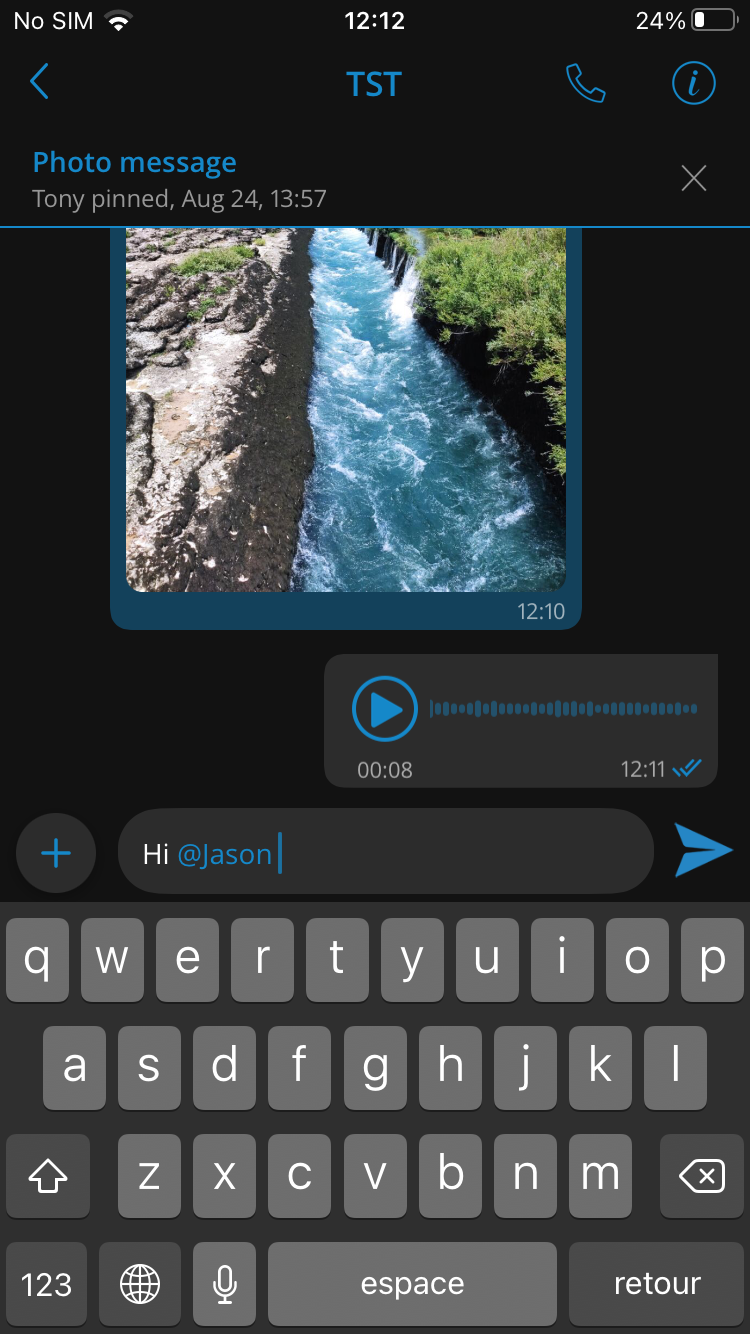
Clicking on a mention link has the same functionality as clicking on a user avatar inside a chat conversation.
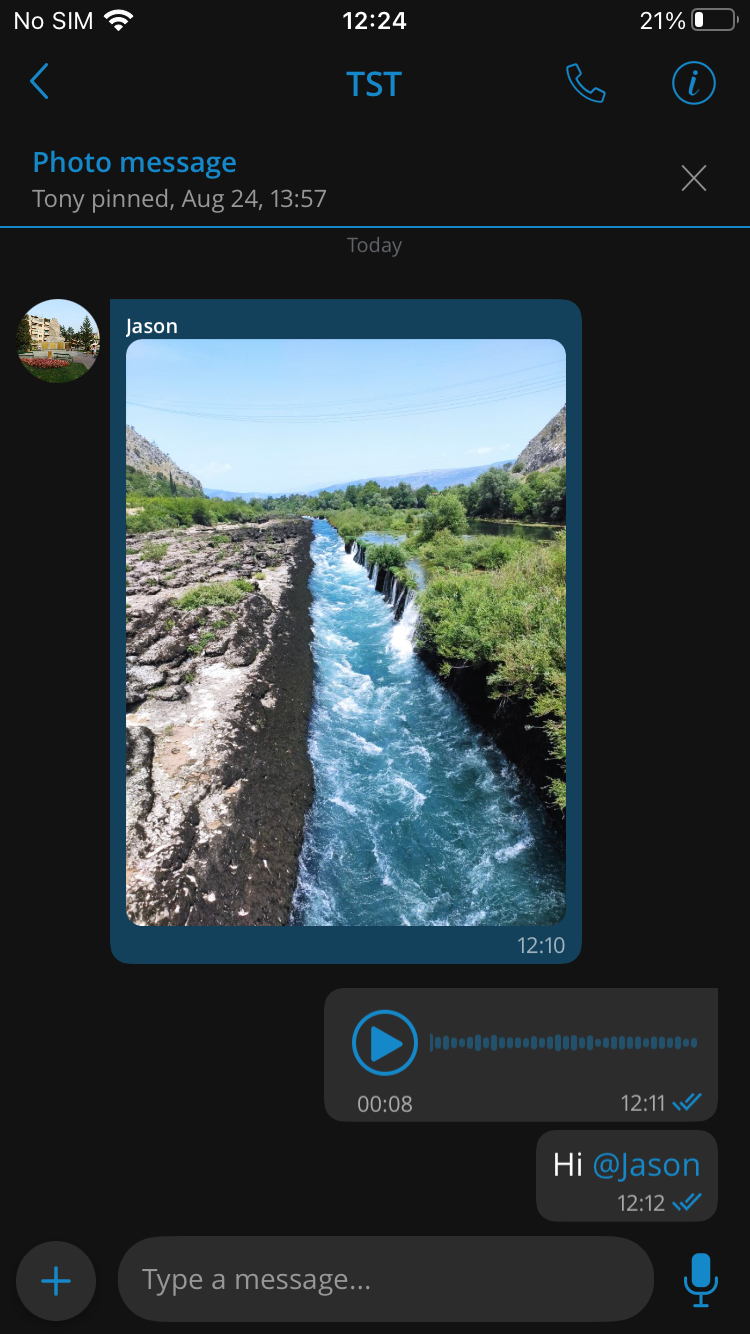
Group Avatar images
Group avatar images feature generates an avatar for group chat conversations from the avatars of group participants so that users see some of the participants even from the chat list for a better user experience.
In group chat conversations, avatars are generated from random group participants that have an avatar. Depending on the number of participants in the group chat, avatars will be generated differently. When there are only 2 participants, the avatar is generated as a collage of 2 images one beside another. If there are 3 or more participants, the avatar is generated as a collage of 3 or 4 images.
In case when group participants from which the avatar is generated change (some of them left), or if their avatars have been changed, then the new group avatar is generated.
![]()
Chat message status info
Message info allows users to see delivery and seen reports for messages. The message info window can be accessed by long-pressing on a message and then selecting info in the context menu. The message info option is only available in group messages.
The message info window opens from the bottom of the screen and takes up a small portion of the screen. It is possible to expand the message info window to full screen by dragging the window up or collapse it by dragging the window down. The window can be closed either by tapping outside the message info window or by pressing the close button in the top right corner of the message info window.
The message info screen is arranged so that it shows the name of the person who sent the message, the content of the message, and two tabs. The seen tab and the delivered tab. By selecting the seen tab you will see a list of users that have sent the seen report. The users will have their name and time, when they have sent the report, printed out. Respectively by selecting the delivered tab, you will see a similar list, but in this case, users that have sent the delivered report. In case any one of the tabs is empty, it will show an appropriate message.
If the info window is opened on a device connected to an earlier version of the server, a message will appear in the message info window stating that the action is not supported.
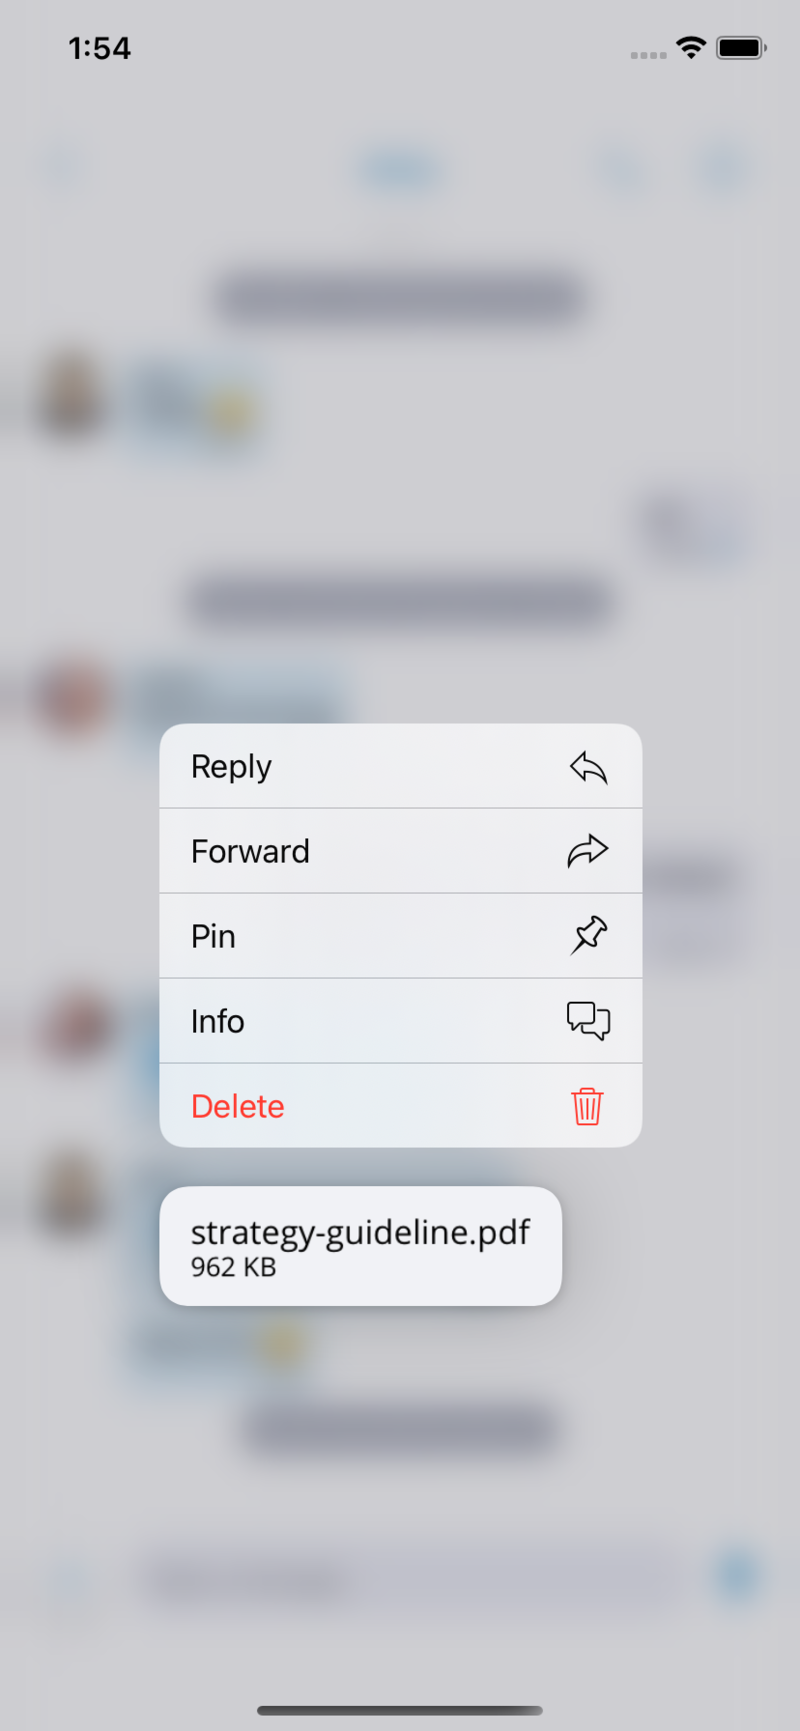
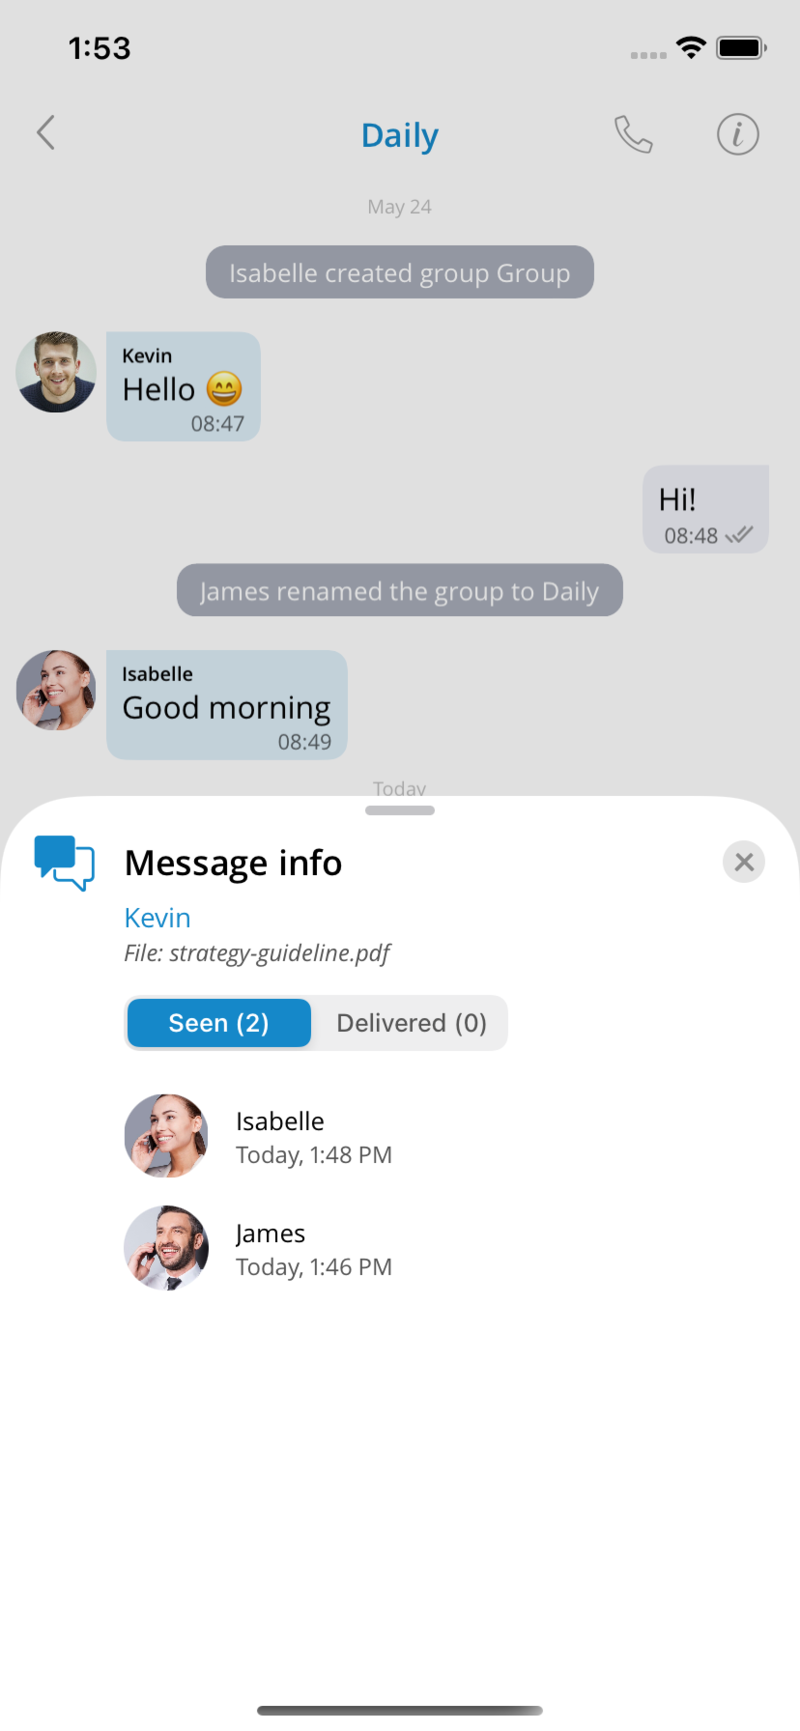
Admin transfer in group chat conversations
Admin transfer feature offers the chat admin to assign one of the group chat participants as a new admin of group conversation. Pressing on an active participant of the group chat, a dialogue will appear offering the current admin to assign the selected active group chat participant as a new admin.
One of the group chat participants can also request to become an admin of that chat conversation after the previous admin has left. Once the group chat admin leaves, chat info will indicate that there is no admin assigned to the group chat. The remaining group chat participants can request to become admin by pressing the Assign myself button in the chat info.
If this feature is not available on older servers, a notification message will appear, informing the user that this action is not yet supported and instructing them to contact their system administrator for more information.

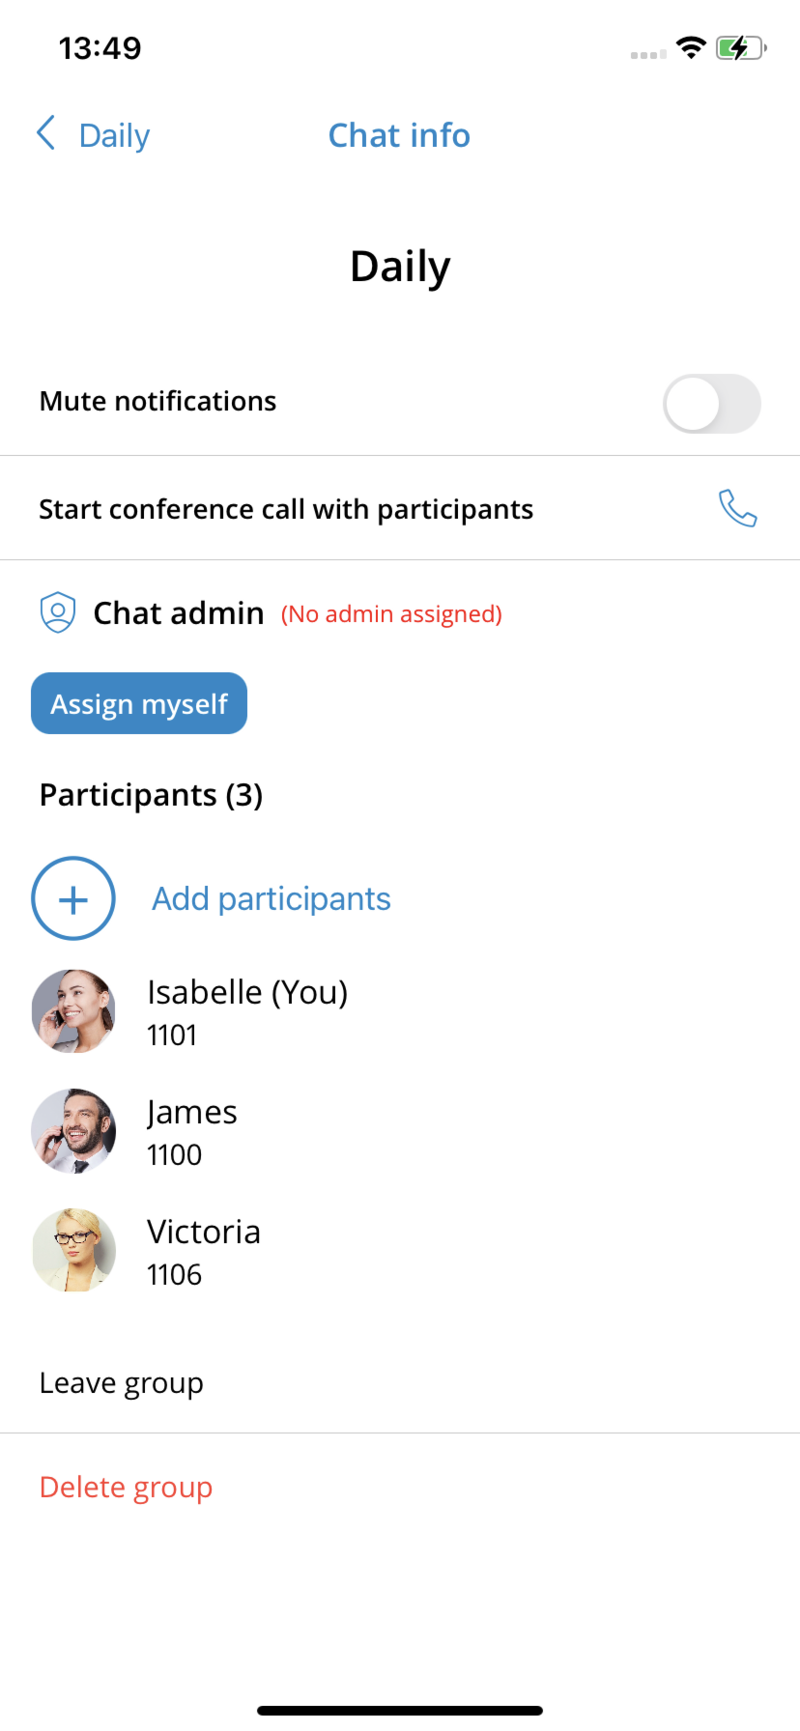
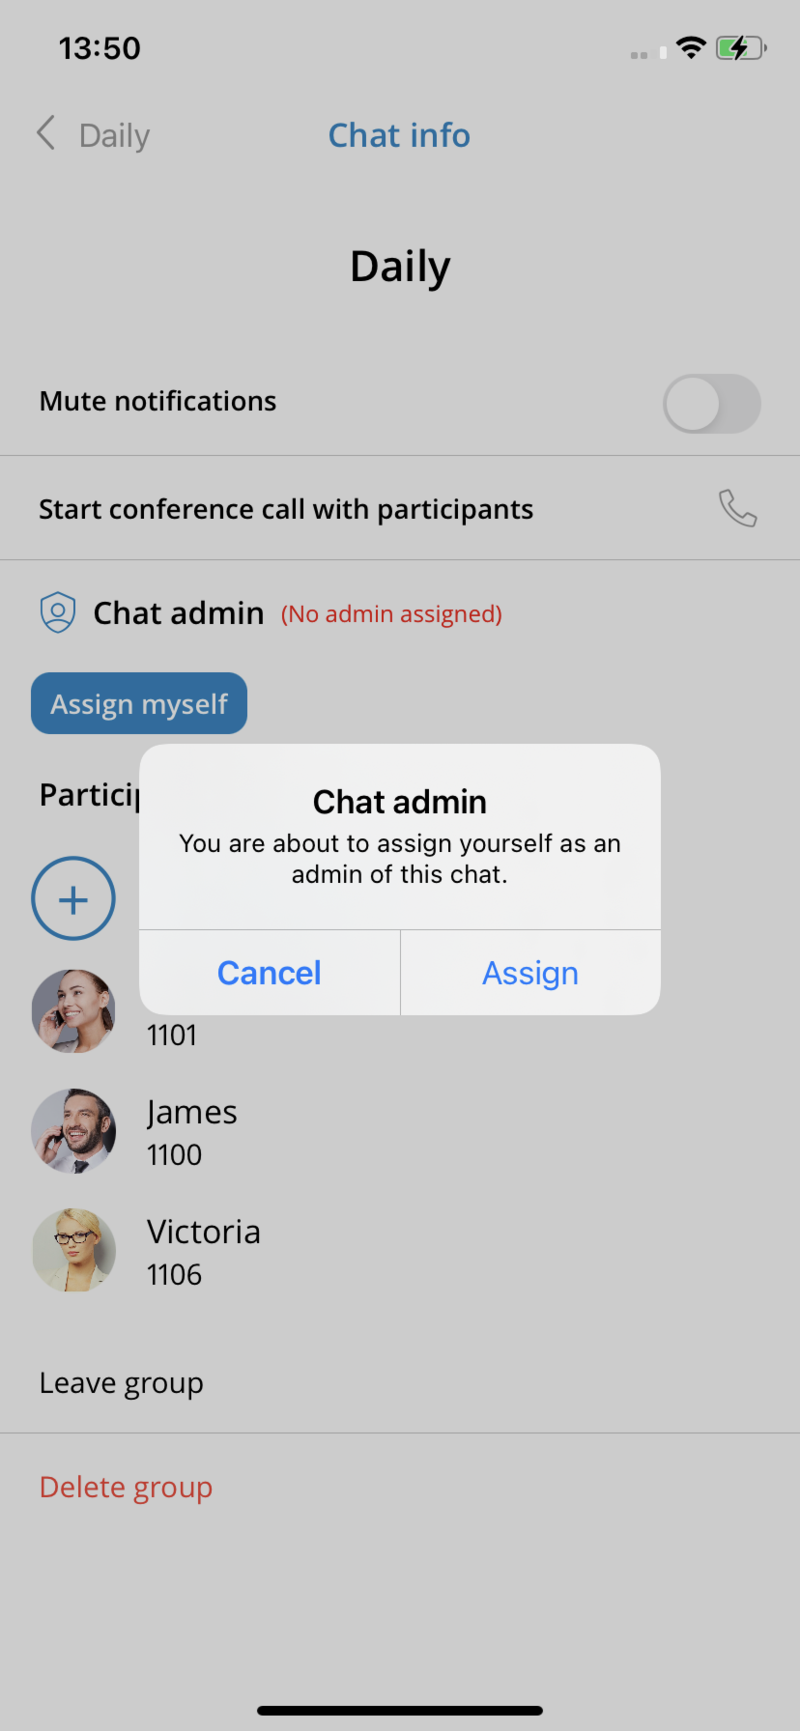
Draft messages
Unsent messages will be remembered inside the app as draft messages. Users can safely close the app, go to another screen, and the message that they were composing will be saved.
Reply from notification
Users can reply directly to messages received via push notifications by long-pressing them and selecting “Reply”. A keyboard with a text field will be displayed where users can enter and send a message. This feature can also be used with notifications received on Apple Watch. Messages sent with the reply from the notification feature are sent as reply messages.
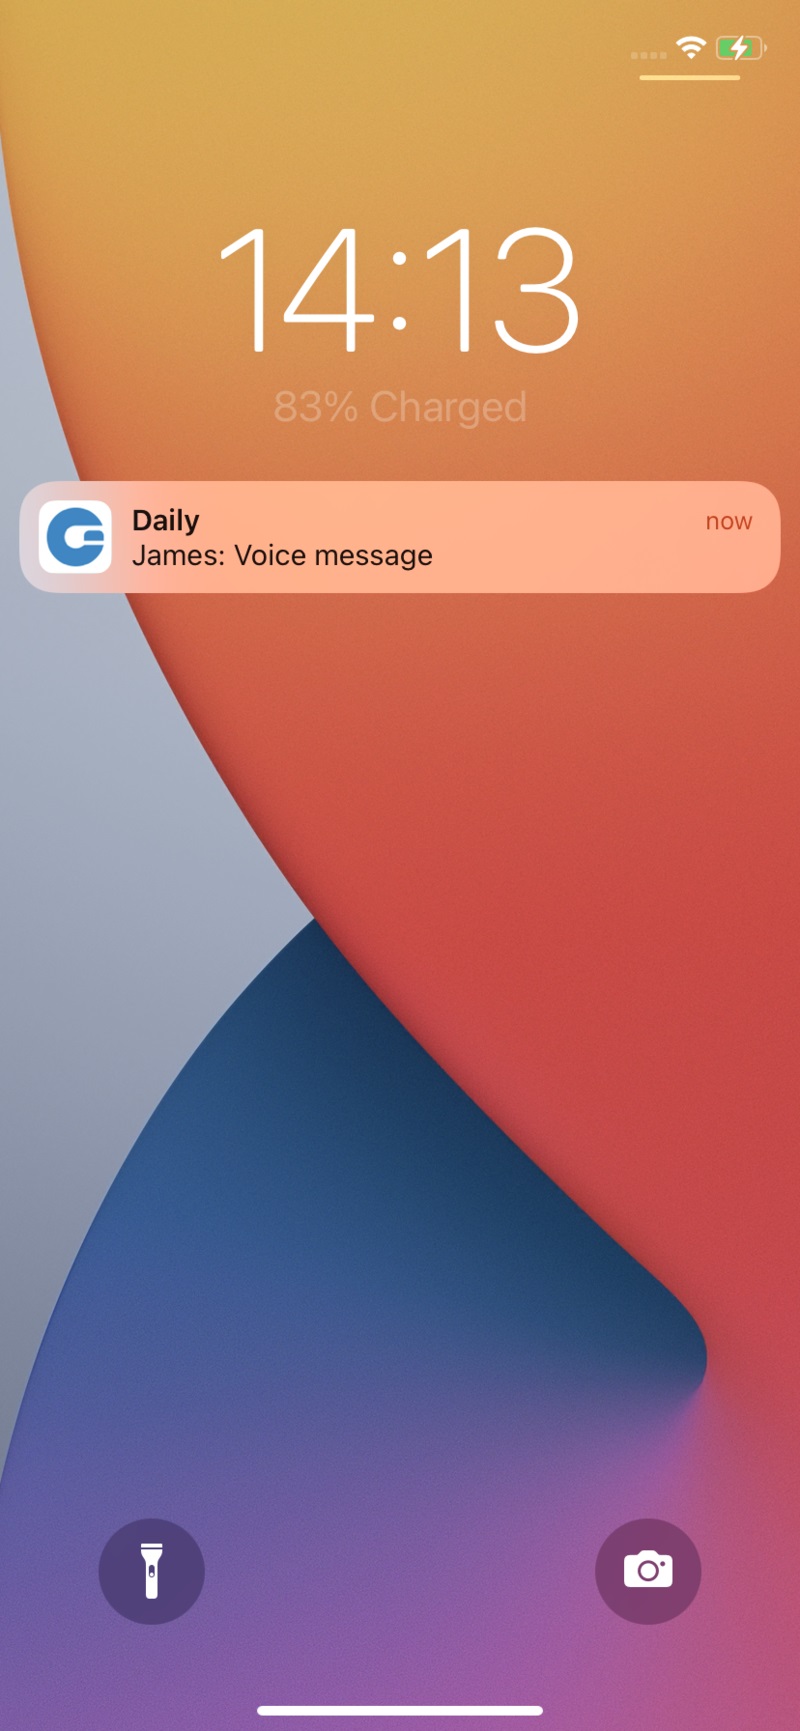
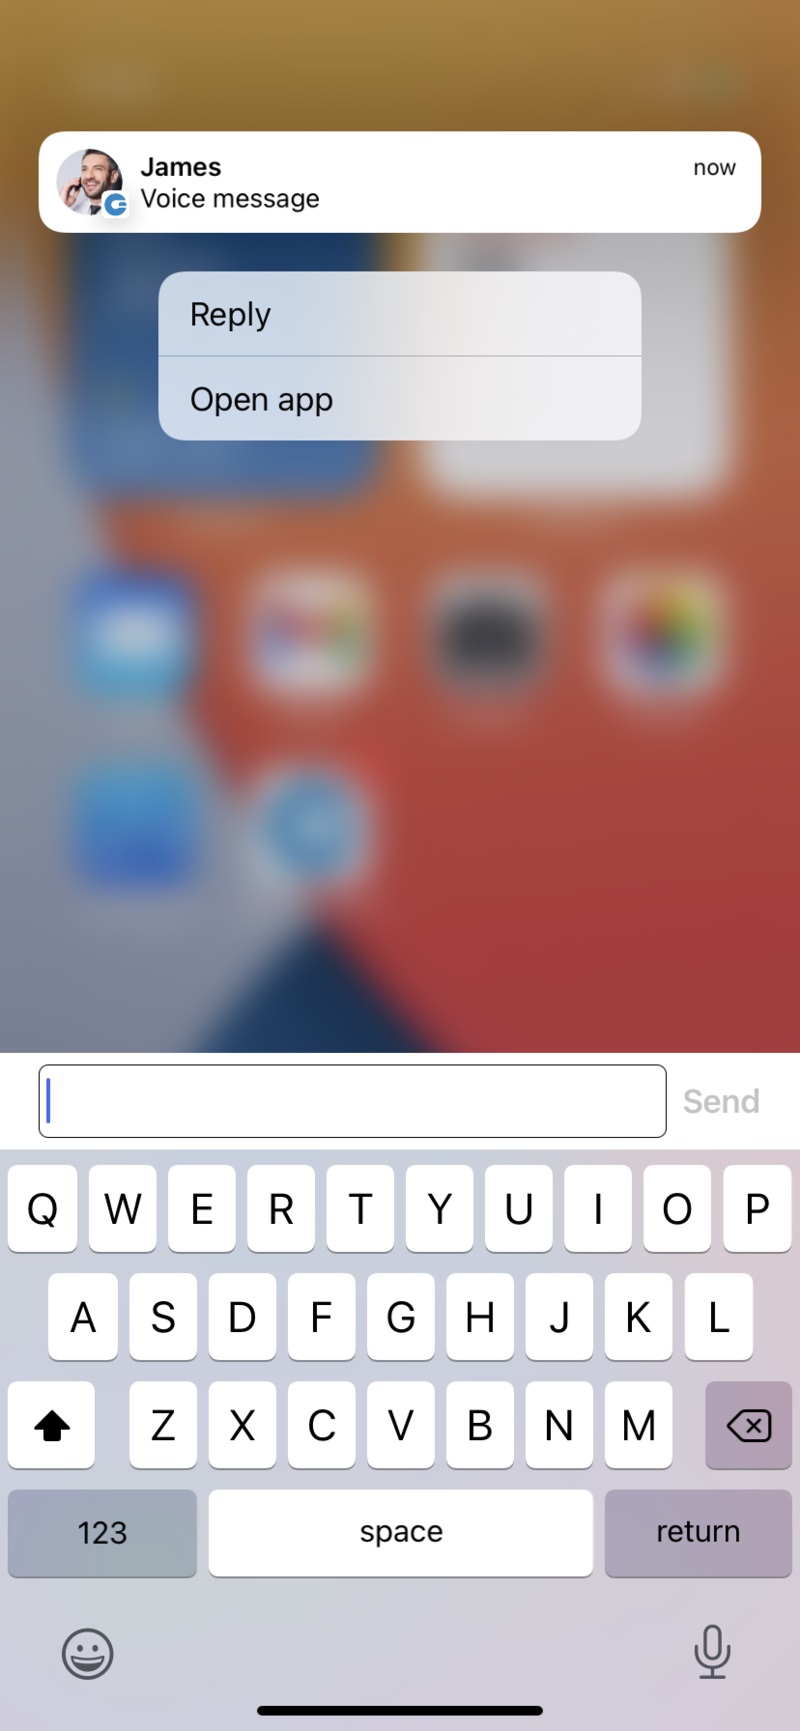
Mark Chat Conversation as Read/Unread
This feature offers a possibility to mark any conversation as Read/Unread. When choosing the conversation as Unread, the Unread indicator will be displayed for this conversation in the chats list screen.
With any action taken within that conversation, the Unread status will be removed. Also, opening that conversation or marking it as read will remove the unread indicator.

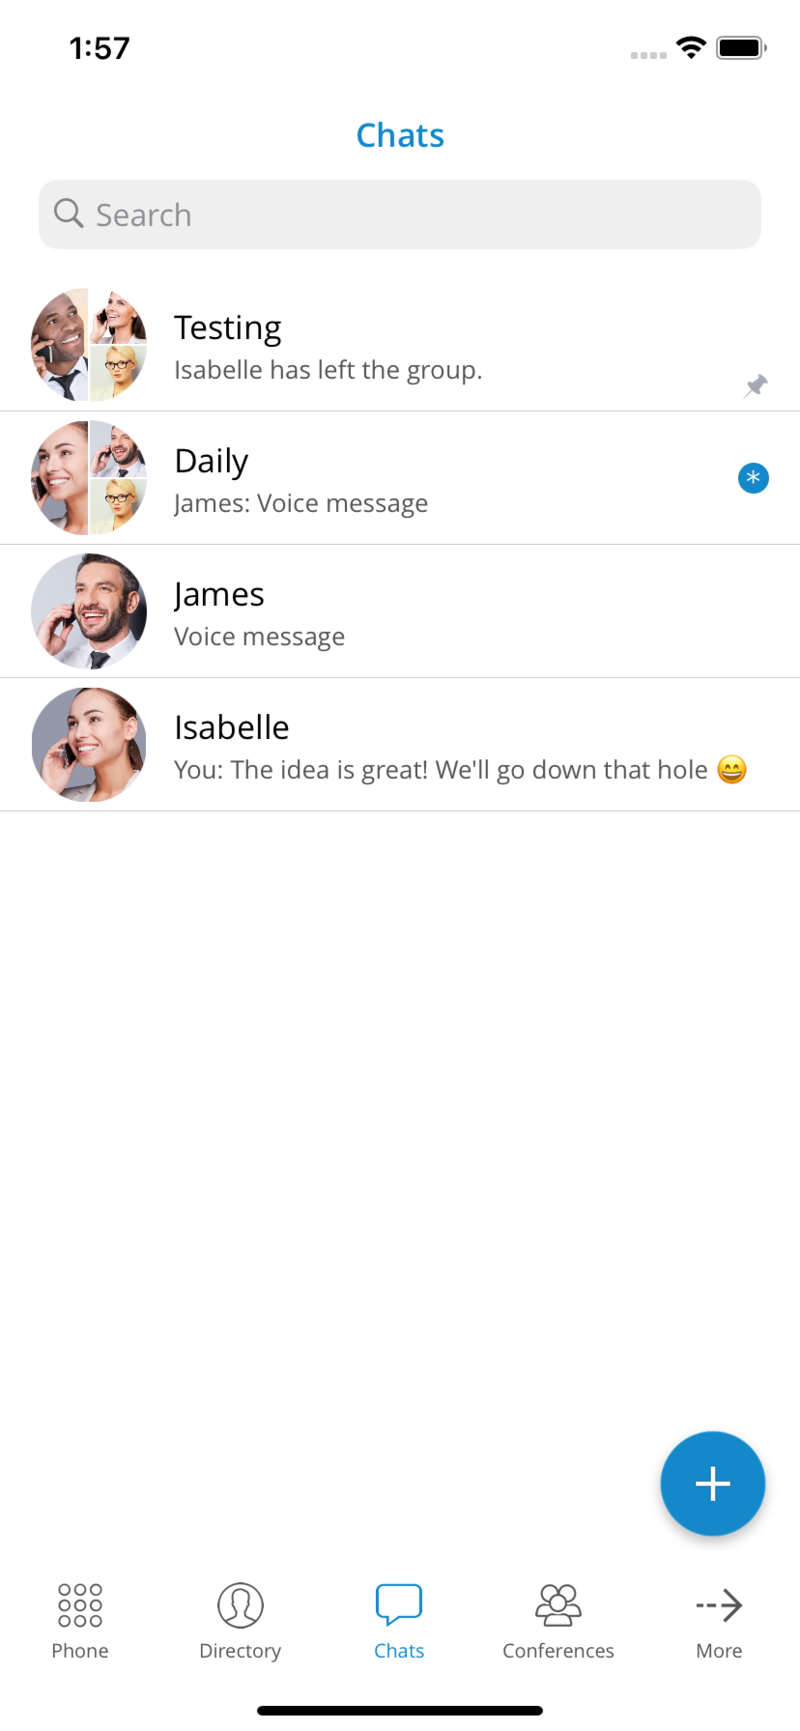
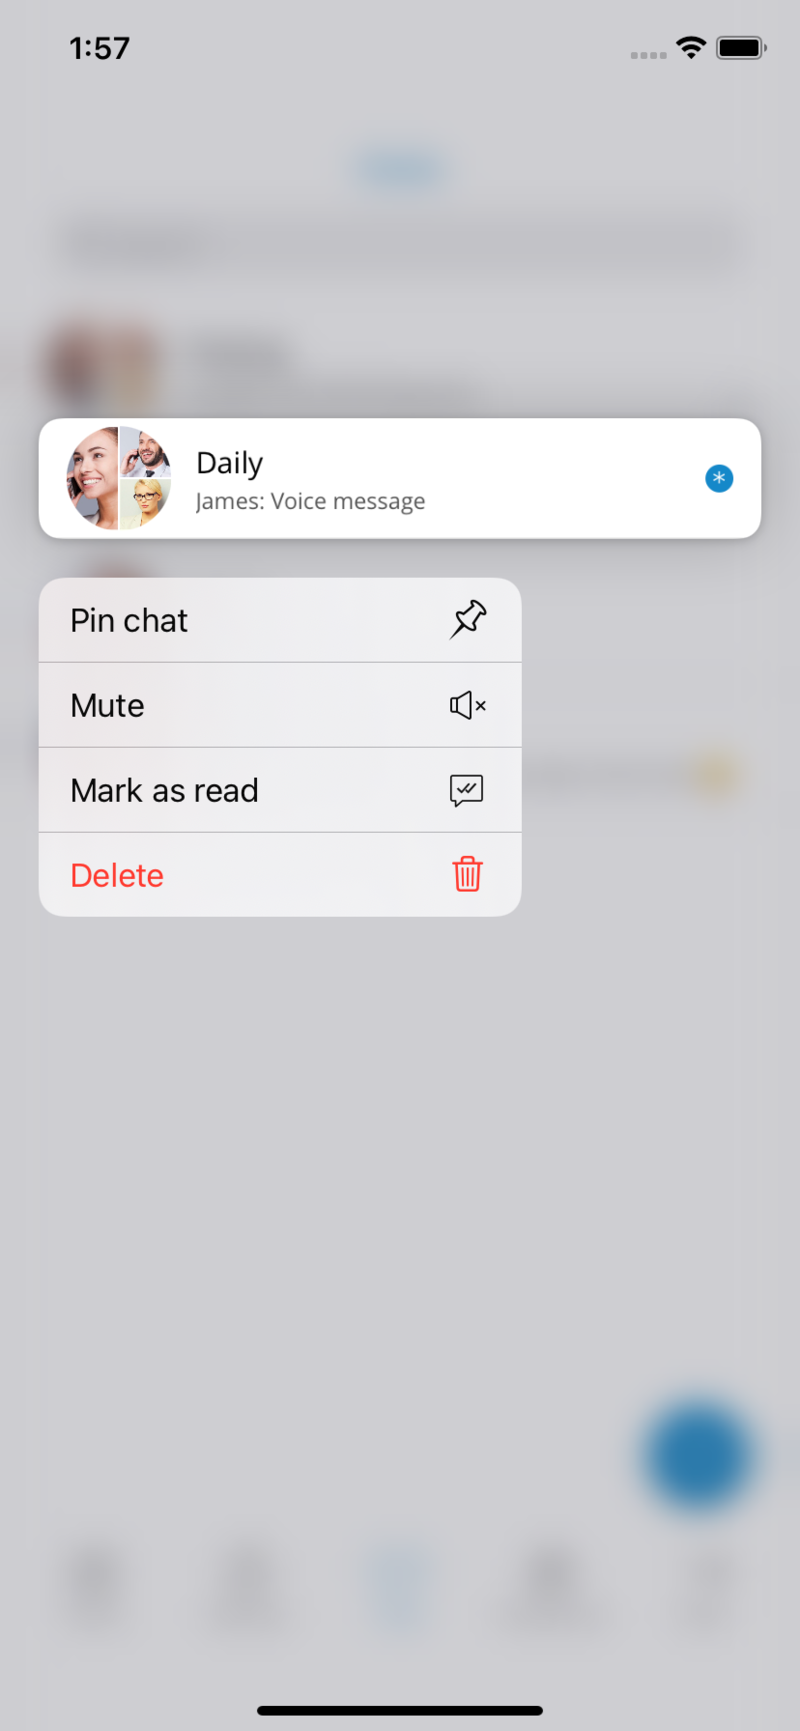
Ability to send messages to myself
Users can send a message to themselves in case they wish to keep notes or transfer some messages between gloCOM apps.
Typing indicators for single and group chat
Typing indicator at the bottom of the chat screen shows that someone is typing within the chat session. In group chats, multiple participants can type simultaneously, so the notification will show a message: 3 participants are typing (when 3 participants are typing simultaneously). Users can also see when someone is typing a message from the chat list screen.
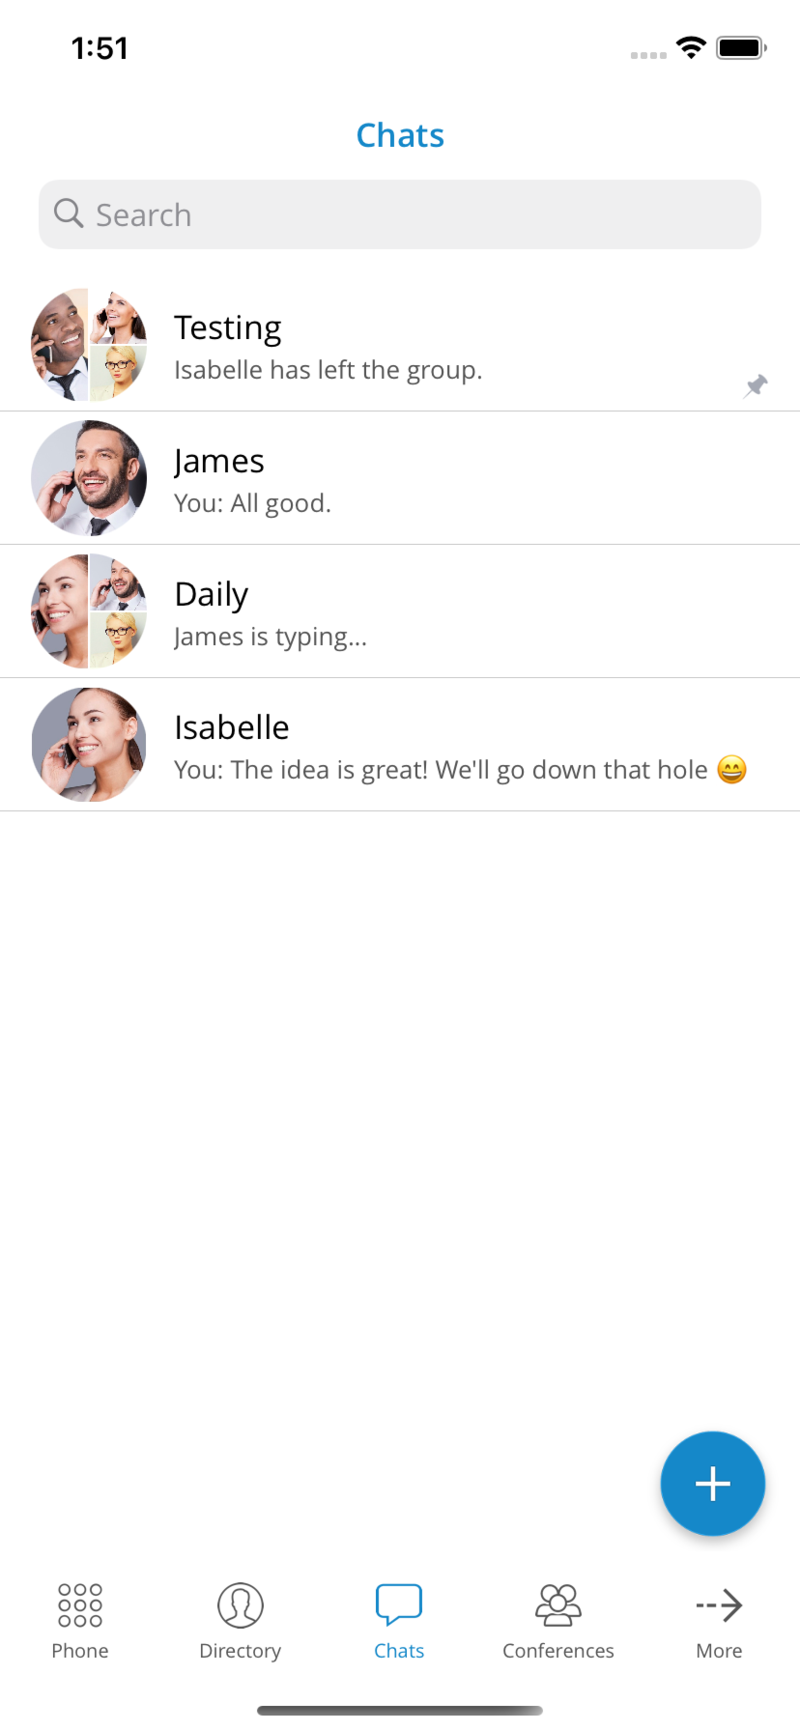
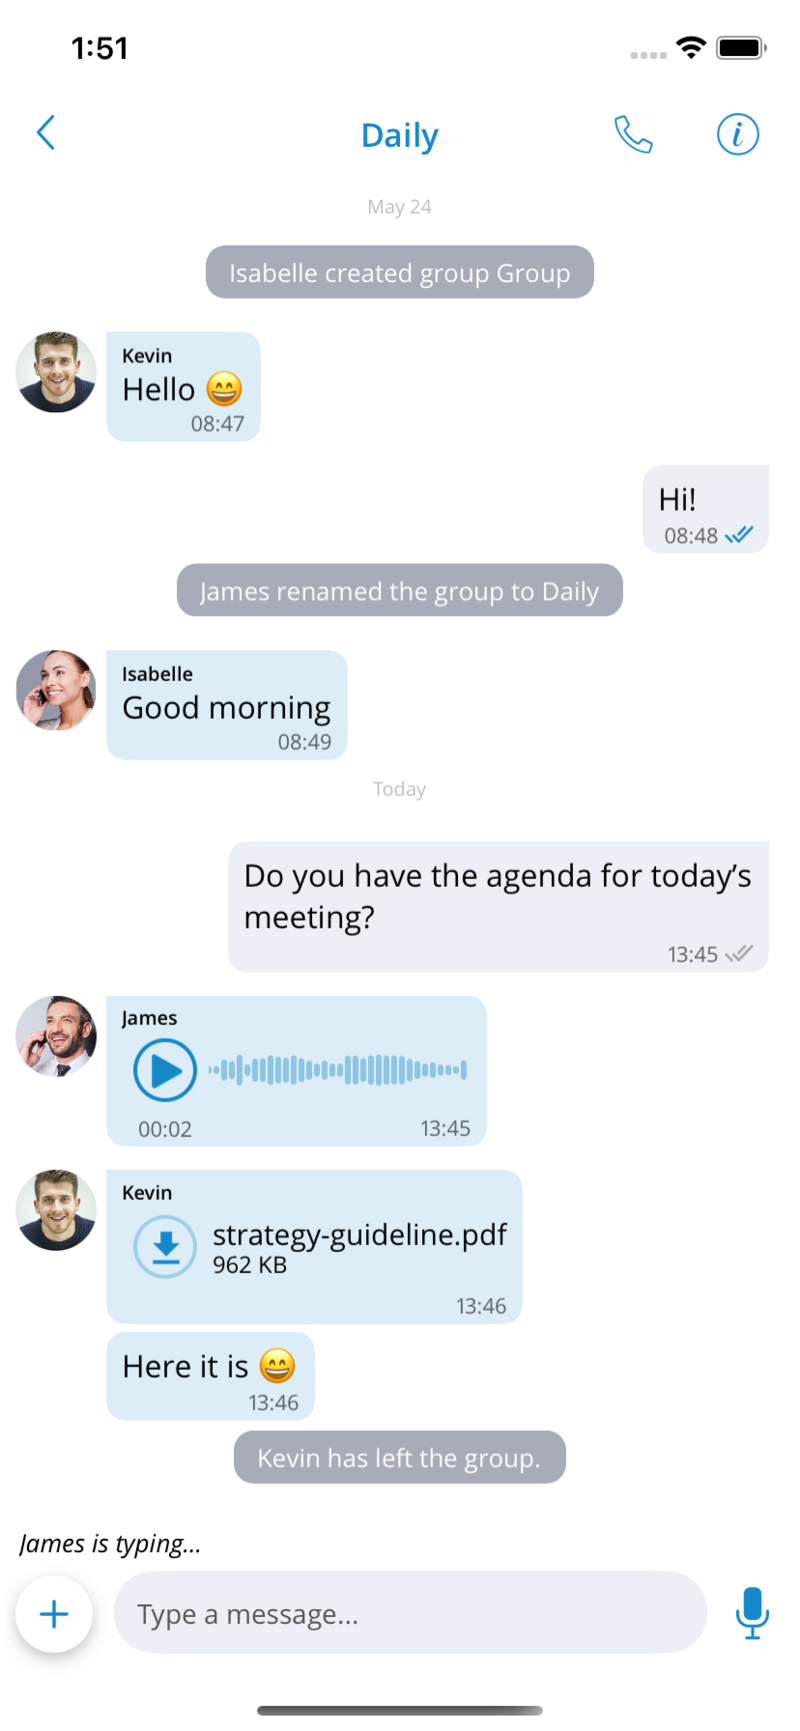
Remove user from the group chat session
This feature allows the group administrator to remove a participant from the group chat. Once a participant is removed, all other participants receive a notification that this person is removed from the group, including the removed participant.
The removed participant can enter the group chat and view all messages until the moment of removal but will not be able to write, send files, or see new messages from other active participants.
Messages
There are three types of messages:
-
Text messages
-
Voice messages
-
File messages (photo, video, gif, pdf, zip, etc.)
Every message that is sent to the server has one of the three states:
-
Sent (message is sent to the server)
-
Delivered (message is delivered to the recipient)
-
Seen (recipient has seen the message)


Messages can also be in the waiting or failed state, depending on network conditions. If the text message contains a URL, users can press it to open it. All waiting messages will try to be resent to the server on the next app start. Failed messages will not be automatically resent. With a long press on a message, you can copy its contents.
Select Text
Users can copy only the portion of text messages by using the Select Text option that can be selected by long-pressing a text message and pressing on it in the context menu.
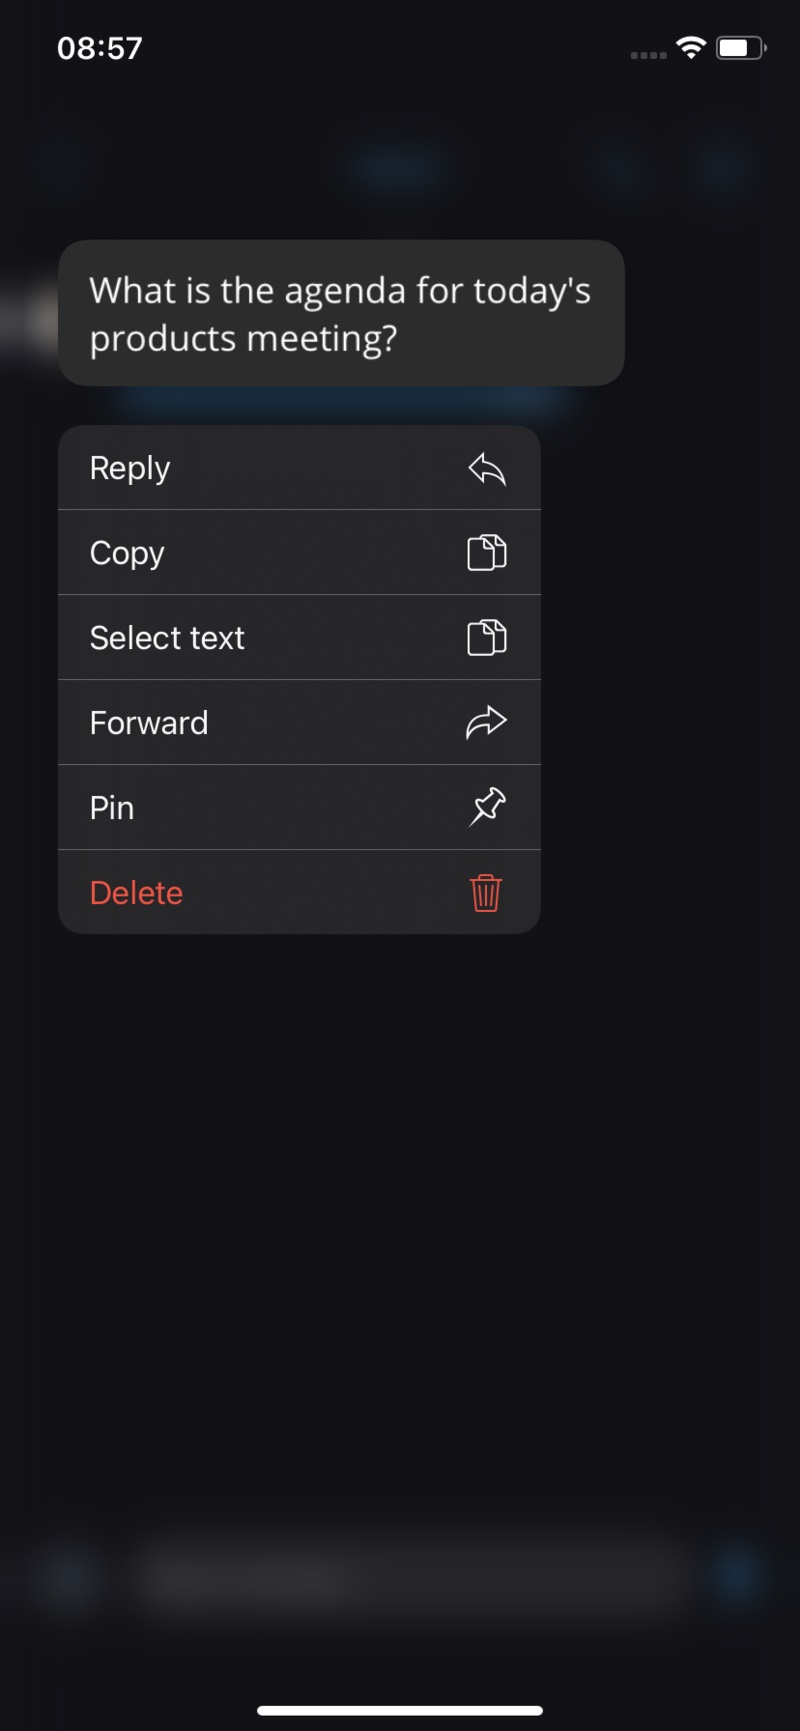
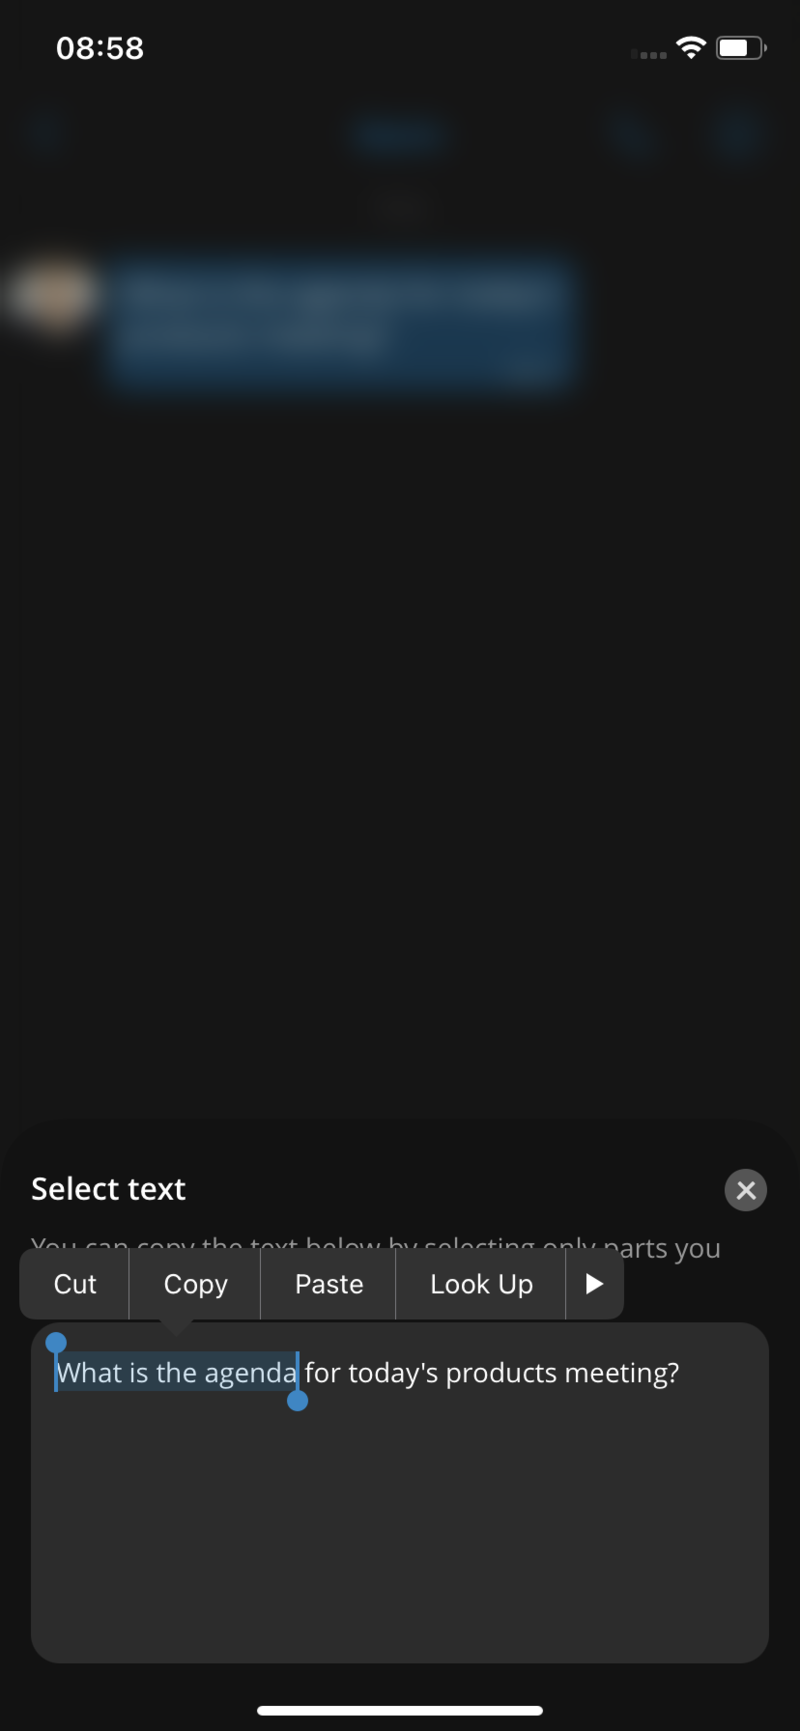
File messages
To send a photo or a video from the Gallery app, users can press the + button and then the Gallery icon on the chat screen. After the file has been selected, it will be compressed (to preserve bandwidth) and sent to the chat server.
To send any document, press the + button and then the document icon, which will open the document browser.
The progress of the uploads or downloads can be seen in the chat view. It is possible to cancel the transfer of the file message by pressing the x button.
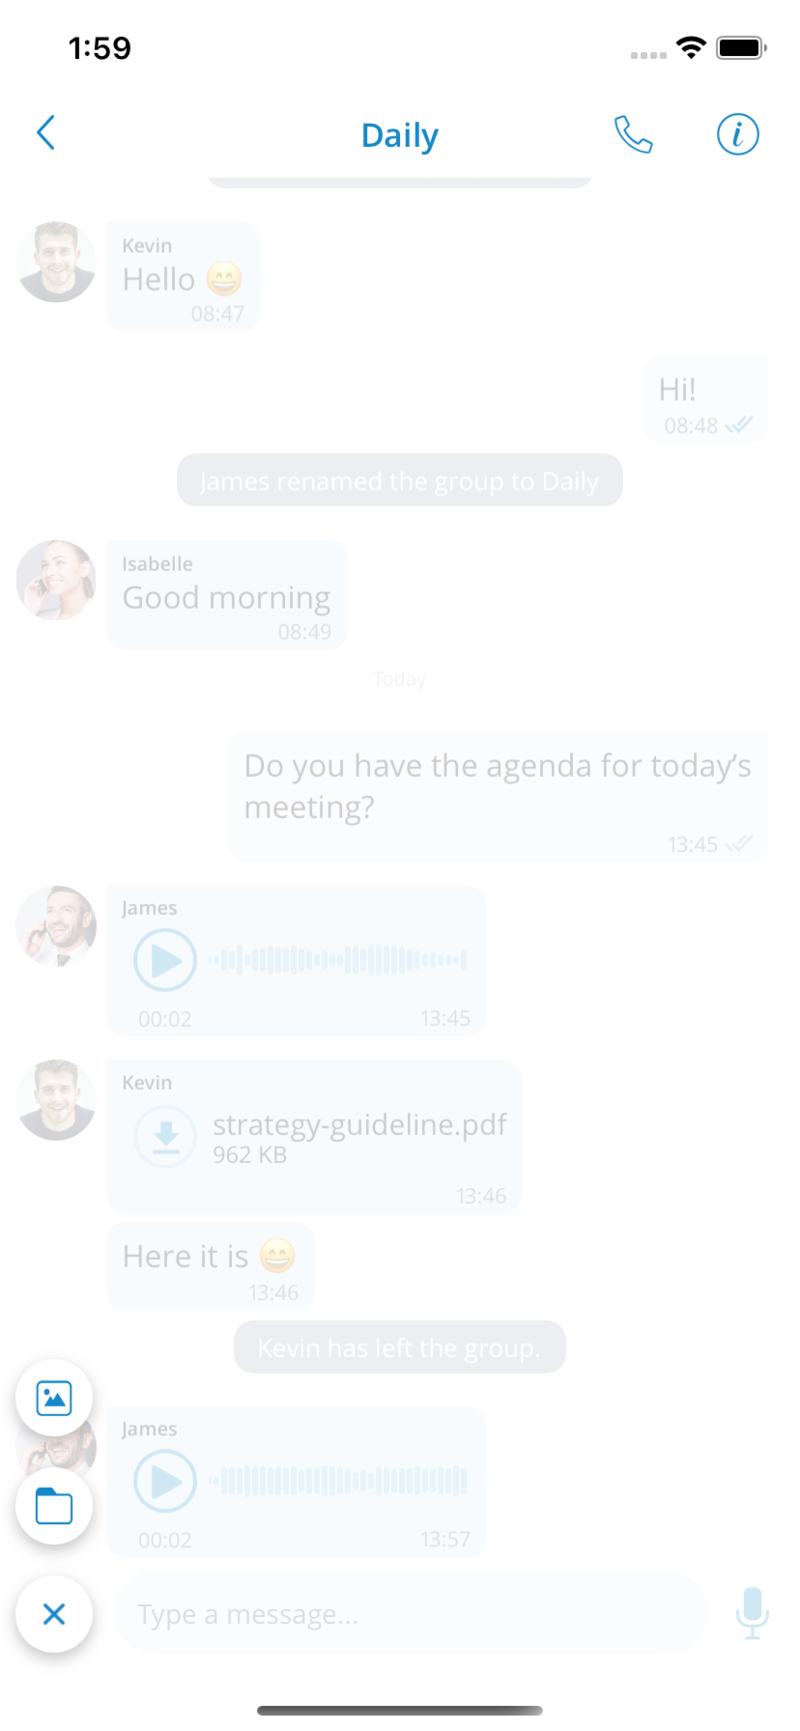
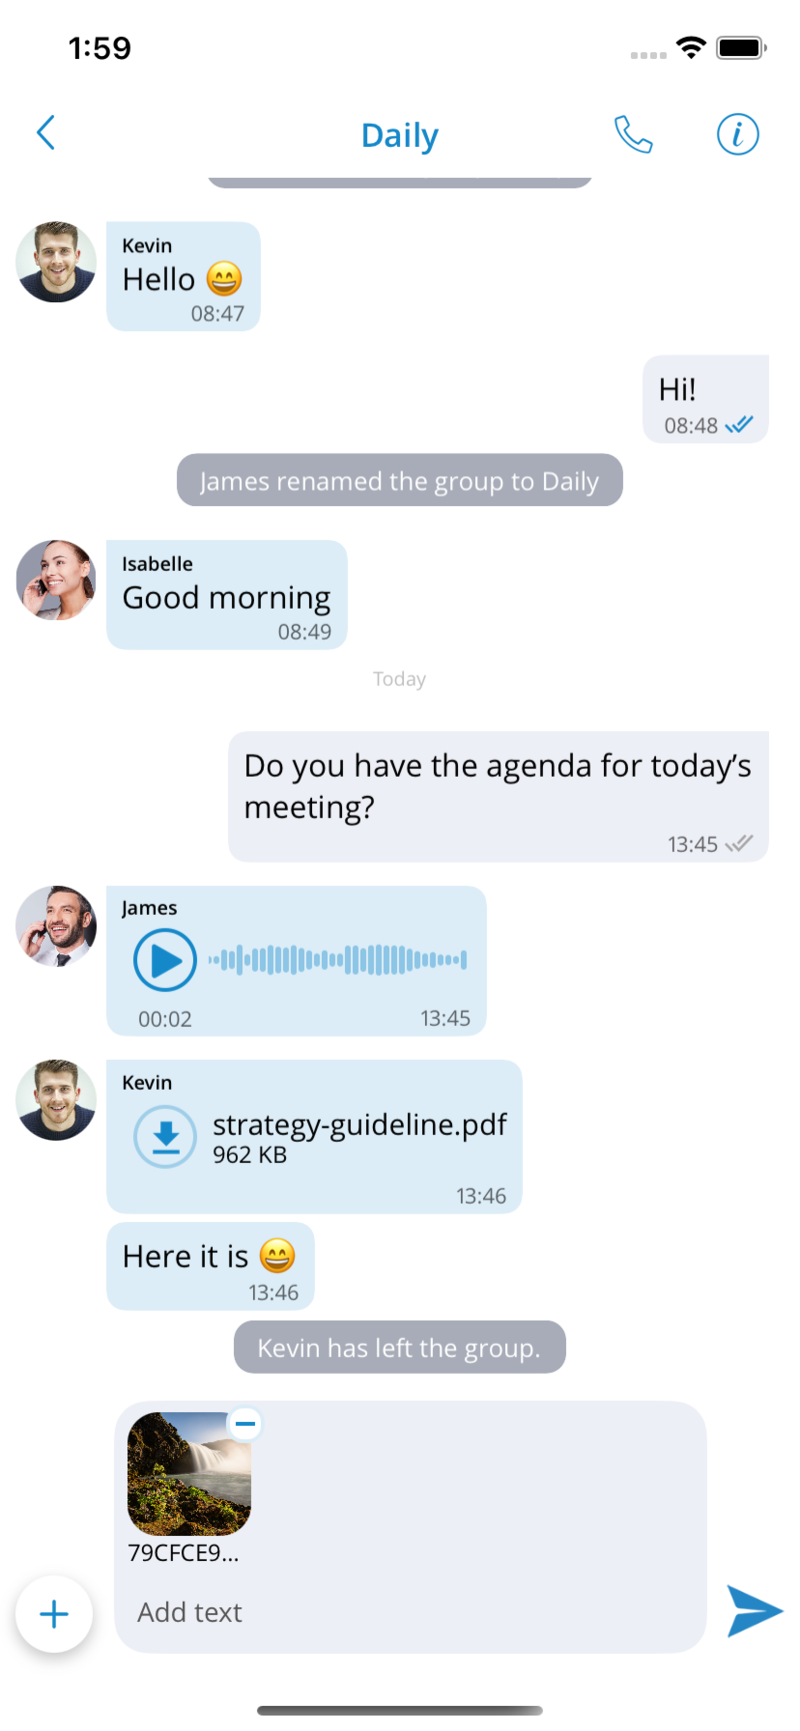
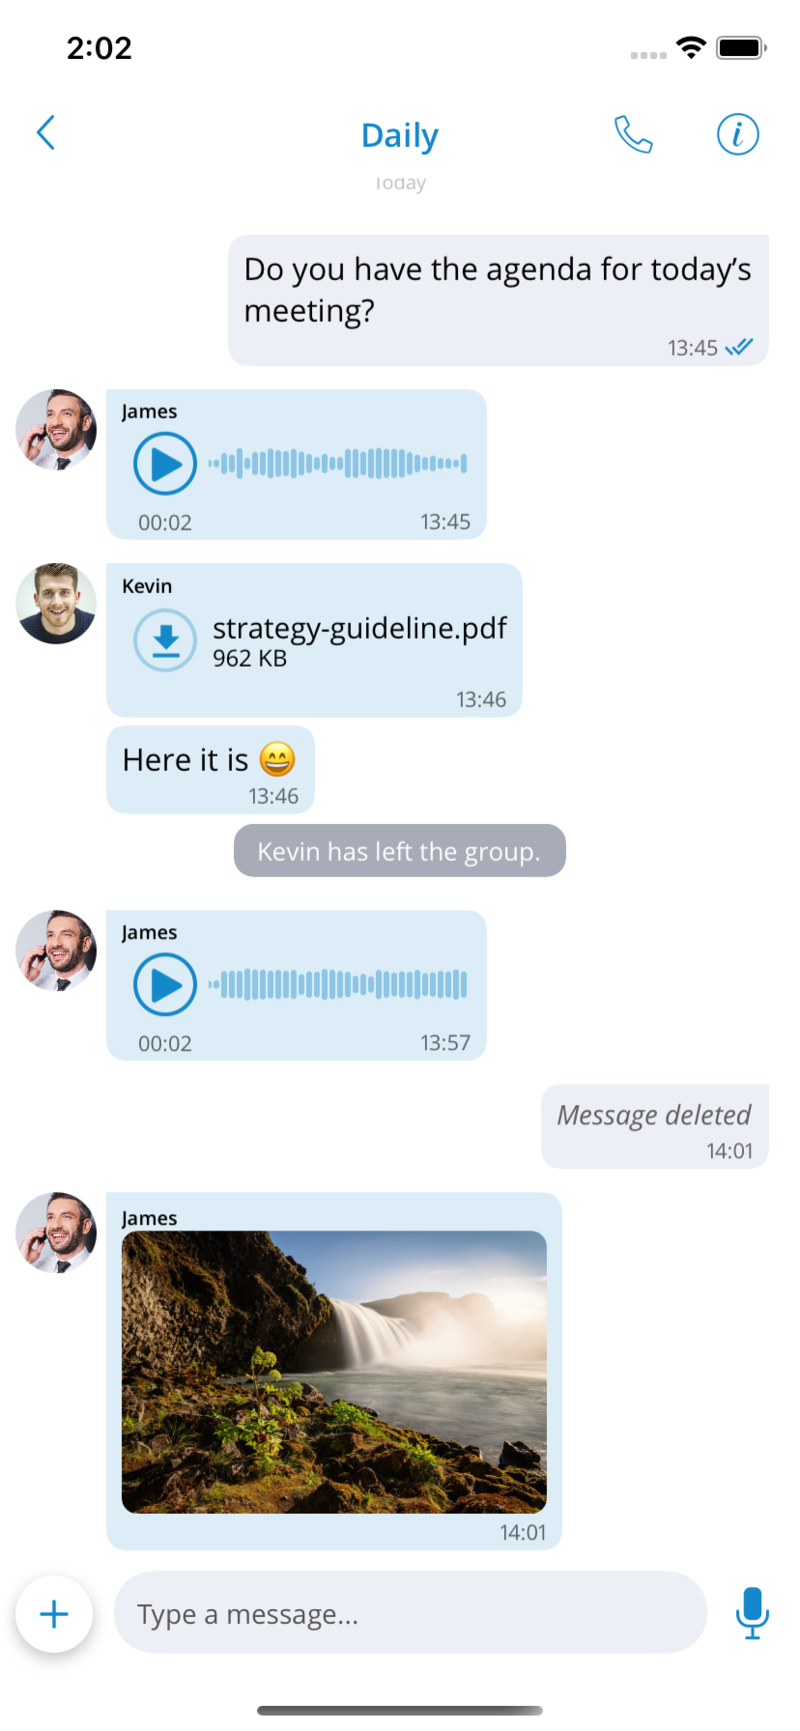
Downloaded photos, videos, or documents will be saved to a local gallery or file system. Files smaller than 500kB will be automatically downloaded if users are connected to WiFi and not to mobile data.
Send more than one file at once
When pressing the gallery or file explorer button a window will appear where the user can select multiple images or files.

In the upper right corner, a button will allow the user to confirm the current selection. There is also a counter that shows how many files have been selected. After pressing the “Add” button the user will return to the chat screen and there will be a file counter above the type text field where the user can preview the selected images or files. The user can put multiple files in that preview but there will be a label with the limit on how many files can be sent. If the user exceeds the limit and tries to send, the system will prompt the user with a message that the limit has been exceeded. If at least three media files have been selected the preview will have a clear button in the top left corner. Pressing the button will clear all selected files in the preview.
Chat media preview screen with orientation support
User has an option to rotate the screen on chat media preview screen. Chat media preview screen can be opened by pressing on any downloaded file message.
Take pictures and videos with camera inside chat conversation
In addition to sending media files from the gallery, there is an option to take a photo or record a video inside the chat conversation screen to give users a better chat experience. By pressing a + button, the user has an option to click on the camera button that opens a camera screen to take a photo or record a video. After taking a photo or recording a video, the user can choose whether to save the file to the gallery, discard it or send it in the chat.
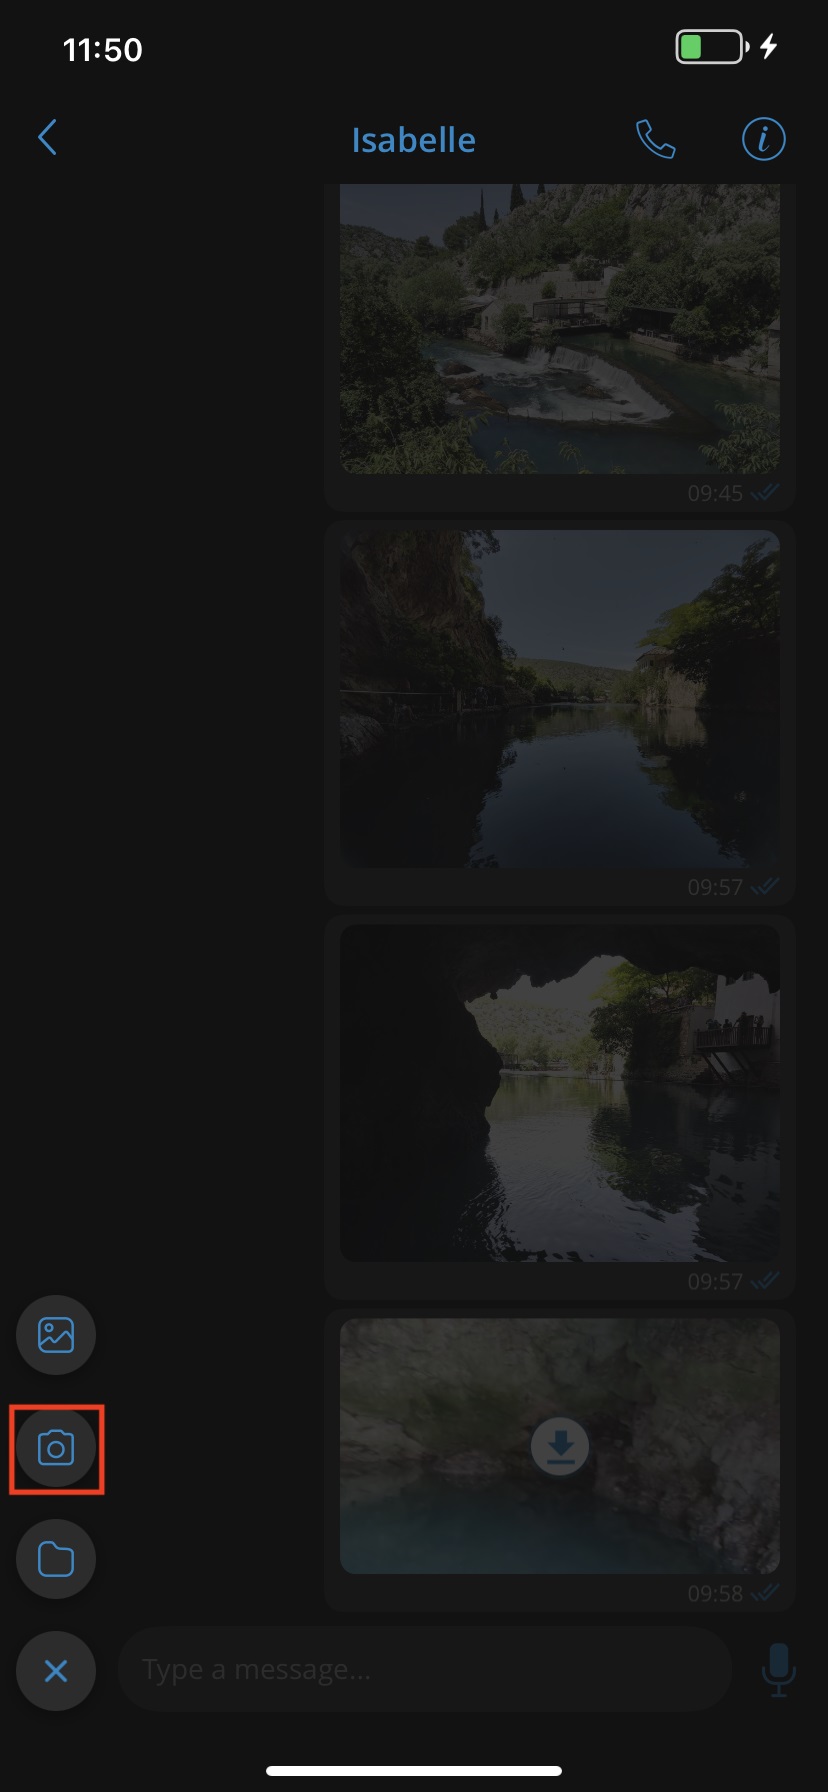

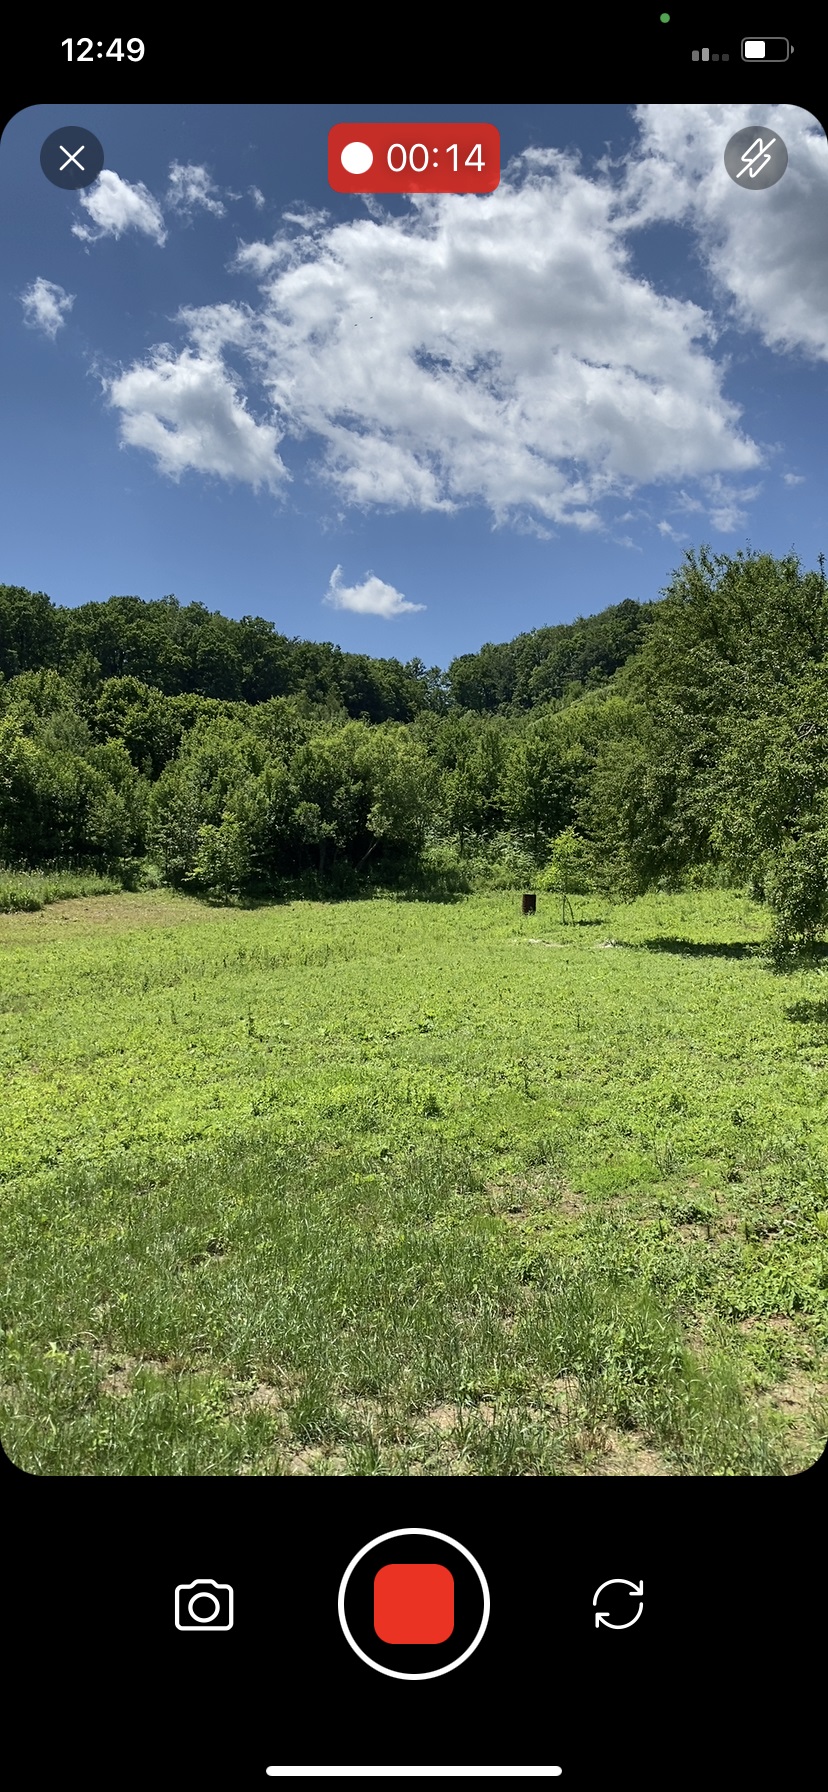
Chat voice messages
gloCOM GO 6 users can send a chat voice message when they cannot type. The maximum duration of the recorded chat voice message is 2 minutes.
An automatic screen lock will be disabled during the recording of the voice message. While recording, if the back button or the screen lock is pressed intentionally, or if the user switches to another app, an active chat voice recording will be canceled.
When listening to the recorded voice message, if the user goes back to the chat list, the recording playback will be stopped.
During playback of received chat voice message, the user will have visible control buttons in the notifications even when switching to another app, because of media player integration. This offers users the flexibility to still listen to the playback, even when switching to another app, or home screen.
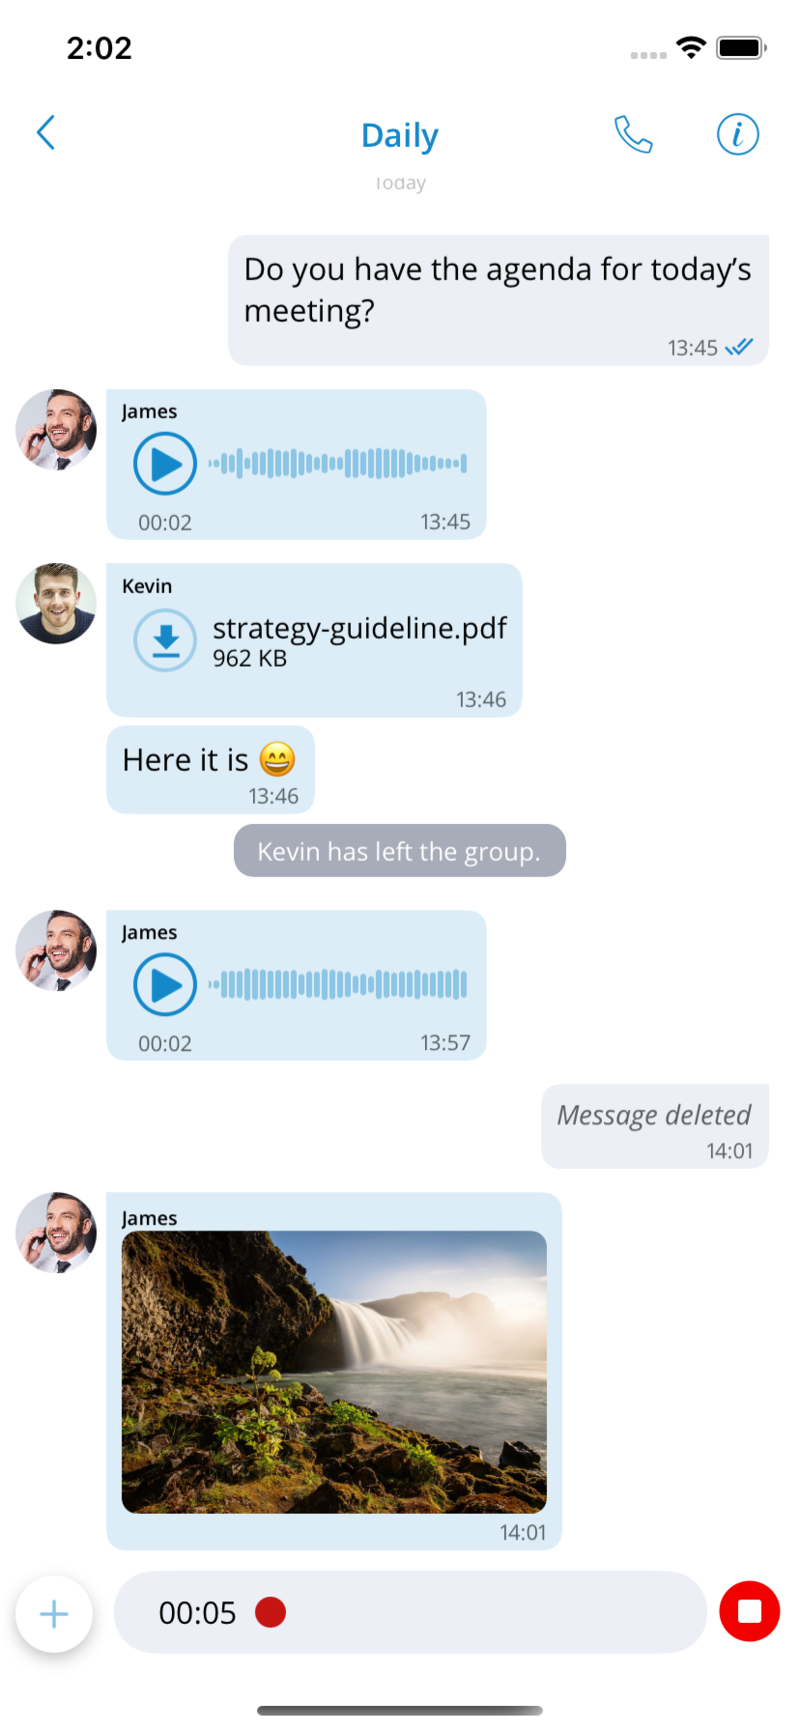
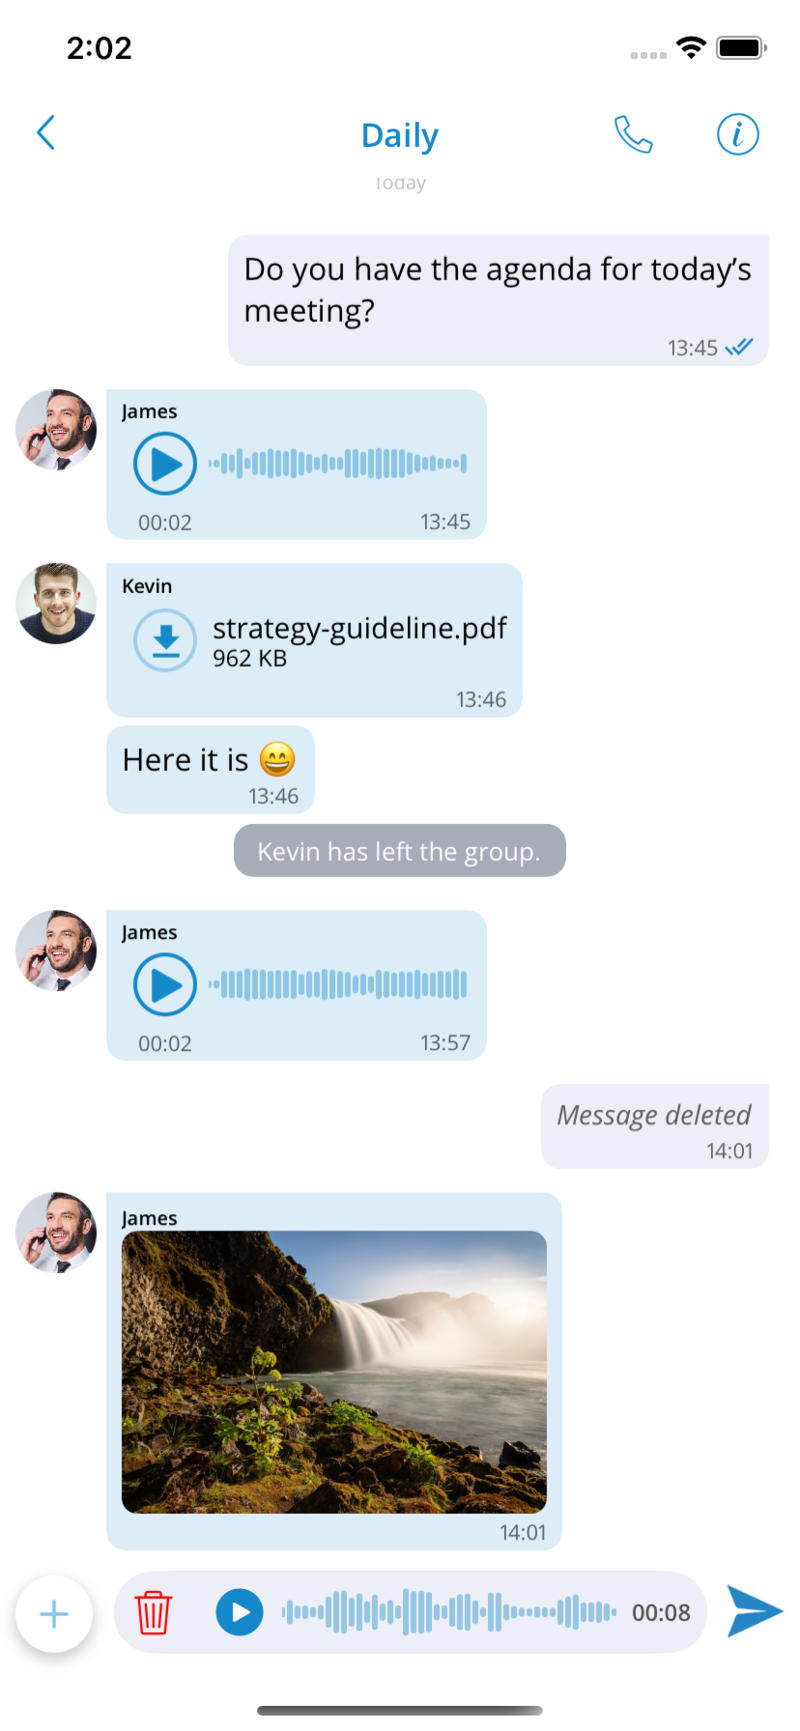


Forward chat messages
Users can forward the message or file up to 10 conversations/contacts at the same time. By long-pressing on the message, a menu will appear with an option to forward the message. After pressing the forward option, a chat picker will open, and users can choose which contacts they wish to forward the message to.
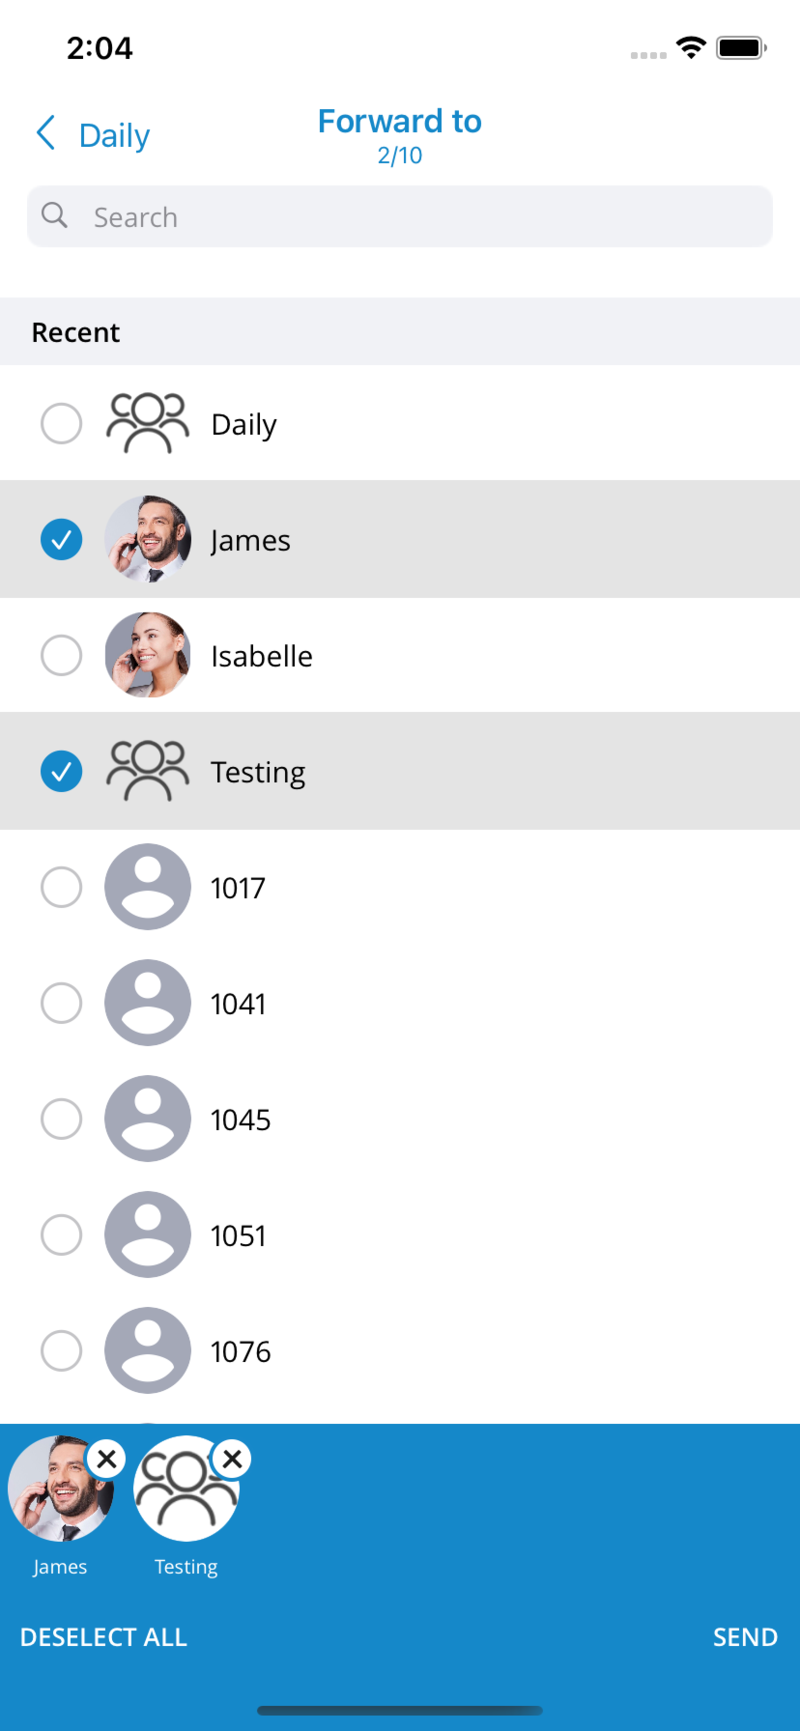
Chat messages reply mode
The reply option allows users to reply to a specific message. To reply to a message, users need to long-press on the message they wish to reply to and select the reply option from the menu. As a result, the message to which the user wants to reply will appear above the message input field. Another way to reply is to swipe right on the message the user wishes to reply to. Pressing on the reply part of the message in the chat will take the user to the original message.
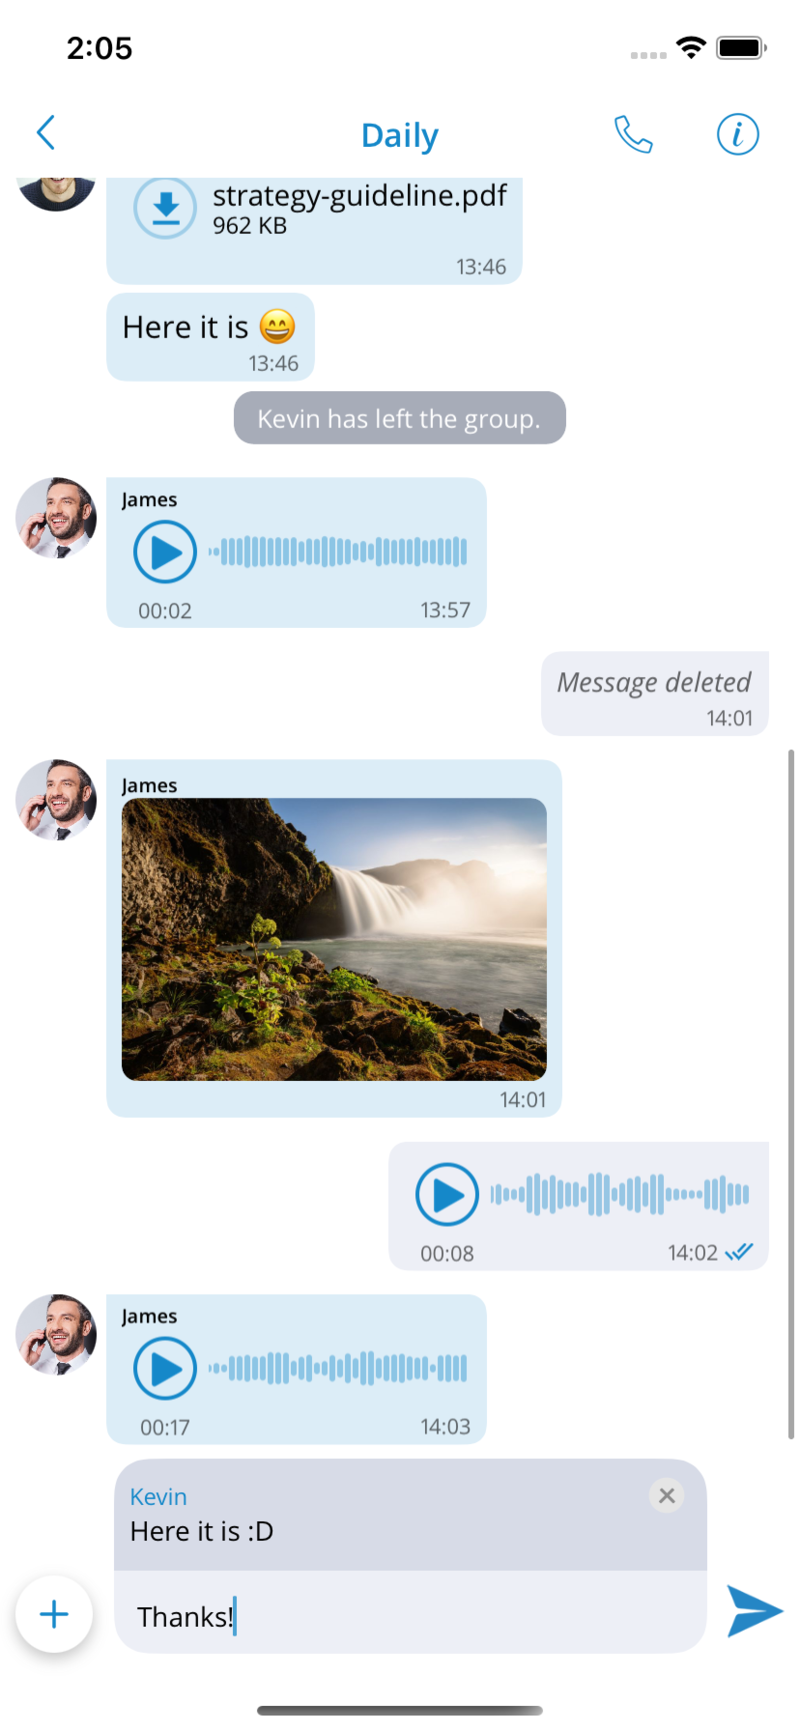
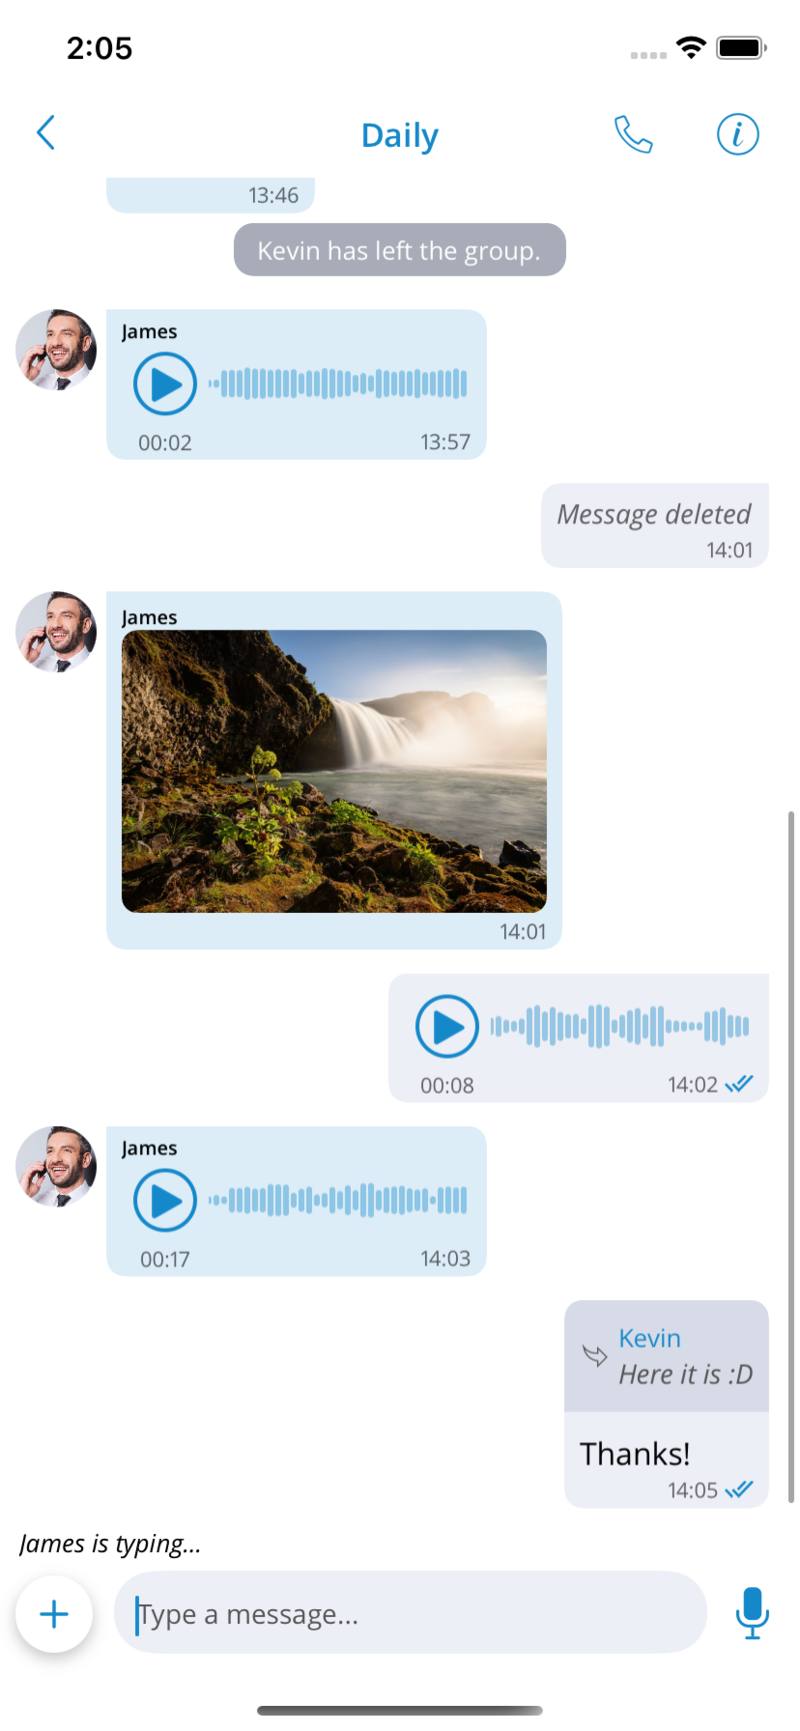
Pin messages for single and group sessions
All messages in single and group conversations can be pinned. Pinned messages are synchronized across all of gloCOM apps. Users can long-press a message and select the Pin option on the menu to pin a message.
After pinning the message, the pinned message indicator will show at the top of the screen, and by pressing on that indicator, users can scroll to the message that is pinned. Pressing the x button on the pinned message indicator will unpin that message.
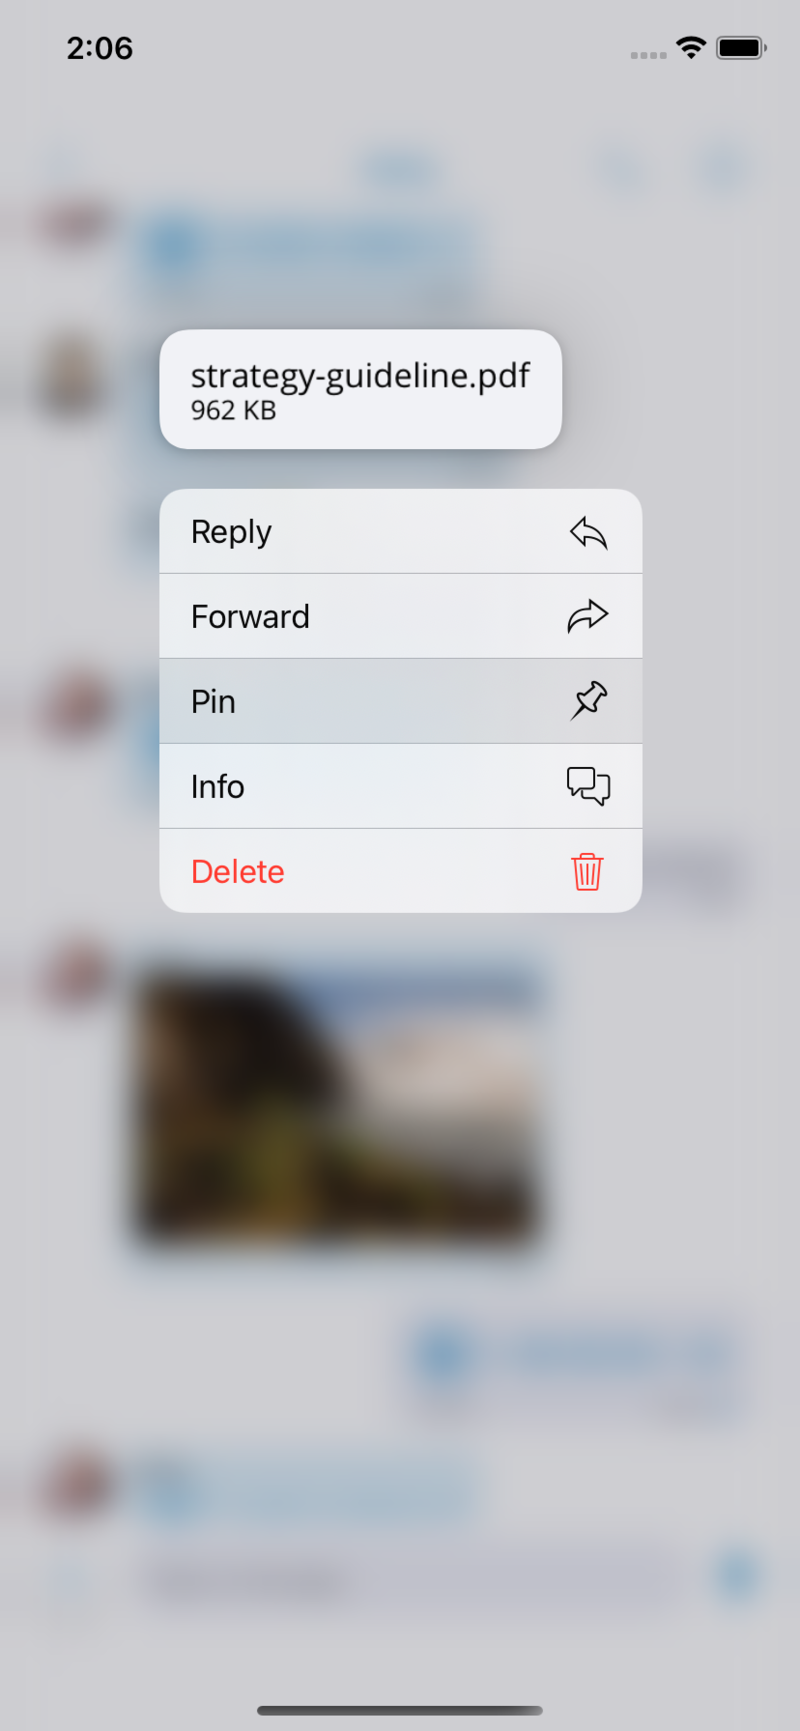
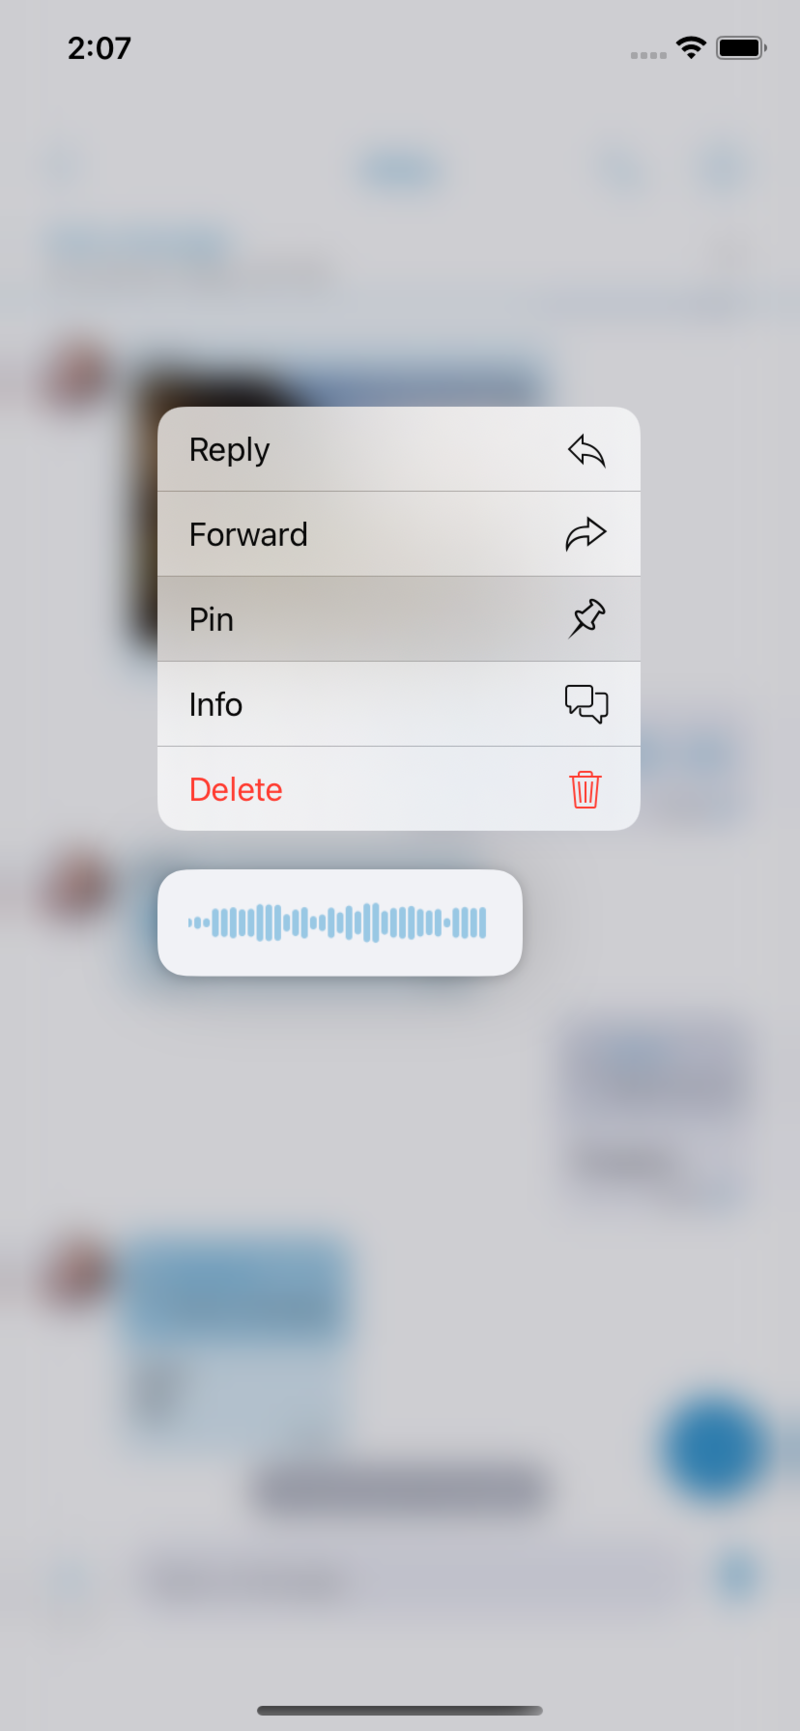
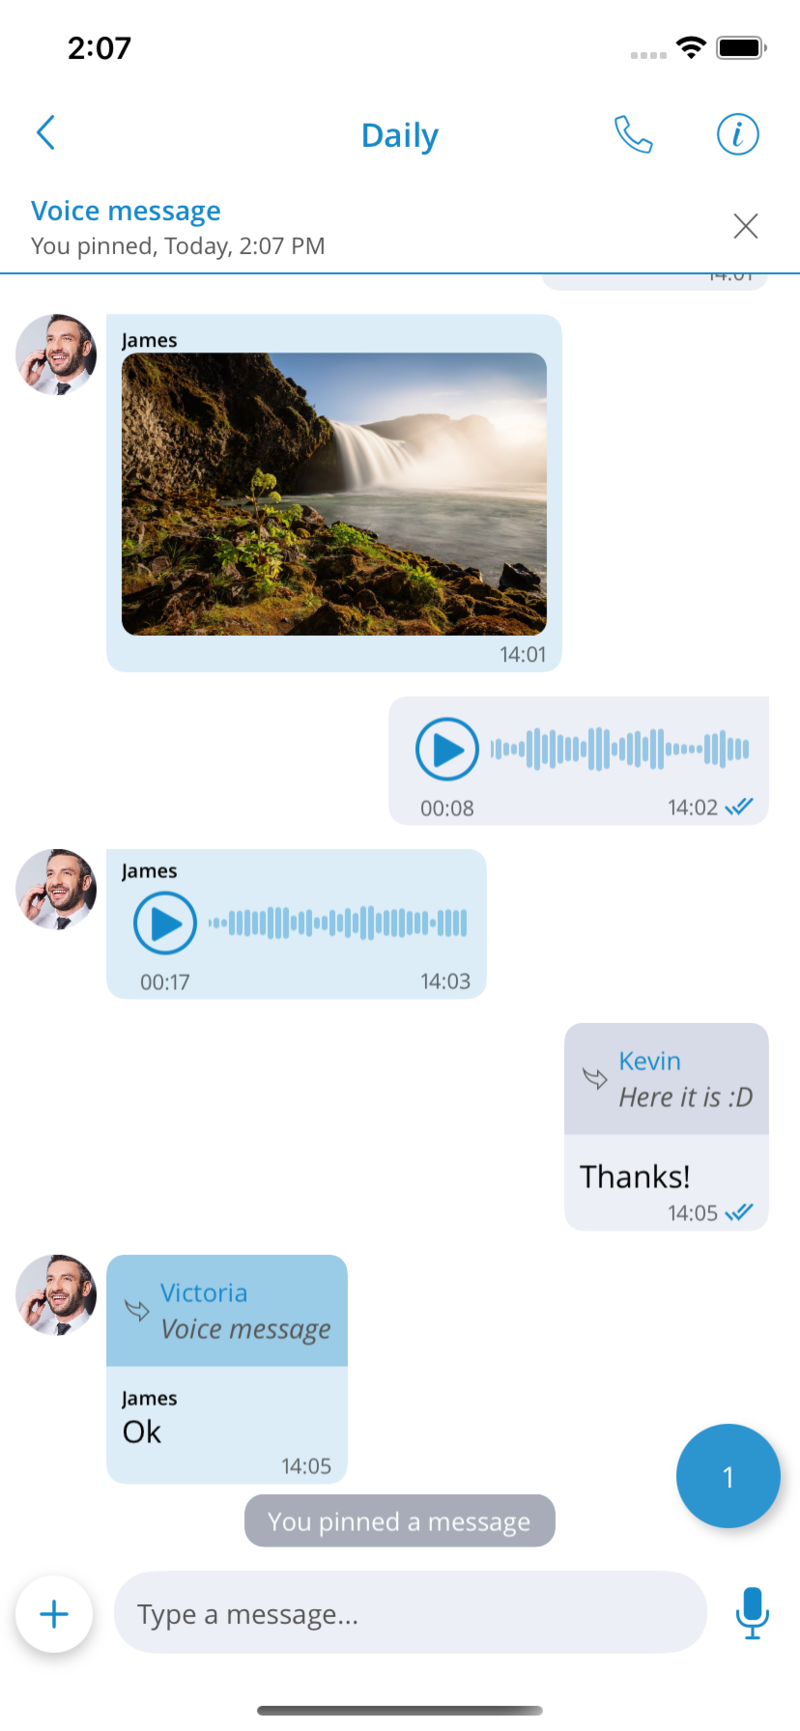
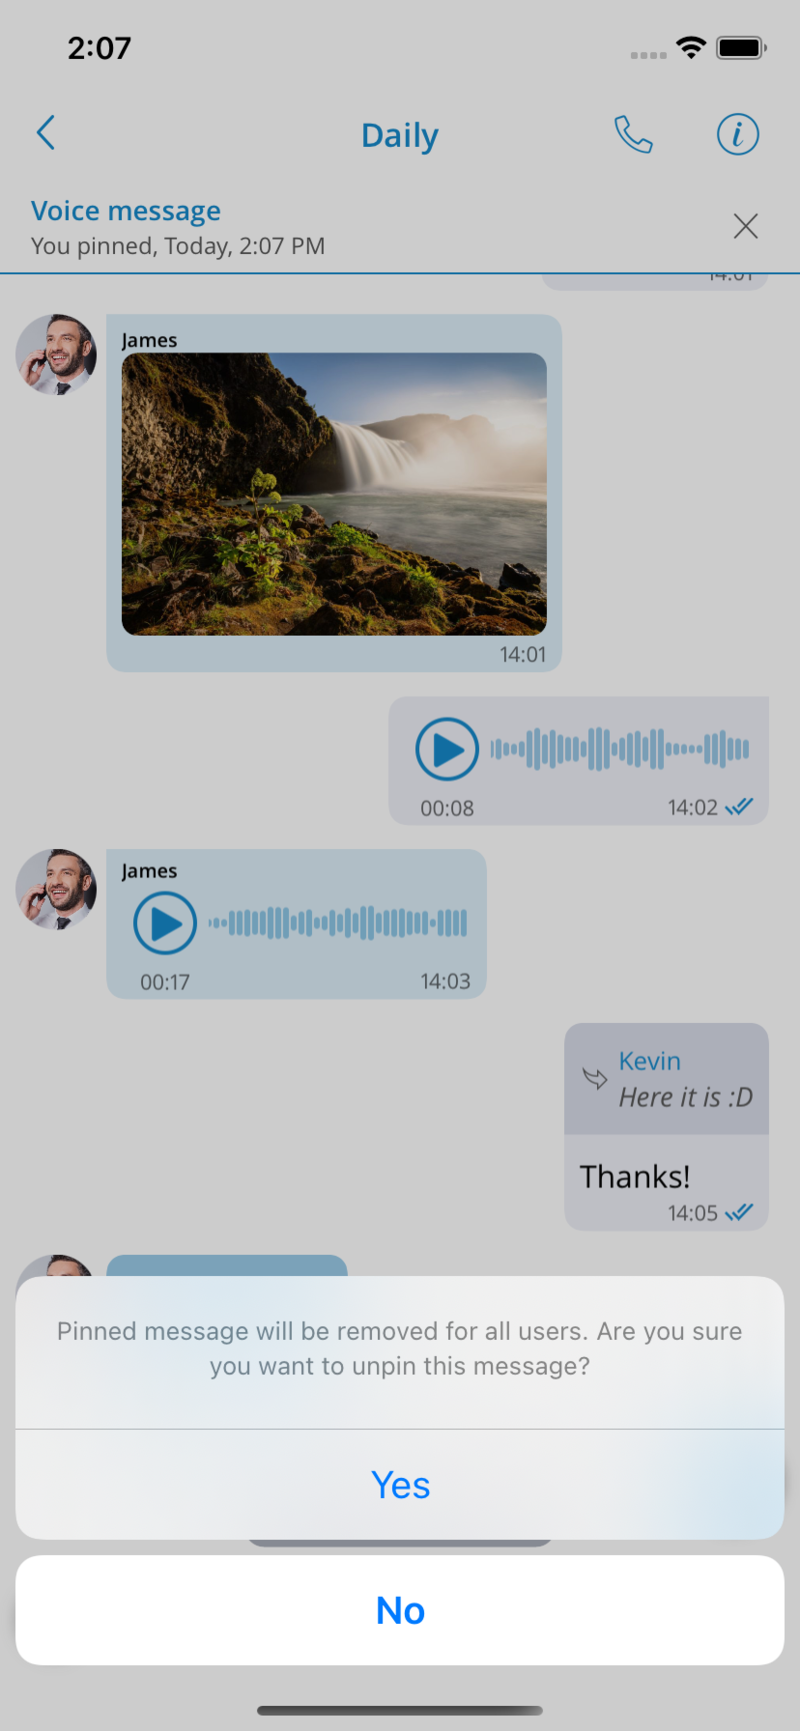
Delete Chat Messages
This option allows users to delete chat messages. To delete the desired message, long press on the message and select delete from the menu. After pressing the delete action, the confirmation dialog will show up with two options for outgoing messages:
-
Delete for myself with the following sub-content: “This message will be deleted only for you. Other chat members will still
be able to see it. Are you sure you want to proceed?” -
Delete for everyone will automatically delete the message for all participants without additional confirmation dialogue.
For incoming messages, there is only one option:
- Delete for myself with the following sub-content: “This message will be deleted only for you. Other chat members will still be able to see it. Are you sure you want to proceed?”
After deleting the message, the message interface will be displayed with the deleted message indicator.
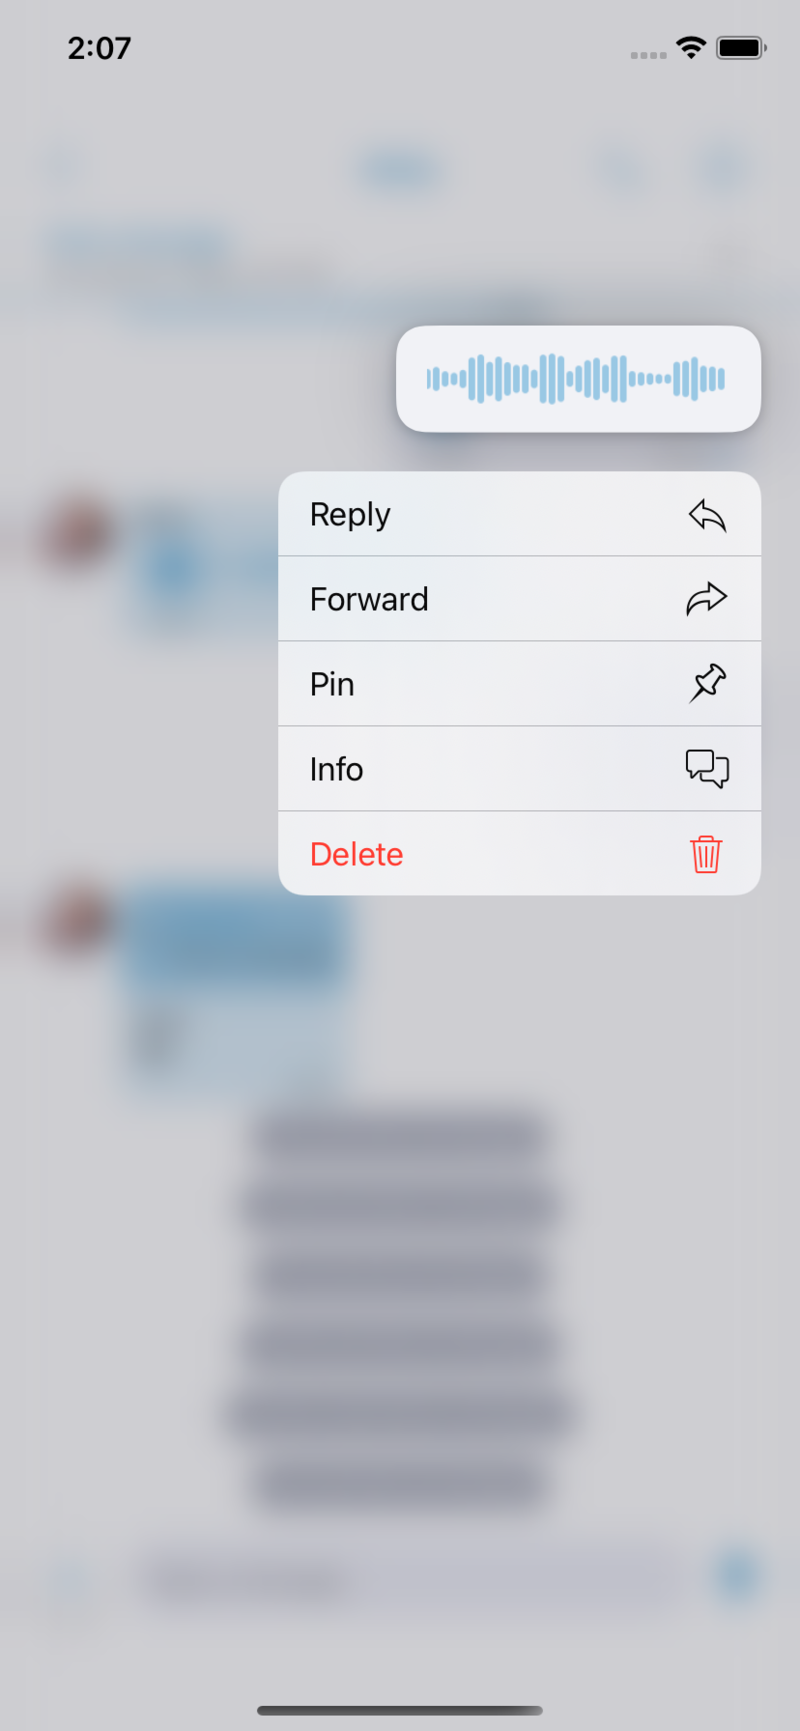

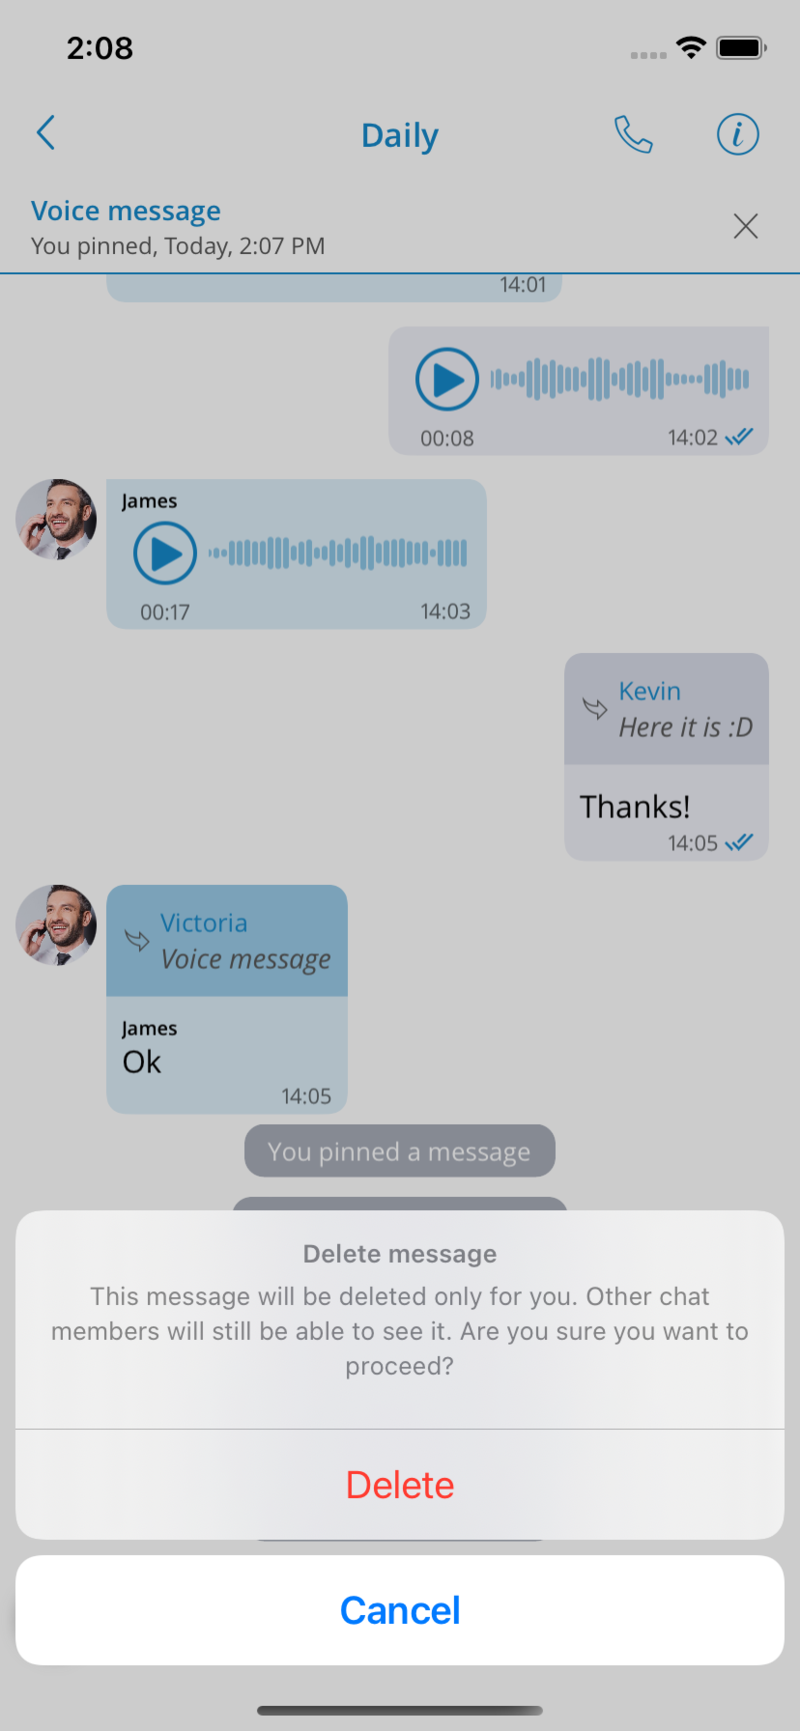
Share files and text from other apps
Share files and text from other apps to gloCOM GO 6, by simply selecting gloCOM GO 6 in the system’s share dialog. App chat picker will open with recent chats where users can select multiple chats that will receive the file or text.
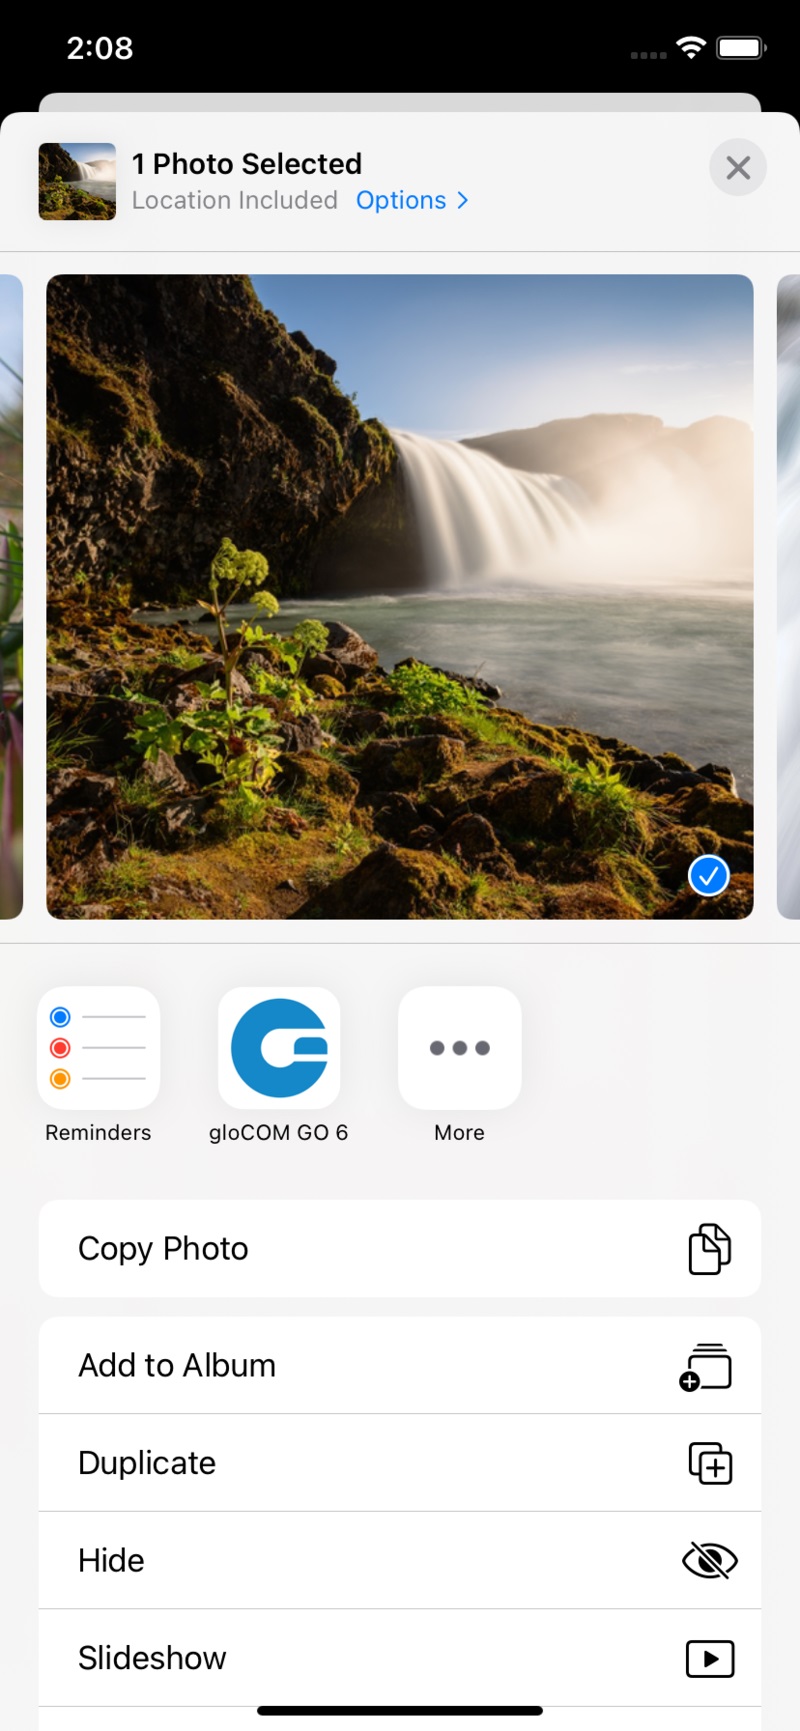
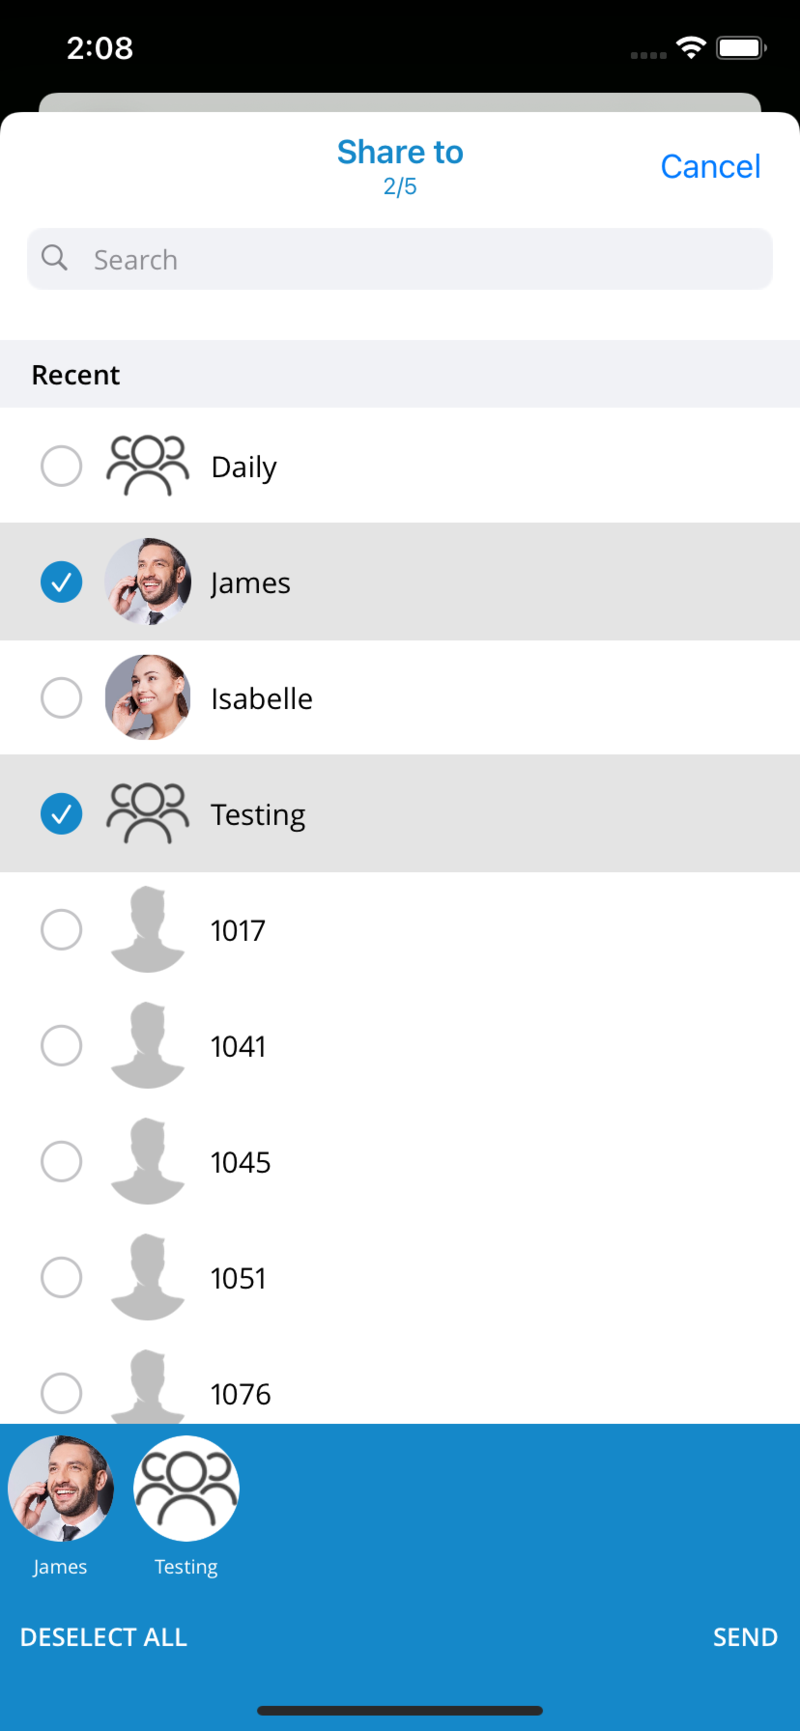
Contact share from other apps
gloCOM GO 6 users have an ability to share contact details from phonebook or any other application to gloCOM GO 6. Contact sharing displays contact data as a chat message to the selected gloCOM GO 6 user.
Quick actions for chats on chats list
Users can perform multiple actions for chats by long pressing on the chat in the chats list screen:
-
Pin – Pins or unpins the chat sessions
-
Reorder pinned chats – Opens a new screen that will allow users
to reorder pinned chats -
Mute – Mutes or unmutes the group chat session
-
Delete – Deletes the chat session
Pin chat sessions
gloCOM GO 6 allows users to pin their most essential and frequently used chat sessions to the top of the chat list screen.
This will help users find groups or contacts they chat with most often quickly.
When users long press on the chat session they wish to pin, a menu will open with the option to pin or unpin the chat session.
Once the chat session is pinned, it will be moved to the top of the screen and remain there even when users receive new messages from chats that are not pinned.
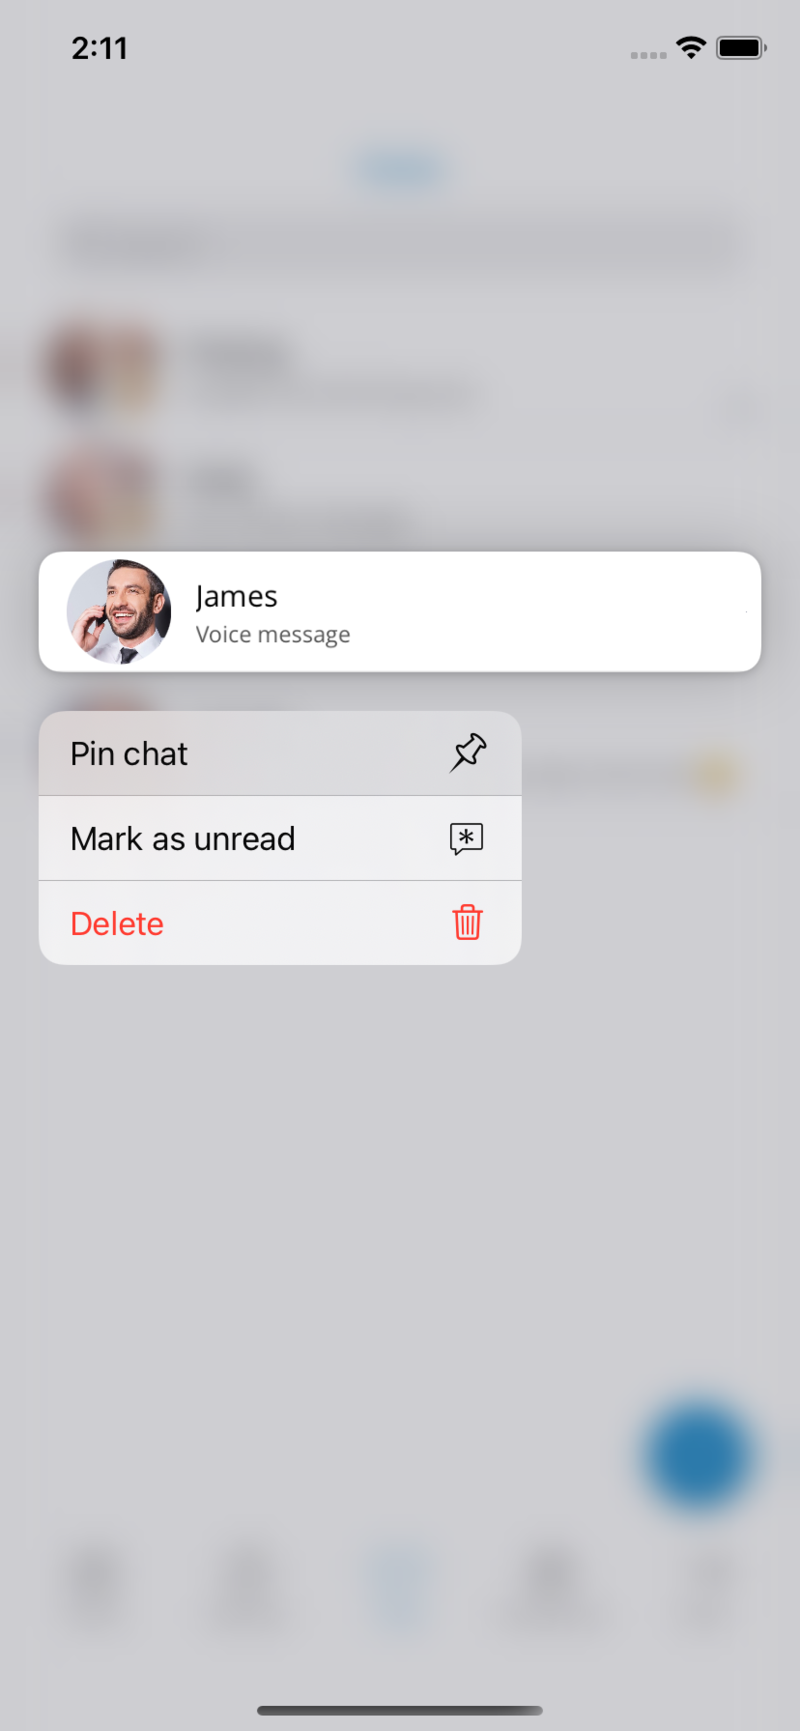
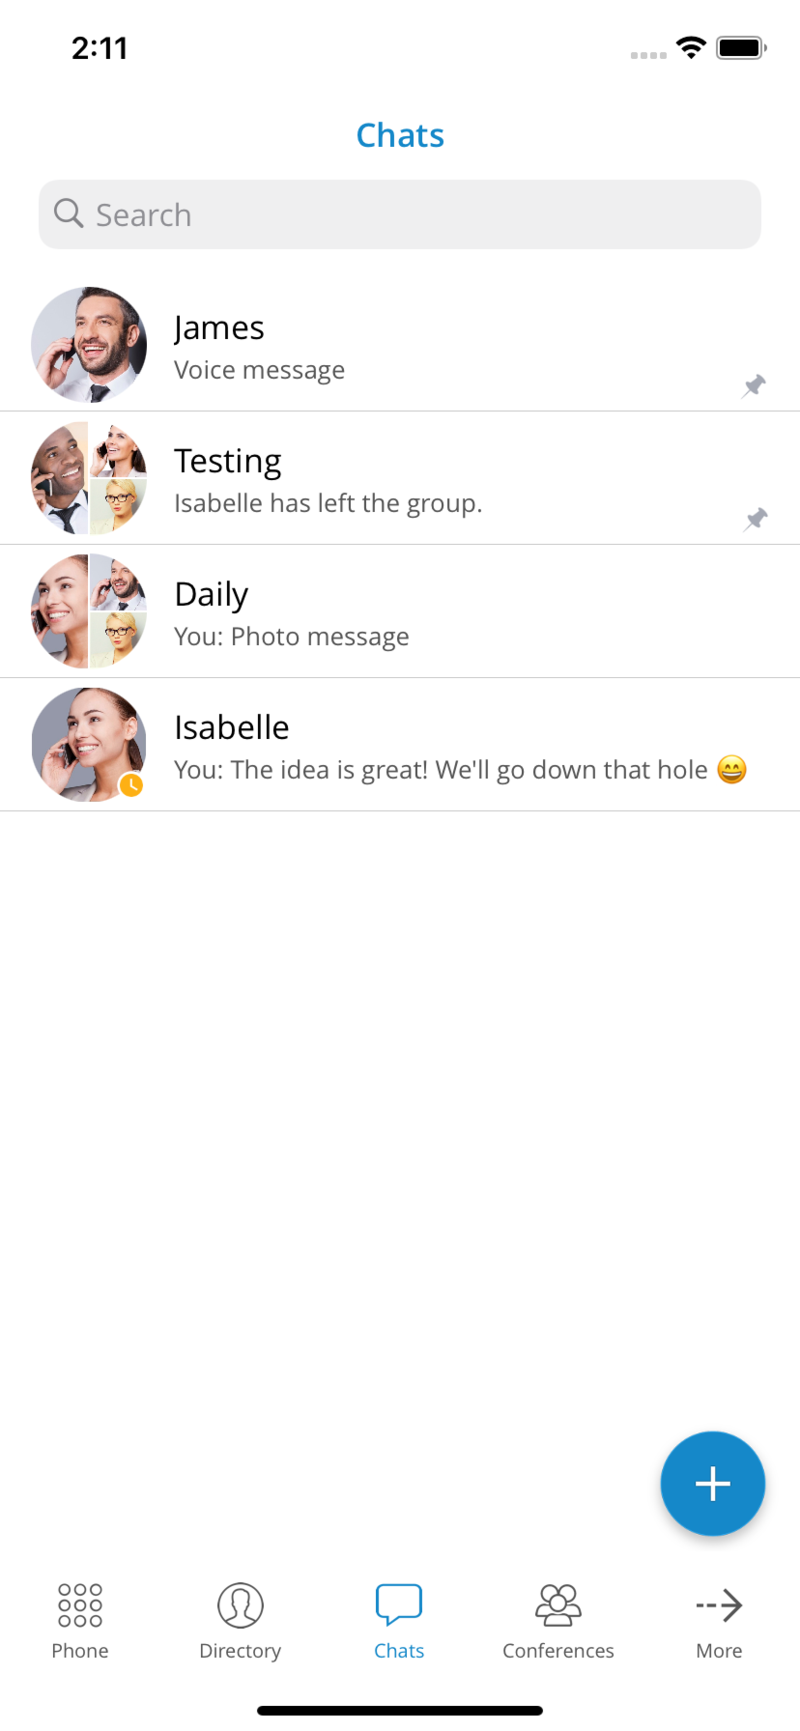
Reorder pinned chat sessions
Users can rearrange pinned conversations by long-pressing on an already pinned chat session and pressing the Reorder pinned chats option. Users can move pinned conversations by using drag and drop. This allows users to prioritize pinned conversations.
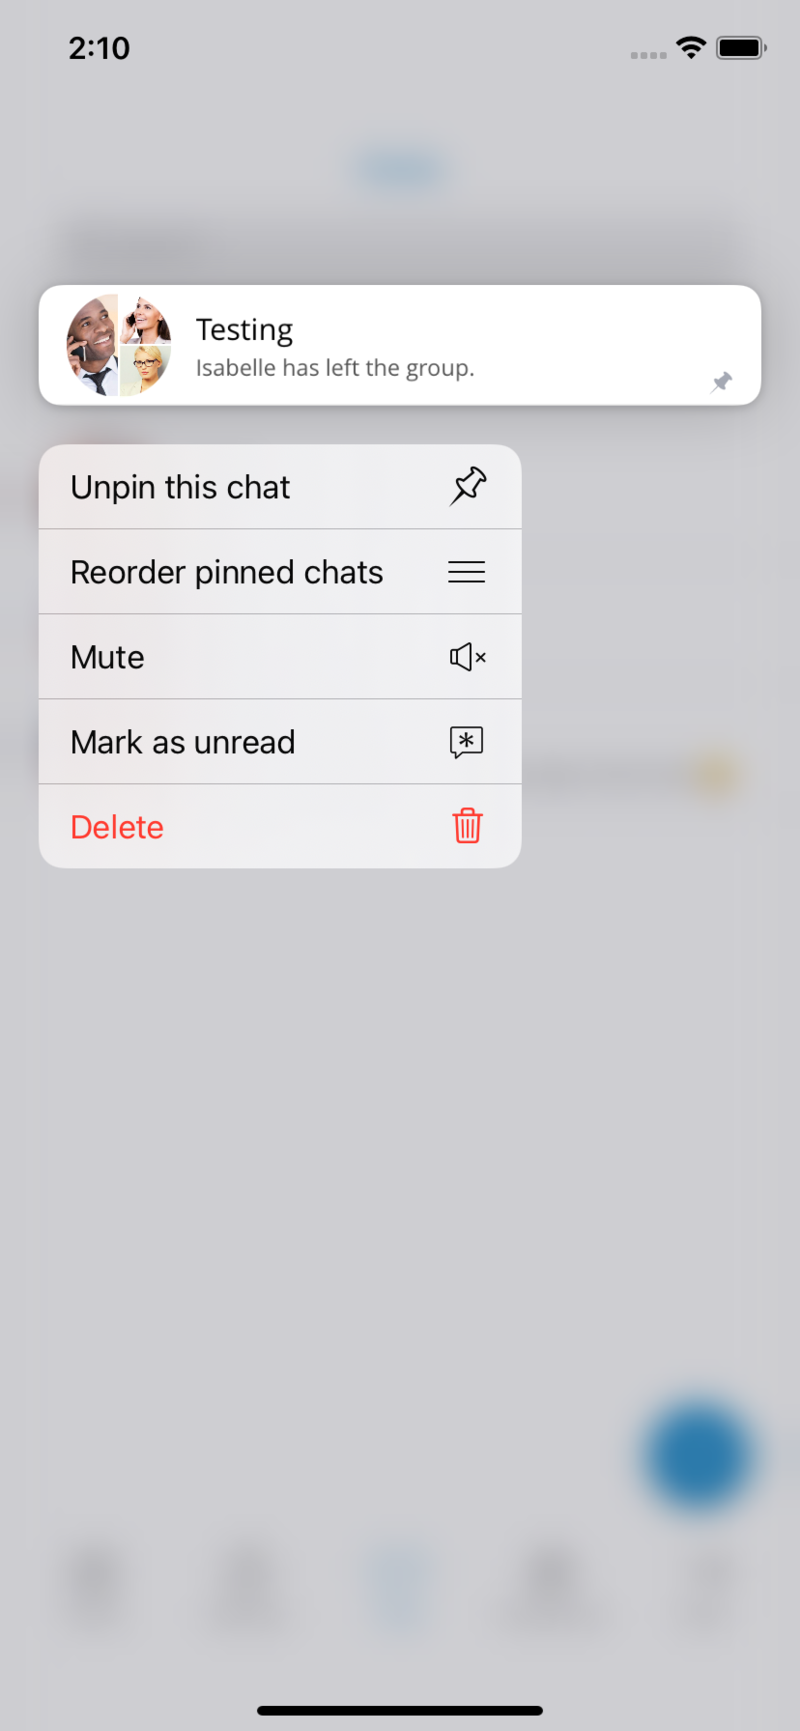
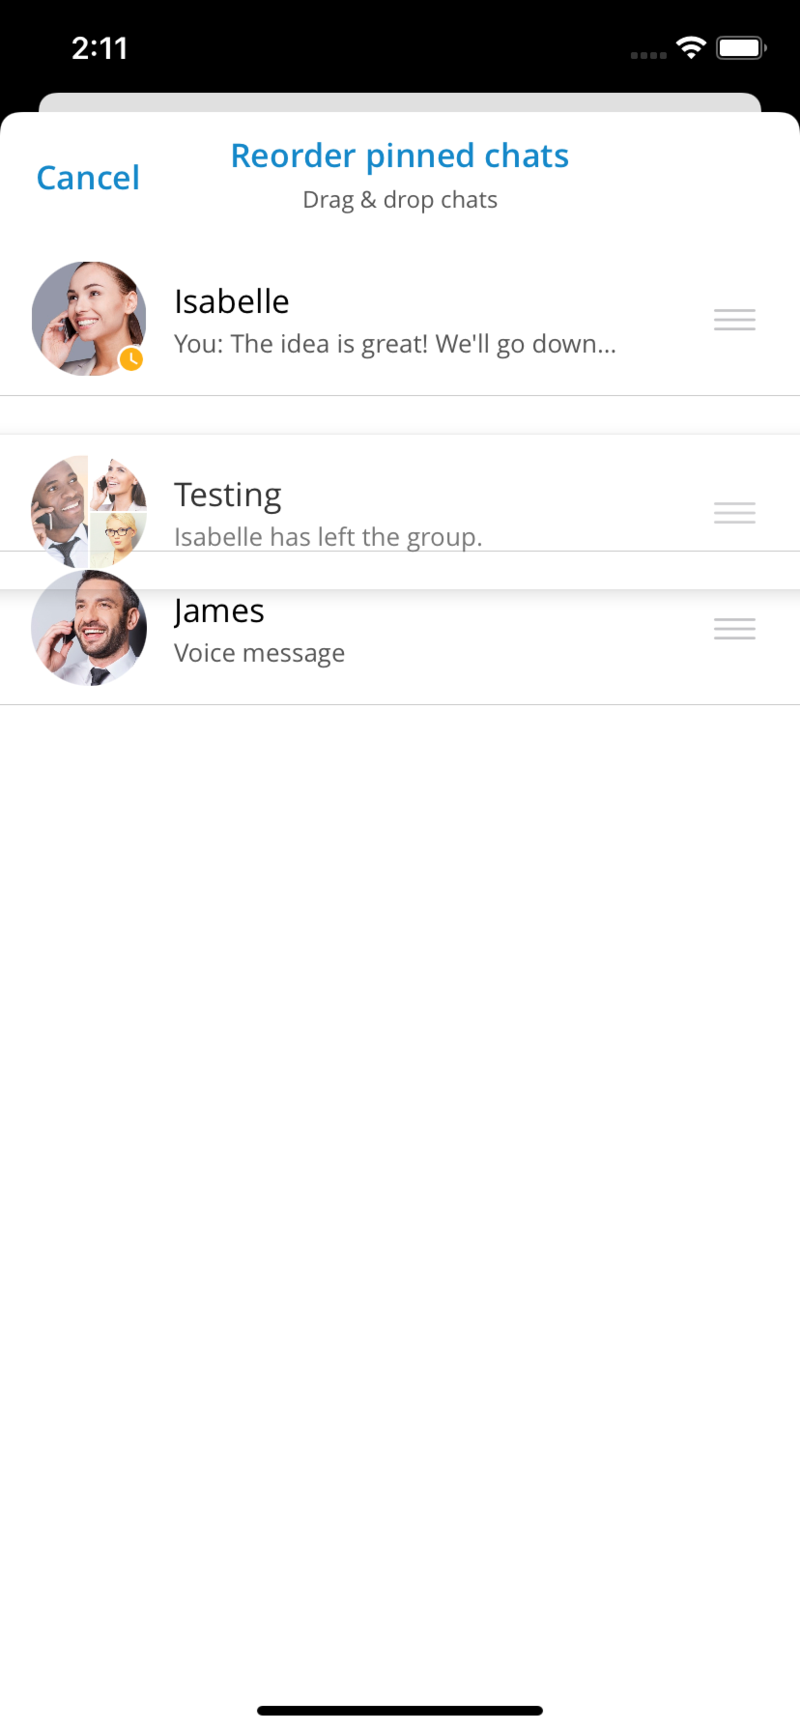
Notifications
For new messages or group events, users will be notified with a notification. Pressing a notification will open a chat session associated with that notification.
The system’s user interface groups notifications for the same chat session. Chat notifications from single chats will display avatars of the users that sent the messages.
Archived users and Chat history
Deleted users will be marked as archived, and users will not lose chat sessions with those users. The user will not be able to start new chat sessions or start new calls with archived users. Deleted users will be labeled with a (Deleted) message at the end of their names.
Feature Flagging – Enabling/disabling chat features based on server settings
Some chat features that are described above can be enabled/disabled depending on the server settings.
Failover Support
gloCOM GO 6 supports SIP and server failover. This feature will enable the users to stay connected at all times. gloCOM GO 6 queries the DNS for SRV records while connecting to PBXware and SIP service.
If the primary host as defined in the SRV records is not working or it is stopped, the gloCOM will try to connect to the next host ordered by defined priority in the SRV records. Timeout between connections is 6 seconds.
To enable this feature DNS records should be configured like this:
-
_pwproxy._tcp.domain. 86400 IN SRV 0 5 10009 pbxserver.domain. -
_pwproxy._tcp.domain. 86400 IN SRV 0 10 10009 pbxserver.domain.
If the primary server starts working after the downtime, the app will connect to it the next time it is resumed from the background.
If users connect to the SIP service hosted on the same PBXware, the SIP service will also support failover. To support this kind of SIP service failover, there should not be any IP address added to PBXware in fields that are sent to the gloCOM clients (e.g., in PBXware field gloCOM SIP Proxy).
SIP service failover
If the users connect to the SIP service using SBCs or proxies that are not hosted on the same machine as the PBXware, the failover must be correctly configured.
For SIP failover to be enabled, a new field is added to PBXware that indicates if SRV resolve will be used for the SIP proxy.
The new field is called gloCOM Use DNS SRV Lookup, and it can be found in the Servers options for a master or specific tenant(s). If the value is set to, No or Not set the gloCOM GO 6 will use the value from gloCOM SIP Proxy Address when connecting to the SIP service. SIP host and SIP proxy values will be equal.
If the value is set to Yes on gloCOM, Use DNS SRV Lookup field, and an IP address or IP address: port is entered into the SIP proxy address field. In that case, the app will use the hostname of the currently connected PBXware as a SIP host, and the value of the SIP proxy will be the IP address:port combination.
If the value inside the SIP proxy address field is a hostname or hostname:port, the app will query the DNS for SRV records. The protocol used for SRV querying is defined on the PBXware Protocols page.
SMS
SMS feature allows users to send and receive SMS or MMS messages using gloCOM GO 6. SMS needs to be enabled in the PBXware license, and the user using the gloCOM GO 6 needs to have an SMS number associated with their account.
Users can start an SMS conversation from:
-
SMS icon at the Menu toolbar
-
User info screen by selecting the recipient’s number
-
Entering a phone number in the Phone dialpad and pressing on
send SMS icon
Users can start SMS conversations on the SMS tab by pressing the + button located at the bottom right of the screen. Users can then select recipients from Directory, device Contacts, or enter a phone number manually for numbers not stored in contacts.
In cases when a user has more than one number entered in their numbers list, a pop-up window will appear, allowing users to choose which number to send the SMS to.
The maximum number of SMS messages sent at once is 4. The SMS counter is located next to the send button at the bottom of the screen.
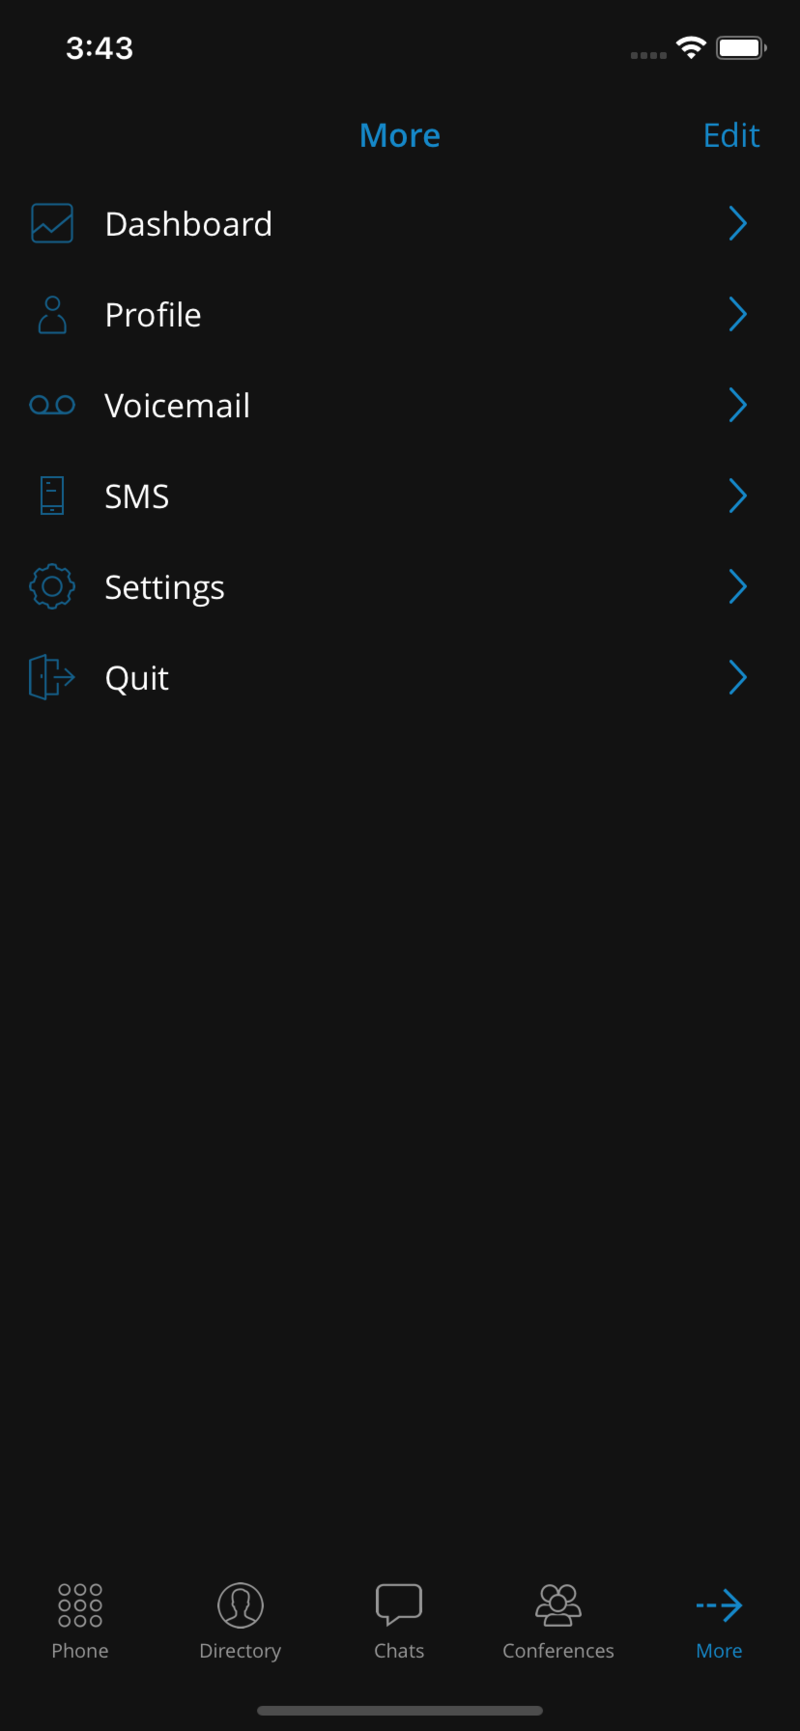
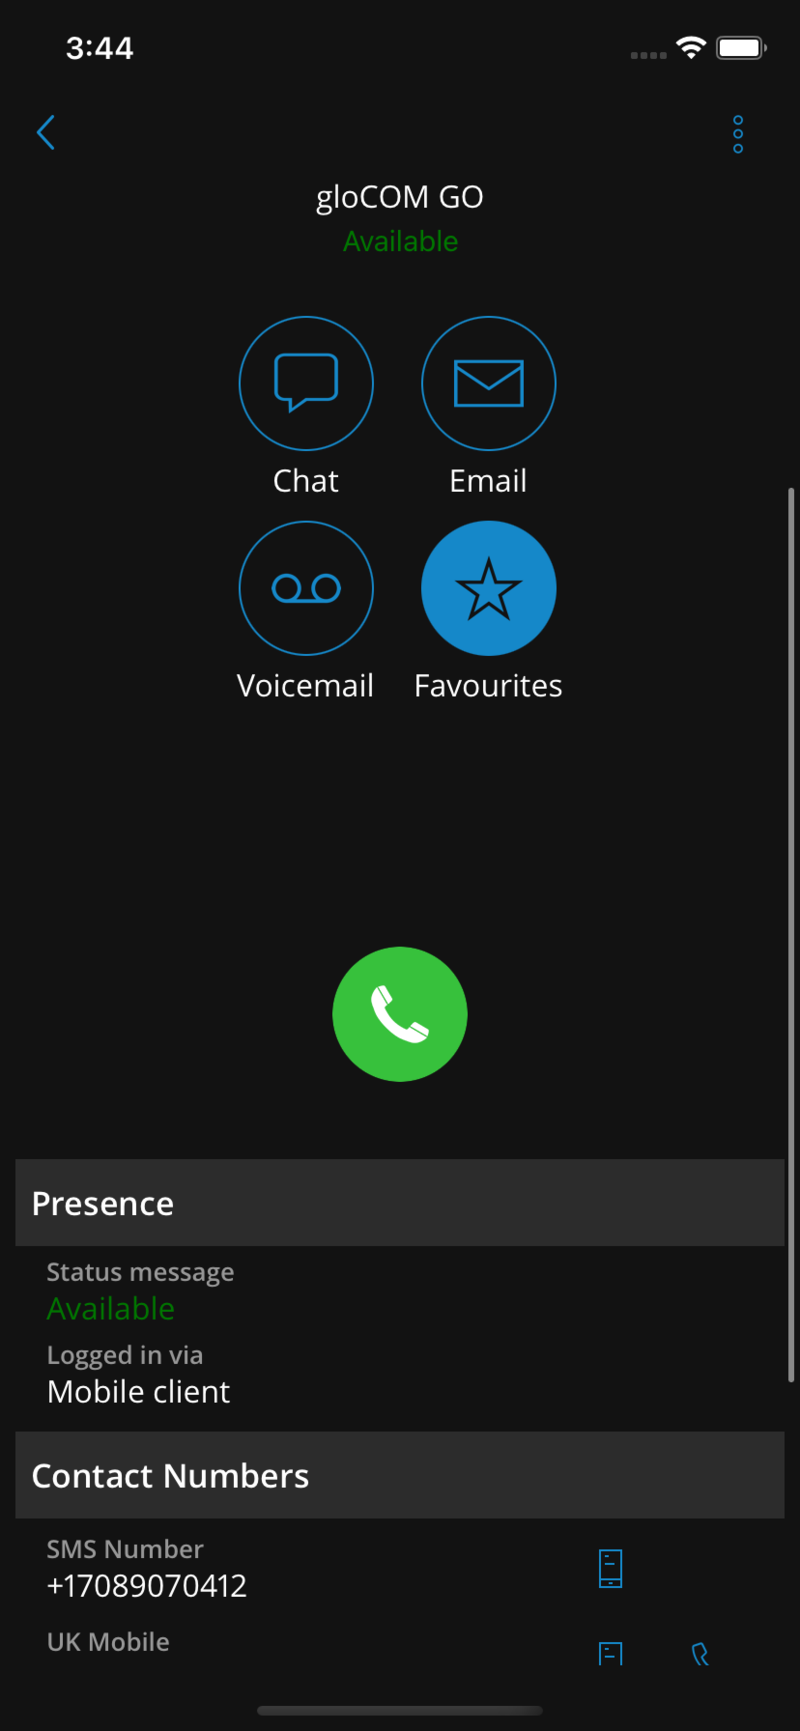
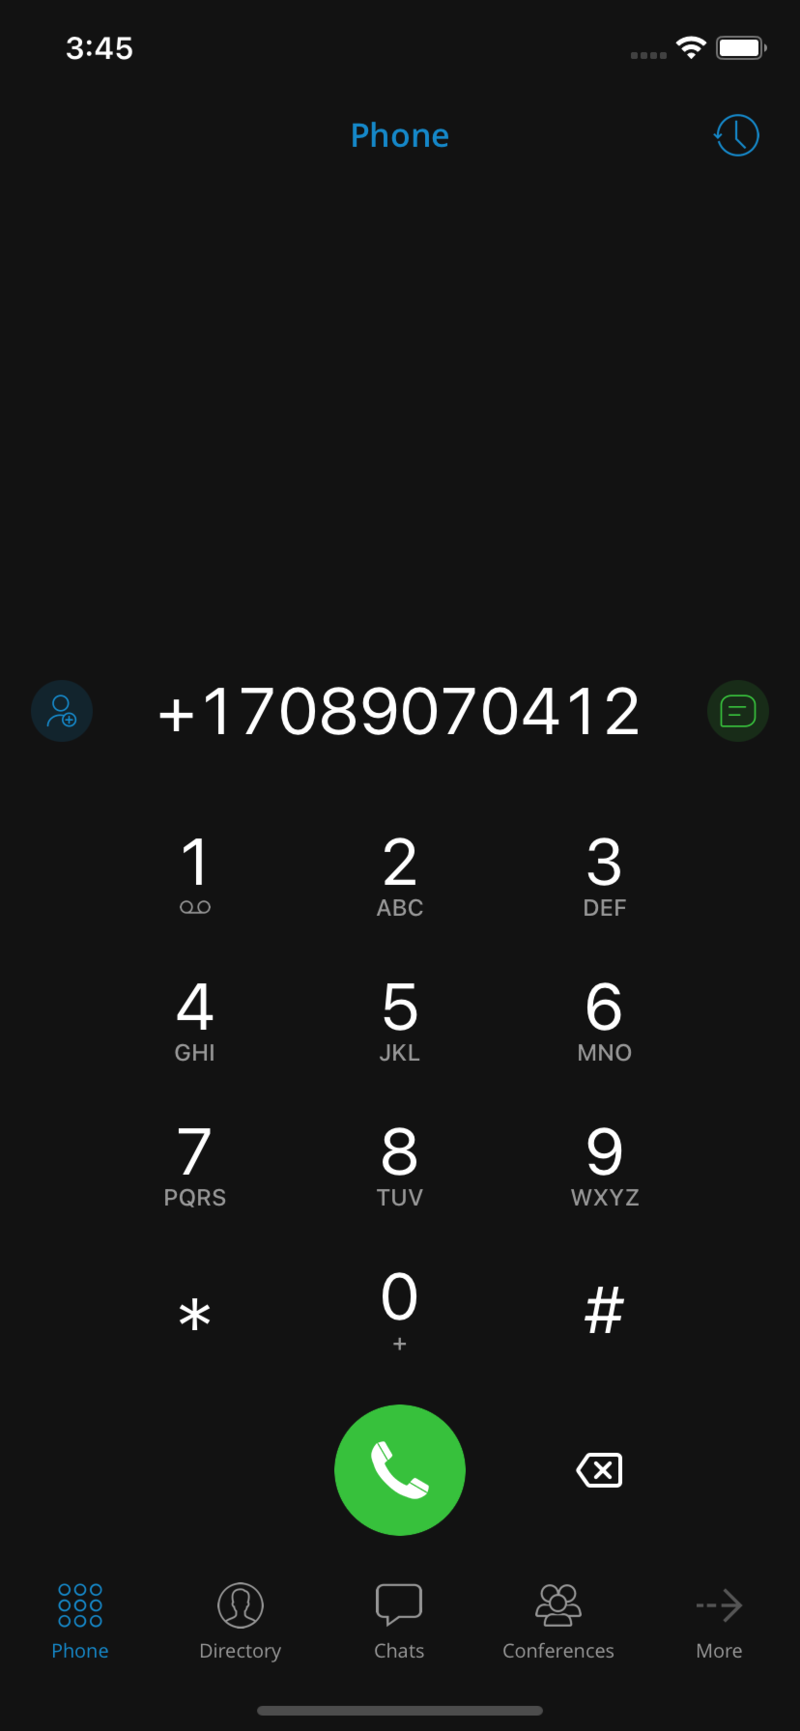
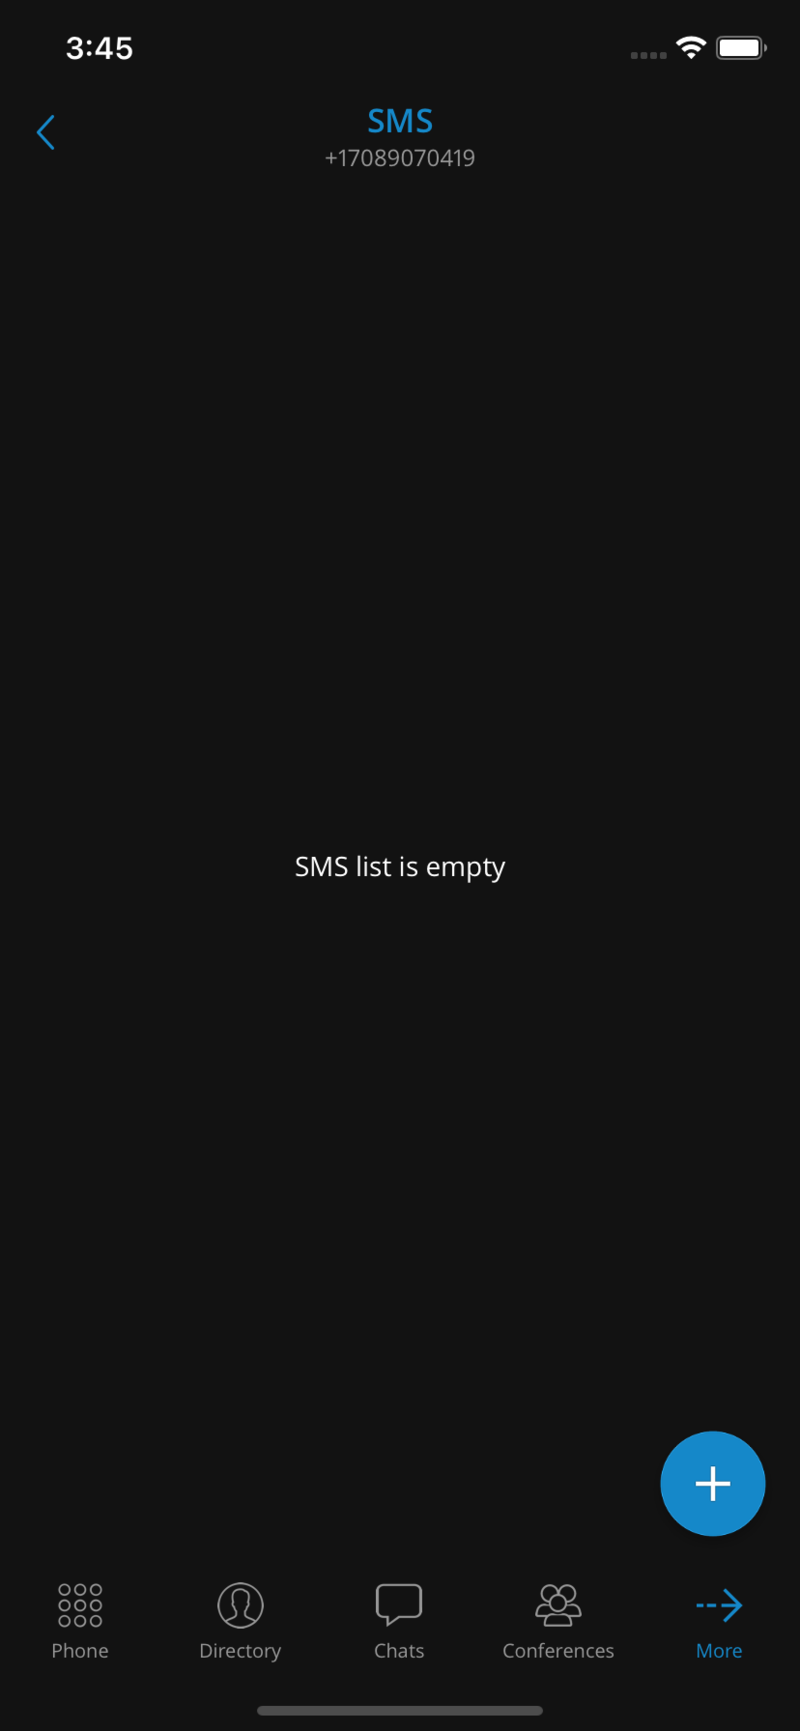
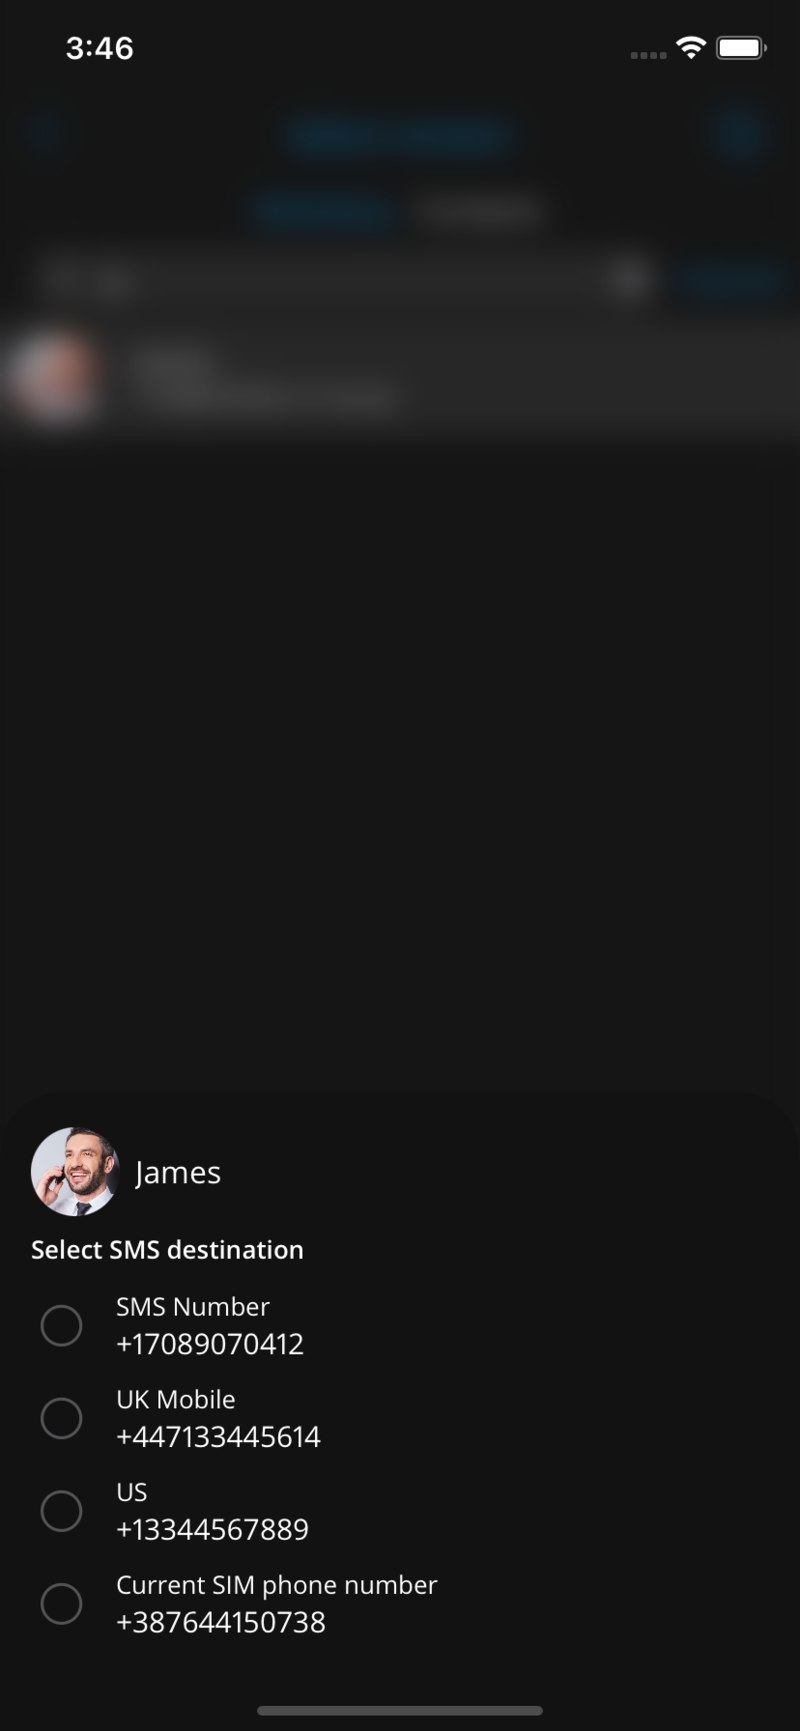
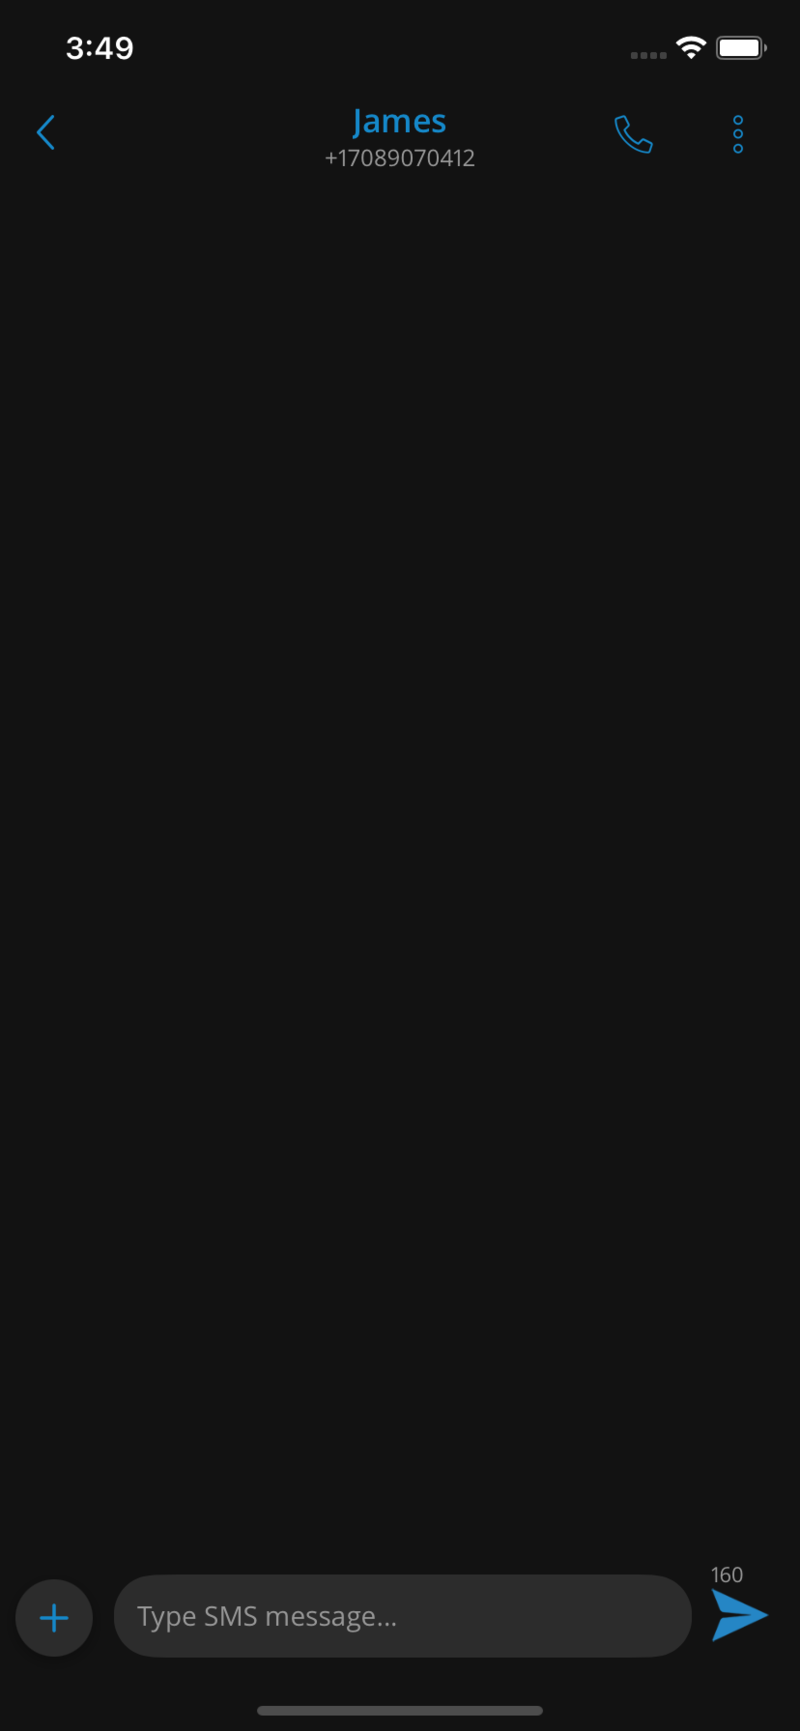
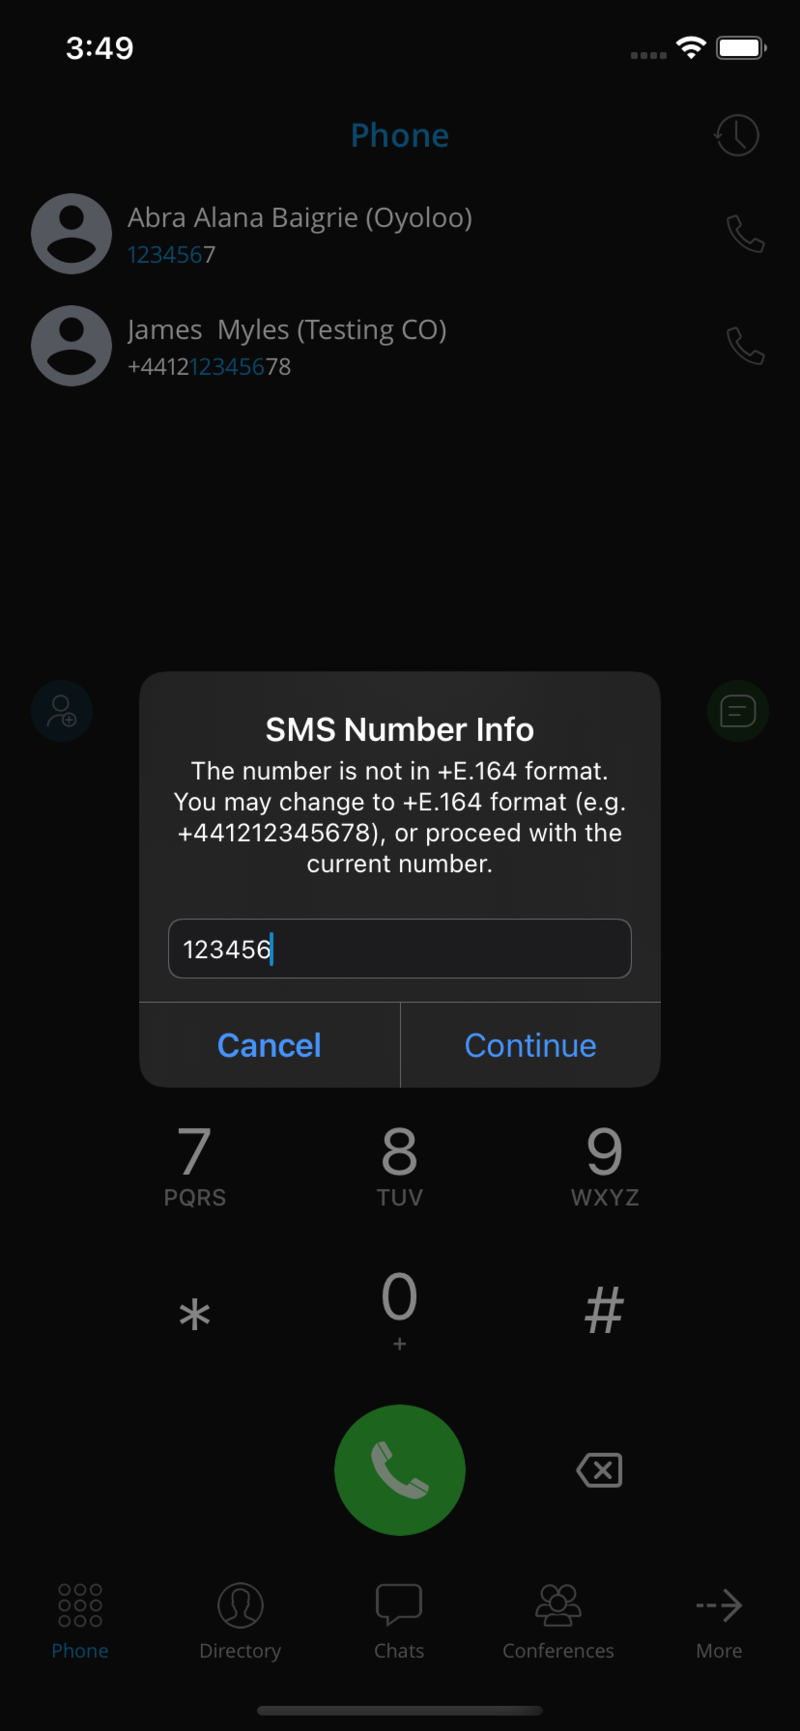

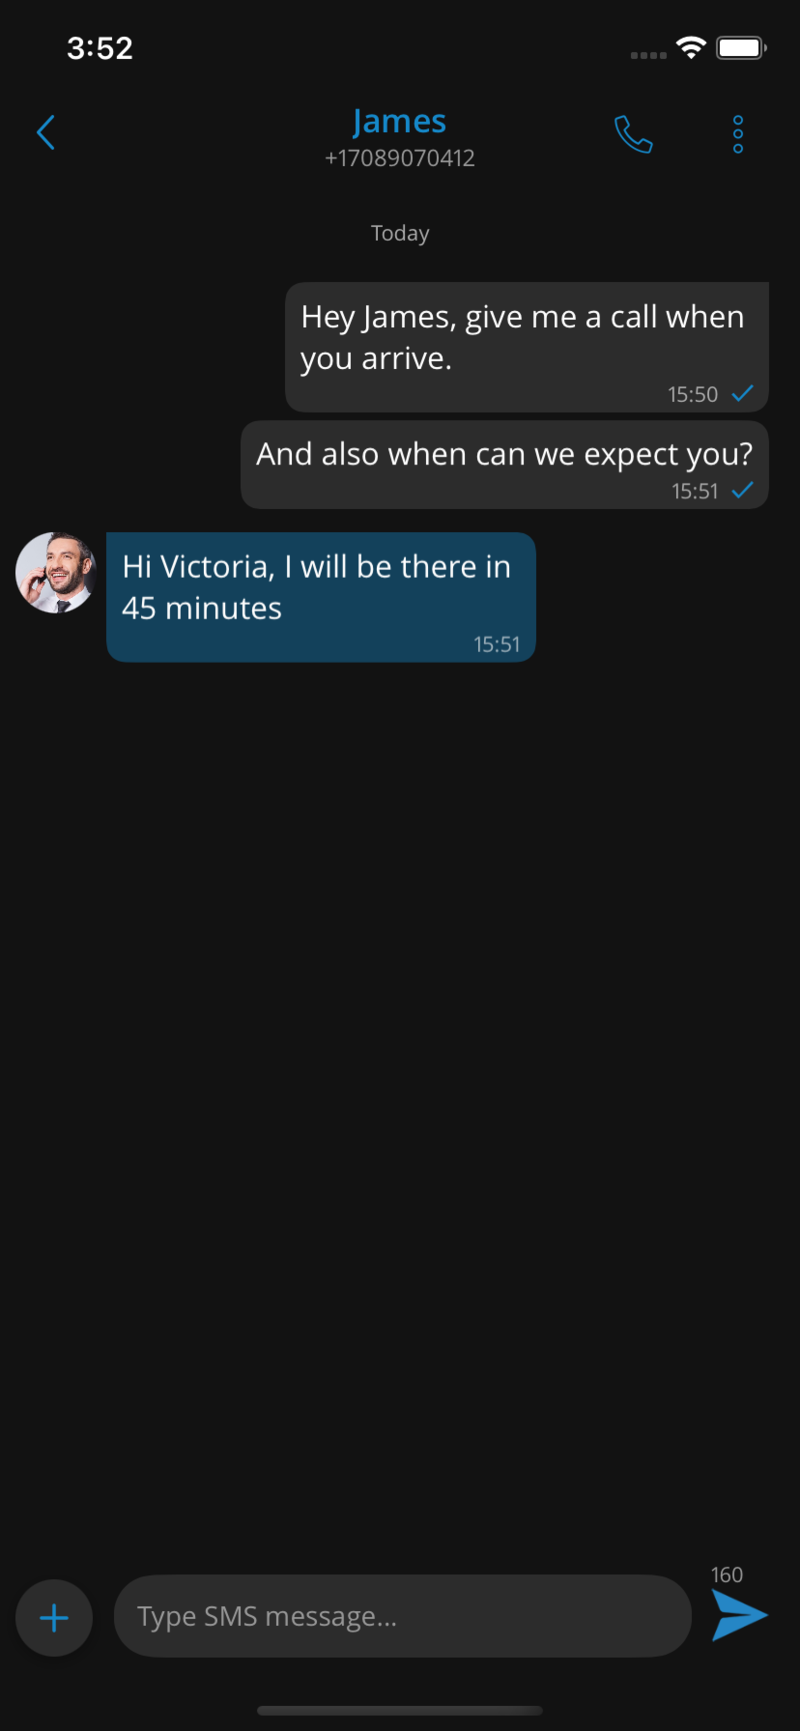
Receiving SMS messages
When users receive an SMS message, a pop-up notification will appear on the top of the screen. In case when users are offline, the pop-up notifications will appear after the sync is completed on the next app login. Currently, there is no support for push notifications for SMS messages. SMS unread count badge will be visible in the SMS icon in the Main menu displaying the number of unread messages.
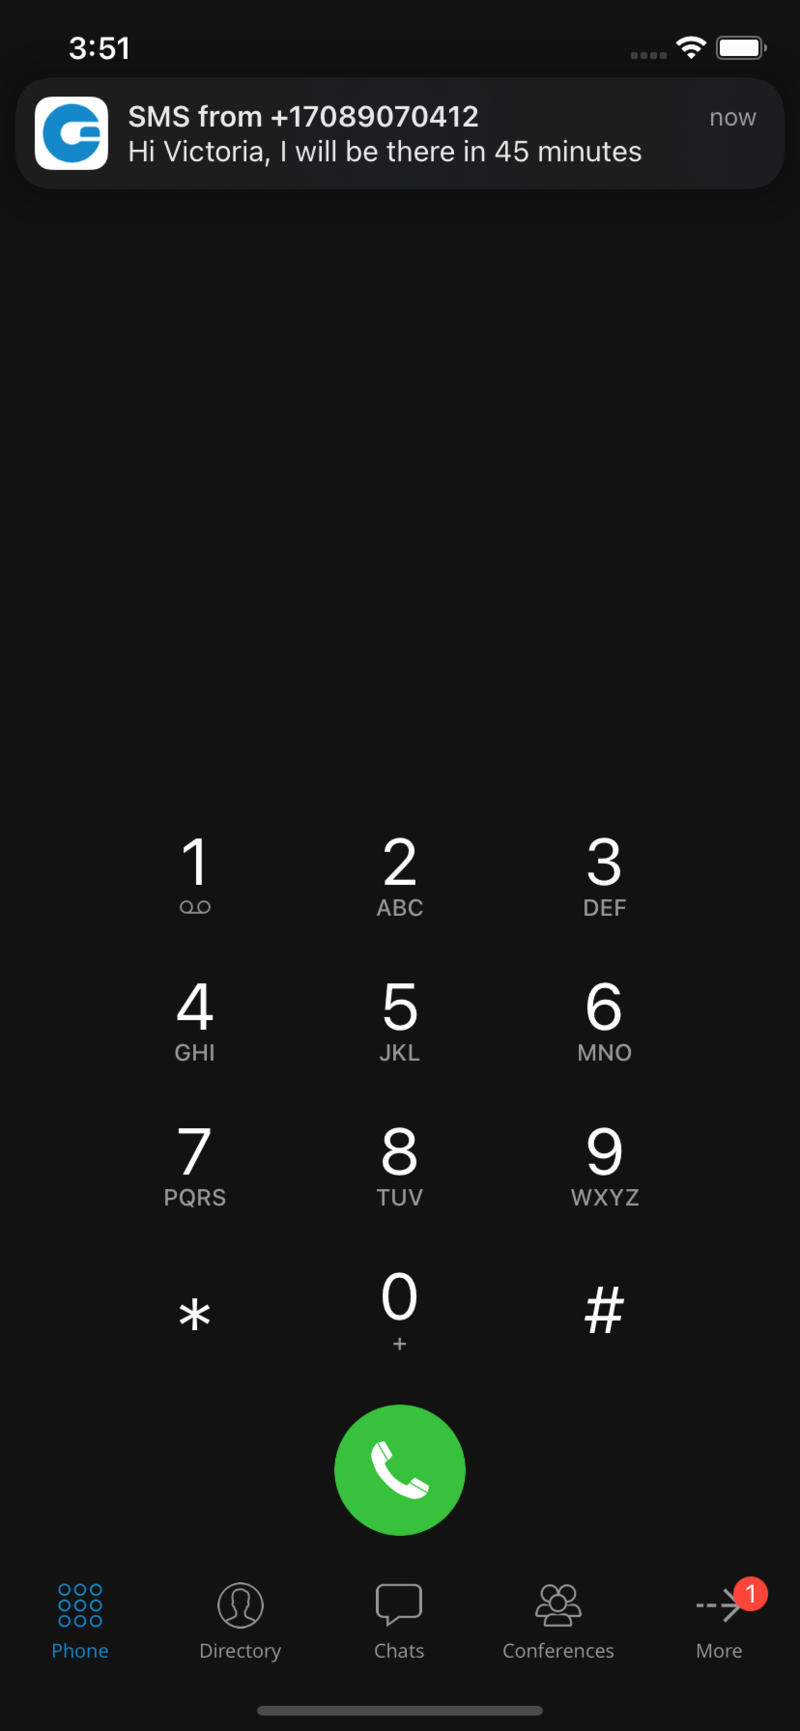
Search existing SMS conversations
The search bar in the SMS conversations list screen allows users to search messages by name or phone number.
Full-text search for SMS messages
Full-text search can be done by entering an existing SMS conversation and by pressing on the Search icon in the upper right corner of the screen. After entering the search query, users can move up and down between search results using the arrow buttons at the top of the screen.
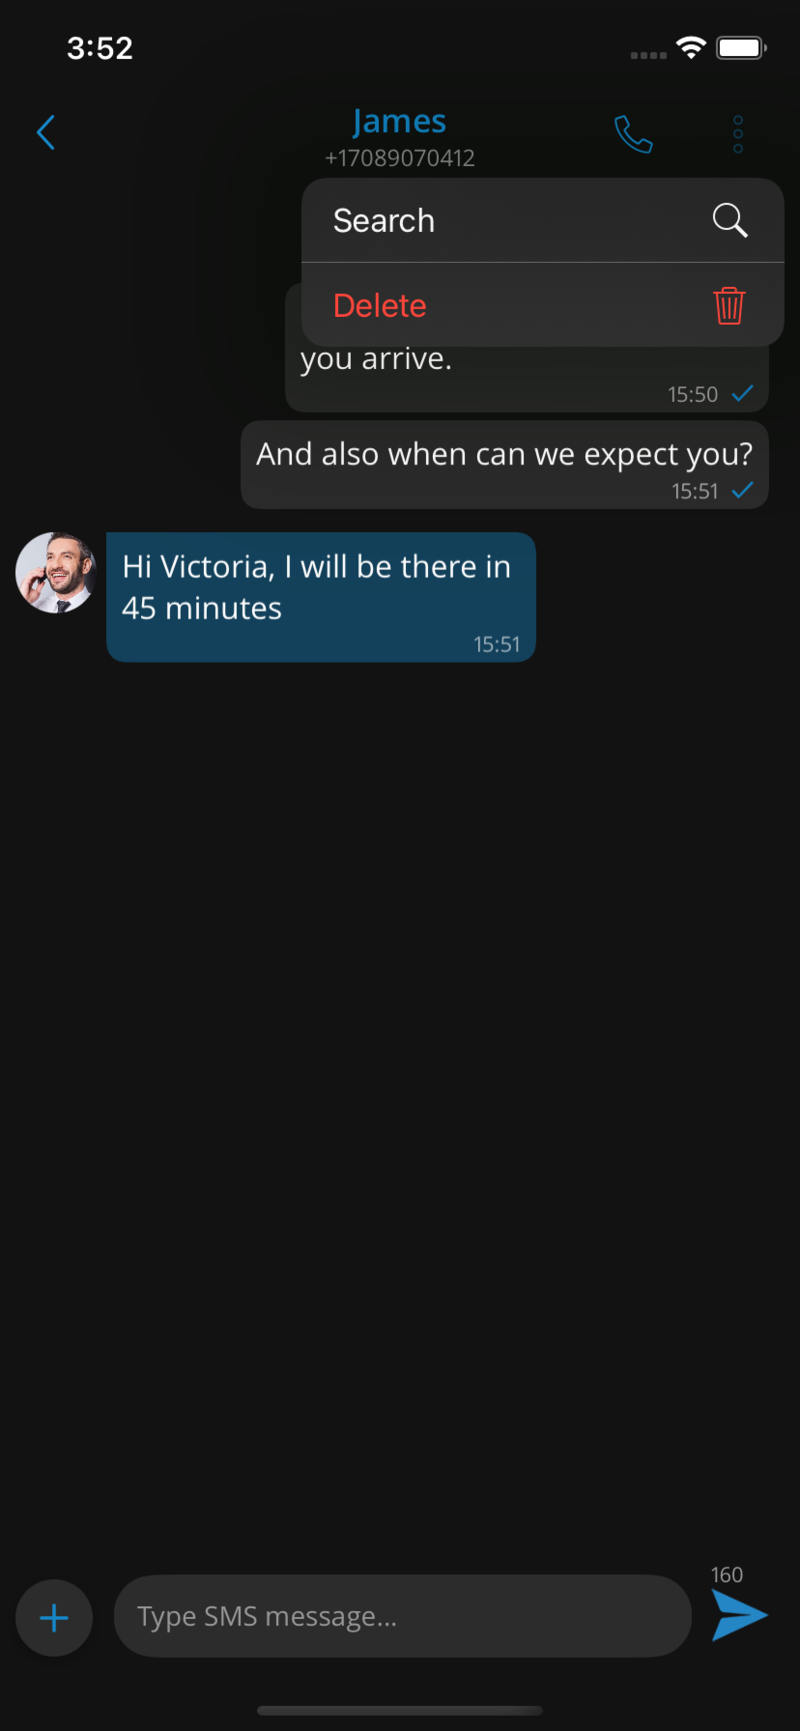
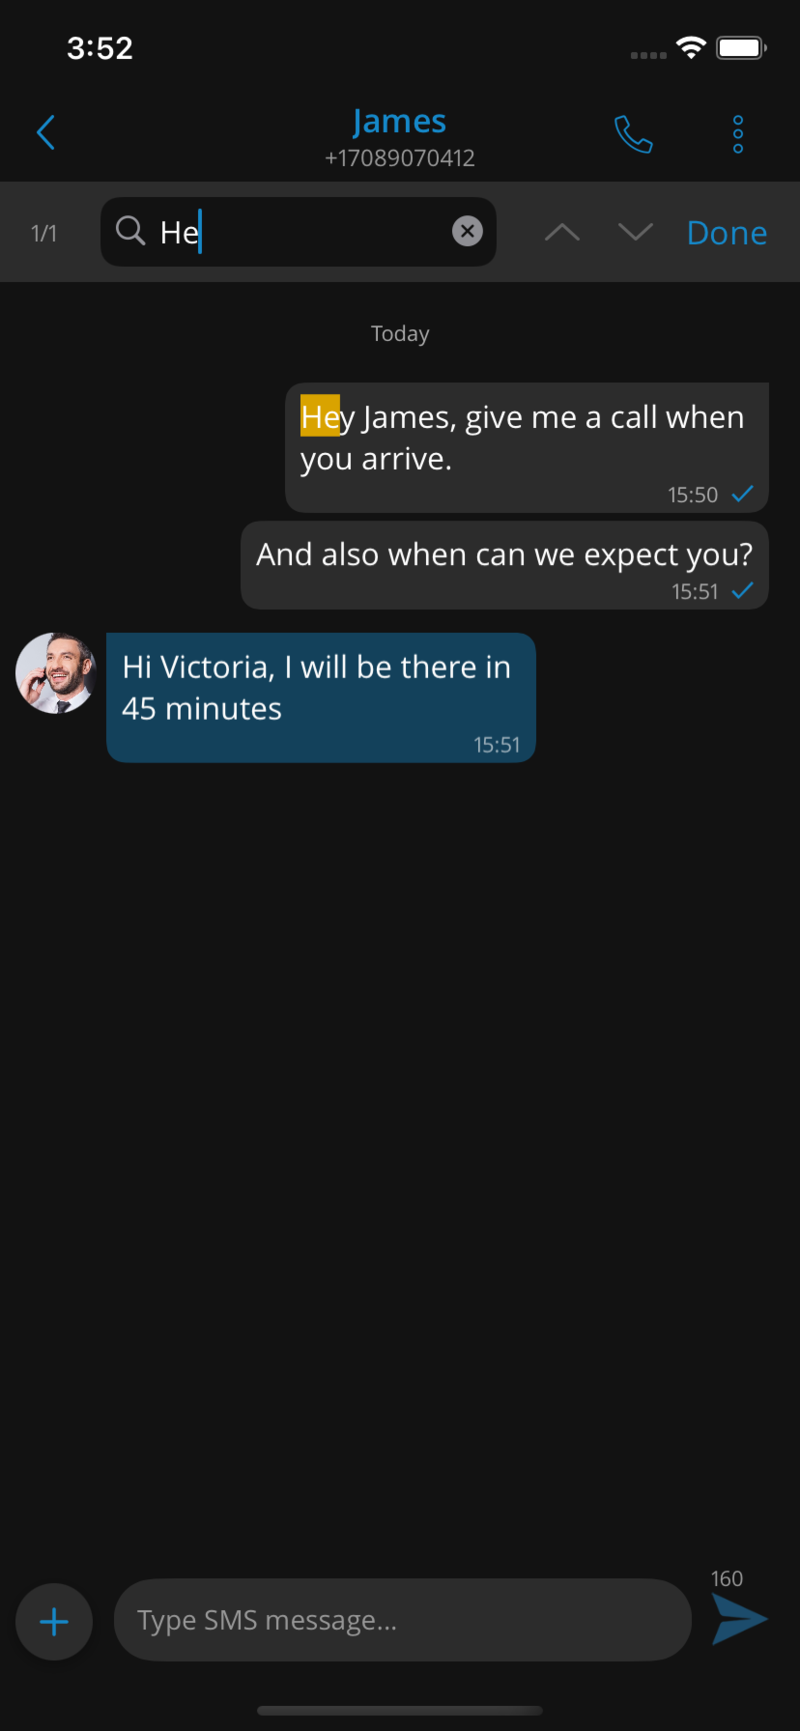
Delete SMS conversations
Users can delete already existing SMS conversations directly by long pressing on a conversation in the SMS conversations list or by selecting the delete option from the upper right corner when they are inside the conversation.
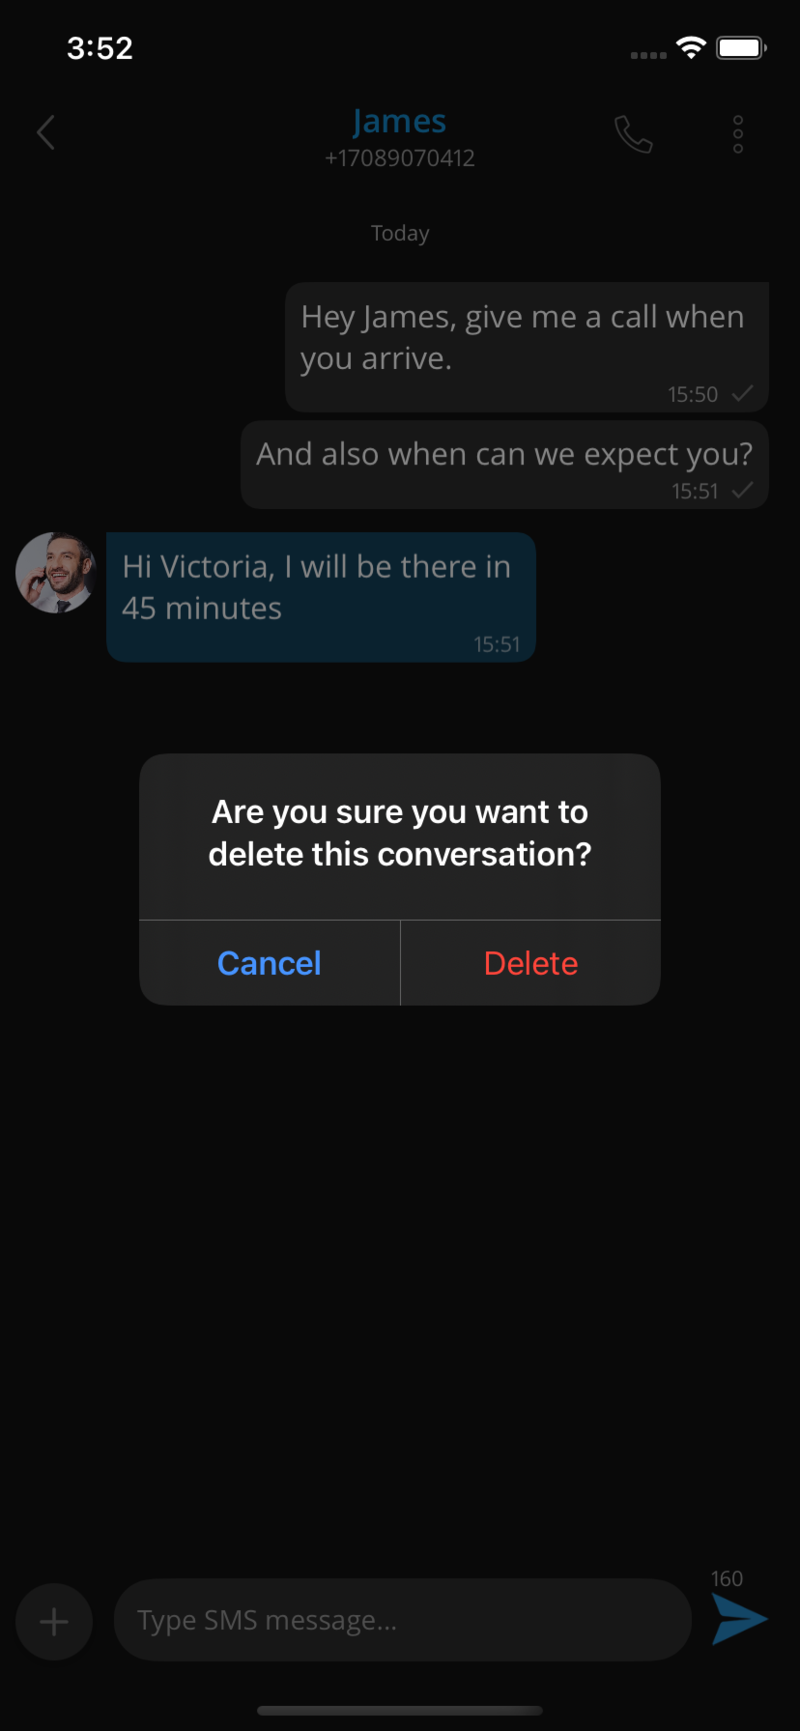
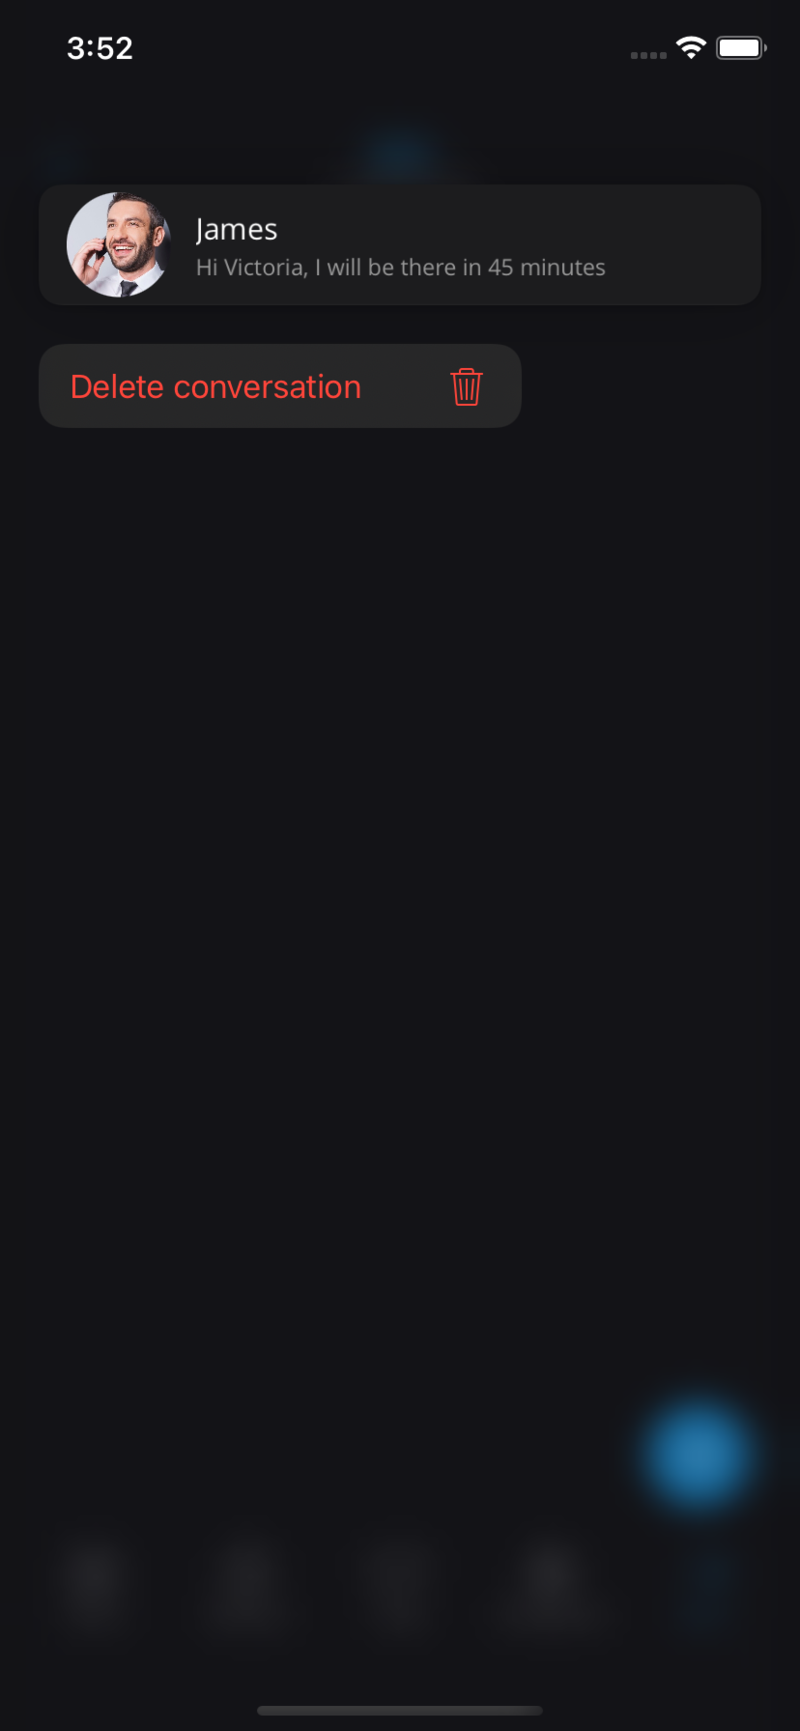
MMS
The MMS message is an enhancement to the standard SMS message. The main difference between SMS and MMS messages is that the users can send multimedia and other files in their messages. It includes media such as videos, pictures, audio clips, GIFs, and much more.
The maximum size of uploaded files is 500 KB or up to ten (10) files per message. Additionally, MMS allows up to 1000 characters of text in the message. MMS notifications have the same behavior as chat notifications – when the MMS message is received, a notification pops up.
The + button is used to send files, and it can be found on the bottom left side of the SMS screen. Pressing the button opens up a dialog where the users can pick files to be sent to the currently selected conversation.
If users select data exceeding 500kB or if more than ten (10) files are selected, a pop-up message will appear displaying: “Maximum size of attached files for MMS reached.” All files that exceed the previously mentioned limits will be discarded.
Please note that supported MMS files are as follows:
-
Image Files – jpeg, png, gif
-
Audio Files – MP3, OGG, AMR
-
Text Files – PDF, Vcard, txt
-
Video Files – mp4
If a file is selected, an SMS message becomes an MMS message, which can be seen on the right side of the Send SMS/MMS button as the counter of the remaining kilobytes is displayed instead of the character counter.
After selecting the files, a thumbnail with the file name for each selected file will be displayed above the text area within the input
field. Also, it is possible to remove selected files from the MMS message by pressing the – icon in the top right corner of the file.
The gloCOM will automatically download all files smaller than 500kB when connected to WiFi.


Voicemail management
With gloCOM GO 6 users can listen to new and archived voice messages and archive or delete one or many messages. Users can also call other users’ voicemail directly.
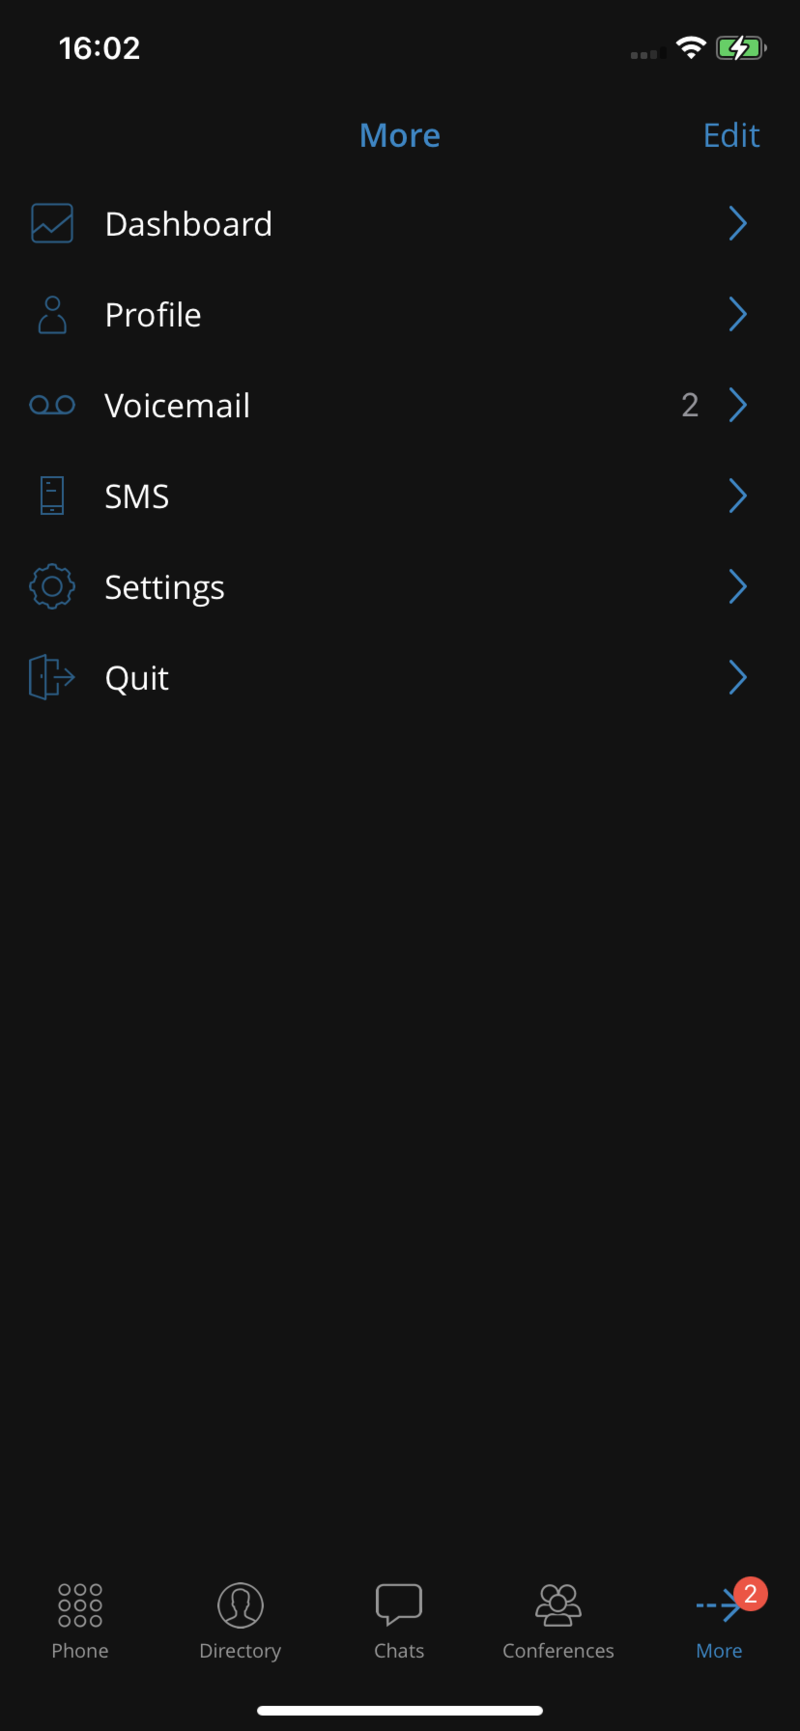
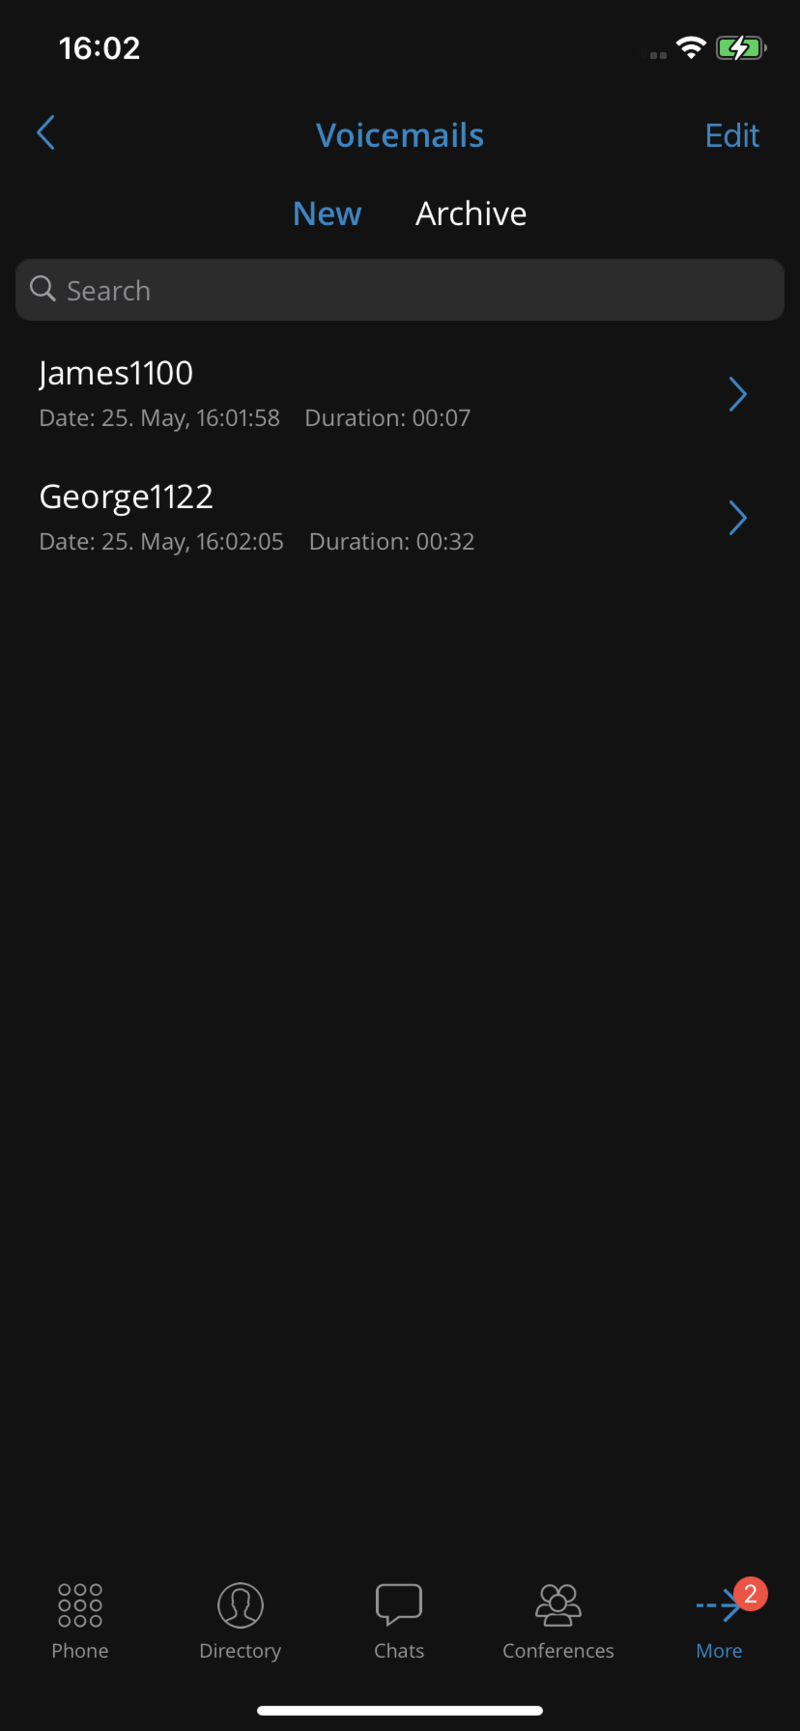
Notifications are shown for new voice messages.
Playing voicemail messages
Messages can be played by selecting them in the list and then playing them. If the message is not downloaded when play is pressed, a progress dialog will be shown, and once the download is done message should start playing.
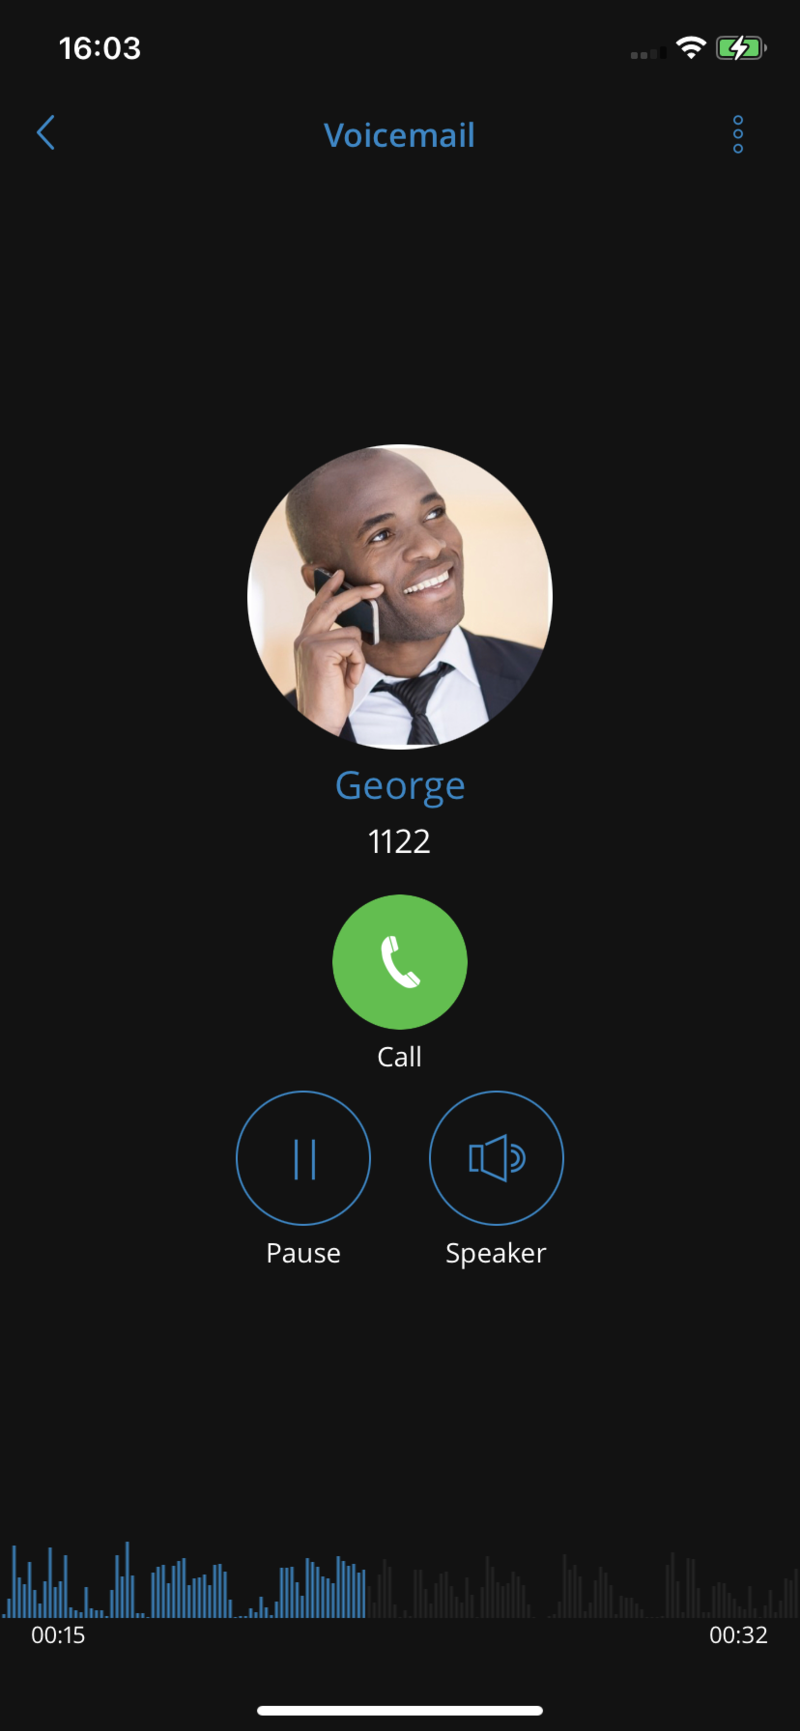
Deleting and archiving voicemails messages
Users can delete or archive individual messages by opening them and then pressing the delete icon or archive icon after opening the menu from the navigation bar.
Users can also select more messages and delete or archive them by long-pressing a message from the list and pressing the delete icon or archive icon in the toolbar.
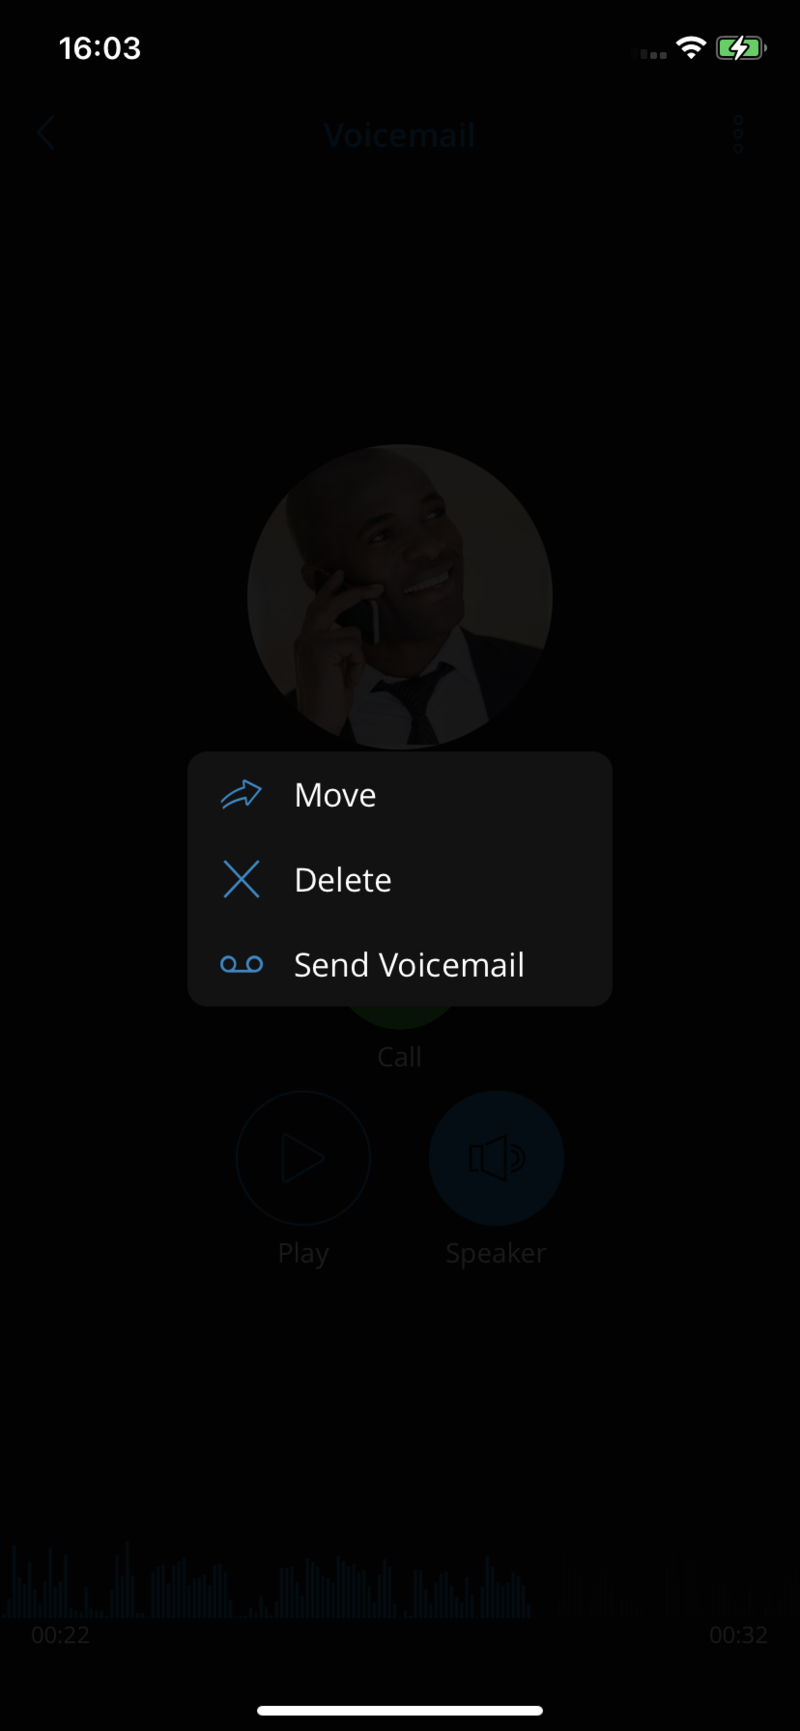

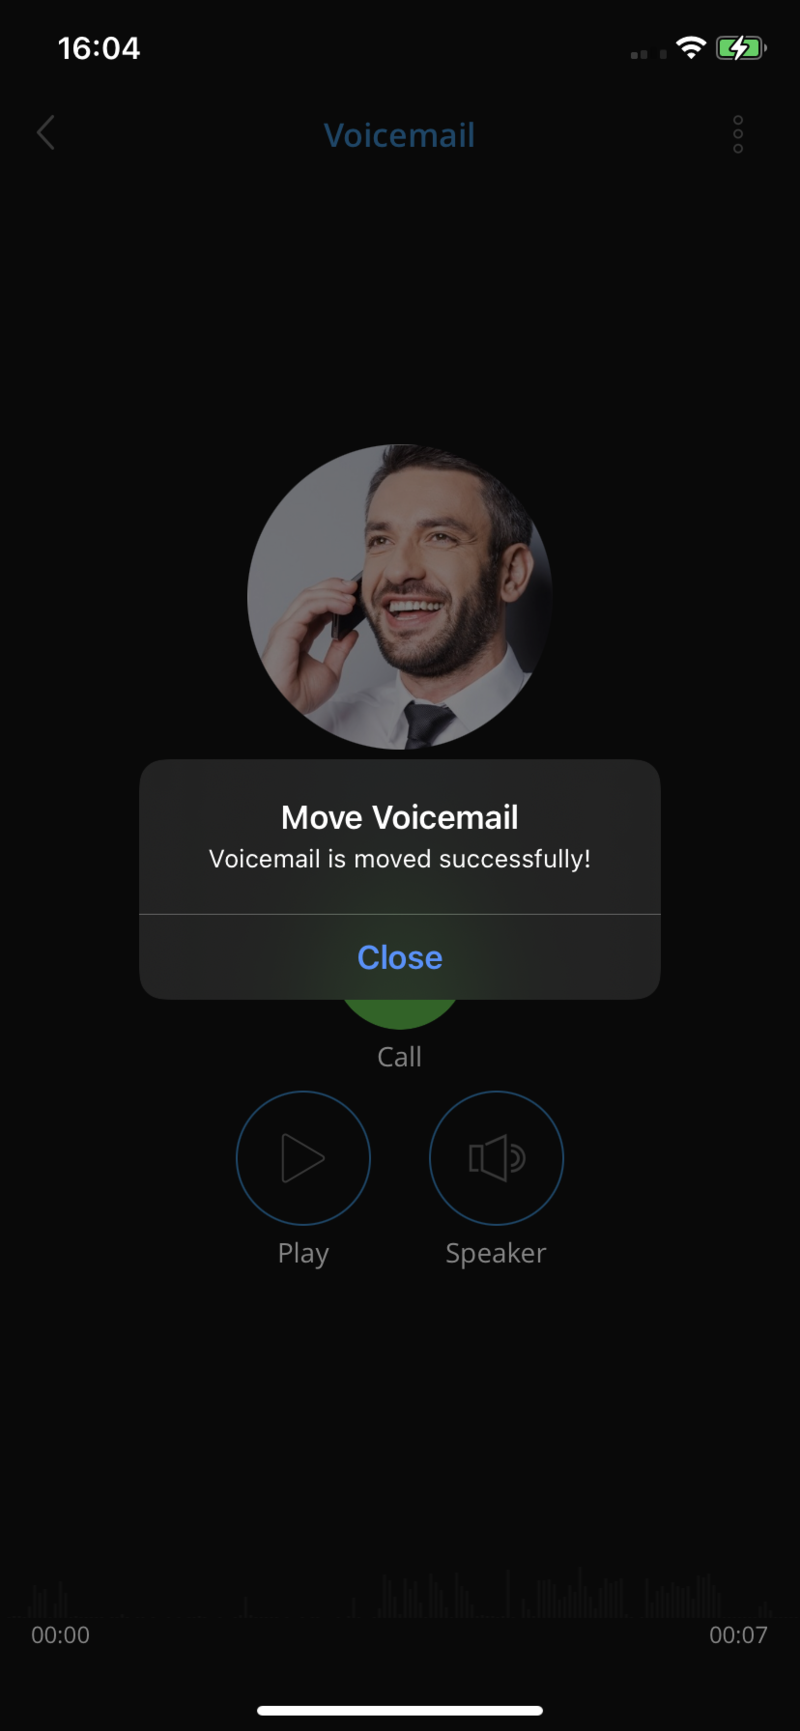
Calling other voicemail boxes directly
Users can open the user’s details screen and press the voicemail button to call the voicemail directly.
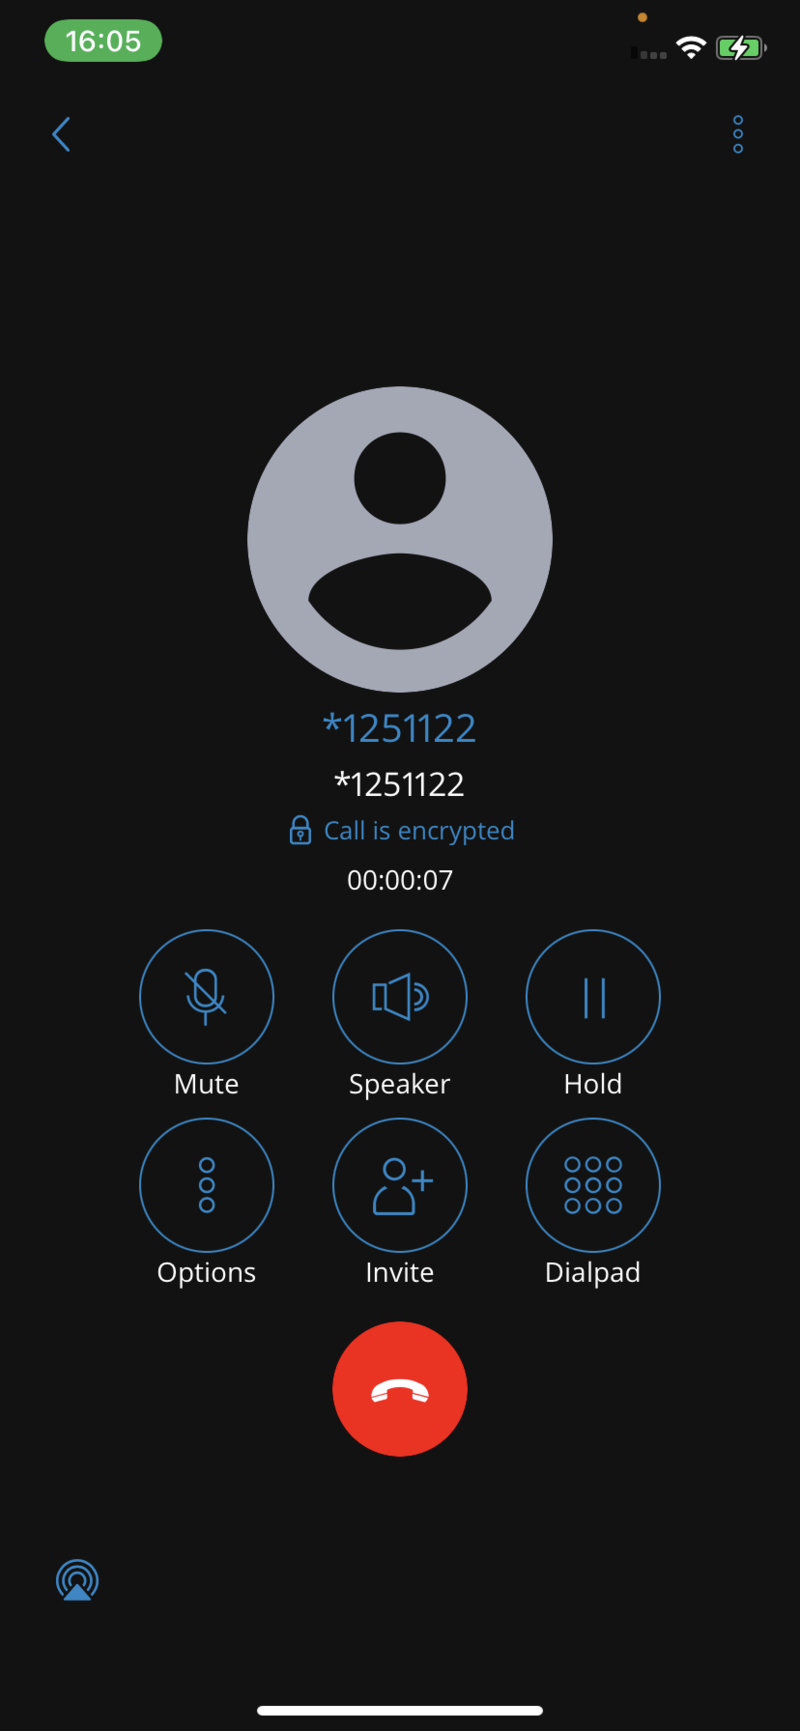
Presence
With the Presence feature, users’ status is visible. Users can also see which users are online, busy, away, or offline. This feature also provides information when other users were last seen on the system. The users’ presence can be seen on the system in the Directory tab at the bottom menu. By default, the Directory is sorting online users at the top, alphabetically. Next on the Directory screen are users that recently went away, and then completely offline users. Presence can be seen in the Grid or List view on Directory.
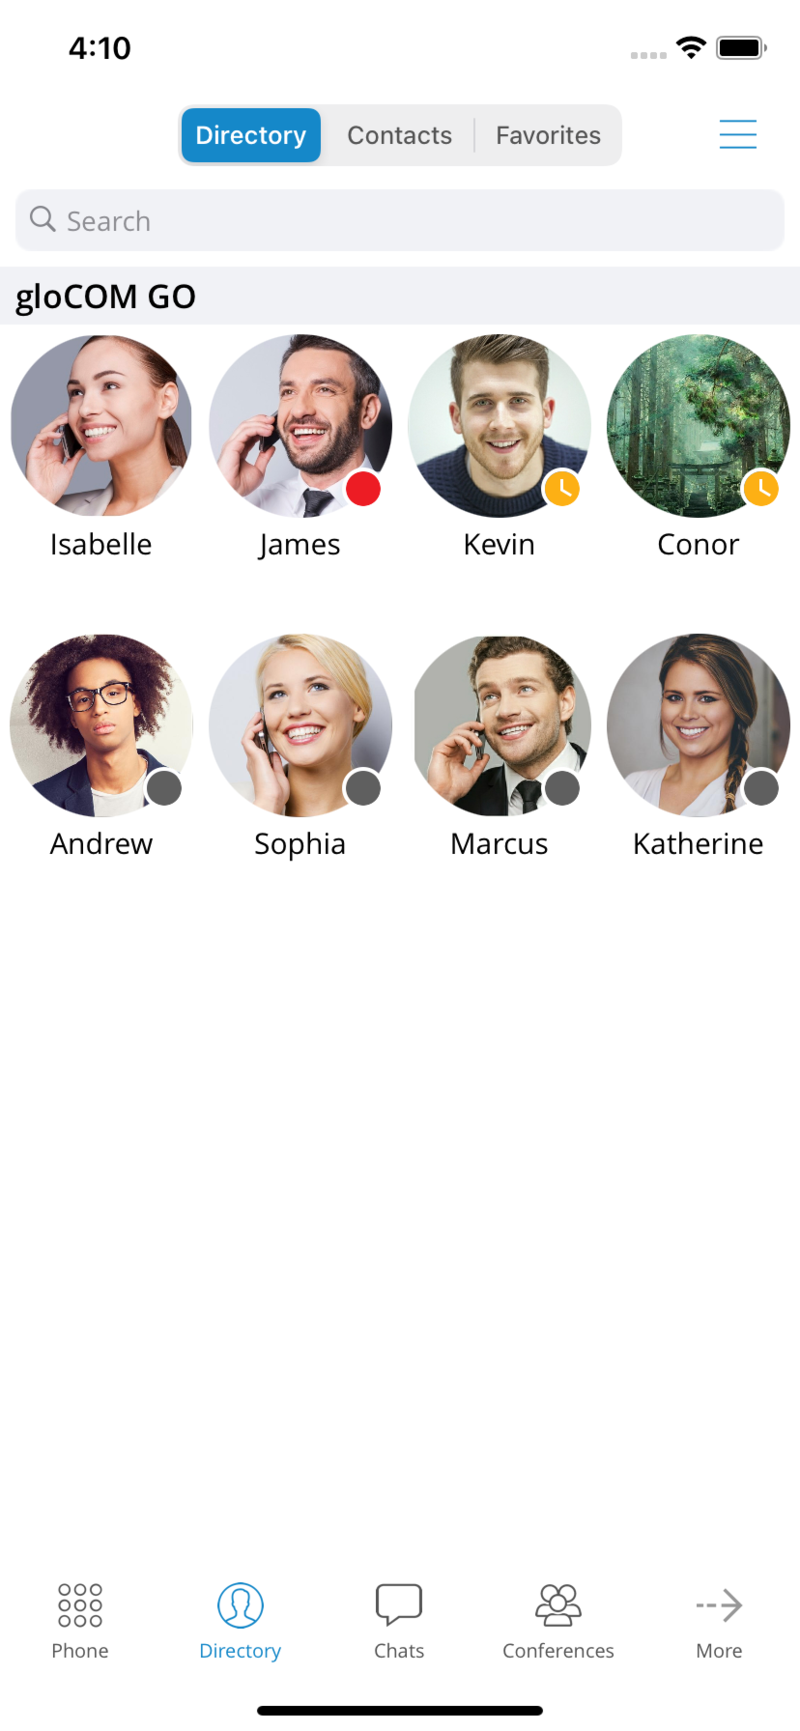
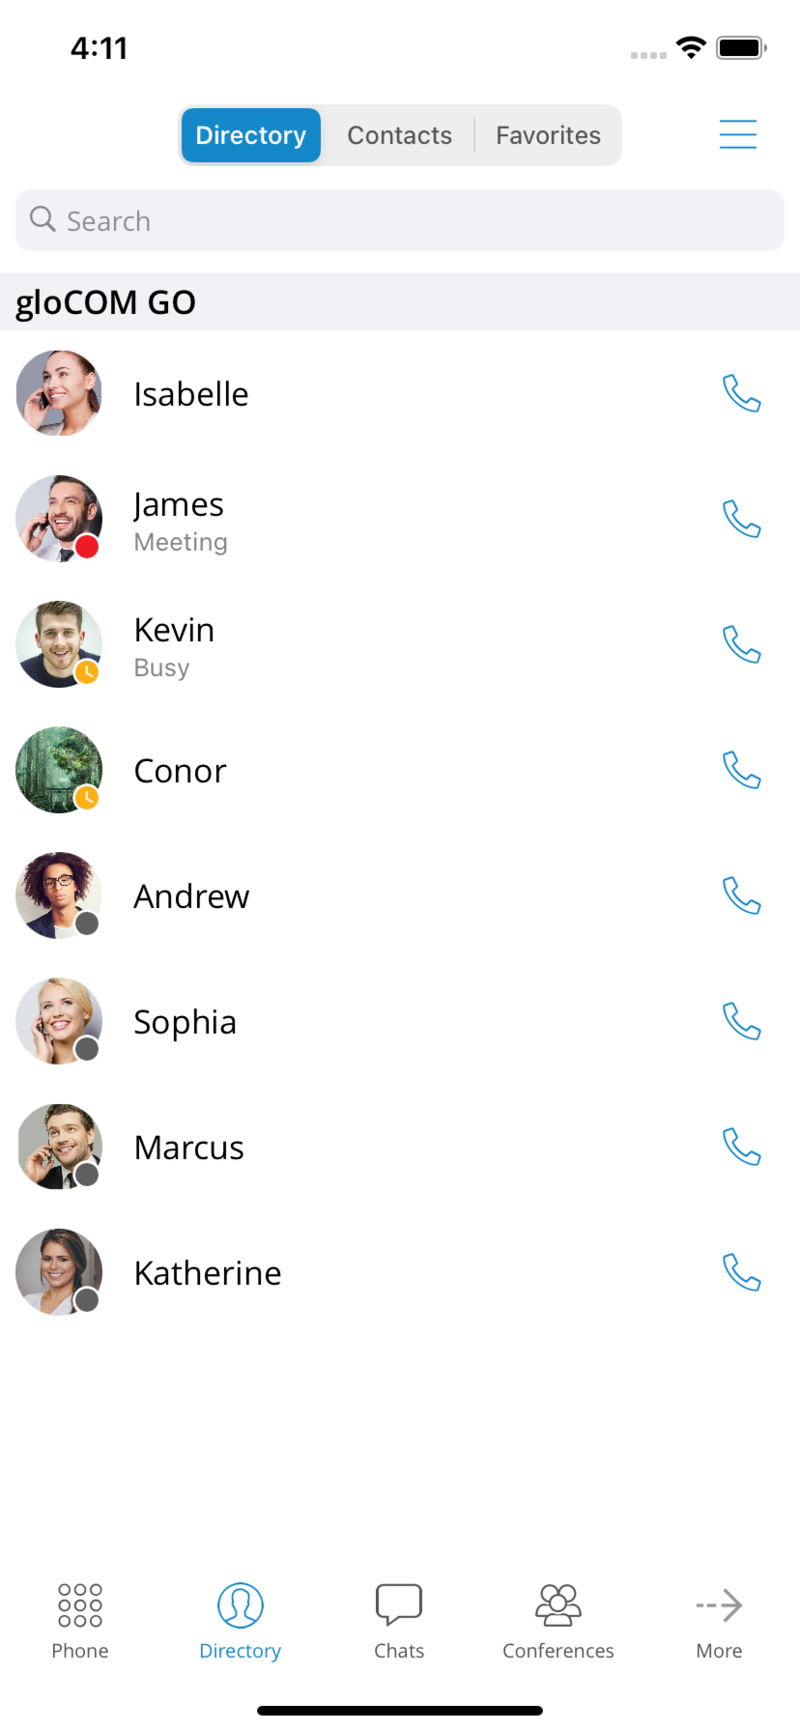
If users prefer alphabetical sorting instead of sorting by Presence, they can change that by pressing the icon with three lines in the top right corner of the screen in Directory.
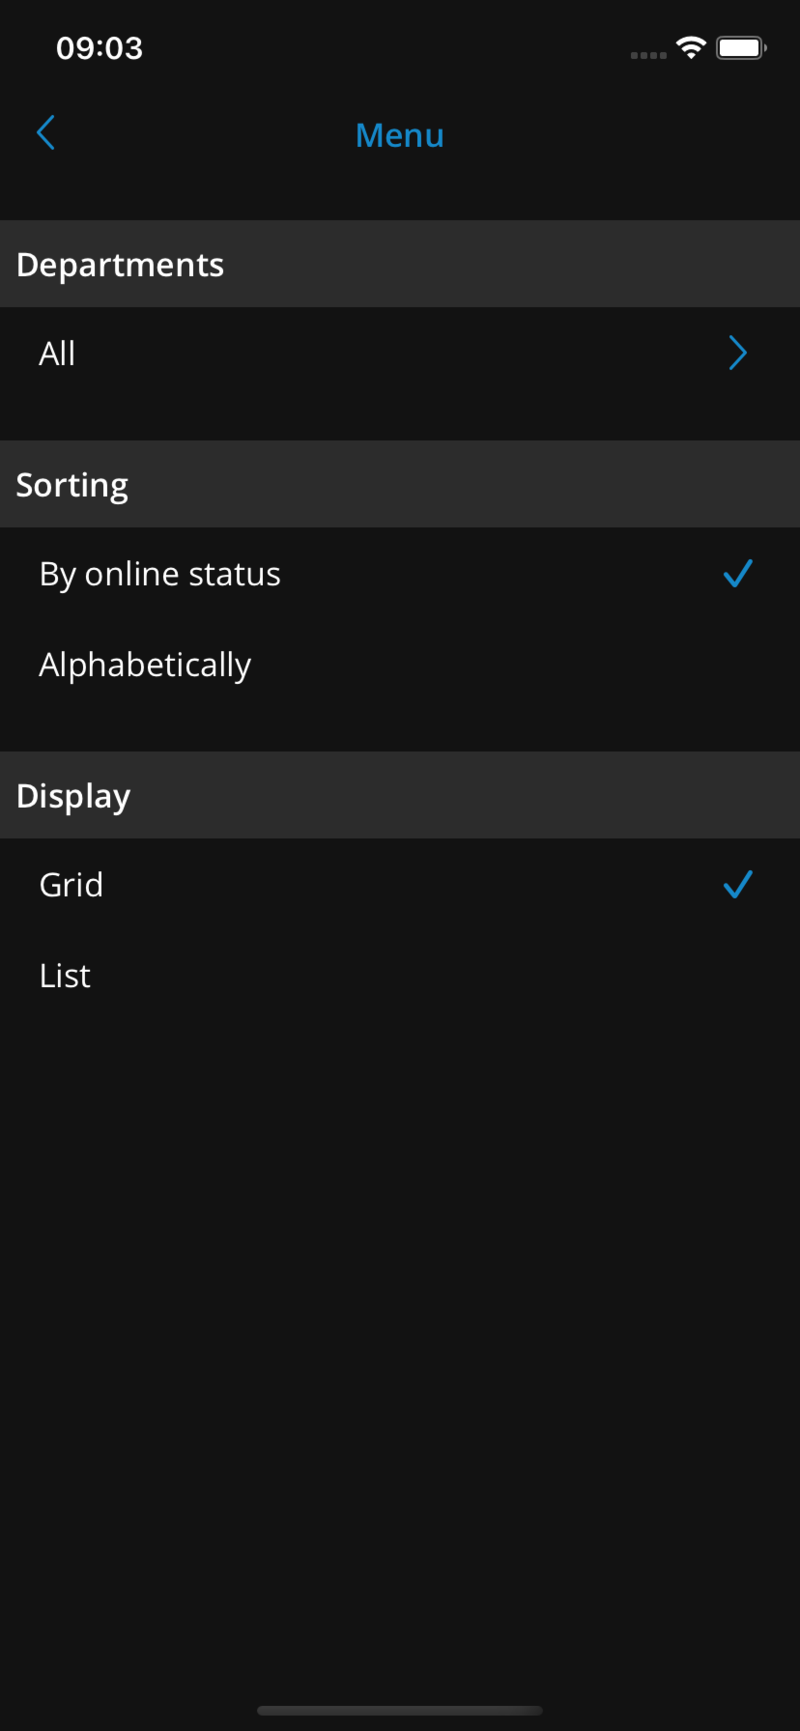
Pressing the user’s avatar on Directory and opening the user’s info screen, more presence information is available.
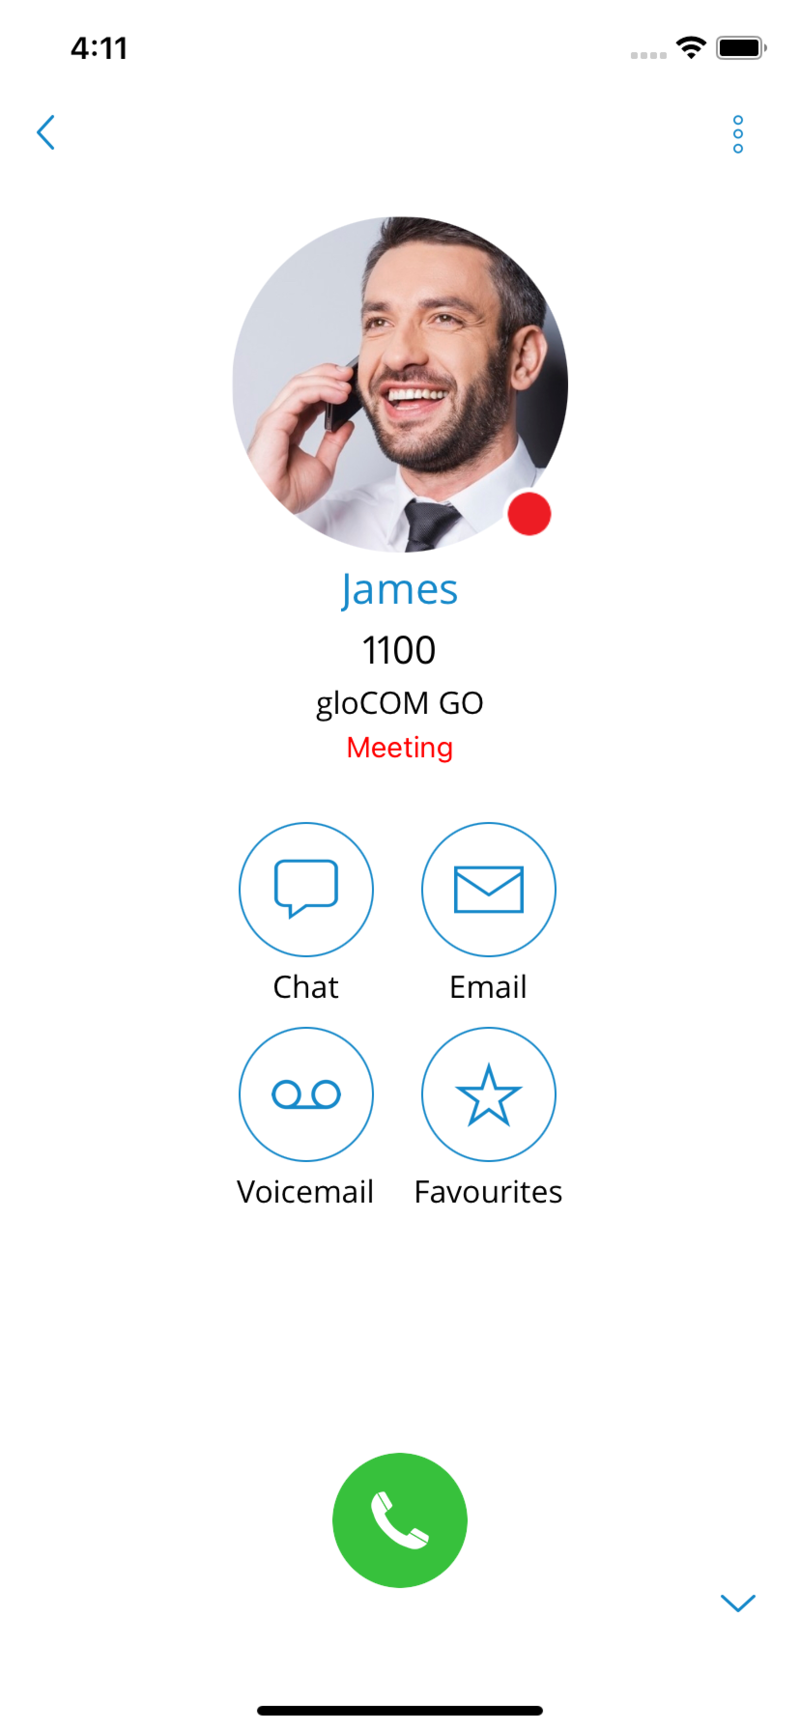
Presence change or update can be done by going to the Profile item on the bottom bar. If users can not see the “Profile” item, they can click on More and find it there.
Users can change their personal presence status by pressing on their current status or on the icon of an arrow pointing downwards. A dialog screen will open with three fields: Status, Message, and the display status (for the duration of chosen status).
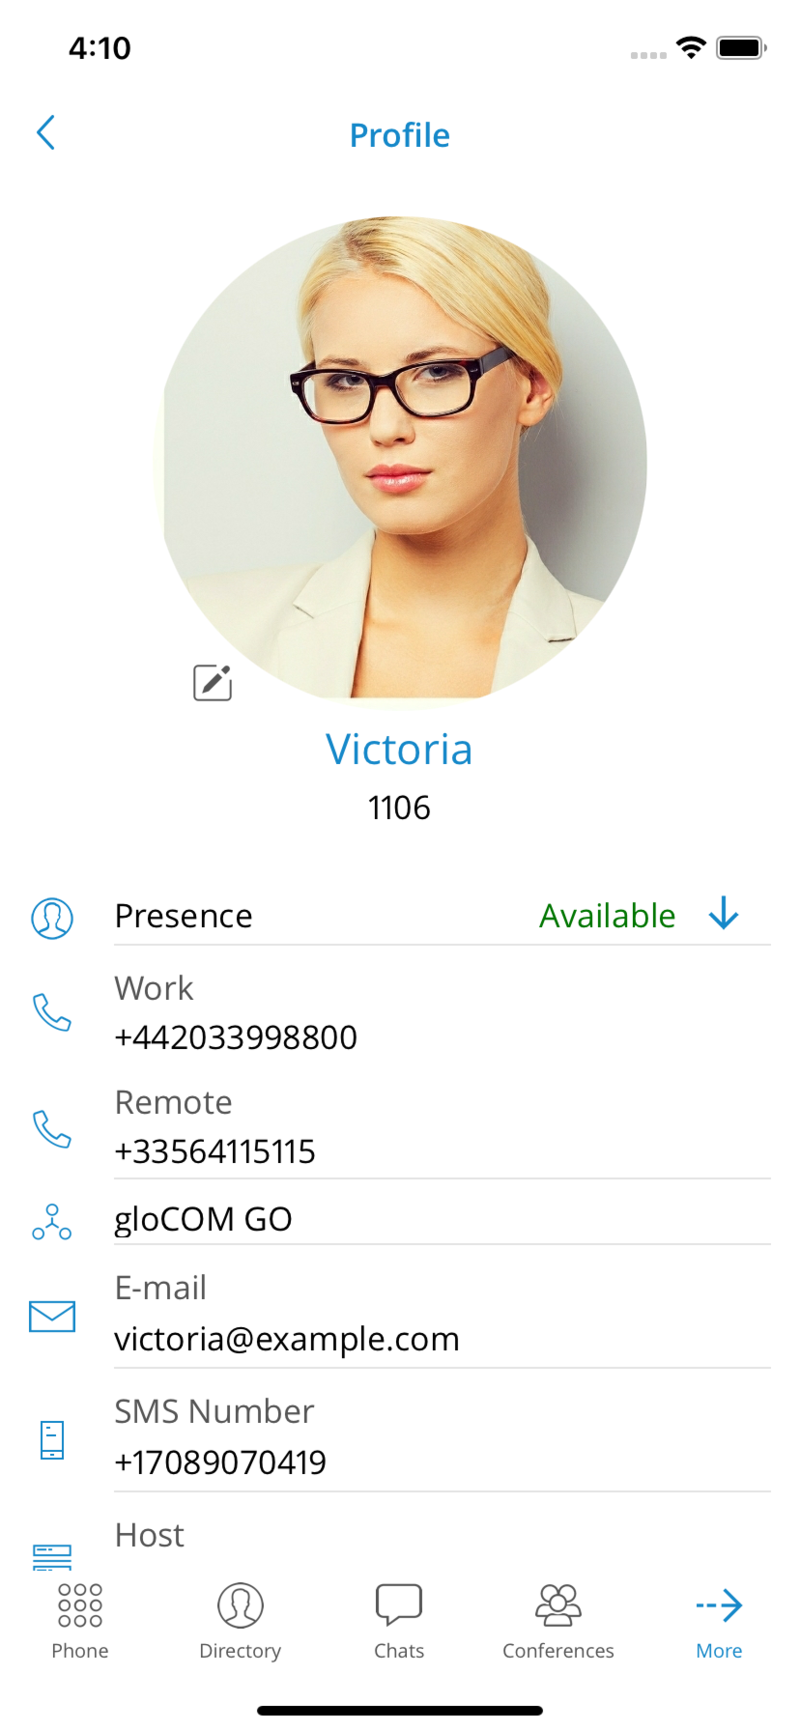
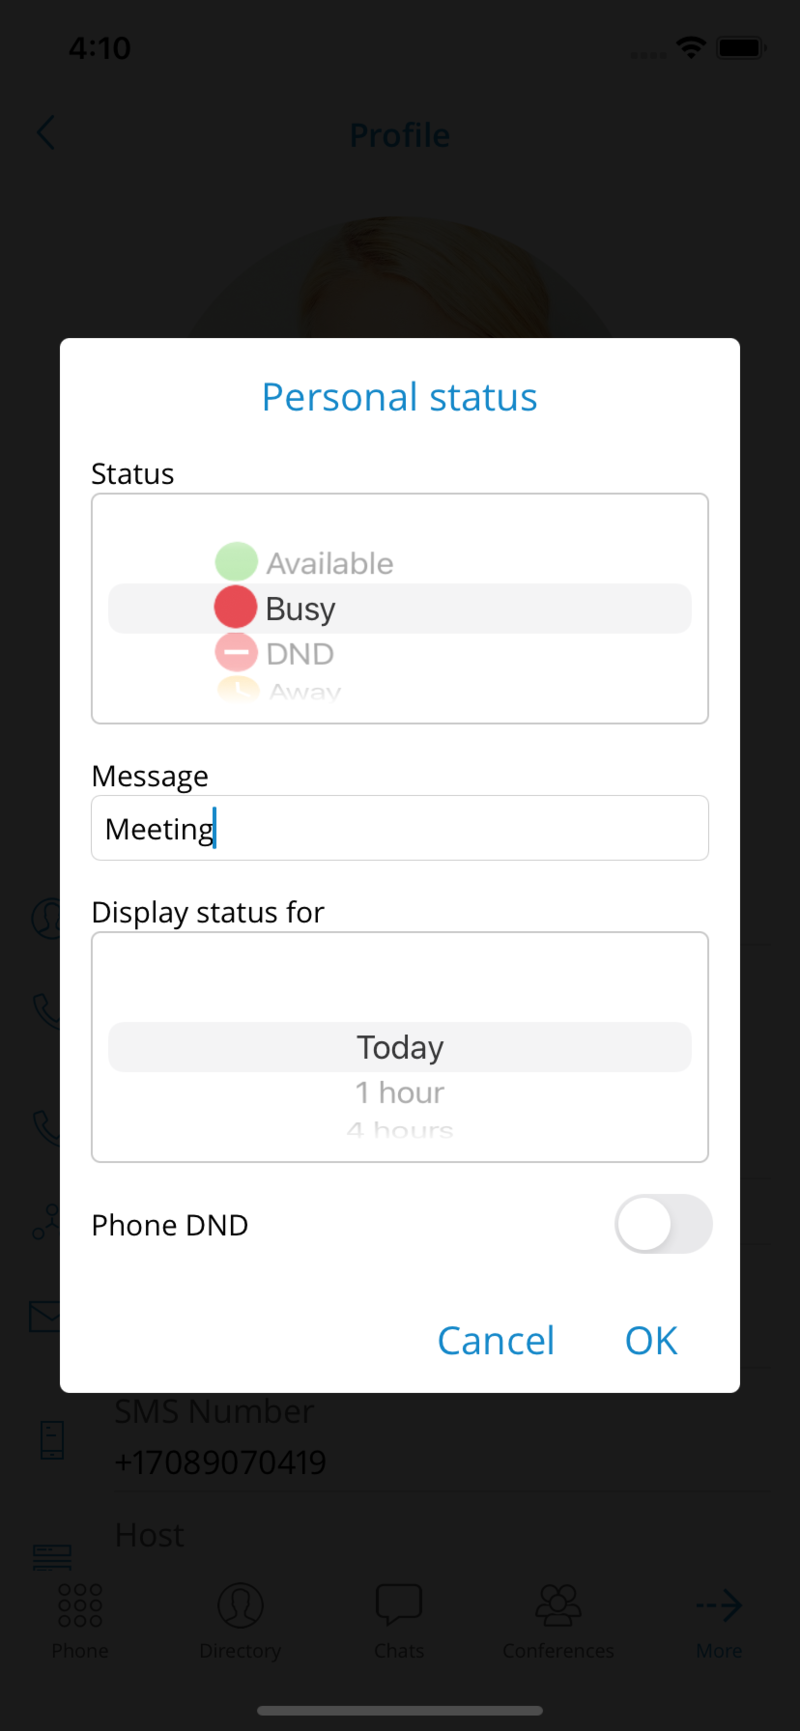
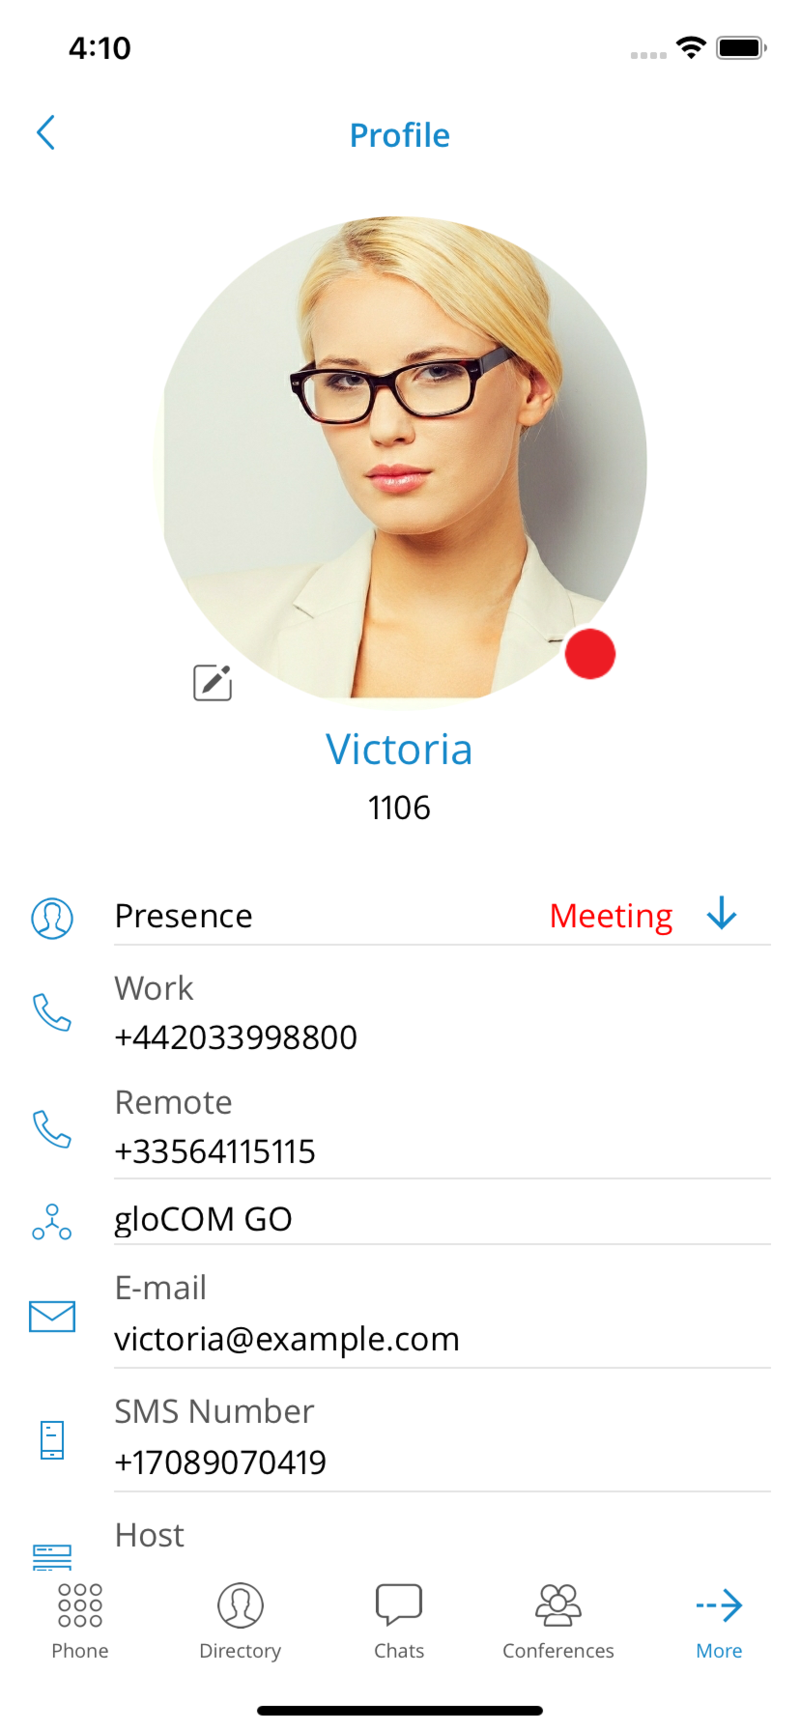
Default statuses are:
-
Available (green icon)
-
Busy (red icon)
-
DND – Do not disturb (red icon with a rectangle)
-
Away (yellow icon with a clock)
Users can create predefined statuses by adding them to PBXware. For default statuses, users cannot enter a custom message, but for predefined statuses, they can associate a message that will be displayed to other users with the selected status. The last option in the Presence dialog is how much time the new Presence status will last.
Available values are:
-
Today
-
1 hour
-
4 hours
-
8 hours
-
12 hours
-
2 days
-
5 days
-
This week
-
Always
Presence status in the chat list
The chat list presence status provides information about the availability of other users. It is displayed with the corresponding icon in the bottom right corner of the user’s avatar.
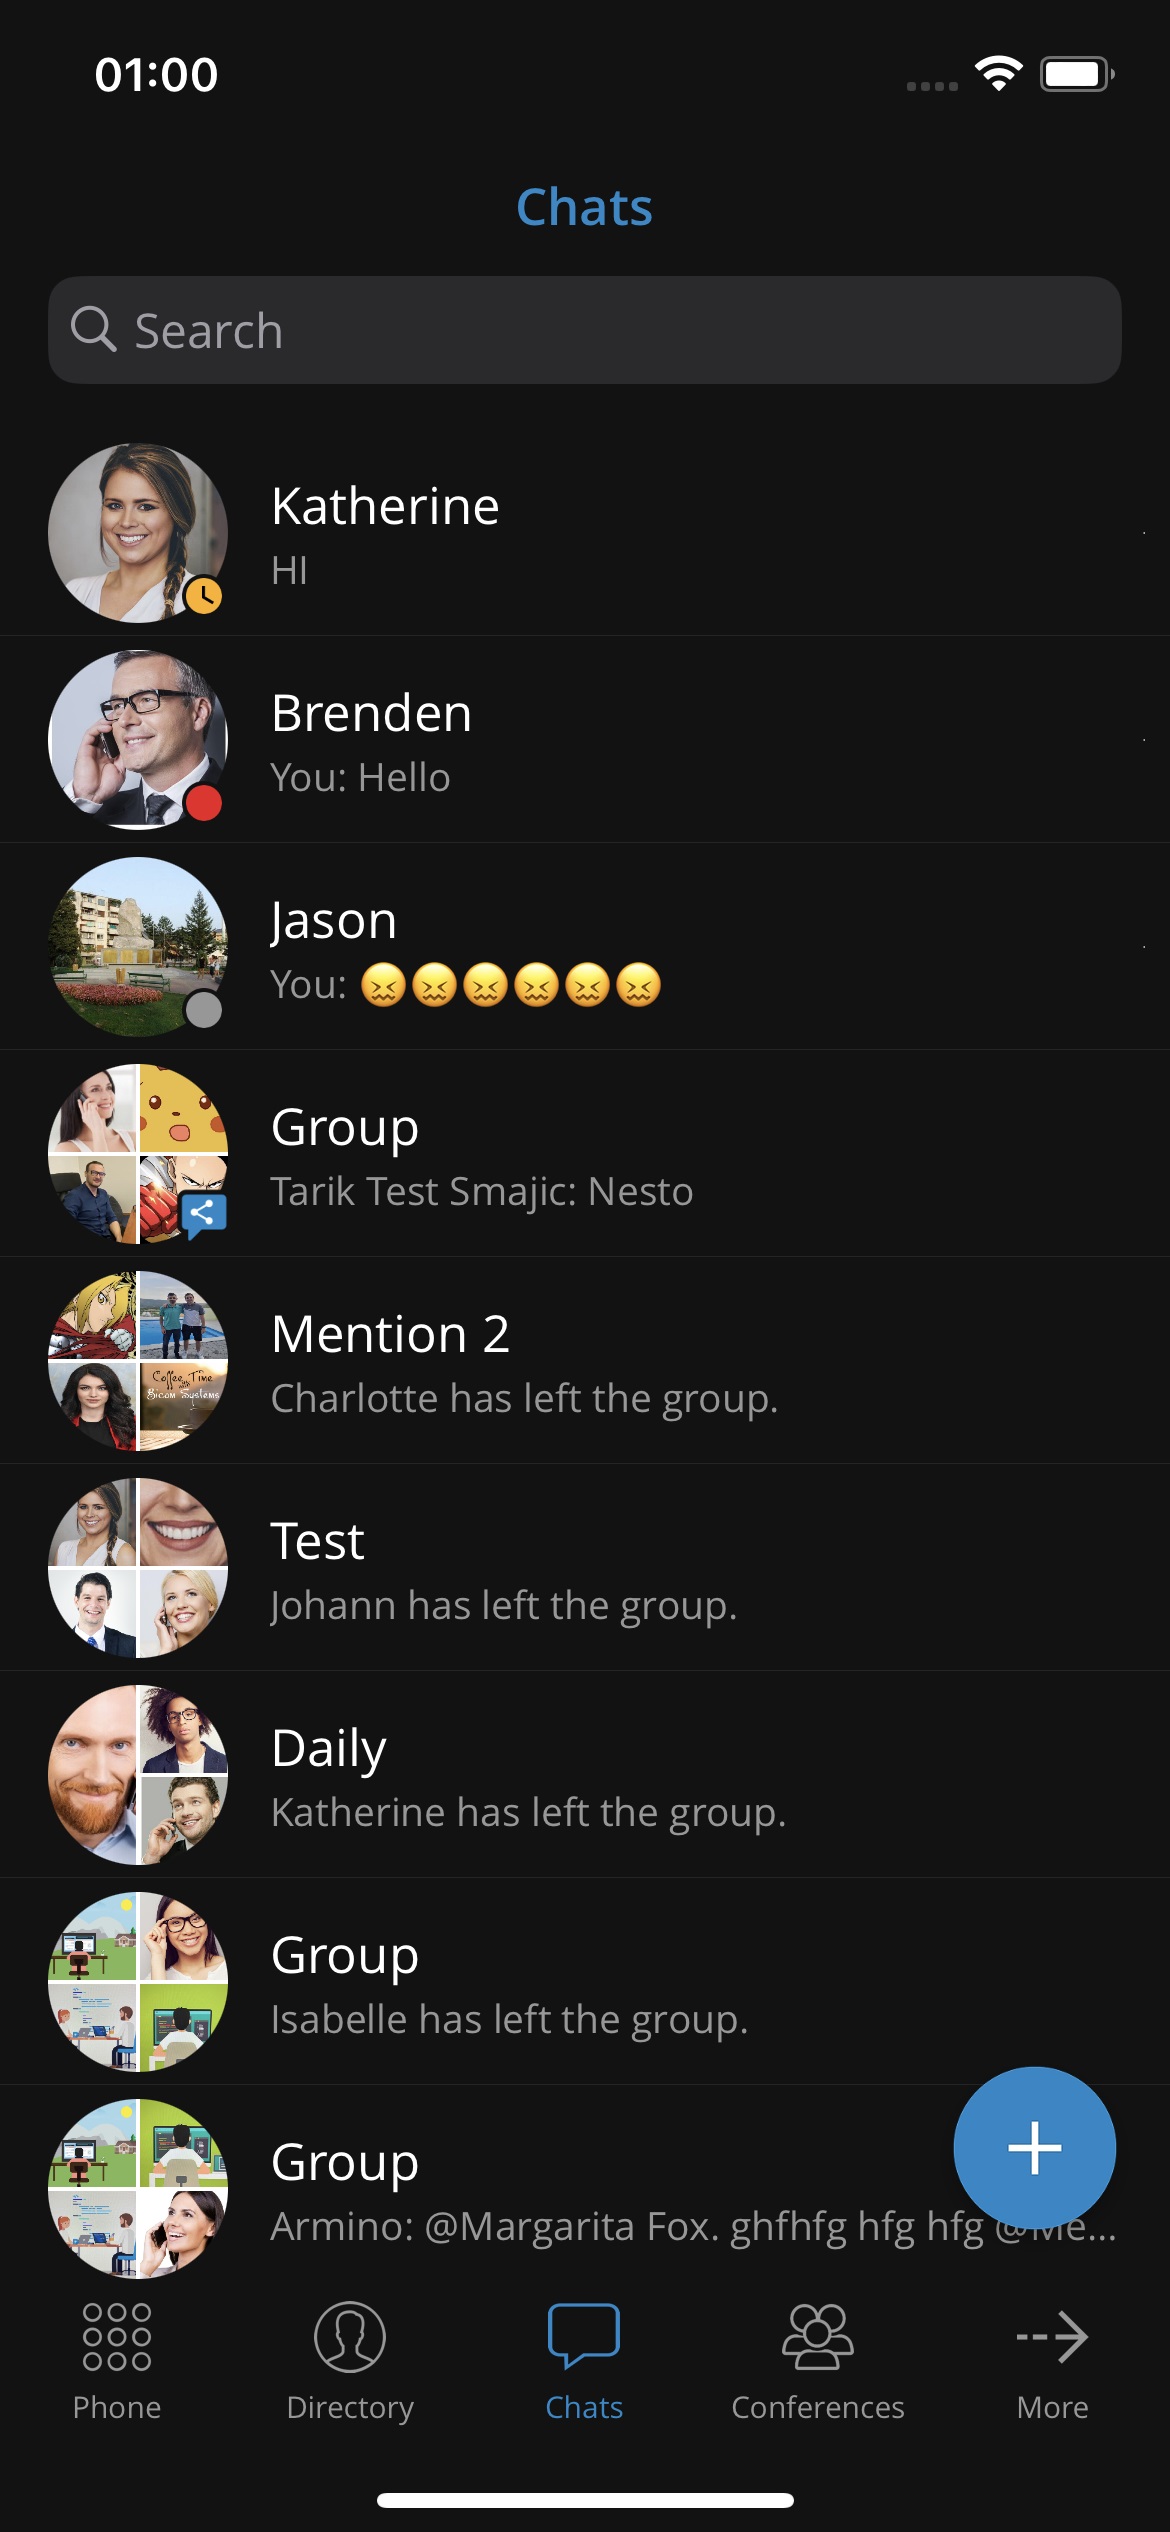
Dashboard
gloCOM GO 6 dashboard incorporates call information and easy control of Enhanced Services.
The dashboard contains easy access modules for Profile info, today’s calls stats, Recent calls, Call options & Voicemail, Favorites, and Quick actions.
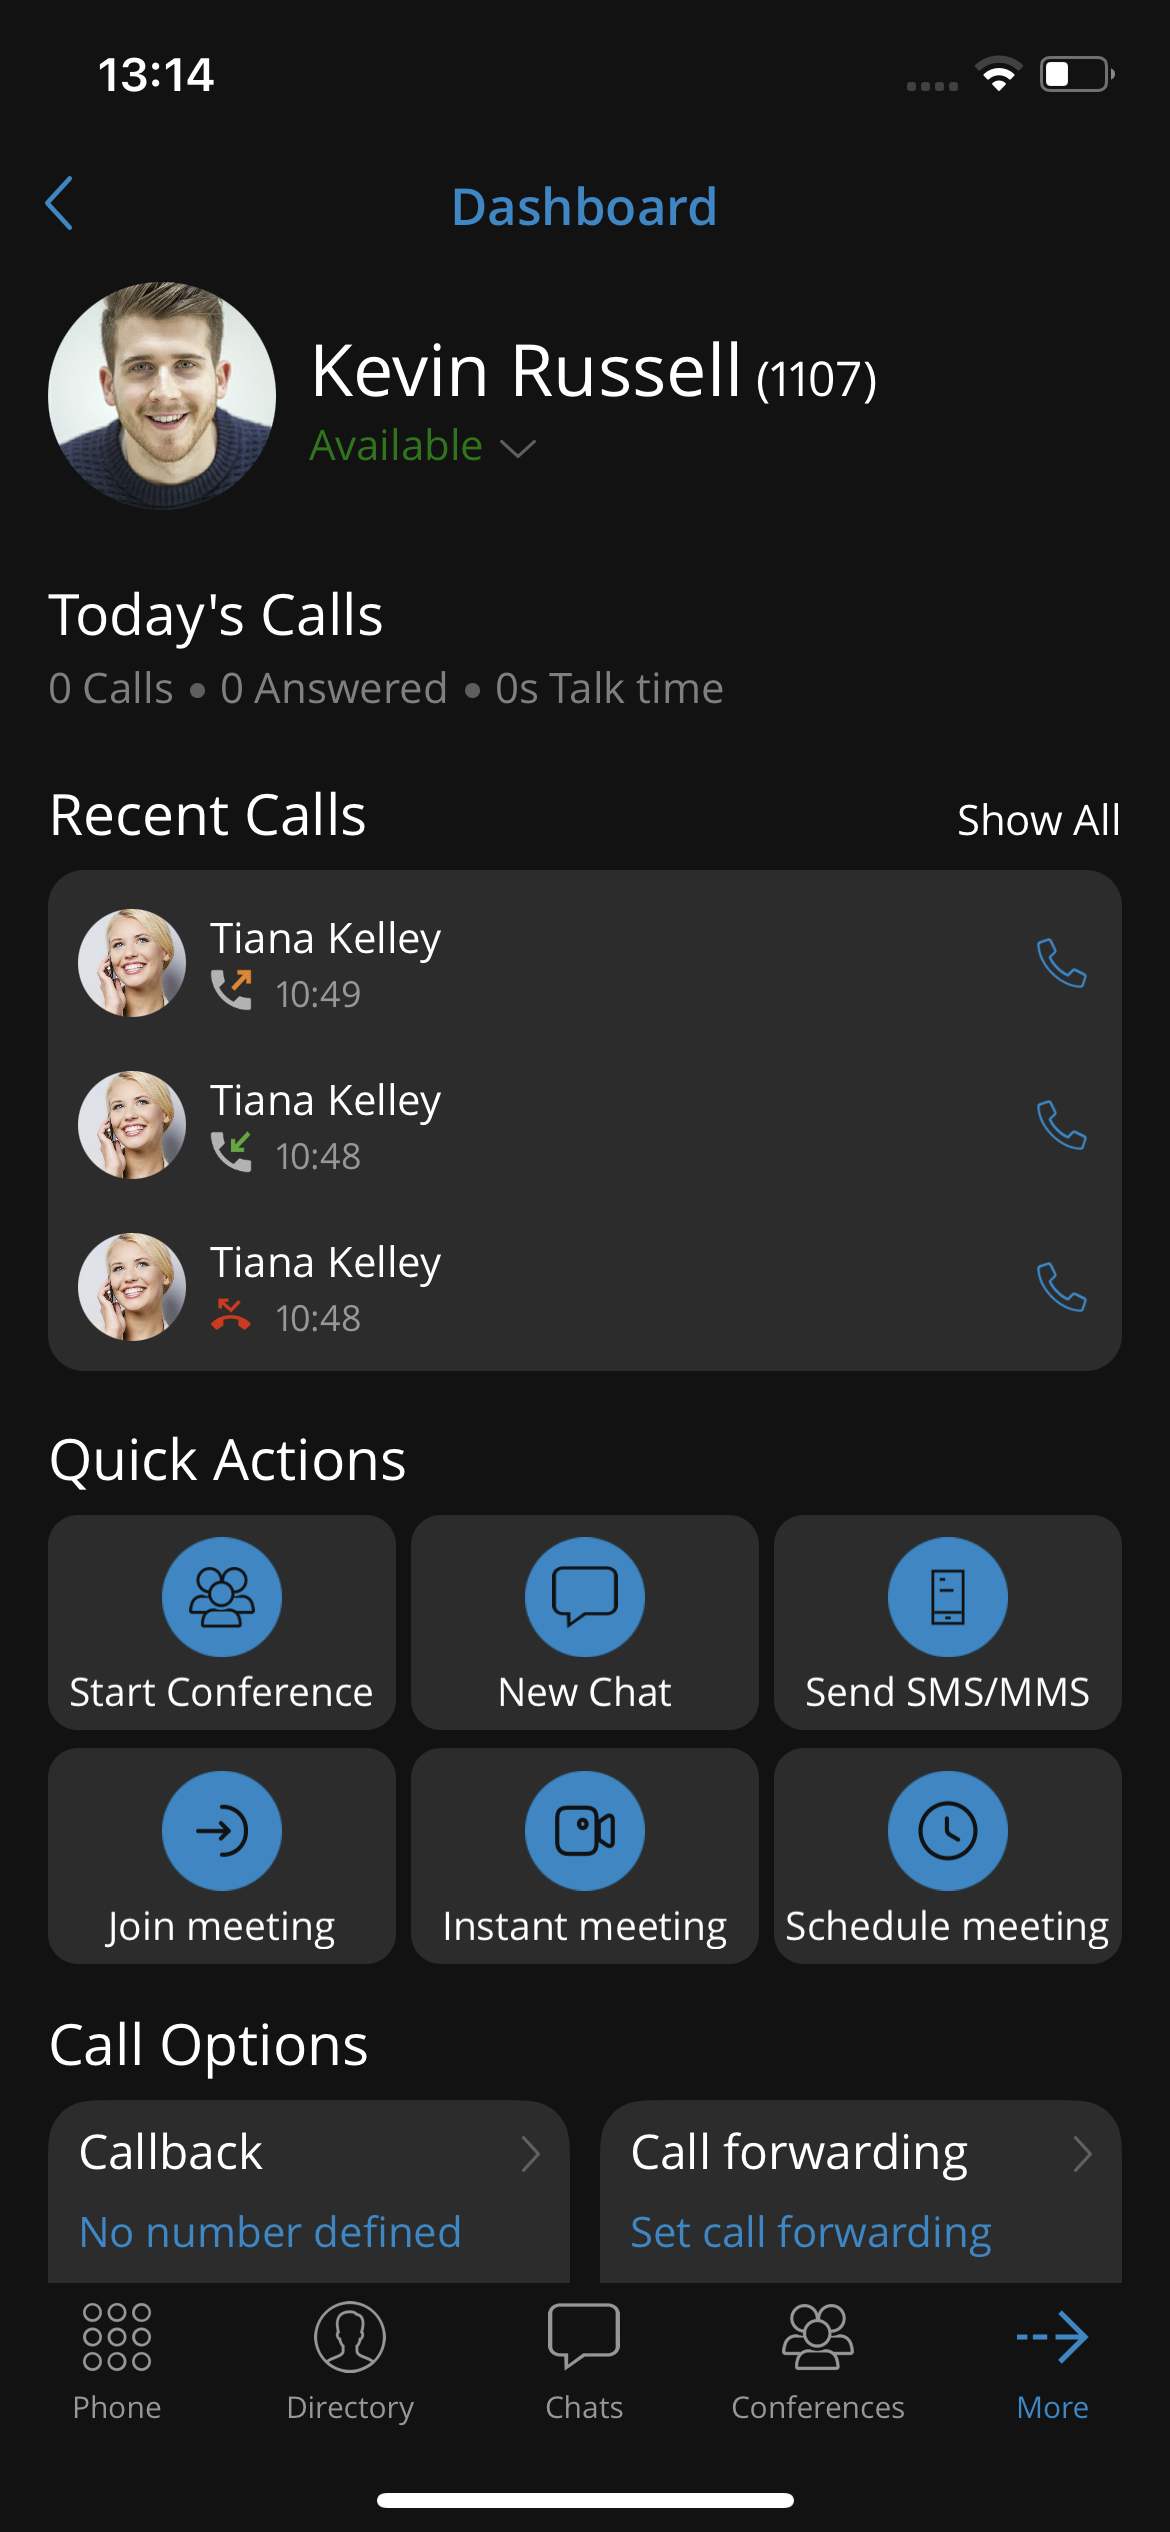
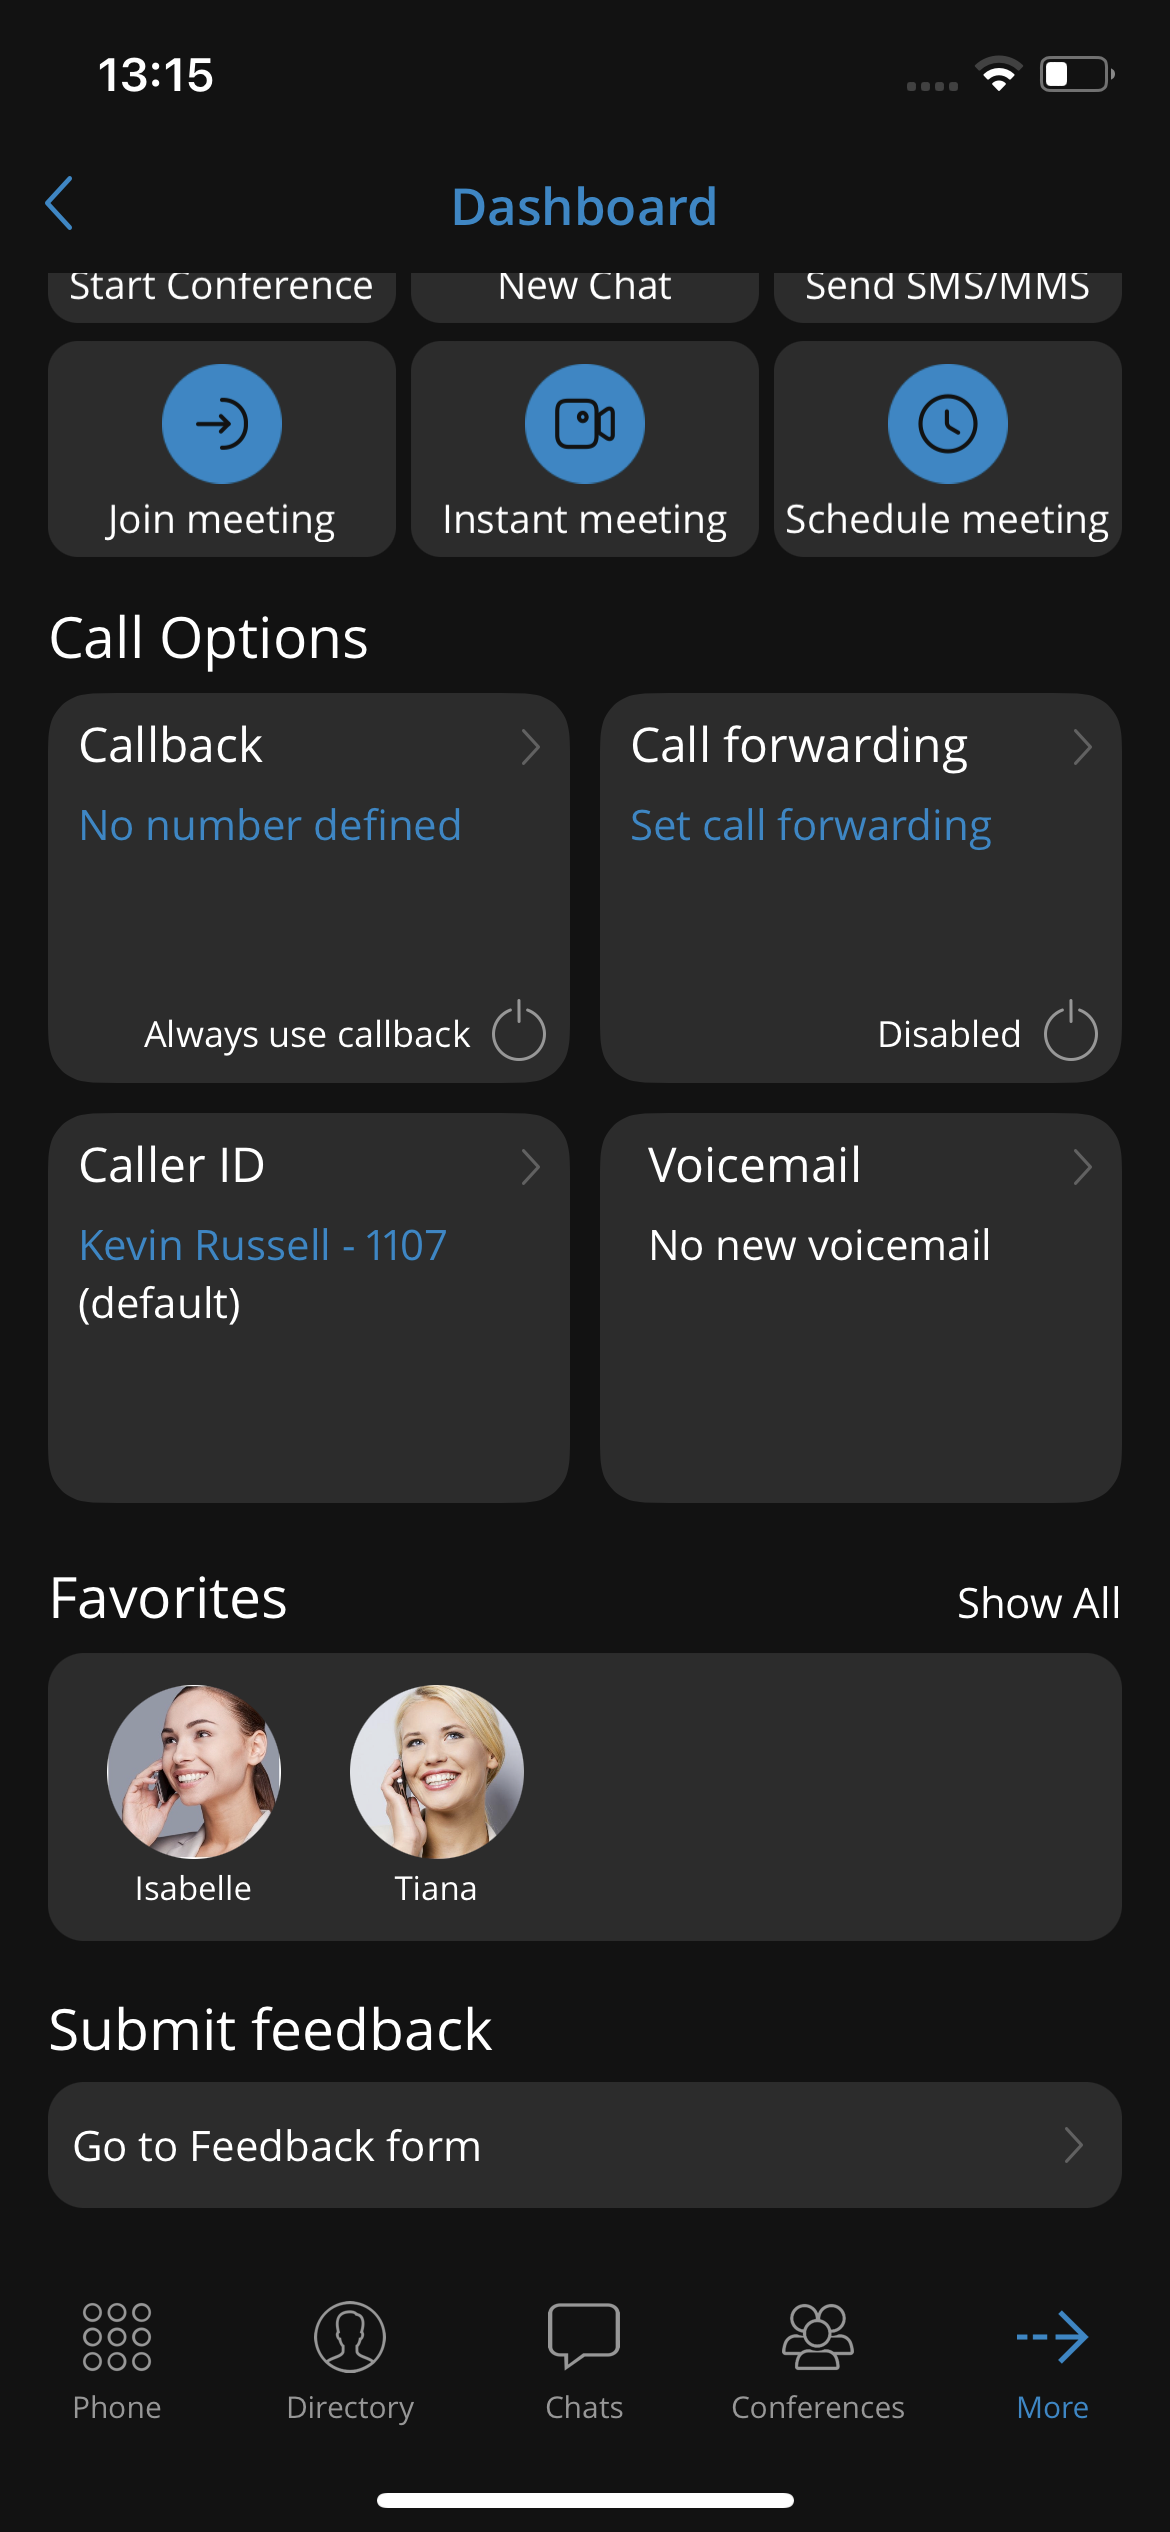
The profile info module displays the username, extension, avatar, and personal status. Today’s calls module displays stats about calls that are made today.
The Recent calls module displays the last three calls and allows interaction with them. The quick actions module will enable users to start a conference quickly, create a new chat, send SMS/MMS and join/schedule/create an instant meeting.
The call options & voicemail module allows users to access settings for call forwarding, callback, caller id, and open voicemail screen.
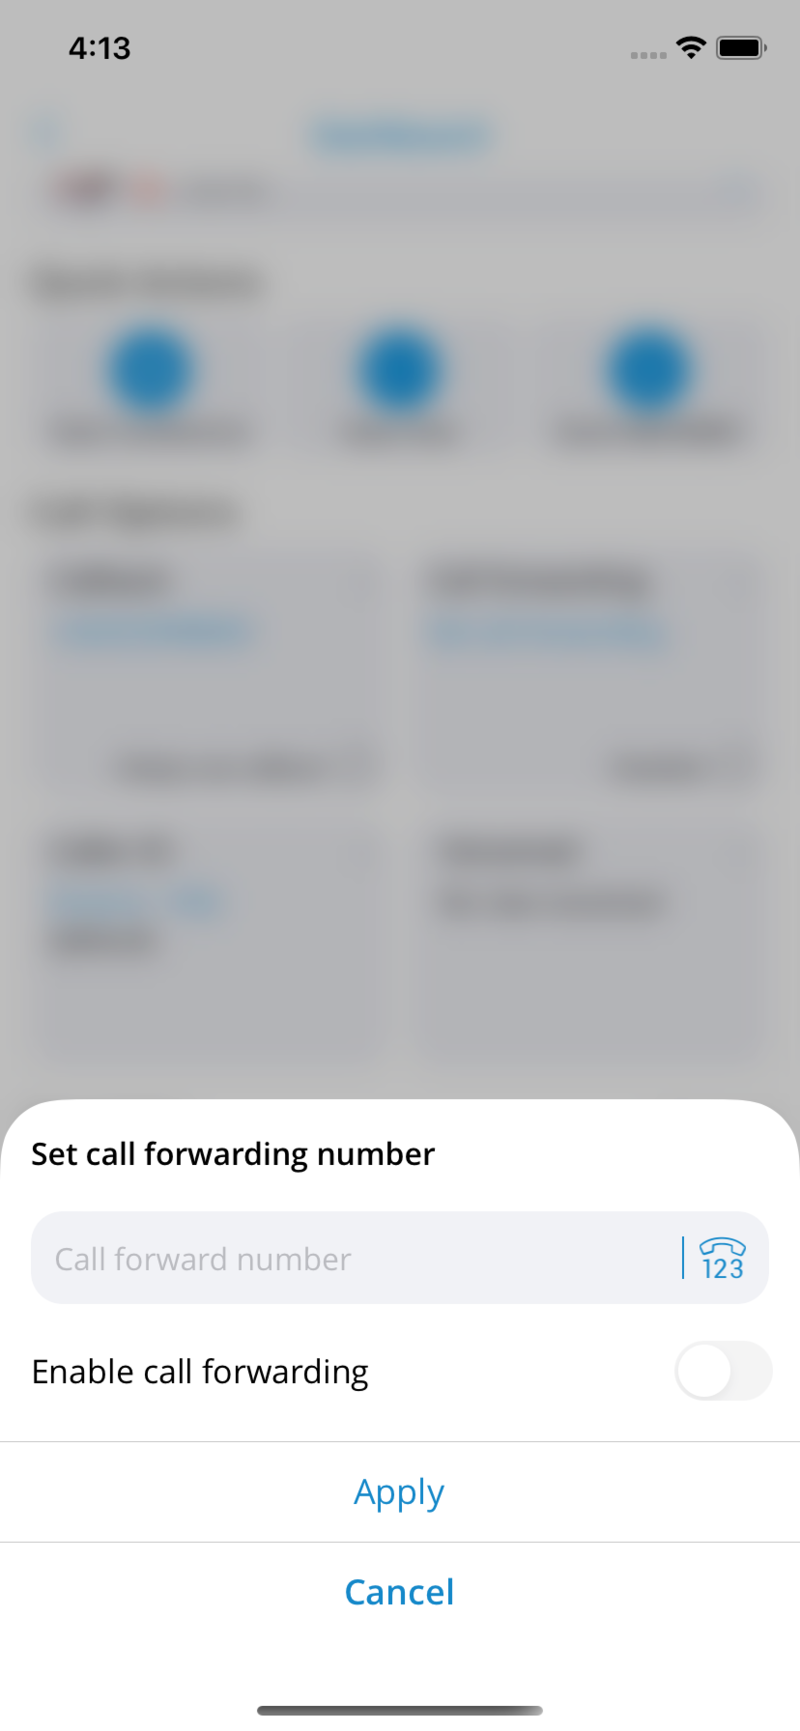
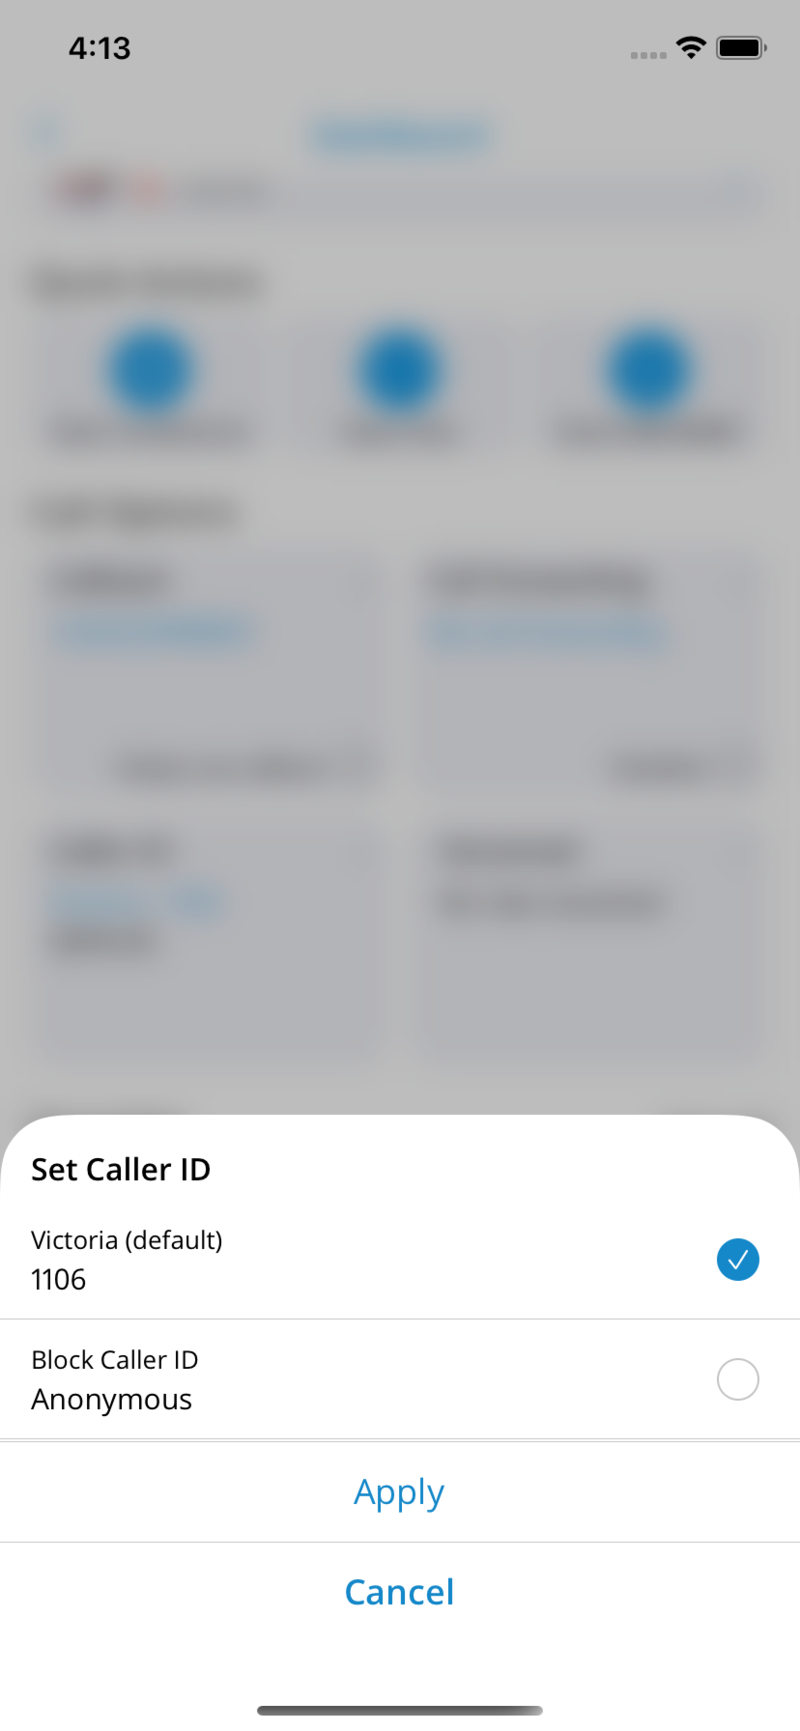
The Favorites module displays ten favorite contacts and allows interaction with them. At the bottom of the Dashboard screen, users can express their opinion about gloCOM GO 6 by selecting Feedback.
Dark Theme support
gloCOM GO 6 users can select light theme, dark theme or system default. Dark Mode will follow the system options if Dark Mode is selected in the device system.
In order to select a light, dark, or system default theme, users press on Theme in Settings, and select the preferred theme from the pop-up menu. Once the preferred theme is selected, it will change immediately.
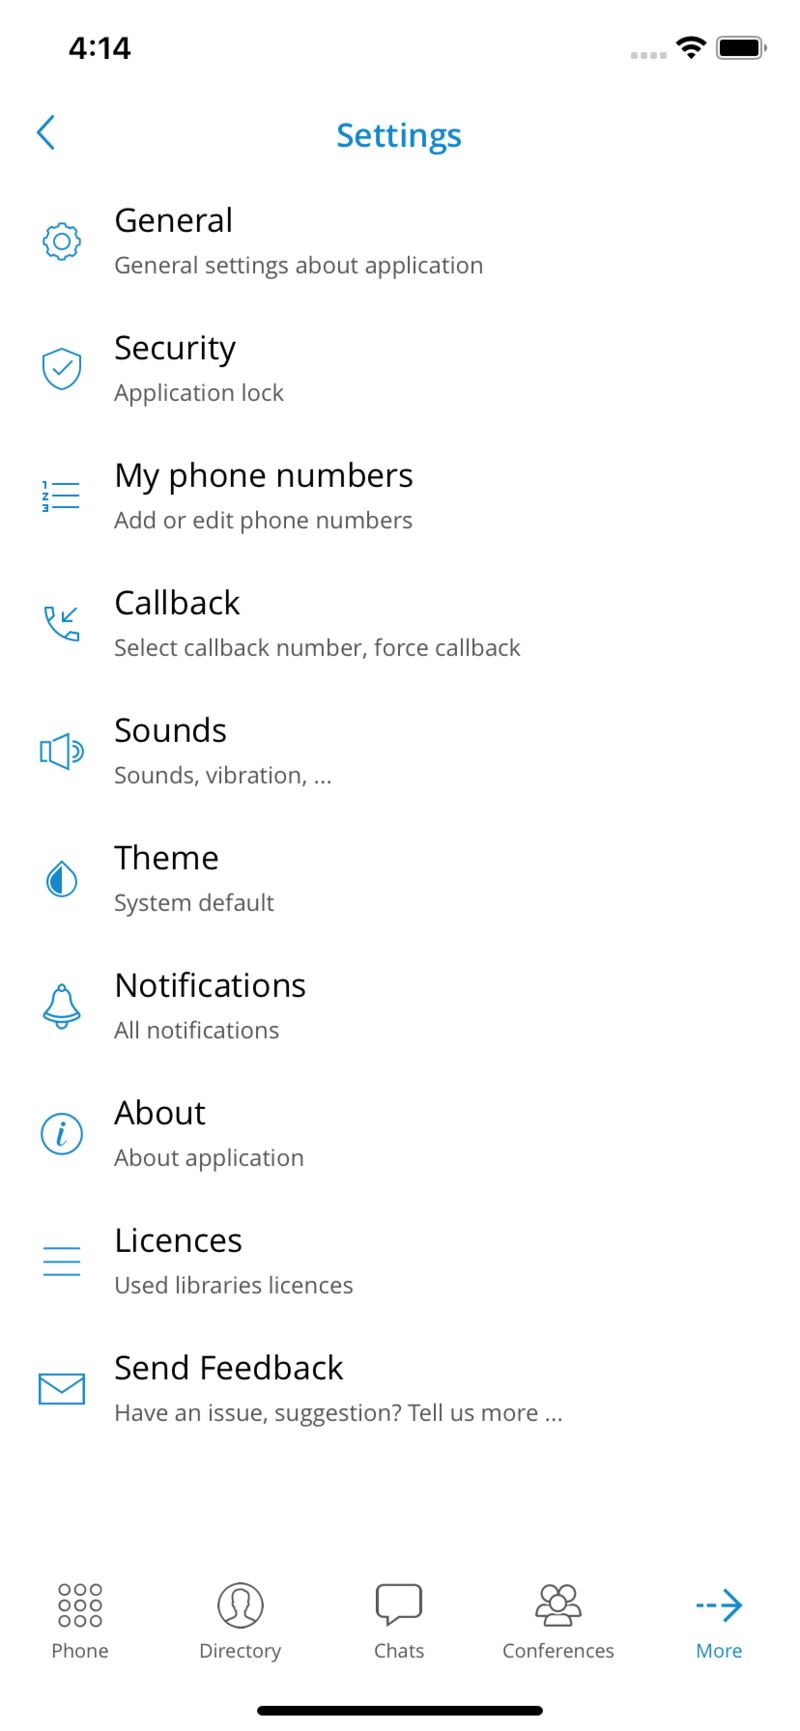
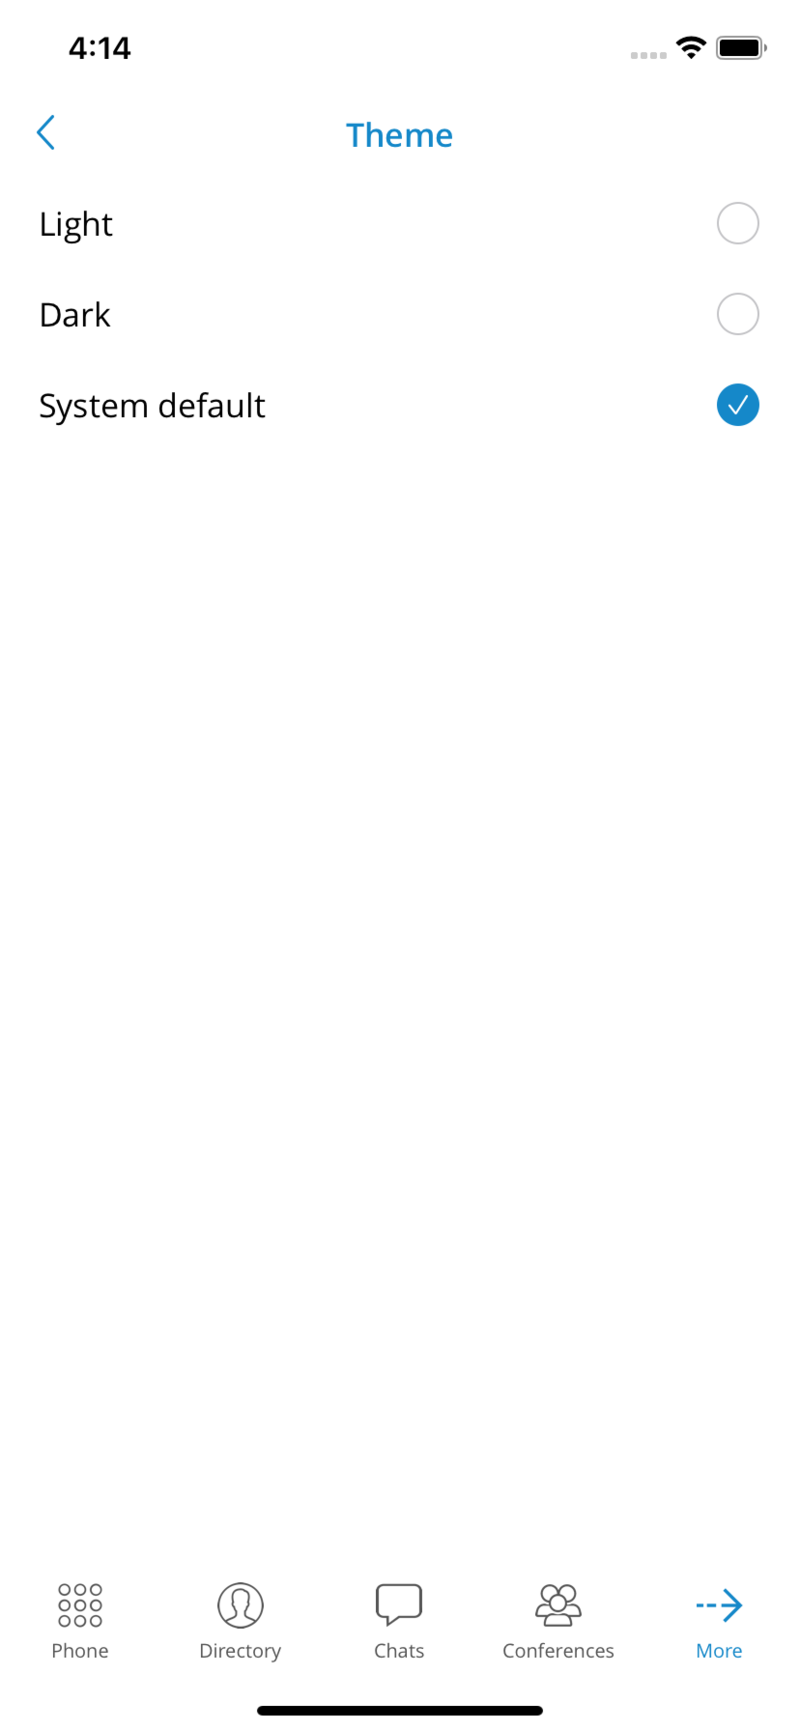
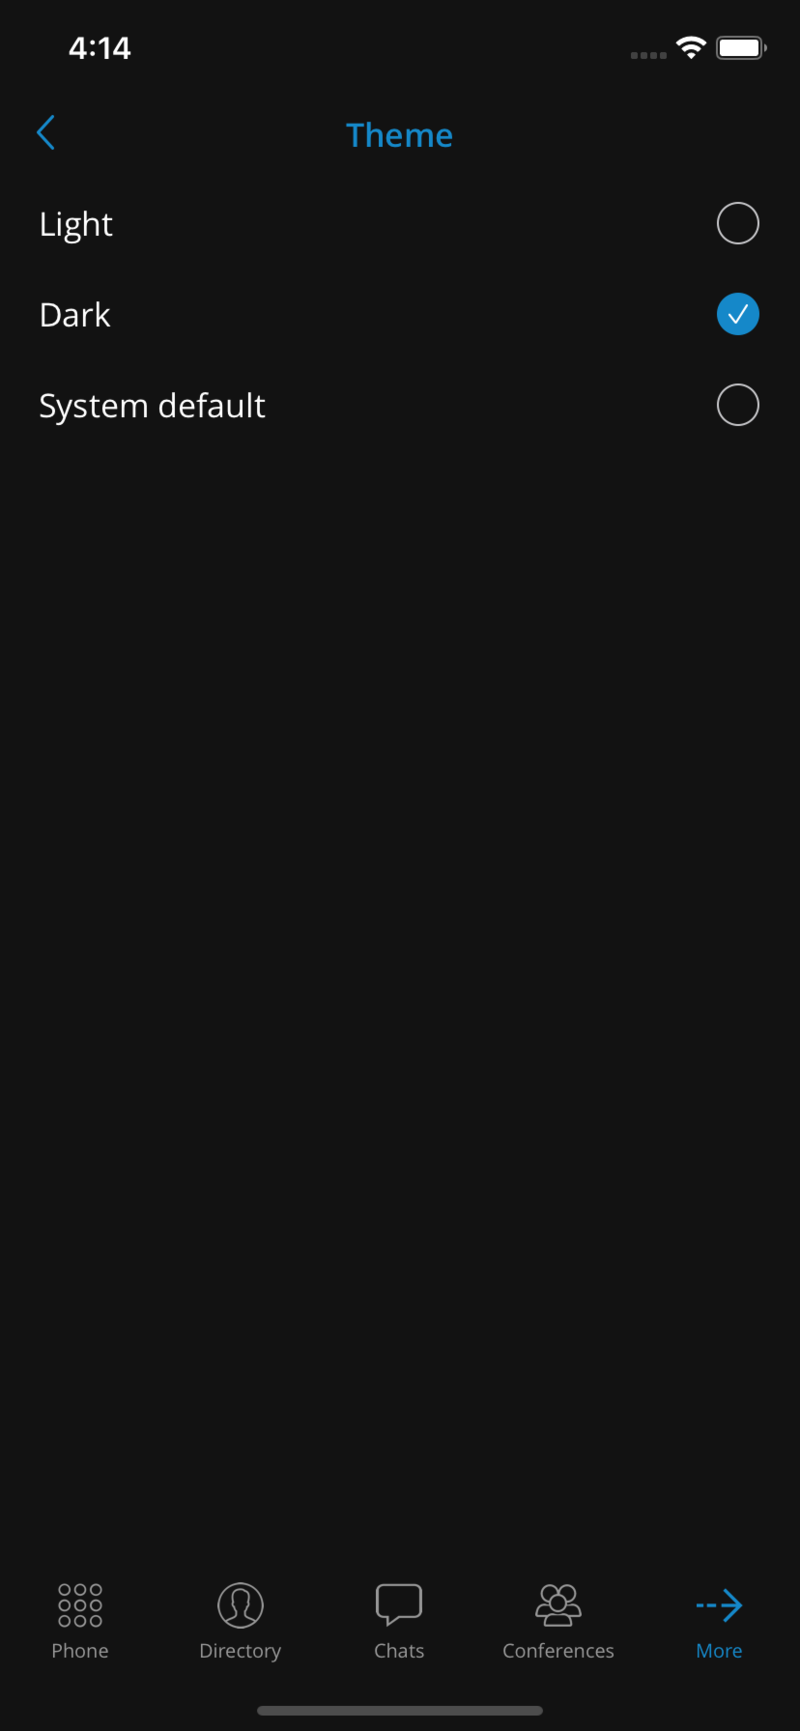
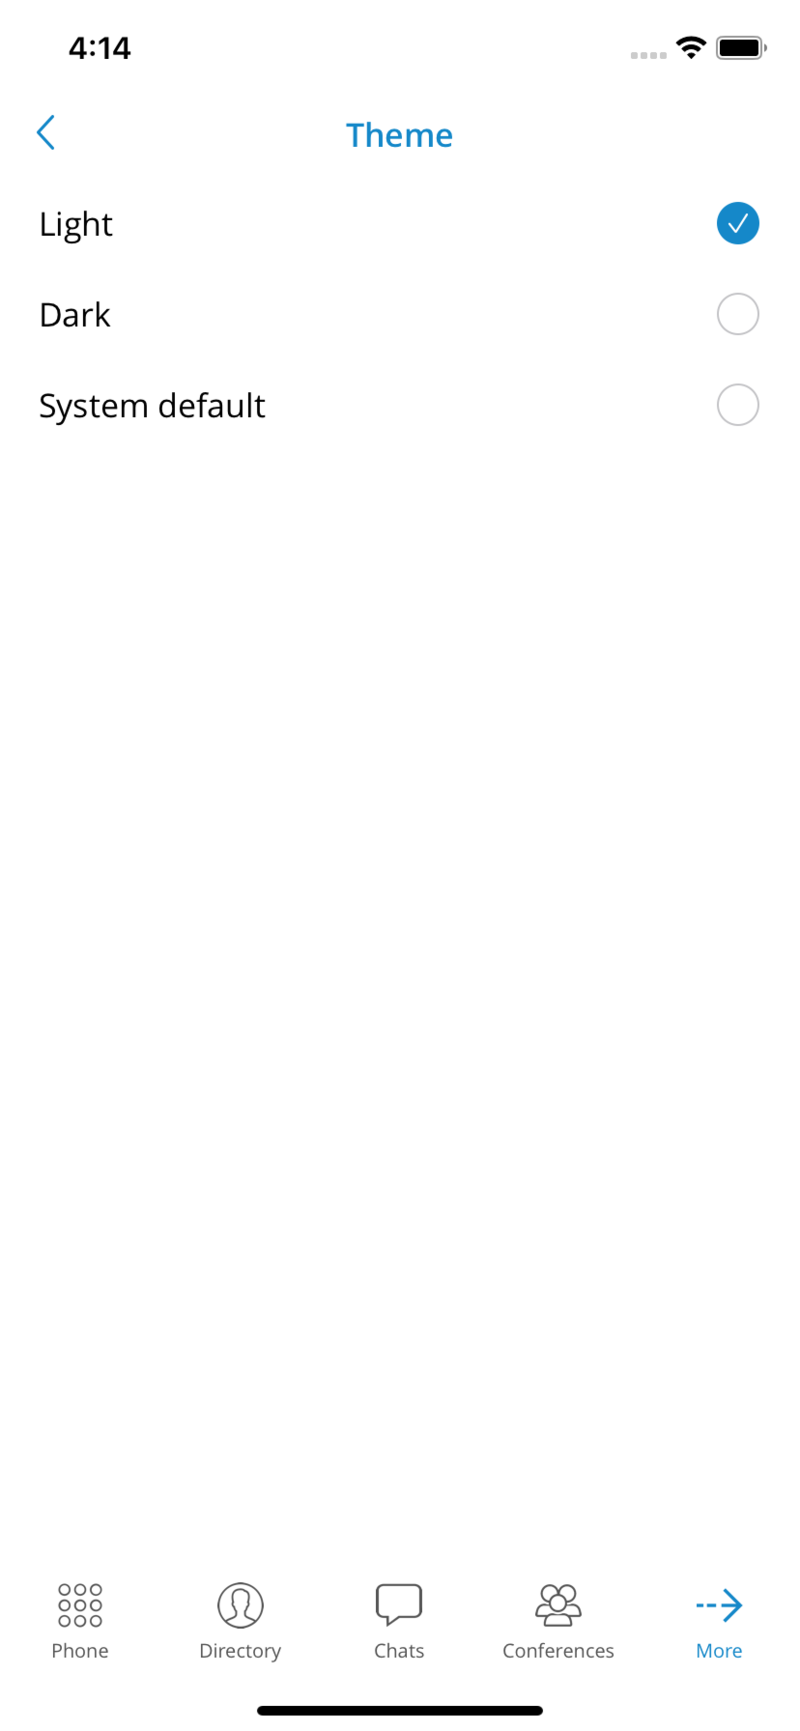
Localisations (translations)
gloCOM GO 6 is available in different languages. The app detects the system language and applies the translations if that language is supported.
The gloCOM GO 6 has been translated to Italian, Portuguese and German languages, so our international gloCOM GO 6 users can explore the benefits of the gloCOM GO 6 in their native language.
Settings
-
General – option shows a screen with general settings for gloCOM GO 6.
-
Phone – shows a screen where it is possible to change phone and dialer options.
-
Meetings – shows a screen where it is possible to change meeting integration options.
-
Security – offers users to enable Biometrics security for gloCOM GO 6.
-
My phone numbers – shows a screen with settings for Country, SIM number, add, edit or delete a phone number, and phone numbers associated with the user’s account.
-
Callback – screen with settings for a Callback feature.
-
Notifications – option shows all new notifications for gloCOM (e.g. missed calls, new voicemail, server notifications…)
-
Theme – screen with settings for the gloCOM GO 6 theme (dark, light or system default).
-
Sounds – offers an option to select a ring tone for incoming calls and to Enable/Disable dialpad sounds.
-
About – will display gloCOM GO 6 about page with version number and contact information.
-
Licenses – shows a screen with a list of the gloCOM GO 6 libraries.
-
Send Feedback – launches integrated feedback submission form.
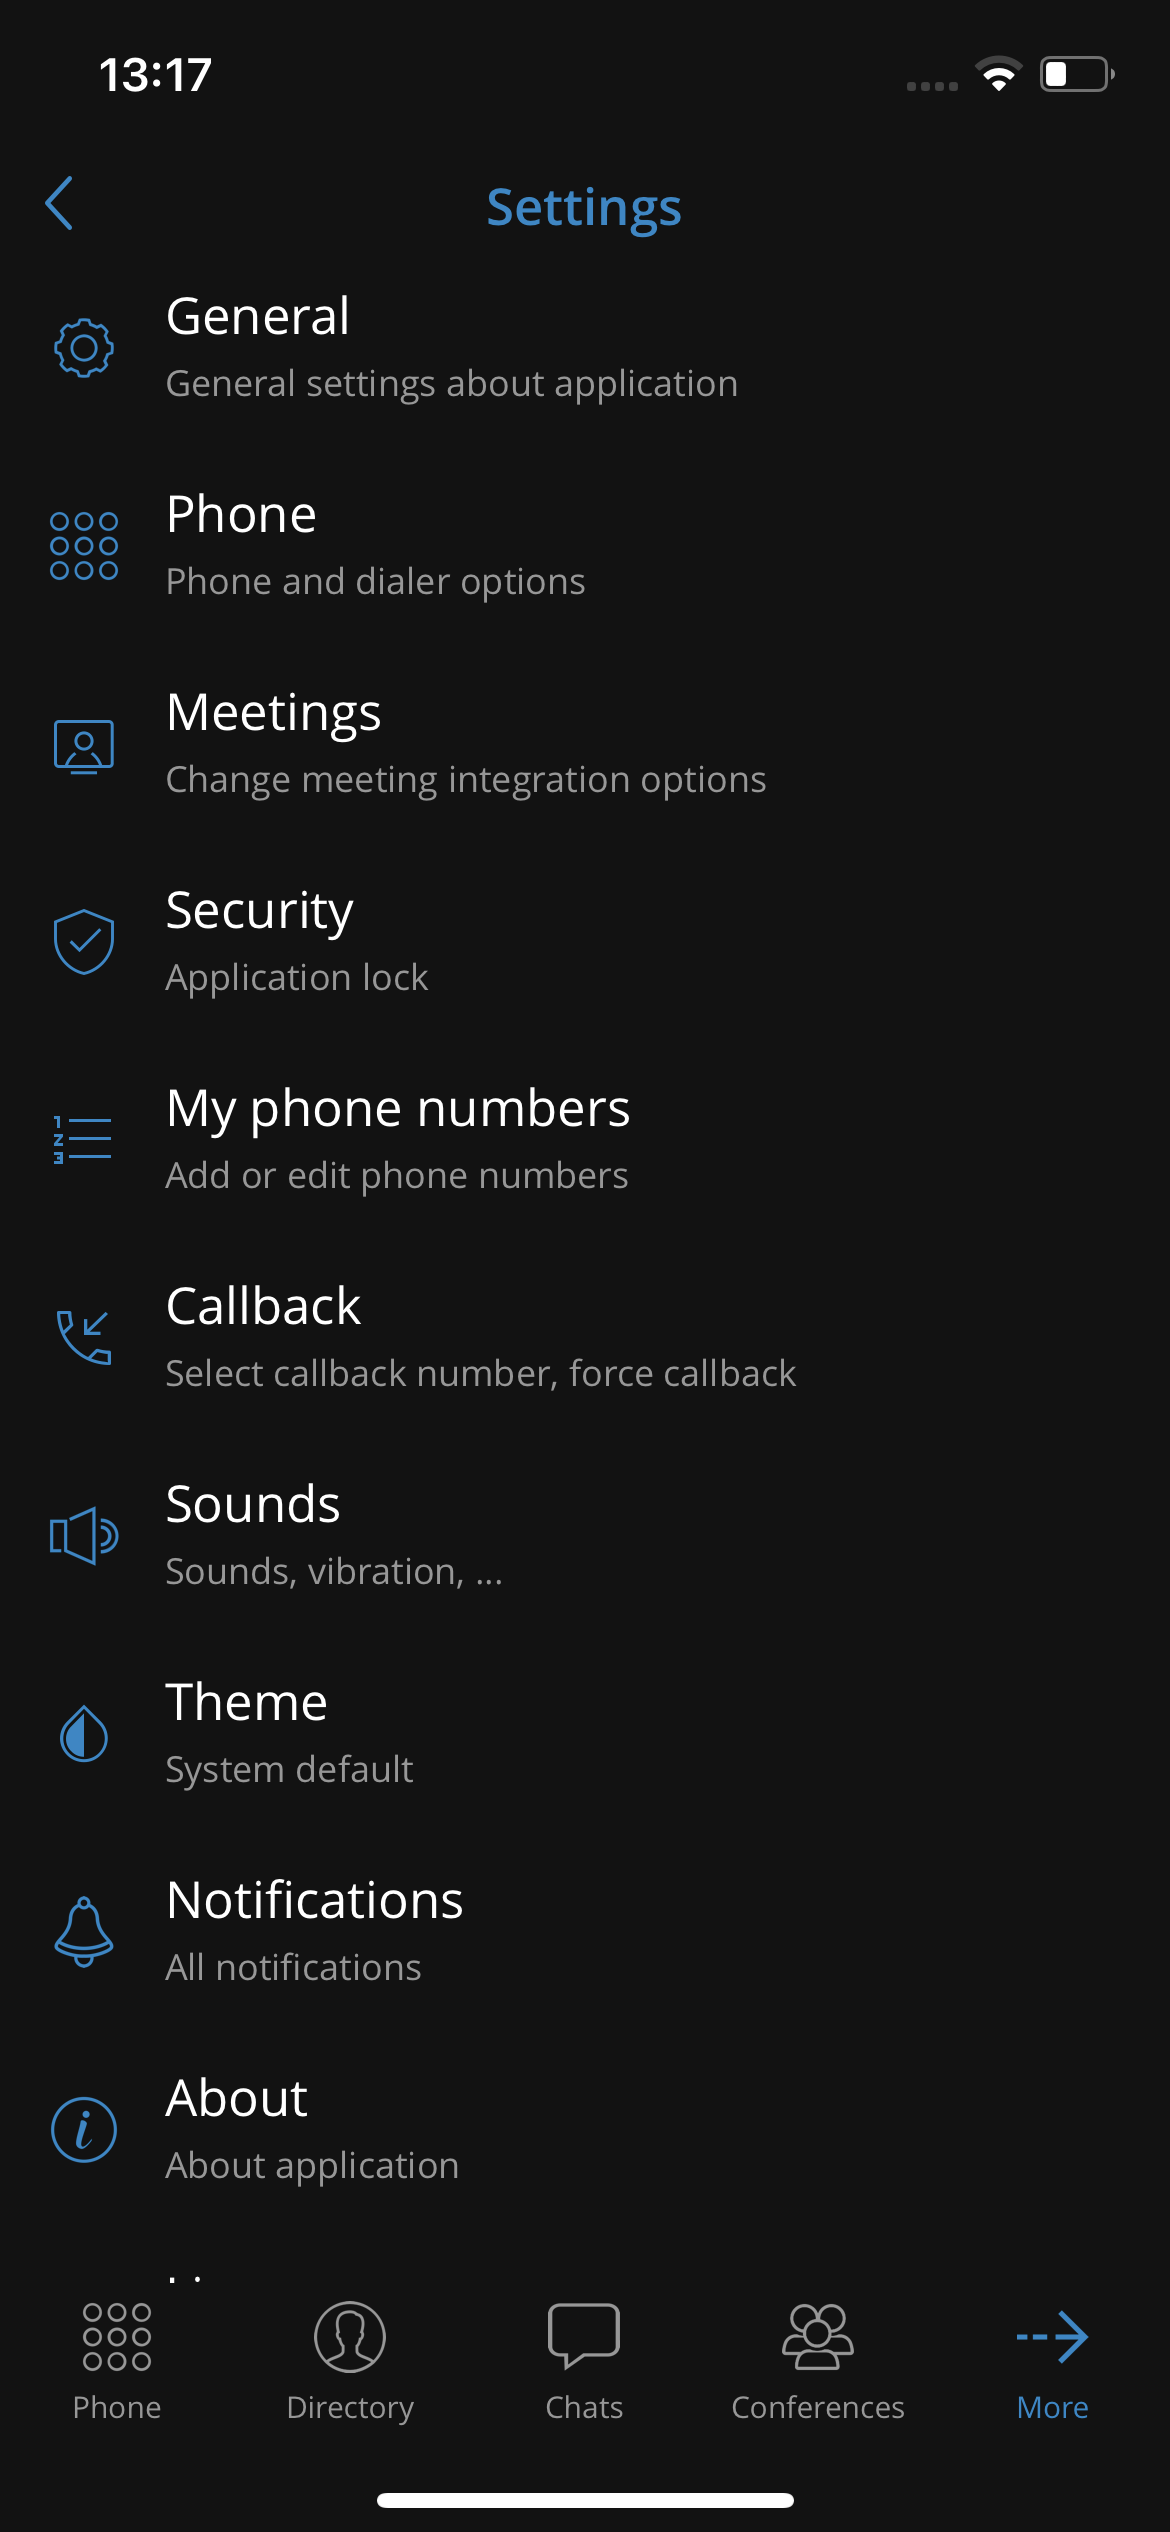
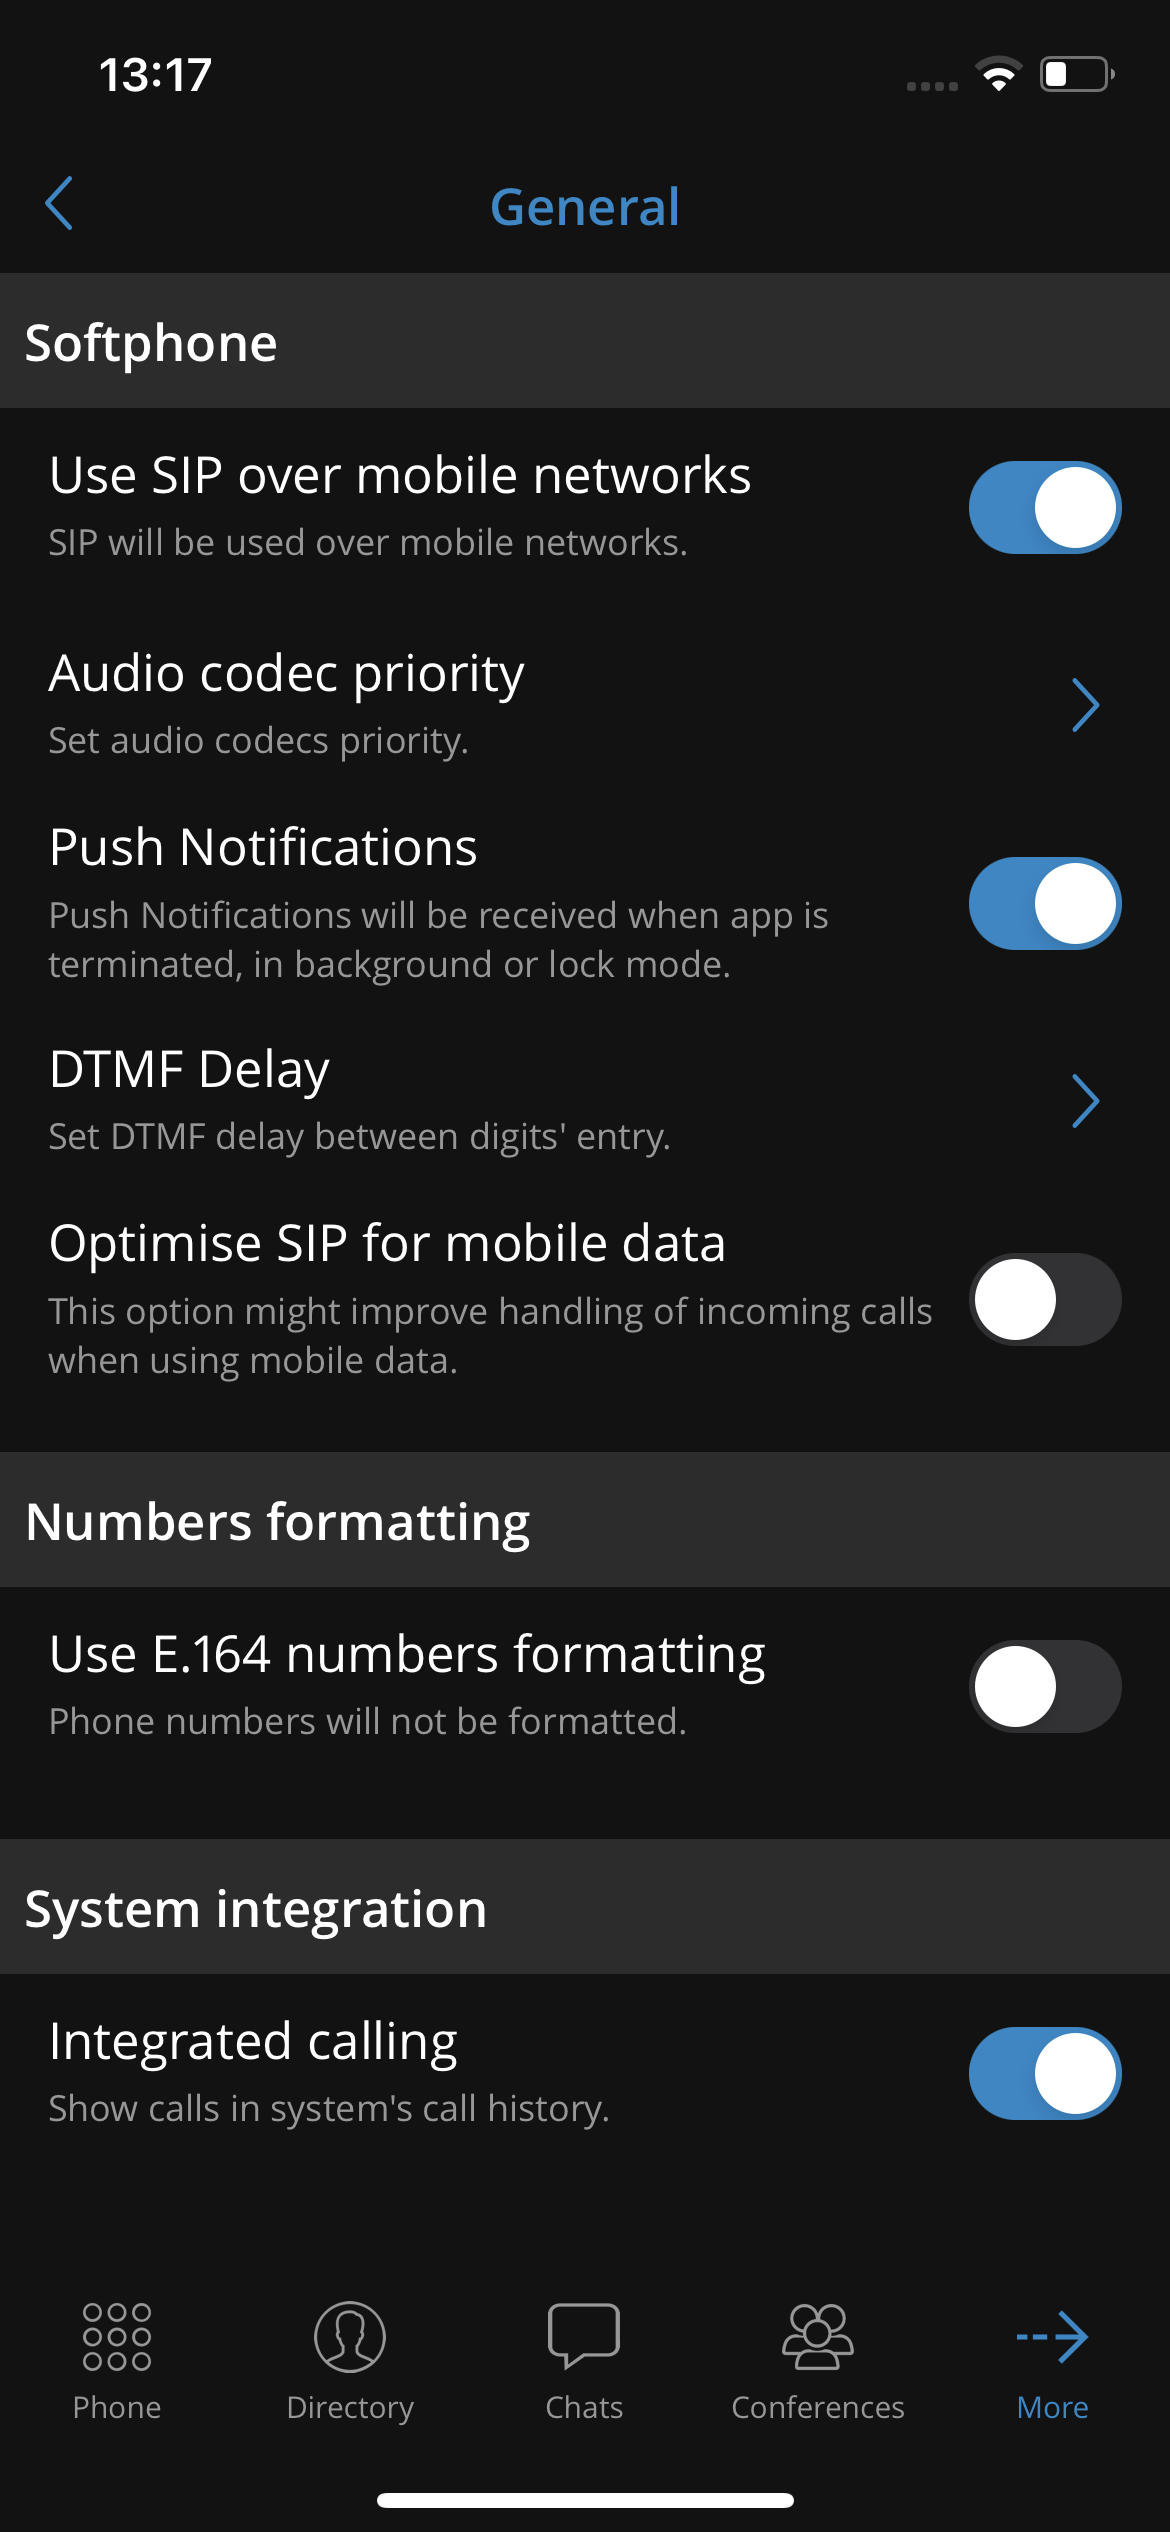
My phone numbers
This section contains numbers defined by the user’s account. Users can add more numbers by using the ADD NEW NUMBER button and sort them by priority using the drag option on the right side of the number and label. These numbers appear in a list of numbers associated with the user’s account when someone tries to call them from gloCOM GO 6 or gloCOM.
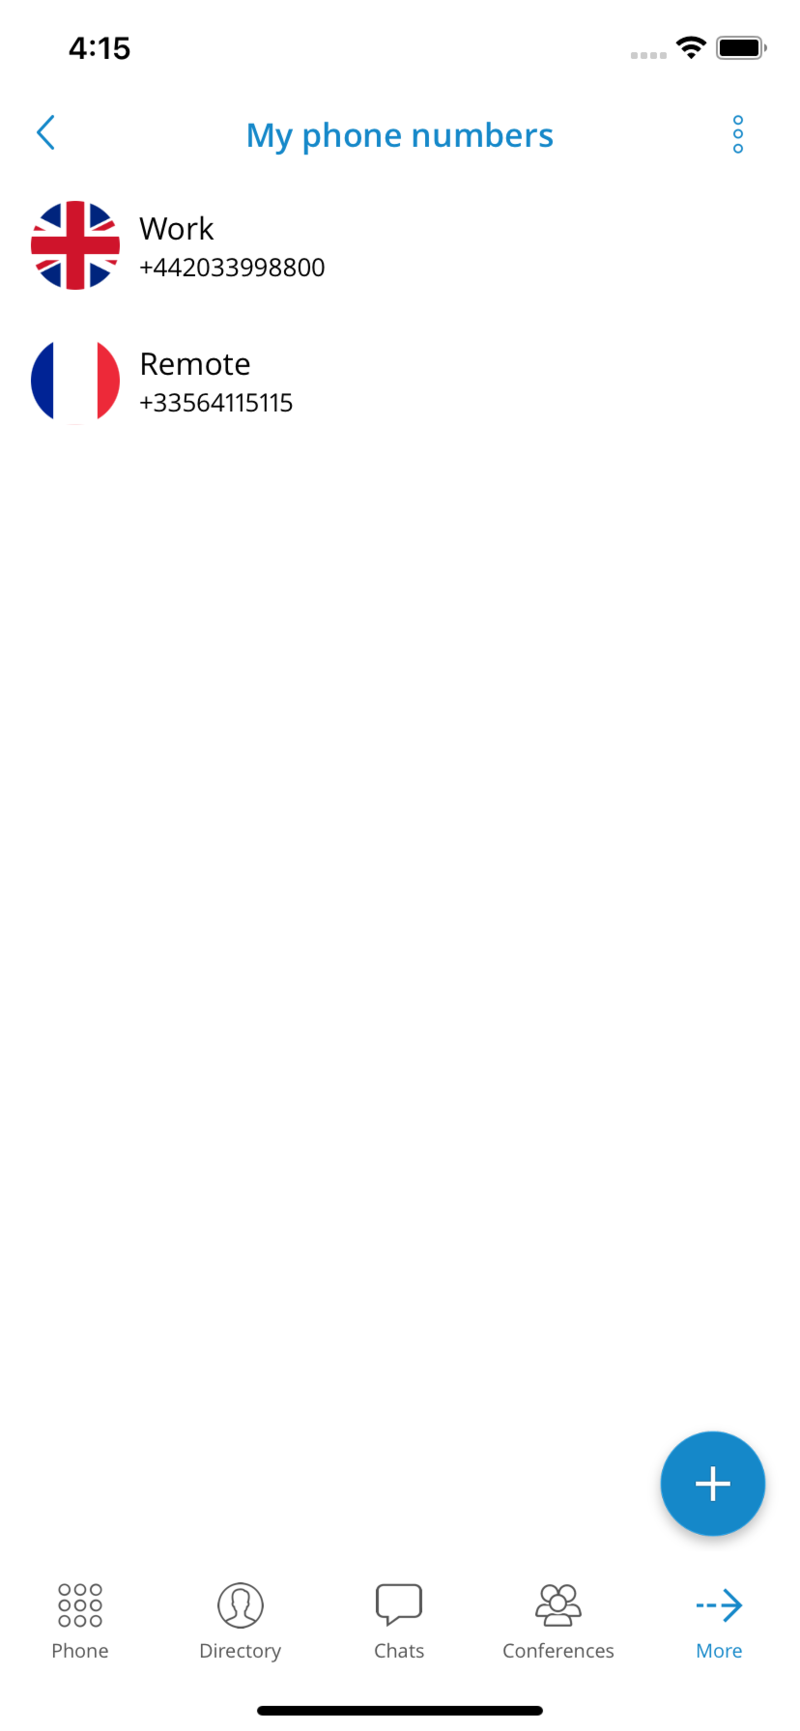
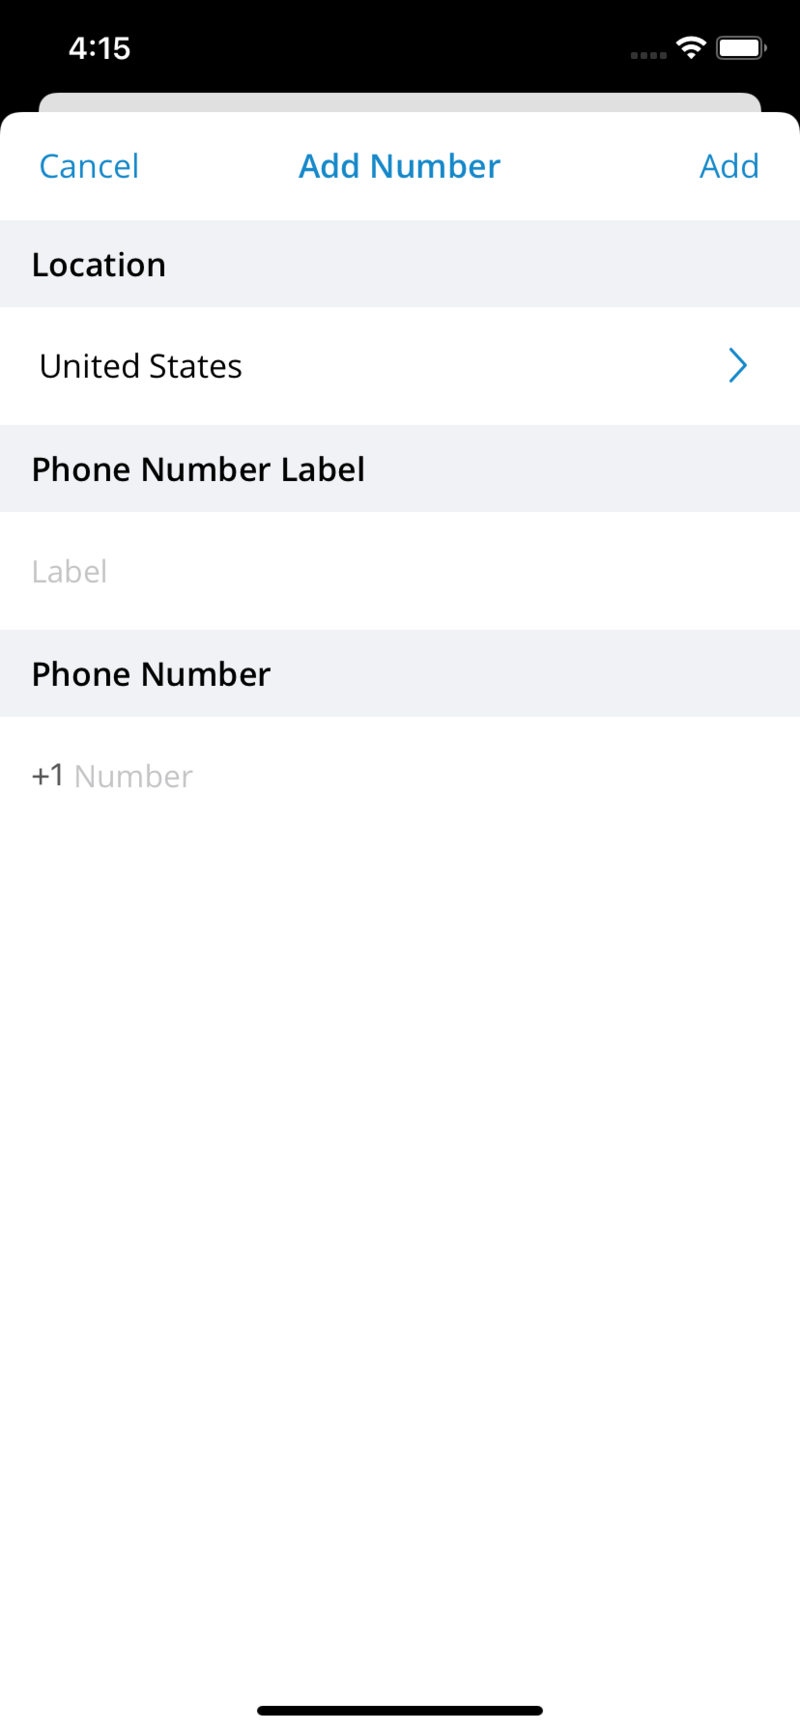
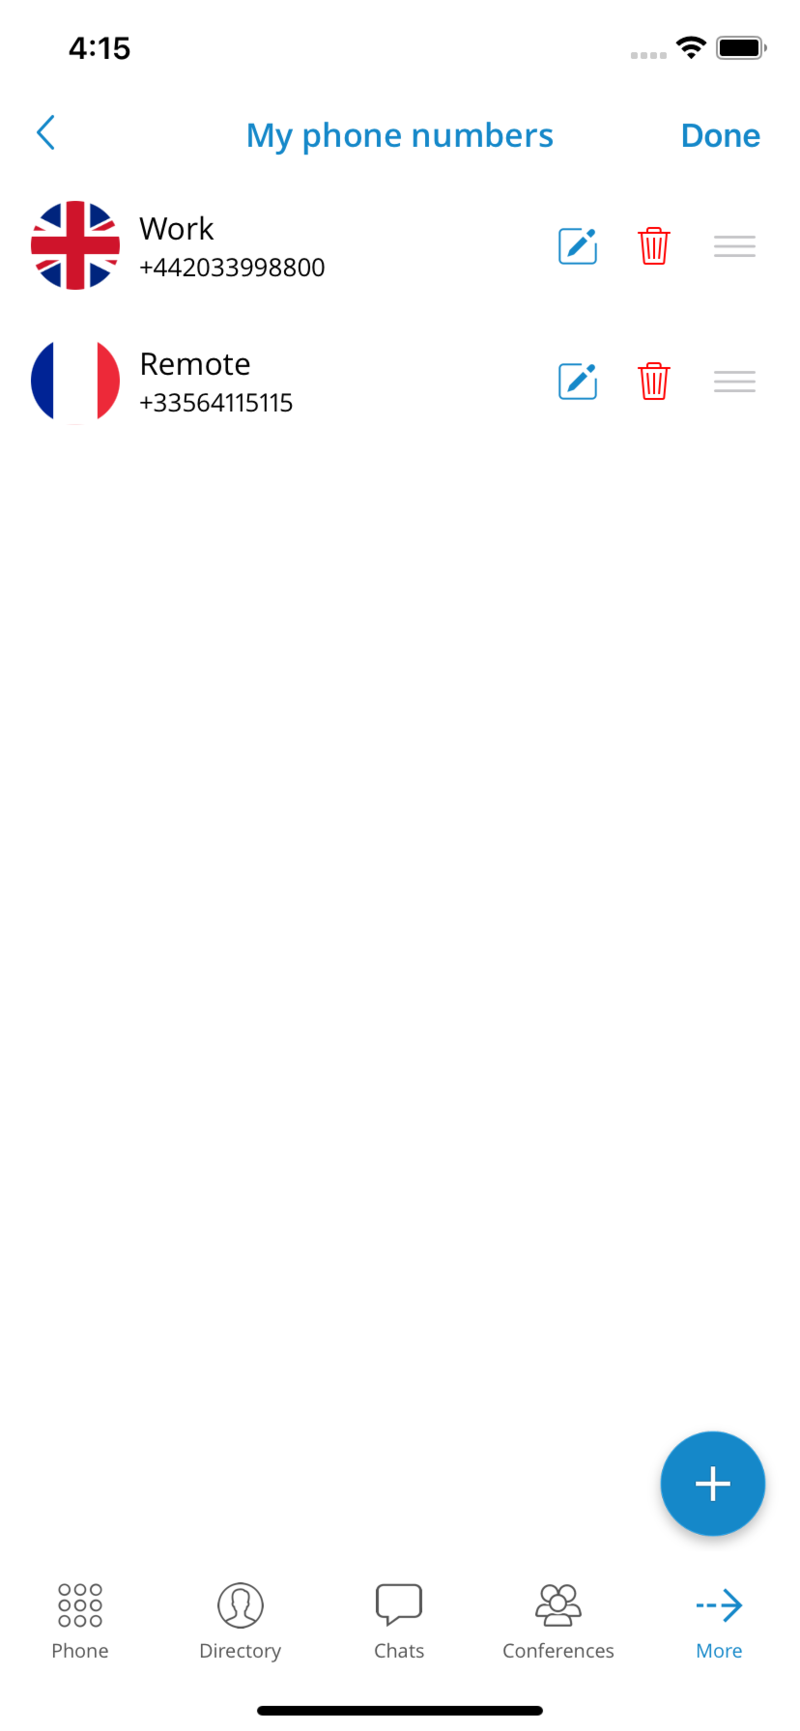
Feedback
Feedback can be submitted by pressing Settings and then Feedback which will allow users to send feedback from the gloCOM GO 6. Feedback text needs to be longer than ten characters for the Send button to be enabled. Users will be notified about successful or failed feedback submissions.
Signing out and Quitting gloCOM GO 6
There are two ways to quit gloCOM GO 6 when users press Quit from the More menu.
Sign Out will clear profile data, and users will be asked to provide a password next time they start gloCOM GO 6.
Users also can use to Quit the application. This exits gloCOM GO 6 leaving all profile data and settings untouched. Next time when users start gloCOM GO 6, they will not be asked for a password. Quit will also disable push notifications, and they will be automatically enabled next time the users enter the gloCOM GO 6.
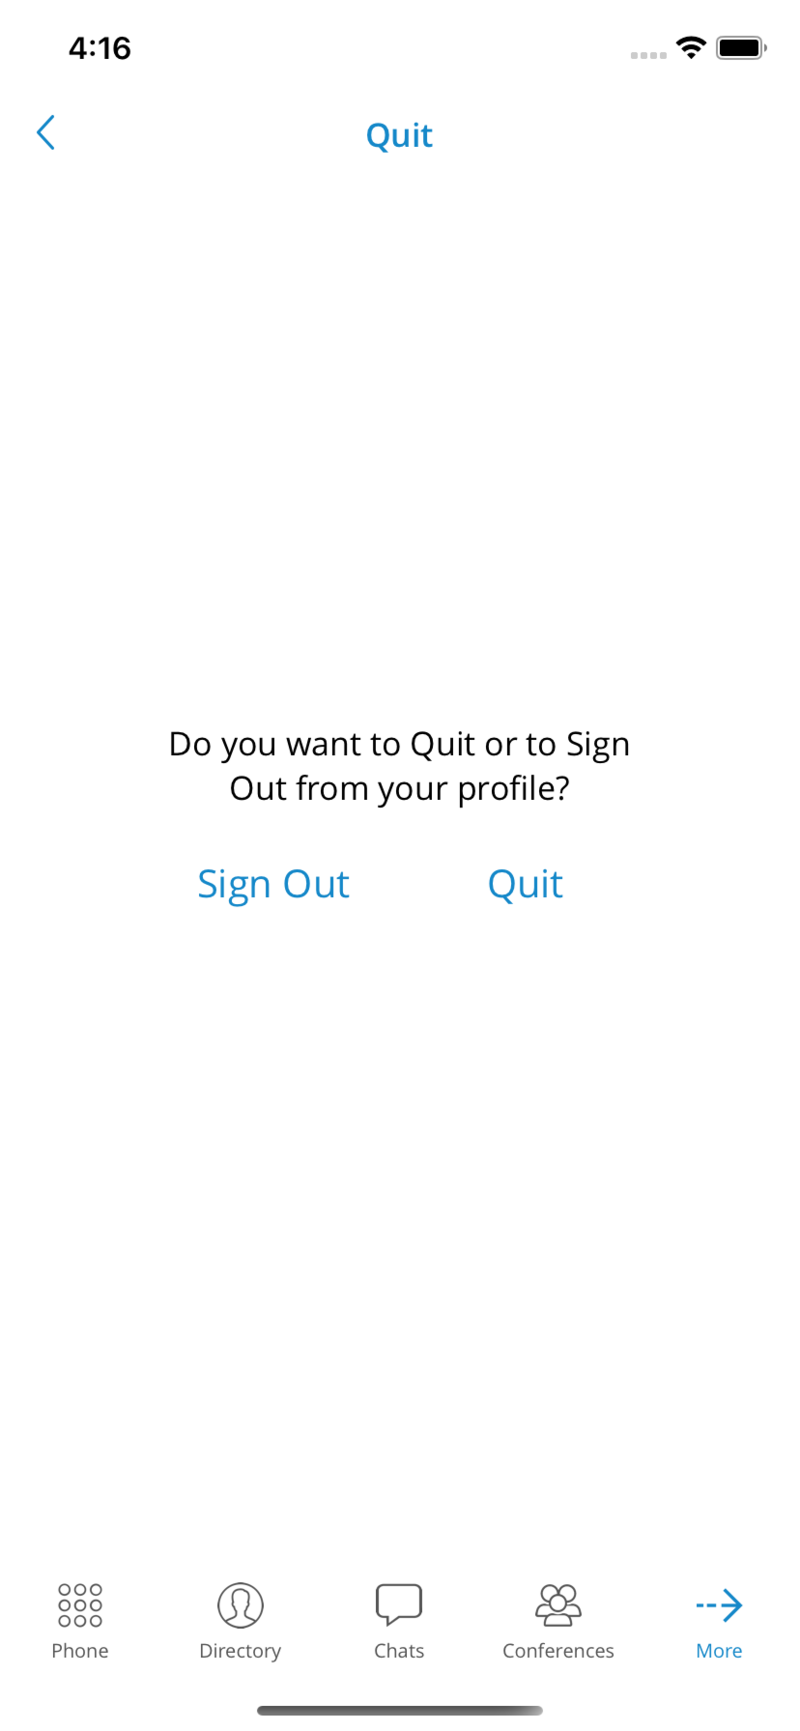
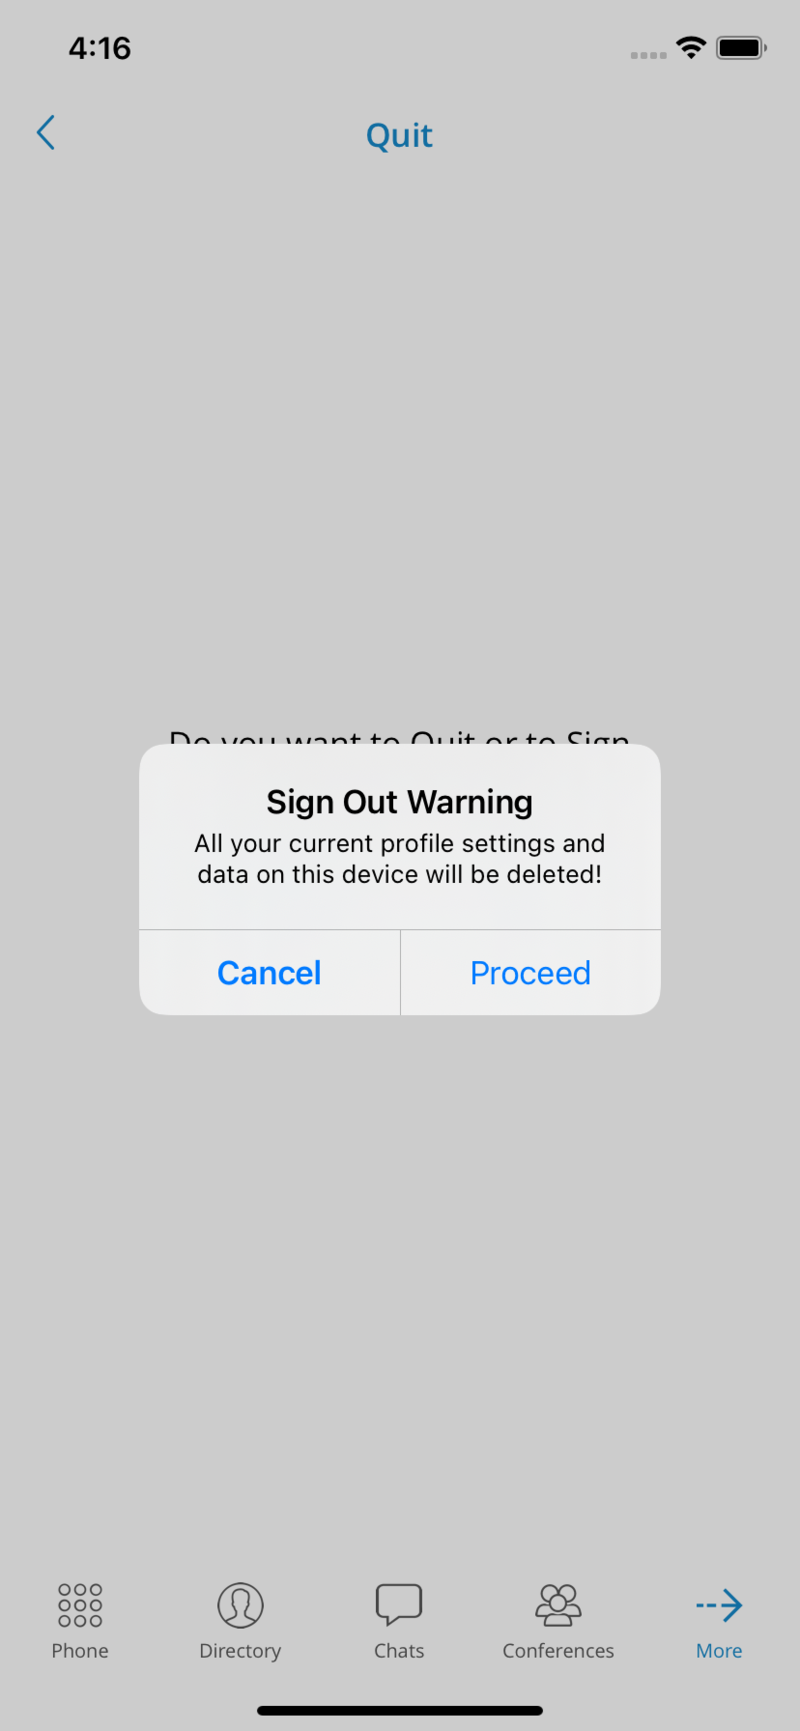

gloCOM Web
Introduction
Nowadays, when VoIP technology is developing more than ever to achieve the best possible quality of long-distance communication and to reduce the costs of telecommunication services, there is a need for making more simple and more user-friendly communication tools. The gloCOM Web represents one of the solutions for those needs.
Although the Siarum Communciations has applications such as gloCOM Desktop or gloCOM GO, the idea for creating this kind of communication tool is the result of the need to reduce memory usage and performance of our devices such as computers and mobile phones. Also, one of the main ideas for creating the gloCOM Web is increasing mobility. It means that users can stay in touch with their colleagues all the time, no matter where they are and whether their devices are at their hands or not.
Even though the gloCOM Web cannot entirely replace products like gloCOM Desktop or gloCOM GO. However, it represents a valuable solution for the situations mentioned above.
Unlike the other two gloCOM products, the gloCOM Web does not require download and installation. For using the gloCOM Web, everything that the user needs is a computer, a good Internet connection, and one of the browsers supported by the gloCOM Web.
The list of the browsers supported by the gloCOM Web is as follows:
- Google Chrome
- Mozilla Firefox
- Microsoft Edge
- Opera
- Safari
Simple, the gloCOM Web allows users to make a call, start a conference, send messages, and much more. So let’s get started!
Working with gloCOM Web
Before the user starts to work with the gloCOM Web, they need to point their browser to the appropriate IP address (for example, http://192.168.1.1/webapp). The browser will automatically redirect to the gloCOM Web login screen, which will ask the user to provide their account details. Make sure you have received your account details from your system administrator or account manager.
The received details must include:
- E-mail address for example: test@testmail.com
- User password for example: 93sU2e_2%
After entering the e-mail address and password, click the Login button. The gloCOM Web will try to connect to the specified server with the user’s account details.
In case the user’s account details are incorrect, an orange warning will appear:
Login Failed: Username or Password is incorrect.
Otherwise, the browser will redirect to the first-time login screen, notifying the user to change their password since they are using their gloCOM account for the first time.
The password must contain at least eight characters and must meet the required pattern. Users are required to change their password on login, and once it is changed, it is unknown to all administrators of the system.
The list of allowed special characters that can be used when creating a password is !@#$%^&\.
If the user is already using one of the gloCOM products, clicking the Login button will redirect the browser to the gloCOM Web home screen.
Multiple gloCOM accounts can have the same e-mail.
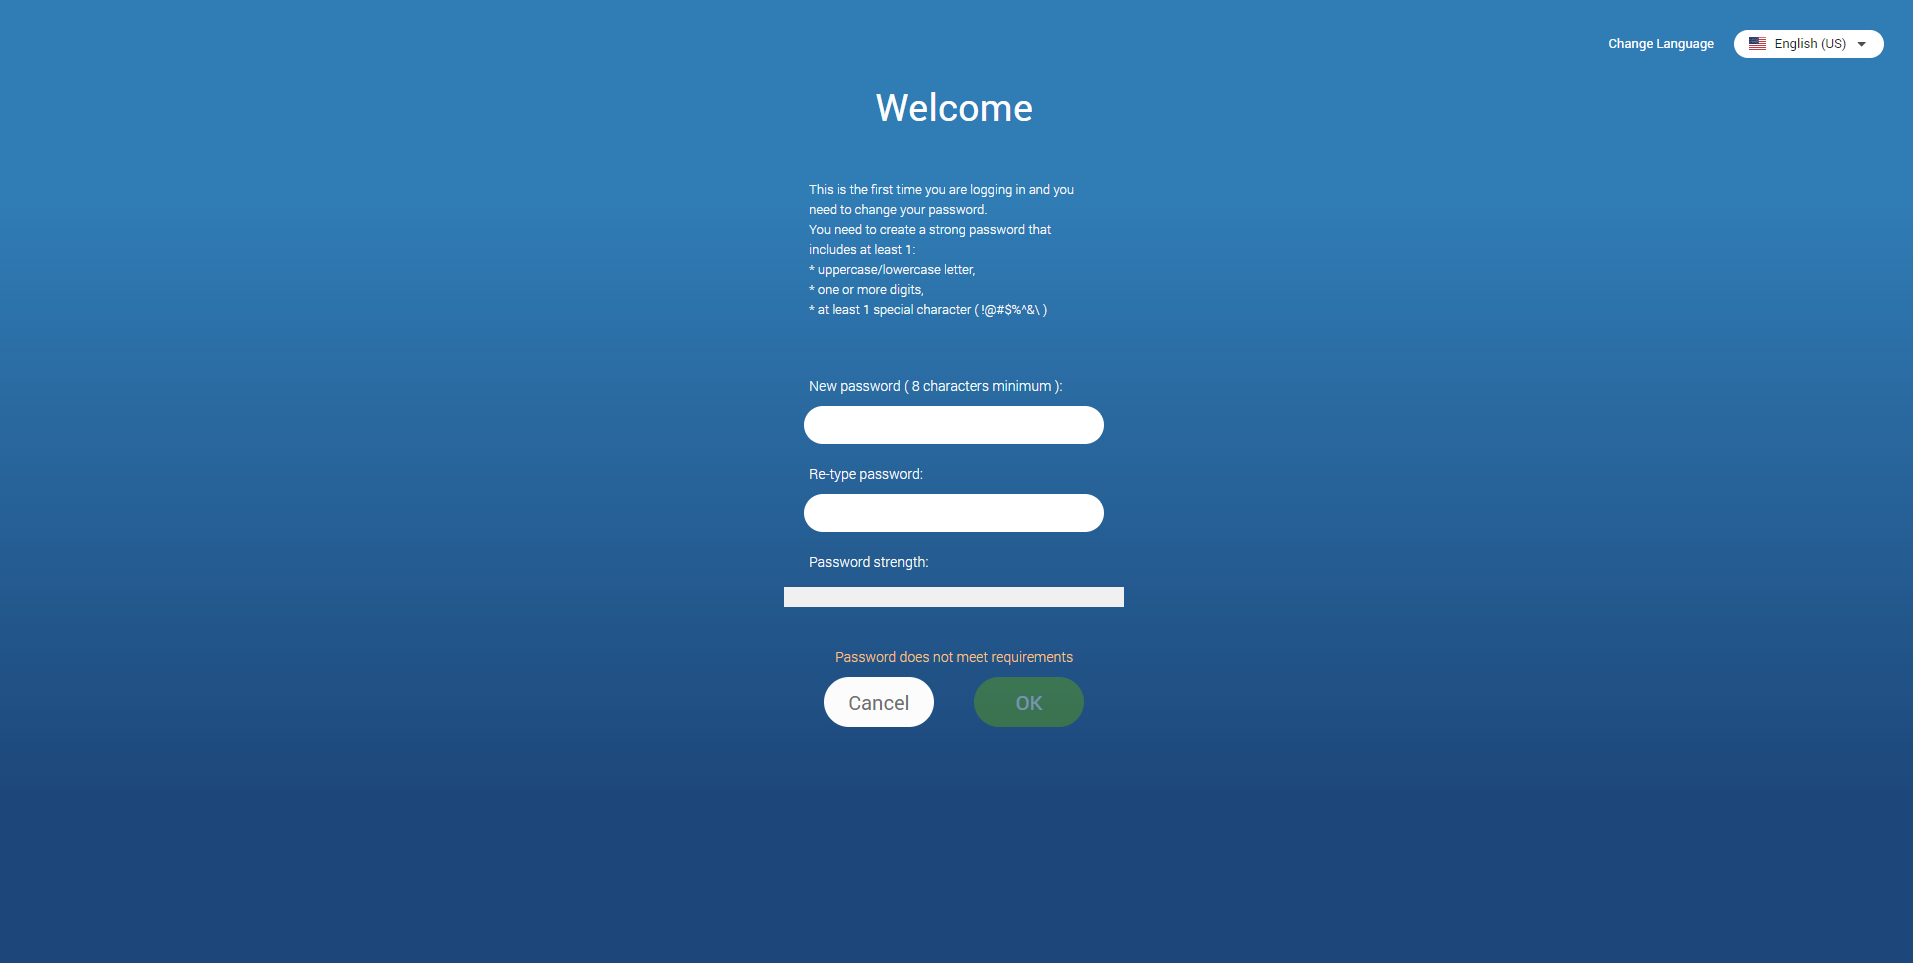
Log In
To start using the gloCOM Web, the user needs to provide their account details.
Account details:
- Email: Provide the e-mail address assigned to the user’s Extension.
- Password: Enter the password created during the gloCOM Web first-time login.
Additional options:
- Forgot your password: If the user has forgotten their password, they can recover it by clicking the Forgot your Password link. They will receive a password recovery link via e-mail. Additionally, if they have multiple gloCOM accounts associated with their e-mail, they will be asked to specify the Extension number for the desired account during the password recovery process.
 : Show Password button.
- Change Language: Allows the user to change the language used throughout the app.
Home Screen
Once the user has successfully logged into the gloCOM Web, the browser will display the gloCOM Web home screen. The home screen gives users easy access to various options, such as Dialer, Conference, Group Chat, Meeting, Voicemail, and much more.
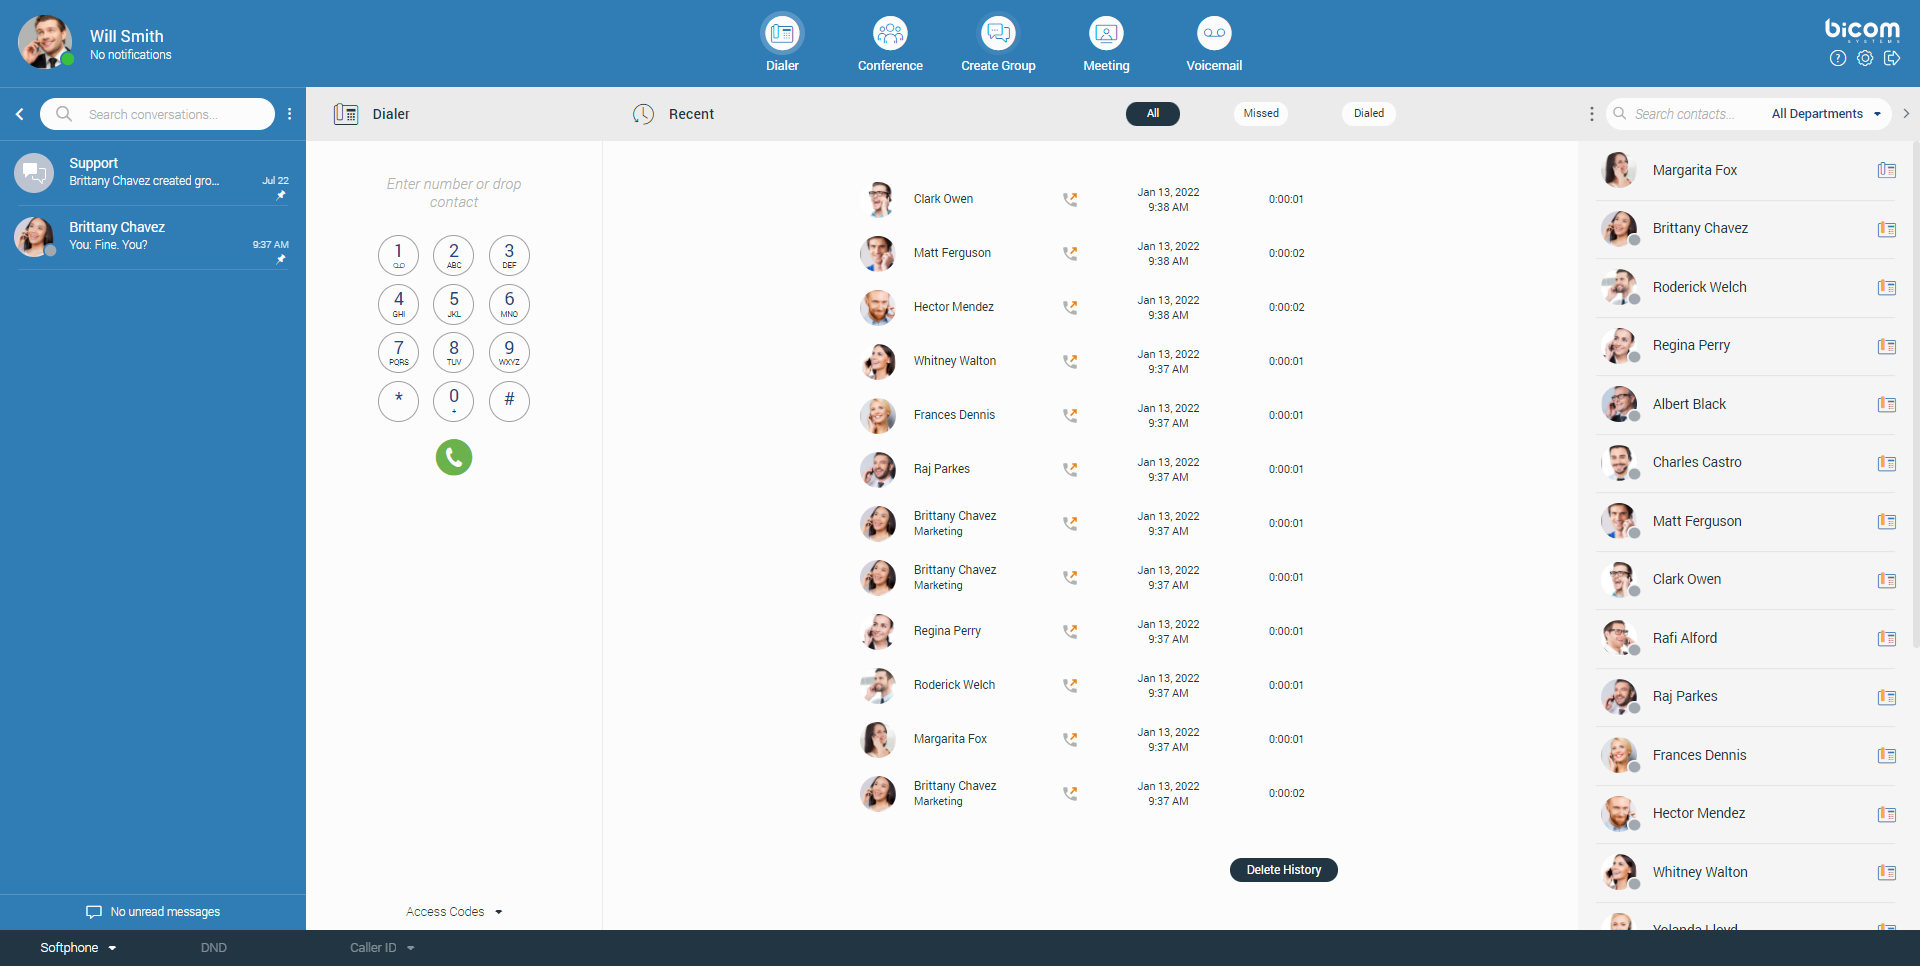
Navigation Bar
The navigation bar is on the top of the screen.
On the far left side of the navigation bar is the user’s avatar image with online status at the bottom of the image. Next to it is the extension name and notifications (if any). Otherwise, No notifications message will be displayed.

The next list shows the meaning of these options:
- Avatar Image: Represents the user’s profile image that can be changed at any time. Clicking on it brings a pop-up menu. Select the Personal Information option from the popup menu. The Personal Information screen will appear in the middle of the window. Click the avatar image and select the new image from a computer as a new avatar image.
- Status Icon: Represents the user’s current status that can be changed at any time. Clicking on it brings a pop-up menu, where the user can choose between Available, Busy, Do not Disturb, Away, or create their own status by clicking the Custom status… label.
- Username: Represents the name shown in the user’s chat conversations.
- Notifications: Displays any notifications (unread messages, missed calls, new voicemails, meeting invitations), otherwise displays No notifications message. Also, the browser tab title shows the number of notifications.

The middle of the navigation bar contains five options: Dialer, Conference, Create Group, Meeting, and Voicemail.
The next list shows the meaning of these options:
- Dialer: Opens a Dialer screen in the middle of the window.
- Conference: Opens a Conference screen in the middle of the window.
- Create Group: Opens a Create Group chat screen in the middle of the window.
- Meeting: Opens a Meeting screen in the middle of the window.
- Voicemail: Opens a Voicemail screen in the middle of the window.

The far-right side of the navigation bar contains the Help, Preferences, Logout button, and Bicom Systems logo.
The next list shows the meaning of these options:
- Help: Opens a Help screen in the middle of the window.
- Preferences: Opens a Preferences screen in the middle of the window.
- Logout: Log out the user from the gloCOM Web.
- Logo: Clicking on the Siarum logo redirects to the Siarum official page.
Contact List
The contact list is on the right side of the screen. It allows the user to see which of their colleagues are currently available, busy, or away from the desktop. The contact list can be in two modes: Grid View and List View.
Extensions with Inactive or Suspended status in PBXware, will not be shown within the contact list.

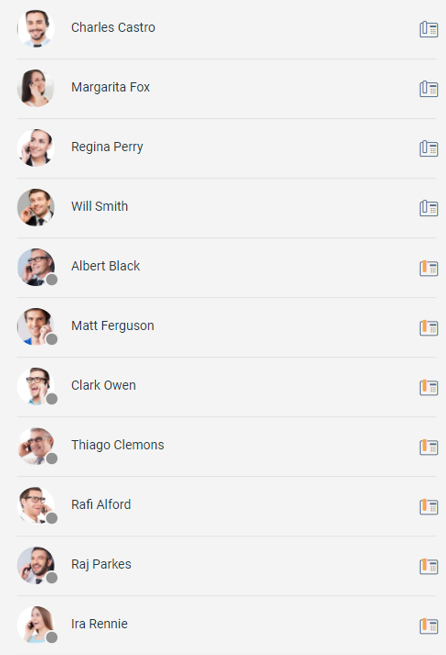
The user can start a call or a chat conversation while hovering over the contact (only in Grid View). Also, while hovering over the contact, the user can see the status message, phone status, and which devices the contact is currently using.
The extensions with the Show in Desktop/Mobile App option on the PBXware set to No or Not Set will not be displayed within the contact list. Also, they cannot be searched through the contact or conversation list, but the user can still receive a call or message from these extensions.
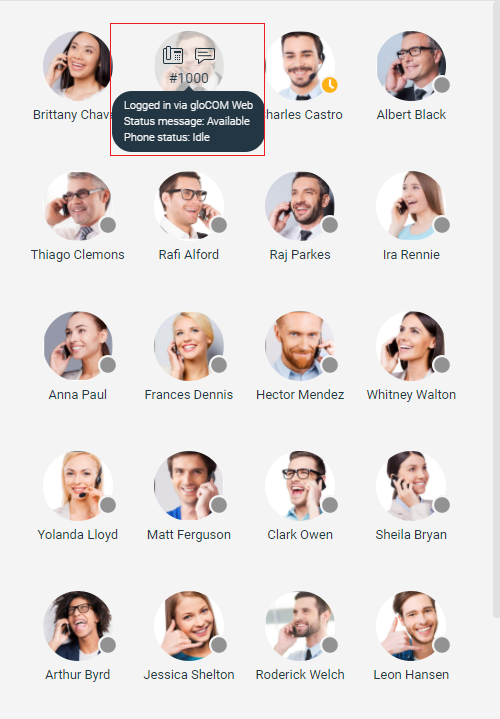
Right-clicking on the contact brings a drop-down menu with additional options.
The next list shows the meaning of these options:
- Call: Place a phone call.
- Call with: Allows the user to select which device they want to use for a call (Softphone/Deskphone).
- Chat: Start a chat conversation.
- Contact Information: Displays information about the contact.
- Send e-mail: Send an email.
- Voicemail: Leave a voicemail.
- Call Monitor: Allows the user to monitor calls in real-time for any contact listed within the Call Monitor list in PBXware Enhanced Services. Right-click on the contact that is on a call and select Call Monitor from the drop-down menu.
Call Monitor must be enabled by your administrator in the PBXware Enhanced Services.

The search field is above the contact list. It allows the user to search for a specific contact by entering the contact’s name or extension number. Also, it is possible to filter contacts by the department. Filtering contacts by departments allows the user to search through departments using the up and down arrow key on the keyboard or entering the department’s name inside the search field above the department list.
The Backspace arrow on the keyboard deletes character by character, and the ESC key deletes the whole term written inside the search field.
In case of mistyping inside the search field, the user gets the message: No results found.
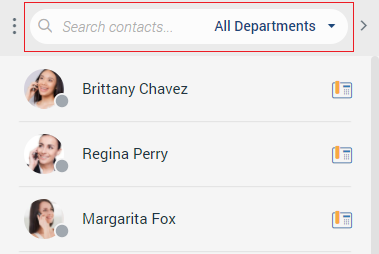
The three dots menu is on the left side of the search field. Clicking on it brings a drop-down menu where the user can choose between Grid View and List View. Also, they can choose whether they want to Sort users by Online status or Sort users alphabetically. Furthermore, on the right of the search field is an arrow that allows the user to collapse/expand the contact list.
Additionally, the user has the ability to resize the contact list instead of collapsing it. This way, the user will keep their contacts visible and still get extra space in the middle of the screen.
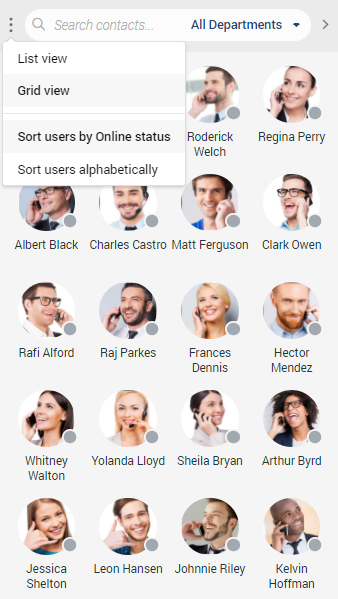
Central Phone Book
The Central Phone Book is a centralized list of contacts managed by the PBXware administrator. It is shared across all gloCOM Web users. Select the Central Phone Book option from the drop-down menu above the contact list to access your Central Phone Book contacts.
Users can use the search contact field to find a contact by their name or number. Click on the phone icon next to the contact’s number to initiate a phone call. Right-click on a contact to open a context menu with additional options.
Besides contacts managed by the administrator, each user can manage their personal list of contacts. This personal contact list is private and visible only to the user, and can be managed through Online Self Care by clicking the Central Phone Book tab.
Here, users can see all their Personal Phone Book contacts, add new contacts, import/export contacts, or download a CSV template. To remove a contact, click on the X button on the right side of each contact.
After closing the Online Self Care window, the user needs to click the sync button to refresh the contact list if necessary, so the modifications made in the Online Self Care can be synced inside the gloCOM Web.
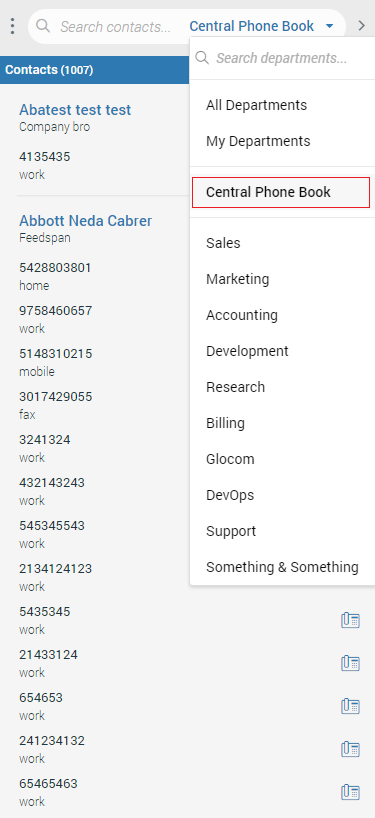
Dialer
The first thing that catches the user’s attention after they successfully logged in is the Dialer positioned in the middle of the screen. It contains two sections: a Dial-pad and a Recent calls section. Dialer allows the user to place, receive and see recent calls.
gloCOM brings a unified call history between gloCOM Desktop, gloCOM GO, and gloCOM Web. Call history is stored for up to a month on the server and synced between all user devices. It means that the user will be up to date with their recent calls all the time. The application makes sure that the user’s call history is synced on every login and that they have recent calls available on their device. During the sync, there is an indication inside the Recent call list. It informs the user that the sync is currently in progress.
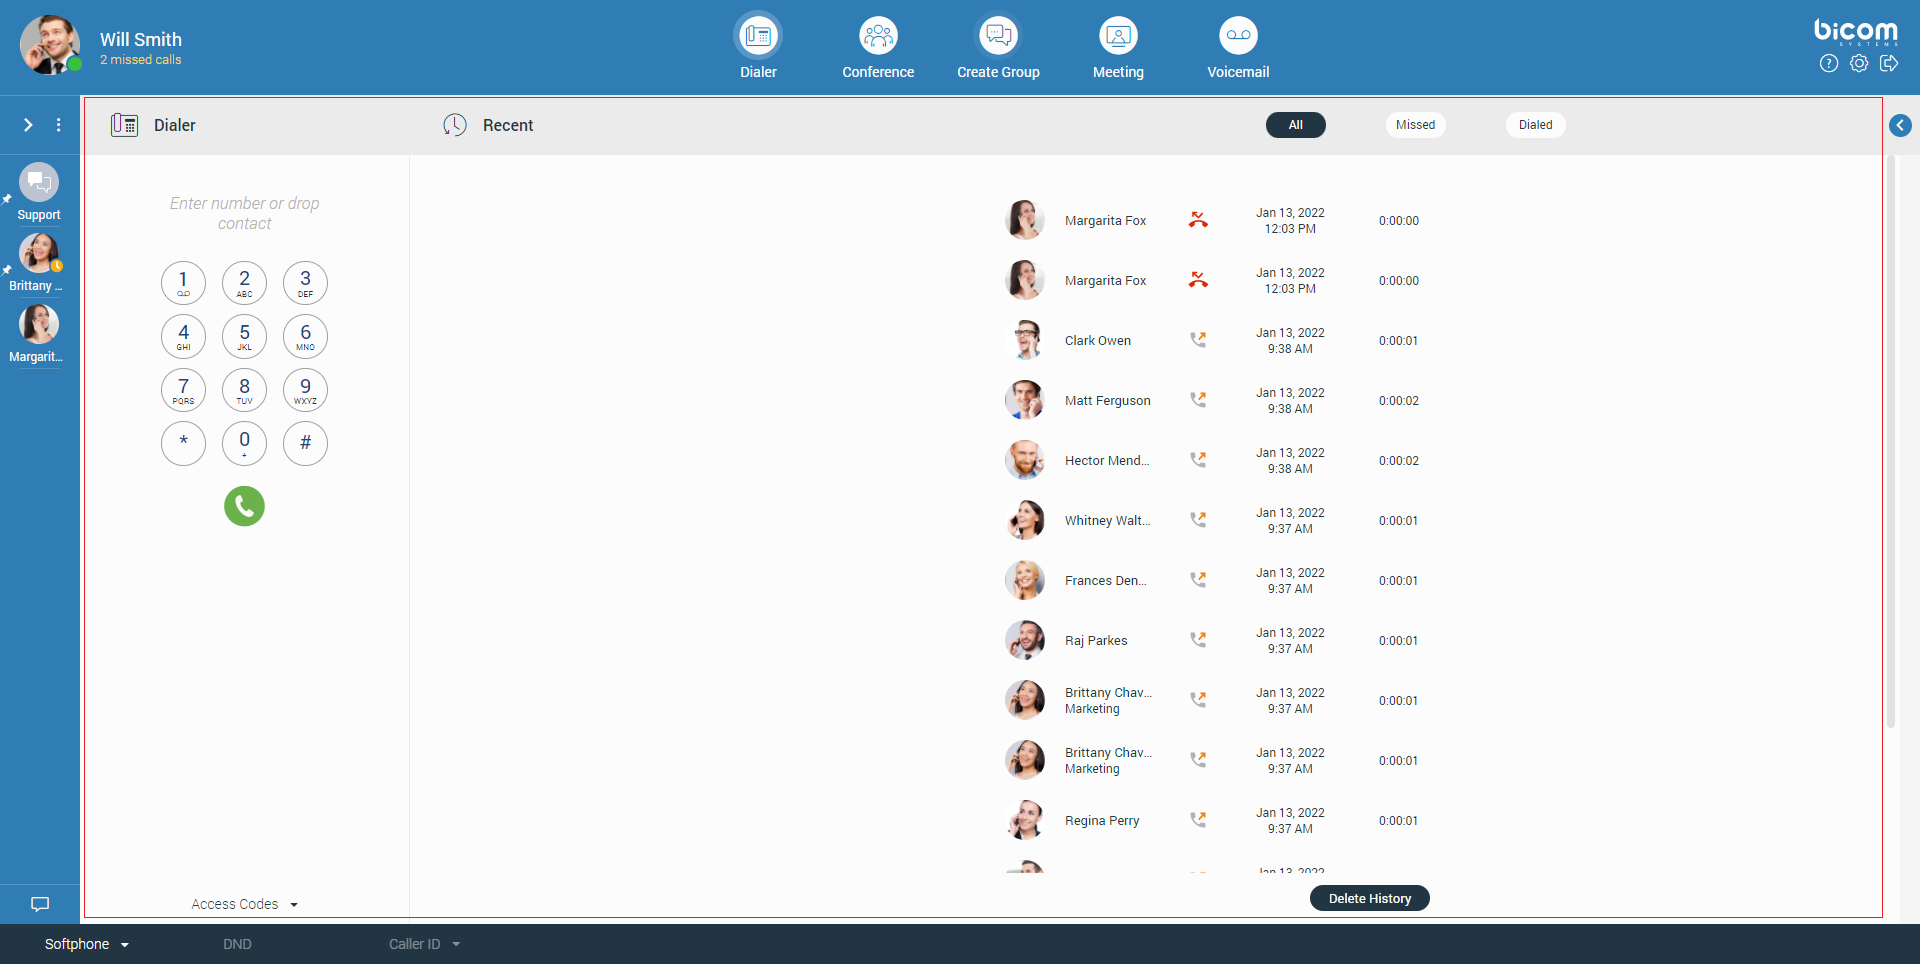
The user can place a call by entering the number using a dialer dial-pad, keyboard, or dropping a contact into the predicted area.
Immediately after the user starts entering numbers, a backspace arrow appears on the right side of the dialer input, allowing them to delete the entered number. Also, the number can be deleted using the Backspace key on the keyboard.
If the input field is in focus and there is no entered number, hitting the Enter key twice in a row on the keyboard will call the last called number. Also, double-clicking the green handset gives the same results.
When a user presses and holds down any key within the Phone Dialer except 0, it will display the pressed number or sign. However, when the user presses and holds down the 0 key, it will display the + (plus) sign.
The Access Codes allows the user easy access to some of the most used access codes.
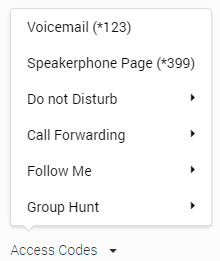
Furthermore, the second part of the dialer is the Recent calls section. It enables the user to see all their calls missed or dialed and their conference calls.
The recent call section provides information like:
- Caller’s Avatar (if any)
- Caller’s Name
- Type of call (Inbound/Outbound call)
- The date and time of the call
- Duration of the call
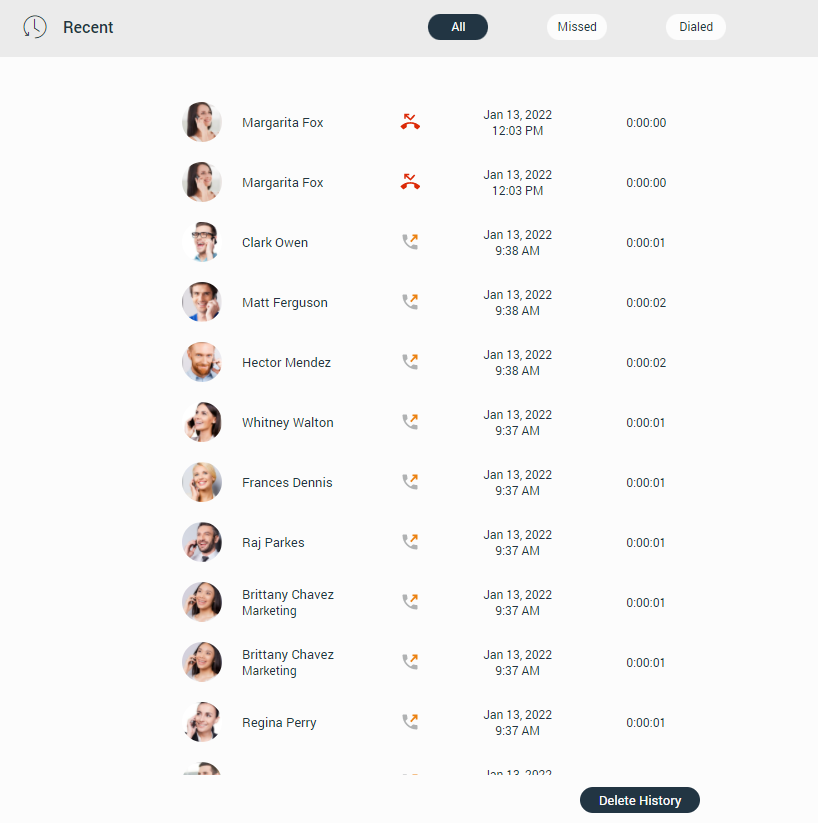
Also, hovering over a call displays additional options (start a call and start a chat conversation).

Placing Phone Call
Before placing a call with gloCOM Web, the user extension must have enabled WebRTC and Opus codec on their PBXware system. Also, TLS settings must be enabled on the PBXware system. Otherwise, if they try to start a call with these three options disabled, a pop-up message will appear displaying the following: Call failed and Incompatible SDP.
Once these three conditions are satisfied, a call can be placed or received without any problems.
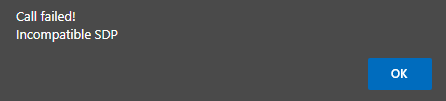
All calls are encrypted, and there is an indicator during an ongoing call that notifies the user about encryption. Hovering over the indicator, a tooltip pops up with the following message: Call is encrypted with TLS/SRTP. TLS encrypts the signaling of the call, and SRTP secures the actual voice media that is being transferred.
The rule above does not apply to calls placed from other devices since we do not know whether the other device (from which the call was placed) uses TLS encryption.
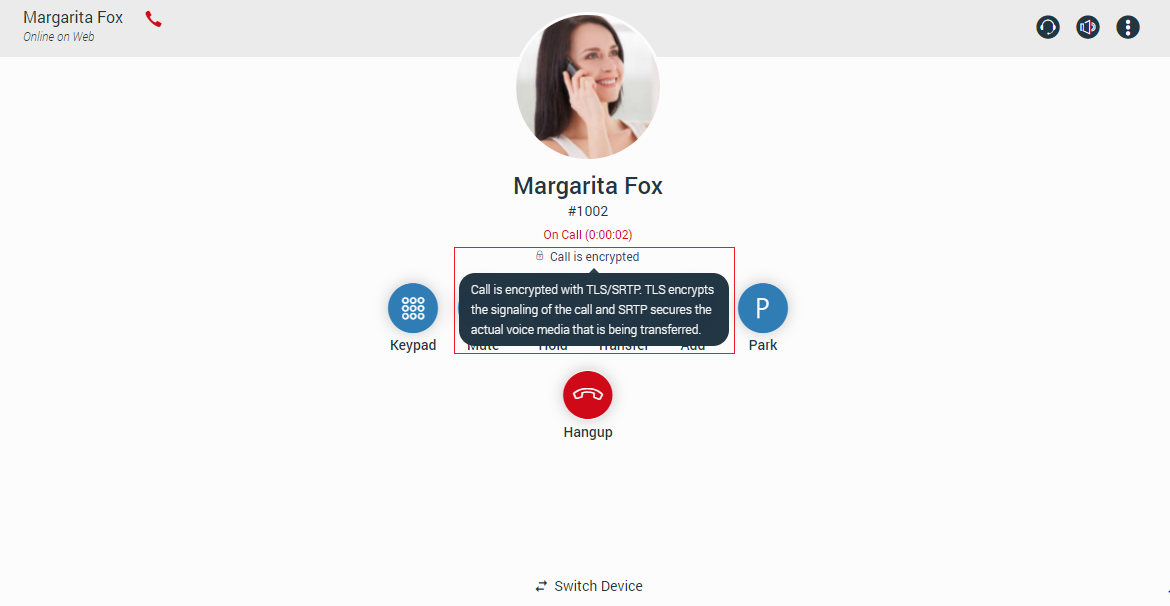
Dial entering the phone number:
- Use the Dialer keypad or keys on the keyboard to enter the phone number you want to dial.
- Click the Dial button to place a call.
Dial with Drag and Drop:
- With the mouse, click and hold any contact from the contact list then, drag the contact from the list to the dialer area, and drop it.
- Click the Dial button to place a call.
Dial from the Chat:
- Open the chat conversation. Click the Dial button inside the context bar on the top of the chat or click the more options and place a call by selecting one of the two offered options: Call and Call with.
Dial from the Contact List:
If the user wants to place a call from the contact list, they can do it in more ways than one:
- By hovering a contact and clicking the phone image (Grid View only).
- Right-click the contact and select one of the two offered options: Call and Call with.
- Click the phone icon (List View only).
Dial from the Conversation Sidebar:
- Click the Dial button inside the desired chat conversation while hovering over it.
Call on Available [6.7]
Call on Available represents some kind of reminder, so the user does not forget to call their colleagues after they become available. For example, if the user tries to reach their colleague while they are on a call (one-to-one, conference, meeting call), or their presence status is set to Do Not Disturb, after pressing the call button, a modal dialog pops up with four possibilities:
- Call on Available: Selecting this option will remind the user to proceed with the call after the other party becomes available.
- Call now anyway: Selecting this option will proceed with a call.
- Call Voicemail: Selecting this option will call the other party’s voicemail directly.
- Cancel: Selecting this option will cancel the Call on Available procedure.
Assume that the Call on Available procedure is activated. After the other party becomes available, the user will be presented with a modal dialog asking whether they want to place a call or not.
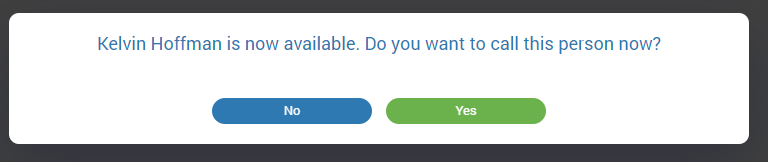
Furthermore, the Call on Available procedure can be canceled anytime. To do this, right-click on the contact within the contact list for which the Call on Available procedure is activated, and from the drop-down menu, select the Cancel “Call on Available” option.
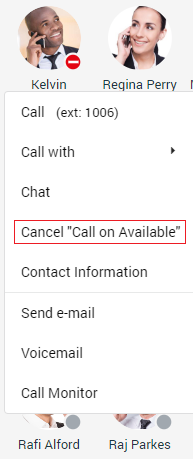
Live Call Screen
There are various options that users can use during a live call.
The live call options list:
- Keypad: Brings up a keypad.
- Mute/Unmute: Allows the user to Mute/Unmute themselves.
- Hold: Allows the user to put the other side on hold in case they have another call.
- Transfer: Allows the user to transfer the call to someone else in three ways:
- Regular transfer – Transfer without annunciation.
- Supervised transfer – Transfer with annunciation.
- Voicemail transfer – Transfer the call to voicemail.
- Add: Allows the user to make a conference call from the regular call by adding more participants to the existing call.
- Park: Allows the user to park a call so someone else can pick it up.
- Hangup: Allows the user to terminate a call.
- Switch Device: During a live call, the user can use the Switch Phone button to initiate ringing across all their registered devices or a specific device (softphone, desk phone, and mobile app), so they can continue the call on another device. A perfect example would be switching from the desk phone to the mobile phone when they need to leave the office but would like to continue the call. The same applies to conference calls.
- Transfer a call using drag and drop: During a live call, the user can transfer the call by dropping it onto the desired contact inside the contact list. While dragging, a transfer indicator will be displayed. Both transfer types, Blind and Supervised, can be used. The user can select which one they want to use while hovering over the contact. Transfer using the drag and drop option does not apply to conference calls.
Additionally, the user can add the contact into the call by dragging and dropping them, which starts a dynamic conference automatically.
For the Safari browser: To enable ringtones for incoming and outgoing calls, please navigate to the Safari menu, click on Preferences and choose the Websites tab. Next, click on Auto-play on the left side of the window. On the right side of the window, you should see the listed websites. Click on the gloCOM Web website, and change this setting from Never Auto-Play to Allow All Auto-Play.

At the right top corner of the context bar, there are four additional options.
The next list shows additional options:
- Record: Allows the user to record a call (If enabled).
- Audio: Allows the user to change their audio devices like a microphone, speaker, and ringing devices.
- Volume: Allows the user to adjust their speaker volume.
- Options: Opens a drop-down menu with next options:
- Call
- Call with
- Contact Information
- Pin Chat
- Send e-mail
- Voicemail
- Call Monitor
- Delete Conversation
Also, the screen displays called party’s name, avatar picture, number, and call duration. Furthermore, the user has the ability to chat with the called party during a live call.
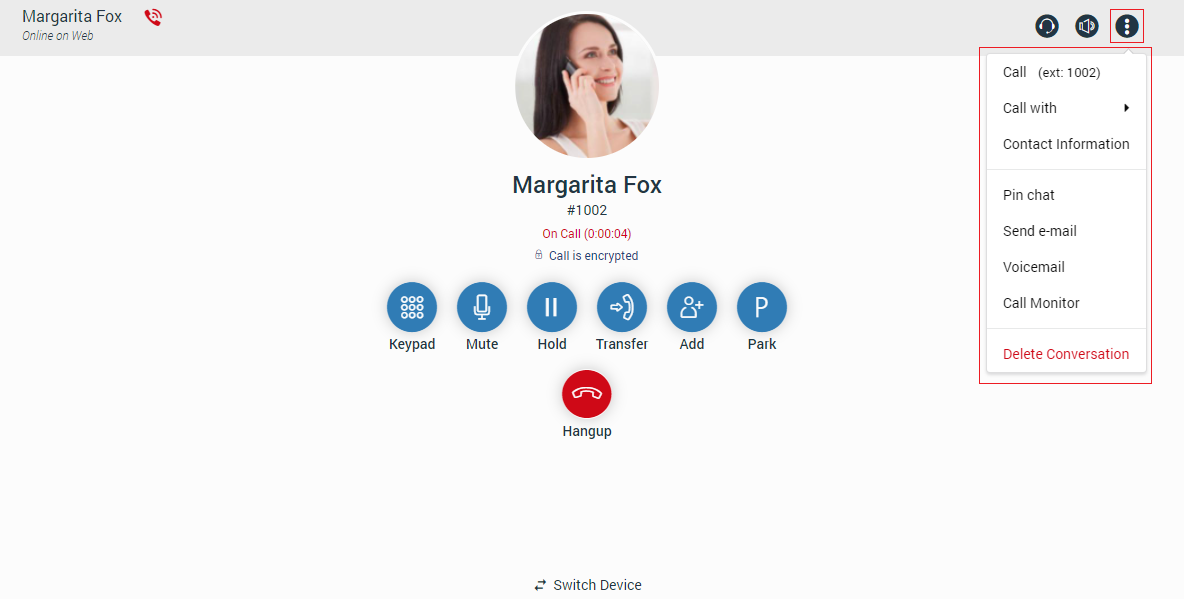
Receiving a Call
There is more than one way to answer the incoming call:
- Click the Dial button inside the ringing conversation within the sidebar conversation list to accept the call, or click the reject icon to reject the call.
- Or, click the ringing conversation within the sidebar conversation list to bring up the ringing phone screen with the following options at the front of the application:
- Voicemail: Allows the user to transfer a call to the voicemail.
- Answer: Allows the user to accept the call.
- Reject: Allows the user to reject an incoming call, which will be automatically forwarded to the voicemail.
- Forward: Allows the user to forward the call to someone else.
The call will be transferred to the user’s voicemail if the user does not take any action within 32 seconds.
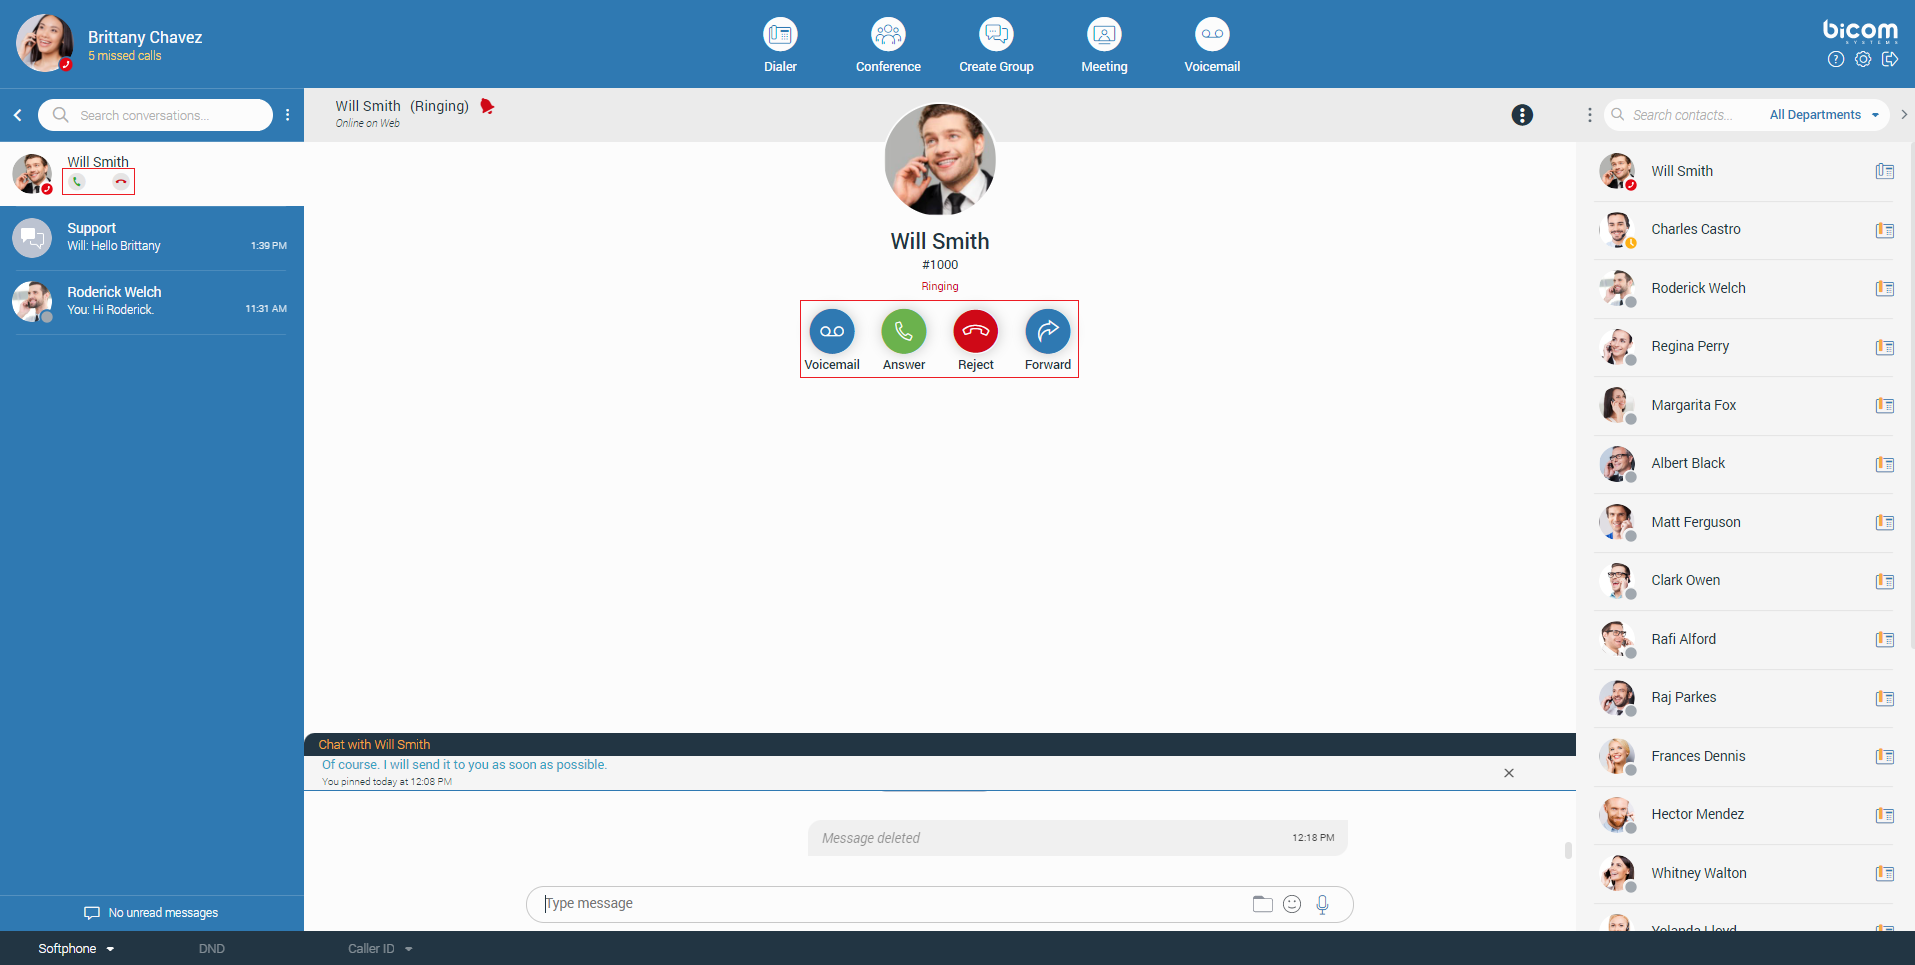
Conversation List
On the left side of the window is a list of all user’s conversations sorted by their most recent activity. These conversations are persistent, meaning they will appear within the conversation list even after the user restarts the application. To remove the conversation permanently, the user has to delete the conversation.
If the user wants to close the conversation, they can hover over it. The three dots will appear at the top left corner of the hovered conversation. Clicking on them brings a drop-down menu with additional options. Select Close Chat from the drop-down menu to close the conversation. This way, the user can keep visible only those conversations they are interested in currently.
Above the conversation list are three dots. Clicking on them brings a drop-down menu with two options: Show closed chats and Close all chats. Next to them is a search field that allows the user to filter conversations by name.
- Show closed chats: Allows the user to have an overview of all closed conversations. Any closed conversation can be back to the active conversation list by clicking on it, clicking on the Move to active chats button at the right side of the conversation, or selecting the Move to active chats option from the dropdown menu.
- Close all chats: Allows the user to close all their conversations without having to close them one by one. Any activity within the closed conversation will return the conversation back to the active conversation list (any new messages, new participants added, calls, etc.). This way, the user never misses the latest messages and events. The user can find any closed conversation using the search field above the conversation list or selecting the Show closed chats option within the three dots menu next to the search field.
Next to the search field is an arrow that allows the user to collapse(expand) the conversation list to get more space for a section in the middle of the screen. Additionally, the user has the ability to resize the conversation list instead of collapsing it. This way, the user will keep their conversations visible and still get extra space in the middle of the screen.
Also, a conversation with a user that has been deleted from PBXware will be marked with a prefix (Deleted). The user can no longer send messages to this conversation, but it is still useful because of the chat history and all existing messages with that user before deletion.
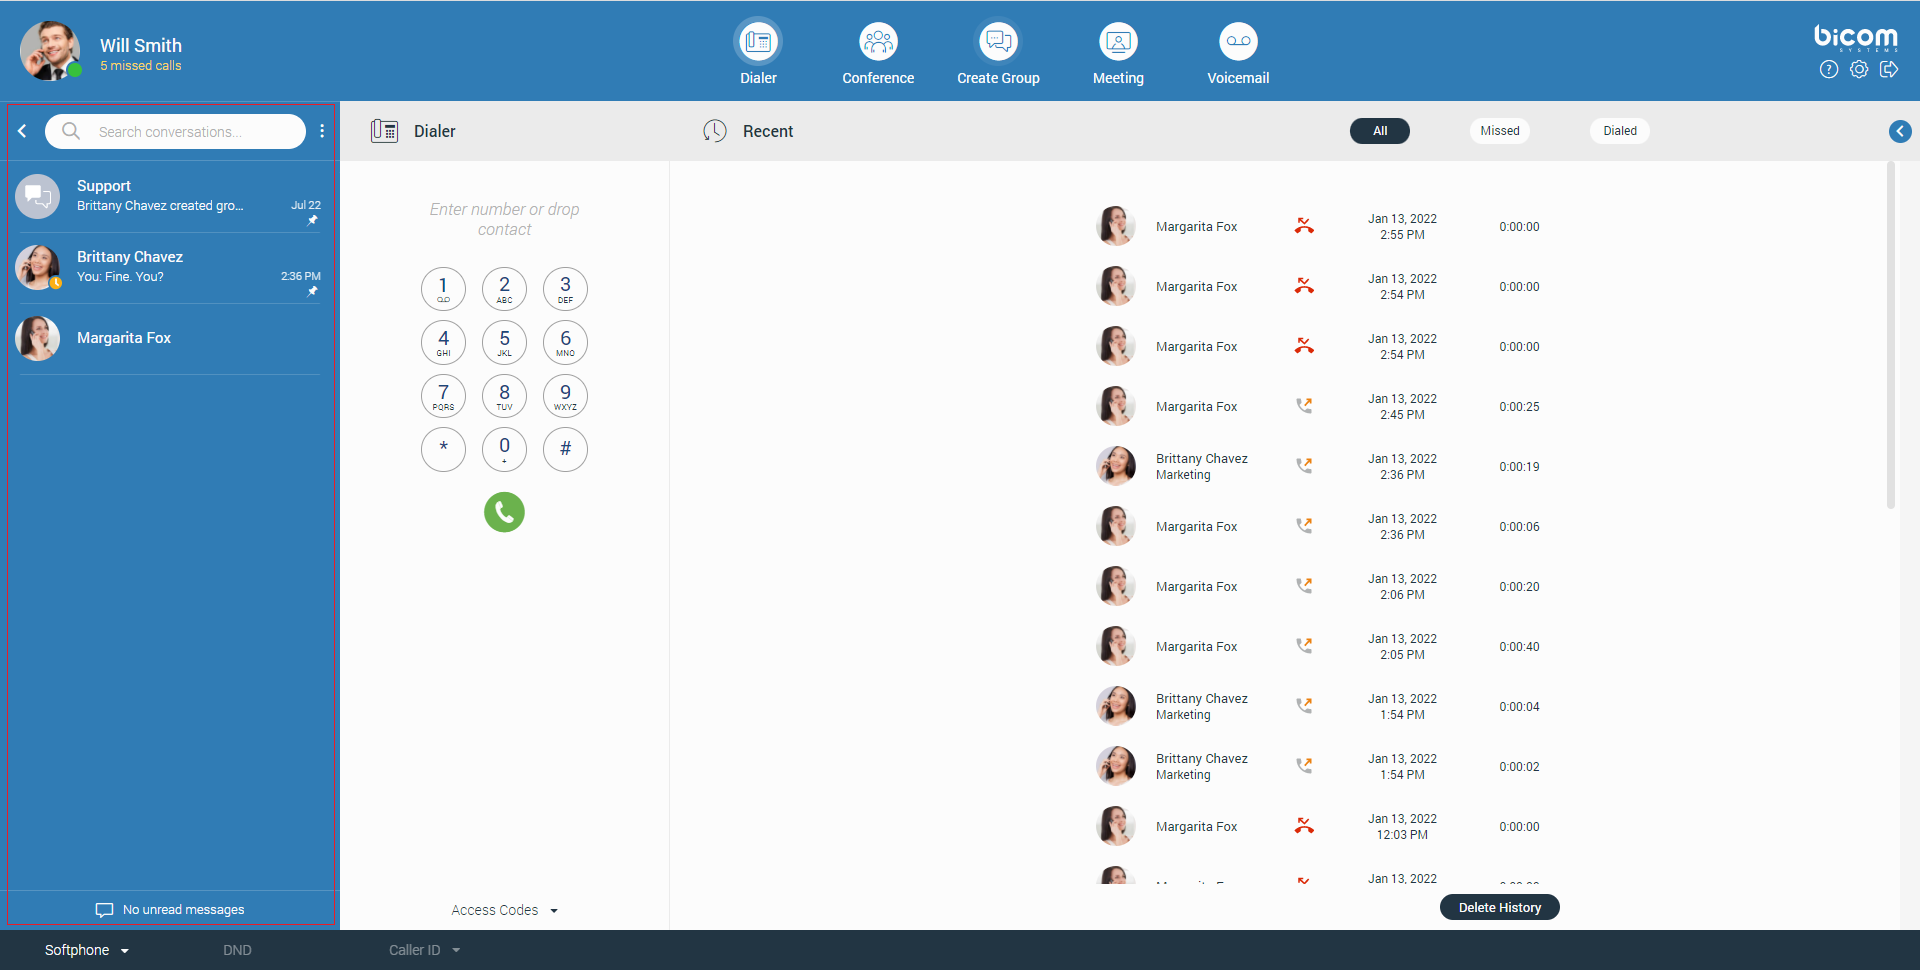
Hovering over the conversation displays additional options. On the left side, there is a three dots menu that contains the Pin/Unpin Chat, Mute/Unmute Chat, Close Chat, and Mark as Read/Unread options. On the right side, the user can find the Call option.
- Pin/Unpin Chat: Allows the user to pin the most important conversations at the top of the conversation list. The last pinned conversation is always at the top of the conversation list. The user can unpin conversations the same way as they would pin them. Also, they can be unpinned by clicking on the pin icon
 that appears for pinned conversations. The user can rearrange pinned conversations as per their needs, using drag and drop. This way, they can define priority for pinned conversations.
 - Mute/Unmute (Group chats only): Allows the user to stop receiving notifications for a group chat. It could be helpful if there are too many exchanged messages that distract the user. They can unmute the group chat in the same way as they muted it or by clicking on the speaker icon
 that appears for muted conversations.
 - Close Chat: Allows the user to close the desired conversation.
- Mark as Read/Unread: Allows the user to explicitly mark the conversation as Read/Unread. If the user marks the conversation as unread, the unread indicator will show up for that conversation. It informs the user to look at that conversation again and take some actions if needed. Any action inside the chat conversation with unread status will remove the unread indicator. Also, opening the conversation or explicitly marking it as read will remove the indicator.
- Call option: Allows the user to place a call.
For each one to one conversation within the conversation list, the user can see:
- Contacts’s avatar with his/her status icon
- Contacts’s name
- Last message in the conversation
- Time of the last message in the conversation
- Number of unread messages (if any)
For each group conversation within the conversation list, the user can see:
- Group chat icon
- Group name
- Last message in the conversation
- Time of the last message in the conversation
- Number of unread messages (if any)
- While in search mode conversation list will change its items according to the searched term
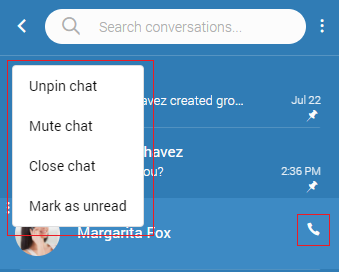
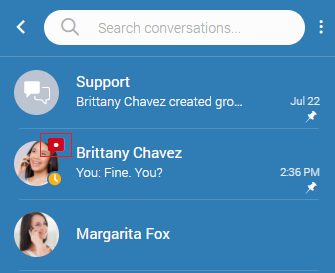
Unread Messages Indicator
At the bottom of the conversation list is an unread messages indicator. It informs the user if there are currently unread messages. It is helpful in cases where the user has scrolled down and does not see their most recent conversations or when they are in search mode.
If there are unread messages, the label and the icon are emphasized in orange to draw the user’s attention.
Click the label to open up a menu showing a list of all conversations with unread messages indicating the number of unread messages in the parenthesis. Also, there is an option to mark all messages as read.
Marking all messages as read will effectively send seen to all those conversations even though the user has not read those messages yet. Click any other option besides Mark all as read opens the selected chat conversation. It can be used as a quicker way to find conversations with unread messages instead of looking for them in the conversation list.
If there are no unread messages, the label is not emphasized and serves only as an indicator, without any functionality.
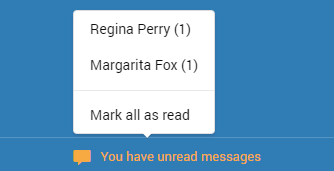
Bottom Bar
The bottom bar represents the bar at the bottom of the gloCOM Web screen. It allows the user to specify which type of phone device they want to use Softphone/Deskphone/Mobile app), enable/disable DND (Do not Disturb), and Caller ID, which allows the user to hide Caller ID for all calls or to hide Caller ID for next call only.
By default DND and Caller ID options are disabled. To use these options, please contact your administrator.

Conference
The conference is a part of a gloCOM Web where the user can place conference calls with more than one participant (external or internal).
There are two types of conference calls:
- Instant conference (Dynamic conference): The user can create a conference call by adding one or more people to an ongoing call or through the conference section. With this option, the user can add contacts or any number available from their contact list. If the user missed the conference call, they can still join it from the Call History tab, provided that a conference call still exists, by clicking on the Dial button.
- Static conference: The user can join predefined conference rooms and add other participants. There is a conference number next to the conference name within the conference list for the static conference call.

Placing a Conference Call
Clicking on the Conference icon within the navigation bar, the conference section will open. To place a conference call, the user needs to select participants from the contact list. The user can choose participants by clicking on them or dragging and dropping them into the participant list.
Additionally, the user can select them using the Select All radio button above the contact list or by entering the external number. The user can filter contacts by using the search field or filtering them by the department.
Next, select the conference from the conference list that is placed next to the contact list. Below the conference list is the participant list. It allows the user to see all chosen participants and to remove them from the list. While hovering over them, the blue cross will appear. Click it to remove the desired participant from the participant list. Press a Deselect All button to remove all participants from the list.
To start the conference, click the Start Conference button. This button will be disabled in case there is no selected conference. Also, a conference call can be started without pre-selected participants, which can be added later.
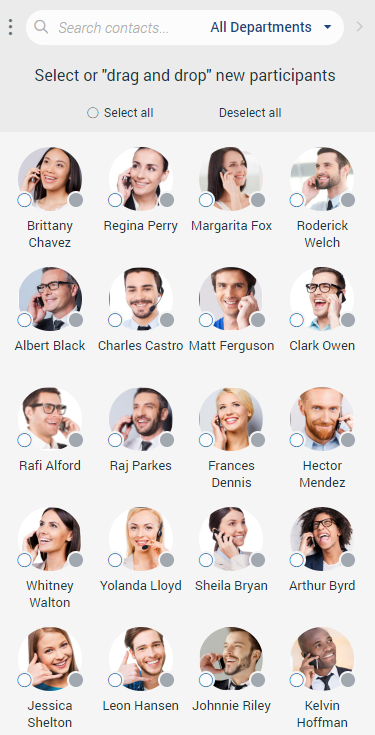
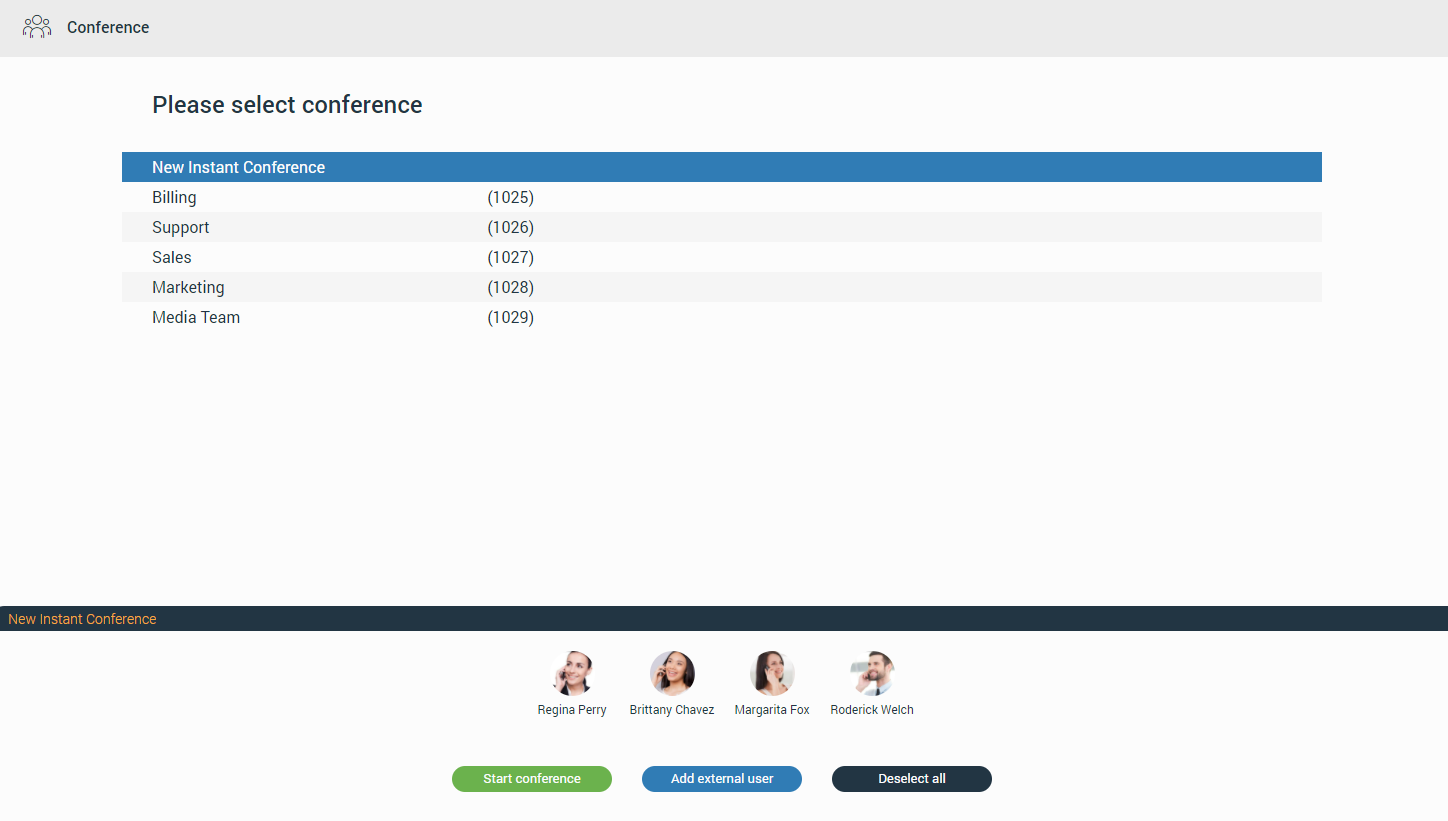
Meeting
The meeting is a part of the gloCOM Web, which gives a user the ability to organize an instant meeting, schedule a meeting, or join an existing meeting. To access the meeting screen, click on the Meeting icon within the navigation bar.
The meeting screen contains the following tabs: Instant Meeting, Join Meeting, Schedule Meeting, and Meeting List.
If the meeting is disabled on the license, all meeting tabs except Join Meeting will be disabled, and the following message will be displayed: No meeting license, please check with your admin. You can still join a meeting with a meeting number, but you can not start, schedule, or view meetings.
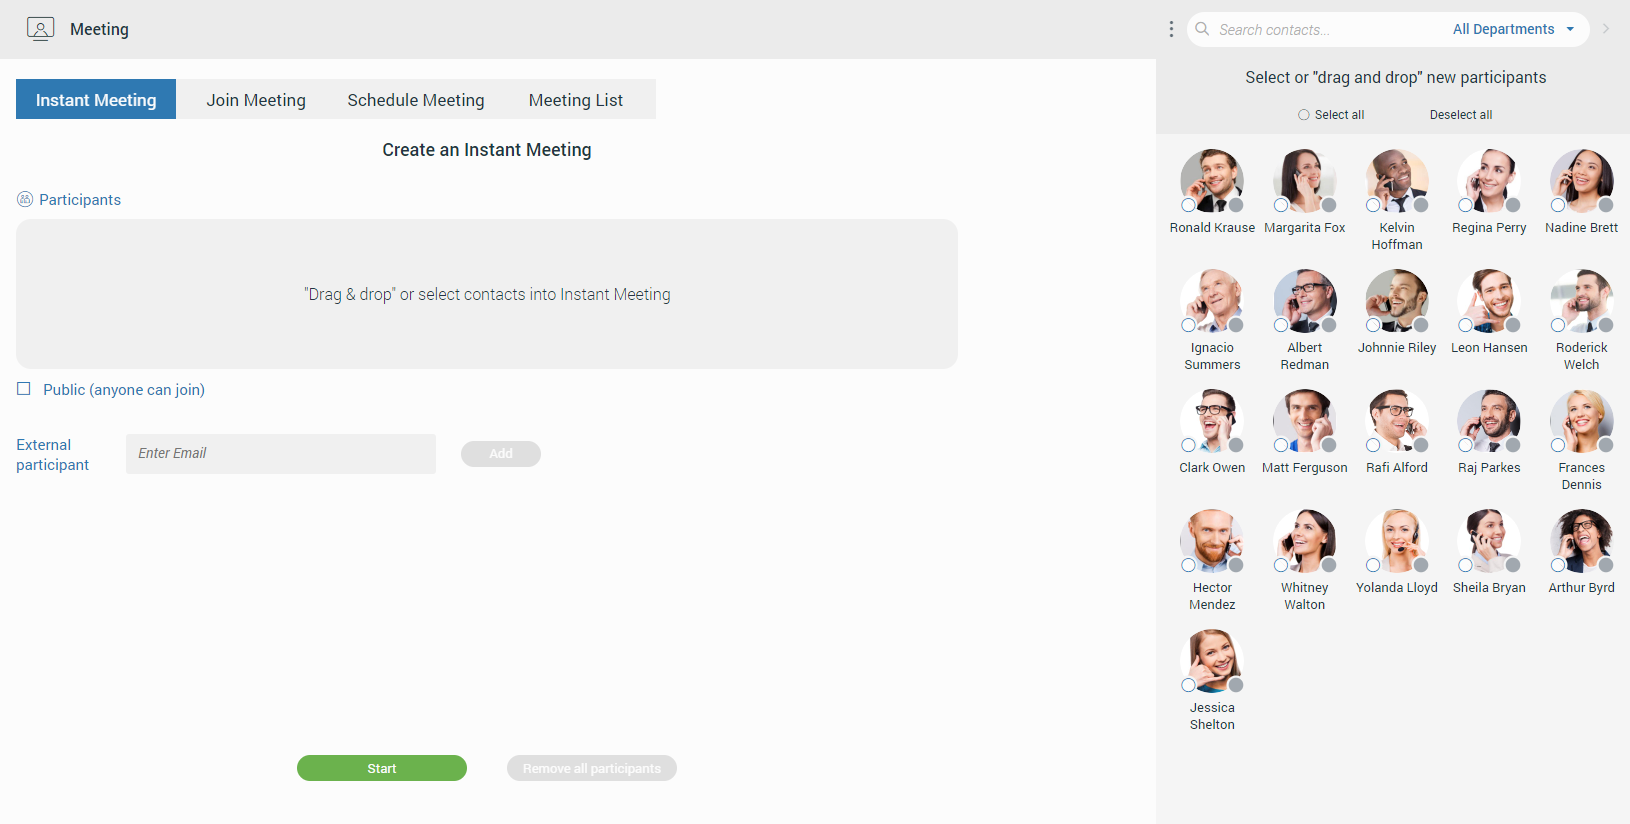
Instant Meeting
Instant Meeting is the first screen presented to the user after clicking the Meeting button within the navigation bar. It contains the participant list in which the user can add participants by clicking on them within the contact list, selecting them all by pressing the Select all radio button above the contact list, or dragging them to the participant list.
Additionally, it is possible to add an external participant to the meeting by entering the participant’s e-mail. [6.7]
Removing participants from the participant list can be done by hovering over them within the participant list and clicking on them, or clicking on them within the contact list. Additionally, the user can remove participants by pressing the Deselect all radio button above the contact list, or pressing the Remove all participants button to remove all participants from the participant list.
While creating the Instant Meeting, the user can decide whether they want to make a private or a public meeting. In the case of the private meeting, only called parties can join the meeting. Otherwise, anyone can join the meeting.
After selecting participants and choosing whether the meeting will be private or public, pressing the Start button starts the meeting in the new window displaying the gloCOM Meeting Web app page.
If the user uses the gloCOM Desktop and the gloCOM Web simultaneously, while starting a meeting via Web, the meeting will be started automatically within the gloCOM Desktop app.
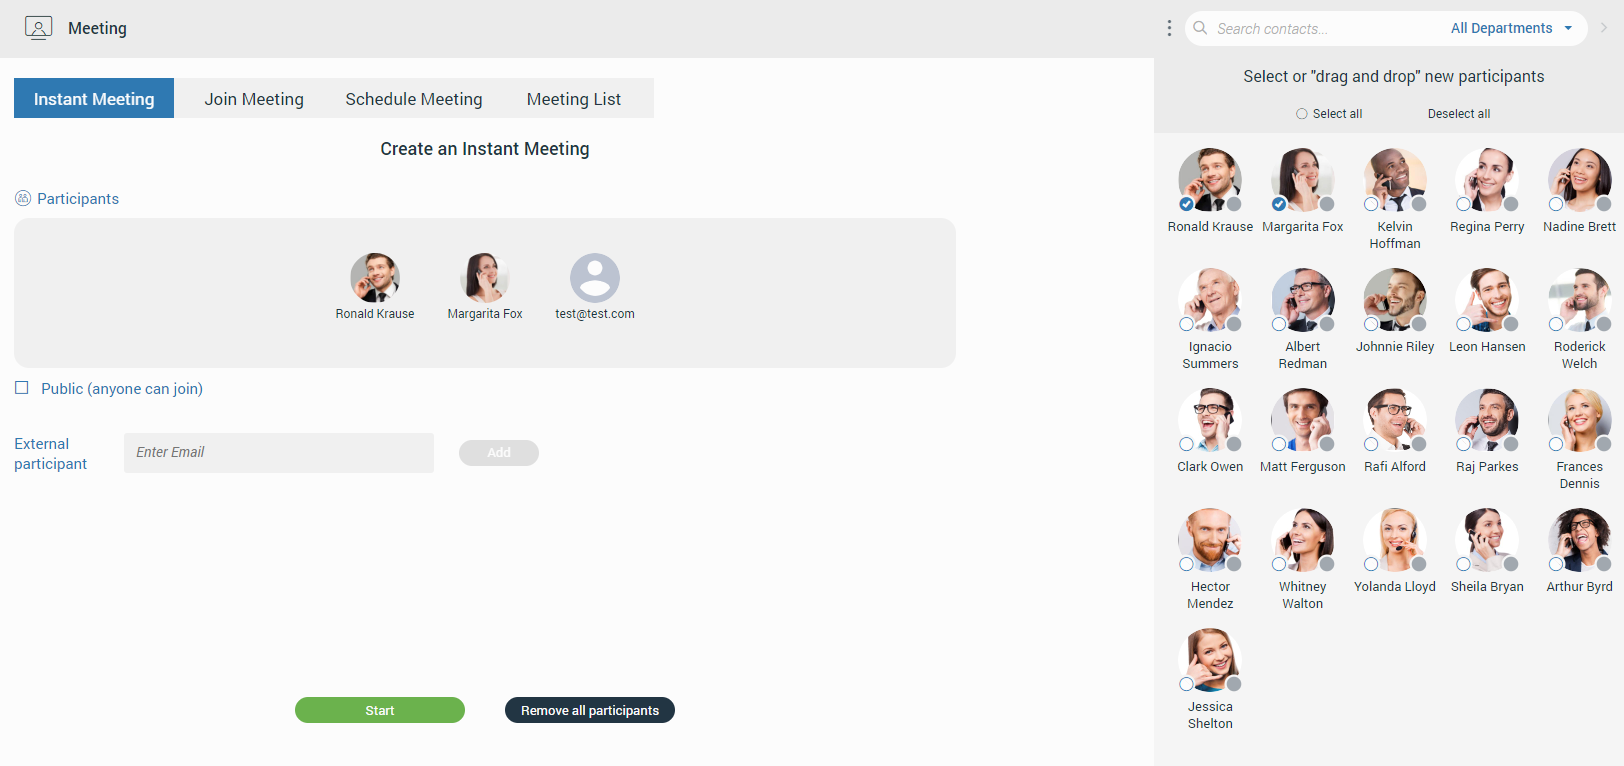
Join Meeting
Join Meeting gives the user ability to join the existing meeting by entering the meeting number. After entering the meeting number and clicking the Join button, the meeting will be opened in the new window displaying the gloCOM Meeting Web app page.
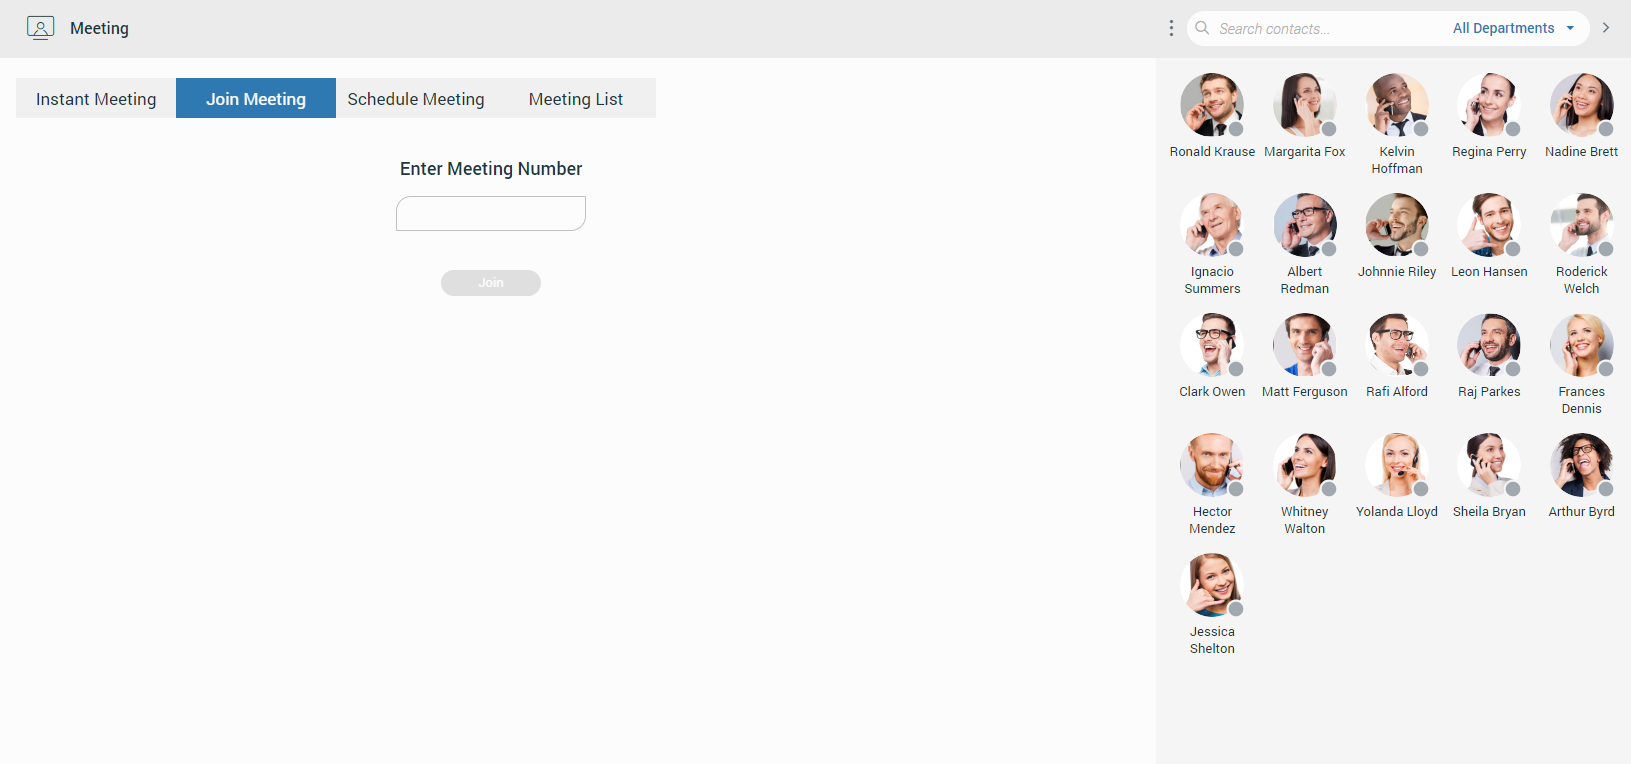
Schedule Meeting
Schedule Meeting gives the user ability to schedule a meeting beforehand.
While scheduling the meeting, the user needs to provide information such as:
- Subject: Provides information on what the given topic for the meeting is (It must be filled.).
- Start (date or time must be in the future):
- Date: Provides information on which day you will have the meeting.
- Time: Provides information on the time of day it will occur.
- Duration: Provides information on how long the meeting will be.
- Time Zone: Provides information on the time zone your meeting will be scheduled in.
- Recurring: Provides information on whether the meeting is recurring or not (If it will repeat, e.g. every Thursday at 3 pm) and how long it will recur for (e.g. stop after ten meetings).
- Description: Provides the user to describe a meeting in a few sentences.
- Public Meeting: Provides the user with the ability to make a public meeting so anyone can join the meeting. Otherwise, only called parties can join the meeting.
- Participants list: Provides information on who is supposed to attend the meeting (The user can add participants as described before in the Instant Meeting section.).
A recurring meeting is a meeting that will repeat every set time (every day, week, or month), e.g. every week on Tuesday, you have a sales meeting. You may edit recurring meetings to suit your needs if you need to reschedule.
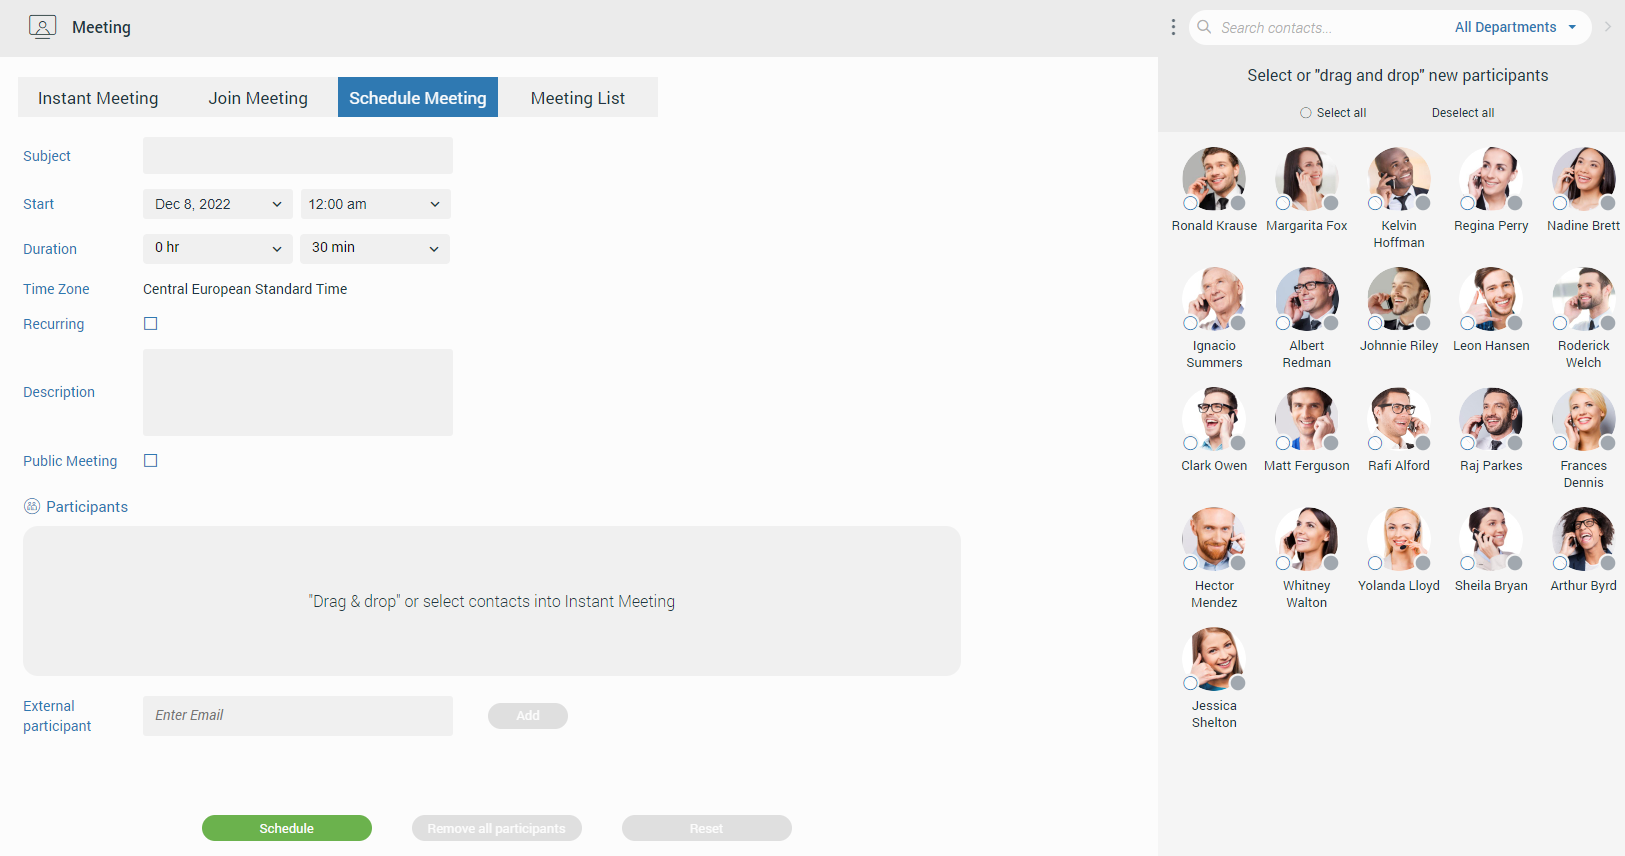
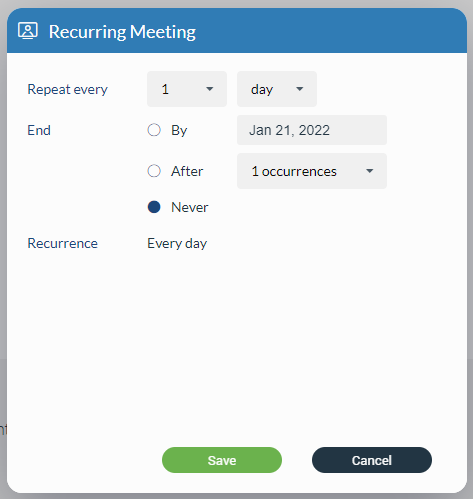
At the bottom of the screen, there are three buttons as follows:
- Schedule: Clicking on it schedules a meeting if everything is filled correctly.
- Remove all participants: Clicking on it removes all participants from the participant list.
- Reset: Clicking on it resets all meeting settings.
Scheduled meetings will be displayed within the Meeting List under the Scheduled subtab.
The user can edit Scheduled meetings from the Meeting List screen by pressing the Edit button.
After pressing the Edit button, the Scheduled Meeting screen will be open, where the meeting can be edited. The user can save the changes by pressing the Save button. Pressing the Cancel button discards all changes.
Meeting List
Meeting List provides information about Scheduled and Previous meetings. Under the Scheduled tab beside scheduled meetings, the user will also find all ongoing meetings at the top of the list. All meetings in the scheduled list are grouped by date and sorted by ASC order. Next to the Scheduled tab is a Previous tab which contains all previously finished meetings grouped and sorted by date and DESC order.
When the user selects the meeting from the list, the Meeting Info section shows on the right side of the screen displaying details about the meeting.
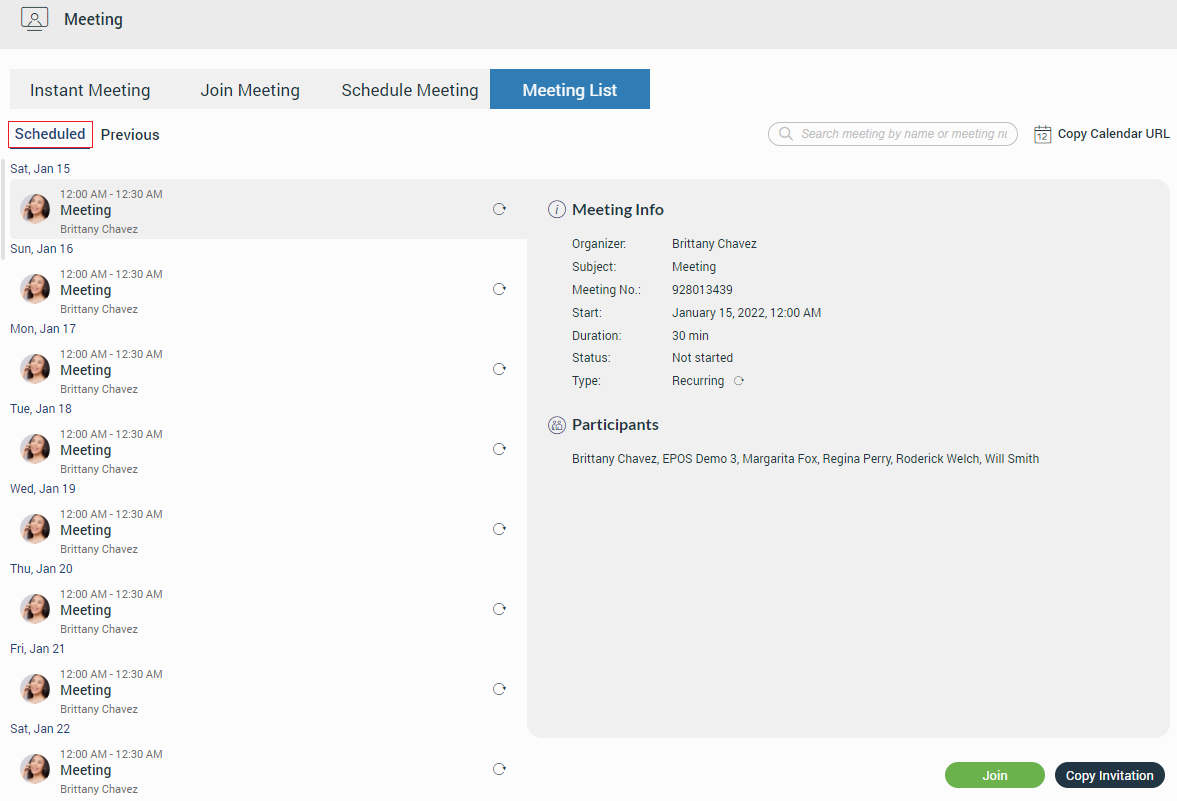
The following list shows those details:
- Organizer: Provides information on who organized the meeting.
- Subject: Provides information on what the given topic for the meeting is.
- Meeting No: The randomly assigned number to distinguish meetings.
- Start: Start time and the day it will occur.
- Duration: How long the meeting will be.
- Status: The state of the meeting (e.g. finished or upcoming).
- Description: Provides the user with a short description of the given topic.
- Type: Provides information on whether the meeting is recurring or not.
- Participant list: Provides information on who is supposed to attend the meeting.
Additionally, the user has the ability to search for the desired meeting using the search field, which is located above the Meeting Info section. Meetings can be searched by number or by name.
The Copy Calendar URL option is next to the search field, which allows the user to copy the Meeting Calendar into their calendar software.
Depending on the meeting type and meeting status, the user will be presented with different button options.
The following list shows the meaning of those buttons:
- Join button: As the button name says, it allows the user to join the ongoing meeting.
- Copy Invitation button: As the button name says, it allows the user to copy a meeting invitation easily.
- End button: As the button name says, it allows the user to end the meeting (Only the meeting organizer can end the meeting.).
- Start button: As the button name says, it allows the user to start a scheduled meeting (Only the meeting organizer can start the scheduled meeting.).
- Edit button: As the button name says, it allows the user to edit the scheduled meeting (Only the meeting organizer can edit the scheduled meeting.).
- Delete button: As the button name says, it allows the user to delete the meeting (Only the meeting organizer can delete the meeting.).
- Clone button: As the button name says, it allows the user to clone the finished meeting (Only the meeting organizer can clone the meeting).
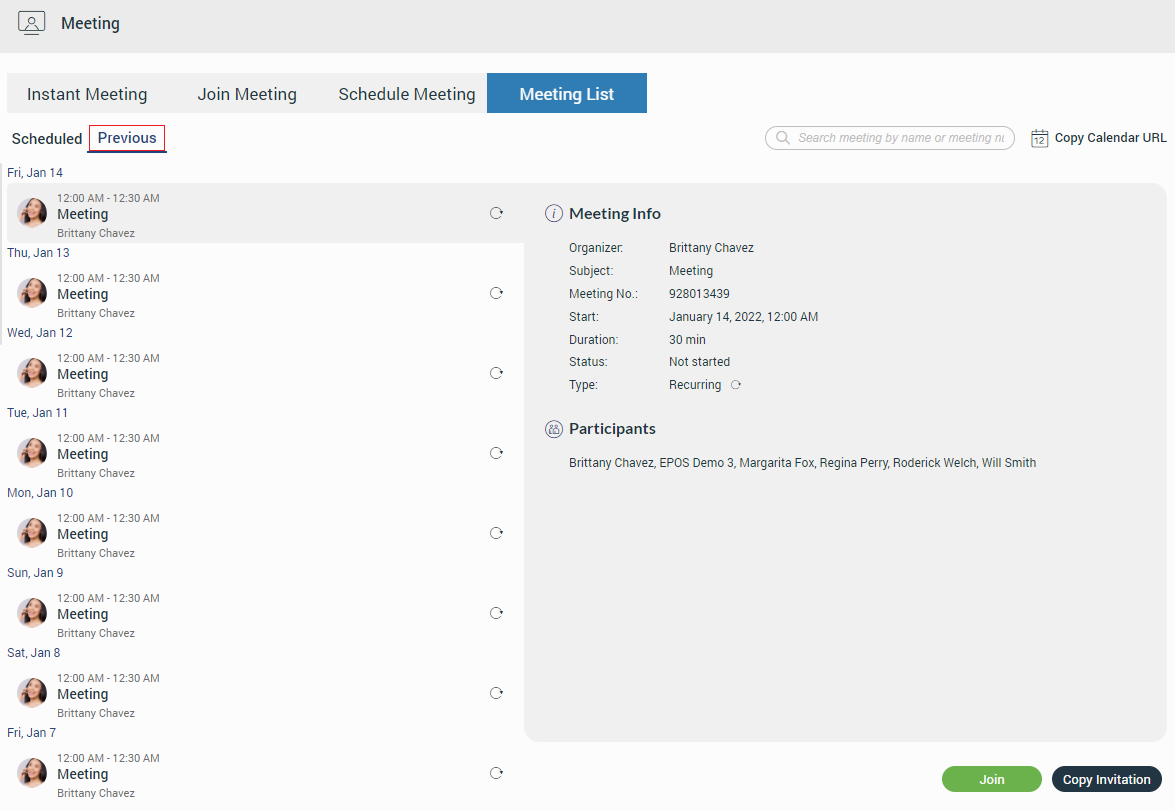
Meeting Notification
For every meeting invitation, the user will receive a pop-up notification. Additionally, the user will be provided with a pop-up dialog within the gloCOM Web app to access the meeting quickly.
Furthermore, all meeting invitations can be found within notifications below the user’s name.
Notifications for the meeting invitations will only be received if the user is logged in to the gloCOM Web app.

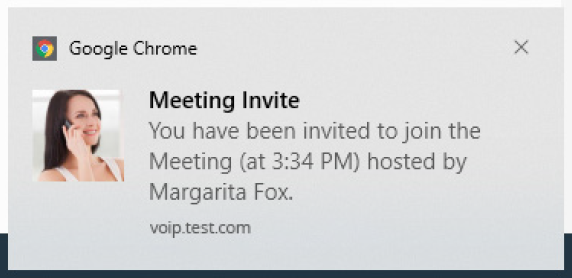

Voicemail
The voicemail section allows the user to listen to their voicemail messages. Clicking on the Voicemail icon within the navigation bar opens the voicemail screen.
At the top of the voicemail screen is the context bar with two tabs:
- New: Contains new voicemails.
- Old: Contains old voicemails.
Below the context bar is the voicemail list with information like:
- Caller: Displays caller name.
- Date: Displays the date when the voicemail was received.
- Duration: Displays voicemail duration.
Clicking on the desired voicemail message offers additional options like:
- Play: Allows the user to play the voicemail message.
- Call: Allows the user to call the person who left the voicemail.
- Move: Allows the user to move voicemail messages from the New folder to the Old folder and vice versa.
- Download: Allows the user to download the voicemail message to the computer.
- Delete: Allows the user to delete the voicemail message.
gloCOM Web supports only .wav audio format.
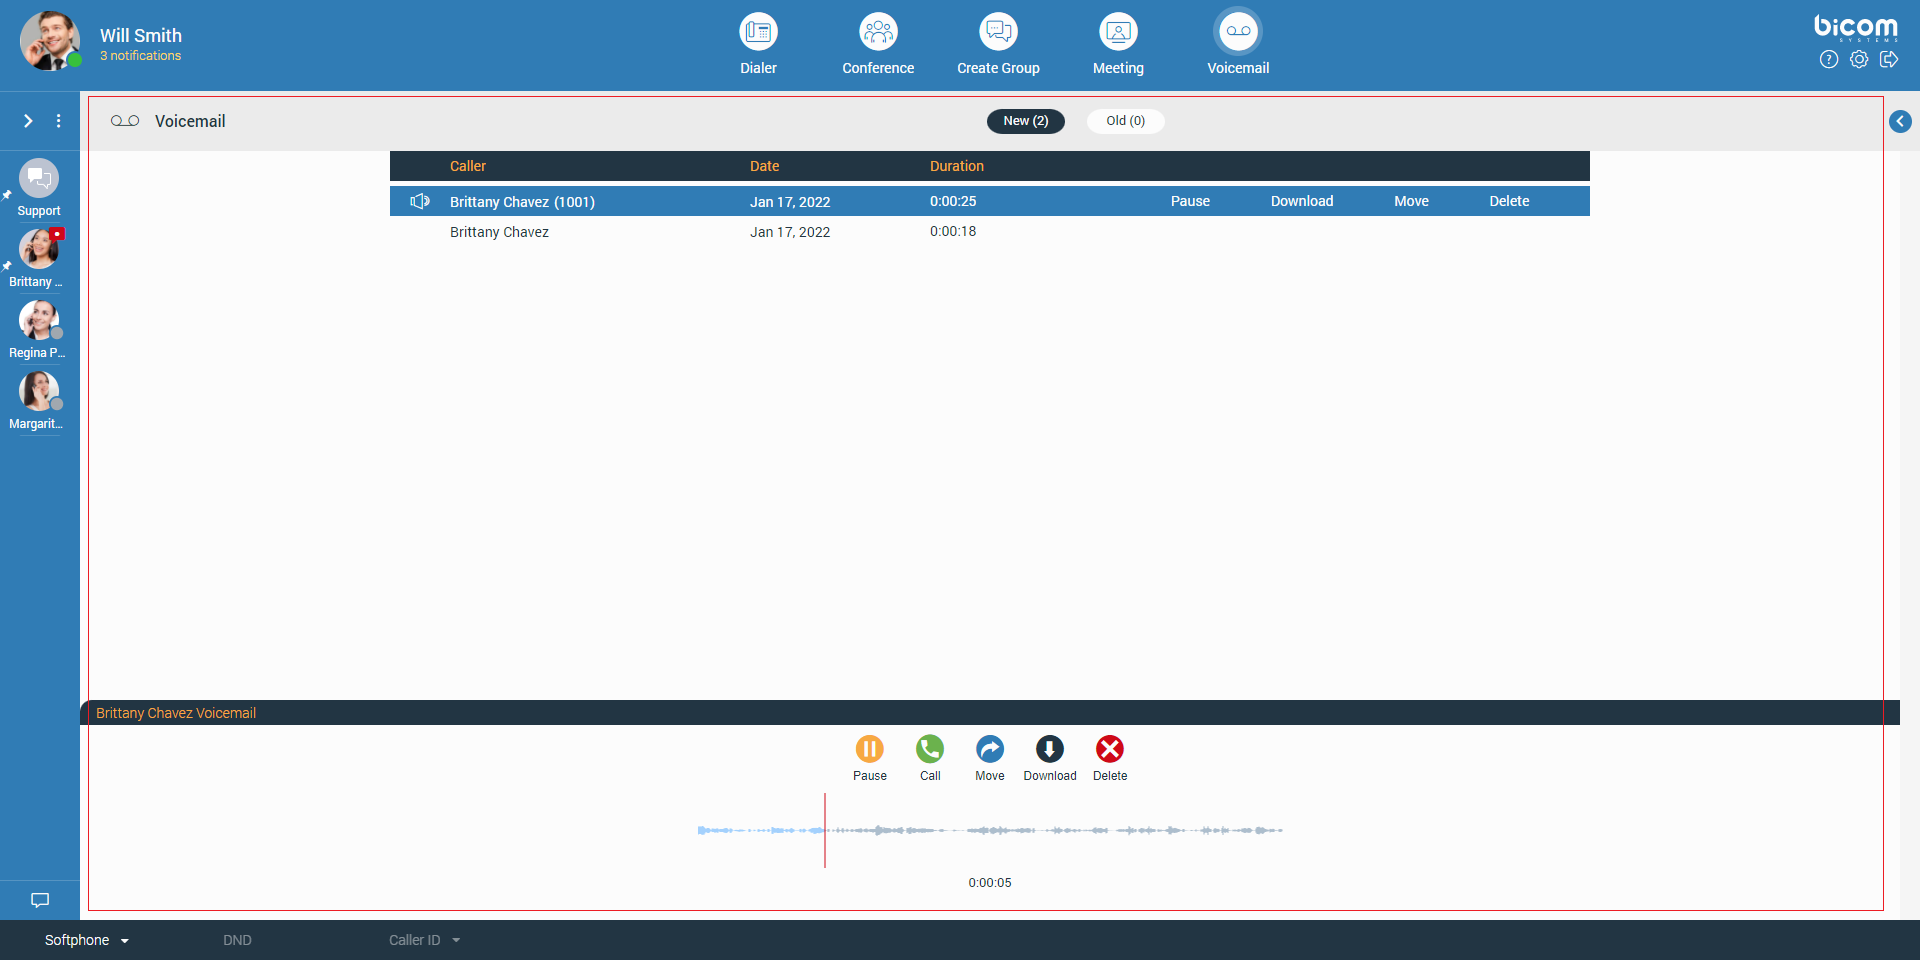
Personal Information
To access the Personal Information, the user needs to click on their avatar image or status icon at the right bottom of the avatar image and select Personal Information from the drop-down menu.
It brings up a Personal Information screen where the user can see their:
- Avatar picture: Clicking on it allows the user to change their avatar picture.
- Extension name
- Extension number
- Department
- Status Message
- Phone numbers: Allows the user to edit and delete their phone numbers.
- Add number: Allows the user to add as many phone numbers as they want.
- Currently logged devices: A list of devices to which the user is currently connected.
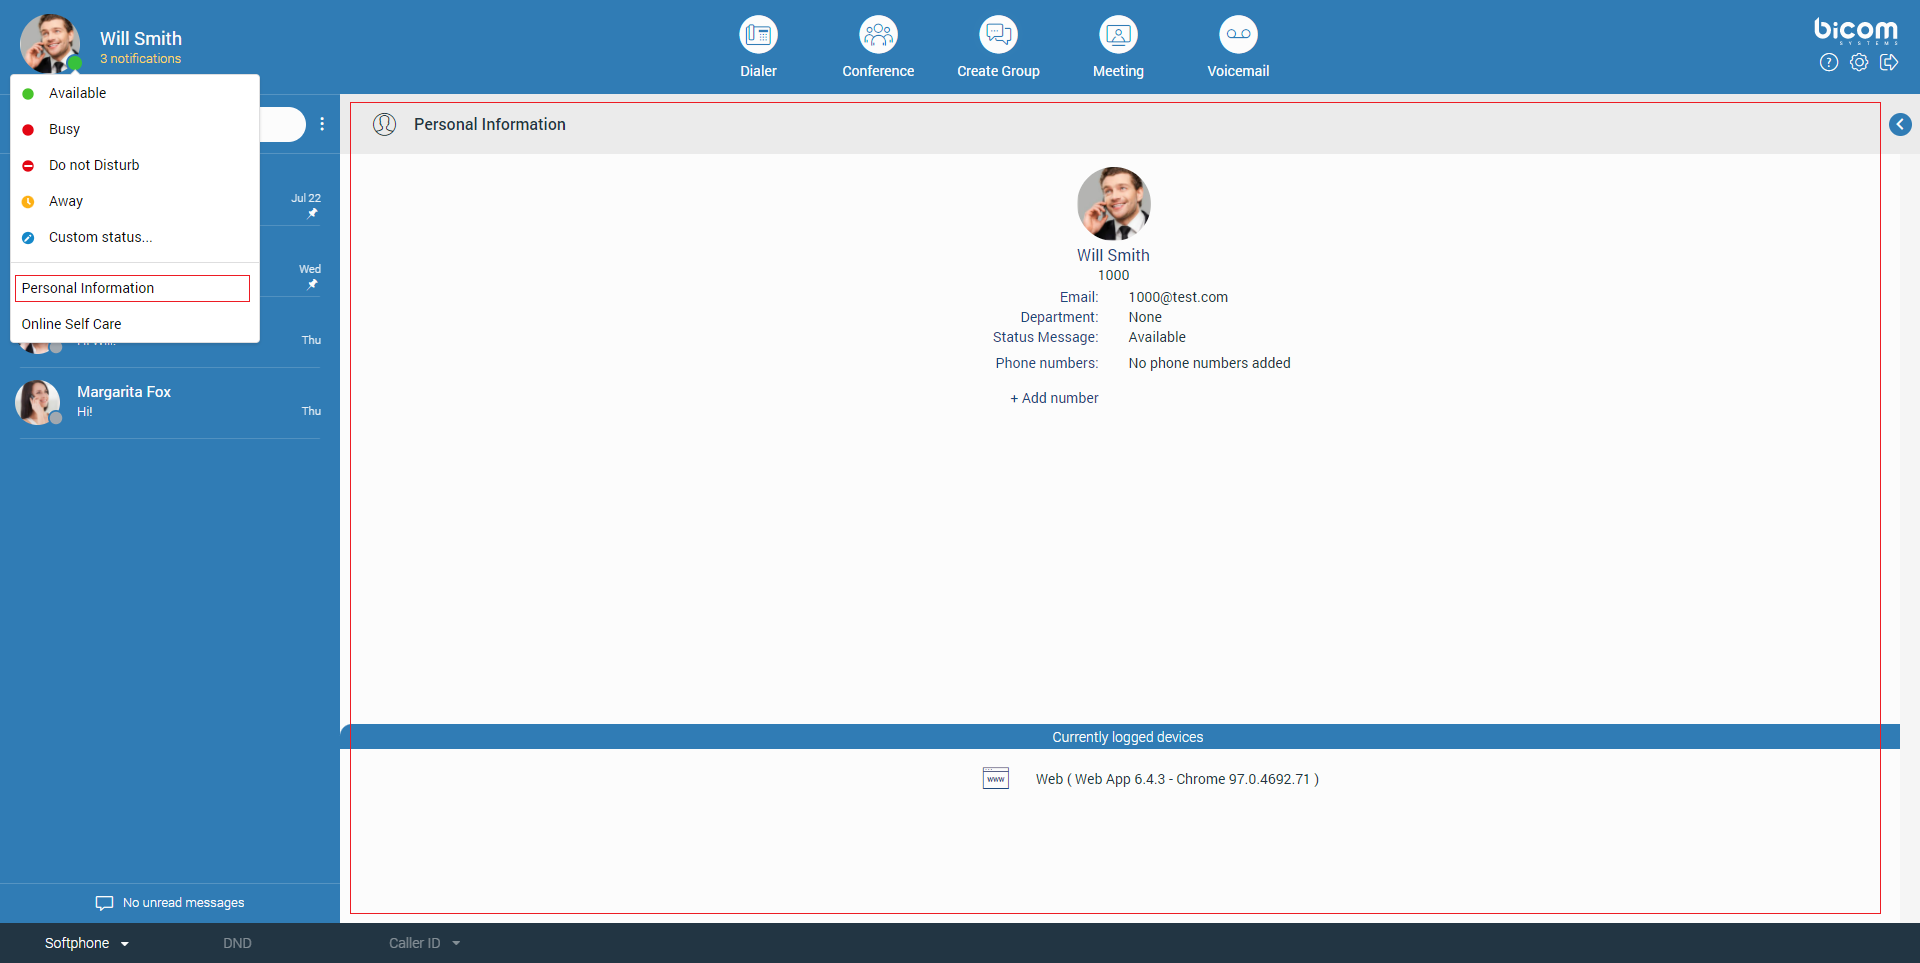
Online Self Care
To log in to Online Self Care, the user needs to point their browser to http://$IPADDRESS/ (for example http://192.168.1.1/). To access OSC through the gloCOM Web, the user needs to click on their avatar image or status icon at the right bottom of the avatar picture and select Online Self Care from the dropdown menu.
- Email: The email address assigned to the extension (ex. The provided email address is used as a username for logging into Online Self Care (e.g. email@example.com)).
- Password/PIN: The user password assigned to the extension (ex. This field accepts the gloCOM Web password (e.g. n9h*Caq1Icr)).
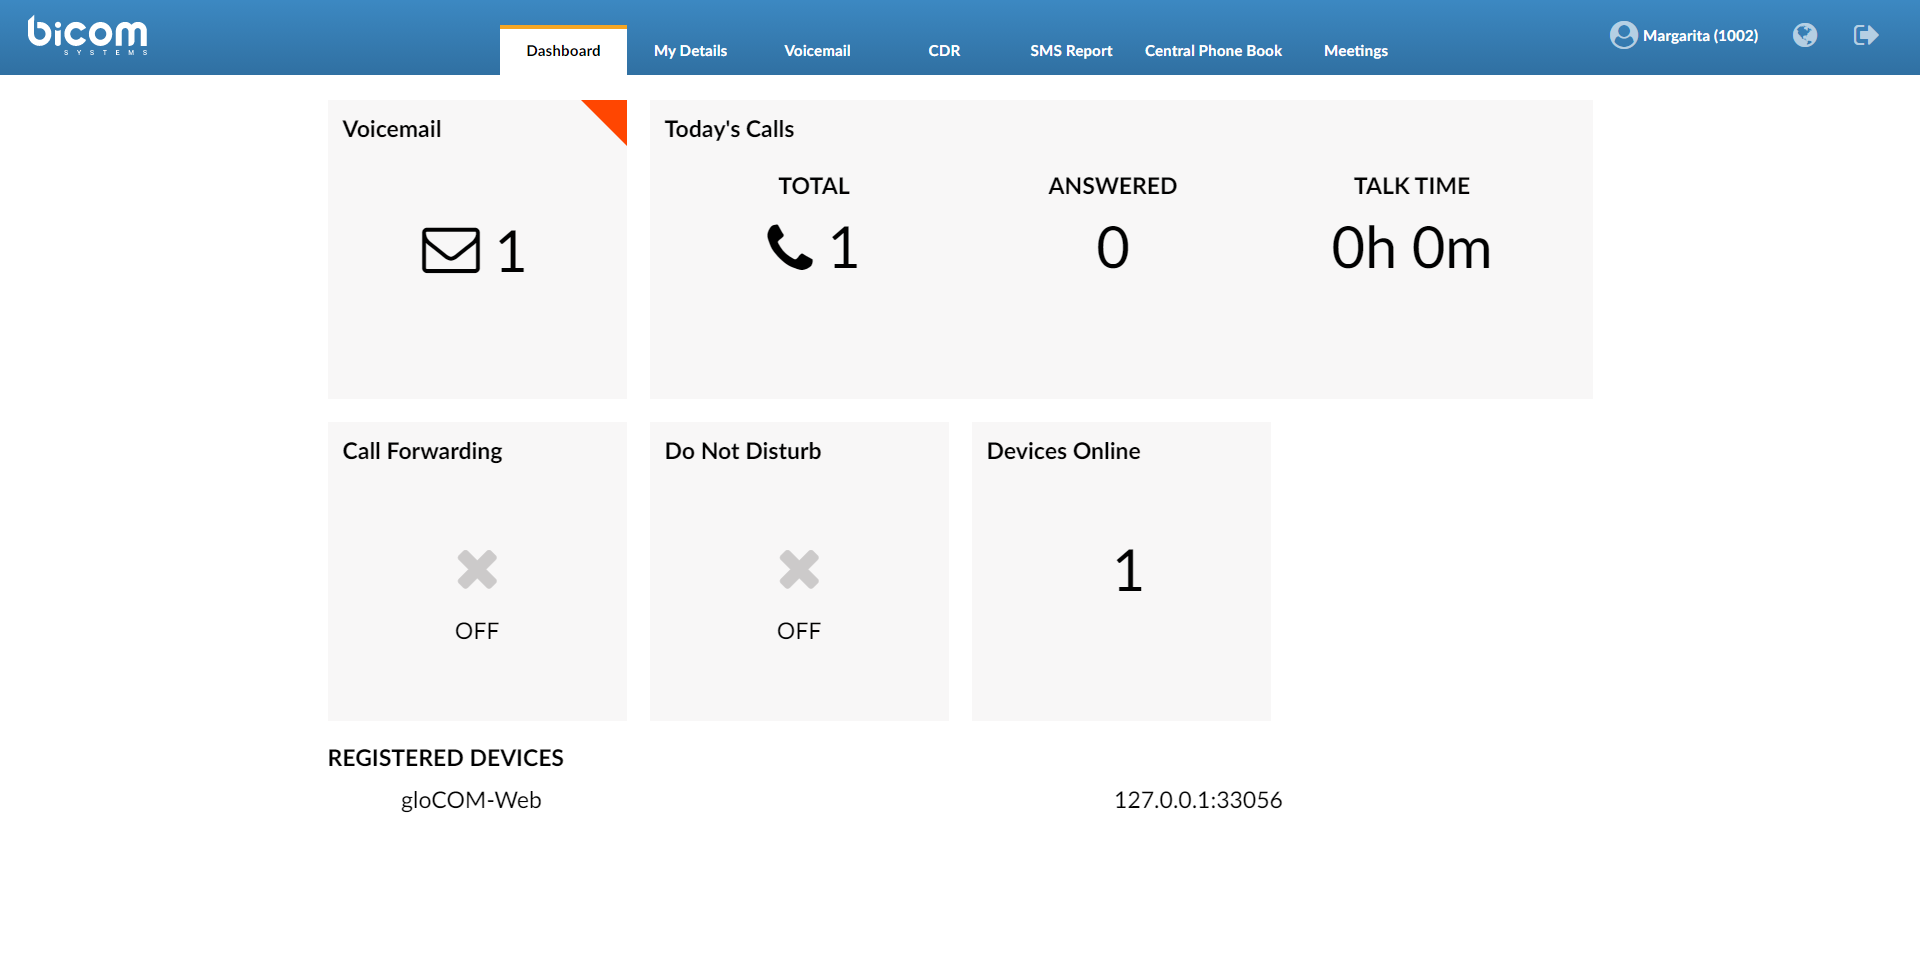
Help
The help screen contains the About and Feedback sections.
About
The About section gives the user information about the gloCOM Web application and information about the PBX system that gloCOM Web is connected to.
Clicking on the  copies all information from the screen to the clipboard.
Feedback
Users can easily send feedback for the gloCOM Web application. Just navigate to the Help → Feedback.
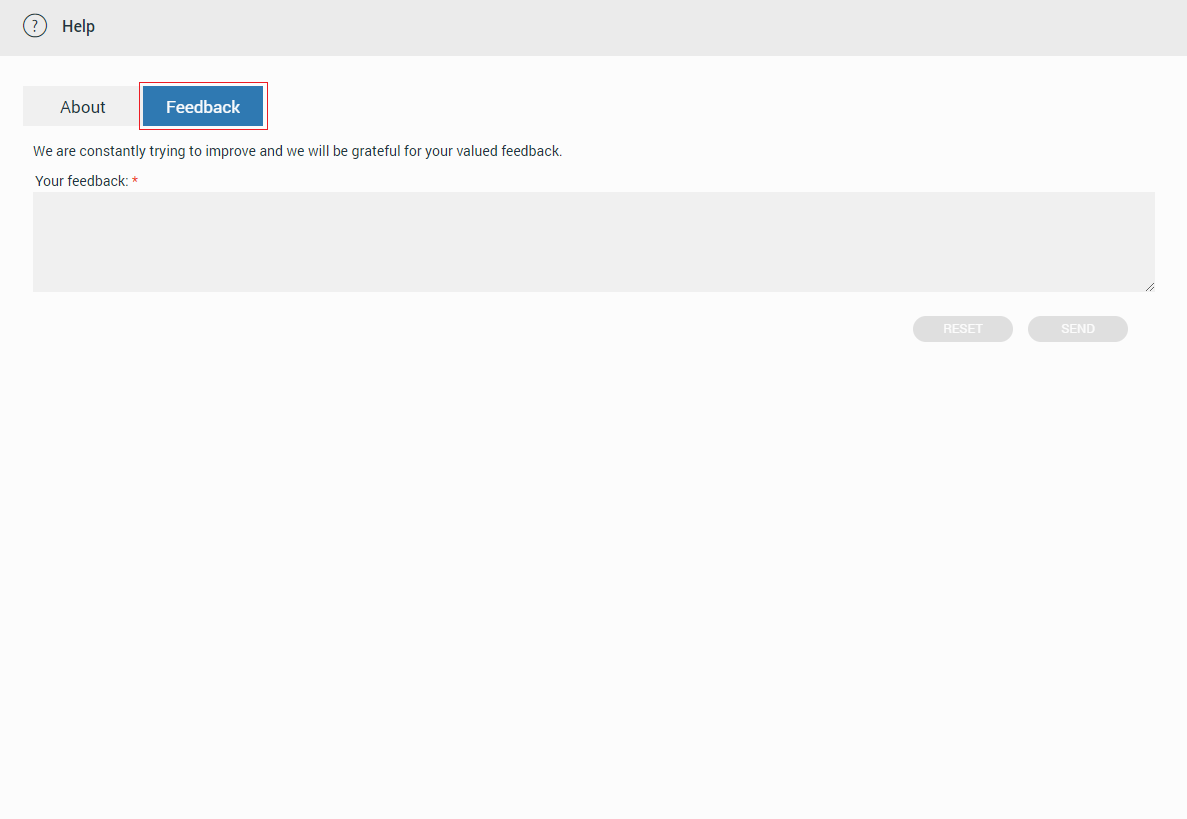
Preferences
Within preferences, the user can change their Audio, Alerts, and Appearance settings.
Any changes inside these tabs will be automatically saved.
Audio
Within the Audio tab, the user can set their audio devices like microphone, speakers, and ringing device.
Alerts
Within the Alerts tab, the user can check which kind of notifications they want to receive.
Appearance
Within the Appearance tab, the user can change their gloCOM Web appearance. They can choose between Light(Default), Navy Blue, and Dark mode. Also, they can change the language used throughout the app. This way, they can use the app in their native language.
Presence
gloCOM Web brings a unified presence synced across all user devices (Desktop, Mobile, and Web). For online contacts, the user can see if they are connected: via Desktop, via Mobile, via Web, or even all three. For offline contacts, the user can see when was their last activity in order to have a better understanding of their availability.
For example, if you see that the contact was last seen a few minutes ago, you might assume they will probably be able to respond to your calls/messages. On the other hand, if a contact has not been seen for a few days, it might indicate they have limited availability and are out of the office. User’s presence and availability are represented by the icon visible at the bottom right of their avatar.
Details about a contact’s presence are shown in a tooltip while hovering over them in both Grid View and List View. The tooltip contains information such as the device that the contact is connected with, their last activity, their status message, and their phone status (idle, on-call, do not disturb, etc.).
Status icon indicator can be any of the following:
 If there is no icon at the bottom right of the user’s avatar, it means that they are currently online and available.
 The user is currently on a phone call.
 The user is currently online, and they’ve set their status to Busy.
 The user is currently online, and they’ve set their status to Do not Disturb.
 This icon has multiple meanings:
- The user is currently online, and they’ve set their status to Away.
- The user is currently connected via Desktop, but they are Away from Desktop.
- The user is not currently connected, but they were last active less than 8 hours ago.
 The user was not active in the last 8 hours
Status and Status Message
The user can select their status by clicking on the status icon at the right bottom of their avatar.
A menu will pop up, and they can choose between:
- Available
- Busy
- Do not Disturb
- Away
- Any of the statuses defined by the PBXware administrator
- Custom Status
The PBXware administrator can add statuses through PBXware GUI, and those will appear as an option in the menu for all users. For example, an administrator could add Lunch Break status. This way, the user can inform others when they are using their lunch break, and they are not at their desk. Also, they can set their own custom status and write any message to describe their current availability.
For example, if they have to attend a meeting and they will not be available to respond to calls or messages, they could choose Custom status… from the menu.
Select Busy from the dropdown, and type In a meeting as a message. It informs all other users that they are busy, and the reason for that is they are currently attending a meeting. This way, all users can have a better understanding of each other’s availability since each user can type a custom message to describe their current availability. After they select any of the statuses, they also have to specify status expiration. It allows them to let the application revert their status to Available after a certain period of time.
Using the example mentioned above, the user could set their status to Lunch Break with the expiration of 1 hour, so when they come back to the office, they don’t have to remember to change their status back to Available since the application will automatically do that for them.
When setting status expiration the user can choose between:
- Today
- 1 hour
- 4 hours
- 8 hours
- 12 hours
- 2 days
- 5 days
- This week
- Always

Chat
gloCOM brings a unified chat between Desktop, Mobile, and Web applications. Chat history is stored on the server and synced between all user devices. For example, if the user needs to leave the office but has a discussion via chat with their colleagues, they can seamlessly continue the discussion using their mobile application. Also, if the user changes their PC or laptop, the entire chat history will sync the first time they log in on the new computer.
Sync Chat History
After every login, the application makes sure that every chat session has synced the last 20 messages, and by scrolling, the user will get older messages.
Chat Server Unavailable
If the chat server is down, the user cannot send nor receive messages until it gets back up. While the chat server is down, there is an indication inside the conversation list to alert the user. As soon as the application detects that the chat server is back up, the warning message disappears, and the user can continue chatting where they left off.
If chat sync has failed, there is a warning inside the conversation list displaying the following message: Chat server not connected.
Starting Conversation
There are several ways to start a conversation or to open an existing one.
Clicking on the chat icon while hovering over a contact within the contact list (only Grid View).
Right-click on the contact within the contact list and select the Chat option from the drop-down menu.
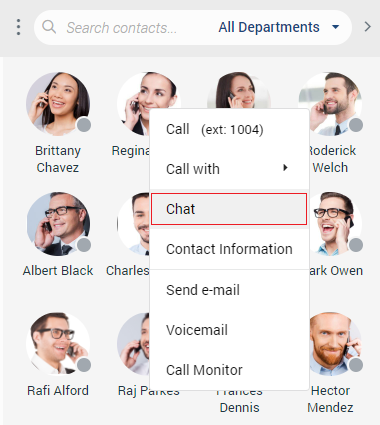
Clicking on a contact within the contact list ( only List View).
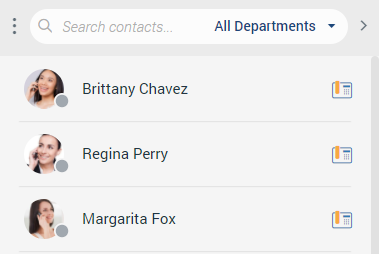
Clicking on a contact within the conversation list to open an existing conversation or use the search field above the conversation list to find the contact and start a new conversation. Also, the existing conversation can be found using the search field above the conversation list.
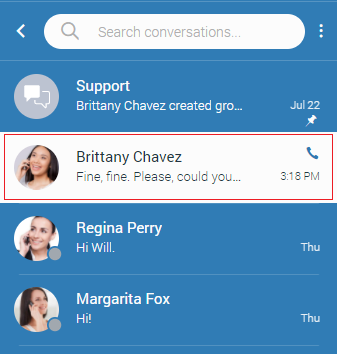
Click the Create Group icon within the navigation bar, select several contacts from the contact list, enter the group name, and click create.
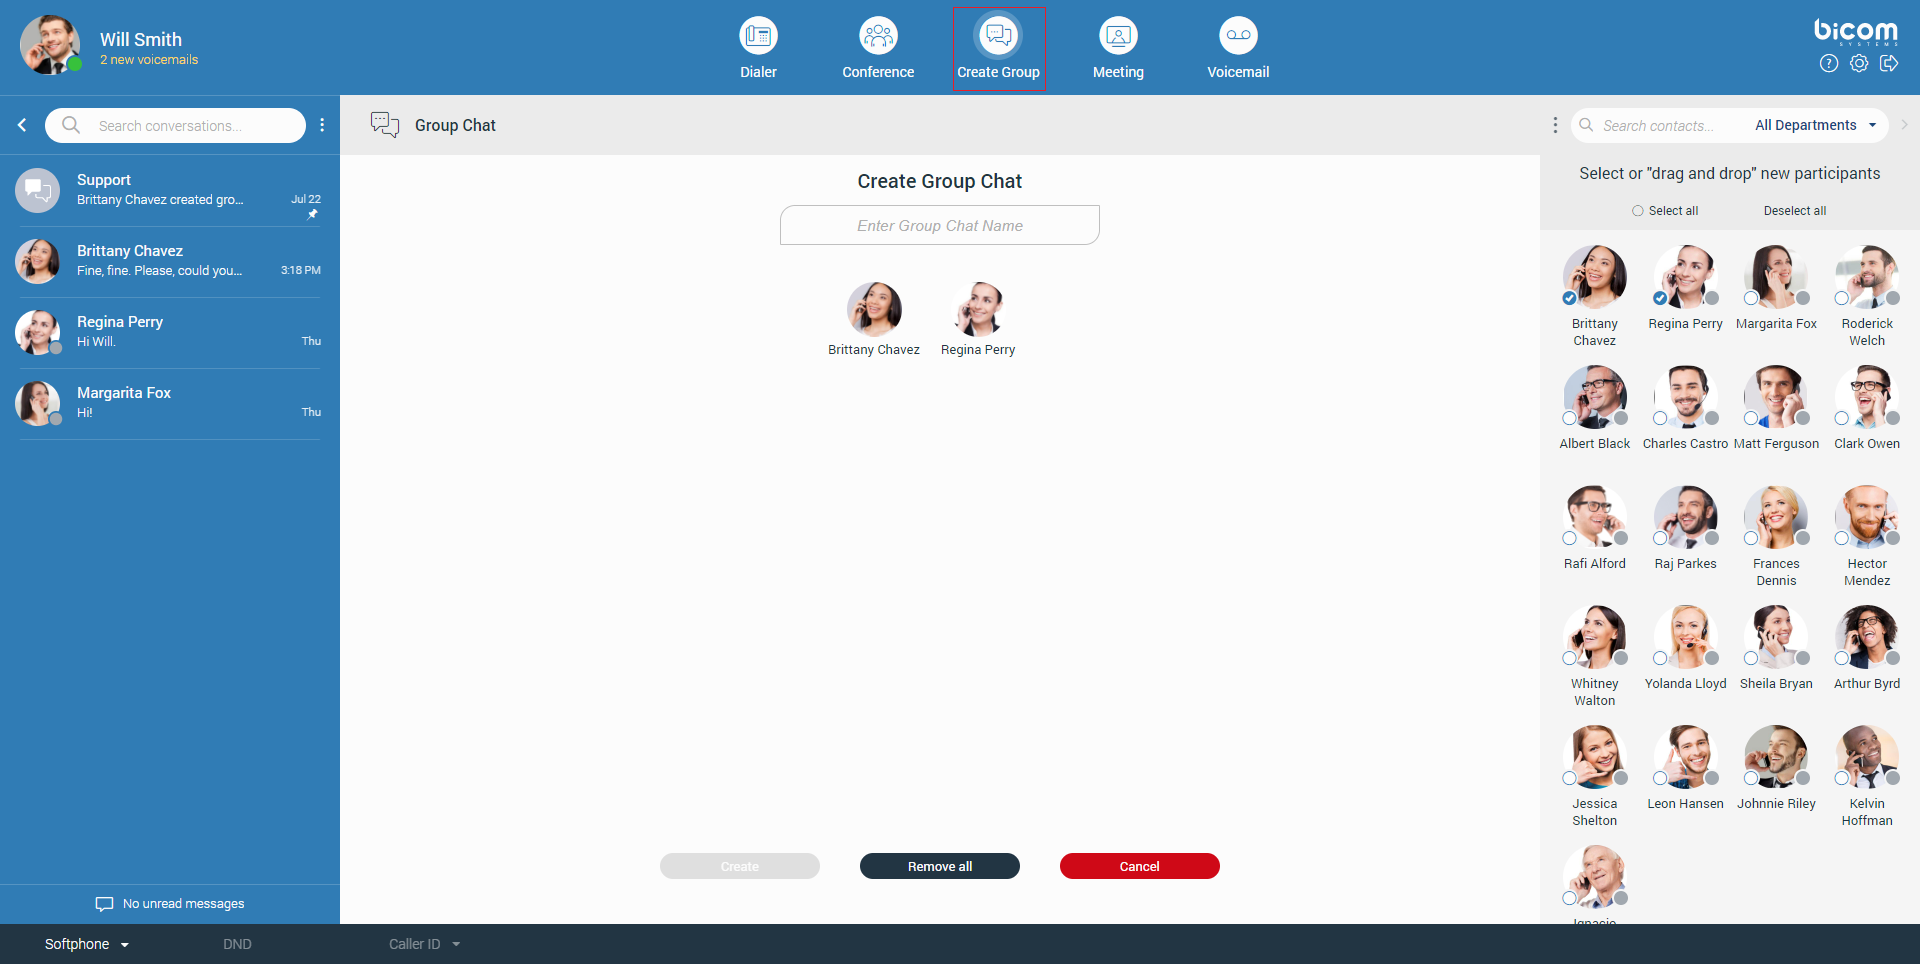
Start a chat from the regular call (one-to-one chat conversation).
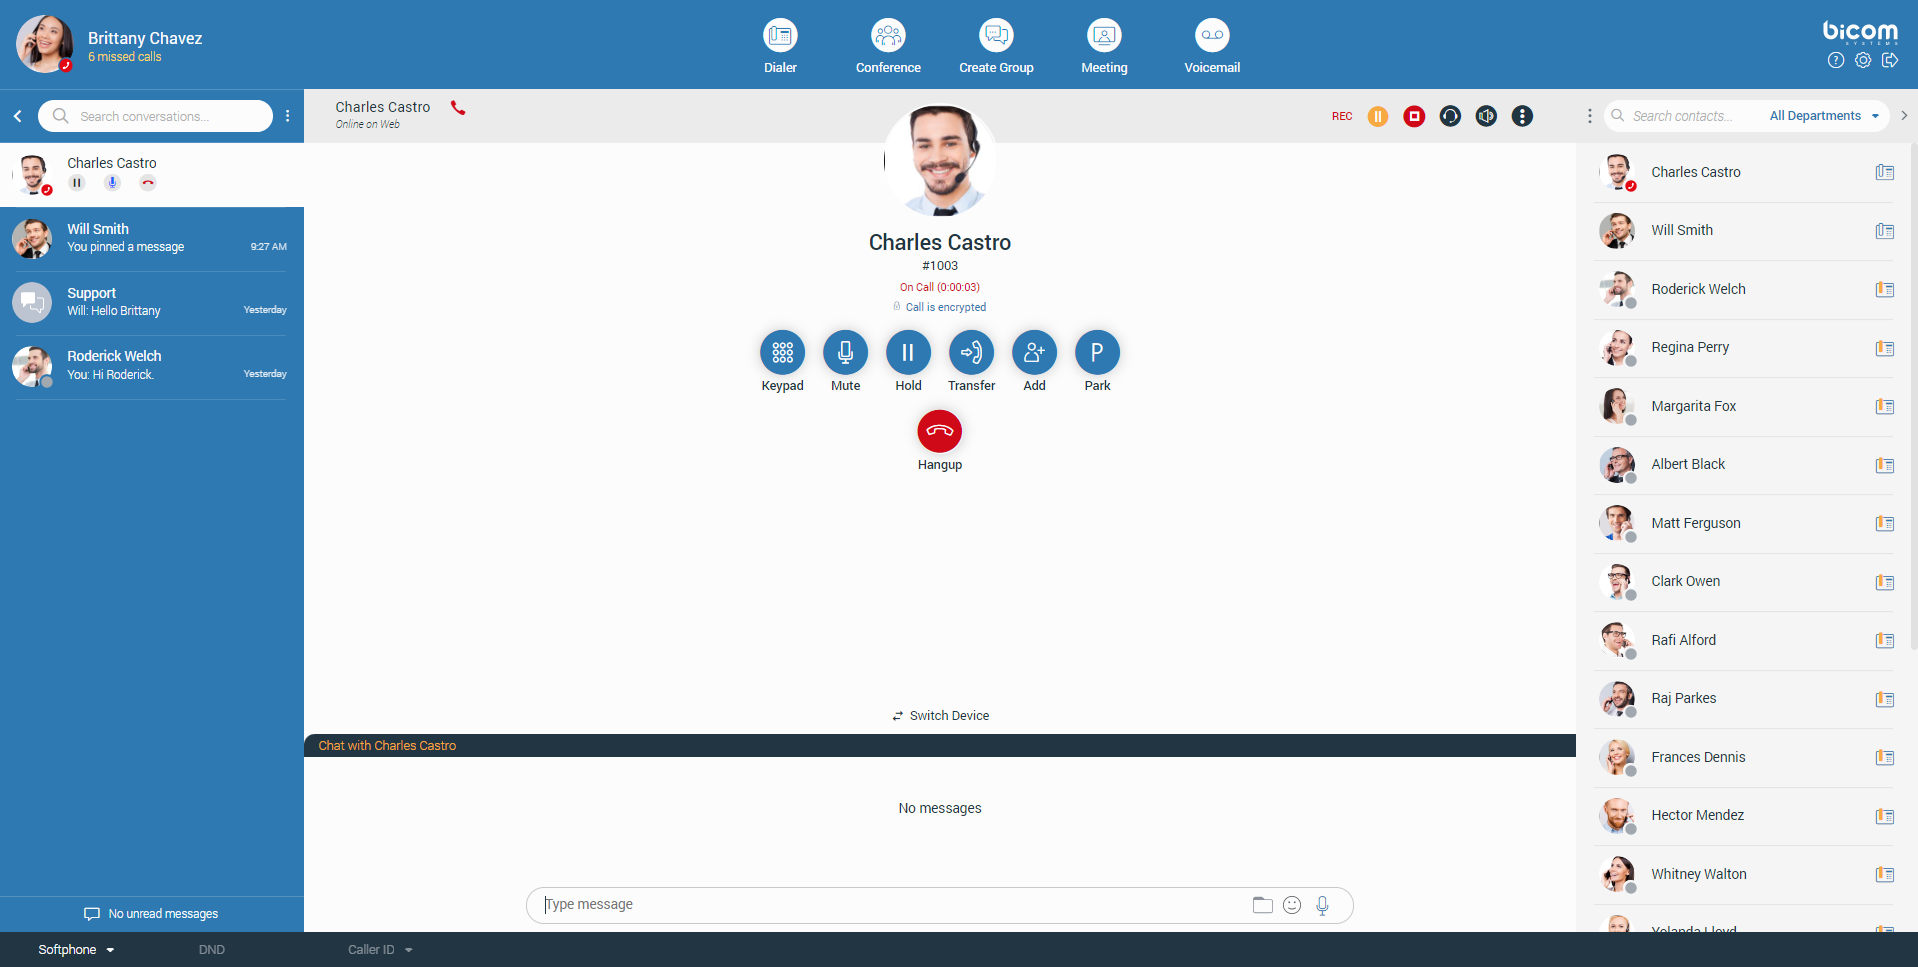
Start a group chat from the conference ( group chat conversation).
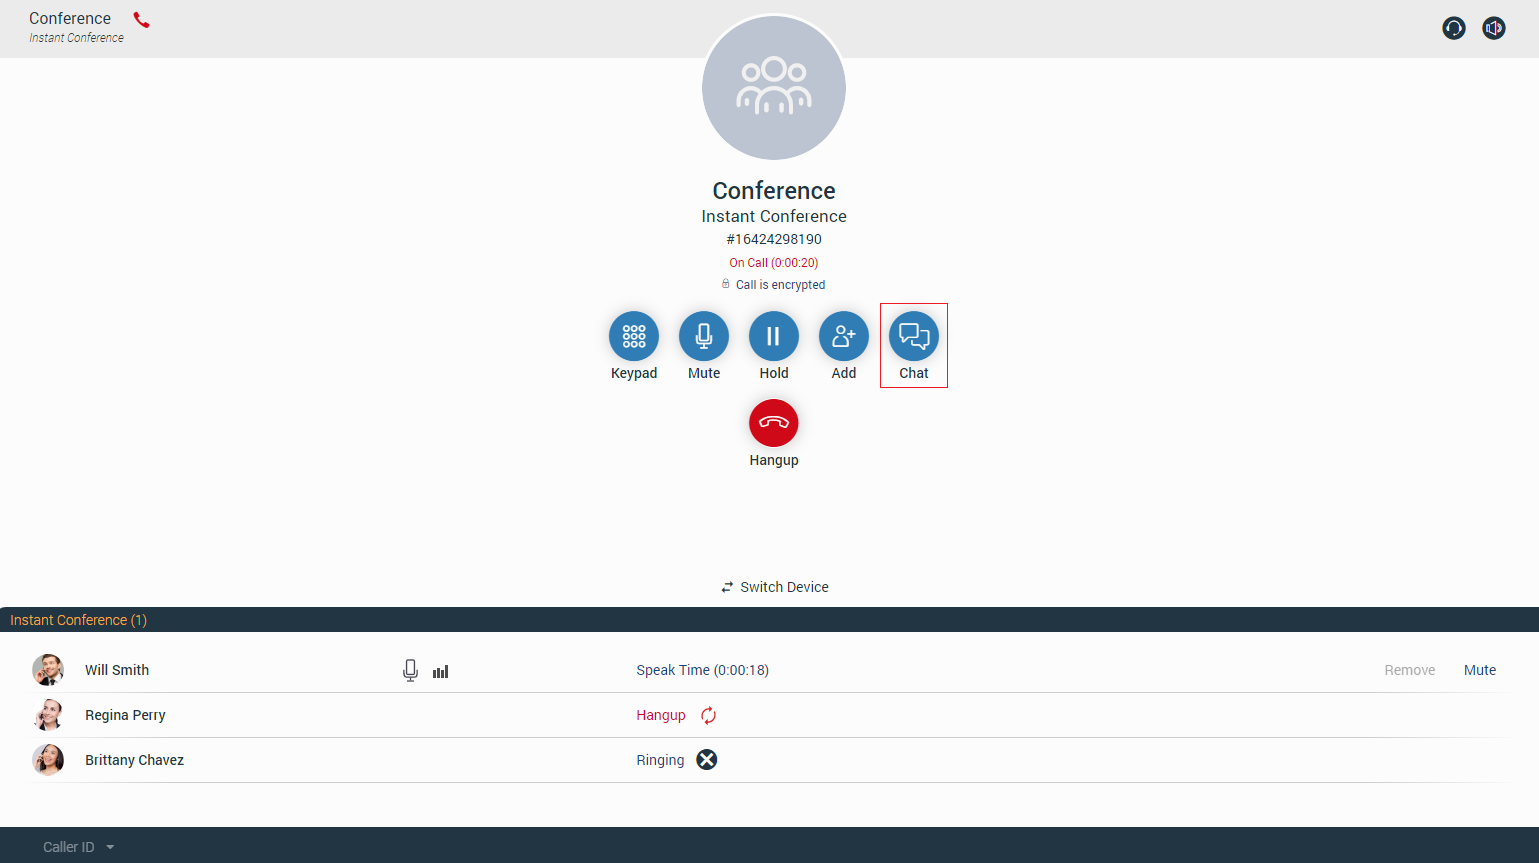
Context Bar
At the top of the chat screen area is a context bar. It contains information about the currently selected conversation and also provides various actions available for that conversation. At the far left side is an avatar of the currently selected conversation. Next to it is a user name (or a group name in case of a group conversation). Below the name is information about the user’s presence and status (for example, online status, status message, etc.).
In the case of a group conversation, there is a label indicating the number of participants in the conversation.

One to One Chat Conversations
At the right side of the context bar are buttons for performing actions available for the currently selected conversation.
 Start a meeting from the chat (Start a Meeting from the chat will automatically send an invite link into that chat.).
 Call the currently selected contact (create a voice conference in case of a group conversation).
 Add more contacts into the currently selected conversation.
 More options gives options like:
- Call (ext number)
- Call ( Select on which number you want to call the contact)
- Call With ( Select would you like to use softphone or deskphone)
- Contact Information opens a contact information screen
- Pin/Unpin currently selected conversation
- Send e-mail to the contact
- Voicemail – leave a voicemail to the contact
- Call Monitor
- Delete Conversation
While adding contacts into the currently selected conversation, the user can filter contacts by searching for a contact’s name or extension number. Also, contacts can be filtered by department or even add a whole department into the conversation. Added contacts cannot read previous messages in the chat conversation.
Group Chat Conversations
At the right side of the context bar are buttons for performing actions available for the currently selected conversation.
- Start a meeting from the chat (Start a Meeting from the chat will automatically send an invite link into that chat.).
 Place a conference call for the currently selected group conversation
- Add more contacts into the currently selected conversation.
 Group info opens a group info screen. The group info screen gives information about the chat admin, participants, and an option to add more participants to the group.
Suppose the user is a group chat administrator. In that case, they can change the group name, remove participants from the group chat, and select a new administrator for the group chat.
If the user wants to remove a participant from the group chat, they need to go to the Group Info screen, and within the participant list, click on the avatar of the participant they wish to remove.
To change the group chat administrator, they need to click on their avatar within the Group Info screen, select a new administrator from the participant list, and click the Transfer button.
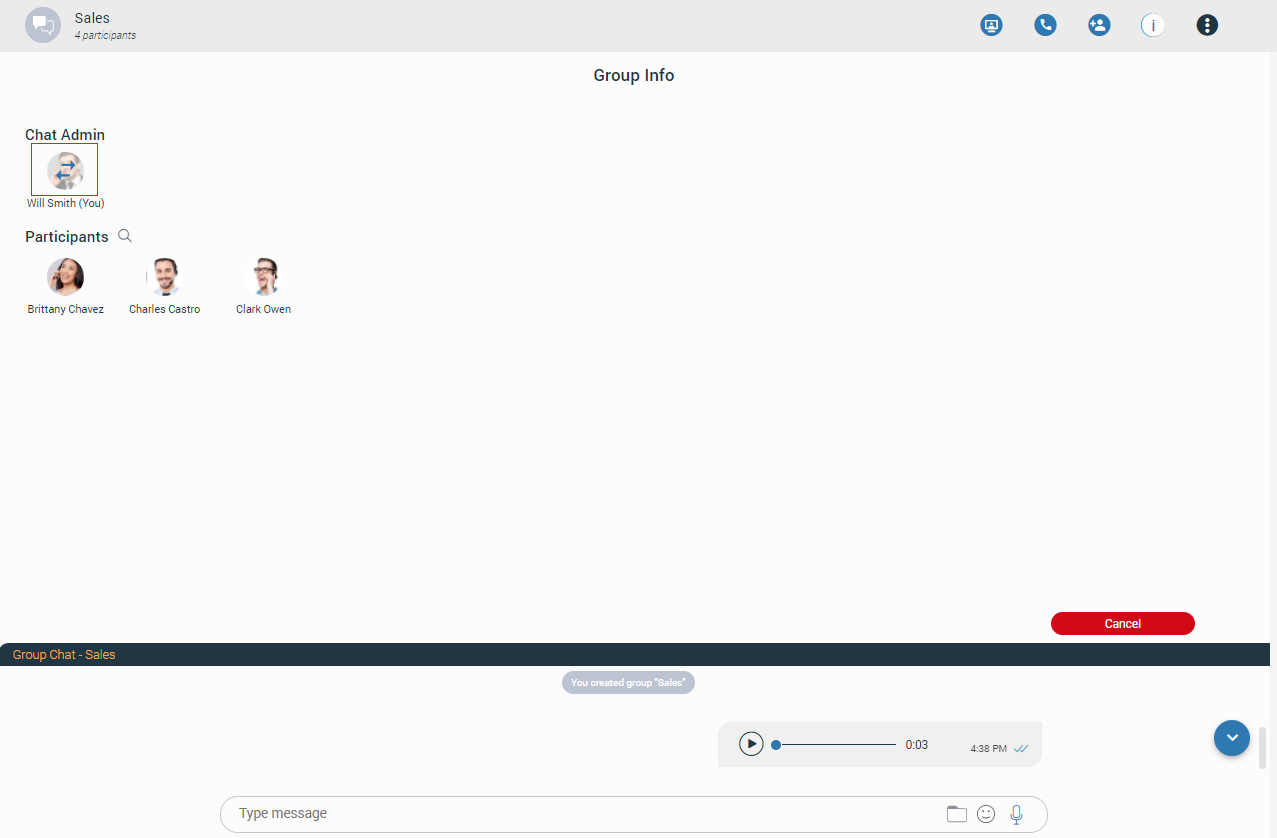
If the group chat does not have an administrator, the user can become an administrator by clicking the Assign myself button next to the No admin assigned label.
- More options gives options like:
- Pin/Unpin: Pin/Unpin currently selected conversation.
- Mute/Unmute chat: Disable/enable notifications for the currently selected conversation.
- Leave: Leave group conversation but not delete. The user can see old messages, but it cannot send/receive messages.
- Leave & Delete: Leave and Delete group conversation.
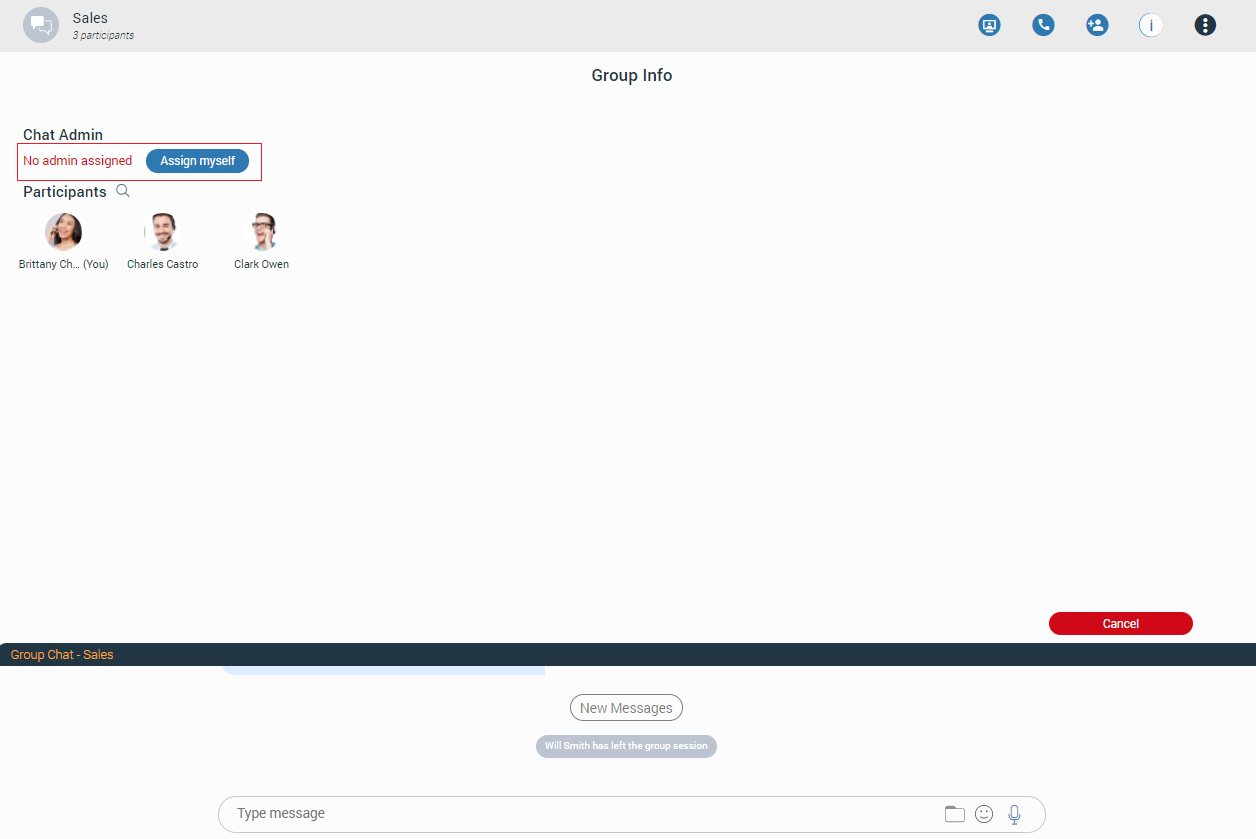
Create Group Chat [6.7]
Create Group Chat option is used for creating group conversations (as the group creator, you are automatically the group administrator). Two types of groups are available. The first type of groups are ordinary groups, meaning that the chat history will not be available to newly added participants. The second type of groups are groups with visible chat history, meaning that the full chat history will be available to newly added participants.
To create a group with visible chat history, check the option Allow full history visibility.
 – Indicates that the chat history is visible to newly added participants.
The group name may or may not be provided during the group creation. If the user does not provide a group name, the group name will be just Group. However, the user can change the group name at any time after creating the group by clicking on the group name.
Filtering and selecting contacts are the same as described in the conference section. The user can filter contacts by name, extension number, and department. Created groups are permanent, meaning the user will remain a group member after closing the application.
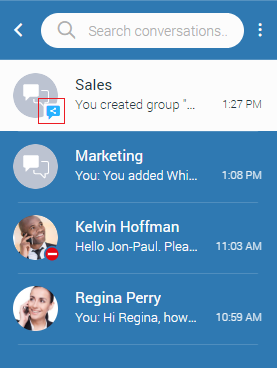
It is possible to have multiple groups with the same participants and the same or different names. For example, you could create Sales Reports and New Release groups. Both groups can have the same participants, and the user can use them for various topics, so unrelated matters are not mixed up in a single conversation.
Group chat can be created from one-on-one conversations and conference calls.
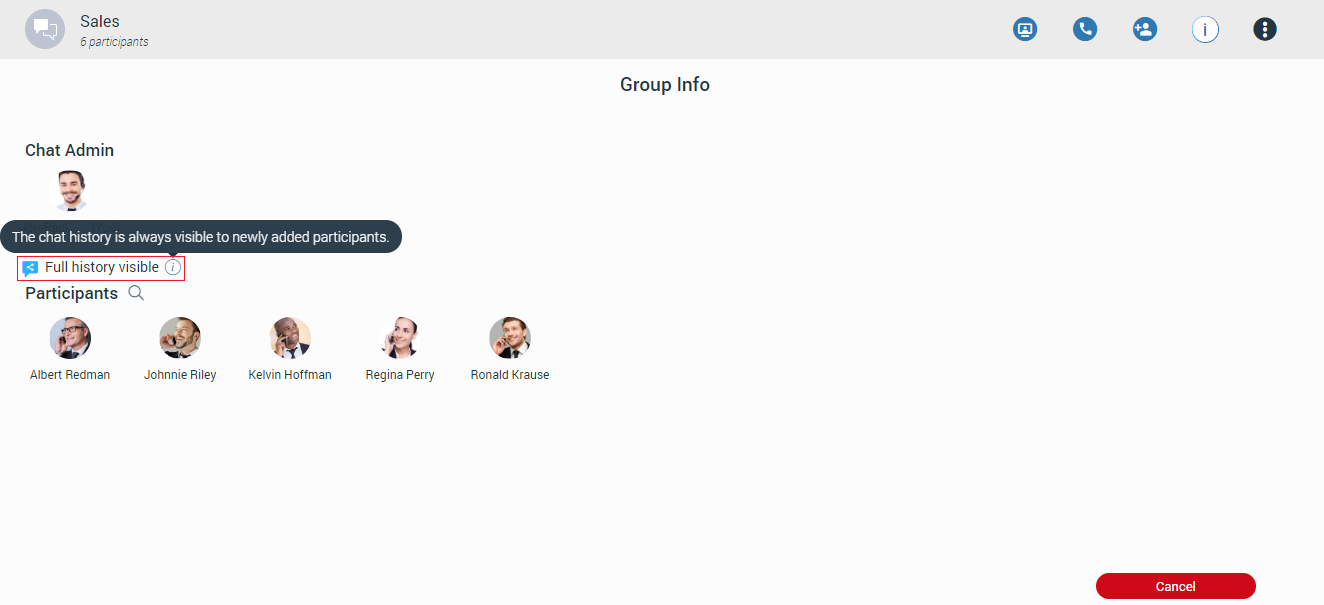
Mention participants in group chat conversations [6.7]
The mention as a feature represents a good way to get someone’s attention within the group conversation. It allows the user to mention one or more participants and provide the context of their mentioning within the message. The mentioned participants will receive a notification even in the group conversations they have currently muted.

To mention a participant, the user needs to enter the @ sign followed by the name of the desired participant. Immediately after entering the @ sign, the list of the participants who can be mentioned will be displayed above the input field.
Only participants from the group chat conversation can be mentioned.
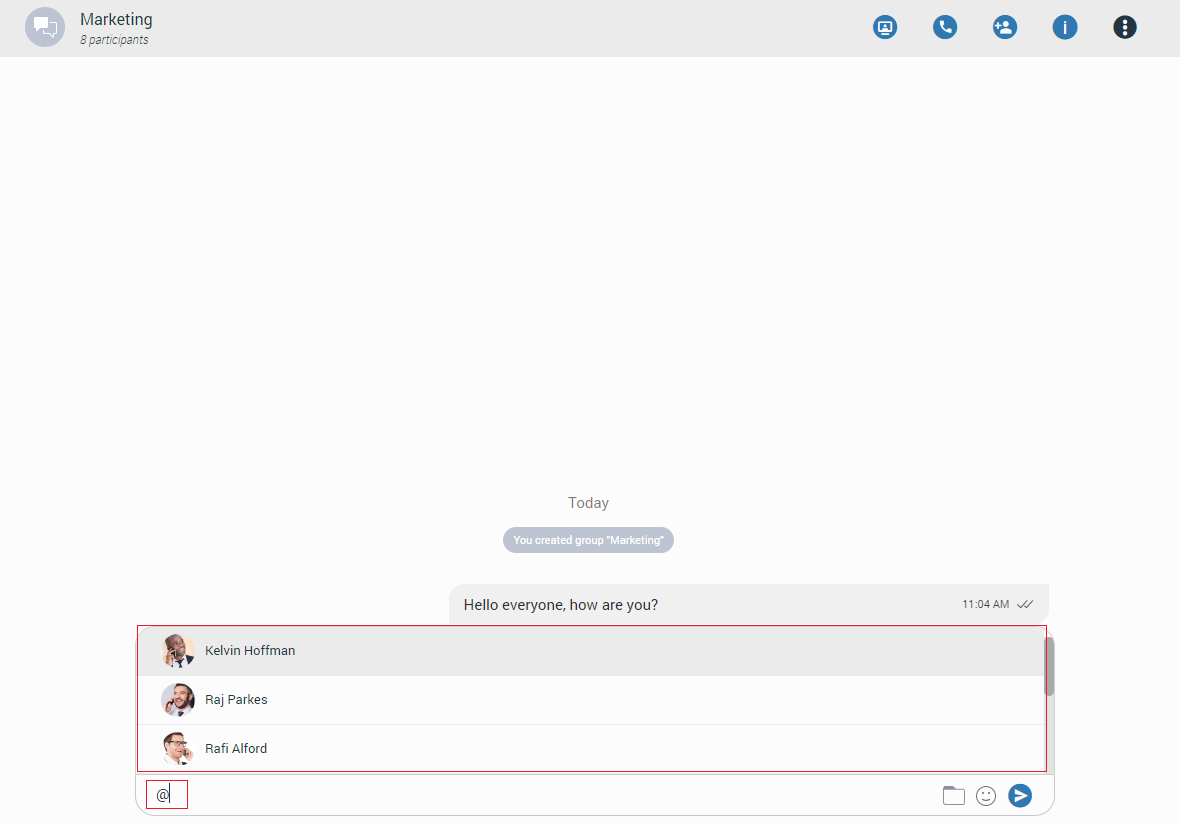
The user has a few possibilities for selecting participants:
- The first includes scrolling through the list using the up and down arrow keys and selecting the participant by pressing the Enter (Return) key on their keyboard or using the mouse wheel and clicking on the participant.
- The second is to continue entering the participant’s name after the @ sign. In that case, the list above the input field will only display participants whose names match the entry.
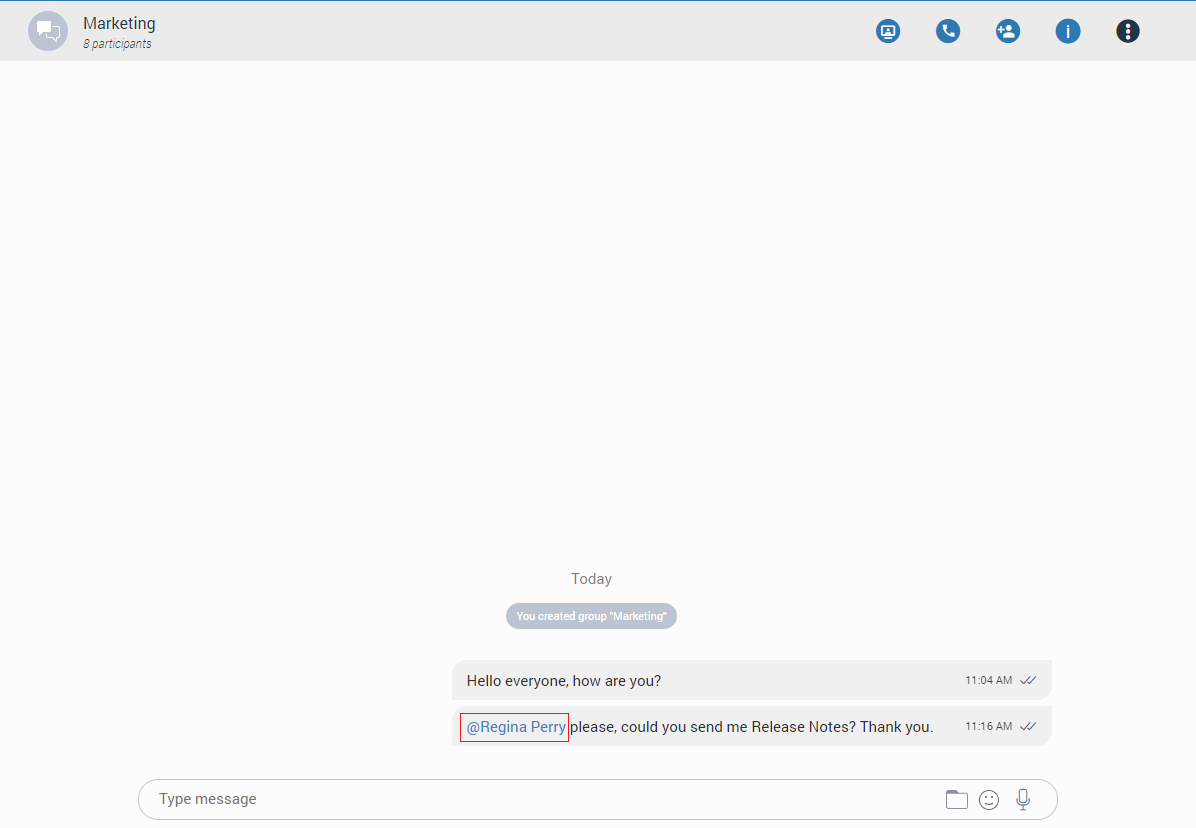
The mentioned participant will be colored in blue within the conversation.
Clicking on the mentioned participant within the conversation brings a pop-up menu with the following options:
- Call
- Chat with
- Contact information
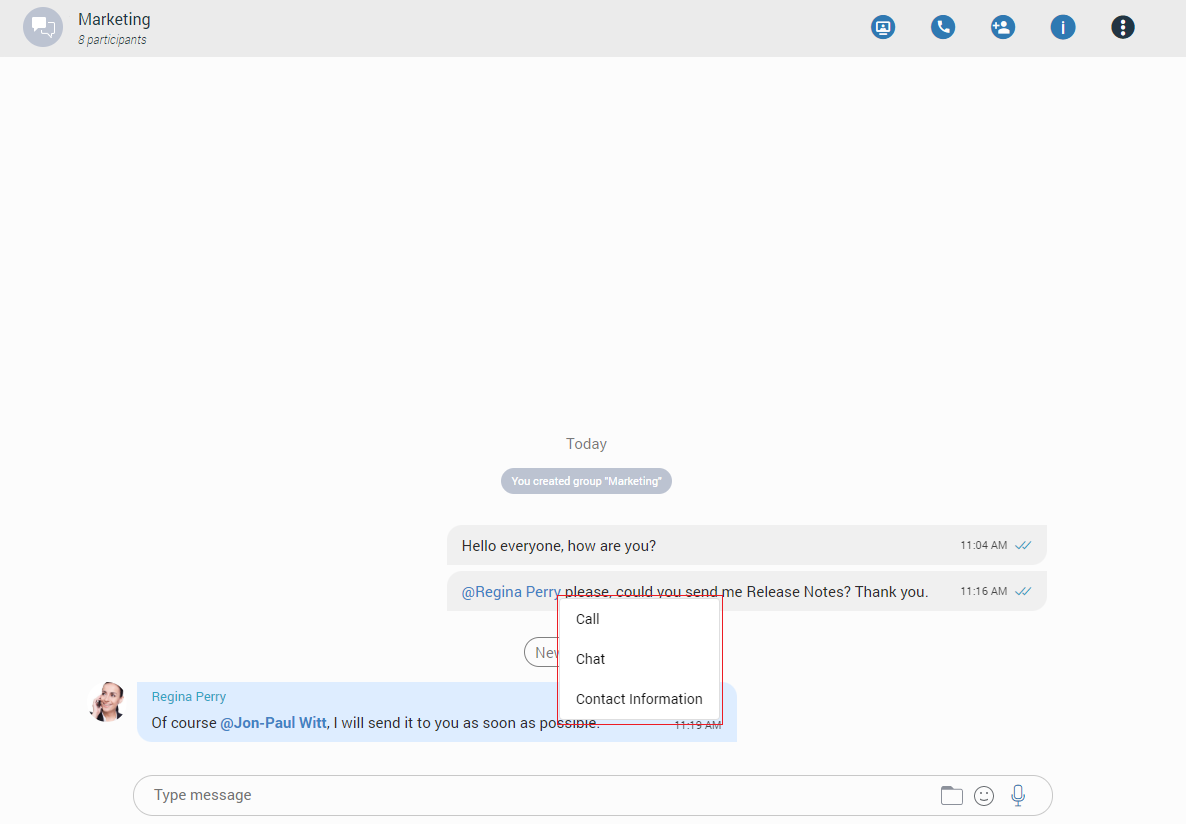
Messages View
Messages of the currently selected conversation can be seen in the middle of the screen. If there are no unread messages, the application loads the last 20 messages and place the scrollbar at the bottom of the messages view area. The user needs to scroll up if they want to see older messages. This way, they can scroll to the beginning of the conversation.
On the other hand, the scrollbar will be positioned on the first unread message (if any) with the  indicator to inform the user where new messages start.

Also, the user can see when the other party is typing. The typing indicator can be seen above the messages input field and within the conversation list. For a group conversation, if more than one participant is typing, at the time, the typing indicator will take the form of N participants are typing where N represents the number of typing participants.
While scrolling up, within the currently selected conversation, a Jump to the newest message  button appears at the bottom right corner of the message’s view so the user can easily move to the end of the conversation. In case new messages are received while scrolling, the Jump to the newest message
 button shows the number of received messages. Clicking on it leads to the first received message.
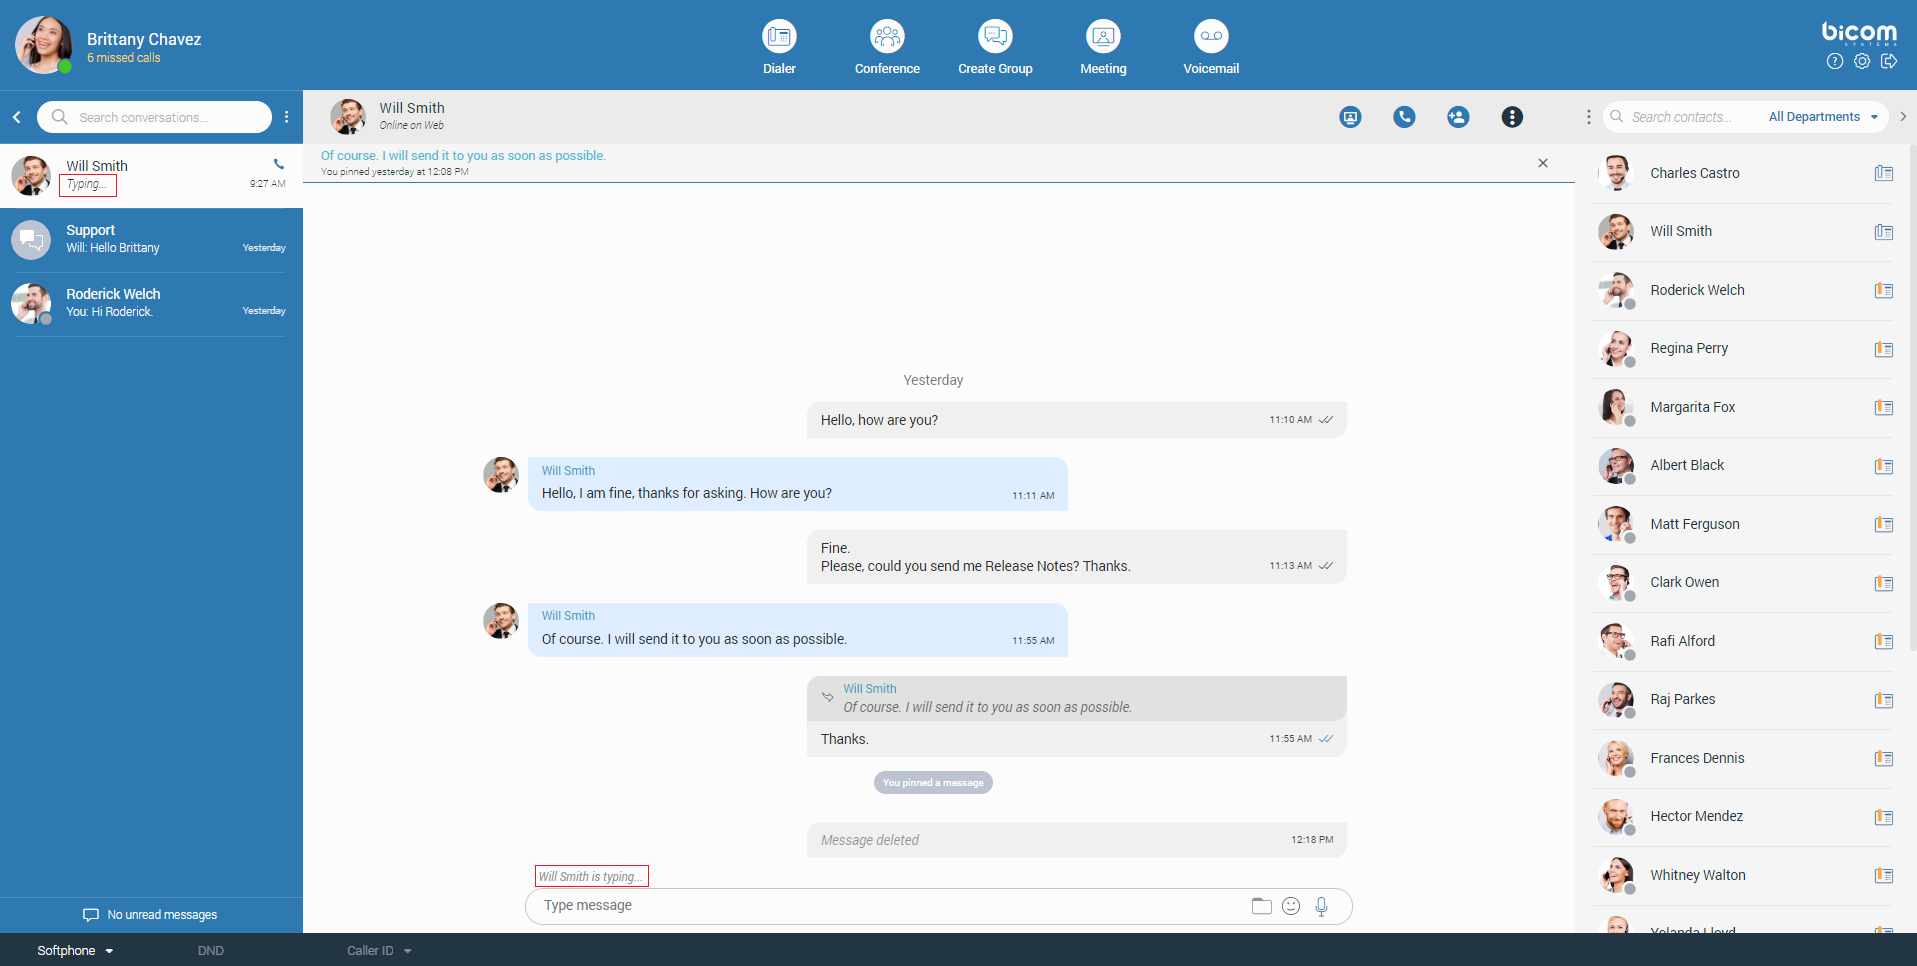
Furthermore, while you are inside of a group chat conversation, left-click on the participant’s avatar inside the messages area will show a popup menu with the following options:
- Call: Call the participant directly.
- Chat: Start a one-to-one conversation with the participant.
- Contact information: Show the contact information.
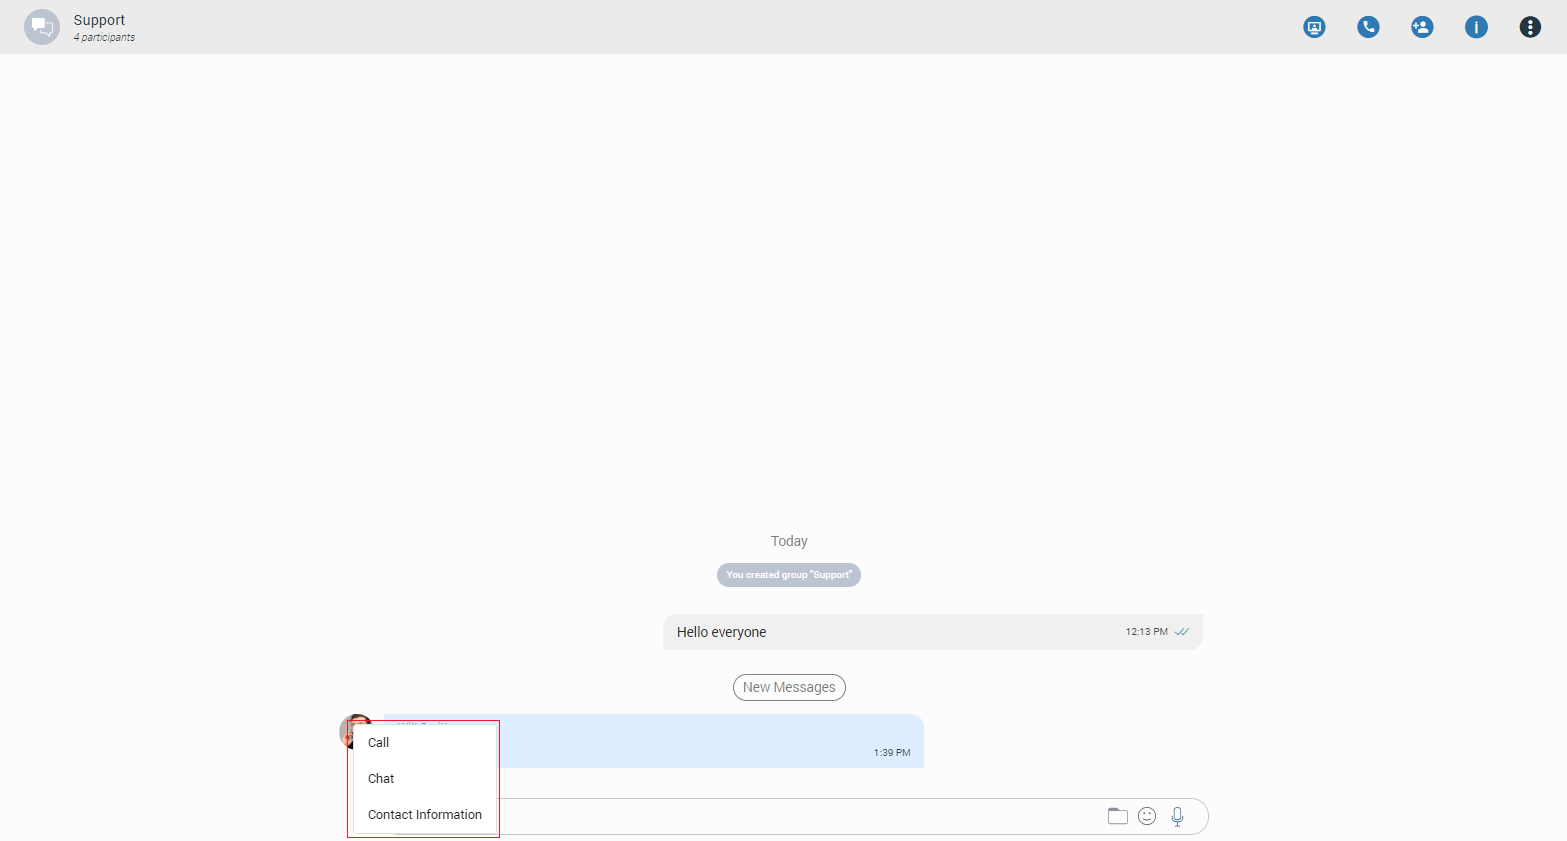
Message States
For outgoing messages, there is an indicator explaining the current state of the message:
 The message is on its way to the server.
 The message is sent and has reached the server.
 The message is delivered to the other user(s).
 The message has been read by the other user(s).
 The message could not reach the server.
Text Selection and Context Menu
The user can select text by pressing and dragging the mouse across the messages area. Clicking anywhere within the messages area deselects all previously selected messages.
While there is selected text in the messages area, right-clicking brings a context menu with the Copy option to copy all selected messages in the clipboard. Also, the user can press CTRL+C on Windows or Command ( )+ C on macOS to copy all selected messages in the clipboard.
If the user hovers over a message bubble (gray or blue rectangle), the three dots will appear.
Click on them brings a context menu with these options:
- Reply: Allows the user to reply to a specific message. The user has a few ways to reply to a message. The first way is to click on the reply button that appears within the message while hovering over it. The second way is by clicking on the three dots menu, which appears on the right side of the message while hovering over it, and from the drop-down menu, select the Reply option. As a result, the message that the user wants to reply to will appear above the input field. Clicking on the replied message inside the chat will take the user to the original message.
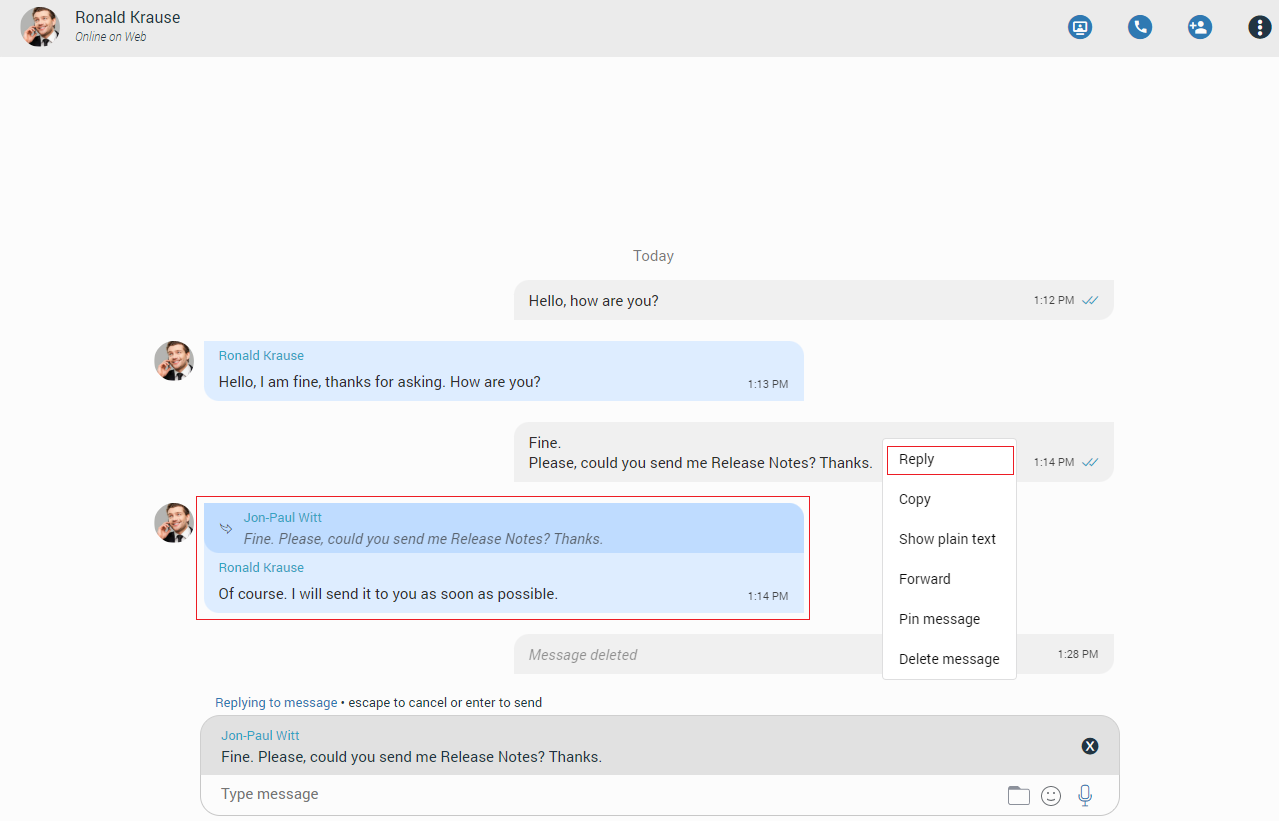
- Copy [6.7]: Allows the user to copy message content to the clipboard.

- Show plain text [6.7]: Allows the user to disable all message formatting (links, emojis, etc.) to see the original message source. If the user right-clicks on the message again after pressing the Show plain text option, a Show rich text option will be displayed within the drop-down menu. This way, the user can revert to the previous message state and see the formatted message with links and emojis.
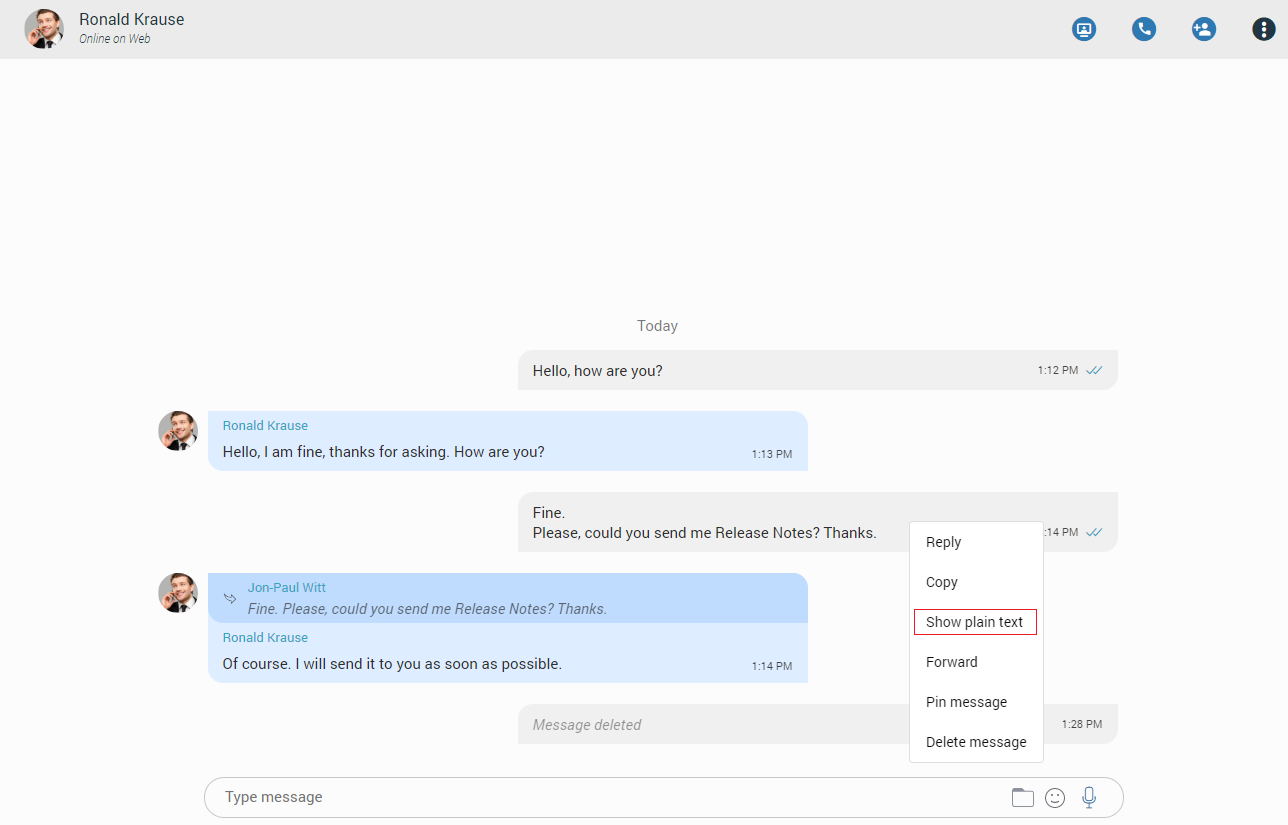
- Forward: Allows the user to forward messages and files from one conversation to another. The user can forward the messages or files up to 10 conversations at once.
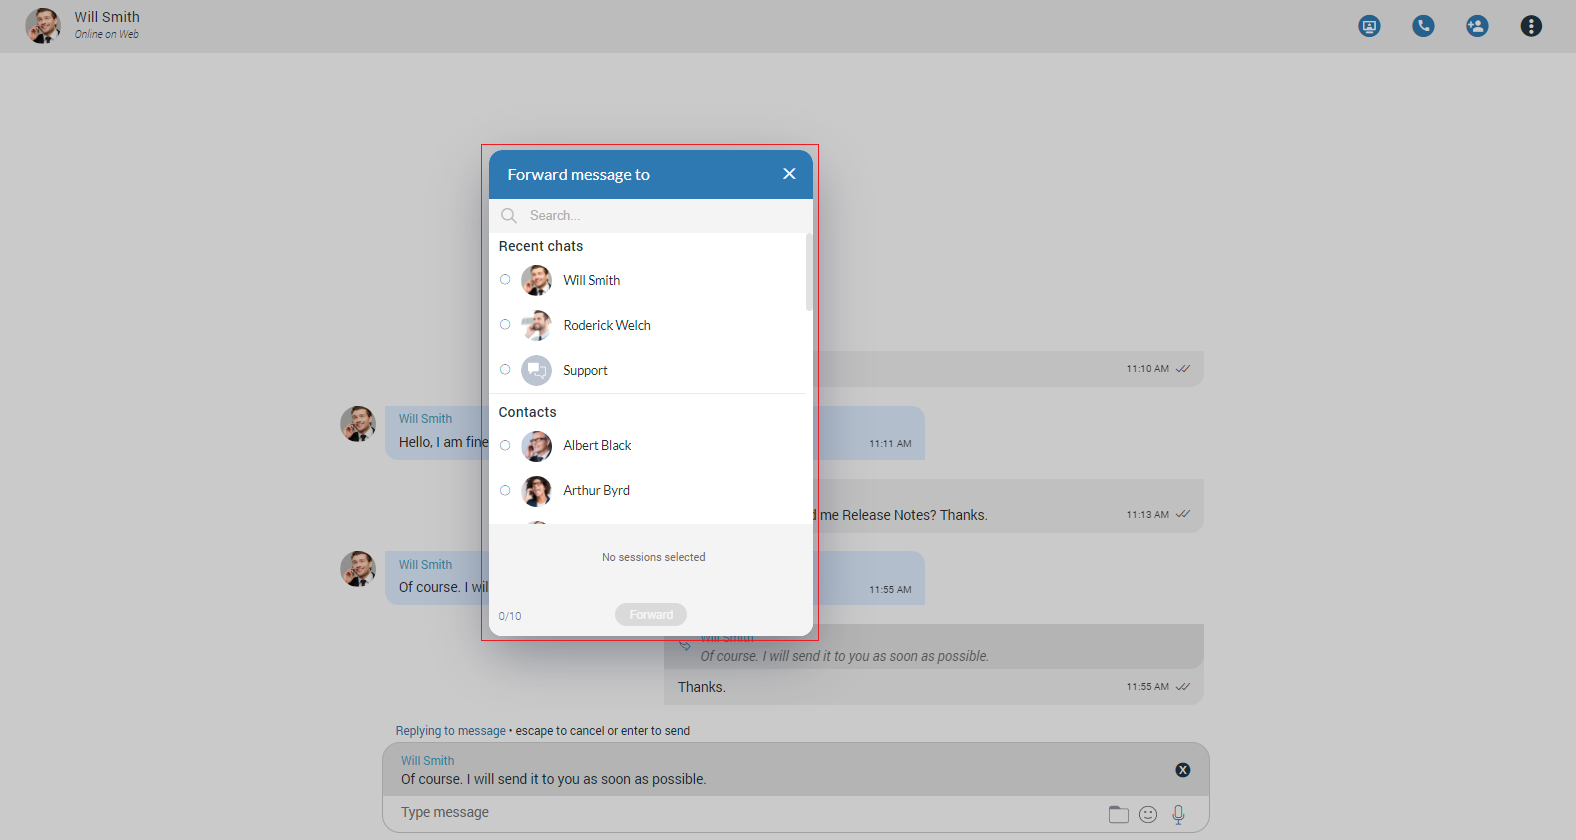
- Pin/Unpin Message: Allows the user to Pin/Unpin an important message or file message at the top of the conversation. Anyone can Pin/Unpin the message within the conversation. Clicking on the pinned message leads to that message within the conversation. It is possible to have only one pinned message at a time.
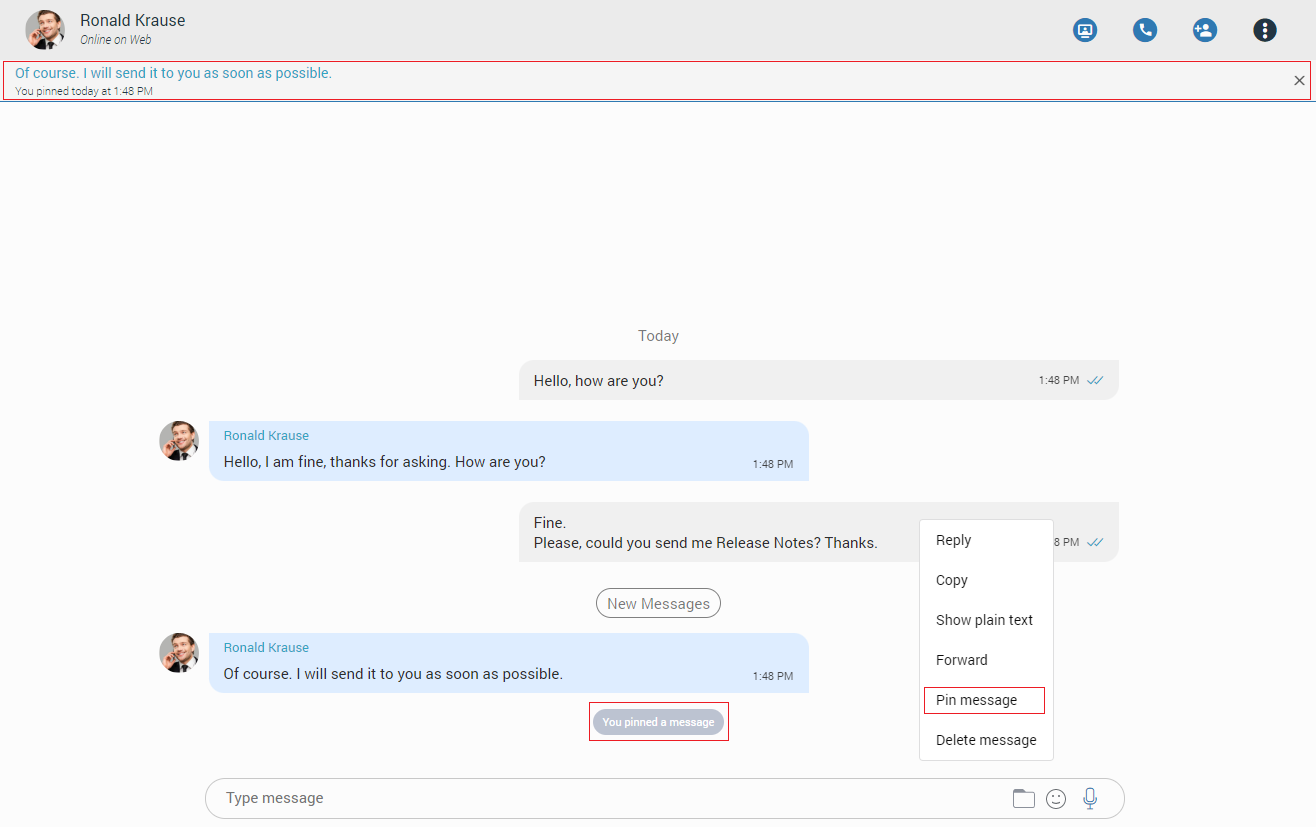
- Info: Allows the user to see the information about the delivery and seen status of a single message within a group chat conversation.

- Delete Message: Allows users to delete text and file messages.
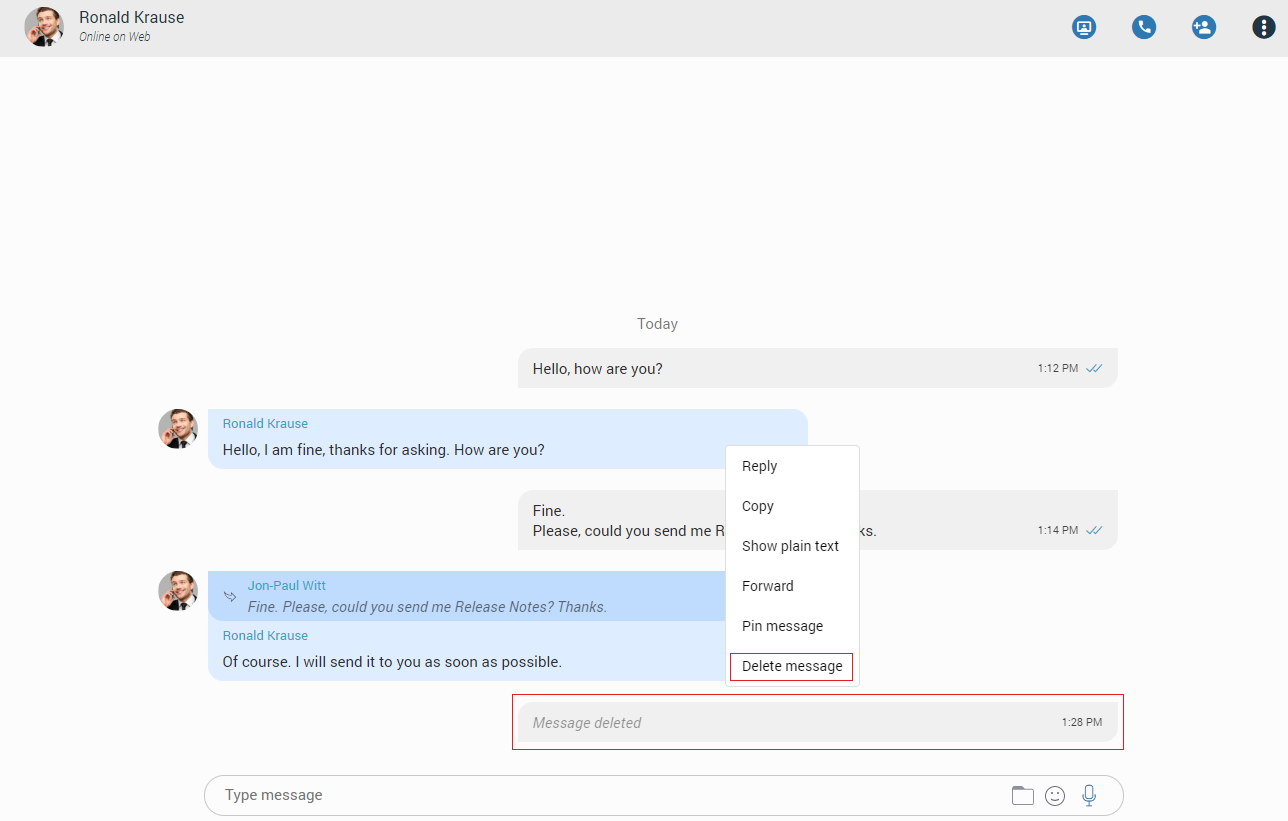
Following the deletion action, the confirmation dialog will show up with two options for outgoing messages:
- Delete for myself with the following sub-content: This message will be deleted only for you. Other chat members will still be able to see it. Are you sure you want to proceed?
- Delete for everyone with the following sub-content: This message will be deleted for all participants. Are you sure you want to proceed?
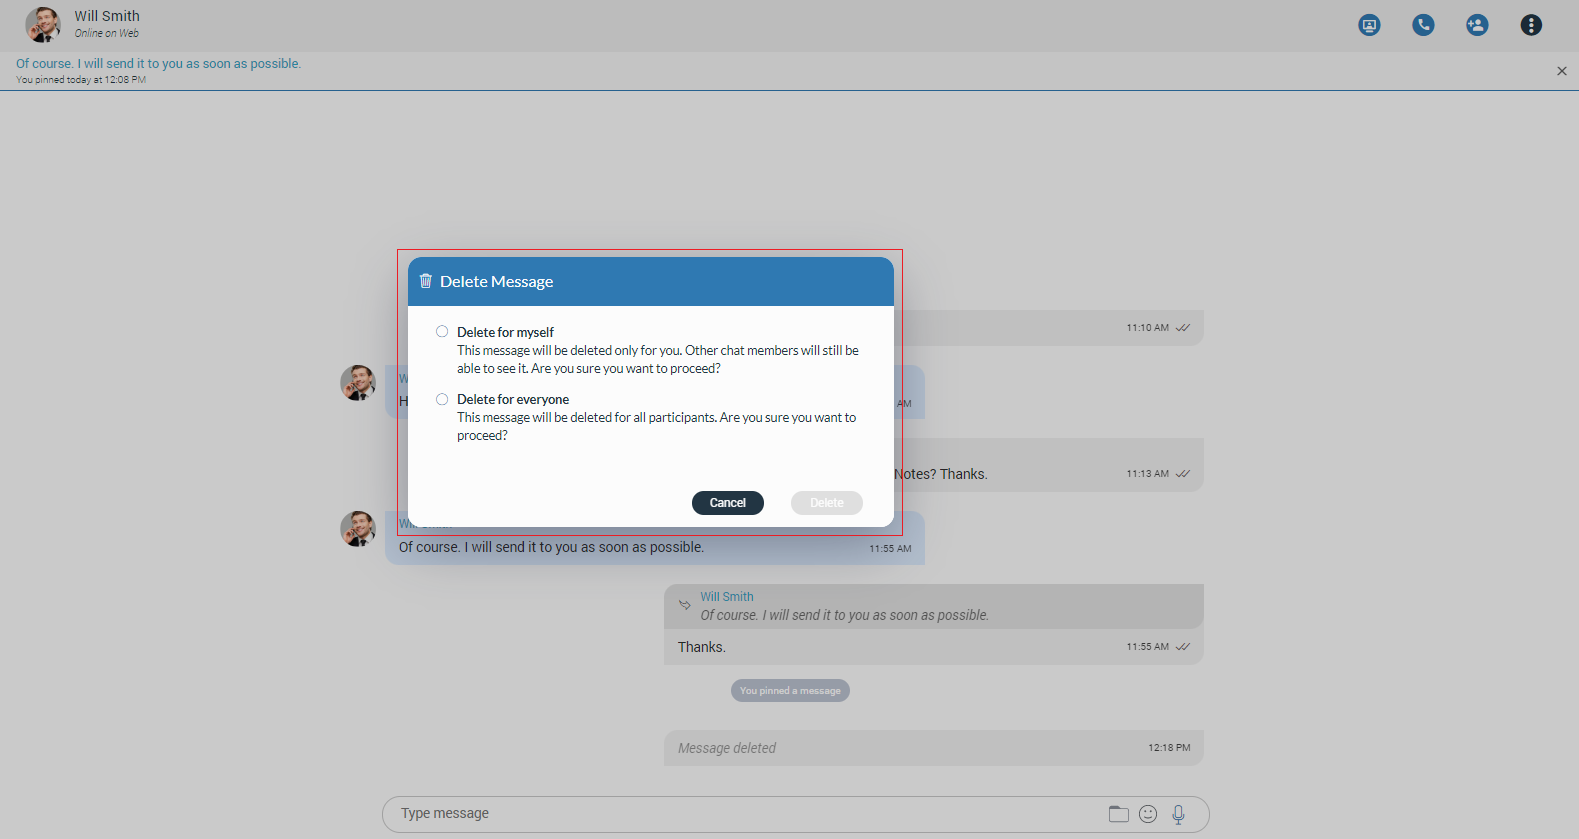
And for incoming messages, there is only one option:
- Delete for myself with the following sub-content: This message will be deleted only for you. Other chat members will still be able to see it. Are you sure you want to proceed?
In addition to the options mentioned above, the confirmation dialog contains the Delete and Cancel buttons.
After deleting the message, the Message deleted indicator shows up.
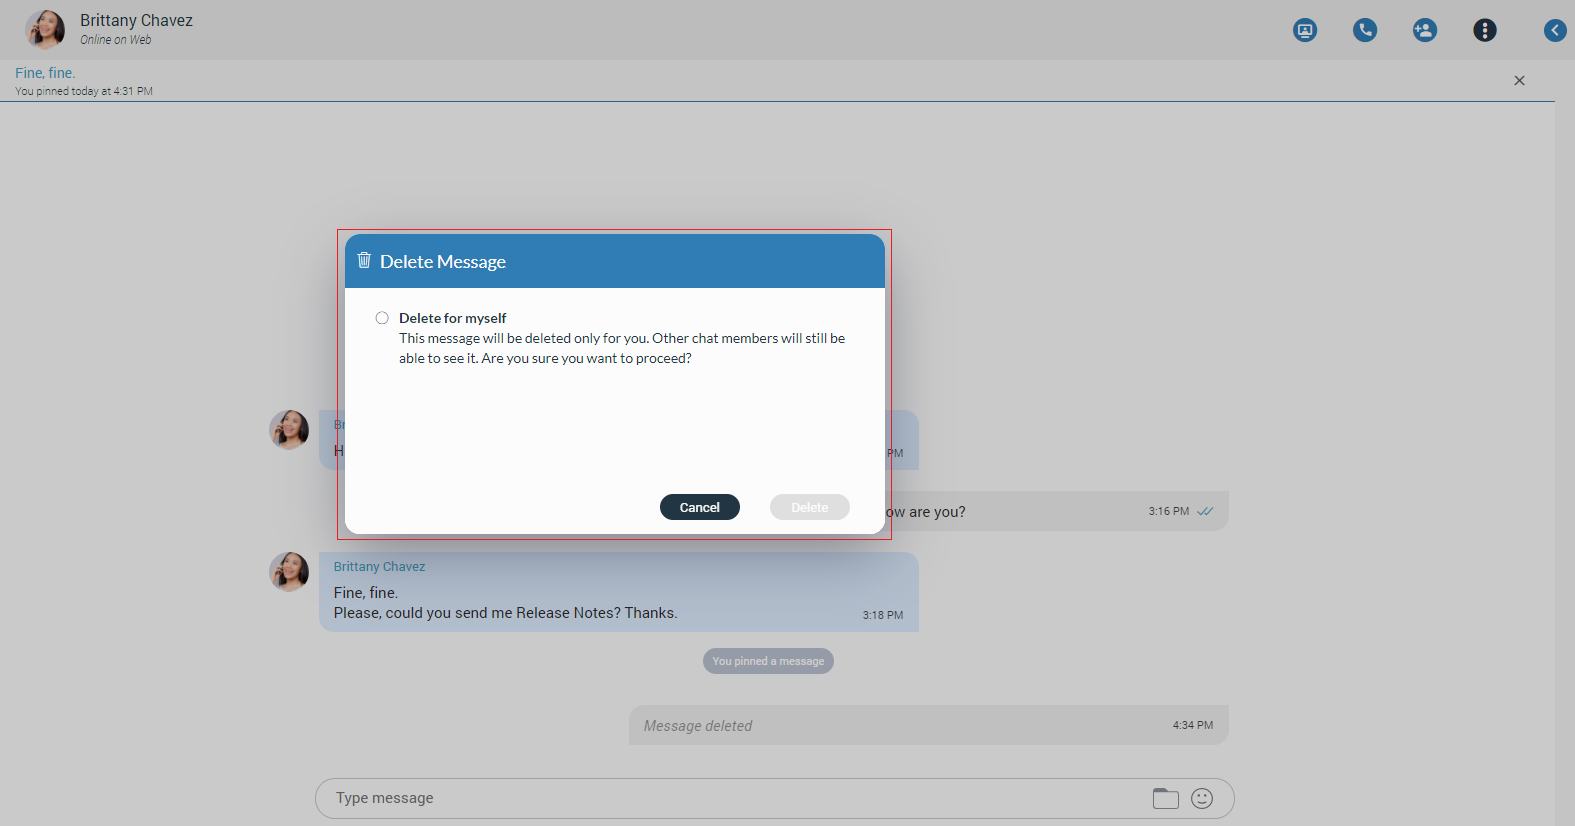
File Message
Besides regular text messages, the user can use the chat in gloCOM Web to share files.
For media and other file types, there is a thumbnail. Under the thumbnail, there is information about the file name and the file size. At the bottom of the file message is an icon used to download, shows upload/download progress, or retry file upload/download depending on the file status. If the browser supports the file type, clicking on the thumbnail opens the file in a new tab. Otherwise, it downloads it to the computer so the user can open it with some other program.
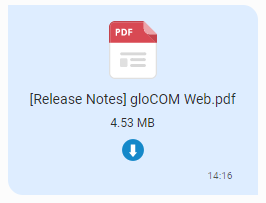
Clipboard
gloCOM Web supports clipboard functionality for images and files. It means that the clipboard now can be used for copying/pasting images from the external app (such as image viewer, browsers, etc.) or copying/pasting images and files from the File Explorer (Finder on macOS) directly into the chat session. With this at their disposal, users are no longer limited to just using an image/file picker and drag & drop feature for sending images and files.
While using clipboard functionality for sending images and files, instead of sending them immediately after pasting into the chat, the application creates an attachment list that includes thumbnails within the selected chat session. If possible, clicking on the thumbnail opens the file in a separate tab within the browser. Otherwise, the application downloads it to the computer. This way, users have the opportunity to double-check selected files and images before sending.
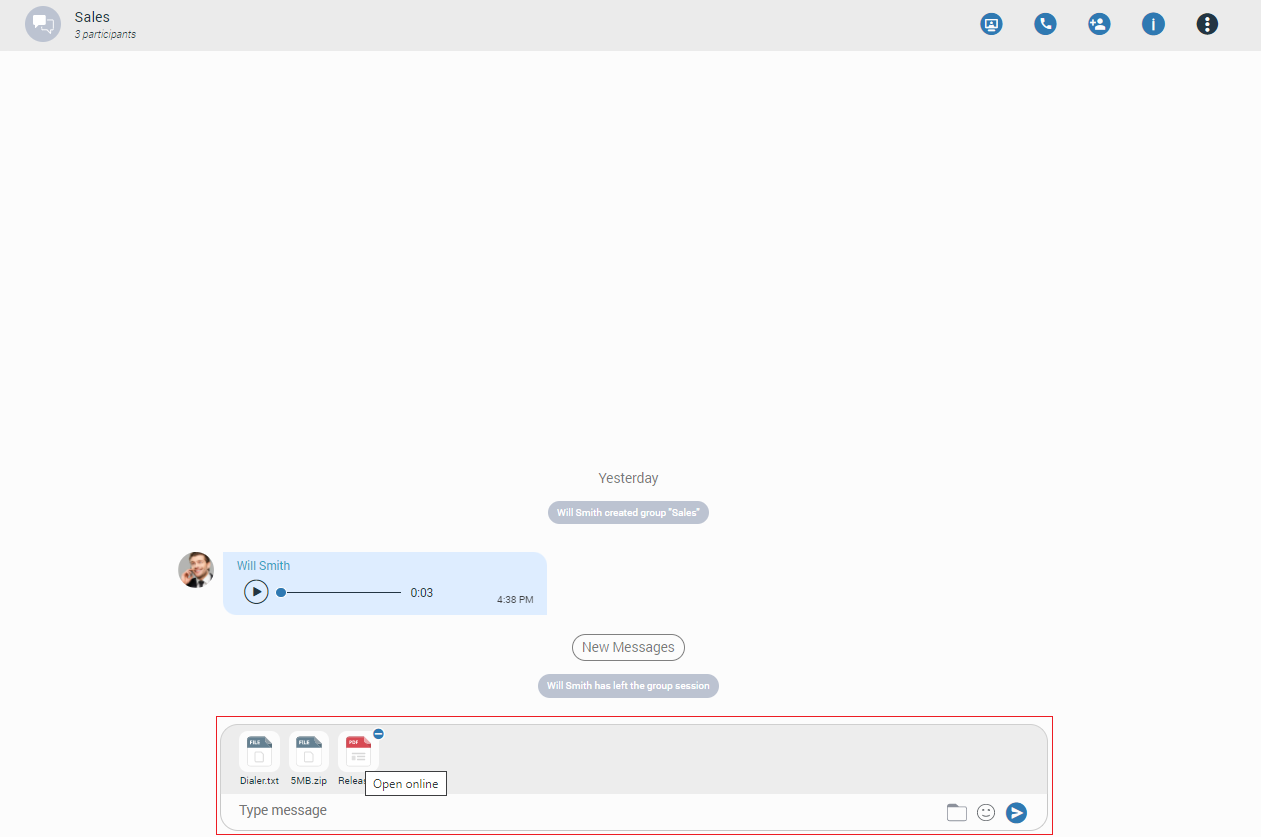
Adding files to the attachment list while using the clipboard can be done in two ways:
- Using CTRL(Cmd on macOS) + C/V for copying/pasting files or
- Using the mouse right-clicking to copy/paste files.
Furthermore, hovering over the file inside the attachment list displays a blue circle with the white dash at the thumbnail’s upper right corner. Click on it to discard the file from the list.
While the attachment list is active and the user selects files using a file picker or drags them into the chat, they will be attached to the attachment list. Otherwise, the application will send them immediately.
In addition, while the attachment list is present within the selected chat conversation, the user can write a text message simultaneously. In that case, the application will send the text message first and then the attached files one by one.
The maximum number of files attached to the attachment list at once is limited to five (5). Once the limit is reached, a pop-up message will appear displaying the following: You cannot upload more than 5 files simultaneously.
For larger images, the copy operation will take a while. During this time, the application will change the cursor type to loading, indicating that the file is being copied.
Input Field
Type message field on the bottom of the chat is used to send messages to the currently selected conversation. After typing a message, press the Enter (Return) key on your keyboard to send a message. To type in a new line, press Shift + Enter.
The length of the message that can be sent is limited to 10 000 characters.

 A folder icon allows the user to send files. Clicking on it opens up a dialog where the user can pick up to 5 files to be sent to the currently selected conversation. Also, the user can send files by dragging them from Windows Explorer (Finder on macOS) to the messages area within the chat.
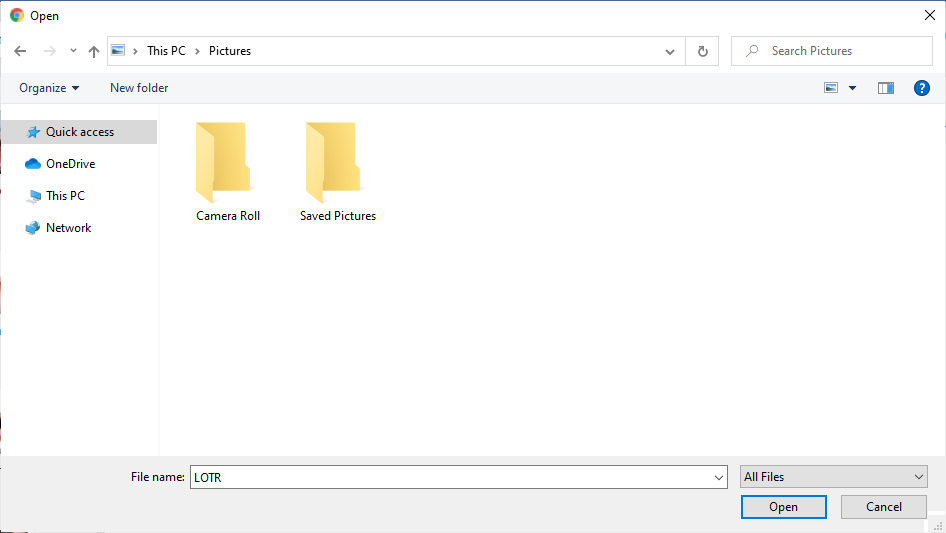
 An emoji icon allows the user to send emojis. Clicking on it shows an emojis window where the user can browse through emojis separated into categories.
![]() A microphone icon allows the user to record voice messages for up to 2 minutes.
A microphone icon allows the user to record voice messages for up to 2 minutes.
While recording, the user has the ability to use the following options:
- Discard recording: It will discard a voice message.
- Stop recording: It will stop recording. This way, the user can listen to the voice message before sending or discarding it.
- Send: It will stop the voice message and send it immediately without the chance to listen to it.
While recording is active, sending text and file messages will be disabled until the user sends or discards the voice message.
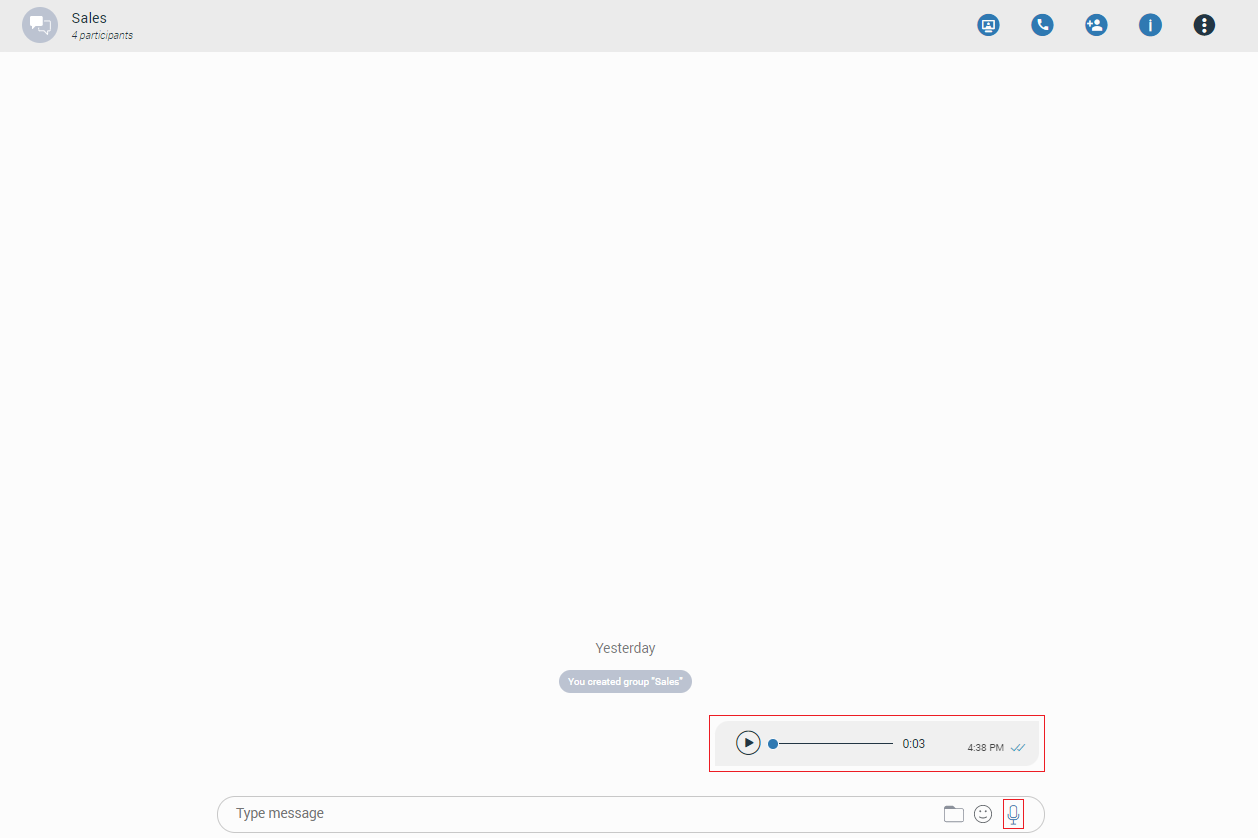
Playing voice messages is possible within a chat by pressing the play button. It is possible to go back and forth through a selected voice message by clicking on the waveform.

Some chat features that are described above can be enabled/disabled depending on the server settings.
gloCOM Desktop
Installation
We suggest to always use the standard setup.exe instead of the MSI package if possible because the standard setup.exe takes care of prerequisites and installs them automatically for the user.
Please download gloCOM 6.7 from our official website www.siarum.com. After the download is finished, click on the icon to start the installation.
The welcome window starts the installation process. Click on the Next button to proceed with the installation or click on the Cancel button to exit the installation wizard.
Read the license agreement and select I agree if you accept the License Agreement. Click on the Next button to proceed with the installation or click on the Cancel button to exit the installation wizard.
The Installation Folder window sets the default location where the gloCOM installation will reside. By default C:\Program Files\Bicom Systems\gloCOM is offered. To select a different location, click on the Change button. When done, click on the Next button to proceed with the installation or click on the Cancel button to exit the installation wizard.
The Shortcut Folder window sets how the gloCOM shortcut will be displayed on the Windows Start menu. Select the preferred shortcut under the Shortcut Folder select box and click on the Next button to proceed with the installation, or click on the Cancel button to exit the installation wizard.
The Ready-to-Install window summarizes the Installation wizard steps and displays all of the selected options. If you agree with these, click on the Next button to proceed with the installation or click on the Cancel button to exit the installation wizard.
The Installing gloCOM window shows the installation in progress.
After this step, you’ll see the Installation Successful window. Click on the Finish button to close the window and finish the installation.
MSI package Installation
In order to install gloCOM from an MSI package, the following are the prerequisites and must be installed before MSI package :
- Microsoft Visual C++ 2015 Redistributable (X86)
- Microsoft .NET Framework 4 (or above) (optional, if the user wants to use functionalities like Outlook plugin, Skype For Business integration etc…)

If there is no Visual C++ installed users might get installation errors.
IMPORTANT: Windows Terminal Server installation
Configuring gloCOM

After the installation process, you need to configure gloCOM. Click on the gloCOM icon and the Profile Wizard will appear. To continue with the configuration click the Next button.
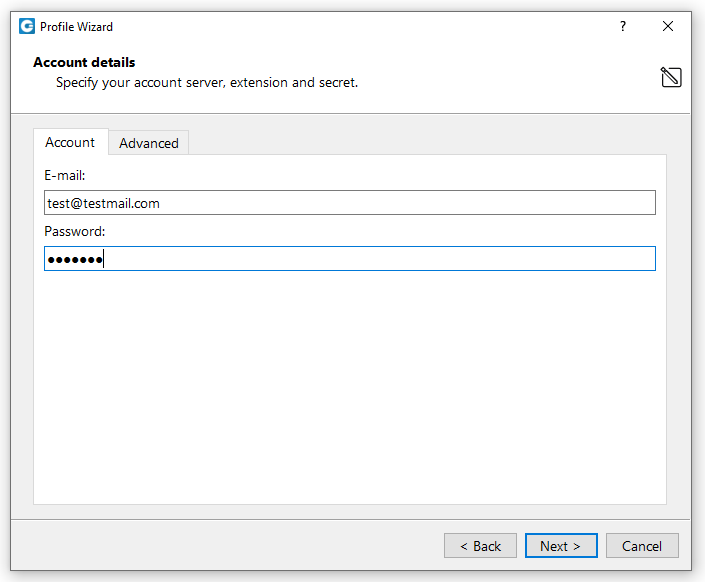
1. Account details
- Make sure you have received your account details from your system administrator or account manager. The received details must include:
Account
- E-mail, for example: example@siarum.com
- User password, for example: 93sU2e_2%
Advanced
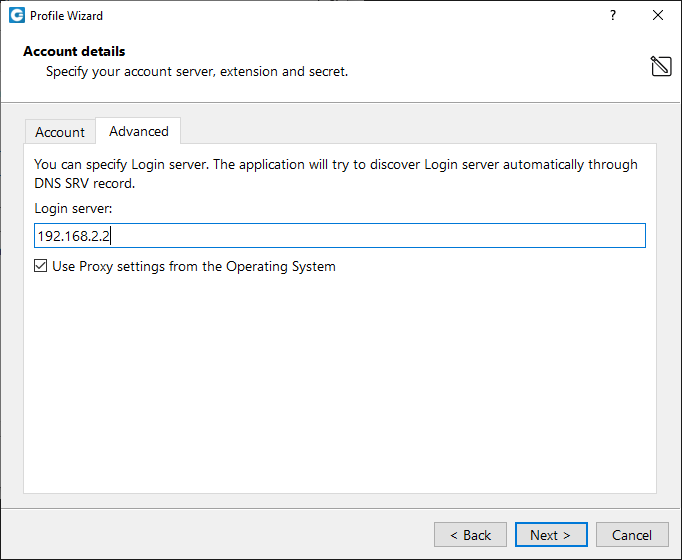
- Server address: The user can enter the DNS domain or the server address (for example: voip.test.com or 134.23.211.23). In the case of the DNS domain, the application will perform a DNS SRV lookup, and it will try to connect to each server that the application obtains based on their priorities. In the case of the server address, the application will try to connect directly to the given address.
Your administrator can set up a DNS domain for SRV lookup on the server-side. SIP registration will be done for all obtained records, and the first one that succeeds will be in use. This way, failover can be performed for scenarios with more than one SBC. In that case, if the primary SBC goes down, the second one will be in use.
From gloCOM 6.0, instead of an extension and secret, users will provide their e-mail assocciated with extension and User password.
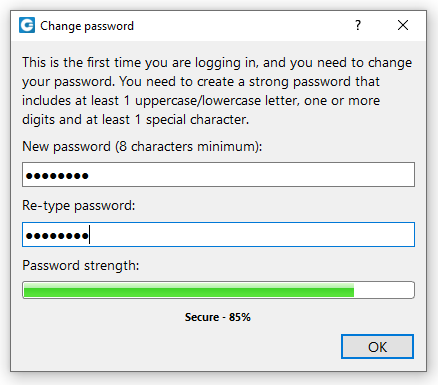
After you click Next, gloCOM will try to connect to the specified server with the user’s account details. If the account details are wrong, a red warning will appear. Otherwise, a Change Password pop-up window will appear telling you to change your password since this is the first time you are logging in. Your password has to be at least 8 characters and 85% secure. Users are required to change this password on login and once changed it is hashed and unknown to all administrators of the system.
2. gloCOM edition
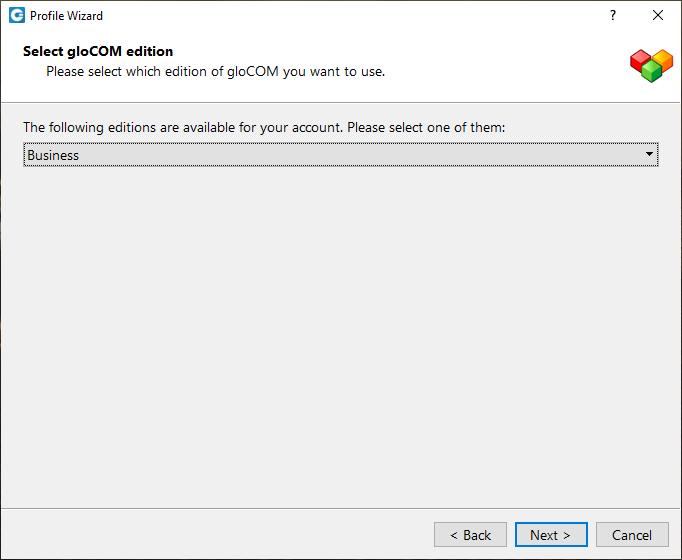
- Select gloCOM edition. You may choose between Office, Business, Agent (Call Center), or Supervisor (Call Center).
3. Setup office and mobile phone
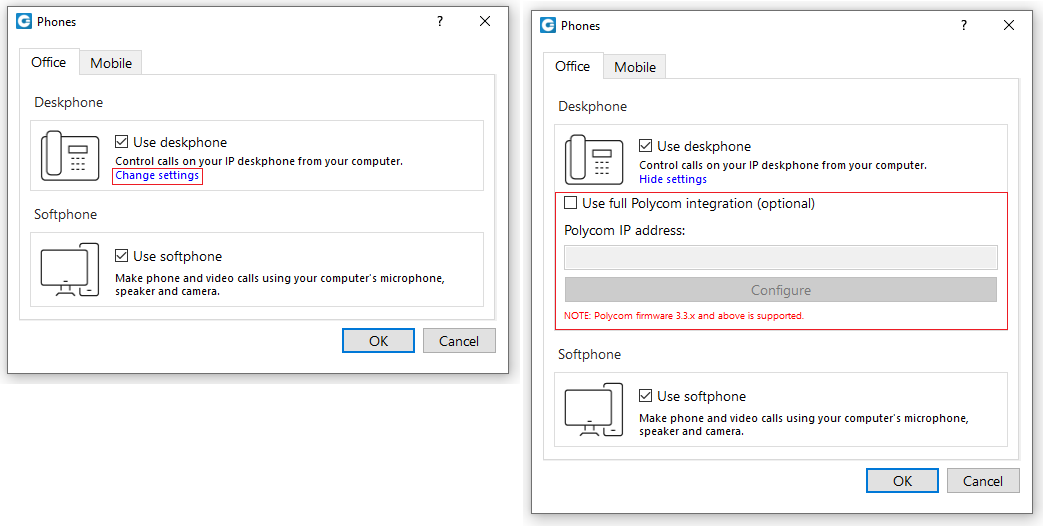
- Setup your Office phones. If you choose softphone, you will be able to place and receive calls using your computer. If you choose desk phone, you can control calls on your IP desk phone from your computer. Selecting the checkboxes for both desk phone and softphone will allow users to switch between devices when initiating a call and also to pick which device they would like to answer incoming calls on.
If you use Polycom phones, click on Change settings. Provide the phone’s IP address and click Configure. This will help gloCOM to identify and configure Polycom phones.
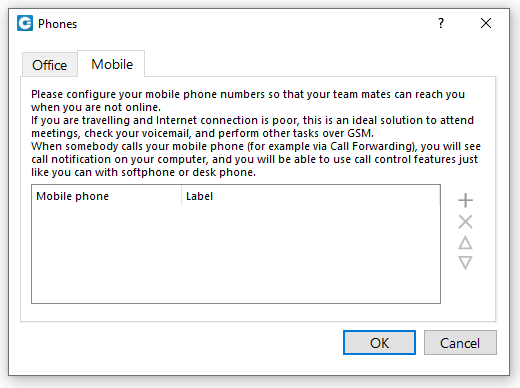
- In gloCOM, users can assign Mobile Numbers that they would like to receive calls on when not at their desk. Click the Mobile tab and click + icon to add Mobile phone number and it’s label.
The entered Mobile phone number can be with or without the plus(+) sign.
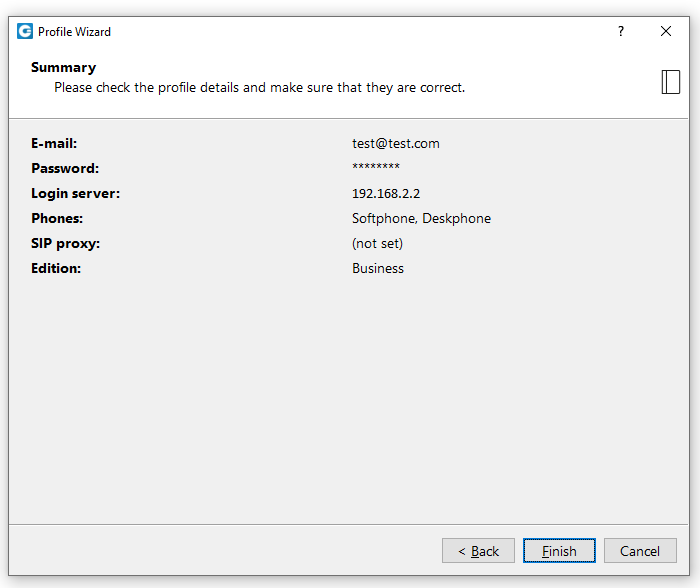
Click Next and a configuration summary window will appear. Please check the profile details and make sure they are correct.
Click Finish and you will be automatically logged in with your account. Now you are ready to use gloCOM with all its features.
Working with gloCOM
Log In
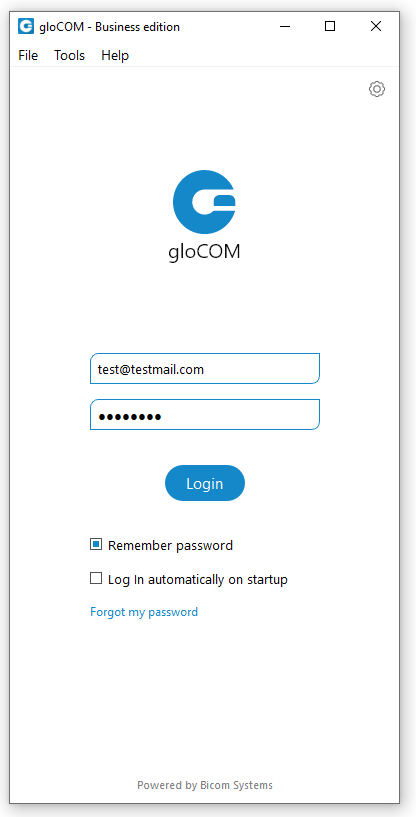
- E-mail: Provide the e-mail address that is assigned to your extension.
- Password: Enter the password that you created during the gloCOM configuration.
- Remember password Check if you want gloCOM to save your password.
- Log In automatically on startup: When this option is turned on, gloCOM will log in automatically. Every time gloCOM is started, it will automatically log in.
- Forgot my password: If a user has forgotten their password, they can recover it by clicking the Forgot my Password link. The user will receive a password recovery link via email.
Please bear in mind that one can use only one email address associated with a single extension. Using the same email address for multiple extensions is not supported.
- Login Failure message: In case of invalid credentials, a message will appear displaying the following: Login Failed: Username or Password is Incorrect.
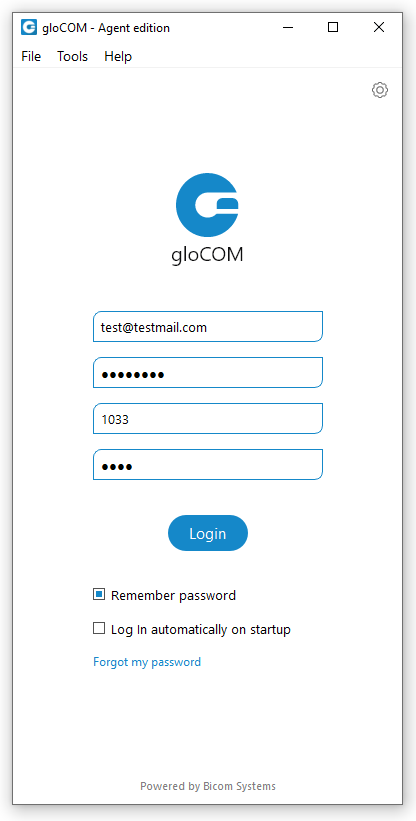
Login options for Agent/Supervisor edition
- Agent number: Enter the Agent number received from your PBXware administrator.
- Agent pin: Enter the Agent pin received from your PBXware administrator.
 Enable/disable Agent login details (only for Supervisor edition).
PBXware administrator defines the Agent number and the Agent pin through the PBXware GUI.
In the Agent and the Supervisor edition (if Agent options are enabled), a valid Agent number and PIN must be entered in order to log in to the application.
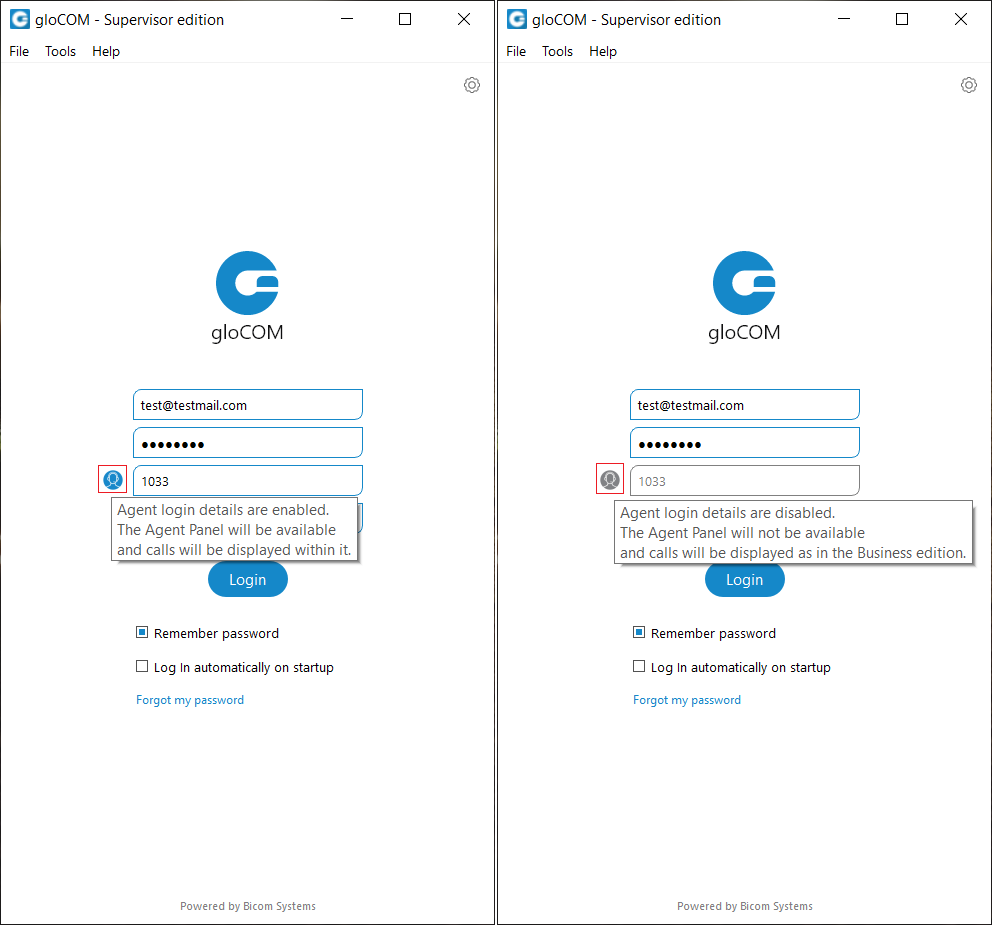
Toolbar
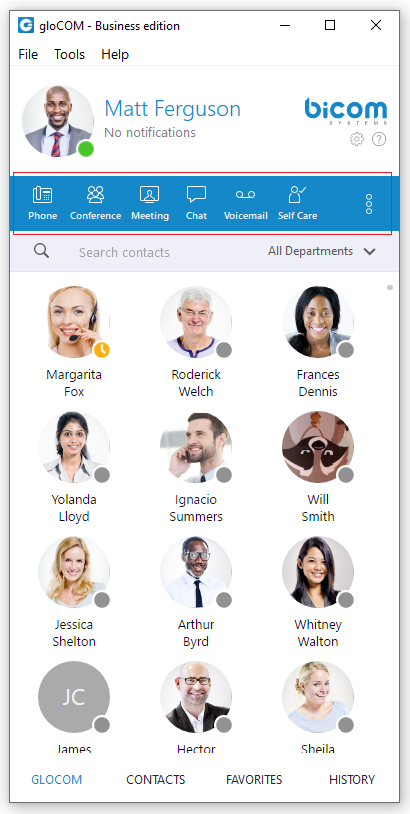
- User image: Represents the user’s profile image that can be changed at any time. Clicking on it brings a Personal Information window. Click the avatar image and select the new image from a computer as a new avatar image. gloCOM now supports higher resolution avatars, allowing users to set up resolution between 256×256 and 512×512 pixels.
- Username: Represents the user name displayed within the application.
- Notifications: Displays any notifications (unread messages, missed calls, pending meeting invites, new voicemails), otherwise displays No notifications.
- Phone: Opens a softphone window next to the gloCOM main window.
- Voice Conference: Opens a Voice conference window next to the gloCOM main window.
- Chat: Opens a Chat window with all user’s conversations.
- Voicemail: Opens a Voicemail window next to the gloCOM main window.
- SMS: Opens a SMS window with all user’s conversations.
- Fax: Offers the choice to send a fax or view received faxes. Based on the user’s choice, an additional window will open next to gloCOM.
- Personal Dialer: Opens a Dialer window next to the gloCOM main window.
- Surveillance Camera: Opens up a Surveillance Camera preview. This option will work only if the user has their surveillance camera set up on the IP address in Tools –> Preferences –> Video –> Surveillance Camera.
![]()
- Online Self Care: In order to login to Online Self Care, the user needs to point their browser to: http://$IPADDRESS/ (For Example: http://192.168.1.1/).
- Email: The email address assigned to the extension (ex. The provided email address is used as a username for logging into Online Self Care (e.g. email@example.com)) ([a-z] [0-9] [@_.-]).
- Password: Password assigned to the extension ([a-z] [0-9] [@_.-]).
- Parked calls: Once a call is parked, it can be picked up by anyone at any location by dialing the parked extension. In the PBXware there is a default parking lot defined in Access Codes. When a user presses the Park button inside the call window they are presented with a drop-down so they can choose a lot to park.
- Show Login QR Code: Show Login QR Code as a part of the gloCOM Desktop allows users easier login to their mobile app by scanning QR Code generated by the gloCOM Desktop app.
- Preferences: Opens a Preferences window. Refer to the Preferences chapter for detailed instructions.
- Help: Redirects to our official website: www.siarum.com. Additional documentation and guides are available on our official website www.siarum.com If you still have any questions, please feel free to contact our support department.
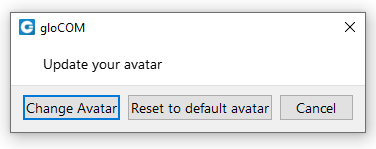
- Reset Profile picture to Default: Allows users to reset their profile picture to the default value (no profile picture). Clicking on the avatar image within the Personal Information dialog opens a pop-up window with the following options: Change Avatar, Reset to default avatar, and Cancel. Clicking the Reset to default avatar option resets the profile image to its default value.
If the user has not set their avatar image, clicking the default avatar image within the Personal Information dialog opens Windows Explorer (Finder on macOS) window, which allows them to select their avatar image.
If the SMS feature is not included in the license, you will not see the SMS module within the gloCOM toolbar.
Personal Dialer

Personal Dialer enables users to load a CSV file inside gloCOM and to dial numbers from that file one after another. This is useful for people who dial the same list of numbers every day, so they don’t have to copy-paste each number. When you open the Personal Dialer module, you are presented with this window:
After loading a file first line from the file is shown in the info section, so a user can have a preview of the file structure. Then they have to select the phone number column, so gloCOM knows what to dial. Optionally they can choose an identifier column which is useful for labeling numbers with a name.
For example in the file:
- 101, Joana Smith, Street A Miami
- 102, James Tartos, Street B London
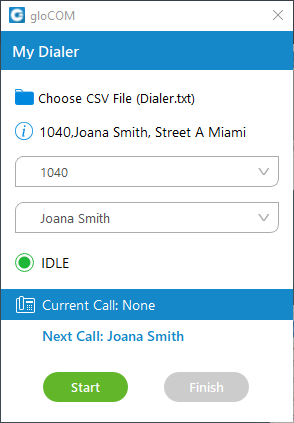
The first column would be a number, and the second would be an identifier (person name, company name, etc.). This identifier is used in the Current Call and Next Call labels so a user can have an idea of who is going to be dialed next. After he presses the Start button gloCOM proceeds to call the first number from the list if there are no other calls at the moment. Numbers are being dialed one after another, but a user can pause the dialer at any time if they want to. Dialing is finished after the end of the list is reached, or if a user finishes dialing.
Destinations and gloCOM Modules
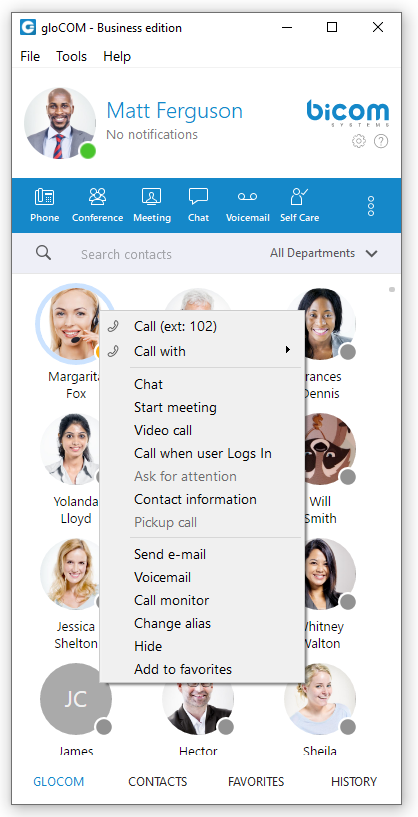
gloCOM can place a call to any system destination, for example: extensions, queues, conferences, voicemail, system calls, or parking. Through PBXware GUI an administrator can hide non-gloCOM extensions so they are not displayed in the user list. Calls can be placed with a drag-and-drop motion from one extension to another, or directly from the phone display to the extension, for example. Right-clicking on a contact name offers more possible actions regarding the selected extension.
This way the user can:
- Make a call from gloCOM
- Chat with the selected contact
- Start a meeting with the selected contact
- Make a Video Call from gloCOM
- Call the selected contact On Available
- Ask for attention
- See more information about the contact
- Pickup call
- Send an email to a contact
- Leave a Voicemail
- Monitor calls
- Change the contact’s alias
- Hide contact
- Add the selected contact to Favorites
Placing Phone Calls
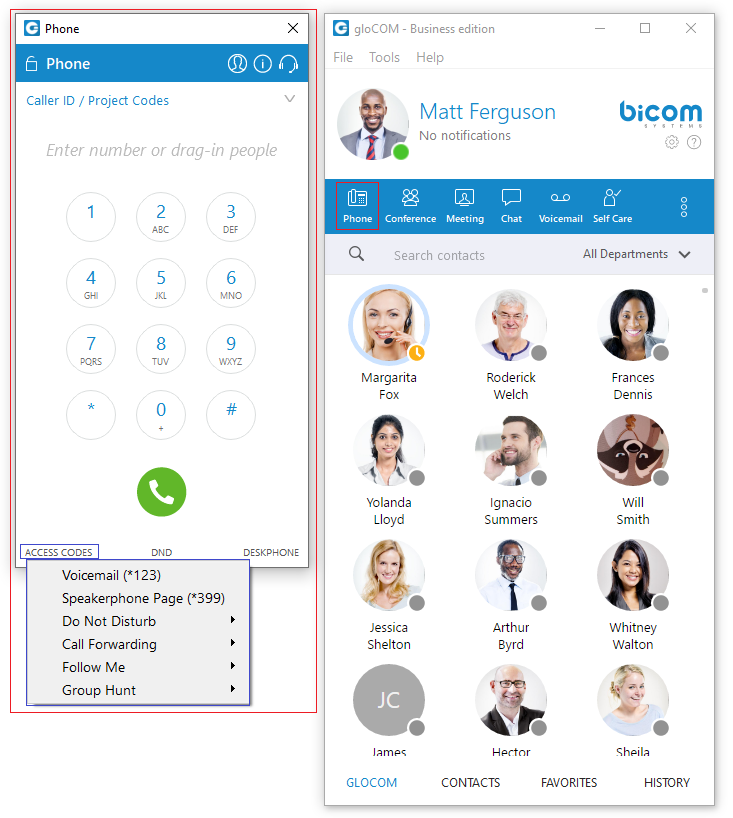
1. Open Phone module
- Click on the Phone module icon to show the Phone module.
2. Dial entering the phone number
- Use the Phone module dial keypad or keys on your keyboard to enter the phone number you want to dial.
- Click on the Dial button to place a call.
1. PCI compliance
The user is on a phone call with an agent, and the caller needs to perform a payment, he needs to say his credit card obviously. Agents turn on an option in gloCOM that will detect DTMF from the caller, and enter them into a text field by simulating keypress with DTMF digit. This way caller does not send credit card by voice, but rather through DTMF, straight into the field on a website for payment. Inside the call window, there is an icon for activating this feature. After activating, DTMF that other side inputs are written wherever your cursor is positioned. You can stop receiving remote DTMF by either pressing the icon again, click on the Stop Remote DTMF button or by ending the call.
2. Show entered DTMF
This feature enables you to see entered DTMF in the call window, so you can make sure you have entered the correct digits.
3. Dial with Drag and Drop
- With your mouse click and hold any contact from the contact list, then drag the selected contact from the gloCOM list to the phone module area, and Release (Drop) the contact.
- Click the Dial button to place a call.
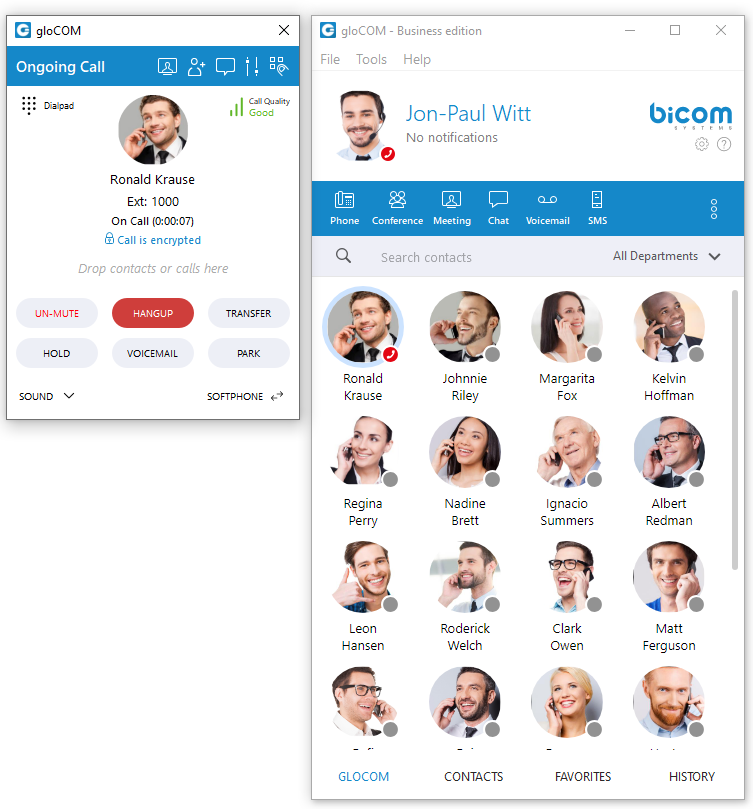
Live call
4. Transfer options:
- Blind/transfer to a phone number: Type in some number (i.e. mobile phone) and transfer the call to it.
- Transfer to another ongoing call: If a user has 2 or more active calls, he can transfer the calls from one to another.
- Transfer a call using drag and drop: During a live call, the user can transfer the call by dropping it onto the desired contact inside the contact list. While dragging, a transfer indicator will be displayed. Both transfer types, Blind and Supervised, can be used. The user can select which one they want to use while hovering over the contact. Transfer using the drag-and-drop option does not apply to conference calls.
One simple scenario is:
A gloCOM user is talking to John Doe. He receives a call from Allison Smith while speaking to John Doe. The gloCOM user is now able to add Allison Smith to the existing call with John Doe and all 3 participants will now hear each other.
When trying to transfer a call via gloCOM, when choosing a contact from your list you can now see the google and outlook contacts in a dropdown list. Also, users can press enter to confirm the transfer.
5. Call encryption
During an ongoing call, there is an indicator that shows call encryption if a call is encrypted. Call encryption settings are configured on the server by default, but the user can override them within the gloCOM app by going to Preferences → Phone → Advanced.
There is a checkbox that indicates the use of the default encryption set by the PBX. By unchecking it, the user can change options between TCP, UDP, and TLS. The user is required to log out and log in after changing these options.
The indicator should only be present when the TLS encryption is enabled and if the softphone is in use (in all other cases, the indicator will not be displayed). Clicking it will bring up a pop-up message explaining the encryption.
6. Echo Cancellation
Echo Cancellation as a part of the gloCOM Desktop app is a method used to improve voice quality by preventing an echo from being created or removing it after it is already present.
The time required for Echo Cancellation to start removing echo is up to 10 seconds. It is important to note that the Echo Cancellation only works for softphones.
7. Switch phone
During a live call, you can use the Switch Phone button to initiate ringing across all registered devices or a specific device (softphone, desk phone, and mobile app), so the user can continue the call on another device. A perfect example would be switching from your desk phone to your mobile when you need to leave your office but would like to continue your call. The same applies to conference calls.
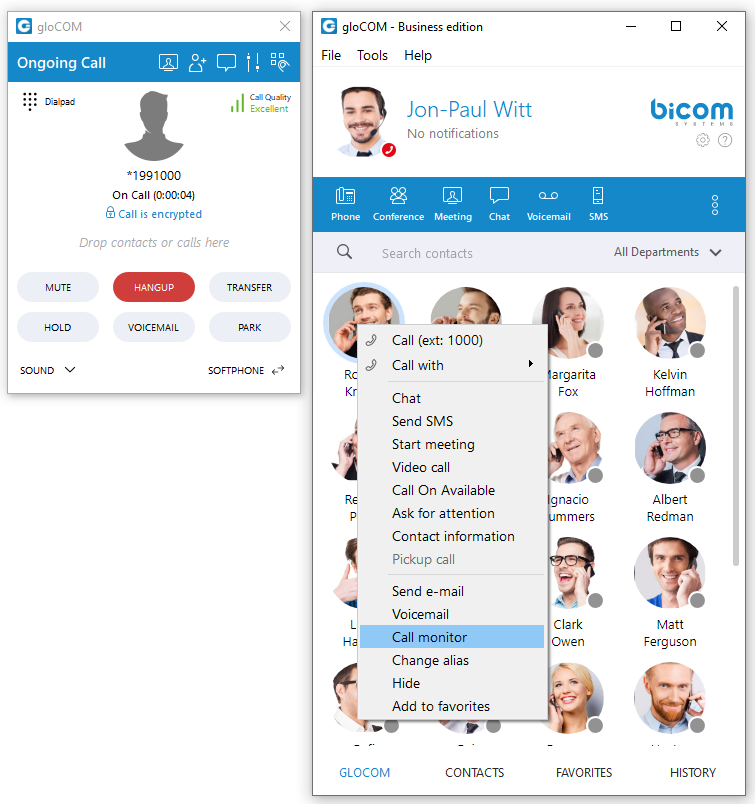
8. Call Monitor
If your administrator enables Call Monitor on your extension in PBXware Enhanced Services, you will be able to listen to any call-in in real-time. When a call is placed, right-click on the user that is on call and choose Call Monitor. You can escalate from silent monitoring to barging in to speaking with all parties.
gloCOM brings a unified call history between Desktop, Web and Mobile applications. Call history is stored for up to a month on the server and synced between all user devices. It means that the user will be up to date with their recent calls all the time. The application makes sure that the user’s call history is synced on every login and that they have recent calls available on their device.
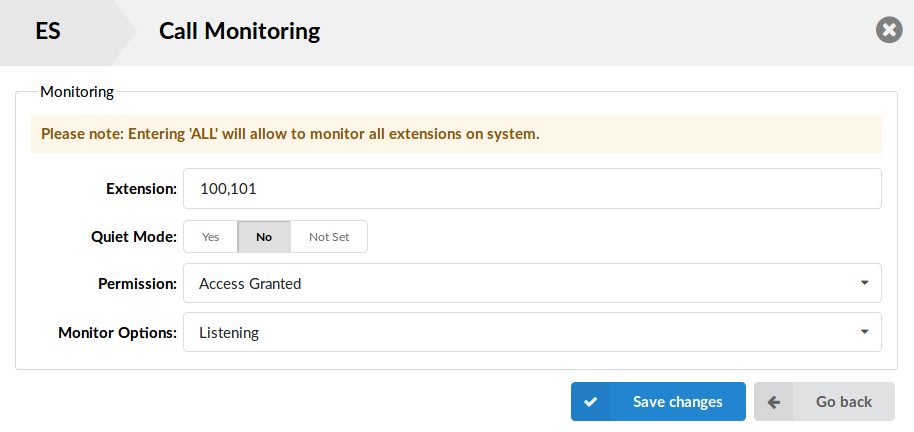
Phone
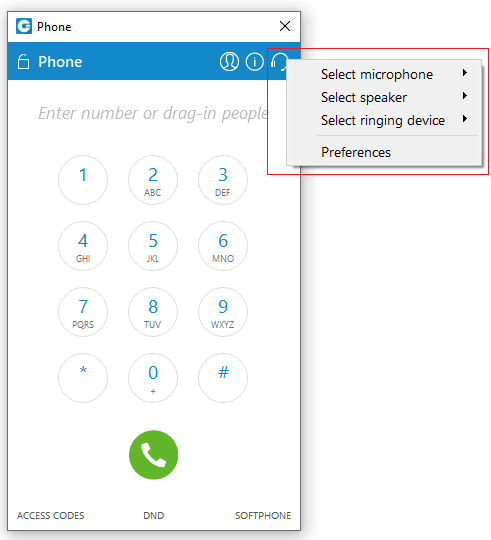
The phone module area where information about possible missed calls is shown.
- From the phone module you can set up an office and mobile phone by clicking the settings icon next to missed calls information.
- Select your audio device by clicking the Headset icon. The drop-down menu with the following options will appear:
- Select the microphone device: Allows you to select which device you want to use as an input device.
- Select the speaker device: Allows you to select which device you want to use as an output device.
- Select the ringing device: Allows you to select which device you want to use as a ringtone device.
- Preferences: It points to the Preferences → Phone → Audio devices section where you can also select which input, output, and ringtone device you want to use or to test your audio devices.
Also, you can change your audio device during a live call by clicking the Sound button.
Default ringtones are different for inbound and outbound calls when using a softphone.
- A green (or eventually red) circle shows the Phone module connection status. If green is shown, the Phone module is connected and the user can place calls. If a red circle is shown, the Phone module is not connected and the user is unable to place a call, in which case the user should contact their system administrator.
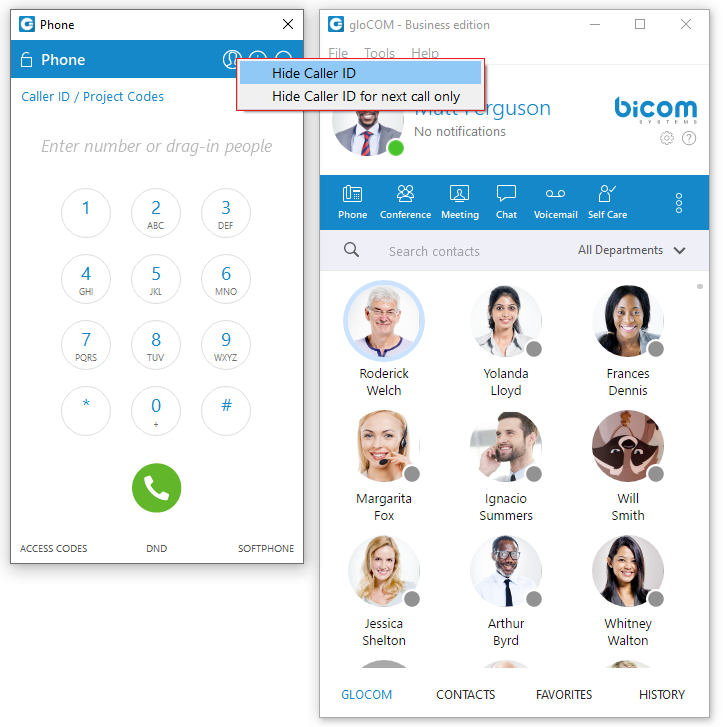
- In the Phone module, you can see which phone mode is set by default. Click on the dropdown menu, and choose between Softphone, Deskphone, and Mobile App. Next to this dropdown, there is a DND icon with the option to set your status to Do Not Disturb.
- Phone module area where contact is shown after the Drag-and-Drop action.
- Phone module area where a dialed contact’s phone number is shown.
- Speaker volume tuner. Adjust the speaker volume by moving the slider up or down. Do not increase volume more than needed because it can induce hearing loss.
- Microphone volume tuner. Adjust the microphone volume by moving the slider up or down.
- Phone module dial keypad. Used for entering phone numbers.
Users are able to block caller ID directly from gloCOM. Two options are available: Hide Caller ID and Hide Caller ID for the next call only.
When a user presses and holds down any key inside the Phone Dialer except 0, it will display the pressed number or sign. However, when the user presses and holds down the 0 key, it will display the + (plus) sign.
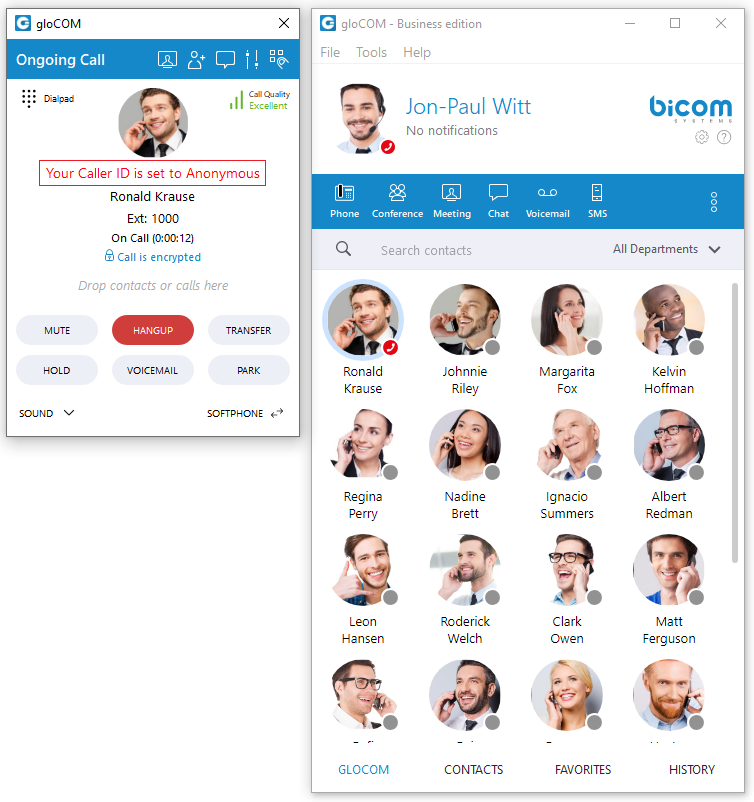
Call Quality Metrics [6.7]
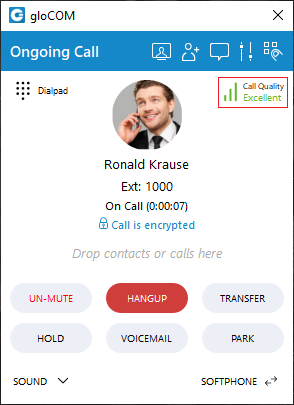
Call Quality Metrics provides the user with details about the call and network quality during a call.
These details include information like:
- MOS Score
- Round Trip Time
- Packet Loss
- Jitter
For example, if the quality of a call is Excellent, there is no problem with the connection, there is little latency, and there is no packet loss. Otherwise, there are some problems with connection, latency, and packet loss.
In a word, it helps with troubleshooting potential network issues during a call.
During a call, a Call Quality indicator will appear in the upper right corner of the call window, giving rough information about the call and network quality. The Call Quality window will appear by clicking on it, providing more detailed information about MOS Score, Round Trip Time, Packet Loss, and Jitter.
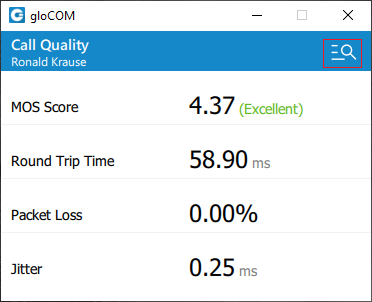
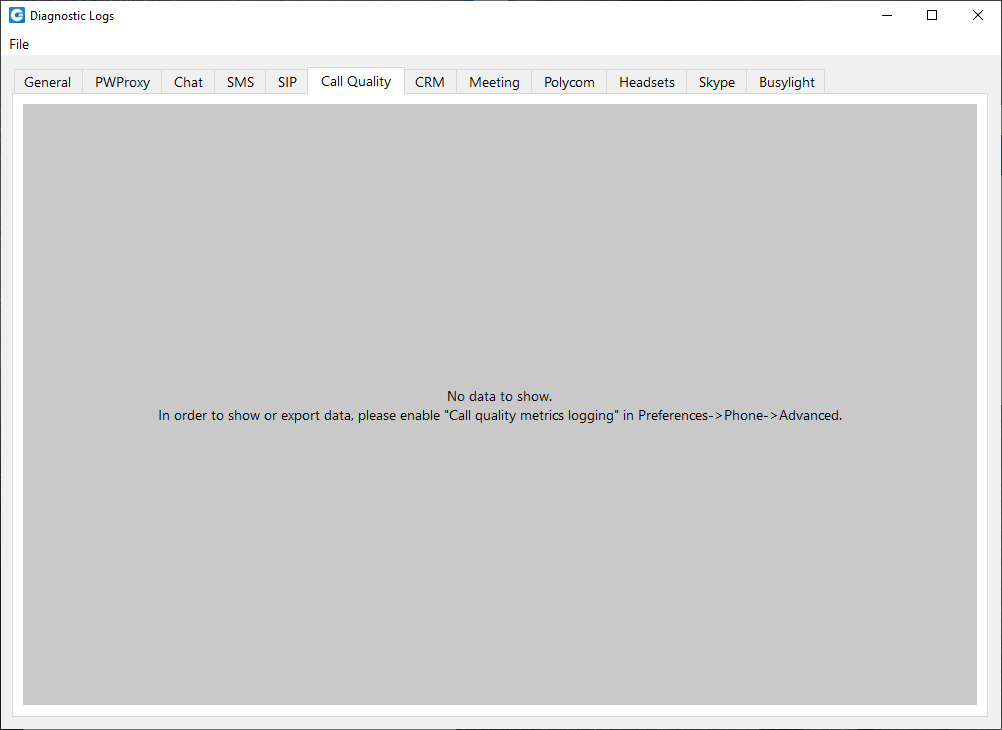
To export this information, click on the Open call quality diagnostic logs. By default, this option is disabled, and to enable it, please navigate to Preferences -> Phone -> Advanced and check the Enable call quality metrics logging.
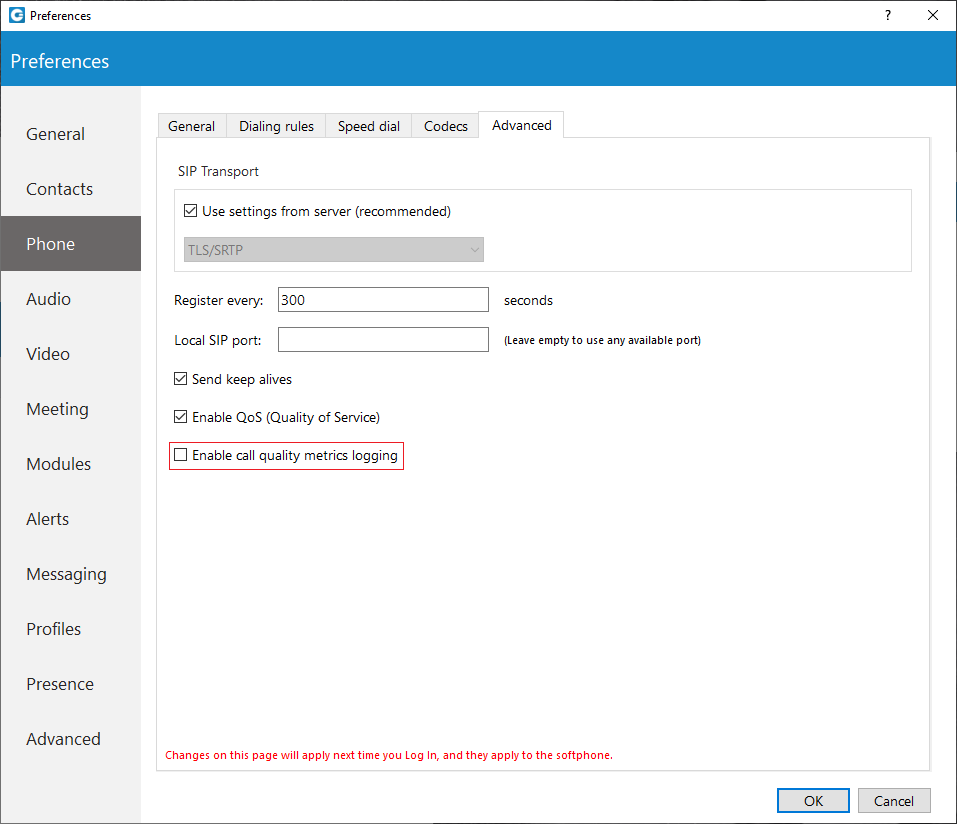
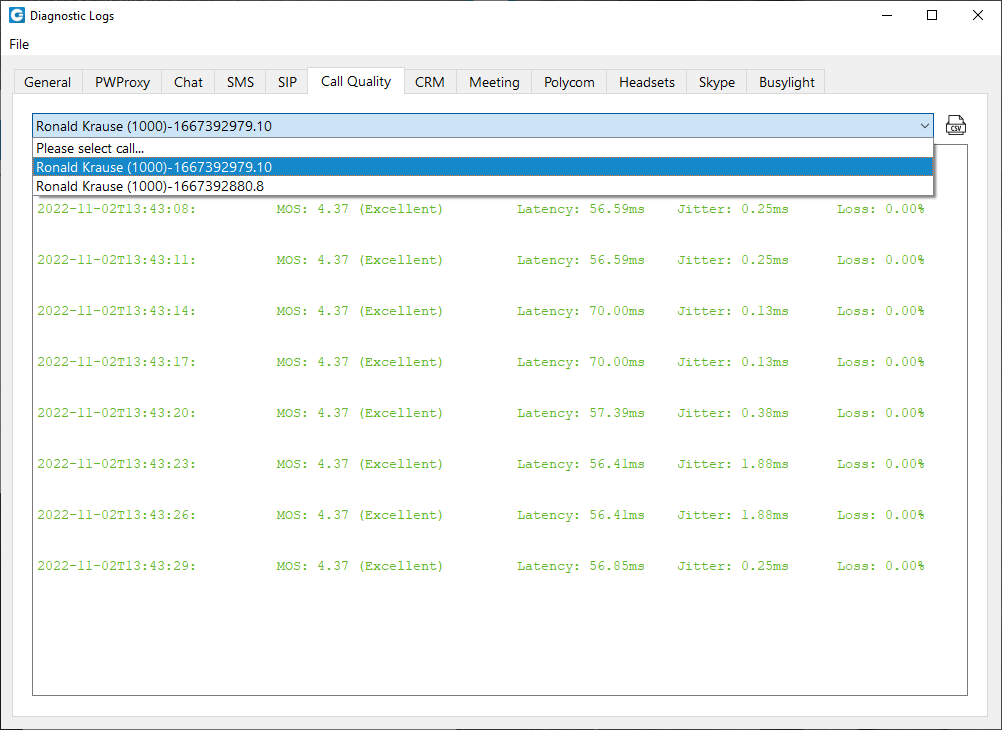
After enabling it, under the Call Quality tab within the Diagnostic Logs, the user will be presented with the Call Quality information for the last 50 calls. To export the Call Quality information, the user needs first to select the call from the drop-down menu for which they want to create a report and click on the Export call quality report button.
Voice Conference
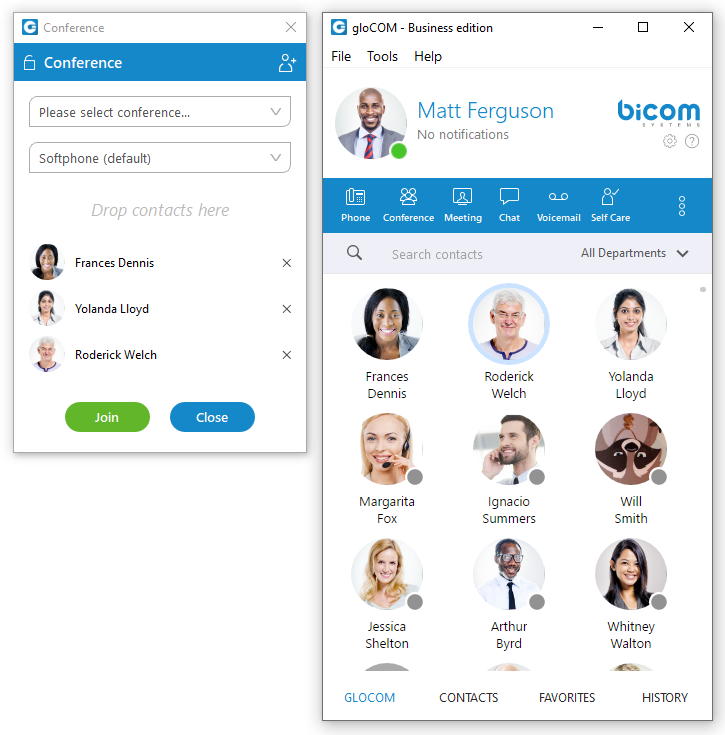
- Plus sign used to invite a contact using his landline or mobile number.
- Select a box to choose from a conference room
 .
. - The Voice Conference module area where contact is shown after Drag-and-Drop.
- To remove a contact from a list, click
 .
. - Click on the Start button to start the Voice Conference.
- Click on Close to close the Voice Conference.
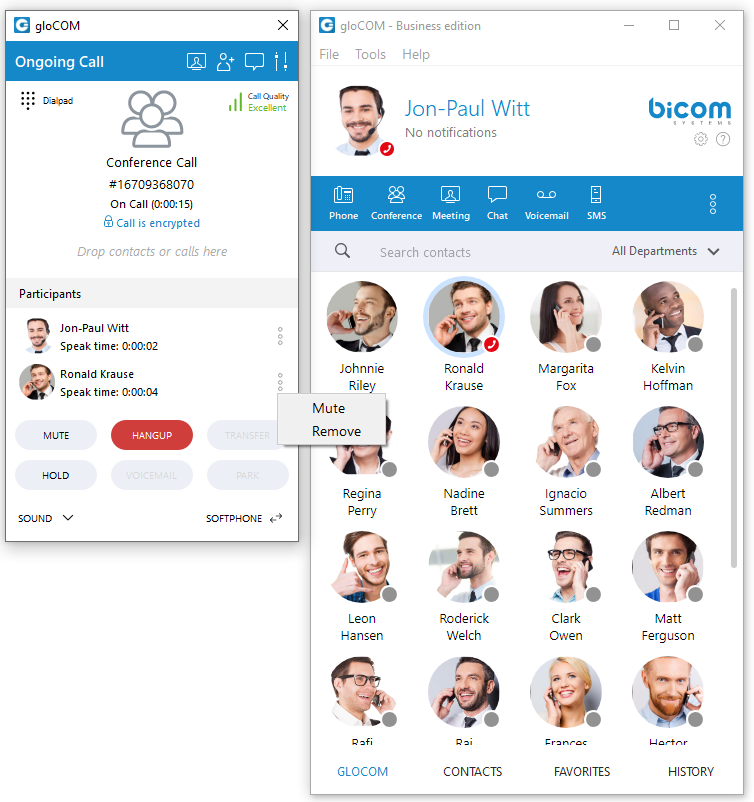
Conference can be created from the dropdown list, and Instant and Predefined conferences can be selected.
- Instant conferences: User can create a conference by adding one or more people to an ongoing call. With this option, you can add extensions or any number available from your contact list. If you missed the conference call, you are still able to join the conference from the Call History tab provided that a conference still exists. There are two ways to do that: double-click on the conference number or right-click on the conference number and then choose a call or call with.
- Predefined conferences: Users can join predefined conference rooms and add other participants.
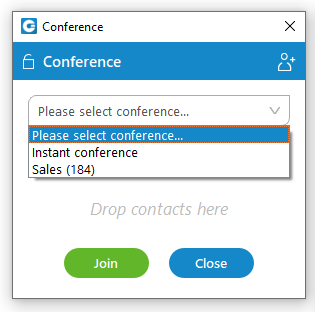
Meeting
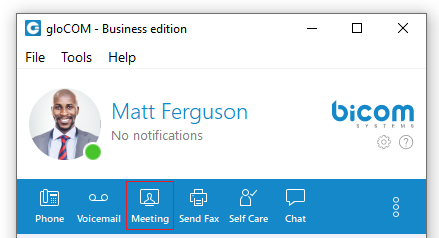
gloCOM meeting is a gloCOM module that allows the user to launch video-meetings without the hassle of switching applications and keeping all of your gloCOM contacts. gloCOM meeting enables the meeting with multiple users simultaneously with key features such as: video conferencing, audio conferencing, chat, screen sharing, and local recording. gloCOM meetings can be private (invite only) or public (anyone with the number or link can join). In order to use gloCOM meeting, the user must first acquire gloCOM and the gloCOM meeting add on.
Granting necessary permissions
If you have a problem with using a microphone or camera with gloCOM meeting on Mac OS please check security options described in this section.
gloCOM needs permission to:
- Camera for video communication.
- Microphone for audio communication.
- Screen Recording and Accessibility for screen sharing and remote control.
The user can enable these options by going to: Settings → Security and Privacy → Privacy.
If the necessary permissions for camera and/or microphone have not been granted, the user will see a dialogue asking them to grant the permissions. There will also be a red exclamation mark next to the icons in the option bar.
Here you will find the options to enable your camera and microphone.
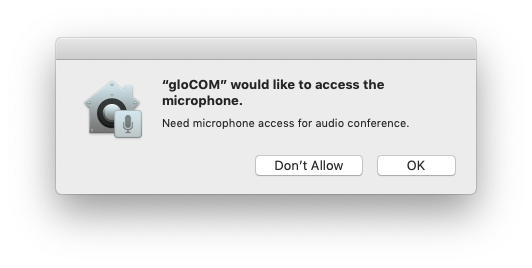
You will have a pop up that looks like this to confirm you are giving permission.
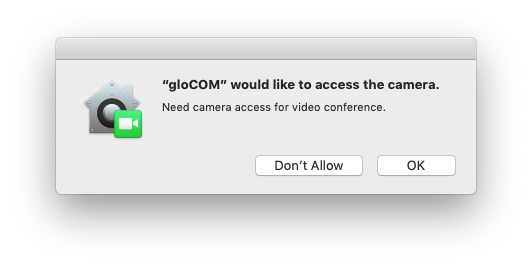
When they are enabled you can disable access at any time by unchecking the tick box.
Starting A Meeting
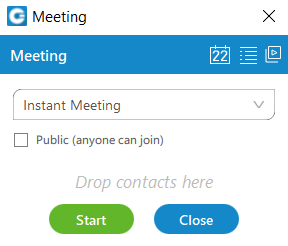
To launch gloCOM meeting you must first have gloCOM open, then simply click on the icon labeled Meeting, this will open up a small window that will allow you to drag contacts in. Once you have all the contacts that you want you can instantly start the meeting. If you wish for anyone to access this meeting then tick on the Public checkbox.
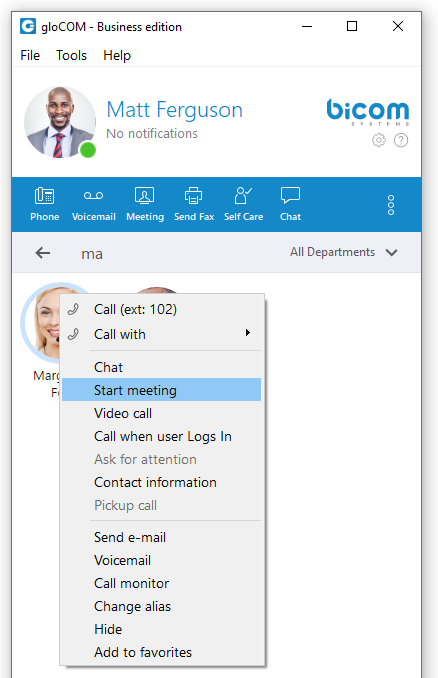
There are also alternative methods of starting a meeting. The user can find a contact in the list and right-click on their name, this will give the option to start a meeting instantly. This is useful to avoid having to navigate the meeting menu and to start one on one meetings quicker.
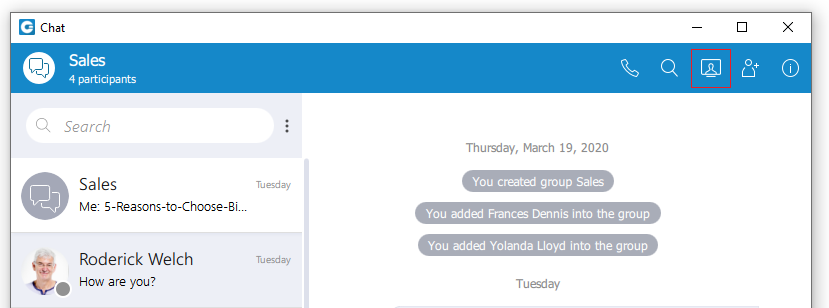
One final method to start a meeting is from a chat. This can be done for both one on one and group chats. Just navigate to the conversation and find the Meeting icon in the top-right.
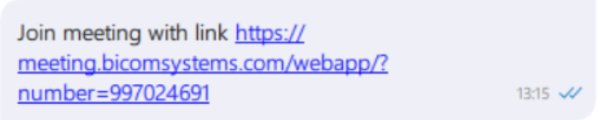
[6.7] When meeting is started from the chat, invite link will be automatically sent to the chat.
Using this link user can easily join meeting either via web or mobile application.
In order to have this link in a chat, user should check this option in gloCOM Meeting preferences.
Meeting List
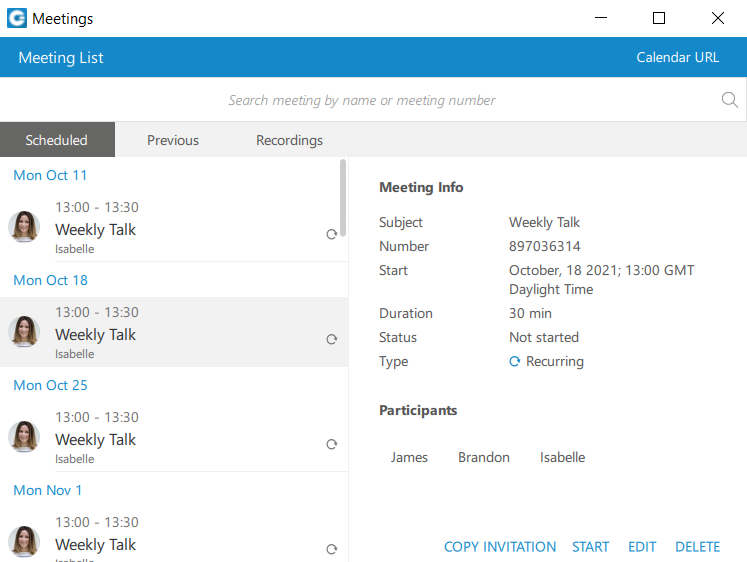
If the user wishes to view any of the ongoing, scheduled or previous meetings, they can open the Meeting List. To do this, open the Meeting window and click the Meeting List icon in the top-right. There will be a busy indicator in meeting details until all data is available.
The meeting list will give you the following information:
- Start and end time (The time of day it will occur)
- Date (Which day you will have the meeting)
- Name/subject (What the given topic for the meeting is)
- ID number (The randomly assigned number to distinguish meetings)
- Duration (How long the meeting will be)
- Status (The state of the meeting e.g. finished or upcoming)
- Participants (Who is supposed to attend the meeting)
Scheduled Meetings
Scheduled meetings are all meetings scheduled in the future. There is also a special category of In Progres meetings that contains all currently active meetings the user has been invited to.
Recurring Meetings
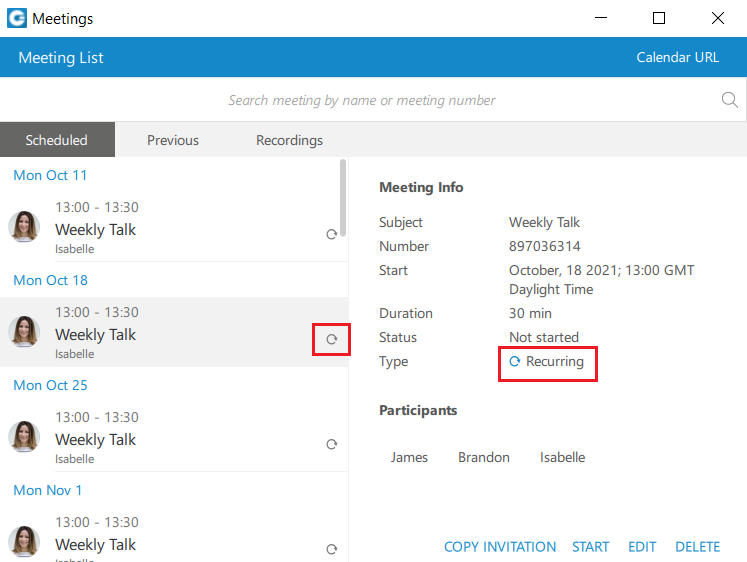
A Recurring meeting is a meeting that will repeat every set time (every day, week or month), e.g. every week on Tuesday you have a sales meeting.
You may edit recurring meetings to suit your needs if you need to reschedule.
Previous Meetings

Under this tab, the user can find all meetings that have ended.
Meeting Recording(s)
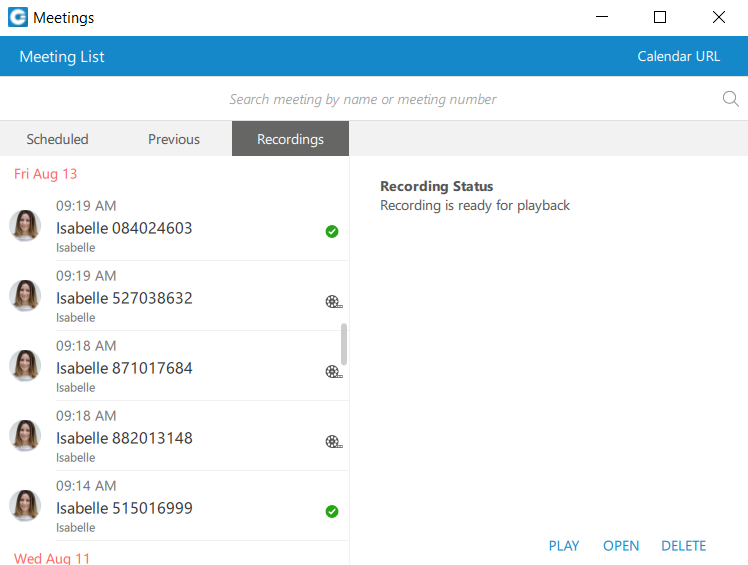
When recording meetings, the application stores all the necessary information to generate a recording later on. This is done to prevent the recording process from interfering with a meeting in progress, because converting a recording requires significant computer resources. To find meetings that you can create recordings for, the user should open the Meeting List and then the Recordings tab. They can now select a meeting and click Convert to start the conversion process. They can also Open the recording location on the computer, or Delete the recording.
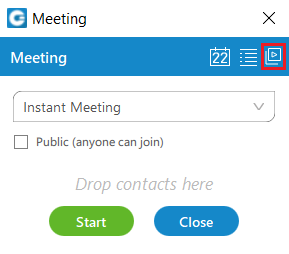

Alternatively, if the user wishes to automatically convert every meeting recording, the user must go to Preferences → Meeting → Recording and check Automatically convert recordings after meeting is ended.
Schedule A Meeting
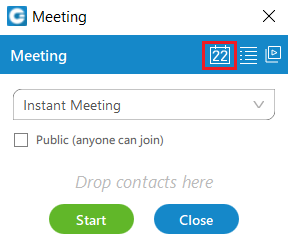
You are also able to schedule a meeting beforehand. To be able to schedule a meeting click on the button to the left of the meeting list.
These are the options available to edit:
- Time (the time of day it will occur)
- Date (which day you will have the meeting)
- Duration (how long the meeting will be)
- Time Zone (this will display the time zone your meeting will be scheduled in)
- Subject (what the given topic for the meeting is)
- Participants (who is supposed to attend the meeting, you can invite them via contacts or email)
- Whether it is recurring (if it will repeat e.g. every Thursday at 3 pm) and how long it will recur for (e.g. stop after 10 meetings)
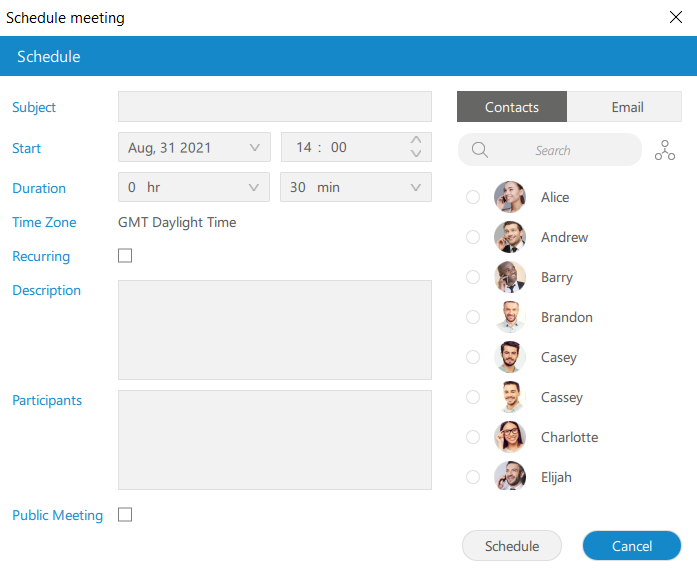
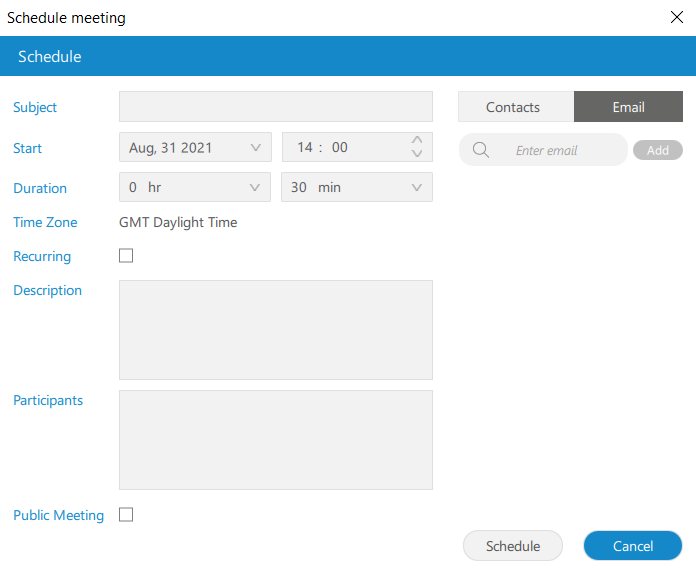
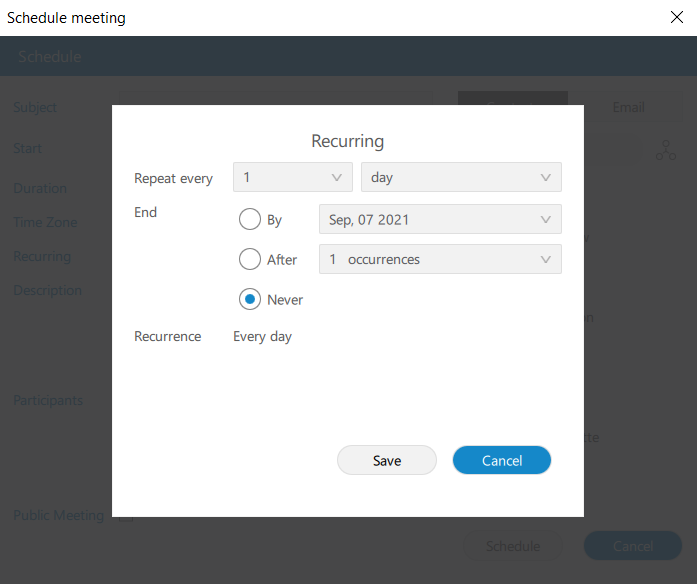
Join By number
There is an additional option to Join by number, in which the user enters an already existing meeting number to join the meeting. To access it, the user clicks on the drop-down list in the Meeting window and selects Join by number. They can now enter the meeting number supplied to them by the organizer.
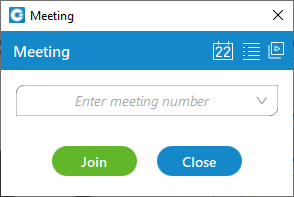
Meeting Interface

The user can invite as many participants as they want to the meeting.

The meeting interface consists of:

- Local Recording record audio, video and and screen sharing to a computer. The user can click the record button located in the bottom left to record the meeting, the recording can also be paused and stopped, the user must be joined by computer for their audio to be recorded. If the user joins in any other way, ex. via deskphone, their audio will not be in the recording
- Mute your own microphone (Disable/Enable the audio coming from your device)
- Disable/enable your own video (Turn on or off the video shown from your camera)
- View the participant’s list (See the participants in the meeting, if someone is missing you have the option to reinvite them. This will give the participant a new invite message to join the meeting.)
- Share your own screen (Broadcast your screen to the participants of the meeting)
- Open the chat window for the meeting (The meeting window will expand with the chat on the right, here you can view messages of the participants and input your own messages. You can close the meeting chat by clicking on the chat button again.)
- Leave the meeting (Ability to leave when you have the necessary feedback)
- Options – shows additional options for screen sharing, video, participants and meeting
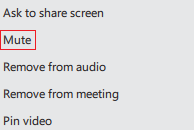
- Mute participants as the meeting organizer allows the user to Mute participants:
- Mute participants as organizer: The meeting organizer can mute other participants from the carousel or the participant list.
- Mute all participants as organizer: The meeting organizer can mute every other participant from the participant list.
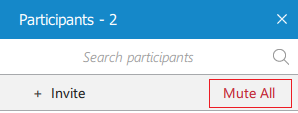
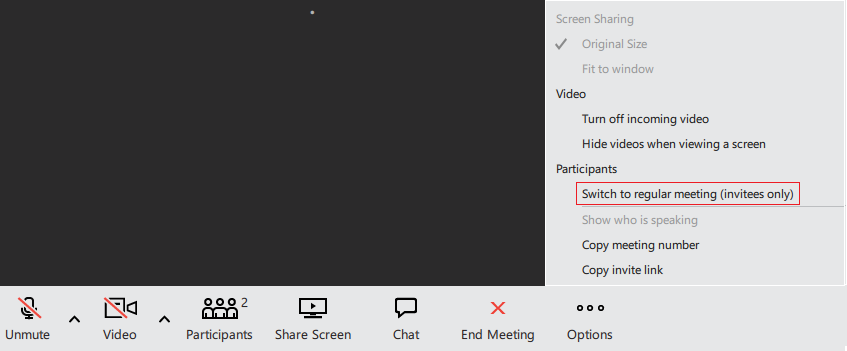
- Toggle meeting privacy between regular and private during an ongoing meeting. The organizer can toggle the meeting from private to public
and public to private.
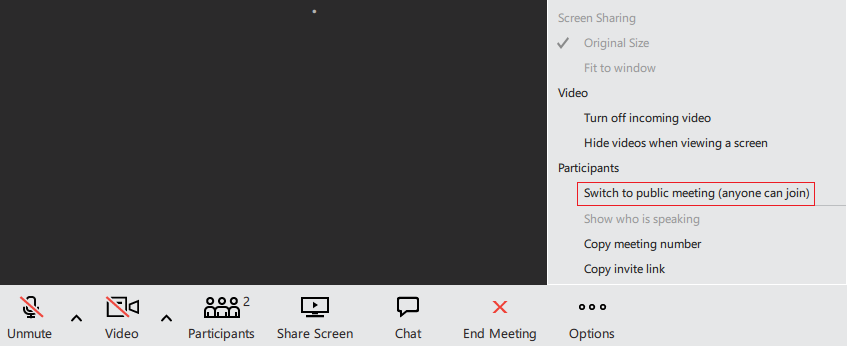
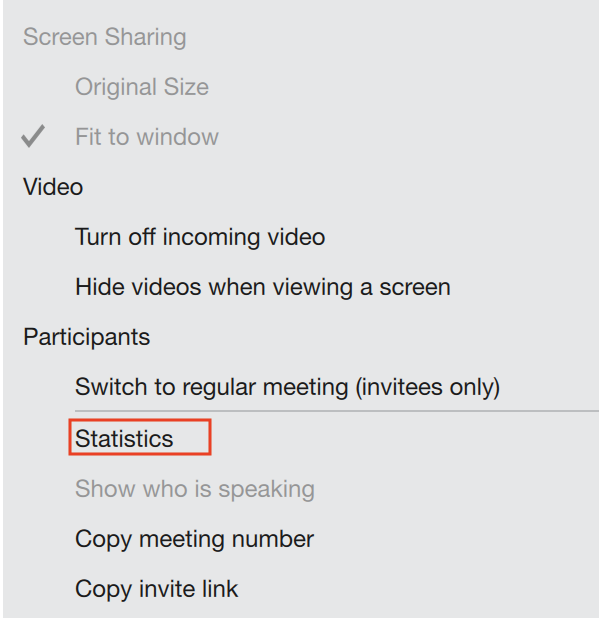
- [6.7] Statistic provides the user with details about the network quality during the meeting.
The statistics include metrics about Audio, Video and Screensharing quality.
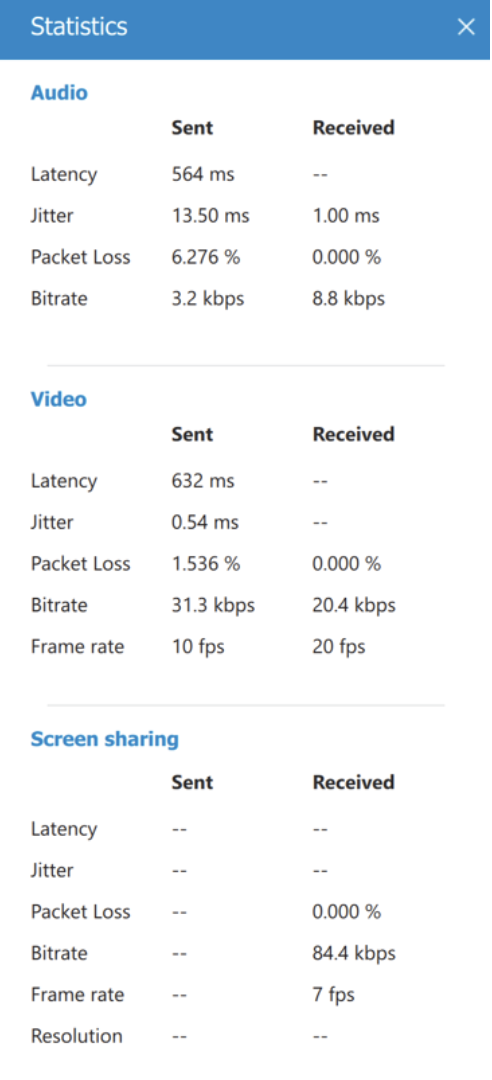
If there is a problem with network connection that is affecting audio quality, a notification in the lower left corner of the Meeting window will be displayed informing the user about the cause of bad audio.
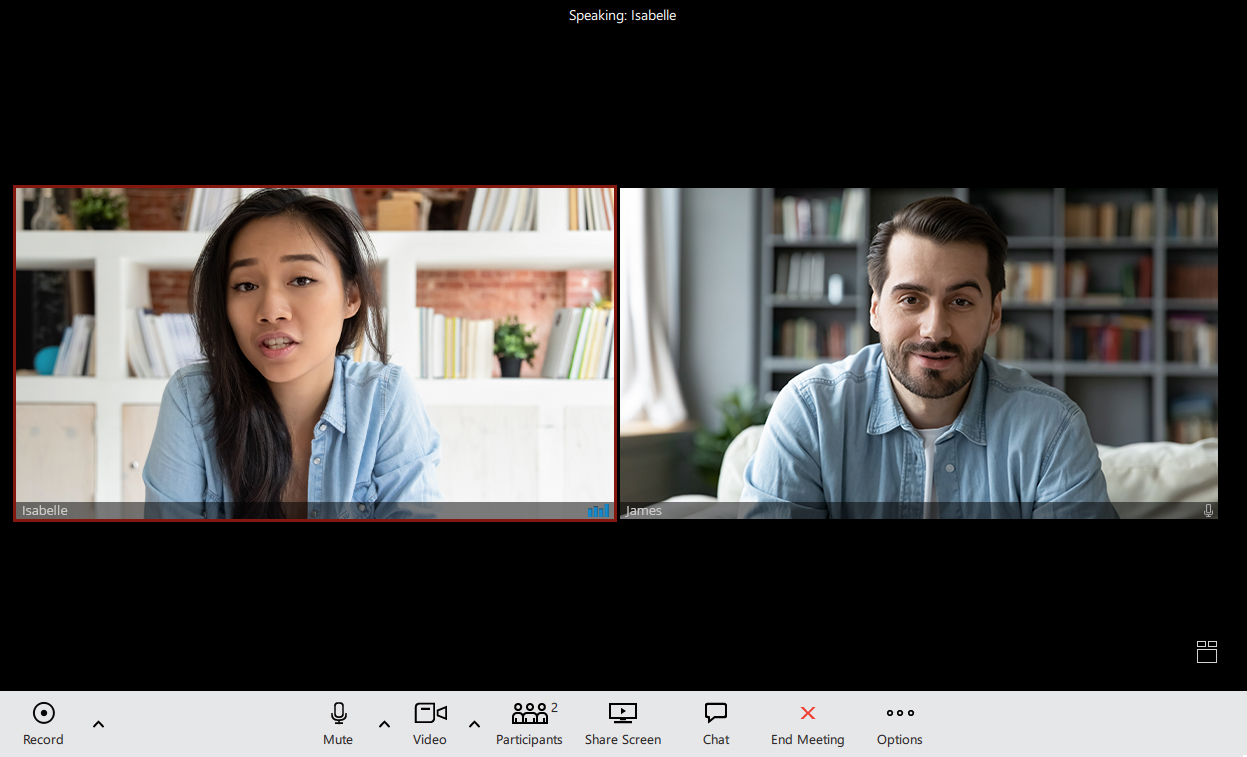
There is also an option to change the layout of other participants in the meeting (bottom right corner). The user can switch between Speaker and Grid layout. Speaker layout puts one video stream in the focus. That video stream is either the person currently speaking, or the one user pins. This is also the default view when there is a screen sharing session active.
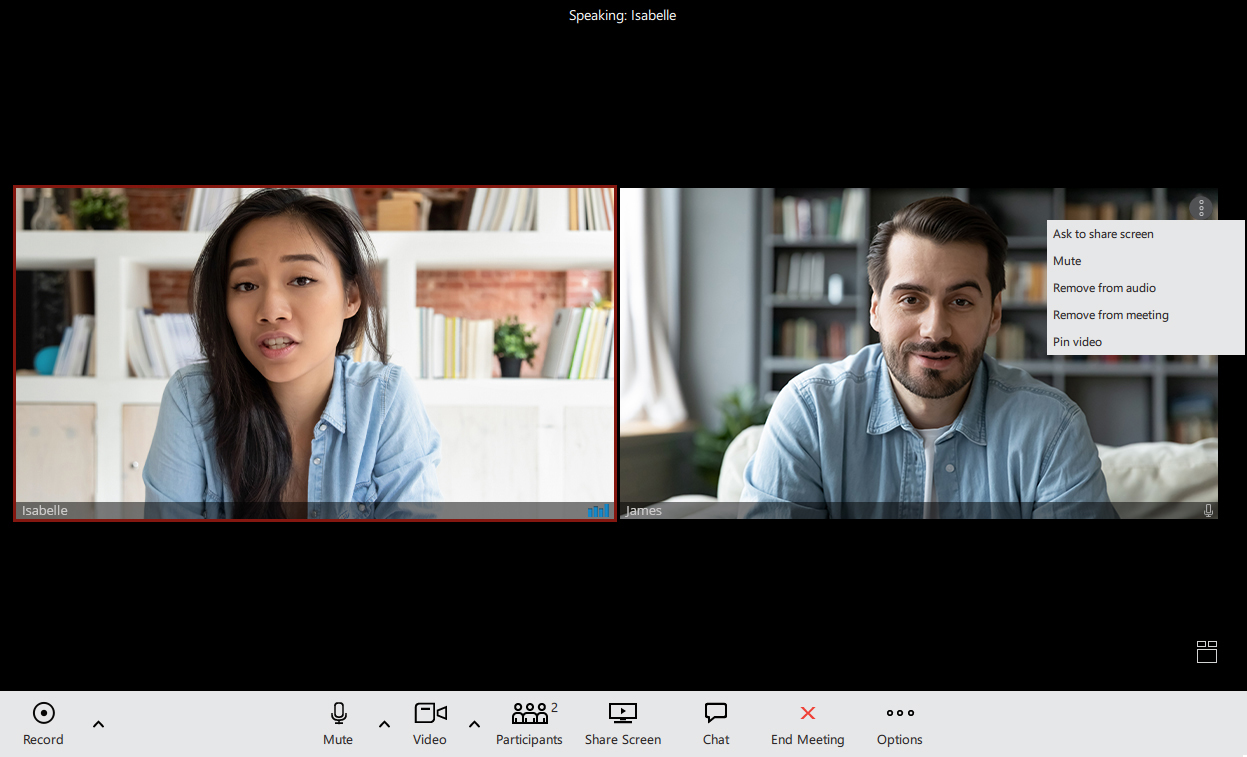
If you click on the more options button on a user you will be granted the following options:
- Ask to share screen (prompts the participant to share their screen for the meeting to see, helps the participant achieve it faster).
- Mute (removes the ability to hear that person, useful for if they have a bad microphone).
- Remove from meeting (kicks a participant ideal for if they no longer need to be in the meeting).
- Pin video (makes their video the main video on display for you).
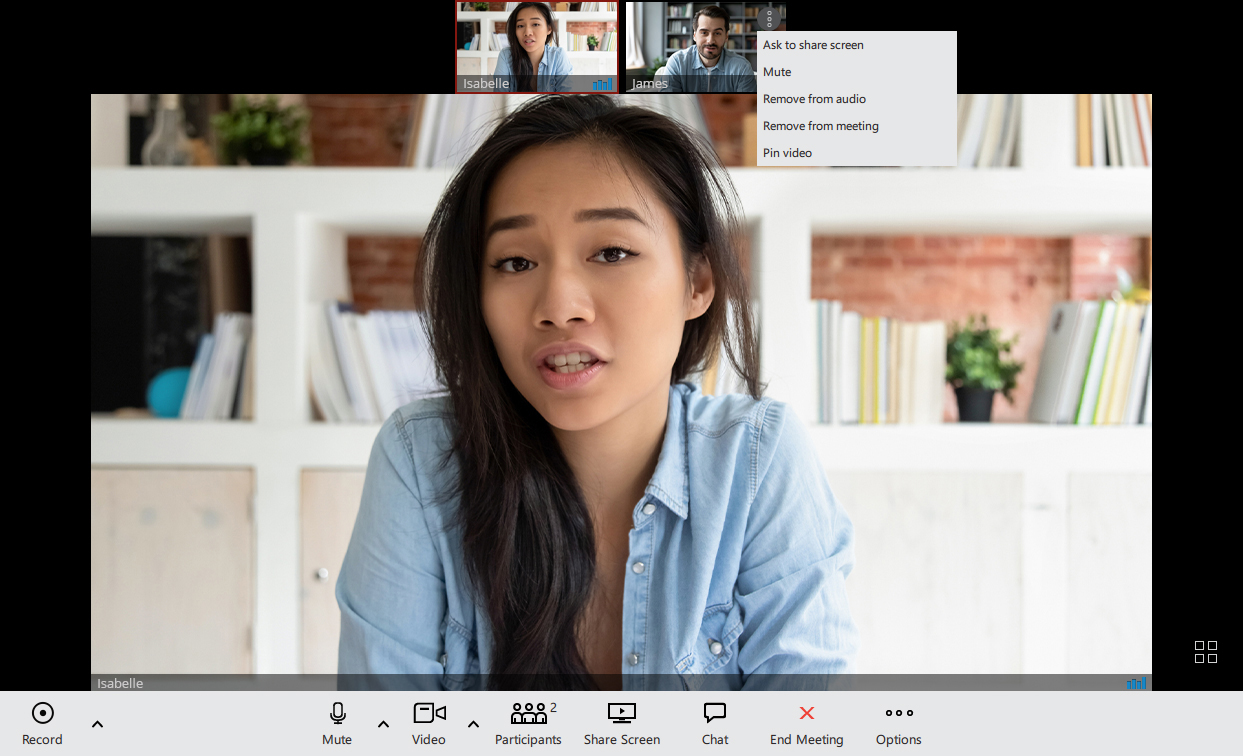
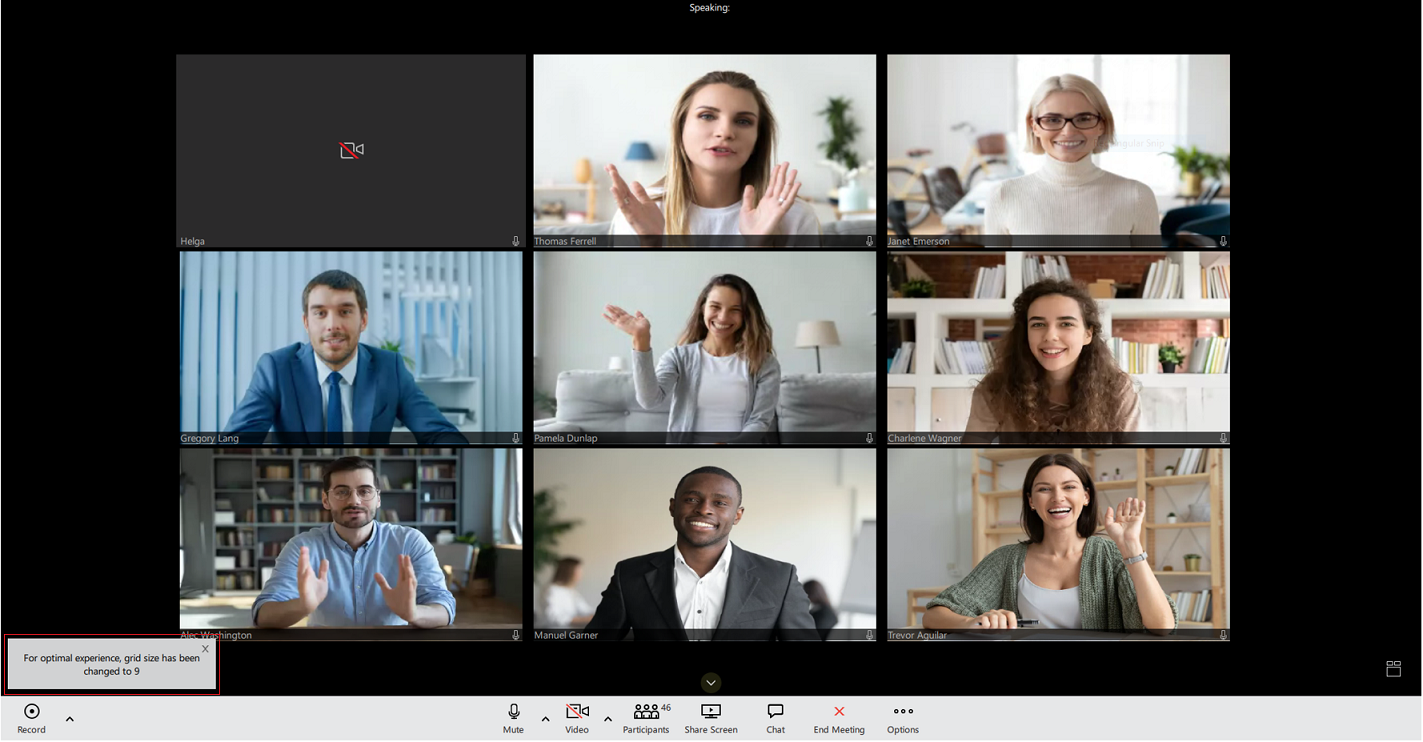
The grid view in the meeting will automatically change the number of video streams based on the number of participants in the meeting.
It follows the following conditions:
- Up to 45 participants = grid size 12 (user + 11)
- 46 – 50 participants = grid size 9 (user + 8)
- Over 60 participants = grid size 6 (user + 5)
Participants will be sorted to have those who spoke last to be among the first video streams.
The Meeting is now able to run 100 active video participants in one meeting.
Selecting Audio Input and Output
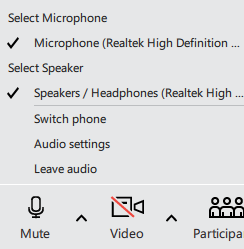
When the user clicks on the arrow next to the Mute button they will be given the following options:
- Select Microphone (select which device they want to pick up your audio)
- Select Speaker (select which device they want the audio to play through)
- Switch phone (ability to switch the audio device they are using e.g. softphone to desk phone)
- Leave audio (ability to leave the audio channel to only view the video)
In addition to this, the user can Mute themselves (press the Mute icon) to not let anyone else hear them. If the user is currently muted and attempts to speak, a prompt will appear to inform the user they are muted.
You are muted notification will appear when a user attempts to speak while muted.

Selecting Video Device
Once you click on the arrow next to the Video icon you will be given the option to select which device you want to capture video. This should display all the devices that you have connected and ready to use. You also have the option to click on the Video icon to remove the video you are displaying.

Screen Sharing
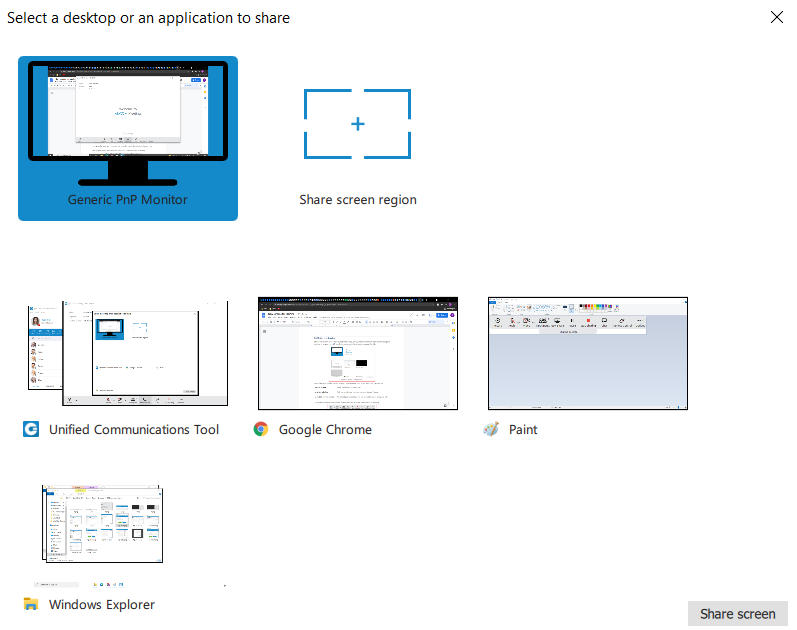
If you wish to share your screen during the meeting, simply click on the Share Screen button or request someone to prompt you with one. Then your screen should look something like this.
You will be given several options when you wish to share your screen with other participants:
- Whole screen (Share everything on your screen),
- A select window (Only one application you have open, e.g. Google Chrome) or share
- A region of your screen (An area of your screen that you can choose the zones for e.g. top left).
Once you have selected one click on share screen and it will be broadcast to the meeting.

Once you start sharing your screen, you can access the icons at the top of your screen. Here you have all of the previous options, in addition, you have control to:
- Pause sharing (Momentarily stop screen sharing)
- Stop sharing (Permanently stop screen sharing)
- Remote control (Once you give control to a participant they will have the ability to use your computer e.g. move a mouse and input from a keyboard.)
Under options, you have the added functionality to:
- Original size (Change the meeting application to the original size)
- Fit to window (Change the meeting application to the size of the window)
- Hide video panel (Hide the options of the meeting panel from the top of the screen)
- Turn off the incoming video (Remove the video of other participants from reaching you)
- Copy meeting number (Faster method to copy the meeting number)
Outlook integration [6.7]
Outlook integration allows user to manage gloCOM Meetings from Outlook. This includes following:
- Schedule a Meeting
- Start Instant Meeting
- Start Meeting with multiple contacts
- Cancel a Meeting
- Convert existing event to gloCOM Meeting
Schedule a meeting
User can Schedule gloCOM Meeting from outlook main tab.
After cliking on to Schedule meeting, user should see an outlook meeting appointment window with a schedule settings dialog where can set the meeting private or public.
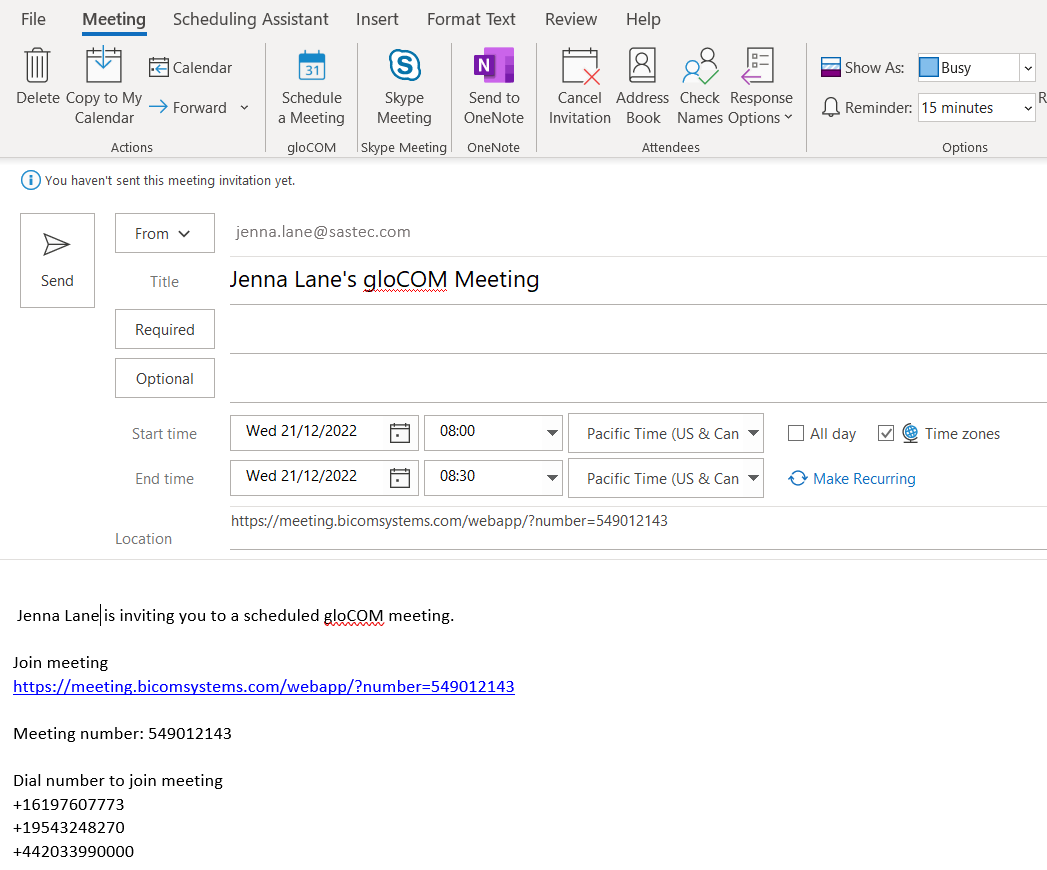
A user is allowed now to edit this invitation – to change subject, body; set date and time, add participants, etc. When enter all necessary data, user should Send invite to participants.
Meeting then will be added to gloCOM Meeting list.
Starting instant Meeting with one or multiple contacts
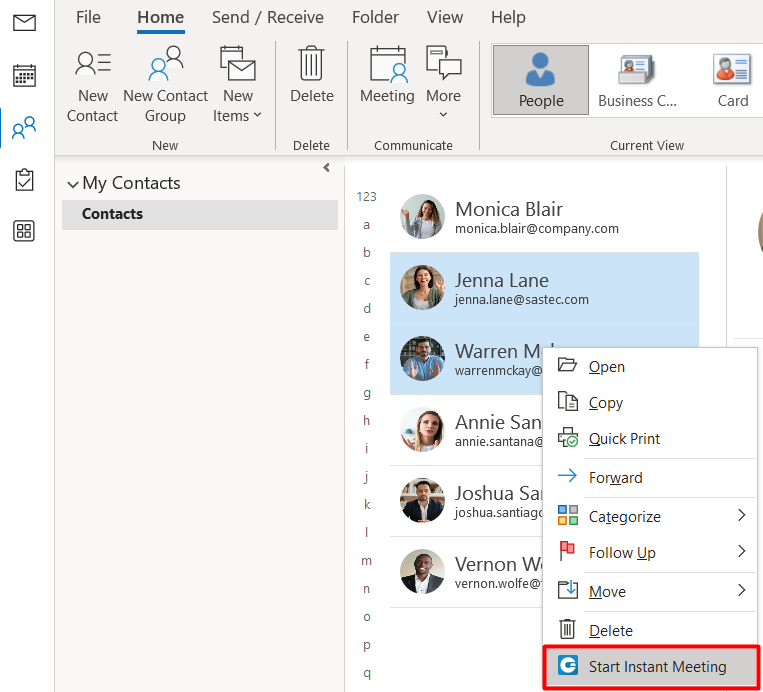
User is able to Start Instant Meeting from outlook main tab if press gloCOM Start Instant Meeting icon. This will start instant meeting without any participants.
Another option is to Start Instant Meeting with one or multiple contacts, by selecting them from the contact list in outlook. Selected contacts will receive a Meeting invitation.
Cancelling a Meeting
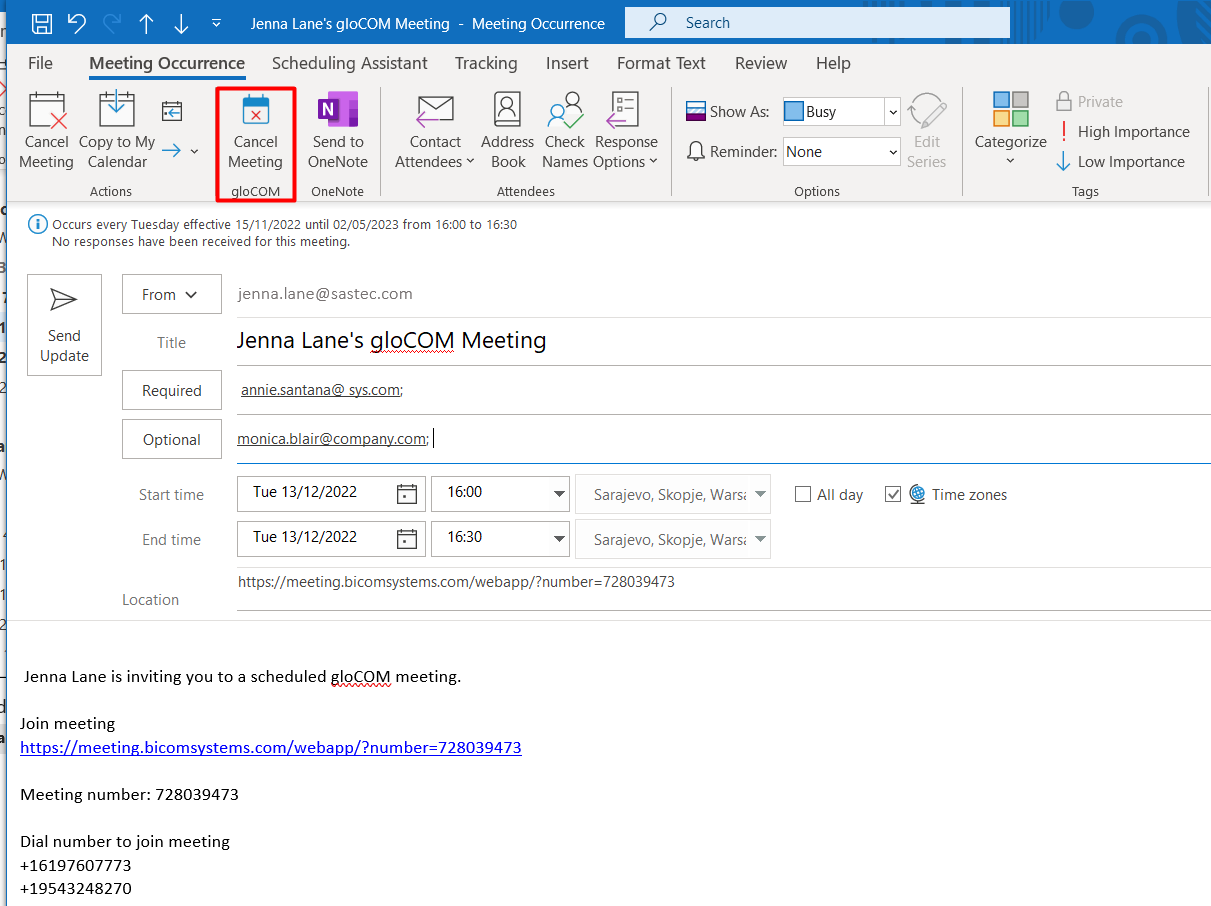
In order to Cancel the Meeting, user should open that Meeting from the outlook calendar list, and choose gloCOM Cancel Meeting option.
After that, user should press Sent Update icon to inform all invitees about cancellation.
Meeting then will be removed from gloCOM Meeting list.
This option will only delete gloCOM Meeting. Outlook appointment will not be deleted.
Convert existing event to gloCOM Meeting
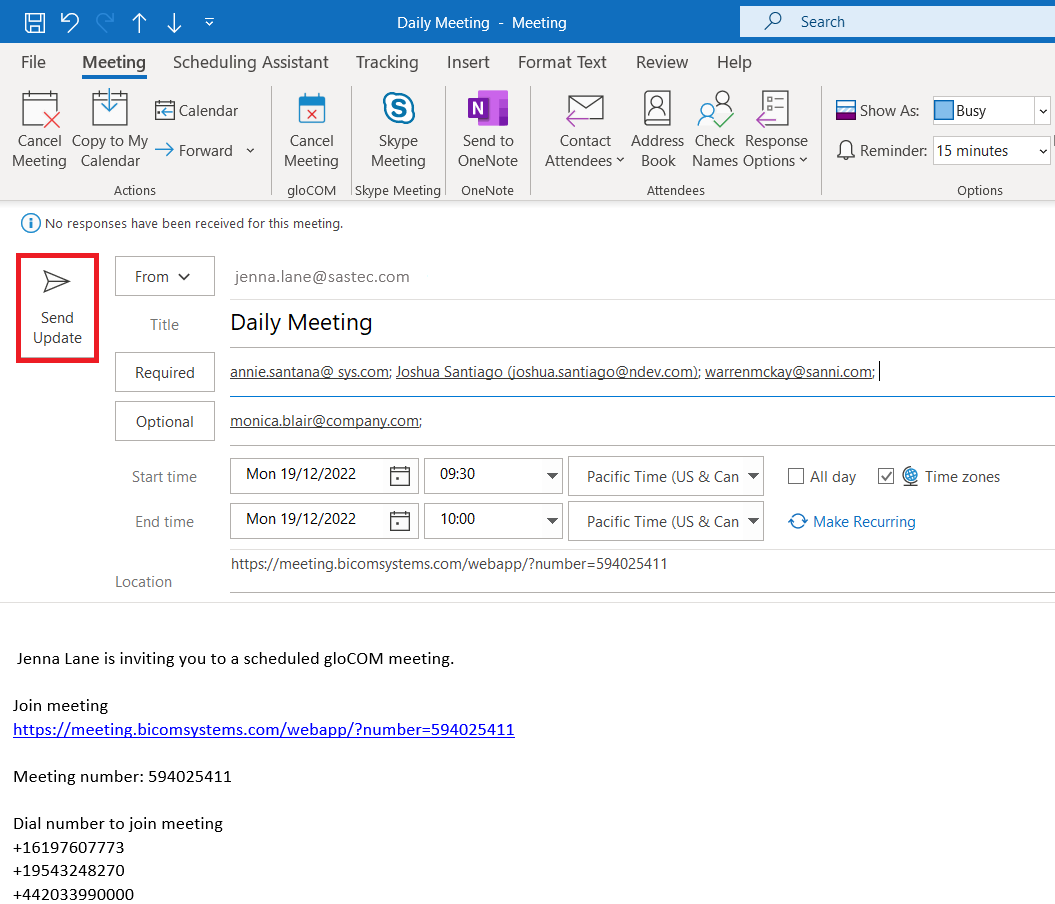
To convert outlook appointment into gloCOM Meeting, user should do the following steps:
- Find an existing event in Outlook calendar and open it
- Click on Schedule meeting icon
- Edit your meeting if needed
- Send Update to participants
Meeting is now added to gloCOM Scheduled Meetings list.
Meeting Licences [6.7]
The limitations of the Meeting packages are as follows:

Starter package is defaualt one. This means that will be automatically assigned to all gloCOM Meeting users.
So, if user exceeds limitations for current package type, following info messages appears:
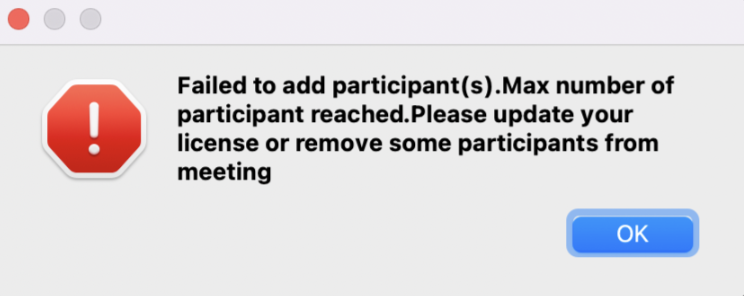
- Message when user exceed number of invitees – when scheduling meeting or adding participant to existing meeting
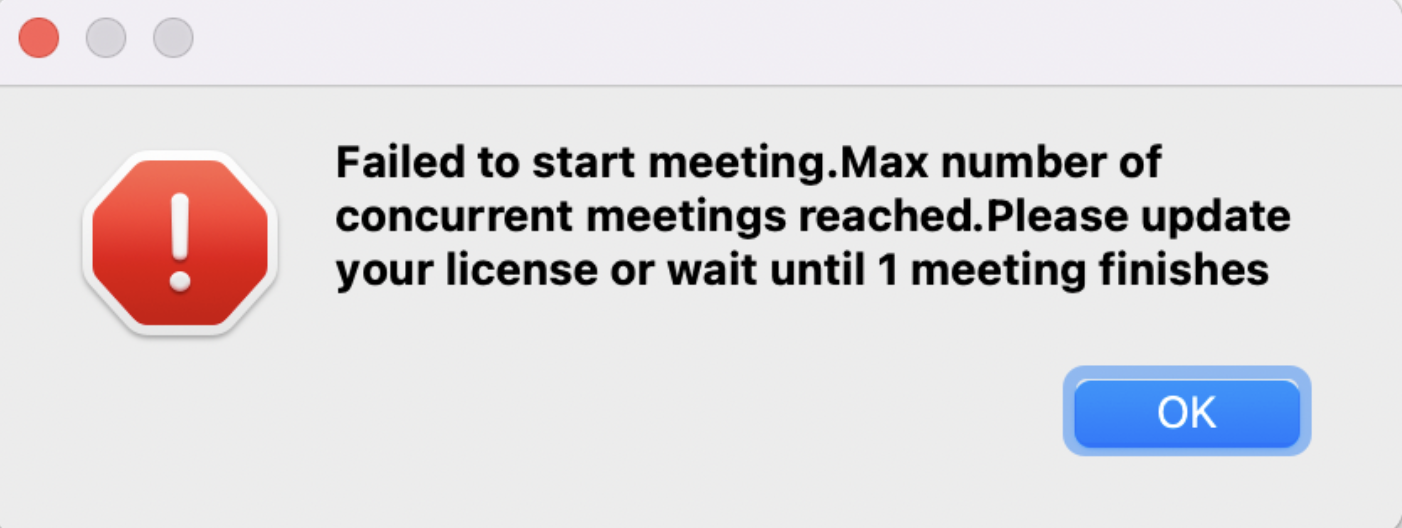
- Message when user exceed number of meetings for current license type
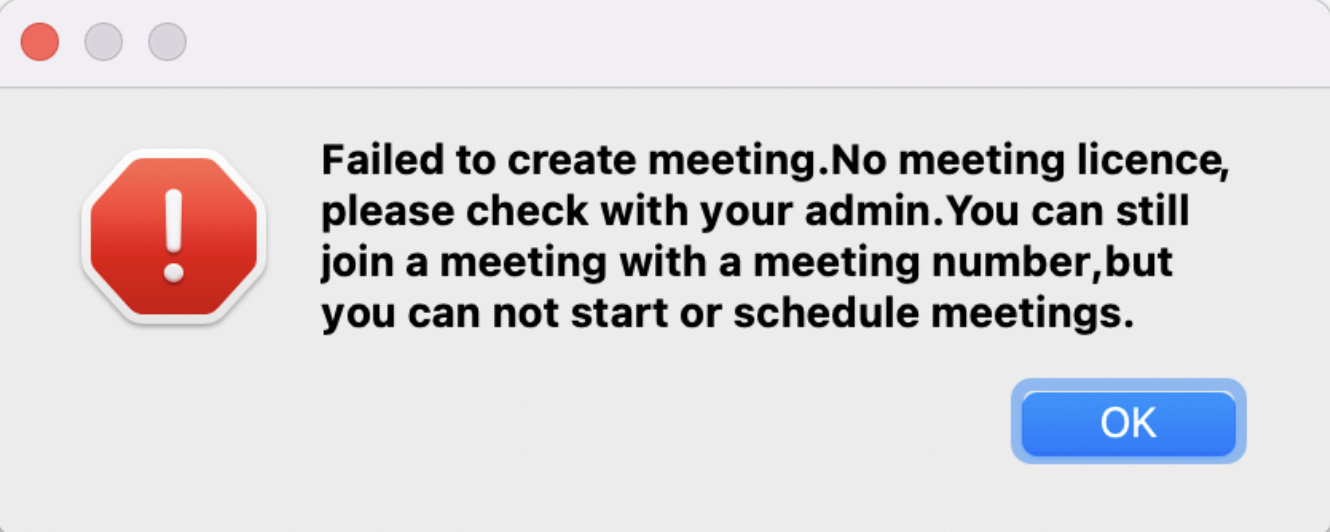
- Message when user does not have license
Chat
gloCOM brings a unified chat between Desktop, Web and Mobile applications. Chat history is stored on the server and is always synced between all your devices. This means that if you need to leave the office but you were having an important chat discussion with your colleagues you can seamlessly continue chatting using your mobile application. Also, in case you change your PC or laptop your full chat history will be synced the first time you log in on the new computer.
Full history sync
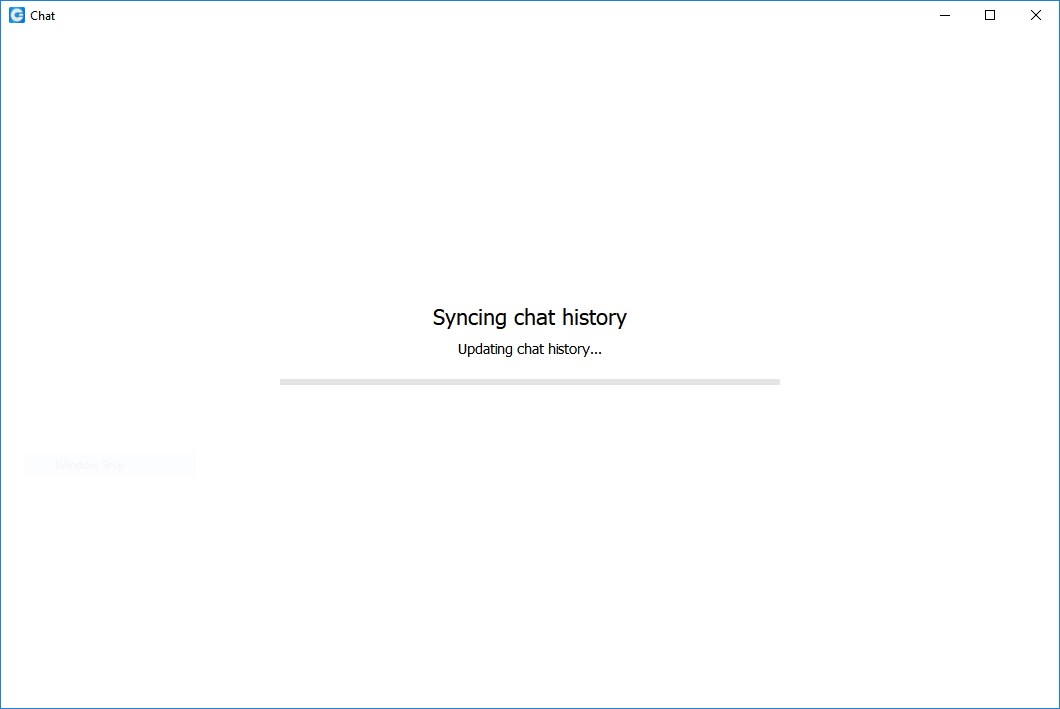
After every log in the application makes sure that your chat history is always synced and that you have all messages available on your device.
 During the sync there is an indication on the chat module icon in the main window to inform the user that the sync is currently in progress.
If you open the chat window during sync you will see an informative message, with a progress bar indicating the sync progress.
If chat sync has failed there is a warning in the chat window with the option to retry the sync by pressing the Retry button.

In case that chat sync has failed because chat server was down at the time you logged in, the application will automatically start the sync process again, once it detects that the server is back up.
Chat server unavailable
If chat server is down you cannot send nor receive messages until it gets back up.
While the chat server is down there is an indication on the Chat module icon in the main window to alert the user.
If you open the chat window while the server is down, there is also an informative message that the chat server is not connected.

As soon as the application detects that the chat server is back up the warning is dismissed and you can continue chatting where you left off.
Starting conversations
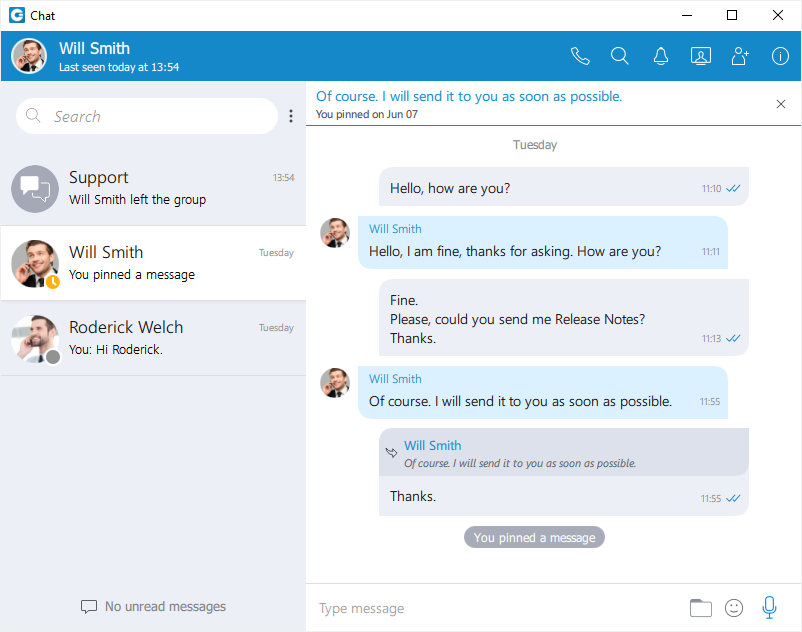
To open the Chat window click on the Chat module icon in the main window.
This will bring up the chat window and show all of your conversations. There are a few ways to start a conversation, or to open the existing conversation with another user:
- Click on the chat icon when hovering over a user in the main window (only for Grid View).
- Right-click on a user in the main window, and choose the option Chat from the menu.
- Double click on a user in the main window (if your default double click action is set to Chat inside the Preferences).
- Select multiple users in the main window, right-click, and choose the option Group chat from the menu to create instant groups from the main window.
- Search for a user inside the chat window and click on the desired user.
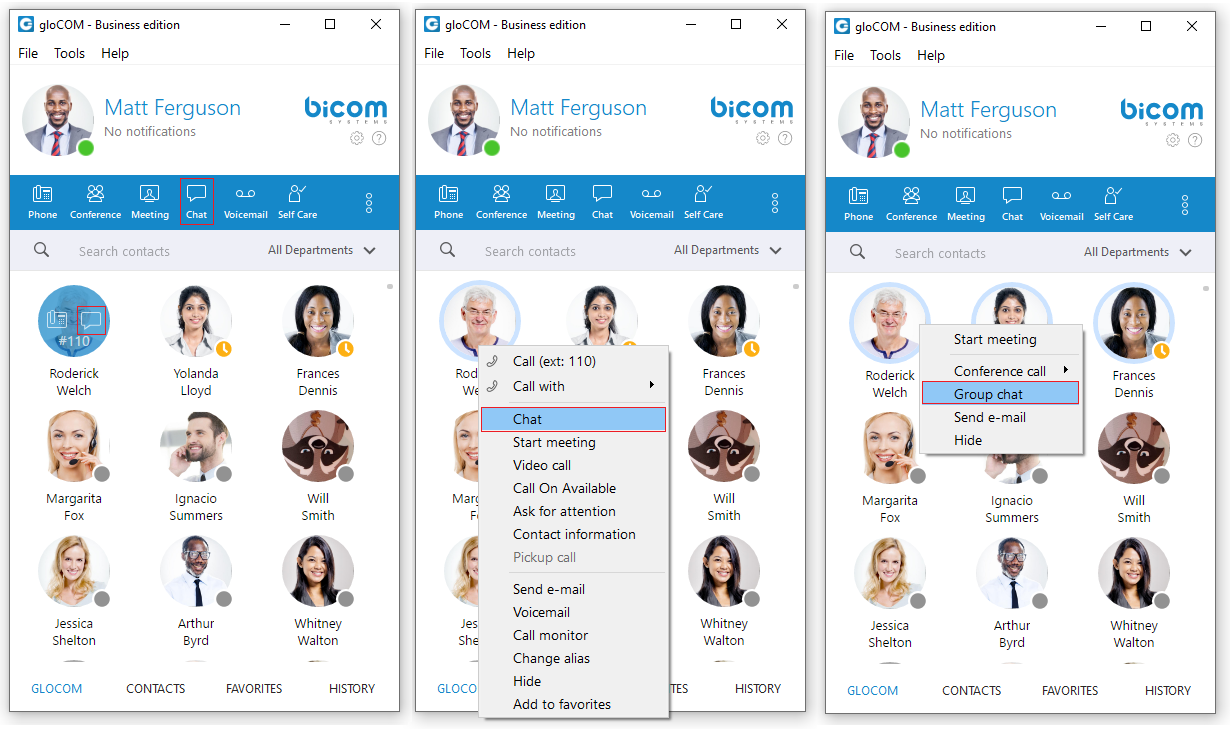
Top blue bar
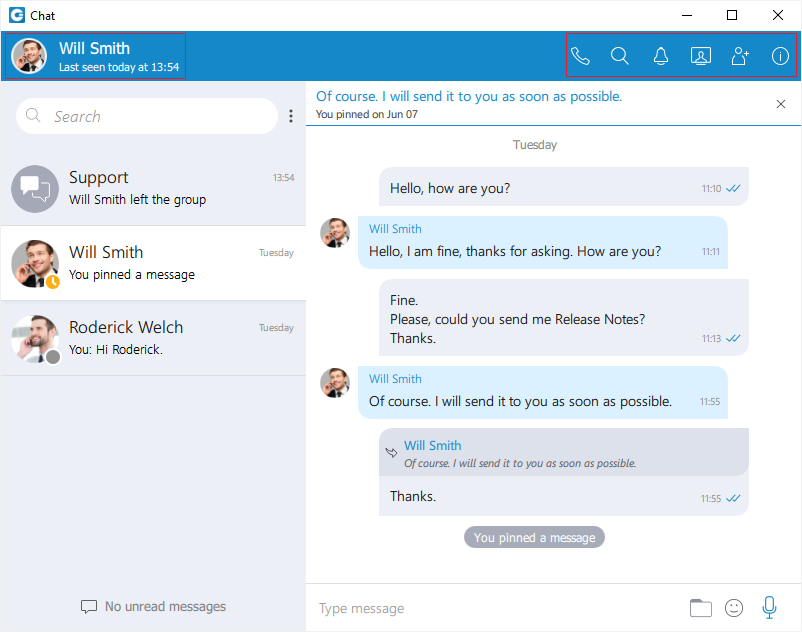
On top of the chat window area there is a blue bar that contains information about the currently selected conversation, and also provides various actions available for that conversation.
On the far left of the top blue bar, there is an avatar of the currently selected conversation. Next to it, there is a user’s name (or a group name in case of a group conversation). Clicking on the user’s name opens up the Contacts Information dialog for the selected user. Clicking on the group’s name or the participant’s label opens up the Info drawer. Below the user’s name, there is information about the user’s presence and status, e.g. is the user currently online, what is the user’s status message, is he currently away from the Desktop, etc. In the case of a group chat, there is a label indicating the number of participants in the conversation.
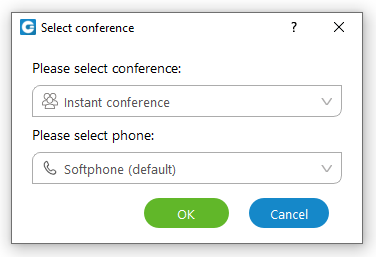
On the right side of the blue bar there are buttons for executing actions available for the currently selected conversation.
 Call the currently selected user (create a voice conference in case of a group conversation).
 Search for messages from the current conversation.
 Ask for attention – the user in the current conversation will be notified that you need their immediate attention. Not available for group conversations.
 Create a meeting with all chat participants.
 Add more users into currently selected conversation
 Open the chat info.
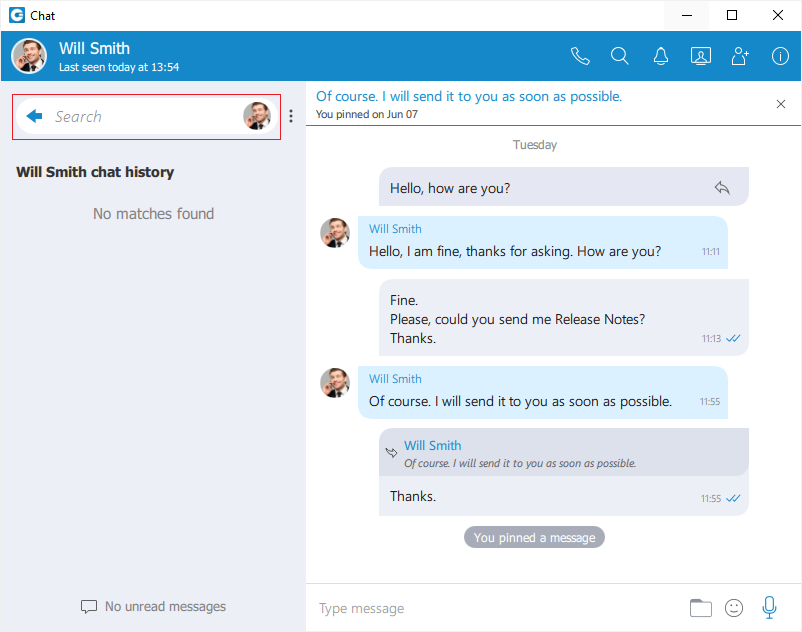
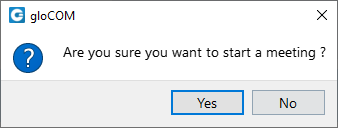
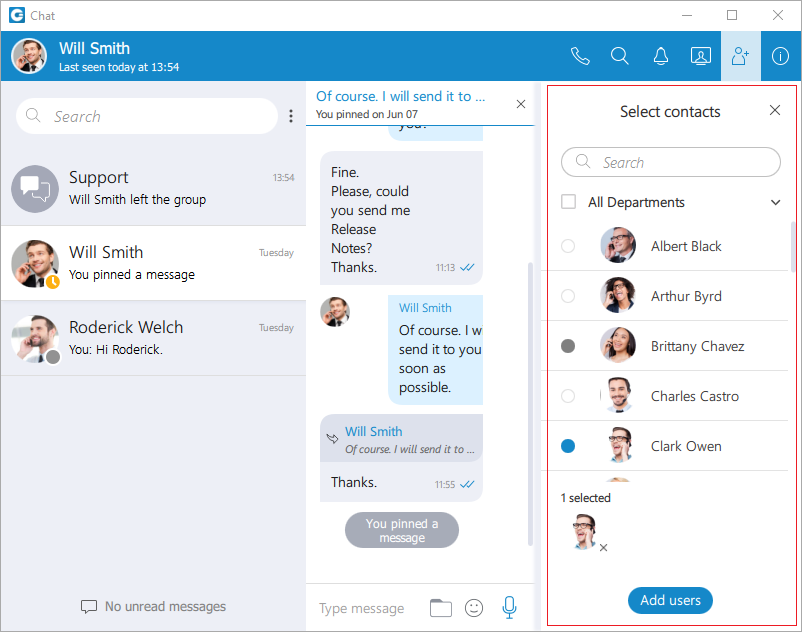
When adding users into the currently selected conversation you can filter users list by searching for a user’s name or extension. You can also filter by department, or even add a whole department into the conversation. Added participants cannot read previous messages in the conversation.
To collapse the users list and show a list of departments click on the name of the currently expanded department. To select all users from the currently expanded department, click on the checkbox next to the department name.
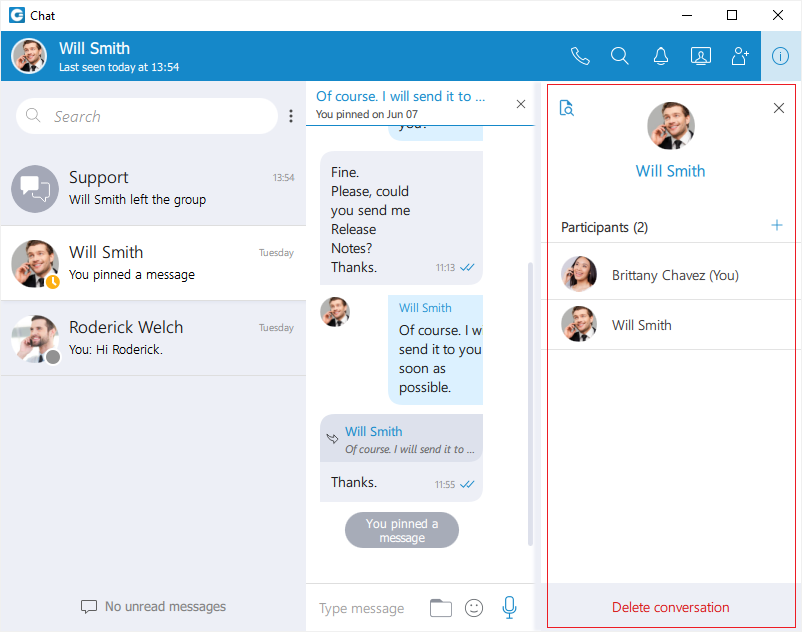
Chat Info
Single chat conversations
Info drawer shows all participants within the selected conversation. Furthermore, it allows users to add more participants to the selected conversation by clicking on the + sign located on the right of the Participants label. This way, the user can easily create a group chat conversation from a single chat conversation. Additionally, by hovering over each participant, the user can see information about their presence and available actions.
While hovering over a participant, the following action is available:
 Call the hovered participant.
 The Show Files icon at the top of the Info drawer shows all shared files within the selected conversation.
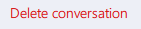 The Delete conversation button at the bottom of the Info drawer allows the user to delete the selected conversation.
Group chat conversations
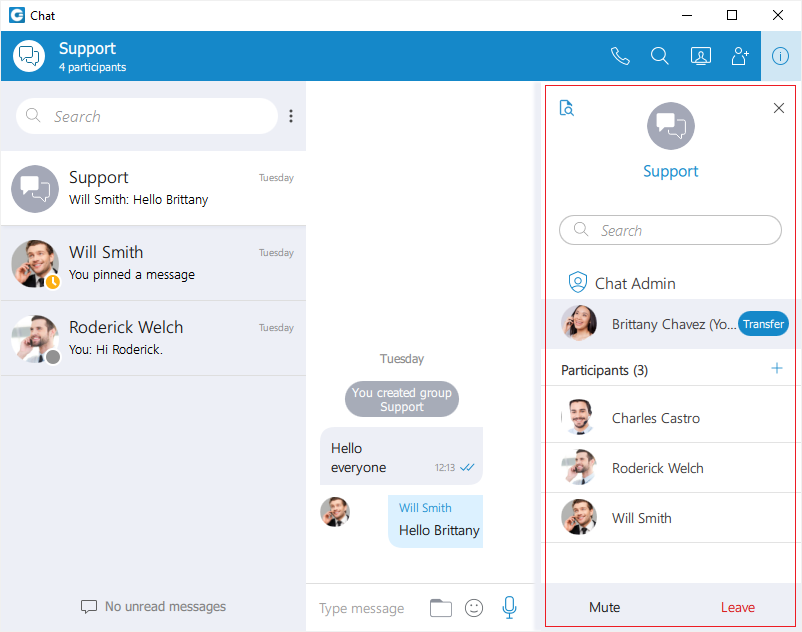
Info drawer shows the group name, all participants of the selected group conversation, and the group administrator. As a group administrator, the user can change the group name, remove participants from the group, and select a new group administrator.
To change a group name, the user needs to click on the group’s current name, type in a new name, and press the Enter key on their keyboard.
Furthermore, the user can add new participants to the selected conversation or filter participants of the conversation. Additionally, by hovering over each participant, the user can see information about their presence and available actions.
While hovering over a participant, the following actions are available:
- Call the hovered participant.
 Open the single chat conversation with the hovered participant.
 Remove the hovered participant.

The Show Files icon at the top of the Info drawer shows all shared files within the selected conversation.
 To mute the selected conversation, click on the Mute button at the bottom of the Info drawer.
However, to leave the selected conversation, click on the Leave button at the bottom of the Info drawer. The popup message will show up, asking the user to select what they would like to do.
The user can select one of the following options:
- Leave: It will leave the group and keep the chat history.
- Leave & Delete: It will leave the group and delete all chat history.
- Cancel: It will cancel the leaving process.
And finally, as a group administrator, the user can select a new group administrator by clicking on the Transfer button next to their name and selecting a new group administrator. To confirm the transfer process, the user needs to press the Transfer button at the bottom of the Info drawer or press the Cancel button if they want to quit the transfer process.
If the group chat does not have an administrator, the user can become an administrator by clicking the Assign myself button below the No admin assigned label.
Files overview
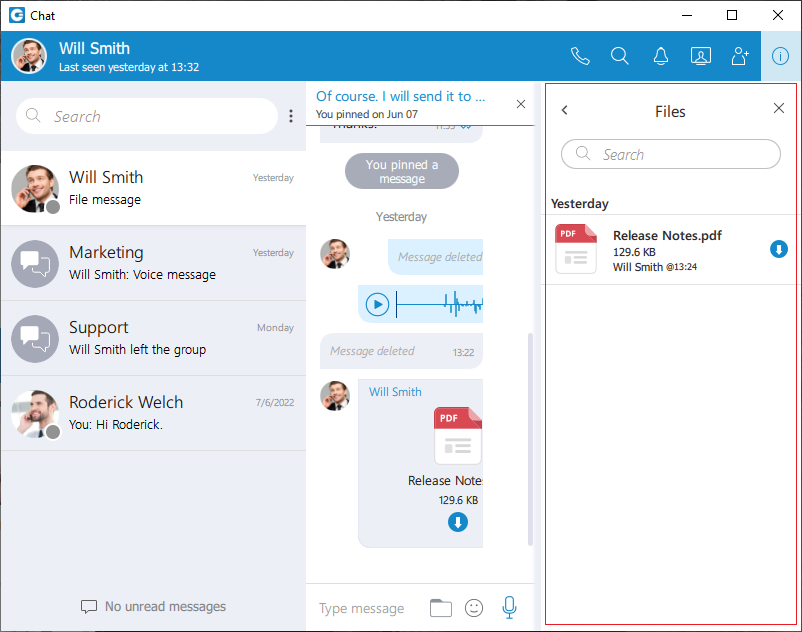
You can click on the icon to see all sent and received files inside the conversation.
You can search for a particular file by its name. Clicking on the file thumbnail or the file name opens the file if it is available, or offers to download it if the file has not been downloaded yet.
File name, file size, sender, and time are shown for each file. Depending on the file direction (incoming/outgoing) and file status (uploading/uploaded/ready to download/downloading/downloaded) the button on the right of the file name provides certain actions:
 Click to download the file.
 File is already downloaded, click to show the menu and choose from Open, Show in Windows Explorer for Microsoft Windows (Show in Finder for macOS) and Save As options.
- Open option opens the file in the default application
- Show in Windows Explorer/Show in Finder option opens the folder containing the file and selects the file which is useful for locating the file on the file system.
- Save As option is used to create a copy of the file in the desired location with the desired name.
 Show progress of currently uploaded/downloaded file.
 Click to cancel current uploading/downloading. Visible when you hover the progress circle.
Options (3 dots) menu
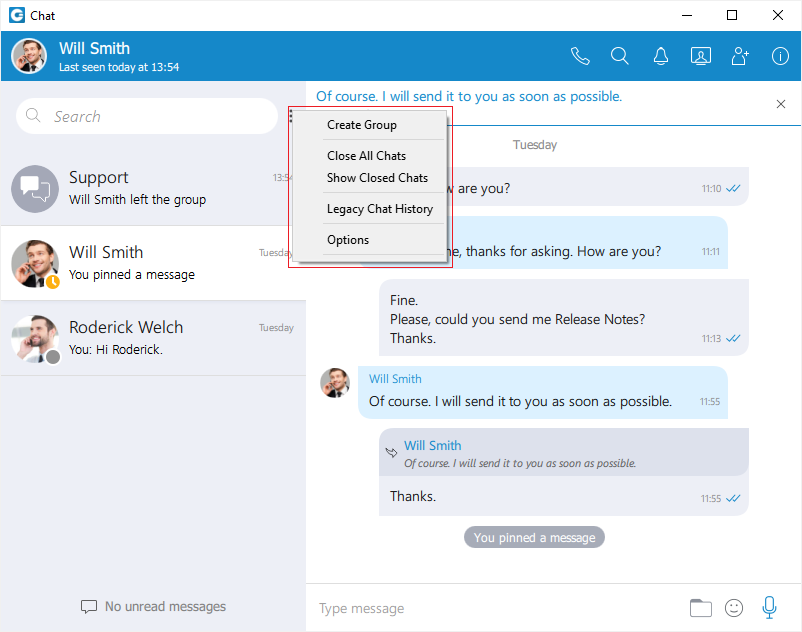
The menu contains the following options:
- Create Group
- Close All Chats
- Show Closed Chats
- Legacy Chat History
- Options

Create Group Chat [6.7] option is used for creating group conversations (as the group creator, you are automatically the group administrator). Two types of groups are available. The first type of groups are ordinary groups, meaning that the chat history will not be available to newly added participants. The second type of groups are groups with visible chat history, meaning that the full chat history will be available to newly added participants.
To create a group with visible chat history, check the option Allow full history visibility.
 – Indicates that the chat history is visible to newly added participants.
The group name may or may not be provided during the group creation. If the user does not provide a group name, the group name will be just Group. However, the user can change the group name at any time after creating the group by clicking on the group name.
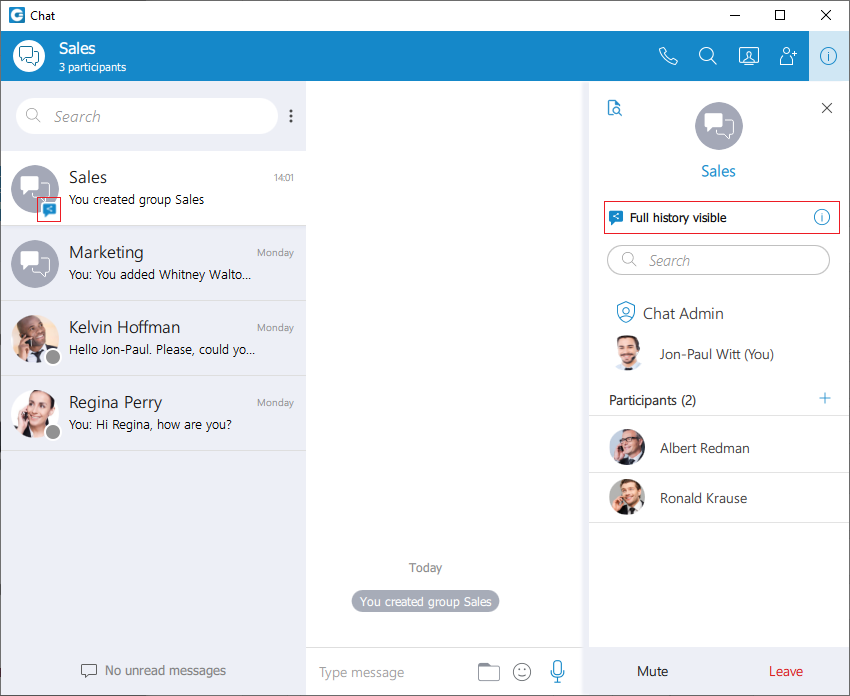
Filtering and selecting contacts are the same as described in the conference section. The user can filter contacts by name, extension number, and department. Created groups are permanent, meaning the user will remain a group member after closing the application.
It is possible to have multiple groups with the same participants and the same or different names. For example, you could create Sales Reports and New Release groups. Both groups can have the same participants, and the user can use them for various topics, so unrelated matters are not mixed up in a single conversation.
Group chat can be created from one-on-one conversations and conference calls.
Close All Chats option is used to close all your conversations easily without having to close each one manually.
Show Closed Chats option is used to see all of your closed conversations so you can find them and move them back to active.
Legacy Chat History option is used to show chat history from previous versions so you would not lose all of the messages you had in your chat history prior to the update to gloCOM version 6.0. This chat history is kept only for those purposes since old chat messages cannot be migrated to the new chat.
Options option is used to quickly navigate to Chat section in the Preferences window.
Mention participants in group chat conversations [6.7]

The mention as a feature represents a good way to get someone’s attention within the group conversation. It allows the user to mention one or more participants and provide the context of their mentioning within the message. The mentioned participants will receive a notification even in the group conversations they have currently muted.
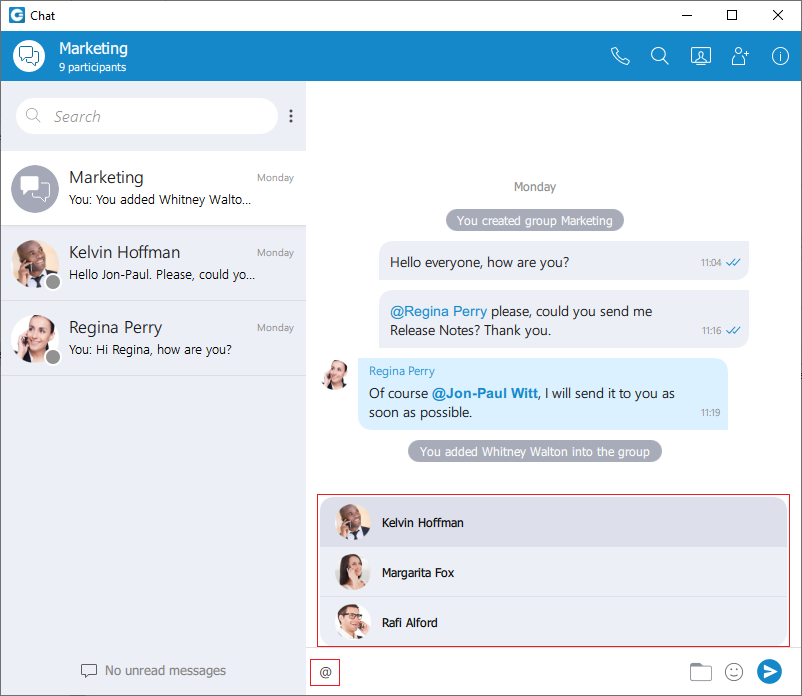
To mention a participant, the user needs to enter the @ sign followed by the name of the desired participant. Immediately after entering the @ sign, the list of the participants who can be mentioned will be displayed above the input field.
Only participants from the group chat conversation can be mentioned.
The user has a few possibilities for selecting participants:
- The first includes scrolling through the list using the up and down arrow keys and selecting the participant by pressing the Enter (Return) key on their keyboard or using the mouse wheel and clicking on the participant.
- The second is to continue entering the participant’s name after the @ sign. In that case, the list above the input field will only display participants whose names match the entry.

The mentioned participant will be colored in blue within the conversation.
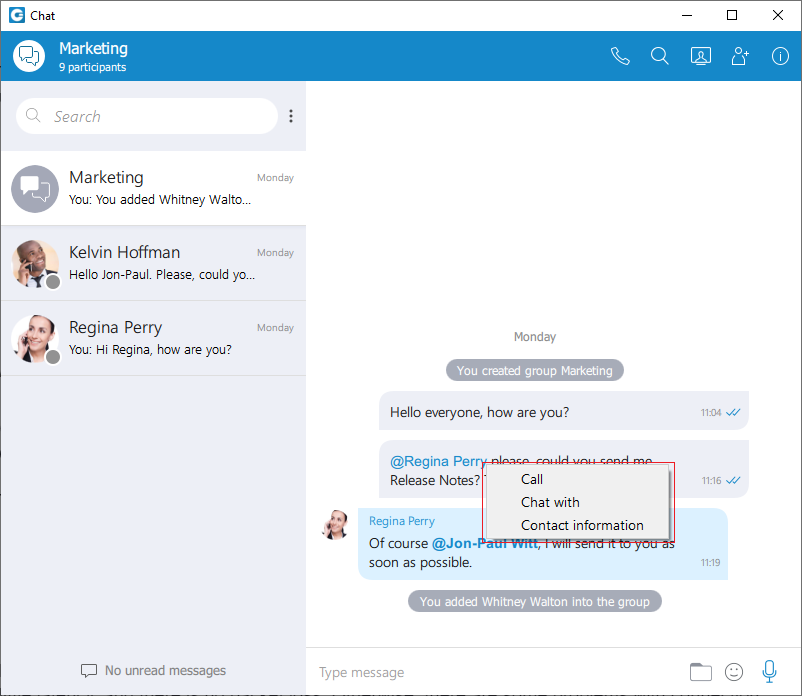
Clicking on the mentioned participant within the conversation brings a pop-up menu with the following options:
- Call
- Chat with
- Contact information
Search and Chat History
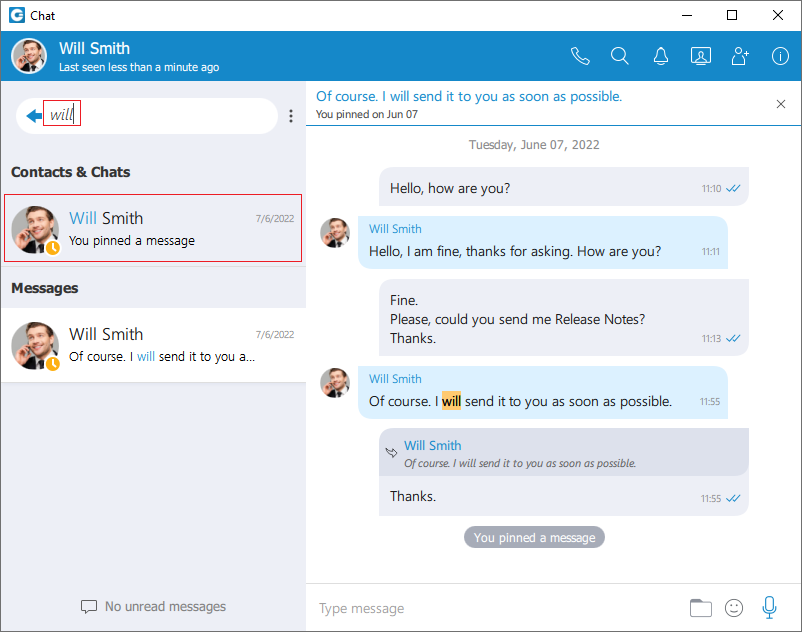
The Search field on the top left of the chat window, right below the blue bar, has multiple purposes:
- Start a new conversation or open an existing conversation by searching for a user’s name, a user’s extension or a group name, and click on the desired item in the list
- Chat history
Unlike the versions prior to gloCOM 6.0 chat history is now integrated into the chat window so you don’t have to open another window to search for a message. When you type in a term in the search field, the application is going to find all users or existing conversations that match the term, and also find all messages that match the term. Users and existing conversations are positioned on the top, followed by all messages that match the term, sorted from the most recent one to the oldest one.
If you click on any item in the Contacts & Chats section, the application is going to open the selected conversation and clear the search field.
On the other hand, if you click on an item in the Messages section, the application is going to open the conversation, focus the desired message and load a few messages around it to give you the context of the conversation at that point. From there, you can scroll up/down to load older/newer messages, where every occurrence of the searched term is going to be highlighted.
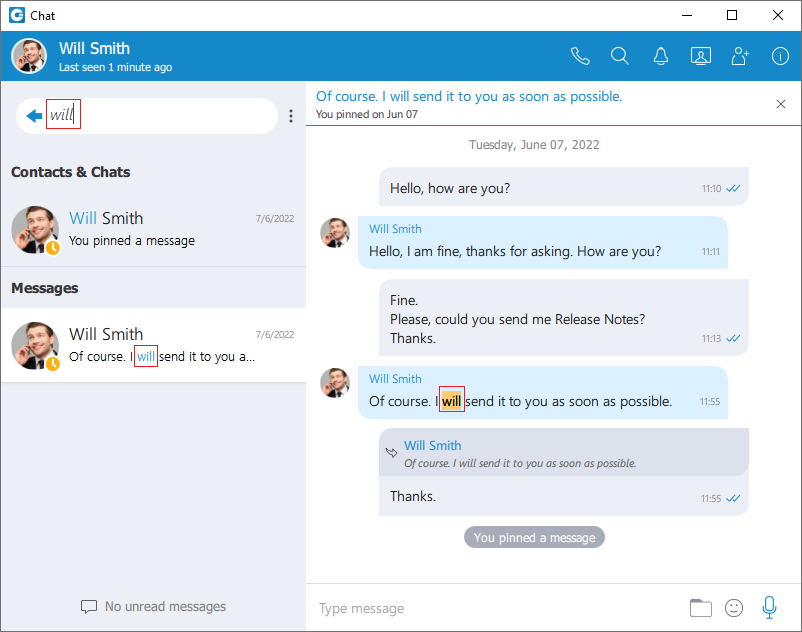
Once you have found what you were looking for, you can delete the term in the search field to exit the search mode or click on the  button on the left side of the search field. This enables you to search your entire chat history without ever leaving the chat window.
If you type in more than one word in the search field, the application is going to find all messages that contain both of those words in any order.
For example, searching for “Hello Bob” matches all of these:
- Hello, how are you Bob?
- Bob? Hello? Are you there?
- Hello Bob, do you have a few minutes?
- hello Bob, how are you?
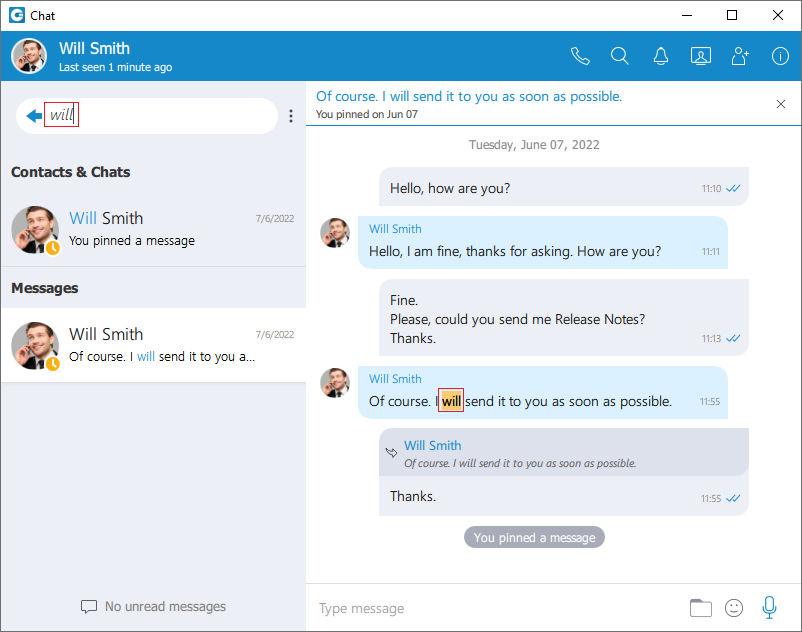
But maybe you just wanted to find the last two messages, where words Hello and Bob are right next to each other and in the right order (where the word Hello comes before Bob). In that case you have to put quotation marks around the term.
For example, search for “Hello Bob” matches just these:
- Hello Bob, do you have a few minutes?
- hello Bob, how are you?
As you can see in the examples above search in the chat window is case insensitive.
Conversations list
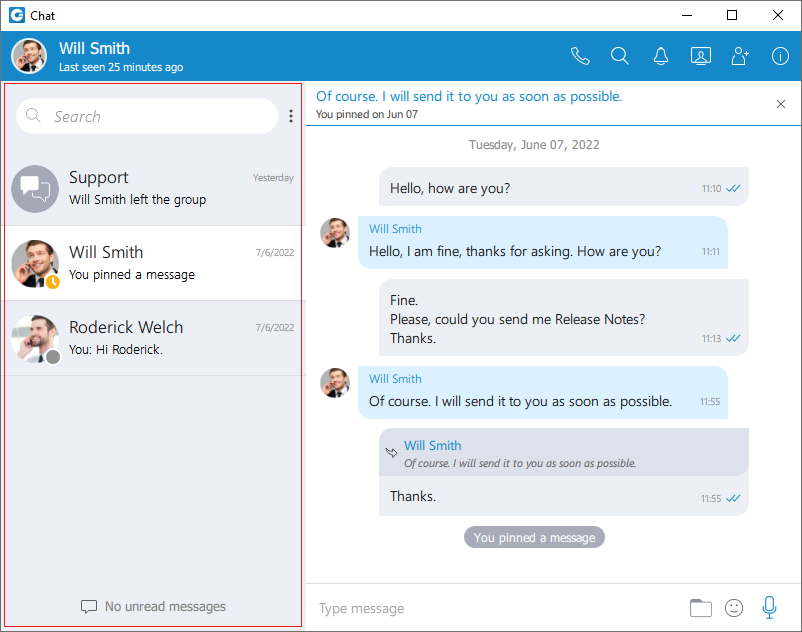
On the left side of the chat window, right below the search field, there is a list of all your conversations sorted by their most recent activity. These conversations are persistent, meaning that they will appear in the chat window even after you restart the application. To remove the conversation permanently you have to delete the conversation which can be done from the info drawer. In case you just want to close the conversation you can hover the conversation and press the x icon that appears in the top right corner of the conversation. This way you can keep visible only those conversations you are interested in currently. If you want to close all of your conversations you can do so by clicking on the Close All Chats option from the global dots menu in the chat window. Any activity in the closed conversation will move it back to active (any new messages, new participants added etc.) so you never miss the latest messages and events. You can find any of your closed conversations by searching for them in the chat window. You can also have an overview of all closed conversations by clicking on the Show Closed Chats option from the global dots menu in the chat window. From there you can move any conversation to active just by clicking on it, or you can move multiple conversations to active without leaving this mode by clicking on the  icon that appears on hover in the top right corner. Click on the Back to active chats label to return to your active conversations list.
Conversation with a user which has been deleted from PBXware will be marked with a prefix (Deleted). You can no longer send messages to this conversation, but it is still useful because of the chat history and all existing messages with that user before deletion.
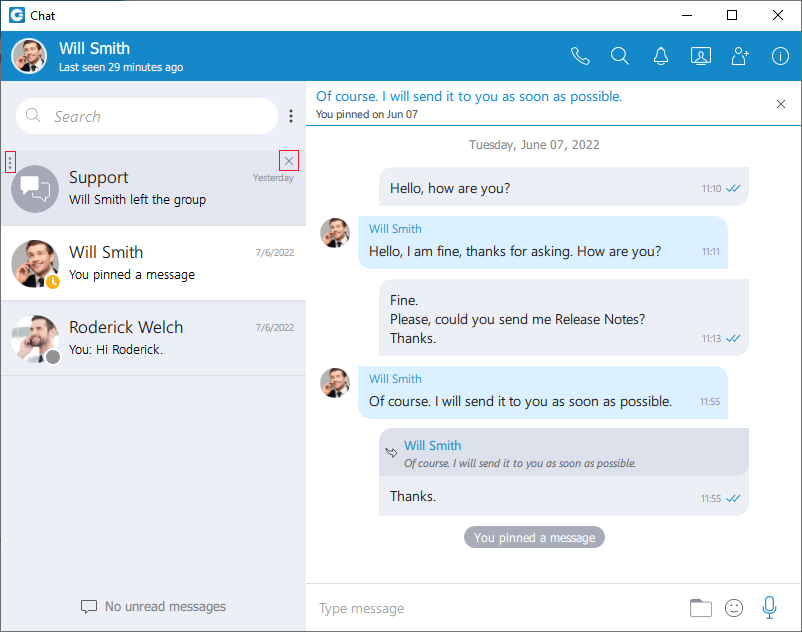
When you hover a session, besides the x icon there is a dots icon in the top left corner of the conversation. Clicking on this icon opens up a menu containing the following options:
- Search
- Call
- Pin Chat
- Mark as Read/Unread
- Mute (only for group conversations)
- Close All Except This Conversation
Also, right-clicking on the chat conversation in the conversations list brings up a context menu with these options.
Search option allows you to search for messages from that conversation. This is useful to search only for messages from a specific user unlike global search which searches for messages from all conversations. There are two ways to get out of this mode: by clicking on the back icon ![]() located on the left side of the search field, or by pressing the ESC key.
located on the left side of the search field, or by pressing the ESC key.
Call option allows you to call the user or to create a conference call in case of a group chat.
Pin Chat allows you to pin the most used conversations on the top of the conversation list. The last pinned conversation is always on the top of the conversation list. You can unpin the conversation in the same way as pin, and also by clicking on the pin icon ![]() that appears if a conversation is pinned. The user can rearrange pinned conversations according to their needs by using the drag and drop options. This allows them to define priority for pinned conversations.
that appears if a conversation is pinned. The user can rearrange pinned conversations according to their needs by using the drag and drop options. This allows them to define priority for pinned conversations.
Mark as Read/Unread allows the user to explicitly mark the conversation as Read/Unread. If they mark the conversation as Unread, the Unread indicator will show up for that conversation. It informs the user to look at this conversation again and take some actions if needed. Any action inside the chat conversation with the unread status will remove the Unread indicator. Also, opening the conversation or explicitly marking it as read will remove the indicator.
Mute option is used if you want to stop receiving notifications for a group chat maybe because there are too many messages exchanged and it distracts you. You can unmute a group chat in the same way as mute, and also by clicking on the speaker icon ![]() that appears if a conversation is muted. You can also Mute/Unmute a conversation from the Chat Info screen.
that appears if a conversation is muted. You can also Mute/Unmute a conversation from the Chat Info screen.
Close All Except This Conversation option allows you to close all conversation except this one. This is useful if you have only one conversation you are currently engaged in, so you want to hide all others so they don’t distract you.
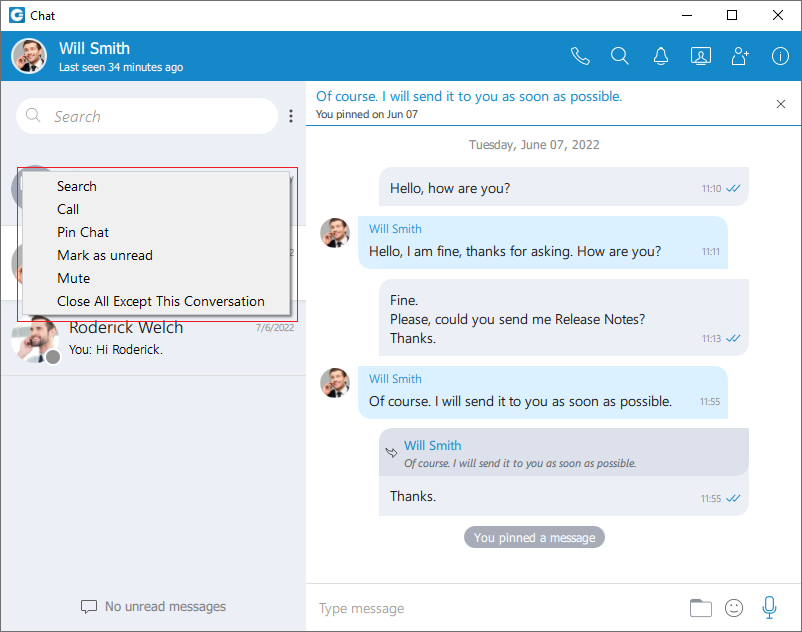
For each 1 on 1 conversation in the list you can see:
- User’s avatar with his status icon
- User’s name
- Last message in the conversation
- Time of the last message in the conversation
- Number of unread messages (if any)
For each group conversation in the list you can see:
- Group chat icon
- Group name
- Last message in the conversation
- Time of the last message in the conversation
- Number of unread messages (if any)
While in search mode conversations list will change its items according to the searched term which is explained in the Search and Chat History section.
Unread messages indicator
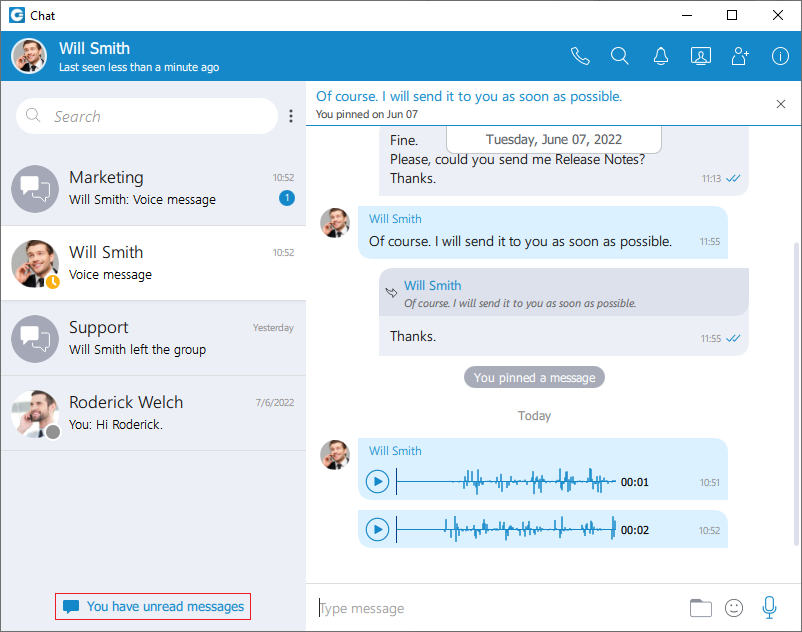
At the bottom left of the chat window there is an unread messages indicator to inform the user if there are currently any unread messages. This is useful in cases where you’ve scrolled down and you don’t see your most recent conversations, or if you are in search mode.

If there are any unread messages the label and the icon are emphasized in blue color to draw the user’s attention.
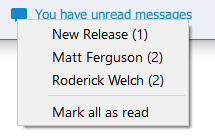
Click on a label to open up a menu showing a list of all conversations with unread messages indicating the number of unread messages in the parenthesis. Also, there is an option to mark all messages as read.
Marking all messages as read will effectively send seen to all those conversations even though you haven’t read those messages yet. Clicking on any other option besides Mark all as read opens the selected conversation. This can be used as a quicker way to find conversations with unread messages instead of looking for them in the conversations list.

If there are no unread messages, the label is not emphasized and serves only as an indicator, without any functionality.
Messages view
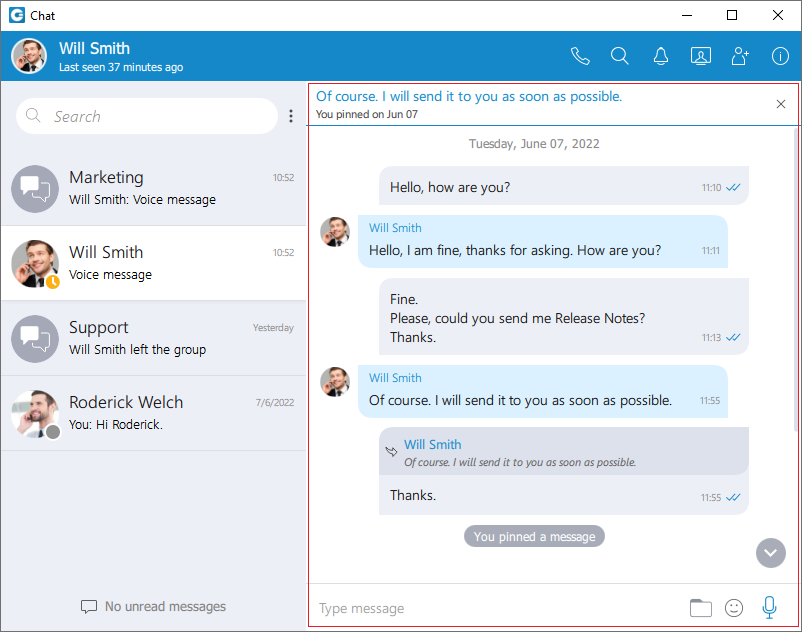
On the right side of the chat window you can see the messages of the currently selected conversation.
In case there are no unread messages in the conversation, the application will load last 20 messages and place the scrollbar on the bottom. If you want to load older messages, you just scroll up until you reach the top. This way you can scroll all the way to the beginning of the conversation.
In case there are unread messages in the conversation, the application will load all unread messages plus 20 additional older messages. The scrollbar will be positioned on the first unread message with the  indicator so you know where should you continue reading the messages.
The keyboard’s up and down arrow keys can be used for scrolling messages through chat/SMS conversations.
The typing indicator is presented above the input field of the message window and within the conversation list so you can see when somebody is typing to you. In the case of a group conversation, if more than one participant is typing at the same time, the typing message will take the form N participants are typing where N is the number of typing participants.

While you are inside of the group conversation, left-click on the participant’s name or avatar inside the messages window will show a popup menu with three options:
- Call: Call the participant directly.
- Chat with: Start a one to one conversation with the participant.
- Contact information: Show the contact information.
While scrolling up in the currently selected conversation, a scroll indicator ![]() appears in the bottom right corner of the messages view so you can easily move to the end of the conversation. If you receive a new message while searching/viewing the older messages, the scroll indicator will show the number of messages received. Clicking on the scroll indicator
appears in the bottom right corner of the messages view so you can easily move to the end of the conversation. If you receive a new message while searching/viewing the older messages, the scroll indicator will show the number of messages received. Clicking on the scroll indicator ![]() will take you to the first received message.
will take you to the first received message.
Message states
For outgoing messages there is an indicator explaining the current state of the message:
 Sending: The message is on its way to the server.
 Sent: The message is sent and has reached the server.
 Delivered: The message is delivered to the other user(s).
 Seen: The message has been read by the other user(s).
 Failed: The message could not reach the server.
Text selection and context menu
You can select text inside of messages by pressing and dragging your mouse across the messages area. Click anywhere on the messages area to unselect all messages.
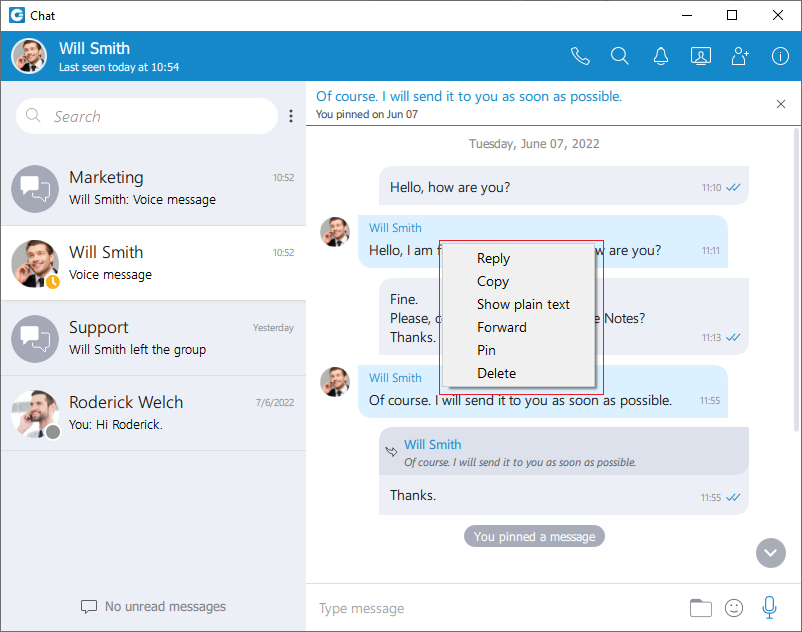
While there is any selected text in the messages area, right-clicking brings a context menu with the Copy option to copy all selected messages in the clipboard. You could also press CTRL+C on Windows, or Command(⌘)+C on macOS to copy all selected messages in the clipboard.
If you right click inside a message bubble (gray or blue rectangle) while there is no selected text, a context menu appears with the Reply, Copy Message, Show plain text, Forward, Pin Message, Info (only for groups) and Delete Message options.
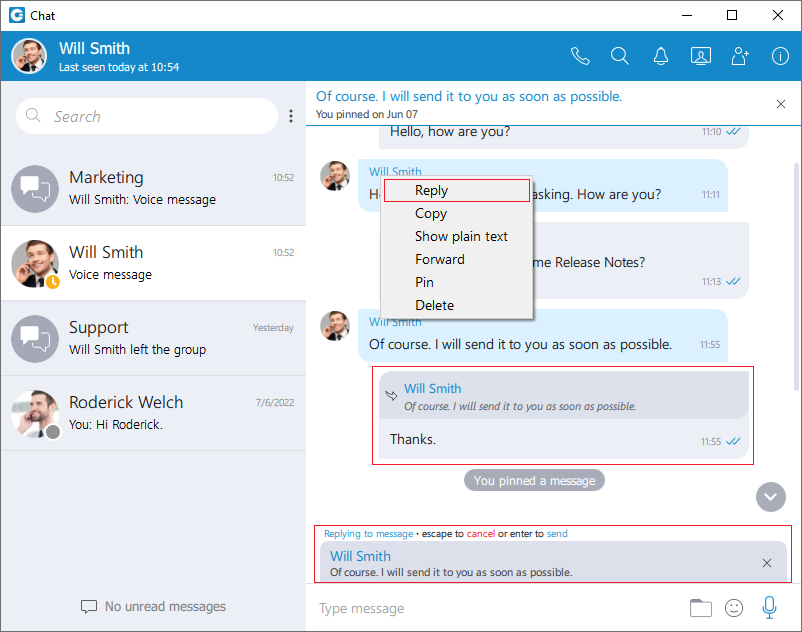
Reply option allows the user to reply to a specific message. To reply to a message, hover over it, and click on the reply button, or right-click on the message, and from the drop-down menu, select the Reply option. As a result, the message that the user wants to reply to will appear above the input field. Clicking on the replied message inside the chat will take the user to the original message.
Copy option is used to copy all message content to the clipboard.
Show plain text option is used to disable all message formatting (links, emojis, etc.), to see the original message source. If you right-click on the message again after you’ve pressed the Show plain text option, there is a Show rich text option to revert it and to see the formatted message with links and emojis.
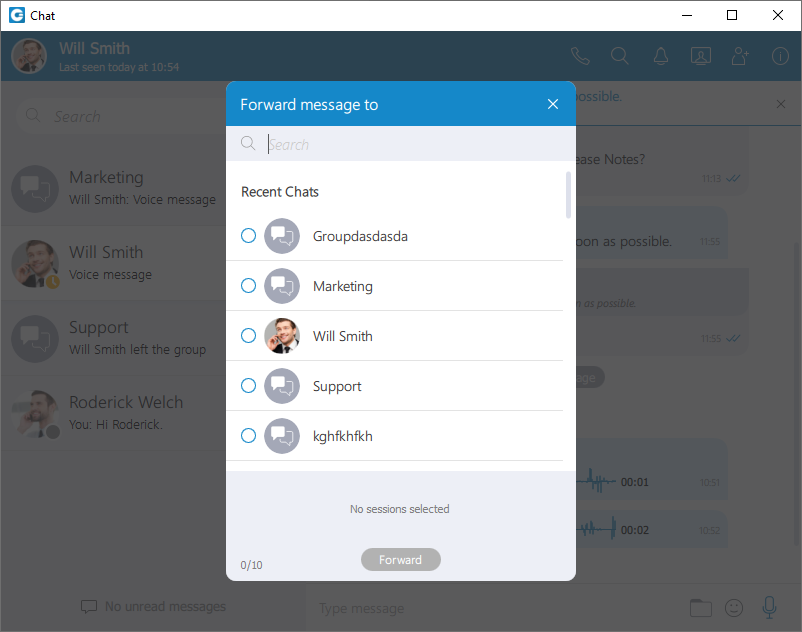
Forward option is used to forward messages and files from one conversation to another. You can forward the message or file up to 10 conversations at once.
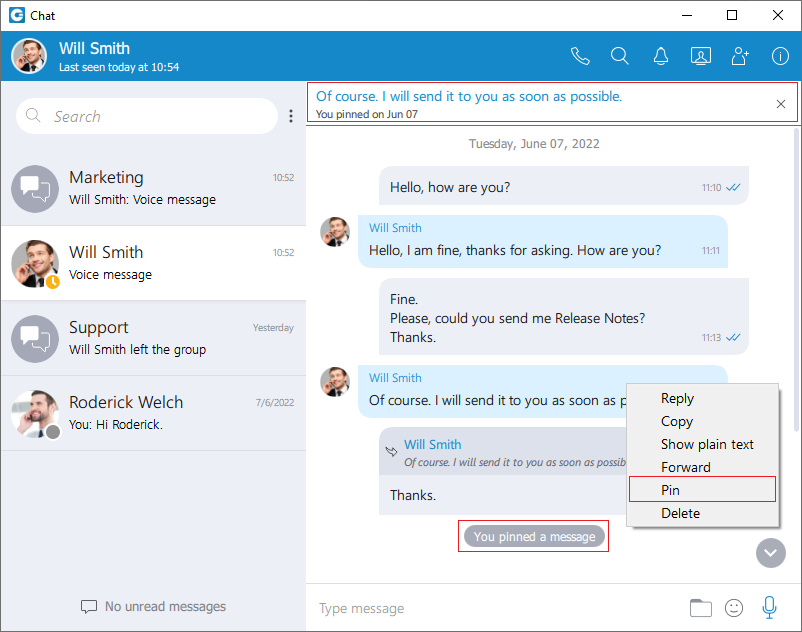
Pin/Unpin options are used to pin/unpin an important message or file message to the top of the conversation window. Anyone can pin/unpin the message inside the conversation. You can pin one message at the same time. By clicking on the pinned message, will redirect you to that message inside the conversation.
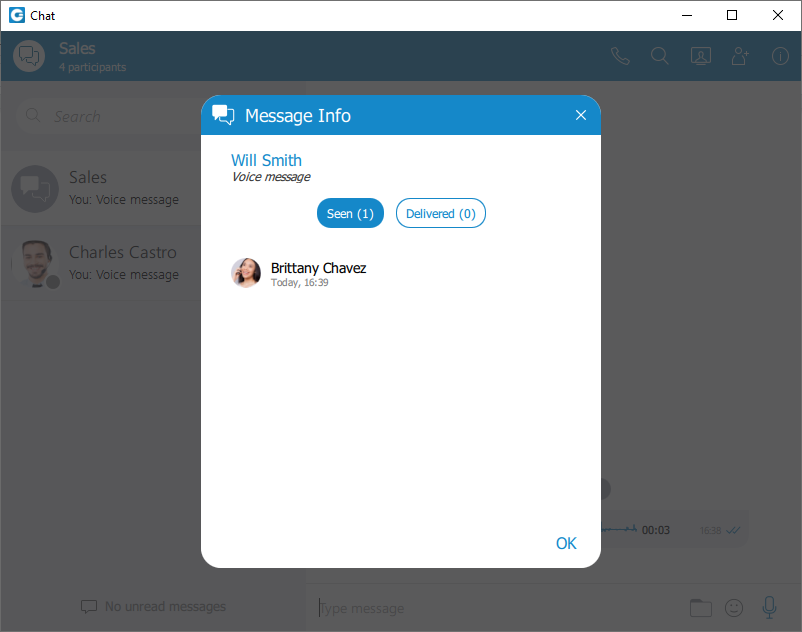
Info allows the user to see the information about the delivery and seen status of a single message within a group chat conversation.

Delete allows users to delete text and file messages. To delete the desired message, users can just right-click on it, and from the drop-down menu, select Delete option.
After selecting the Delete option, the confirmation dialog will show up with two options for outgoing messages:
- Delete for myself with the following sub-content: This message will be deleted only for you. Other chat members will still be able to see it. Are you sure you want to proceed?
- Delete for everyone with the following sub-content: This message will be deleted for all participants. Are you sure you want to proceed?
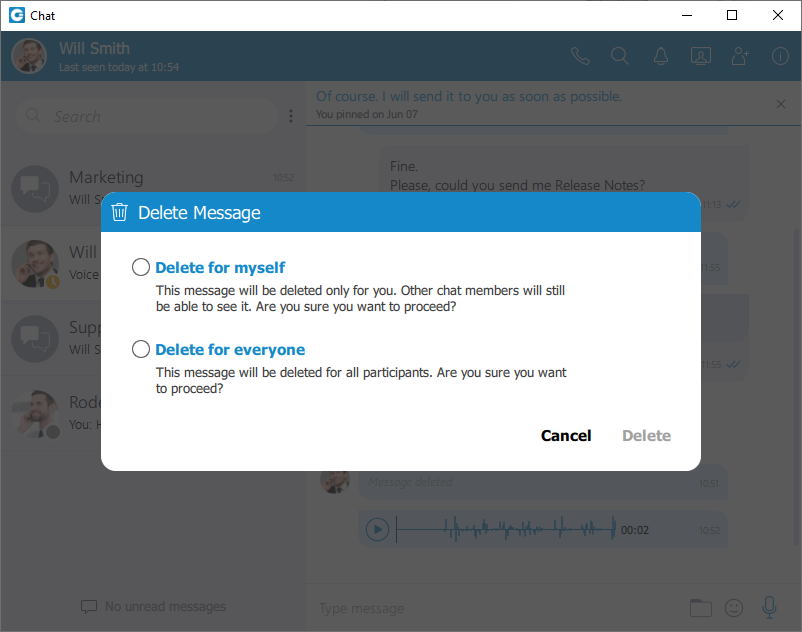
And for incoming messages, there is only one option:
- Delete for myself with the following sub-content: This message will be deleted only for you. Other chat members will still be able to see it. Are you sure you want to proceed?
In addition to the options mentioned above, the confirmation dialog contains the Delete and Cancel buttons.
After deleting the message, the Message deleted indicator shows up.
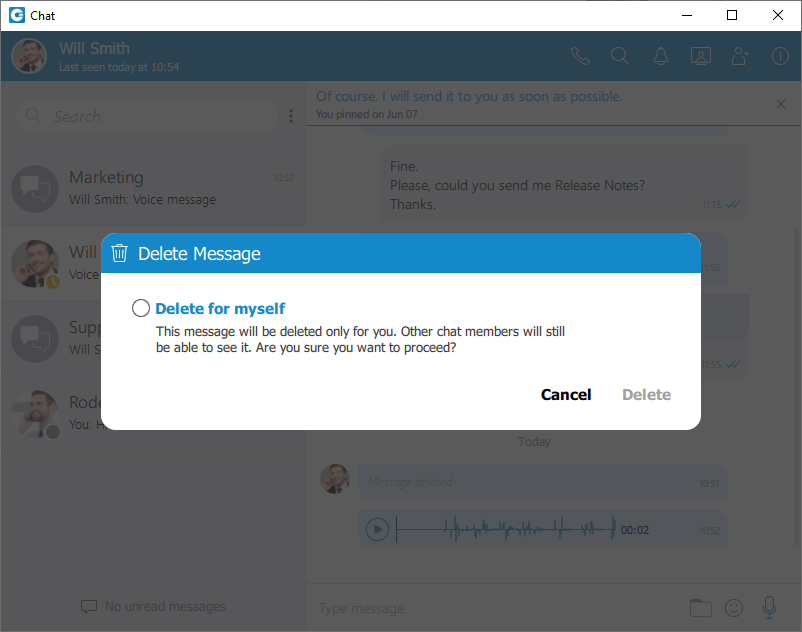
File message
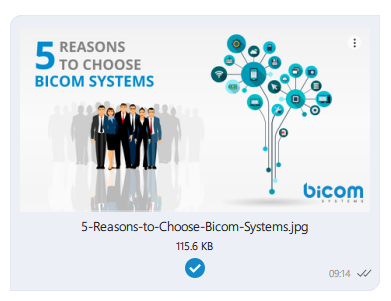
Besides regular text messages, you can use the chat in gloCOM to share files.
For image and video files there is a thumbnail that is automatically downloaded. Under the thumbnail, there is information about the file name and the file size. At the bottom of the file message there is an icon used to open, download, show upload/download progress or retry file upload/download depending on the file status. This is explained in detail in the Files Overview section. Also, at the top right of the file message, there is a 3 dots icon. Clicking on the icon opens a menu with options to download, open, locate the file on the file system, or create a copy of the file.
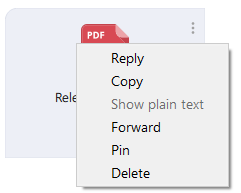
Clipboard
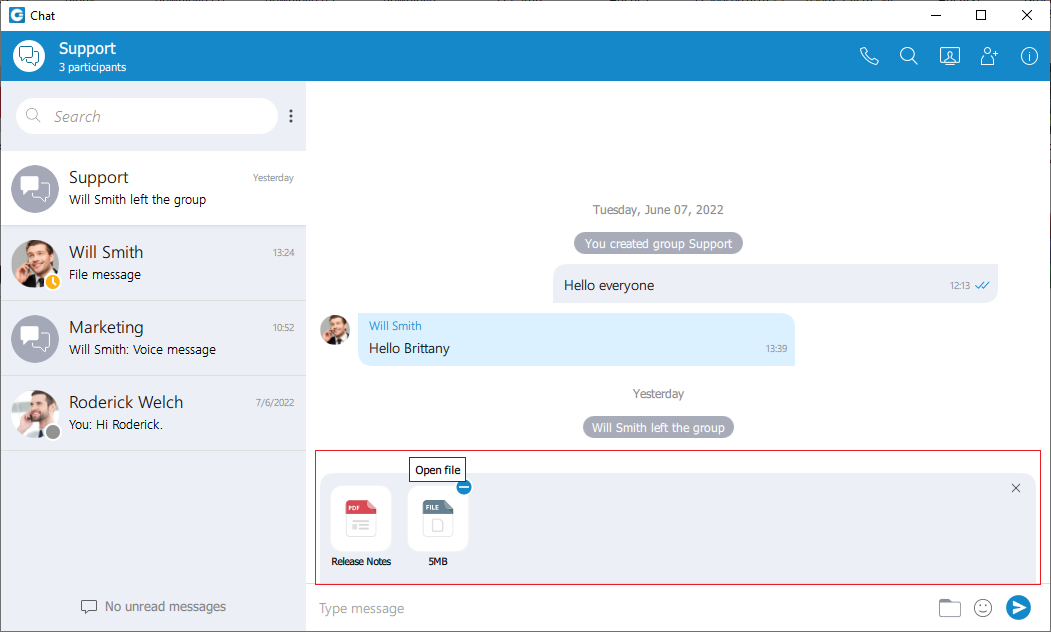
gloCOM Desktop supports clipboard functionality for images and files. It means that the clipboard now can be used for copying/pasting images from the external app (such as image viewer, browsers, etc.) or for copying/pasting images and files from the File Explorer (Finder on macOS) directly into the chat session. With this at their disposal, users are no longer limited to just using an image/file picker and drag & drop feature for sending images and files.
While using clipboard functionality for sending images and files, instead of sending them immediately after pasting into the chat, the application creates an attachment list that includes thumbnails within the selected chat session. Clicking on the thumbnail opens the file in the proper viewer app (image viewer for the pictures, the default video player for videos, etc.). This way, users have the opportunity to double-check selected files and images before sending.
Adding files to the attachment list while using the clipboard can be done in two ways:
- Using CTRL(Cmd on macOS) + C/V for copying/pasting files or
- Using the mouse right-clicking to copy/paste files.
Every image sent using the clipboard will be saved into the gloCOM downloads directory.
Furthermore, hovering over the file inside the attachment list displays a blue circle with the white dash at the thumbnail’s upper right corner. Click on it to discard the file from the list. Discarding all files from the list can be done by clicking the x button in the upper right corner of the attachment list.
While the attachment list is active and the user selects files using a file picker or drags them into the chat, they will be attached to the attachment list. Otherwise, the app will send them immediately.
In addition, while the attachment list is present within the selected chat conversation, the user can write a text message simultaneously. In that case, the app will send the text message first and then the attached files one by one.
The maximum number of files attached to the attachment list at once is limited to five (5). Once the limit is reached, a pop-up message will appear displaying the following: Could not add files since it would violate the maximum files limit! (Max. count of all attachments: 5).
For larger images, the copy operation will take a while. During this time, the application will change the cursor type to loading, indicating that the file is being copied.
Input field
Type message field on the bottom of the chat window is used to send messages to the currently selected conversation. After typing a message press the Enter (Return) key on your keyboard to send a message. To type in a new line press Shift + Enter or Ctrl + Enter (Command + Enter for macOS).

The length of the message that can be sent is limited to 10 000 characters.

 A folder icon allows the user to send files. Clicking on it opens up a dialog where the user can pick up to 5 files to be sent to the currently selected conversation. Also, the user can send files by dragging them from Windows Explorer (Finder on macOS) to the messages area within the chat window.

 An emoji icon allows the user to send emojis. Clicking on it shows an emojis window where the user can browse through emojis separated into categories. At the bottom of the emojis window is a list of the most recently used emojis.
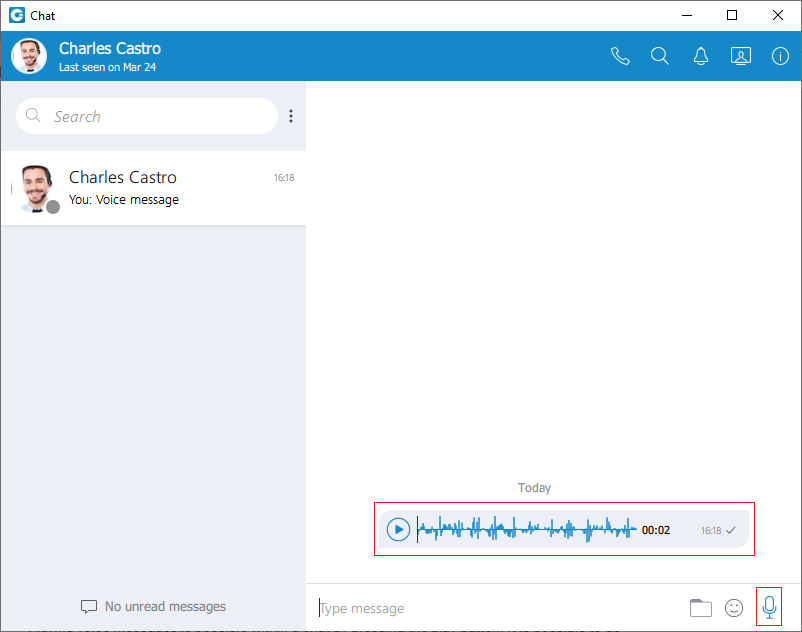
![]() A microphone icon allows the user to record voice messages for up to 2 minutes.
A microphone icon allows the user to record voice messages for up to 2 minutes.
While recording, the user has the ability to use the following options:
- Discard voice message: It will discard a voice message.
- Stop recording voice message: It will stop recording. This way, the user can listen to the voice message before sending or discarding it.
- Send voice message: It will stop the voice message and send it immediately without the chance to listen to it.

While recording is active, sending text and file messages will be disabled until the user sends or discards the voice message.
Playing voice messages is possible within a chat by pressing the play button. It is possible to go back and forth through a selected voice message by clicking on the waveform.
Some chat features that are described above can be enabled/disabled depending on the server settings.
SMS/MMS
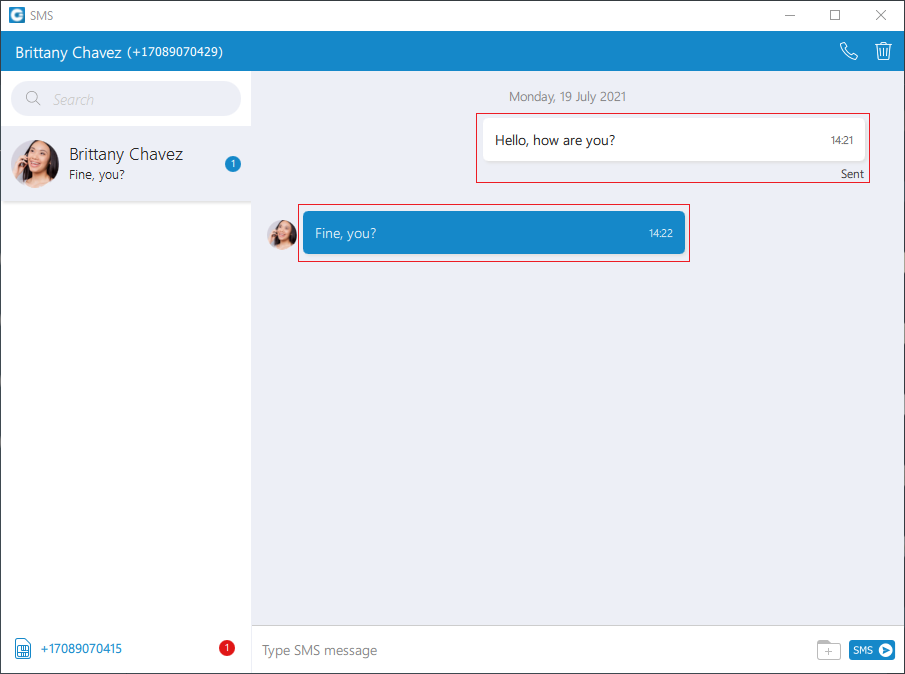
These features allow the user to send/receive SMS/MMS messages.
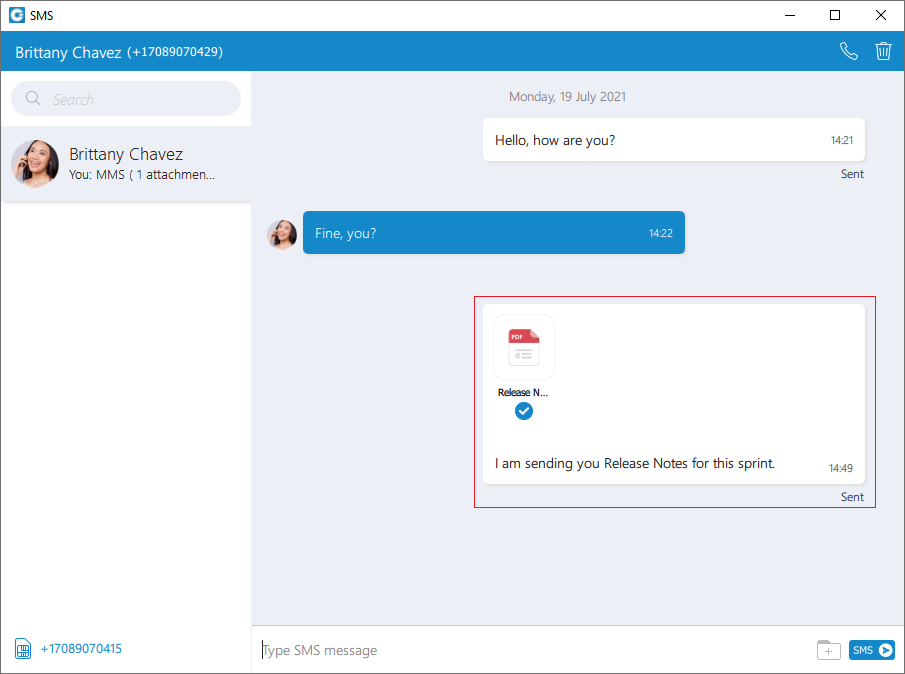
The MMS message is an enhancement to the standard SMS message. The main difference between SMS and MMS messages is that the user can send multimedia and other files in their messages. It includes media such as videos, pictures, audio clips, GIFs, and much more. The maximum size of uploaded files is 500 KB or up to ten (10) files per message. Additionally, MMS allows for up to 1000 characters of text in a message, which is a lot more than for a standard SMS.
Unfortunately, SMS history is not synced between the user devices. It means that if a user reads the messages on the gloCOM Desktop, it will not be available on gloCOM GO and vice versa.
SMS Number
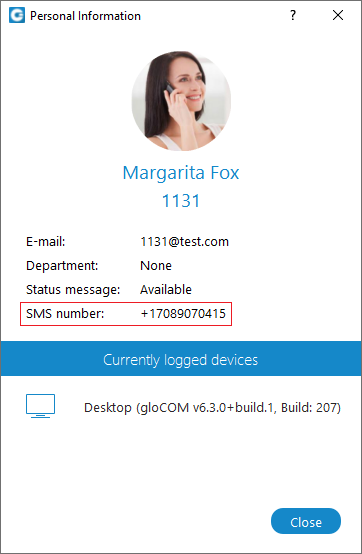
If the user has associated an SMS number with their Extension, they need to open the Personal Information screen to see it.
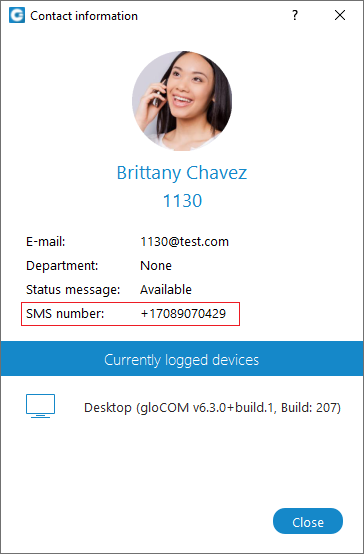
To see the SMS number of the contact, right-clicking on contact, and from the drop-down menu, select the Contact Information.
Start SMS conversation
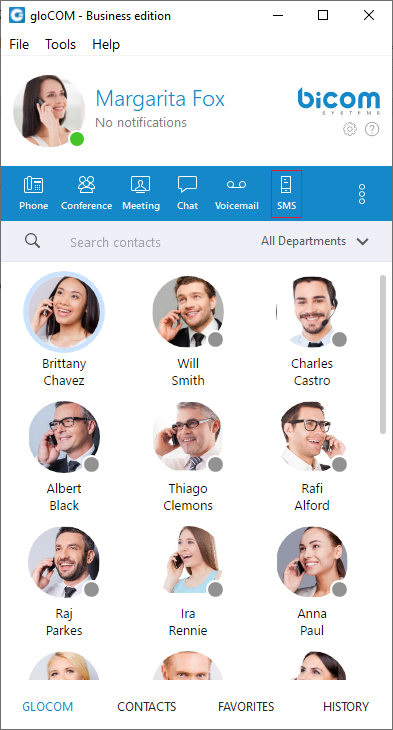
There are two ways to start an SMS conversation:
The first way is to open the SMS window by clicking on the SMS icon in the toolbar within the main gloCOM window. The SMS window will appear. Next, enter the name or number of the contact inside the search field and click the result to start a conversation.
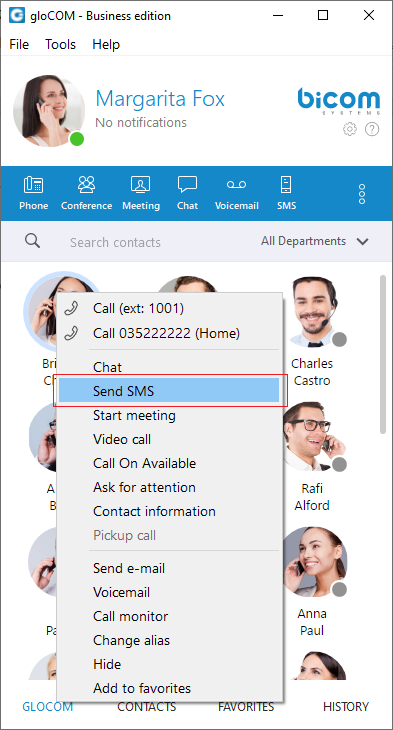
The second way is right-clicking on the contact, and from the drop-down menu select Send SMS.
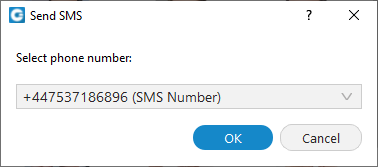
If the contact has multiple phone numbers, the pop-up window will appear with all their numbers, and the user will be able to select which number they desire to send an SMS/MMS message.
SMS/MMS Notifications

SMS/MMS notifications have the same behavior as chat notifications. When the SMS/MMS message is received, a notification pops up.
The app will display the number of unread SMS messages within a gloCOM main window, taskbar, tray icon, and at the bottom of the SMS window.

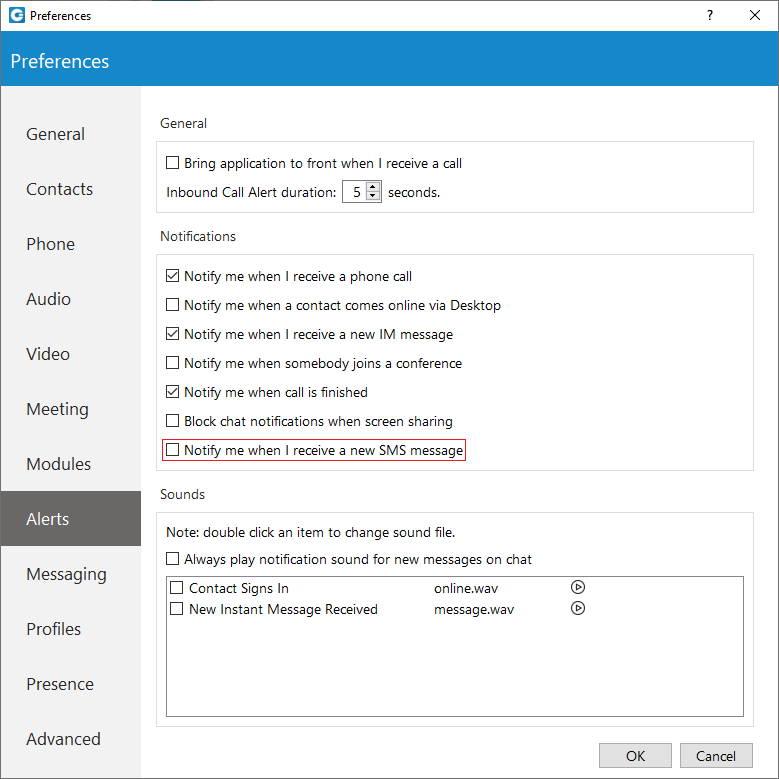
To turn off the SMS notifications, please navigate to Preferences → Alerts and uncheck the Notify me when I receive a new SMS message option.
SMS notifications are unchecked by default.
SMS Window

The SMS window is similar to the chat window. At the top left side of the blue bar is displayed an SMS number of contact the user is currently talking to.
On the right side of the blue bar, there are two options:
 Call the currently selected user.
 Delete the current conversation.
The search field is below the contact’s SMS number. The user can use it for filtering contacts, conversations, and searching messages.
Below the search field is a conversation list of all user’s conversations sorted by their most recent activity.
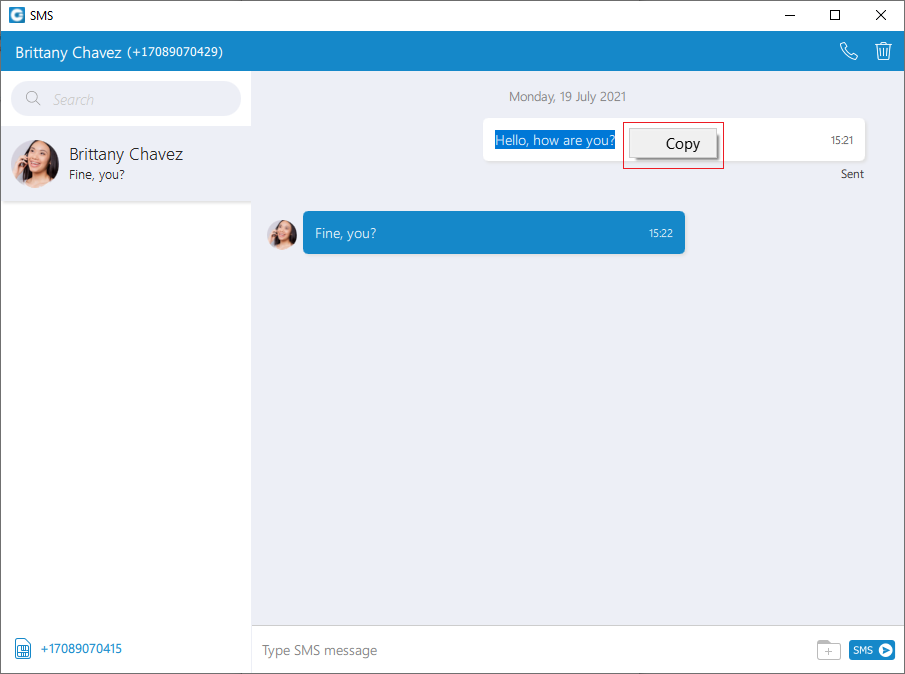
Next to it is the messages view. Right-clicking within the white or blue rectangle allows the user to copy the previously selected text. The white rectangle represents outgoing messages, and the blue represents incoming messages.
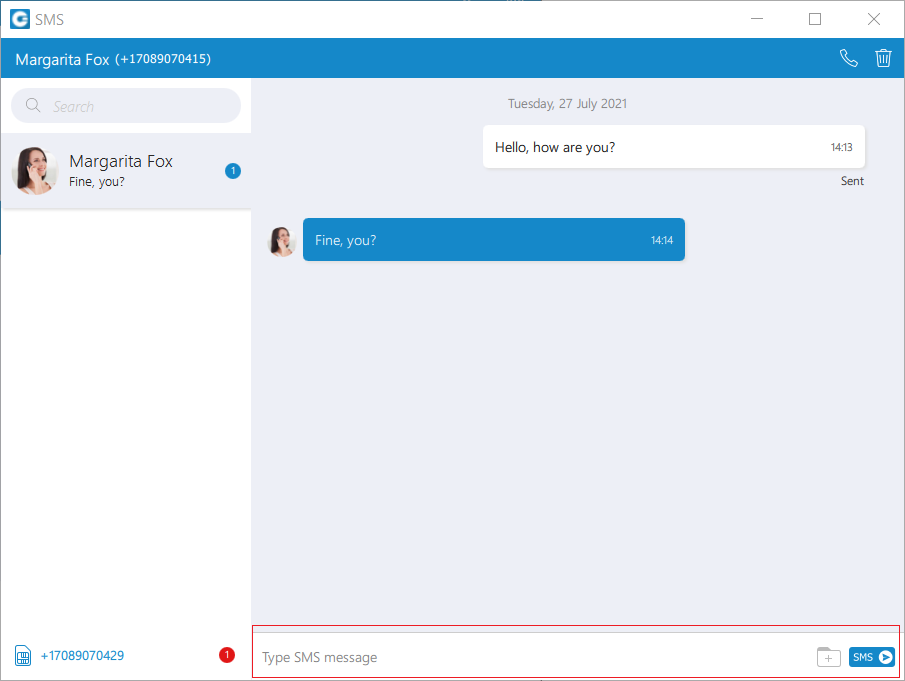
An input field is below the messages view. Click the send SMS icon on the right side of the input field to send an SMS message. The Enter key on the keyboard represents a new line.
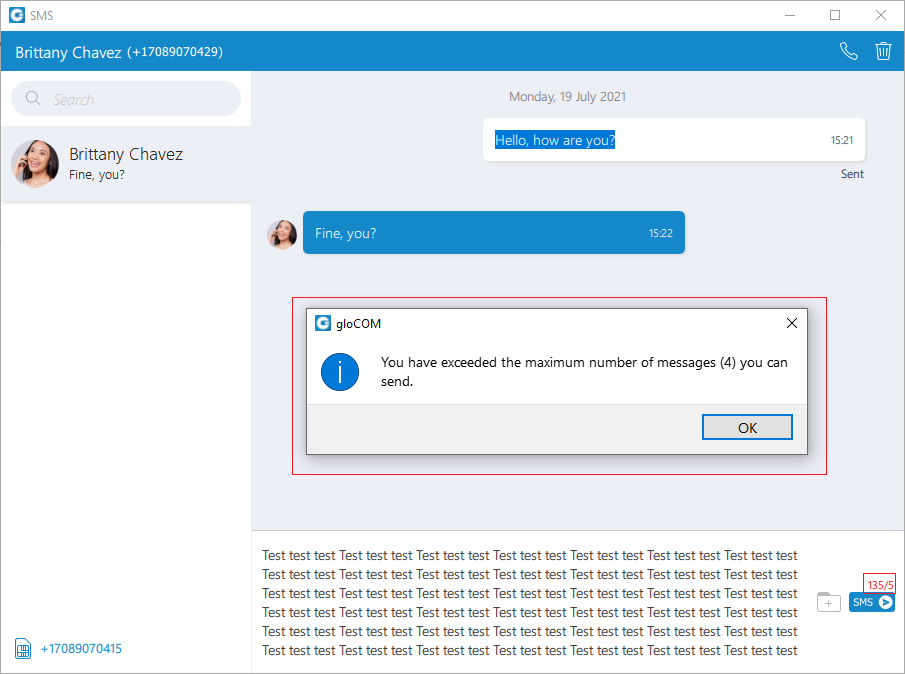
It is not possible to send more than four (4) messages at a time. Also, the character counter appears above the send SMS icon as soon as you start typing the message.
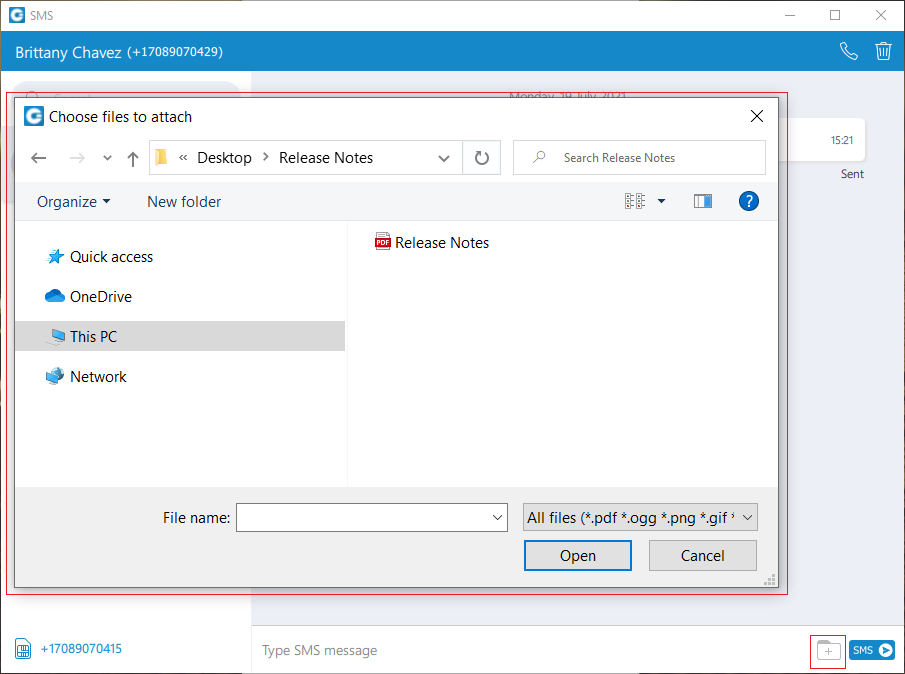
A folder icon that is used for sending files can be found next to the Send SMS icon. Clicking the icon opens up a dialog where the user can select up to ten (10) files to be sent to the currently selected conversation.
The user can upload a max of 500 KB of multimedia data.
Additionally, the user can send files by dragging them from Windows Explorer (Finder on macOS) to the message area inside the SMS window. If the amount of the selected data is larger than 500 KB or if more than ten (10) files are selected, a pop-up message will appear displaying the following: Maximum size of attached files for MMS reached. All files that exceed the previously mentioned limits will be discarded.
Please note that supported MMS files are as follows:
- Image Files: jpeg, png, gif
- Audio Files: MP3, OGG, AMR
- Text Files: PDF, Vcard, txt
- Video Files: mp4
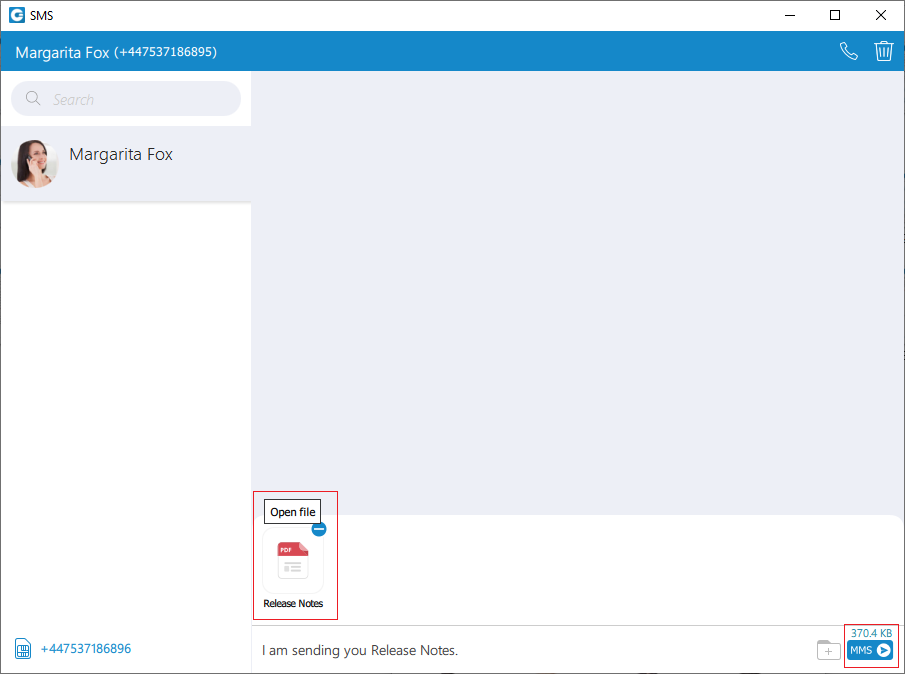
The application will compress images (jpeg and png) before sending, which gives the user the ability to send images larger than 500 KB. The application will preserve the quality as much as possible and adjust the resolution as needed.
If a file is selected, an SMS message becomes an MMS message, which can be seen above the Send SMS/MMS icon as the counter of the remaining kilobytes is displayed instead of the character counter.
After selecting the files, a thumbnail with the file name for each selected file will be displayed above the text area within the input field. Also, it is possible to remove selected files from the MMS message by hovering over them and selecting the blue circle with a white dash at the top right corner of the thumbnail.
The gloCOM will automatically download all files smaller than 500 KB. If the file is not downloaded for any reason, the user can click on it to download it.

The associated SMS number (or the alert icon) is displayed at the bottom left side of the SMS window. What will be displayed depends on whether the SMS option is enabled or not.
If the user has associated an SMS number with their Extension, the SMS number will appear. It means that they can send/receive SMS/MMS messages. Click on it to copy it to the clipboard.
Next to it is an unread SMS messages indicator. It informs the user if there are currently unread SMS messages. It has the same behavior as the unread messages indicator within the chat window.
If there are unread messages, the red circle will appear with the number of missed SMS messages inside it to draw the user’s attention.
Click on it to open up a menu showing a list of all conversations with unread messages indicating the number of unread messages in the parenthesis. Also, there is an option to mark all messages as read.
Marking all messages as read will effectively treat all messages as read and remove the unread count indicator even though you have not read them yet. Clicking on any other option besides Mark all as read opens the selected conversation. It can be used as a quicker way to find conversations with unread messages instead of looking for them in the conversations list. If there are no unread messages, the red circle will not appear.
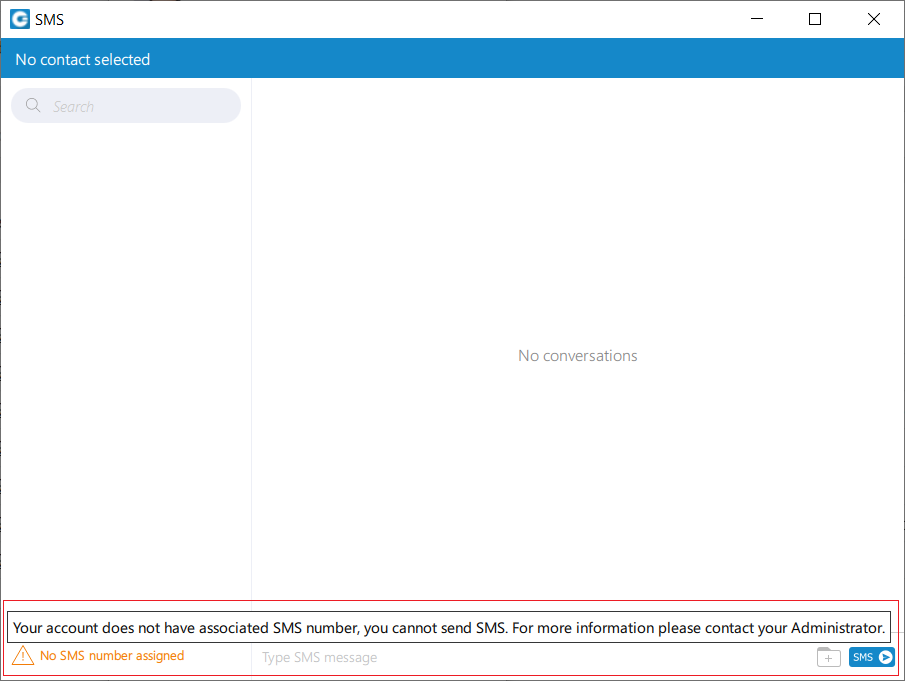
If the SMS number is not associated with the user Extension, the alert icon will appear instead of the SMS number with the message, No SMS number assigned. It means that the SMS/MMS messages cannot be sent or received.
SMS Message States
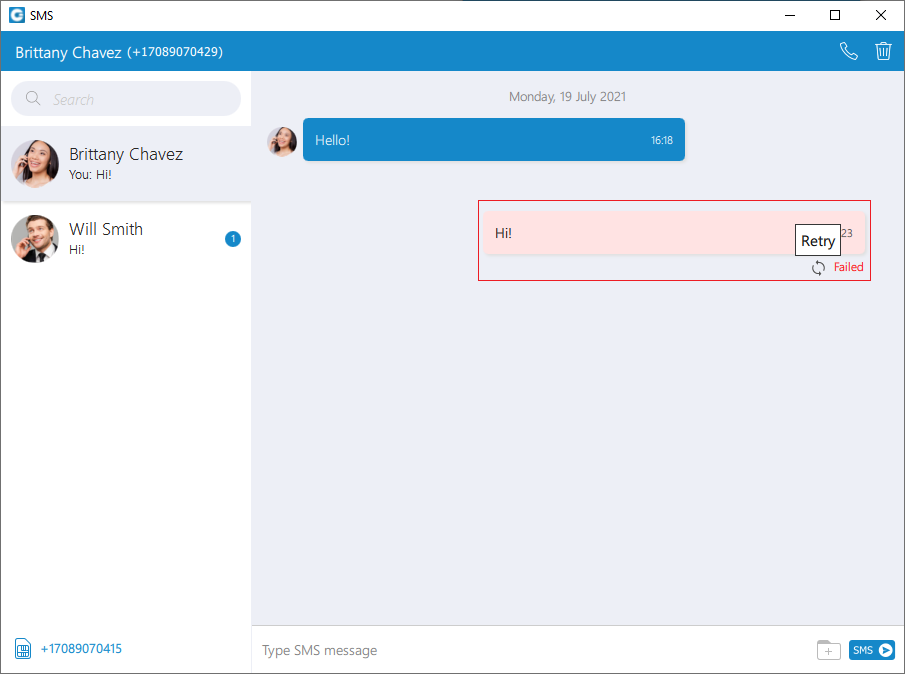
The SMS/MMS message has only three states:
- Sending
- Sent (It does not mean that the message is delivered.)
- Failed ((When the SMS/MMS message is in this state, click the Retry option to send it again.)
Enable/Disable SMS messaging on Desktop [6.7]
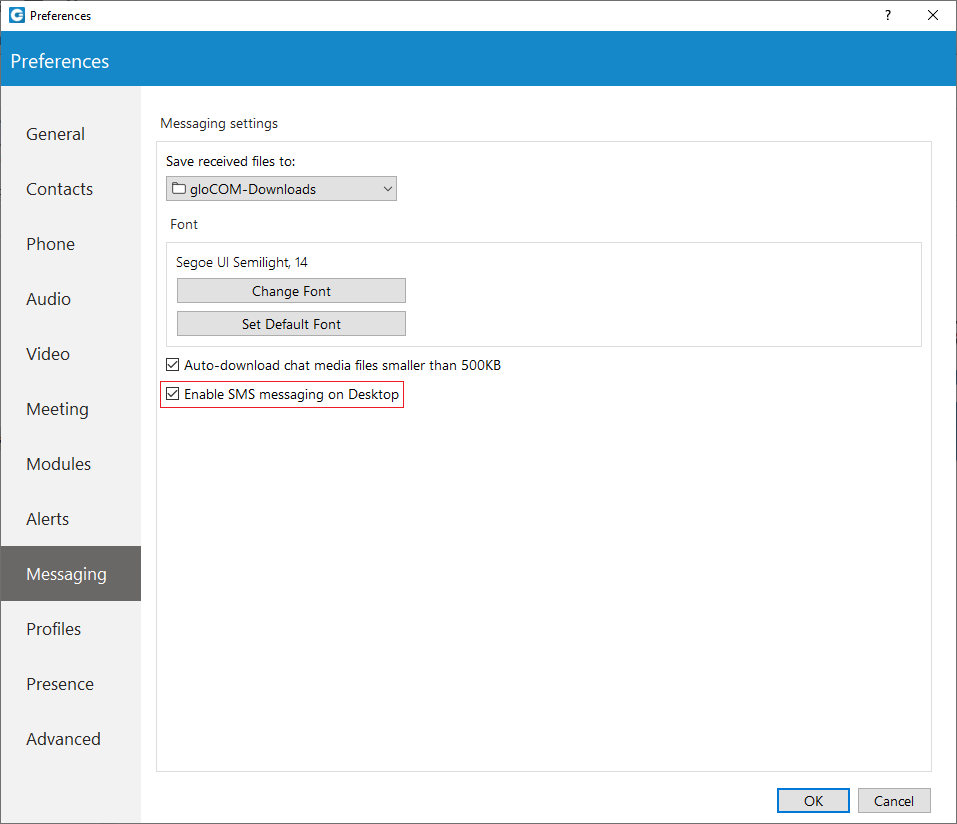
By default, SMS/MMS messaging is enabled within the gloCOM Desktop application. The user can disable it if they do not want to use the gloCOM Desktop application for SMS/MMS messaging.
To disable SMS/MMS messaging, please navigate to the Preferences –> Messaging and uncheck the Enable the SMS messaging on Desktop option. Unchecking this option will disable sending/receiving SMS/MMS messages through the gloCOM Desktop application, but users can still send/receive SMS/MMS messages through the gloCOM GO application.
Presence
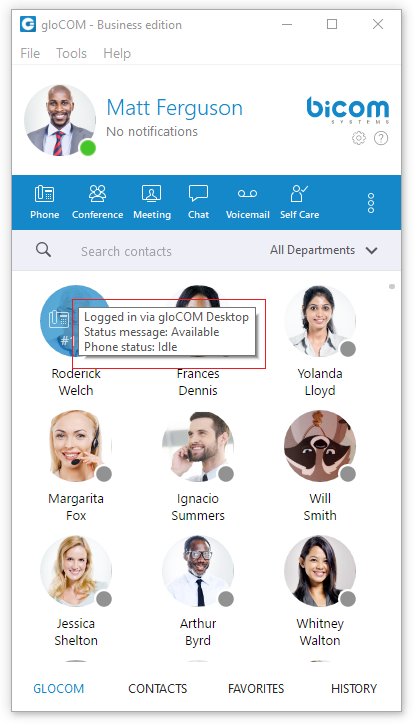
gloCOM brings a unified presence that is synced across all of your devices (Desktop, Mobile, and Web). For a currently online user, you can see if they are connected via Desktop, via Mobile, via Web, or even all three. For users who are not currently connected, you can see when was their last activity, in order to have a better understanding of their availability. For example, if you see that the user was last seen a few minutes ago, you might assume they will probably be able to respond to your calls/messages. On the other hand, if a user has not been seen for a few days, it might indicate they have limited availability and are out of the office. User’s presence and availability are represented by the icon visible in the bottom right of their avatar. Details about a user’s presence are shown in a tooltip after hovering over them in both grid and list view. The tooltip contains information such as: the device that the user is connected with, their last activity, their status message, and their phone status (idle, on-call, do not disturb, etc.).
Status icon indicator can be any of the following:
 If there is no icon in the bottom right of the user’s avatar, it means that they are currently online and available.
 The user is currently on a phone call.
 The user is currently online, and they’ve set their status to Busy.
 The user is currently online, and they’ve set their status to Do not Disturb.
 This icon has multiple meanings:
- The user is currently online, and they’ve set their status to Away.
- The user is currently connected via Desktop, but they are Away from Desktop.
- The user is not currently connected, but they were last active less than N hours, where the N represents the value that depends on the settings set on the server (For example, 8 hours, 15 minutes, etc.)..
 The user was not active in the last N hours, where the N represents the value that depends on the settings set on the server (For example, 8 hours, 15 minutes, etc.).
Status and status message
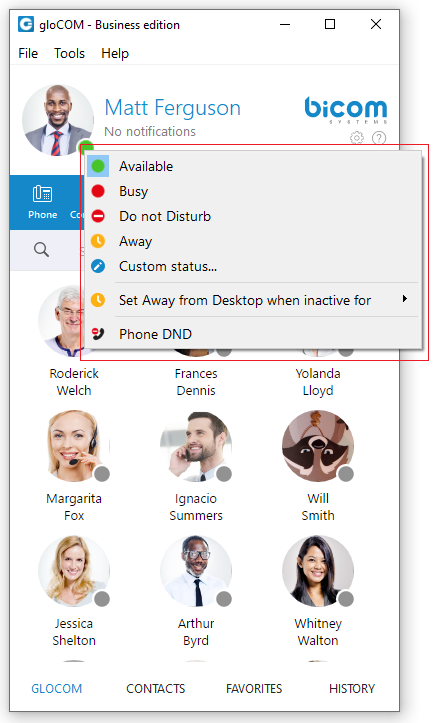
You can choose your own status by clicking on the status icon in the bottom right of your avatar in the main window, or by clicking on the tray icon.
A menu will pop up and you can choose between:
- Available
- Busy
- Do not disturb
- Away
- Any of the statuses defined by the PBXware administrator
- Custom status
PBXware administrator can add statuses through PBXware GUI and those will appear as an option in the menu for all users. For example, an administrator could add Lunch Break status so users can easily inform others when they are using their lunch break and are not at their desk.
Also, you can set your own custom status, and write any message to describe your current availability. For example, if you have to attend a meeting, and you are not available to respond to calls or messages, you could choose Custom status… from the menu, select Busy from the dropdown, and type In a meeting as a message. This informs all other users that you are busy and the reason for that is you’re currently attending a meeting. This allows all users to have a better understanding of each others availability since each user can type a custom message to describe their current availability.
After you choose any of the statuses, you also have to specify status expiration. This allows you to let the application revert your status back to Available after a certain period of time. Using the example mentioned above, you could set your status to Lunch Break with the expiration of 1 hour, so when you come back to the office you don’t have to remember to change your status back to Available since the application will automatically do that for you.
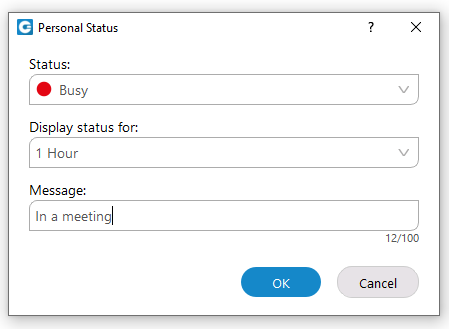
When setting status expiration you can choose between:
- Today
- 1 hour
- 4 hours
- 8 hours
- 12 hours
- 2 days
- 5 days
- This week
- Always
Do not Disturb status
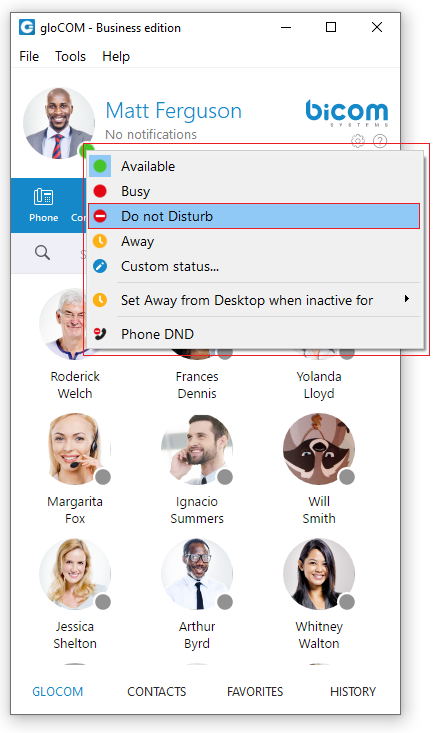
Setting your status to Do not Disturb (including custom Do not Disturb statuses) disables chat notifications, conference join notifications, and notifications informing you that someone has come online via Desktop. This allows you to easily remove distractions during an important period of the day when you need to fully concentrate on the task at hand. Note that this overrides the settings in the Alert section inside of the Preferences window.
Away from Desktop
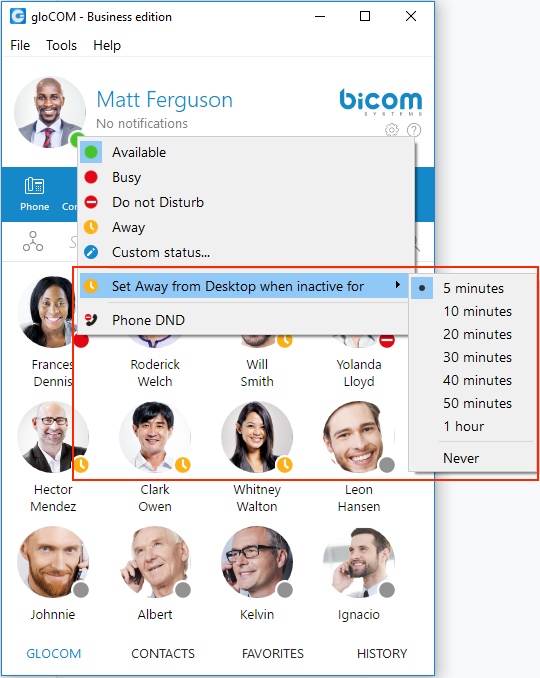
When there is no user activity on your computer for a certain period of time gloCOM can inform other users that you are away from your desk. This can be configured by clicking on the status icon next to your avatar in the main window, hovering over the Set away from Desktop when inactive for item and choosing the desired option.
Voicemail
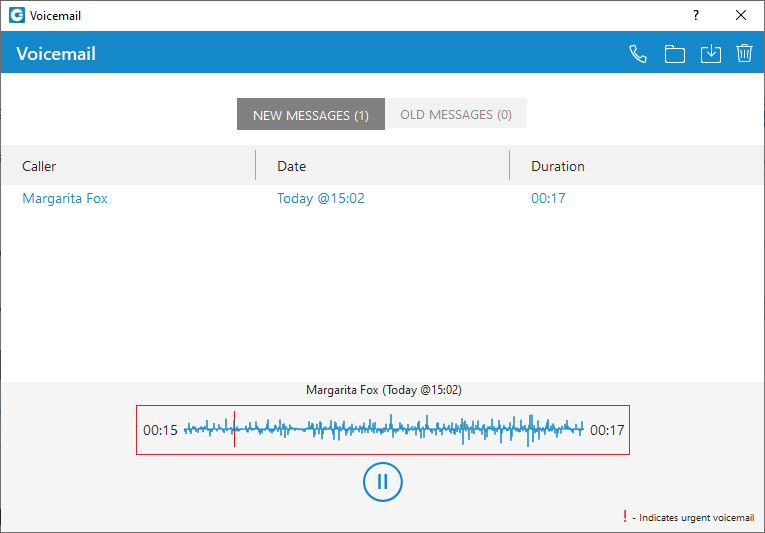
- Select a Voicemail message and click to delete it. Please note, voicemail delete is permanent.
- Click
 to move the selected voicemail message to the old messages directory.
 - Click
 to place a call to a contact who left a voicemail message.
 - Click
 to save a voicemail file to the disk.
 - Click
 to play the selected voicemail message.
 - Click
 tab to show new voicemail messages.
 - Click
 tab to show old voicemail messages.
While playing voicemail messages, the waveform shows up for the selected voicemail. It is possible to go back and forth through selected voicemail by clicking on the waveform.
Agent Panel (available in gloCOM Call Center edition)
![]()
All agent-related features are now located in one window (Agent Panel), making it easier for an agent to handle multiple calls, feedback forms, CRM popup, callbacks, other agents, and queues.
Also, the phone dialer and all phone-related settings will be displayed within the Agent Panel window. This way, when an agent wants to place a call, they do not have to switch between two different windows, back and forth.
Agent Panel window can be opened by clicking on the module icon from the main window.
If the supervisor has not logged in as an agent, the Agent Panel window is not available.
From gloCOM 6.0 there is support for Inbound/Outbound/Blended Call Centers. Agent Edition automatically changes UI and provides specific functionalities depending on the working strategy, licence and module options.
Top blue bar
On the right side of the top blue bar there are icons that provide a shortcut for the following things:
 Log out the user from the application.
 Log out the user and close the application
Agent information
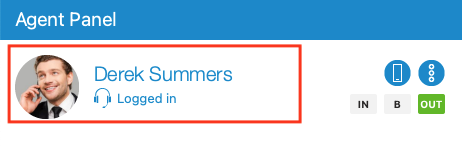
On the left side of the Agent Panel window, below the top blue bar, agent information are presented. First, there is an agent avatar. The agent can set/change their image by clicking on the current avatar and choosing a new image. The avatar on the Agent Panel window is the same as the avatar in the main window.
Next to the agent image, you can see the agent’s first and last name. Below the agent’s name, there is a blue(or red) label that shows the current status of the agent ( ,
,  ,
,  ,
,  ).
).
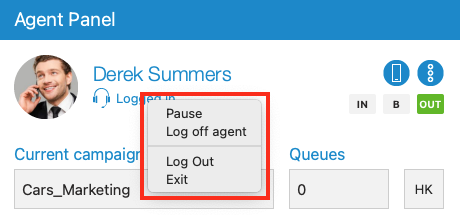
When the user clicks on the status label while the agent is logged in, a menu is shown with the following actions:
- Pause / Un-pause: Used for changing pause state of an agent. If the user is logged in and paused then Un-pause action will be shown, otherwise, there will be a Pause action. If an agent tries to pause while on a call, the agent’s state changes to Pending pause. When the call is completed and there are no active calls the agent state automatically switches from Pending pause to the Paused state.
Unlike previous versions, in this one, an agent can change the reason for the pause without unpausing themselves and without fear of receiving a call from the Queue. After changing the reason, the counter will reset and start counting from the beginning (0:00:00).
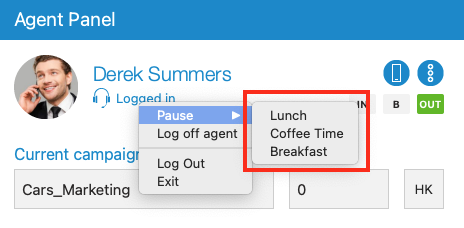
- Log off agent: Log off agent from all queues or campaigns.
- Log out: Log out gloCOM user from the application.
- Exit: Log out gloCOM user and close the application.
If the user clicks on the Log off agent option, the agent logs off, and the Agent Login window is automatically displayed. The color of the status label changes to red. Status text is set to Logged off.
Agent Login window
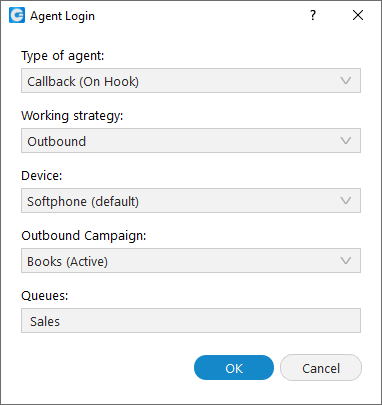
The Agent Login window consists of the following options:
- Type of agent: You can choose whether you want to log in as the callback or dynamic agent.
- Working strategy: – You can choose between outbound, inbound and blended strategy. Inbound mode means an agent works only in queues. Outbound mode means an agent works only in campaigns. Blended mode means the system will automatically move the agent from inbound to outbound strategy if a queue is not busy, or the system will move the agent from outbound to inbound strategy if there are people waiting in the queue. This field is visible only if you are using the Outbound Call Center (Dialer).
- Device: Type of device you want to use for sending/receiving calls.
- Outbound Campaign: The campaign in which the agent works during the login session. An agent can be part of multiple campaigns but during the login session can operate in only one campaign. This field is visible only if you are using the Outbound Call Center.
- Queues: List of queues of which an agent is a member, and in which he works during the login session.
When you select the desired options, click on the OK button in order to log in as an agent.
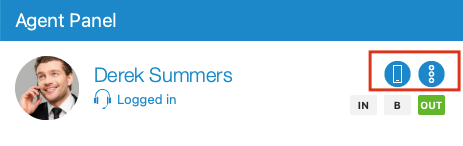
On the right side of the agent’s name, the following actions are placed:
 – Show the main window.
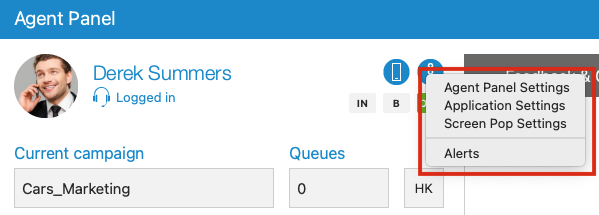
 – Show more options. When a user clicks on this action a menu with the following options appears:
- Agent Panel Settings: Open Agent Panel Settings dialog.
- Application Settings: Open the Preferences window with General tab selected.
- Screen Pop Settings: Open the Preferences window with Modules tab selected.
- Alerts: Ppen Alerts dialog.
Direction buttons
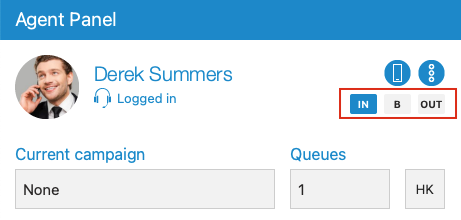
From gloCOM 6.0 version an Agent can work in Inbound/Outbound/Blended Call Centers. Direction buttons have been introduced for this purpose. There are 3 types of direction buttons: 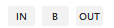 . They show in which strategy is the agent currently working.If IN button is selected (blue color)
  it means the agent is working in inbound strategy. If OUT button is selected (green color)
  it means the agent is working in outbound strategy. If B button is selected (red color)
  it means the agent is working in blended mode.
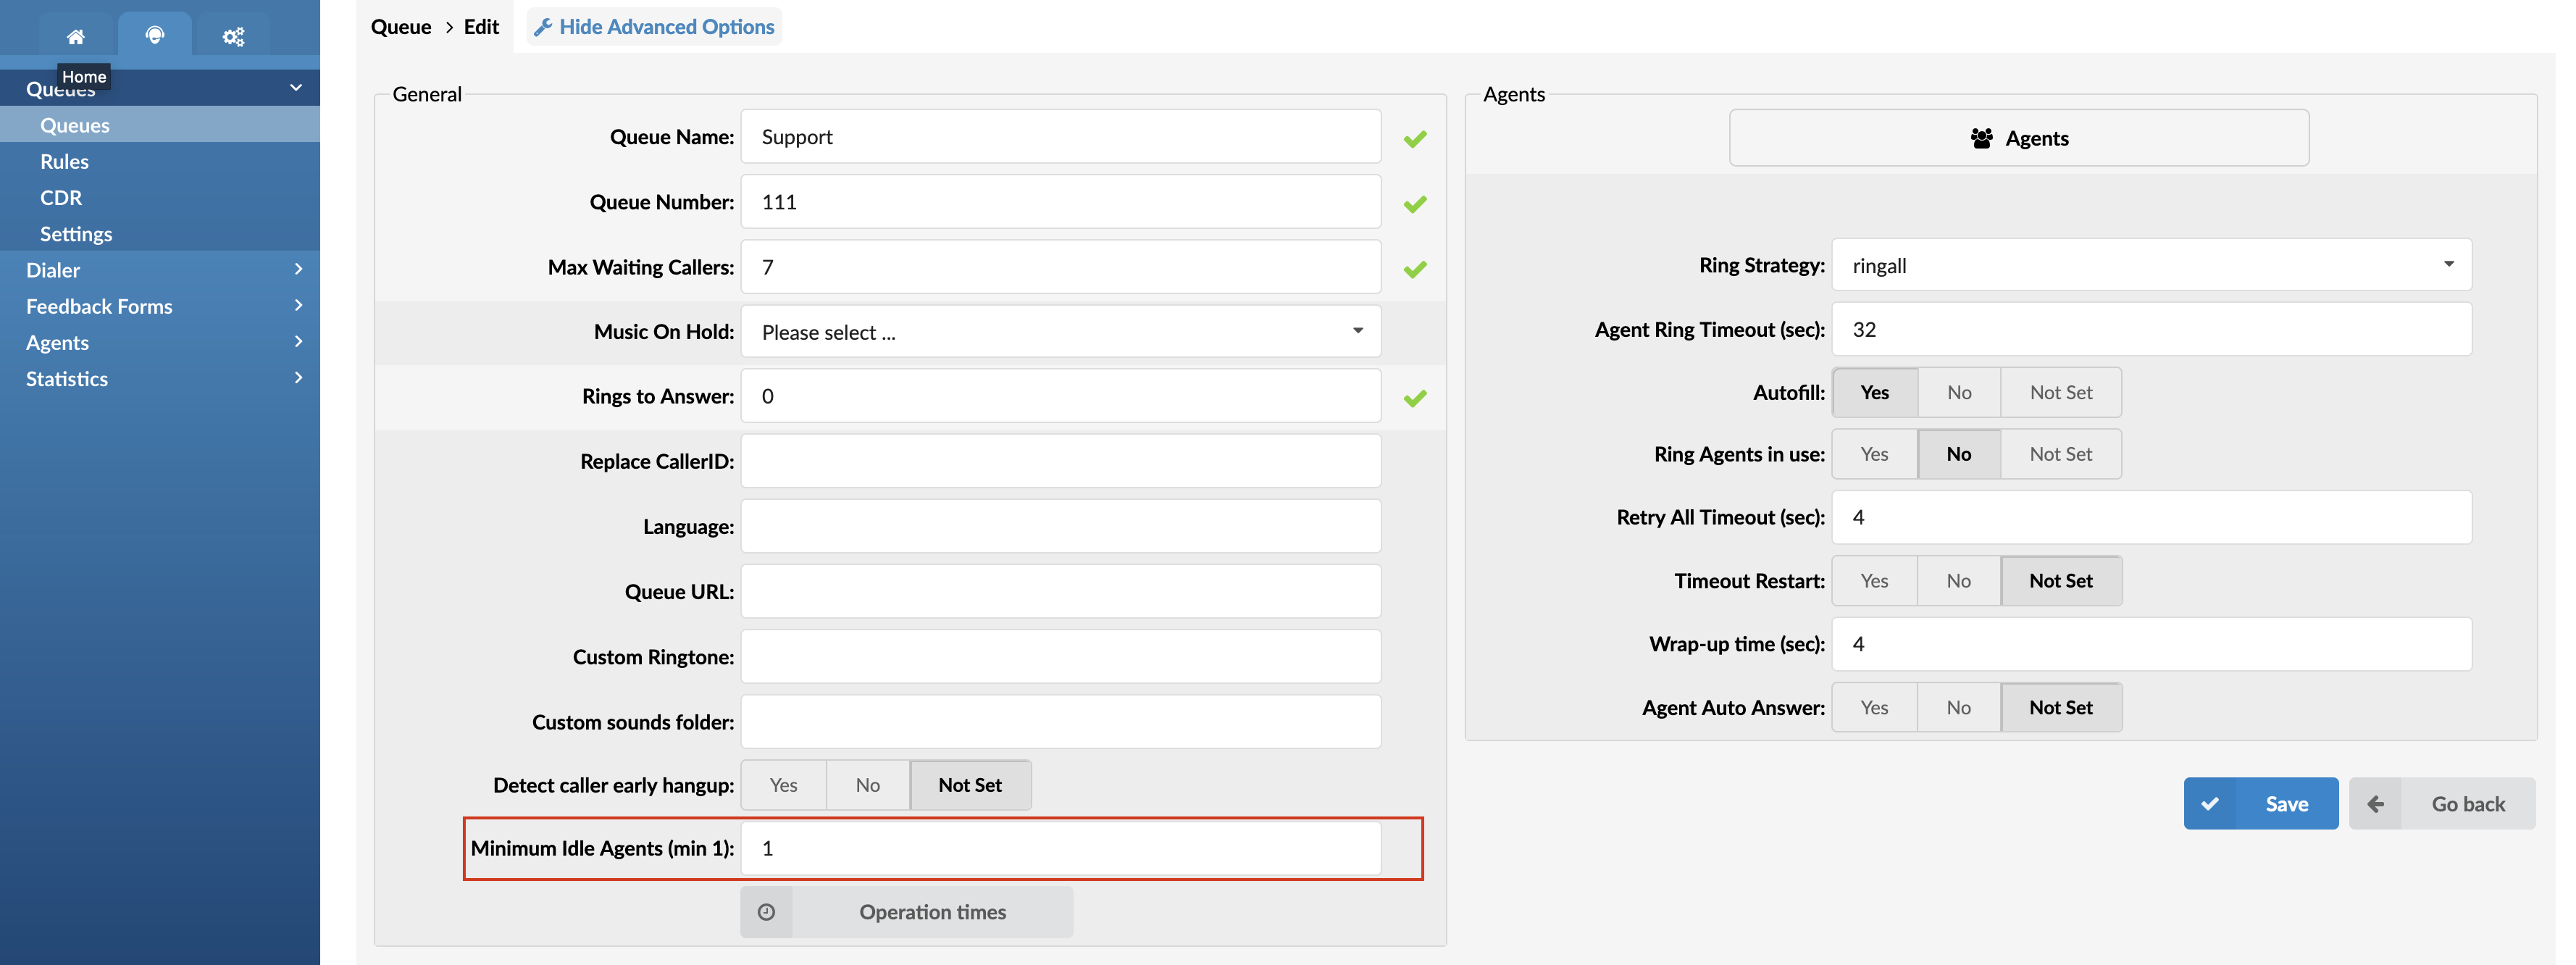
Blending can be automatic or manual. It is based on the minimum idle agents parameter per Queue, which can be found and updated on PBXware. Manual blending means that the agent can choose direction manually at login time or during the operation he can switch between inbound, outbound, and blended mode by clicking on a specific button. A working strategy can be also changed by a supervisor. On every change, direction buttons are updated, so that agent has an overview of operation mode in real-time.
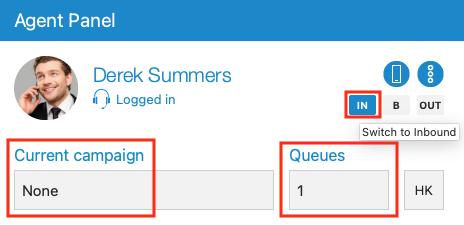
Below agent information area, we have Current campaign and Queues labels.
- Current campaign label shows the campaign name in which an agent is working during the login session.
- Queues label shows a number of queues in which an agent is working during a login session.
If an agent works in an inbound call centre then Current campaign label is displaying None. Otherwise, if an agent is working in an outbound call centre Queues label displays 0.
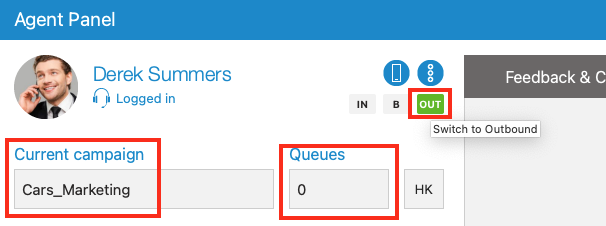
Agent can not work in a campaign and a queue at the same time.
Agent Session state
![]()
If an error occurs with an agent login session, the following message will be displayed within the Agent Panel window.
If you want to know more details about the error, click on the label above. The error message is displayed in the following cases:
- You are logged into a queue and a campaign at the same time.
- You are not logged into any queue nor campaign.
- You are not a member of any queue nor campaign.
- You are not logged into all queues of which you are a member.
- Service was restarted.
To solve this error you need to log in again.
Call Centre status
If an error occurs with Call Centre connection status, the error message will be displayed within the Agent Panel window:
Call center module is not ready.
The text of the error message changes depending on the type of error. An error can occur if any of the modules are not connected (Agentpool or Dialer module). If you click on the error message, gloCOM will log out and hang up all your active calls.
You will also be notified if the license limit for Dialer module is reached:
License limit for Dialer module reached. Please contact your Administrator.
Call handling
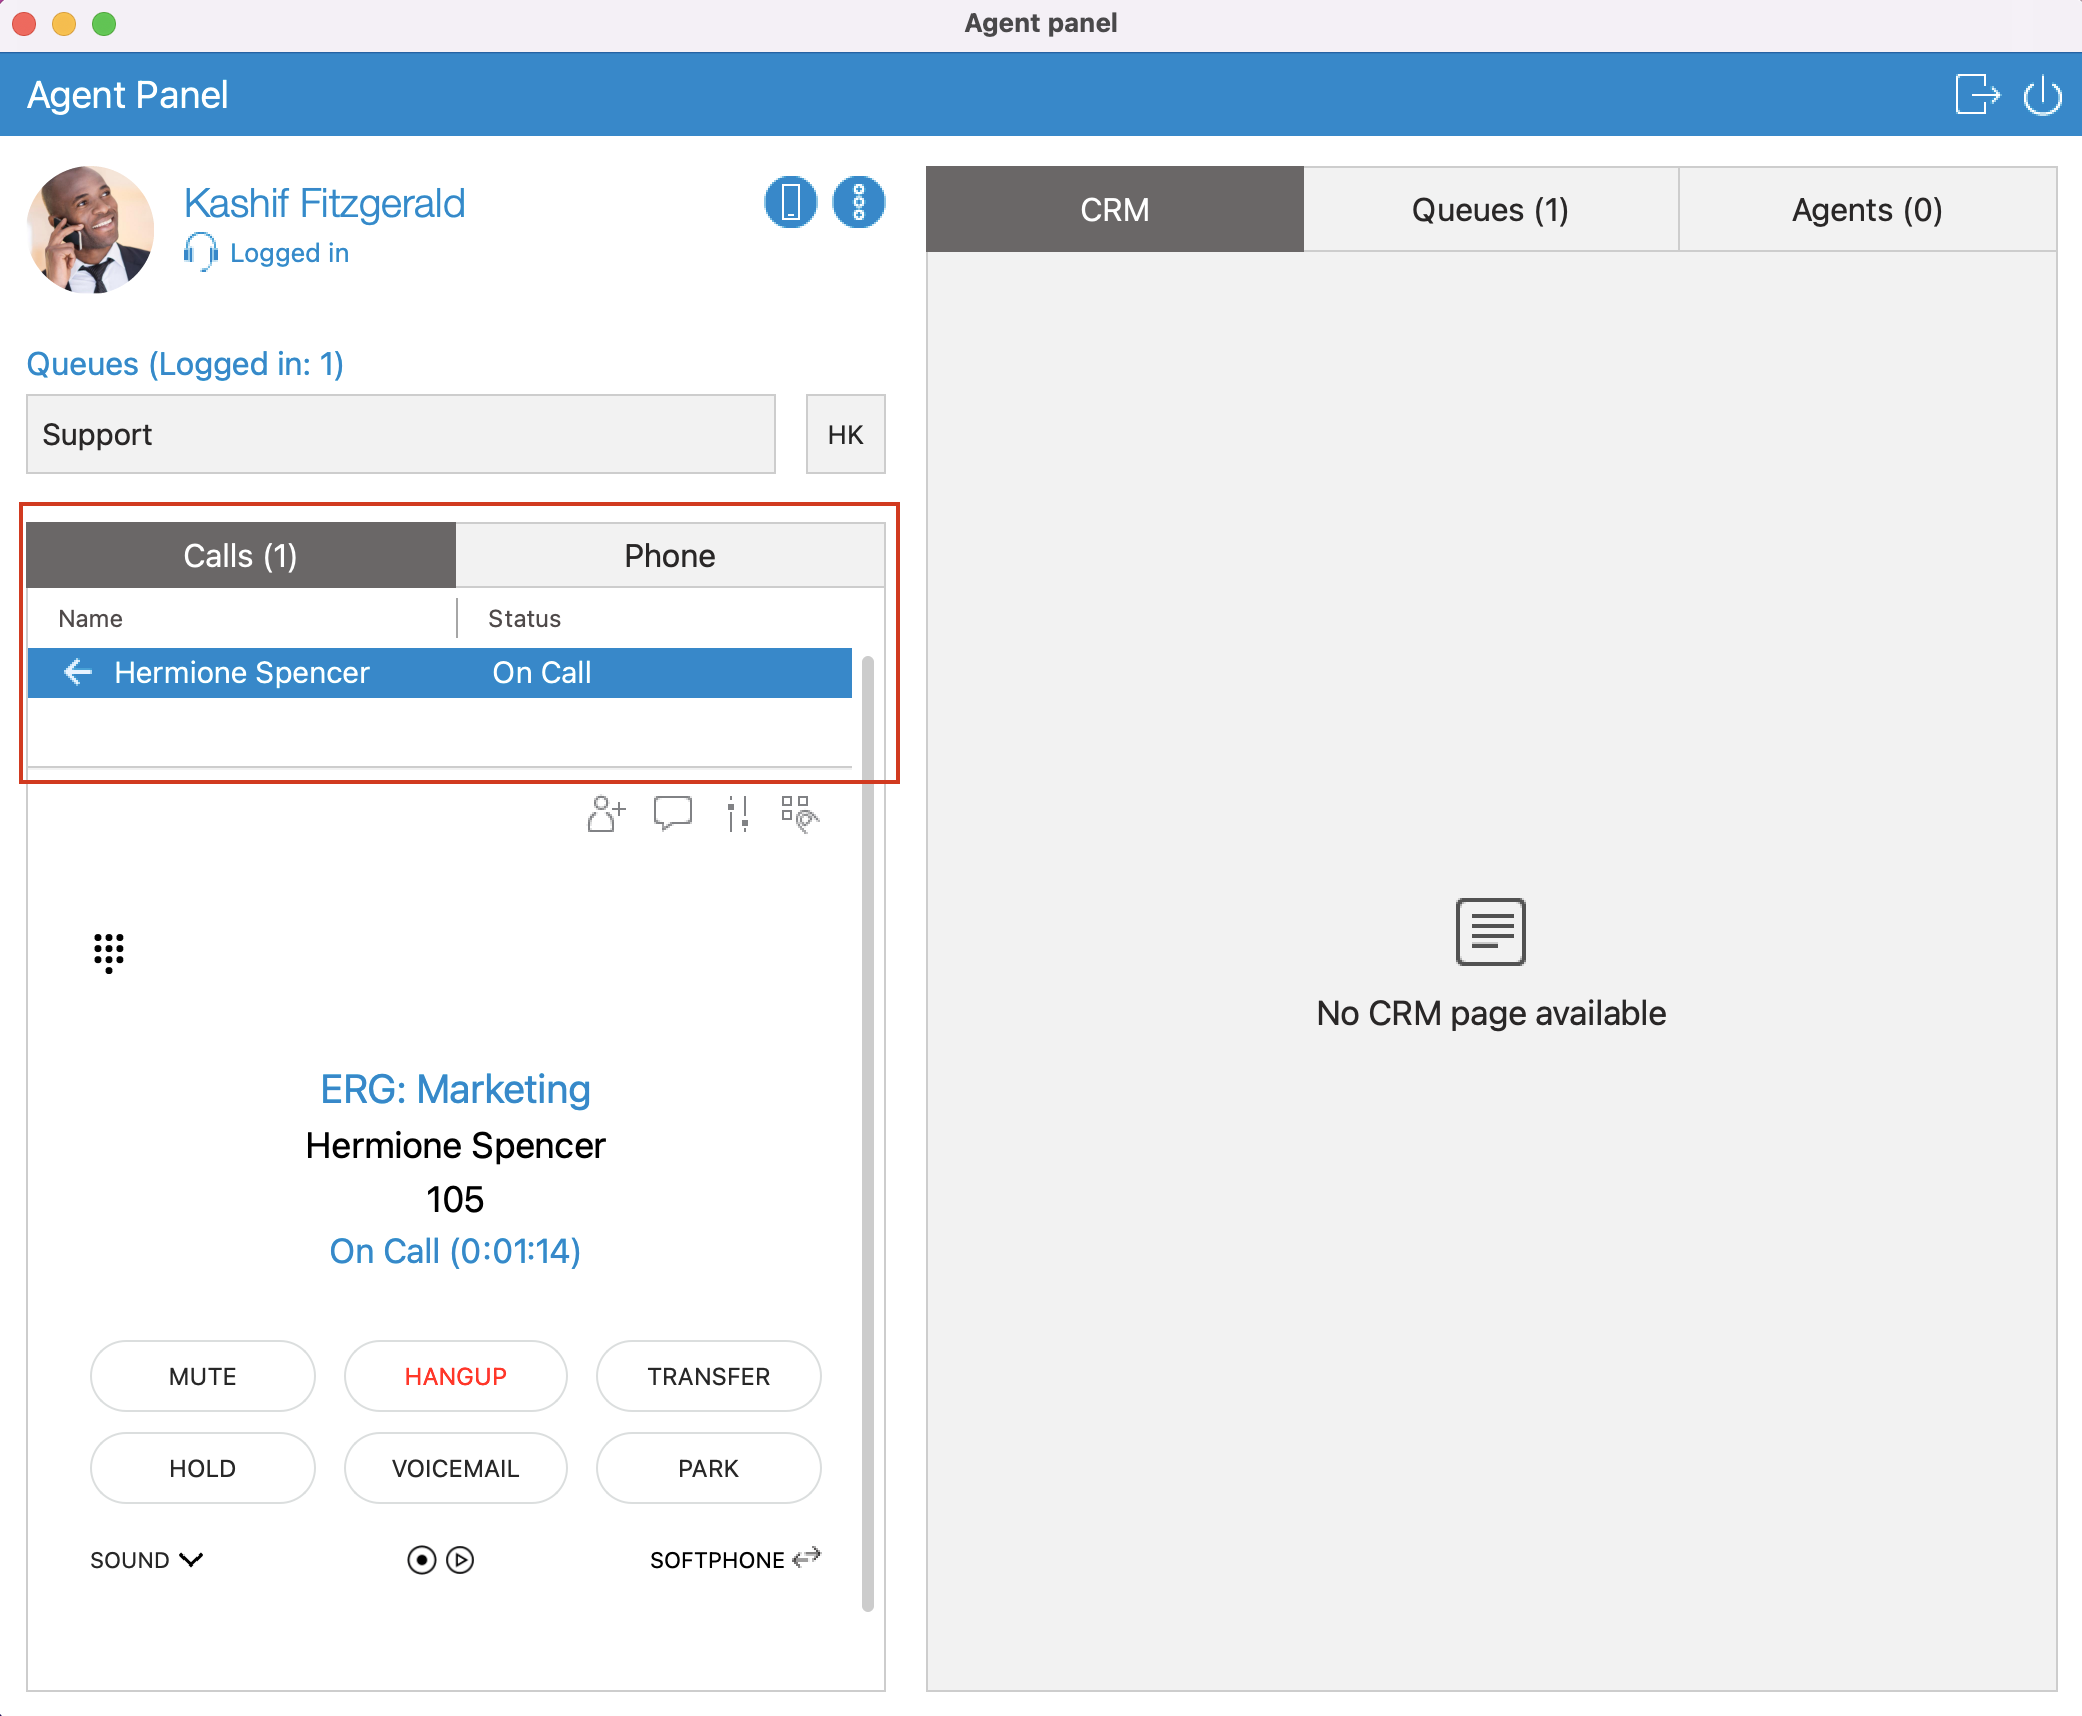
Down below, we have Calls label that is followed by the number of current calls that are displayed in the list below. This makes it easier to handle multiple calls. The list is showing call direction (inbound  or outbound
  ), name or number of the contact, and call status (Ring In, On call, On Hold…). Switching between calls is possible by selecting the desired call. You can also expand this area if you want to see more calls, or you can hide it completely.
Below the calls list, there is a call widget that displays the call information and through which we can handle the call.
Dialer calls (Outbound Call Center)
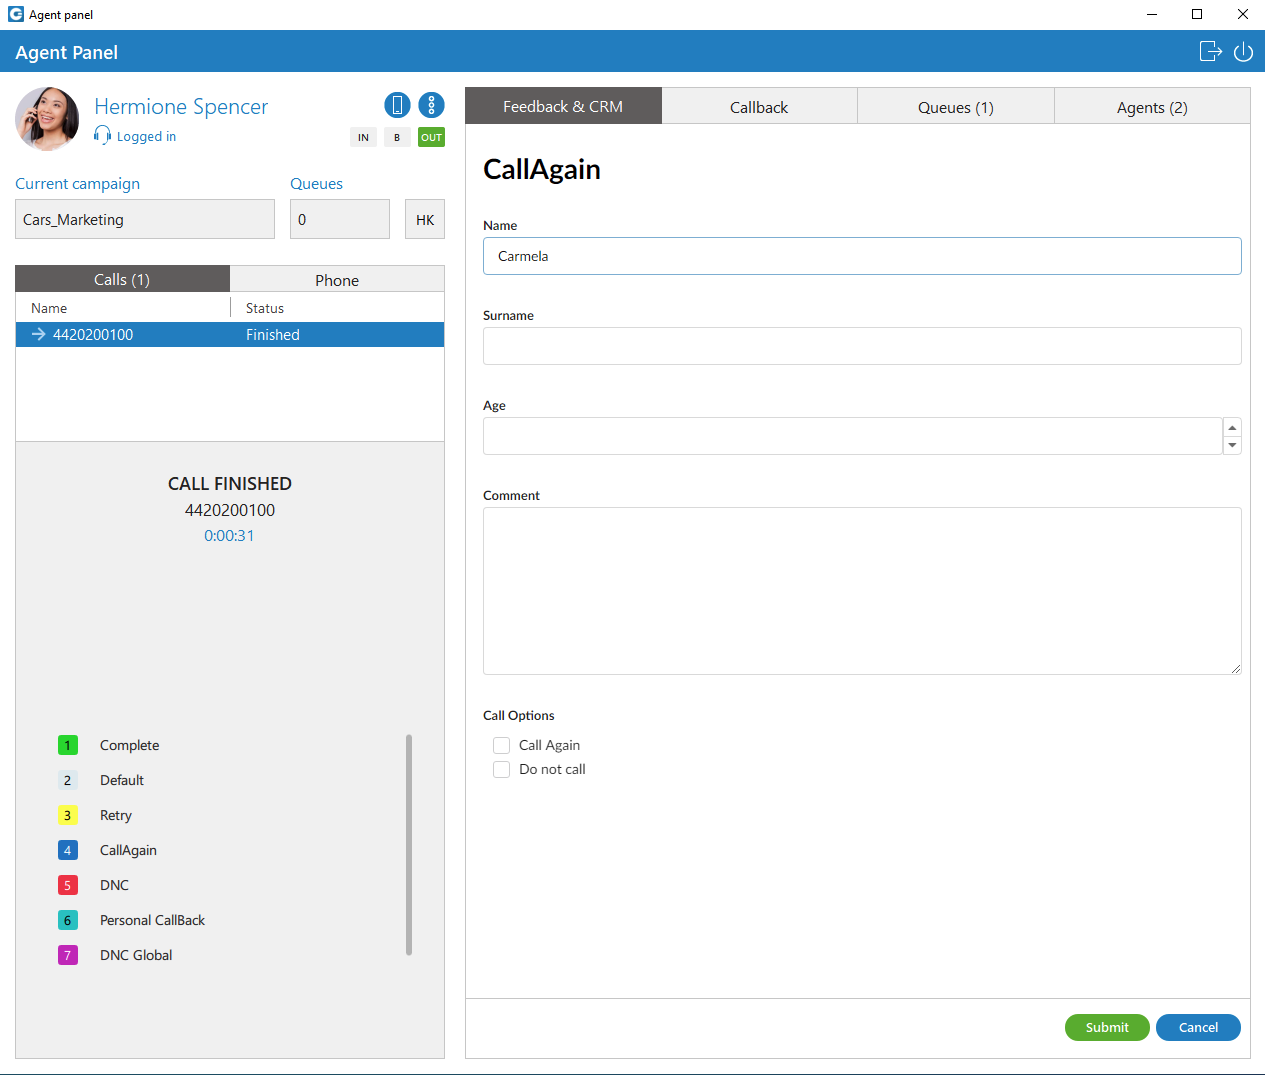
Each dialer call belongs to a specific campaign. The campaign can have different strategies. Currently, gloCOM supports the following: Power, Preview and Progressive strategy. The appearance of the application changes depending on the type of strategy. Each campaign can have various options that the agent should submit. These options are called dispositions. Also, every campaign can have its own feedback form which will be displayed for all dialer calls. Dispositions and feedback forms need to be set on PBXware.
Unlike regular calls, the dialer call is considered completed when both dispositions and feedback form have been submitted (if enabled), and only then the call is removed from the calls list. If enabled, dispositions are displayed when the audio call is finished and remain visible until the user submits a disposition. On the other hand, if enabled, the feedback form is always visible, until it is submitted.
If the disposition is a callback type agent must select the date and time when the lead will be called again.
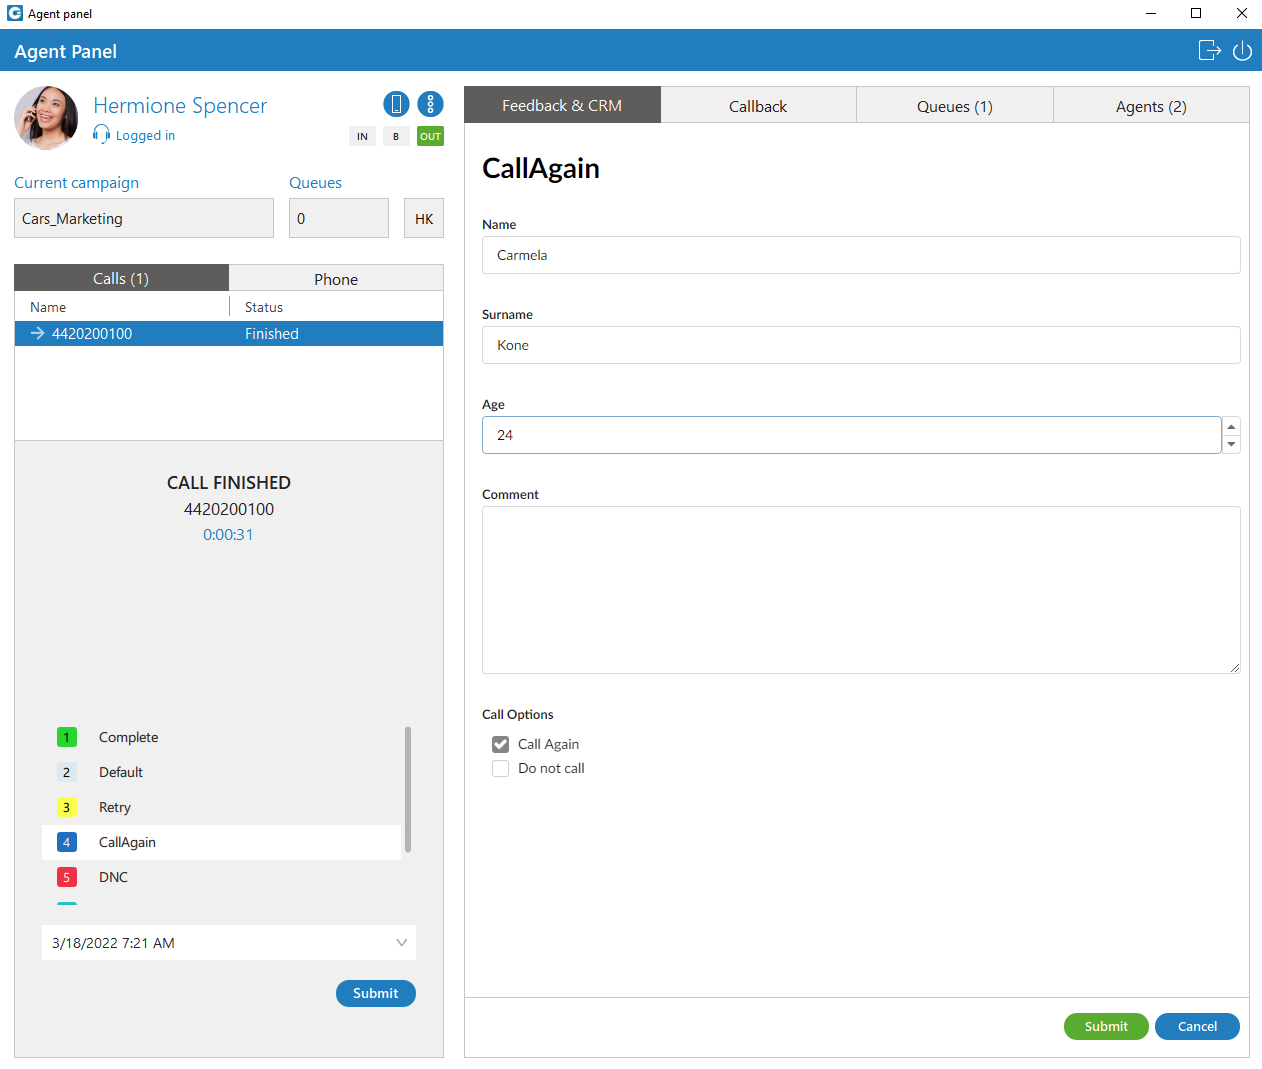
Power strategy
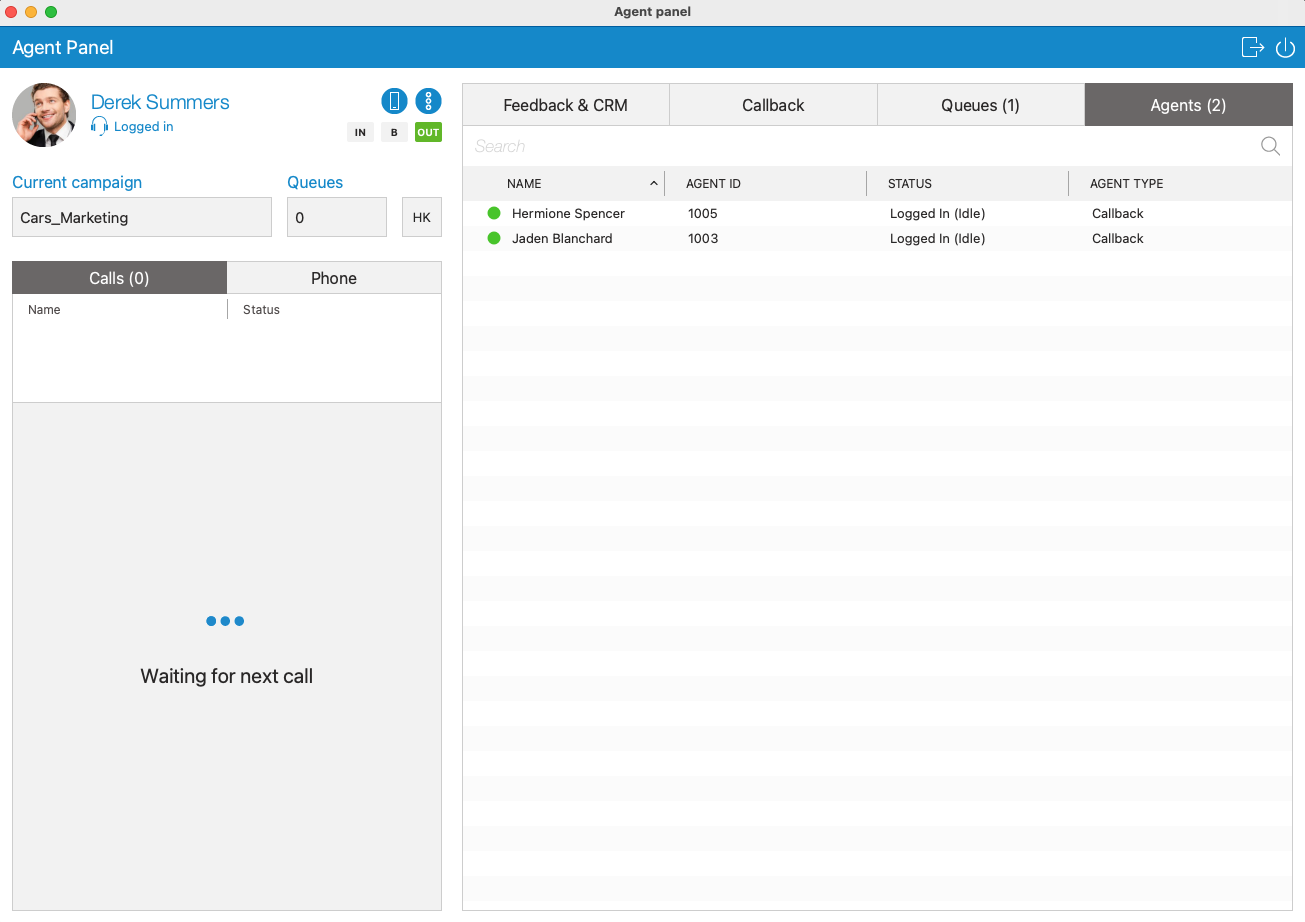
In this strategy, the agent is waiting to receive the next call from the campaign in which he is currently logged.
Preview strategy
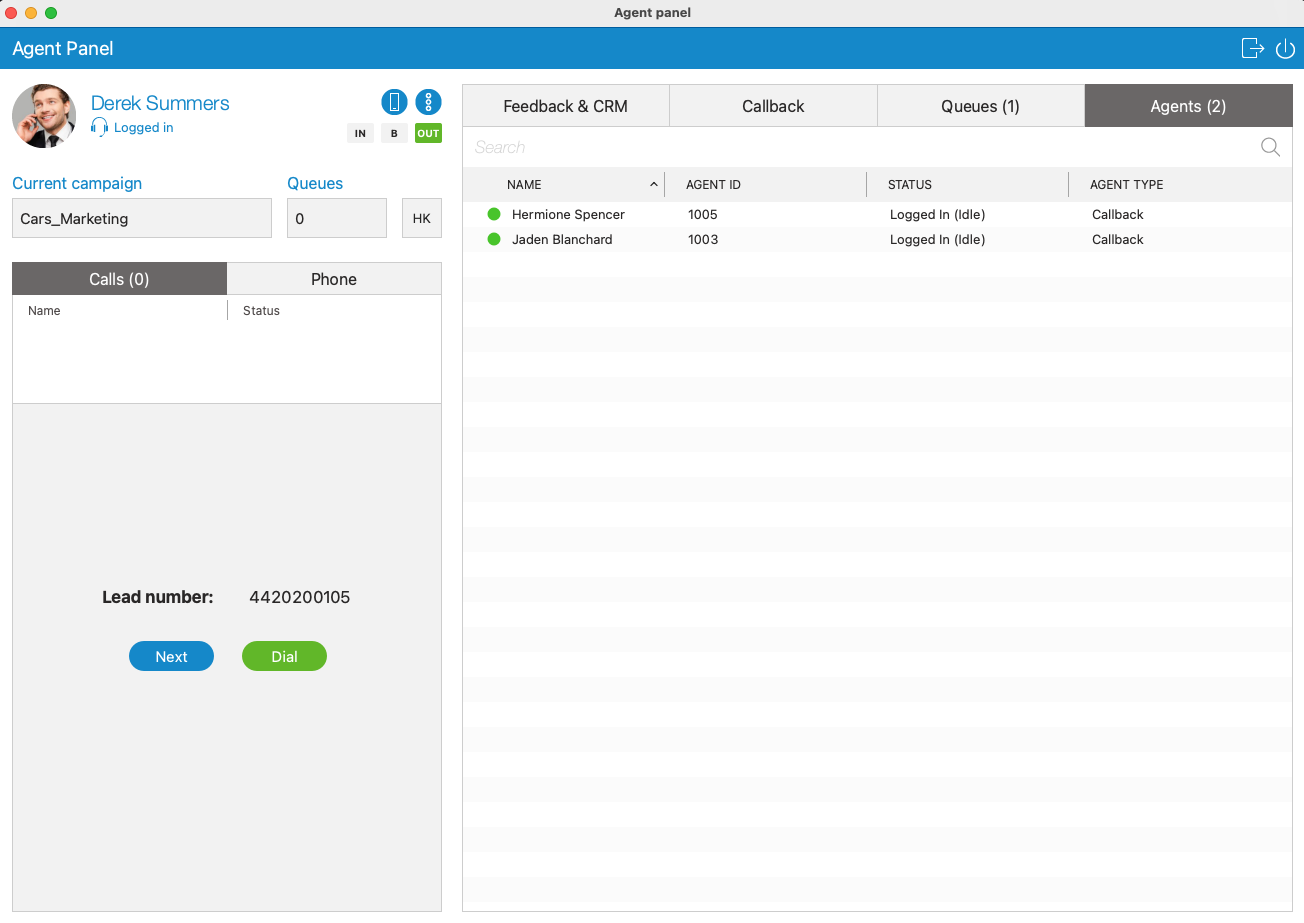
This strategy allows the agent to have a preview of lead details so he can decide whether to dial lead or not. The agent can fetch the next lead from the campaigns list by clicking on the  button. If he decides to call the lead then he needs to press the
  button. Feedback form is displayed but cannot be edited, until the call starts.
Progressive strategy
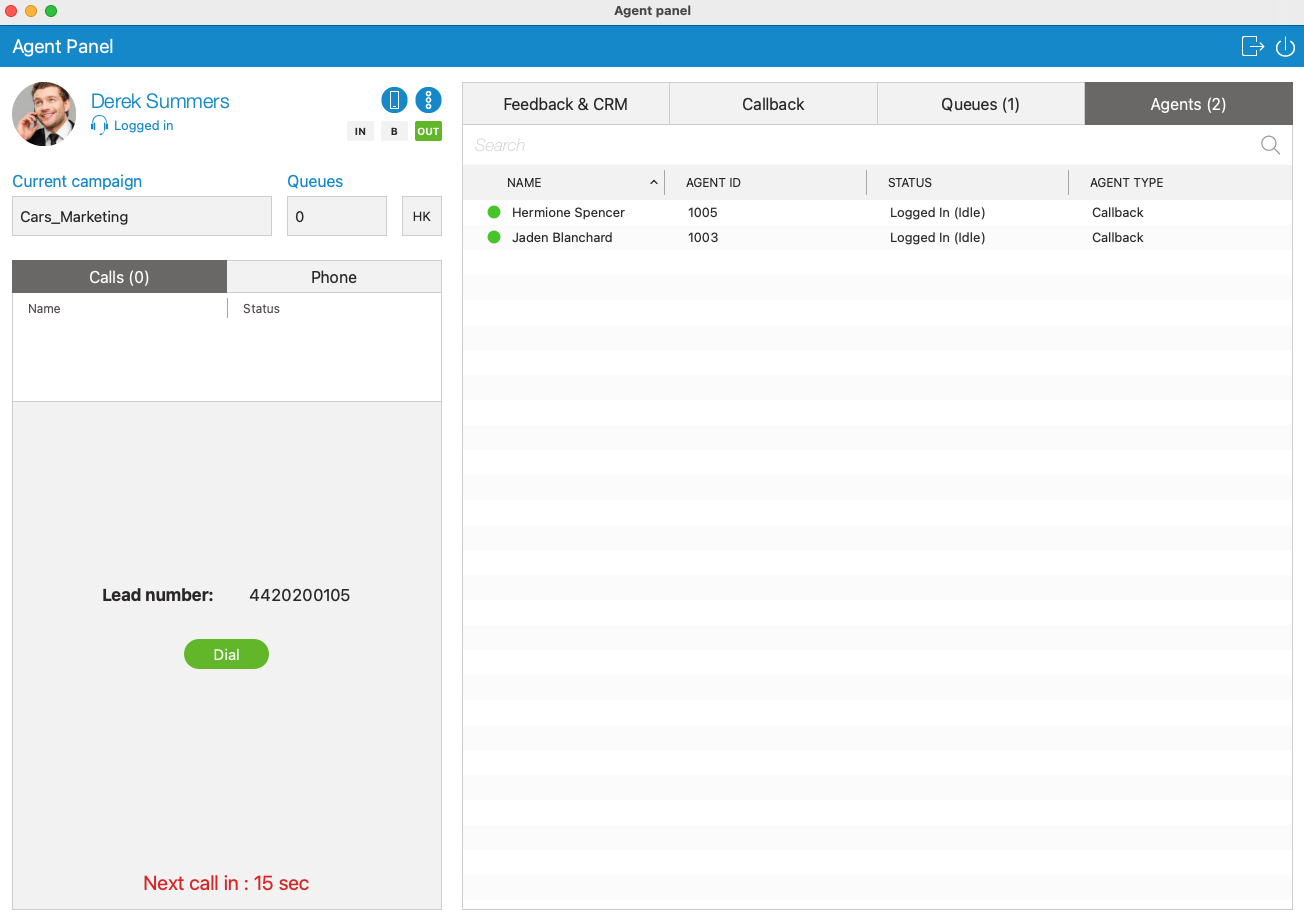
The progressive strategy works the same as a preview. The only difference is the agent has a timeout in which he must perform dial, and there is no possibility to manually fetch the next lead. If the agent does not perform dial inside the desired time frame, the system will automatically dial the next lead. There is an option in PBXware called Preview Timeout that indicates how long will it take before the system dials lead automatically. This information is shown below the Dial button.
In all strategies, there is information message label that provides us details about the lead, campaign or notifies us about errors that might happen, timeouts etc…
Enhanced Ring Groups Calls
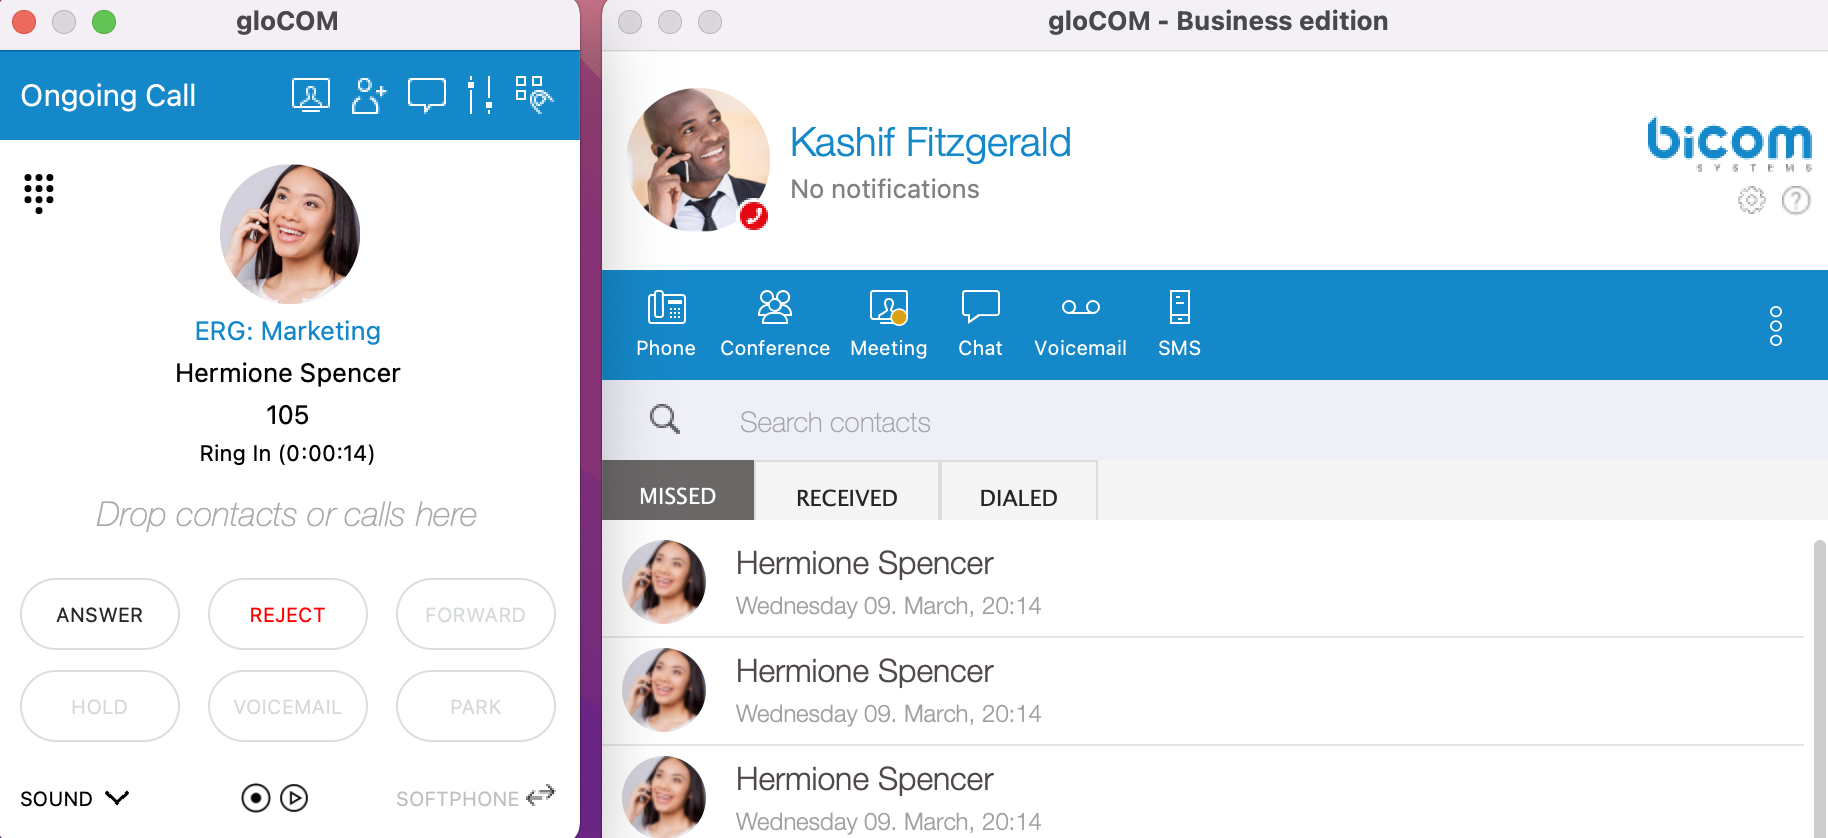
Calls from Enhanced Ring Groups are supported from version 6.5 on the Business, Office, Agent & Supervisor edition. For all incoming calls, the user is able to see the name of the ERG that has been calling.
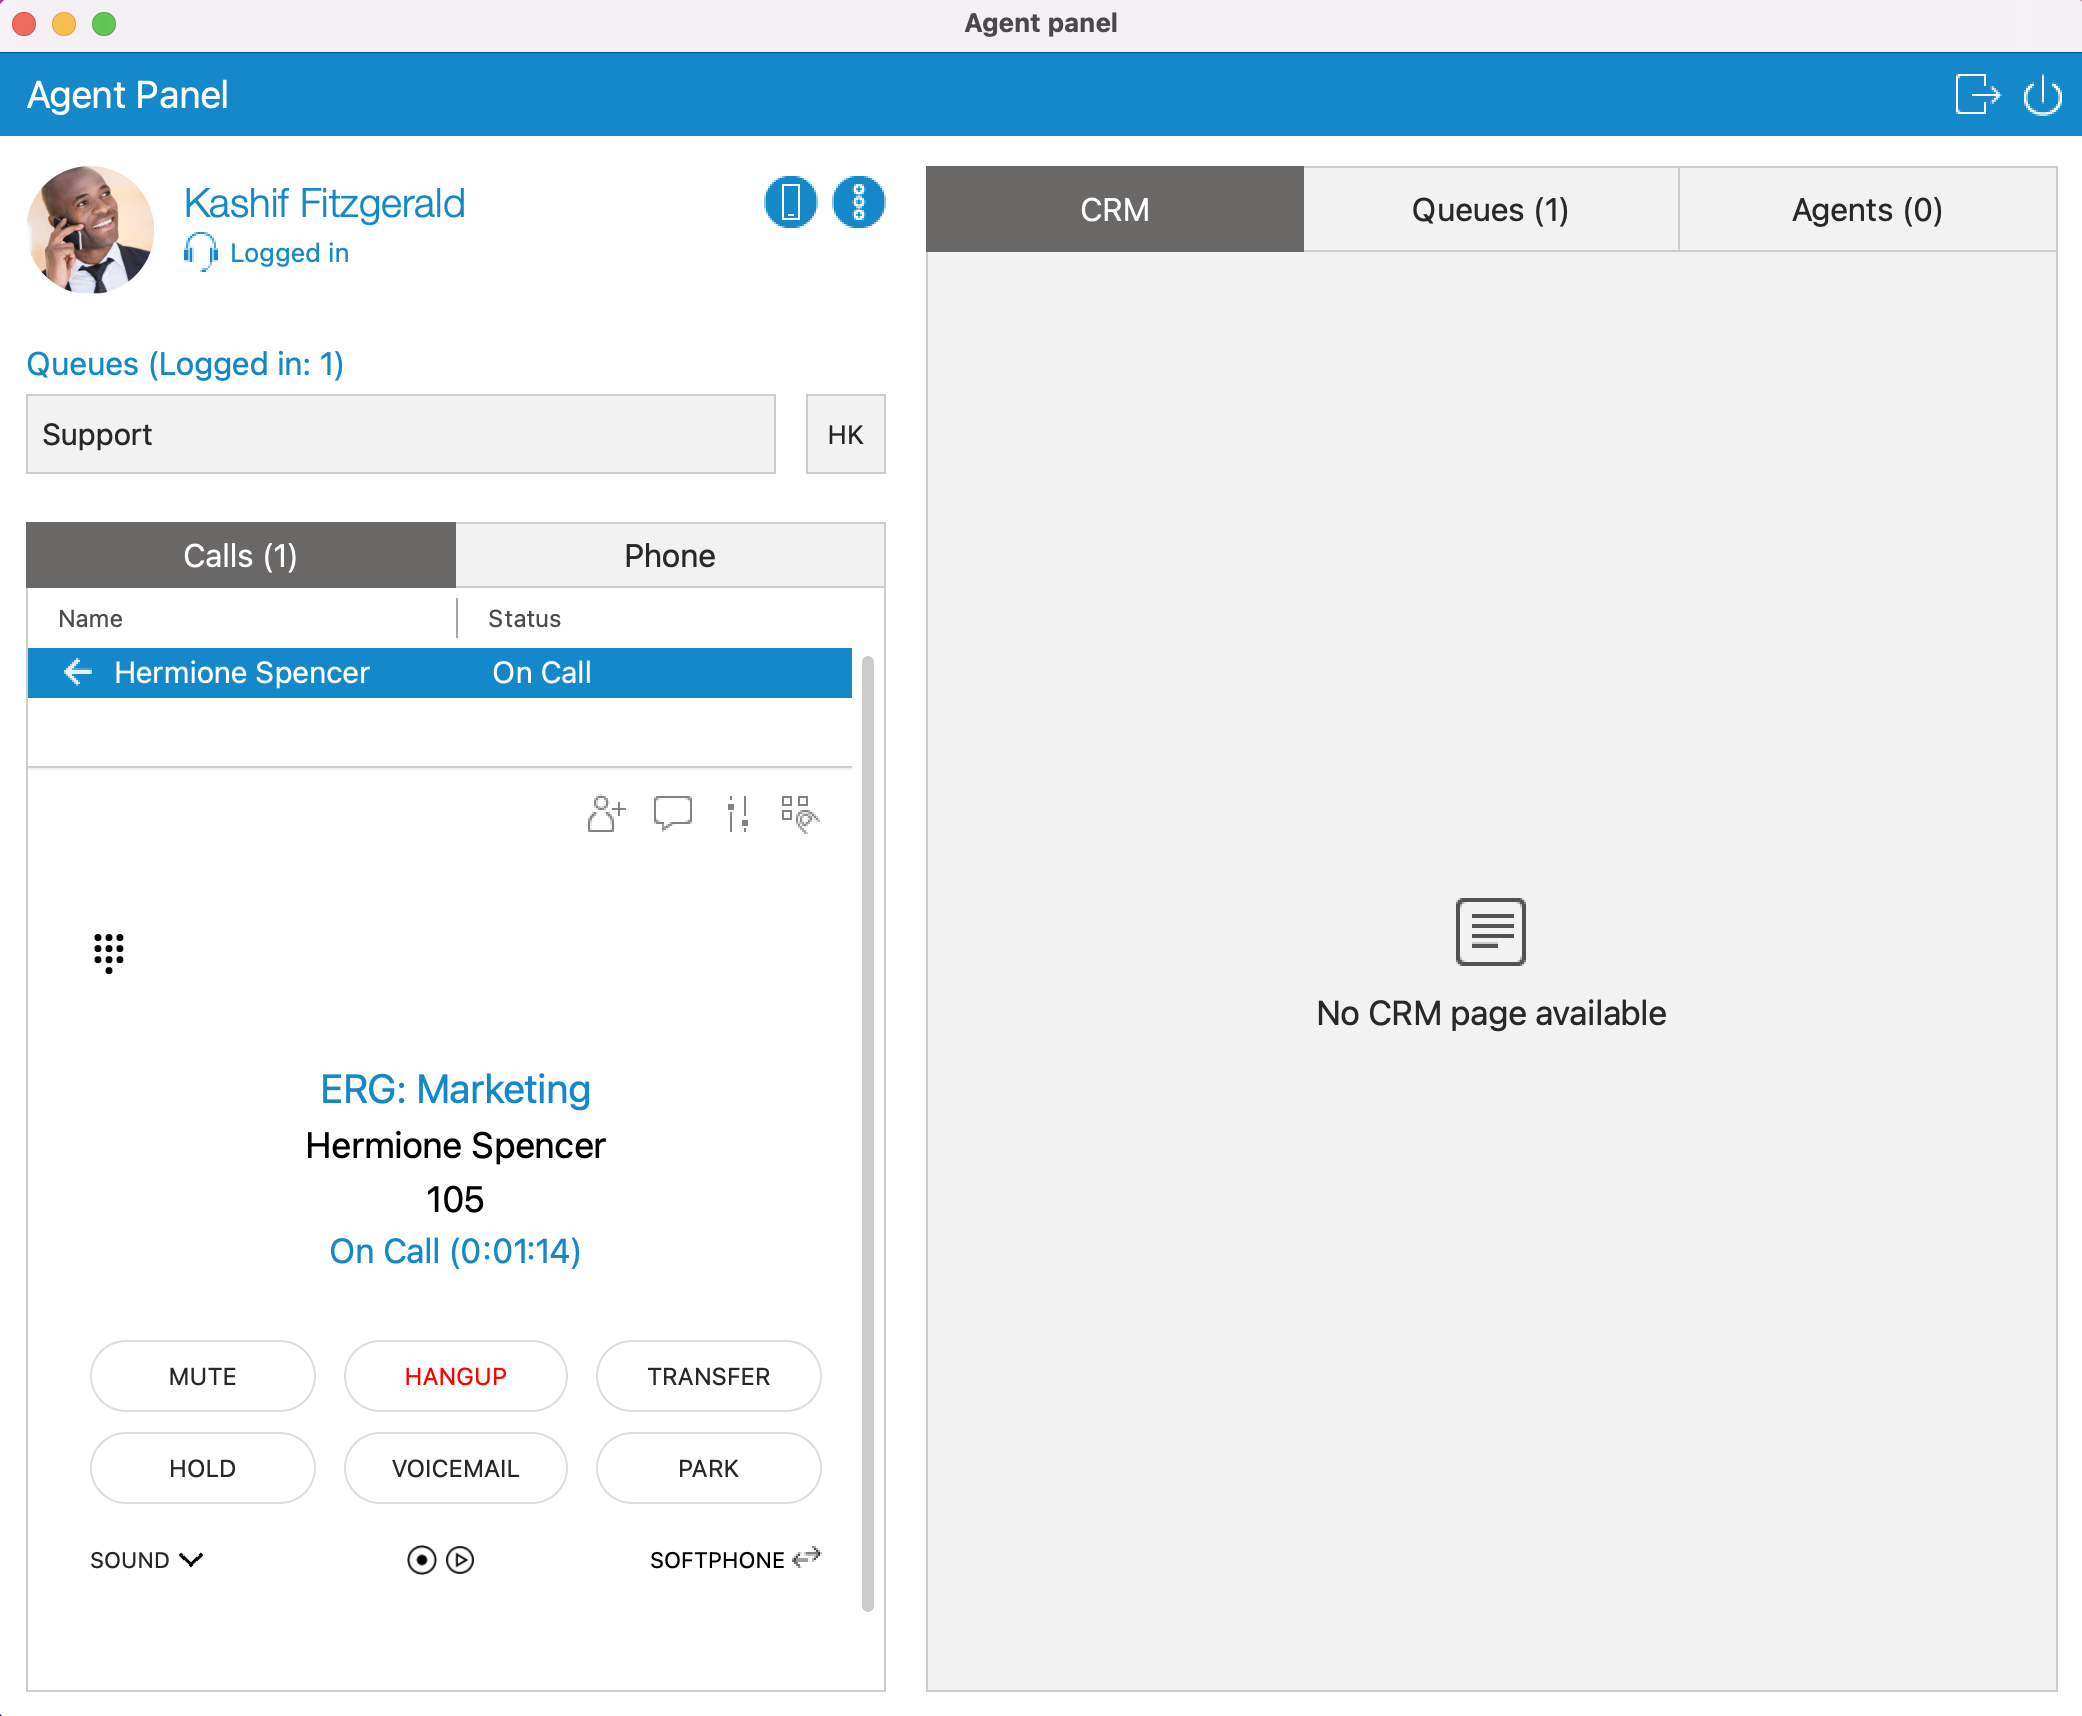
Hotkeys

When the user hovers the mouse over the  button, he gets the list of dispositions and their keyboard shortcuts for the current campaign/queue, displayed in the area next to the button. As long as the button has hovered, when an agent presses a keyboard shortcut for any disposition following happens:

- The call is terminated
- Selected disposition is submitted
- If in preview/progressive mode next call will be dialed (applies to campaigns only)

Hotkeys are used only if we have active dialer/queue calls that are answered or completed. In all other cases if we press some hotkey nothing happens.
On the right side of the Agent Panel window, there are Feedback&CRM, Callback, Queues and Agents tabs. gloCOM brings us an integrated web browser for CRM Popup, Call Popup, and Queue URL Popup and Feedback forms. It is located in the Feedback&CRM tab.
Assume that the agent is a member of only one queue. While hovering over the
Screen Pop
Call Popup
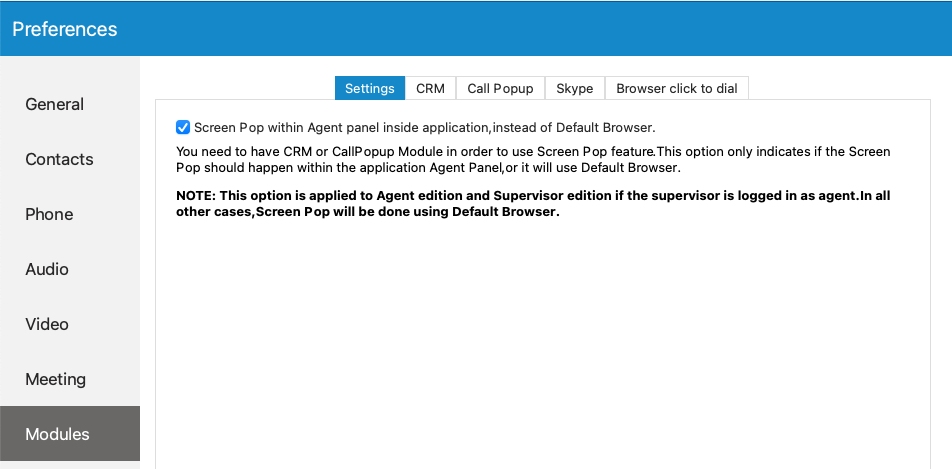
In order to use this feature, CRM and CallPopup Module need to be enabled. Inside Preferences –> Modules –> Settings there is an option Screen Pop within Agent panel inside the application, instead of Default Browser that has to be checked, otherwise, the Call Popup option will not work. If this feature is enabled the Screen Pop will happen within the application inside the Agent Panel window, otherwise it will use your Default Browser.
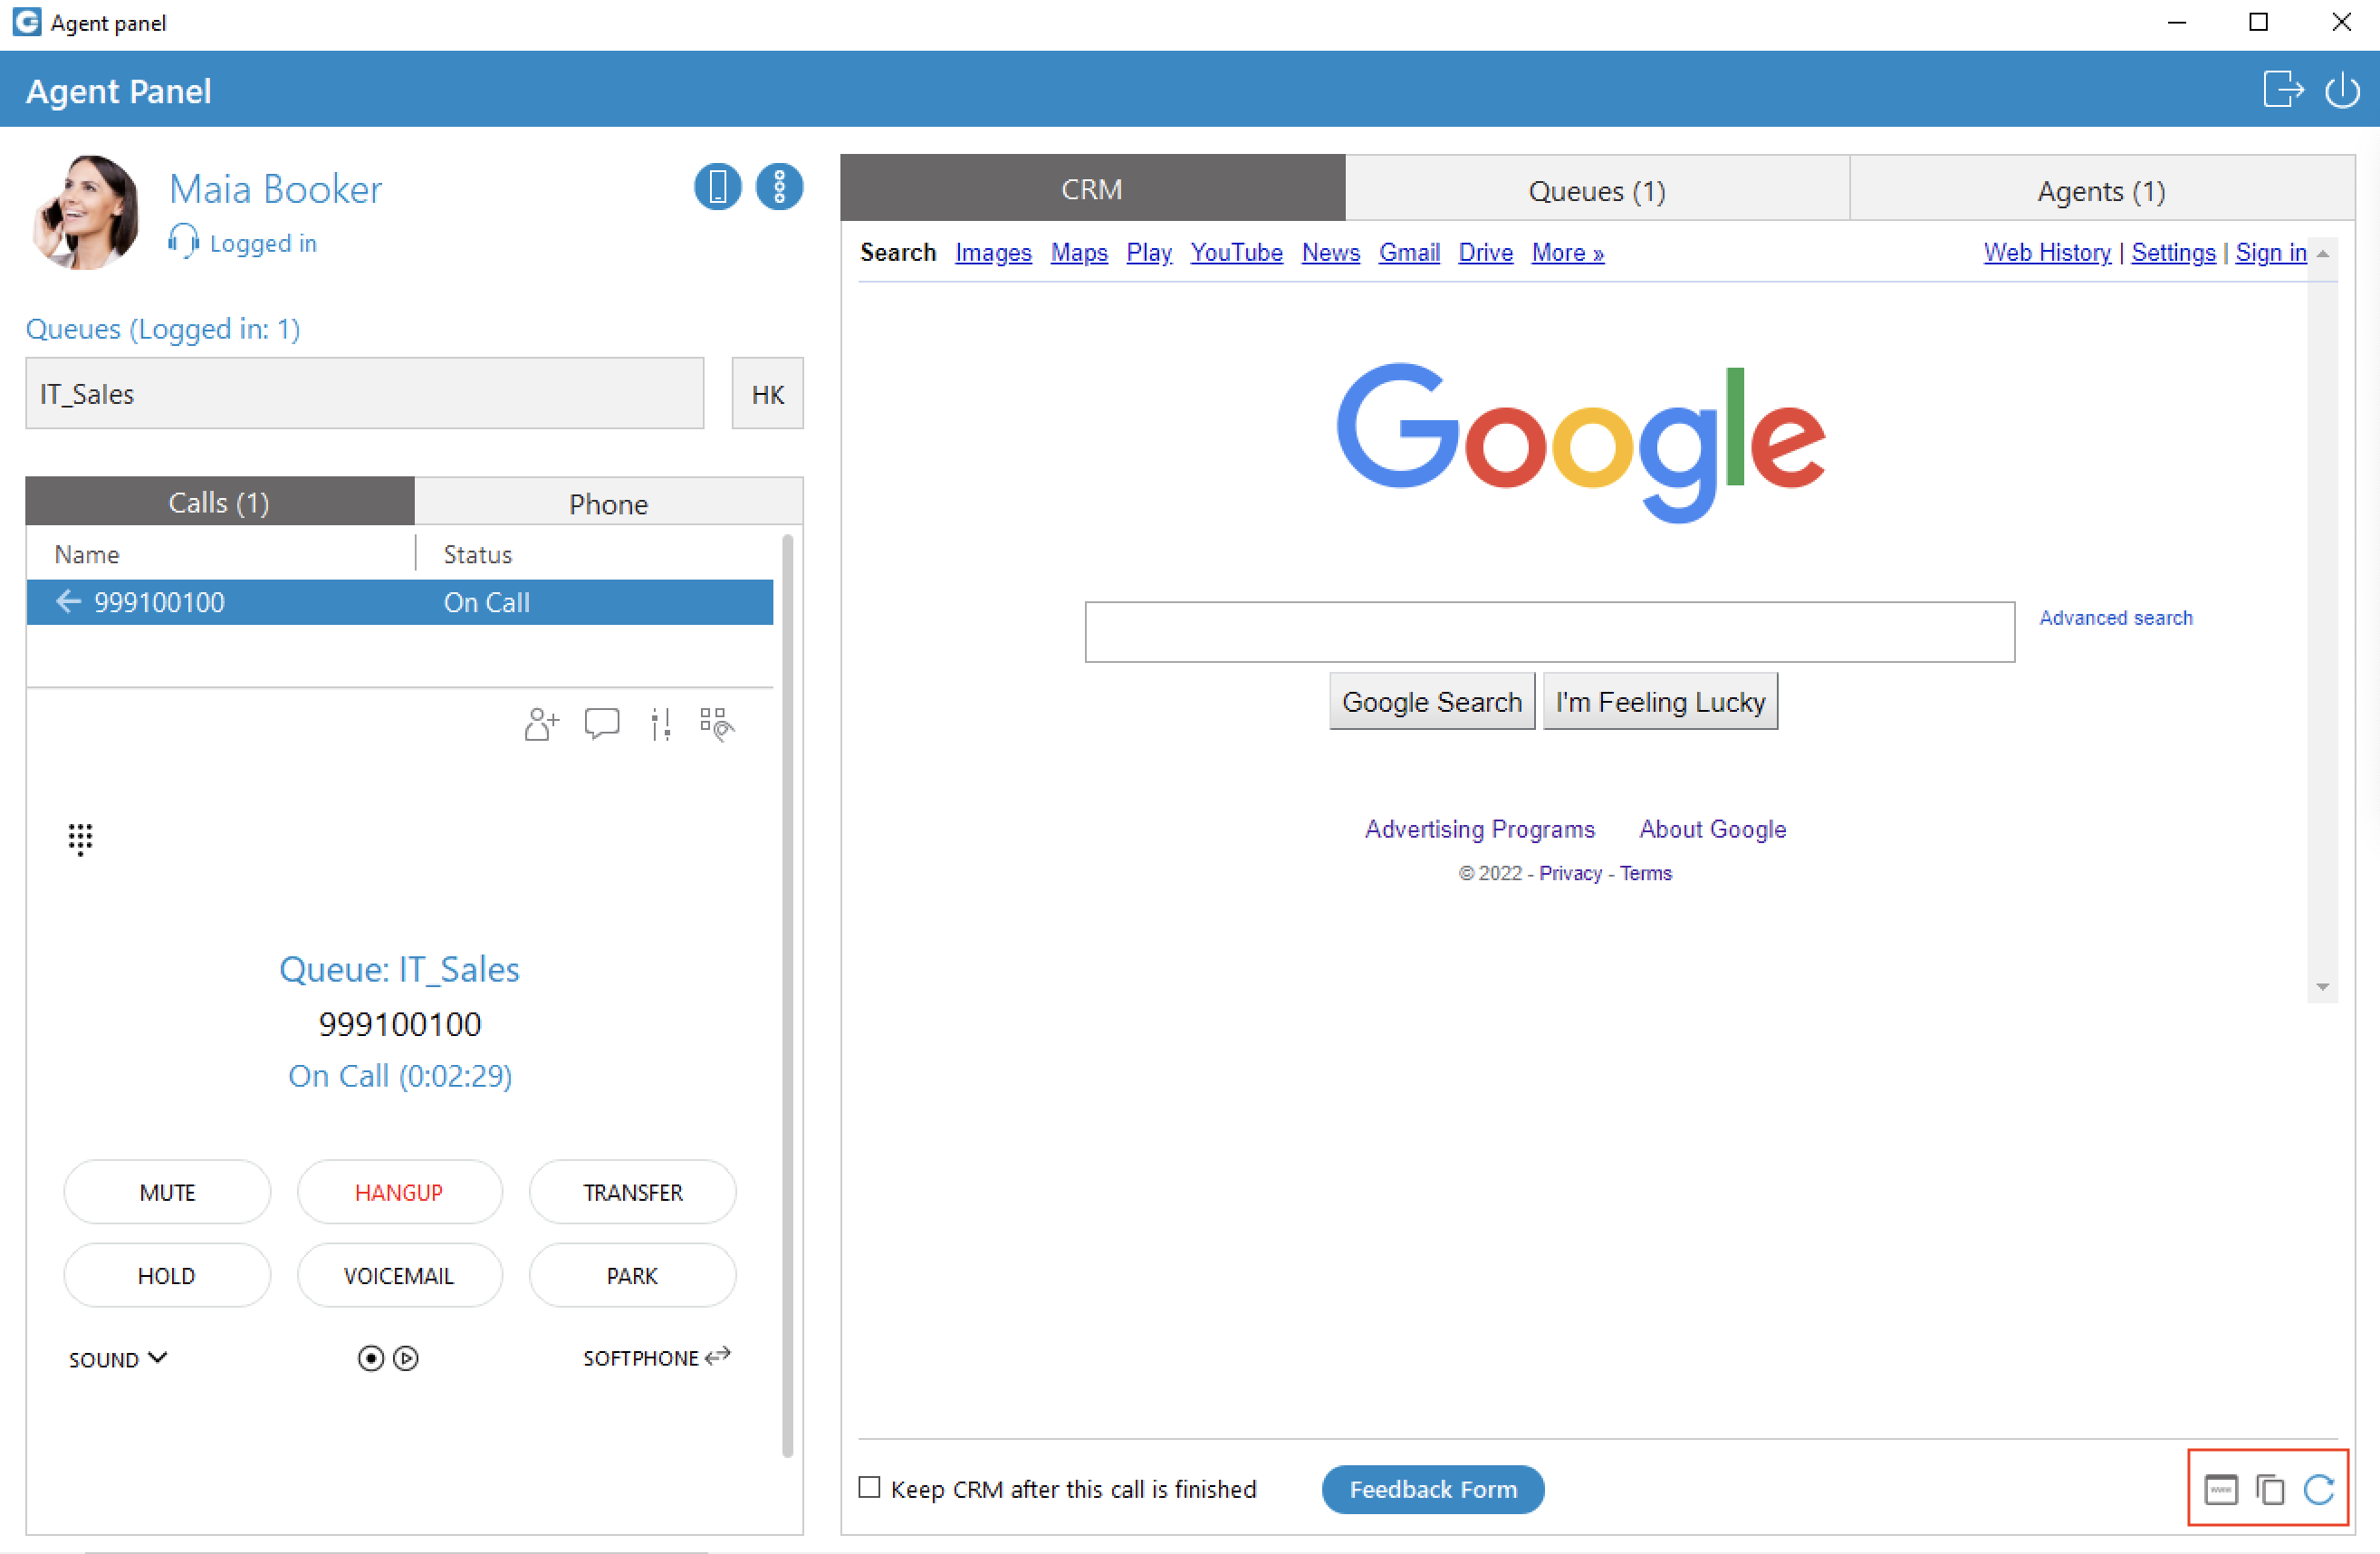
While loading the page, there is a progress bar that indicates that the page has not been fully loaded, yet. Other options like Copy URL and Reload are located in the bottom right corner.
CRM
Also, it is possible to do a screen pop based on the URL set per Queue. This can be done only if the option Enable Queue/ERG URL Popup. If enabled, application will use URL configured on server. is checked (Preferences –> Modules –> Call Popup).
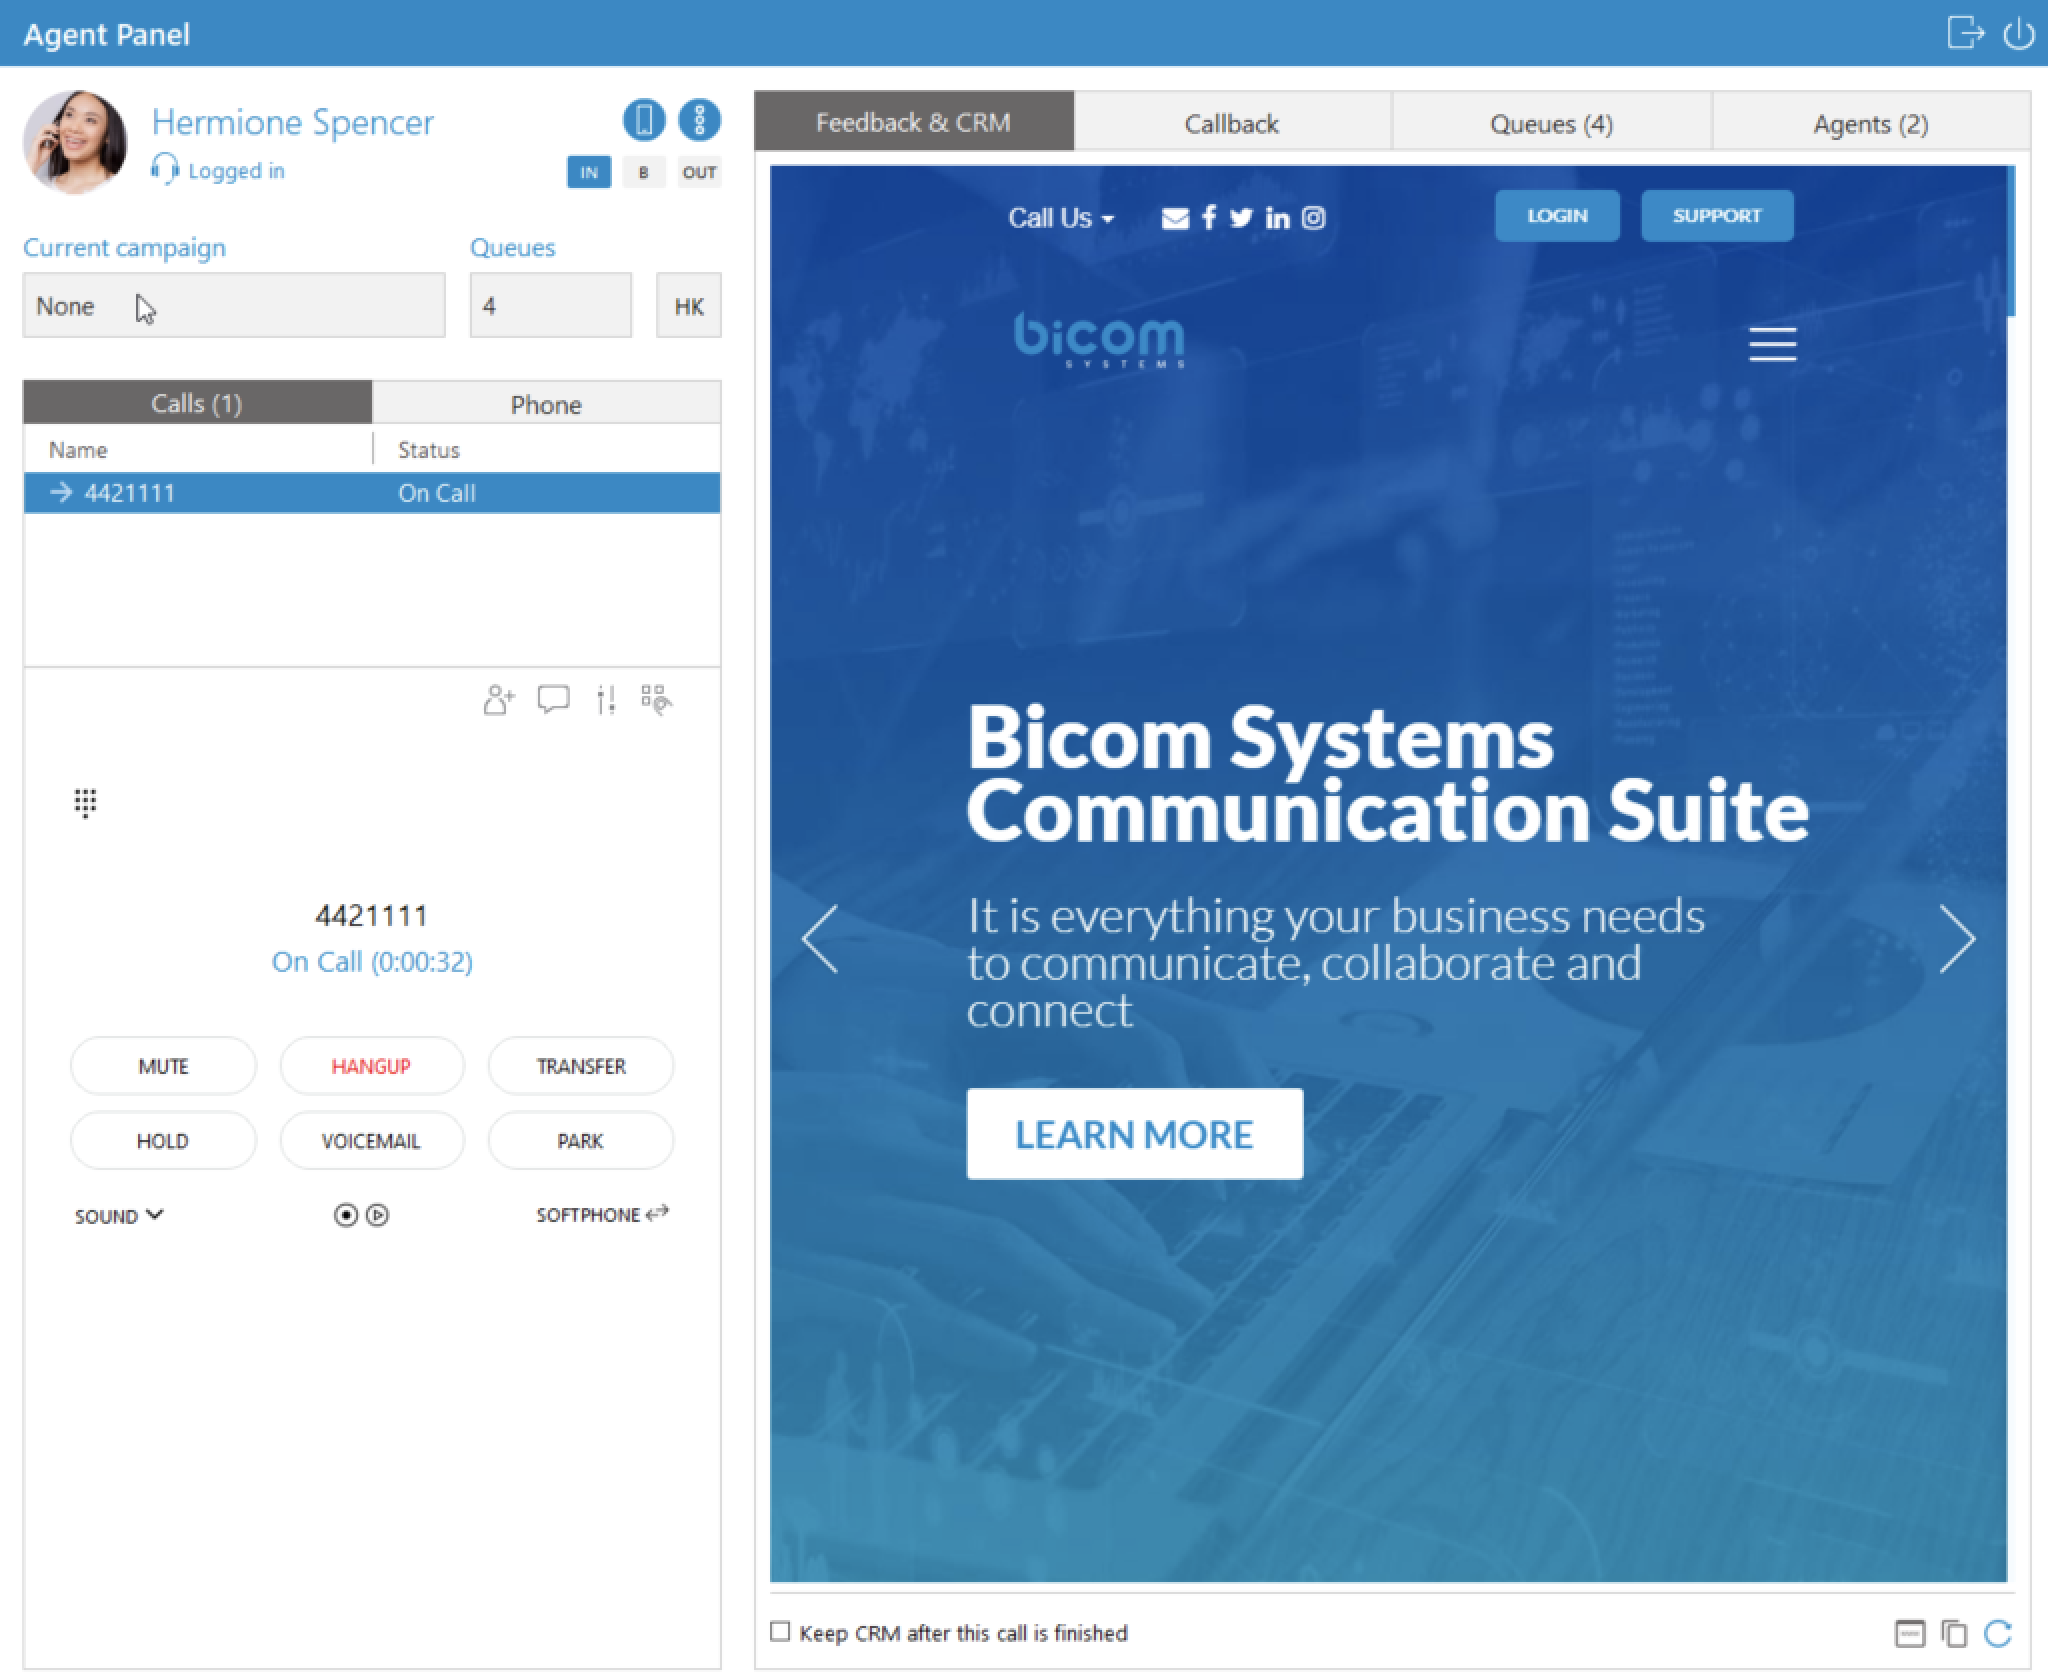
Below the CRM, an option allows CRM to remain visible even after the call is completed. If the CRM option was checked, and if the call was completed, the Close CRM button will be available on the left side to close CRM.
Feedback Form
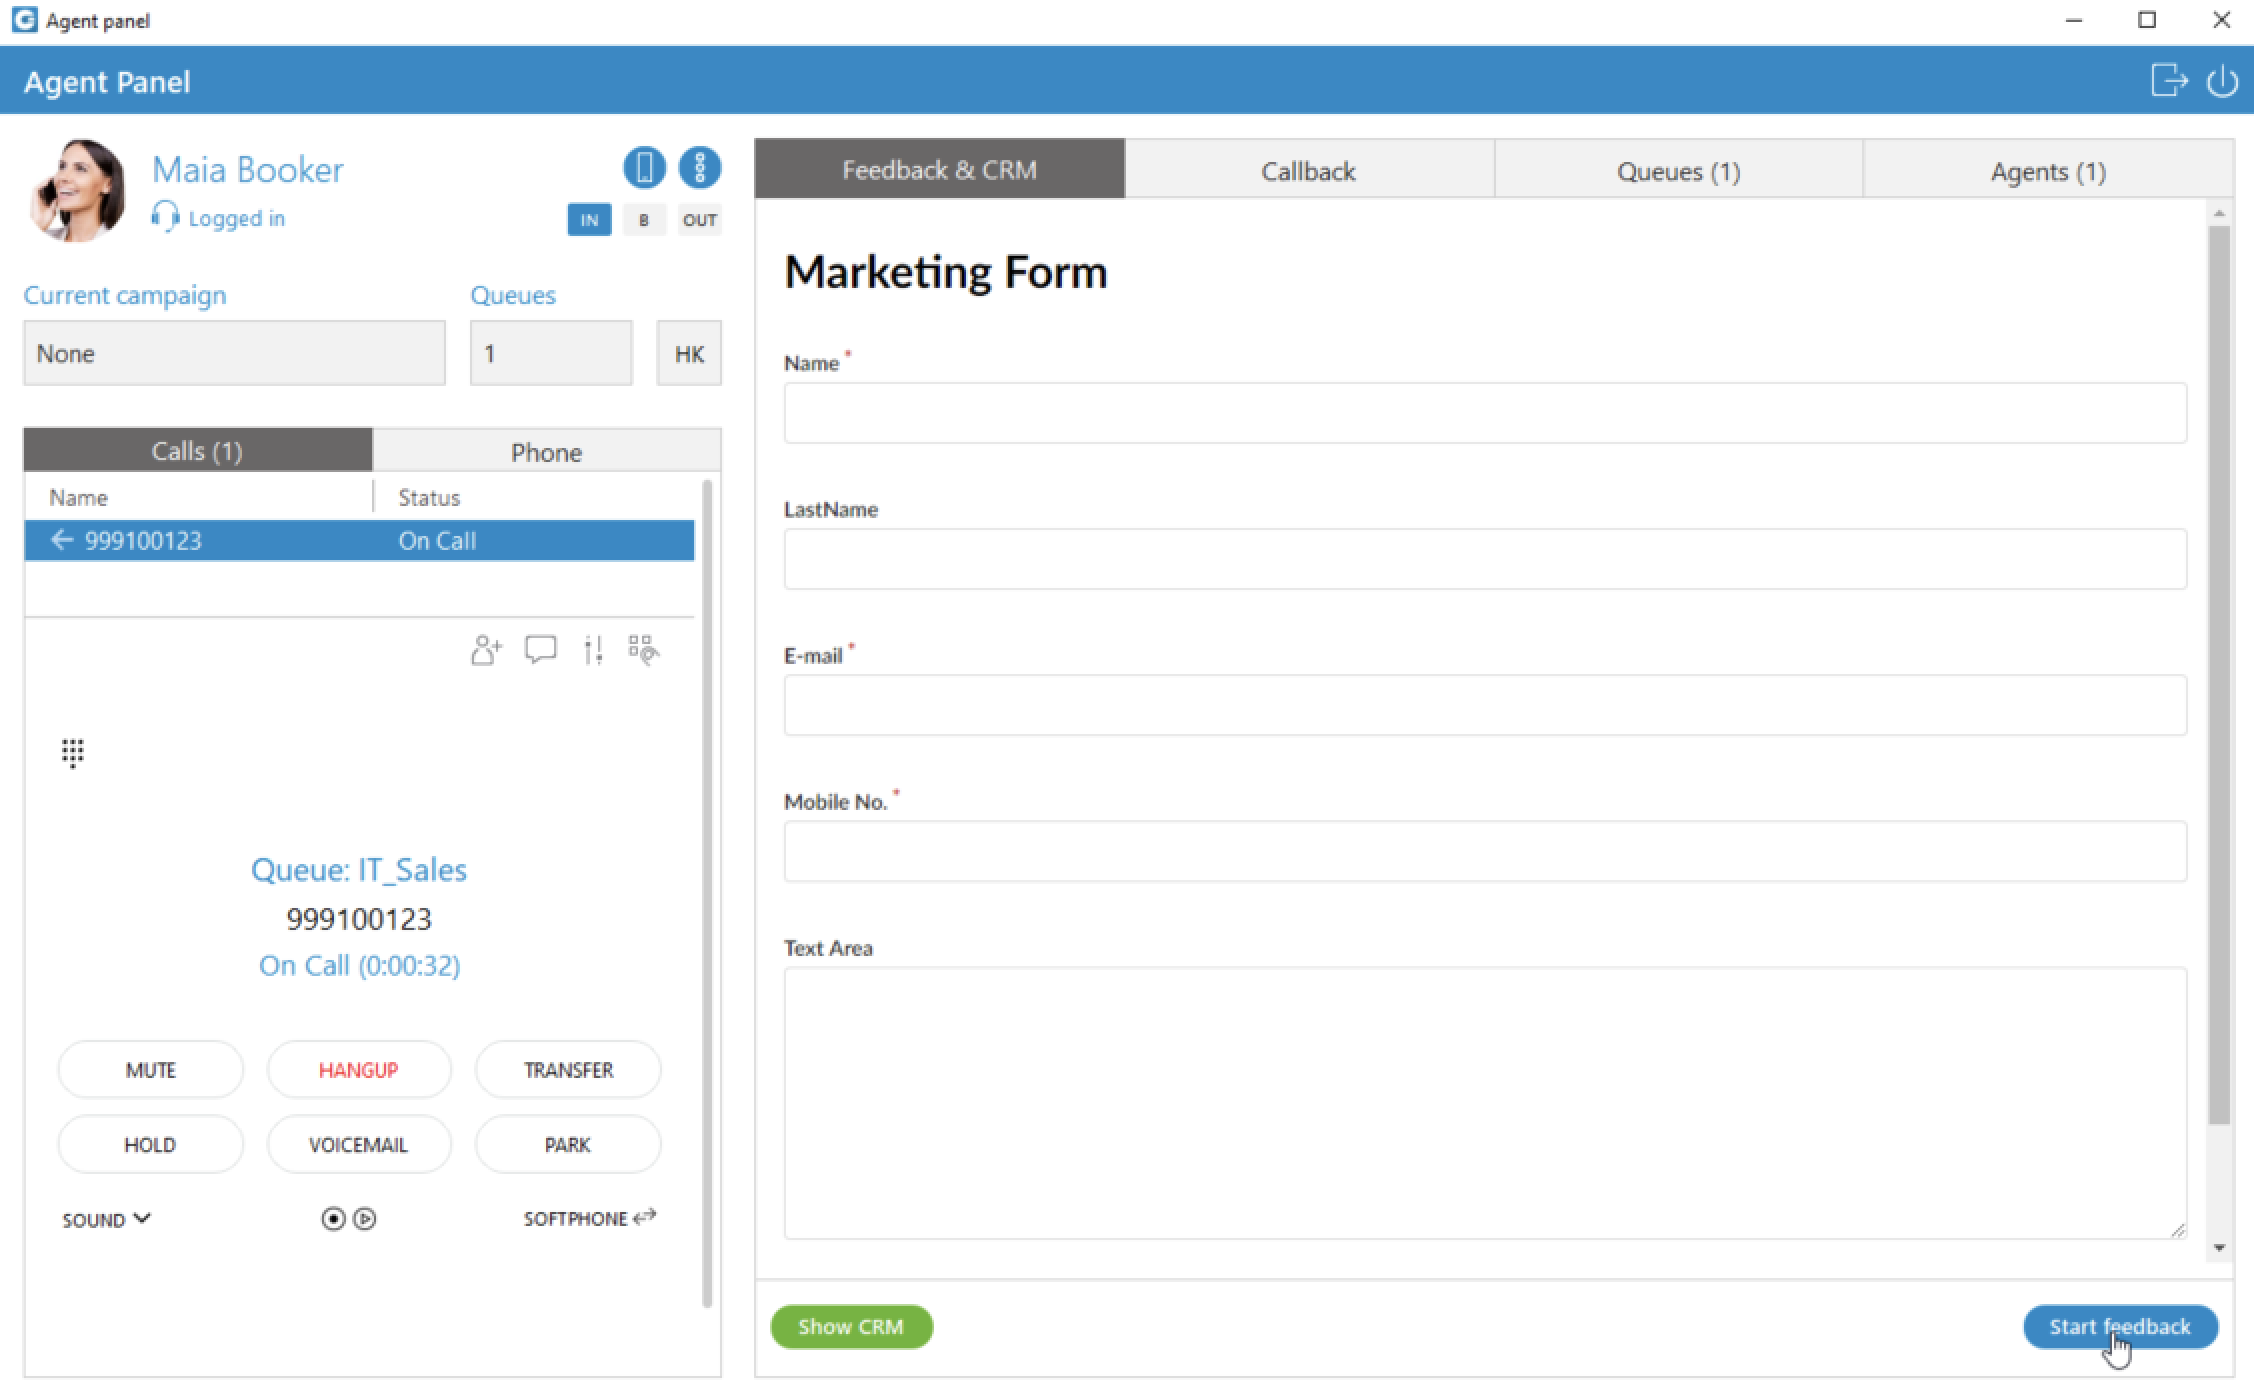
Feedback forms are used for Queues and Campaigns. They are displayed whenever there is a new call into the Queue or there is a new call from the Campaign. In order to show the Feedback form, it has to be loaded on PBXware and the option Send Feedback Forms must be set to Yes. Otherwise, a Feedback form is not available.
In order to edit the Feedback form, click on the  button that is placed on the bottom right side of the Feedback widget. When editing is done click on the
  , to send all data to the server. If we click on the
  button, all entered information will be lost, and the Feedback form will be closed.
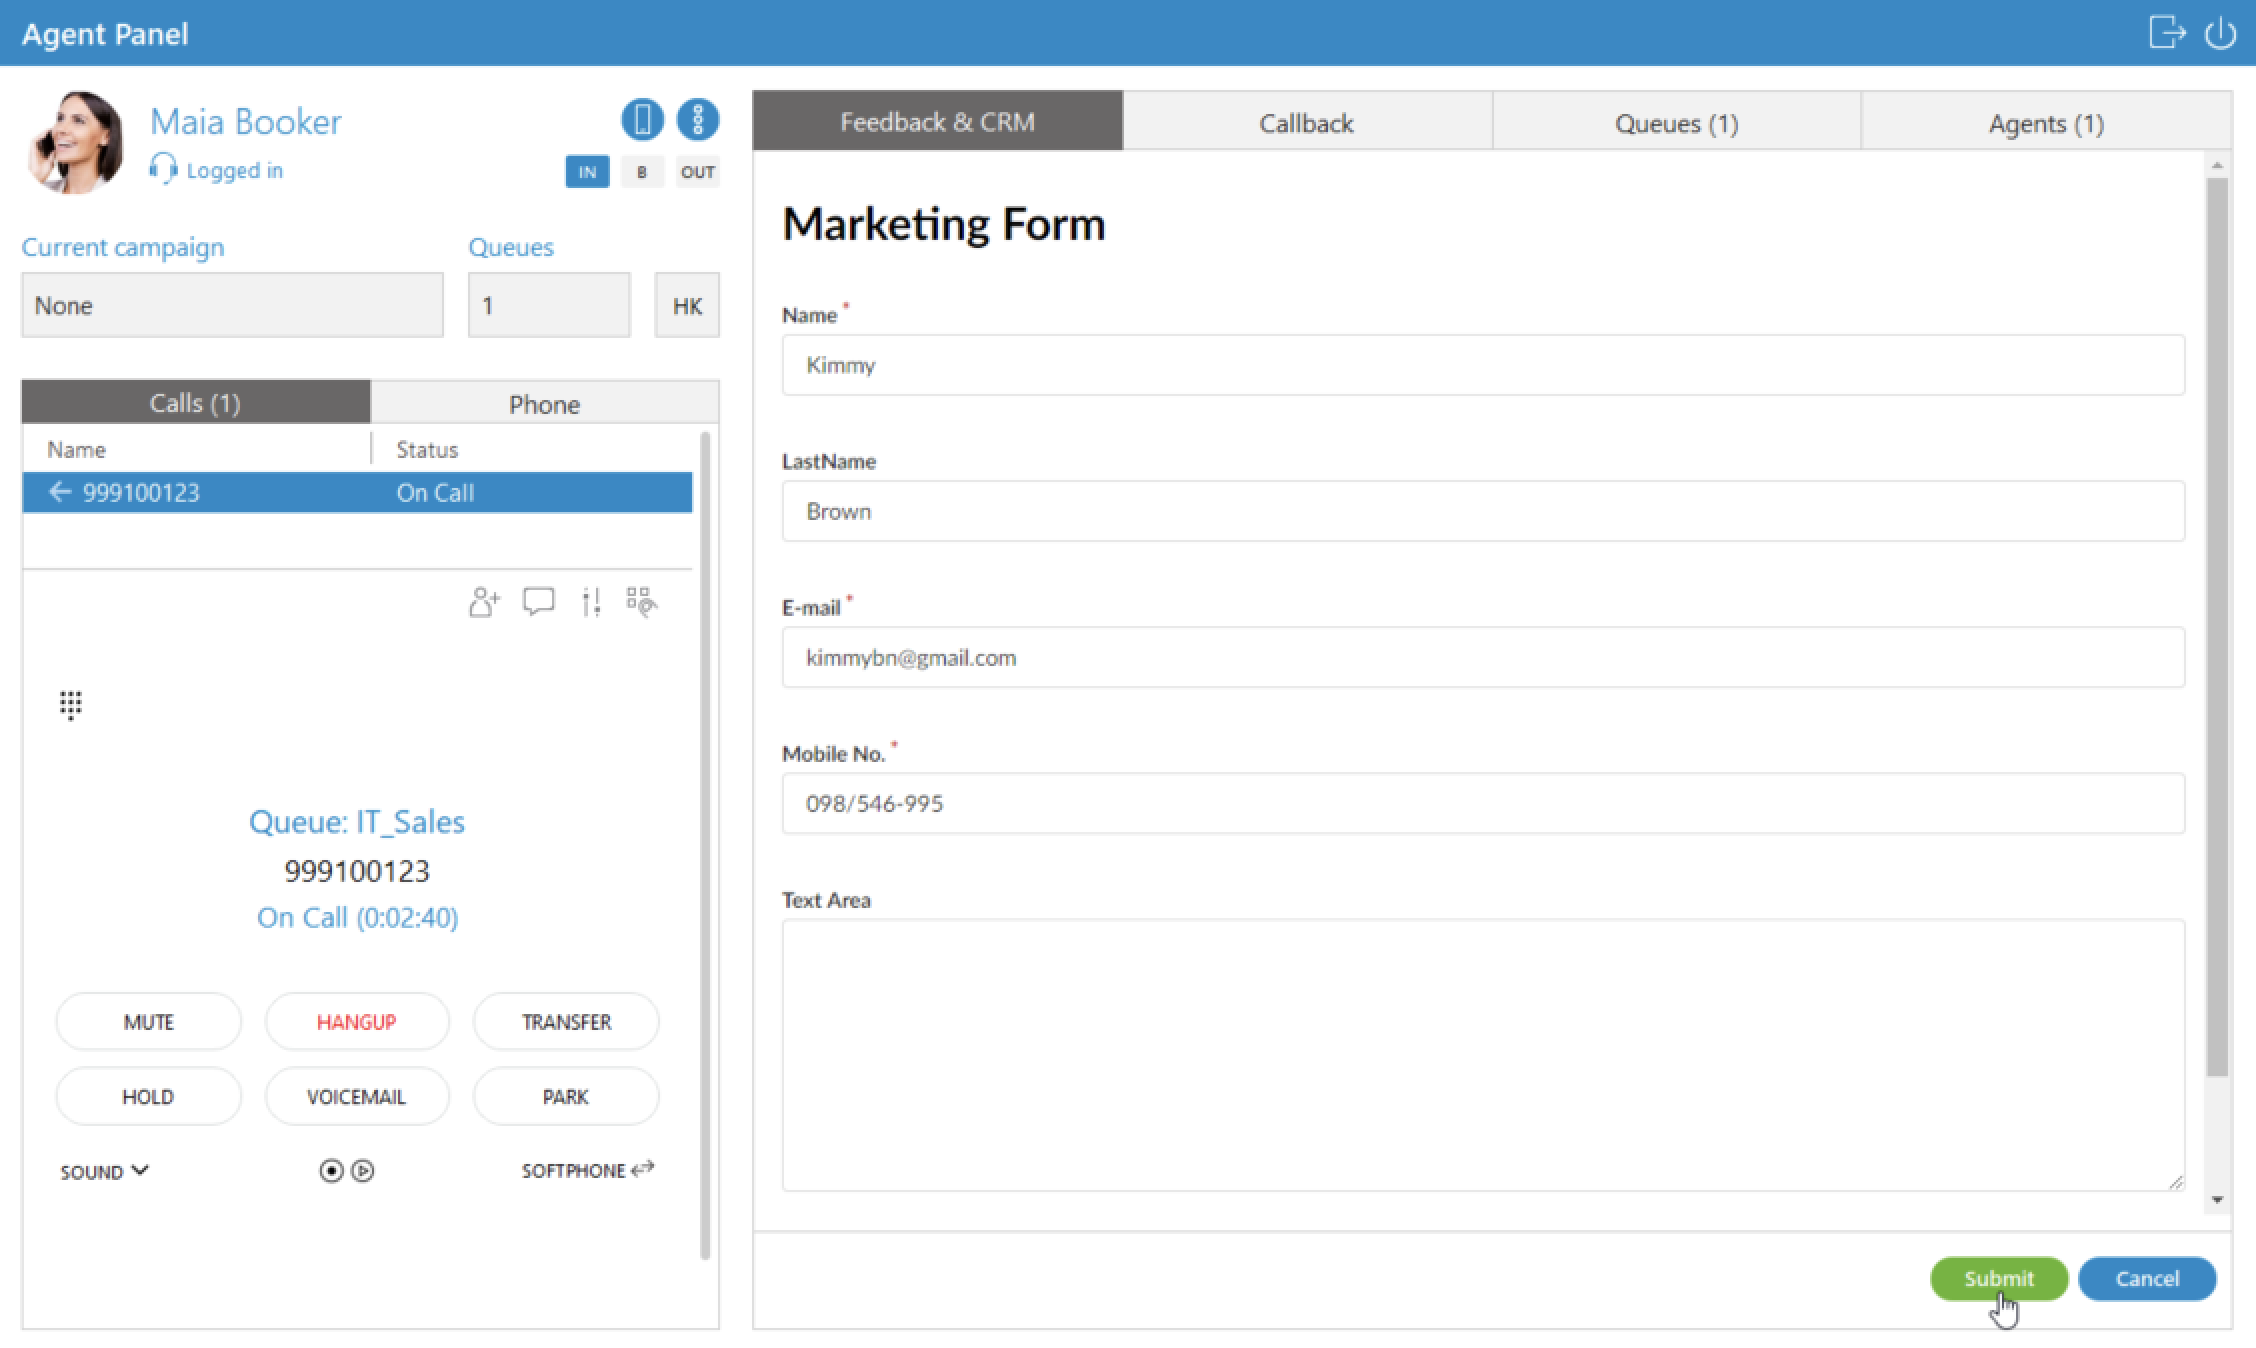
When it comes to Campaigns, in Preview/Progressive strategy there is a Feedback form visible before the call is started, but in that case is possible only to read information, not to edit. That helps an Agent to decide if he/she wants to call that contact or go to the next one.
The Feedback form stays visible even after the call is finished until the Agent submits or closes it. If the call is rejected Feedback form will not be displayed.
Personal Callback
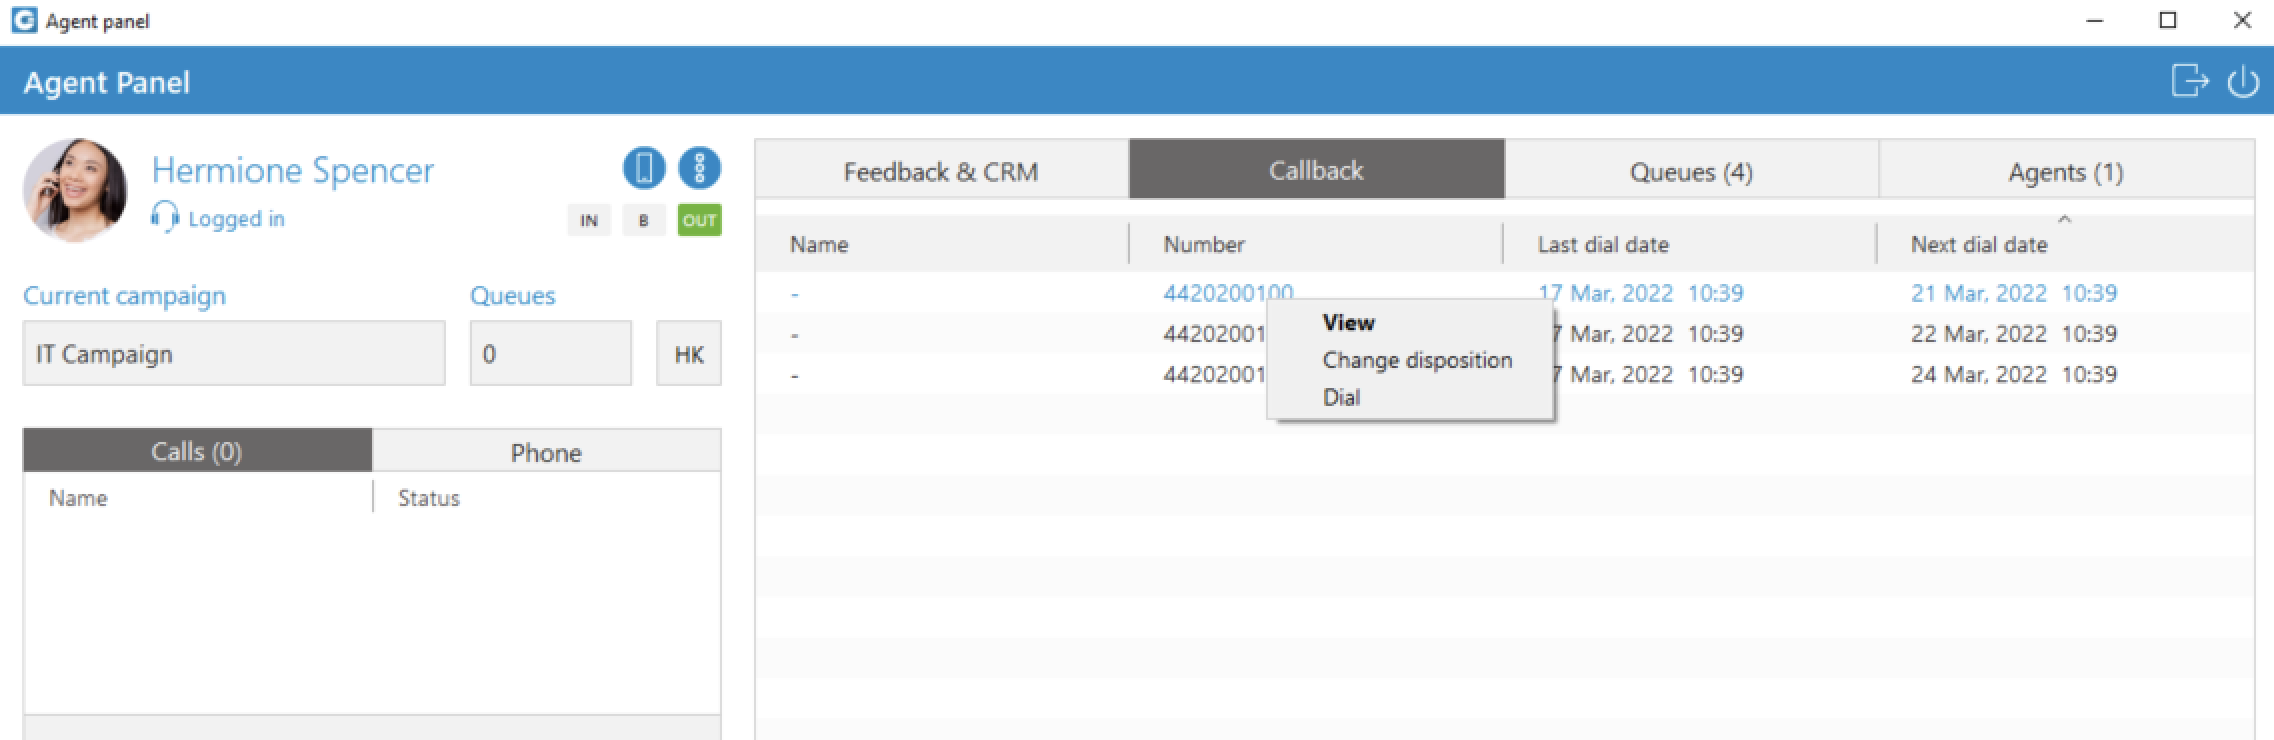
The agent can choose the disposition of the personal callback type, and he needs to have an overview of all personal callbacks in order to handle it. The list of all upcoming and expired Personal Callbacks is placed inside the Callback tab in the Agent Panel. Every personal callback is represented by a name, number, last dial date, and next dial date.
When clicking on the callback a menu with the following actions appears:
- View: Opens a new dialog with detailed information about lead (Feedback form). From this dialog it is also possible to dial callback and change disposition of the callback. This is a default option available with mouse double click.
- Change disposition: Opens a new dialog where it is possible to change callback disposition.
- Dial: Dial callback.
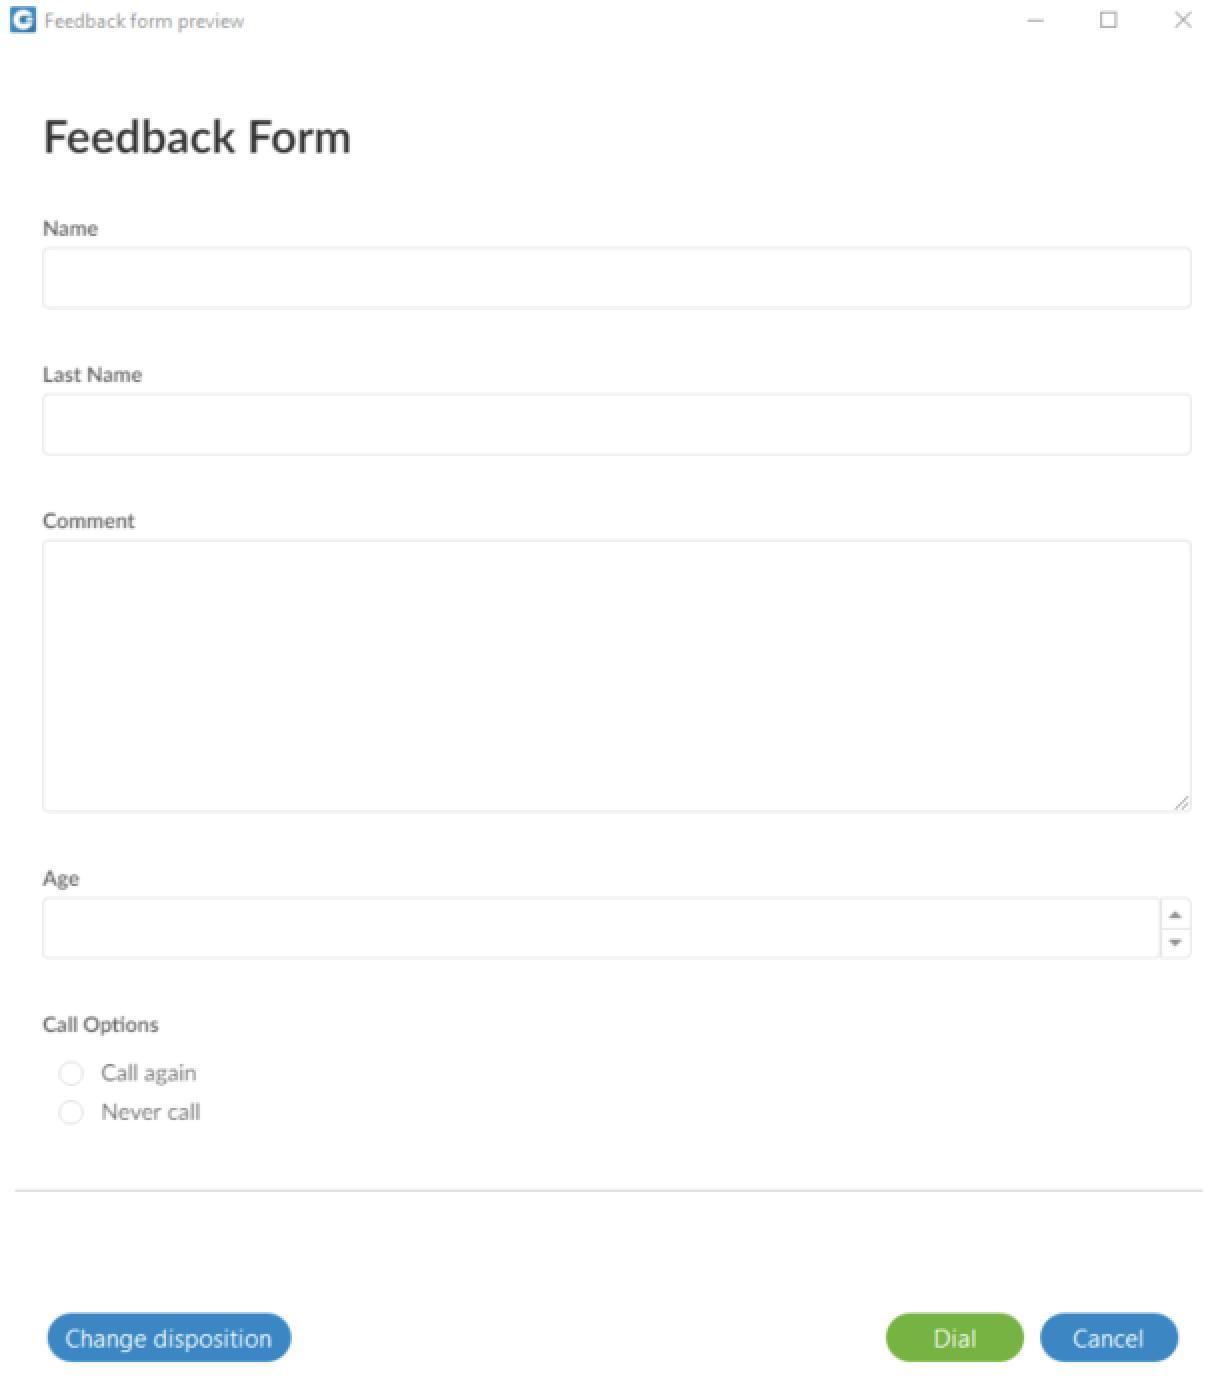
Project Codes
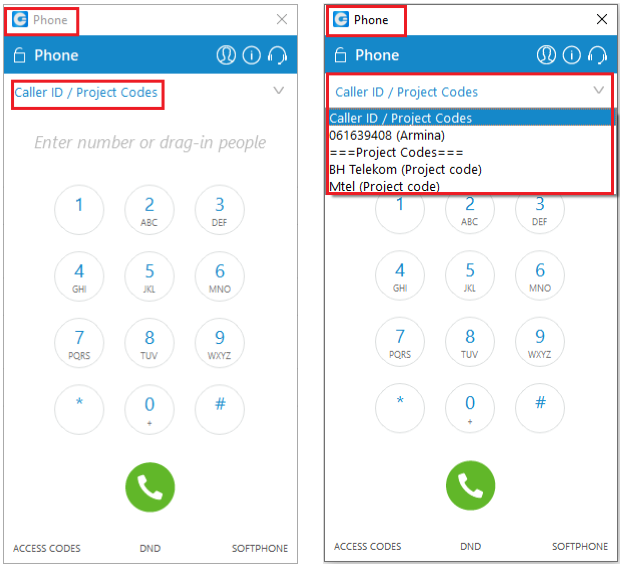
From gloCOM 6.0 version an agent can view and select project codes for his outgoing calls. Project codes can be found inside phone dialog. They are defined in PBXware (Agents –> Project Codes).
Agents
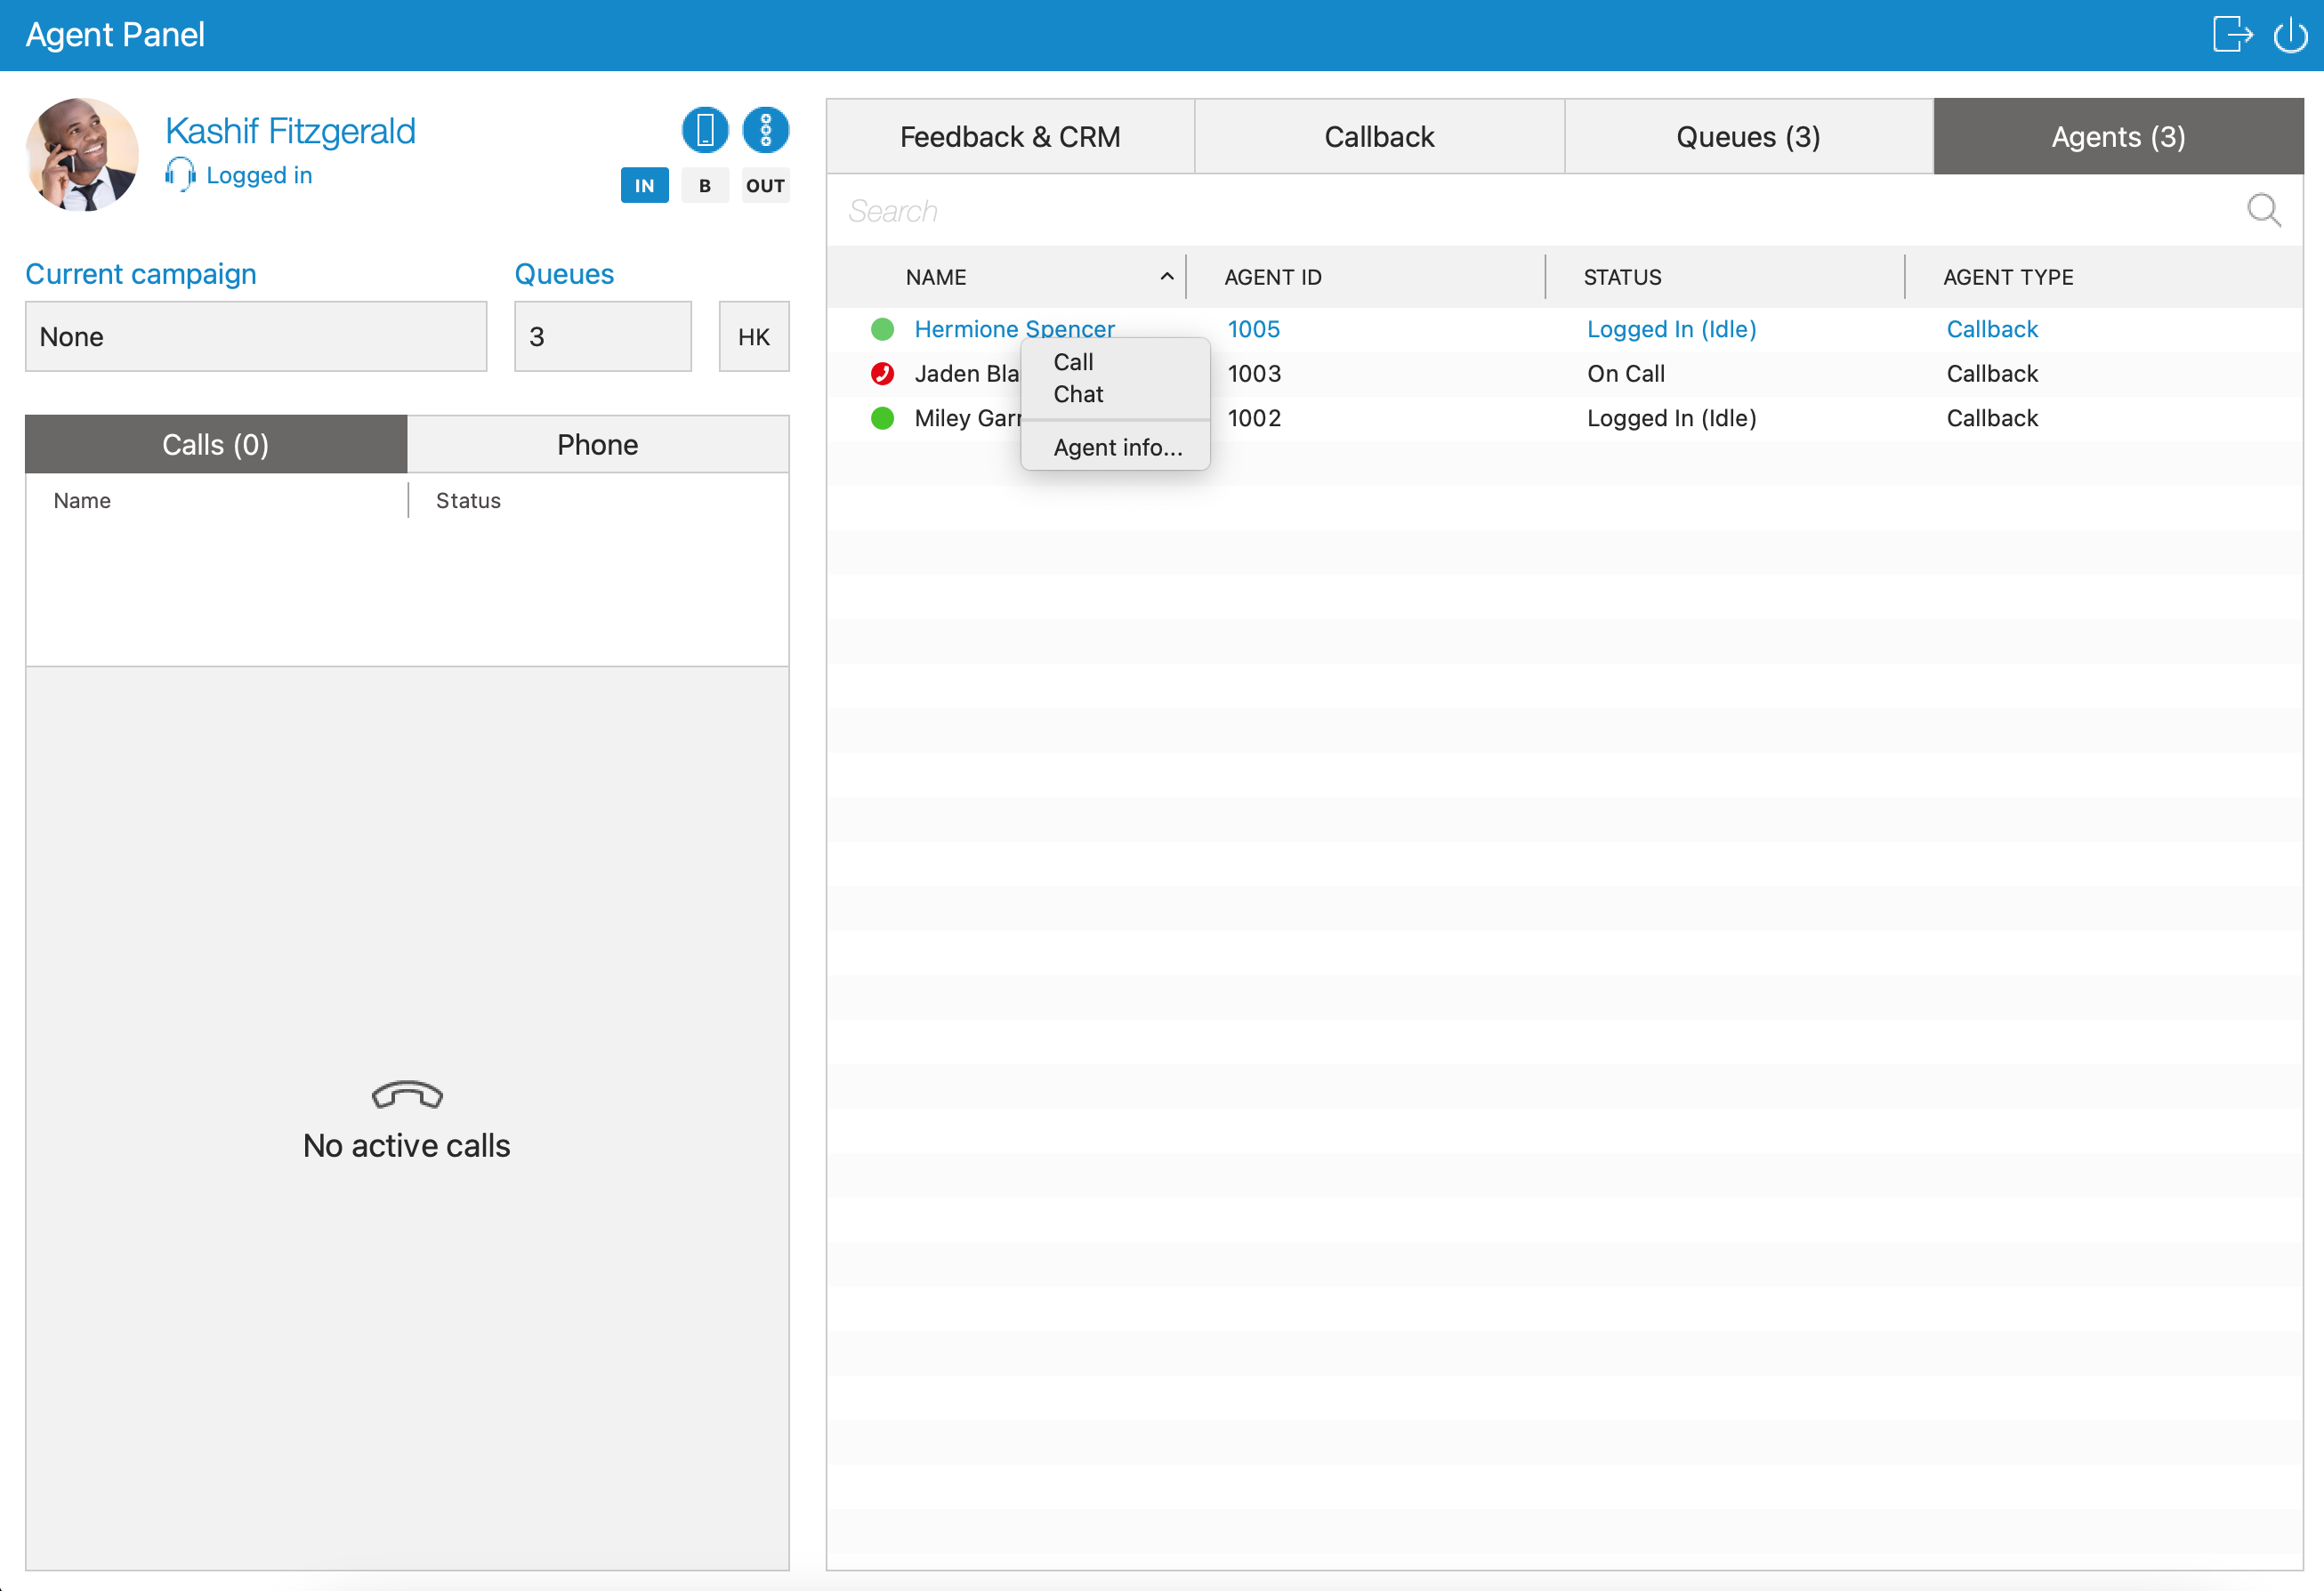
Agents tab displays all agents that you choose to be visible in Agent Settings (Agent Panel Settings –> Agents), and the total number of those agents. It is possible to search for agents by the agent’s name or number. The following information is displayed for each Agent: Name, Agent ID, Status, and Agent Type.
- Name
Displays the Agent’s Name
(E.g. Agent 1001)
(Display) - Agent ID
Displays the Agent’s ID
(E.g. 1001)
(Display) - Status
Displays the Agent’s status
(E.g. Paused: Lunch break)
(Display)
If the Agent is on a pause, the pause reason will be displayed as well.
- Agent Type
Displays the Agent’s type
(E.g. Callback)
(Display)
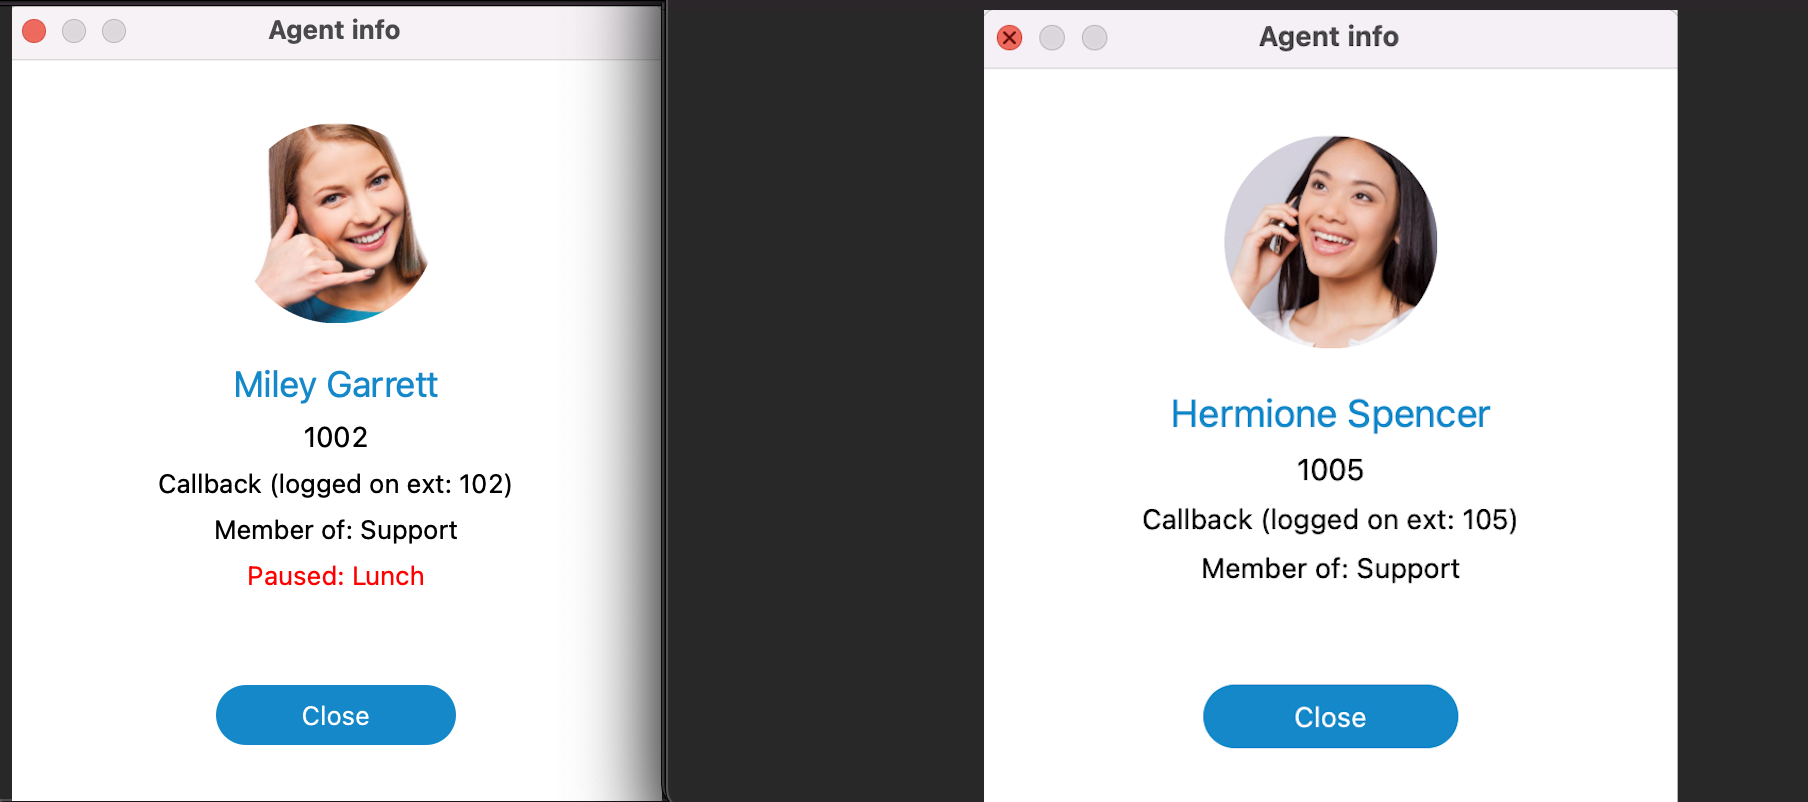
Clicking on a specific agent brings up an options menu:
- Call: Call selected agent.
- Chat: Start a chat with the selected agent. Shortcut for this is double click the agent.
- Agent info: Opens a dialog containing all information about the agent like agent name, agent number, agent login type and queues of which an agent is a member. If you are logged in as a Supervisor then additional actions appear (Listen, Logout, Transfer, Chat, Pause, Close).
Queues
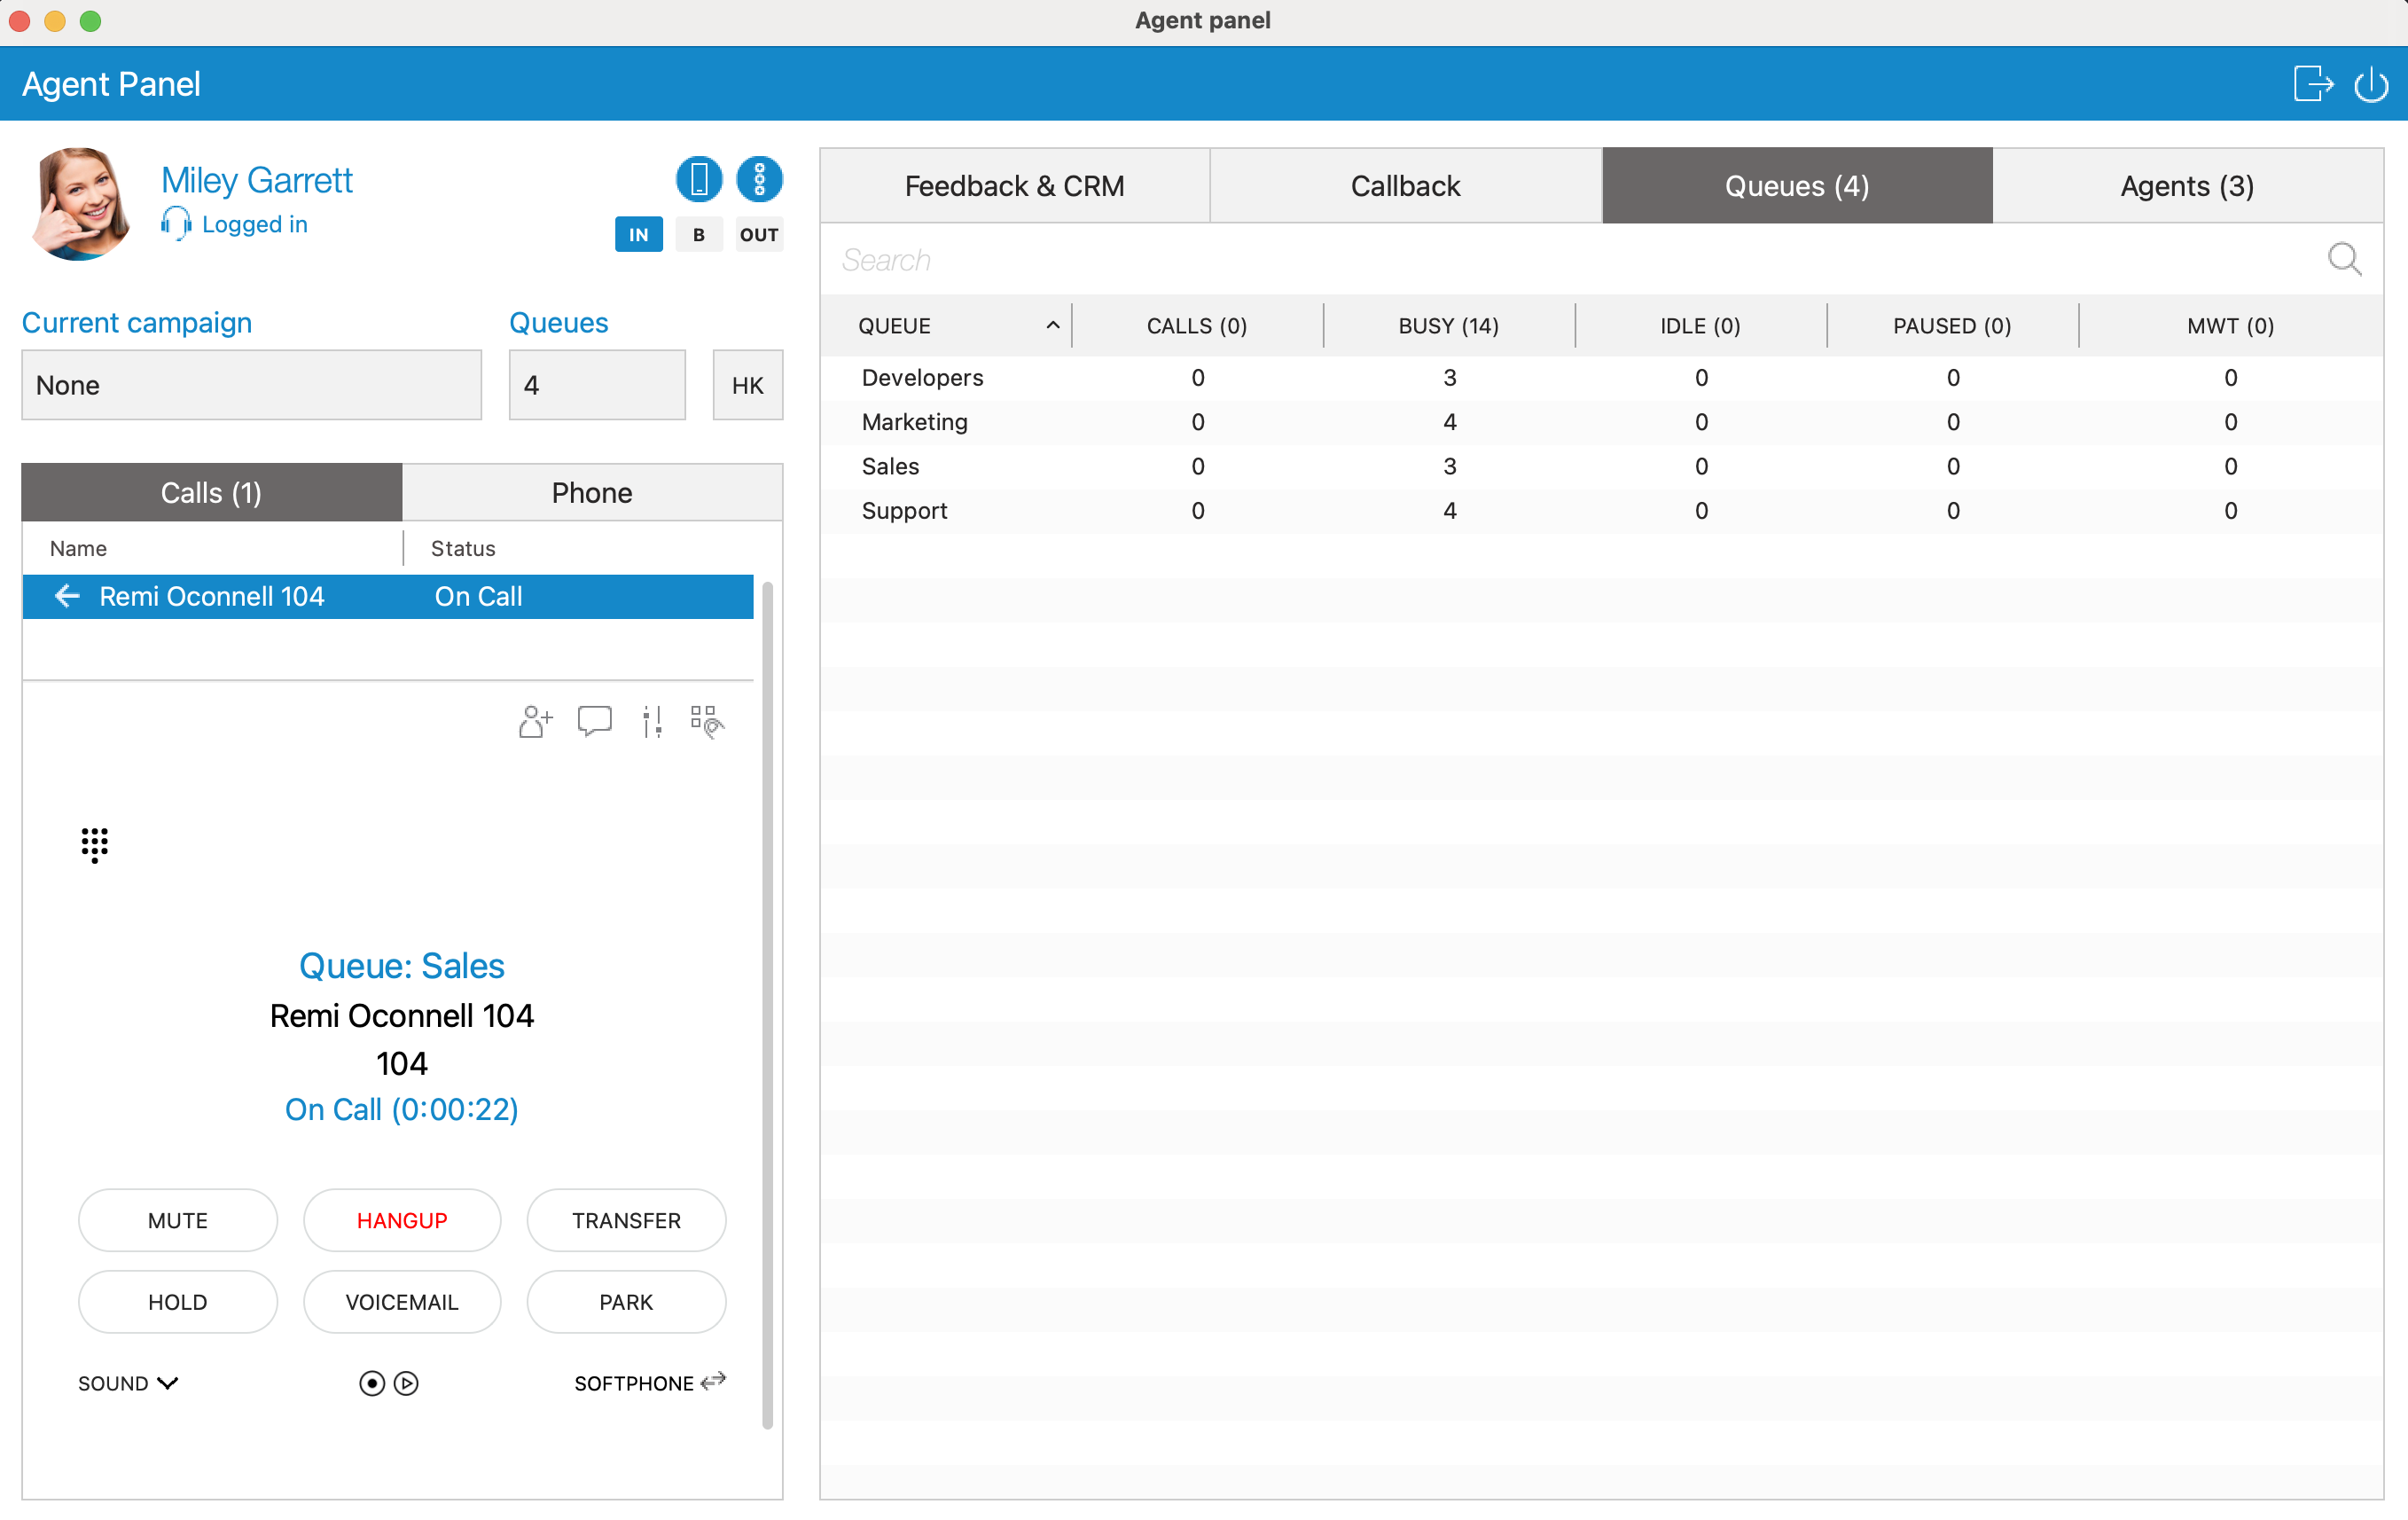
Queues tab displays all queues that you choose to be visible in Queues Settings (Agent Panel Settings –> Queues), and the total number of those queues. It is possible to search for queues by the queue’s name or number. For each queue, the following information is shown: Queue name, Calls, Busy, Idle, Paused and MWT.
Queues Dispositions
It is possible to set Dispositions per Queue on PBXware. When the Queue call is finished, a list of added Dispositions is displayed so that an Agent can select one accordingly.
Each Disposition has the following information:
- Name
For example:  and
and 
Each Disposition can have its name. This way, the user knows what will happen if they press a specified disposition button. Using names of Dispositions is helpful on the gloCOM interface when presenting a list of Dispositions to Agents.
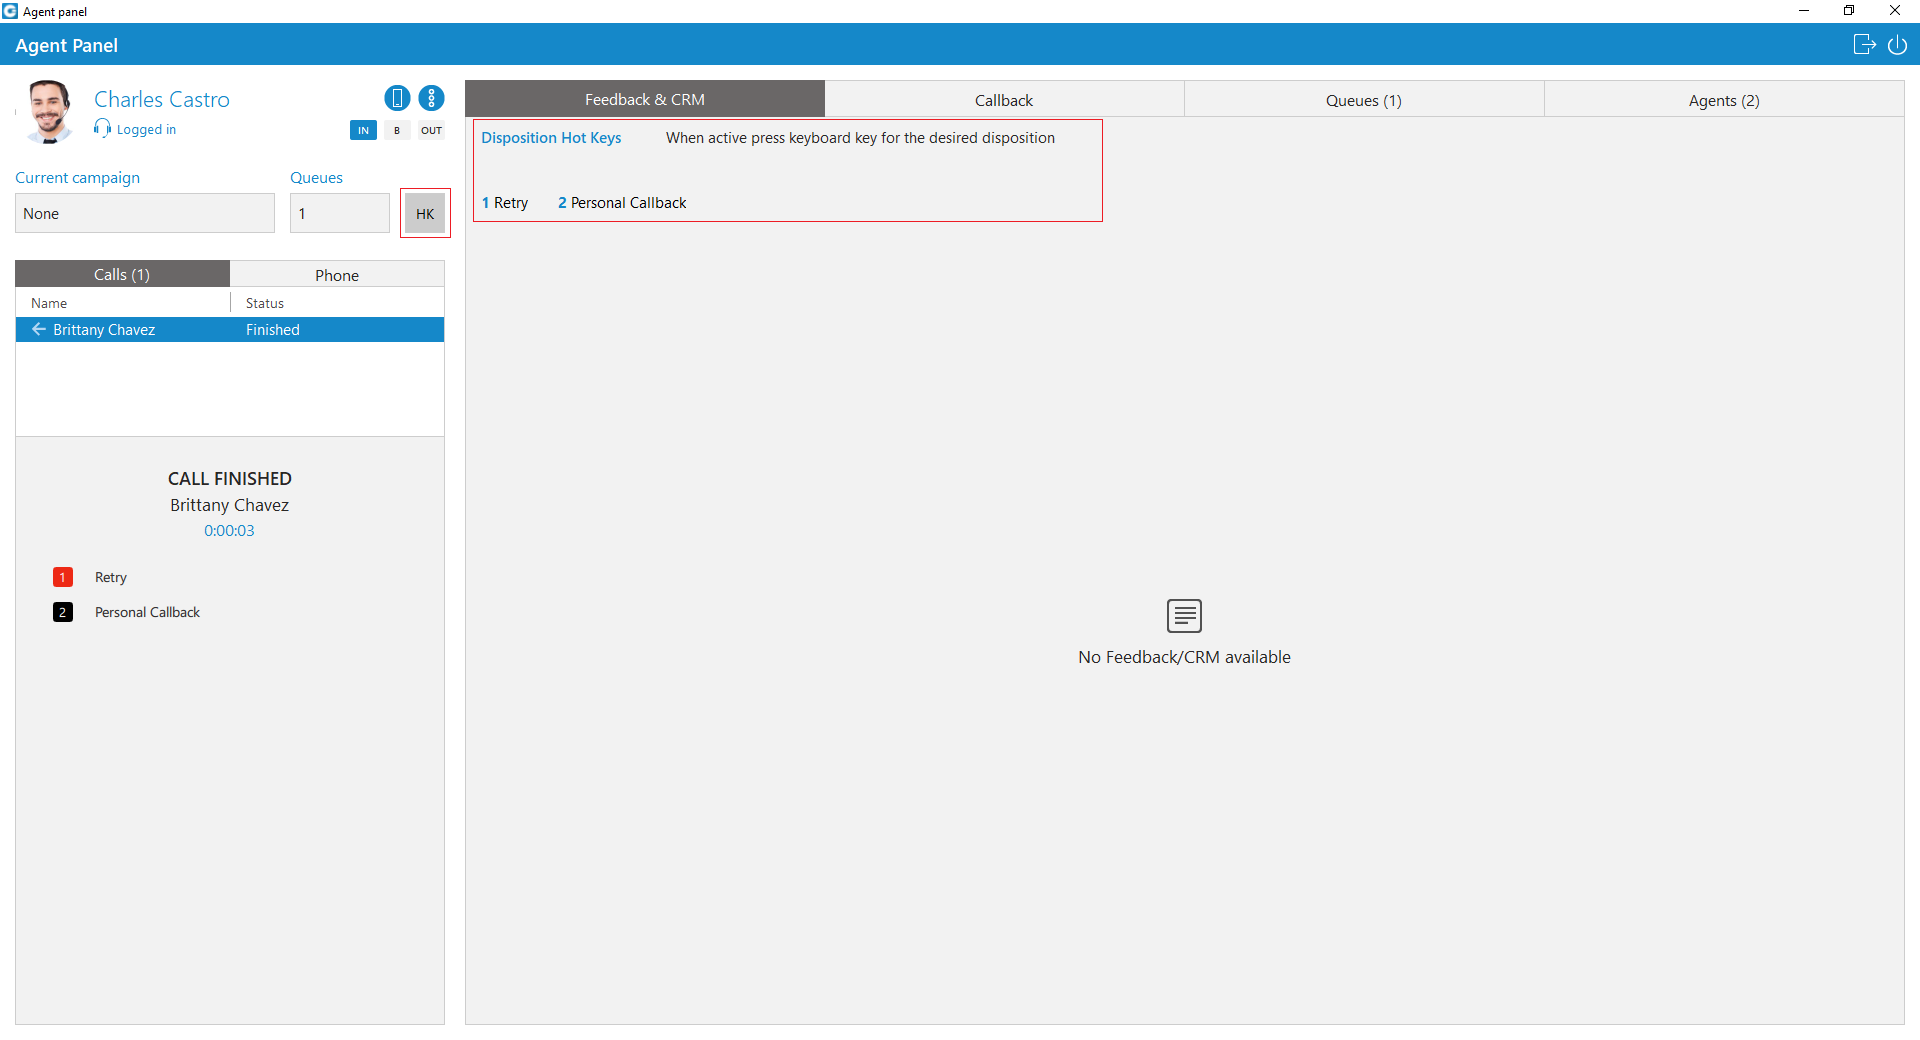
- Hotkey
For example: and
It refers to a keyboard shortcut that Agents use to improve their performance. When using button, Agents do not have to use the interface. For example: If the hotkey of a disposition is 1, to submit this disposition an Agent can press the number 1 on their keyboard. After pressing 1 if the disposition is submitted, the message saying Disposition submitted successfully will appear.
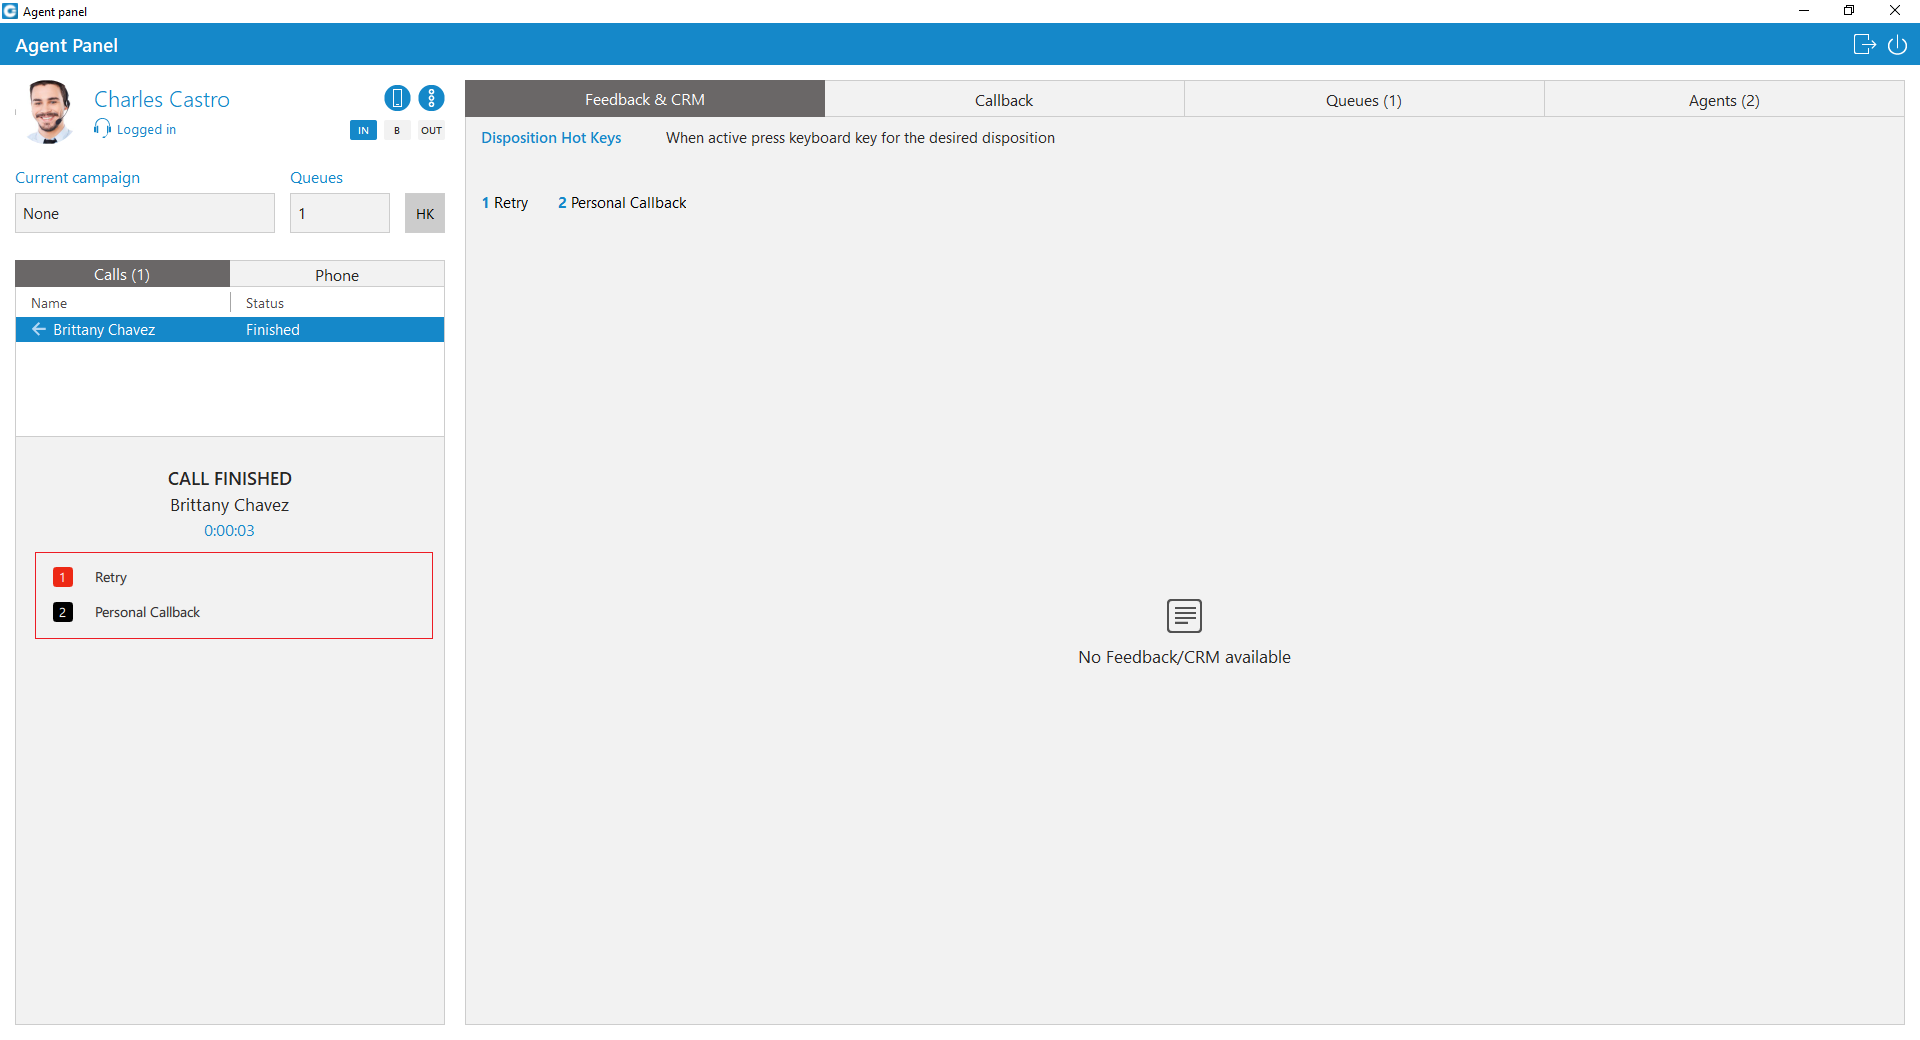
- Color
For example:  and
and 
Each Disposition can have its own color for easier visual representation. Using various colors of Dispositions is useful on the gloCOM interface when presenting a list of Dispositions to Agents.
Agent Panel Settings
This dialog contains settings for agents, queues and alerts. Accordingly, there are 3 tabs: Agents, Queues and Alerts.
Agents
The drop-down list is used to select which agents will be visible in the Agent Panel window, inside Agents tab.
You can select the following options:
- Show only agents from my queues
- Show all agents
- Show custom selected agents
Also, there is checkbox Show offline agents that is used for showing offline agents inside the Agents tab. Below, there is another checkbox Agent panel always on top that is used in case you want to set the Agent Panel always on top.
Queues
The drop-down list is used to select which queues will be visible in the Agent Panel window, inside Queues tab.
The following display options are offered:
- Show my queues only
- Show all queues
- Show custom selected queues
Below, there is a checkbox Agent panel always on top that is used in case you want to set the Agent Panel always on top.
Alerts
- Max wait time (MWT): MWT displays longest waiting caller in the queue.
- Threshold (minutes): If you want to be alerted when a caller is waiting for more than X minutes in the queue, set Threshold on that value. When the waiting time reaches the Threshold, it will be displayed in red color, and application will optionally display an alert to the user.
- Refresh time (seconds): Select or enter the number which will represent Refresh interval in seconds.
- Alert options
- Alert interval (minutes): Alert interval is the amount of time in which application will alert agent for one specific type of event (alert). You can select or enter the number which will represent this interval in minutes.
- Show popup for alerts: If this option is checked, the application will show popup whenever an alert occurs.
- Alert me for my queues only: If this option is checked, you will receive alerts only for your queues.
Below, there is a checkbox Agent panel always on top that is used in case you want to set the Agent Panel always on top.
Alerts dialog
Alerts dialog displays a list of alerts. For each alert, the following information is shown: Time and Alert details.
On the top right side of the Alerts dialog there is an option to delete all alerts from the list. Also, next to the Delete button is placed Settings button in order to open the Agent Panel Settings dialog, so you can change already configured options for alerts.
Placing Video Calls
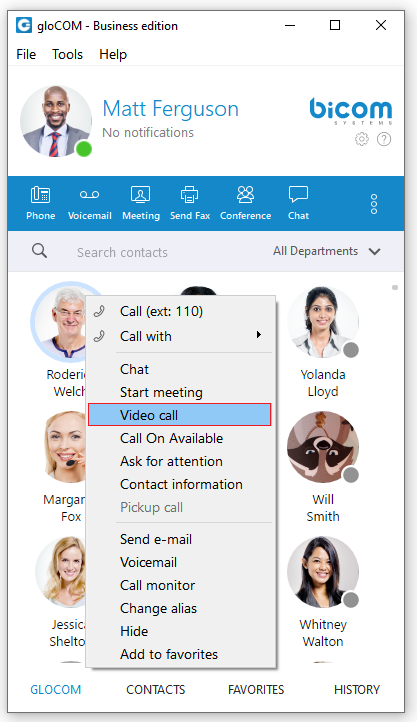
To place a video call, right click on a gloCOM contact and select Video Call from the drop-down menu.
Sending Fax
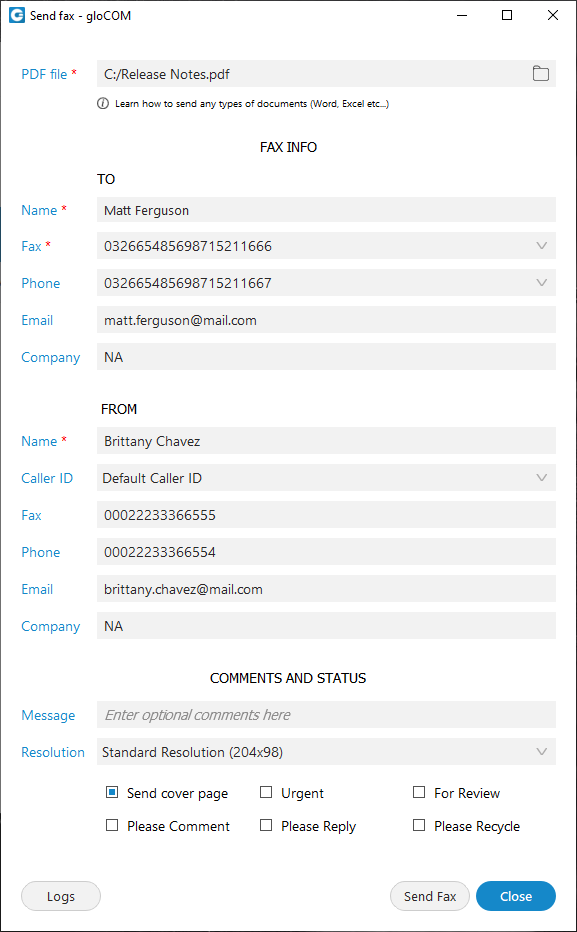
- Outgoing faxes
- Click on the Fax module icon, then select Send fax to open the Fax module.
- Read the information message and click the OK button.
PDF file:
- Enter the path or browse for a PDF file that you wish to send using the icon.
Information that you enter in the Send Fax wizard will be displayed on the fax cover page if you choose to send a cover page. In the Send Fax window you can see two sections, To and From.
TO Section
- Name: Enter the name of the recipient. For example, Tim Barr.
- Fax: Enter the phone number to which you want to send your fax, for example, 02033998800.
- Phone: Enter the phone number of the recipient.
- Email: Enter the recipient’s email.
- Company: Enter the recipient’s company name.
FROM Section
- Name: This field will be automatically populated with your gloCOM username.
- Caller ID: Caller ID is a drop-down menu with the list of caller IDs allowed for an extension. Caller IDs are added from the PBXware GUI.
- Fax: Enter your fax number.
- Phone: Enter your phone number.
- Email: Enter your email.
- Company: Enter your company’s name.
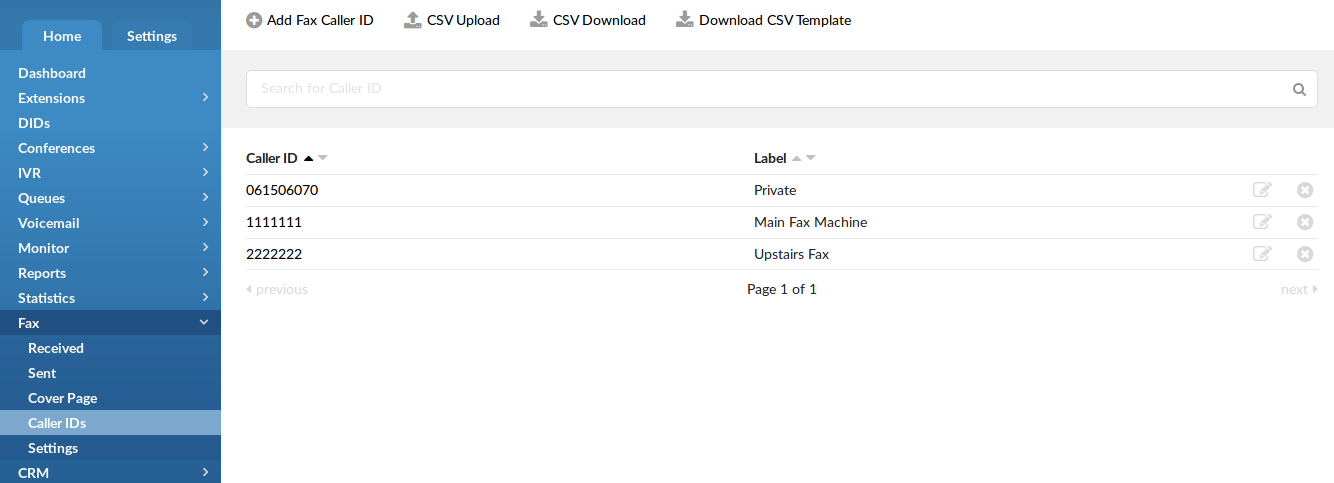
Additional information like comments and status can be entered also.
When sending a fax user is presented with a Sent X of Y pages so fax sending progress is more detailed.
- Incoming faxes
- Show list of all received and pending fax documents.
Supervisor Edition
The Supervisor Edition is broadened with Agent Edition functionalities. Now, the Supervisor can enable/disable Agent login details, and additionally use all Agent Edition features.
 Clicking this action will enable/disable Agent login details. Hovering over it displays a tooltip with the appropriate message.
If the Supervisor logs in as an Agent, the Agent Panel window will be available, and all calls will be displayed within it. Also, the phone dialer and all phone-related settings will be placed inside the Agent Panel.
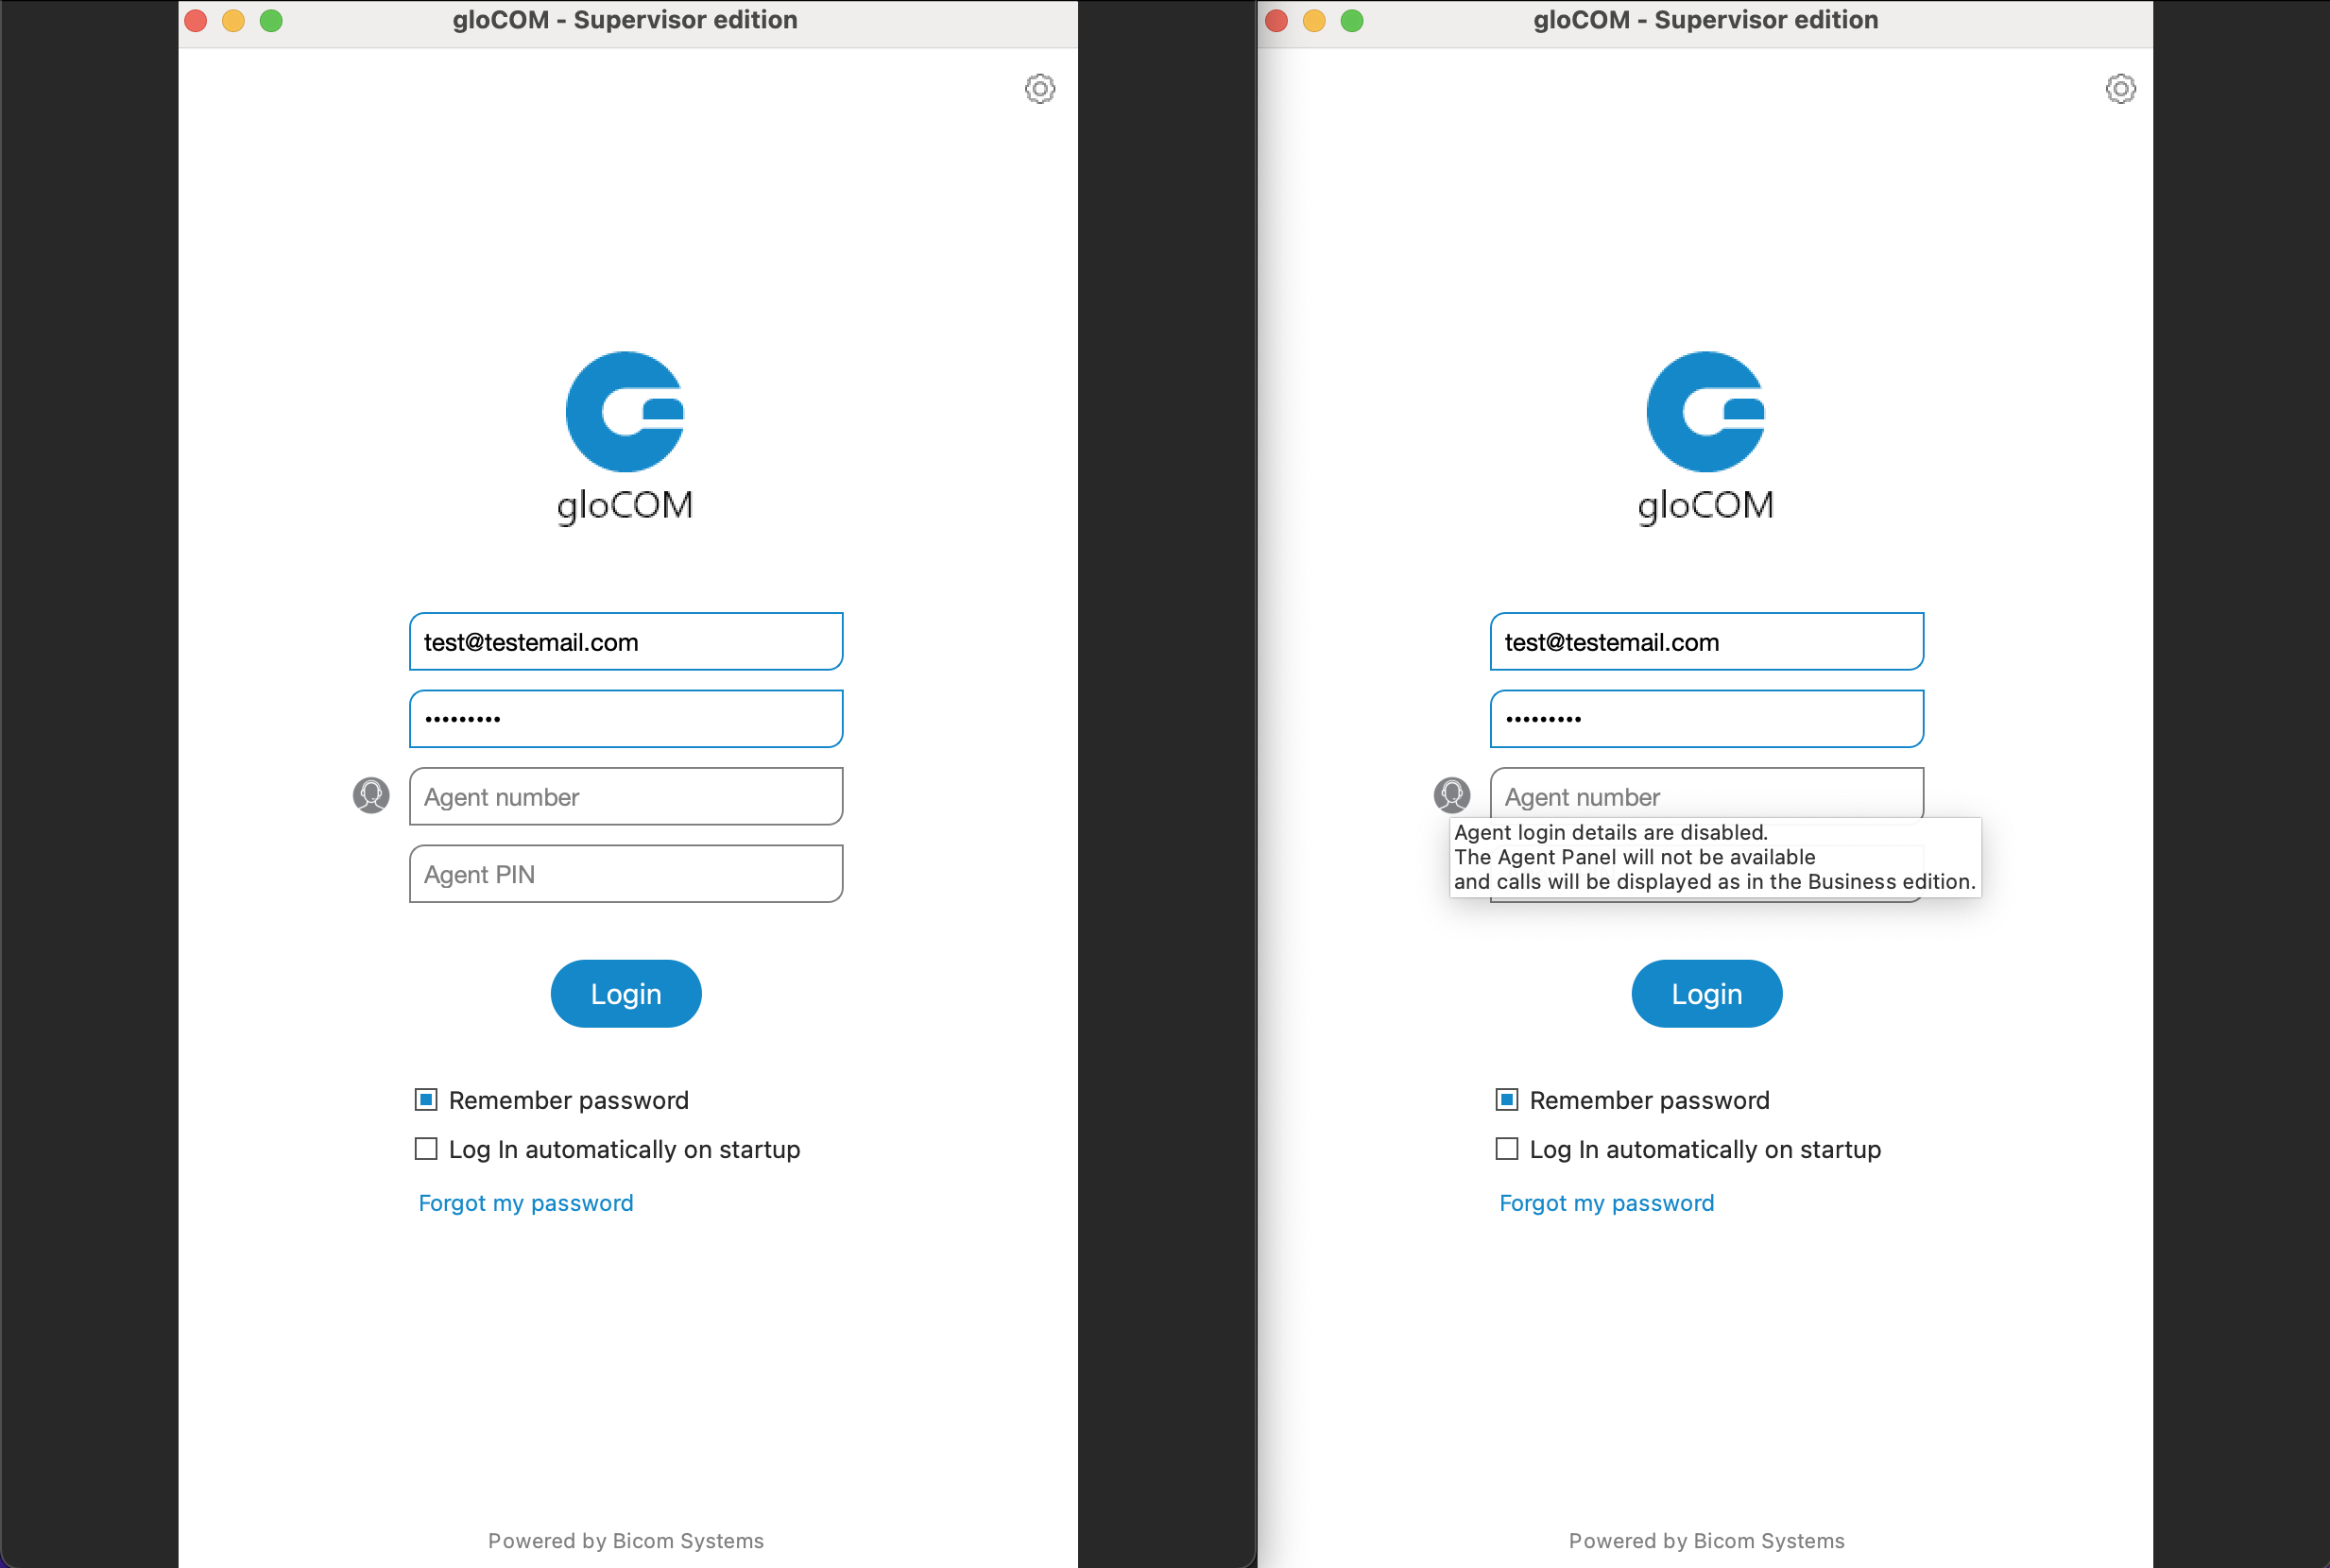
If Agent login details are disabled, then the Agent Panel window will not be available, and the application will behave as the Business Edition of gloCOM.
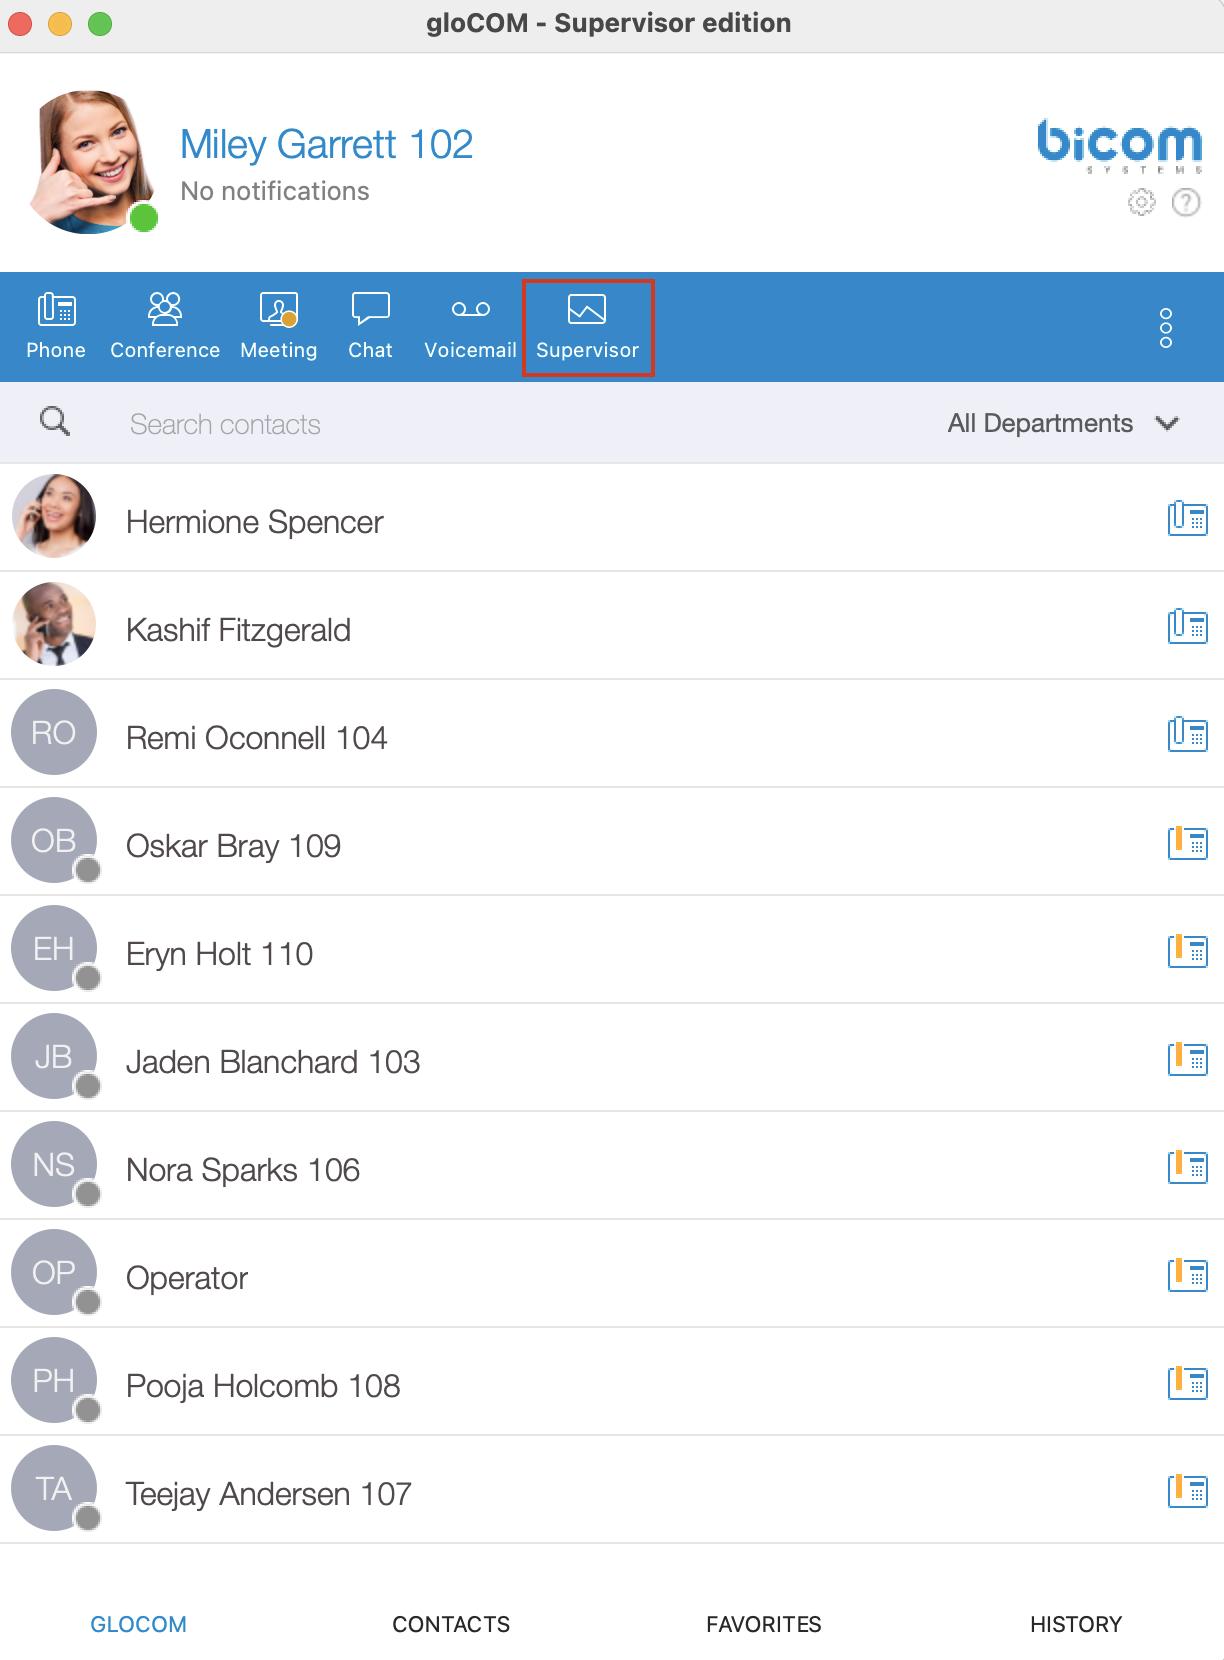
Supervisor Panel (available only in gloCOM Supervisor edition)
Advanced and improved design of the Supervisor Panel was created.
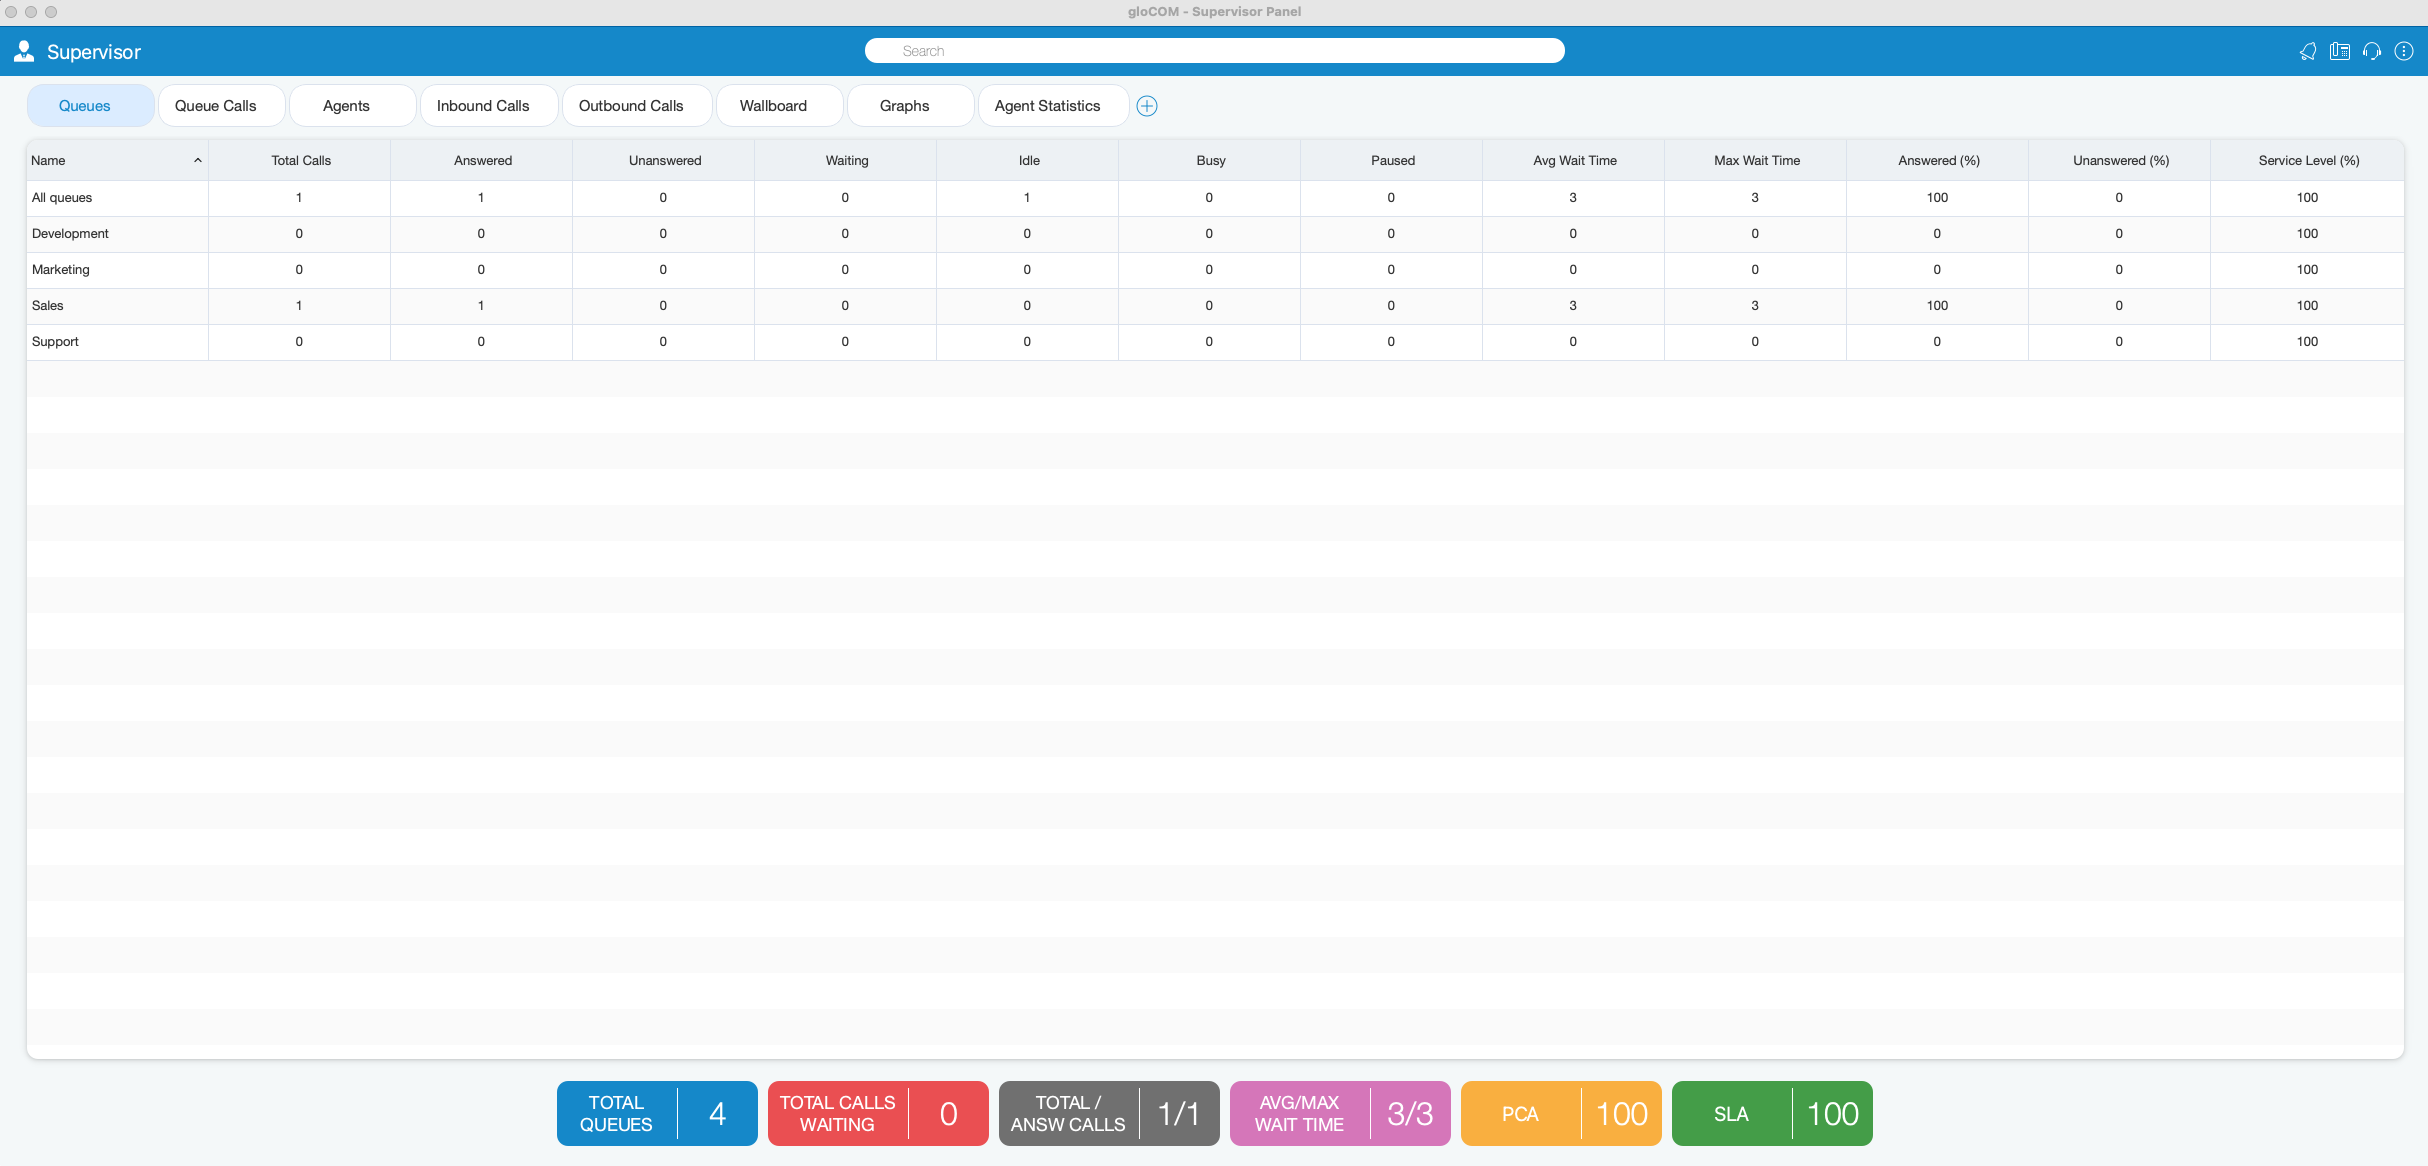
Search Field
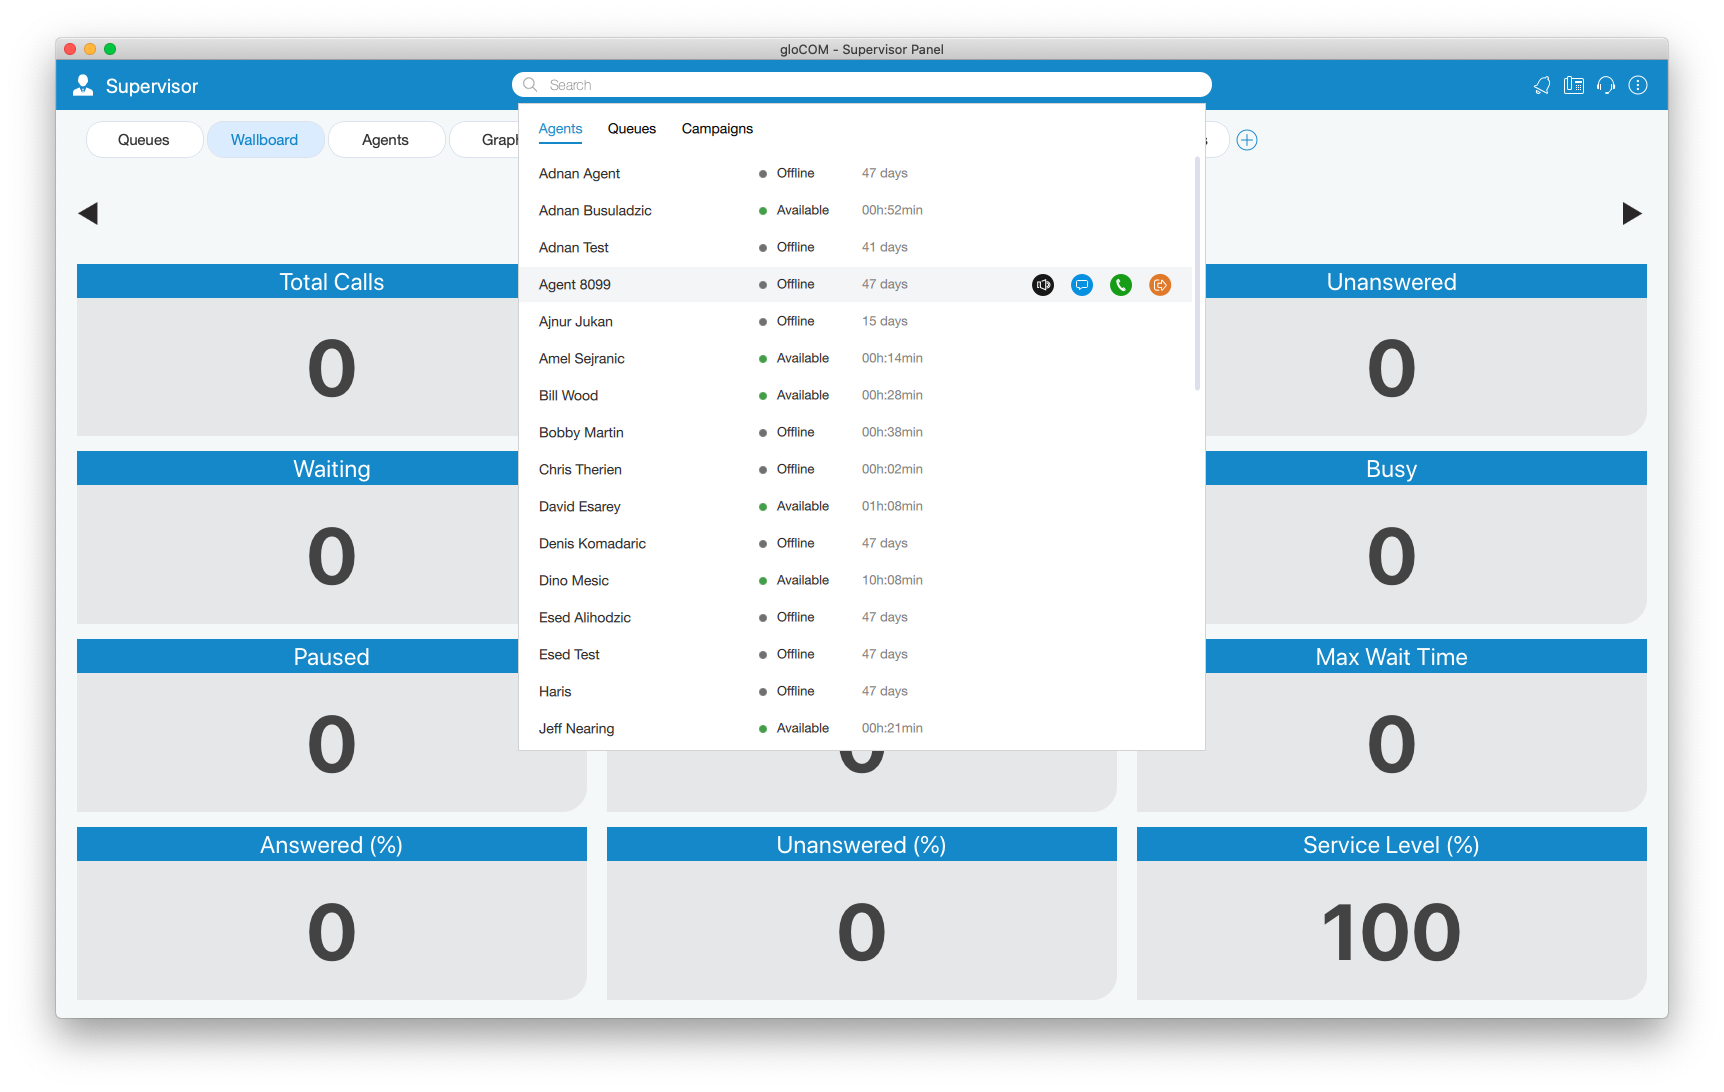
A Search field has been added inside the Supervisor Panel. It is possible to search for Agents, Queues, or Campaigns.
When the user clicks on the Search field, the view with all Agents/Queues/Campaigns should be displayed. This view is visible only if the Search field is focused. If the user clicks anywhere outside the Search field or that view, it will close.
Agents are searched by a name or number. Queues and Campaigns are searched by name.
There are some additional actions provided when the user mouseover searched Agents:
- Listen: The Supervisor is authorized to Listen calls.
- Chat: The Supervisor can Chat with Agents.
- Call: The Supervisor can Take a call.
- Logout: The Supervisor may Logout specific Agent.
To exit Search mode press the ESC key or simply click anywhere outside the Search field.
If the user’s license does not support the Dialer option, the search option for Campaigns will not be available.
Supervisor Toolbar
On the right side of the toolbar, there are icons that provide the following things:
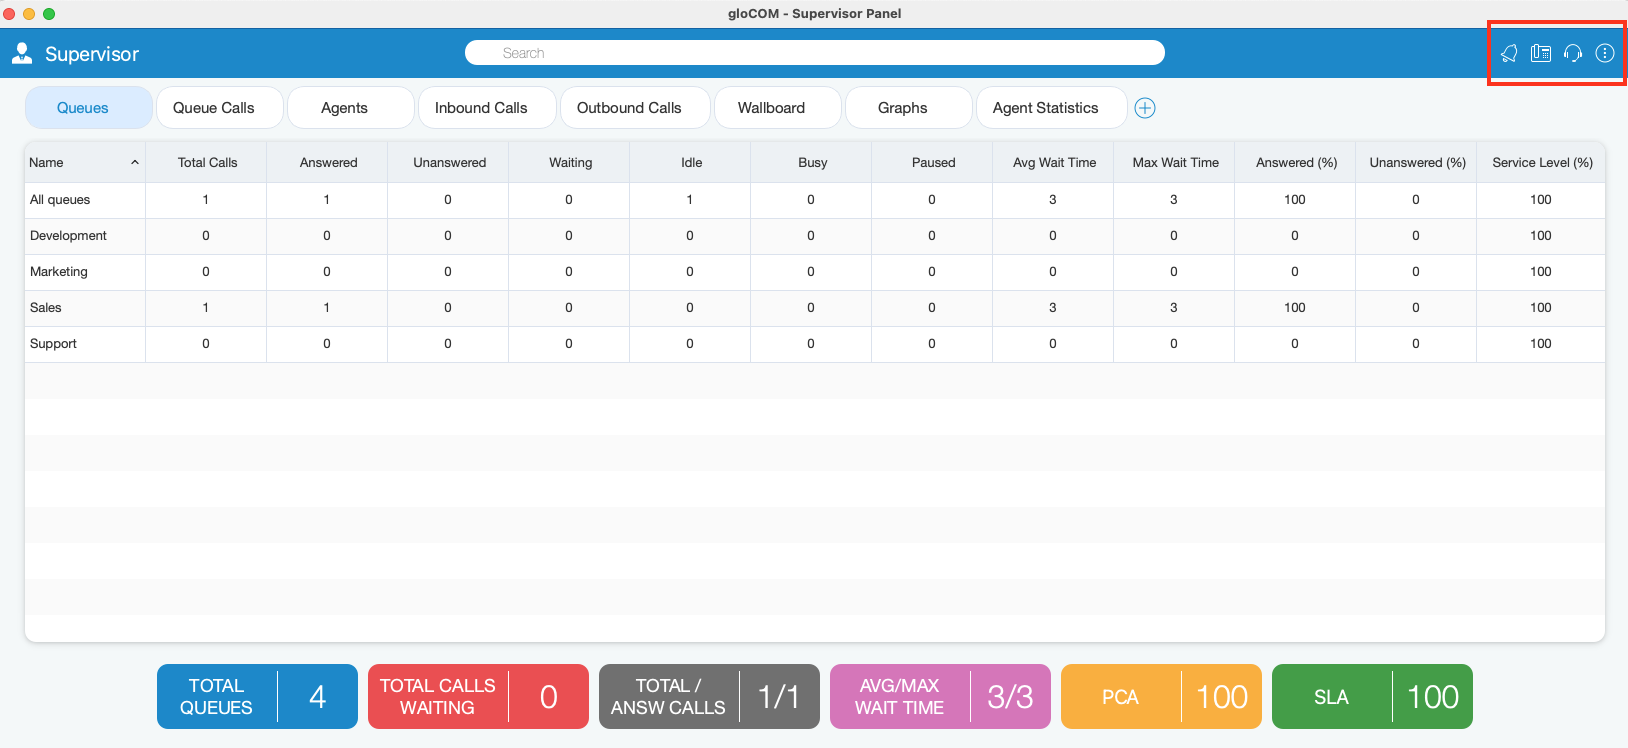
 Notification Bell: Clicking the Bell icon displays a list of all alerts.
 Phone Dialog: Shows Phone Dialog.
 Agent Panel: Shows Agent Panel.
 Preferences: When the user clicks this action, an additional menu with the options appears.
Additional information about icons is shown below.
Notification Bell
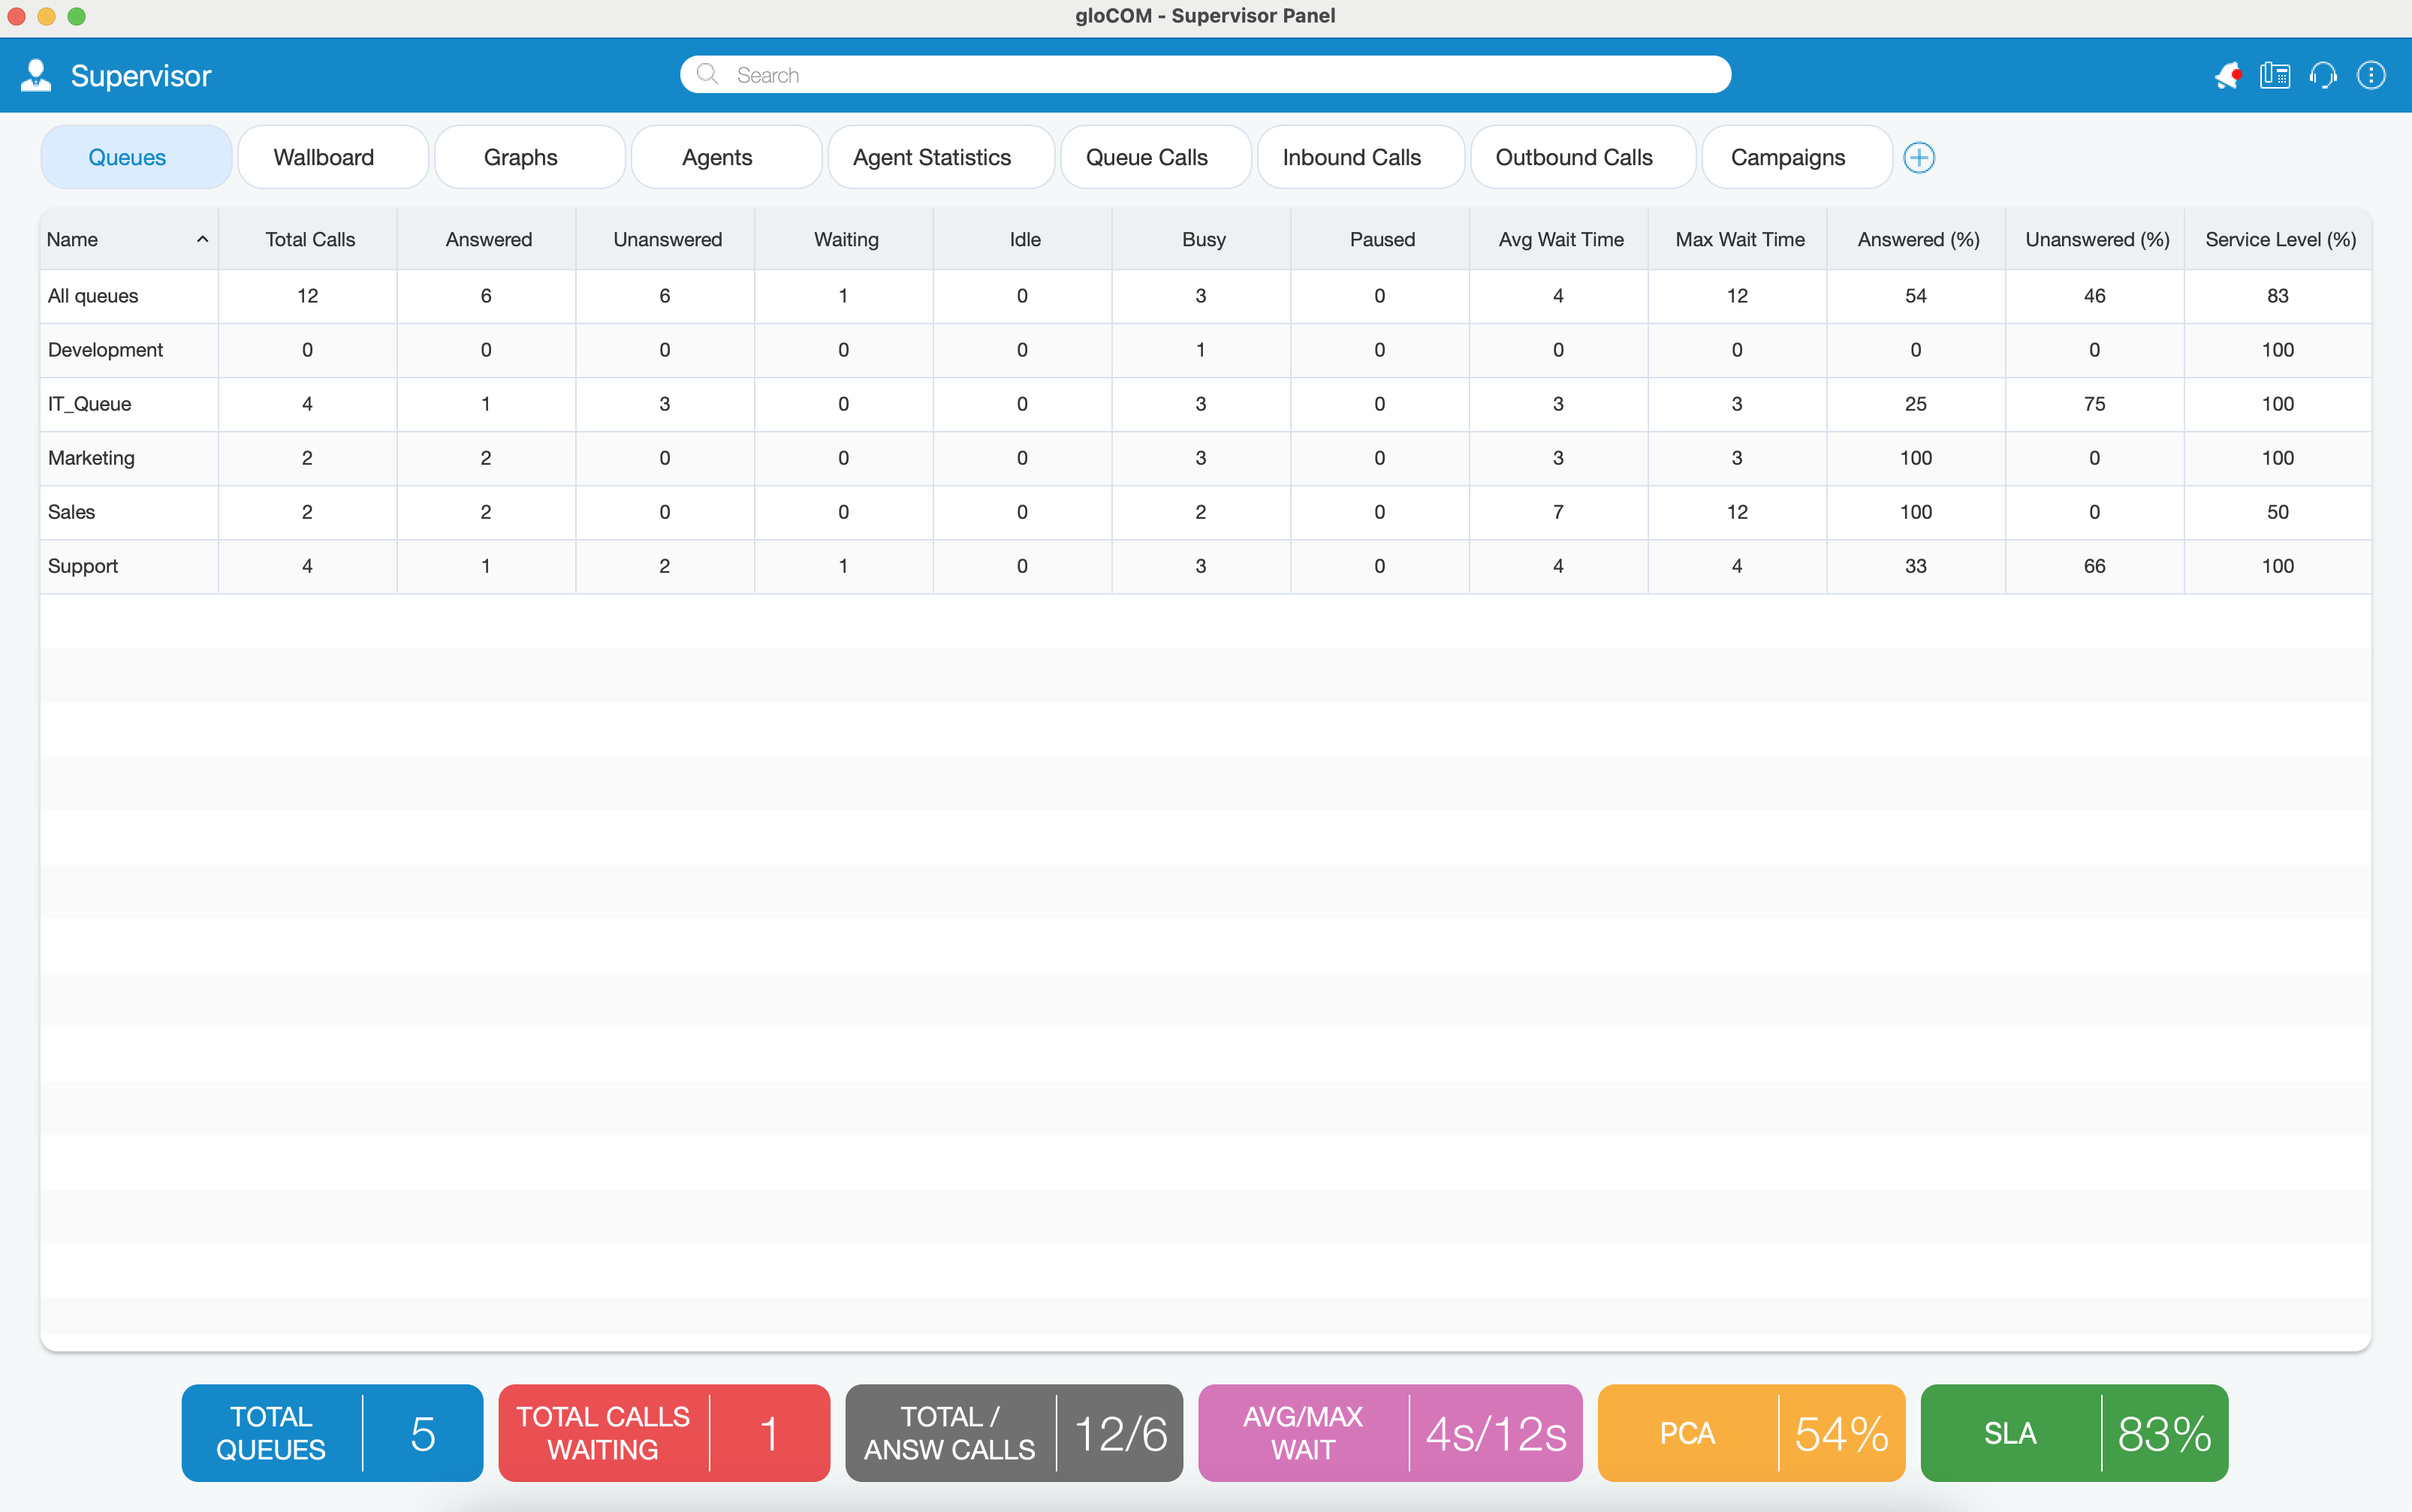
If there are new alerts, the Notification bell icon changes.
- Each item of the notification list consists of the message, the time when the alert occurred, and the state of the alert (read, unread).
- The unread message contains a blue circle on the right.
- To mark an alert as read it is necessary to hover over the alert item.
- To close the notification list click outside of the notification area, or simply by clicking on the notification bell icon again.
- To delete all notifications click the icon on the top right side (recycle bin).
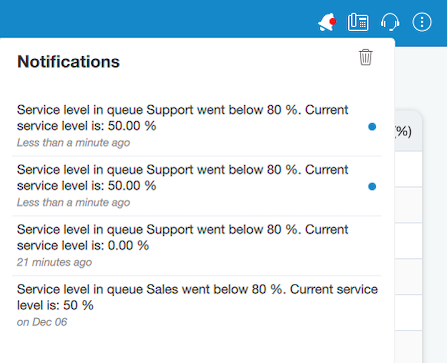
Phone Dialog

Clicking the Show Phone Dialog icon opens the Phone module area:
- The phone module area shows information about missed calls.
- From the phone module, users can set up an office and mobile phone.
- Allows users to select which device they want to use as an input/output device.
- Allows users to select which device they want to use as a ringtone device.
- Drag-and-Drop action is displayed in this phone module area.
- Microphone and Speaker volume tuner.
- The phone module area shows dialed contact’s phone numbers.
- Phone module dial keypad – used for entering phone numbers.
Agent Panel
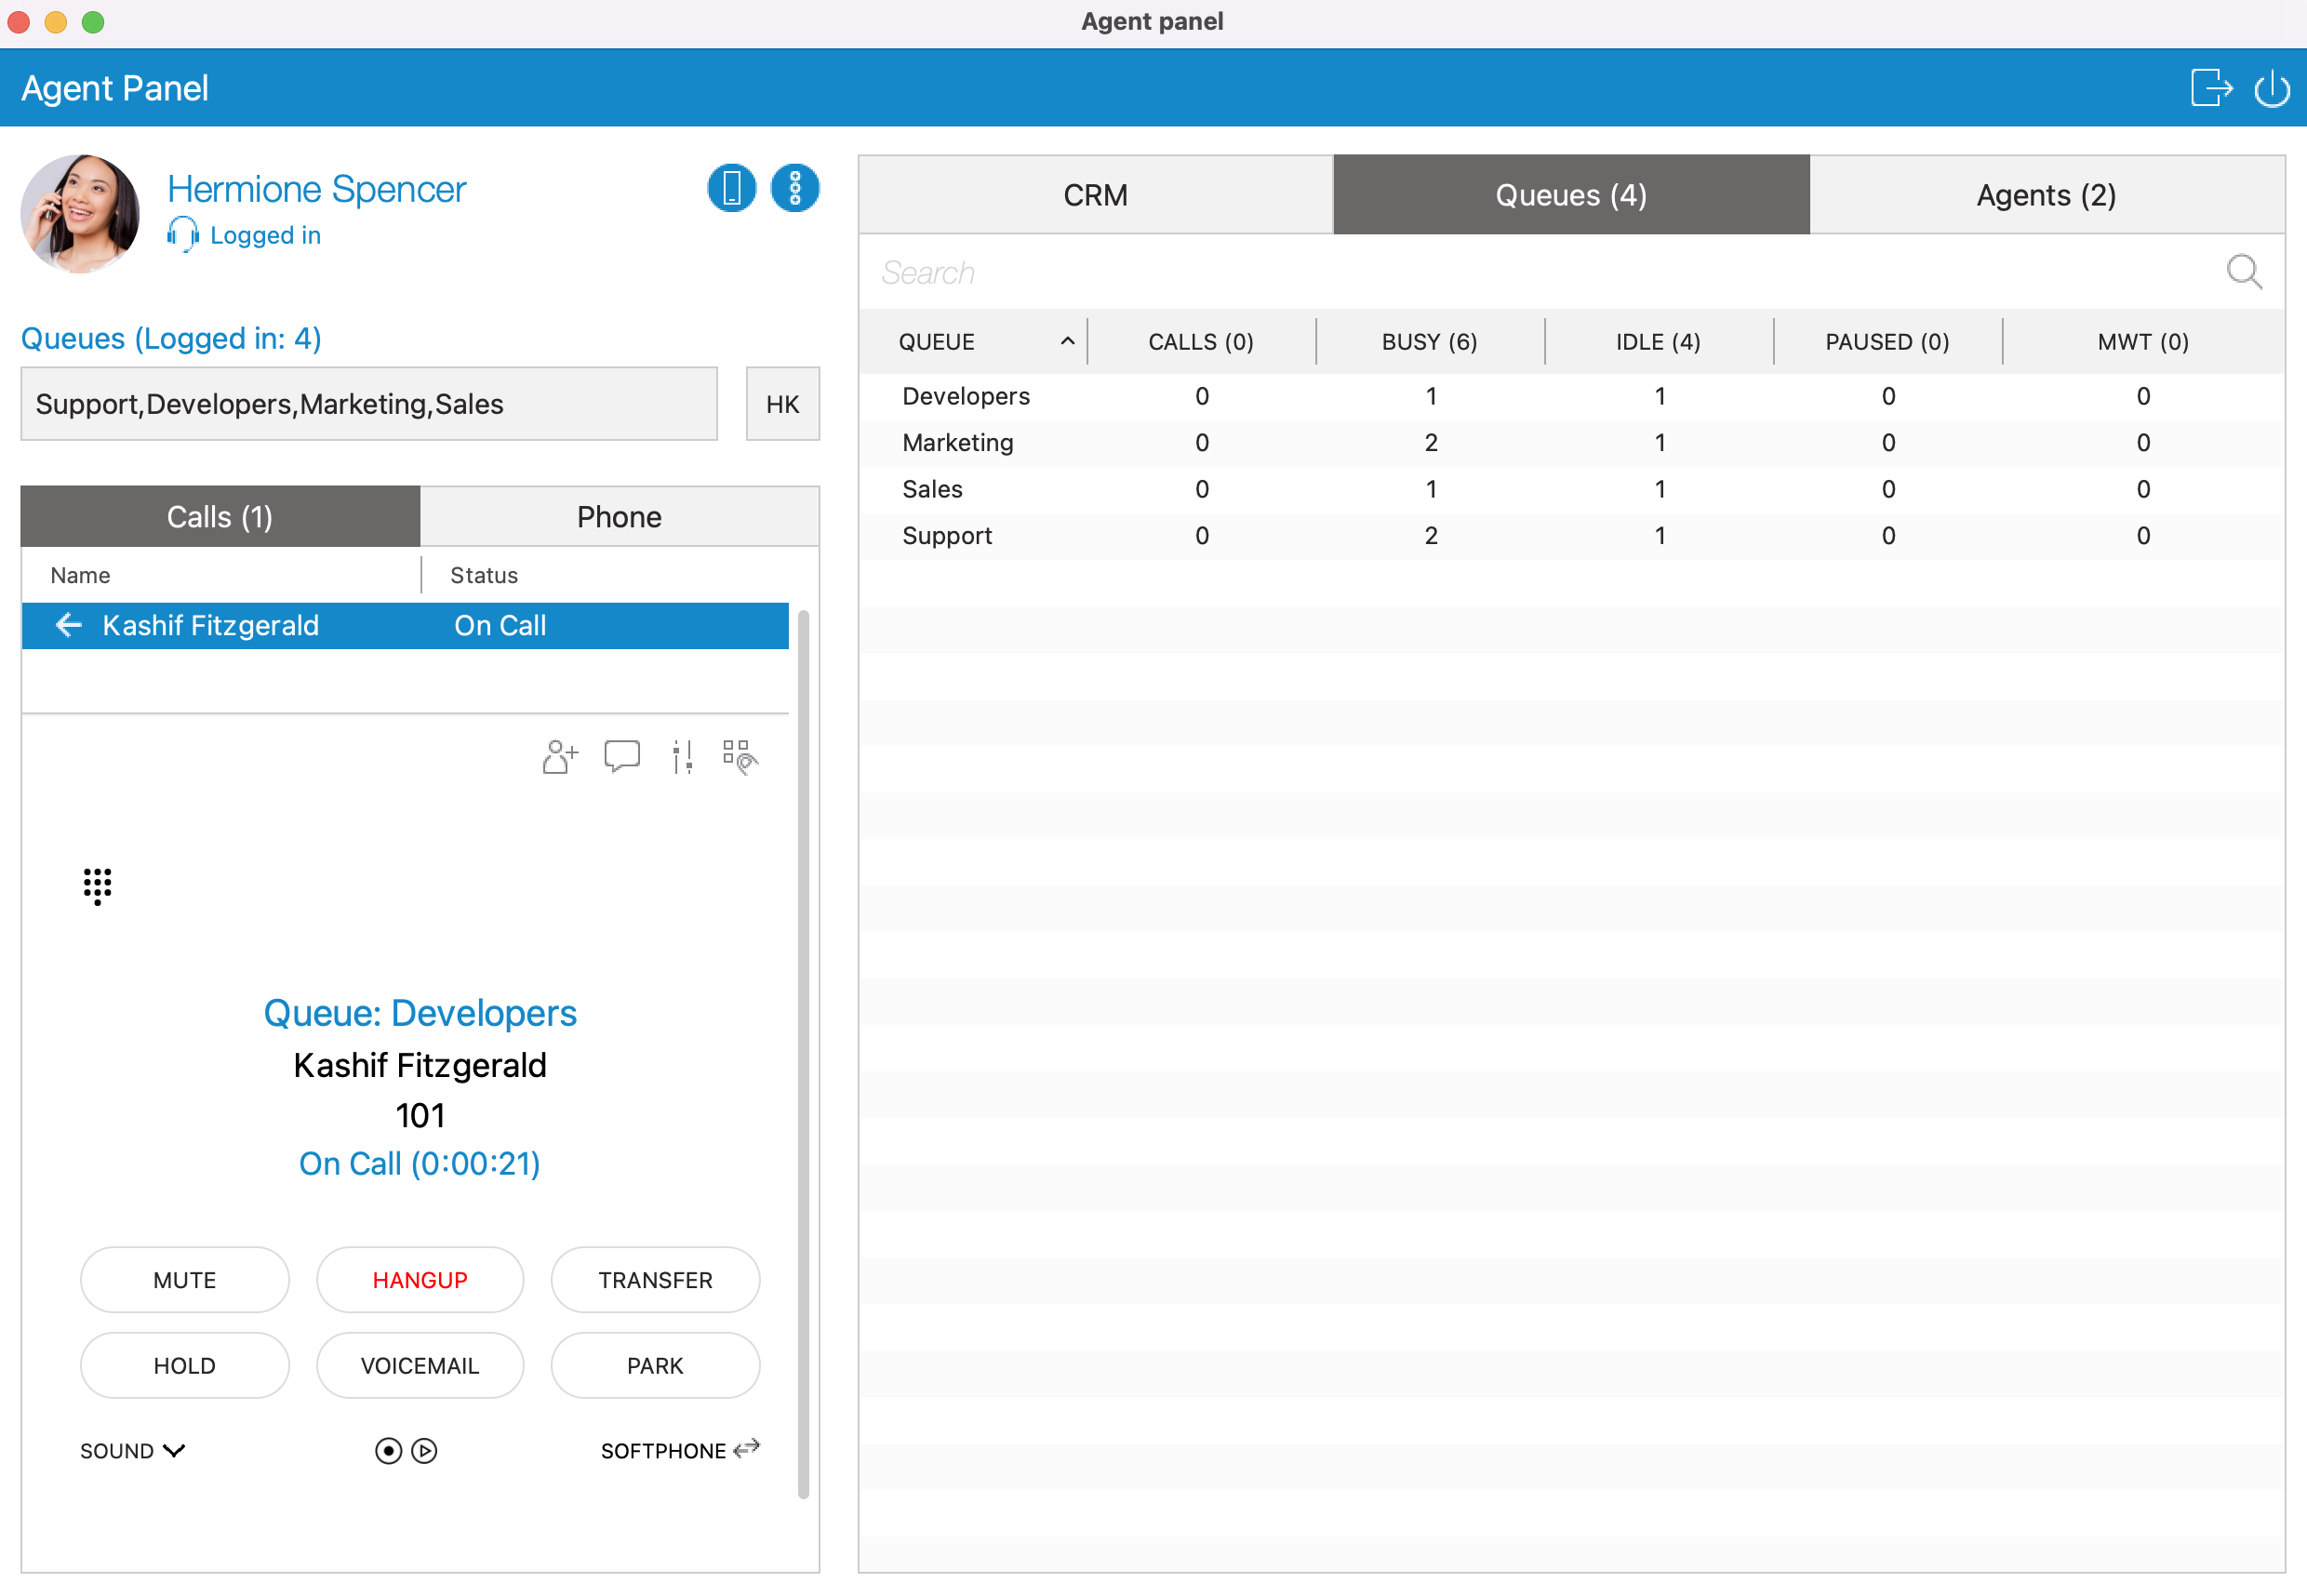
Agent Panel window can be opened by clicking the module icon from the Supervisor panel.
All agent-related features are located in this window (Agent Panel), and makes it easier for an agent to handle multiple calls, feedback forms, CRM popup, callbacks, other agents, and queues.
Also, the phone dialer and all phone-related settings will be displayed within the Agent Panel window.
Preferences
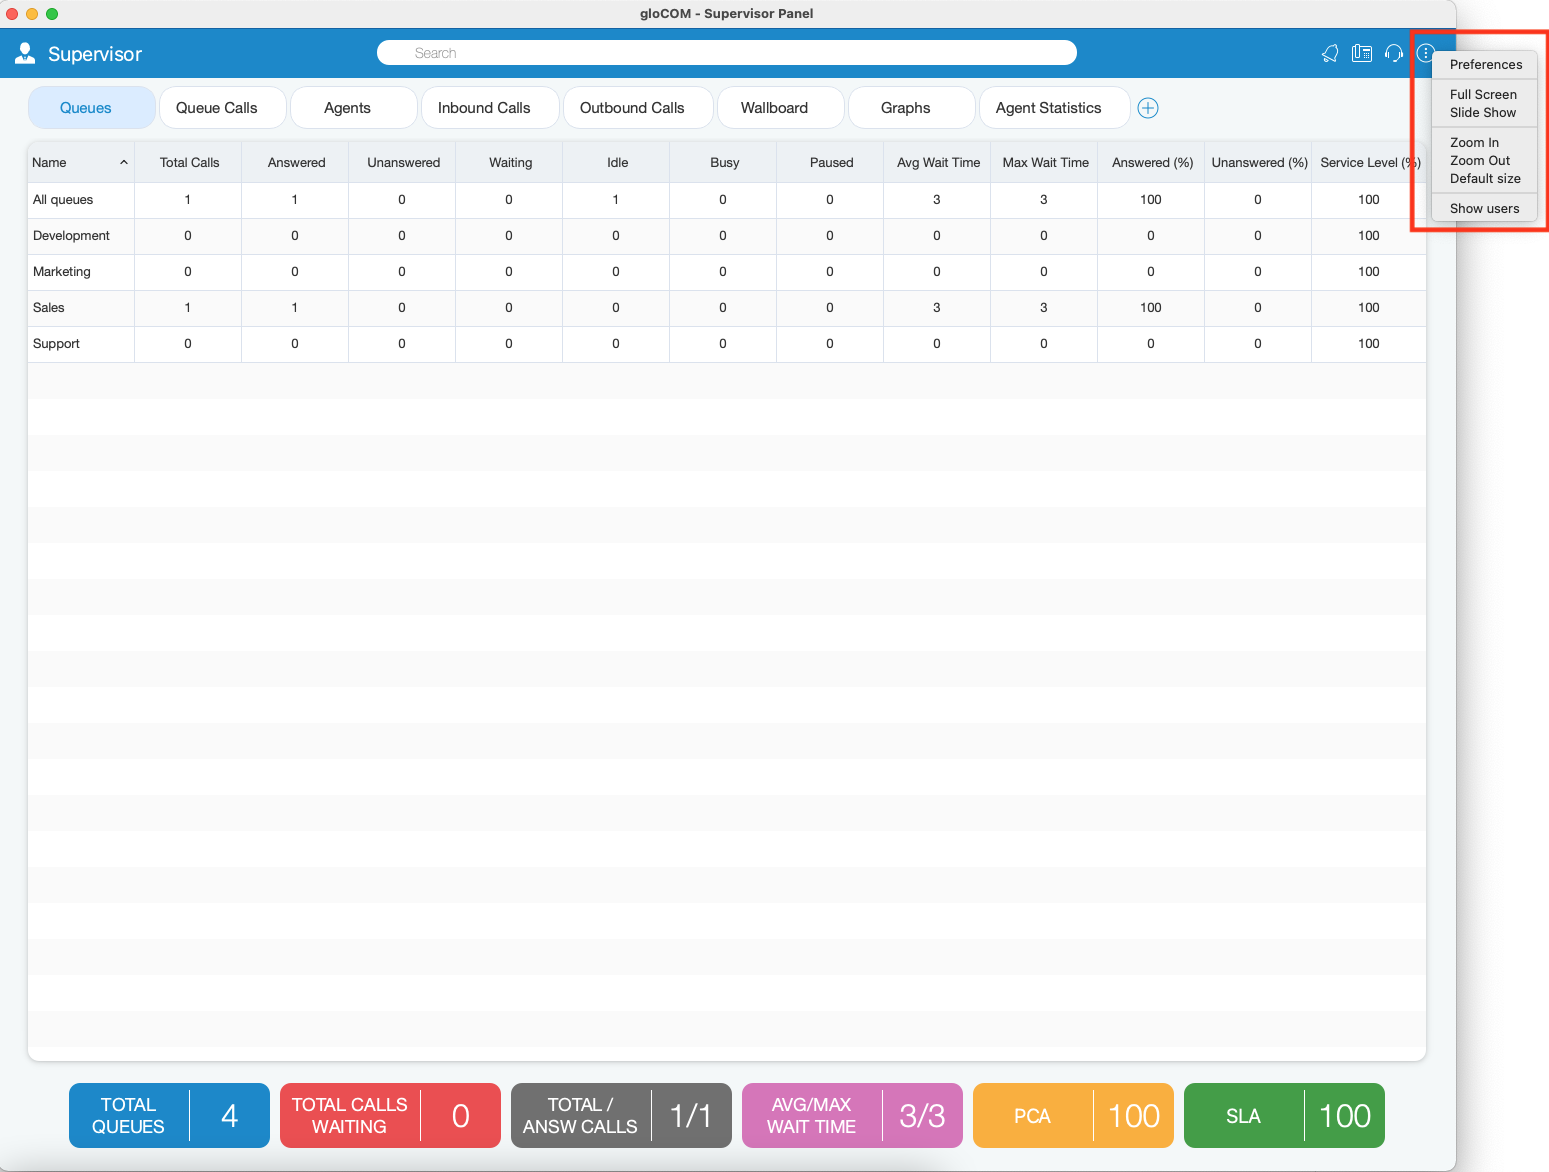
By clicking Preferences, users have additional options for:
- Preferences: Open Preferences dialog in which users have configuration options for Alerts, Queues, Agents, and Threshold. More information about Preferences Options is displayed below.
- Full Screen: This option is used to enter fullscreen mode (Supervisor window occupies the whole computer screen). If the window is already in fullscreen mode, clicking this option restore window size to the previous size.
- Slide Show: This option is used to start/stop slide show of Wallboard module content.
- Zoom In/Out: This option is used to increase/decrease the font size for the content of all modules except Wallboard module.
- Default size: This option restores font size to default size.
- Show users: Open gloCOM main window.
Preferences Options
General tab
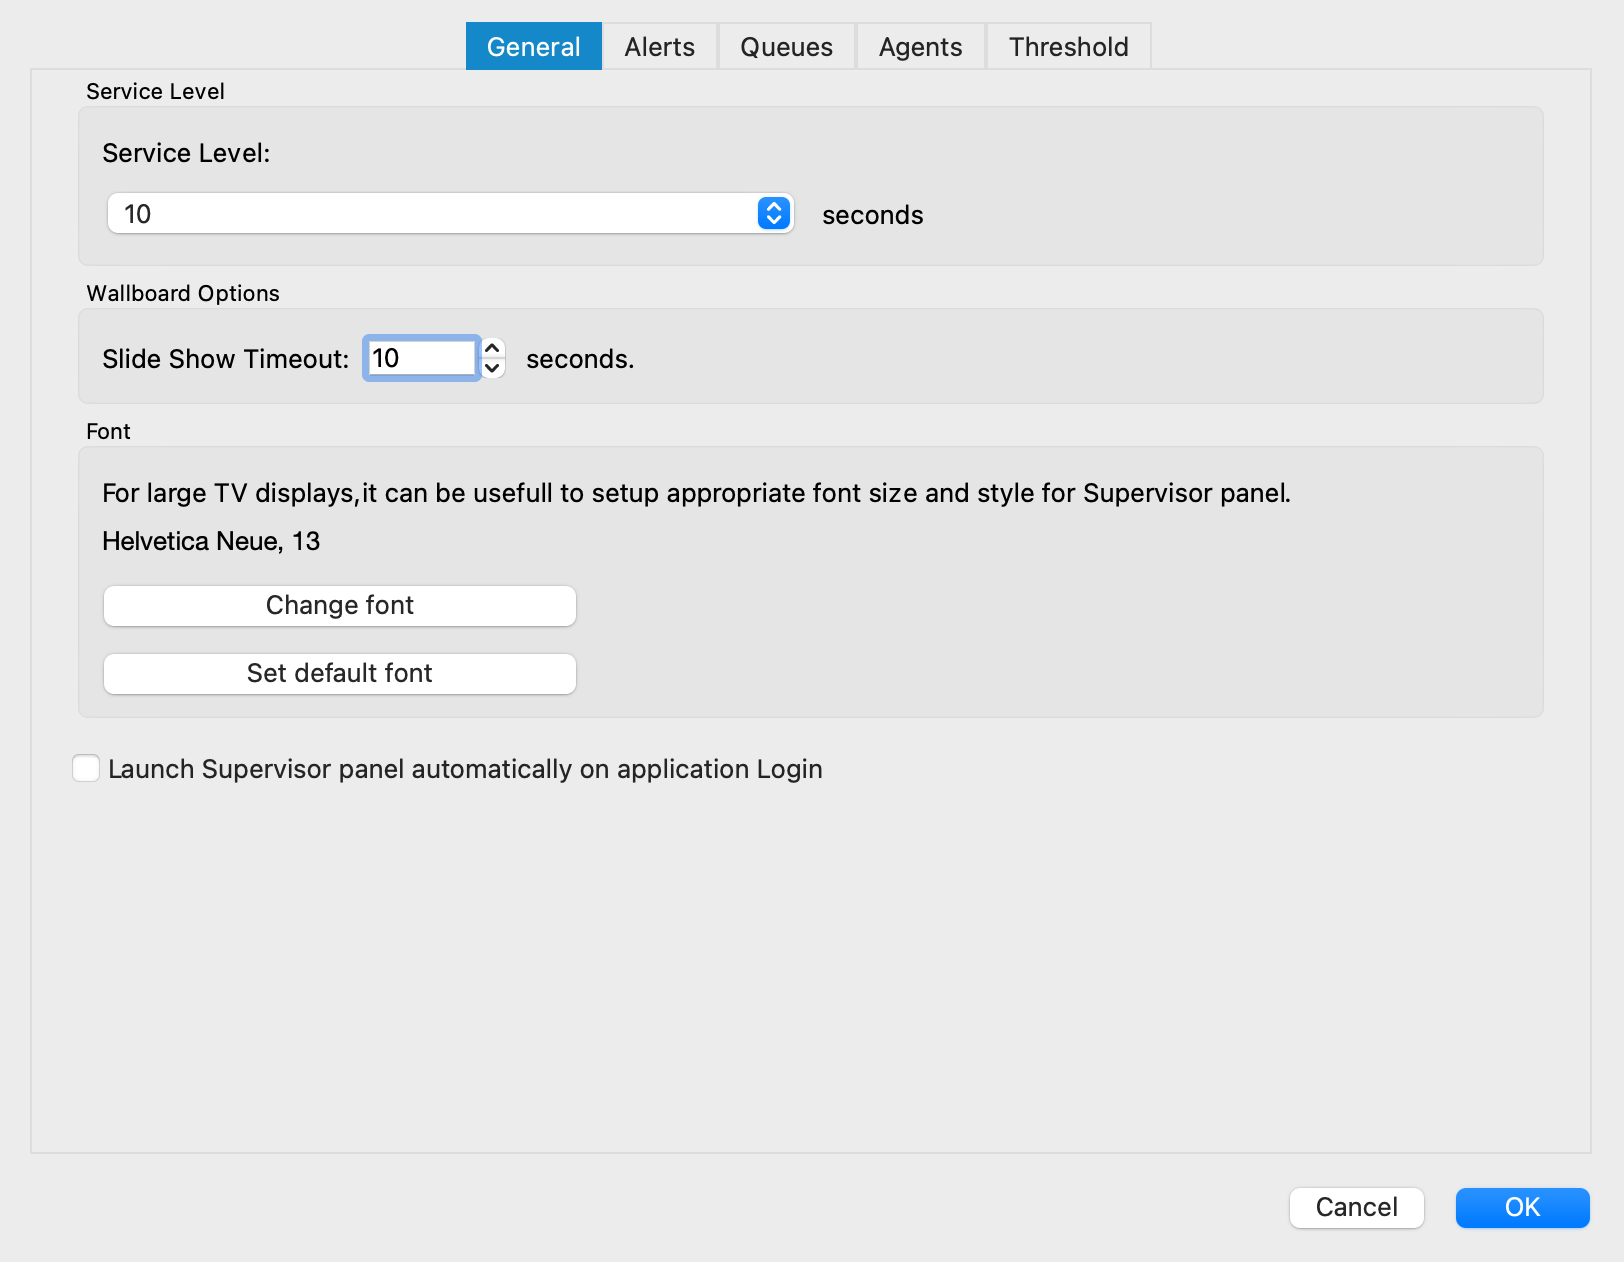
- Service level: Select time in seconds. This is used for calculating statistics inside Supervisor Panel.
- Slide Show Timeout: Select timeout for the slide show (in seconds).
- Change font: Change font and style of content inside Supervisor Panel. It can be useful for large TV screens to set up an appropriate font size.
- Set default font: Reset to the default font and style of Supervisor Panel.
- Launch Supervisor panel automatically on application Login: If this option is checked, after the Supervisor logs in, the Supervisor Panel will be automatically shown.
Alerts tab

- Flash Agent in Not Ready state after: Choose time in seconds when an alert will flash if the Agent is not ready.
- Flash Agent that has been in Talking state for more than: Choose time in seconds when an alert will flash if the Agent is in Talking state.
- Alert me when more than specified number of Agents are Not Ready: Choose the number of Not Ready Agents after which the alert will popup.
- Alert me when Service Level is below: Choose percent of service level after the Alert will popup.
- Alert me when a new message is received: Click on the checkbox to enable this option.
- Alert me when a new assistance request is received: Click on the checkbox to enable this option.
- In case of an alert play system sound beep: Click on the checkbox to enable this option.
- In case of an alert bring the application: Click on the checkbox to enable this option.
Queues tab
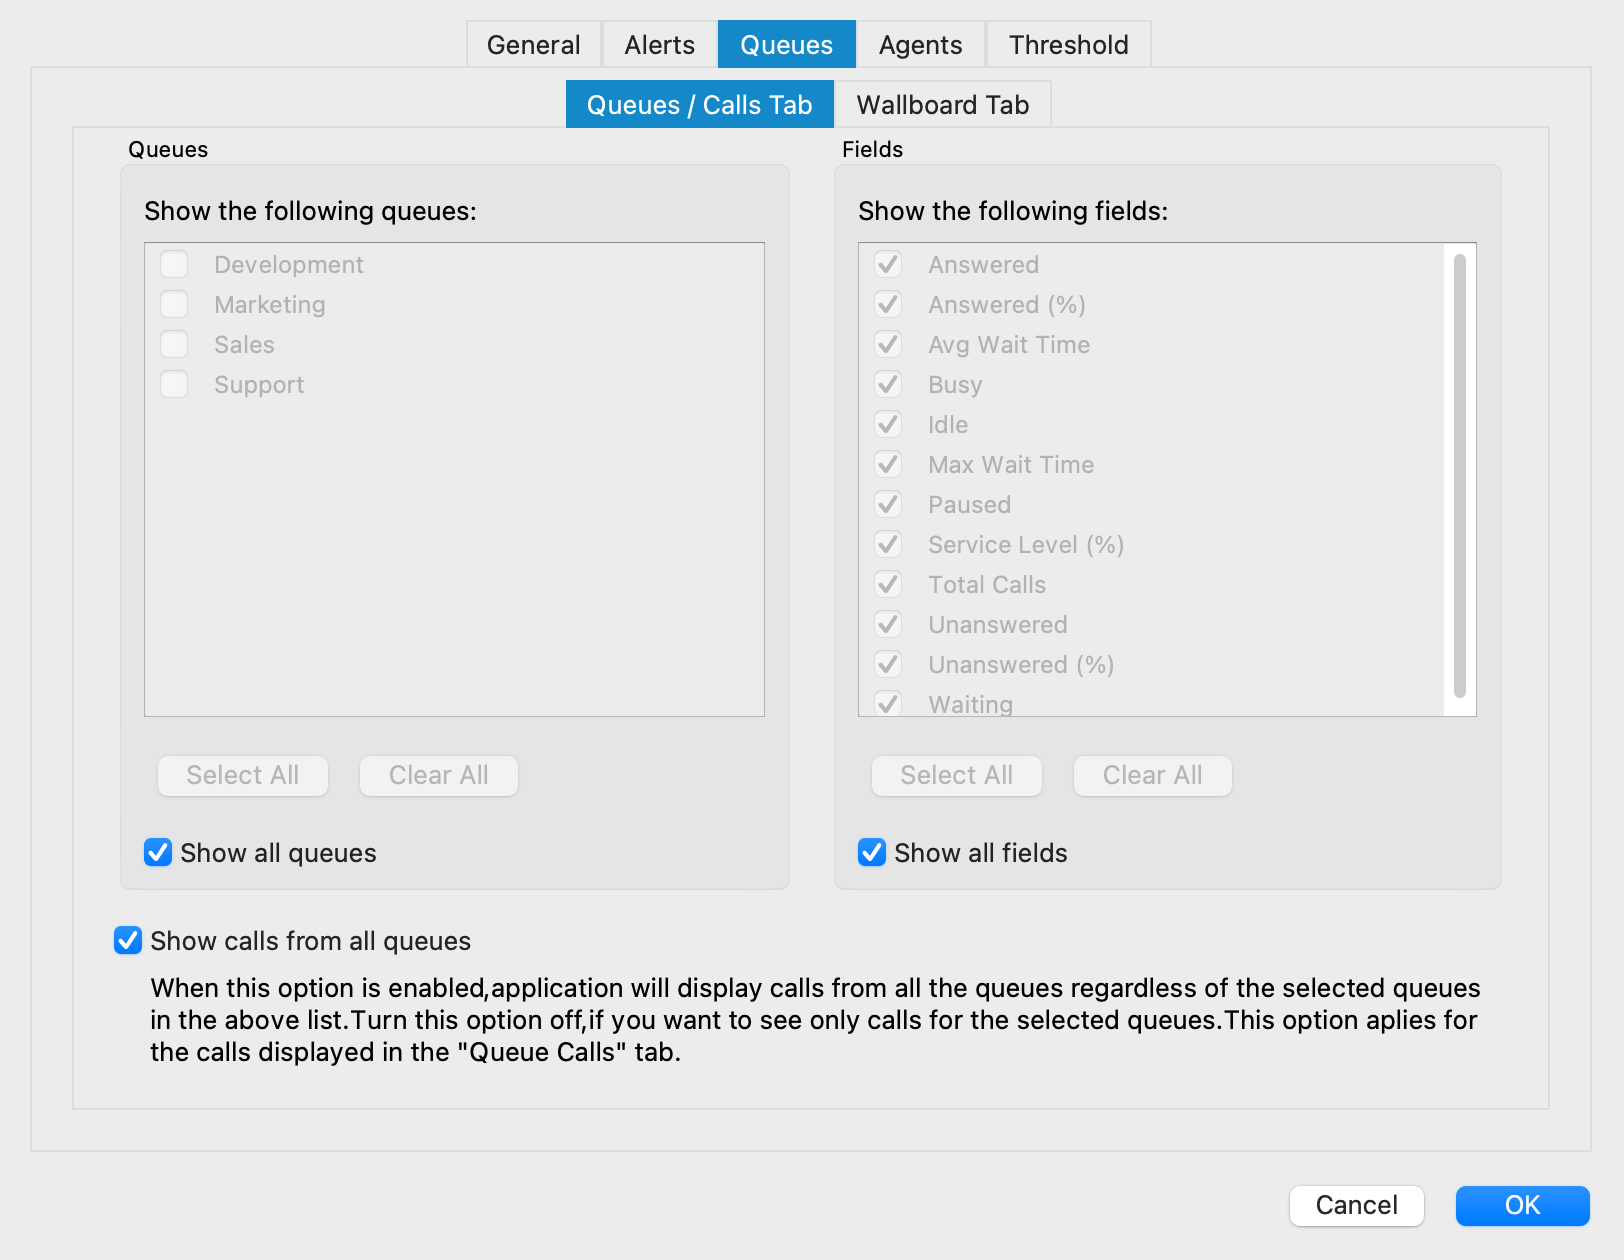
1. Queues/Calls
Inside the Queues/Calls tab you can select which Queues or fields will be visible in the Supervisor Panel, inside the Queues module.
- Select all: Select all Queues/Fields from the list of visible Queues/Fields.
- Clear all: Clear selection of all Queues/Fields from the list of visible Queues/Fields.
Also, there are options Show all Queues and Show all Fields if you want all Queues/Fields to be displayed inside the Queues module.
- Show calls from all Queues: If this option is selected, the application will display calls from all Queues regardless of the selected Queues in the above list. Otherwise, you will see only calls for the selected Queues. This option applies to the calls displayed in the Queue Calls tab.
2. Wallboard
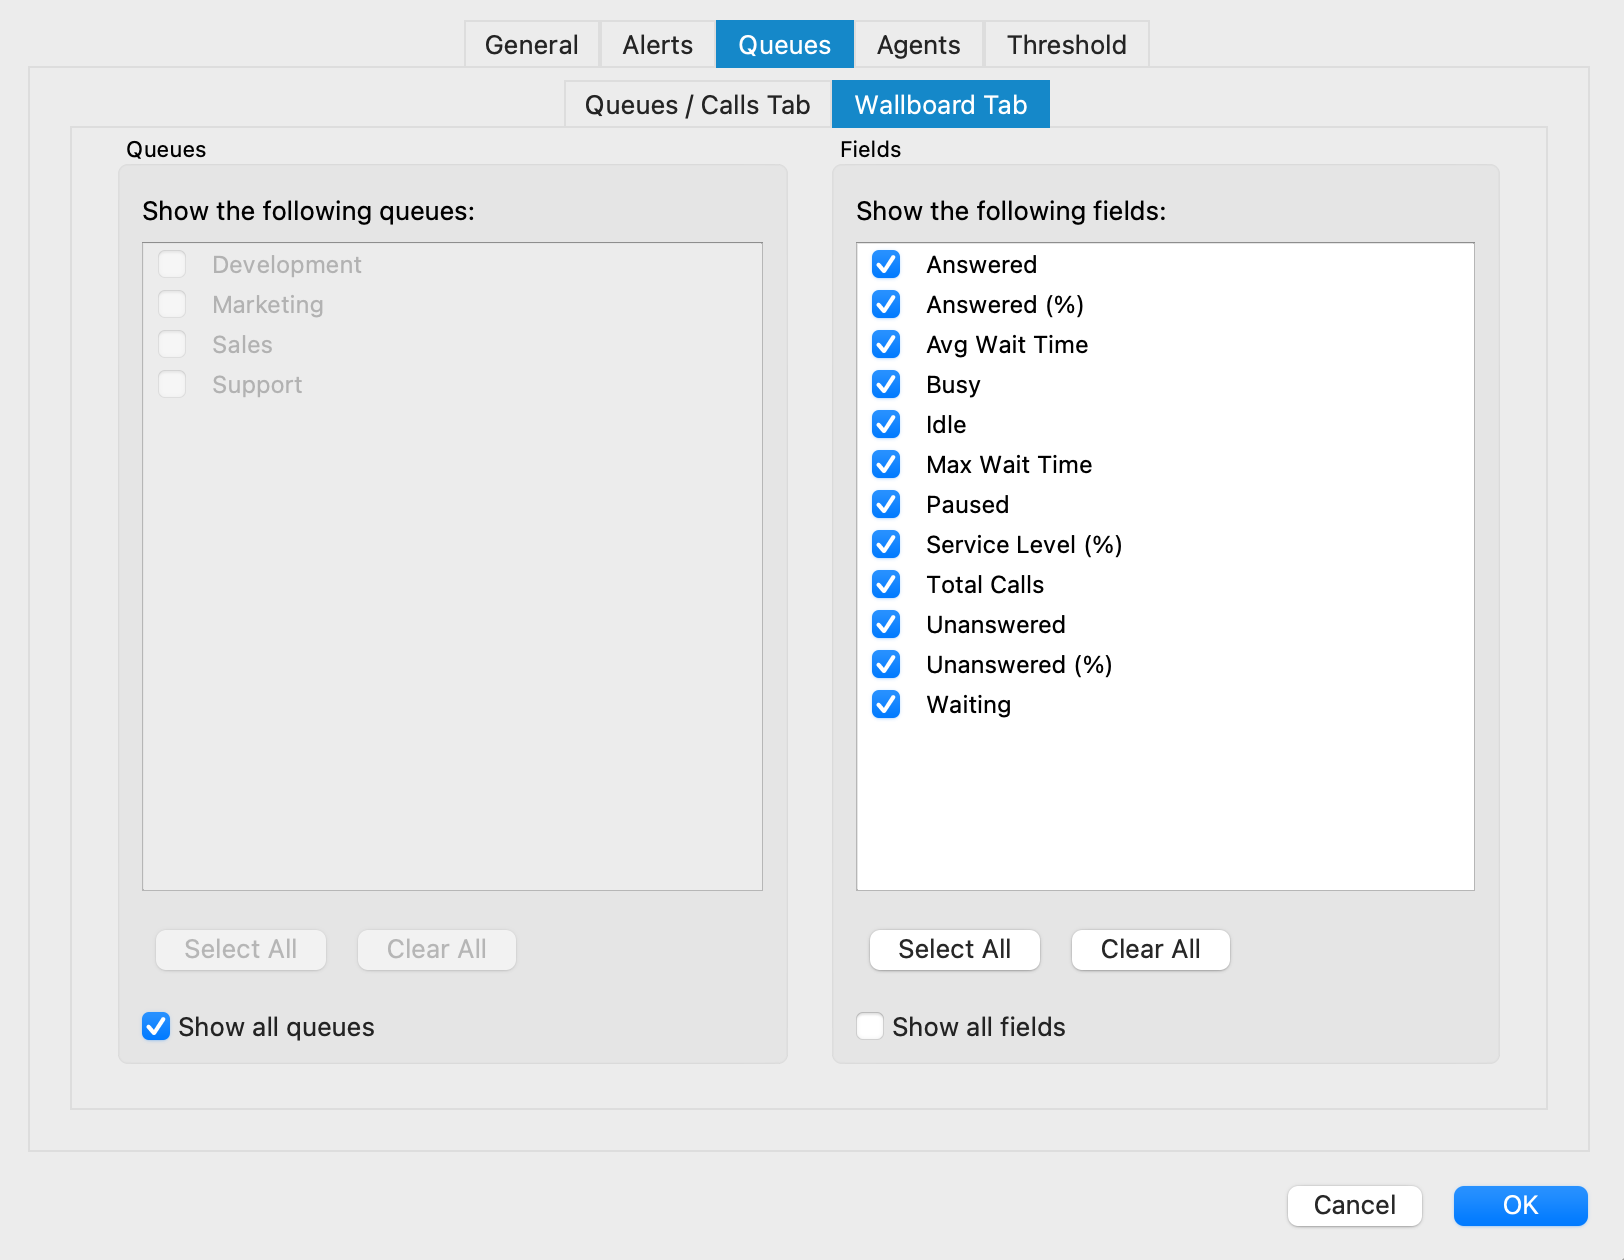
Inside the Wallboard tab you can select which Queues or Fields will be visible in the Supervisor Panel, inside Wallboard module.
- Select all: Select all Queues/Fields from the list of visible Queues/Fields.
- Clear all: Clear selection of all Queues/Fields from the list of visible Queues/Fields.
Also, there are options Show all Queues and Show all Fields if you want all Queues/Fields to be displayed inside the Wallboard module.
Agents tab
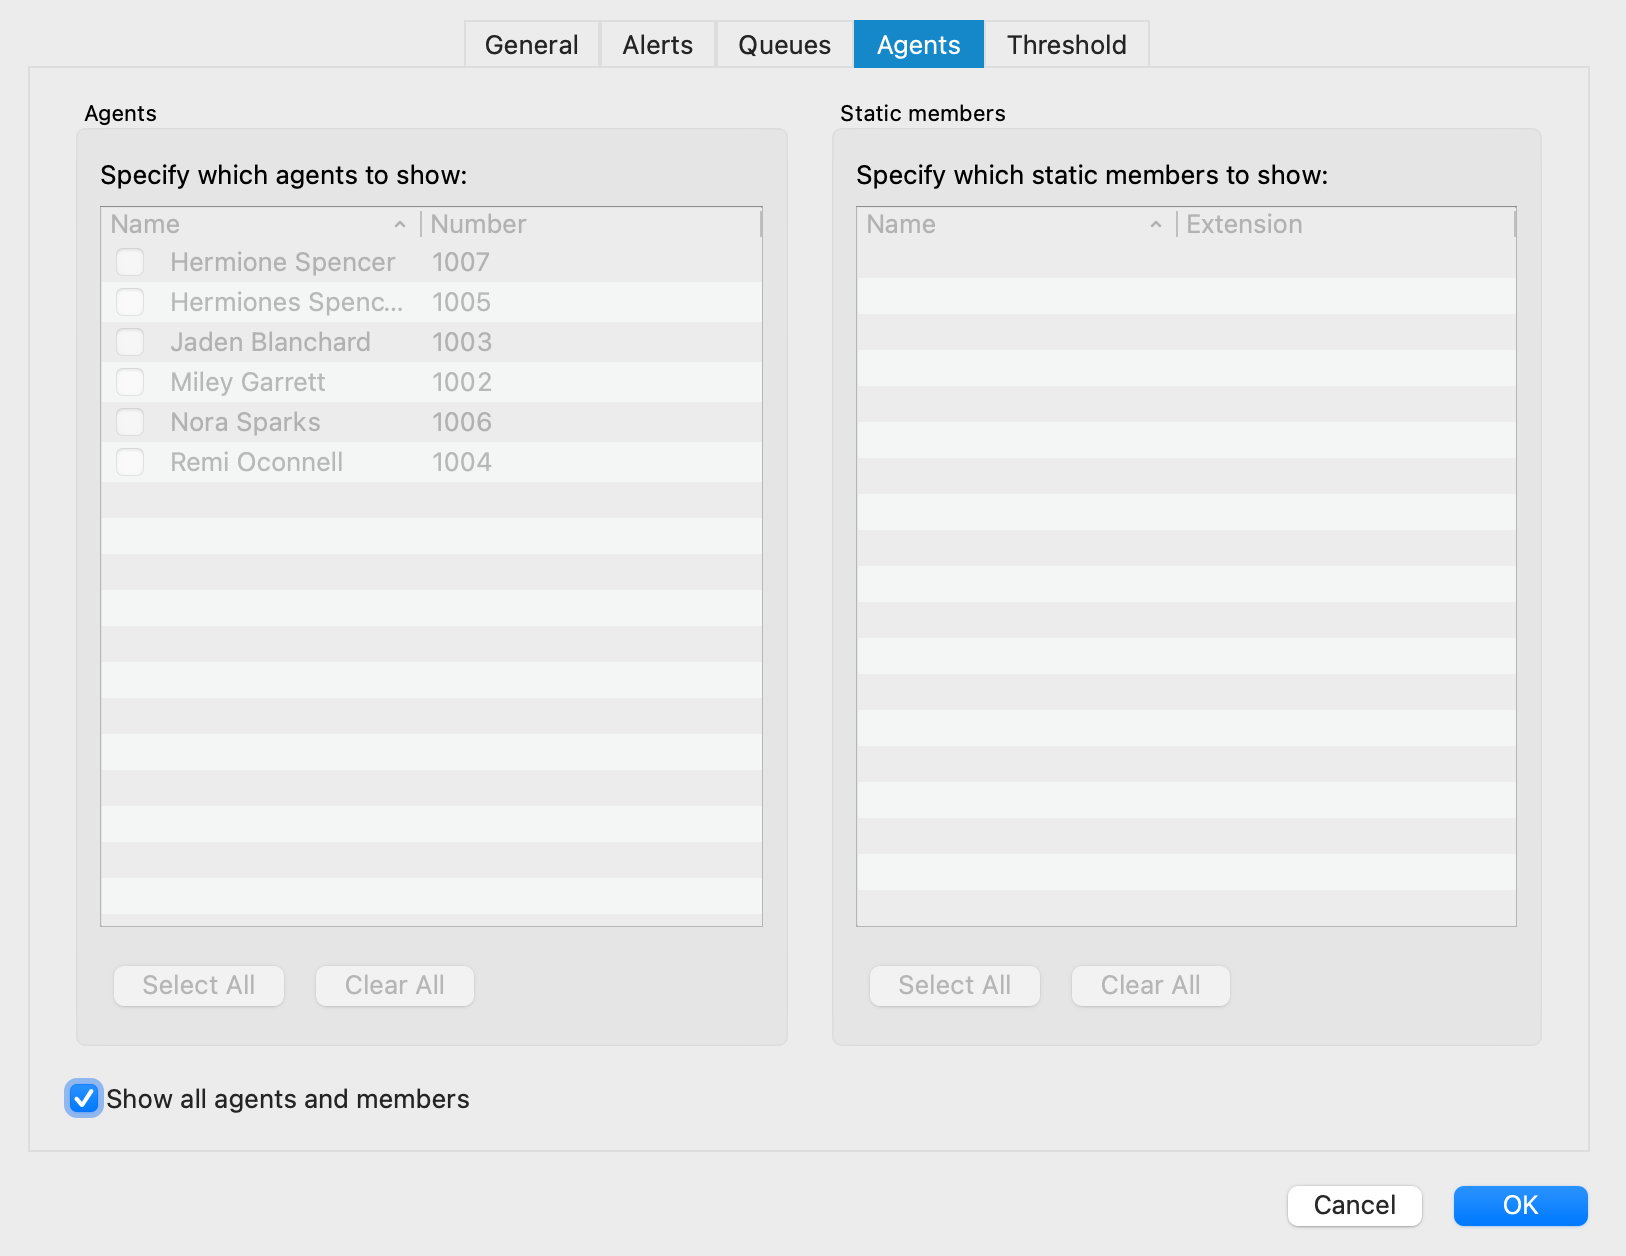
Inside the Agents tab you can select which Agents or Static Members will be visible in the Supervisor Panel, inside Agents module.
- Select all: Select all Agents/Static Members from the list of visible Agents/Static Members.
- Clear all: Clear selection of all Agents/Static Members from the list of visible Agents/Static Members.
Also, there is option Show all Agents and Members if you want all Agents/Members to be displayed inside Agents module.
Threshold
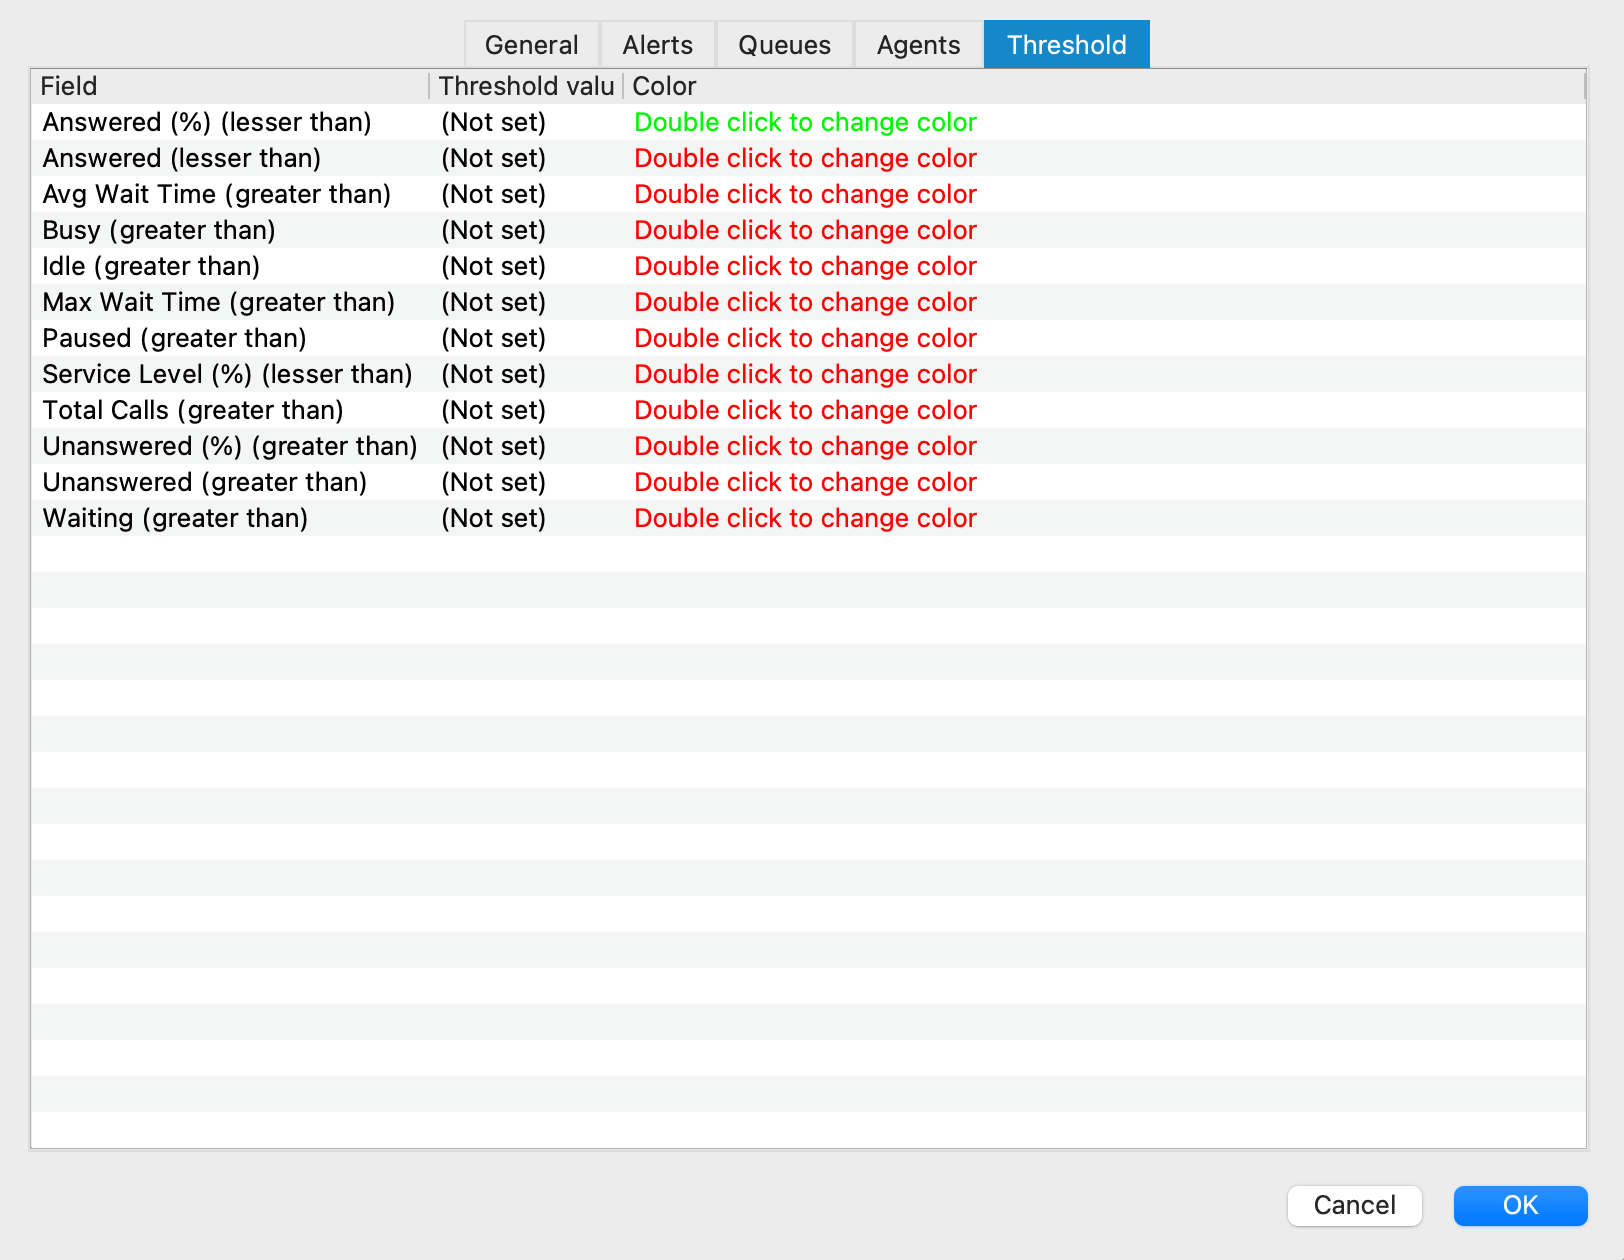
- Field: Various field are displayed, such as Answered, Busy, Idle, Paused, Unanswered, Waiting, Service Level (%), etc…
- Threshold value: Defines the value for a particular event.
- Color: Defines the color that will be used for a particular event if the threshold value is set.
Supervisor Panel Modules
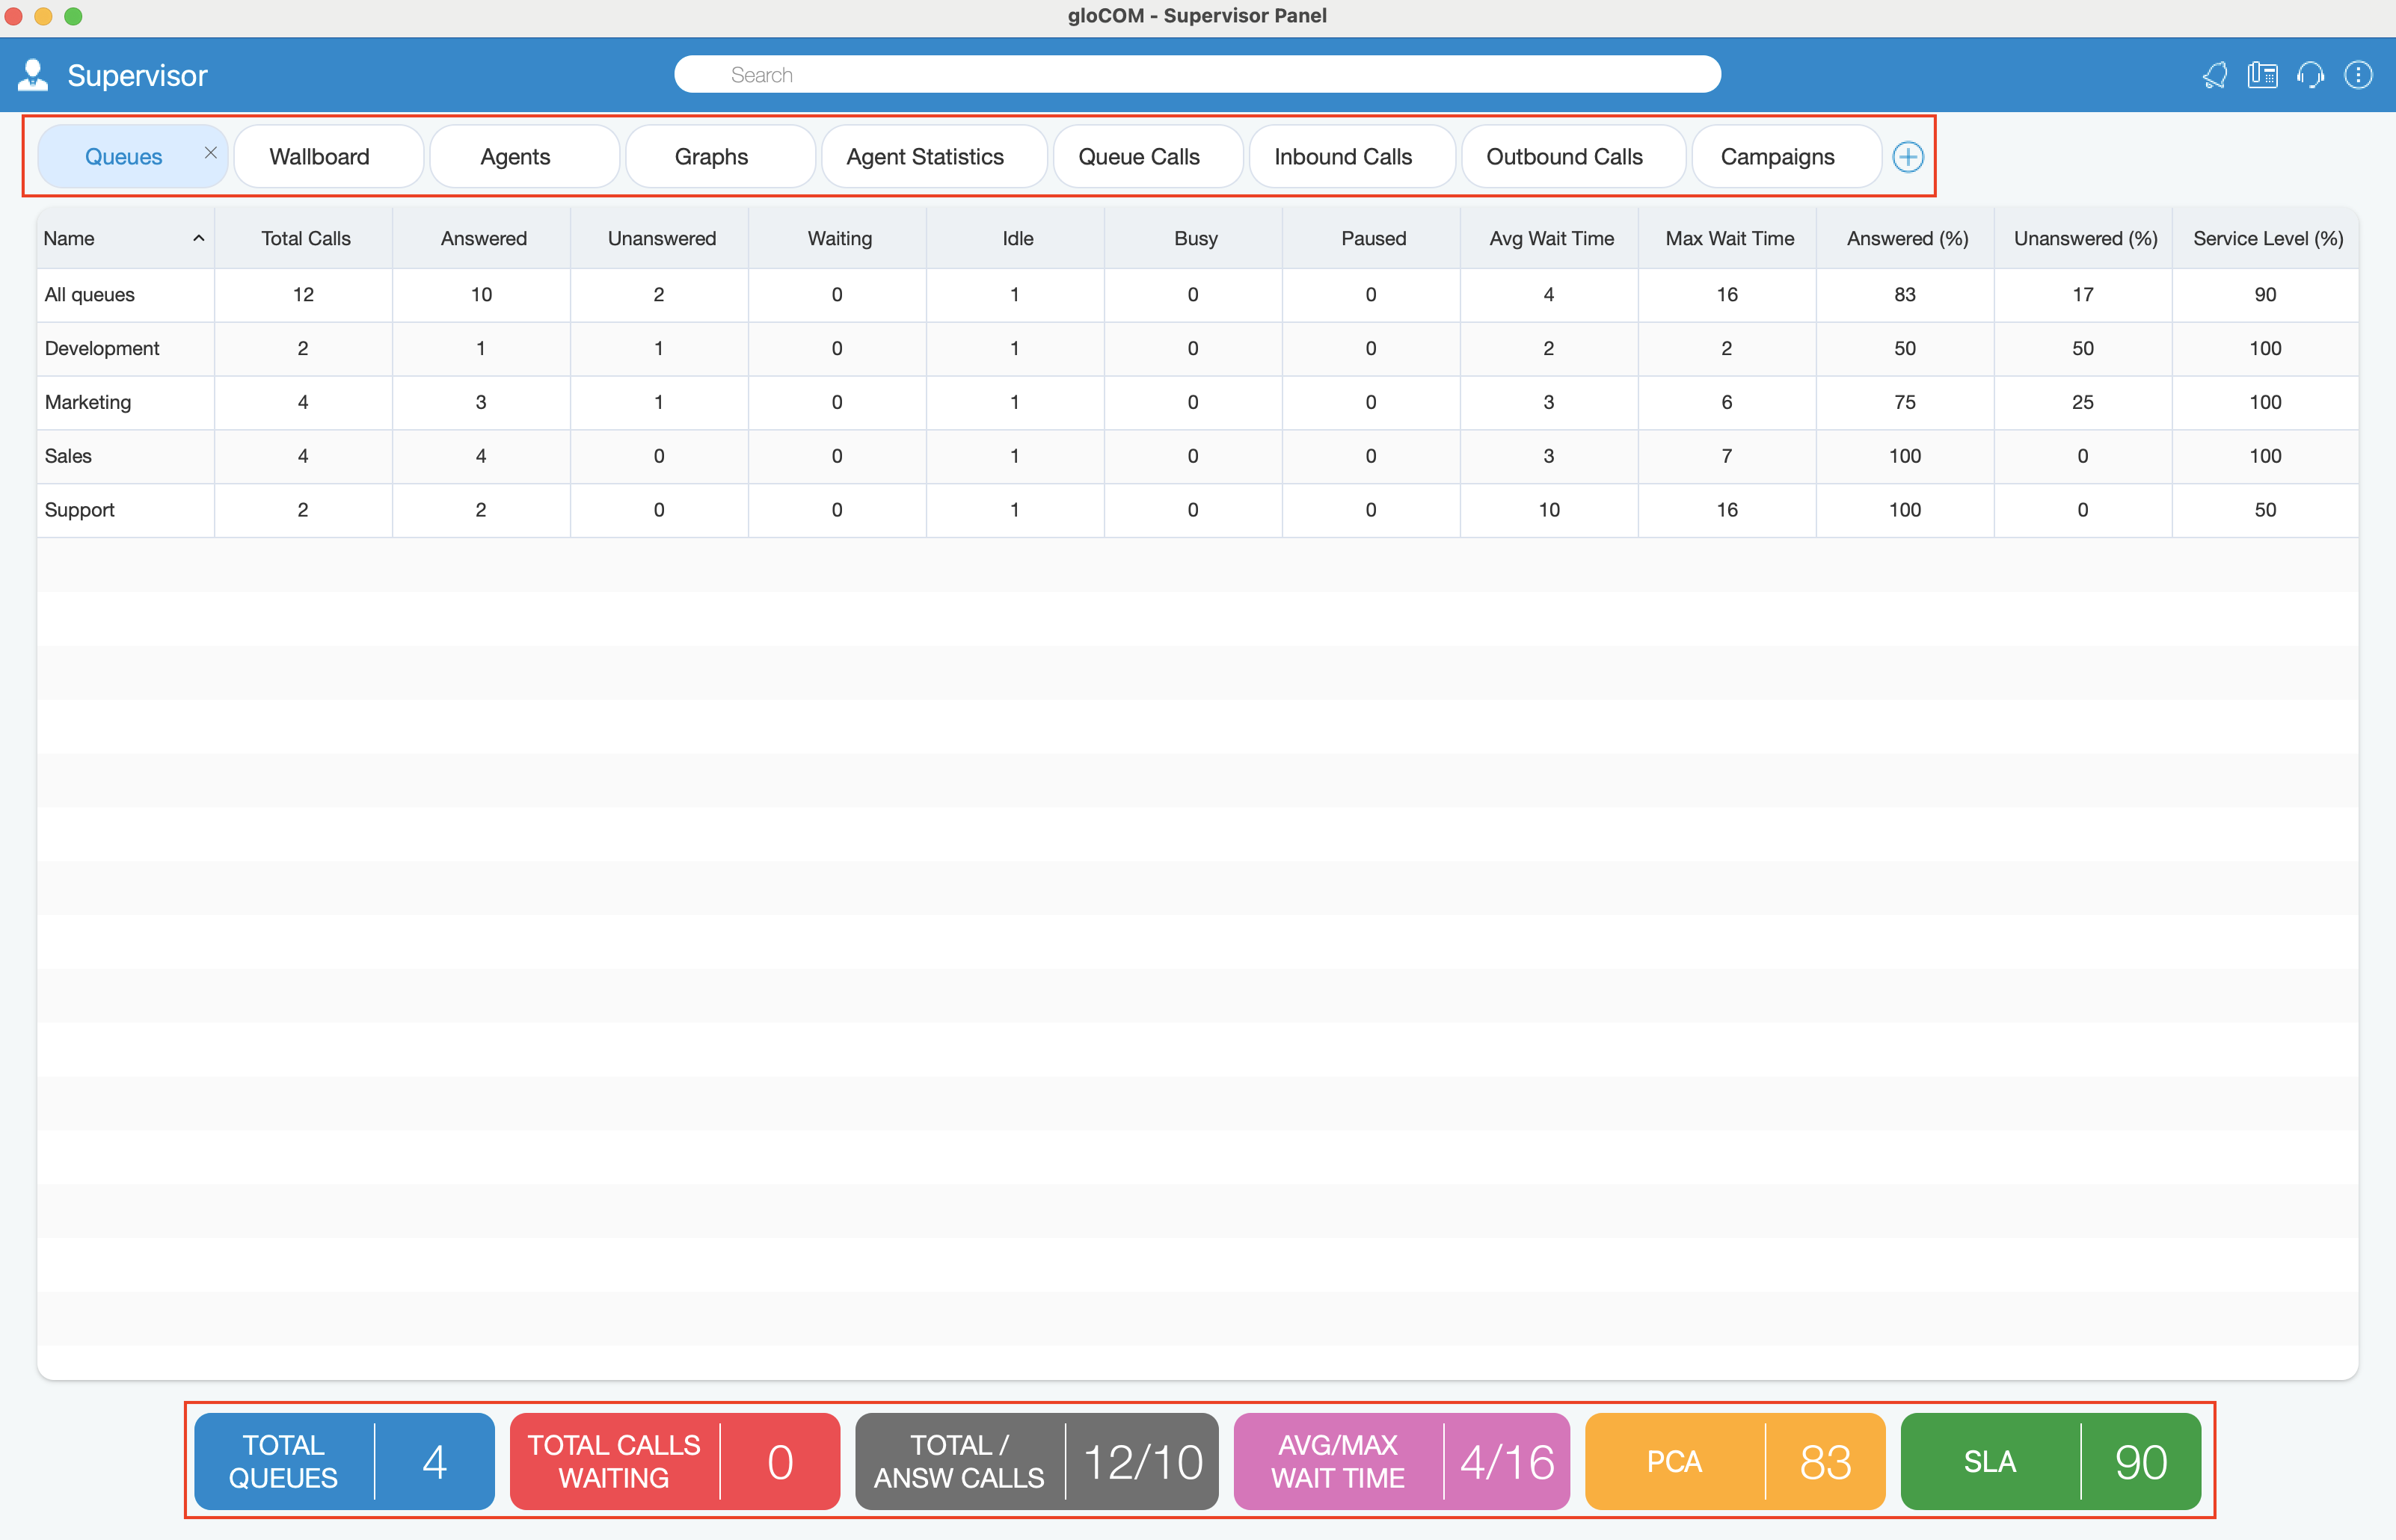
Users can decide which tabs they want to see inside the Supervisor Panel. All tabs are displayed by default, the same as before.
All tabs are stored on the server, so the user does not have to customize tabs every time he/she logs in. Tabs are saved per account, and if the server does not support saving tabs, they will be saved locally. After updating the server, when the user logs in for the first time, tabs saved locally will be saved on the server so the user does not have to customize tabs again. Local storage is used only when the server does not support storing tabs.
 Add a new tab: A new, + option has been added. It is used to add a new tab. When the user clicks the + button, a new window with the following information is displayed:
- Type: Dashboard by default.
- Subtype: User can choose one of the subtypes from the dropdown menu.
- Tab name: The user can name the tab as he/she wishes, and if the user does not enter anything, the tab will be named automatically by default. (For custom Tab name, the maximum length is 100 characters)
The user will not be able to add a new tab if the max number of tabs (9) is reached.
- Rename tab: The user can rename the existing tab by right-clicking on the tab.
- Remove existing tab: Each tab can also be easily removed by clicking the X button.
- Reorder tabs: It is also possible to change the order of the tabs, simply by grabbing the tab and dragging it to a different location.
If the user’s license does not support the Dialer option, the user will not be able to add Campaigns tab.
Queues Module
Inside of the Queues Module the Supervisor can monitor Real-time information for all Queues selected through Preferences dialog.
- Total calls: Represents the total number of calls during the day (answered + unanswered).
- Calls answered: Represents the total number of answered calls during the day.
- Calls unanswered: Represents the total number of unanswered calls during the day.
- Calls waiting: Represents the total number of calls waiting in the Queue to be answered by a free Agent.
- Members idle: Represents the total number of idle Agents.
- Members busy: Represents the total number of busy Agents.
- Members paused: Represents the total number of paused Agents.
- Average Wait Time (AWT) (in seconds): Represents the average amount of time callers must wait to reach an Agent.
- Maximum Wait Time (MWT) (in seconds): Represents the maximum amount of time callers must wait to reach an Agent.
- Calls Answered (%): Represents the percentage of answered calls during the day.
- Calls Unanswered (%): Represents the percentage of unanswered calls during the day.
- Service Level (%): Represents the percentage of calls that have been answered within a specified period of time. Service Level can be configured in the Preferences window.
The Queues module displays queue statistics for the current day.
Wallboard Module
Inside the Wallboard Module the Supervisor can monitor real-time information for all Queues selected through the Preferences dialog. The Wallboard is displayed in a large format intended for use with televisions or other large screens.
For each Queue the following information is shown:
- Total calls: Represents the total number of calls during the day (answered + unanswered).
- Calls answered: Represents the total number of answered calls during the day.
- Calls unanswered: Represents the total number of unanswered calls during the day.
- Calls waiting: Represents the total number of calls waiting in the Queue to be answered by a free Agent.
- Agents idle: Represents the total number of idle Agents.
- Agents busy: Represents the total number of busy Agents.
- Agents paused: Represents the total number of paused Agents.
- Average Wait Time (AWT) (in seconds): Represents the average amount of time callers must wait to reach an Agent.
- Maximum Wait Time (MWT) (in seconds): Represents the maximum amount of time callers must wait to reach an Agent.
- Calls Answered (%): Represents the percentage of answered calls during the day.
- Calls Unanswered (%): Represents the percentage of unanswered calls during the day.
- Service Level (%): Represents the percentage of calls that have been answered within a specified period of time. Service Level can be configured in the Preferences window.
The Wallboard module displays Queue statistics for the current day.
Agents Module
Inside the Agents module, the Supervisor can monitor information for all logged-in Agents selected through Preferences dialog.
For each Agent the following information is shown:
- Agent Name: Represents Agent’s name. If the Supervisor clicks on the Agent’s name the Agent Info dialog will be displayed.
- Agent ID: Represents Agent’s number.
- Agent State: Represents current state of an Agent (idle, paused, busy…).
- Time In State: Represents the amount of time the Agent is in the current state.
- Unique Call ID: Represents unique ID number of a Call.
- Call Direction: Outgoing, Incoming.
- Call Type: Regular Call, Queue Call, Campaign Call.
- Call Info: Represents the information about the call (call number, project code…).
- Login Time: Represents the amount of time the Agent is logged in.
- Login Type: The login type of the Agent.
From version 6.0 it is possible to see the Agent direction and blending option in real-time. The Supervisor can change the direction of any Agent by clicking on the direction buttons. Also, the Supervisor can see which project code each Agent is using for their current calls, and it is possible to monitor Dialer calls and Campaigns from the Agents module.
Graphs Module
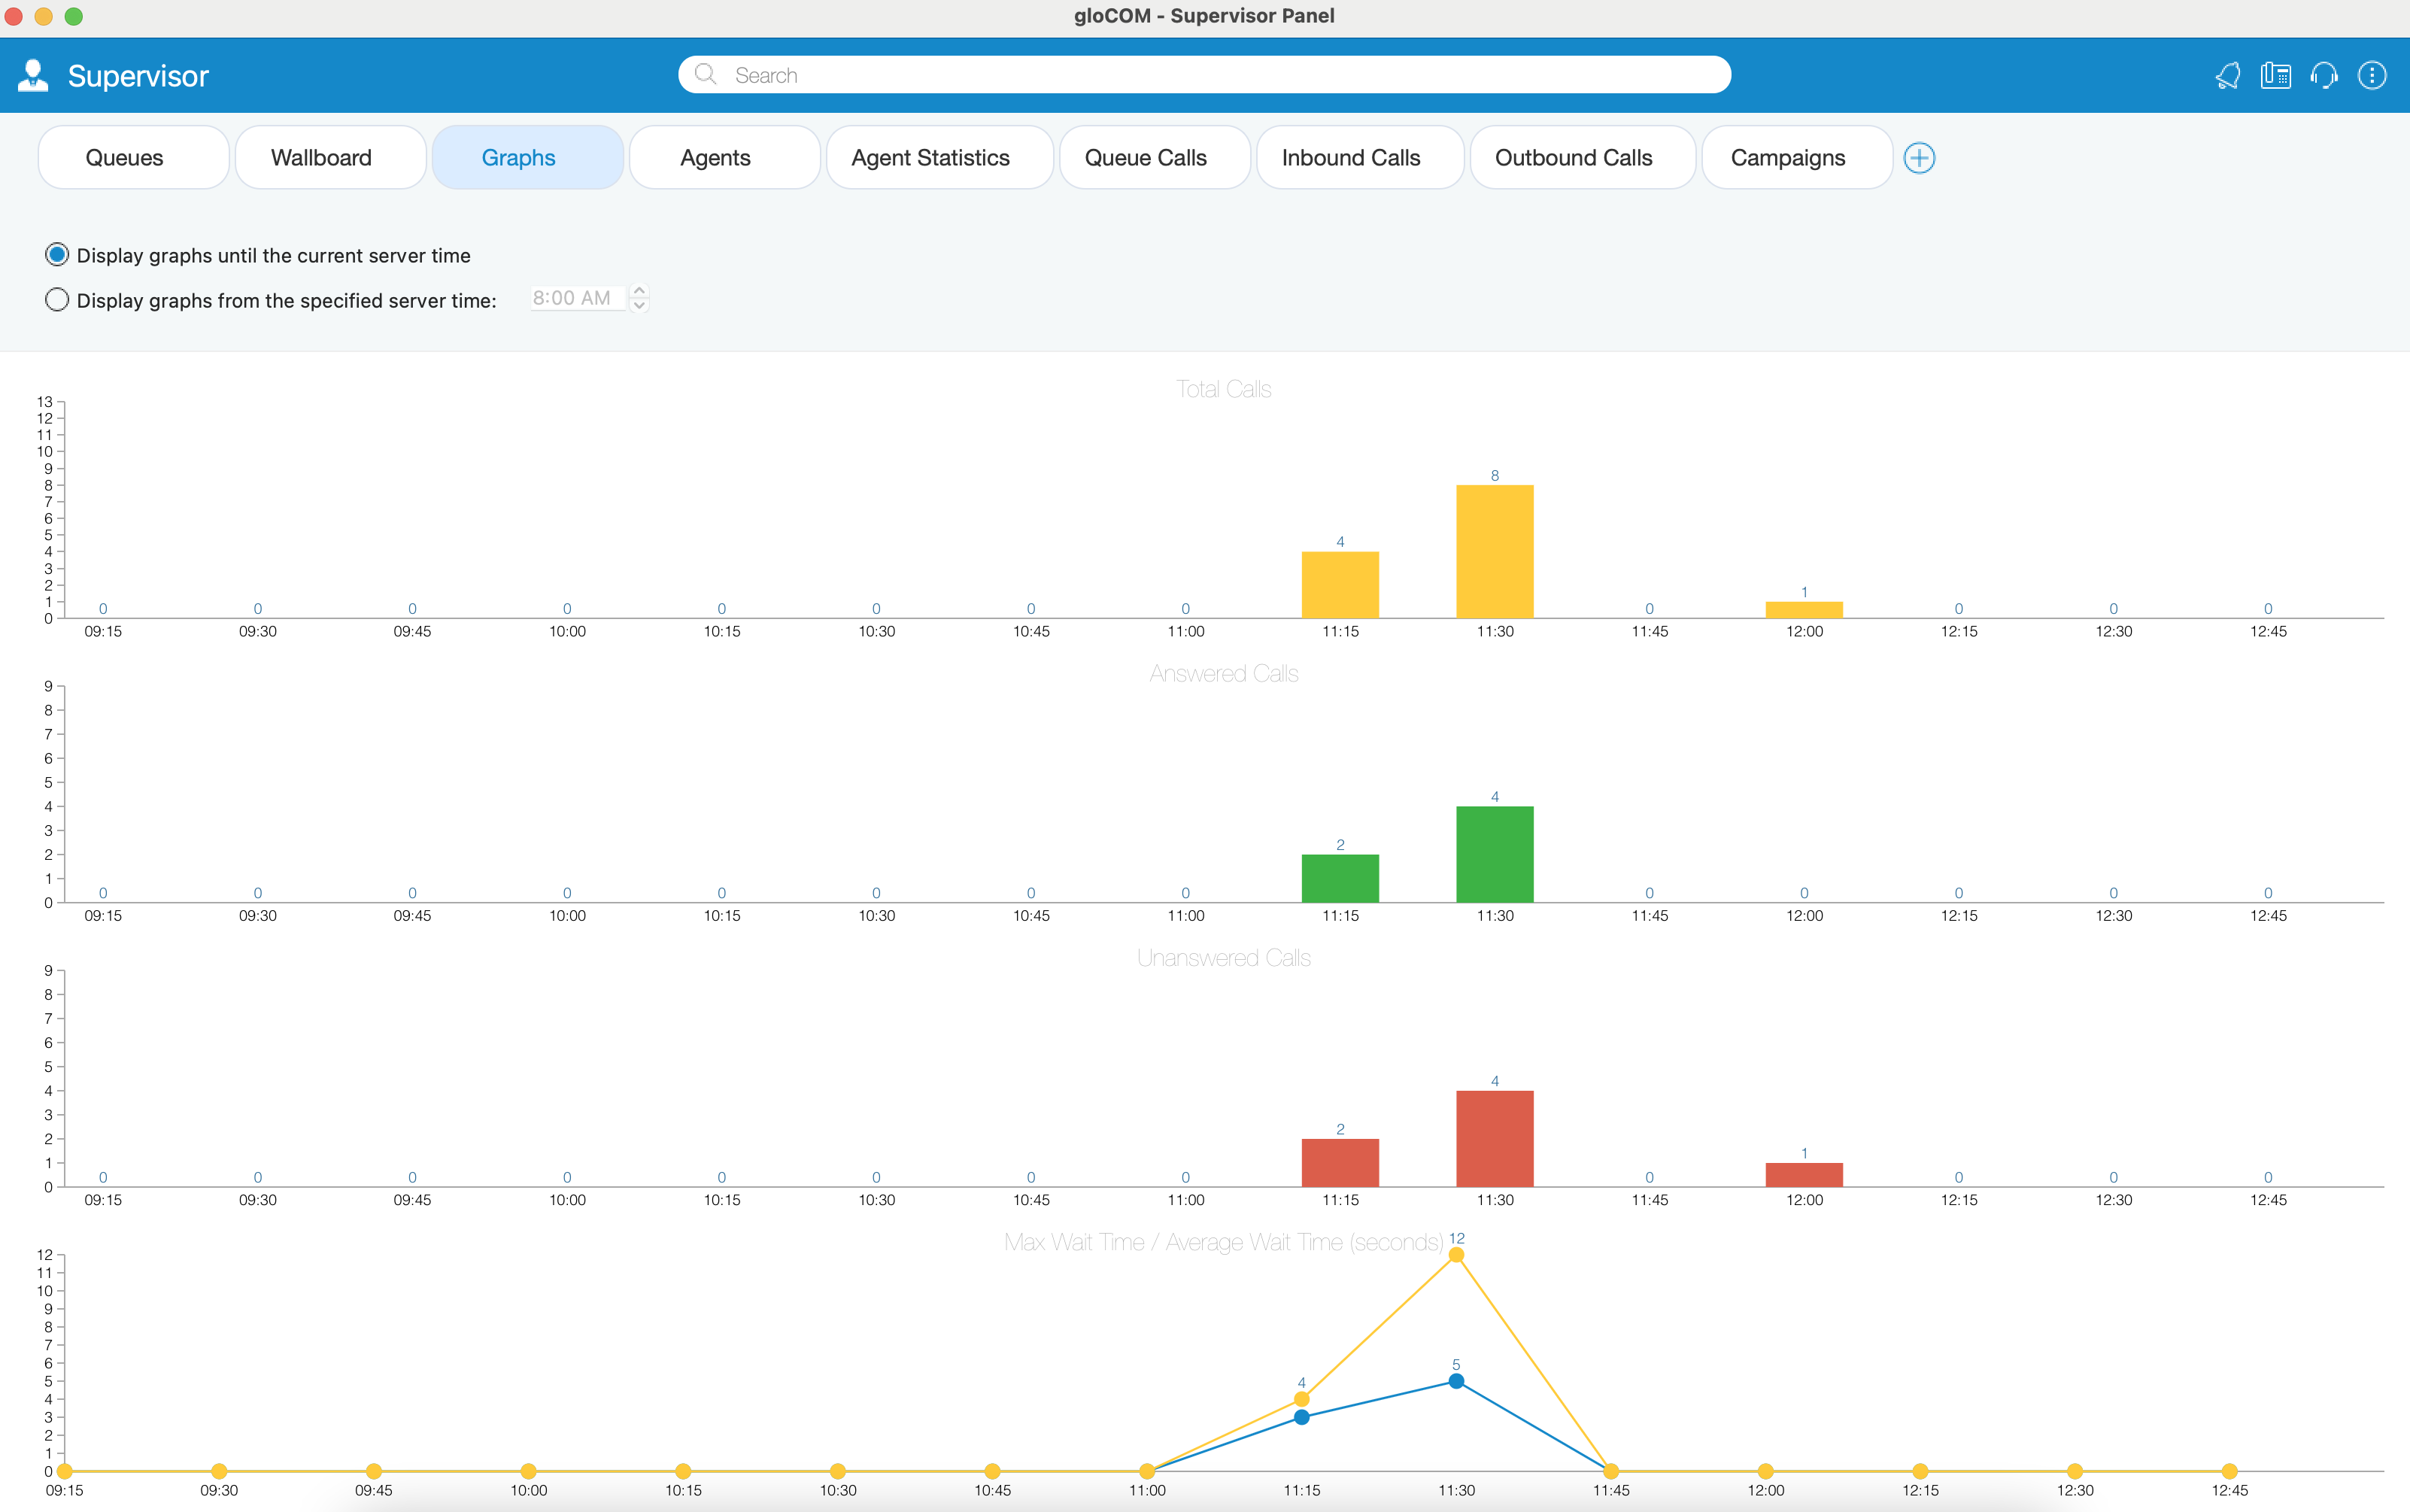
The Graphs module shows Real-time call statistics in the form of Graphs.
The following information is shown:
- Total Calls: Represents the total number of calls during the day.
- Answered Calls: Represents the total number of answered calls during the day.
- Unanswered Calls: Represents the total number of unanswered calls during the day.
- Maximum / Average Wait Time (in seconds): Represents the maximum/average amount of time callers must wait to reach an Agent.
Also, the user can choose whether he/she wants to display Graphs until the current server time, or to display Graphs from the specified server time.
Agent Statistics Module

Prior to version 6.0, only Agent Inbound (real-time) statistics were available. Now, Agent Statistics module displays Agent’s Inbound and Outbound statistics that include all Agent’s calls (inbound, outbound, direct (in/out) ) into calculations. Calculations are reset every day starting from midnight.
For each Agent the following information is shown:
- Agent Name and Number: This section shows Agent’s name and Agent’s number.
- Calls: All calls answered by Agent.
- Total: Represents the total number of calls.
- Answered: Represents the total number of answered calls.
- Unanswered: Represents the total number of unanswered calls.
- Talk Time: Agent talk time.
- Total: Represents the total talking time.
- Mean: Mean/Average Agent talk time.
- Mean Delay: Mean/Average caller wait time before answered by the Agent.
- Idle Time: Agent idle time (callback Agents only).
- Total: Total Agent idle time(when Agent is not busy).
- Mean: Mean/Average Agent idle time.
- Sessions: Time Agent was logged in the queue.
- Total: Total time Agent was logged in.
- Count: Number of Agent sessions.
- Pauses: Represents Agent’s time on Pauses
- Total: Total time Agent was on pause.
- Count: Number of pauses.
It is possible to set refresh time to the desired value to keep statistics updated. Also, labels on the bottom of the page are showing the total number of Agents, Total/Answered calls, Total Session Time, Total Talk Time, Average Talk Time, and Talk Time (%). More information about these labels is on the Agent Statistics tab.
Queue Calls Module
Inside the Queue Calls module, the Supervisor can monitor information for calls from all the Queues he/she selects to be visible through the Preferences dialog.
For each call the following information is shown:
- Call ID: Represents ID number of call.
- Queue Name: Displays Queue name.
- Queue Number: Shows Queue number.
- Caller ID: Represents DID number of the Caller.
- State: Represents current state of the Call.
- Time in State: Total time in current state.
- Position in Queue: Represents position number in Queue.
- Estimated Answer Time: Shows estimated answered time.
The Supervisor can perform the following operations for each call if he/she has the permissions:
- Transfer Call: The Supervisor can transfer selected call.
- Take Call: The Supervisor can take selected call.
- Monitor Call: The Supervisor can monitor selected call.
Inbound Calls Module
Inside the Inbound Calls module, the Supervisor can monitor information for all calls coming into the system.
For each call the following information is shown:
- DID: Displays DID Call number.
- DID Destination: Represents destionation of the Call.
- Caller ID: Shows DID number of Caller.
- Location: Represents type of location (IVR, Queue, Conference etc…)
- Location Name: Displays name of location.
- Location Number: Shows location number.
- Duration in Location: Shows current duration in location.
- Total Call Duration: Show total Call Duration.
The Supervisor can perform the Transfer Call operation for each call if he/she has the permissions.
Outbound Calls Module
Inside the Outbound Calls module, the Supervisor can monitor information for all calls going out from the system.
For each call the following information is shown:
- Call Originator: Displays originator of the call (Agent, Dialer, Project).
- Trunk: Displays used trunks for calls.
- Destination Number: Displays DID number of the outbound call.
- Location: Displays type of location.
- Location Name: Represents location name.
- Location Number: Represents location number.
- Call Duration: Represents total call duration.
The Supervisor can perform the following operations for each call if he/she has the permissions:
- Transfer Call: The Supervisor can transfer selected call.
- Take Call: The Supervisor can take selected call.
- Monitor Call: The Supervisor can monitor selected call.
- Hangup Call: The Supervisor can hangup selected call.
Campaigns Module
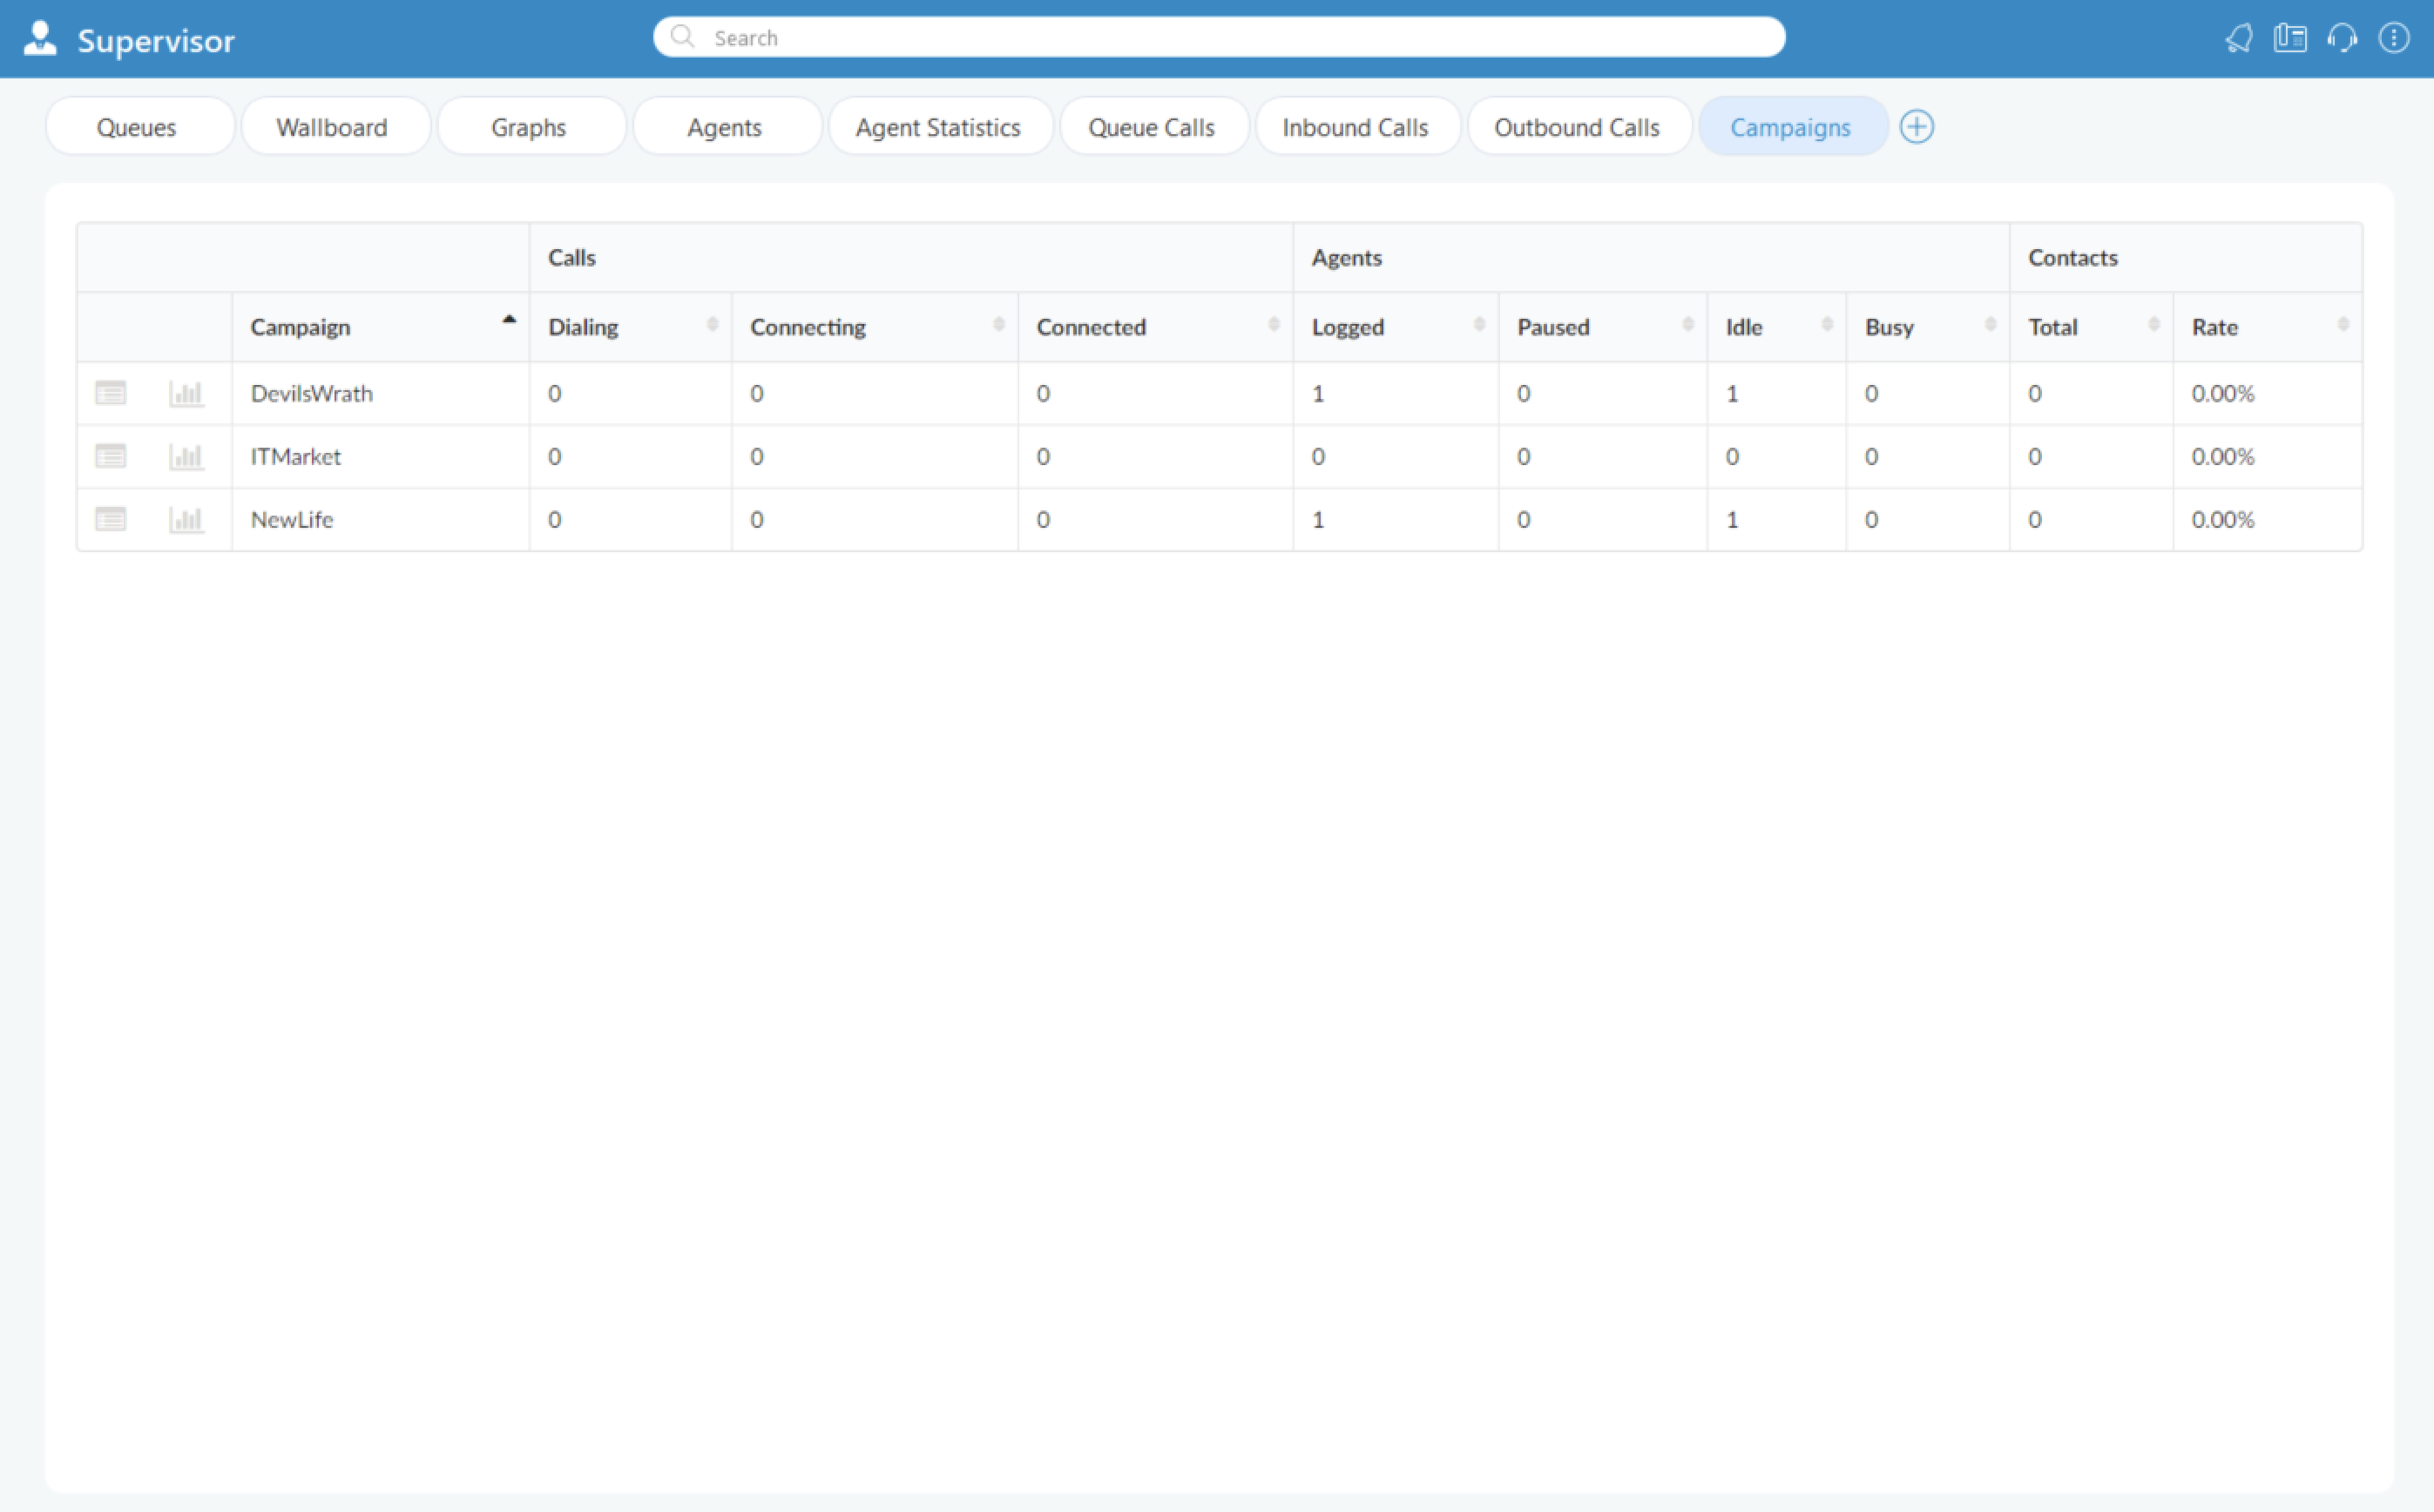
The Campaigns module displays Campaign statistics for the current day.
For each Campaign the following information is shown:
- Campaign Name: Displays Campaign name.
- Calls: Represents number of dialing, connecting and connected calls.
- Dialing: Shows number of Dialed calls.
- Connecting: Shows number of currently Connecting Calls.
- Connected: Displays number of Connected Calls.
- Agents: Displays number of Agents in current Campaigns.
- Logged: Shows number of Logged Agents.
- Paused: Shows Agents on pause.
- Idle: Displays currently Idle Agents.
- Busy: Displays number of Busy Agents.
- Contacts: Indicates successful contacts in Campaigns.
- Total: Indicates total number of successful contacts in Campaigns.
- Rate: Refers to the percentage of workload that has been done in Campaigns.
Supervisor Real Time Statistics
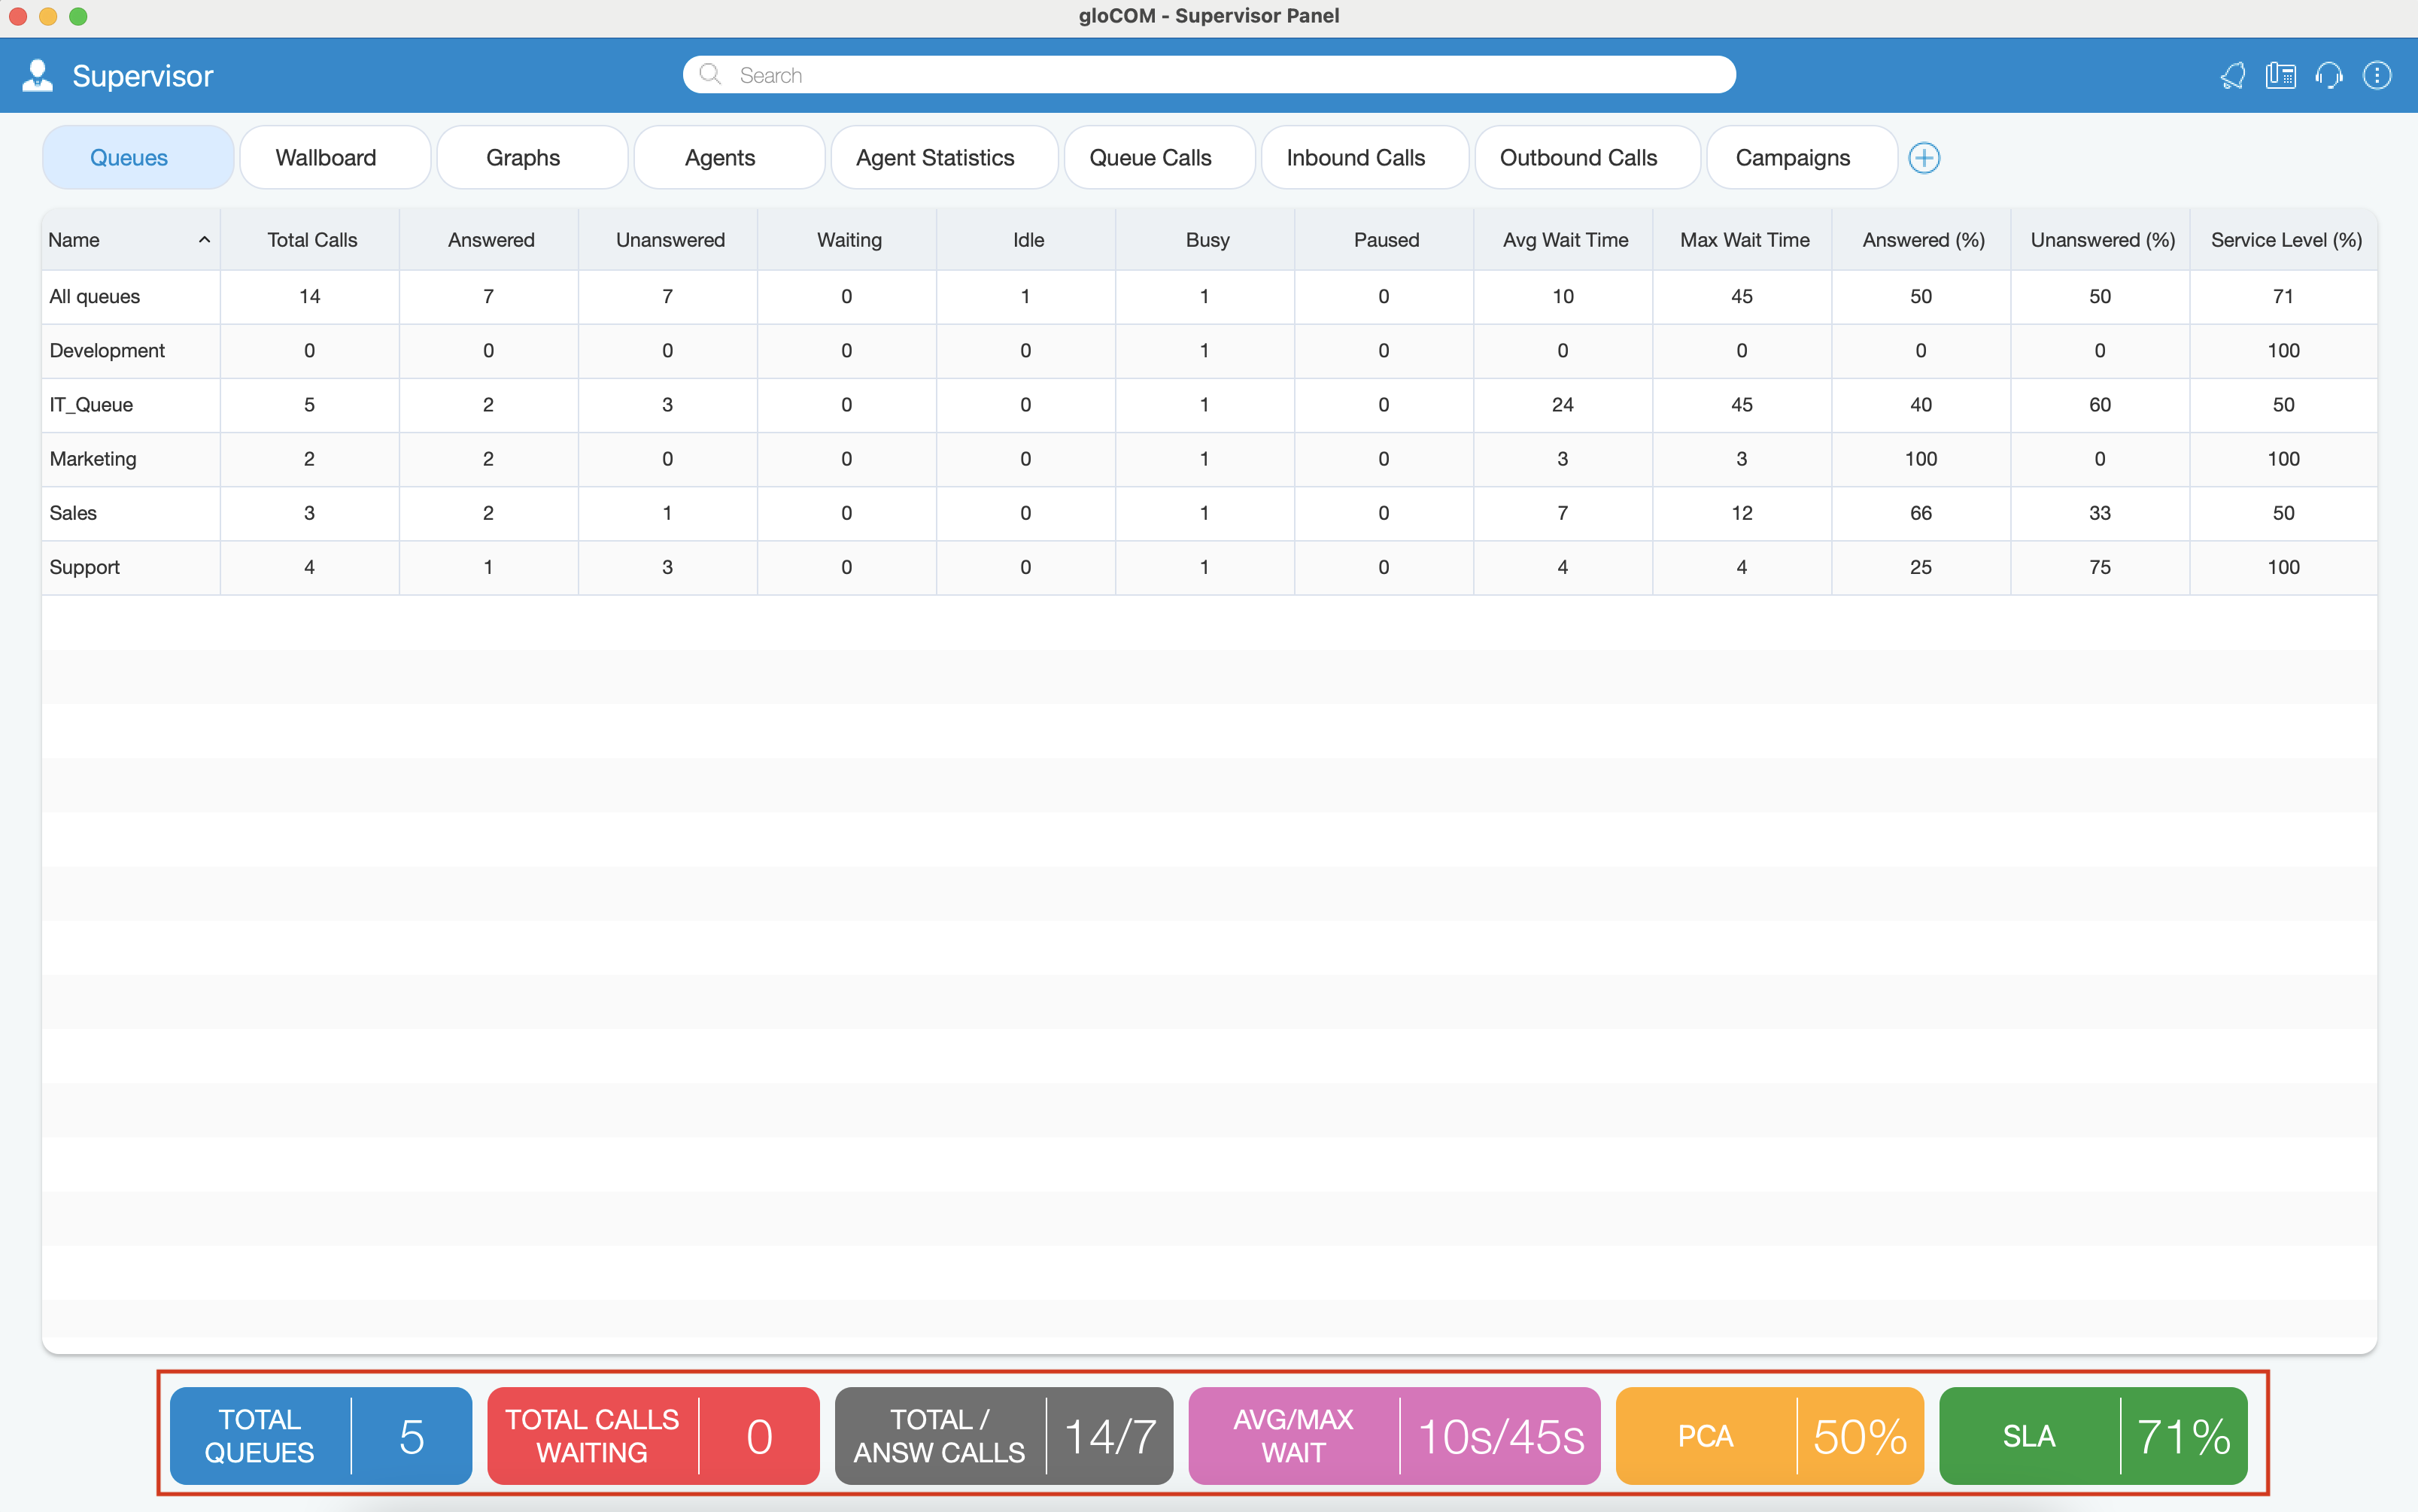
With the current fresh design of the Supervisor, advanced Global Statistics were introduced. These statistics include all Systems statistics, Queues, and Agents statistics in real-time, and can be displayed within different tabs.
For selected tabs in Supervisor Panel, there are specific areas (on the bottom of the panel) that are showing Real-time Statistics for each tab separately.
Queues Tab
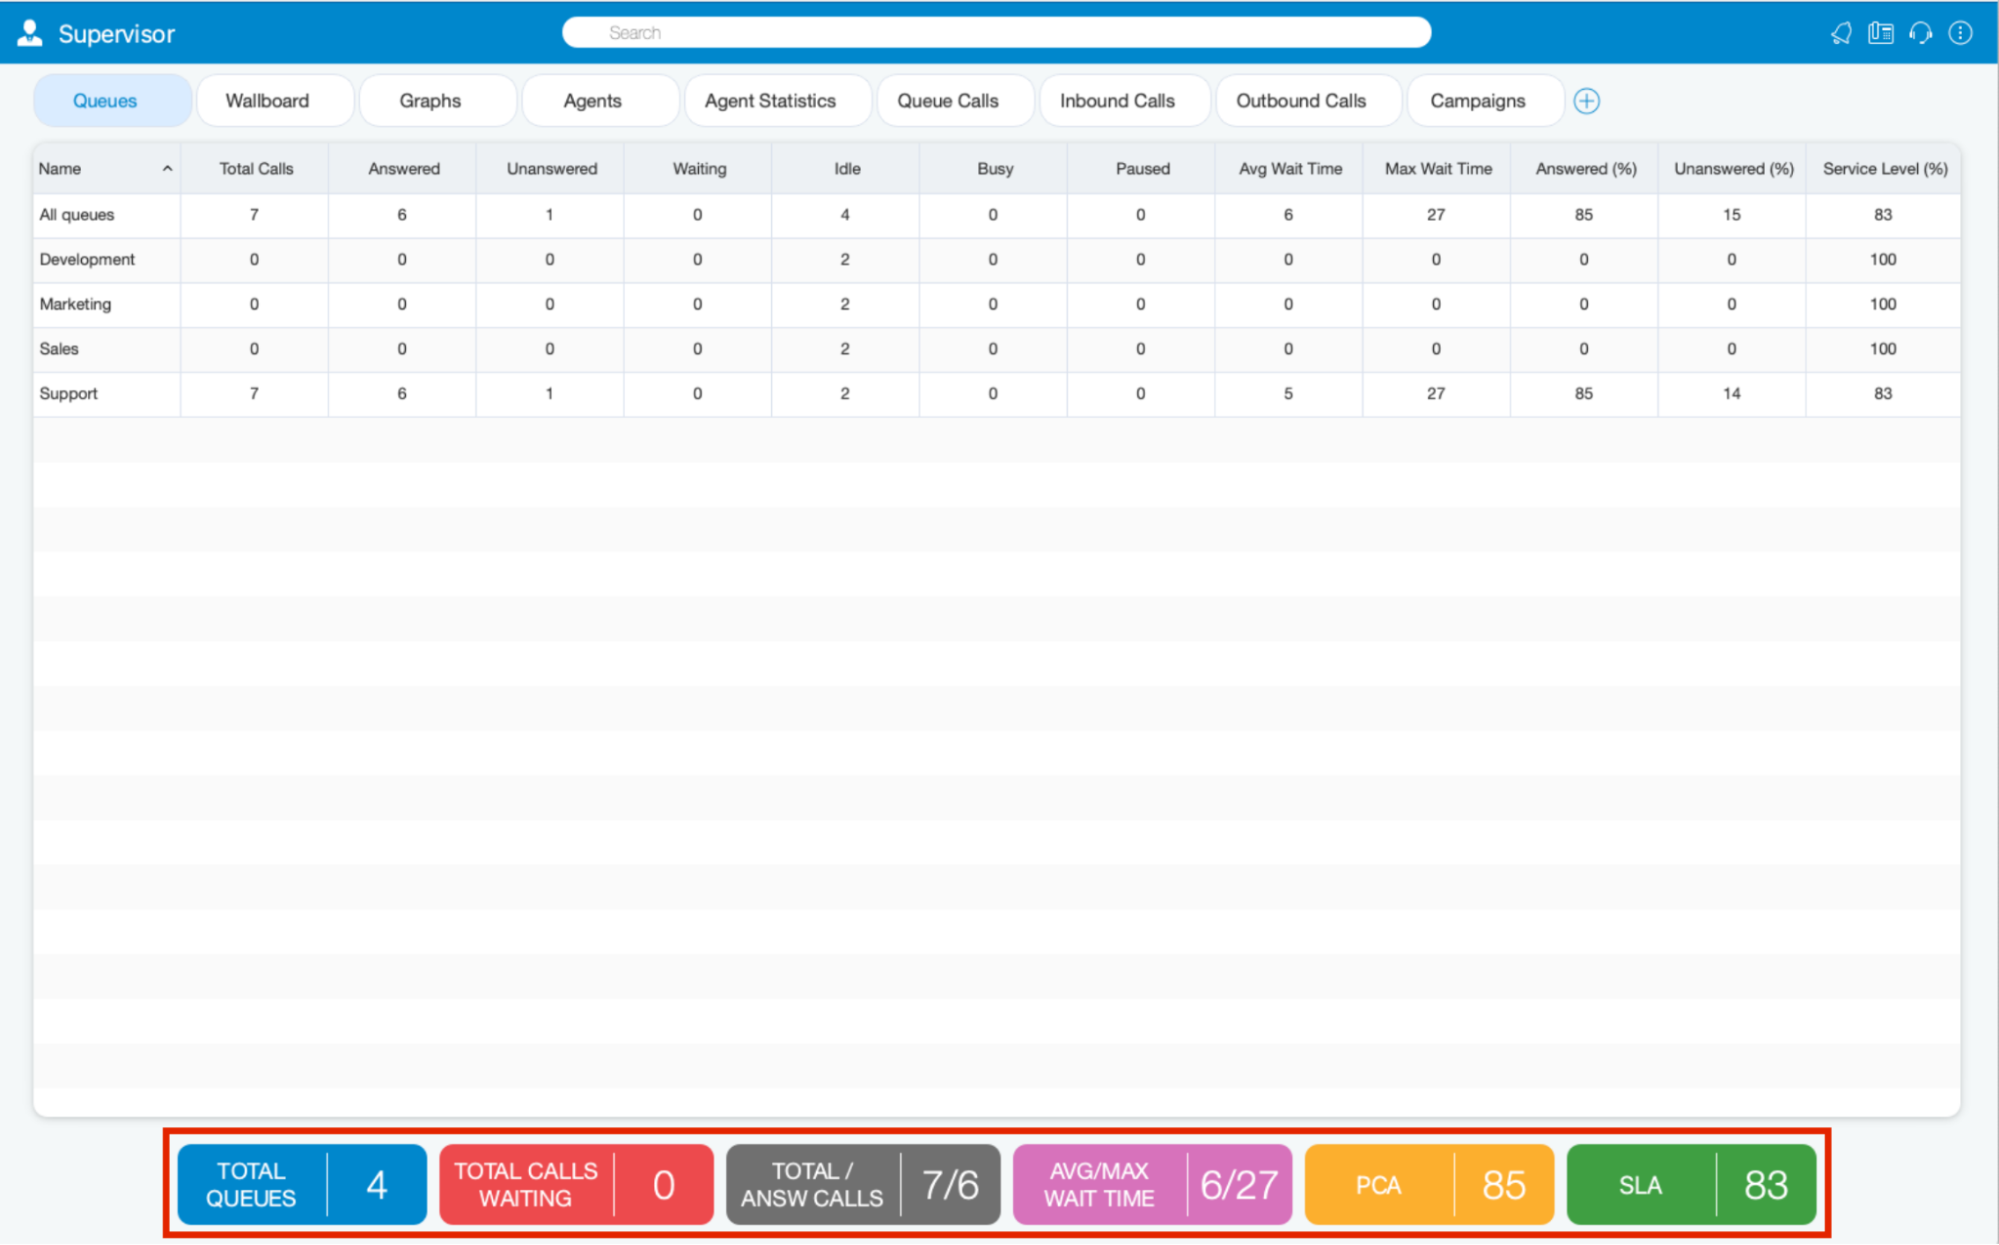
Inside the Queues tab, the Supervisor can monitor real-time information for all Queues selected through the Preferences dialog.
For the Queues tab the following statistics are shown:
- Total queues: Represents the total number of queues on the system.
- Total calls waiting: Represents the total number of calls waiting in the Queue.
- Total/Answered calls: Represents the total number of calls that entered the system and the total number of answered calls by all Queues.
- Average Wait Time (AWT) (in seconds): Represents the average amount of time callers must wait to reach an Agent.
- Maximum Wait Time (MWT) (in seconds): Represents the maximum amount of time callers must wait to reach an Agent.
- PCA: Represents the percentage of calls answered in all Queues.
- SLA (%): Represents the percentage of calls that have been answered within a specified period of time. Service Level can be configured in the Preferences window.
Agents Tab
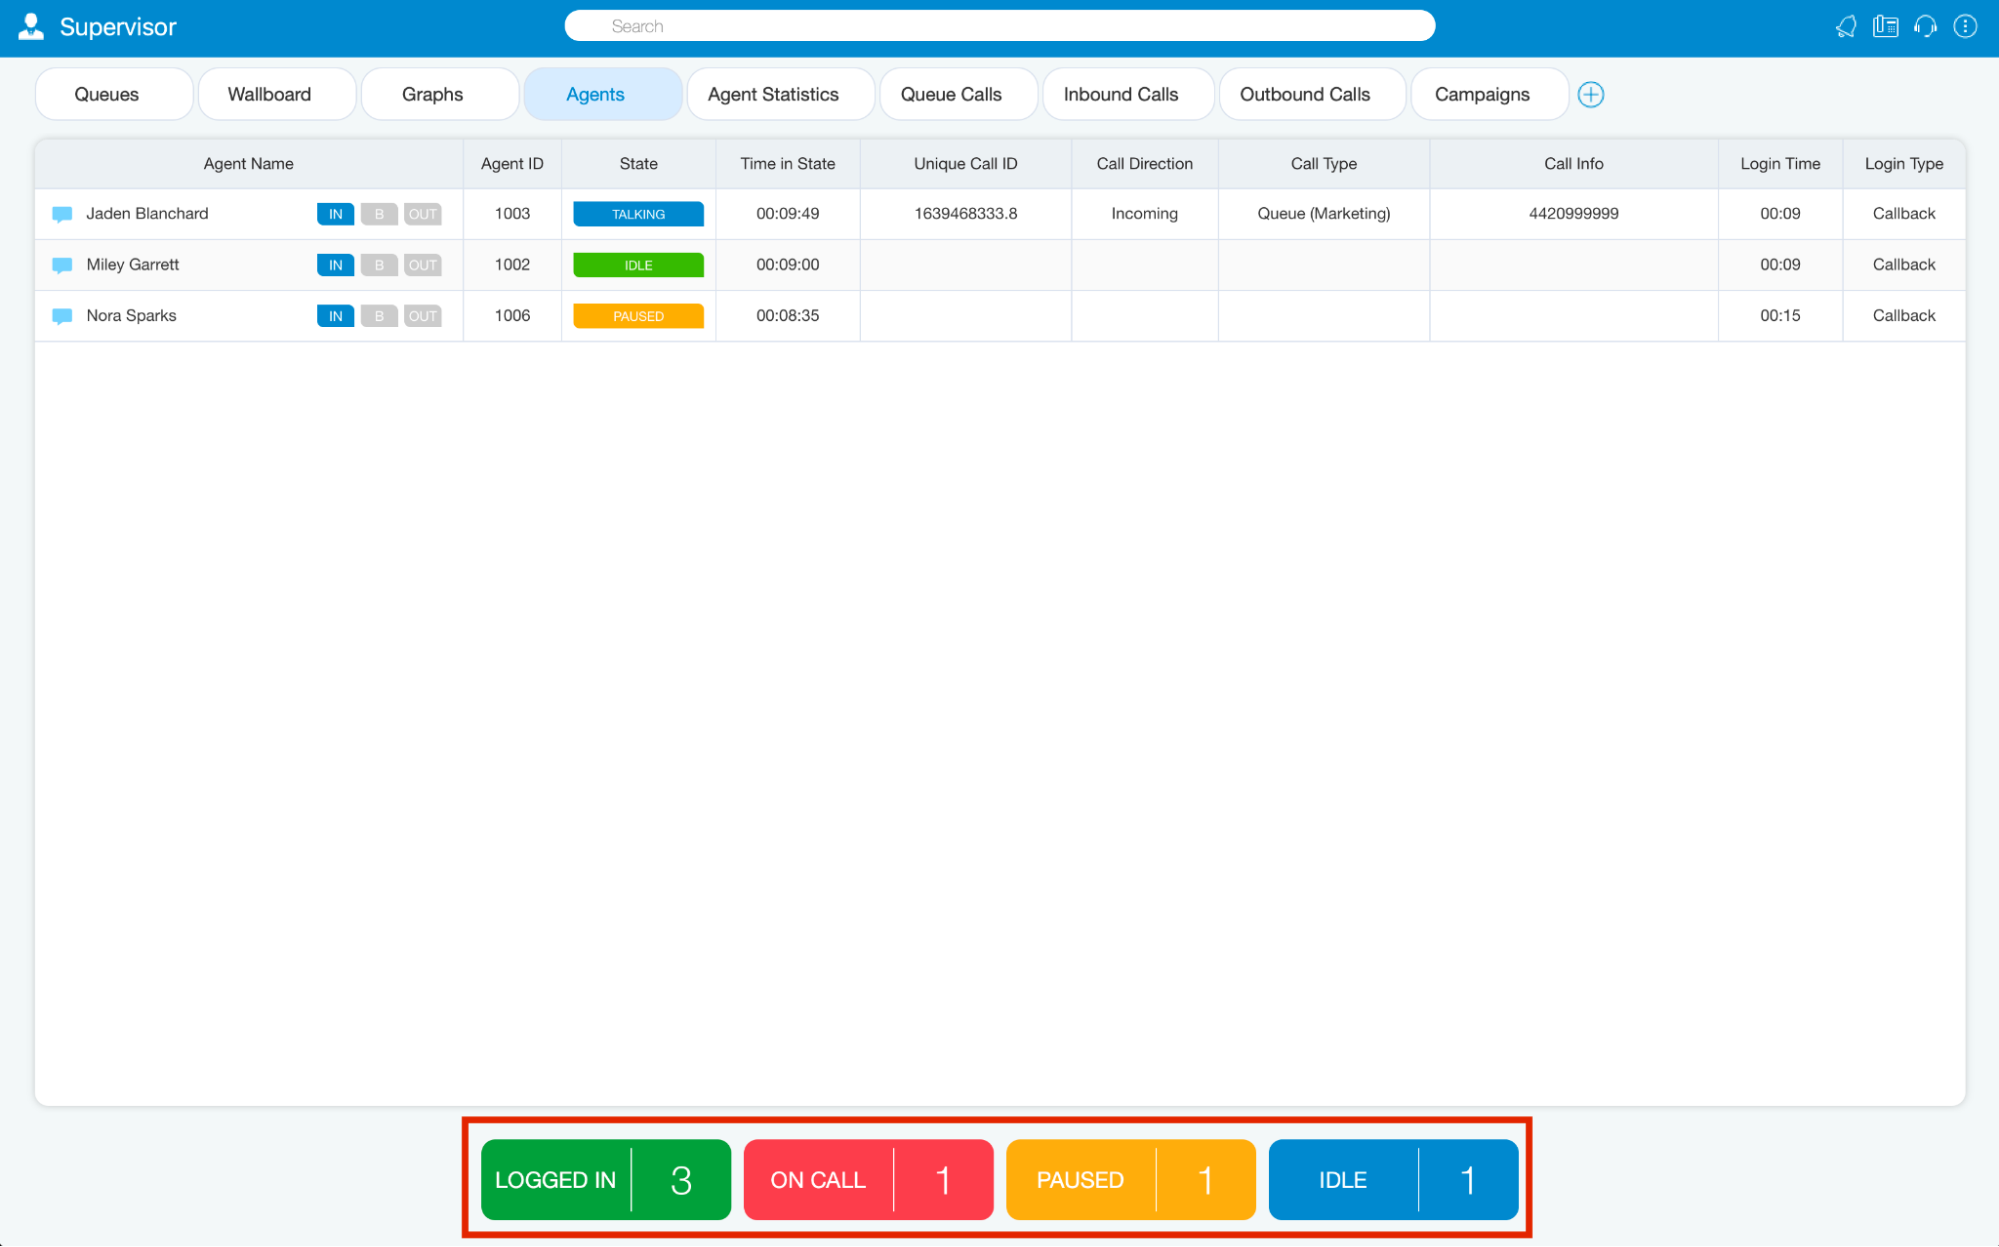
Inside the Agents tab, the Supervisor can monitor information for all logged-in Agents selected through the Preferences dialog.
For the Agents module tab the following statistics are shown:
- Logged In: Represents the total number of logged-in Agents.
- On Call: Represents a number of Agents on call.
- Paused: Represents the total number of paused Agents.
- Idle: Represents the total number of idle Agents.
Agent Statistics Tab
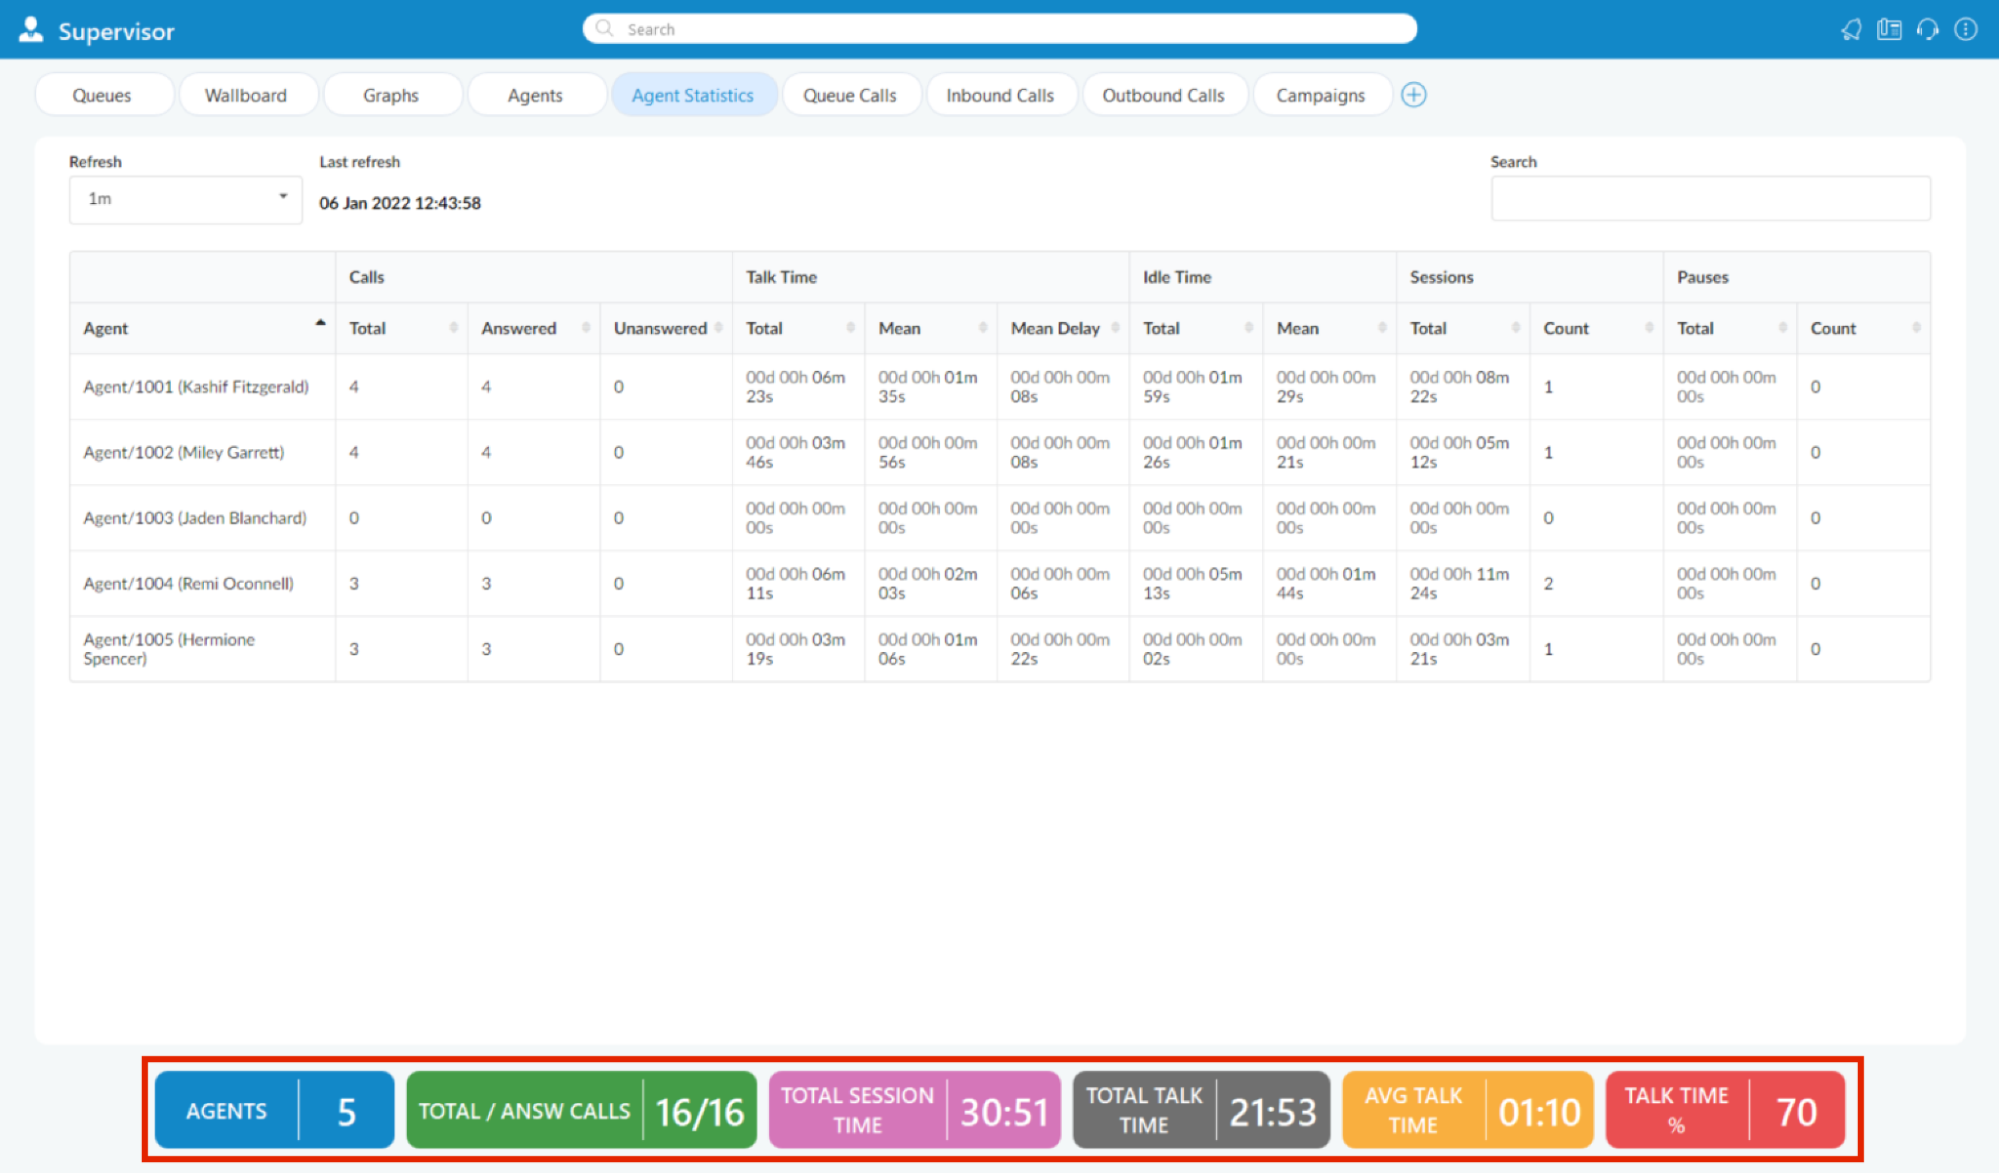
Agent Statistics tab displays Agent Inbound and Outbound statistics that include all Agent calls (inbound, outbound, direct (in/out) ) into calculations.
For the Agents Statistics tab the following statistics are shown:
- Agents: Represents the total number of Agents on the system.
- Total/Answered calls: Represents the total number of calls per Agent and the total number of answered calls by all Agents.
- Total Session Time: Represents the total amount of time Agents were logged on the system. (Total Session Time is updated every minute, and also whenever an Agent logs off, in real-time).
- Total Talk Time: Represents the total talking time for all Agents. (Total Talk Time is updated every minute, and also whenever an Agent finishes a call, in real-time).
- Average Talk Time: Represents the average amount of talking time per Agent. (Average Talk Time is updated whenever an Agent completes a call).
- Talk Time (%): Represents the percentage of all session time, Agents were on calls.
Queue Calls Tab
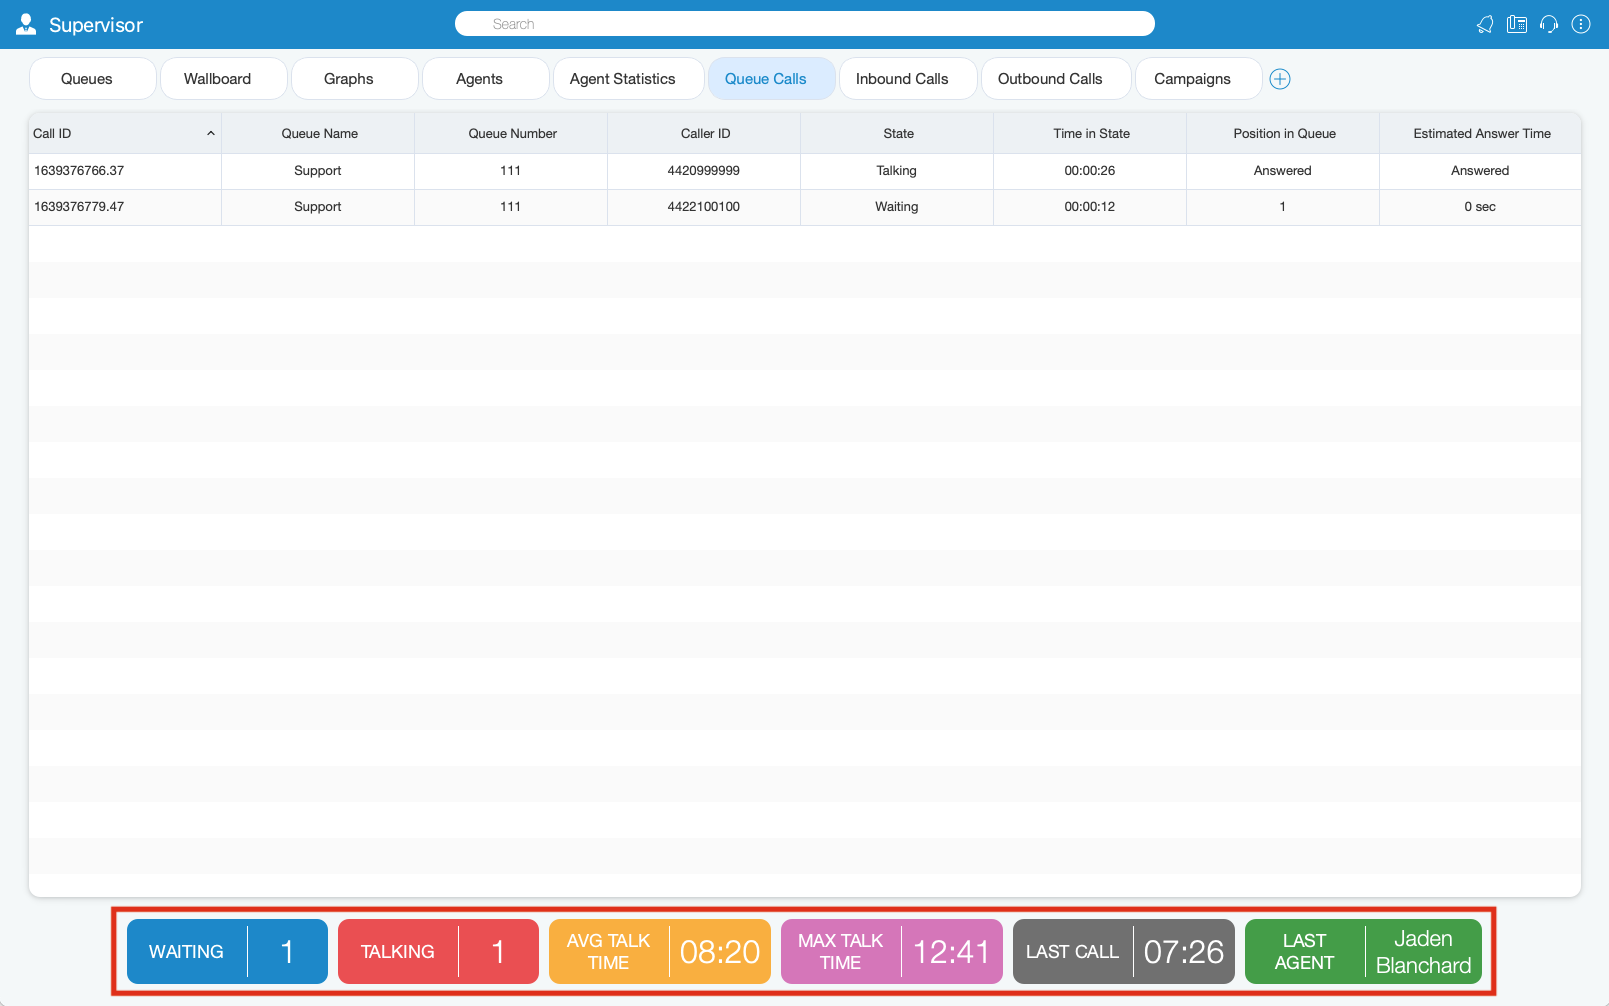
Inside the Queue Calls tab, the Supervisor can monitor information for calls from all the Queues he/she selects to be visible through the Preferences dialog.
For the Queue Calls tab the following statistics are shown:
- Waiting: Represents the number of callers in the Queues.
- Talking: Represents the number of Agents currently talking.
- Average Talk Time: Represents the average talk time for all Agents.
- Max Talk Time: Represents the longest Queue call.
- Last Call: Displays the time when the last call happened.
- Last Agent: Shows the name of the Agent who has the last call.
Inbound Calls Tab
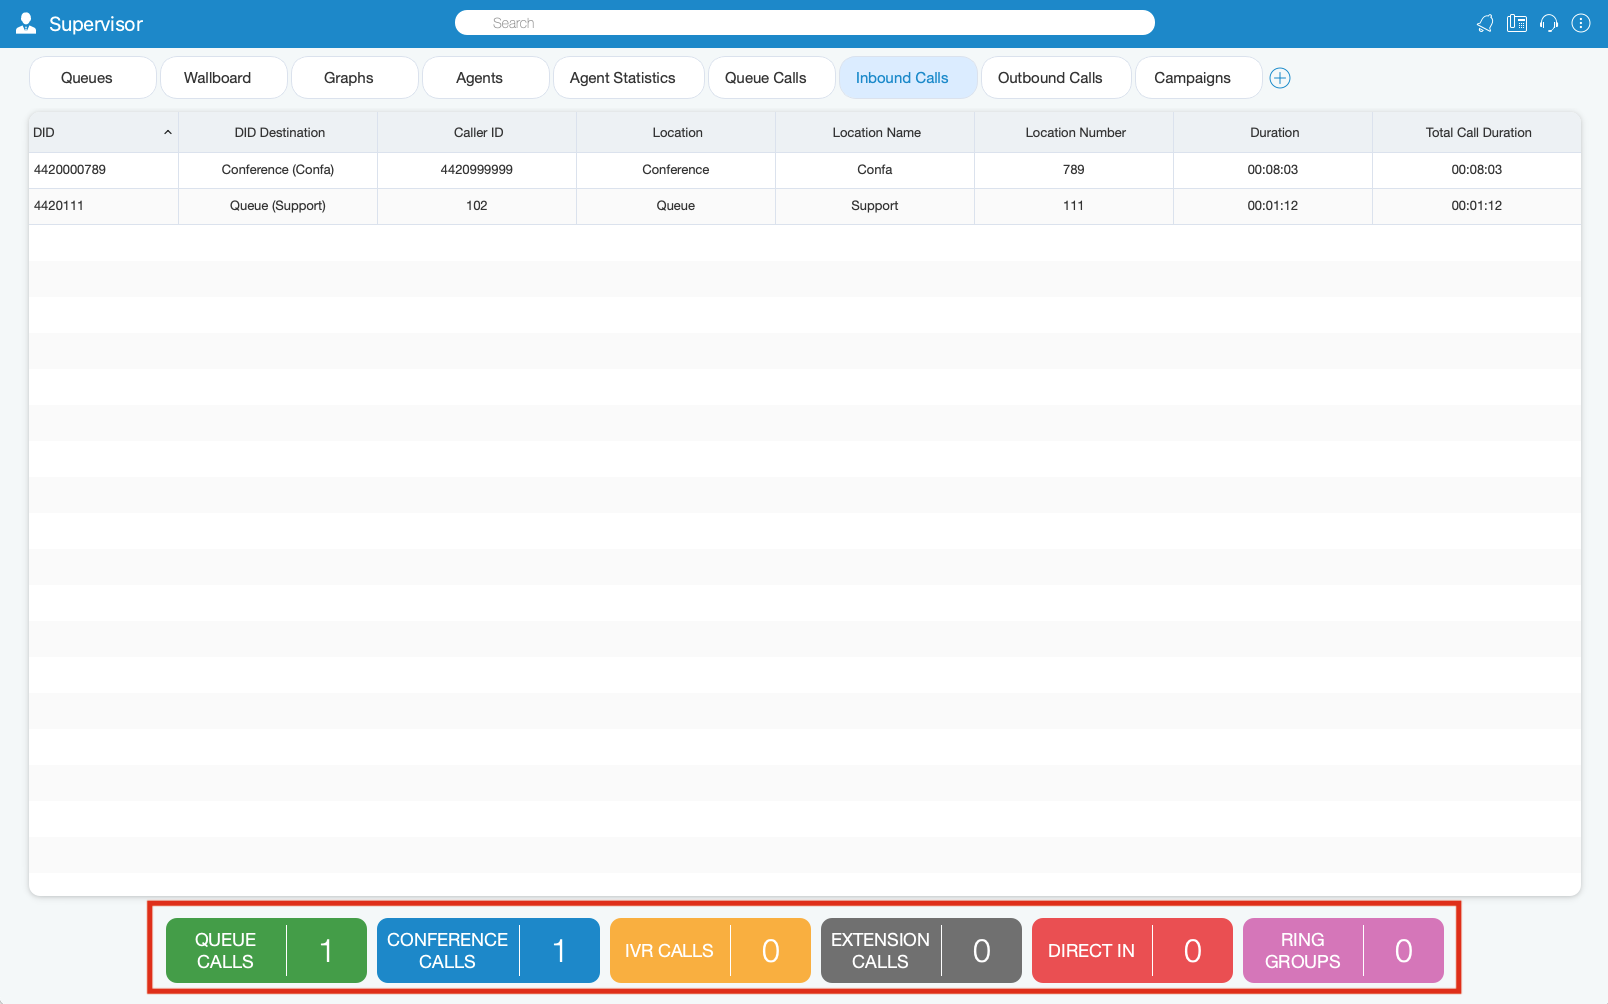
Inside the Inbound Calls module, the Supervisor can monitor information for all calls coming into the system.
For the Inbound Calls tab the following statistics are shown:
- Queue Calls: Shows the number of all Queue calls.
- Conference Calls: Shows the number of all Conference Calls.
- IVR Calls: Shows the number of all IVR Calls.
- Extension Calls: Show the number of all Extension Calls.
- Direct In: Shows the number of all Direct In Calls.
- Ring Groups: Shows the number of all Ring Group Calls.
Outbound Calls Tab
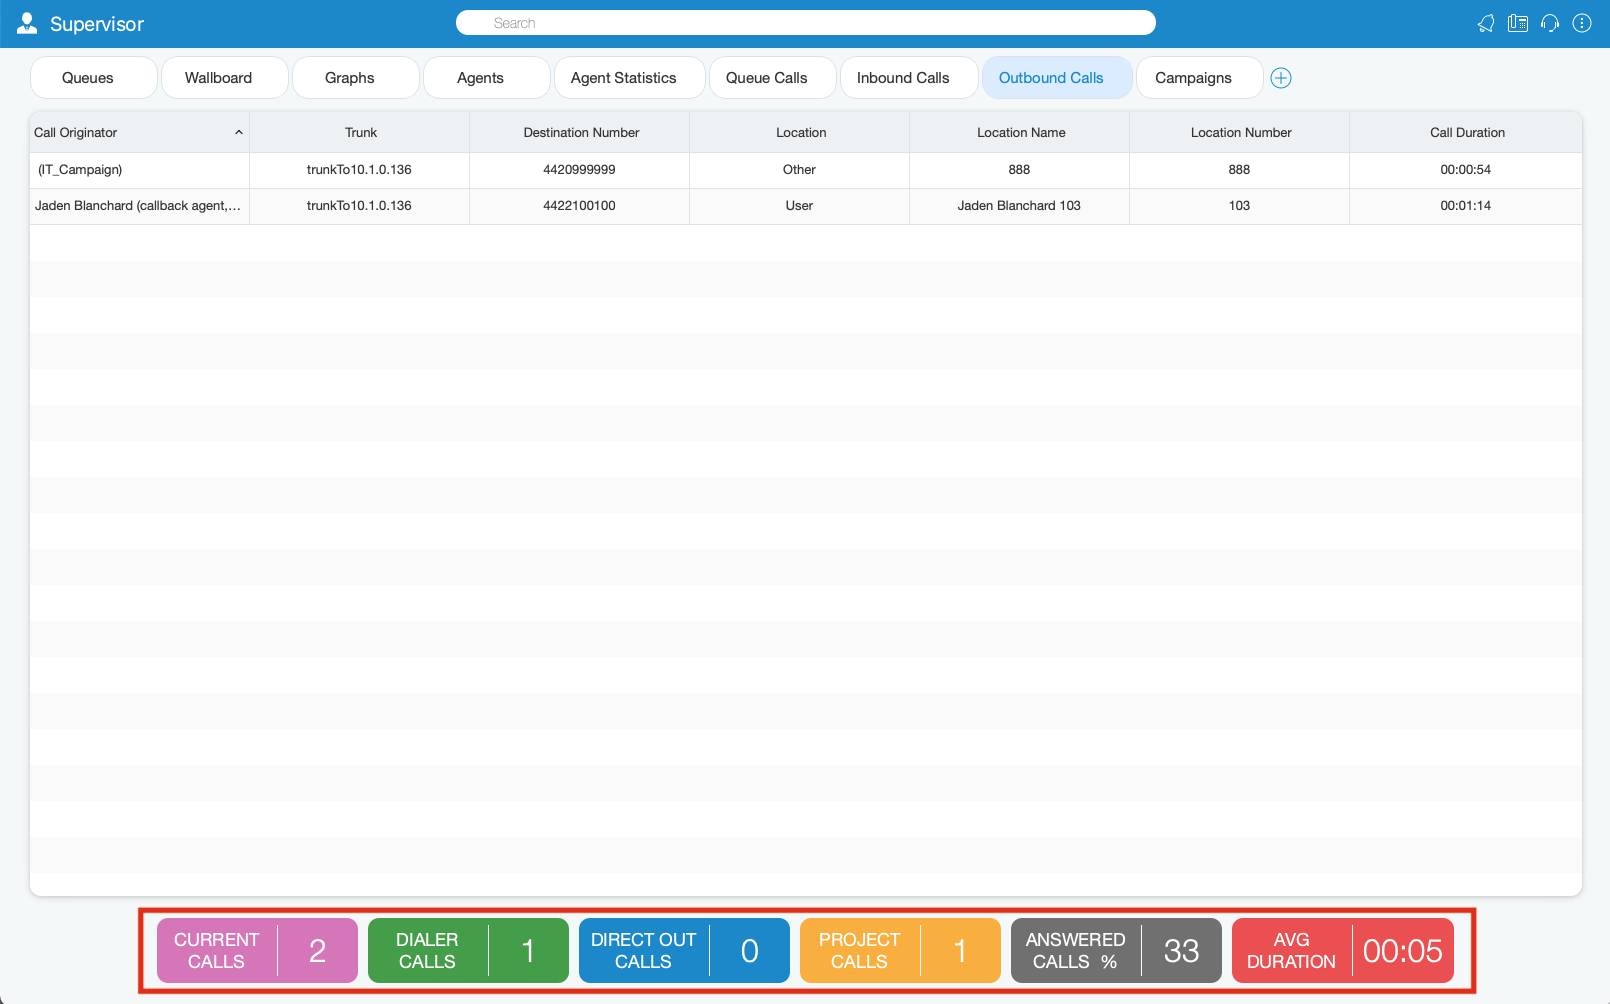
Inside the Outbound Calls module, the Supervisor can monitor information for all calls going out from the system.
For the Outbound Calls tab the following statistics are shown:
- Current Calls: Displays the number of current calls.
- Dialer Calls: Displays the number of Dialer calls.
- Direct Out Calls: Displays the number of Direct Out Calls.
- Project Calls: Displays the number of Project Calls.
- Answered Calls(%): Represents the percentage of Answered Calls during one day (starting from midnight).
- Average Duration: Represents the Average Duration of the call.
Supervisor Overview
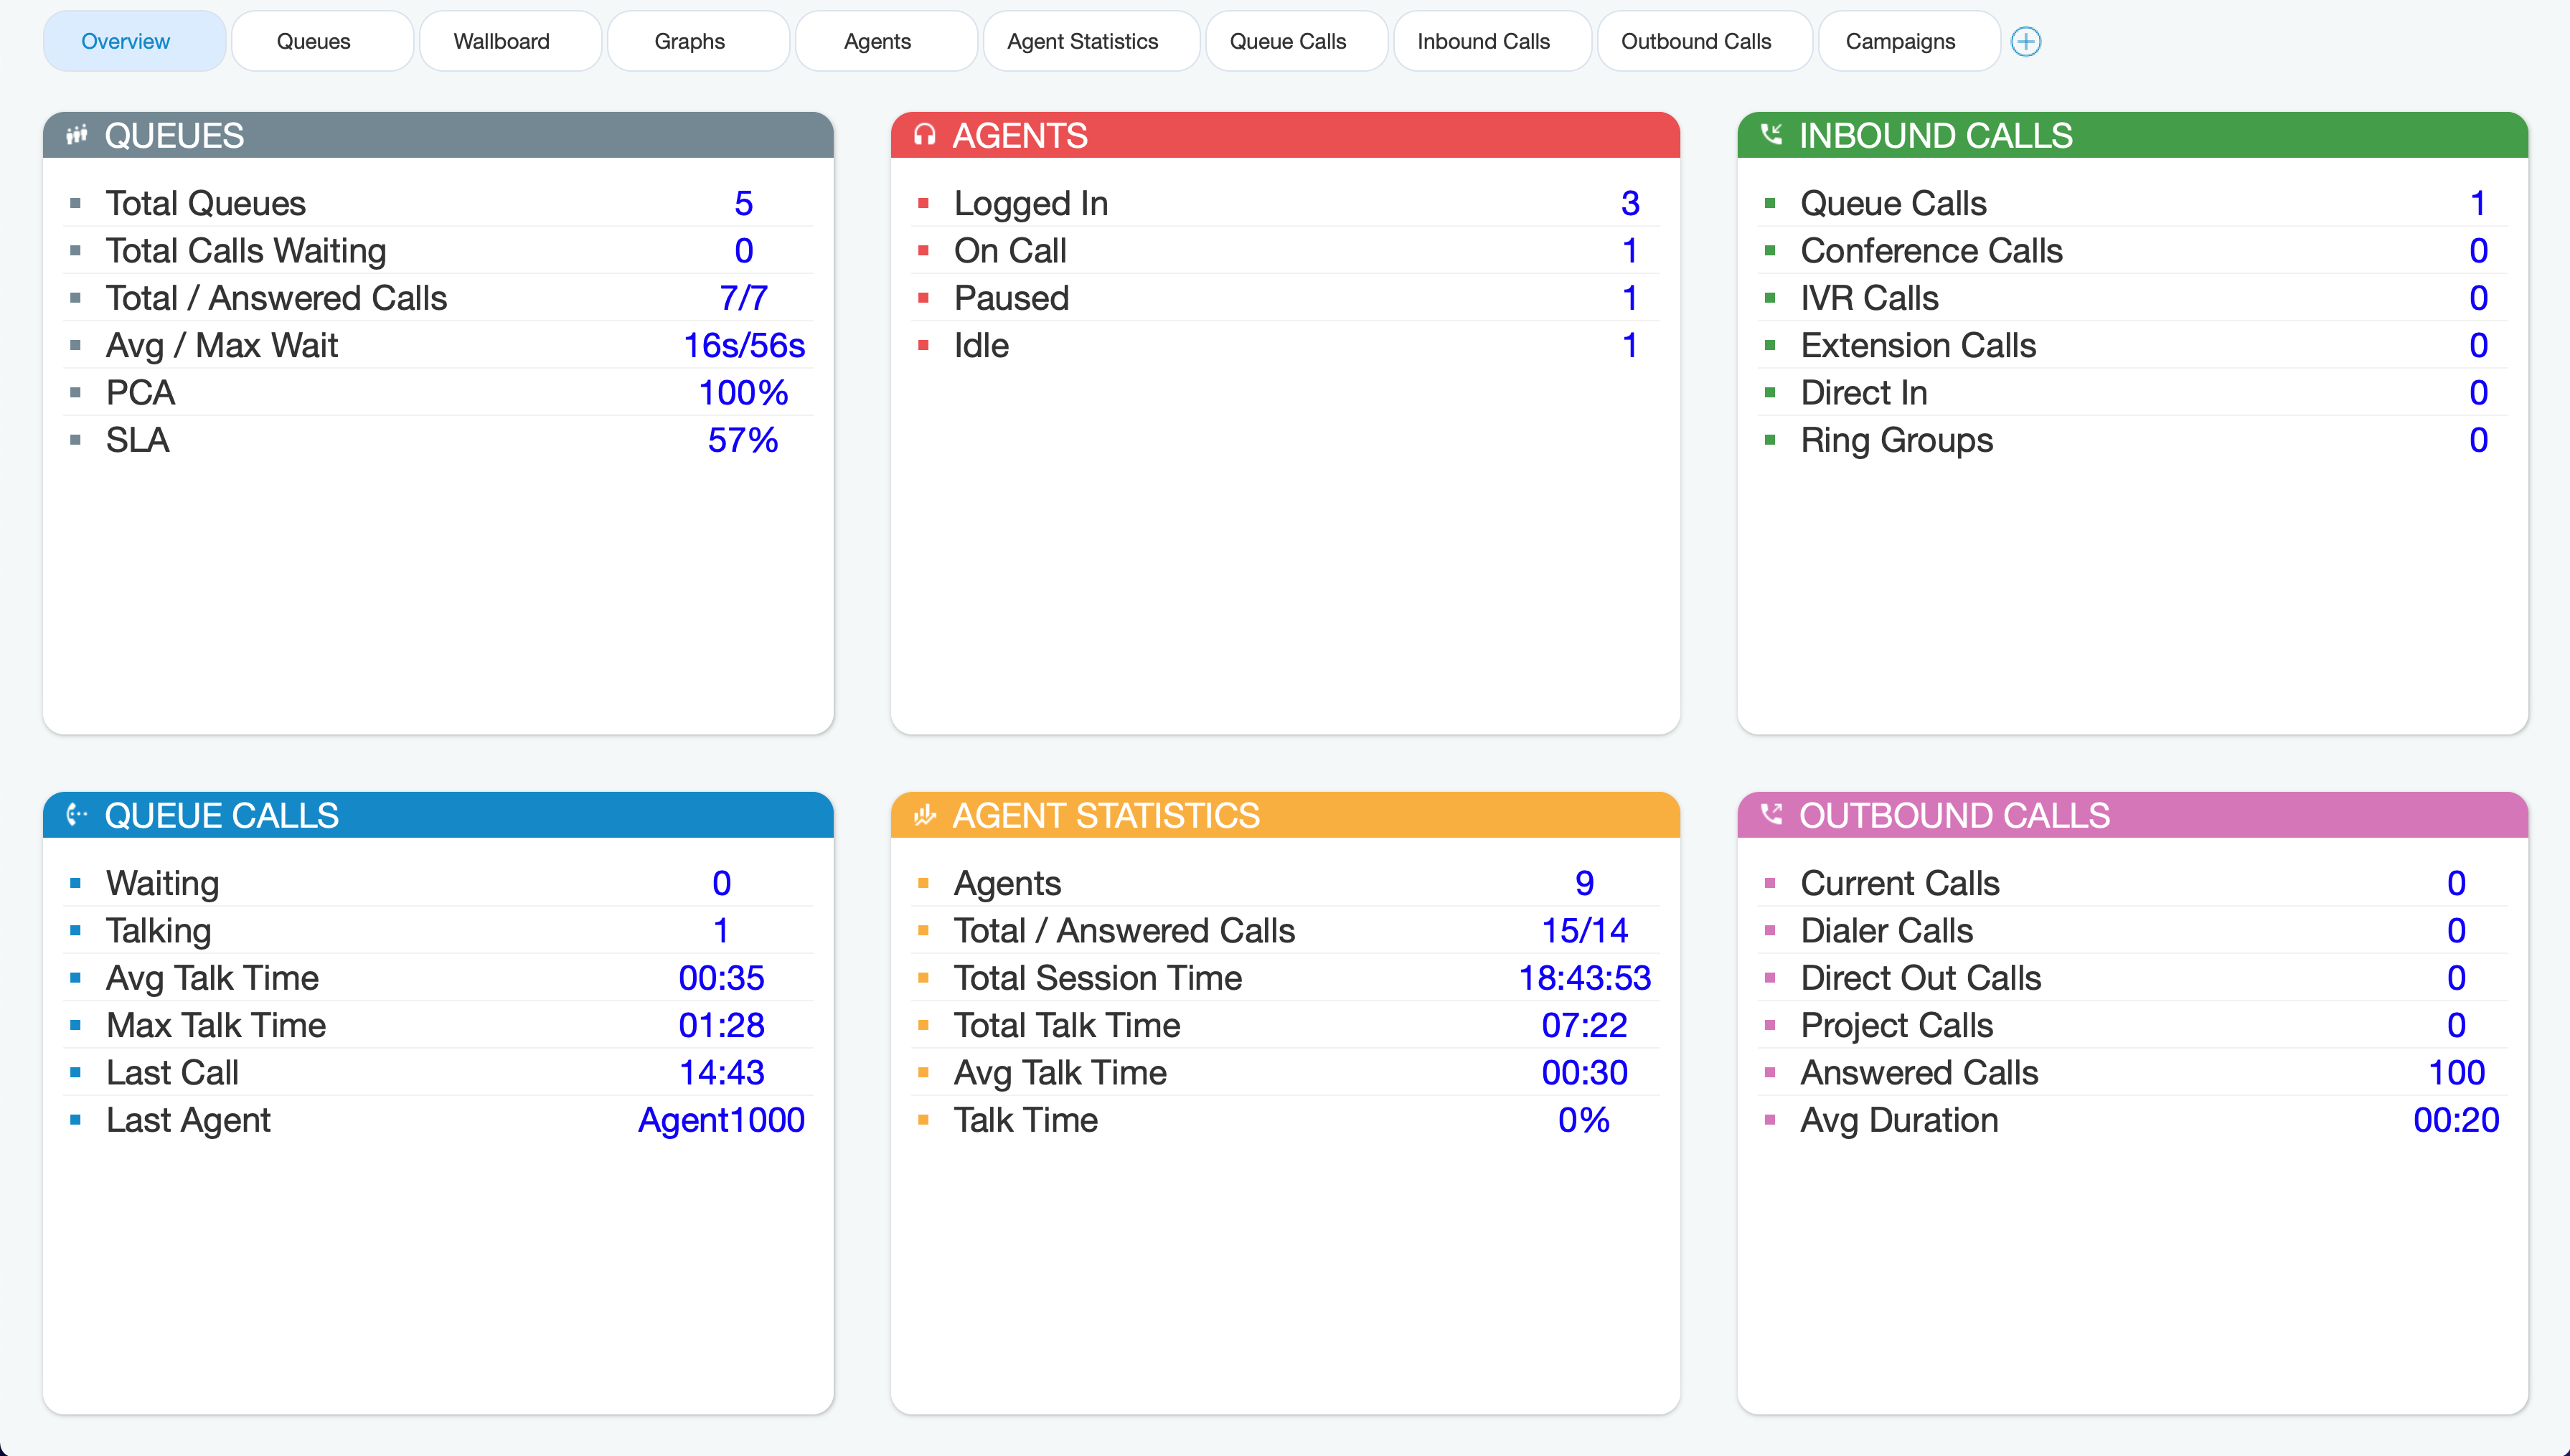
User can have an Overview of all Supervisor Agent tabs inside of Overview tab all at one place organised as dashboard where all information are easily accessible at one place.
Queues Overview
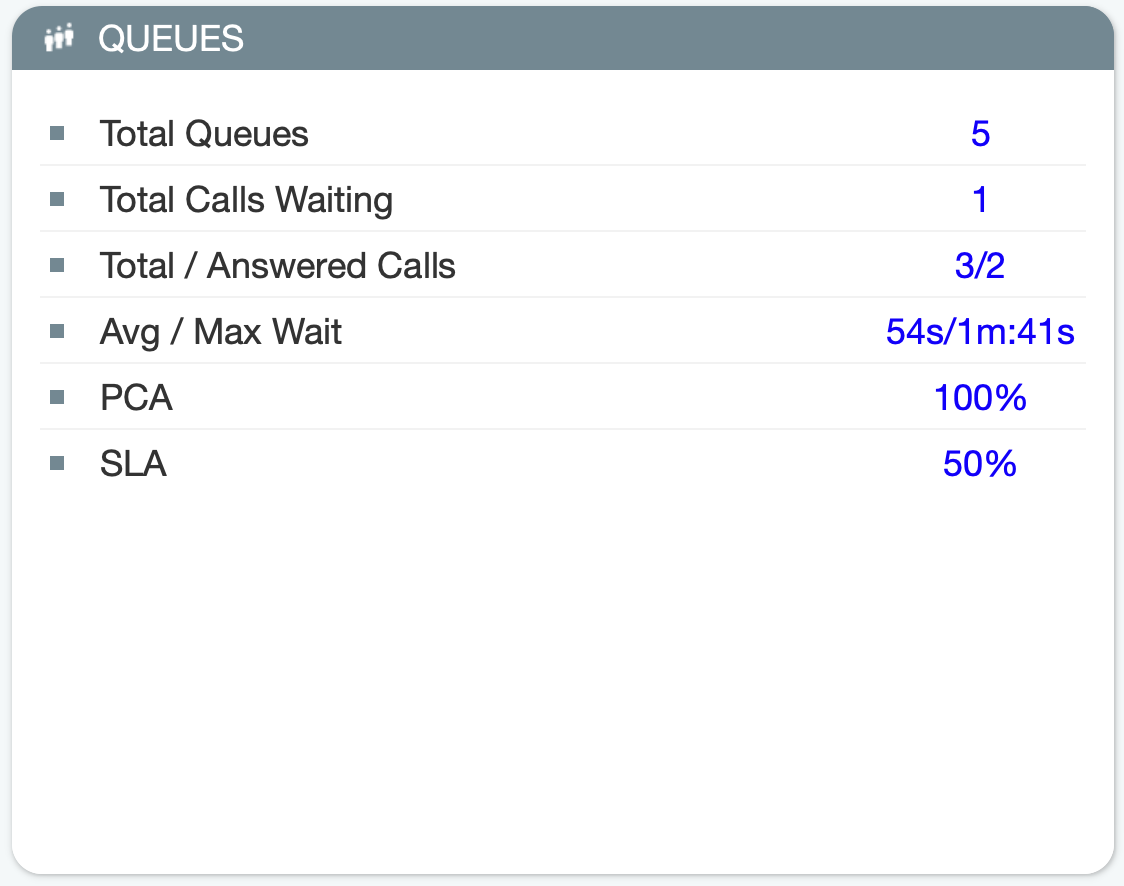
- Total Queues: Represents the total number of queues on the system.
- Total Calls Waiting: Represents the total number of calls waiting in the Queue.
- Total/Answered Calls: Represents the total number of calls that entered the system and the total number of answered calls by all Queues.
- Avg/Max Wait: Represents the average amount of time callers must wait to reach an Agent.
- PCA: Represents the percentage of calls answered in all Queues.
- SLA: Represents the percentage of calls that have been answered within a specified period of time. Service Level can be configured in the Preferences window.
Agents Overview
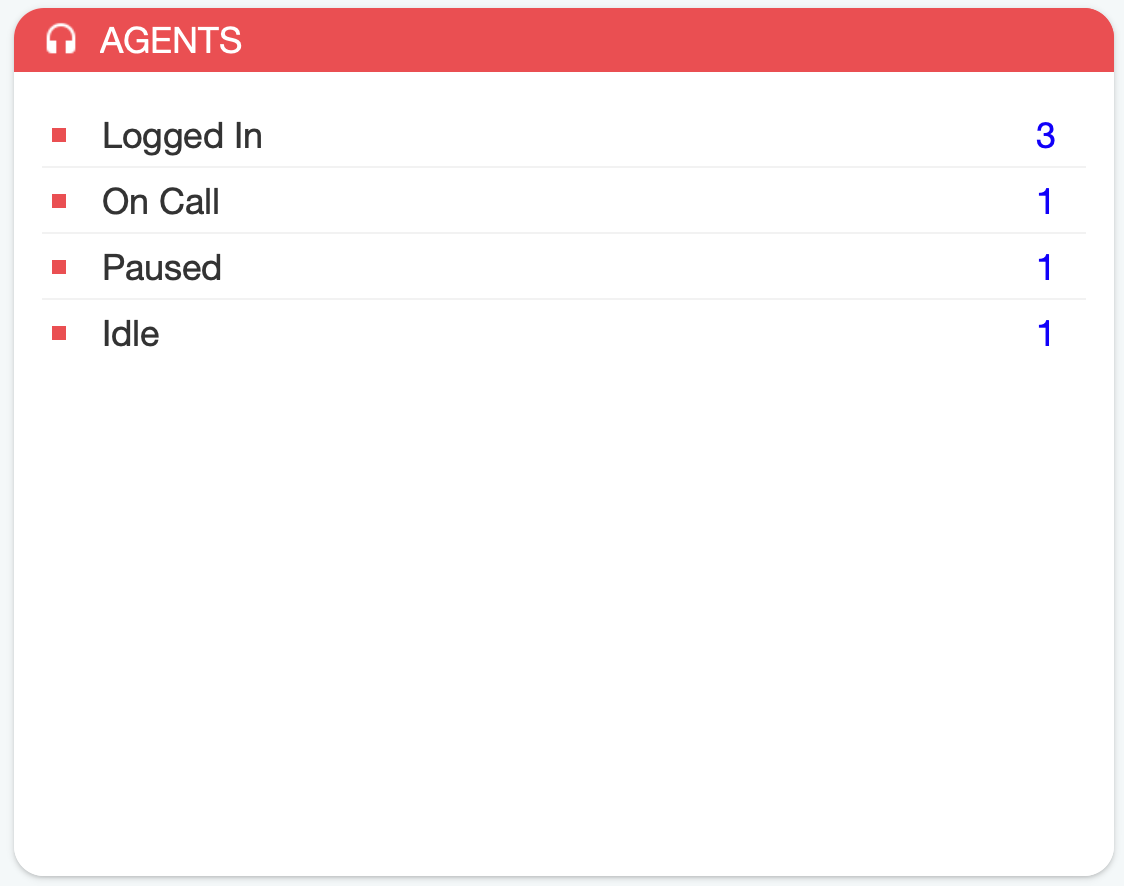
- Logged In: Represents the total number of logged-in Agents.
- On Call: Represents a number of Agents on call.
- Paused: Represents the total number of paused Agents.
- Idle: Represents the total number of idle Agents.
Inbound Calls Overview
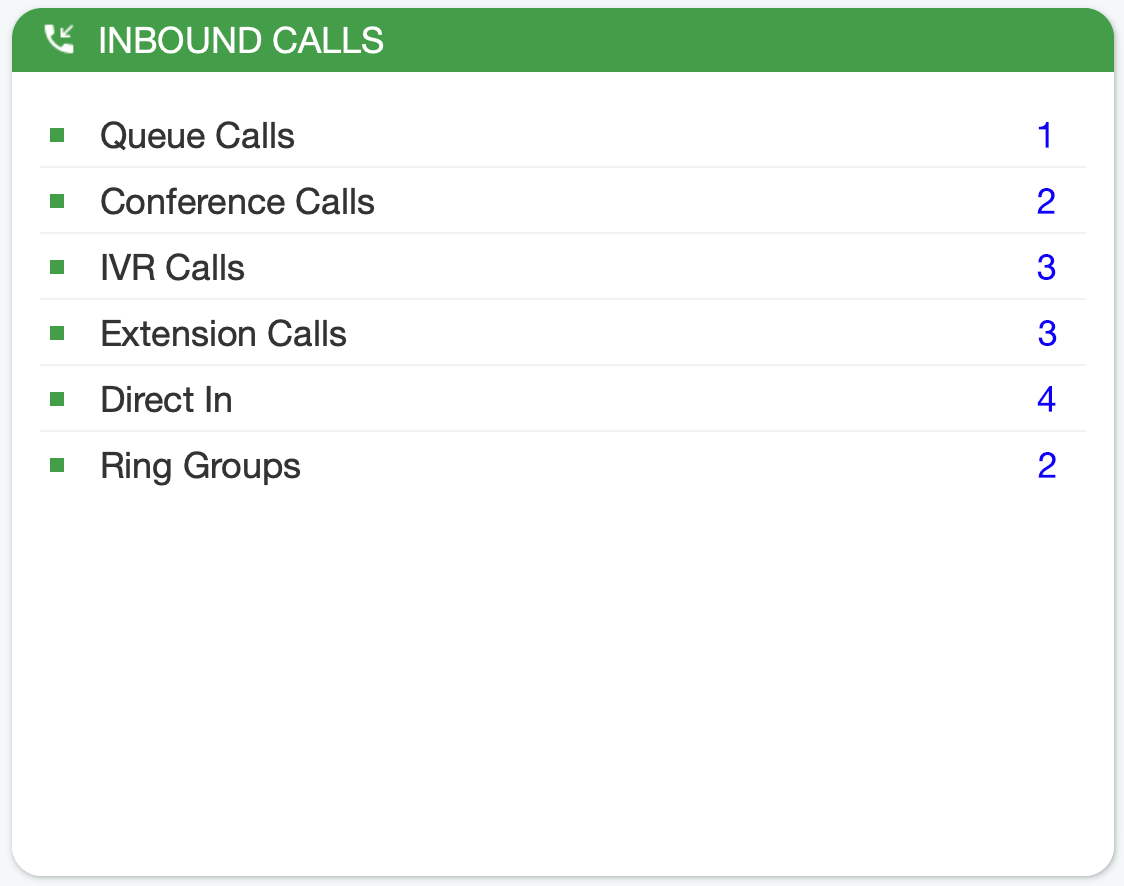
- Queue Calls: Represents the total concurrent inbound calls per Queue.
- Conference Calls: Represents the total concurrent inbound Conference Calls.
- IVR Calls: Represents the total concurrent inbound calls per IVR.
- Extension Calls: Represents the total concurrent inbound calls per Extension.
- Direct In: Represents the total concurrent inbound per Agent calls.
- Ring Groups: Represents the total concurrent inbound calls per Ring Groups.
Queue Calls Overview
- Waiting: Represents the total number of concurrent calls waiting in the Queue to be answered.
- Talking: Represents the number of Agents currently talking.
- Avg Talk Time: Represents the average talk time for all Queues.
- Max Talk Time: Represents the longest Queue call.
- Last Call: Displays the time when the last call happened.
- Last Agent: Shows the name of the Agent who has the last call.
Agent Statistics Overview
- Agents: Represents the total number of Agents on the system.
- Total/Answered Calls: Represents the total number of all answered Agent calls.
- Total Session Time: Represents the total logged in time for all agents.
- Total Talk Time: Represents the total talk time for all agents.
- Avg Talk Time: Represents the average Agent talk time.
- Talk Time: Represents the percentage of talk time for all agents.
Outbound Calls Overview
- Current Calls: Displays the number of current calls.
- Dialer Calls: Displays the number of Dialer calls.
- Direct Out Calls: Represents the total number of direct out calls.
- Project Calls: Represents the total number of concurrent per Project Code calls.
- Answered Calls: Represents the percentage of Answered Calls during one day (starting from midnight).
- Avg Duration: Represents the Average Duration of the call.
Not all information are present both on 6.6 and 6.4.x versions so here is a comparison so user can see differences and enrichment in information types introduced in 6.6 version.
Camera
- Surveillance Camera: Opens up a Surveillance Camera preview. This option will work only if you have your surveillance camera set up in the IP address in gloCOM Preferences –> Video –> Surveillance Camera.
Online self care
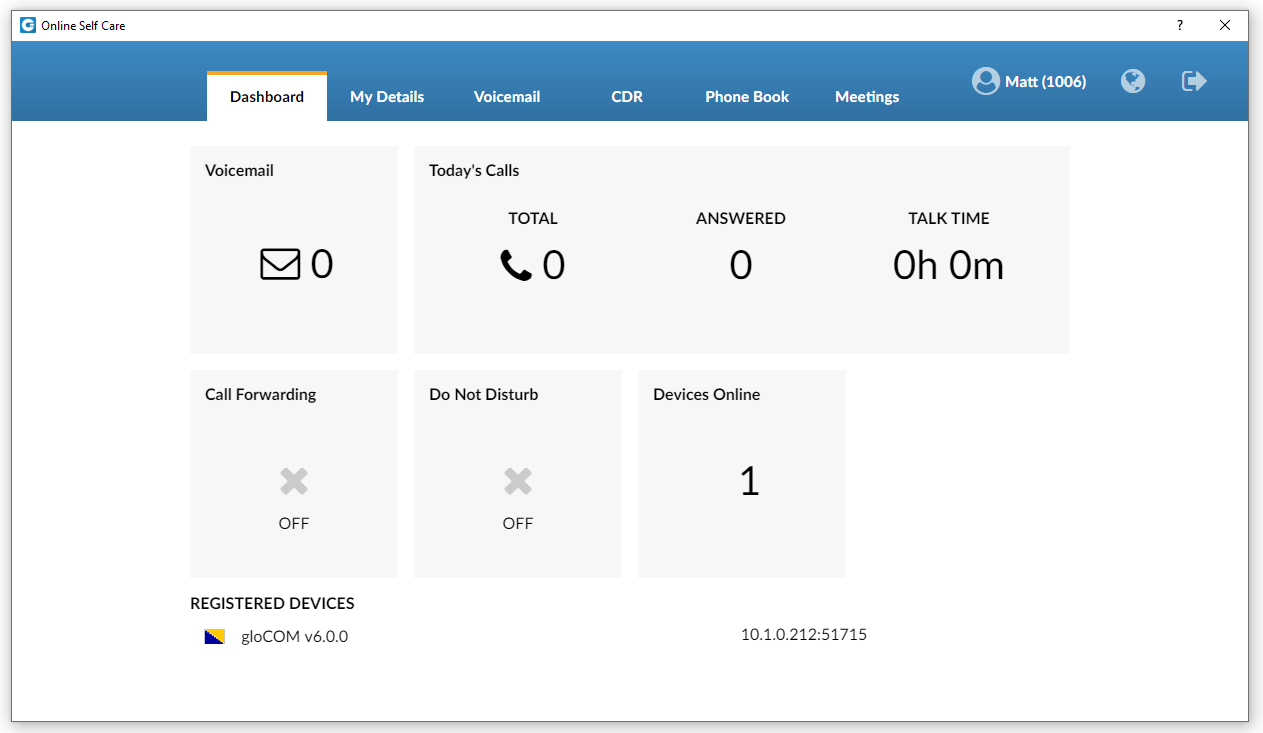
In order to login to Online Self Care, point your browser to: http://$IPADDRESS/ (For Example: http://192.168.1.1/). When you click on the gloCOM OSC icon, you are automatically directed to your OSC page.
- Email: The email address assigned to the extension (ex. The provided email address is used as a username for logging into Online Self Care (e.g. email@example.com)), ([a-z] [0-9] [@_.-]).
- Password/PIN: The user password assigned to the extension (ex. This field accepts your gloCOM password (e.g.n9h*Caq1Icr)), ([0-9]).
Options (3 dots) menu
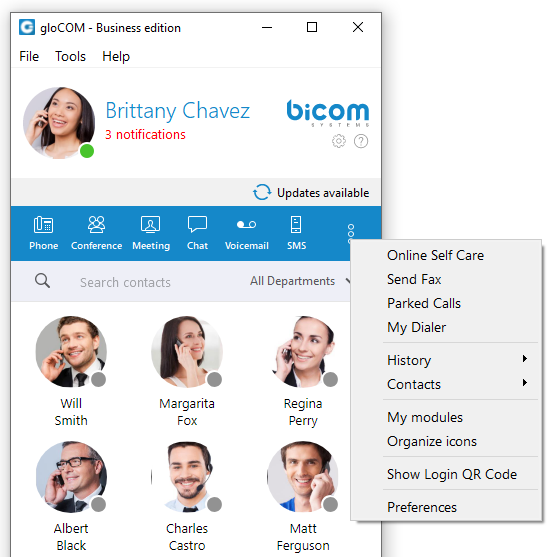
Options menu can be accessed by clicking on the 3 dots icon on the far right of the module icons. This menu shows all the remaining modules besides the 6 modules visible in the main window, as well as a few additional options explained below.
History submenu
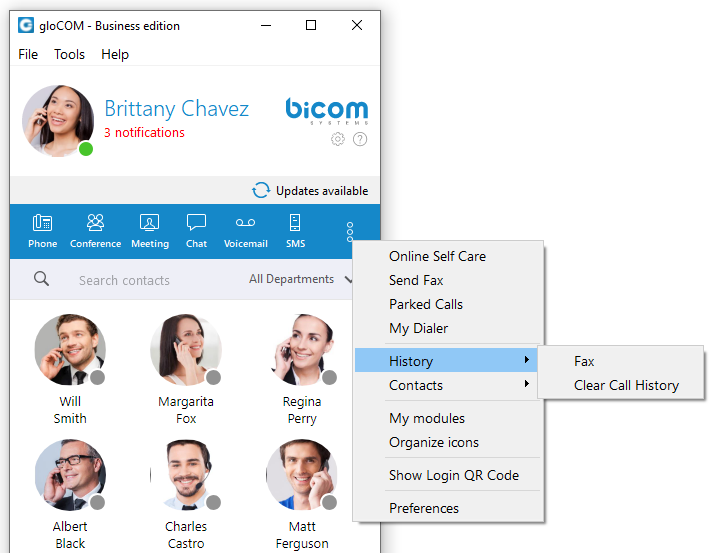
- Fax option is used for opening Fax History window which allows you to see all sent and received faxes.
- Clear Call History option is used to clear all your missed, received and dialled calls from the HISTORY tab.
Contacts submenu
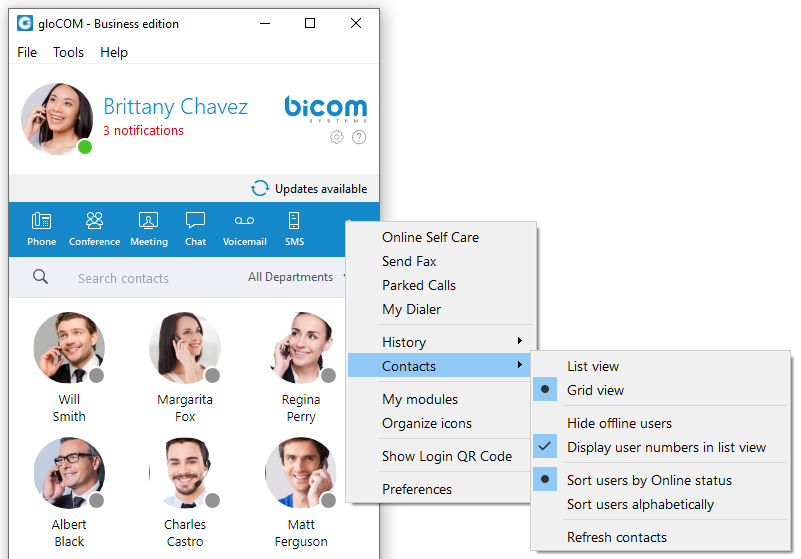
- List view option is used to layout gloCOM users in a list.
- Grid view option is used to layout gloCOM users in a grid.
- Hide offline users option is used to hide all users that were not active for 8 hours or more.
- Display user numbers in list view option is used to show a user’s extension number in the parenthesis in the list view.
- Sort users by Online status option is used to sort gloCOM users according to their most recent activity.
- Sort users alphabetically option is used to sort gloCOM users according to the alphabetical order of their names.
- Refresh contacts option is used to sync Outlook (for Microsoft Windows), Address Book (for macOS), Google, CRM, and Central Phone Book contacts.
Other options
- My modules option is used to quickly navigate to Modules section in the Preferences so you could see which modules are available to you, and to set up those modules.
- Organize icons option is used to personalize the module icons available in the main window. Note that the first icon has to be the Phone module, but you can rearrange the 5 other icons as it suits your needs.
- Show Login QR Code as a part of the gloCOM Desktop allows users easier login to their mobile app by scanning QR Code generated by the gloCOM Desktop app.
- Preferences option is used to open the Preferences window.
Central Phone Book
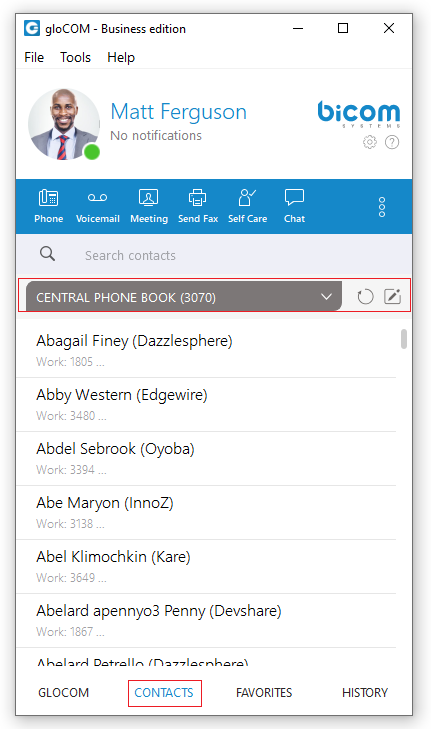
Central Phone Book is a centralized list of contacts managed by the PBXware administrator. It is shared across all gloCOM users, and synced together with the rest of your contacts (Google, CRM, etc.). To access your Central Phone Book contacts navigate to the CONTACTS tab, and select CENTRAL PHONE BOOK from the dropdown.
You can use Search contact field to find a contact by their name. Double click on a contact to initiate a phone call. Right-click on a contact to open a context menu with additional options.
Besides contacts managed by the administrator, each user can manage his own personal list of contacts. This personal list is private and visible only to you. Clicking on the  button while in the CONTACTS tab opens up the Online Self Care window and switches to Phone Book tab. Here you can see all of your Personal Phone Book contacts, add new contacts, import/export contacts, or download a CSV template. To remove a contact click on the
  button on the right side of each contact.
After you close the Online Self Care window, the application will automatically refresh contacts if necessary, so the modifications you made in the Online Self Care are now synced inside of gloCOM.
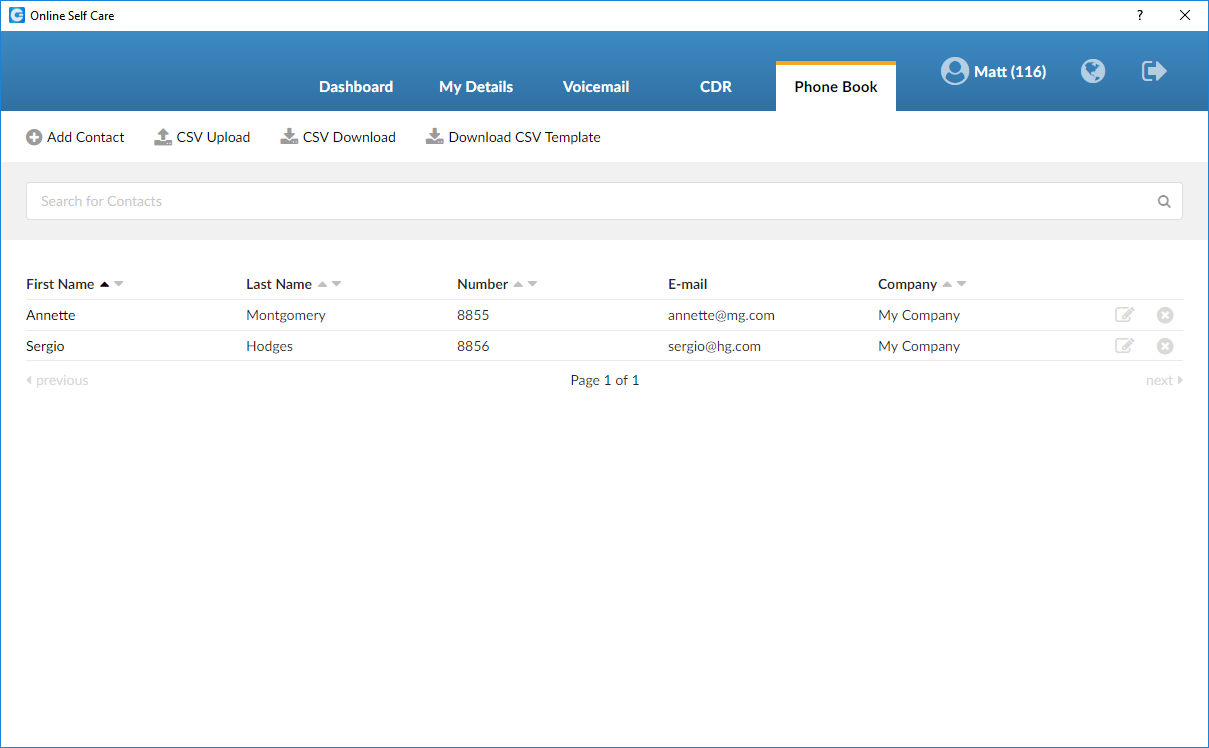
Quick List

Quick list buttons enable a quick overview of gloCOM, Contacts, Favorites, and Recent tabs.
- gloCOM: Displays a list of all gloCOM contacts.
- Contacts: Displays a list of all saved and imported contacts.
- Favorites: Displays all contacts that you marked as a favorite.
- History: Displays log of all recent missed, received, and dialed.
Menu
File Menu
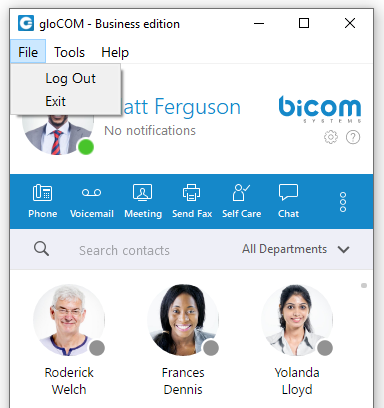
- Log Out: Click on Log Out to log out from active connection(s).
- Exit: Click on Exit button to log out from active connection(s) and close gloCOM application.
Tools Menu
Diagnostic Logs
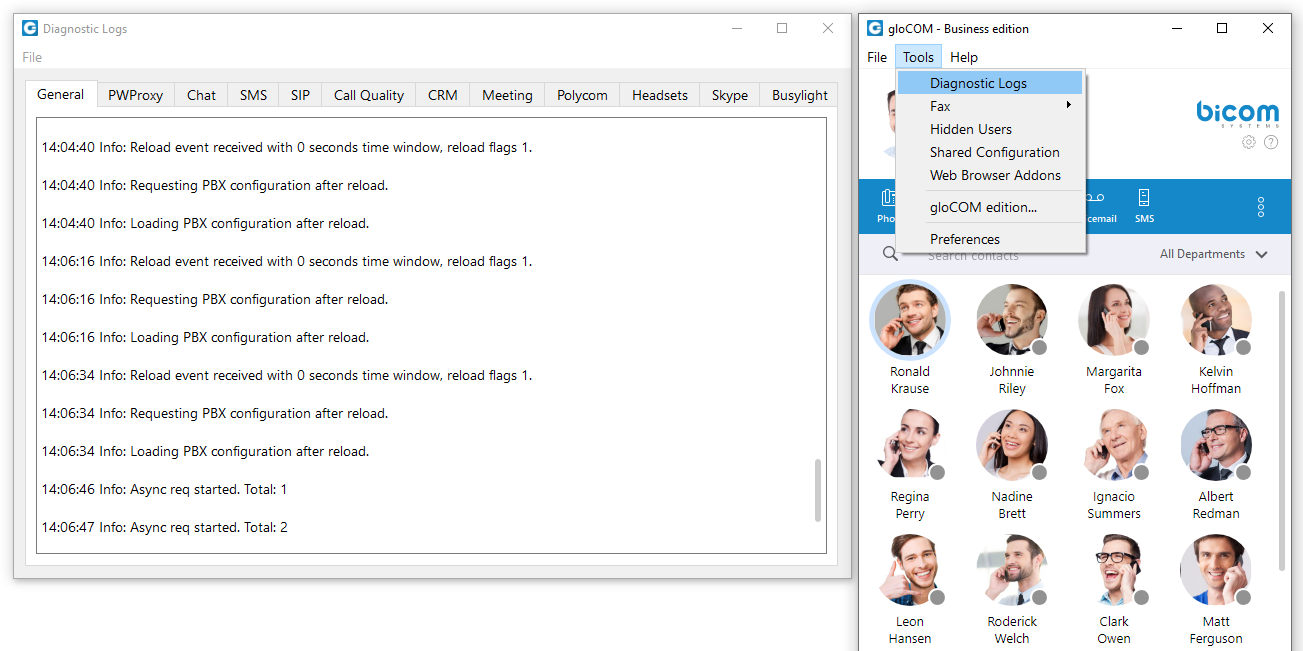
Here you can see diagnostic logs with the level of verbosity that you have set in Preferences –> General –> Diagnostic Logs.
Fax
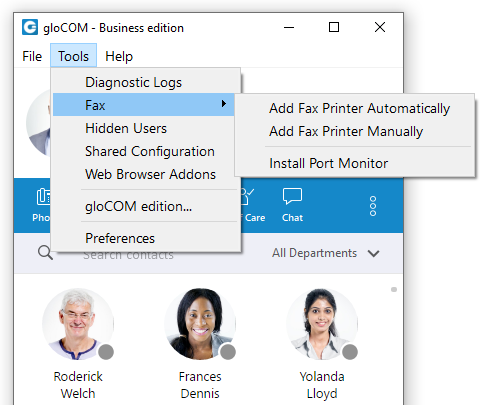
- Add Fax Printer Automatically
- Add Fax Printer Manually
- Install Port Monitor
Hidden Users
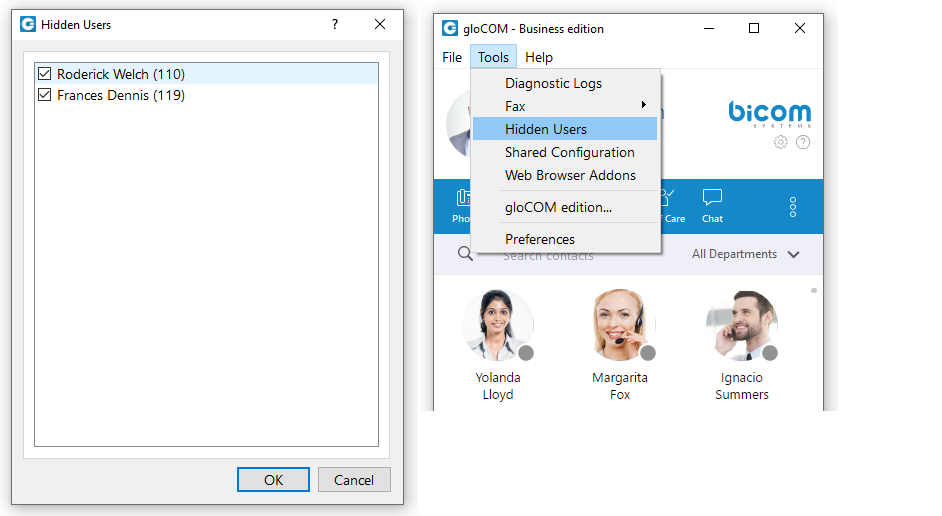
Opens a dialog showing all your hidden users. Uncheck the box next to a user’s name if you want to unhide them.
Shared configuration
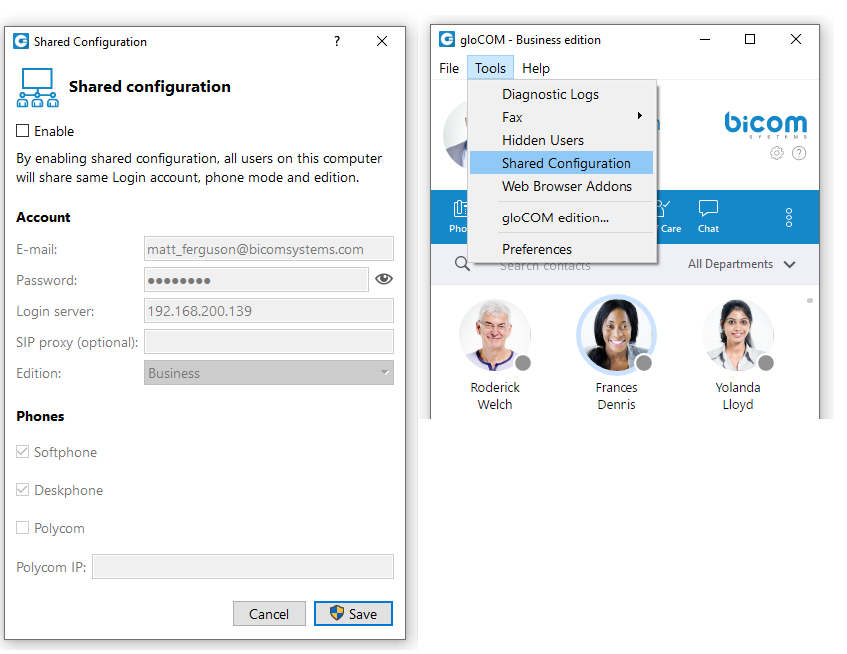
Enable:
By enabling shared configuration, all users on this computer will share the same Login account, phone mode, and edition.
Account:
- E-mail: email address is displayed in this field.
- Password: in case the option Enable is unchecked, the password will be hidden. After you check the Enable option, the option Show Password will be functional.
- Login Server: Shows IP address of server.
- SIP proxy (optional): this field is optional.
- Edition: In this option select edition for your gloCOM. The current edition is displayed, but the possibility to choose between other editions is given.
Phones:
Choose which phones you want to use:
- Softphone: choose to use Softphone.
- Deskphone: choose to use Deskphone.
- Polycom: choose to use Polycom phone.
Polycom IP:
In case the user chose Polycom, in this option user needs to provide the IP address of the Polycom phone.
Web browser add-ons…
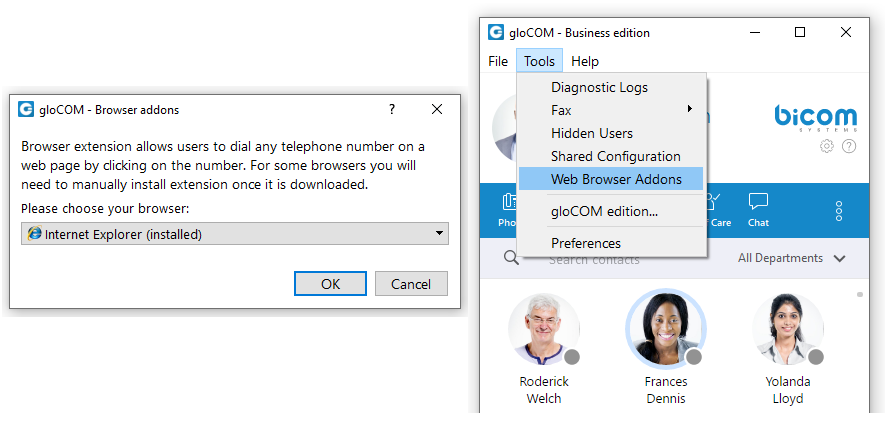
Click on Download web browser add-ons to add the browser add-on which will allow the user to select and dial a phone number directly from a web page. Supported browsers: Internet Explorer, Firefox, Safari, Edge, and Chrome.
gloCOM edition…
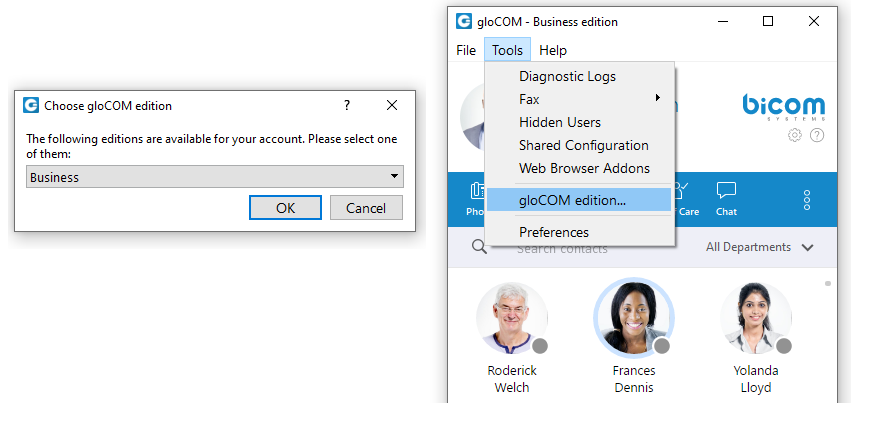
- Change the gloCOM edition.
- Changing gloCOM editions is not possible in case if Shared configuration is enabled.
Preferences
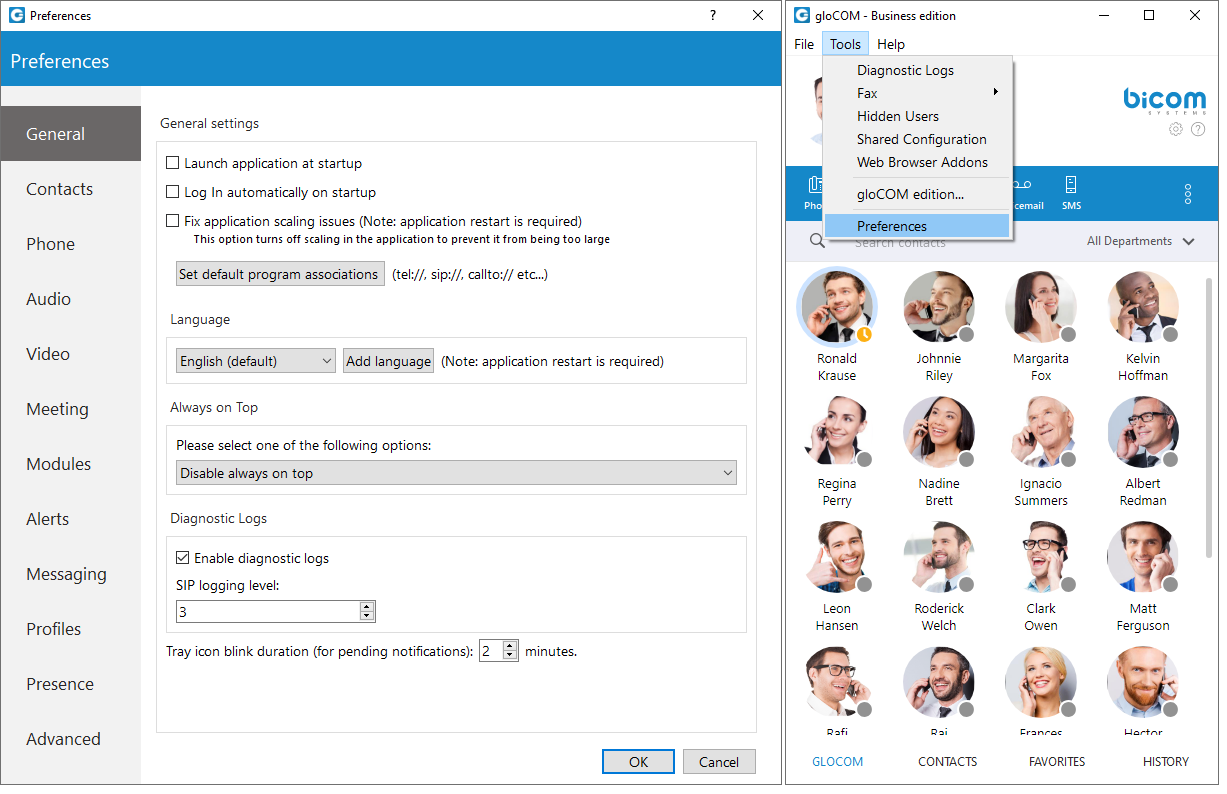
Click on Preferences to open gloCOM settings. For more about preferences, please visit the Preferences chapter.
Help
gloCOM Help
- Redirect to our official website https://www.siarum.com/
- Additional documentation and guides are available on our official website: [https://www.siarum.com/]. If you still have any questions, please feel free to contact our support department.
Check for updates
- Check online for official product updates.
- If there are updates available, the software will apply them automatically. If your software is up to date, you will receive a message as stated above.
Submit Feedback
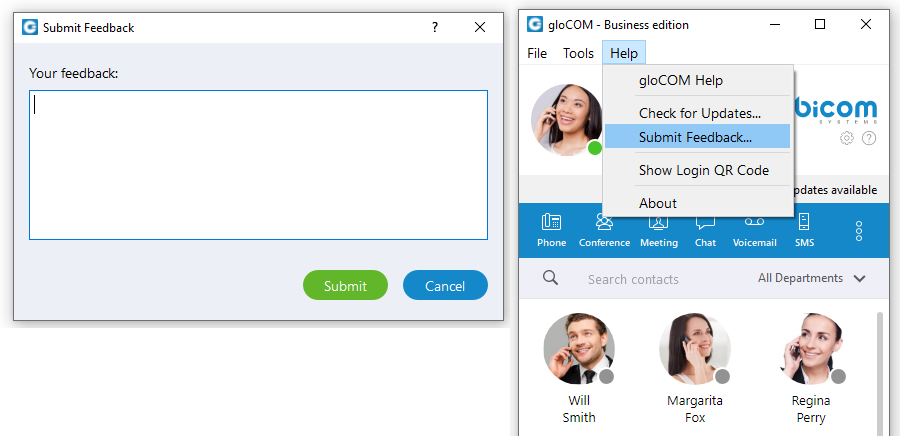
- User can now easily send feedback from the Help –> Submit Feedback…
Show Login QR Code
- Show Login QR Code as a part of the gloCOM Desktop allows users easier login to their mobile app by scanning QR Code generated by the gloCOM Desktop app.
- QR Code can be accessed from the Help menu or the three dots menu within the gloCOM Desktop main window.
- Selecting the Show Login QR Code option from one of these menus opens the QR Code window, which will stay open for 15 seconds.
About
- gloCOM About dialog contain information regarding application version, revision, PBX information, libraries, and other important information. Users can easily access/copy and paste info for support if needed.
Automatic crash report system.
- When gloCOM crashes, the user has the option to send a crash report for developers to analyze the issue and solve the problem.
Preferences
Any changes made within the Preferences of the gloCOM Desktop application will be applied only to the gloCOM Desktop application on which they were made.
General
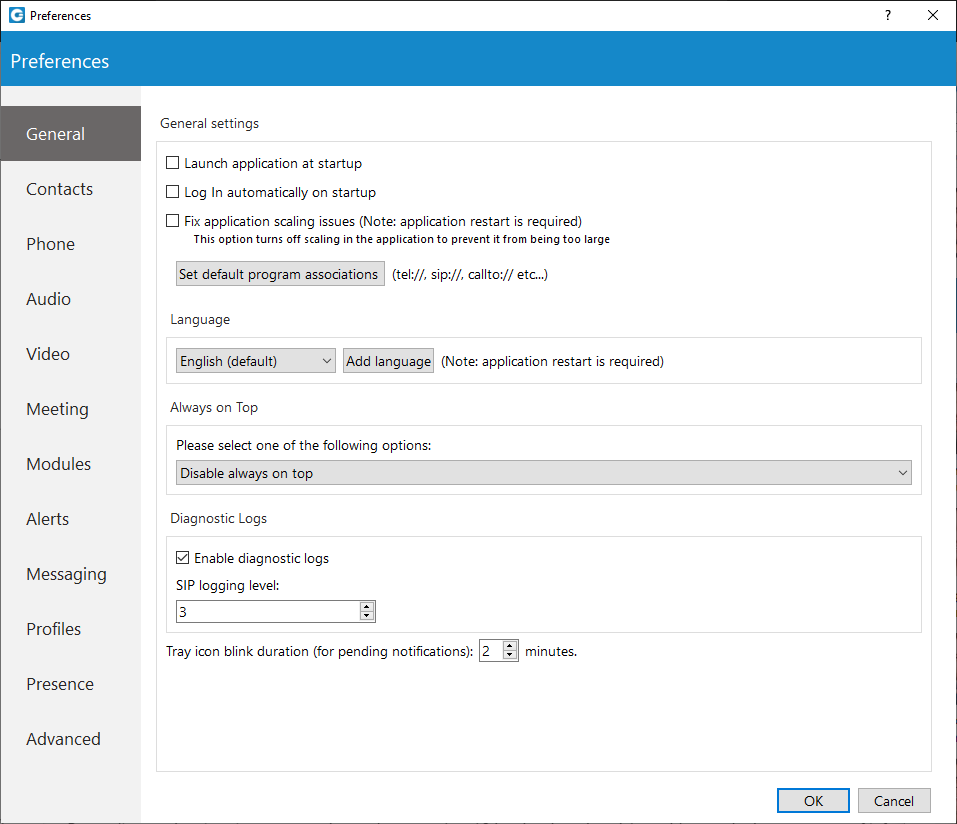
General settings
To start click on the Settings icon inside the toolbar.
Inside the General Settings section, checking the box next to Launch application at startup will start the application when your operating system starts, while checking the Log in automatically on startup will log the user in automatically every time the application is launched.
Checking the box next to Fix application scaling issues will enable operating system managed scaling, which fixes issues regarding the window being too enlarged on monitors with a scaling set up in Display Settings. This option is available only for Microsoft Windows. Note that the application has to be restarted for this option to take effect.
Depending on your Operating System, the Set default program associations button will allow you to choose which protocols the application will open by default (tel://, sip://, callto://, etc.).
From the drop-down menu, you can select the language and if you have your own language file you can add it by clicking the Add language button, then select the language that you wish to add from a list and then choose your language file. You will need to restart the application for the language change to take effect.
Please be informed that some pages in the Supervisor panel will be translated into a language set on PBXware.
Under the Always on Top section, you can choose whether you would like to have a call or call and contacts window always on top or if you wish to disable the always on top option. This feature will keep the gloCOM window on top even if another window, e.g., a web browser window is selected.
You can turn on or off diagnostic logs by checking the box next to it. When turned on, gloCOM will store all logs on your computer/machine. You can specify how much data/information you want to store by editing SIP and Jabber logging levels. By default, the SIP level is set at 3.
Depending on the situation you can choose between 1 to 10 levels where Level 1 would store the least amount of information and Level 10 would store all information.
You can set for how long the gloCOM tray icon will blink while you have notifications pending such as missed calls or unread messages.
Contacts
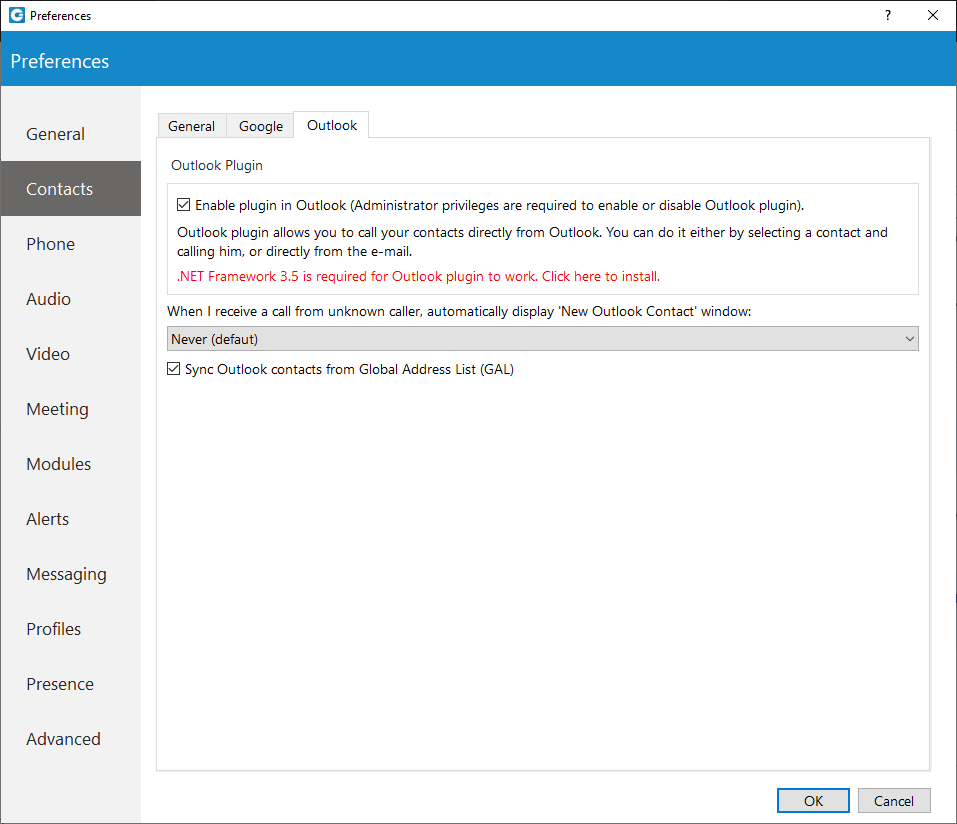
To start click on the Settings icon inside the toolbar, and navigate to the Contacts settings section. At the top, you have 3 tabs: General, Google, and Outlook.
Under the Default contact double-click action you can set what action will be initiated when the user double-clicks on a contact. If chat is selected then a chat window with contacts will open, and if a call is selected then double-clicking the contact will call the contact. If you wish to sync your contacts daily, check the box next to Sync my contacts daily. Furthermore, if the user wants to convert contact numbers to E164 format, they can check the box next to Convert contact numbers to E164 format.
Next, go to the Google tab. Here you can choose to integrate your Google account contacts with gloCOM. Simply check the Enable Google contacts integration, enter your Google email and your Google contacts will sync automatically.
Outlook Plugin with gloCOM navigate to the Outlook tab and check the Enable Plugin in Outlook Contacts box. This will enable you to initiate calls directly from Outlook.
Users can control if Outlook’s add new contact windows shows up on Call started, answered or finished.
gloCOM automatically syncs your Outlook contacts. (When I receive a call from an unknown caller, automatically displays the new Outlook contact window) option, when turned on, it will open a new Outlook contact form every time you receive a call on gloCOM from a number that is not on your contacts list.
To disable syncing Outlook contact from the Global Address List, please navigate to Preferences -> Contacts -> Outlook and uncheck the Sync Outlook contacts from the Global Address List (GAL) option. By default, it is enabled.
Phone
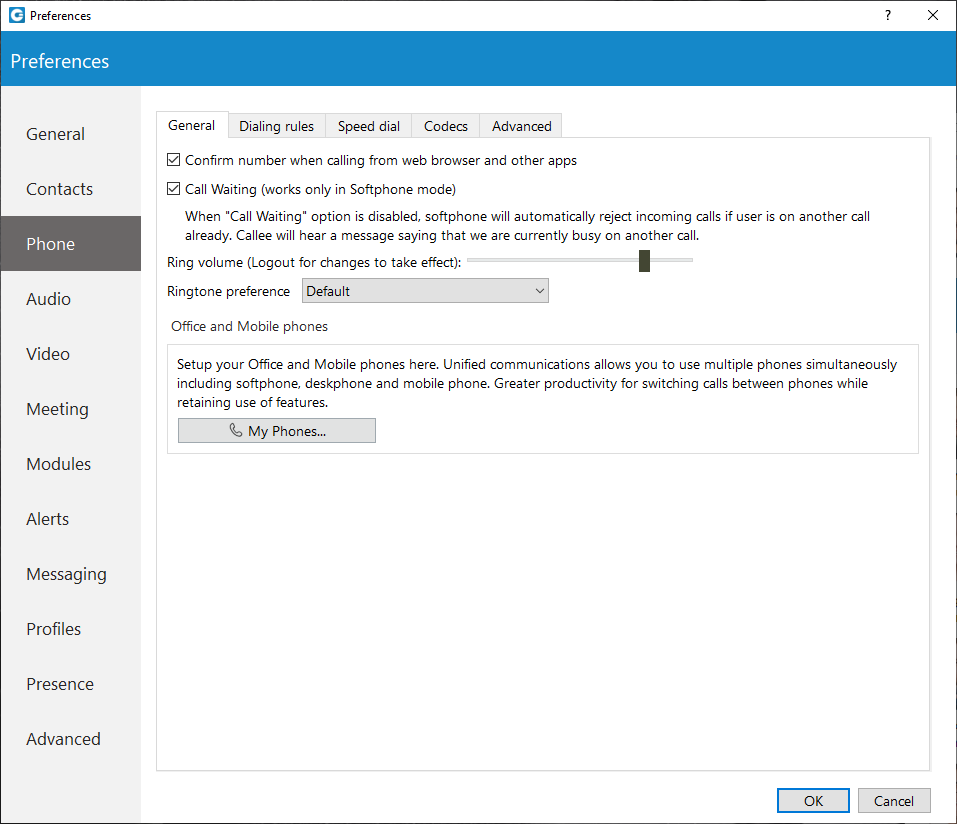
To start click on the Settings icon inside the toolbar, and navigate to the Phone Settings section.
When turned on, Confirm the Number when calling from a web browser and other apps will ask you to confirm the number and will also give you an option to make corrections if necessary. When the Call Waiting option is disabled, the softphone will automatically reject incoming calls if the user is on another call already.
Callee will hear a message saying that the user is currently busy on another call. Use the ring Volume slider to adjust the ring volume.
You will need to restart the application for changes to take effect. My phones… button allows you setup your deskphone, softphone, and add a mobile number.
Inside the Dialing rules tab you can set rules for outbound calls. e.g., If you enter 061 under text to replace and under replacement text you enter 0038761, gloCOM will replace every phone number that has 061 with 0038761. However, sometimes you would only want to replace numbers that begin with 061, and not the ones ending in 061…
For a more precise replacement, you can use regular expressions. For example, if you enter 061{6}/d under text replacement, and 0038761/1 under replacement text and you turn regular expressions on, this will replace 061 digits of every number that begins with 061 and has 6 more digits with 0038761 followed by those 6 digits. E.g. 061-123-456 would be replaced with 0038761-123-456.
Enabling the Detect and format USA and UK phone numbers for outbound calls option will auto-detect and format your local USA & UK numbers so that they can go through the system. This may cause problems in some countries so be careful when using this feature.
Inside the Speed Dial tab click on the Add button and from a drop-down menu and choose a number from 1 to 99, and in the field next to it assign the phone number that you want to Speed dial. For example, dialing #7 will dial 061-123-456 To edit an existing speed dial number select the number from the list and click the Edit button or press Remove to remove the number.
Inside the Codecs tab, select the codecs that you wish to use. Some codecs offer higher quality but take more bandwidth, some offer better compression so they are less heavy on network resources, depending on your needs you might want to turn some codecs on or off, and if you have more than one codec you can sort them by priority using the up and down arrows on the right.
Inside the Advanced tab, you can choose to turn the encryption on or off for voice and video calls, or you can select Use the settings from server to use the settings that your admin has set.
Under the Register field, you can set how often gloCOM will send the SIP register to the SIP Server or VoIP provider to let it know where it is. It is recommended to leave the local sip port empty to allow SIP Protocol to use any port available. However, if you wish to restrict SIP (outgoing) traffic to a specific port you can enter the port number here.
Check the Send keep alives option to send SIP keep-alive to the server.
Check the Enable QoS to enable the Quality of Service feature. QoS is a set of technologies that work on a network to guarantee its ability to dependably run high-priority applications and traffic under limited network capacity (must be supported by the user network).
The Ringtone preference option allows the user to select between Default, Silent, and Custom ringtone mode for incoming calls.
A Default mode will generate a standard ringtone of gloCOM upon receiving a call. As the name suggests, gloCOM will remain silent upon receiving a call by selecting the ”Silent” mode.
Additionally, suppose the user decides to use the Custom ringtone mode. After selecting it, the file picker window will be displayed, allowing the user to select the desired audio file as a ringtone for incoming calls. The selected audio file must be in mp3 or wav format. However, thanks to the implemented filter, a file picker window will not display audio files that are not in the formats specified above. This way, the application ensures that the user will not be able to select an audio file with an unsupported format.
Audio
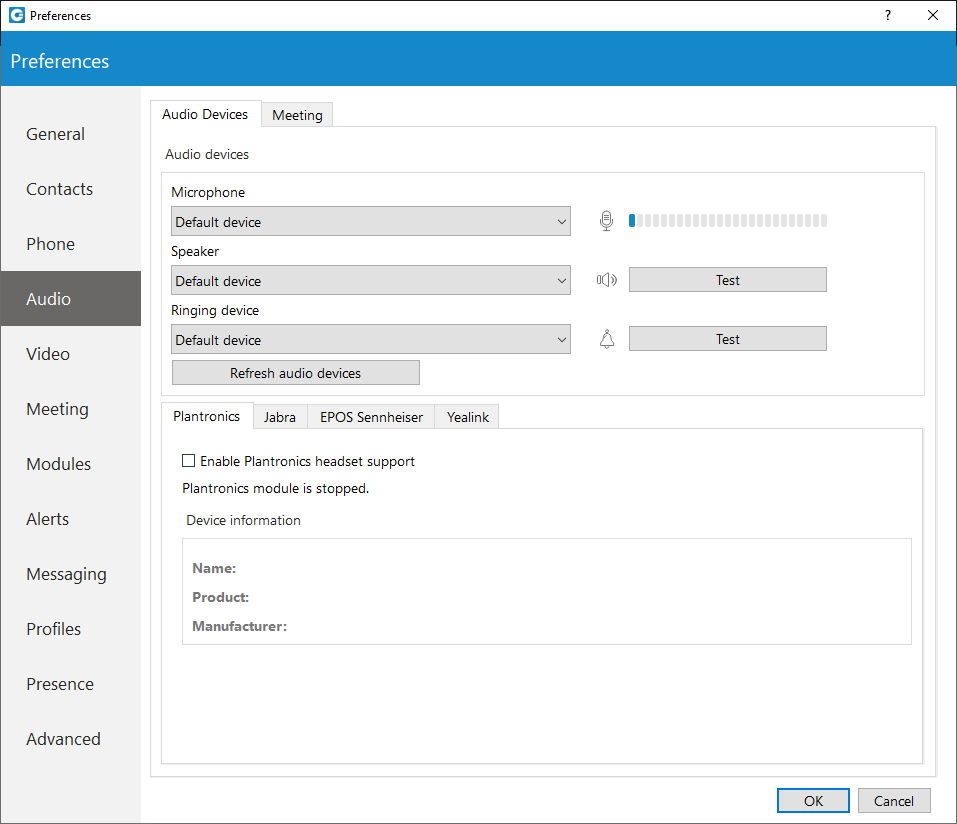
You can set input, output, and ringtone devices, or test your devices. To test your microphone, say something on it and watch the changes in the microphone progress bar. For testing your speaker or ringing device, press the Test button to hear a sound on the selected device.
Check the Enable Plantronics headset support option in order to integrate a Plantronics headset with gloCOM. This will enable the use of Plantronics headset buttons such as answer, hold, transfer…
The same applies for Jabra and EPOS Sennheiser headsets. Turn on the Enable Jabra headset support option, in order to integrate a Jabra headset with gloCOM. Turn on the Enable EPOS Sennheiser headset support option, in order to integrate an EPOS Sennheiser headset with gloCOM.
Check the Enable Yealink headset integration option to integrate a Yealink headset with gloCOM. It will enable Yealink headset buttons such as answer, hold, transfer, etc…
Plantronics Runtime (Only for Windows)

gloCOM deploys Plantronics Runtime, which is required for the Plantronics module to work properly. Runtime is installed automatically during the setup wizard.
If Runtime is not installed properly for whatever reason, gloCOM will detect it on startup and automatically alert the user about it. It will redirect the user to the Preferences –> Audio dialog where gloCOM allows the user to install Runtime manually. To do that, check the Enable Plantronics headset support option, and click on the Install Plantronics Runtime.
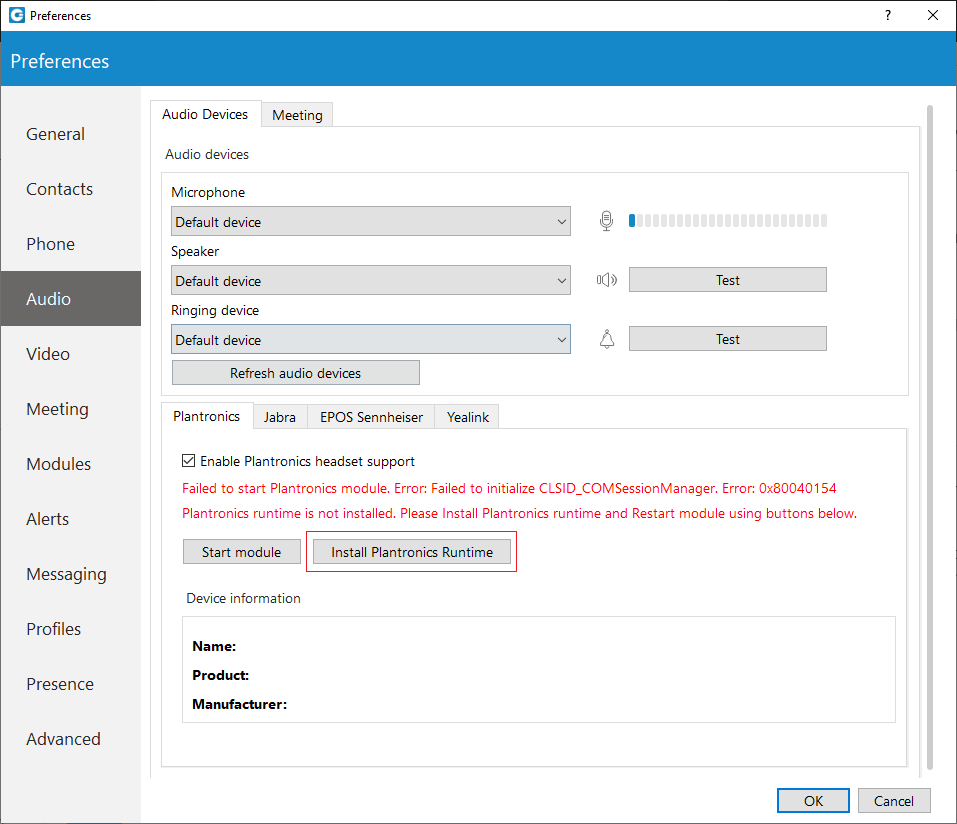
MSI installer cannot install Plantronics Runtime automatically because Windows OS does not allow to run two MSI installers at the same time. In case you are using the MIS installer to install gloCOM, you should start gloCOM manually and install Plantronics Runtime from the Audio dialog. To do that, please navigate to Preferences –> Audio. Check the Enable Plantronics headset support button, and click on the Install Plantronics Runtime, or go to the gloCOM installation folder → Plantronics subfolder, and run all three MSI installers for Plantronics Runtime.
Video
Video Settings section is divided into 5 tabs. Inside the Quality tab, you can set the resolution of the video call. You should adjust these settings based on the quality of your network connection.
For example: If your bandwidth is low or you are experiencing temporary network issues, you can set the video quality to Low resolution to get better video call performance. Inside the Codecs tab, you can enable or disable video codecs, and if you have more than one codec you can sort them by priority using the up and down arrows on the right.
Under Advanced codecs settings, you can adjust how much compression the codecs will use. The higher the bitrate the less compression codecs will use, which directly relates to better video quality but also larger files. Use default values for codecs if you are not familiar with video codecs.
Inside the Devices tab, you can select the video capture device. e.g., if you have a laptop with an integrated web camera, and you connect another web camera to your laptop, you can specify which camera gloCOM will use for video the call from a drop-down menu. Next, inside the surveillance camera tab, you can enable or disable the surveillance camera and choose if the surveillance camera video should always stay on top even if another window is selected. Under the URL field, enter the URL of your IP surveillance camera stream.
Please be aware that only MJEPG stream over HTTP is supported at the moment.
Meeting
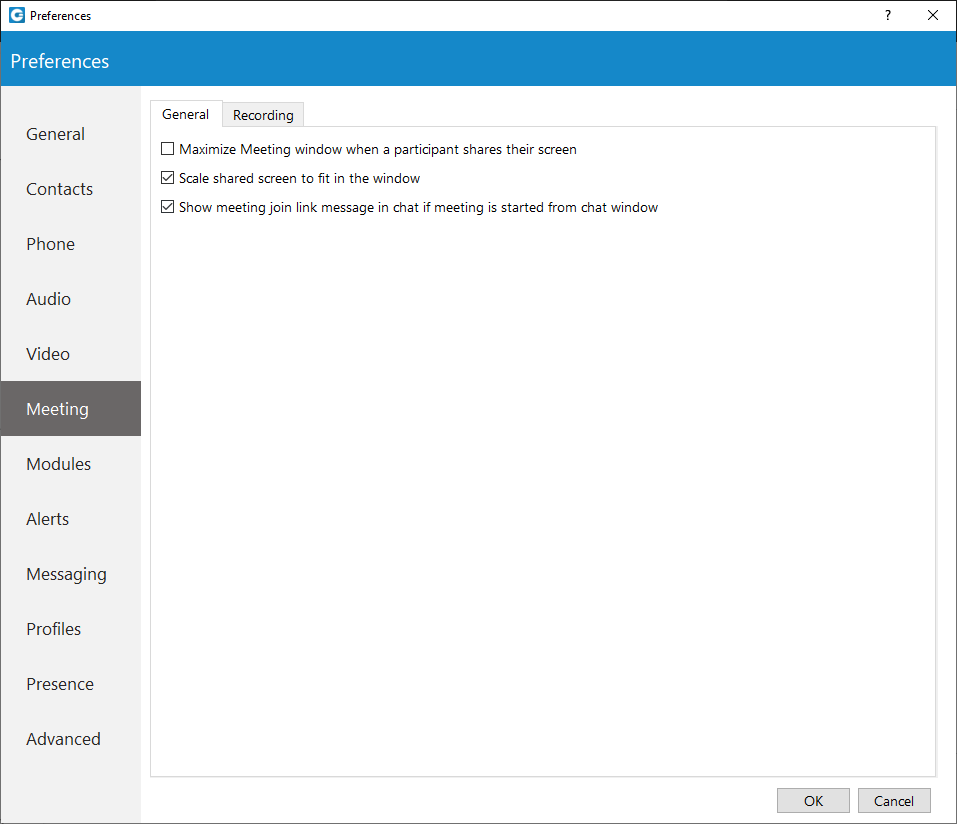
In the Meeting menu, you can set how will your meeting window look when someone shares the screen.
You have two options:
- Maximize Meeting window when a participant shares their screen.
- Scale shared screen to fit in the window
Modules
gloCOM is compatible with several Customer Relationship Management solutions, such as Salesforce, SugarCRM, Zoho, Zendesk, MS Dynamics, and Bullhorn.
CRM
To enable CRM integration with gloCOM, click on the Settings icon, navigate to the CRM section and check the box next to Enable CRM integration.
Under the Popup Options the users can set:
- When a page with customer information should open (This can be set to open when answering the call, or immediately when the phone starts ringing before even answering, and not to open at all for Incoming calls).
- For Outbound calls, the users can set it to pop up when the call is initiated or when the call is answered, and same as with Incoming calls this can be disabled by selecting the option Never.
Under the Authentication, users can enter account details for CRM. Each CRM is different and requires from the user to enter a security token, password, or a combination of both.
Under the Logging options, users can specify which information they want to log. Also, users can choose to log information that their admin has set by selecting the Use the settings from the server option.
Call Popup
Call Popup module can be used to push the call details to the browser or third-party software.
It is possible to do a Call popup based on the URL, and this can be set per Queue and ERG. This can be done only if the option “Enable Queue/ERG URL Popup. If enabled, application will use URL configured on server.” is checked. (Preferences –> Modules –> Call Popup).
Users can set the Call popup to open when the call has started/answered or when the call has finished. For each setting, the user can specify to enable it for Inbound and/or Outbound calls, and turn it on Silent mode. In the Silent mode, a URL request will silently be sent to the server, meaning it will not open a web browser.
Call popup is macro-based. In the URL field the following macros can be used: callerid, callerid name, extension, duration, call id, did, direction, queue number, queue name, agent number and agent name.
(e.g., In Call started URL field the user may enter yourcrm.com/calls?id=�llerid% and check the Inbound calls below. Now, whenever the user receives a call from a customer Call popup will open a web browser and will write the customer’s phone number.).
All this information can be sent silently to the user’s CRM server and create reports such as how many inbound calls the user has received, how many outbound calls the user has made, average call duration, etc.
Specify EXE file, APP in MacOS, or URL that will be executed in Call Popup module.
Alerts
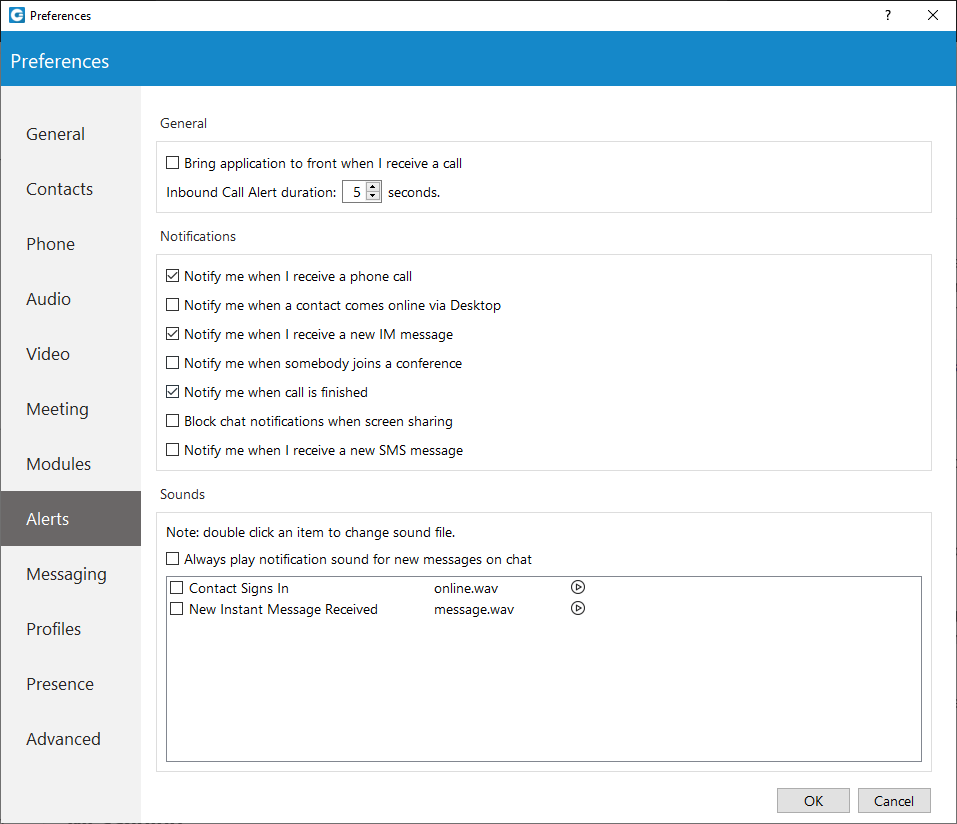
To start click on the Settings icon inside the toolbar and navigate to the Alerts section. Check the bring application to front when I receive a call option to bring gloCOM to the front whenever someone calls you. You might not want to have your work interrupted by call alerts, in that case, you can uncheck this option. You will still be able to receive the calls, however, you will have to navigate to the application yourself.
If you want the Agent panel to pop up when you receive a call please navigate to the Alerts section in Preferences and check the option Bring application to front when I receive a call.
Inbound Call Alert duration can be set between 5 and 15 seconds. This option controls the duration of a small notification window that pops up in a lower right corner of the screen whenever you receive a call.
To turn off the inbound call alert completely, simply uncheck the Notify me when I receive a phone call option. You can also set to receive notifications when a contact comes online, when you receive a new message, when somebody joins a conference, and or when a call is finished. Only the duration of the call alert notification can be adjusted, all other notifications have a fixed duration of 5 seconds.
Under the Sounds section, you can choose to turn sound notifications on or off for contact sign-in and or for new chat messages. If you select Always play notification sound for new messages, you will hear a sound notification for every message received, even if you have a chat window currently open. For this feature to work the New instant message received option has to be selected as well, otherwise, you will hear no sound.
To preview a sound, click on the play button on the right, and if you wish to change a sound, double-click an item and select the sound file you wish to use. Please note that only .wav files are supported.
Messaging
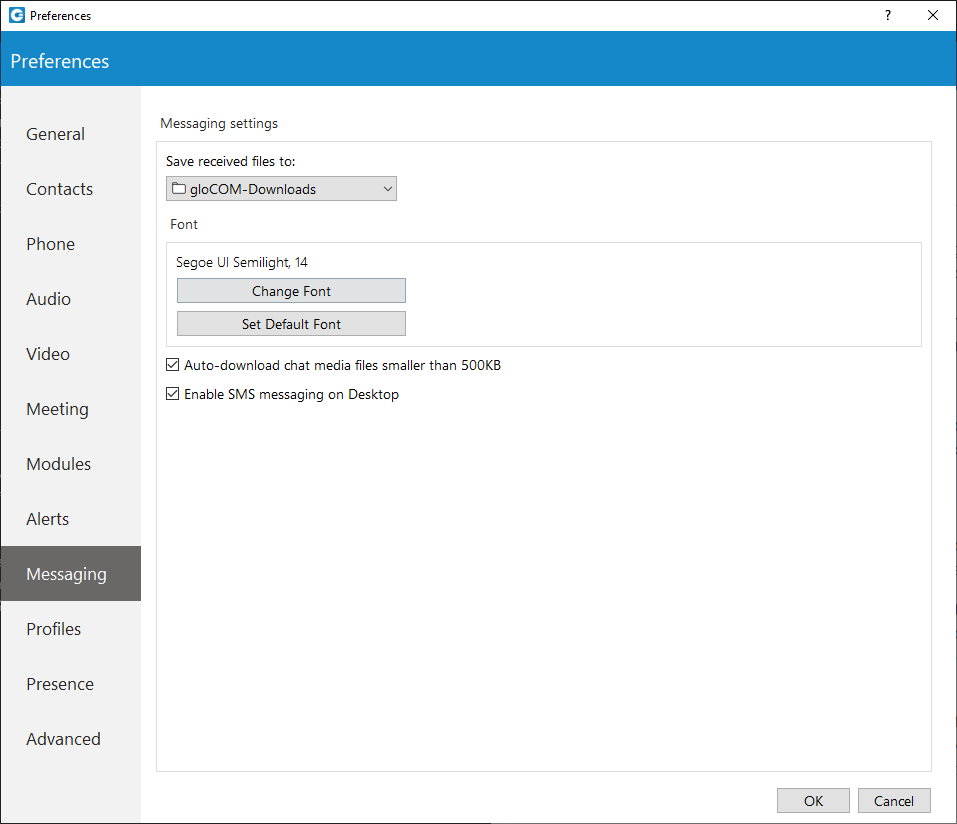
Click on the drop-down menu below the Save received files to and select Other to specify the location where gloCOM will save received files. Under the Change font menu, the user can choose the default font for the chat layout.
The Auto-download chat media files smaller than 500 KB option allows the user to enable/disable auto-download for media files smaller than 500 KB within the chat conversations. By default, this option is enabled. (Does not apply to SMS conversations.)
Changes in this section will apply to both Chat and SMS messages.
Profiles
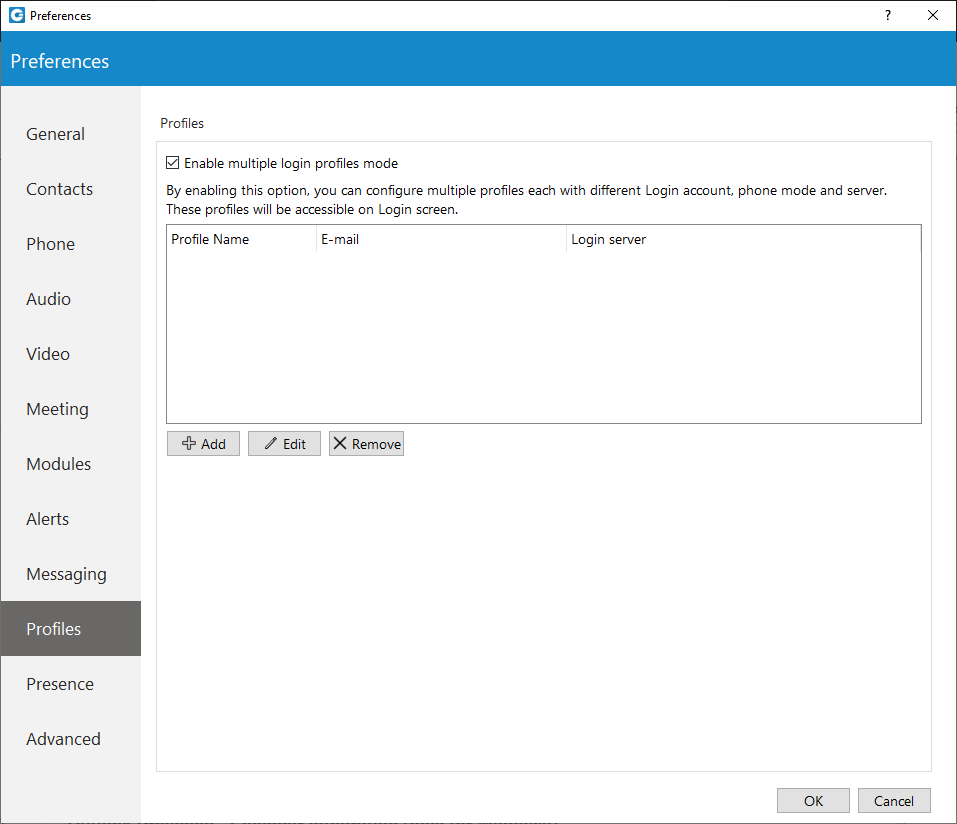
To enable profiles click on the Enable multiple login profiles mode. With this option enabled you can add, edit or remove an existing profile.
To add a profile click the Add button, follow the setup wizard, enter the profile name, enter your gloCOM email and password, and under the Advanced tab enter the server address, and if needed specify the SIP proxy as well. When done click Next to continue.
Adjust the phone settings to your preference and click Next, review your information once more, and click Finish to create a profile. Once created you can edit the profile by selecting it from the list, and clicking the Edit button or you can remove the selected profile by clicking the Remove button.
To log in with your newly created profile on the gloCOM login screen, from a profile drop-down menu select your profile and click on the Login button.
Presence
Busylight
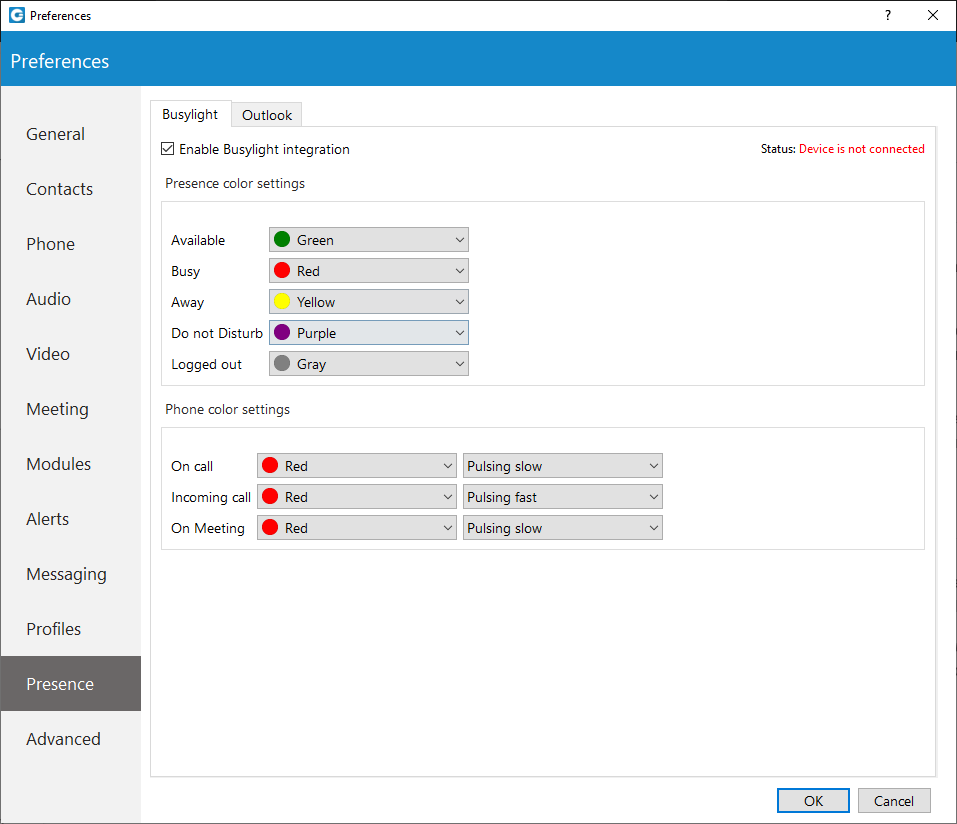
Busylight integration allows users to use their Busylight devices as a part of the gloCOM Desktop application. This way, they can inform colleagues about their current presence status.
To start using Busylight integration, click on the Settings icon placed on the right side of the main window just above the blue bar, navigate to the Busylight section, and check the Enable Busylight integration option. On the right side of the window, the user can see the status message, which gives them information on whether their device is connected or not.
Furthermore, users can change the Presence status color for each status per their wish. By default, these colors match the Presence status colors within the gloCOM app, and we do not recommend changing them. Additionally, users can change Phone status color and pulse rate as well.
Outlook Presence – Calendar integration (only for Windows) [6.7]
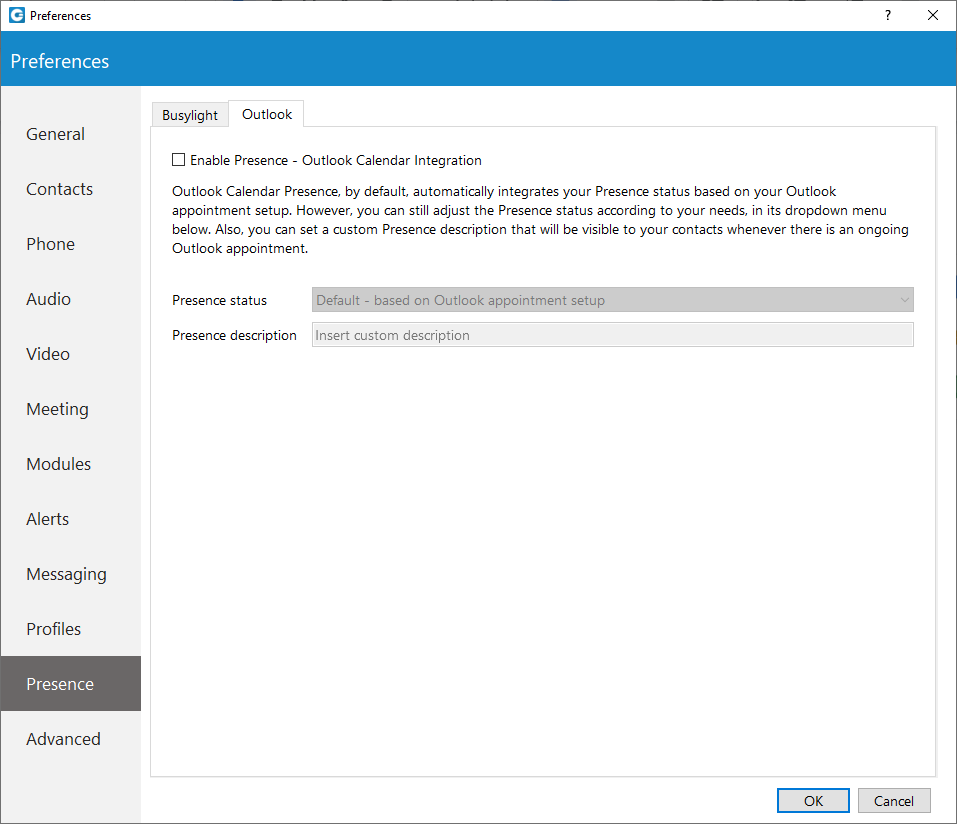
Outlook presence integration works only for Windows. To enable Outlook integration with the gloCOM Desktop application, please, navigate to the Preference –> Presence –> Outlook and check the Enable Presence – Outlook Calendar Integration option, which is disabled by default.
Outlook Calendar Presence, by default, automatically integrates users’ Presence status based on their Outlook appointment setup. However, the user can still adjust their Presence status according to their needs. Also, they can set a custom Presence description that will be visible to their contacts whenever there is an ongoing Outlook appointment.
Advanced
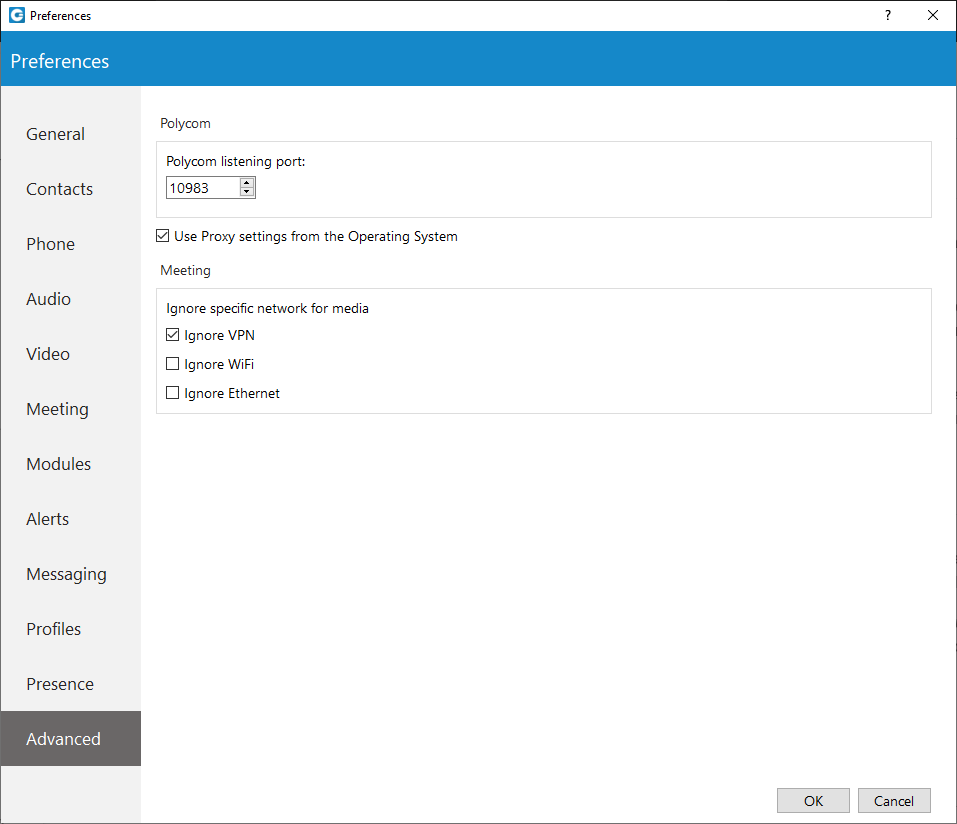
In the Advanced menu you can change the Polycom listening port to suit requirements of your Polycom phone.
The default port is set to 10983 which can be changed by clicking inside the box and entering your listening port number.
Skype for Business Module
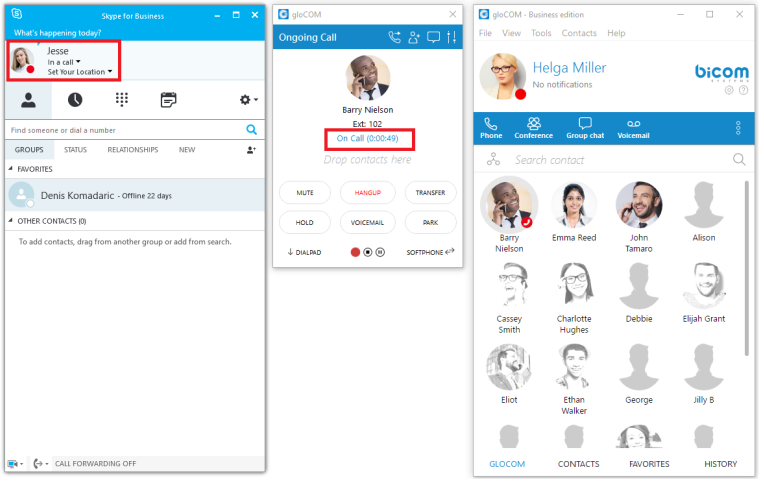
Skype For Business module is used for integration between Skype For Business and gloCOM. The idea behind this module is to provide integration between Skype For Business client and the user’s phone system (PBXware).
It consists of four parts:
- Presence
- Click to dial
- Conferencing
- Control of ANY SIP deskphone/softphone/mobile device registered on the PBXware telephony platform from the PC.
Presence
Whenever a user is on a call with ANY of their devices, including deskphone, softphone, or mobile phone, Skype For Business will change its presence automatically, and other Skype users will see this presence as On a call. Once the call is completed, Skype presence will revert back to the previous state.
Red marked squares are showing status change inside Skype for Business.
Click to Dial
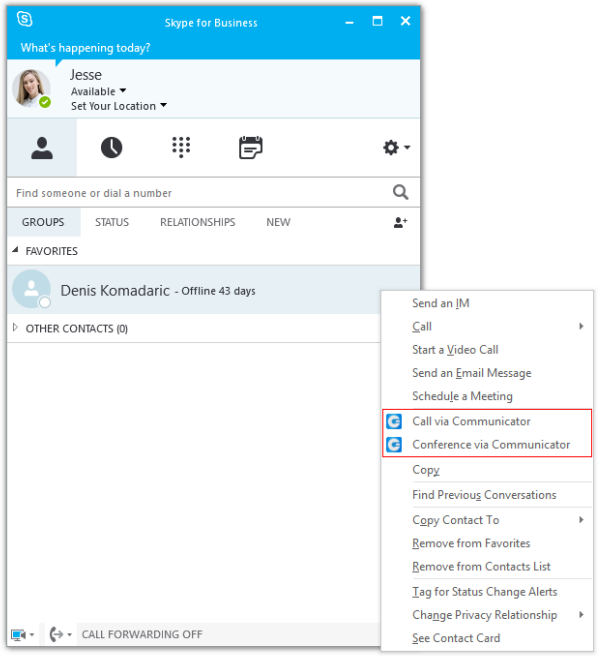
The click-to-dial plugin allows you to make regular or conference calls from Skype For Business using the PBXware phone system. It allows the user to use ANY of their devices to make the call through their Phone System.
This includes: deskphone, softphone, and mobile phone. The user can even make a call from Skype with a single click through the mobile network (GSM) and Skype will still show its status as On Call until the user hangs up on GSM. When click to dial plugin is enabled, two options appear in Skype For Business: Call via gloCOM and Conference via gloCOM.
When we click on the Call via gloCOM option, a dialogue appears, as seen in the next image. We have to choose the contact number that we want to call and the device from which we want to make a call. Only one Skype For Business contacts can be selected if we want to use this option. If the check box below Show this window before placing a call is selected, every time we are placing a call from Skype for Business this window will popup (this can be changed in preferences). Once we press Call, the call will be placed, in this case using our deskphone.
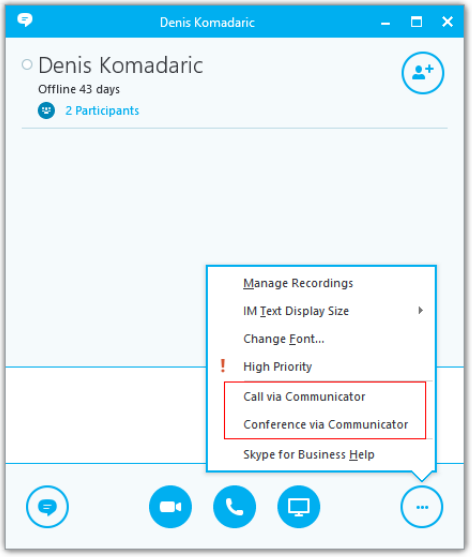
Conferencing
We can also invite gloCOM contacts to this conference. We add them by typing their name or number into the search field where we can also enter any other number we want and then press Enter. X button is used to remove contact/number from the list of users that we want to invite to the conference. Once we press Start Conference, an audio bridge will be automatically created on the PBX, and all the invitees will join automatically. We will join on our deskphone in this example. Although the call is in progress on our deskphone, we can see and control this audio conference on the PC in the gloCOM app, as displayed in the next image.
Settings
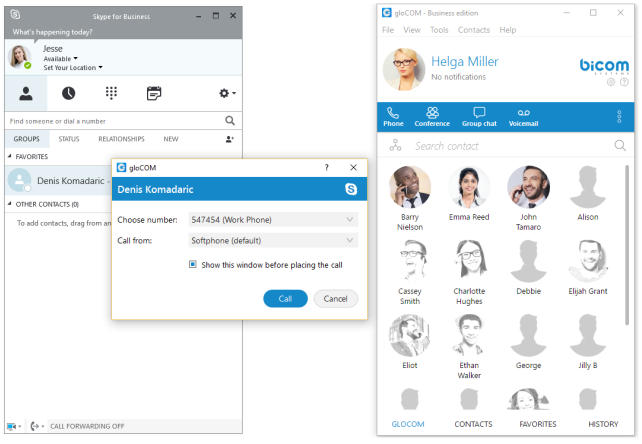
If we want to enable/disable Skype For Business module plugins for all gloCOM users on one computer, we need to navigate to Preferences –> Modules –> Skype. After we enable/disable Skype For Business module plugins, we have to restart the Skype For Business application in order to apply the changes made. Even if these plugins are enabled, we can use them only if the logged user has Skype For Business module enabled by the supplier.

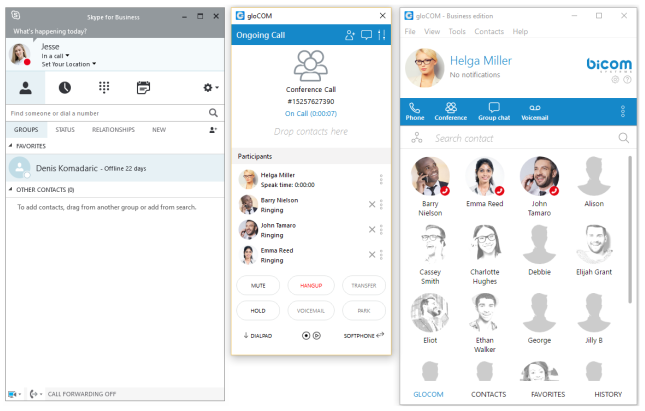
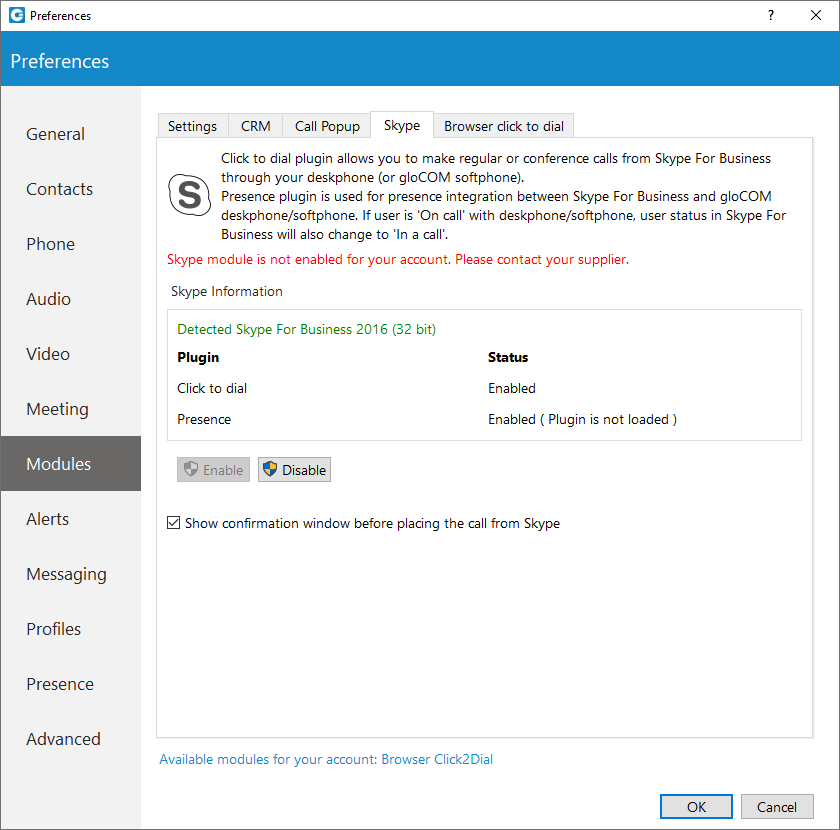
Conferences
Conferences
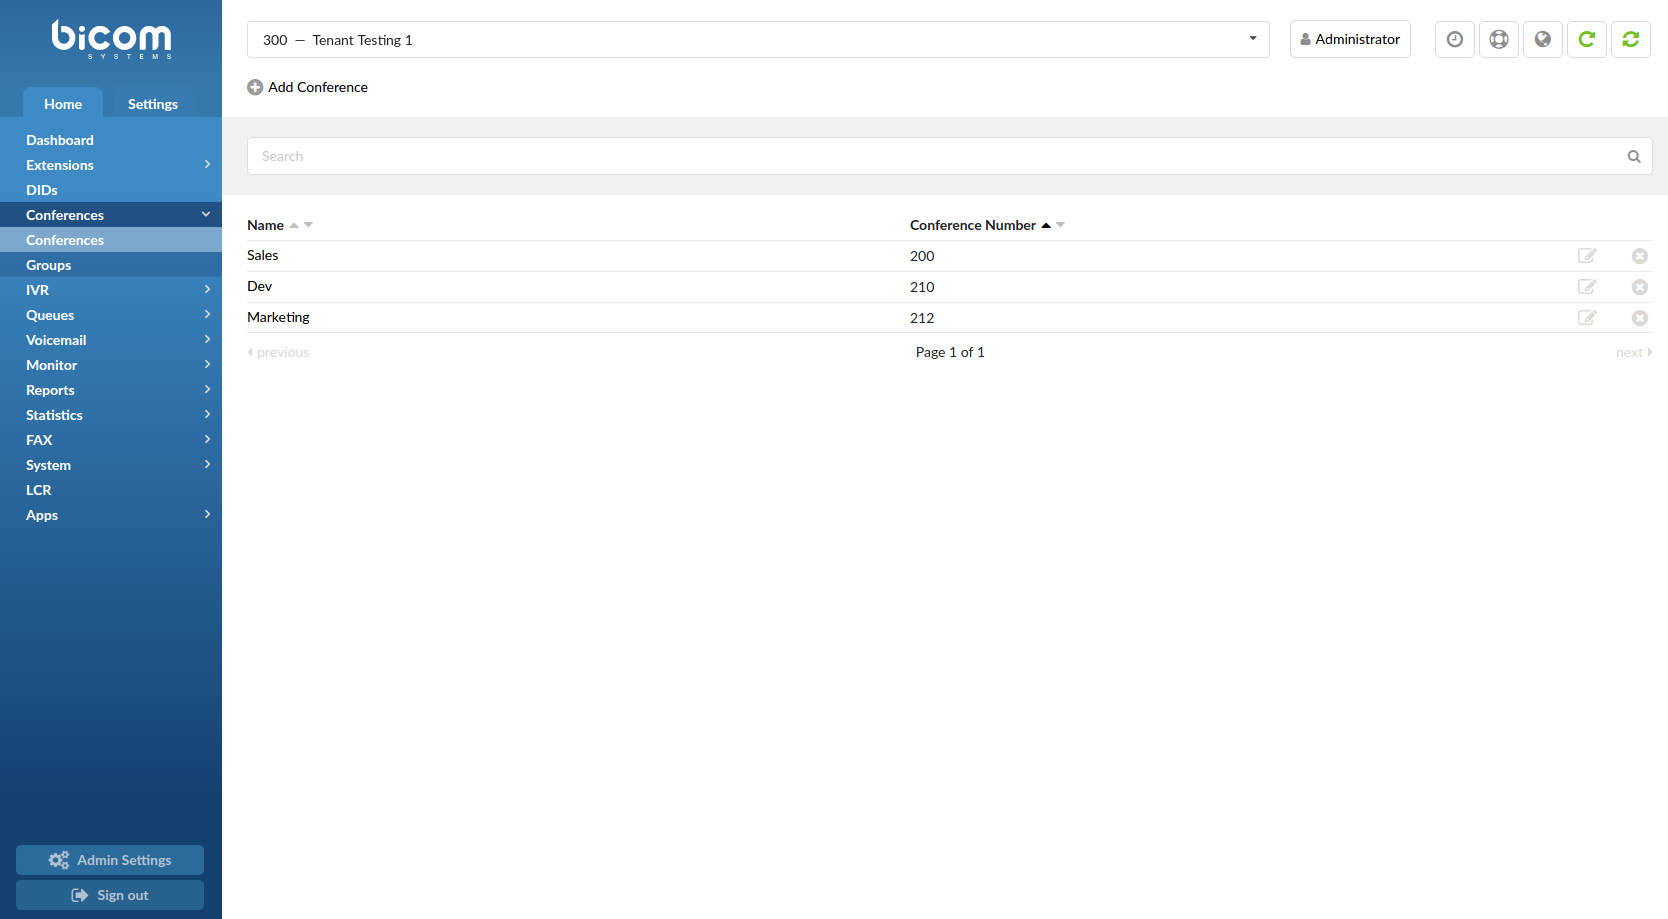
Conferences allow two or more participants to communicate with each other at the same time using voice, video, or both. Default limit for active conference members in PBXware is 256 users in all conferences, meaning that you can have a single or multiple conferences but their total active users count cannot exceed 256.
This screen lists all system conferences with the following details
- Name:
Conference name
(E.g. Sales, Development)
- Conference Number:
Conference system or network number
(E.g. 2255)
Edits the Conferences configuration
Deletes a Conference from the system
Search

By selecting the ‘Search’ Command, the search menu will be displayed. Searches can be done by Name and Number.
Add Conference
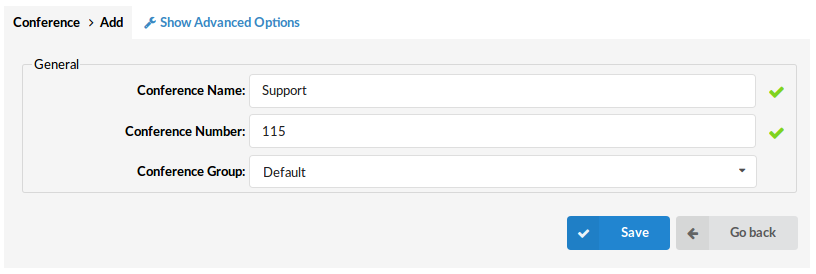
Clicking on the ‘Add Conference’ button will allow you to add a new conference.
- Conference Name
Unique Conference identifier/name, this name will be displayed once the ‘Conferences’ menu is selected.
(E.g. Main Conference)
- Conference Number
Unique Conference PBXware number, this number should be dialed in order to access the conference.
(E.g. 106)
- Conference Group
Here you can select a conference group that you have made before. In this group you can define users permissions and conference options. Conference groups are added under a Conferences -> Group -> Add Conference.
(E.g. Staff)
Advanced Options
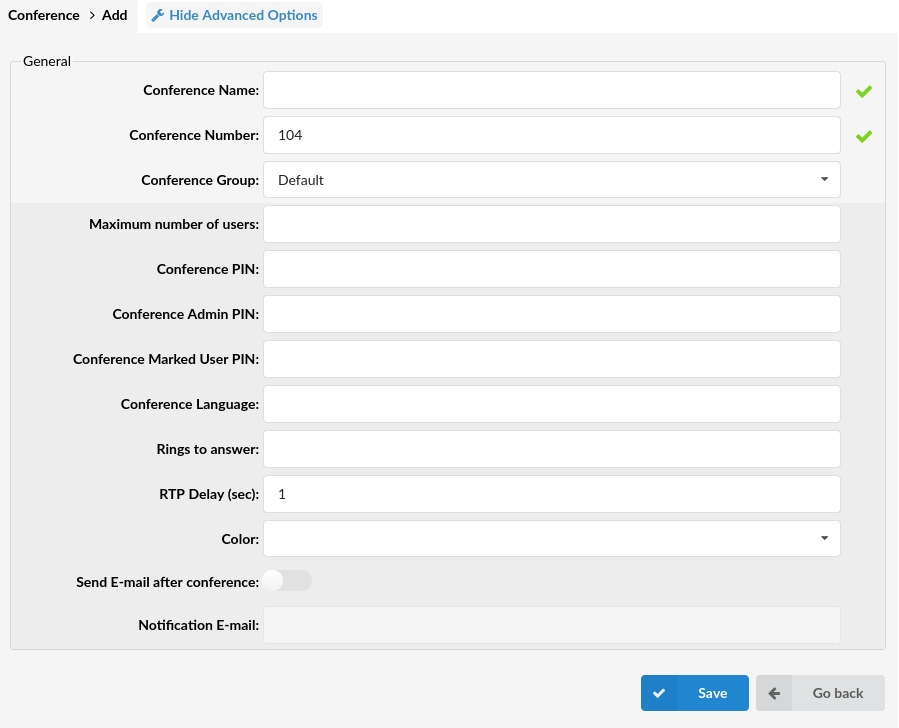
Click on the “Advanced Options” button to open more detailed conference options.
- Maximum number of users
This is the maximum number of users permitted in the Conference.
(E.g. 10)
- Conference PIN
Conference PIN number. If set, this PIN will have to be provided by all callers before entering the Conference.
(E.g. John dials the sales conference (1001), but this conference has this field set to 9576. John is asked to provide the conference PIN. If a valid PIN is provided, John will enter the conference, or his call will be rejected after 3 invalid PIN entries).
- Conference Admin PIN
When users enter the Admin PIN, they dynamically gain administrative rights for the conference that they are dialing into.
(E.g. John is the operator, but he needs to enter the conference as an admin. Since he does not have admin privileges set, when entering the conference he will use an admin PIN to dynamically gain those privileges).
NOTE: Administrators can change Conference PIN even when they do not have the ‘Show Advanced’ toggle button enabled.
- Conference Marked User PIN
When users enter the Marked PIN, they dynamically gain marked user rights for the conference that they are dialing into.
(E.g. John is the operator, but he needs to enter the conference as a Marked user. Since he does not have Marked user privileges, when entering the conference he will use a Marked user PIN code to dynamically gain those privileges).
- Conference Language
Set the language used for announcements to the conference. Default language is English.
- Rings to answer
Number of rings played to the caller before the call is allowed to enter the Conference.
TIP: It is recommended to set the “Rings to answer” rather than just “drop” callers into the Conference.
- RTP Delay [sec]
Delay time in seconds inserted before the conference operator answers. This delay solves the “half-played” greeting file problem. Keep this value set between 1-3 for optimal performance.
NOTE: The “half-played” greeting file problem usually exists on VOIP trunks.
(E.g. John enters the sales conference (1001) and hears ‘… currently the only user in this conference’ message. This message is only partial and can confuse conference members. Set this field to 1 (or higher, depending on how much is not heard) to play the message in full length.)
- Color
Determines which color will be used for this conference in Bicom Systems gloCOM.
(E.g. Black)
- Send E-mail after conference
After the conference ends, an email containing the sound file can be sent to the predefined email address.
NOTE: Please note in order for the e-mail with a conference recording to be sent once the conference call ends, Auto MP3 Conversion must be enabled under Settings -> Tenants -> MasterTenantName (edit) -> Call Recordings (section).
In order for an e-mail to be sent “Convert and remove original” or “Convert and keep original” must be selected.
- Notification E-mail
Enter the email address which will receive the conference sound file after the conference has ended.
NOTE: These two options have no effect if the “Record Conference” option is not selected in the conference group for that conference.
Groups
Conference Groups are used to create groups of users that have certain permissions for conferences.

General
- Group Name
Name of the conference group.
(E.g. Staff)
- Users
Extension numbers of users added to this group.
(E.g. 101, 108, 109)
Edits the Conference Group configuration.
Deletes a Conference Group from the system.
When you click on the “Add Conference” Group button, you will be able to add a new Conference Group.
Add/Edit Conference Group
- Group Name
Write unique Conference Group name here.
(E.g. Staff)
Options
- Announce user join/leave
If this option is checked/enabled, all new conference members will be asked to say their name and press the ‘#’ key before they enter the conference. After a user presses the ‘#’ key, the following menu will be presented:
- 1 – press 1 to accept your name and enter the conference
- 2 – press 2 to listen to your name
- 3 – press 3 to re-record your name
This name will be recorded and played to other conference members when a caller joins/leaves the conference.
(E.g. John dials the 1001 sales conference and is asked to say his name and to press the ‘#’ key. Of course, he says ‘John’ and presses the ‘#’ key. After that he is introduced with a menu where he chooses to accept his name and enter the conference. At the same time, all conference members will hear “John has entered the conference”. When John leaves, all conference members will hear “John has left the conference” message).
- Quiet mode
If this option is checked/enabled, conference members will not hear the enter and leave sound.
(E.g. Check this option if you do not want to hear the join/leave sound).
- Record conference
This option will enable recording the conference so you can download the recorded file.
NOTE: You can download the recorded file in Conferences: CDR’s, by selecting a conference and clicking on the Listen button.
- Enable music on hold
Enable MOH (Music On Hold) if there is a single member in a conference. Enable this feature to play MOH music files until someone else joins the conference.
(E.g. If John enters the conference first and he is the only one there, he will hear MOH. John will hear this sound till someone else joins the conference).
- Present menu
Plays Conference options once * is dialed while in a conference.
(E.g. John enters the sales conference and dials ‘*’, Conference options are played back (e.g. ‘Please press 1 to mute/un-mute yourself’)).
- Announce the number of participants
Announces the number of conference participants to a new conference member. “There is currently only 1 other participant in the conference.”
(E.g. The Sales conference has this option enabled and is currently empty. John enters the conference and hears “You are currently the only person in this conference” played back to him).
- Close the conference when the last marked user exits
Closes the conference once the last marked user exits, no matter how many participants are still active in the conference conversation, their calls are immediately dropped.
(E.g. John (marked user) enters the sales conference. This conference has this option enabled and there are 3 other members participating in the conference (who are not marked users). As soon as John leaves the conference, all other conference members will have their calls dropped and will no longer be able to talk to each other).
- Wait for the marked user before allowing anyone to talk
Disables the conference until the marked user enters the conference.
(E.g. This option is enabled for the sales conference. There are 3 members waiting for John (marked user) to enter the conference. These 3 members will hear nothing and will not be able to talk to each other until John enters the sales conference).
Users
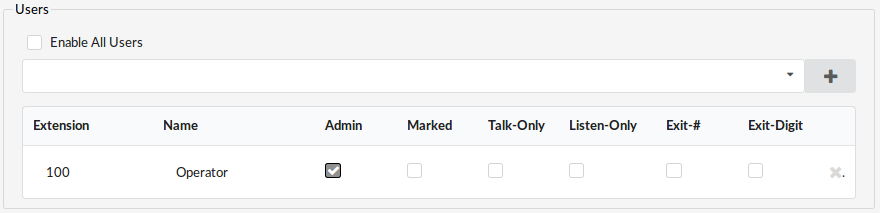

There are two options for enabling users to join a specific conference room. You can either enable all users by selecting the check box “Enable All Users”. The other option is to click the drop-down menu and to pick desired extension. After picking click the ‘+’ sign and extension/user will be added and you will be given new options for that particular extension.
- Extension
The extension number of the user that you have added to the group.
(E.g. 233)
- Name
The name of the user that you have added to the group.
(E.g. John Crichton)
- Admin
Sets the admin conference mode. If this option is enabled, conference calls coming from the extension will be treated with admin privileges.
- Marked
Sets the marked conference mode. If this option is enabled, conference calls coming from the extension will be given less privileges than admin, but more than regular conference participants.
- Talk-Only
Sets the “talk only” conference mode. If this option is enabled, conference calls coming from this extension will be allowed to talk only (no voice will be heard on the UAD/Phone).
- Listen-Only
Sets the listen only conference mode. If this option is enabled, conference calls coming from the extension will be allowed to listen only (no voice will be sent from the UAD/Phone).
- Exit-#
If this option is enabled, users will be allowed to exit the conference by dialing the ‘#’ key.
- Exit-Digit
If this option is enabled, users will be allowed to exit the conference by dialing any digit.
(Check box)
CDRs
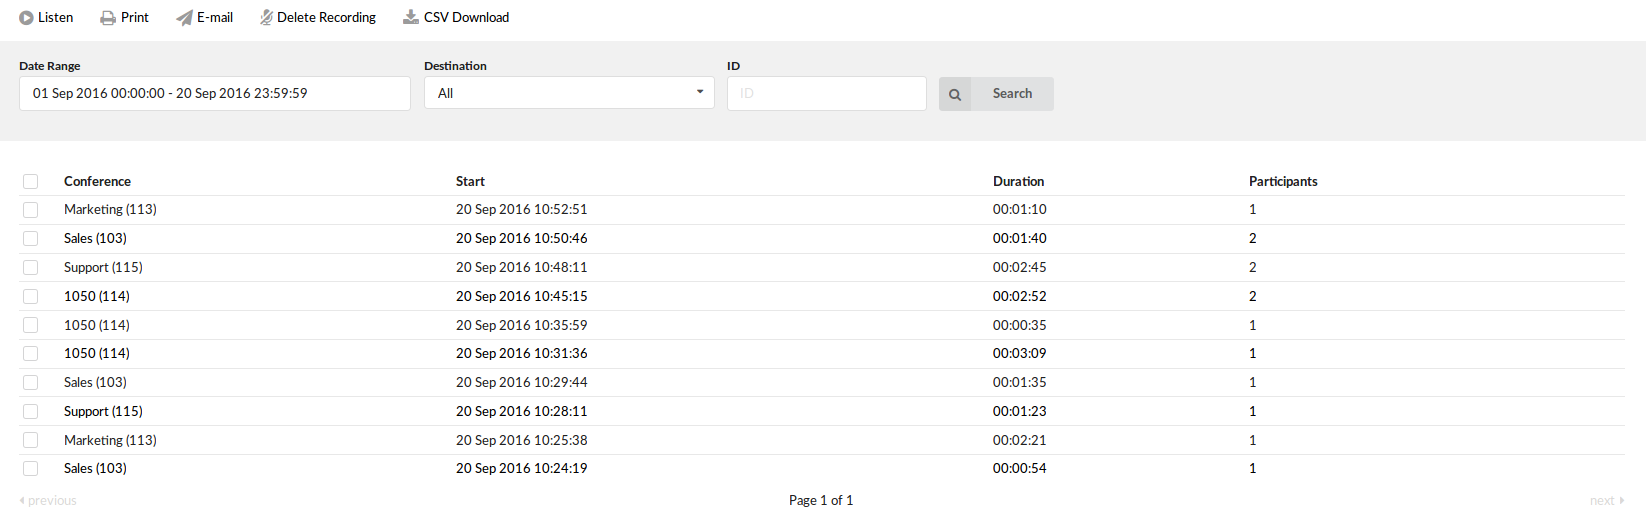
CDR displays detailed records of all PBXware calls in the conferences with the following details.
- Conference
Name of the conference.
(E.g. Tech Discussion)
- Start
Date and Time when the conference began.
(E.g. 04 Oct 2019 10:44:10)
- Duration
Conference duration time in hh:mm:ss format.
(E.g. 00:12:45)
- Participants
Number of users inside the conference.
(E.g. 10)
This icon is displayed once a call is recorded and ‘Delete’ or ‘Listen’ enhanced service is active.
This is a box used with the CDR commands to select a desired call.
Search/Filter
Calendar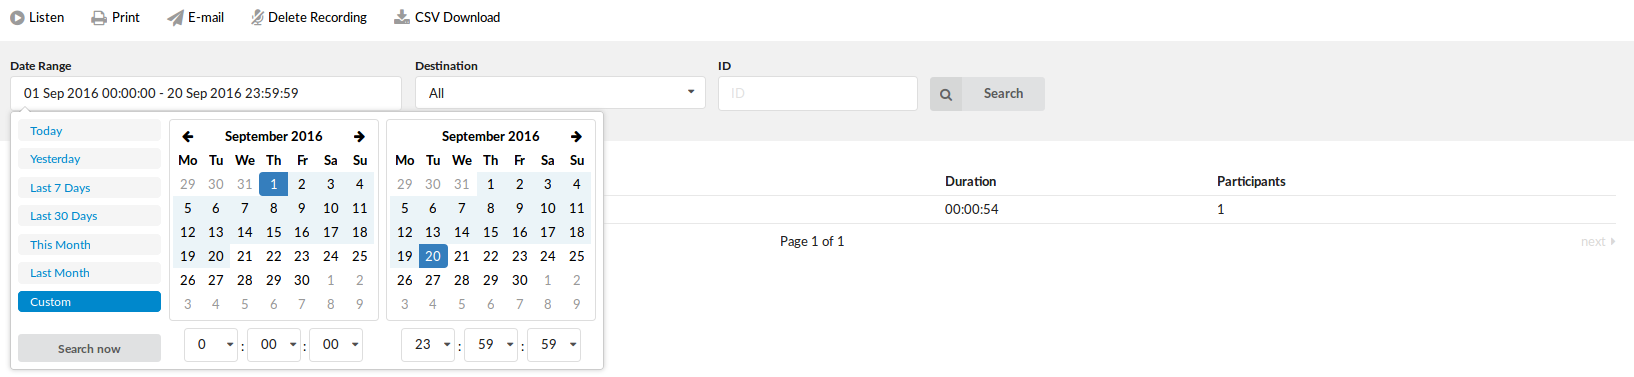
- Start Date
Select a Search/Filter start date. Click on the small “Calendar” icon next to a field and select the desired date.
- End Date
Select a Search/Filter end date. Click on the small ‘Calendar’ icon next to a field and select the desired date.
- Start Time
When searching for CDRs, this is the start time in the Start Date.
(E.g. Time in hh:mm:ss format like 10:15:30)
- End Time
When searching for CDRs, this is the end time in the End Date.
(E.g. Time in hh:mm:ss format like 15:20:30)
- ID
ID of the CDR. When the user selects a CDR, the ID field shows that CDR’s ID. If there are problems on the system, the customer can give the support team the problematic CDR ID which helps in locating it.
(E.g. 1221045103.66)
- Destination
Search conferences based on the number of conference typed in this field.
(E.g. 1006)
Actions

Listen
- Listen
Once the “Listen” icon is displayed next to a conference record, it means that the specific conference was recorded. To play the recorded conference, check the box next to the “Listen” icon and click “Listen”. The browser will prompt you to open the sound file in your audio player or to download the sound file.
TIP: By default the sound format is available as a .gsm file. To change the recording format go to “Settings -> Tenants -> Call Recordings -> Recordings format” and select one of the available sound formats:
- gsm
- wav
- wav49
- ogg
Click on the “Print” button to open a new pop-up window with the printing interface.
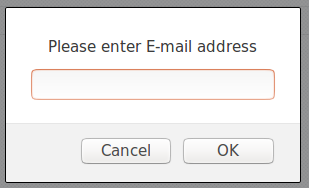
Click on the “E-mail” button to send all reports listed on the page.
Provide the e-mail address where the report should be sent and click the “OK” button to proceed or “Cancel” to abort the email action.
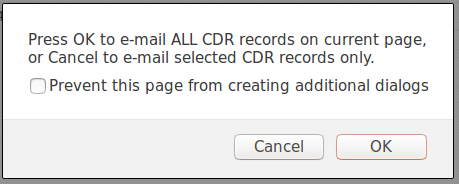
Press “OK” to email all CDR records on the current page (even if they are not selected) or click “Cancel” to print the selected records only.
Finally, press the “OK” button to confirm the email action or “Cancel” to abort the email action.
- Delete Recording
Deletes the recorded conferences.
- Download CSV
Download data as the .csv (Comma Separated Value) file.
(E.g. Click this button to download the .csv file to your desktop).
CRM
CRM
Customer Relationship Management (CRM) is a business strategy that provides companies with an opportunity to manage their own previous, present, and planned interactions. PBXware allows users to integrate, test, select some of the log options for their CRMs. It is integrated with several CRM solutions. The supported CRMs are as follows: Bullhorn, Hubspot, Microsoft Dynamics 2015, Pipedrive, Proprietary CRM, Proprietary CRM I, Salesforce, SugarCRM, SuiteCRM, Vtiger CRM, Zendesk, and Zoho CRM.
To get more information on CRMs supported by PBXware and details on how to set them up please click matching CRM logos below.
Supported CRMs
 |
.
Routing

CRM Routing allows routing to a specific Queue or IVR, and it also allows playing sound files based on the information fetched from CRM. When the call comes in AGI, PBXware will first contact CRM and make a specific action based on the returned value.
To set up the configuration in PBXware, navigate to the CRM section with the ‘Integration’ and ‘Routing’ sub-menus. When on the ‘Routing’ section, a user can set up rules based on which calls will be routed. On DID and IVR, new destinations can be assigned the rule which will be evaluated for a particular DID/IVR.
NOTE: CRM Routing must be enabled in a license.
- Search
Search the specific data by typing details in the search bar
- Rule Name
Displays the name of a Routing Rule
(E.g. Example Name)
- CRM Field Name
Displays the API Name of a CRM field
(E.g. Account_Name)
- Location
Displays the location it points to
(E.g. IVR)
Click this button to edit the Routing Rule.
Click this button to delete the Routing Rule.
NOTE: Upon deleting the Routing rule, the warning message will appear saying “Are you sure you want to remove ‘XYZ’?” If ‘OK’ is pressed, the action will be confirmed and the Routing rule will be deleted.
Add/Edit Rule
General
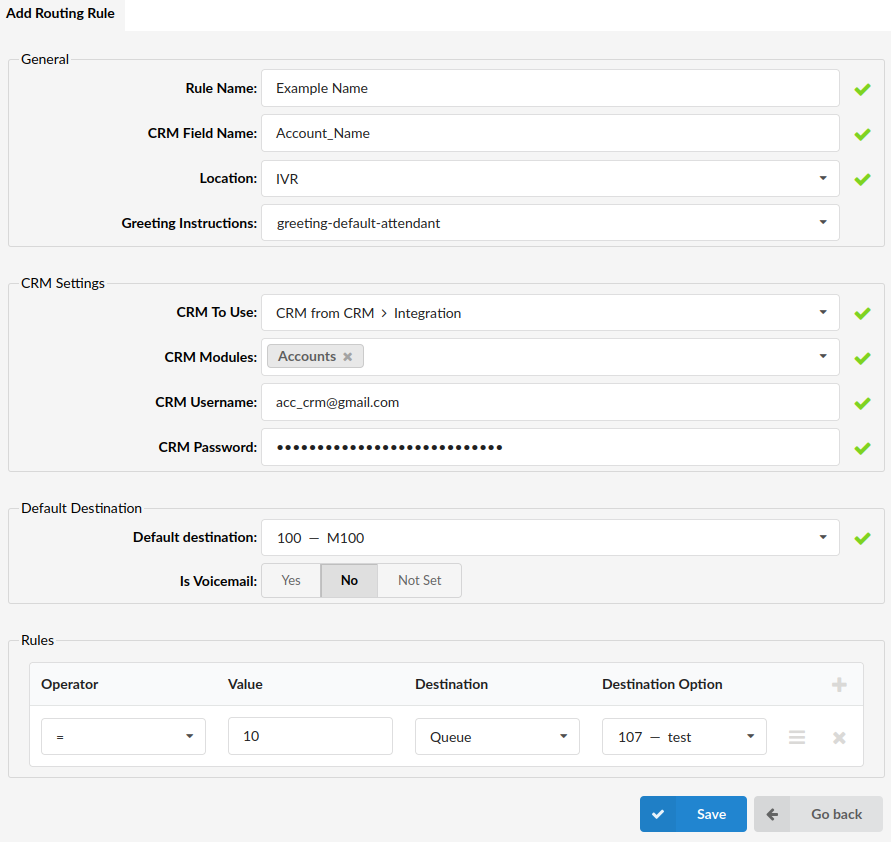
- Rule Name:
Name for a new rule
(E.g. Example Name)
- CRM Field Name:
CRM field defining which value should be fetched
(E.g. Account_Name)
NOTE: Please note that this field needs to be populated with a suitable API Name.
For more on how to find the API Name, please refer to the example of Zoho CRM below. This is applied to every supported CRM respectively.
For instance, this is a link of the Zoho CRM account:
https://crm.zoho.com/crm/orgXXXXXXXX/settings/api/modules
Once users are logged in to their CRM account, they can navigate to ‘Settings’ -> ‘API’ and find the applicable API Name. Please refer to the screenshots.
NOTE: Please note that the link provided above refers to Zoho CRM so the page URL can have one of three possible formats: https://crm.zoho.com/crm, https://crm.zoho.eu/crm, or https://crm.zoho.in/crm depending on the Data Center to which a certain Zoho instance belongs to. Therefore, the format has to be changed accordingly. Also, the ‘orgXXXXXXXX’ stands for the organization number to which users can have access once they are logged in to their CRM account.
- Location:
Define where to use this rule
(E.g. DID/IVR)
- Greeting Instructions:
If ‘IVR’ is chosen as a ‘Location’, a new option pops up.
The greeting should be set if a user wants to get DTMF from a caller and send that DTMF to CRM.
(E.g. greeting-default-attendant)
.
CRM Settings
- CRM To Use:
Select one of two options to use:
1. CRM from CRM > Integration: PBXware will contact CRM and fetch the value.
2. Custom CRM: A customer should implement communication with CRM on his own.
If ‘CRM To Use’ is set to CRM from CRM > Integration, the following options are available:
- CRM Modules:
Define from which CRM module PBXware should fetch information
(E.g. Accounts/Contacts/Leads)
- CRM Username:
Enter a valid CRM username
(E.g. Example CRM Username)
- CRM Password:
Enter the CRM password in the same way as for gloCOM. Please follow the instructions for a specific CRM.
(E.g. ********)
NOTE: Please follow the instructions for a specific CRM.
If ‘CRM To Use’ is set to Custom CRM, the following option is available:
- CRM URL:
Provide a URL which PBXware will contact.
NOTE: It must start with “https://”.
Default Destination
- Default destination
Select the destination to which the call will be redirected in case the return value does not match any rules
(E.g. 100 – Test)
- Is Voicemail
Select whether the call will be redirected to the voicemail of the default destination
(E.g. Yes/No/Not Set)
.
Rules
- Operator:
Select the arithmetic operator
(E.g. <,>,=, <=, >=)
- Value:
Enter a value to compare with
(E.g. 50)
- Destination:
Select a Destination
(E.g. Queue/IVR/Play recording)
- Destination Option:
Enter the Queue/IVR number or recording name.
(E.g. 103)
NOTE: All fields except ‘Greeting Instructions’ are required.
How Does Routing Work?
After fetching the value from CRM, PBXware goes through the rules row by row and evaluates the comparison between the returned value and a value from the rule’s row by using the arithmetic operator defined in the row. A destination for a caller is the destination from the first row which matches the criteria.
For example, a user needs to filter inbound calls on DID and send calls to destinations based on some fields in his/her CRM. Following this, in CRM, there is a “status” field name with the customer’s status and the value of the field that can be ‘GOLD’, ‘SILVER’, ‘BRONZE’, and so on. A user can set his/her CRM routing rule to check if the customer is marked as ‘GOLD’. If this is true, a user can send the call to the appropriate location such as IVR, Queue, and so on.
.
Custom CRM
In case of a custom CRM (CRM implemented by a customer), a URL which PBXware will try to reach is as follows:
{URL}?field_name={CRM_FIELD_NAME}&dtmf={DTMF}
- URL = CRM URL set on the Routing Rule,
- CRM_FIELD_NAME = CRM Field Name set on the Routing Rule,
- DTMF = DTMF entered by a caller (available only for IVRs when the ‘Greeting instructions’ option is selected).
Based on the configuration from the example above, a URL will be:
https://crmurl.com?field_name=Field_Name
NOTE: A user who implements the Custom CRM integration is the one who is in charge of handling this request on his/her side.
Dashboard
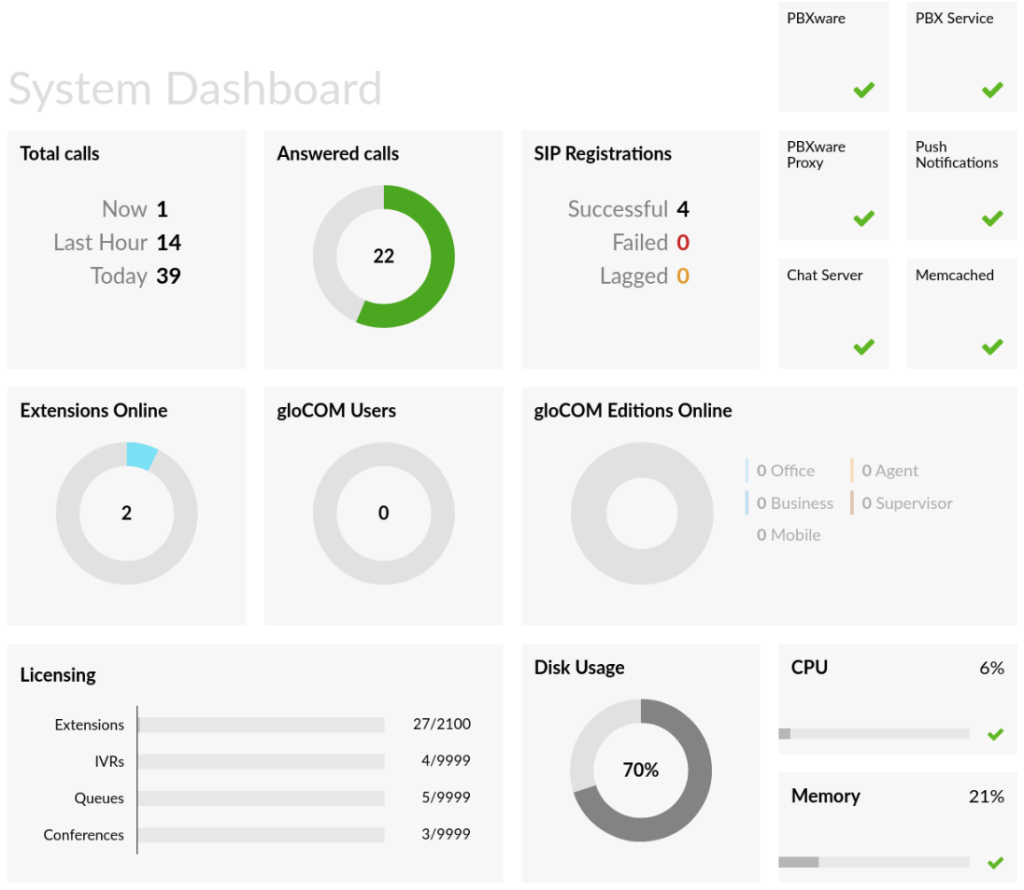
Siarum System Dashboard provides single-page overview of important software information and statistics in real time. On this page you are able to see information on running services, call statistics, licensing and Apps usage as well as hardware status information.
Calls Overview
__________________________________________________________________________________________
Calls overview section displays information on number of live calls on PBXware along with number of calls in past hour, number of calls made in current day as well as Answered calls, displayed in a circle that depicts percentage of answered calls vs total calls.
- Now
Number of current calls on PBXware.
- Last Hour
Number of PBXware calls in past hours.
- Today
Number of calls for a current day.
- Answered calls
Number of answered calls displayed in percentage.
SIP Registrations
SIP Registrations displays information on successful, failed and lagged SIP registrations.
- Successful
Number of successful PBXware SIP registrations.
- Failed
Number of failed PBXware SIP registrations.
- Lagged
Number of PBXware SIP registrations that are currently in lagged state.
Note: If any of these three values is different than zero, you will be able to click on it to get more information.
PBXware services
Services section of PBXware dashboard allows you to monitor current status of main system services: PBXware, PBX Service, PBXware Proxy, Push Notifications, Chat Server and Memcached. If green check mark icon is displayed, service is running without any issues, otherwise, red X mark will inform you that there are some issues with the service and that it has been stopped.
- PBXware
This represents the main PBXware service, if the PBXware service stops for some reason you will not be able to access your system through web interface.
- PBX Service
PBX Service is core service PBXware is running on. In case PBX Service is not running, you will be able to access PBXware web interface but you will not be able to make or receive calls.
- PBXware Proxy
PBXware Proxy is connecting to asterisk manager and reading events which are then put into memcached for later usage. Based on that data, monitoring section will provide information users are interested in.
- Push Notifications
Push Notifications service will wake up mobile devices in case there is a call to that extension
- Chat Server
Chat Server is messaging service that allows you to use chat when connected to PBXware with our desktop and mobile apps.
- Memcached
Memcached service stores information which is read by PBXware Proxy.
Extensions Online
Extensions online diagram depicts number of online extensions compared to the total number of PBXware extensions.
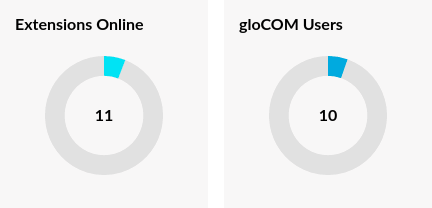
gloCOM Users
GloCOM Users diagram depicts number of logged gloCOM users compared to the total number of available licenses.
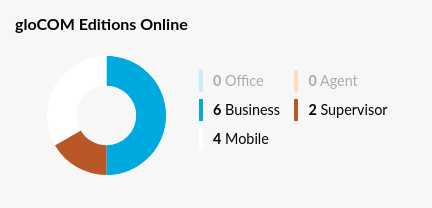
gloCOM Editions Online
This section displays information on apps registered to PBXware and editions they are using.
NOTE: Please take in consideration that numbers might be off slightly because of the way mobile devices are trying to minimize power consumption. Once application is in the background and not interacted with for some time, device will defer CPU and network activity to that application.
gloCOM GO and Communicator GO are also affected by this and when the system is in Doze/background mode or when system forces application into a stand by mode, applications may not be connected to server and may not receive incoming calls. Doze mode on Android kicks in when device is not used for more than an hour. On iOS application become suspended when in background for more than 10 minutes.
Licensing
Licensing section helps you to prevent issues with licensing by displaying percentage usage information of your PBXware license for Extensions, IVRs, Queues and Conferences.
System Hardware Usage
Hardware usage section displays important information on current server load, it helps you easily monitor main hardware components like disk space, CPU and memory usage.
- Disk Usage
Disk usage section displays information on current PBXware hard disk usage.
- CPU
CPU section displays information on current CPU usage on PBXware server.
- Memory
Memory section displays information on current PBXware memory usage.
DID
DIDs on Tenants
After creating a DID on a master tenant edits and additional settings are available in the slave tenant to which the DID is assigned to.
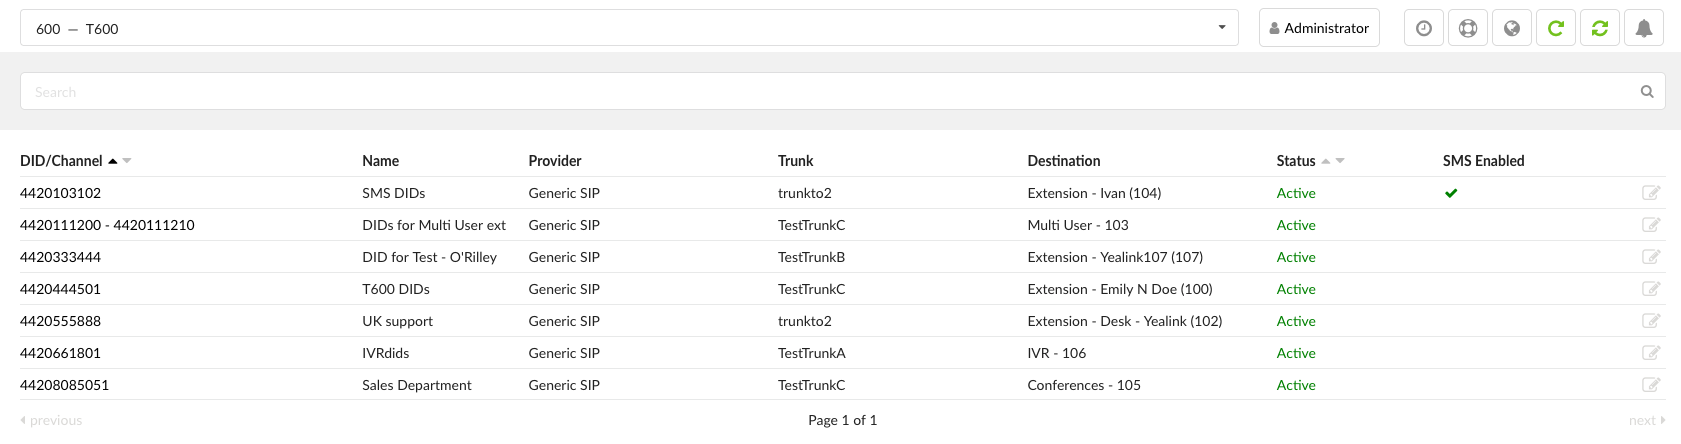
Entering Slave tenant-> Home -> DIDs you will be given:
- DID/Channel:
DID number or a PSTN channel slot number.
(E.g. 00201200103)
- Name (6.6)
Displays the name of a DID for easier navigation
(E.g. Tech Support)
NOTE: Please note that this feature is part of the beta release and is only visible to beta testers. Once the stable version is released, it will be available for general use.
- Provider:
Provider name
(E.g. Generic SIP)
- Trunk:
Trunk used by a DID
(E.g. Trunk1)
- Destination:
Trunk destination and destination network number
(E.g. Extension – 5000)
- Status
Refers both to the status of DID and SMS service
(E.g. Active/Inactive)
NOTE: Please take a look at the table for further explanation of what happens when the status is either ‘Active’ or ‘Inactive’.
| Active | Calls and SMS messages both go through . |
| Inactive | Calls do not go through, but SMS messages still go through. |
EXAMPLE: In case a user adds a DID, and following this, enables SMS for this DID on Slave Tenant, the number will be added to the list of SMS numbers and its status will be displayed as ‘Active’ which means that both the calls and SMS messages will go through. In case a user changes settings on Master Tenant, and the status changes to ‘Inactive’, this action will make it unable for calls to go through, however, SMS messages will still go through since the number stays on the list of SMS numbers regardless of the status change.
Edit DID
By clicking the edit button you will be given additional editing options which weren’t available on master tenant.
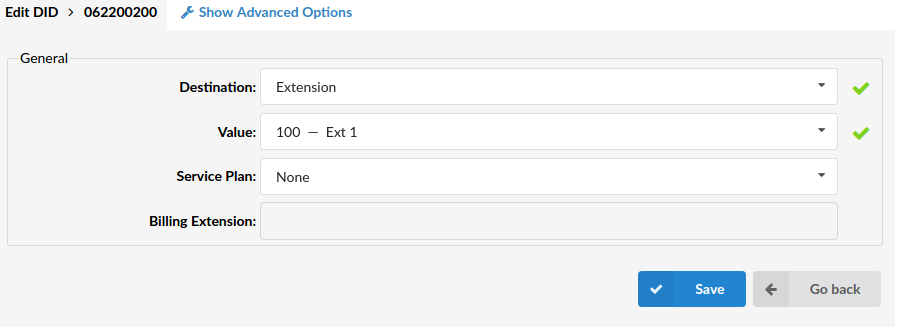
General
- Destination
PBXware MT destination to which DID will transfer all calls.
(E.g. Extensions)
- Value
Destination value to which all DID calls will be transferred
(E.g. If ‘Destination’=’Extension’, set the extension number here(e.g. 1002). In case ‘Destination’=’IVR’, set the IVR extension number here)
TIP: If using ‘Fax to E-mail’ as ‘Destination’, set the ‘Value’ field to an email address (email@domain.com) or extension number (1002). If an extension number is used, the fax will go to the email address associated with the extension. The email which arrives to the specified address will contain both TIFF and PDF versions of the FAX.
- Service Plan
This option is used so you can bill inbound calls to IVRs, Conferences, Queues, and Voicemail. If these are selected as Destination, they will be billed as ‘Local destinations’ from Service Plan.
If Extension/Multi-User is selected, call will be billed as per incoming price set for E.164 number in DID. Balance on Extension could be set as + or – value so you can decrease or increase balance for that extension when it receives the call.
For other Destination Types Service Plan is disabled
(E.g. National Service Plan)
- Call Rating Extension
Extension which is charged for inbound call rating set on DID.
(E.g. 1005)
Advanced Options
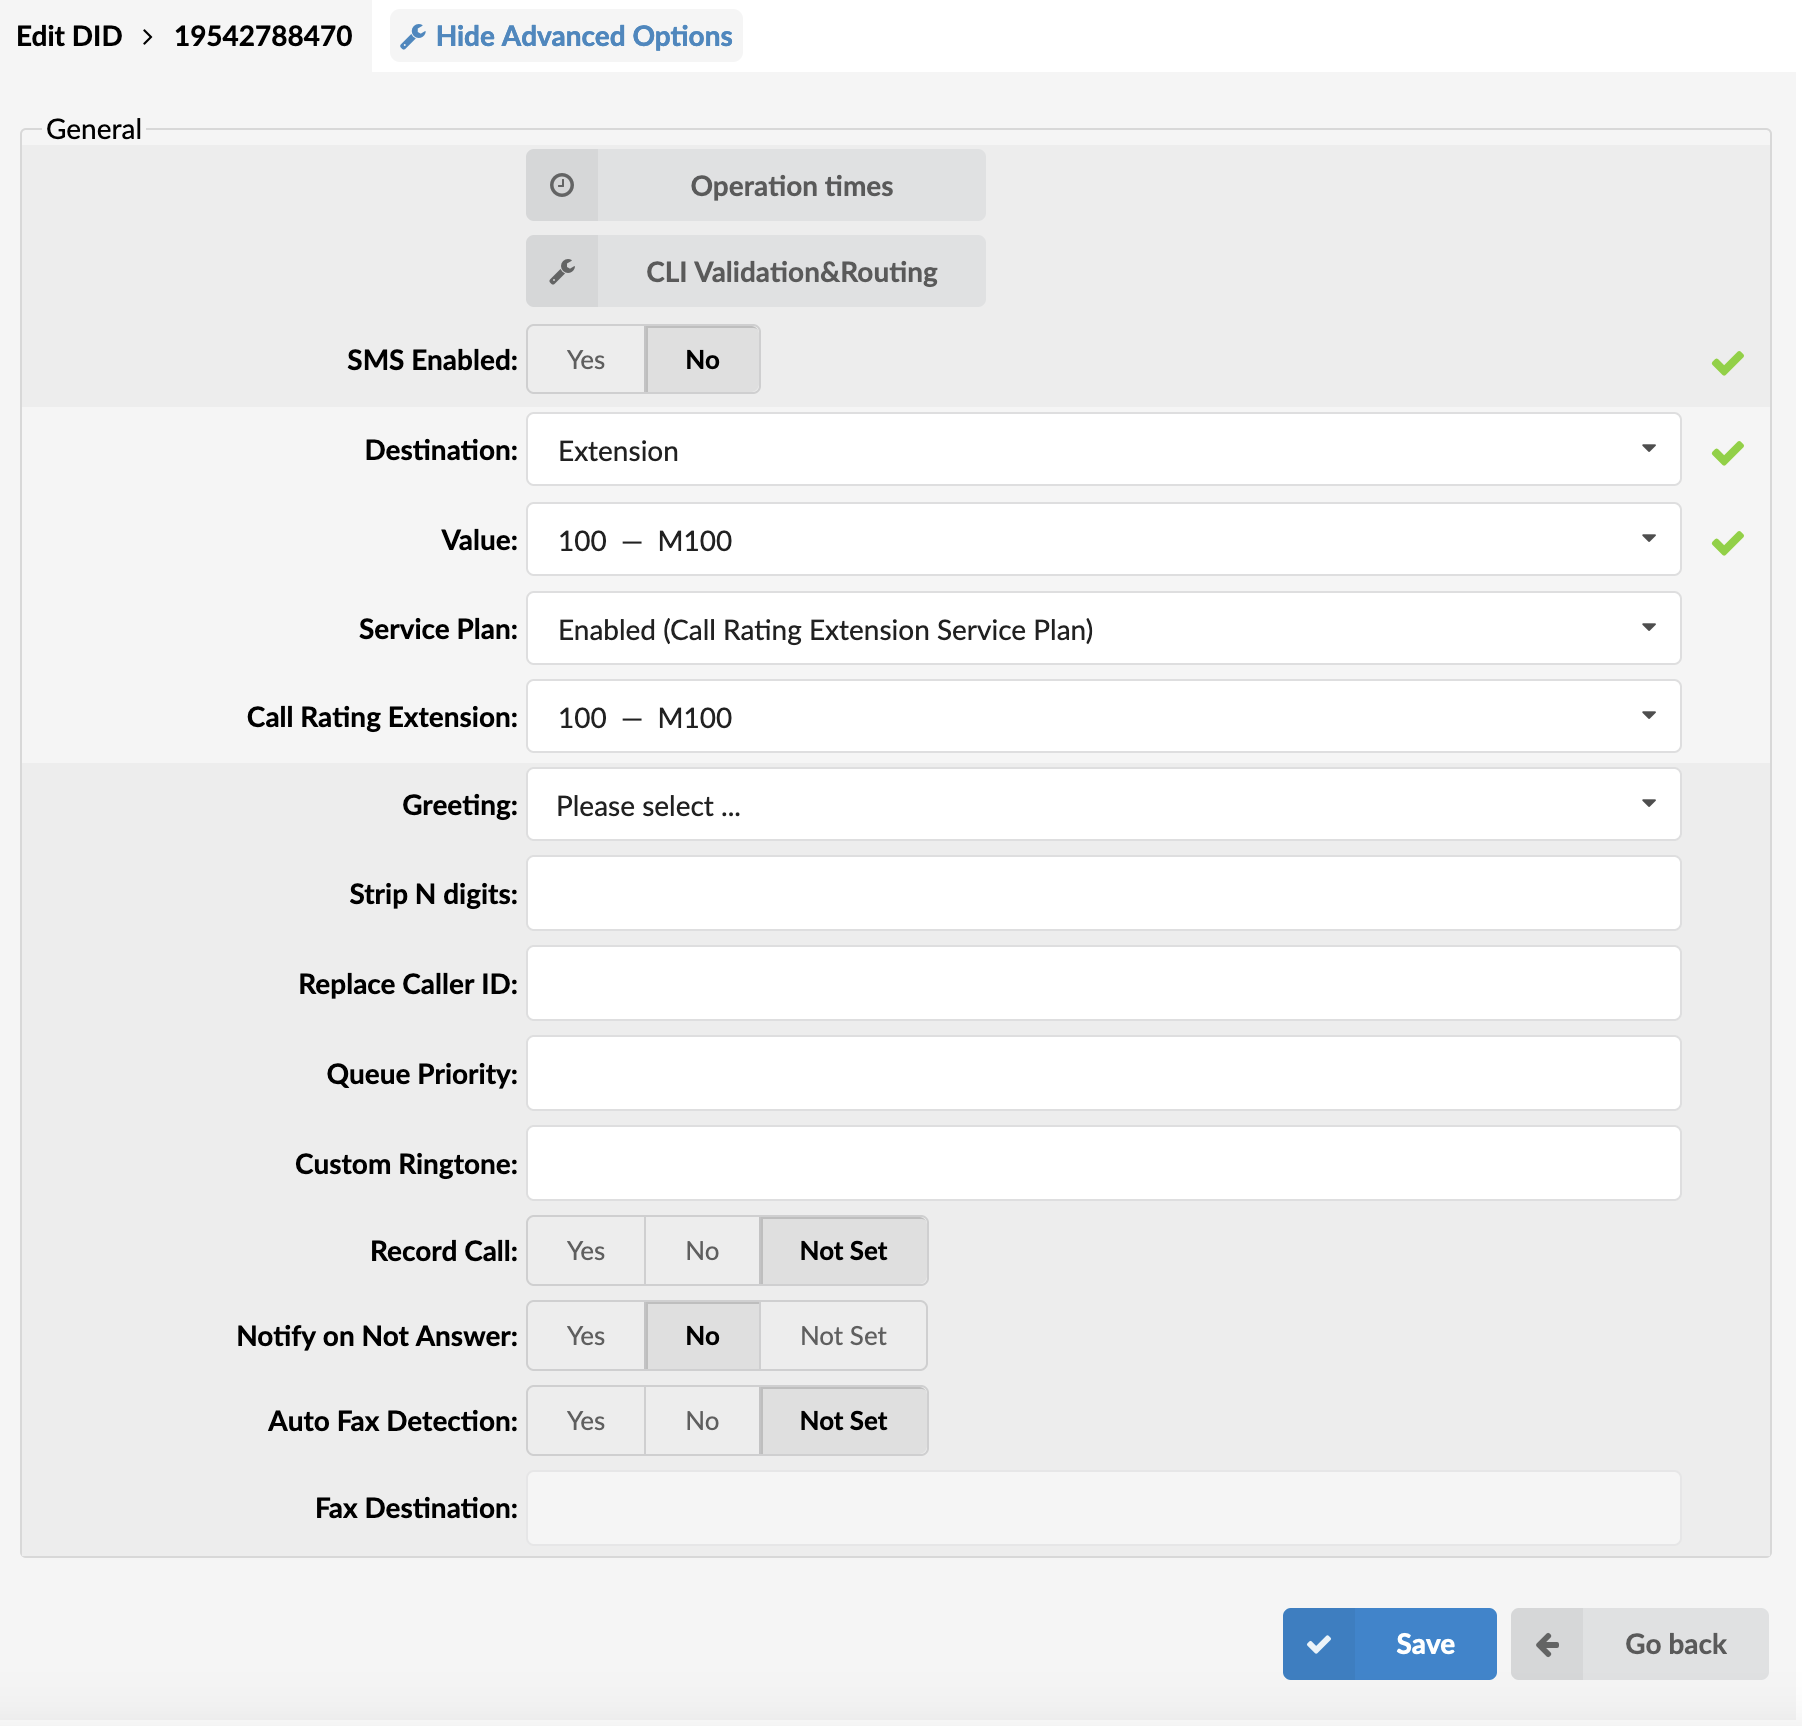
General
- Operation Times:
Set the DID operation time
- CLI Validation & Routing
Configure Validation & Routing
- SMS Enabled
Enable the SMS service for this DID
(E.g. Yes/No)
NOTE:
Scenario I: If this option needs to be enabled and editable, then the Destination must be set to ‘Extension’ and a certain ‘Value’ has to be provided. Otherwise, if any other Destination is set, this field will be uneditable. Also, a number has to be in a valid E.164 format. Please refer to the table.
Scenario 2: Please note that if ‘DID Range’ is enabled on Master Tenant, the ‘SMS Enabled’ button will be disabled. Please refer to the table.
| Editable Field (Extension) | Uneditable Field (Other Destination) |
|---|---|
|
|
|

- Preserve original Caller ID (6.6.1)
If set to ‘Yes’, the original Caller ID will be preserved in case the Destination of a DID is set to ‘External Number’
(Option buttons)
NOTE: The value set in the ‘Replace Caller ID’ field still has the highest priority. Only that value overwrites the original Caller ID. Also, please note that this option will be visible in the GUI once ‘External Number’ is selected as a Destination.
- Greeting
Greeting which is played when calling this DID
When uploading a greeting for DID, the name of the sound file must start with “greeting-did-“
- Strip N digits
Here you can set the number of digits which will be stripped from the beginning of the incoming call.
(E.g. 3)
- Replace Caller ID
Replaces the caller id with the custom data provided here. This is used when you want all incoming DID calls to have this value displayed as a caller id information. Along with the custom data, you can use the ‘%CALLERID%’ variable, which displays the calling party phone number.
NOTE: Please make sure you enter this information as it is written down, otherwise, it will not work properly.
(E.g. Providing a ‘USDID’ here, will display ‘USDID’ on your phone display, for all calls coming through this DID. Providing ‘USDID %CALLERID%’, will display ‘USDID 55510205’ on your phone display, where 55510205 is calling party phone number).
- Queue Priority
Set the Queue priority
(E.g. If this DID redirects all calls to the queue, set ‘1’ here to give all calls over this trunk the highest queue priority).
- Custom Ringtone
If you are directing calls to an extension on which a supported UAD is registered, you could set a Custom Ringtone with which the phone will ring.
(E.g. <Simple-3>)
- Record Call
If this option is turned on the incoming call on this DID will be recorded. When this option is turned on, a complete call will be recorded, whenever it goes or whatever happens to it
- Notify on Not Answer
If set to ‘Yes’ – any calls that are not answered on this DID will be logged for the next notification e-mail.
- Auto Fax Detection (v6.7.1)
This feature allows you to enable automatic fax detection on DID, and forward incoming fax calls to an extension number different from the main destination configured on DID.
- Fax Destination (v6.7.1)
Extension number incoming fax calls will be forwarded to when a fax call is detected. This field will be inactive unless Auto Fax Detection is enabled.
.
Operation Times
Set the system open/closed times. Depending on the time when the call is received, the call can be redirected to different PBXware MT destinations.

- CSV Upload
Click on this button to upload Operation Times configuration from csv file
- CSV Download
Click on this button to download Operation Times configuration to csv file
- Download CSV Template
Download CSV Template button will present you with a file that already contains necessary headers which should help you create CSV file easier
- Enable operation times
Enable operation times
(E.g. Yes, No, Inherit)
Default Destination
- Default Destination
PBXware MT extension to which all calls are redirected during the closed time hours
(E.g. 1000)
- Is Voicemail
Choose if Default Destination is voicemail
Greeting
- Greeting:
Greeting sound file played to callers during the closed times
(E.g. greeting-***)
Options
- Closed dates Sets the specific date/s when all calls are redirected to the ‘Default Destination’. If the ‘Destination’ field in the Closed dates is set, calls will not go to the ‘Default Destination’ but to this number.
- Custom Destinations: Redirects all calls received during non-working hours (e.g. weekend) to the PBXware MT extension provided here.
- Open dates: Sets the working hours during which the DID is to redirect calls as set in the DID Add/Edit window. If any call is received during the hours not set here the call is redirected to ‘Default Destination’.
CLI Validation & Routing
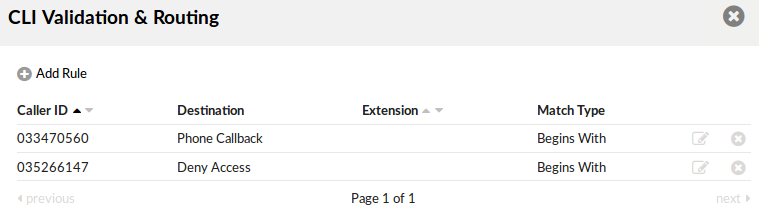
This option is used to fine tune the functionality of the DID by adding rules which send the calls to different destinations based on Caller IDs. For example, if the caller’s ID begins with 203, you can send all those calls to the IVR, if the CallerID is specifically number 063456789 then send that call to extension 4444 etc.
Once you click on CLI Validation & Routing button on Edit DID page, new window with following option will be shown:
- CSV Upload
Click on this button to upload CLI Validation & Routing configuration from csv file
- CSV Download
Click on this button to download CLI Validation & Routing configuration to csv file
- Download CSV Template
Download CSV Template button will present you with a file that already contains necessary headers which should help you create CSV file easier
- Caller ID
The Caller ID which is matched in the rule.
(E.g. 063456789)
- Destination
The type of destination to which the call will be directed.
(E.g. IVR)
- Extension
Extension of the destination or selection where the call should go.
(E.g. 2222)
- Match Type
How the Caller ID is matched.
(E.g. If we set Match explicitly to ‘yes’ here will be written ‘Explicit Match’. If we set this option to ‘No’ or ‘Not Set’ here will be written ‘Begins With’.)
Edits the CLI Validation & Routing configuration
(Button)
Deletes CLI Validation & Routing Rule from the system
Add/Edit CLI Validation & Routing Rule
- Caller ID
The Caller ID which is matched in the rule.
(E.g. 063456789)
- Destination
The type of destination to which the call will be directed.
(E.g. Queue)
- Extension
Value of the destination or selection where the call should go.
- Match Explicitly
Is Caller ID going to be matchet ‘explicitly’ or with ‘begins with’.
(E.g. Yes, No, Not Set)
Add DID (Group Mode)
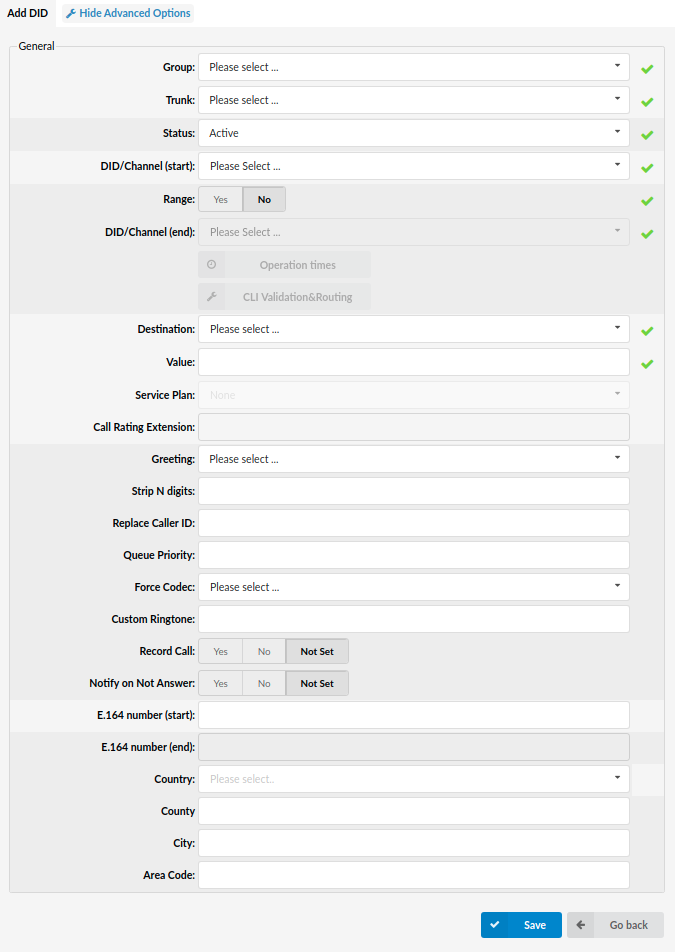
When DID Groups mode is active, DIDs are created on Slave tenant instead of Master tenant. Fields are almost the same as for creating on Master Tenant. The only difference is that instead of ‘Tenant’ field you have ‘Group’ field.
The following things have changed:
-
After you have chosen a group, the DID/Channel field will be changed to a drop-down, depending on some rules (written below)
-
The drop-down will be used as an autocomplete feature and will show available DIDs from the chosen group.
-
Maximum of 10 DID numbers are shown at a time so in order to narrow your choice you need to type in more characters.
-
The drop-down will only show the available DIDs, meaning that those already reserved/created will not be shown.
Extensions
Extensions are associated with all UADs/Phones registered to the current slave tenant. On Multi Tenant PBXware, this menu item is only available when you are editing a tenant, since the master tenant is used for controlling the system behavior and tenants functionality.
- Add Extension
Click Add Extension icon to get to the extension creation screen.
- Search
In search section you can find your extension by typing its Name, E-mail, Extension number or MAC address.
- CSV Download
This option allows you to download CSV file with all extensions already created on tenant. This type of file can be later used to import extensions with their details to a new PBXware system.
System
In this section all Extensions configured on the tenant are listed.
- Name
Full name of the user to which the device is registered
(E.g. Peter Doyle)
- Extension
UAD/Phone extension number
(E.g. 1111)
- User Agent
UAD/Phone type
(E.g. Yealink T38P)
- MAC Address
MAC Address of UADs
- Status
UAD/Phone system status
(E.g. Active/Inactive)
- Protocol
Protocol used by the UAD/Phone
(E.g. SIP/IAX)
- Edit
Edit Extension configuration
- Delete
Delete Extension from the system
Add/Edit Extension
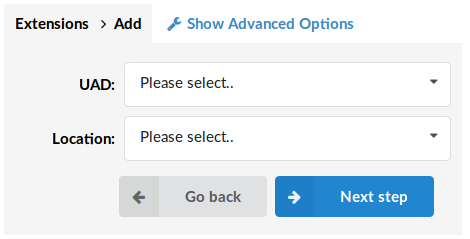
The procedure for adding a new system extension is divided into two steps. In the first step, the UAD/Phone type and extension location need to be provided. In a second step, basic UAD/Phone information such as the user’s name and email address is provided.
- UAD (User Agent Device)
UAD is the type of device which will be connected to the system.
If the UAD/Phone is not listed here, navigate to ‘Settings: UAD’ Edit the desired UAD/Phone and set its ‘Status’ to ‘Active’. Now, the UAD/Phone will be available in this list.
(E.g. Linksys SPA-941)
- Location
Select the location of the new UAD/Phone. Location refers to whether the UAD/Phone is in ‘Local’ or ‘Remote’ network.
(E.g. Local/Remote)
NOTE: By default, a ‘Single Extension’ will be created. ‘Advanced Options’ offer the facility to add multiple extensions as well. For more information, check the ‘Adding Multi Extensions’ chapter.
TIP: Since this is an extension on a tenant you will see that the Username is prefixed with a tenant code, which is required for a UAD/Phone to register to the system. Nevertheless, when you register you will be able to dial other users on the tenant with only their extension number.
Once UAD and locality have been selected, we can proceed with the second step. Required fields are:
General
- Extension number
By default, this field is automatically populated, but can be changed to any free Extension number.
(E.g. Setting ‘1008’ here will create a new system extension with the same network number).
- Name
Full name of the person using the Extension. This name is sent in a Caller ID information
(E.g. setting name ‘Joanna Cox’ in this field will display the name on the other UAD/Phone display when the call is made.)
Email address associated with the extension and used for various system notifications
(E.g. Setting ‘joanna@domain.com’ here will transfer all Voicemail notifications, Extension PIN and other details to this email. Also, E-mail used together with ‘User Password’ is what user needs for OSC login.)
- Department
Department to which extension will belong to. This is used so the mobile and desktop apps can group extensions depending on which department they belong to.
(E.g. Select “Sales” and when sorted in gloCOM, this extension will be shown in the Sales department group).
PIN Based Devices

- PBD PIN
PIN Used for PIN Based Dialing
(E.g. 12345)
Call Rating
- Call Rating
Turn Call Rating on or off for the current extension. If you set this option to ‘Yes’ you will also need to add a suitable Service Plan.
(E.g. Yes, No, N/A)
- Service Plan
Service plan which will be applied to the extension. Call rates which were set in this service plan will now apply to the extension.
(E.g. Test Service Plan)
TIP: Looking from a call rates perspective, extension can be set as slave or master. Master extension have their own credit and are able to have a reminder, when balance reaches certain amount and certain limitations. Slave extensions are using credit available under Master extension which is set as Master Account Code for that slave extension.
- Slave
Set whether this extension is slave or not.
(E.g. Yes, No, N/A)
- Master Account Code
Set the master account code (extension number) of a master extension from which the current extension is using funds.
(E.g. 1005)
- Reminder Balance
Account balance at which a reminder should be sent to the user.
(E.g. If this field is set to 10, the user will receive an email notification when the account balance reaches this amount.)
- Credit Limit
The maximum amount that the system will extend to the billing account.
(E.g. If this field is set to ’10’ and the account balance has dropped down to ‘0’, your account will still have ’10’ units in available funds.)
Authentication

- Username
Username used by the UAD/Phone for the registration with the PBXware MT
By default, this field is the Extension network number prefixed with tenant code and cannot be changed.
(E.g. If the extension number is 1008 and tenant code is 300, then the Username will be ‘3001008’).
- Secret
Secret/Password used by the UAD/Phone for registration with the PBXware MT.
By default, this field is automatically populated but can be changed to any value.
(E.g. xKa2r4ef7X*v0!Fk)
- User Password
Password used for gloCOM registration with the MT PBXware.
By default, this field is automatically populated but can be changed to any value.
(E.g. Vk5F_3*dDZrmT1k7)
- Show QR Code
Show QR Code button will display QR code that can be scanned with gloCOM GO mobile application. This feature will make mobile app setup and registration process as fast and simple as possible. In order to setup gloCOM GO with QR Code scanning you will have to enter public address of your PBXware in QR Server field in Settings -> Servers -> Network Info section.
NOTE: Once you are registered to PBXware with your gloCOM GO you will be asked to change automatically generated User Password in order to log in. Once this procedure is completed User Password will not be visible anymore and QR Code button will be hidden.
NOTE: PBXware requires strong password enforcement, which means that the Password/Secret must meet certain criteria in order to be accepted, otherwise PBXware will display an error message stating that Password/Secret is too weak.
Strong Password Requirements
Password and Secret have to meet the following criteria in order to be accepted:
- It must be at least 8 characters long
- It must contain at least 1 uppercase
- It must contain at least 1 lowercase
- It must contain at least 1 digit
- It must contain at least 1 special character
- Allowed characters are: a-z, A-Z, 0-9, ! % * _
TIP: In order to make it easier for our users, we also implemented password generator, that will automatically generate strong password that meets the criteria above with a single mouse click on a key icon located on a side of Secret/User Password field.
- PIN (Personal Identification Number)
Number used for account authorization.
(E.g. If the PIN for this extension is set to ‘84745’, PBXware MT will ask for it when checking your Voice inbox or Enhanced Services.)
TIP:
- After the extension is created, the ‘Permissions’ group will be editable for the administration.
- Do not paste a value to the ‘Name’ and ‘Email’ fields, but please type it in. If these values are pasted, ‘Advanced options’ will need to be opened and the system will prompt for missing values.
- Once the extension is created, the ‘Save & Email’ button becomes available. This command sends Extension details on the provided ‘E-mail’ address.
Auto Provisioning
- Auto Provisioning

Option for enabling auto provisioning service for this extension. This feature enables you to connect the UAD/Phone to PBXware MT without any hassle by providing UAD/Phone MAC address (and optionally adding the Static UAD/Phone IP address and network details).
(E.g. Yes, No, Not Set)
- MAC Address (Media Access Control)
Provide the UAD/Phone MAC address here.
(E.g. Its a 48-bit hexadecimal number (12 characters))
Adding Multiple Extensions
Extension Template
- Select an Extension that will be used as a template
- (E.g. M100)
- (Checkbox)
If a user selects the ‘Extension Template’ option and chooses a specific Extension, then the complete configuration of that Extension will be applied to all other Extensions created below. In case a user does not check the ‘Extension Template’ option, then s(he) can create multiple Extensions, but has to edit their additional configuration respectively.
Users can add multiple Extensions to PBXware in two ways:
1. Manually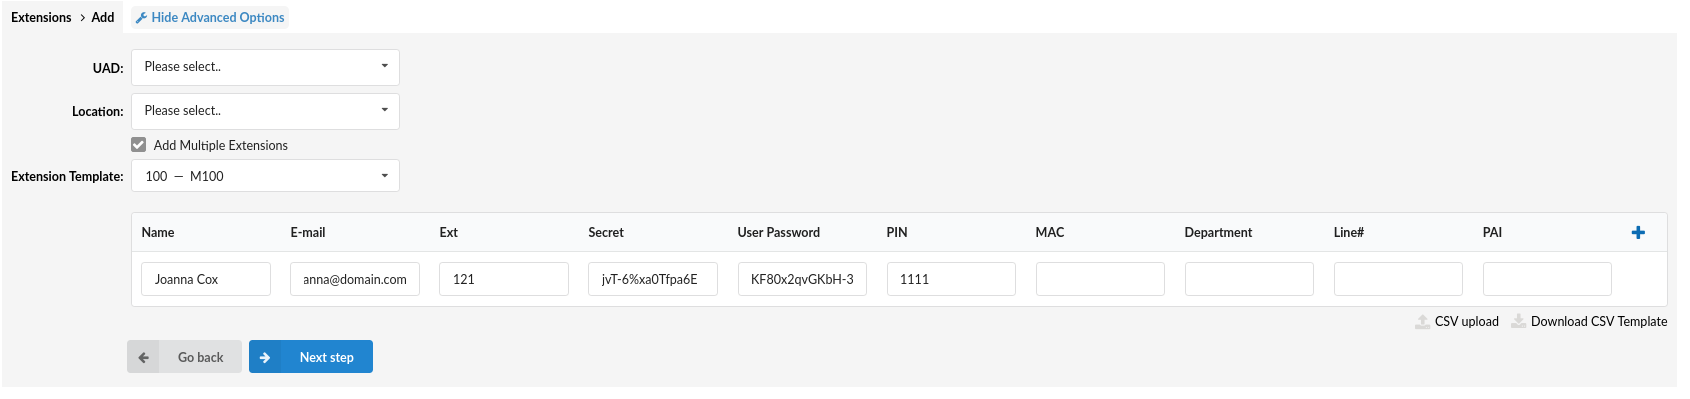
- Create a list
- Manually populate the following fields: ‘Name’,’E-mail’,’Ext’,’Secret’, ‘User Password’, ‘PIN’, ‘MAC’, ‘Department’, ‘Line#’, ‘PAI’
- Click the Add(+) icon
2. Creating and uploading ‘.csv’ file
- Upload a .csv file
- Open a new file in the text editor
- Add the following lines (as shown in the example):
| “Name” | “Email” | “Ext” | “Secret” | “User Password” | “PIN” | “MAC” | “Department” | “Line#” | “PAI” |
|---|---|---|---|---|---|---|---|---|---|
| “Joanna Cox” | “joanna@domain.com“ | “121” | “jvT-6%xa0Tfpa6Em” | “KF80x2qvGKbH-3” | “1111” | “001122AABBCC” | “Sales” | “2” | “%EXT%” |
- Save the file as ‘multiple-extensions.csv’
- Click the ‘CSV upload’ button
- Select the ‘multiple-extensions.csv’ from the hard drive
- Click the ‘Upload’ button
- New Extensions will be created
NOTE: In order for this to work as intended, please note that the following fields must be populated: ‘Name’, ‘E-mail’, and ‘Ext’.
NOTE: Always use a simple editor such as Notepad++ on Windows, or Gedit on Linux when editing .csv files. Please refrain from using Excel as it may remove formatting which will render the file unusable.
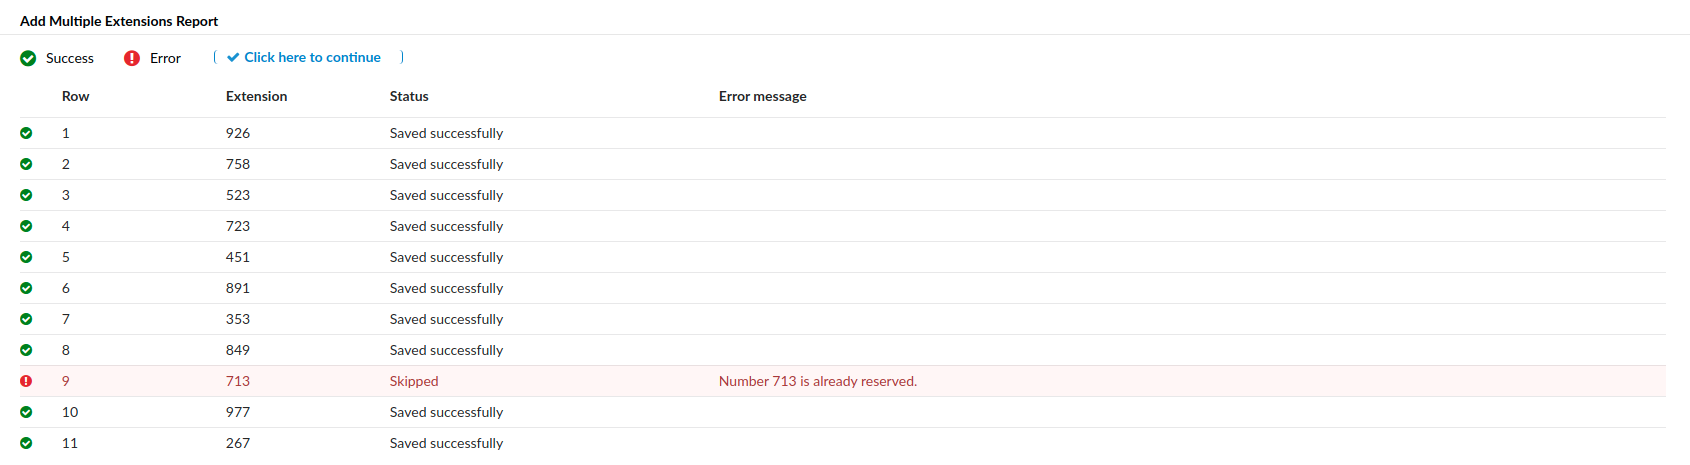
After the CSV file was uploaded, a report showing the number of uploaded/failed/skipped Extensions will be displayed. For more information, please refer to the screenshot.
NOTE:
PBXware enforces strong password requirement, which means that the Secret must meet certain criteria in order to be accepted, otherwise PBXware will display an error message stating that Password/Secret is too weak. For more on how to create a successful Password/Secret in order to be accepted, please refer to the following criteria:
- It must be at least 8 characters long
- It must contain at least 1 uppercase
- It must contain at least 1 lowercase
- It must contain at least 1 digit
- It must contain at least 1 special character ()
- Allowed characters are: a-z, A-Z, 0-9, ! % * _ –
- Download CSV Template
Download a CSV template for adding multiple Extensions
Advanced Options
Clicking the Advanced Options button will show advanced configuration options and fields that were previously hidden.
Opening the ‘Advanced Options’ section following options are added:
General
The following options are used frequently and are mostly required for normal extension operation. Some of these fields are pre-configured with default values. It is not recommended to change these unless prompted to do so while saving the changes.
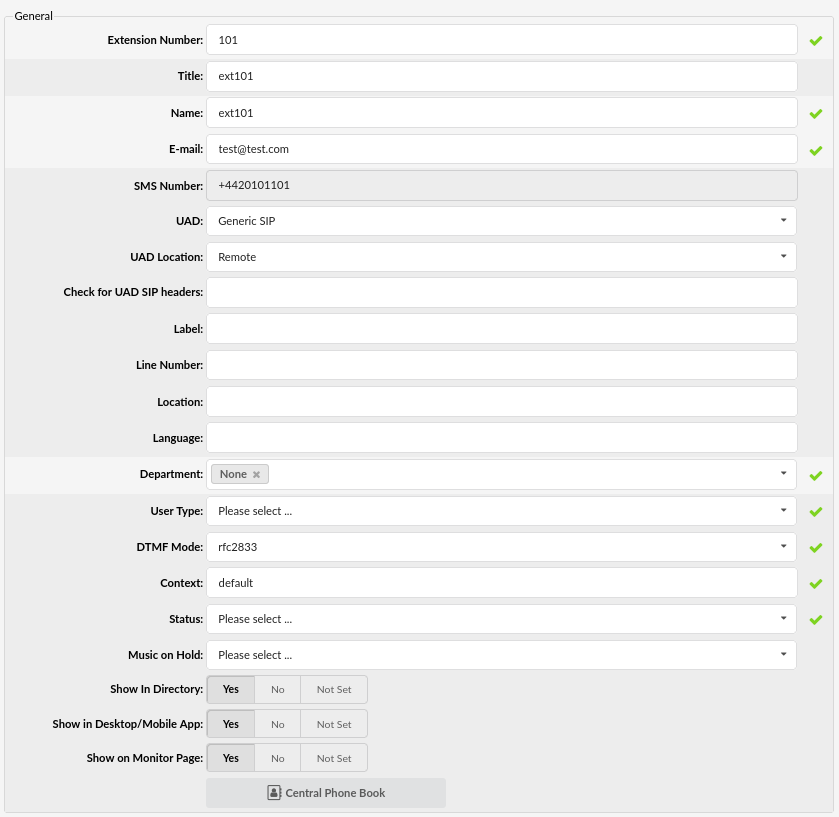
- Title
The user’s title such as Mrs, Mr, etc.
- SMS Number
Displays the SMS number if set on the Extension
(E.g. +1234567890)
NOTE: Please note that the SMS number cannot be edited on this page.
- UAD
UADs (User Agent Devices) are various IP phones, soft phones, ATA (Analog Telephone Adaptors), and IADs (Integrated Access Devices) used for system extensions. PBXware supports a wide range of UADs using SIP, IAX, MGCP, and ZAPTEL protocols. If your phone is on the supported UAD list and UAD is enabled on your PBXware, you will be able to choose the UAD that matches the phone registering to the extension.
(E.g. Generic SIP)
- UAD Location
This option is related to the Auto Provisioning function of PBXware. Extensions located in same LAN as PBXware have to be set to Local while extensions connecting to PBXware from WAN should be set to Remote.
(E.g. Local)
- Check for UAD SIP Headers (6.6.)
List desired SIP headers that will be forwarded from a UAD to the outbound Trunk
(E.g. p-early-media, x-tn-mobility)
NOTE: For example, if the UAD sends the ‘x-TN-Mobility’ header through the SIP INVITE and users want to preserve it on the outbound Trunk, they can add this header to the ‘Check for UAD SIP Headers’ field. When making a call, a check will be made to see if the UAD sends header(s) that is/are listed in this field. In case it is set, that header will be forwarded to the outbound Trunk.
NOTE: When checking for additional headers, make sure to avoid using all default invite headers.
Here is the list of unsupported headers which should be case insensitive: “via”, “from”, “to”, “cseq”, “call-id”, “contact”, “allow”, “user-agent”, “accept-language”, “supported”, “allow-events”, “max-forwards”, “content-type”, “content-length”, “p-asserted-identity”, “privacy”, and “remote-party-id”.
If one of the aforementioned headers is typed in as shown in the screenshot, the warning message should appear saying that the header is not allowed.
- Label
The name showing on the LCD of the current device
(E.g. John Doe)
- Line Number
When auto provisioning multiple extensions on 1 phone, extensions are assigned onto lines in the order in which they were created in PBXware. The line field will allow customers to specify the extension line where this extension will be assigned on the device.
(E.g. 2)
NOTE: An empty line number field will be treated as the last one.
- Location
Information on the geographic location of a user
(E.g. Los Angeles)
- Language
Set a language per Extension
(E.g. en)
NOTE: The language set on the Extension will override the language set on the Tenant.
- Extension Timezone
Select timezone for extension if different from server.
(E.g. Europe/London)
- User Type
Extension can be set to make calls only, receive calls only or both make and receive calls
- Friend – make and receive calls
- Peer – receive calls only
- User – make calls only
- DTMF Mode (Dual Tone Multi-Frequency)
A specific frequency, consisting of two separate tones. Each key has a specific tone assign to it so it can be easily identified by a microprocessor.
This is a sound heard when dialing digits on touch-tone phones. Each phone has different ‘DTMF Mode’.
(E.g. By default, this field is populated automatically for supported devices. If adding other UAD/Phone select between ‘inband’, ‘rfc2833’ or ‘info’ options)
- Context
Every system extension belongs to a certain system context. Context may be described as a collection/group of extensions. Default context used by the PBXware MT per tenant is ‘t-XXX’ (where XXX is tenant number) and cannot be changed.
(E.g. t-500)
- Status
Extension status/presence on the network.
Rather than deleting the extension and then recreating it again later on, the extension can be activated/deactivated using this field.
(E.g. Setting this field to ‘Not Active’ will disable all calls to this extension).
Options:
Active – Extension is active, it can make and receive calls.
Not Active – Extension is not active and it can’t make nor receive calls.
Suspended – Extension is suspended and can’t make calls to numbers other than those defined as Emergency Service numbers in Settings -> Servers -> Edit Server -> Locality (section) -> Emergency Services,
- Music on Hold
It allows users to choose different Music on Hold class for every extension. Select the MOH (Music On Hold) class name. All sound files belonging to this MOH class will be played to users dialing this extension.
(E.g. default)
NOTE: When you select MoH class, you need to enter ‘m’ in Incoming Dial Option field. Entering ‘m’ will provide Music on Hold to the calling party until the called channel answers.
- Show In Directory
Whether the extension should be shown in Remote Directory accessed through the desk-phones interface.
(E.g. Yes, No, Not Set)
- Show in Desktop/Mobile App
Enable/disable non-gloCOM extensions from displaying in gloCOM contacts.
(E.g. Yes, No, Not Set)
NOTE Device must support this feature.
- Show on Monitor Page
This excludes an extension from showing on the Monitor page. Useful for virtual extensions that will never be online in order to get a more accurate count of phones online.
(E.g. Yes, No, Not Set)
- Central Phone Book
When you click on this button new pop-up (where you can manage your Central Phone Book contacts) will be shown.
More about managing Phone Contacts you can find at Central Phone Book page
Call Rating
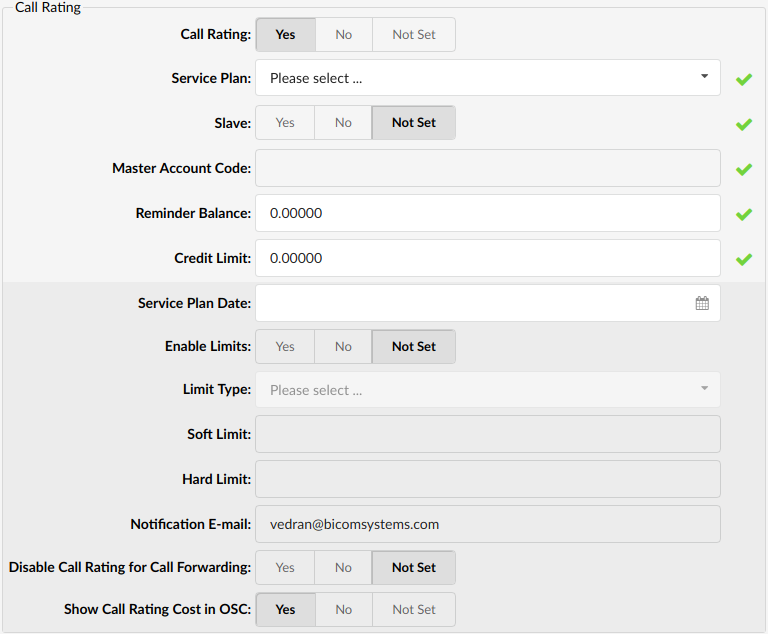
These options are used for call rating of incoming and outgoing calls. The extension is assigned to a service plan and its call rates and additional call rating options are set here as well.
- Service Plan Date
This option is only available if you set extension to be master extension. (Call rating -> Slave-> No/Not Set. Also, Service Plan must be set in order for this to work. This date defines when will Service Plan reset.
(E.g. In service plan you have set inclusive minutes to 5. If this field is set to 03-12-2019, inclusive minutes will be reset on 3rd day of each month. So, if all 5 inclusive minutes were used by this day, inclusive minutes will be reset back 5 from this date)
- Enable Limits
If the extension is master extension it is possible to set this option to yes. Setting this field to yes enables setting limits on the current extension.
(E.g. Yes, No, Not Set)
- Limit Type
This option lets us decide whether limits we set will be applied on a Daily or Monthly basis.
(E.g. Daily)
- Soft Limit
Depending on Limit Type, when the extension reaches Soft Limit, it will email the person in charge of a call rating.
(E.g. If you set this field to 10, an email will be sent to you when the user reaches that amount [10] while calling)
- Hard Limit
Depending on the Limit Type, when an extension reaches Hard Limit, the system will block this extension from making any further calls.
(E.g. If you set this field to 20 and the user reaches that amount while calling, system will block this extension from making further calls)
- Notification E-mail
Email which will be used when the user reaches Soft Limit.
(E.g. admin@domain.com)
- Disable Call Rating for Call Forwarding:
You can set whether you want call rating to be applied for any forwarded calls.
(E.g. Yes/No/Not Set)
- Show Call Rating Cost in OSC:
Users can choose to have call rating displayed for their extension in the Online Self Care window.
(E.g. Yes/No/Not Set)
Call Rating Info
This section displays the extension’s Call Rating information such as: Account Balance, Available Funds, Inclusive Minutes Left.
- Account Balance
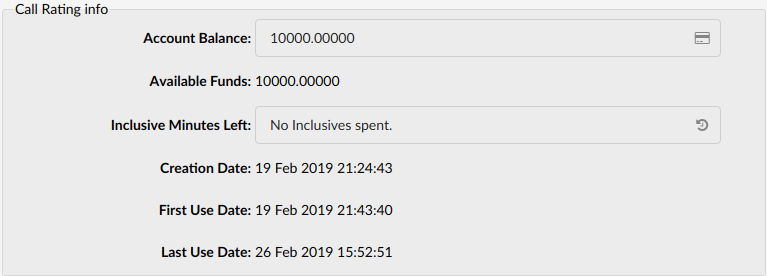
Displays the amount of credit units left (available funds minus sum that is already spent by the user).
(E.g If the user has 100 units of credit, 100 units + the credit limit can be spent in total. If this field displays a negative value (e.g. -4.00000) that means that the account balance has reached 0 and the credit limit is being used).
- Credit/Debit

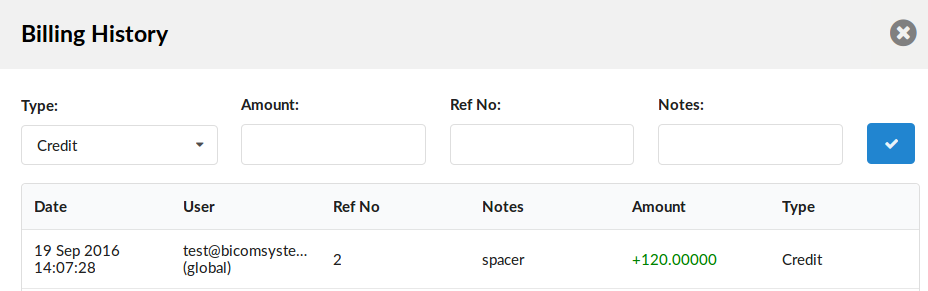
Opens a window with Call Rating History, where you have option for adding extension credit/debit. Following parameters available: - Type
Call Rating type, select whether call rating is Credit or Debit.
(E.g. Credit)
- Amount
Call Rating amount, if the call rating type is in Euros, and you add 100 here, 100 Euros will be added to the extension amount.
(E.g. 50)
- Ref No
Call Rating reference number, depending on how your company bills clients, the invoice number can be assigned here, for example.
(E.g. Invoice01)
- Notes
Additional Call Rating notes.
(E.g. 50 Euros credit added)
- Confirm
This will finalize Call Rating action, fill in all previous fields and click this button to add funds.
Once funds are added, the following details will be displayed:
- Date: Time and date of the payment
- User: The username used for login to the system of the user who added the funds
- Ref No: Call Rating reference number
- Notes: Additional Call Rating notes
- Amount: Amount of funds added
- Type: Call Rating type
- Available Funds
Displays available account funds (account balance + credit limit).
(E.g. If the user account balance has 100 units + 10 credit limit units, 110 units will be displayed here).
- Inclusive Minutes Left
Displays the inclusive minutes left. As long as there is any inclusive time left, call rating is not calculated for outgoing calls.
(E.g. You’ll see the inclusive minutes left in the following form ‘0d 0h 4m 25s’).
- Reset Inclusive

Reset extension inclusive minutes, click on this button and confirm with ‘Yes’ to reset inclusive minutes.
NOTE: Buttons Reset Inclusive and Credit/Debit will not be displayed unless Call Rating is enabled.
- Creation Date
Extension creation date.
(E.g. 14-06-2049 12:30:36)
NOTE: If your system was updated to a newer version, all extensions created on old version will display ‘unknown’ in this field.
- First Use Date
Date/Time of the first extension use.
(E.g. 11 Jun 2019 18:58:25)
- Last Use Date
Date/Time of the last extension use.
(E.g. 11 Jun 2019 19:25:12)
Network Related
These options set important network related values regarding NAT, monitoring and security.
- Transport
Type of transfer protocol that will be used on PBXware.
Available options:
UDP (User Datagram Protocol) – is used primarily for establishing low-latency and loss-tolerating connections between applications on the internet. UDP enables process-to-process communication. With UDP, computer applications can send messages, in this case referred to as datagrams, and it is considered as best-effort mode of communications. UDP is considered a connectionless protocol because it doesn’t require a virtual circuit to be established before any data transfer occurs
TCP (Transmission Control Protocol) – provides reliable, ordered, error-checked delivery of a stream of octets between programs running on computers connected to an intranet or the public Internet. TCP sends individual packets and is considered a reliable transport medium.
TLS (Transport Layer Security) – cryptographic protocol that provide communication security over the Internet.[1] They use asymmetric cryptography for authentication of key exchange, symmetric encryption for confidentiality, and message authentication codes for message integrity.
(E.g. TLS)
- WebRTC Enabled
Whether WebRTC is enabled for this Extension or not
(E.g.Yes, No, Not Set)
Navigate to Settings > Protocols > SIP and make sure TLS is set to “Yes”.
Under Extensions > Extension > Edit screen, make sure option WebRTC Enabled is set to Yes.
For Allowed Codecs make sure “Opus” is enabled and set.
In order for WebRTC to function properly, following things must be done:
Go to Setup Wizard > SSL Certification page and make sure to upload a valid certificate or to use automatic Let’s Encrypt service.
Navigate to Settings > Protocols > SIP and make sure TLS is set to “Yes”.
Set WebRTC Enabled option to Yes.
For Allowed Codecs make sure Opus is enabled and set.
- Encryption
This option enables or disables encryption in PBXware transport.
Available options are:
- Offer if possible (TLS only) – Offers encryption only if it is possible and only with TLS protocol.
- Required -Encryption always required.
- Offer (TLS only) – Always offers encryption but only with TLS.
- NAT (Network Address Translation)
Set the appropriate Extension – PBXware NAT relation.
If extension 1000 is trying to register with the PBXware from a remote location/network and that network is behind NAT, select the appropriate NAT settings here.
Available options:
- Default (rport) – this setting forces RFC3581 behavior and disables symmetric RTP support.
- Yes – Always ignore info and assume NAT
- No – Use NAT mode only according to RFC3581
- Comedia RTP – enables RFC3581 behavior if the remote side requests it and enables symmetric RTP support.
- Direct Media
Should you allow RTP voice traffic to bypass Asterisk.
Available options:
- No – this option tells the Asterisk to never issue a reinvite to the client
- Yes – send reinvite to the client
- No NAT only – allow reinvite when local, deny reinvite when NAT
- Use UPDATE – use UPDATE instead of INVITE
- No NAT, Update – use UPDATE when local, deny when NAT
- Direct RTP setup
Here you can enable or disable direct RTP setup. Setting this value to yes sets up the call directly with media peer-2-peer without re-invites. Will not work for video and cases where the callee sends RTP payloads and fmtp headers in the 200 OK that does not match the callers INVITE. This will also fail if directmedia is enabled when the device is actually behind NAT.
(E.g. Yes, No, Not Set)
- Qualify (ms)
Timing interval in milliseconds at which a ‘ping’ is sent to the UAD/Phone or trunk, in order to find out its status(online/offline). Set this option to ‘2500’ to send a ping signal every 2.5 seconds to the UAD/Phone or trunk. Navigate to ‘Monitor: Extensions’ or ‘Monitor: Trunks’ and check the ‘Status’ field.
Since PBXware v5.1 ‘Qualify’ is set to 8000 by default.
(E.g. 8000)
- Host
Set the way the UAD/Phone registers to PBXware. Set this field to ‘dynamic’ to register the UAD/Phone from any IP address. Alternately, the IP address or hostname can be provided as well.
(E.g. dynamic)
- Default IP
Default UAD/Phone IP address. Even when the ‘Host’ is set to ‘dynamic’, this field may be set. This IP address will be used when dynamic registration could not be performed or when it times out.
(E.g. 192.168.1.1)
NOTE: In order for deafult IP feature to be used UAD/Phone must be set up with static IP address.
- Max Connected Devices
Maximum number of connected devices per extension.
(E.g. 10)
Caller ID
The caller’s name and number displayed here are sent to the party you call and are shown on their UAD/Phone display. The information you see here is taken from the extension number and user name. To set different Caller ID information, please go to ‘Enhanced services: Caller ID’ and set new information there.
- Set Caller ID
Enable ‘Caller ID’ service. Set this option to ‘Yes’ to enable the Caller ID service.
(E.g. Yes, No, Not Set)
- Caller ID
Extension Number and Name that are displayed on dialed party UAD/Phone display. These options are read-only. Caller ID information can be changed only through ‘Enhanced Services’
- Caller ID Presentation
The way Caller ID is sent by the Extension
If PBXware MT is connected to a third-party software and there are problems with passing the Caller ID information to it, applying different ‘Caller ID Presentation’ methods should sort out the problem
(E.g. Allowed, Not Screened)
(Select box)
- Hide CallerID for Anonymous calls
Setting this option to ‘Yes’ formats all incoming calls who have Caller ID set but anonymous number to both anonymous (anonymous <anonymous>).
(E.g. Yes, No, Not Set)
- Ringtone for Local calls
This option enables setting up the custom ringtone for local calls. It is necessary to know which phone is registered on this extension.
(E.g. If your phone is SPA941 you could set <Simple-2>)
- Ringtone for Transferred calls
Ringtone for transfered calls, work same as Ringtone for local calls setting. Depending of your phone manufacturer you can send a string to the phone in order to use different ringtone than the one set on device. Once this string is set in Ringtone for transfered calls field (as well as in your device itself) it will be used for all calls that are transfered to your extension.
- Only Allow Trunk CallerID within DID range
When you assign the extension to a customer and assign some DIDs to it, the customer can make calls through that extension with Trunk CallerIDs that match its DID numbers. If a customer tries to make a call with a Trunk CallerID that doesn’t match any of the DIDs assigned to him, the Trunk CallerID will be reset to Anonymous.
(E.g. Yes, No, Not Set)
NOTE: This option is also available when creating a tenant. When setting this on tenant, it applies to all its extensions. If we want a different treatment for a particular extension then we set this option here while creating or editing the desired extension.
- Trust Remote-Party-ID
Defines whether PBXware will allow Remote-Party-ID header
(E.g. Yes, No, Not Set)
- Send Remote-Party-ID
Should ‘Remote-Party-ID’ be added to uri.
Options available:
- Use Remote-Party-Id – Use the “Remote-Party-ID” header to send the identity of the remote party
- Use P-Asserted-Identity – Use the “P-Asserted-Identity” header to send the identity of the remote party
(Select Box)
- Send Caller ID in RPID for Anonymous calls
Whether Caller ID will be sent in RPID header for Anonymous call
(E.g. Yes, No, Not Set)
- Connected Line Updates
This option is particularly useful as for some providers, if Use PAI is enabled, calls might start dropping short time after update is sent. Setting Connected Line Updates to No will prevent these call drops.
(E.g. Yes, No, Not Set)
- RPID with SIP UPDATE
In certain cases the only method which will immediately transmit connected line change is with a SIP UPDATE request. If communicating with another Asterisk server and wish to be able to transmit such UPDATE messages to it, then you must enable this option. Otherwise, we will have to wait until we can send a reinvite to transmit the information.
(E.g. Yes, No, Not Set)
- PAI header variable
Set the value for the PAI header.
Available placeholders are:
- %CALLERIDNUM%
- %TENANT%
- %EXT%
- %TENANTEXT%
- %TENANTNAME%
- %CALLERIDNAME%
- %PAIEXT%
Call Properties
These options fine-tune incoming/outgoing call settings.
- Area Code
Area code that the system is located in or is operating from.
(E.g. If PBXware is located in New York, set the New York area code here (e.g. 212). This will override the default area code which is set on Tenant.)
NOTE: The maximum area code value is 50 digits. Users can set it per Extension in the ‘Area Code’ field.
- Ringtime (sec)
UAD/Phone ring time in seconds.
(E.g. Amount of time which tells us how long the UAD/Phone will ring before the call is considered unanswered (by default it is 32 seconds))
- Incoming Dial Options
Advanced dial options for all incoming calls.
Note: Please see below for a detailed list of all available dial options (default: tr).
- Outgoing Dial Options
Advanced dial options for all outgoing calls.
NOTE: Please see below for a detailed list of all available dial options (default: empty).
Dial Options:
- t – Allow the called user to transfer the call by hitting #
- T – Allow the calling user to transfer the call by hitting #
NOTE: The caller can use ‘#’ to transfer local calls but only if both Extensions or just the callee’s Extension has ‘T’ set as the ‘Incoming dial’ option. Please note that the calls that originate from Trunk do not execute a transfer on ‘#’.
- r – Generate a ringing tone for the calling party, passing no audio from the called channel(s) until one answers. Use this option with care and don’t insert it by default into all of your dial statements as you are killing call progress information for the user. Asterisk will generate ring tones automatically where it is appropriate to do so. ‘r’ makes it go the next step and additionally generate ring tones where it is probably not appropriate to do so.
- R – Indicate ringing to the calling party when the called party indicates ringing, pass no audio until answered. This is available only if you are using kapejod’s bristuff.
- m – Provide Music on Hold to the calling party until the called channel answers. This is mutually exclusive with option ‘r’, obviously. Use m(class) to specify a class for the music on hold.
- o – Restore the Asterisk v1.0 Caller ID behavior (send the original caller’s ID) in Asterisk v1.2 (default: send this extension’s number)
- j – Asterisk 1.2 and later: Jump to priority n+101 if all of the requested channels were busy (just like behaviour in Asterisk 1.0.x)
- M (x) – Executes the macro (x) upon connect of the call (i.e. when the called party answers)
- h – Allow the called party to hang up by dialing *
- H – Allow the caller to hang up by dialing *
- C – Reset the CDR (Call Detail Record) for this call. This is like using the NoCDR command
- P (x) – Use the Privacy Manager, using x as the database (x is optional)
- g – When the called party hangs up, exit to execute more commands in the current context.
- G (contextextenpri) – If the call is answered, transfer both parties to the specified priority; however it seems the calling party is transferred to priority x, and the called party to priority x+1
- A (x) – Play an announcement (x.gsm) to the called party.
- S (n) – Hang up the call n seconds AFTER the called party picks up.
- d: – This flag trumps the ‘H’ flag and intercepts any dtmf while waiting for the call to be answered and returns that value on the spot. This allows you to dial a 1-digit exit extension while waiting for the call to be answered – see also RetryDial
- D (digits) – After the called party answers, send digits as a DTMF stream, then connect the call to the originating channel.
- L (x[:y][:z]) – Limit the call to ‘x’ ms, warning when ‘y’ ms are left, repeated every ‘z’ ms) Only ‘x’ is required, ‘y’ and ‘z’ are optional. The following special variables are optional for limit calls: (pasted from app_dial.c)
- + LIMIT_PLAYAUDIO_CALLER – yes|no (default yes) – Play sounds to the caller.
- + LIMIT_PLAYAUDIO_CALLEE – yes|no – Play sounds to the called party.
- + LIMIT_TIMEOUT_FILE – File to play when time is up.
- + LIMIT_CONNECT_FILE – File to play when the call begins.
- + LIMIT_WARNING_FILE – File to play as a warning if ‘y’ is defined. If LIMIT_WARNING_FILE is not defined, then the default behavior is to announce (‘You have [XX minutes] YY seconds’).
- f – forces CallerID to be set as the extension of the line making/redirecting the outgoing call. For example, some PSTNs don’t allow Caller IDs from other extensions than the ones that are assigned to you.
- w – Allow the called user to start recording after pressing *1 or what defined in features.conf, requires Set(DYNAMIC_FEATURES=automon)
- W – Allow the calling user to start recording after pressing *1 or what defined in features.conf, requires Set(DYNAMIC_FEATURES=automon)
NOTE: Dial options can bind together. (E.g. t + r = tr)
Groups
These options define who is allowed to pickup our calls, and whose calls we are allowed to pickup.

- Call Group
Set the Call Group that the extension belongs to. It is only allowed to have 1 Call Group.
(E.g. 3)
- Pickup Group
Set which groups the extension is allowed to pickup by dialing ‘*8’. It is allowed to have as much Pickup Groups as needed.
(E.g. 4 2)
TIP: Grouping works only within a technology (SIP to SIP or IAX to IAX)
Example:
Extension A:
- Call Group = 1
- Pickup Group = 3,4
Extension B:
- Call Group = 2
- Pickup Group = 1
- If A is ringing, B can pickup the ringing call by dialing ‘*8’.
- If B is ringing, A cannot pickup the ringing call because B’s Call Group = 2, and A can pickup only Call Groups 3 and 4.
NOTE: To be able to select Call Group and Pickup Group they have to be assigned to the tenant in Settings -> Tenants -> edit tenant -> Numbering Defaults (section) -> Call groups/Pickup groups.
Default Trunks
These options enable extensions to use custom default trunks for all outgoing calls.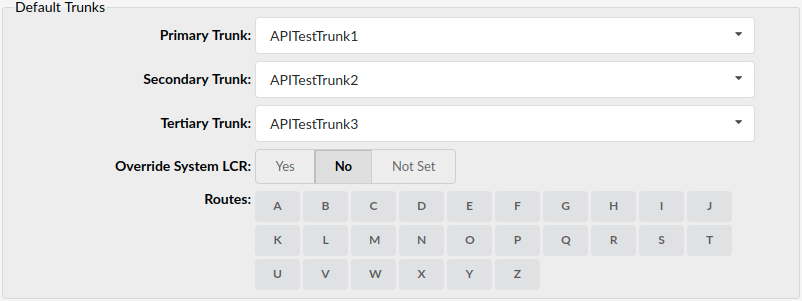
- Primary/Secondary/Tertiary Trunk:
Set the default trunks for all routes dialed from this extension.
If the connection is not established through the primary, the secondary trunk is used, etc. Default trunks can be set per extension and on the Settings->Default Trunk, on a Slave tenant. Please look at the ‘Precedence’ section below.
(Select box)
- Override System LCR
This option tells the system that when making calls, it should omit checking System Level LCR.
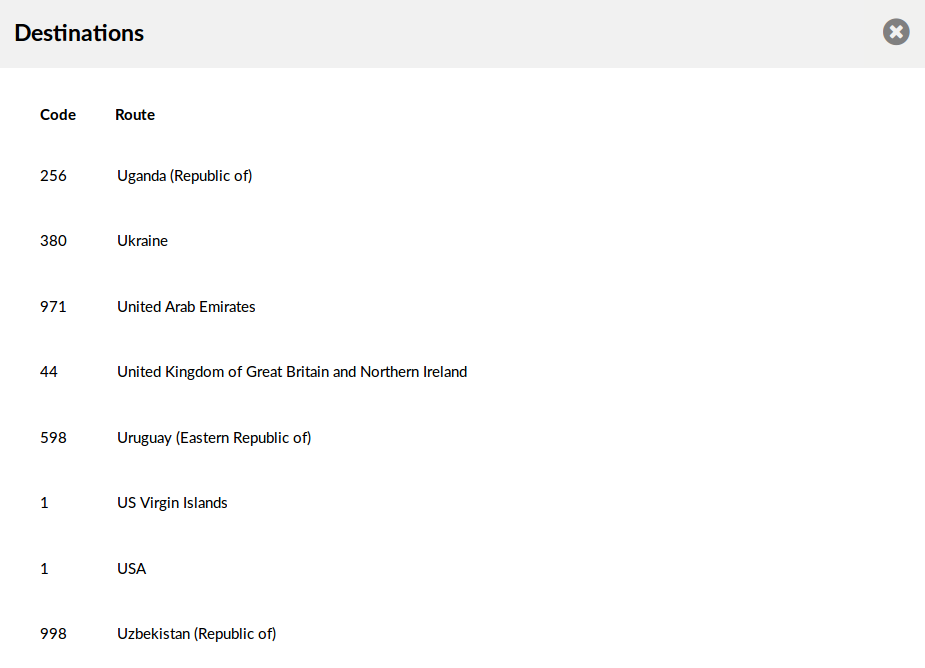
- Routes
Set the default extension trunks ‘per Destination/Country provider’ (Routes: Example). For some countries/providers to be reached through non-primary trunks, or when one of the default trunks needs to be given higher precedence over another, a route may be set for each destination provider
NOTE: These routes are not available if the system is set to use Simple Routing mode.
Precedence
Settings
- Default Trunks: All System calls go through the trunks defined here.
- MiniLCR: Overrides ‘Default Trunks’ and sets a specific trunk for a destination.
Extensions
- Trunks: Overrides ‘Settings: Default Trunks’
- Routes: Overrides ‘Settings: MiniLCR’
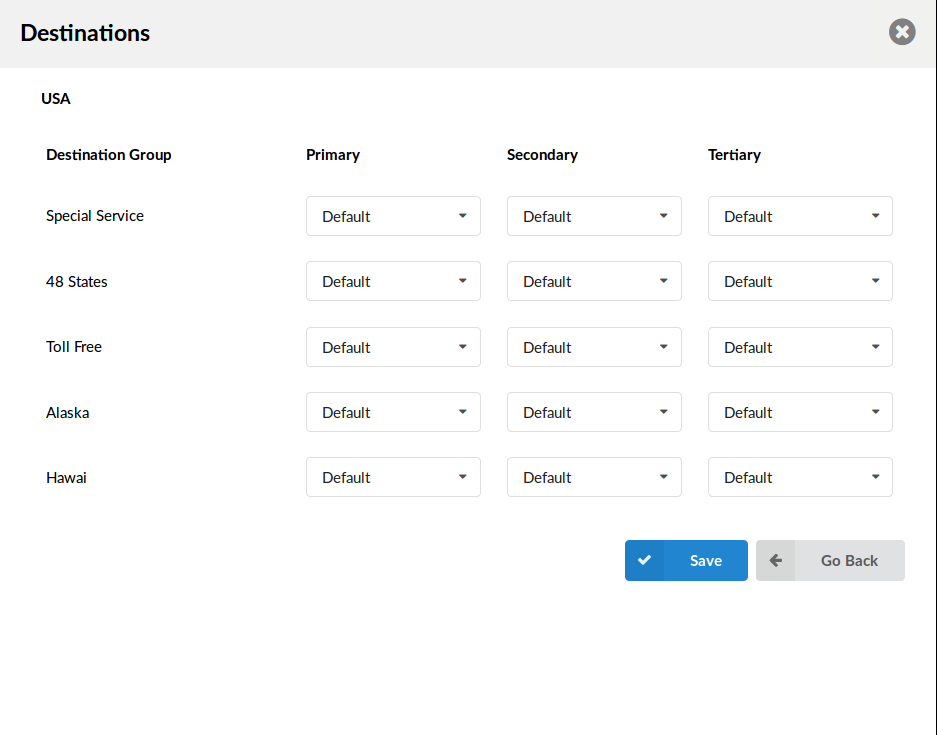
Routes: The list of countries that start with the letter ‘A’ is displayed when you click on the ‘A’ in the upper navigation. After the countries are listed, click on one of them to see default trunks for their providers. Once the default trunk is selected for a provider, all calls made from that extension to the set provider will be made using the set trunk.
Emergency Trunks
NOTE: This option will be shown only if enabled on MT/tenant > General Settings > Emergency Trunks per Extension.
- Primary/Secondary/Tertiary Trunk:

These trunks will override the trunks set on Trunks and Tenants. The trunks available for selection are only those that are allowed to be set on that tenant (defined in Trunks & Tenants), but only if the value is not “Default”.
Call Control
These options set the number of simultaneous incoming and outgoing extension calls.
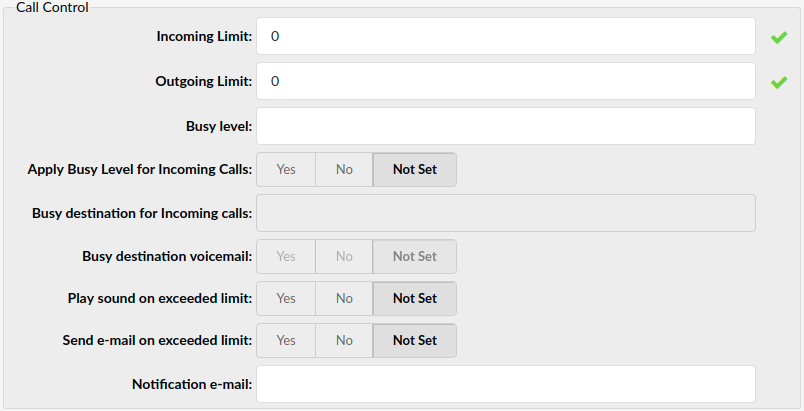
- Incoming Limit
Sets the maximum number of simultaneous incoming calls. If an extension receives more incoming calls than set here, they are all redirected to the extension voice-box
(E.g. 2)
- Outgoing Limit
Sets the maximum number of simultaneous outgoing calls. The outgoing call can be placed on hold and another call can be made from the same extension. However, this feature has to be supported by the UAD/Phone
(E.g. 2)
- Busy level
Maximum number of concurent calls until the user/peer is considered busy. This option is not intended for blocking calls, but for displaying user/peer status properly, for example in BLF.
- Apply Busy Level for Incoming Calls
If Apply Busy Level for Incoming Calls is set, and one receives an incoming call while extension is on a call, the incoming call is blocked and redirected to Voicemail or any other option set for extension.(For this to work one needs to set the Busy Level option to 1 under group Call Control).
- Busy destination for Incoming calls
Users can redirect calls to a custom extension when the busy level is set and they have the option to set the busy destination voicemail to yes/no as well.
- Busy destination voicemail
Whether destination for busy level is voicemail
(E.g. Yes, No, Not Set)
- Play sound on exceeded limit
If you try to make more calls than allowed in the Outgoing Limit, a message will be played that the limit has been exceeded.
(E.g. Yes, No, Not Set)
- Send e-mail on exceeded limit
Whether or not to send a notification mail when the limit is exceeded.
(E.g. Yes, No, Not Set)
- Notification e-mail
E-mail address to which the notification mail should be sent if the number of calls exceed the limit.
(E.g. user@domain.com)
IAX Extensions only
- Notransfer

Prohibit Asterisk from stepping out of the media path and connecting the two endpoints directly to each other. This, of course, affects your CDR and call rating information
(E.g. Yes, No, Not Set)
- Send ANI
Whether to send ANI along with CallerID
(E.g. Yes, No, Not Set)
- Trunk
Whether to use IAX trunking. IAX Trunking needs support of a hardware timer
(E.g. Yes, No, Not Set)
Authentication
These options are used for UAD/Phone authentication with PBXware MT
- Authname
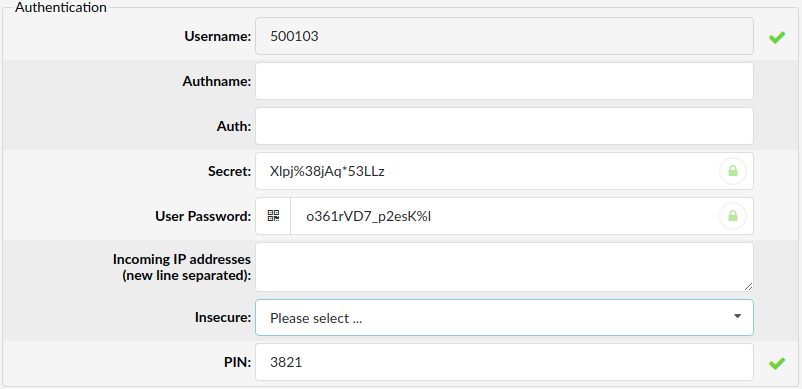
Name used for authentication with the sip provider
(E.g. If you set this field to 12345, for example, the sent SIP header will look like 12345@sipprovider.com)
- Auth
Auth is the optional authorization user for the SIP server
(E.g. 44000)
Fields from Trunks available on Extension
- Incoming IP addresses (new line separated)
Ip used by the phone for registration with PBXware
(E.g.. 192.168.x.x)
- Insecure
security level for incoming connection
(E.g. port)
TIP: If Incoming IP addresses are empty Insecure option will not apply.
Note: To enable this option go to Settings > Tenants > “Tenant name” Allow IP Address Authentication for Extensions set this to “YES”
IAX Extensions only
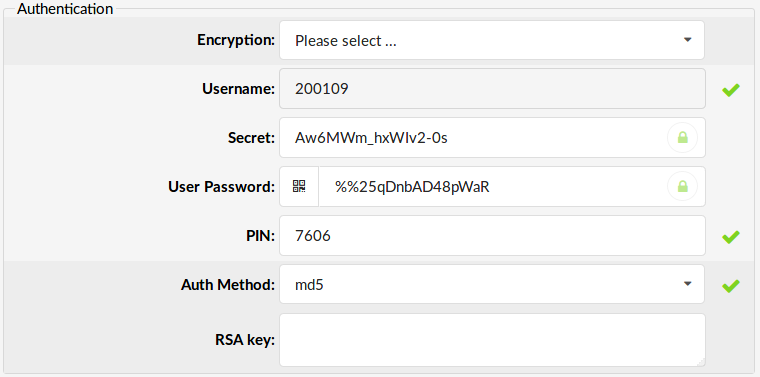
- Encryption
Whether to enable encryption of IAX data stream. For this to work, you must choose ‘md5’ auth method.
(E.g. AES-128)
Auth Method
Authorization method used for IAX extensions, can be set to:
- none
- plaintext
- md5
- rc4
- rsa
RSA Key
RSA key used for authorization, if preferred auth method is ‘rsa’ then RSA key needs to supplied to this field.
Permissions

Destinations

If a Service Plan is previously created, destination permission template was set. Every extension using that service plan will have the same destination permissions. Here we are able to change (or add if we don’t have Service Plan) destination permissions only for one particular extension.
By pressing “Allow all destinations” every single country and every single destination group will be allowed.
Manually, destinations can be set through the following groups:
- Remote – E164 PSTN destinations, ITSPs, other VoIP networks etc.
- Local – All destinations within the system/network (Extensions, IVR, Queues, Conferences…).
- Special Routes – Other PBX networks we are connected to.
Destinations Permissions
Allowed![]()
PIN Required![]()
Not allowed![]()
Enhanced Services
When you click on Enhanced Services new window with various features will be opened. Before setting up and editing any one of these, first it is needed to enable it and save changes.

For detailed information on Enhanced Services click the link below:
Notes
When you click on the ‘Notes’ button you will you can set notes in regards to this extension.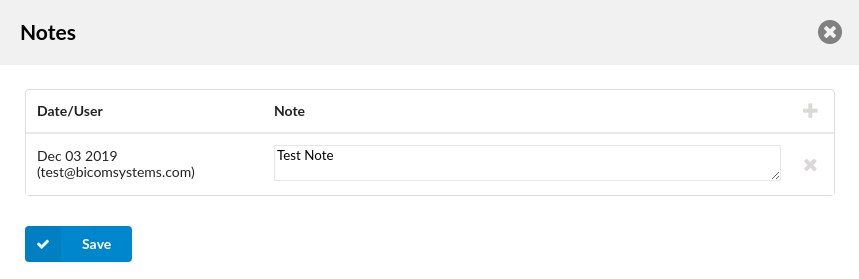
- Date/User
When a new note is added, this field is automatically filled with the current date and email of the user who create a note.
- Note
In this field, enter your desired note.
Editions & Modules
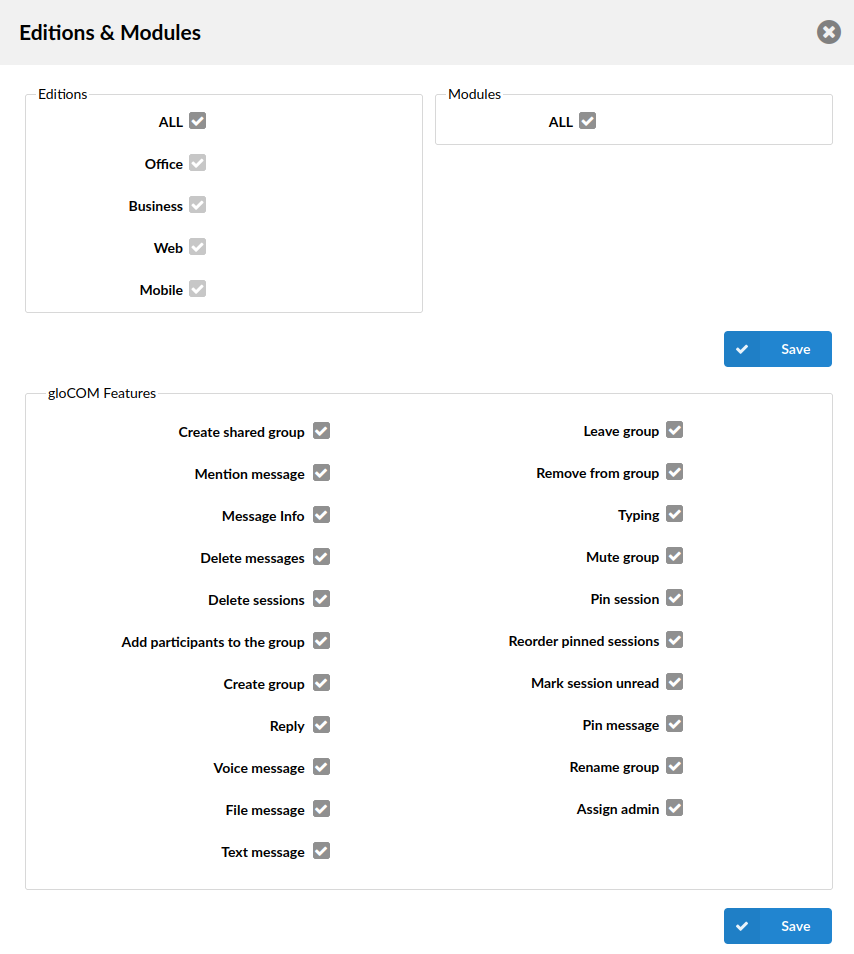
Here you can set which gloCOM editions the extension can use. The ALL option is set by default, so the extension can use all editions. You can uncheck the ALL option and choose which editions you want to enable per extension. (E.g. If you select Office and Mobile, this extension will be able to use gloCOM Office edition and gloCOM GO.)
.
gloCOM Features (v6.7)
This section allows PBXware administrator to allow or prevent gloCOM users from using specific features when using gloCOM Desktop, Mobile, or Web applications.
- Create shared group
Enable or prevent user from creating shared gloCOM groups.
- Mention message
Enable or prevent user from using mention in gloCOM chat
- Message info
Enable or prevent user from being able to see message info in gloCOM chat groups.
- Delete message
Enable or prevent user from deleting messages in gloCOM chat.
- Delete sessions
Enable or prevent user from deleting gloCOM chat sessions in gloCOM application.
- Add participants to the group
Enable or prevent user from adding new participants to gloCOM chat group.
- Create group
Enable or prevent user from creating a new gloCOM chat group.
- Reply
Enable or prevent user from replying to gloCOM chat messages.
- Voice Message
Enable or prevent user from leaving voice messages on gloCOM
- File Message
Enable or prevent user from sending file messages in gloCOM chat.
- Text Message
Enable or prevent user from sending text messages on gloCOM
- Leave Group
Enable or prevent user from leaving gloCOM chat group.
- Remove from Group
Enable or prevent user from removing participants from gloCOM chat groups.
- Mute Group
Enable or prevent user from muting gloCOM chat groups.
- Pin session
Enable or prevent user from pinning chat sessions in their gloCOM application.
- Reorder pinned sessions
Enable or prevent user from reordering pinned chat sessions in their gloCOM application.
- Mark session unread
Enable or prevent user from marking chat sessions unread in their gloCOM application.
- Pin message
Enable or prevent user from pinning chat messages in gloCOM chat groups.
- Rename group
Enable or prevent user from renaming gloCOM chat groups.
- Assign admin
Enable or prevent user from assigning admin in gloCOM chat groups.
For more information and specifics of these features, please check gloCOM user manual for your preferred platform.
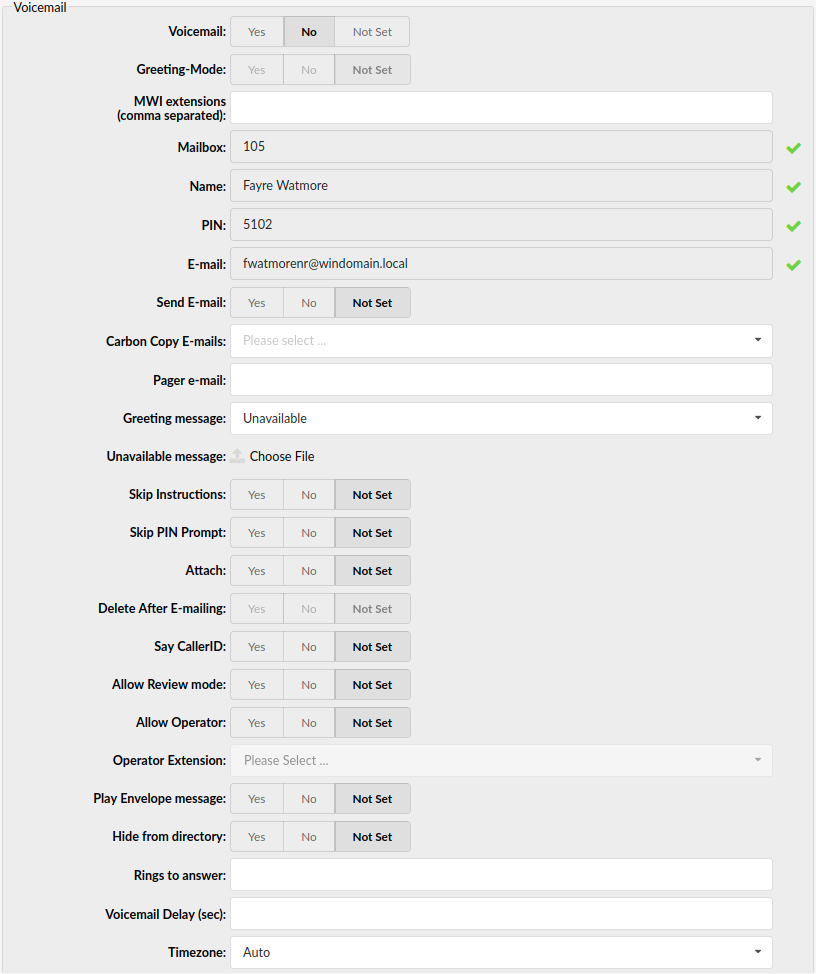
Voicemail
Voicemail feature mimic the functions of an answering machine but with many additional options available. Voice messages are saved on central file-system location instead on a UAD/Phone.
NOTE: PBXware 6.0 has introduced a new lockout feature for Voicemails. It is directly related to the ‘Max login attempts’ option meaning that if a user fails to enter their voicemail PIN correctly after e.g., 3 tries, that voicemail will be blocked until an administrator unblocks it.
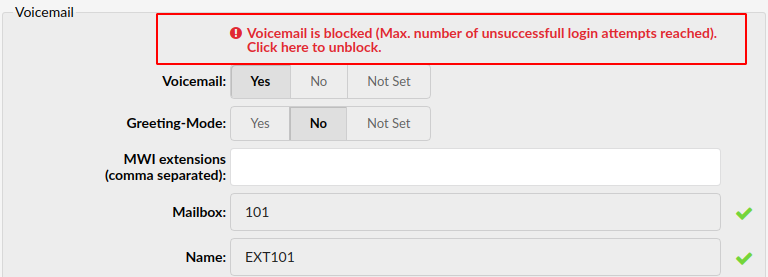
- Accessing voice-box
To access a voice-box, dial ‘*123’, enter the extension PIN (if “Skip PIN Prompt” is not set to “Yes”), and follow the instructions.
- Leaving a voice message
When the user is transferred to voice-box, ‘Please leave your message after the tone. When done, hangup or press the # key’ message will be heard. Two options are available:
- Leave a voice message (ended by pressing ‘#’ key or by hanging up), or
- Reach an operator by dialing ‘0’
- If ‘0’ is dialed, the ‘Press 1 to accept this recording, otherwise please continue to hold’ message will be heard. Two options are available:
- Press ‘1’ to save your message, after which the operator will be dialed. The ‘Please hold while I try that extension’ message will be heard, or
- Continue to hold, which will delete any left messages, after which the operator will be dialed. ‘Message deleted, please hold while I try that extension’ message will be heard.
- File – system usage:
With continuous tone for 60 seconds:
- wav49 = 91.0kb
- wav = 863.0kb
- gsm = 91.0kb
With continuous silent tone for 60 seconds:
- wav49 = 0.38kb
- wav = 3.0kb
- gsm = 0.32kb
- Voicemail
Enabling the Voicemail service. When no one picks up the call, after some time the calling party will be transferred to the voice box of the dialed extension. The caller will then have an option to leave a voice message.
(E.g. Yes, No, Not Set)
- Greeting-Mode
If your Voicemail is turned on, you can set this option to yes to play a greeting and then a busy sound
(E.g. Yes, No, Not Set)
- MWI extensions (comma separated)
If you want your extension to be notified for multiple Voicemails, you can enter them in this field.
(E.g. 2002, 2003, 2004, 2005)
NOTE: Please bear in mind that if you make any changes to the MWI option in the GUI, you will have to re-register your device for those changes to be applied.
- Mailbox
Mailbox extension number. This value is the same as the extension number and cannot be modified.
(E.g. 1008)
- Name
Full name of the user associated with the voice box. This value is the same as the ‘Name’ field from ‘General’ section and cannot be modified
(E.g. John Doe)
- PIN: (Personal Identification Number)
Password used for accessing voicemail. The value of this field is set under ‘Authentication: PIN’. When you want to access your voicemail you will be asked to authenticate with 4 digit PIN
(E.g. 1234)
E-mail address associated with the voice box. The value of this field is set under ‘E-mail’ field from ‘General’ section.
(E.g. When A calls B and leaves a voice message, B will get an email notification about new voice message on this email address).
- Send E-mail
Whether or not to send an E-mail to the address given above
(E.g. Yes, No, Not Set)
- Carbon Copy E-mails
Add additional E-mail addresses to which you want voice inbox to be associated with.
- Pager e-mail
Pager e-mail address associated with the voice box.
(E.g. When A calls B and leaves a voice message, B will get a pager email notification about a new voice message on this email address).
- Greeting message
Greeting message played to users upon entering the voice box.
(E.g. When A gets to B’s voice box, the selected ‘Greeting message’ is played to A before he is allowed to leave a message).
(Select box)
- Unavailable/Busy message
Upload a sound file which will be played when extension is unavailable/busy.
(Button)
- Reset Busy message
If greeting message is set to busy you have option to reset busy message.
(E.g. Yes, No, Not Set)
- Skip Instructions
Skip the instructions on how to leave a voice message.
(E.g. Once user A reaches the dialed voice box, if this option is set to ‘Yes’, A will hear the ‘Greeting message’, and then be transferred directly to the ‘beep’ sound).
- Skip PIN Prompt
Enter your voicemail options faster. Setting this option to Yes will skip the PIN entry when dialing *123 (*124 should work as before with the PIN.
(Option buttons)
- Attach
Send the voice message as an attachment to the user’s email.
(E.g. Once B gets the new voice message, if this option is set to ‘Yes’, the message sound file will be attached to the new voicemail notification email).
- Delete After E-mailing:
Delete the voice message after sending it as an attachment to the user’s email.
(E.g. Once B gets the new voice message, if this option is set to ‘Yes’, the message will be deleted from the voice box after it has been emailed to B.)
- Say Caller ID
Announce the extension number from which the voice message has been recorded.
(E.g. If this option is set to ‘Yes’, when checking voicemail, the ‘From phone number {$NUMBER}’ message will be heard).
- Allow Review mode
Allow B to review the voice message before committing it permanently to A’s voice box.
E.g. B leaves a message on A’s voice box, but instead of hanging up, he presses ‘#’. Three options are offered to B:
- Press 1 to accept this recording
- Press 2 to listen to it
- Press 3 to re-record your message
.
- Allow Operator
Allow user to reach an operator from within the voice box.
E.g. B leaves a message on A’s voice box, but instead of hanging up, B presses ‘#’.
‘Press 0 to reach an operator’ message played (Once ‘0’ is pressed, the user is offered the following options):
- Press 1 to accept this recording (If selected, ‘Your message has been saved. Please hold while I try that extension’ is played and operator is dialed)
- Or continue to hold (If B holds for a moment, ‘Message deleted. Please hold while I try that extension’ is played and operator is dialed)
.
- Operator Extension
Local extension number that acts as an operator.
(E.g. If A’s voice box has an option ‘Allow Operator’ set to ‘Yes’, all users dialing ‘#0’ inside the voice box will reach this operator extension).
- Play Envelope message
Announces the Date/Time and the Extension number from which the message was recorded.
(E.g. Once the voice box is checked for new messages, if this option is set to ‘Yes’, ‘Received at {DATE} from phone number {NUMBER}’ will be played, giving more details about the message originator).
- Hide from directory
This option will allow you to hide your extension from the Directory/BLF list.
(E.g. Yes, No, Not Set)
- Rings to answer
Number of rings before Voicemail answers the call
(E.g. 5)
- Voicemail Delay (sec)
How long to pause in seconds before asking the user for PIN/Password.
(E.g. Some UADs/Phones have a tendency to garble the beginning of sound files. Therefore, the user checking the voice box, when asked for a password, would hear ‘…sword’ instead of ‘Password’. Setting this field to 1-2 seconds will provide a long enough gap to fix this anomaly).
- Timezone:
Sets the correct date/time stamp.
NOTE: Time zones are taken from ‘/usr/share/zoneinfo’ system directory
(E.g. By setting the correct time zone, the user would always be notified of the exact date/time voice message was left on their box. Set the correct time zone if the user is located in a different time zone than PBXware MT).
Speakerphone Page Auto-Answer SIP Header
These options allow the caller to use a UAD in a public announcement system. If the UAD fully supports this service, the call is accepted automatically and put on a loudspeaker.
- Custom SIP Header
Set a custom UAD/Phone header for this extension.
(E.g. If one of the predefined headers does not work, you might want to try setting a custom header for this service. The custom header line to be used ‘Call-Info:\;answer-after=0’).
Note: If Custom SIP Header is not set, header is automatically detected via User-Agent.
Codecs
Codecs are used to convert voice signals from analog to digital and vice versa. These options set preferred codecs used by the extension.
NOTE: Opus codec will be the default codec when dialing mobile apps (gloCOM GO) in PBXware 6.0. This change affects incoming and outgoing calls via the mobile app.
TIP: If some of the desired codecs is disabled (cannot be selected), navigate to ‘Settings: Tenants: Edit: Default Codecs’ and enable them under the ‘Local’ group.
- Codec
Choose wich codec to use
(E.g. iLBC)
- Ptime
Time in ms – represents how much audio recorded in itself will have each packet
(E.g. 20ms)
- Video Support
Set this option to Yes to enable SIP video support.
(E.g. Yes, No, Not Set)
- Force codec on outbound trunk channel
With this option you can force codec use for outbound trunk calls.
(E.g. iLBC)
- Auto-Framing (RTP Packetization)
If autoframing is turned on, the system will choose the packetization level based on remote ends preferences.
(E.g. If the remote end requires RTP packets to be of 30 ms, your PBXware system will automatically send packets of this size if this option is turned on. Default is set to 20 ms and also depends on the codecs minimum frame size like G.729 which has 10 ms as a minimum).
Codecs:
- ITU G.711 ulaw – 64 Kbps, sample-based, used in US
- ITU G.711 alaw – 64 Kbps, sample-based, used in Europe
- ITU G.722 – 64 Kbps,
- Opus – 6-510 Kbps, 2.5 ms – 60 ms frame size
- ITU G.723.1 – 5.3/6.3 Kbps, 30ms frame size
- ITU G.726 – 16/24/32/40 Kbps
- ITU G.729 – 8 Kbps, 10ms frame size
- GSM – 13 Kbps (full rate), 20ms frame size
- iLBC – 15Kbps,20ms frame size: 13.3 Kbps, 30ms frame size
- Speex – 2.15 to 44.2 Kbps
- LPC10 – 2.5 Kbps
- H.261 Video – Used over ISDN lines with resolution of 352×288
- H.263 Video – Low-bit rate encoding solution for video conferencing
- H.263+ Video – Extension of H.263 that provides additional features that improve compression over packet switched networks.
- H.264 Video – Offers great balance between quality and size
Jitter Buffer
- Jitter buffer
Choose Jitter Buffer Type
Available options are:
- Inherit – inherited jitter buffer settings from the tenant configuration.
- Fixed – Set a fixed jitter buffer on the channel.
- Adaptive – Set an adaptive jitter buffer on the channel.
- Disabled – Remove a previously set jitter buffer from the channel.
- Max lenght (ms)
Length in milliseconds for the buffer. By default it is 200 ms.
(E.g. 20)
- Re-sync threshold
The length in milliseconds over which a timestamp difference will result in resyncing the jitter buffer. By default it is 1000ms.
(E.g. 1000)
- Target extra
This only affects the adaptive jitter buffer. It represents the amount of time in milliseconds by which the new jitter buffer will pad its size. By default it is 40.
(E.g. 40)
Hot-desking
- Automatic Logout (hours)

Sets automatic log-out time in hours for devices set up for hot-desking.
(E.g. 5)
Recording
This group of options is used for the recording of all incoming/outgoing calls.
TIP:
- Laws in some countries may require notifying the parties that their call is being recorded.
- Recorded calls, marked with icon, can be accessed from ‘Self Care Interface’ or ‘Reports: CDR’ PBXware’ menu.
- Call are recorded in audio format set under ‘Settings: Servers: Recordings Format’.
- Record Calls

Enable call recording service. Select ‘Yes’ to enable the service. All incoming/outgoing calls will be recorded. If using call recording with many extensions, check server disk space from time to time. Please see below for bit rates table.
(E.g. Yes, No, Not Set)
- Silent
Set whether call recording would be announced to the parties in a conversation. If Silent is set to ‘No’, calling parties will hear ‘Recorded’ or ‘This call is recorded’ message before their conversation starts.
(E.g. Yes, No, Not Set)
As Extension level settings have a higher priority, all changes applied to Extension’s settings will override the system configuration. However, if “Not Set” is selected, system level configuration or default configuration is applied.
- Play Periodic Beep
To enable this feature, enter time in seconds to define how often periodic sound signal will be played to informed parties that call recording is enabled.
For example, enter 60 to enable this feature and play periodic signal every 60 seconds.
Disk Space Used By Call Recording
With continuous tone for 60 seconds:
- wav49 = 84.5kb
- wav = 833.0kb
- gsm = 85.0kb
With continuous silent tone (without sound) for 60 seconds:
- wav49 = 84.0kb
- wav = 827.0kb
- gsm = 84.0kb
Auto Provisioning
These options enable PBXware MT to automatically provision the UAD/Phone. Configuration files are downloaded from PBXware MT’s TFTP server
NOTE: These fields are merely templates when creating a new extension.
- Auto Provisioning:
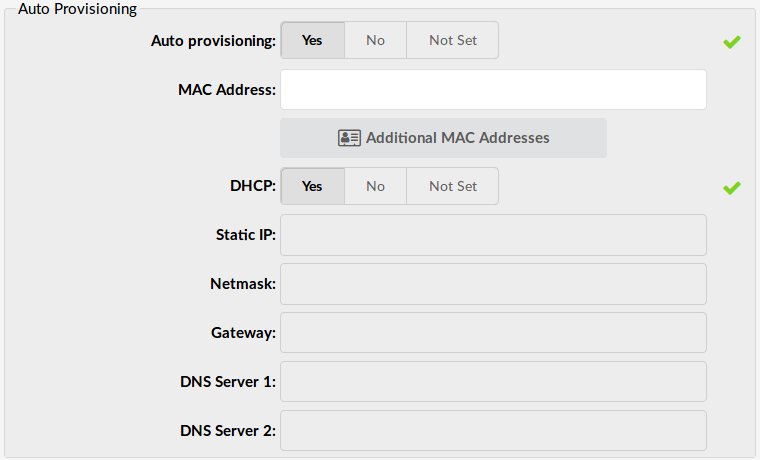
Enable auto provisioning service for this extension
Connect the UAD/Phone to PBXware MT without any hassle by providing UAD/Phone MAC address (and optionally adding the Static UAD/Phone IP address and network details)
- MAC Address (Media Access Control):
UAD/Phone MAC address
Provide the UAD/Phone address here. Its a 48-bit hexadecimal number (12 characters)
- Additional MAC Addresses
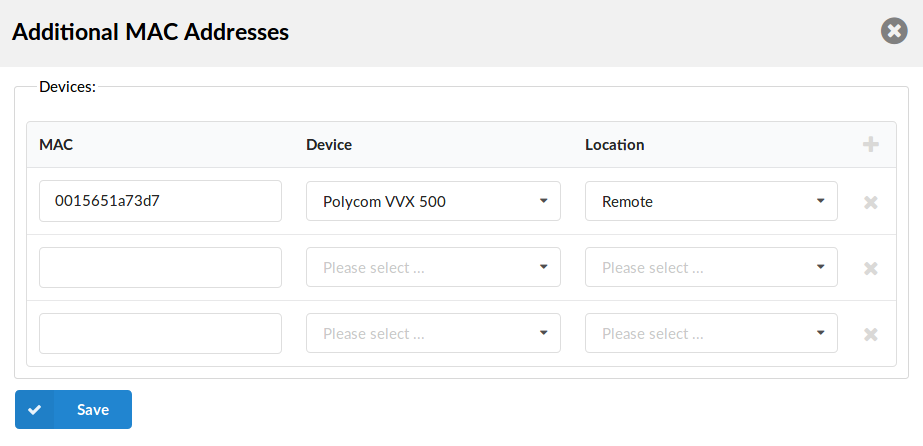
Ability to use multiple MAC addresses per one Extension. This provides the ability to auto provision multiple phones attached to the same Extension. - DHCP (Dynamic Hosts Configuration Protocol):
Set whether the UAD/Phone is on DHCP or Static IP address
Set DHCP = Yes if UAD/Phone is on dynamic or DHCP = No if UAD/Phone is on static IP address. If on static IP, you will have to provide more network details in the fields below.
(Option buttons)
- Static IP:
Provide the Static UAD/Phone IP address. For this, you have to set DHCP = No
- Netmask:
UAD/Phone netmask
(E.g. Netmask applied to UAD/Phone static IP address)
- Gateway:
Gateway IP address
(E.g. Local area network gateway IP address)
- DNS Server1 and Server2 (Domain Name Server):
DNS Server IP address
(E.g. Local area network DNS IP address (Usually the same as your gateway))
Presence
This option simply notifies you of whether device presence is enabled or disabled. Supported UADs can be seen in the Settings->UAD menu.
- Presence Enabled:

Enable presence support, but not every UAD/Phone supports this feature. - Global Presence:
Enables presence like the option above but when this option is turned on, it will enable presence for all tenants on the system. Please note, enabling this option will prevent you from monitoring presence status for extensions on the same tenant, unless you enter tenant prefix in front of extension number (e.g. 2001001 for extension 1001 on tenant 200.). However, setting Global Presence to Yes, will prevent you to use BLFs to monitor parking lots on your tenant as their numbers do not have tenant prefix.
(E.g. Yes, No, Not Set)
Supported UADs:
- Snom 190(Firmware >= 3.60s), 320/360(Firmware >= 4.1)
- Polycom IP30x/IP50x/IP600
- Xten EyeBeam
- Grandstream GXP2000 (Firmware >= 1.0.1.13)
- Aastra 480i
- Aastra 9133i
CLI
User Agent Auto Provisioning Template
This option allows adding of additional settings to auto-provisioning template.
Auto-provisioning settings are generally defined in the ‘Settings: UAD’ and are custom set for each device.
NOTE: Unless absolutely sure, do not change or add to this template.
Additional Config

This option is used for providing additional config parameters for SIP and IAX configuration files. Values provided here will be written into these configuration files.
NOTE: Unless absolutely sure, do not change or add to this template.
Buttons

- Save
Save changes
- Save & E-mail
Save changes and send an email to email address from E-mail field from General section
- Copy As New
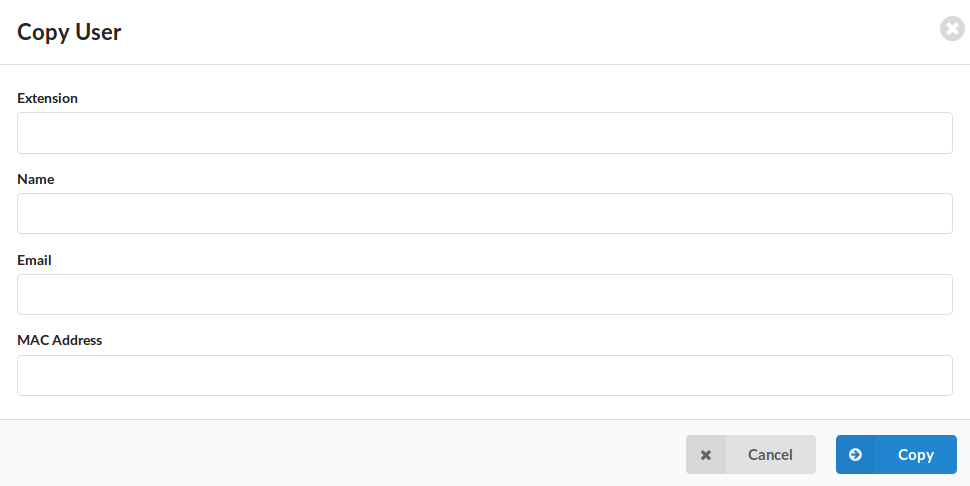
Create a new extension by making copies of a current one
- Go back
Go back without saving changes
Paging Groups
Paging Groups feature works similar to standard paging, except this feature allows you to organize extensions to multiple paging groups and to assign a unique number to each of them. As this feature is used with access code *600, paging group number is entered after the access code.
For example, if we assign number 300 to the paging group and add 4 extensions to it, once we dial *600300 we will be able to broadcast the message over the intercom to all the extensions added to paging group 300.
- Search
In search section you can find your Paging Group by typing its Name or Number.
- Group Name
Paging group name
- Number
Paging Group number. Once the user dials *600 + this number, all extensions assigned to this paging group will be paged.
- Destinations
Extensions associated with a paging group
(E.g. 102,103,105…)
NOTE: Please bear in mind that the destinations limitation is 100 extensions.
Click to edit the paging group configuration.
Click to delete a paging group from the system.
Add/Edit Paging Group
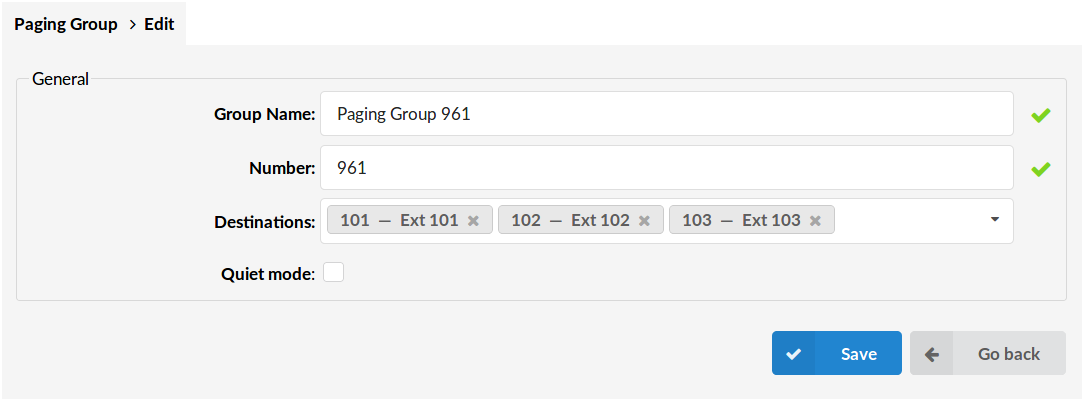
Clicking on ‘Add Paging Group’ or ‘Edit’ will open the following options:
General
- Group Name
Unique Paging group name
(E.g. Group I)
- Number
Paging group extension number
(E.g. 1010)
- Destinations
System extensions associated with the paging group
(E.g. 101, 102, 103… Selected extensions will be paged)
- Quiet mode
Does not play beep to paged extensions.
Departments
Departments section will list all the departments present on this <%PRODUCT%> system, and give the ability to edit or add a new ones.
Departments are used by Bicom Systems gloCOM to sort extensions based on the department they belong to.
Add/Edit Department

When you click on Add Department link or the edit button you will be presented with this screen:
General
- Name:
Name of the department
(E.g. Accounting)
Hot Desking
Hot Desking is a feature that allows your business the practice of not assigning permanent desks in a workplace, so that employees may work at any available desk.
From a managerial perspective, Hot Desking is attractive because it can cut overhead costs significantly. However, the concept won’t work in environments where employees are expected to be in the office most of the time.
Hot Desking, as PBXware feature, is simple as it can be. By dialing proper access code (*555 by default) on any pre-configured office phone for HotDesking, user will go to an IVR, where it will be asked for extension and pin. Once proper extension / pin combination is entered, the phone will be rebooted and auto-provisioned with the new extension.
If there was any phone already registered with the same extension, it will reboot too and auto provisioned with dynamic extension. If extension is in use, phone will reboot once the call ends. Phones provisioned with dynamic extension will not be able to dial anything but Hot Desking IVR.
Emergency numbers can be dialed even if the hot desking device is not logged in (if no extension is provisioned). In this case, the Emergency Caller ID will be used for the outgoing call.
NOTE: To be able to use Hot Desking feature in PBXware 6, it has to be enabled in your PBXware license. For more information on how to get Hot Desking enabled, please contact your account manager.
- MAC
MAC address of the device.
- Device
Hot Desking Device
- Extension
Extension’s number associated with MAC/Device.
- Enabled
Status of Hot Desking device.
Click to edit the hot desking device configuration.
Click to delete a hot desking device from the system.
CSV upload
There is an option to upload CSV file instead of manually entering phones. Click Browse button, select the .csv file from your hard drive and press upload button. Please make sure that CSV file contain comma separated MAC address of the phone and device type per each line (MAC,device), like in example below:
001565267db9,yealinkt42p
0004f23fd871,polycomvvx300
In case you are not sure what to enter for your device name, check the Settings -> UAD, edit UAD for your device model and in General (section) check exact name set under Internal UAD name for Auto-Provisioning field.
CSV download
Once you have created list of Hot Desking devices you might get in to position where you would like to export it to a new system, for testing purposes or in case of a migration for example. CSV Download button gives you an option to download a full list of hot desking devices from a tenant, in CSV format, which can later be used to recreate the list on a new system/tenant.
Download CSV Template
As described earlier you can add large number of hot desking devices at once, by creating a CSV file. Download CSV Template button will present you with a file that already contains necessary headers which should help you create CSV file easier.
Add/Edit Hot Desking Device
MAC
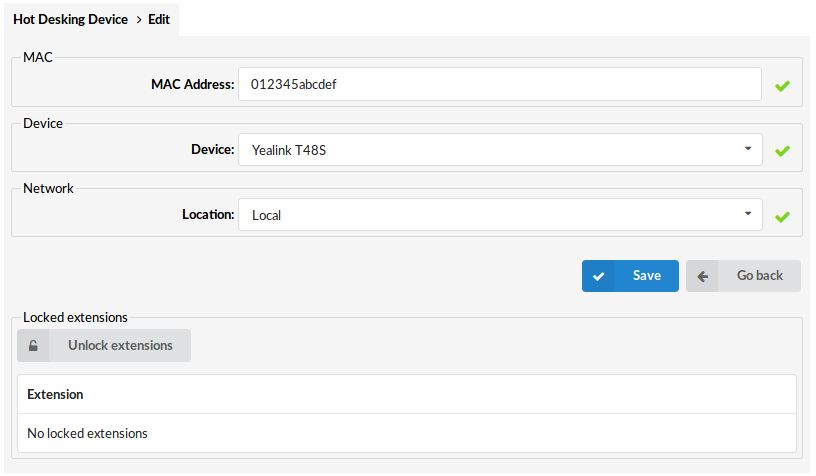
- MAC address
MAC address of the UAD.
Device
- Device
Select a device for Hot Desking.
NOTE: List of supported devices can be found on the following page:
Network
- Location
Network refers to whether the UAD/Phone is in the ‘Local’ or ‘Remote’ network.
- Emergency CallerID
CallerID entered here will be used only for calls to Emergency Services numbers.
Emergency numbers can be dialed even if the hot desking device is not logged in. In this case, the Caller ID set here will be used for the outgoing call.
Locked extensions
- Unlock extensions
Unlock locked extensions
- Extension
List of all locked extensions for this device
PIN Based Devices
Every extension has its own unique PBD PIN. When you are making a call from a device, that is set as a Pin Based device, after you enter the desired extension number it will ask you to enter your PBD PIN.
This PIN will identify the user on the system and then dialling will proceed as if the user was dialling from his own extension. Call Rating, CDRs and everything else will apply for the user extension and not for the extension of the Pin Based device. To make a call with extension that is connected with a PIN Based device you must enter the PBD PIN for that extension.
- CSV Upload
There is an option to upload CSV file instead of manually entering PIN Based devices. Click Browse button, select the .csv file from your hard drive and press upload button. Please make sure that CSV file contain comma separated names, extensions and information if Device is active or not, like in example below:
Device I,1050,yes
Device II,1009,no
- CSV Download
CSV Download button gives you an option to download a full list of PIN Based devices from a tenant, in CSV format, which can later be used to recreate the list on a new system/tenant
- Download CSV Template
Download CSV Template button will present you with a file that already contains necessary headers which should help you create CSV file easier
Once you click on PIN Based Devices in Extensions Menu, page with following details will be opened:
- Name
Name of a PIN Based Device
(Display)
- Extension
Extension used by the device
(Display)
- Active
Is PIN Based Device active or not
Click to edit a PIN based device configuration.
Click to delete a PIN based device from the system.
Add/Edit PIN Based Device
General
- Name
Name of a PIN Based Device
(E.g. Device 1)
- Extension
Extension which will be used by the device.
- Active
Whether PIN based device is active or not
(E.g. Yes, No Not Set)
Aditional information
PBD local extensions
PIN Based dialling is disabled for local extensions. Entering PBD Pin for local calls is not required.
PBD access codes
Using access codes requires proper identification of the user with PBD pin. Most of the access codes are related per user, which means that they can be used only if they are enabled under enhanced services. Dialing access codes will result in requiring to enter the PBD pin so that system can identify the user and do required actions.
Access codes that can be used with PBD:
- General Voicemail = *124
- Call Park = 700
- Call Park Start = 701
- Call Park End = 720
- Speed Dial = *130
- Call Pickup = *8
- Asterisk Call Pickup = *88
Caller ID List
In this section, users can see all extensions on this tenant, along with the values from Enhanced Services/Caller ID for each extension individually.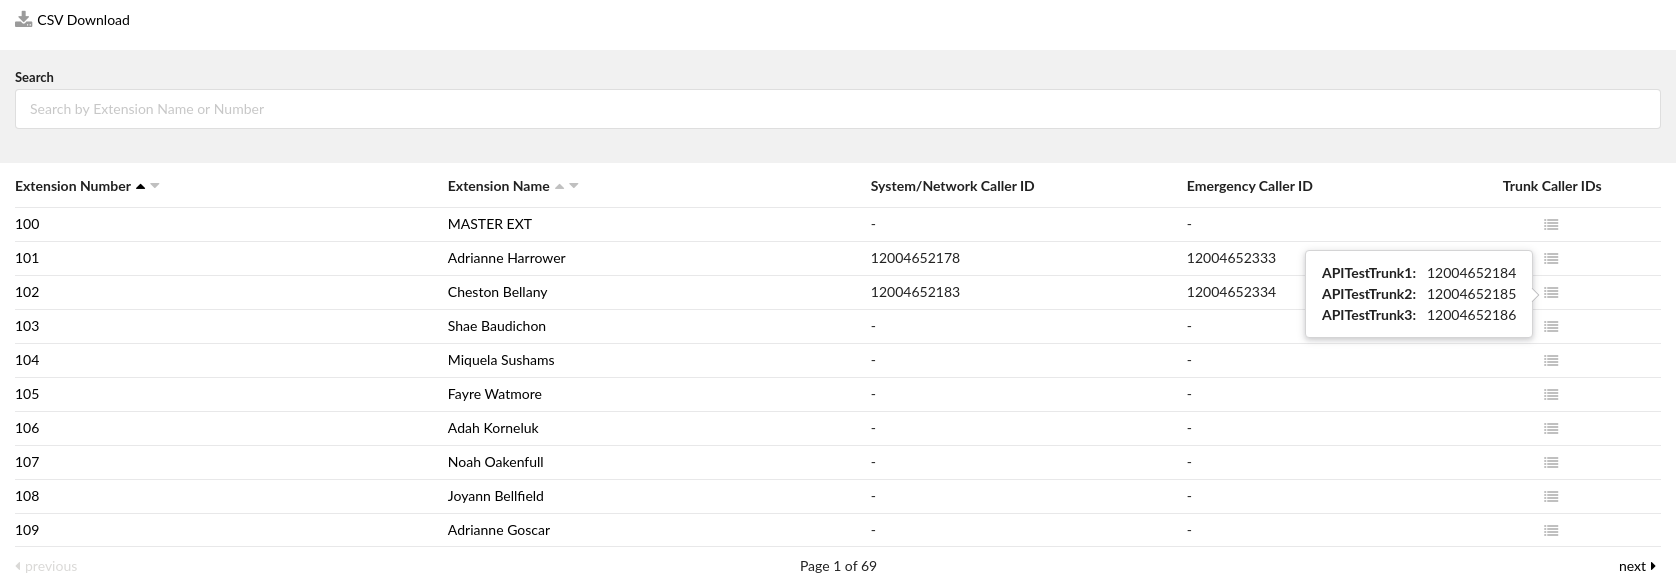
Those values are applied here and visible in one place, so users can associate each emergency call with the calling extension.
- CSV Download
By clicking the CSV Download icon user can download the CSV file that contains all the data visible from the list.
- Search
Click Search icon in order to open a search filter that would allow users to find extensions by Extension Number or Extension Name.
- Extension Number
UAD/Phone extension number
(E.g. 108)
- Extension Name
Full name of the user to which the device is registered
(E.g. Jane Doe).
- System/Network Caller ID
This value is applied here from Enhanced Services/CallerID.
- Emergency Caller ID
This value is applied here from Enhanced Services/CallerID.
- Trunk Caller IDs
This value is applied here from Enhanced Services/CallerID. By clicking Trunk Caller IDs icon users can see which Caller ID is used by an extension on different trunks.
Fax
The Fax window displays all faxes received by PBXware and the ones transferred to remote systems as well.
Received
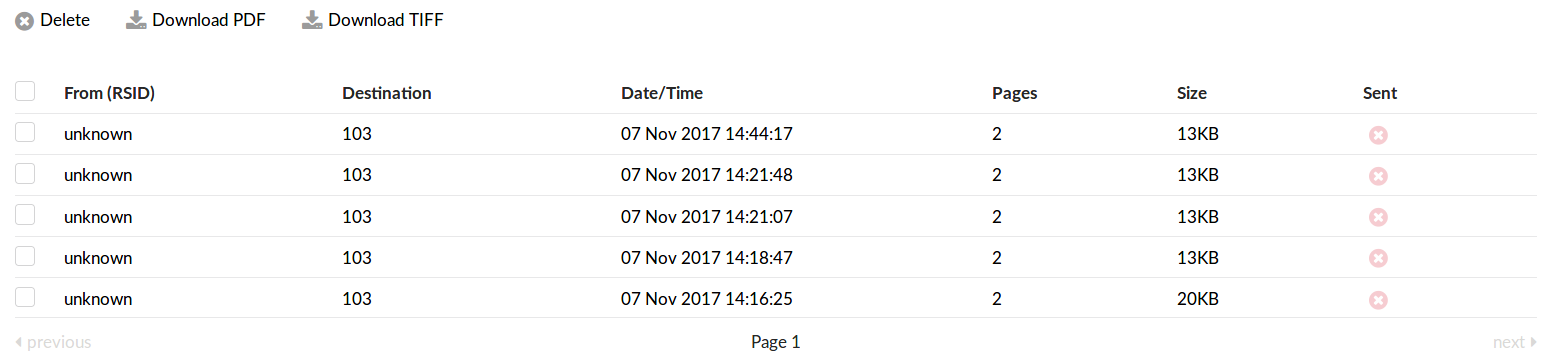
- Delete
With the Delete button you will remove the selected fax(es) from the list.
- Download PDF
Download the selected fax(es) as a PDF file.
- Download TIFF
Download the selected fax(es) as a TIFF file.
This screen lists all faxes received by PBXware with the following details:
- From (RSID)
Extension number from which the fax was sent
(E.g. 032445231)
- Destination
The Email address to which the attached fax was sent. If the extension number is displayed here, the fax is sent to the email address associated with the extension
(E.g. email@domain.com|1001)
- Date/Time
Date/Time fax was received
(E.g. 04 May 2019 12:48:12)
- Pages
Number of pages in the received fax
(E.g. 1)
- Size
Fax size in KB
(E.g. 14KB)
- Sent
Shows whether the fax was sent remotely or not
(E.g. The red icon indicates local and the green one indicates the remote fax destination)
- Box used for download/delete fax actions
(E.g. Select this box and click ‘Download’ button to download the selected fax)
Sent
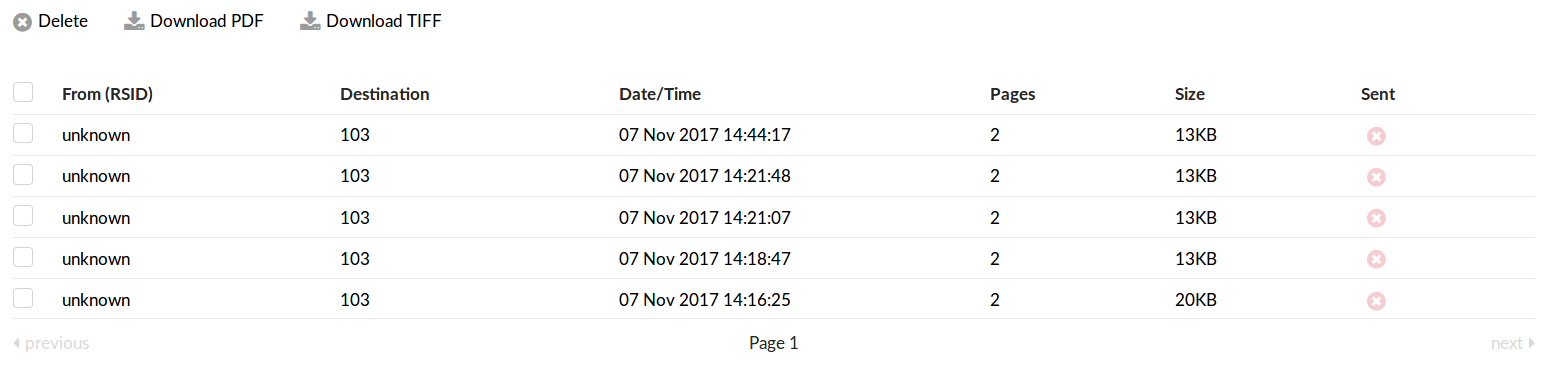
- Delete
With Delete button you will remove selected fax(es) from the list.
- Download PDF
Download selected fax(es) as a PDF file.
- Download TIFF
Download selected fax(es) as a TIFF file.
This screen lists all faxes sent from PBXware with the following details:
- From
Extension number from which the fax was sent.
(E.g. 1005)
- Destination
External Number which the attached fax was sent to.
(E.g. 032445231)
- Sent Pages
Number of fax pages that were sent successfully.
(E.g. 5)
- Total Pages
Total number of pages selected fax consist of.
(E.g. 5)
- Status
Sent fax status, describing whether the fax was sent successfully or not.
(Successful)
- Date/Time
Date/Time fax was sent.
(E.g. 04 May 2019 12:48:12)
- Box used for download/delete fax actions
(E.g. Select this box and click ‘Download’ button to download the selected fax)
.
Cover Page
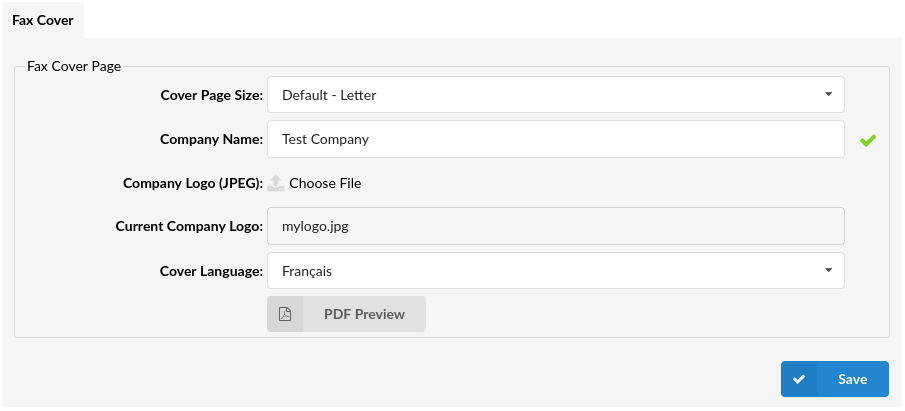
This page will allow users to set up Cover page according to their preference. It is possible to change Cover Page Size (A4, Legal, Letter) as well as Company name and to upload Company logo that will be displayed in Cover page.
.
Fax Cover Page
- Cover Page Size
Set size of cover page.
(E.g. A4)
- Company Name
Set company name which will be used on cover page for Faxes.
(E.g. Bicom Systems)
- Company Logo (JPEG)
Upload Company logo.
- Current Company Logo
Shows the file name of current company logo.
- Cover Language (6.6.1)
Set the language of a cover page.
- PDF Preview
Open new window with with example how Cover page will look using settings from this section.
Caller IDs
GloCOM users can choose caller IDs, from a predefined list in PBXware, for use when sending a FAX.

- CSV Upload
There is an option to upload CSV file instead of manually entering Caller IDs. Please make sure that CSV file contain comma separated Caller IDs and labels per each line (callerid,label), like in example below:
- 032445231,Fax Caller ID 1
- 032445232,Fax Caller ID 2
.
- CSV Download
Download list of defined Fax Caller IDs into CSV File.
- Download CSV Template
Download CSV Template button will present you with a file that already contains necessary headers which should help you create CSV file easier.
- Search
In search section you can find your Fax Caller IDs by typing its Number or Label.
.
This screen lists all Fax Caller IDs with the following details:
- Caller ID
Unique Fax Caller ID Numbe
- Label
Fax Caller ID label.
- Edit
Edit Fax Caller ID configuration.
- Delete
Delete Fax Caller ID from the system.
.
Add/Edit Fax Caller ID
General
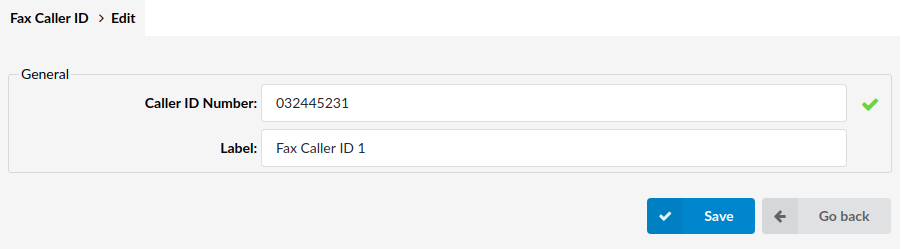
- Caller ID Number
Unique Fax Caller ID Number.
(E.g. 032445231)
- Label
Label which will be show in gloCOM for this Caller ID.
(E.g. John Doe)
Settings
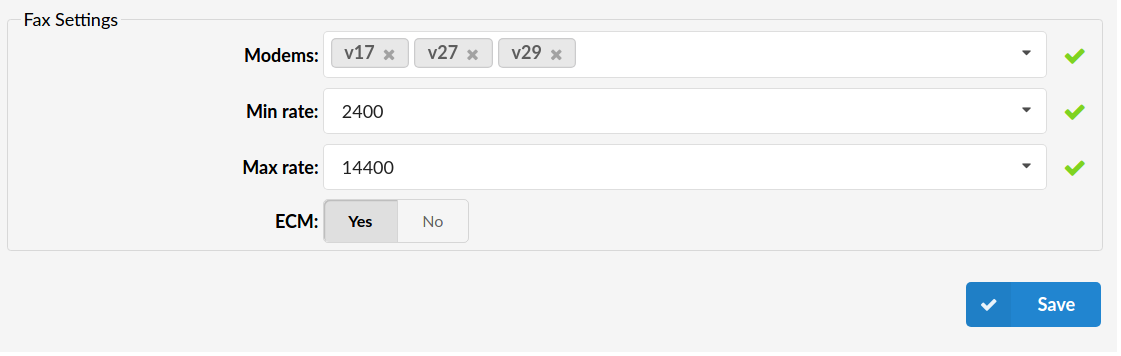
- Modems
Supported versions of modems.
(Select box)
- Min rate(bps)
Minimal BPS rate.
(E.g. 2400)
- Max rate(bps)
Maximal BPS rate.
(E.g. 14400)
- ECM
Error Correction Mode (ECM) automatically detects and corrects errors in the fax transmission process.
E-mail to Fax
E-mail to Fax is a service that allows users to send faxes via e-mail.
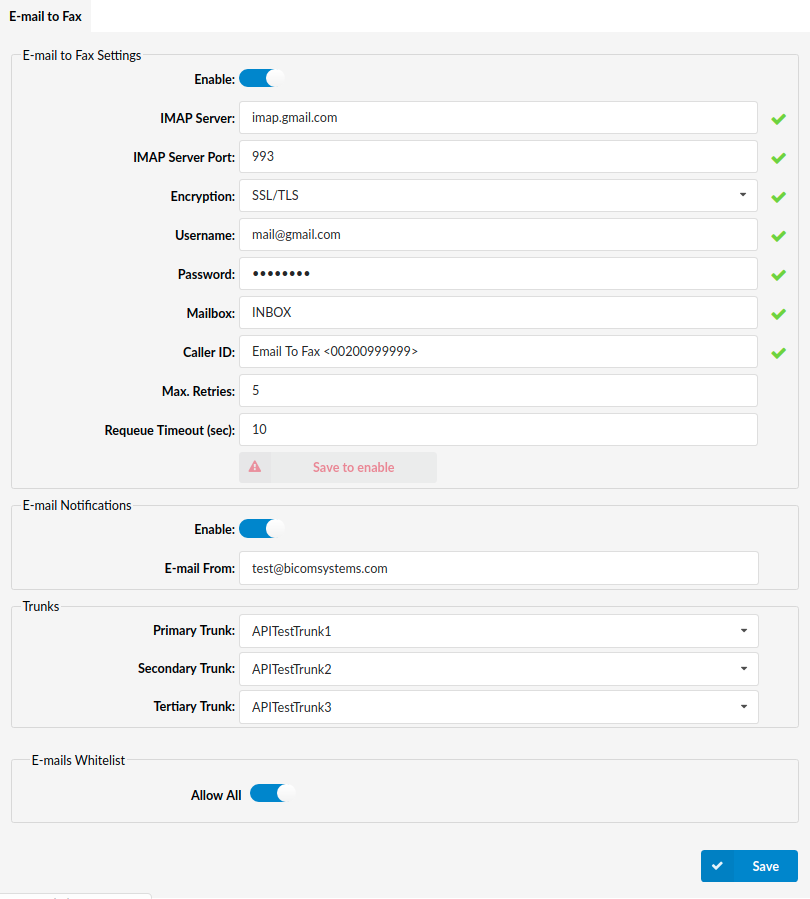
Requires the e-mail to have the following structure:
- The e-mail subject represents a number where the fax will be sent to.
- The e-mail attachment will be the fax content that will be sent (the attachment must be in a PDF format).
NOTE: If the format is not PDF that e-mail will be skipped and deleted from the server.
NOTE: E-mail To Fax must be enabled in the license.
The e-mail can have multiple files attached, but there is a configurable limit on those files, default is max. 5 files per e-mail.
E-mail To Fax Setting
- Enabled
Enable/Disable this feature for a tenant
- IMAP Server
Hostname for the server we will be listening to
(E.g. imap.gmail.com)
- IMAP Server Port
Default 993 for TLS, 143 for STARTTLS
(E.g. 993)
- Encryption
SSL/TLS or STARTTLS
- Username
Email that the faxes will be sent to.
(E.g. mail@gmail.com)
- Password
Password used for authentication on server.
- Mailboxes
Email mailbox that we will be listening to. Default INBOX.
If the mailbox folder has a subfolder and you want to listen to that subfolder instead then set this field as FOLDER/SUBFOLDER1
(E.g. INBOX/EMAILTOFAX)
- Caller ID
Users can enter both the Caller ID name and the Caller ID number in this field which will be applied when using thisfeature.
(E.g. CallerID <16476990841>)
- Max. Retries
Defines how many times we will try sending the fax before flagging it as failed. Default 3.
(E.g. 3)
- Requeue Timeout (sec)
This option defines the number of seconds after which a failed Fax try will be requeued.
(E.g. If you set this option to 20, then when a fax sending process fails, the message will be put back in the queue after 20 seconds instead of doing a retry right after.)
E-mail Notifications
- Enabled
Enable/Disable email notifications
- E-mail From
Email that will be set as FROM when sending a notification
(E.g. imap.gmail.com)
TIP: Notification Email can be defined via templates on Settings -> Email Templates -> Email To Fax
.
Trunks
This option lets you select the primary, secondary and tertiary trunk for the E-mail to Fax feature. These trunks override the trunks set on the tenant/server level. You can choose the ‘System default’ option for each of these trunks which reads from the tenant/server level.
.
E-mails Whitelist
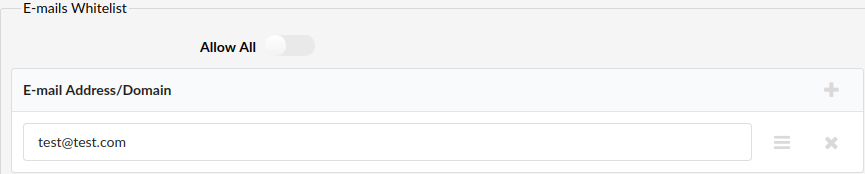
Users can define certain email addresses or domains so they are whitelisted thus limiting who can send pdf files to this email. You can also enter a domain where all email addresses from that domain would be allowed to send pdf files. Alas, there is an option ‘Allow all’ where all email addresses are validated and allowed to send pdf files.
Example configurations
Gmail
.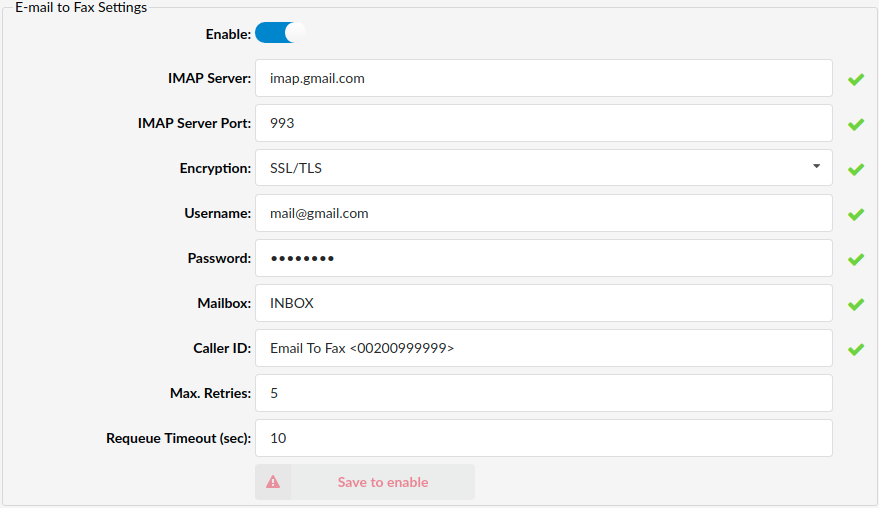
Notes for Gmail users
Some things need to be checked first before using the Gmail’s IMAP server. We need to enable IMAP and “less secure apps” option, because google needs to allow us to get the data from their servers.
Enabling IMAP
- On your computer, open Gmail.
- In the top right, click Settings Settings.
- Click Settings.
- Click the Forwarding and POP/IMAP tab.
- In the “IMAP Access” section, select Enable IMAP.
- Click Save Changes.
Enabling Less Secure Apps
- Open Gmail Account
- Go to Sign-in & security
- Find option “Allow less secure apps” and set it to ON
After doing these two steps try testing the connection by clicking the “Test” button. If the test is successful then disable and re-enable the application using the “Enable” Toggle. This will make the app reconnect to the server and you can start using it.
Microsoft Outlook
.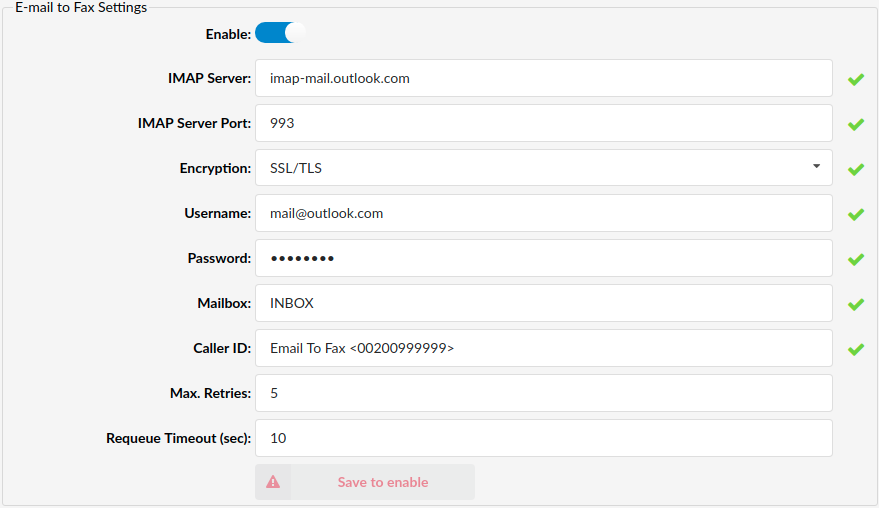
IVR
IVR
IVR (Interactive Voice Response) is an automated answering machine that guides callers to their Destination by providing a number of choices and waiting for a caller to make a selection through DTMF tones by utilizing the device keypad.

The first page on the IVR section displays a list of all existing IVRs on the system. Please note that the ‘#’ option can be used for transferring an IVR to a different Destination.
- Name
Displays an IVR name
(E.g. Office)
- Number
Displays the IVR number
(E.g. 105)

Click this button to edit the existing IVR configuration.

Click this button to delete an existing IVR.
NOTE: Upon clicking the button, the following warning message will appear: “Are you sure you want to remove XYZ*?”*. If users click the Cancel button, then the action will be abandoned. On the contrary, if OK is clicked, the selected IVR will be deleted.
Search

- Search
Search by entering data into the field and hitting the ‘Enter’ key afterwards
Add/Edit IVR

Once a user clicks the ‘Add IVR’ button, s(he) will be prompted to a different section where s(he) can configure all the details for a certain IVR.
NOTE: Please make sure to create a greeting sound before adding a new IVR.
Users can create one by dialing ‘*301’ from the UAD/phone or by uploading a custom sound file from a computer through the ‘System’ -> ‘Sounds’ section.
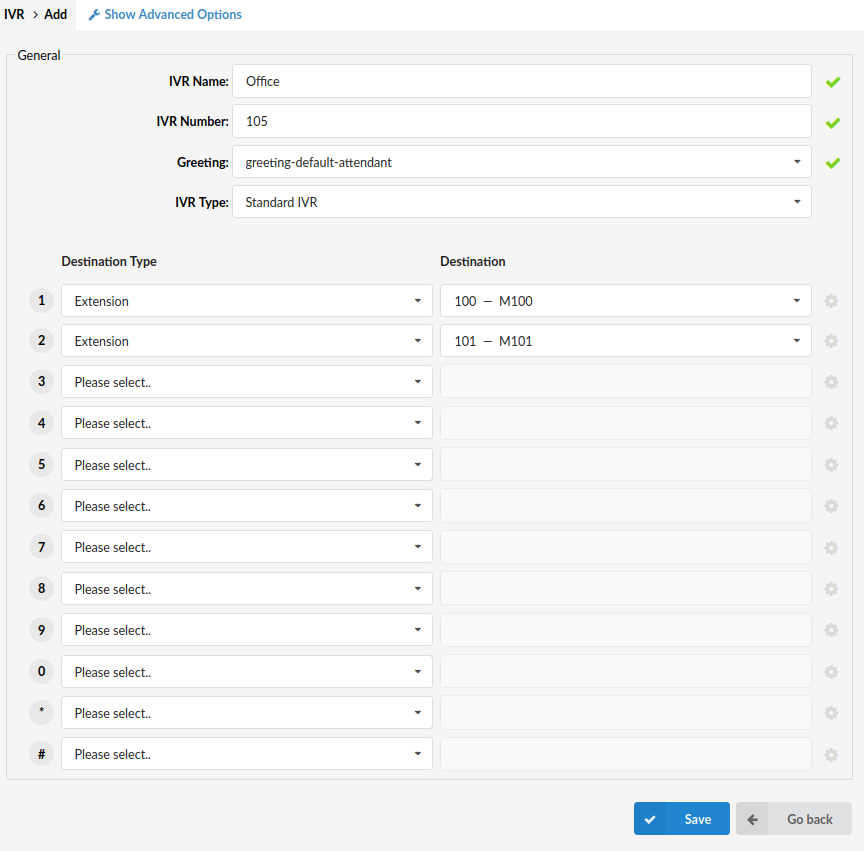
General
- IVR Name
Enter a unique IVR name (identifier)
(E.g. This name will be displayed once IVRs are accessed.)
NOTE: This is a required field.
- IVR Number
Enter a unique IVR number
(E.g. This number should be be dialed in order to access this specific IVR.)
NOTE: This is a required field.
- Greeting
Select a greeting sound file
(E.g. Once a user enters the IVR number, a greeting with instructions is played, for instance “Welcome. For Sales Press 1…”. )
NOTE: This is a required field. Please note that the greeting file name should start with ‘greeting-***’.
To record a custom greeting message, users can dial ‘*301’ from their Extension. This newly recorded greeting file will have the current date stamp in the title. For example, if the greeting was recorded on 17th of May, 2020, then the title would be as shown -> ‘greeting-May-17-2020’.
- IVR Type
Select a desired IVR type
(E.g. Standard IVR)
Users can choose between four different IVR types:
1. Standard IVR – It is used for a small range of options (0-9).
2. Multi-digit IVR – It is used for a wider range of options (10-9999999999).
3. PIN-based IVR – It is used for dialing local/remote Destinations by providing a pre-set IVR PIN number.
4. Meeting IVR – It is used when a user wants to join the Conference only via audio. A user needs to call a DID that is connected to a Meeting IVR and follow the instructions in order to join a Meeting. The necessary information (Meeting Number and Participant ID) is provided in an e-mail when the Meeting is being created.
NOTE: If the ‘Meeting IVR’ type is selected, the pre-recorded system’s greeting is used and the field is therefore grayed out. Since the user gets asked for the Meeting Number immediately in the Greeting, the “Play Greeting” option will define how many times s(he) can miss saying a Meeting number and get re-prompted.
- Destination Type
Set a proper ‘Destination Type’ for each digit pressed
(E.g. ‘Extension’)
Users can choose among the following ‘Destination Types’:
• IVR – After selecting this ‘Destination Type’, enter the number of the IVR in the ‘Destination’ field.
• Queue – After selecting this ‘Destination Type, enter the number of the Queue in the ‘Destination’ field.
• Conference – After selecting this ‘Destination Type’, enter the number of the Conference in the ‘Destination’ field.
• Extension – After selecting this ‘Destination Type’, enter the number of the Extension.
• Ring Group – After selecting this ‘Destination Type, enter the number of the Ring Group in the ‘Destination’ field.
• Voicemail – After selecting this ‘Destination Type’, enter the number of the Extension that will point to its Voicemail in the ‘Destination’ field.
• Directory – After selecting this ‘Destination Type, the ‘Destination’ field will be grayed out, but for further configuration, please refer to the screenshot below.
NOTE: With this option selected, users will be able to dial an Extension by entering the first three letters of the Extension’s first or last name, if it is provided. Choosing whether to use the first or last name depends on the selection in the ‘Options’ menu.
Please note that Directory’s “Response timeout” and “Digit timeout” are inherited from the IVR’s ‘General Settings’. After entering the Directory from an IVR for example, the user will have the same amount of time to start typing as set on IVR.
• Remote Access – After selecting this ‘Destination Type’, choose between ‘Destinations’ or ‘Voicemail’.
• Fax to E-mail – After selecting this ‘Destination Type’, enter the number to which the specific fax will be sent as an e-mail.
• Call External Number – After selecting this ‘Destination Type’, define an external number.
• CRM Routing – After selecting this ‘Destination Type’, select a specific CRM rule.
- Destination
Select a specific Destination to which the call would be redirected
(E.g. If ‘Extension’ is set as a ‘Destination Type’, then a specific Extension number should be entered in this field.)
EXAMPLE: Once a greeting message (e.g. ‘Press 1 for Sales’) is played to the caller, s(he) should be redirected to a specific Destination. Users can here set a Destination to which the call would go after the caller presses ‘1’. So, if John from the Sales department is to be reached after this digit is pressed, then ‘Extension’ pointing to John should be selected in this field. In case users want to provide additional options to the caller, they can point him/her to another IVR with its separate set of options by selecting ‘IVR’ here.
Click the ‘More Options’ button to access additional settings.
Once this button is clicked, the pop-up window with more options will appear. If one of the following ‘Destination Types’ is chosen, users can configure two fields ‘Default CallerID’ and ‘Language’: IVR, Conference, Extension, Ring Group, Voicemail, Remote Access, Fax to E-mail, CRM Routing.
- Default CallerID
Enter a default Caller ID that would override the incoming Caller ID with some custom information
(E.g. It is useful to know from which IVR the call is coming. By setting ‘LobbyIVR’ here, all calls coming through this IVR will be displayed as ‘Lobby IVR’ on the phone display. To show the actual phone number along with the name, use ‘%CALLERID%’ with the same text (e.g. ‘Lobby IVR %CALLERID%’). This will display ‘Lobby IVR 55528790’ on the phone display, where ‘55528790’ represents the phone number of the person calling us.)
NOTE: Users can use %CALLERID%, %CALLERIDNUM%, and %CALLERIDNAME% variables.
- Language
Set a language used for this ‘Destination Type’
(E.g. us)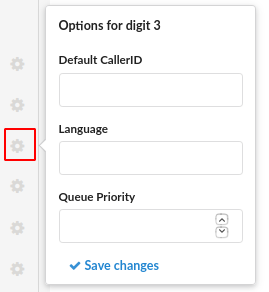
If Queue is set as a ‘Destination Type’, after clicking the ‘More Options’ button, one additional field will appear:
- Queue Priority
Set the priority in regards to other callers in that Queue, with ‘1’ having the highest priority
(E.g. 5)
If Directory is set as a ‘Destination Type’, after clicking the ‘More Options’ button, more additional fields will appear:

- Read Extension Number
If this option is ticked, the system will spell the Extension number after the Extension name.
- Search for Name
Select whether to search the directory by first name, last name, or both
(E.g. ‘Last Name’)
- Department Filter
Select the department that will be applied to this directory
(E.g. ‘None’, ‘Accounting’, etc.)
- Exit Digit
Select the exit digit that a user can press to exit the Directory app at any moment
(E.g. ‘#’ or ‘0’)
If Call External Number is set as a ‘Destination Type’, after clicking the ‘More Options’ button, users will only have to set the ‘Default CallerID’ option.
Advanced Options
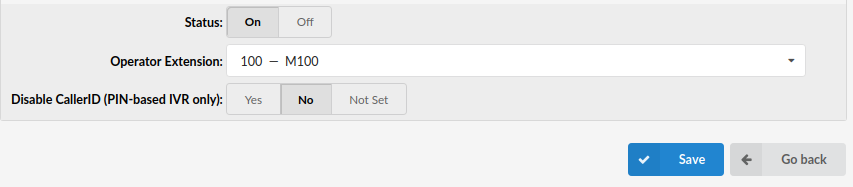
Clicking ‘Show Advanced Options’ will result in the additional configuration being displayed.
- Status
Rather than deleting the IVR, users can set its status to ‘Off’. This will make the IVR inactive and all calls will be transferred to ‘Operator Extension’.
(E.g. ‘Lobby IVR’ has this option set to ‘Off’. John dials this IVR number, e.g. 1003, but instead of receiving further IVR instructions, his call is transferred to ‘Operator Extension’.)
- Operator Extension
Choose the Operator Extension to which all calls will be redirected if the ‘IVR Status’ is set to ‘Off’
(E.g. ‘Lobby IVR’ has the ‘Status’ set to ‘Off’. John dials this IVR but instead of receiving further IVR instructions, his call is transferred to the Extension Number provided here.)
- Disable CallerID (PIN-based IVR only)
Disable a CallerID but only for PIN-based IVRs
(E.g. ‘Yes’)
General Settings
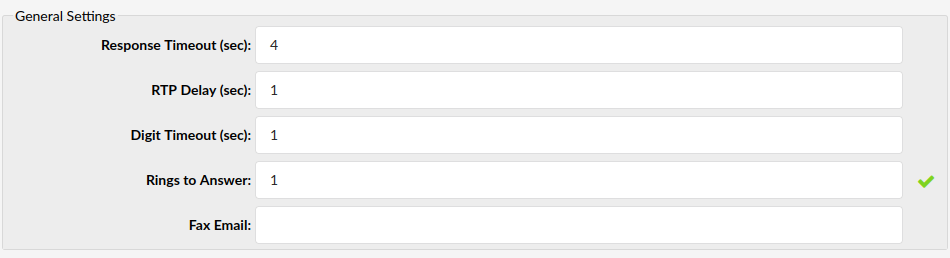
- Response Timeout (sec)
Define the time period in seconds during which an IVR option must be dialed by the user
(E.g. John enters the Sales IVR and hears the instructions. If this field is set to ‘4’, John will have 4 seconds to dial an IVR option.)
- RTP Delay (sec)
Define the delay time in seconds inserted before the IVR greeting message is played
(E.g. The user A enters the IVR and hears this incomplete message: “..me. For sales press 1”. If this field is set to ‘1’, there will be a one-second pause before the message is played. Now, when the user A enters the IVR, s(he) will hear “Welcome. For Sales press 1”).
NOTE: This solves the ‘half-played’ file problem. Please make sure to keep this value between 1-3.
- Digit Timeout (sec)
Define the timeout in seconds during which a new digit must be dialed. This option is used with Multi-digits IVR.
(E.g. John has entered the IVR and wants to dial the ’25’ option. If ‘1’ is provided in this field, John will have one second to dial number ‘2’, and additional one second to dial number ‘5’. If the time exceeds, and John hits ‘5’ too late, IVR will assume that John has dialed option ‘2’ instead of ’25’.)
- Rings to Answer
Define the number of rings played to the caller before a call is allowed to enter the IVR
(E.g. Rather than just ‘falling’ into IVR, it is recommended to set the number of ring sounds played to the caller.)
NOTE: This is a required field.
- Fax Email
Enter an e-mail address to which all received faxes should be mailed
NOTE: In order for this option to work, users need to enable ‘Fax Detection’ in ‘Settings’ -> ‘Protocols’ -> the ‘SIP’ page.
Greeting Options
- Play Greeting

Define the number of times that the greeting message is played to the caller
(E.g. John enters the sales IVR and hears the IVR options. If John does not dial one of the options, the IVR options sound file will be played again, a number of times set in this field, before the call gets transferred to ‘Timeout Destination’).
NOTE: This is a required field, and if there is no response from the calling party within this time, the call is disconnected.
- Timeout Destination
Select the Extension Number to which the IVR call will be transferred if there is no response from the user during the ‘Play Greeting’ time period
(E.g. John enters the sales IVR and hears the IVR options. If John does not dial one of the options, the IVR options sound file will be played again, a number of times set in ‘Play Greeting’ field, before the call gets transferred to the Extension Number provided here.)
- Is Voicemail
Set whether the ‘Timeout Destination’ is pointing to voicemail or not
(E.g. ‘No’)
Operation Times

Calls can be redirected to different PBXware Destinations depending on the time they are received.
- Operation Times
Enable Operation Times
(E.g. Yes, No, Inherit)
The ‘Inherit’ option will allow administrators to put the higher level of’Operation Times’ settings back into effect if deemed necessary.
- Default Destination
Set the PBXware Extension to which all calls are redirected during closed hours
(E.g. 1000)
- Greeting
Set the greeting sound file that is played to callers during closed times
(E.g. greeting-***)
- Open Days
This section allows users to set the working hours during which the IVR redirects calls as set in the IVR ‘Add/Edit’ window. If any calls are received during the hours that are not defined here, the calls will be redirected to the ‘Custom Destination’. If it does not apply, then the call is redirected to ‘Default Destination’ (‘Closed Dates’).
- Custom Destinations
This section allows users to redirect all calls received during the set hours to the PBXware Destination provided here.
- Closed dates
This section allows users to set the specific date/s when all calls are redirected to the ‘Default Destination’. If the ‘Destination’ field is set in the ‘Closed Dates’, the calls will not go to the ‘Default Destination’ but to this number.
NOTE: If users manually open/close the system by using ‘*401’/’*402’ access codes, the time rules defined in ‘Operation Times’ will not be valid for that day. They will be applied to the system after midnight.
Ringing Type
- Ringing Type

Select the ringing type played back to the calling party before they enter the IVR
(E.g. Rather than just ‘falling’ into IVR, play the ring sound to the user or music files located under the MOH class.)
NOTE: This is a required field.
- Music on Hold
Select the MOH/Music on Hold class that is played to users after they make a selection in IVR
(E.g. A MOH class usually contains one or more sound files. To see these files, please navigate to ‘System’ -> ‘MOH’.)
NOTE: This is a required field.
- Custom Ringtone
Select a custom ringtone that will be heard when a phone set as a Destination in IVR rings
(E.g. If the caller in IVR presses ‘3’ and a Linksys phone is used for that Destination, it will ring with this ringtone, ie. <Simple-2>.)
Local Dialing
- Dial Local/Network Destinations
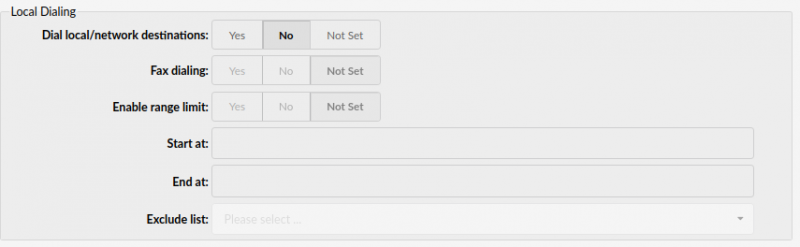
Enable dialing local network Extensions or proper/mobile phone numbers
By setting this option to ‘Yes’, the IVR will be allowed to dial local network Extensions only.
(E.g. If IVR has this option set to ‘Yes’, only local network Extensions will be accessible from this IVR. Please note that no proper/mobile numbers would be dialed.)
- Fax Dialing
Set this option to ‘Yes’ to send a fax to e-mail to any local Extension which is dialed
(E.g. If John dials an IVR which has this option turned on, he will have the ability to dial the local Extension number to which the system will generate a fax tone. He will then send a fax which will be sent to e-mail of the Extension that he dialed.)
- Enable Range Limit
This option tells the system which Extensions on the local network IVR will be able to be dialed
(E.g. Yes, No, Not Set)
- Start At
Define the starting number in the available range of Extensions
(E.g. 1000)
- End At
Define the ending number of the available range of Extensions
(E.g. 2000)
- Exclude List
Define any Extension in this field that cannot be called from that IVR even if it is within the set range
(E.g. 1005)
Permissions

Permissions are used to allow an organization to restrict who is able to enter an IVR. In particular, there are organizations where access to the IVR is only allowed to callers with a valid account number, but it can be used for other similar purposes.
- Account Access Only
Allow only certain PBXware Extensions to access the IVR
(E.g. If this option is set to ‘Yes’, only Extension numbers set under the ‘Account list’ will be allowed to access this IVR.)
- Account List
Define local Extension numbers that will be allowed to enter this IVR
(E.g. If John dials this IVR, but his Extension number is not in the ‘Account list’, he will be transferred to ‘Sales Extension’.)
NOTE: If ‘Account Access Only’ is set to ‘Yes’, this is a required field, and local Extension numbers have to separated with a single space in this field.
- Sales Extension
Define the Extension number to which all calls which are not in the ‘Account list’ will be redirected after not entering the IVR
(E.g. If John dials this IVR, but his Extension number is not in the ‘Account list’, he will be transferred to the Extension number provided here.)
NOTE: If ‘Account Access Only’ is set to ‘Yes’, this is a required field.
Multi-digit IVR codes
The only difference between ‘Standard IVR’ and ‘Multi-digit IVR’ is that the latter accepts two or more digits as a response, for example, numbers between 10-100. Therefore ‘Multi-digit IVR’ gives more options compared to the ‘Standard IVR’, but some advanced features are excluded.

- Access Code
Displays the multi-digit IVR access code
(E.g. ‘12345789’)
- Description
Displays the description of the access code
(E.g. ‘Test’)
- Destination
Displays the Destination to which the call will be transferred
(E.g. 100)
Click this button to edit the existing Access Code configuration.
Click this button to delete an existing Access Code.
NOTE: Upon clicking the button, the following warning message will appear: “Are you sure you want to remove XYZ?”. If user click the Cancel button, then the action will be abandoned. On the contrary, if OK is clicked, the selected IVR will be deleted.
Search
- Search
Search by entering data into the field and hitting the ‘Enter’ key afterwards
Once a user clicks the ‘Add Access Code’ button, s(he) will be prompted to a different section where s(he) can configure all the details for a certain IVR.
Add/Edit Access Code
- Access Code
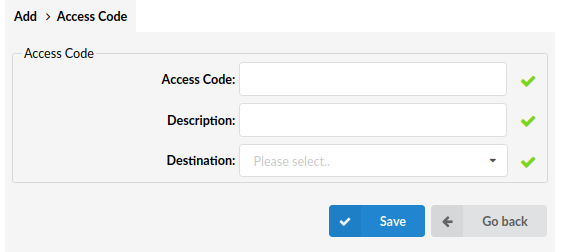
Set the access code to be dialed from the ‘Multi-digit IVRs’ that will transfer users to PBXware ‘Destination’ number
(E.g. ’99’)
NOTE: This is a required field.
- Description
Add a short description of this access code and its Destination
(E.g. Once the administrator goes to the ‘Multi-digit IVR codes’ section, a list of ‘Access Codes’, their ‘Descriptions’ and ‘Destinations’ will be displayed.)
NOTE: This is a required field, and it is viewed by the Administrator only.
- Destination
Set a PBXware Destination to which a call will be transferred once the ‘Access code’ is dialed from the Multi-digit IVR
(E.g. John enters the Multi-digit IVR and dials ’99’, and this ‘Destination’ is set to lead to the PBXware Extension ‘1000’. When John dials ’99’, he will be transferred to the PBXware ‘Destination’ provided here.)
NOTE: This is a required field.
PIN-based IVR
PIN-based IVR allows dialing local/remote Destinations by providing a pre-set IVR PIN number. PIN-based IVR is commonly used for temporary cases. PIN with an expiration date is useful when there is no need for a permanent IVR option. After a certain ‘Expiry Date’, the same defined PIN will not be valid. PIN-based IVR lacks some advanced features.

- PIN
Displays the IVR PIN number
(E.g. 1234)
- Description
Displays the IVR PIN short description
(E.g. Test)
- Expiry date
Displays the PIN expiry date
(E.g. 23 Feb 2021)
- Destination
Displays the Destination dialed once the IVR PIN is provided
(E.g. 100)

TIP: If the item is grayed out and the ‘Expiry date’ field underlined, that PIN has expired. Please refer to the screenshot.
Click this button to edit the existing PIN configuration.
Click this button to delete an existing PIN.
NOTE: Upon clicking the button, the following warning message will appear: “Are you sure you want to remove XYZ?”. If user click the Cancel button, then the action will be abandoned. On the contrary, if OK is clicked, the selected IVR will be deleted.

Click this button to upload a CSV file with multiple PIN and Destination codes in one step.
To do so, click the ‘Browse’ button and select a desired .csv file, then click the ‘Upload’ button to add new PIN codes to PBXware.
| Sample .csv file | |||
| 10002 | John Smith Office | 31-08-2021 | 123456789 |
| 20002 | George Nimara Home | 31-08-2021 | 987654321 |

Click this button to download a CSV template.
Search
- Search
Search a phrase by entering data into the field and hitting the ‘Enter’ key afterwards

Once a user clicks the ‘Add PIN’ button, s(he) will be prompted to a different section where s(he) can configure all the details for a certain IVR.
Add/Edit PIN
- PIN
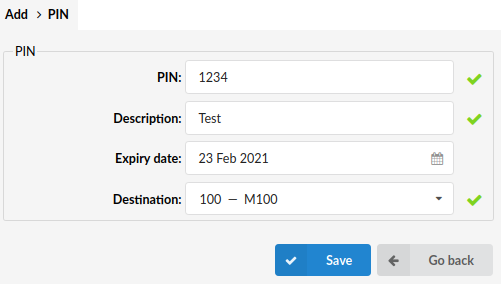
Define a unique PIN number
(E.g. John dials local IVR ‘1003’ and is asked to provide a PIN. He enters PIN ‘1234’ and PBXware then dials the number provided under the ‘Destination’ field.)
NOTE: This is a required field, and the PIN defined here should be provided once requested by IVR.
- Description
Enter a short description of the PIN
(E.g. ‘John’s Mobile Number’, or ‘Test’)
NOTE: This is a required field, and the description is used for describing the ‘Destination’ number.
- Expiry Date
Define a date to which this PIN can be valid
(E.g. If this field is set to expire on ’23 Feb 2021′, all IVR calls made with this PIN by this date will pass through to the ‘Destination’ number. Any calls made after the expiration date will not go through.)
NOTE: Even though this is not a required field, users are strongly encouraged to set the expiration date by clicking the ‘Calendar’ icon and selecting a desired date. The date can also be provided manually in the following form ‘dd-mm-yyyy’.
- Destination
Select a Destination from the drop-down menu that will be dialed once the IVR PIN is provided
(E.g. 100 – M 100)
NOTE: This is a required field.
IVR Tree
IVR Tree is a special form of IVR where the creation of a particular IVR is more graphically oriented than it is with regular IVR.
Once the ‘Create’ button is clicked, users will be asked to enter an IVR name and Extension after which the IVR will be available for editing.

After a certain IVR Tree is created, users can select the specific one from the drop-down menu and click the ‘Edit’ button as shown in the screenshot to edit the further configuration.
IVR Tree Actions
- Name
Enter the IVR name
(E.g. Test)
- Extension
Enter the IVR Extension number
(E.g. 255)
- Number of Rings
Define the number of rings before the caller enters the IVR
(E.g. 4)
- Response Timeout (sec)
Define the time period in seconds during which an IVR option must be dialed by the user
(E.g. 4)
NOTE: This option is useful when ‘Local dialing’ is turned on.
- Digit Timeout (sec)
Define the timeout in seconds during which a new digit must be dialed
(E.g. 1)
NOTE: This option is useful when ‘Local dialing’ is turned on.
- Selection Timeout (sec)
Define the timeout in seconds during which the selection must be made
(E.g. 3)
- Direct Access
If ticked, this option disables direct access to this IVR which means that the IVR in question can be accessed only through another IVR.
- Local dialling
Enables the user to dial local Extensions while inside the IVR.
The other two options in the menu are as follows:
- Delete – Click this button to delete the selected IVR.
- Save – Click this button to save the changes.
NOTE: The ‘Save’ button has to be clicked after every change in order for it to be applied.
IVR Tree
The main part of the IVR Tree are ‘Action’ and ‘Selection’. they can be added by clicking the ‘plus’ icon and deleted by clicking the ‘Delete’ button right next to it. Actions are items that are going to be executed when the user enters IVR. They will get executed in the order in which they are placed on the list.

When ‘Action’ is selected in the ‘IVR Tree’ section, users can add various ‘Actions’:
• Dial Local Extension – This option lets users dial the local Extension set in the ‘Extension’ field, when the action is executed.
• Dial Remote Extension – This option lets users dial the remote Extension set in the Destination field.
• Dial Voicemail – This option enables users to leave a voicemail for the given Extension.
• Check Voicemail – This option enables users to check the voicemail of the Extension which is provided with the keypad.
• Go to context – This option allows users to go to the given ‘Context’ and ‘Extension’, for example ‘Context’ -> ‘time’, ‘Extension’ -> ‘222’.
• Start Recording – This option allows users to start recording the conversation. Please note that if the ‘Silent recording’ option is ticked, the user will not hear the announcement that his/her call is being recorded.
• Set Queue Priority – This option allows users to set Queue priority, so if a user is about to enter a certain Queue, s(he) will enter it with a given priority.
• Set Language– This option allows users to set the language to be used in IVR. Please use the two-letter notation like ‘us’.
• Play Sound – This option allows users to play a sound file which the user can select and also set a language for it if the sound file was provided in several languages. Also, users can set to accept DTMF tones or keypad buttons during play, so they can dial local Extensions if that option is enabled in the IVR properties.
• Change CallerID – This option allows users to change users’ CallerID.
• Wait – This option allows users to wait the given number of seconds before the IVR continues to execute actions.
• Busy signal – This option allows users to play the busy sound to the caller.
• Hangup – This option allows users to hang up the current call.

When ‘Selection’ is chosen in the ‘IVR Tree’ section, users can add various ‘Actions’. These can range from ‘Selection 0’ to ‘Selection *’. Users can also choose between ‘Invalid Selection’ or ‘Timeout Selection’.
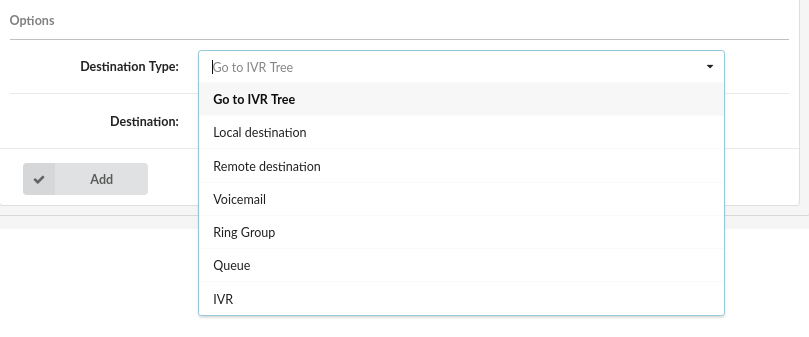
Once users select their desired selection from ‘Selection 0’ to ‘Selection *’, the Destination Types that can be added are as follows:
• Go to IVR Tree
• Local Destination
• Remote destination
• Voicemail
• Ring Group
• Queue
• IVR
- Destination
Select the PBXware Destination applicable to the type selected first
(E.g. If ‘Go to IVR Tree’ is selected as a ‘Destination’, then select the number of the applicable ‘IVR Tree’.)
In other case, if the Selection is ‘Invalid Selection’ or ‘Timeout Selection’, the configuration will be different. Please refer to the screenshots.
Invalid Selection
- Sound File
Select the sound file
Timeout Selection
- Sound File
Select one of the Destination types listed above
(E.g. ‘Go to IVR Tree’)
- Destination
Select the PBXware Destination applicable to the type selected first
(E.g. If ‘Go to IVR Tree’ is selected as a ‘Destination’, then select the number of the applicable ‘IVR Tree’.)
IVR Tree Graph
Once the IVR Tree is created, when users click the ‘IVR Tree Graph’ in the sidebar menu, they will get a graphical representation of their IVR Tree as shown in the screenshot below.
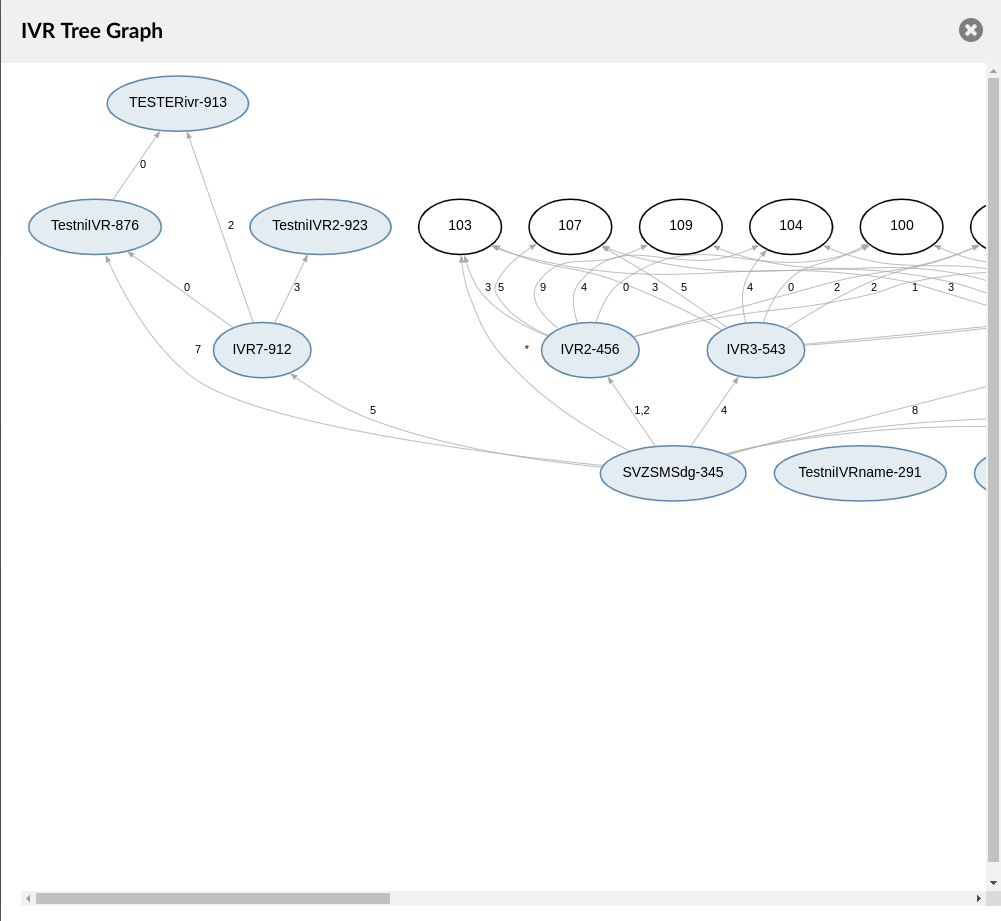
Meetings
Meetings

Meetings is an application that allows users to manage and connect geographically dispersed teams, increase productivity, and ensure high quality performance. Its implementation in PBXware brings an easier form of communication enabling users to organize and conduct meetings while at the same time taking into consideration their location, time zone, or personal schedules. To navigate to Meetings, select one of the desired Tenants. Once selected, the application will appear in the side menu bar.
NOTE: On PBXware, the Meetings application is visible on Slave Tenants.
Create a Meeting
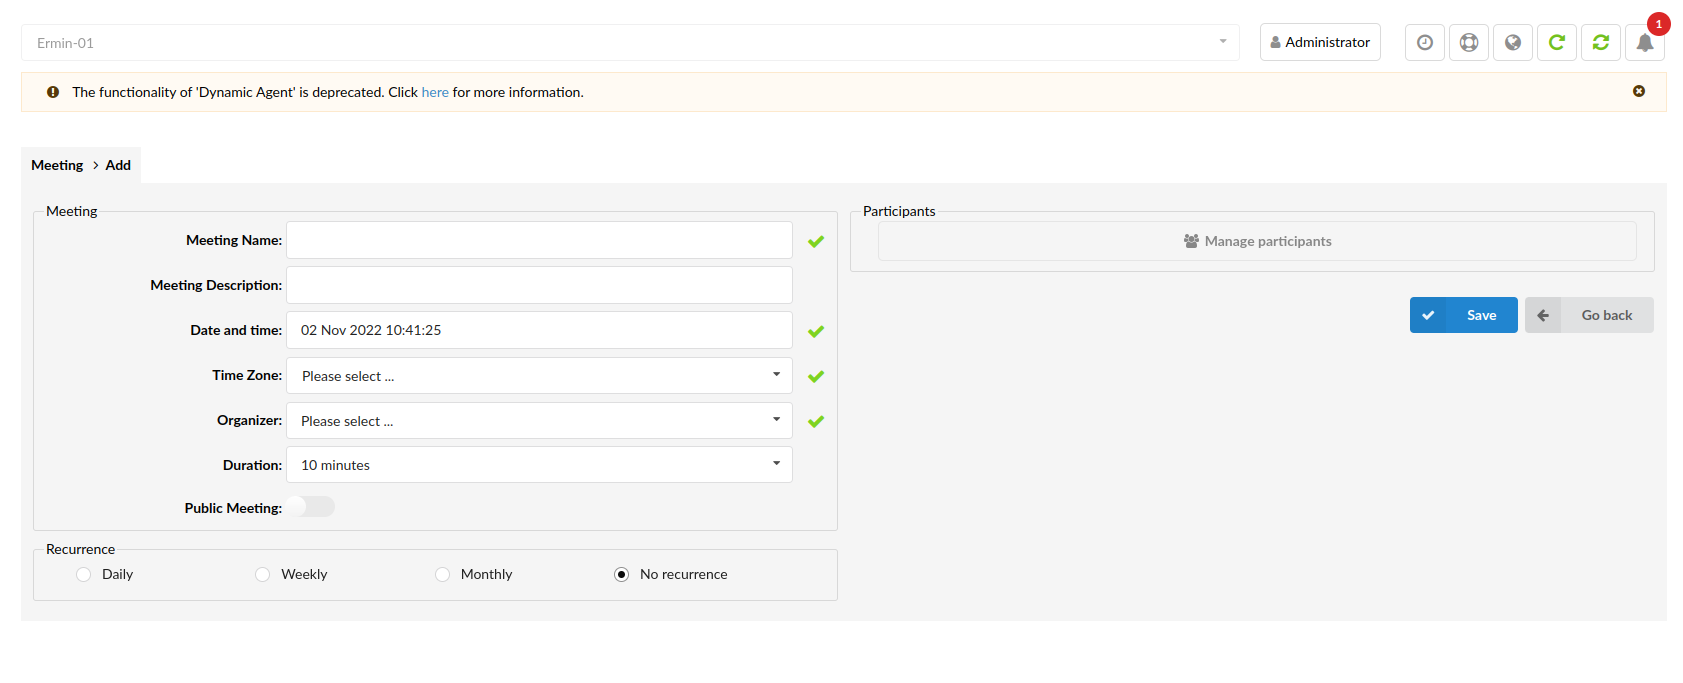

Click this button to create a meeting.
NOTE: ‘Meeting Name’, ‘Date and time’, and ‘Organizer’ are three required fields. Not defining those fields will result in the warning messages being shown. Please refer to the screenshots.
Meeting
- Meeting Name

Enter a meeting name.
(E.g. Daily Meeting)
- Meeting Description
Populate the field with more information regarding the meeting.
(E.g. Revision)
- Date and time
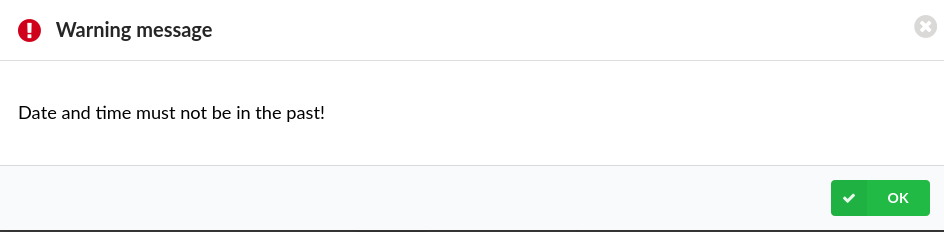
Choose the meeting’s date and time.
(E.g. 06 Sep 2020 12:01:00)
NOTE: Date and time cannot be set in the past. Please refer to the screenshot.
- Time Zone
The time zone in which the meeting takes place.
(E.g. If set to Europe at 12:00 it will always be 12:00 regardless of daylight savings)
- Organizer
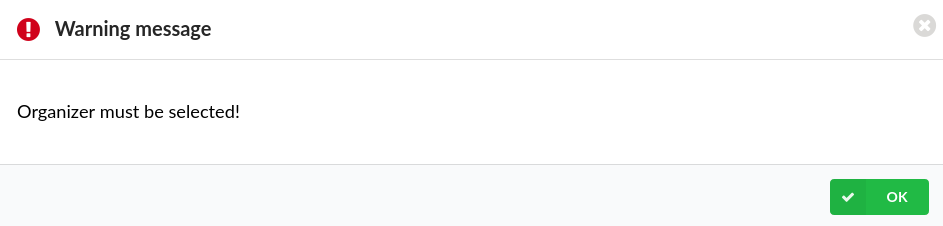
Select the organizer of the meeting from the list of Extensions.
(E.g. Ext 100 (100))
- Duration
Set the meeting’s duration. It ranges from minimum of 10 minutes up to the maximum of 2 hours.
(E.g. 15 minutes)
- Public Meeting
Toggle if the meeting will be public or private.
Recurrence
Recurrence options are used to create meetings that are repeated at specific time intervals:

Daily
If ‘Daily Recurrence’ is selected, meetings can be repeated every 1 to 90 days.
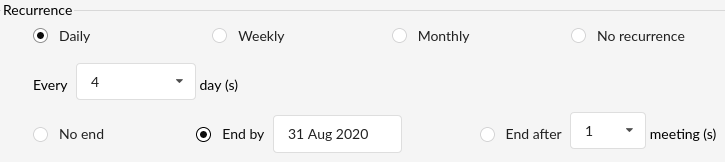
(E.g. If ‘1’ is selected, the meeting will be repeated every day, or if ‘4’ is selected, the meeting will be repeated every four days, and so on.)
Users can select the recurrence’s End Type as follows:
- No end: A meeting is held every day with no further time limitations.
(E.g. Time limitation will not affect the meeting’s recurrence.)
- End by: A meeting will stop recurring on a specific date.
(E.g. Once 31st of August is reached, the meeting will stop recurring, so in September there will be no meetings.)
- End after: A meeting will stop recurring after a specified number of meetings.
(E.g. If ‘8’ is selected, the meeting will stop recurring after eight conducted meetings.)
NOTE: Only one type of recurrence can be selected at a time.
| DAILY | ||
|---|---|---|
| Repetition | (in) Days | |
| Repetition Period | (from) 1 – 90 (days) | |
| Recurrence End Type | No End/End By/End After |
Weekly
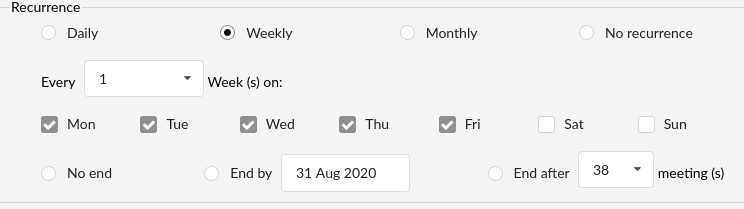
If ‘Weekly Recurrence’ is selected, meetings can be repeated every 1 to 12 weeks.
(E.g. If ‘1’ is selected together with days from Monday to Friday, the meeting will be repeated every week on the specified days.)
Users can also identify specific days in a week with the range being from Monday to Sunday.
(E.g. Mon, Tue, Wed, Thu, Fri)
Users can select the recurrence’s End Type as follows:
- No end: A meeting is held every week with no further time limitations.
(E.g. Time limitation will not affect the meeting’s recurrence.)
- End by: A meeting will stop recurring on a specific date.
(E.g. Once 31st of August is reached, the meeting will stop recurring, so in September there will be no meetings.)
- End after: A meeting will stop recurring after a specified number of meetings.
(E.g. If ’38’ is selected, the meeting will stop recurring after thirty-eight conducted meetings.)
NOTE: Only one type of recurrence can be selected at a time.
| WEEKLY | ||
|---|---|---|
| Repetition | (in) Weeks | |
| Repetition Period | (from) 1 – 12 (weeks) | |
| Week Days | (on) Mon – Sun | |
| Recurrence End Type | No End/End By/End After |
Monthly
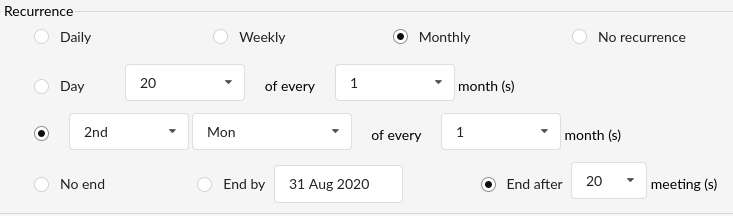
If ‘Monthly Recurrence’ is selected, there are two ways that recurrence can be configured.
1. Meetings can be repeated every 1 to 6 months with the specific date selected ranging from the 1st to the 31st.
(E.g. If ’20’ is selected for the ‘Date’ together with ‘1’ for months, the meeting will be repeated every month on the 20th.)
2. Meetings can be repeated from every 1st to 4th and from Mon to Fri within the range of 6 months.
(E.g. If ‘2’ is selected for the date, ‘Mon’ for days and ‘1’ for months, the meeting will be repeated every second Monday in a month.)
.
Users can select the recurrence’s End Type as follows:
- No end: A meeting is held every month with no further time limitations.
(E.g. Time limitation will not affect the meeting’s recurrence.)
- End by: A meeting will stop recurring on a specific date.
(E.g. Once 31st of August is reached, the meeting will stop recurring, so in September there will be no meetings.)
- End after: A meeting will stop recurring after a specified number of meetings.
(E.g. If ’20’ is selected, the meeting will stop recurring after twenty conducted meetings.)
NOTE: Only one type of recurrence can be selected at a time.
| MONTHLY | ||
|---|---|---|
| Repetition | (in) Months | |
| Repetition Period | (every) 1st – 31st (in) 1 – 6 (Months) | |
| Days/Months | (every) 1st – 4th Mon – Sun (in) 1 – 6 (Months) | |
| Recurrence End Type | No End/End By/End After |
No Recurrence
If ‘No Recurrence’ is selected, meetings are not repeated.
| NO RECURRENCE | ||
|---|---|---|
| Repetition | None | |
| Repetition Period | None | |
| Recurrence End Type | None |
Participants

When creating a meeting, users can add numerous participants. If the meeting is created for the first time, the ‘Manage participants’ field will be grayed out as shown in the screenshot. To make the field clickable, it is needed for all required fields to be populated as well as additional information regarding ‘Recurrence’.
Once done, press the ‘Save’ button, and the ‘Manage participants’ button becomes clickable as shown in the screenshot.

Add Participants
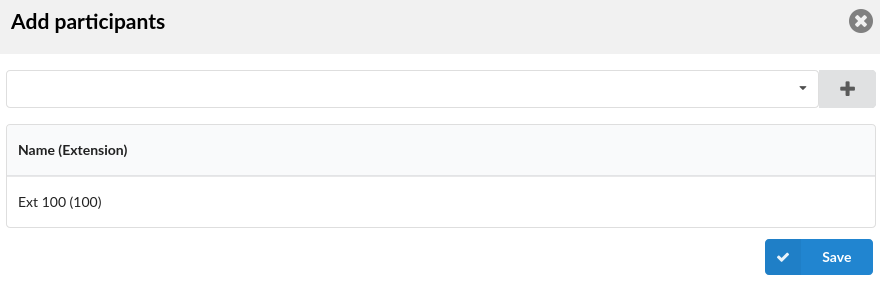
Upon clicking the ‘Manage participants’ button, users will be prompted to the ‘Add Participants’ page. From here, they can see, add, or delete the Extensions.
(E.g. Ext 100)
NOTE: Please note that the organizer’s Extension only will be visible at first.
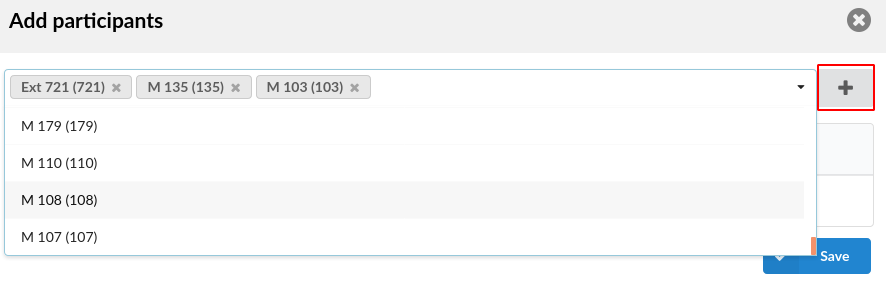
Once the organizer chooses desired Extensions from the drop-down list found at the top of a page, s(he) needs to press the plus sign as shown in the screenshot. The list will display all Extensions for that specified meeting.
(E.g. Ext 100, Ext 721, Ext 103)
If everything is done successfully, the message saying “Participants edited successfully” is displayed as shown in the screenshot.


Click this button to delete a participant from the Participants’ list.
NOTE: It is not possible to delete the organizer of the meeting.
When using the Meetings application, it is possible to see three tabs: ‘Scheduled’, ‘Recent’, and ‘Data Range’. They all display different information on meetings that are planned to be held or have been held.
Scheduled
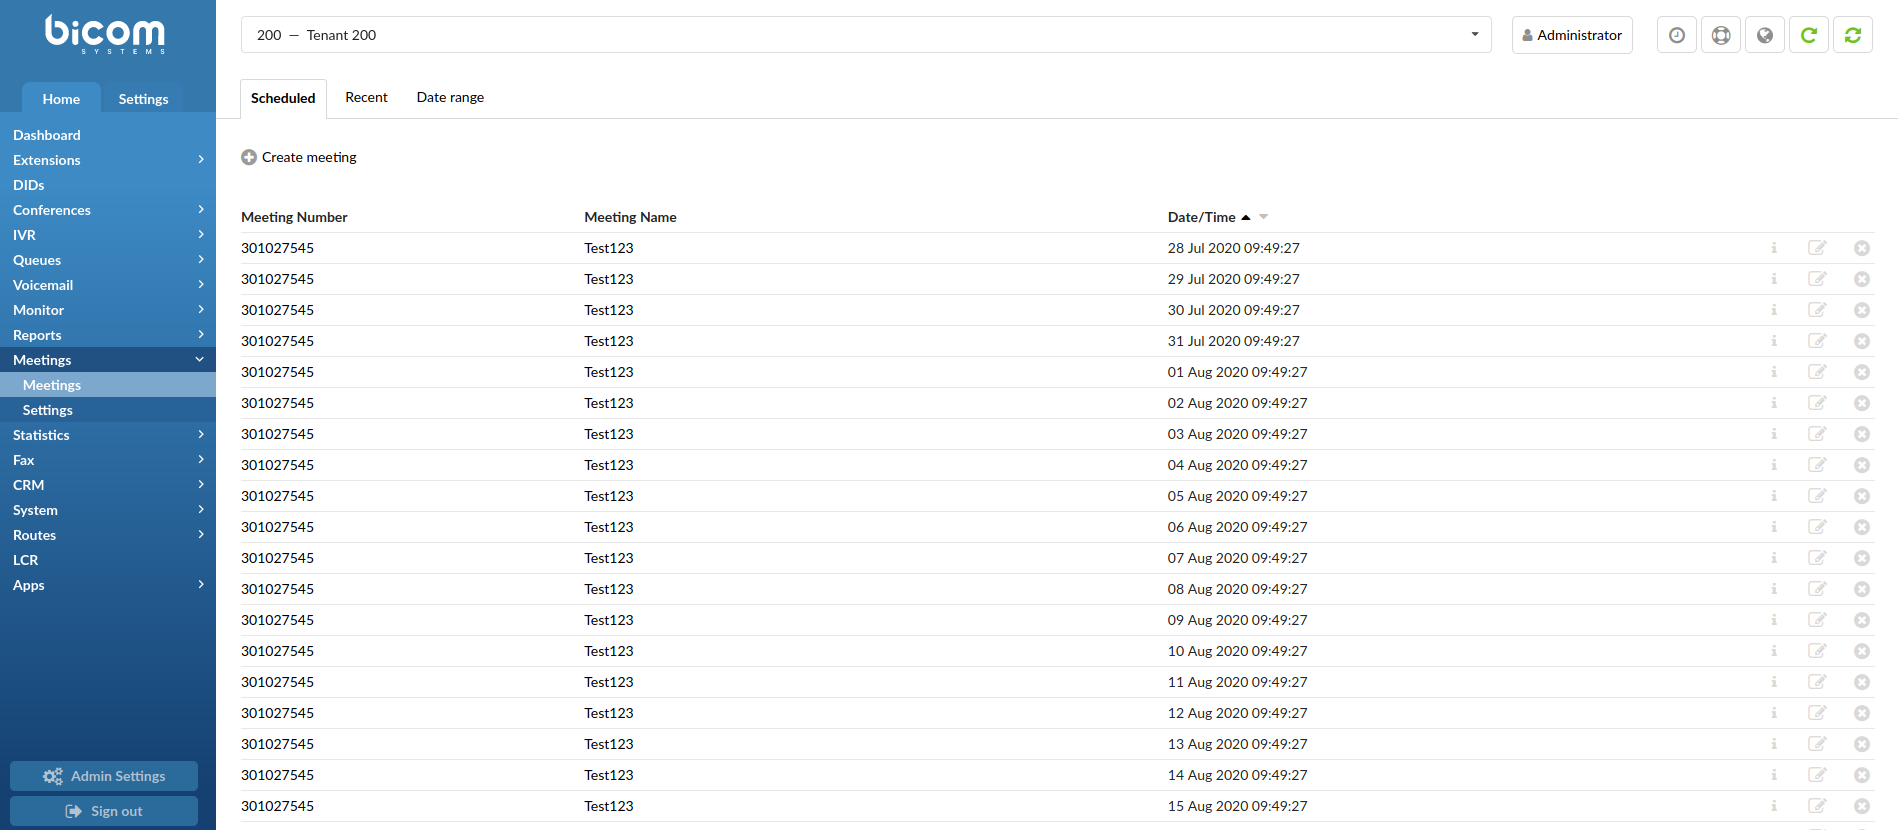
The list displays all scheduled meetings found on the selected Tenant with the following details:
Click this button to create a meeting.
- Meeting Number:
Unique on the system with 9 digits.
(E.g. 301027545)
NOTE: Hovering the mouse over the 9 digit meeting number and clicking it will prompt users to the Meeting Details page.
- Meeting Name:
Name given by the organizer when creating a Meeting.
(E.g. Daily Meeting)
NOTE: Hovering the mouse over the meeting name and clicking it will prompt users to the Meeting Details page.
- Date/Time:
Meeting’s date and time.
(28 Jul 2020 09:49:27)
NOTE: It displays the date and time of current and planned meetings.
Click this button to see the ‘Meeting Details’ page.
NOTE: For more information on the page’s content, please refer to the Meeting Details page.
(Button)
Click this button to edit the meeting.
NOTE: Upon clicking the button, the following warning message will appear: “Do you want to update all or just this instance of recurring meeting?”. If ‘Update this instance’ is clicked, then any changes made to the meeting will be applied only to this recurring meeting. Otherwise, if users click the ‘Update all instances’ button, then changes will be applied to all meetings on the list.
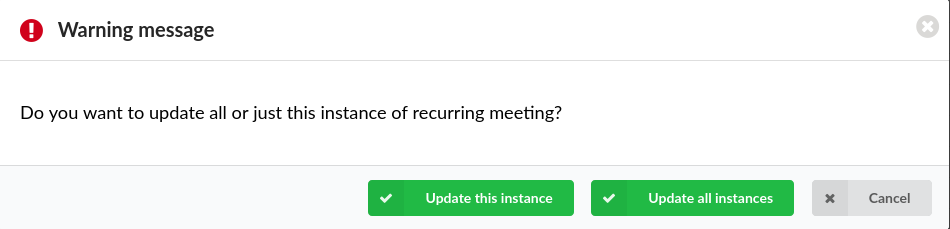
Click this button to delete the meeting.
NOTE: Upon deleting a single meeting, the warning message will appear saying “Are you sure you want to delete this meeting?”.
However, if a user deletes a recurrent meeting, the following warning message will appear: “Do you want to delete all or just this instance of recurring meeting?”.
If ‘Delete this instance’ is clicked, then only this recurring meeting will be deleted. Otherwise, if users click the ‘Delete all instances’ button, then all meetings on the list will be removed.
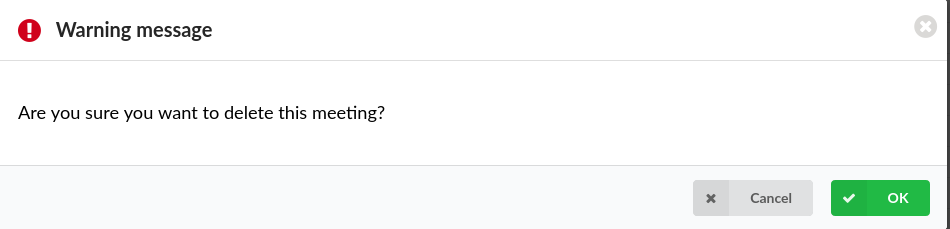
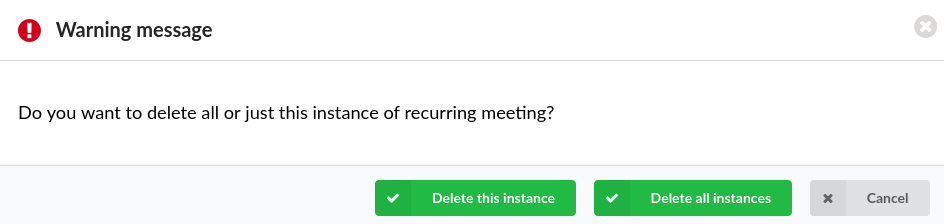
.
Recent
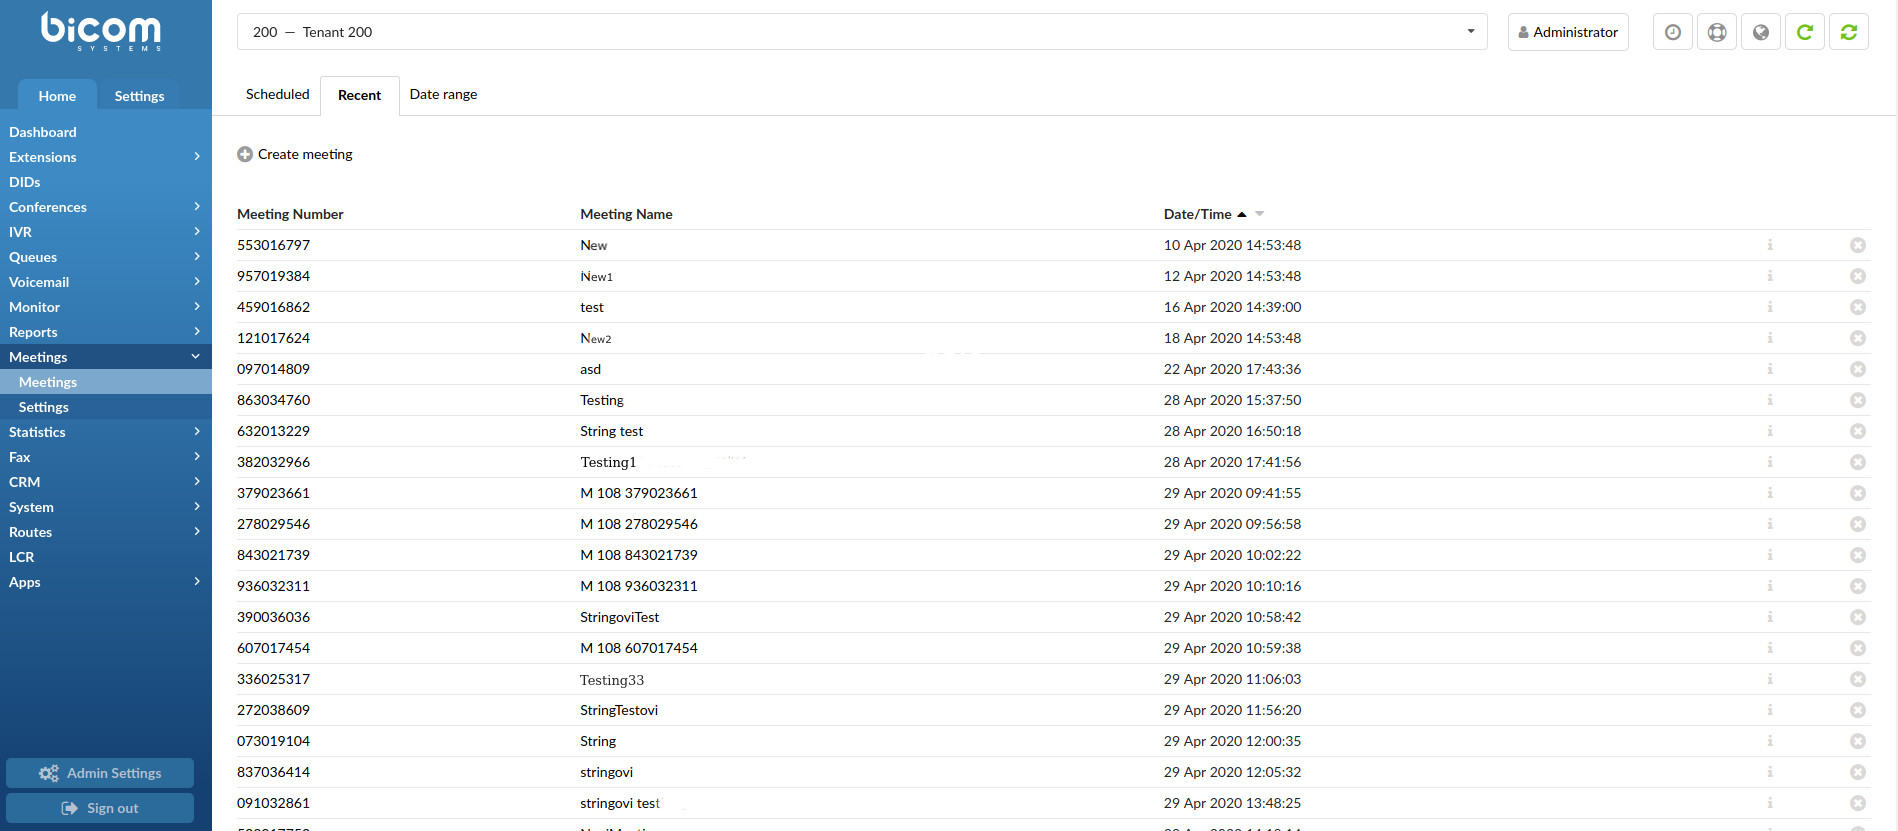
The list displays all recent finished meetings found on the selected Tenant with the following details:

Click this button to create a meeting.
- Meeting Number:
Unique on the system with 9 digits.
(E.g. 301027545)
NOTE: Hovering the mouse over the 9 digit meeting number and clicking it will prompt users to the Meeting Details page.
- Meeting Name:
Name of a previous Meeting.
(E.g. Daily Meeting)
NOTE: Hovering the mouse over the meeting name and clicking it will prompt users to the Meeting Details page.
- Date/Time:
Displays the date and time of previous meetings.
(28 Jul 2020 09:49:27)
Click this button to see the ‘Meeting Details’ page.
NOTE: For more information on the page’s content, please refer to the Meeting Details page.
Click this button to delete the meeting.
NOTE: Upon deleting a single meeting, the warning message will appear saying “Are you sure you want to delete this meeting?”.
However, if a user deletes a recurrent meeting, the following warning message will appear: “Do you want to delete all or just this instance of recurring meeting?”.
If ‘Delete this instance’ is clicked, then only this recurring meeting will be deleted. Otherwise, if users click the ‘Delete all instances’ button, then all meetings on the list will be removed.
NOTE: If user deletes a recurrent meeting on the ‘Recent’ page by pressing Delete all instances, all instances of the meeting will be deleted including the ones found on the ‘Scheduled’ page.
.
Date Range
The list shows all meetings on the Tenant for the period selected, beginning from the start date and finishing with the end date.
Click this button to create a meeting.
- Date Range:
Select the start and end date by using search/filter.
(E.g. Click the ‘Date Range’ button and select the desired dates.)
After making changes to the search filter, click the search icon.
NOTE: Lists can be sorted by Date/Time in the ascending or descending order.
- Meeting Number:
Unique on the system with 9 digits.
NOTE: Hovering the mouse over the 9 digit meeting number and clicking it will prompt users to the Meeting Details page.
(E.g. 301027545)
- Meeting Name:
Name of a selected Meeting.
NOTE: Hovering the mouse over the meeting name and clicking it will prompt users to the Meeting Details page.
(E.g. Daily Meeting)
- Date/Time:
Meeting’s date and time.
NOTE: It displays the date and time of meetings on this Tenant.
(28 Jul 2020 09:49:27)
Click this button to see the ‘Meeting Details’ page.
NOTE: For more information on the page’s content, please refer to the Meeting Details page.
Click this button to edit the meeting.
NOTE: Upon clicking the button, the following warning message will appear: “Do you want to update all or just this instance of recurring meeting?”.
If ‘Update this instance’ is clicked, then any changes made to the meeting will be applied only to this recurring meeting. Otherwise, if users click the ‘Update all instances’ button, then changes will be applied to all meetings on the list.
NOTE: Only meetings that have not been held yet can be updated on the ‘Date Range’ page.
Click this button to delete the meeting.
NOTE: Upon deleting a single meeting, the warning message will appear saying “Are you sure you want to delete this meeting?”.
However, if a user deletes a recurrent meeting, the following warning message will appear: “Do you want to delete all or just this instance of recurring meeting?”.
If ‘Delete this instance’ is clicked, then only this recurring meeting will be deleted. Otherwise, if users click the ‘Delete all instances’ button, then all meetings on the list will be removed.
Meeting Details
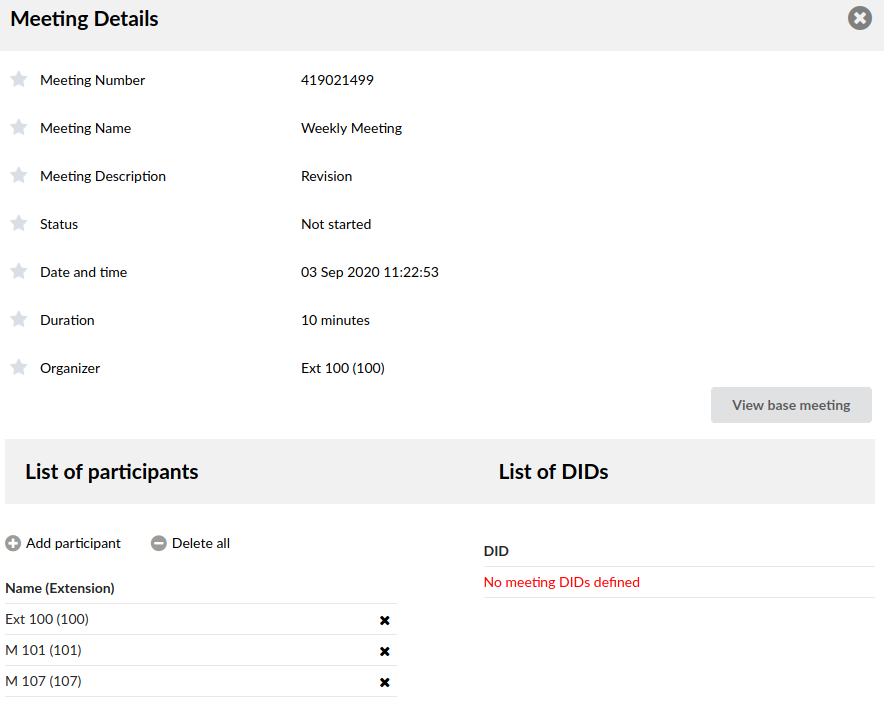
To open the ‘Meeting Details’ page, users can click ‘Meeting Name’, ‘Meeting Number’, or the ‘Info’ button. The ‘Meeting Details’ page contains the following information:
NOTE: If the meeting is recurrent, the ‘View base meeting’ button will be accessible. For more information on the ‘View base meeting’ button, please refer to the link.
- Meeting Number:
Unique on the system with 9 digits.
(E.g. 772023903)
- Meeting Name:
Name given by the organizer when creating a Meeting.
(E.g. Daily Meeting)
- Meeting Description
Additional information regarding the meeting.
(E.g. Revision)
- Status:
Shows the meeting’s status.
Status can be one of the following:
- Not started: A meeting has not been started yet.
- In progress: A meeting has already been started.
- Ended: A meeting has been held.
.
- Date/Time:
Date and time showing if the meeting will take place or it has been held.
(30 Jul 2020 11:01:00)
- Duration:
Time duration of a meeting.
(E.g. 10 minutes)
- Organizer:
Name of the meeting’s organizer and his/her Extension number.
(E.g. Ext 100 (100))
The ‘Meeting Details’ page allows users to see the list of meeting’s participants as well as the list of DIDs.
- List of Participants:
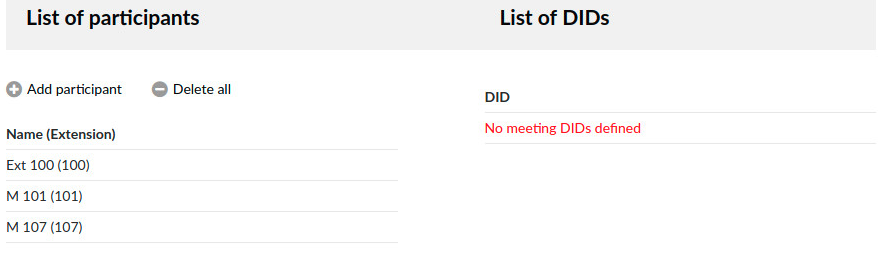
Shows Name and Extension of every participant in a meeting.
NOTE: For recent meetings, it is possible to see participants’ Join and leave time.
- List of DIDs:
Shows the list of DIDs found in the meeting.
(E.g. No meeting DIDs defined)


Click to add participants to the meeting.
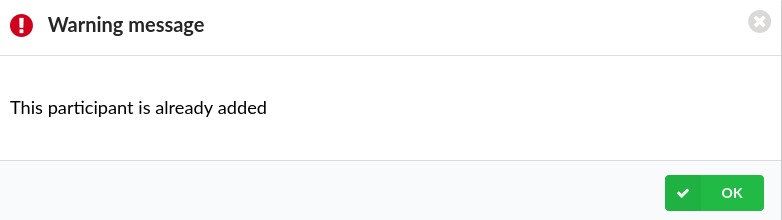
(E.g. Once clicked, the page for adding participants is opened. Please note that the same participant cannot be added twice. If added, the warning message will pop up saying “The participant is already added.”
NOTE: The button is visible only if a user is an organizer, and if the Meeting has not been already held.
- Participant
Select a participant and add him/her to the list.
(E.g. M 101 (101))
- Role
Assign a role to the selected Extension/participant.
(E.g. Participant/Administrator)

Click to delete all participants from the meeting.
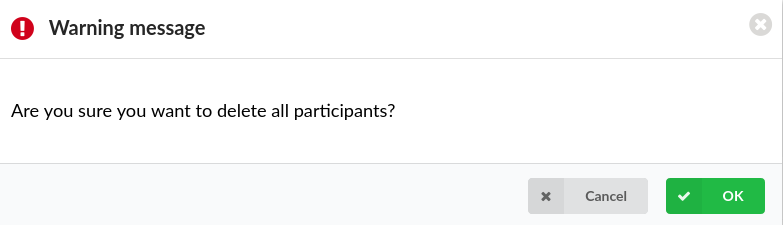
Once clicked, all participants except the organizer will be deleted. Since this is a deletion action, the warning message will pop up saying “Are you sure you want to delete all participants?”.
After confirmation, the message saying “Participants deleted successfully” should appear. Otherwise, if an error occurred, the message saying “Participant/s could not be deleted” should appear.


NOTE: The button is visible only if a user is an organizer, and if the Meeting has not been already held. Also, please note that for any changes to be visible, users have to save the settings and open the ‘Meeting Details’ page again.
View Base Meeting

Click to ‘View base meeting’ details.
(E.g. Once clicked, users will be prompted to a different page. This page shares the same information found on the ‘Meeting Details’ page, however, from here, a user cannot manage participants.)
NOTE: The ‘View base meeting’ button is visible only if a Meeting is recurrent.

Click the button to return to the ‘Meeting Details’ page.
.
Licensing (6.7)
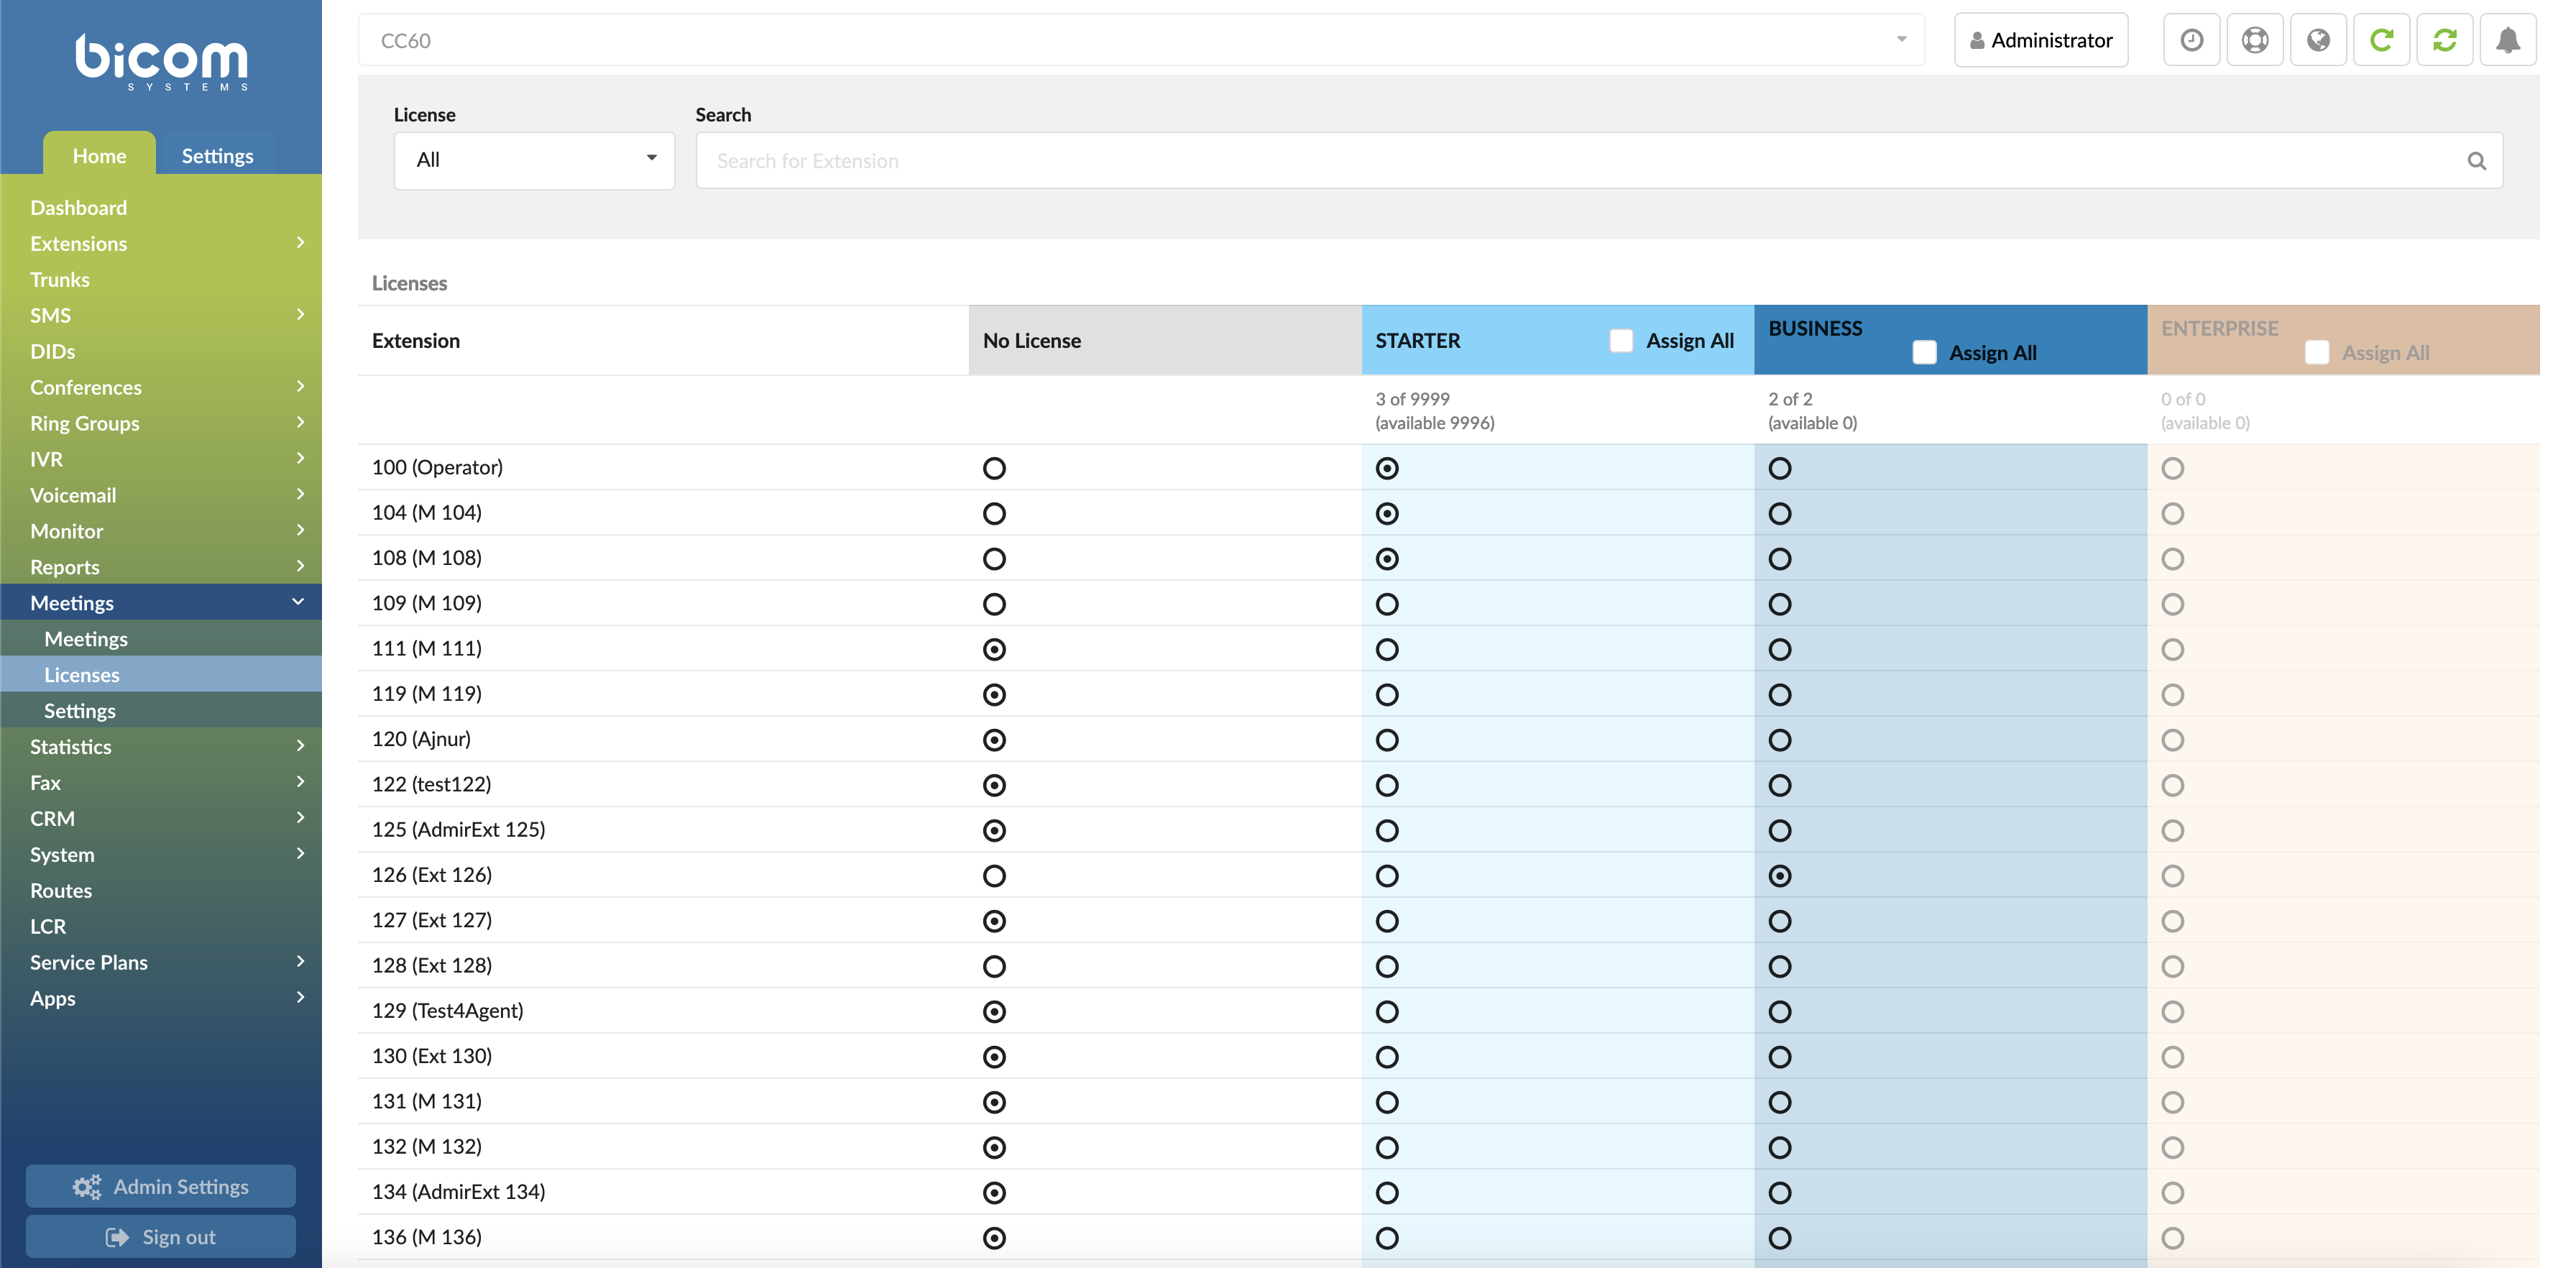
In PBXware 6.7 we are introducing a new page in the Meeting section, named Licensing. Licensing page enables PBXware administrator to easily assign Meeting edition permissions to one or more extensions on a system, from a central point. This feature should severely speed up the workflow of assigning a large volume of meeting licenses.
On top of the page status bar provides information about the edition and current status of assigned meeting licenses.
Assigning licenses is straightforward, and all you need to do to assign a specific edition license to an extension is to click on a corresponding edition button, associated with the extension number you would like to assign this edition to.

In addition to manually assigning a preferred edition to one or more extensions, the administrator also has the option to select the “Assign All” checkbox, located next to the edition name, in order to assign a specific edition to all extensions on a tenant.
When you select the checkbox to use the “Assign All” option you will be presented with a confirmation dialog, and you will need to click OK to confirm the change.
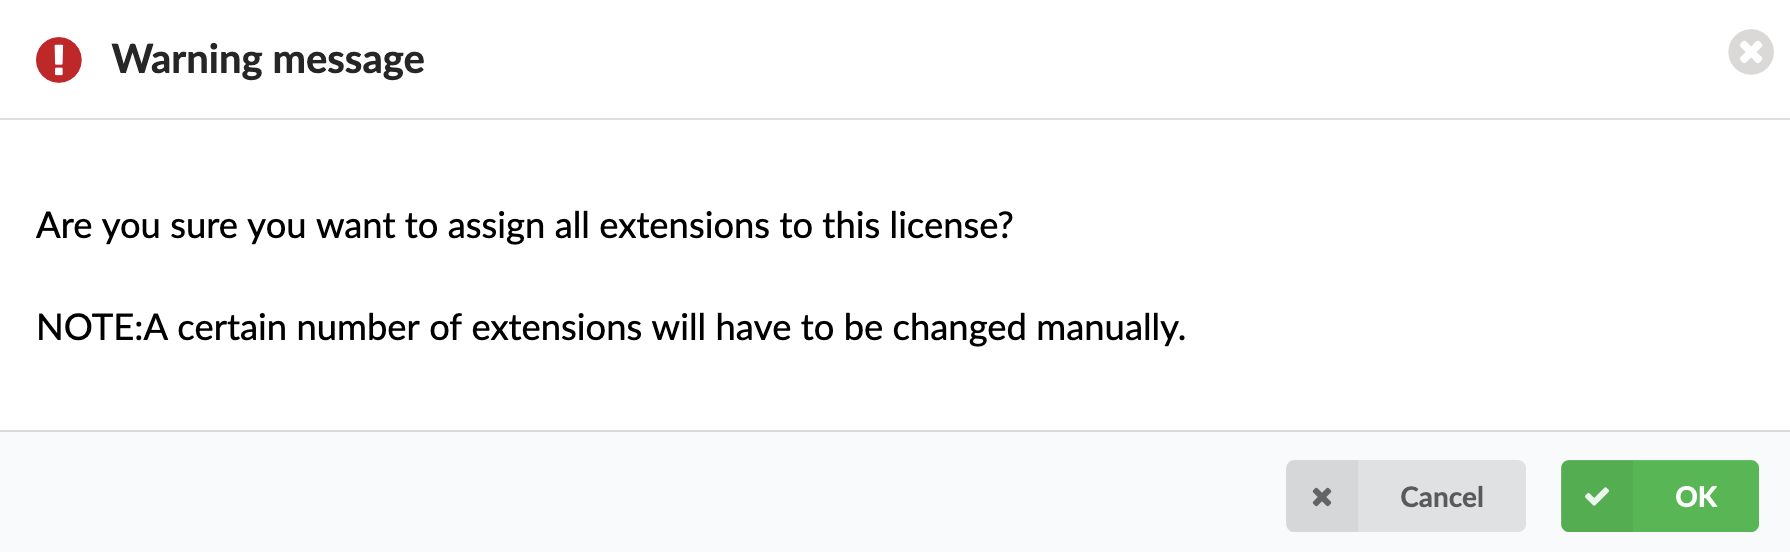
.
Meeting Licensing Changes (v6.7)
With the update of our products to v6.7, there will be a new version of BRM for Meeting pricing, affecting all Meeting users regardless of the software version they are on.
All current Meeting users will be automatically assigned Starter packages for all the extensions in the tenant with a Meeting license.
This includes the following gloCOM editions: Business, CC and Supervisor. Office edition doesn’t have Meeting licenses.
So, all current Meeting users (regardless if they’ve upgraded to v6.7, or stayed on v6.6 and lower) will still have Meeting, it will be free, but at a limited capacity (Starter limitation).
In order to buy a Business package, users will have to upgrade to v6.7 of PBXware.
The limitations of the Meeting packages are as follows:
| Licenses | Starter (free) | Business |
|---|---|---|
| Max. no. of participants | 10 | 100 |
| Max. duration of the meeting | 45 min | 240 min |
| Max. no. of concurrent meetings per tenant | 1 for all starter licenses | X = no. of licenses |
.
Settings
.
Daily digest
Daily digest is used for setting a reminder about receiving any daily e-mails for meetings on a specific Tenant.
- Time Zone:
Tenant’s time zone
(E.g. Europe/London)
- Week Days:
Specifies days in a week when e-mails will be sent.
(E.g. Mon, Tue, Wed, Thu, Fri)
- Daily Digest Time:
Select time for receiving daily e-mails.
(E.g. 08:00 AM)
NOTE: Time for receiving meetings’ daily e-mails is saved in UTC (Universal Time Coordinated). The administrator will see the time set according to his/her time zone. It can be set per Extension or Tenant.
Parameters
- https
Stands for the URL protocol. The ‘https’ protocol will bring users to a browser window before joining the meeting and ensure that all communications between the users’ browser and the website are encrypted.
- {{pbxware_host}}
Stands for the domain name. This is an optional placeholder, and if present, it is substituted by the PBXware domain name.
(E.g. pbx.bicomsystems.com)
NOTE: A user may enter a different domain name in case s(he) does not use the PBXware domain name.
- {{number}}
Stands for the meeting number. This is a required placeholder, and it gets substituted with a meeting number when creating a meeting join link.
(E.g. number=1234567)
NOTE: In order for a join link to be complete, a number of the meeting has to be added to the path. In case there is no meeting number, a warning message will appear saying that the number is missing in the Join Link field. Please read the documentation. For more information, please refer to the screenshot below.
- {{email}}
Stands for the e-mail address of the attendee. This is a required placeholder and it gets substituted by e-mail when creating a meeting join link for e-mail invitations (in PBXware).
(E.g. email=test@test.com)
Monitor
Extensions
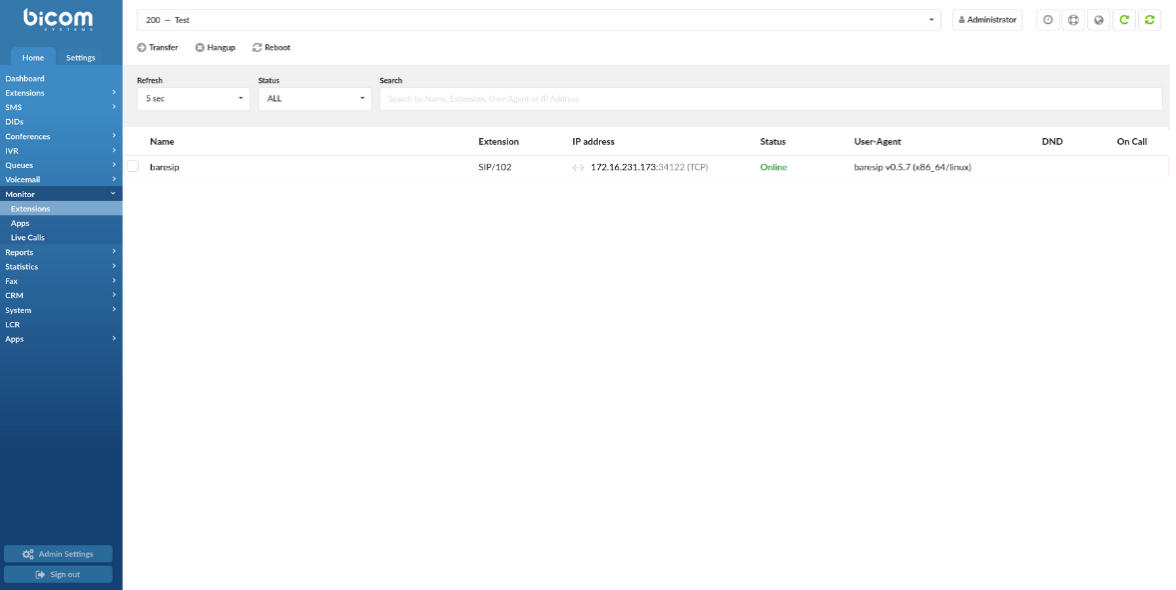
Monitored Extensions are displayed in real-time with the following details:
- Name
Displays the name of the Extension
(E.g. Peter Doyle)
- Extension
Displays the protocol used by the Extension and Extension number
(E.g. SIP/2002)
- IP address
Displays the IP address port that a UAD/Phone is registered to and additionally shows which transport is used (TLS, UDP, TCP, WS, or WSS)
(E.g. 192.168.1.1:5060 (UDP))
NOTE: If you click an IP address, it will open up a new window showing the phone’s web interface, if there is one enabled.
- Status
Displays the status of UAD/Phone network
(E.g. Online/Offline)
- User Agent
Displays the UAD/Phone Brand/Version
(E.g. Yealink SIP-T41S)
- DND
Displays whether DND is applied
- On Call
Displays whether the user is participating in a call at this moment
If the user is on call picture of a headset will be shown, otherwise, this field will be blank.
TIP: Certain call actions (such as transferring calls, hanging up, etc.) can be performed on active calls as well.
Search
- Refresh
Select the time interval in seconds at which data should be refreshed
(E.g. To refresh every ten seconds, select ‘10 sec’ from the drop-down list.)
- Status
Sort Extensions based on their network status (ALL, Online, Offline)
(E.g. Select ‘Online’/’Offline’ to see only online or offline Extensions. Select ‘ALL’ to list all the Extensions on a Tenant.)
- Search
Type a specific Extension name, Extension number, User-Agent, or IP address and have the data filtered accordingly
(E.g. TestTenant)
.
Actions
- Transfer
Transfer a party from the active conversation to a different Destination
(E.g. Extensions ‘1000’ and ‘1001’ are in a conversation. Select one Extension (e.g. ‘1000’) under ‘Channels’ and click this button. Type ‘1005’ in the pop-up window. Extension ‘1001’ will be transferred to the Extension ‘1005’)
- Hangup
Hang up the active conversation
(E.g. Extensions ‘1000’ and ‘1001’ are in a conversation. Select one Extension (e.g. ‘1000’) under ‘Channels’ and click this button. The conversation between these two Extensions will be terminated.)
- Reboot
By selecting Extension and clicking ‘Reboot’, the phone on which the selected extension is registered will reboot.
NOTE: This doesn’t work for all types of phones. Some phones need to be provisioned in order for this to work.
(Button)
Apps

The ‘Apps’ page displays all currently registered apps. The page behaves similarly to ‘Monitor’ -> ‘Extensions’ with the exception of no rows being displayed for Extensions that do not have any apps present. This option is useful because it gives the opportunity to preview how many gloCOM editions are online.
Monitored Apps are displayed in real-time with the following details:
- Name
Displays the name of the Extension
(E.g. TestApp)
- Extension
Displays the protocol used by the app and Extension number
(E.g. SIP/2002)
- IP address
Displays the IP address:port that a UAD/Phone is registered to
(E.g. 192.168.1.1:5060)
- App
Displays the application name and version
- Edition
Displays the app edition
- On Call
Displays whether the user is participating in a call at this moment
(E.g. If the user is on a call, the picture of a headset will be shown, otherwise, this field will be blank.)
NOTE: Certain call actions (such as transferring calls, hanging up, etc.) can be performed on active calls as well.
Search
- Refresh
Select the time interval in seconds at which data should be refreshed
(E.g. To refresh every ten seconds, select ‘10 sec’ from the drop-down list.)
- Edition
Sort Extensions based on their edition
(E.g. ‘Office’, ‘Business’, ‘Agent’, ‘Supervisor’
- Search
Type a specific Name, Extension, or App and have the data filtered accordingly
(E.g. TestTenant)
Actions
- Transfer
Transfer a party from the active conversation to a different Destination
(E.g. Extensions ‘1000’ and ‘1001’ are in a conversation. Select one Extension (e.g. ‘1000’) under ‘Channels’ and click this button. Type ‘1005’ in the pop-up window. Extension ‘1001’ will be transferred to the Extension ‘1005’)
- Hangup
Hang up the active conversation
(E.g. Extensions ‘1000’ and ‘1001’ are in a conversation. Select one Extension (e.g. ‘1000’) under ‘Channels’ and click this button. The conversation between these two Extensions will be terminated.)
Live Calls

Monitored Live Calls are displayed in real-time with the following details:
- From
Displays the caller’s Extension Name (or CallerID) and Extension number
(E.g. TestExtension (101))
- To
Displays the call receiver’s Extension name (or CallerID) and Extension number
(E.g. TestExtension (102))
- Call Duration
Displays the duration of the call
(Display)
Search
- Refresh
Select the time interval in seconds at which data should be refreshed
(E.g. To refresh every ten seconds, select ‘10 sec’ from the drop-down list.)
Actions
- Hangup
Hang up the active conversation
(E.g. Extensions ‘1000’ and ‘1001’ are in a conversation. Select one Extension (e.g. ‘1000’) under ‘Channels’ and click this button. The conversation between these two Extensions will be terminated.)
Reports
CDR displays detailed records of all calls on the current tenant with the following details:

- From:
Extension number from which the call was made.
(E.g. If the call was made from extension 1001 to extension 1004, ‘1001’ is displayed here).
NOTE: Users can now search anonymous calls simply by entering ‘anonymous’ in the From field and then the query will display anonymous results only.
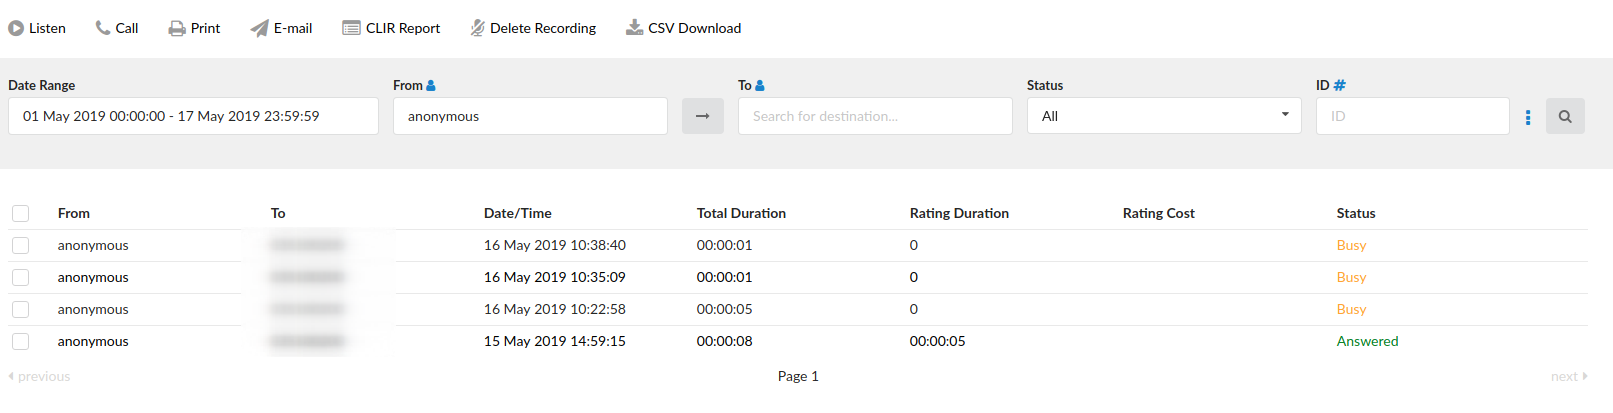
- To:
Extension number to which the call was made.
(E.g. If call was made from extension 1001 to extension 1004, ‘1004’ is displayed here).
- Date/Time:
Date and Time when the call was made
(E.g. 04 Oct 2006 10:44:10)
- Duration:
Call duration time in hh:mm:ss format.
(E.g. 00:12:45)
- Call Rating:
Time billed by the system.
(E.g. 00:12:45)
- Cost:
Cost of the call (E.g. 1.34)
- Status:
Displays the call status.
Example:
Depending on whether a call was answered or not, this field value may have the following content:
- Answered
- Not Answered
- Busy
- Error
.
This icon is displayed once a call is recorded and ‘Delete’ or ‘Listen’ enhanced service is active.

This checkbox used in combination with the CDR commands to select a desired call
.
Remote Recording Playback
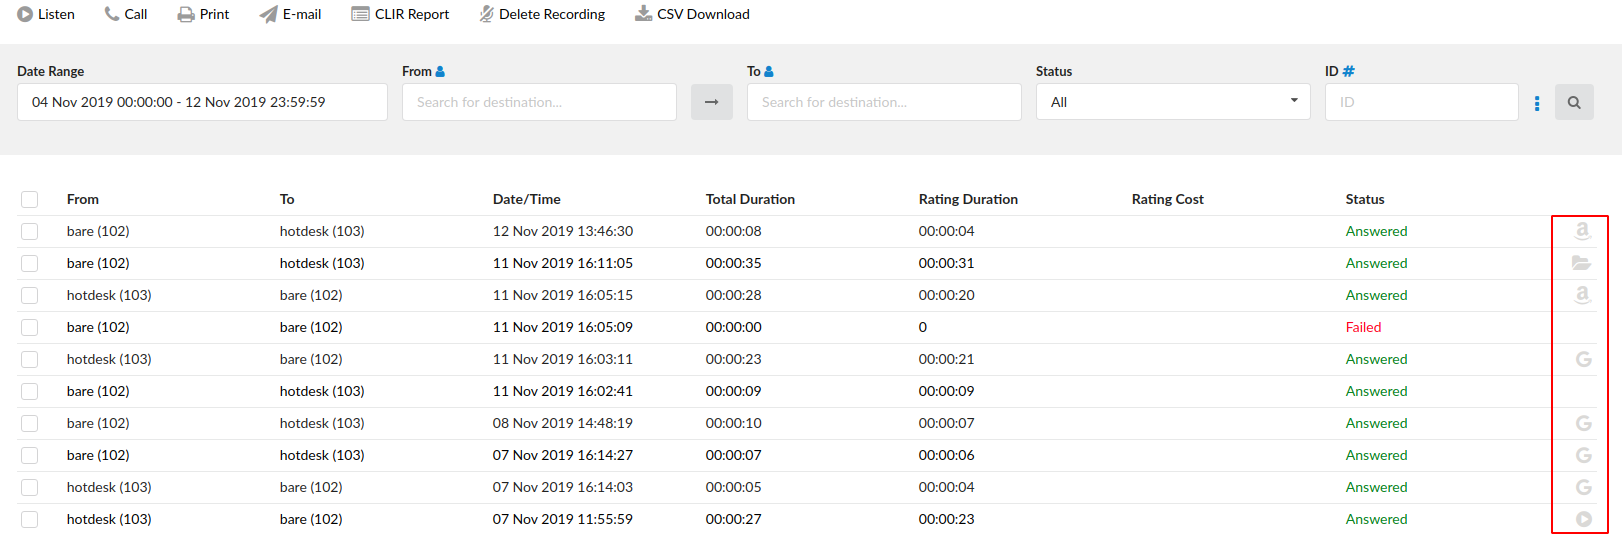
Users can download or listen to recordings offloaded to certain services using Archiving while on this page. Such recordings are similar to regular call recordings but the ones that are offloaded cannot be deleted.
If such an entry is selected and ‘Delete Recording’ is clicked, the following warning message will appear: “Recording not available for selected record.” Please refer to the screenshot.

Based on which case scenario it is, one of the two icons will be displayed:
- Standard play icon – A recording is available both locally and remotely. Such a recording can be downloaded or listened to on this page, and it can be deleted from the system as well. The deletion action will be performed locally, but the recording will stay stored remotely.
- Service icon – A recording is available only remotely. Such a recording can be downloaded or listened to on this page, but it cannot be deleted from the system.
The system displays different icons depending on which service was used.
The list is as follows:
 – Amazon S3
 – FTP
– FTP – SFTP
 – Google Drive
 – Dropbox
NOTE: If there is no recording on the system, no icon will be displayed.
NOTE: For this feature to work properly, a user needs to update the license. Please note that if this feature is not enabled in the license, the icons will be displayed but recordings cannot be downloaded or listened to.
Search/Filter
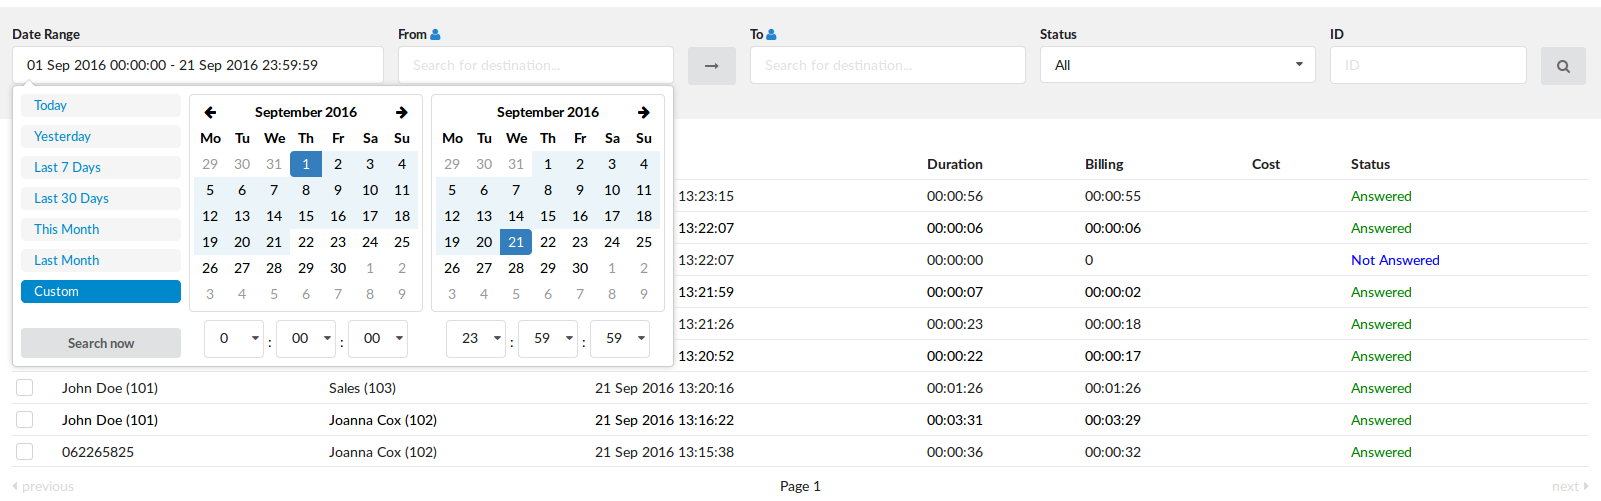
- Start Date:
Select a Search/Filter start date.
(E.g. Click on the small ‘Calendar’ icon next to a field and select desired date)
- End Date:
Select a Search/Filter end date.
(E.g. Click on the small ‘Calendar’ icon next to a field and select the desired date)
- From:
Select whether you want to search CDRs by Destination(s) or Trunk from where the call got in.
(E.g. Destination(s) or Trunks)
- To:
This field points to a Destination(s) or Trunk for which you are searching.
(E.g. Trunk)
- ID:
CDRs can now be filtered by 2 different types of IDs. First is Unique ID, and by filtering with this one you get the same functionality as before (set by default).
By clicking the blue “#” sign right to the “ID” label you change the type of ID to Linked ID. Filtering CDRs with this type of ID will get you all CDRs that are “linked” to the selected one and you will be able a call flow where the selected CDR is included.
(E.g. 1221447123.66)
- Start Time
When searching for CDRs this is the start time on the Start Date.
(E.g. Time in hh:mm:ss format like 10:15:30)
- End Time
When searching for CDRs this is the end time on the End Date,
(E.g. Time in hh:mm:ss format like 15:20:30)
- From
If you chose Destination(s) in the From Select box, you will enter the extension from which the call came. If your selection was Trunk, you will have a Select box in this place where you can choose a trunk on the system from which the call came.
Example:
- Destination(s) – 1009
- Trunk – Sales
.
- To
Here you will enter number of the destination or select a trunk in which the call ended up.
(E.g. 1007)
- Status:
Search calls by selecting desired call status.
Example:
Click on a ‘Please Select’ button and select one of the available fields:
- All
- Answered
- Not Answered
- Busy
- Error
Additional search options:

- Show rated calls only
Users can choose to have only those calls with a cost displayed in the report. If this option is not selected, then the report will feature ALL calls.
NOTE: This feature can also be used in Online Self Care.
TIP: After making any changes to the search filter, be sure to click the search icon.
Listen
- Listen:
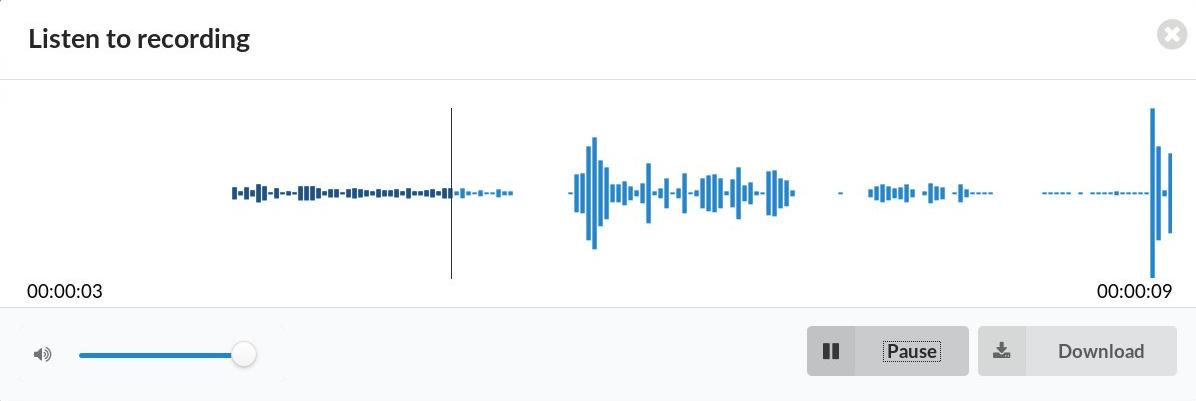
Once the ‘Listen’ icon is displayed next to a call record it means that the specific call was recorded.
(E.g. To play recorded calls, check the box next to a ‘Listen’ icon and click ‘Listen’. Browser will prompt you to open the sound file in your favorite audio player or to download the sound file).
Call
To establish a call between two extensions, all you need to provide is the caller $EXTENSION number and the $DESTINATION extension.
- Caller
Extension that will make a call.
Example:
Provide any extension number here, 1001, for example
- Destination:
Destination extension that will be dialed by the ‘Caller’ extension.
(E.g. To select a destination extension, first check the box next to a CDR record. This field will display two extensions listed under ‘From’ and ‘Destination’ selected record)
TIP: After setting ‘Caller’ and ‘Destination’ extensions, click the call icon.
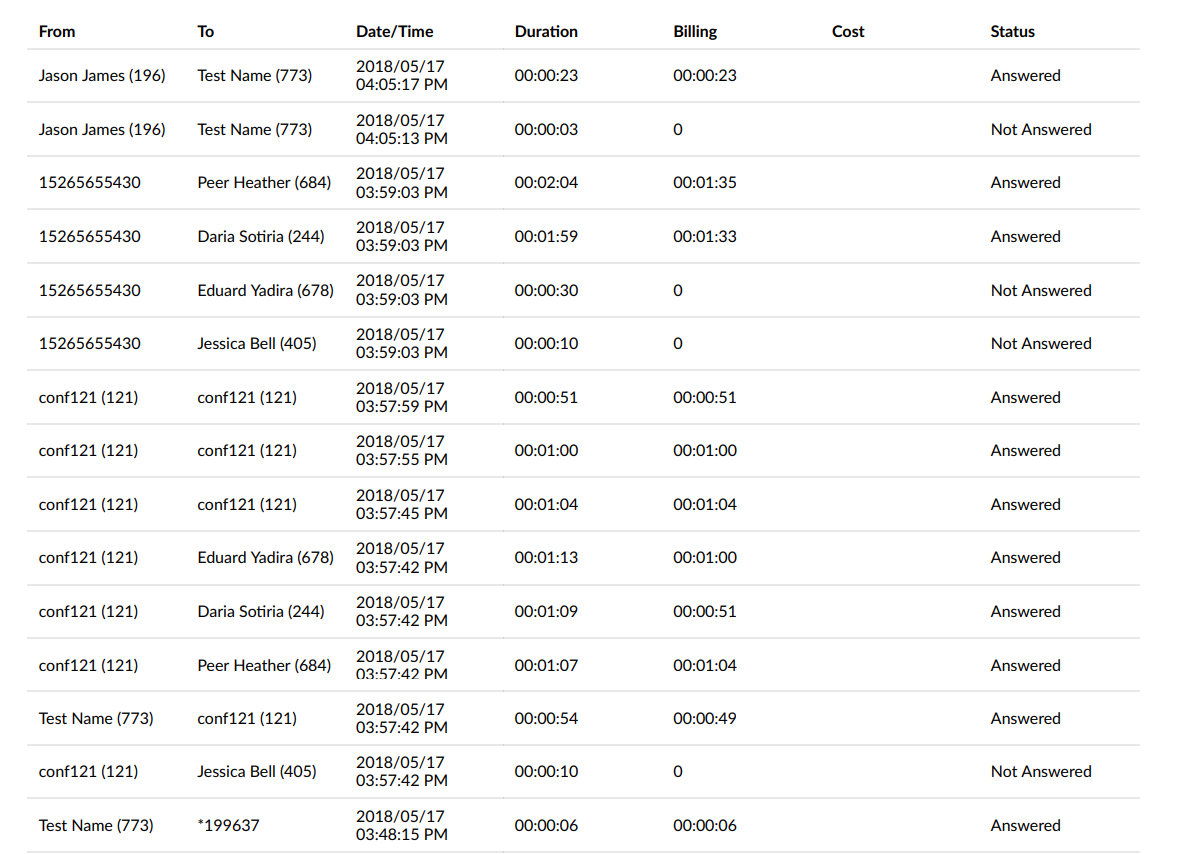
Check the box next to a call record and click the ‘Print’ button. This action will open a new pop-up window with the printing interface.
.
Click on the ‘Email’ button to send all reports listed on a page or select a box next to a report and click the ‘Email’ button to send only selected ones
Provide an E-mail address where the report is to be sent and click on the ‘OK’ button to proceed or ‘Cancel’ to abort the email action
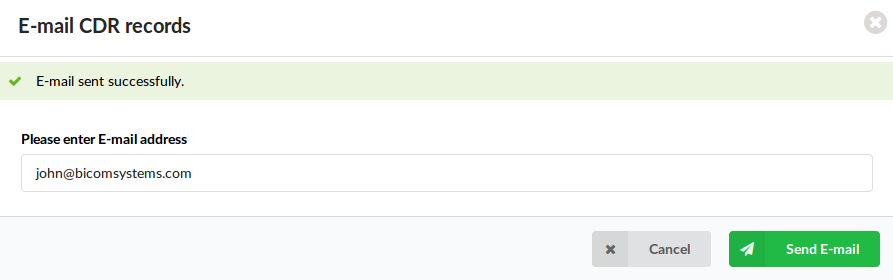
Press ‘OK’ to email all CDR records on the current page (even if they are not selected) or click ‘Cancel’ to print selected records only
Finally, press the ‘OK’ button to confirm an email action or ‘Cancel’ to abort the email action
.
CLIR
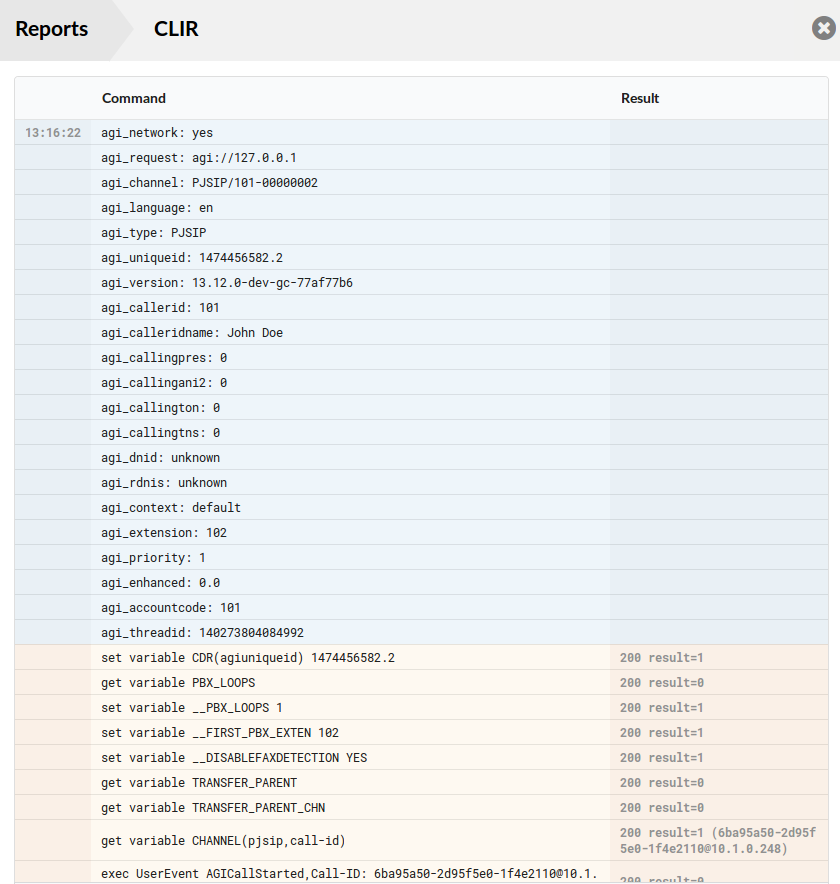
- CLIR:
CLIR (Command Line Interface Record) details
Example:
Select a desired call record and click this button to view more technical details about the call. A small popup window will open with the data.
.
NOTE: When experiencing any kind of unexplained problems, this is the data you need to send to the technical support team
CLIR report has been improved to show when the channels limit defined in the license is exceeded, the CLIR will show the exact numbers ( current > max ).
E-mail CLIR page option enables you to send the current CLIR to desired e-mail address
Delete Recording
- Delete Recording:
Deletes recorded calls.
NOTE: For this command to be displayed, the appropriate enhanced service has to be set.
(E.g. Select a recorded call and click this button to delete it from the file system)
Download CSV
- Download CSV:
Download data as a .csv (Comma Separated Value) file.
(E.g. Click this button to download the .csv file to your desktop)
.
CDR Summary
Create a CDR summary report for a selected period of time.
- Date Range:
Select a Search/Filter start date
(E.g. Click on the small ‘Calendar’ icon next to a field and select the desired date)
- Group by:
Group results by selecting the desired period.
Example:
Click on the field and select one of the available options:
- Whole range
- Quarterly
- Monthly
- Yearly
. - Accountcode:
SFilter results per accountcode.
(E.g. 101)
SMS
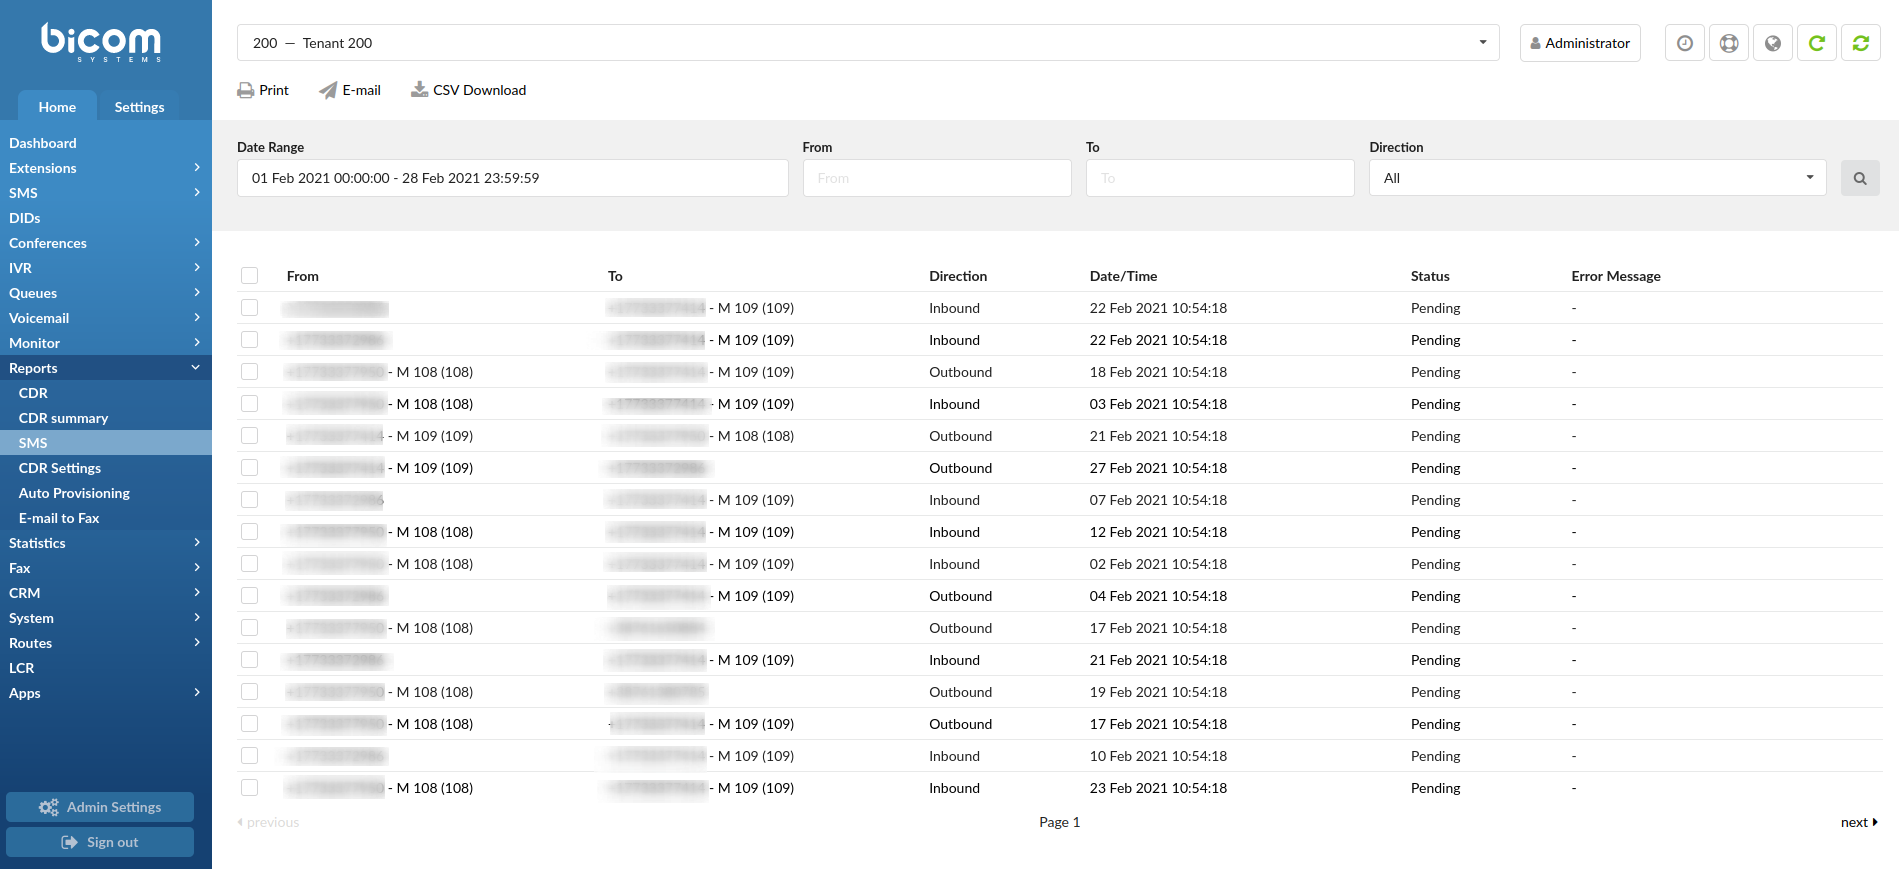
This ‘SMS’ section on Reports allows users to see all details regarding SMS messages on the system.

Click to print selected entries.
NOTE: After users select which entries they want to print, they will be prompted to a different window and complete the configuration based on the printer they have.

Click to send selected entries in an e-mail.
NOTE: In order to successfully send an e-mail, please make sure that some/all entries are ticked. If not, a warning message will appear saying “No results found.” Please refer to the screenshot.

Click this button to download a CSV file.
NOTE: This CSV file contains the data displayed on the ‘SMS’ page. Users can choose to download specific entries or select all of them.

- Date Range:
Select a Search/Filter start date
(E.g. Click the small ‘Calendar’ icon next to a field and select the desired date.)
- From:
Enter a number from which the SMS message was sent and have the data filtered accordingly
(E.g. +1234567890)
- To
Enter a number to which the SMS was sent and have the data filtered accordingly
(E.g. +2221564879)
- Direction
Select one of the directions and have the data filtered accordingly
(E.g. All/Inbound/Outbound)

- Checkbox
Select an entry by ticking this check box
- From
Displays the number from which the SMS message was sent together with the Extension name/number
(E.g. +1234567890 – M 108 (108))
- To
Displays the number to which the SMS was sent together with the Extension name/number
(E.g. +2221564879 – M 109 (109))
- Direction
Displays the SMS message direction
(E.g. Inbound)
- Date/Time
Displays the date and time of the SMS message
(E.g. 30 Nov 2020 09:03:44)
- Status
Displays the SMS message status
(E.g. Sent/Received/Failed)
- Error Message
Displays the message explaining why certain action failed
(E.g. Provider: Authentication failed)
Bulk Messages

This ‘Bulk Messages’ section on Reports allows users to see all details regarding Bulk messages on a Tenant.
Click to print selected entries.
NOTE: After users select which entries they want to print, they will be prompted to a different window and complete the configuration based on the printer they have.
Click to send selected entries in an e-mail.
Click this button to download a CSV file.
NOTE: This CSV file contains the data displayed on the ‘Bulk Messages’ page. Users can choose to download specific entries or select all of them.
- Date Range:
Select a Search/Filter start date
(E.g. Click the small ‘Calendar’ icon next to a field and select the desired date.)
- Status
Select one of the statuses and have the data filtered accordingly
(E.g. Not Active)
- Name
Populate the field with a name and have the data filtered accordingly
(E.g. TestBulk)
- Checkbox
Select an entry by ticking this check box
- Name
Displays the name of a Bulk message
(E.g. TestBulk)
NOTE: Clicking the name of a certain Bulk message will prompt users to the Reports page where they can access more data and information on this Bulk message.
- Sent/Total
Displays the number of sent messages and the total amount of numbers that the message was sent to
(E.g. 2/2)
- Time started
Displays the starting date and time of the Bulk message
(E.g. 17 Aug 2021 13:17:21)
- Time ended
Displays the ending date and time of the Bulk message
(E.g. 17 Aug 2021 13:18:02)
- From
Displays the number/alphanumeric from which the Bulk message was sent
(E.g. +1234567890)
- CSV File
Displays the name of the CSV file
(E.g. CampaignBulk)
NOTE: Clicking the name of a certain CSV file will prompt users to the Reports page where they can access more data and information on this Bulk message.
- Status
Displays the Bulk message’s status
(E.g. Completed)
- Message
Displays the content of the message
(E.g. “This is just a test.”)
- SMS Report
Displays details about the SMS report
NOTE: Clicking an SMS report icon will prompt users to another page where they can access more data and information on this Bulk message.
CDR Settings
Please provide a number in the ‘Records per page’ field.
- Records per page:
Number of records displayed per page.
(E.g. When on the ‘Reports: CDR’ page, and this option is set to ’16’, the last 16 call records will be displayed. On the bottom there is a ‘Page’ field. Type a page number, e.g. ‘2’, and click the ‘GO’ button to display the next 16 call records)
.
Auto Provisioning
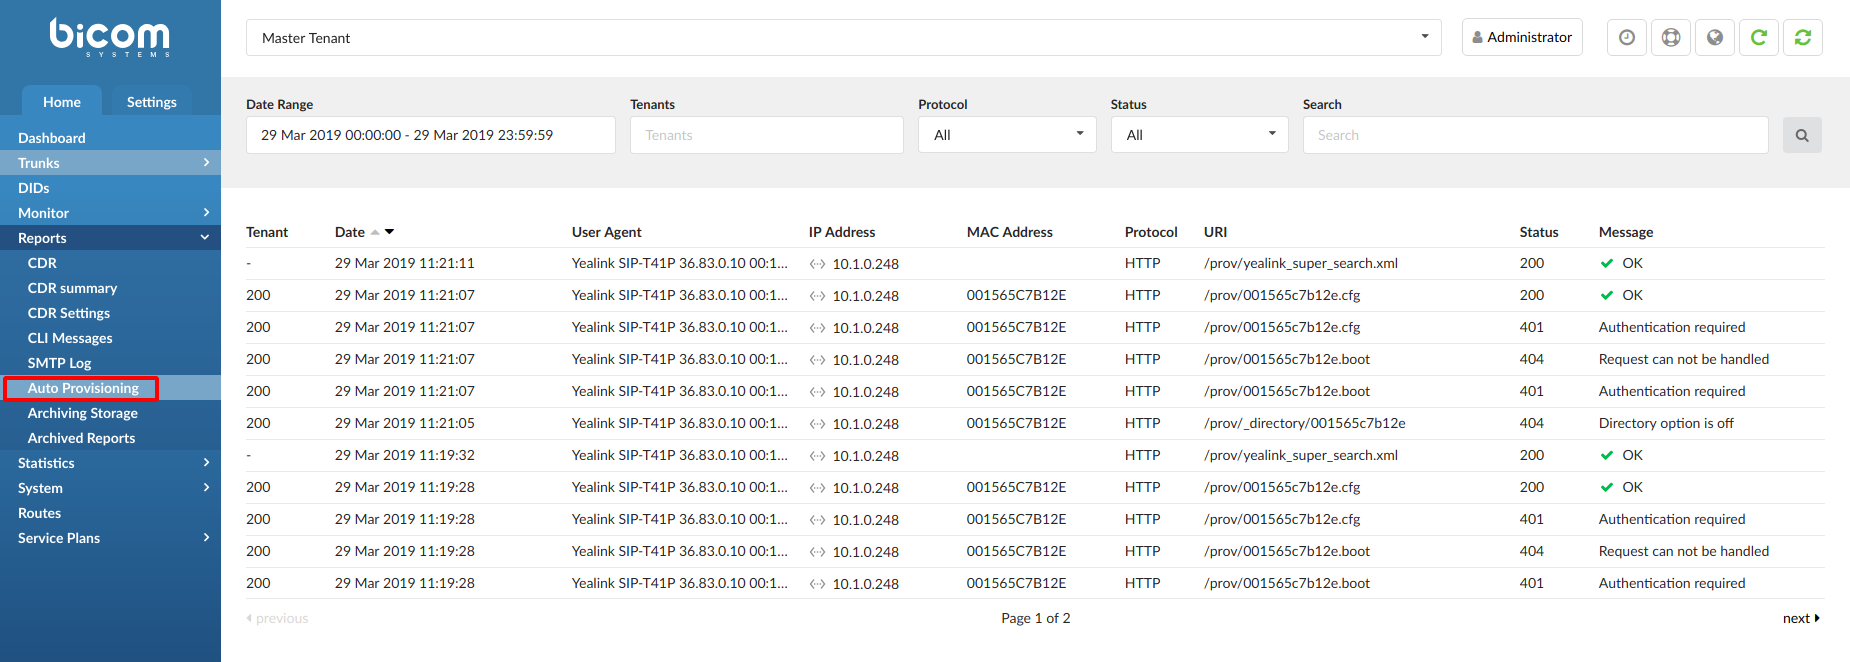
This page displays auto provisioning logs for those UADs which are being registered on the system.
The page will show 9 columns as follows:
- 1. Tenant: Tenant number or “-“. The “-” sign means that it was not possible to know from which tenant the request came
- 2. Date: Date/Time record of when the request came
- 3. User Agent: UA string exactly as written in the request
- 4. IP Address: Country Flag (if possible to determine) + IP Address of the request sender
- 5. MAC Address: Phone MAC address
- 6. Protocol: HTTP, HTTPS or TFTP
- 7. URI: The URI that was requested
- 8. Status: 200, 401, 403, 404, 500
- 9. Message: A message describing the status in more details
The logs can be filtered by Tenant, Date, Protocol, Status and a search input which will try to match the UA, IP, MAC and URI.
.
Archiving
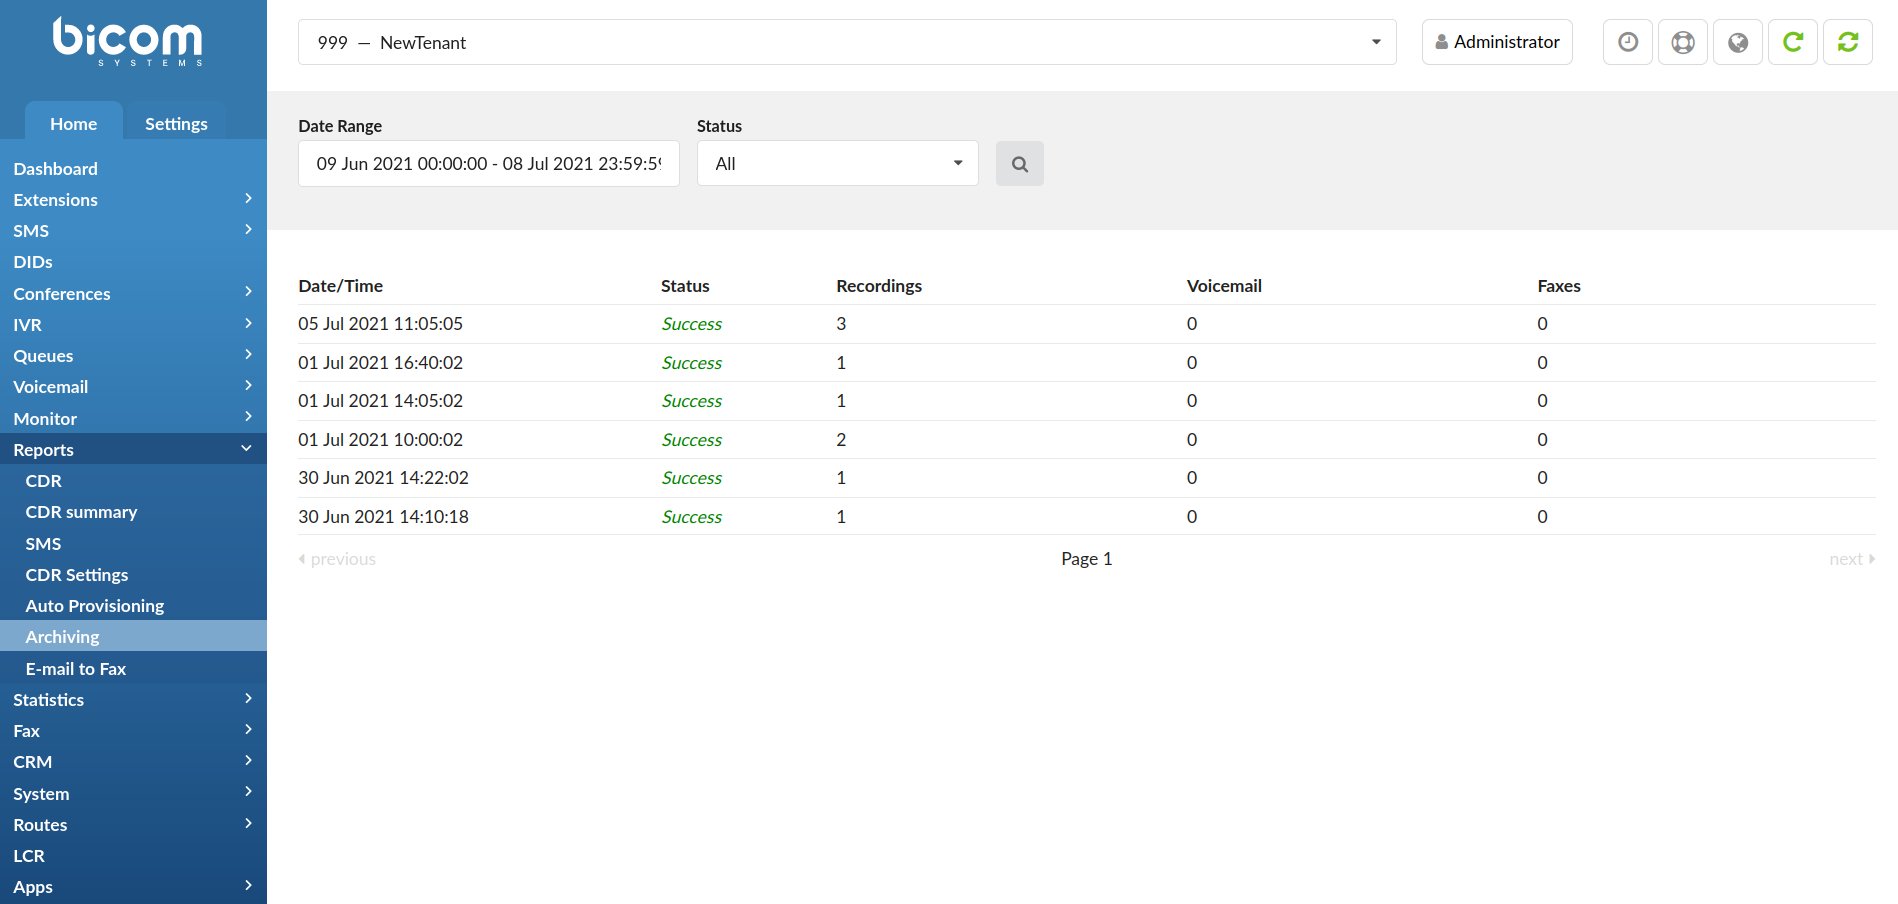
Archiving automatically copies eligible files to a remote destination on a weekly basis.
Users can store data on one of the following services:
- – Amazon S3
- – FTP
- – SFTP
- – Google Drive
- – Dropbox
.
- Date Range

Search data by selecting a specific date range and clicking the ‘Search Now’ button
(E.g. Last 30 Days)
- Status
Search data by selecting one of the statuses displayed in the drop-down list
(E.g. All/Success/Partial Success/Failed)
- Date/Time
Displays the date and time of an upload
(E.g. 01 Jul 2021 16:40:02)
- Status
Displays the status of an upload
(E.g. Success)
- Recordings
Displays the number of recordings
(E.g. 3)
- Voicemail
Displays the number of voicemails
(E.g. 0)
- Faxes
Displays the number of faxes
(E.g. 2)
.
Email to Fax
Each fax (sent or failed) will be logged. Here you can generate report and see details about each log.
Each log will show this information:
- Tenant: Tenant number (only there if system is Multi Tenant and we are viewing reports from the master tenant)
- Email From: Email address of the fax sender.
- Fax Number: The number where fax is sent on.
- Pages (Sent/Total): Shows how many pages were sent.
- Status: Success or Failed
- Date/Time: Date showing when the fax was sent.
The reports can be filtered by Date, Tenant (only on master tenant), Status, Email From and Fax Number.
On this page there are three action buttons:
- Delete File: This will delete the PDF and TIF files from the system for selected reports, if they are available.
- Download PDF: Download PDF for all selected reports. If PDF file corresponding to that report does not exist that report will be skipped.
- Download TIFF: Same as the Download PDF button, but it downloads TIF file format.
Touchless Provisioning
This page will contain last logs regarding ZTP.
Each log will show following information:
- Date – Date/Time of record
- MAC Address – Phone MAC Address
- Provider – UAD Provider
- Action – Action took: Register, Deregister, Update.
- Status – Status of action
- Message – In case of error, detail message will be provided
You can filter the logs by date, action, status or type in a search term which will be matched to a Mac address or a UAD. If the page is open on Master Tenant then the logs can be filtered by Tenant as well.
Directory Sync Management
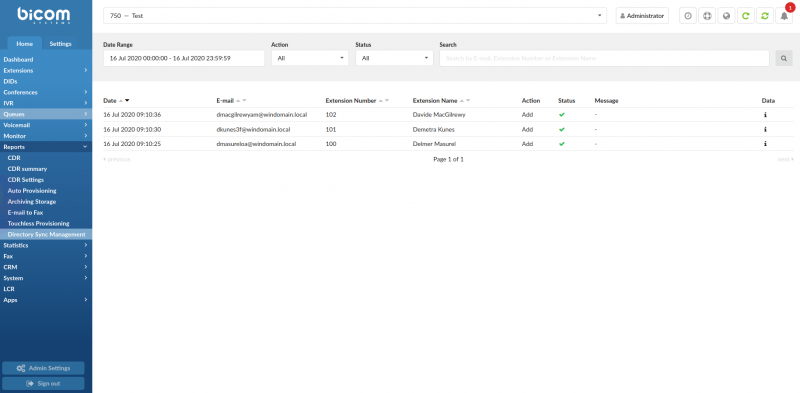
- Date Range:
Select a Search/Filter start date
(E.g. Click the small ‘Calendar’ icon next to a field and select the desired date.)
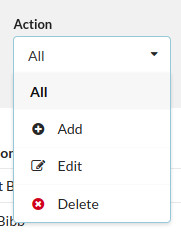
- Action:
Select one of the three Actions and have data displayed for that particular ‘Action’
- Add – Upon selecting, it will display added synced Extensions.
- Edit – Upon selecting, it will display edited synced Extensions.
- Delete – Upon selecting, it will display deleted synced Extensions.
.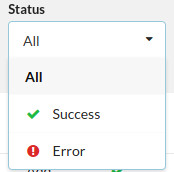
- Status:
Select one of the three Statuses and have data displayed for that particular ‘Status’
- Success – The Extension sync was successfully completed.
- Error – The Extension sync failed.
.
- Search
Search data by ‘E-mail’, ‘Extension Number’, or ‘Extension Name’ and have it displayed accordingly.
- Date
Displays the Date of syncing
(E.g. 14 July 2020 16:09:20)
Displays the name of the synced Extension
(E.g. ebranthwaiteng@windomain.local)
- Extension Number
Displays the Extension Number
(E.g. 103)
- Extension Name
Displays the Extension Name
(E.g. Emmott Branthwaite)
- Action
Displays data based on the selected ‘Action’
(E.g. Add)
- Status
Displays data based on the selected ‘Status’
(E.g. Success)
- Message
Displays the message explaining why certain sync failed
NOTE: If the Status of the sync is ‘Error’, the ‘Message’ section will provide users with further information on why certain sync failed.
- Data
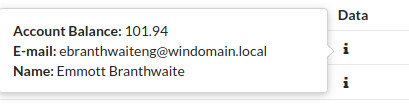
Displays additional information regarding the synced Extension
NOTE: In order to see the data, a user has to hover his/her mouse over the icon.
Ring/Dial Groups
Dial Groups

Dial Groups are used to group a number of UADs/Phones into one network Destination. Each Dial Group is assigned a network number which, once dialed, rings all Extensions assigned to the group.
- Group Name
Dial group Extension number
(E.g. Accounts)
(Display)
- Group Number
Dial group Extension number
Once a user dials this number, all destinations assigned to the Dial group will ring (e.g. 1111)
- Destinations
Extension Numbers assigned to a Dial group
Once a Dial group number is dialed, all Destinations set here will ring at the same time (e.g. 1001, 1002, 1003…)
- Last Destination
Last destination to be called if none of the Destination Extensions answer the call
(E.g. 1010)
- Edit
Edit the Dial group configuration
- Delete
Delete a Dial group from the system
Add/Edit Dial Group
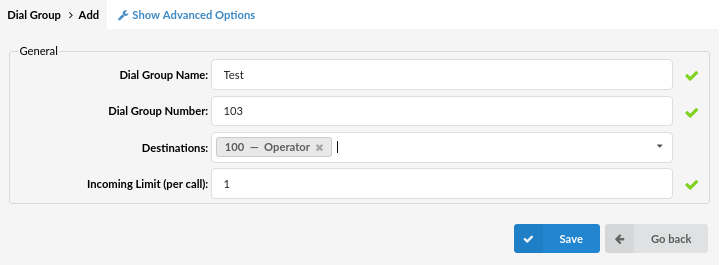
Clicking on the ‘Add Dial Group’ or ‘Edit’ button will open the following Dial group options:
- Dial Group Name
Set a Dial group name
(E.g. Set ‘Accounts’ here to create the same Dial group.)
- Dial Group Number
Set a number associated with the Dial group
(E.g. When this number is dialed, all Extensions associated with it will ring at the same time.)
- Destinations
Extension numbers of Rxtensions which you want to be associated with the Dial group
(E.g. Provide an extension list separated by commas here (e.g. 1001,1002,1003…). When a Dial group ‘Extension’ number is dialed, all extensions set here will ring at the same time.)
NOTE: If all destinations fail after ‘timeout’, ‘Last Destination’ will be called.
- Incoming Limit (per call)
If you have a scenario where call is sent from the current Dial group to the second one and the second one returns the same call back to first group, it will allow only this many loops.
(E.g. If this is set to 1 as it is by default, and the current Dial group sends the call to the next group (or any other object on the system), returning the same call from that object will not be permitted as same call can enter this group only once.)
NOTICE: system wide limitation for these ‘loops’ is 10.
Advanced Options
These options fine-tune Dial group settings with additional options
General
- Greeting
Greeting sound file played to callers when the Dial group is dialed
(E.g. By selecting ‘greeting-default-attendant’ any user that calls this Dial group will hear this sound file before all Dial group extensions are dialed.)
(Select box)
- Answer on undefined greeting
If this option is turned on, the Dial group will not answer until the proper greeting is selected.
(E.g. Yes, No, Not Set)
- Timeout Message
Sound file played to the caller if their call isn’t answered by any of the Dial group extensions.
NOTE: Sound file must have ‘announce-‘ name prefix (e.g. ‘announce-unavailable‘)
(E.g. John dials a Dial group 1000, but nobody answered his call. The sound file selected here will be played to John and then his call will be transferred to ‘Last Destination’ extension)
- Loops
How many times to dial all extensions again if nobody answers
(E.g. John dials a Dial group 1000, but nobody answers his call. If this option is set to ‘2’, all extensions will be dialed one more time before transferring his call to ‘Last Destination’)
- Looping Mode
Define the looping mode for Dial groups by selecting one of the following options:
- Per Extension: an Extension rings multiple times before the next one starts ringing
- Circular: an Extension rings one time before the next one starts ringing
(Select box)
(E.g. The Dial group 1000 has three Extensions (101, 102, and 103).
a) First case scenario:
- Loops: set to 3
- Looping mode: set to ‘Per Extension’
- Timeout (sec): set to ‘7’
- Ring Strategy: set to ‘Round’
In this scenario, the Dial group will ring Extensions respectively and multiple times. This means that the Extension 101 will ring for 7 seconds, if the call is unanswered, the Dial group will ring again the Extension 101 for 7 seconds. If the call is left unanswered for the second and the third time, then the Dial group will ring the next Extension 102, and so on.
b) Second case scenario:
- Loops: set to 3
- Looping mode: set to ‘Circular’
- Timeout (sec): set to ‘7’
- Ring Strategy: set to ‘Round’
In this scenario, the Dial group will ring Extensions respectively and one time. This means that the Extension 101 will ring for 7 seconds, if the call is unanswered, the same will be repeated for 102 and 103. In that case, no one answered the call in the first loop, the call will enter a second loop and three Extensions will be dialed again in the same manner.)
- Timeout (sec)
How many seconds will all Dial group extensions ring before the call is considered unanswered
(E.g. If this option is set to 20 all extensions will ring for 20 seconds before the timeout occurs. Depending on what is set in ‘Loop’ field, all extensions will ring again or the call will be transferred to the ‘Last Destination’.)
- Force Dial Group Timeout
If set to ‘Yes’, the Dial Group timeout will have priority over extensions timeout.
(E.g. Yes, No, Not Set)
- Dial Options
Additional call options assigned to a Dial group
(E.g. To play music to Dial group callers, set this field to ‘m($CLASS)’, where m = MOH class e.g. m(‘default’). Please check details on the bottom)
- Store Unanswered CDRs
An option to exclude unanswered CDR records from a report.
If the option is set to ‘No’ the following will change:
- The call was not answered/canceled: Instead of 2 generated CDRs per extension in the Dial group, only a single CDR will be stored.
- The call was answered: Instead of 2 generated CDRs per extension in Dial group, a total of 2 CDRs will be generated (one for the call to the Dial group and one for the extension that answered).
- Ring Strategy
This option regulates how extension in the Dial Group will ring.
Available Options:
- All – ring all extensions in the group
- Leastrecent – ring extension with least answered calls
- Round – ring each available extension
- Round Memory – like round, except we remember where we left off the last ring pass
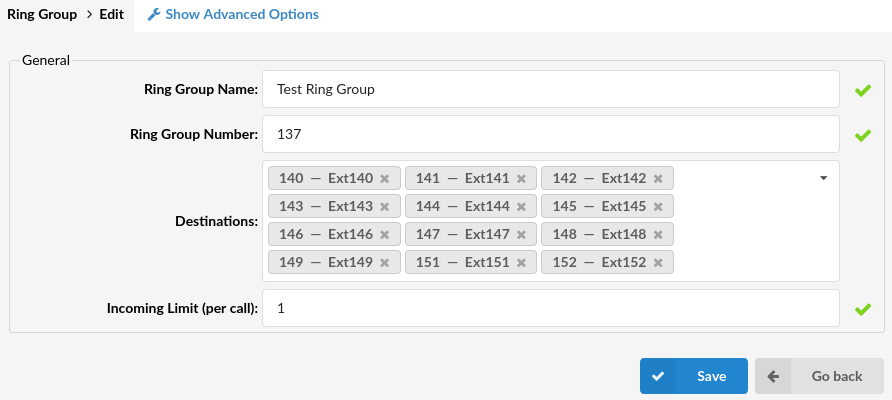
NOTE: In order to ensure the system’s stability and prevent any potential issues from causing the malfunction, the default number of Extensions that may be dialed in a single Dial Group is set to 30. This number limitation is applied when the ‘All’ Ring Strategy is set.
Therefore, if there are more than 30 Extensions in a Dial Group with the ‘All’ Ring Strategy, upon saving the settings for that group, a warning message with the following information should appear: “Due to limitations of ringall strategy, only 30 Destinations will be called”.
(E.g. A user creates a Dial Group with 35 Extensions and sets the Ring Strategy to ‘All’. When s(he) tries to save the settings, a warning message appears as shown in the screenshot. A user is able to save the Dial group which has 35 Extensions, however, only the first 30 will be dialed in the chosen order. The warning message doesn’t appear, if there are 30 Extensions or less.)
- Custom ringtone
Set a custom ringtone for the phones which are in this Dial group
TIP: More info can be found in: Call Filters & Blocking.
- Replace Caller ID
Replaces the caller ID with the custom data provided here. This is used when you want all incoming calls to your Dial Group to have this value displayed as a caller ID information. Along with the custom data, you can use the ‘%CALLERID%’ variable, which displays the calling party phone number.
NOTE: Please make sure you enter this information as it is written down, otherwise it will not work properly. (E.g. Providing a ‘USDID’ here, will display ‘USDID’ on your phone display, for all calls coming to this Dial Group. Providing ‘USDID %CALLERID%’, will display ‘USDID 55510205’ on your phone display, where 55510205 is calling party phone number).
NOTE: If custom data from previous NOTE does not work for you, try with this variable ‘USDID<%CALLERIDNUM%>’
- Call Rating Extension
Setting the Call Rating Extension will result in it being used for the payment of all call expenses that are made from the Dial Group to its Destinations regardless of which Destination is being called. Charging only applies to the part of a call – from a Dial Group to its Destination. All call expenses are expected to be paid by the Call Rating Extension.
(E.g. A Dial Group is set to have two Extensions and an External number as Destinations as shown in the example screenshot (Ext.901, Ext.127, and ‘035200300’). The same Dial Group has another Extension ‘100 – Operator’ set as a Call Rating Extension. When someone reaches the Dial Group, the call is being charged accordingly to the prices set in the Service plan used by the Call Rating Extension. If it is answered by the External number, that call will go through the Trunk and be charged accordingly.)
- Local destinations PBD skip (6.6.1)
When set to ‘Yes’ and this group is called from a PBD device, the user will not be asked for a PBD pin ONLY if all Dial Group destinations are Local Destinations. In case the Dial group has no Destinations set or has a Destination that is not considered ”’Local”’, the user will be prompted to enter the PBD pin.
(Option buttons)
- Use original Caller ID for external calls (6.6.1)
If set to ‘Yes’, the original Caller ID will be used for external calls. This option can be used in case when the original Caller ID that entered the system should also leave the system when an external number is dialed from the Dial group. This option will prevent the system from overriding that Caller ID.
(Option buttons)
The value in the ‘Replace Caller ID’ field still has the highest priority for the call that exits the Dial Group. Only that value overwrites the Caller ID for all calls that exit the Dial Group – including external calls as well.
Operation Times
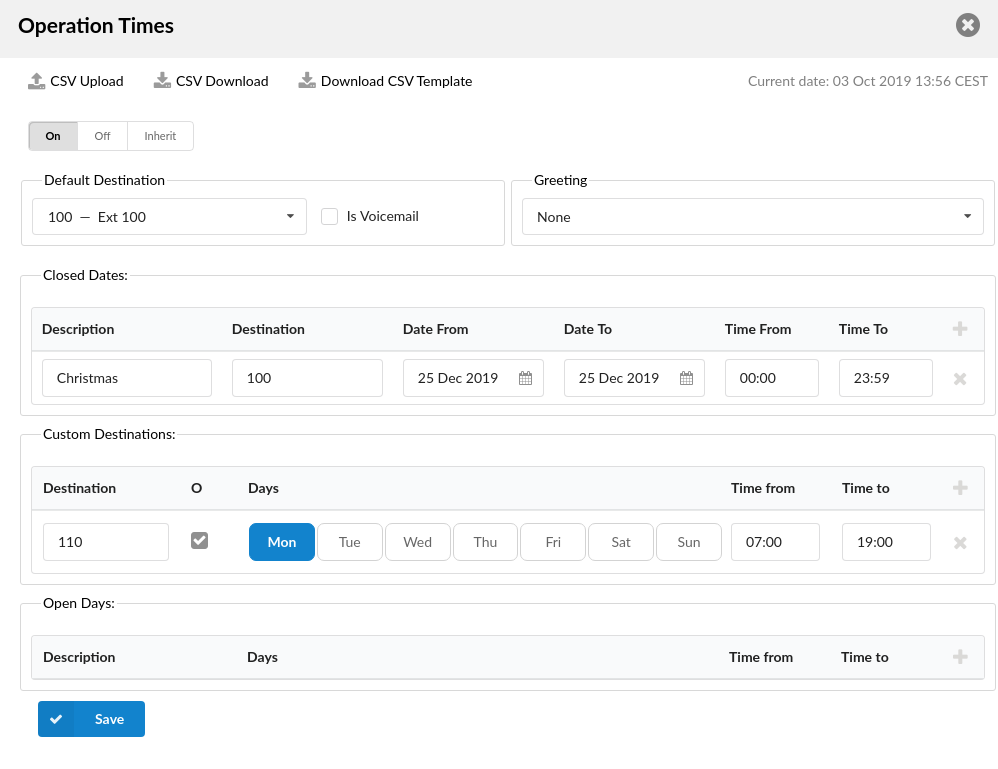
Set the system open/closed times. Depending on the time when the call is received, the call can be redirected to different PBXware destinations.
Buttons
- CSV Upload
Click on this button to upload Operation Times configuration from csv file
- CSV Download
Click on this button to download Operation Times configuration to csv file
- Enable operation times
(E.g. Yes, No, Inherit)
The Inherit option will allow administrators to simply put the Higher Level Operation Times settings back into effect if deemed necessary. Previously, when Operation Times were set, it could be either turned on or off, but it could not be reset to use the Operation Times rules set on the higher level (Server or Tenant).
Default Destination
- Default Destination
Default Destination to be dialed if none of the Dial group extensions answer the call
(E.g. John dials Dial group 1000, but nobody answers his call. Sound file selected under ‘Announce’ is played to John and his call is transferred to the extension number set here).
- Is Voicemail
Choose whether you want calls to be redirected to the Default Destination or Default Destination voicemail
Greeting
- Greeting
Greeting sound file played to callers during closed times
(E.g. greeting-***)
Options
- Closed dates Sets the specific date/s when all calls are redirected to the ‘Default Destination’. If the ‘Destination’ field in the Closed dates is set, calls will not go to the ‘Default Destination’ but to this number.
- Custom Destinations: Redirects all calls received during non-working hours (e.g. weekend) to the PBXware MT extension provided here.
- Open dates: Sets the working hours during which the DID is to redirect calls as set in the DID Add/Edit window. If any call is received during the hours not set here the call is redirected to ‘Default Destination’.
Recording

- Record Calls
Enable call recording service
(E.g. Select ‘Yes’ to enable the service. All incoming/outgoing calls will be recorded. If using call recording with many extensions, check server disk space from time to time. Please see below for bit rates table).
- Silent
Set whether call recordings should be announced to parties in a conversation.
(E.g. If Silent=No, calling parties will hear a ‘Recorded’ or ‘This call is recorded’ message before their conversation starts)
Disk Space Used By Call Recording
With continuous tone for 60 seconds
- wav49 = 84.5kb
- wav = 833.0kb
- gsm = 85.0kb
With continuous silent tone (without sound) for 60 seconds
- wav49 = 84.0kb
- wav = 827.0kb
- gsm = 84.0kb
Exit Digit
- Exit Digit

Exit digits that transfers the call to the ‘Exit Destination’
(E.g. John dials Dial group 1000. While all extensions are ringing, John presses the ‘Exit digit’ set here (e.g. 9) and his call is transferred to the ‘Exit Destination’).
- Exit Destination
PBXware MT extension to which the call is transferred once the user dials the ‘Exit Digit’
(E.g. John dials Dial group 1000. While all extensions are ringing, John presses the ‘Exit Digit’ and his call is transferred to the ‘Exit Destination’ provided here (e.g. 2001))
NOTE: A drop-down option is available for this selection.
Last Destination

- Last Destination
Last destination to be dialed if none of the Dial group extensions answer the call.
(E.g. John dials Dial group 1000, but nobody answers his call. Sound file selected under ‘Announce’ is played to John and his call is transferred to the extension number set here).
- Last Destination is voicemail
Choose whether you want calls to be redirected to the Last Destination (some other extension) or you want to set the voicemail as a last destination.
(e.g. Yes, No, Not Set)
Incoming Call Confirmation

- Confirm Calls
Choose whether the called number in the Dial group list should be asked to accept or refuse the call from the Dial group.
(E.g. Yes, No, Not Set)
- Confirmation Message
Choose whether to play system default or some custom added sound asking if you want to answer or reject the call.
NOTE: All sound files for this option should start with ‘rg-announce-*’
- Call Answered Message
Choose whether to play system default or custom sound file which is presented to the user when he accepts the call from a Dial group, but the call has already been answered by someone else.
NOTE: All sound files for this option should start with ‘rg-late-announce-*’
Enhanced Ring Groups (ERG)

Enhanced Ring Groups (ERG) are more advanced Ring groups that offer basic queueing functions. They are reusing Queues with members to achieve better business intelligence. New reporting systems were implemented together with leading options for a better reporting experience.
- Name
ERG name
(E.g. Patience)
- Number
ERG number
(E.g. 1001)
- Strategy
ERG strategy
(E.g.ringall)
- Members
Number of ERG members
(E.g. 5)
- Edits the ERG configuration
(E.g. Click to edit ERG configuration)
(Button)
- Deletes an ERG from the system
(E.g. Click to delete an ERG from the system)
(Button)
Search
Search is by default performed by Name and Number
- Search:
Provide a search phrase here and hit enter to filter the entries.
Add/Edit ERG

- ERG Name:
Set an ERG name
(E.g. Provide a unique ERG name here)
- ERG Number:
Set an ERG number
(E.g. This number is to be dialed in order to access the ERG.)
- Max Waiting Callers:
Maximum number of callers allowed to wait in a ERG at the same time. This number should be set in accordance with the number of members answering the ERG calls
(E.g. If this field is set to 4, only 4 callers will be allowed to enter the ERG. If caller number 5 tries to enter the ERG he will be transferred to <%PRODUCT%> ‘Redirect Extension’ number).
- Ring to Answer:
How many rings will be played to a caller before call enters the ERG.
Set this value to 0 if you would like calls to hear ERG music on hold as soon as call is connected.
(E.g. 5)
- Record ERG Calls
Set whether to record ERG calls or not
(E.g. ‘Yes’)
NOTE: In order to record calls with ERG, this option has to be set to ‘Yes’. There is no inheritance applied in this case.
- Wake up Mobile Devices
Select whether ERG should wake up mobile devices that are asleep or not
(E.g. ‘Yes’)
- Members
Opens up a screen and add/manage ERG members
(E.g. Click on the button to manage ERG members)
Members
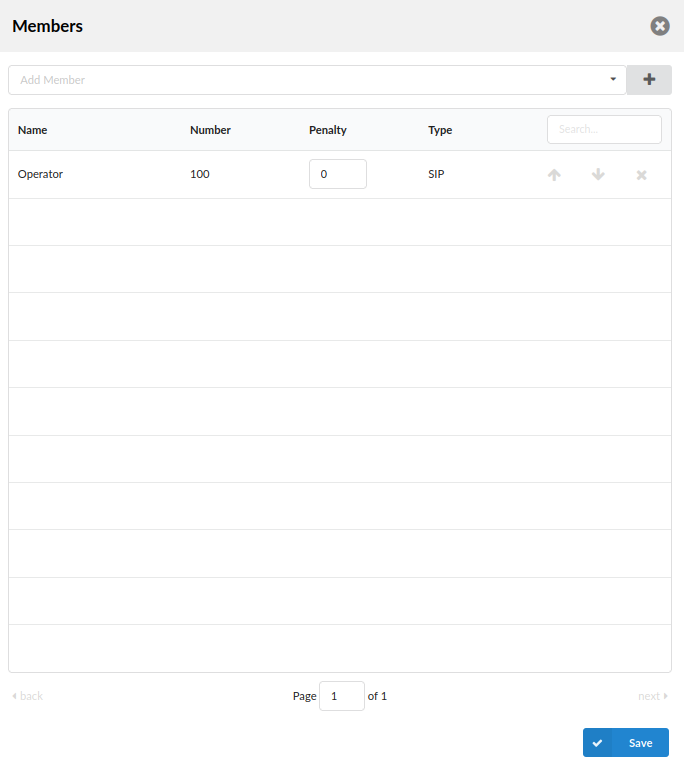
Clicking the ‘Members’ button opens the ‘Members’ pop-up window where users can select one or more Members and add them to the ERG group.
Click this button to add selected Members (button)
There is a table which shows ERG members with the following details:
- Name
Members’ name
(E.g. Sales 1)
- Number
Number of the Extension on the system
(E.g. 1001)
- Penalty
This value can be set per member, so the system can decide which priority to use when sending calls to members
(E.g. Set values between 0 and 10 where 0 is the highest priority and 10 is the lowest priority. If the strategy is defined as ‘ringall’, then only those available members with the lowest priorities will ring. ).
NOTE: If the Extension does not pick up it will not automatically go to the next Extension. It will keep ringing until it is picked up. It will only go to the next extension if the current extension is either busy or unavailable.
- Type
Member type
(E.g. SIP)
- Search
Search ERG members
(E.g. Provide a search phrase here to filter the records)
Move up
![]()
Move an ERG member one place up on the list
Move down
![]()
Move an ERG member one place down on the list
Remove member
![]()
Remove an ERG from the list
Advanced Options
General
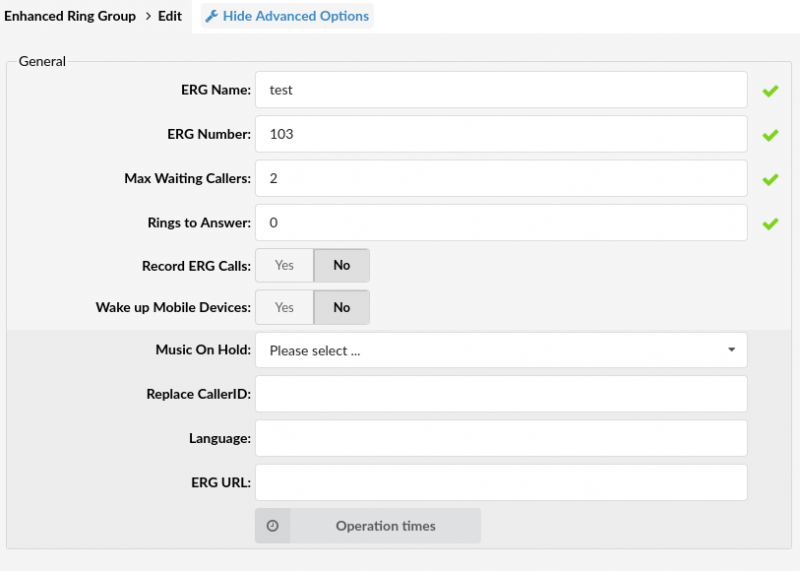
- Music On Hold:
Select MOH(Music On Hold) class name. All sound files belonging to this MOH class will be played to users in ERG
(E.g. User A enters the ERG. After the greeting message is heard, all sound files belonging to selected MOH class are played in the background)
- Replace CallerID:
Replace the caller id with the custom value
(E.g. Type ‘Lobby – %CALLERID%’ to display the caller id information as ‘Lobby – 5552879’ where 5552879 is the actual number calling in)
- Language:
Define custom language for all sound files played by the ERG
(E.g. To play Spanish sound files to all users waiting in the ERG, type ‘es’ here. NOTE: PBXware MT comes with English sound files by default. To install sound files in other languages, please see ‘ Settings: Protocols: Sip: Language’ for more information)
- ERG URL:
Send the following URL to Member’s softphone, if it supports that option, and the softphone can open that URL so the Member can see callers additional info if available. This option must be supported by softphone for it to be used.
(E.g. Additional info on ERG URL field can be obtained here)
Operation Times
Set the ERG open/closed times. Depending on the time when call is received, the call can be redirected to different PBXware destinations

- CSV Upload
Upload Operation Times configuration from csv file
(Button)
- CSV Download
Download current Operation Times configuration to csv file
(Button)
- Download CSV Template
Download template of Operation Times configuration to csv file
(Button)
- Operation Times:
Enable operation times
(E.g. Yes, No, Inherit)
The Inherit option will allow administrators to simply put the Higher Level Operation Times settings back into effect if deemed necessary. Previously, when Operation Times were set, it could be either turned on or off, but it could not be reset to use the Operation Times rules set on the higher level (Server or Tenant).
- Default Destination
PBXware extension all calls are redirected to during the closed time hours
(E.g 1000)
- Is Voicemail
Whether default destination is Voicemail or not
- Greeting:
Greeting sound file played to callers during the closed times
(E.g. greeting-***)
Description of destinations follows in this priority order:
- Closed dates: Sets the specific date/s when all calls are redirected to the ‘Default Destination’. If the ‘Destination’ field in the Closed dates is set, calls will not go to the ‘Default Destination’ but to this number.
- Custom Destinations: Redirects all calls received during set hours to the PBXware extension provided here
- Open dates: Sets the working hours during which DID is to redirect calls as set in DID Add/Edit window. If any call is received during the hours not set here, ‘Custom Destination’ are checked, and if they do not apply, the call is redirected to ‘Default Destination’ (Closed dates)
Enhanced Ring Group Full

- Redirect Destination
ERG full redirect extension number
(E.g. If ERG 2000 accepts a maximum of 4 users waiting at the same time, any new user that enters ERG 2000 will be redirected to the extension number provided here)
- Redirect to Voicemail
Choose whether the redirect extension is a voicemail
(E.g. Yes, No, Not Set)
Enhanced Ring Group Timers
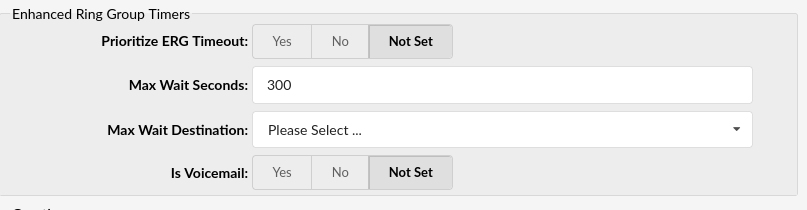
- Prioritize ERG Timeout
Set whether to prioritize ERG timeout or not
(E.g. Yes, No, Not Set)
- Max Wait Seconds:
Maximum time a caller can wait in an ERG. Once this time is exceeded caller will be redirected to ‘Max Wait Destination’ number or callback will be activated.
(E.g. User A is waiting 5 minutes already in the ERG. If this field is set to 300(300s = 5min), A will be redirected to ‘Max Wait Destination’.
- Max Wait Destination:
This option works along with the ‘Max Wait Seconds’ field. Drop down to select the extension to which caller will be redirected once time set under ‘Max Wait Seconds’ exceeds.
(E.g. User A is waiting 5 minutes already in the ERG. If ‘Max Wait Seconds’ field is set to 300(300s = 5min) and Max Wait Destination option is set, A will be redirected to this destination)
- Is Voicemail:
Set whether the max wait destination is pointing to voicemail.
(E.g. Yes, No, Not Set)
Greeting

- Greeting:
Select a greeting file that will be played to all callers waiting in this ERG
(E.g. queue-greeting-introduction)
NOTE: Users can record and select a custom sound greeting file, such as “All our representatives are busy…”. This file will be played to all callers once they enter the ERG. Please note that the file name has to be in the following format: periodic-announce-*.
Position Announcements
There are two types of position announcements: ‘Hold Time’ (Tells the an ERG position) and ‘Periodic Announcements’ (Plays custom message)
- Announce Hold-Time:
Enable callers waiting in an ERG to hear the hold-time announcements.
(E.g. Setting this option to ‘Yes’ will enable the hold-time announcements. A single caller waiting in an ERG would hear ‘The estimated hold time is currently N minute. Thank you for your patience’ message).
- Announce Position:
Enable callers waiting in an ERG to hear the position announcements.
(E.g. Setting this option to ‘Yes’ will enable the position announcements. A single caller waiting in an ERG would hear ‘Your call is now first in line and will be answered by the next available representative. Thank you for your patience’ message).
- Announce Frequency:
How often to play the hold-time announcement message (time in seconds).
NOTE: If you set this option to ‘0’, the announce message will not be played.
(E.g. If this field is set to 30, a single caller waiting in an ERG will hear ‘Your call is now first in line and will be answered by the next available representative. Thank you for your patience.’ message every 30 seconds) The estimated hold time is currently N minute.
- Min. Announce Frequency
Specifies the minimum amount of time that must pass before we announce the caller’s position in an ERG again. This is used when the caller’s position may change frequently, to prevent the caller from hearing multiple updates in a short period of time. Default value is 15 seconds.
(E.g.30)
- Announce Round Seconds:
Rounding level for hold-time announcements. If this is set to 0, only minutes, not seconds, are announced; other possible values are 0, 5, 10, 15, 20 and 30.
(E.g. When set to 30, a wait time of 2:34 will be rounded to 2:30.)
Periodic Announcements

- Periodic Announce:
Select the sound file that is played periodically to callers waiting in an ERG
(E.g. Record a message ‘Hang in there buddy!’ and set it as a periodic announcement. This message will be played to callers every ‘Periodic Announce Frequency’ seconds)
NOTE: File name has to be in the following format ‘periodic-announce-$NAME.gsm’
- Periodic Announce Frequency:
Time interval in seconds at which the periodic message is to be played.
(E.g. If this field is set to 30, all callers waiting in an ERG will hear the ‘Periodic Announce’ message every 30 seconds, as long as they stay in the ERG).
- First Periodic Announce Delay:
The minimum number of seconds between position announcements. Default value is 15 seconds.
(E.g. 30)
Members Settings
- Static Members Login
Select whether to enable Static Members Login
NOTE: If set to ‘Yes’, Static Members have to log in/log off manually to start/stop receiving calls. To log in to all ERGs that an Extension is a member of, please enter the default access code: ‘*200’, and to log off, please enter: ‘*201’. If John Smith is a member of five ERGs, but he wants to log in in a specific ERG and receive calls only from that ERG, he can enter ‘*200xxx’, where ‘xxx’ represents the ERG number. The same action applies to logging off. If John wants to stop receiving calls from a specific ERG, he can enter ‘*201xxx’, where ‘xxx’ stands for the ERG number.
NOTE: If the system is restarted or if it crashes, all Static Members will be logged in successfully upon successful system start. If a Static Member is logged in, s(he) can be added to an ERG through the GUI and start receiving calls from that specific ERG, or conversely, deleted from the ERG to stop receiving calls from that specific ERG.
NOTE: If this option is set to ‘Yes’, please note that reordering of Members and penalty configuration will not work.
- Disable Member Enhanced Services
If set to ‘Yes’, Enhanced Enhanced that are enabled on the Extension (that are ERG members) will possibly not be applied if an ERG call is passed to them.
(E.g. Yes, No)
NOTE: Please note that this option is set to ‘No’ by default since enabling this may cause issues with Statistics.
- Ring Strategy
Set the way calls are transferred to ERG members answering the calls.
Available options:
- ringall – Ring all available Members until one answers (default)
- linear – When used with members, the members will be rung in the order in which they are ordered in the GUI. If the ‘Static Member Login’ option is set to ‘Yes’, they will ring in the order in which they were logged in.
- leastrecent – Rings the interface that least recently received a call. In a ERG where there are many calls of roughly the same duration, this can work. It does not work as well if a member has been on a call for an hour, and their colleagues all got their last calls 30 minutes ago because the Member who just finished the 60-minute call will get the next one.
- random – Rings a random interface. This actually can work very well and end up being very fair in terms of evenly distributing calls among members.
- rrordered – Same as rrmemory, except the ERG member order from the config file is preserved so interfaces will ring in the order specified in this configuration file. If you use members, the members will be rung in the order in which they were added.
(E.g. linear)
- Member Ring Timeout (sec)
Set the Member’s ring timeout
(E.g. ’32’)
- Autofill
Should callers be served one by one or in parallel fashion
(E.g. With this option turned ‘Off’, even if there are five members available, calls will not be transferred to them until the first caller waiting in an ERG is connected to the member. When the first caller gets served, caller number two gets served and all others keep waiting. It is recommended to keep this feature always turned ‘On’ so callers can be served in order)
- Ring Members in Use
Ser whether Members in use should be called when a new caller comes into the ERG
(E.g. If the Member is already in an active conversation, with this option set to ‘Yes’, the Member’s Extension will ring when a new caller enters the ERG)
- Retry All Timeout
Time interval in seconds, for how long to wait before trying the ERG member again.
(E.g. If a member Smith cannot answer the incoming ERG call and hangs up the ringing line, the call will not be transferred back to his extension for a time in seconds provided in this field).
- Timeout Restart
If this option is set to yes and a BUSY or CONGESTION signal is received on the line, the Member’s timeout for answering will be reset. This can be useful with Members that have permission to cancel a call with a reject.
(E.g. A call enters the ERG and is transferred to Member X. Member X has a Polycom phone (for example) and sends a BUSY signal by hitting the ‘Reject’ key. This will reset the internal timer. The call will be transferred to other ERG’s Member(s). The original member will not be contacted until all other Members are tried and the call does not get answered by any of them).
- Wrap-up Time (sec):
After a successful call, this will determine how long to wait (time interval in seconds) before sending a new call to a potentially free member.
(E.g. 4)
Incoming Options
- Incoming Options Set the advanced ERG call options.
Available options:
- t – allow the called user to transfer the calling user
- T – allow the calling user to transfer the call
- H – allow the caller to hang up by pressing *
- n – no retries on the timeout; will exit ERGs and go to the next step
- r – ring instead of playing MOH
- C – avoid missed calls in ringall strategy
- w – Instant Recording with Monitor
- x – Instant Recording with MixMonitor
- Ring (‘r’) timeout
When ‘r’ is selected as Incoming Options and this timeout is used, ERG will first ring entered number of seconds after which MOH will start
(E.g. 10)
Dial Options:
- t – Allow the called user to transfer the call by hitting #
- T – Allow the calling user to transfer the call by hitting #
- r – Generate a ringing tone for the calling party, passing no audio from the called channel(s) until one answers. Use with care and don’t insert this by default into all of your dial statements as you are killing call progress information for the user. Really, you almost certainly do not want to use this. Asterisk will generate ring tones automatically where it is appropriate to do so. ‘r’ makes it go the next step and additionally generate ring tones where it is probably not appropriate to do so.
- H – Allow the caller to hang up by dialing *
- C – Reset the CDR (Call Detail Record) for this call. This is like using the NoCDR command
- w – Allow the called user to start recording after pressing *1 or what defined in features.conf, requires Set(DYNAMIC_FEATURES=automon)
- x – Allow the called user to start recording the conversation to disk via MixMonitor.
Exit Digit
- Use Exit Digit
Should users be able to exit the ERG by dialing a single digit and be automatically redirected to a preset PBXware destination.
Example:
John enters the ERG. A greeting message explains that the user may quit the ERG by pressing the digit defined under the ‘Exit Digit’ option, and be transferred directly to the operator or some other destination (set under the ‘Destination’ option).
(E.g. Yes, No, Not Set)
- Exit Digit
Define the exit digit here. Once this digit is dialed by the user waiting in ERG, it will transfer the call directly to the set ‘Destination’
Example:
John enters the ERG. The greeting message explains that the user may quit the ERG by pressing the digit defined here (e.g. 9) and is transferred directly to the operator or some other destination (set under the ‘Destination’ option).
- Destination
Local PBXware destination number that is dialed once the ‘Exit Digit’ is dialed.
(E.g. John enters the ERG. The greeting message explains that the user may quit the ERG by pressing the digit defined under the ‘Exit Digit’ option, and be transferred directly to the PBXware destination defined here).
- Is voicemail:
Set whether the exit digit destination is pointing to voicemail.
(E.g. Yes, No, Not Set)
Abandoned Calls Notification
Here you can set whether there will be any notification when the call inside an ERG is abandoned.
- Enable Notification:
Enable or disable Abandoned Calls Notification feature
(E.g. Yes, No, Not Set)
- Notification E-mail address:
The e-mail address which will receive notifications of abandoned calls, where an abandoned call is one where the caller hangs up the call while waiting to be answered
(E.g. admin@domain.com)
Routes
Routes
Routes identify each number dialed by users. Information is identified by the number dialed and destination group it belongs to.
This window identifies all destinations by dialed number. Destinations that do not exist in this database cannot be dialed by the PBXware MT.
Depending on what is selected when you edit the Routing mode on the master tenant in Settings->Tenants->Master Tenant->General Settings->Routing mode, you will have two routing modes:
- E.164 Routing mode
- Simple Routing mode
Depending on those routing modes, Routes section is different so we will go through them separately.
E.164 Routing mode
When you are using E.164 Routing mode all destinations are defined by E.164 standard.

- Update PBXware daemon database:
Updates daemon database with imported data. Click to update.
- Import Database:
Imports current data from the central destination database. Click on button and enter Import URL.
- Export database:
Export daemon database with newly added details. Click to export.
TIP: Import and update operations need to be performed at regular maintenance times. In addition, the network administrator should be notified of any destination that is not accessible.
- Routes:
Displays all available destination routes alphabetically. Click on letter and all destination which have selected letter as a first letter, will pop up.
After picking desired route more information is available:
- Destination group:
Further description of selected route. Displays destinations by proper, mobile etc.
Example:
- Special Service
- 48 States
- Toll Free
- Alaska
- Hawaii
. - Show Hidden Groups

Show hidden route groups. Click on the button to display all available groups.
In order to view destination numbers for the United Kingdom, click on the “u” letter under “Routes” navigation. All United Kingdom destination groups will be displayed. Click on one (e.g. Proper) to view all destination numbers assigned to it.
Add/Edit Routes
After picking route and destination within that route Add Destination/Edit Destination option will be shown.
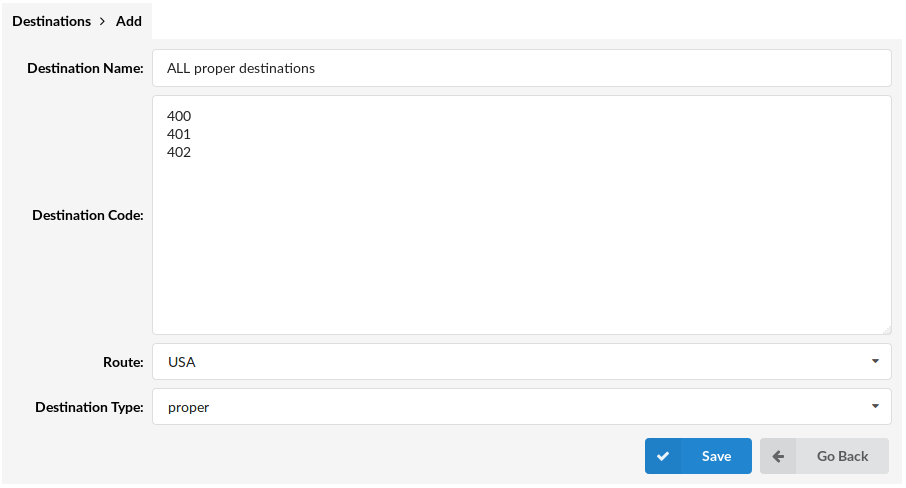
- Destination Name:
Unique destination name.
(E.g. All proper destinations)
- Destination Code:
Destination code identifier. Number that identifies the destination.
(E.g. 442, where all numbers start with 442*******))
- Route:
Route to which the destination code belongs
(E.g. If route “442” belongs to the United Kingdom, select “United Kingdom” here)
- Destination Type:
Group to which destination code belongs
(E.g. If route “442” belongs to proper phones, select “Proper” here. If it belongs to mobile provider, O2 for example, select “O2” here)
.
Special Routes

Special Routes feature allows PBXware administrator to add special services numbers that will be distinguished from extensions numbers (even if they have the same number of digits) and dialed through specified trunk, similar to how Emergency Services numbers are dialed through Emergency Trunk.
NOTE: All existing special routes will be converted to the new format (destination type will be set to trunk and value preserved).
- Name:
Unique name of the Special route.
- Type:
Type of the Special Route (Emergency, Info services or Other).
- Number:
Special route number.
.
Add Special Route
- Name:
Add a name of the special route
(E.g. Test)
- Number:
Enter a special route number
(E.g. 80)
- Destination Type:
Select the type of the special route
(E.g. Trunk)
- Destination:
Select the destination for the special route
(E.g. Alaska)
- Type:
Select the type of the special route
(E.g. Info Services)
.
Destination Groups
Each country can be assigned with many destination groups/service providers. You may add one by clicking on the Add Destination Group from this location. All groups that have no numbers assigned will not be displayed when Routes information is required.
Destination group which the user have created can later be used as a destination type when adding a destination in Routes->Add Destination.
- Destination Group:
Name of the destination group.
(E.g. 48 States)
Deletes a destination group from the system.
NOTE: It is possible to delete only the destination group which is not assigned to a route as a “Destination type”.
.
Add/Edit Destination Group
You will see this option if you have clicked on the “Add Destination Group” option.
- Destination Group:

Destination Group name.
(E.g. 48 States)
.
Disabled Routes
If you want some destinations to be disabled, you can add them to Disabled Routes.
NOTE: Destinations should be separated by new lines. Regular Expressions can be used by prefixing destination with “_” (e.g. _^001[2-9]).
.
Simple Routing mode
This routing mode does not require numbers to be entered in the E.164 form and allows greater flexibility when used right.

- Route
Name of the route.
(E.g. Mobile)
- Start digits
First digits by which the system would recognize a call.
(E.g. 06)
- Required Length
Full length of dialed number recognized.
(E.g. 9)
- Regex
Regular expression which can be used to fine tune which starting numbers to fall under that route.
(E.g. 06[123])
- Prefix
Prefix which should be added to dialed numbers.
(E.g. 0044)
- Strip Digits
Whether the prefix by which the number was recognized, will be stripped when dialing.
Edits the route configuration.
Deletes a route from the system.
.
Add routes
By clicking on Add route you will be able to add a new simple route to the system.
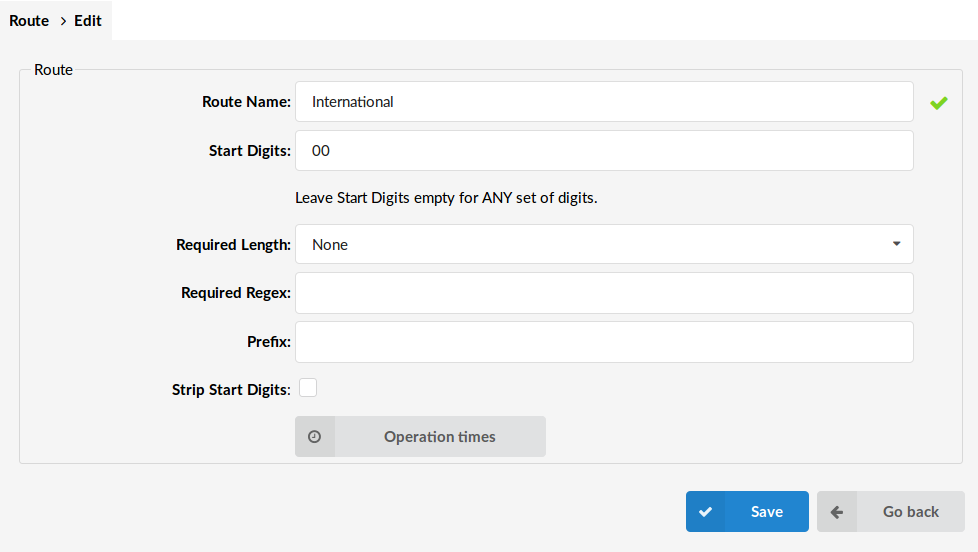
- Route Name:
Name of the route being added.
(E.g. Mobile)
- Start Digits:
Starting digits of the numbers which will fall under this Route. If you leave this field empty, any number will be taken into account, but in that case you must select how many digits those numbers will have.
(E.g. 06)
- Required Length:
Length of dialed numbers which would be recognized as this route. If this field is set to none, any length of numbers will fall under this route, but Start Digits must be set, for this to work.
(E.g. 9)
- Required Regex:
This is an optional regular expression which can be used to fine tune numbers recognized by this route.
(E.g. 06[1-5] – In this example only numbers starting with 061, 062, 063, 064 or 065 will fall under this route. Also you could use other regular expressions here).
- Prefix:
Prefix which should be added to dialed numbers.
(E.g. 00)
- Strip Start Digits:
Whether to strip start digits from the dialed numbers.
.
Operation Times
Set the system open/closed times. Depending on the time when the call is received, the call can be redirected to different PBXware MT destinations.
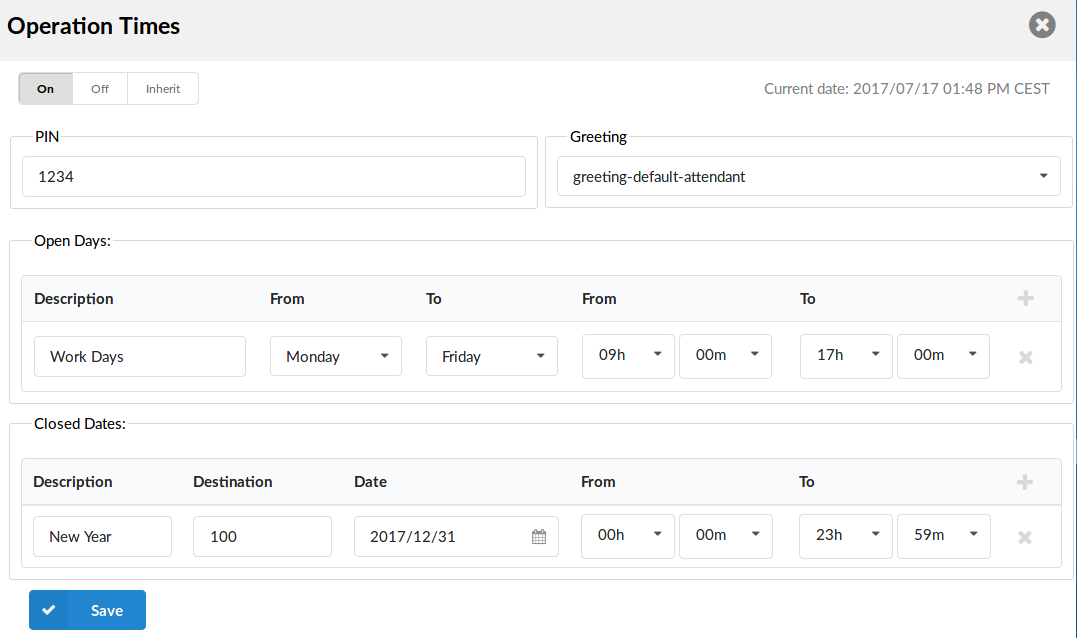
- Operation Times:
Enable operation times.
(E.g. On, Off, Inherit)
The Inherit option will allow administrators to simply put the Higher Level Operation Times settings back into effect if deemed necessary.
- PIN
If you have a PIN set here, the system will ask you for it so you could pass through the Operation Time.
(E.g. 3425)
- Greeting:
Greeting sound file played to callers during the closed times.
(E.g. greeting-***)
- Open days:
Sets the working hours during which the DID redirects calls as set in the DID Add/Edit window. If any call received during the hours is not set here, “Range Destination” is checked, and if they do not apply, the call is redirected to “Default Destination”.
- Closed dates
Sets the specific date/s when all calls are redirected to the ‘Default Destination’. If the “Destination” field in the Closed dates is set, calls will not go to the “Default Destination” but to this number.
Settings
Settings:
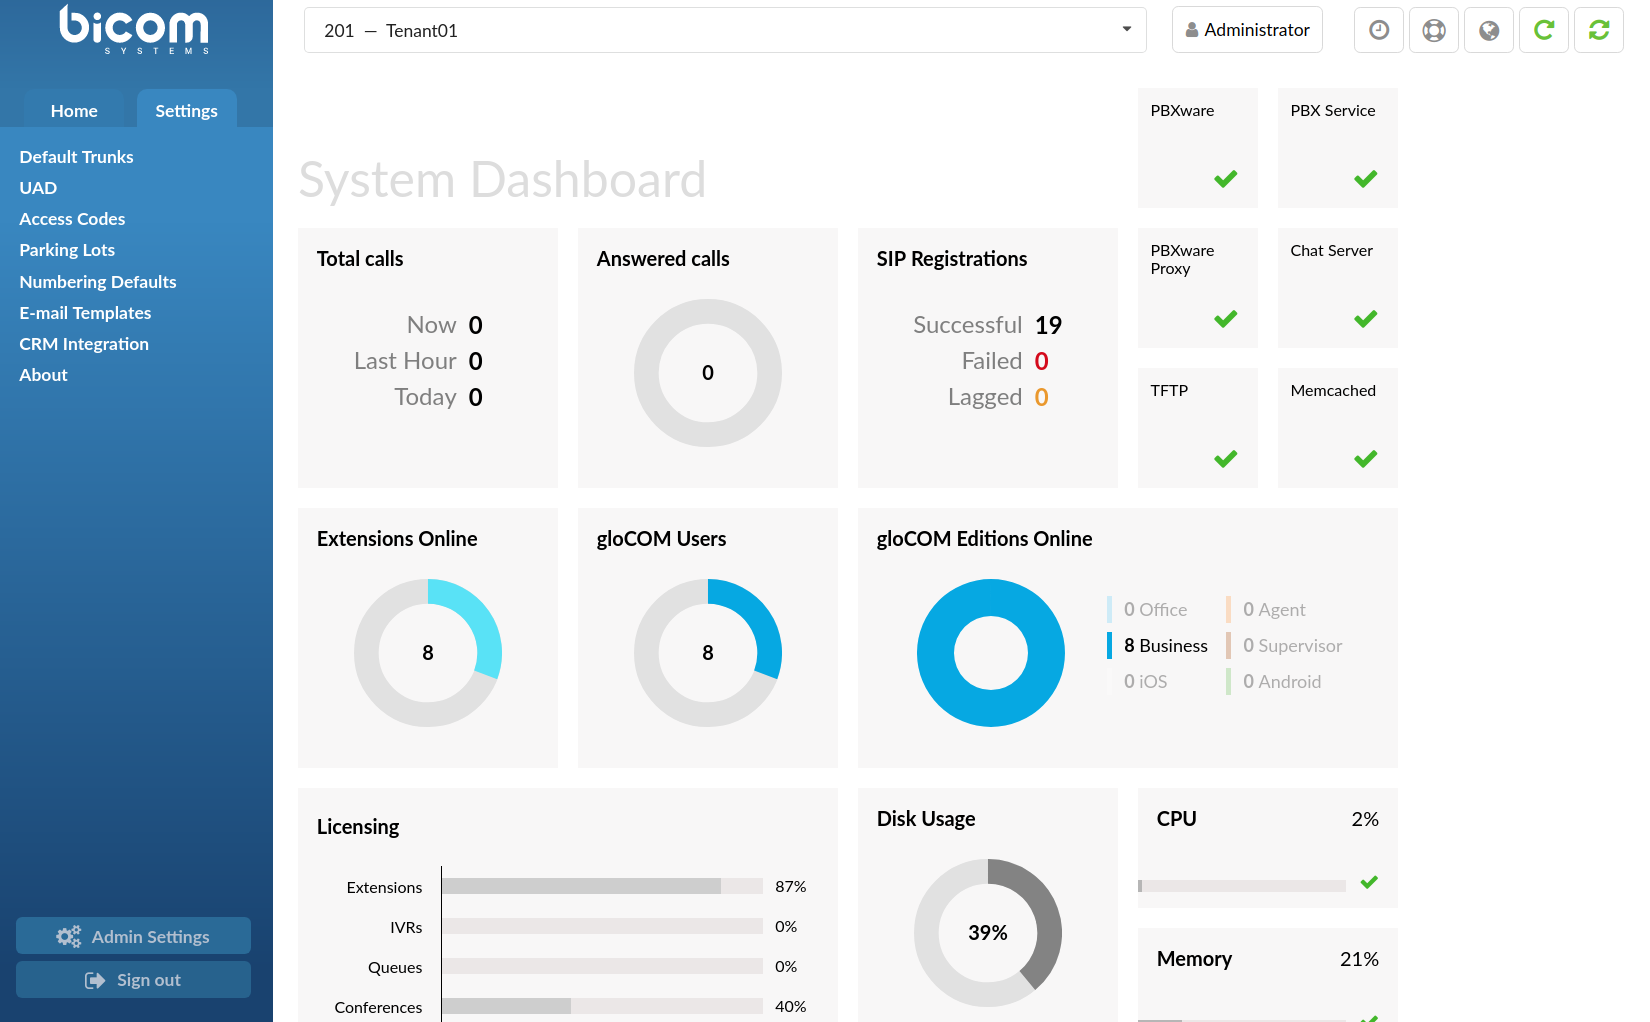
Settings on a slave are used to set current slaves variables. These settings are applied only on the current slave tenant.
Default Trunks
Tenants use trunks in order they are assigned to them on the master tenant, to place calls to various destinations. In order to allow an organization to control its voice communications budget and to provide for termination backup the default trunks allows setting primary, secondary and tertiary trunks.
Tenants will use the primary trunk as its first choice for every destination called. If the primary trunk for some reason fails to terminate the call, the secondary trunk will be used by the system. If the secondary trunk for some reason fails to terminate the call, the tertiary trunk will be used by the system.
- Primary/Secondary/Tertiary Trunk:
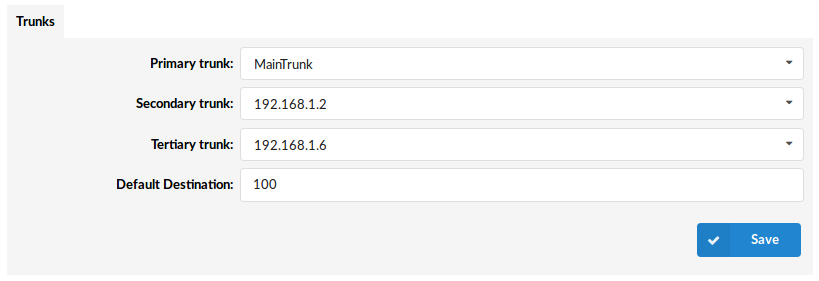
Select priority in which trunks will be used.
If the dialed number is busy, the system will recognize it and won’t skip to other trunks in order to dial it.
- Default Destination:
Default destination where trunks without DID will be transferred
(E.g. If there is no DID for an incoming Trunk/Provider, all calls will be transferred to this system number (e.g. 2000))
Precedence
Settings:
- Default Trunks: All System calls go through trunks defined here
- MiniLCR: Overrides ‘Default Trunks’ and sets a specific trunk for a destination
Extensions:
- Trunks: Overrides ‘Settings: Default Trunks’
- Routes: Overrides ‘Settings: MiniLCR’
.
UAD
UADs (User Agent Devices) are various IP phones, soft phones, ATA (Analog Telephone Adaptors), and IAD (Integrated Access Devices) used for system extensions. PBXware supports a wide range of UAD using SIP, IAX, MGCP, and DAHDI protocols.
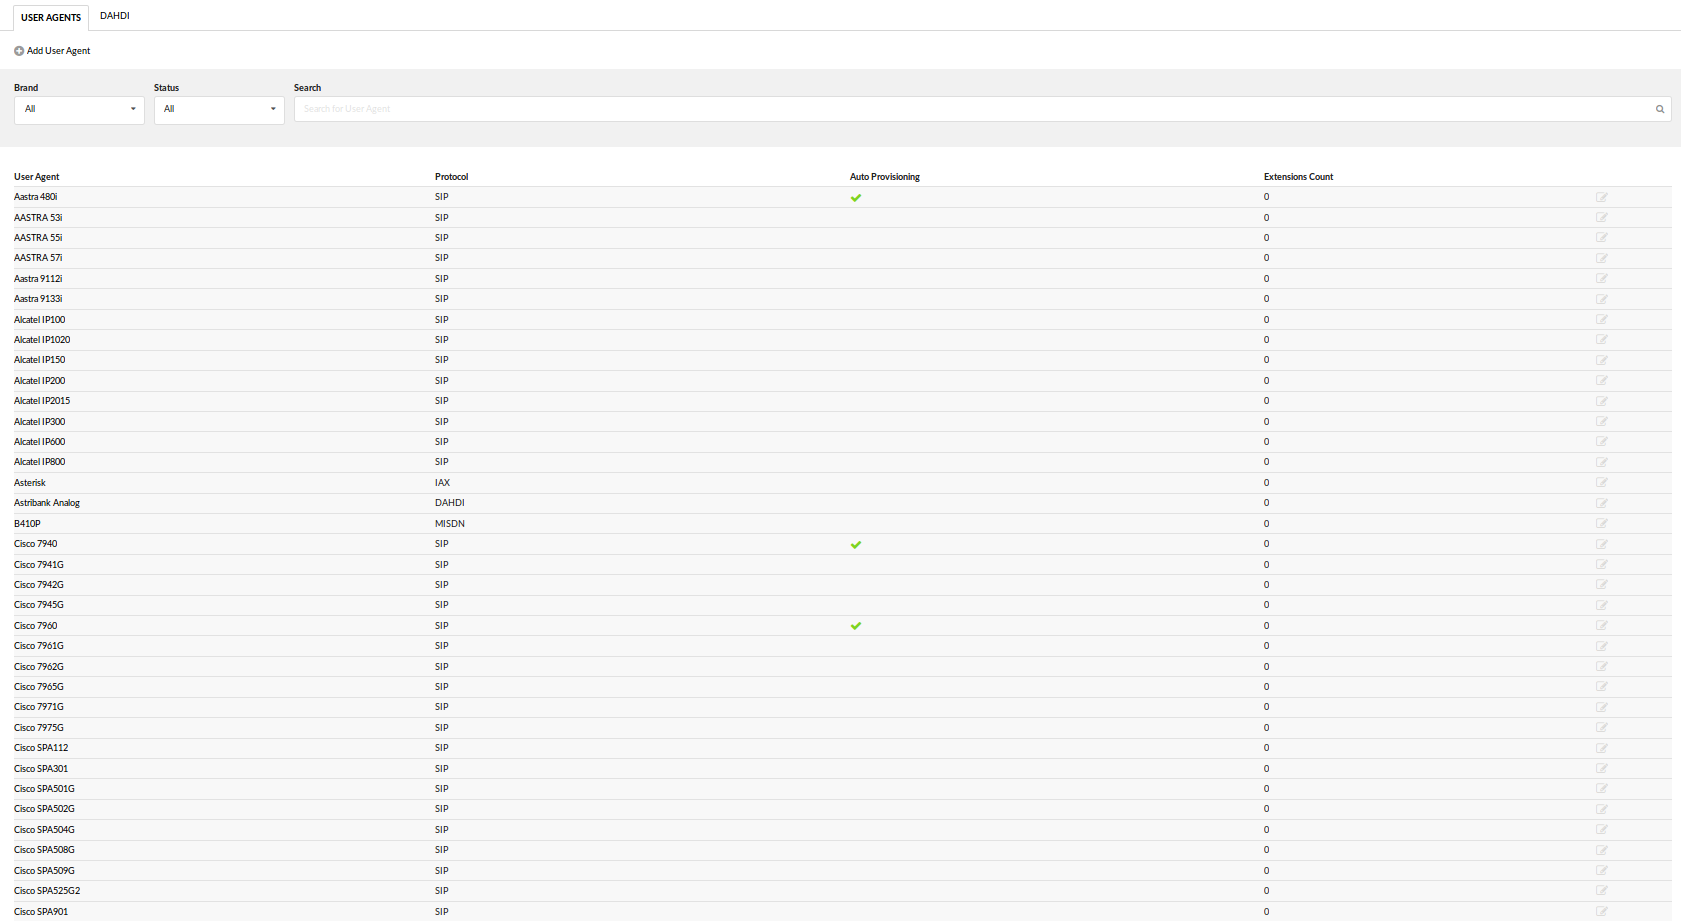
Supported devices are already pre-configured with the most common settings in order to allow administrators an easy way of adding extensions. However, some PBXware installations have specific requirements, hence it is advisable to edit the selected UAD and set it to the required values. Additionally, if an installation needs to use an unlisted UAD, clicking on “Add User Agent” allows adding new UAD.
.
End of Life
All end-of-life devices are now properly marked on the Bicom Systems Wikimedia site under the UAD section.
As for the PBXware GUI:
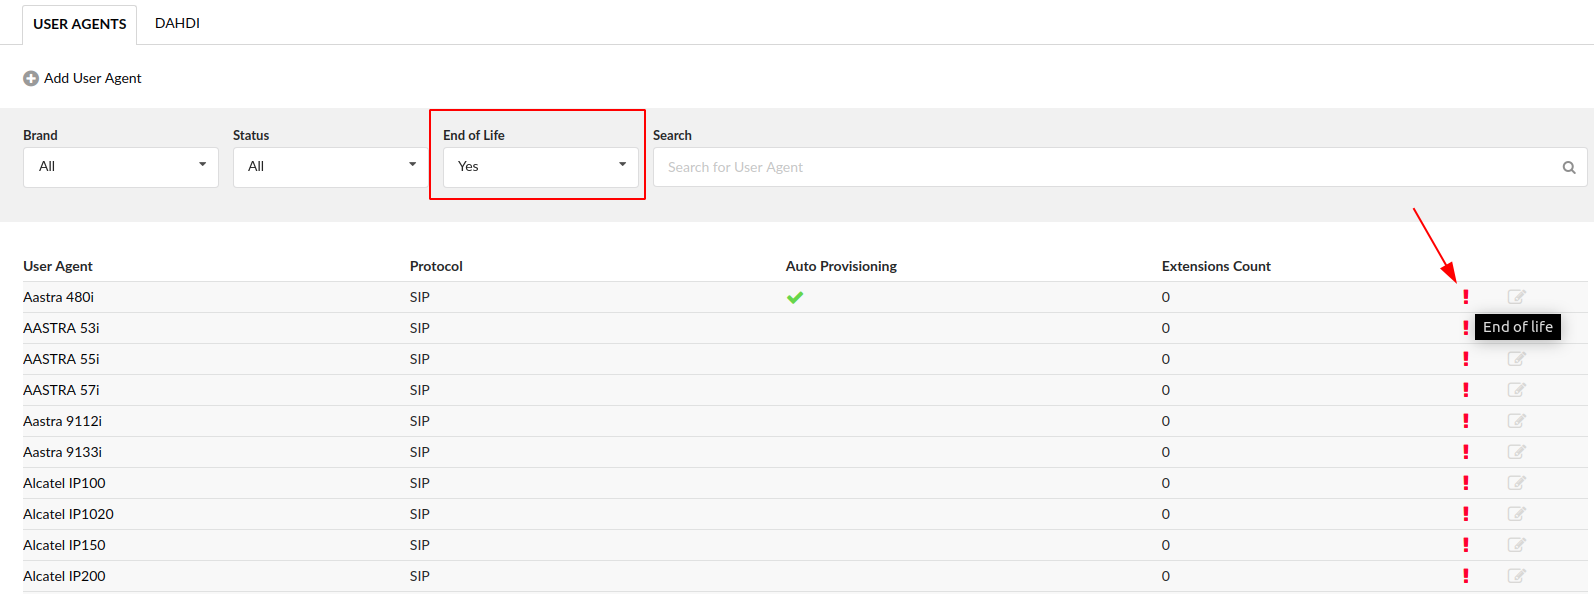
To view which devices are end-of-life, freely navigate to the Settings tab > select the UAD page and a selection box that says ‘End of Life’ will be shown. Simply choose ‘Yes’ if you wish to see the list of end-of-life devices.
Requirements
Paging
Paging is a service that supports transmitting of messages to multiple phones over their loudspeakers
NOTE: With addition of multiple registration to a single extension, paging had to be modified. In PBXware 6 and newer if more than one deskphone or third party softphone application is registered to a single PBXware extension at the same time, Speakerphone paging will be disabled for that extension.
This is expected behavior and a tradeoff users must accept when registering more than one deskphone to their extension. Registration of Bicom Systems gloCOM applications, desktop and mobile, will not affect paging.
.
Budgetone 101/102
1. Navigate Internet browser to the phone IP address
2. Provide admin password (‘admin’ by default)
3. Click on the ‘Login’ button
4. Click on the ‘Advanced Settings’ link
5. Scroll down to the ‘Auto-Answer’ options
6. Select ‘Yes’
7. Click on the ‘Update’ button
8. Click on the ‘Reboot’ button
NOTE: Paging tested with Firmware version 1.0.8.16
GXP 2000
1. Navigate in your Internet browser to the phone IP address
2. Provide the admin password (‘admin’ by default)
3. Click on the ‘Login’ button
4. Click on the ‘Account *’ you wish to edit
5. Scroll down to ‘Auto-Answer’ options
6. Select ‘Yes’
7. Click on the ‘Update’ button
8. Click on the ‘Reboot’ button
NOTE: Paging tested with Firmware version 1.0.1.12
.
Snom 190/320
1. Navigate in your Internet browser to the telephone IP address
2. Navigate to your line e.g. ‘Line 1’
3. Click ‘SIP’
4. Set ‘Auto Answer’ to ‘On’
5. Click on the ‘Save’ button
6. Navigate to ‘Preferences’
7. Set ‘Auto Answer Indication’ to ‘On’ for a sound to be played notifying you that a call has been received
8. Set ‘Type of Answering’ to suit your needs e.g. ‘Handsfree’
9. Click on the ‘Save’ button
NOTE: Paging tested with Firmware version 5.2b
.
Polycom 30x/50x/60x
You need the latest version of both the SIP software and bootROM to do it. Auto-answer could be configured only using provisioning. To prepare configuration files you have to do following steps:
1. In the sip.cfg file, look for the line with these variables:
Polycom calls up class 3 in sip.cfg or ipmid.cfg file.
2. In sip.cfg my ring class ‘AUTO_ANSWER’ looks like this:
se.rt.3.type="ANSWER" sets the Polycom phone ring type, in this case, an answer, that means that the phone will automatically answer without ringing.
3. Update modified files to the provisioning server
4. Reload PBXware if used as the provisioning server
5. Restart your telephone
The bootROM on the phone performs the provisioning functions of downloading the bootROM, the <Ethernet address>.cfg file, and the SIP application and uploading log files. The SIP application performs the provisioning functions of downloading all other configuration files, uploading and downloading the configuration override file and user directory, downloading the dictionary and uploading log files.
The protocol which will be used to transfer files from the boot server depends on several factors including the phone model and whether the bootROM or SIP application stage of provisioning is in progress. TFTP and FTP are supported by all SoundPoint and SoundStation phones. The SoundPoint IP 301, 501, 600, and 601 and SoundStation IP 4000 bootROM also supports HTTP while the SIP application supports HTTP1 and HTTPS. If an unsupported protocol is specified, this may result in unexpected behavior, see the table for details of which protocol the phone will use. The “Specified Protocol” listed in the table can be selected in the Server Type field or the Server Address can include a transfer protocol, for example http://usr:pwd@server (see 2.2.1.3.3 Server Menu on page 10). The boot server address can also be obtained via DHCP. Configuration file names in the <Ethernet address>.cfg file can include a transfer protocol, for example https://usr:pwd@server/dir/file.cfg. If a user name and password are specified as part of the server address or file name, they will be used only if the server supports them.
Polycom
NOTE: URL should contain forward slashes instead of back slashes and should not contain spaces. Escape characters are not supported. If a user name and password are not specified, the Server User and Server Password will be used.
For downloading the bootROM and application images to the phone, the secure HTTPS protocol is not available. To guarantee software integrity, the bootROM will only download signed bootROM or application images. For HTTPS, widely recognized certificate authorities are trusted by the phone and custom certificates can be added. See 6.1 Trusted Certificate Authority List on page 151. Using HTTPS requires that SNTP be functional. Provisioning of configuration files is done by the application instead of the bootROM and this transfer can use a secure protocol.
.
Cisco 7940-7960
1. Create a new line on a Cisco phone and put the configuration into sip.conf as you normally would (go into ‘Settings: Call Preferences: Auto Answer (intercom)’ and then make the line you’ve just created as ‘auto-answer’.)
2. Here are the contents of /var/lib/asterisk/agi-bin/callall:
3. Make sure to make the script executable. And then for every extension you have as an auto-answer, have a file like this in /var/lib/asterisk/agi-bin:
So, for example, if you have three lines that are configured for automatic answering – SIP/2006, SIP/2007, SIP/2008, you should have three files named 2006-conf, 2007-conf, 2008-conf in /var/lib/asterisk/agi-bin that get copied into the outgoing call spool directory every time you call extension 5555.
4. Now, dial 5555 from any phone and you should have one-way paging.
People who use the pager may have to get used to waiting 1-2 seconds before speaking to allow all the phones to catch up with the audio stream. All of the phones hang up after 20 seconds, regardless of if the person originating the page has stopped talking. Change the AbsoluteTimeout values to increase this interval.
If you want a really confusing loud mess, then change the “dmq” options to “dq” and you’ll get an N-way conversation going with everyone who has a phone. Bad.
If you want a really interesting office surveillance tool, change the “dmq” to “dt” and you’ll suddenly be listening to all of the extensions in the office, like some kind of mega-snoop tool. Useful for after-hours listening throughout the entire office.
NOTE: Paging tested with Firmware version 6.1
Linksys 941
1. Navigate in your Internet browser to phone IP address
2. Select ‘Admin Login’
3. Select ‘Advanced’
4. Navigate to ‘User’ tab
5. Set ‘Auto Answer Page’ to ‘Yes’
6. Set ‘Send Audio To Speaker’ to ‘Yes’
7. Click ‘Submit All Changes’ button
At the time paging option is set for all lines and works once handset is picked up.
NOTE: Paging tested with Firmware version 4.1.12(a)
Aastra 480i/9133i/9112i
1. Navigate your Internet browser to your telephone IP address
2. Select ‘Preferences’ under the ‘Basic Settings’ tab
3. Set ‘Microphone Mute’ to ‘No’
4. Set ‘Auto-Answer’ to ‘Yes’
5. Click on the ‘Save Settings’ button
6. Reboot the phone to apply the new settings
At the time, the paging option is set for all lines and works once the handset is picked up.
NOTE: Paging tested with Firmware version 1.3.1.1095
Add/Edit
SIP
Click ‘Add User Agent’ to add a device or click on the ‘Edit’ icon next to one, to change its settings.
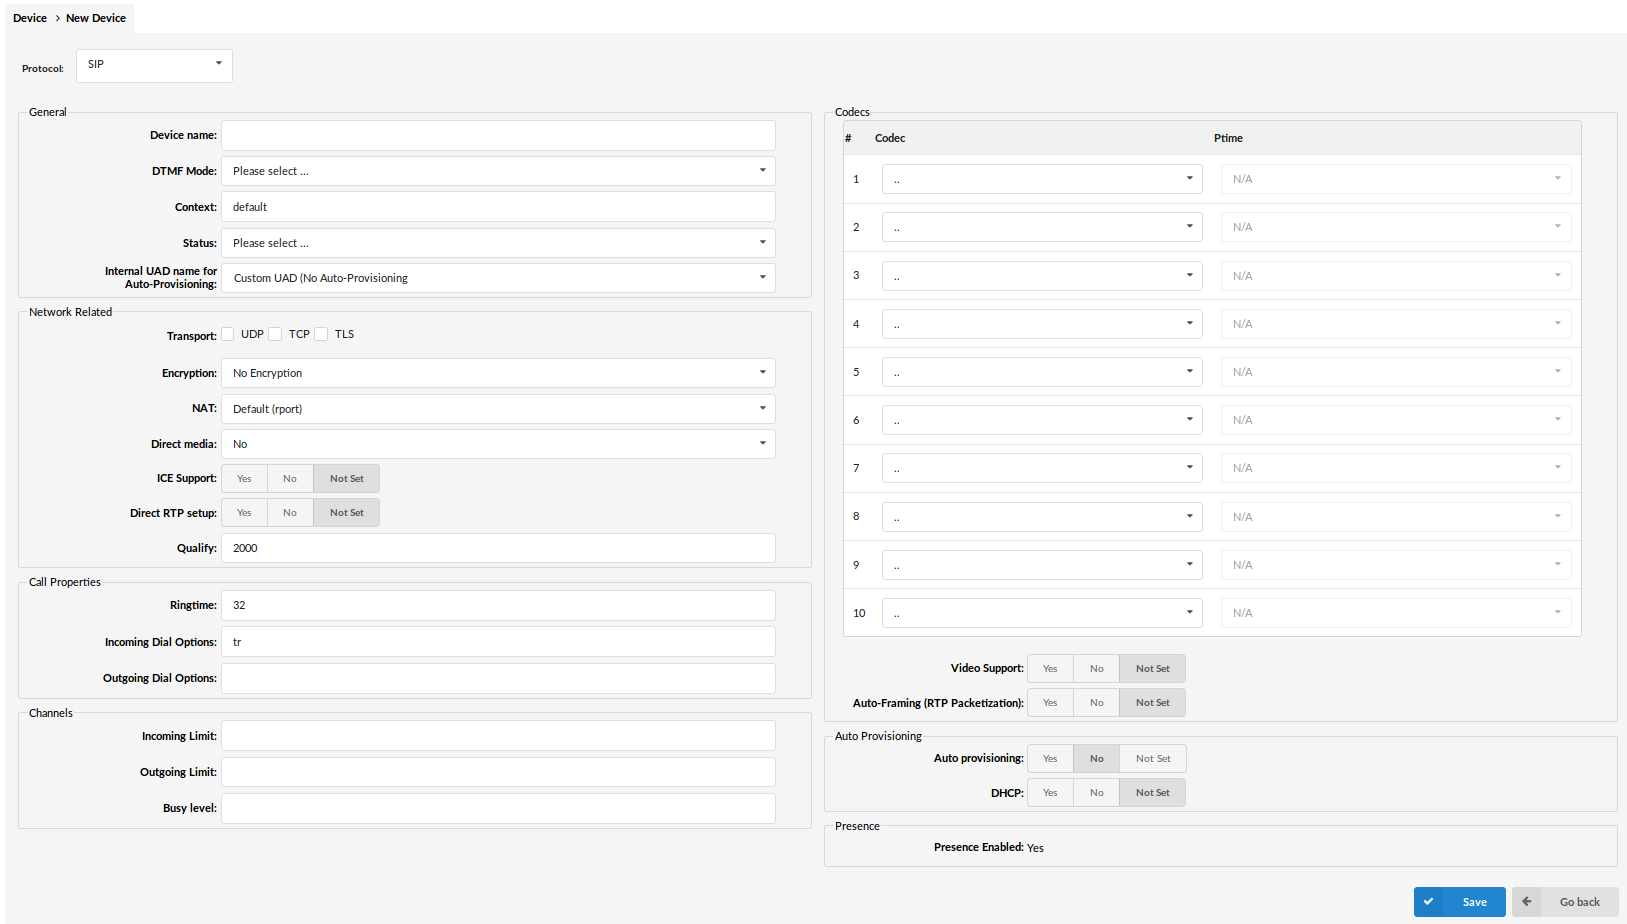
General
- Protocol:
Select protocol UAD(User Agent Device) uses
(E.g. If your UAD/Phone uses SIP protocol, select ‘SIP’ here)
- Device Name:
Unique device name
(E.g. AASTRA 480i
- DTMF Mode (Dual Tone Multi-Frequency):
A specific frequency consisting of two separate tones. Each key has a specific tone assigned to it so it can be easily identified by a microprocessor.
(E.g. This is a sound heard when dialing digits on touch-tone phones. Each phone has different ‘DTMF Mode’. By default, this field is populated automatically for supported devices. If adding other UAD/Phone select between ‘inband’, , ‘rfc2833’ or ‘info’ options
- Context:
Every system extension belongs to a certain system context. The context may be described as a collection/group of extensions. Default context used by the PBXware is ‘default’ and must not be used by custom extensions.
(E.g. default)
- Status:
Extension status/presence on the network
If this field is set to ‘Active’, this UAD/Phone will be available in the ‘UAD’ select box by default when adding new extensions)
- Internal UAD name for Auto-Provisioning
This is where you define how the system will recognize the UAD internally
(E.g. aa57i)
Network Related
- Transport:
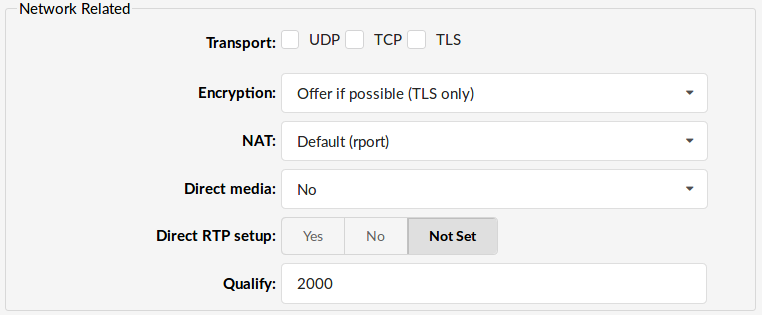
Type of transfer protocol that will be used on PBXware.
UDP (User Datagram Protocol) – With UDP, computer applications can send messages, in this case referred to as datagrams, to other hosts on an Internet Protocol (IP) network without prior communications to set up special transmission channels or data paths.
TCP (Transmission Control Protocol) – provides reliable, ordered, error-checked delivery of a stream of octets between programs running on computers connected to an intranet or the public Internet.
TLS (Transport Layer Security) – cryptographic protocol that provide communication security over the Internet.[1] They use asymmetric cryptography for authentication of key exchange, symmetric encryption for confidentiality, and message authentication codes for message integrity.
- Encryption:
This option enables or disables encryption in PBXware transport.
Options: Yes, No, N/A.
- NAT (Network Address Translation):
Set the appropriate Extension – PBXware NAT relation
Example:
If Extension 1000 is trying to register with the PBXware from a remote location/network and that network is behind NAT, select the appropriate NAT settings here:
- Yes – Always ignore info and assume NAT
- No – Use NAT mode only according to RFC3581
- Default(rport) – force_rport – forces RFC 3581 behavior and disables symmetric RTP support
- Comedia RTP – enables RFC 3581 behavior if the remote side requests it and enables symmetric RTP support
. - Direct media
This option tells the Asterisk server to never issue a reinvite to the client, if it is set to No.
(E.g. Select Yes if you want Asterisk to send reinvite to the client)
- Direct RTP setup:
Here you can enable or disable the new experimental direct RTP setup. Setting this value to yes sets up the call directly with media peer-2-peer without re-invites. Will not work for video and cases where the callee sends RTP payloads and fmtp headers in the 200 OK that does not match the callers INVITE. This will also fail if directmedia is enabled when the device is actually behind NAT.
Options: Yes, No, N/A
- Qualify
Timing interval in milliseconds at which a ‘ping’ is sent to the UAD/Phone or trunk, in order to find out its status(online/offline).
In PBXware 5.1 ‘Qualify’ is set to 8000 by default.
(E.g. Set this option to ‘2500’ to send a ping signal every 2.5 seconds to the UAD/Phone or trunk. Navigate to ‘Monitor: Extensions’ or ‘Monitor: Trunks’ and check the ‘Status’ field)
.
Call Properties
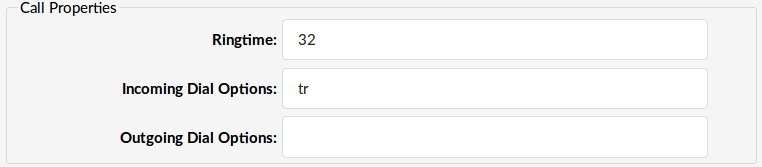
- Ringtime:
UAD/Phone ring time
(E.g. Time in seconds that the UAD/Phone will ring before the call is considered unanswered)
- Incoming Dial Options:
Advanced dial options for all incoming calls
(E.g. Please see below for a detailed list of all available dial options (default: tr))
- Outgoing Dial Options:
Advanced dial options for all outgoing calls
(E.g. Please see below for a detailed list of all available dial options( default: empty ))
.
Channels
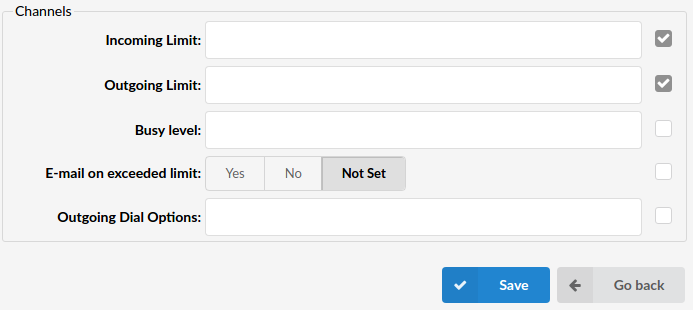
- Incoming Limit:
Maximum number of incoming calls
(E.g. 2)
- Outgoing Limit:
Maxmimum number of outgoing calls
(E.g. 2)
- Busy Level
Maximum number of concurent incoming calls until user/peer is busy.
.
Codecs
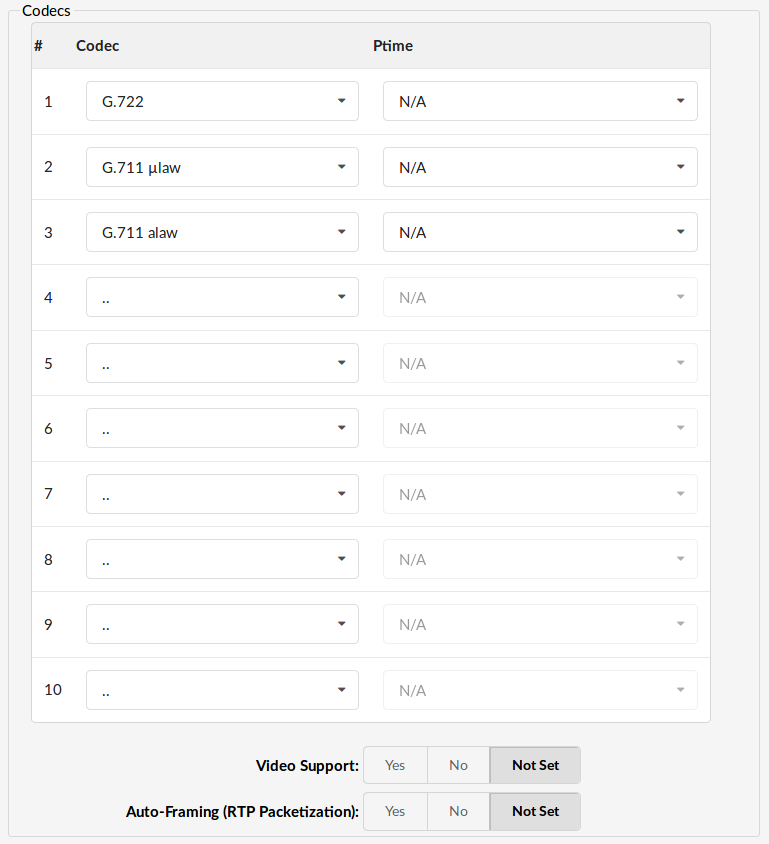
Set the codecs extension is allowed to use.
- Video Support
Set this option to Yes to enable SIP video support.
(Yes, No, N/A)
- Auto-Framing (RTP Packetization):
If autoframing is turned on, system will choose packetization level based on remote ends preferences.
(E.g. Yes)
Auto Provisioning

- Auto Provisioning:
Enable auto provisioning service for this particular model.
(E.g. Connect the UAD/Phone to PBXware without any hassle by providing the UAD/Phone MAC address (and optionally adding the Static UAD/Phone IP address and network details))
- DHCP (Dynamic Hosts Configuration Protocol):
Set whether the UAD/Phone is on a DHCP or a Static IP address
(E.g. Set DHCP = Yes if UAD/Phone is on a dynamic or DHCP = No if UAD/Phone is on a static IP address. If on a static IP, you will have to provide more network details in the fields below).
.
Presence

- Presence
Presence enables UAD to subscribe to hints which are used for BLF.
(E.g. Yes, No, N/A)
- User Agent Auto Provisioning Template:
This option is used for providing additional config parameters for SIP, IAX, and MGCP configuration files. The values provided here will be written into these configuration files.
.
IAX
Click ‘Add User Agent’ to add a device or click the ‘Edit’ icon next to one to change its settings.
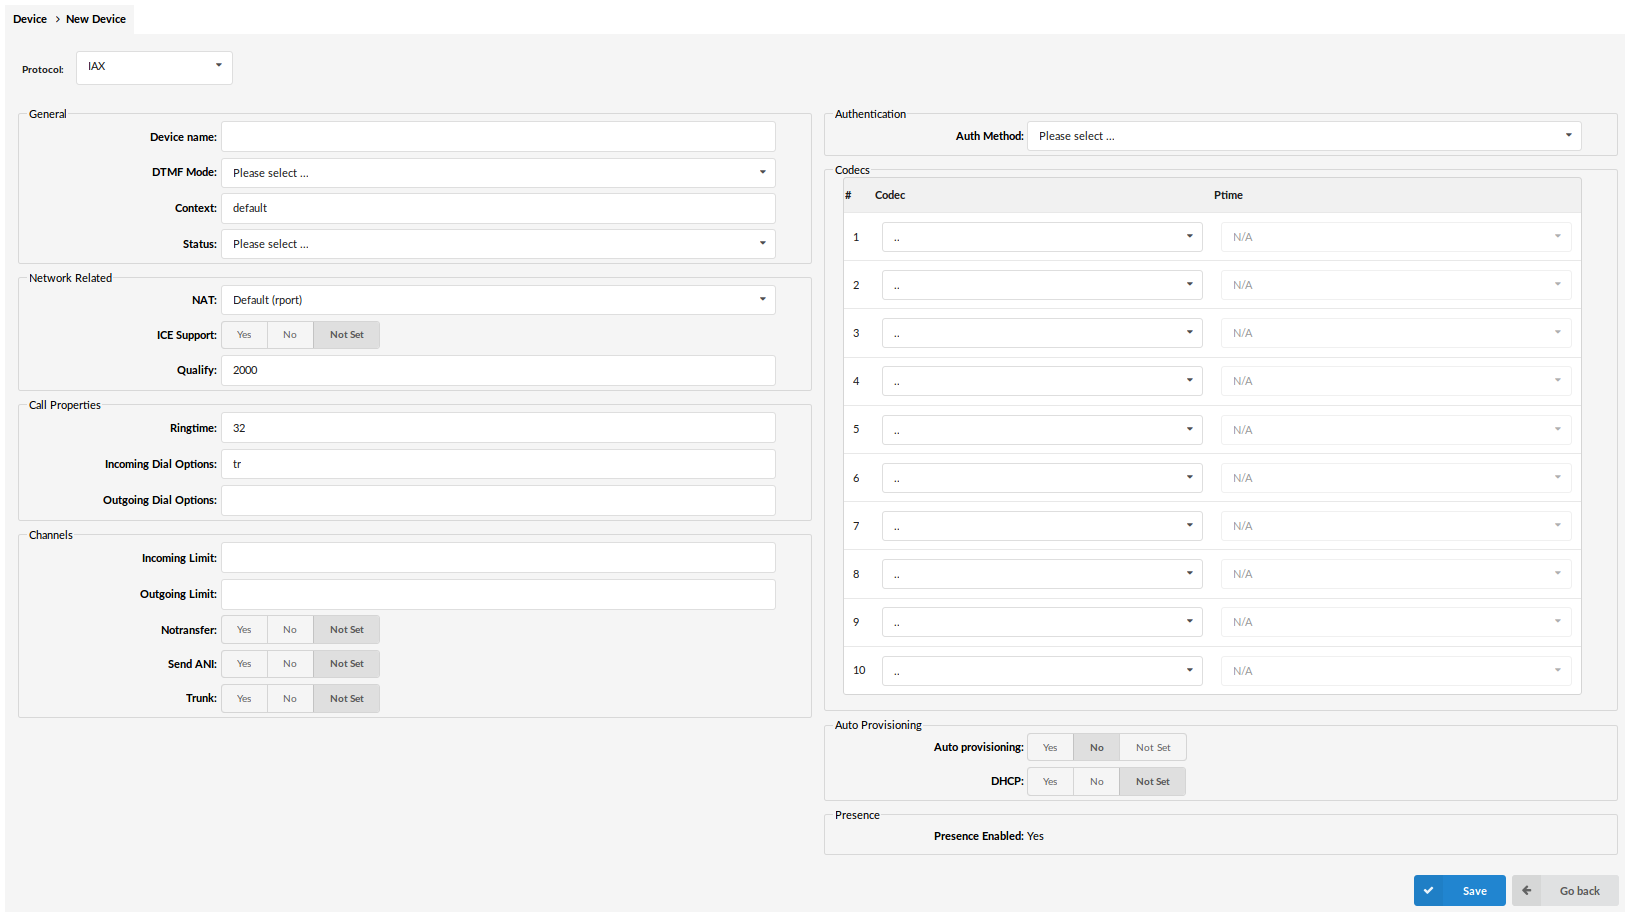
- Protocol:
Select protocol UAD (User Agent Device) uses
(E.g. If UAD/Phone uses IAX protocol, select ‘IAX’ here)
.
General
- Device Name:
Unique device name
(E.g. AASTRA 480i)
- DTMF Mode (Dual Tone Multi-Frequency):
A specific frequency, consisting of two separate tones. Each key has a specific tone assigned to it so it can be easily identified by a microprocessor.
(E.g. This is a sound heard when dialing digits on touch-tone phones. Each phone has a different ‘DTMF Mode’. By default, this field is populated automatically for supported devices. If adding another UAD/Phone select between ‘inband’, , ‘rfc2833’ or ‘info’ options)
- Context:
Every system extension belongs to a certain system context. Context may be described as a collection/group of extensions. The default context used by PBXware is ‘default’ and must not be used by custom extensions.
(E.g. default)
- Status:
Extension status/presence on the network
(E.g. If this field is set to ‘Active’, this UAD/Phone will be available in the ‘UAD’ select box by default when adding new extensions)
.
Network Related

- NAT (Network Address Translation)
Set the appropriate Extension – PBXware NAT relation.
If extension 1000 is trying to register with the PBXware from a remote location/network and that network is behind NAT, select the appropriate NAT settings here:
- yes – Always ignore info and assume NAT
- no – Use NAT mode only according to RFC3581
- Default (rport) – this setting forces RFC3581 behavior and disables symmetric RTP support.
- Comedia RTP – enables RFC3581 behavior if the remote side requests it and enables symmetric RTP support.
.
- Direct Media
This option tells the Asterisk server to never issue a reinvite to the client, if it is set to No. Select Yes if you want Asterisk to send reinvite to the client.
- Qualify:
Timing interval in milliseconds at which a ‘ping’ is sent to a UAD/Phone or trunk in order to find out its status (online/offline).
In PBXware 5.1 ‘Qualify’ is set to 8000 by default.
(E.g. Set this option to ‘2500’ to send a ping signal every 2.5 seconds to UAD/Phone or trunk. Navigate to ‘Monitor: Extensions’ or ‘Monitor: Trunks’ and check the ‘Status’ field)
.
Call Properties
- Ringtime:
UAD/Phone ring time
(E.g. Time in seconds that the UAD/Phone will ring before the call is considered unanswered)
- Incoming Dial Options:
Advanced dial options for all incoming calls
(E.g. Please see below for a detailed list of all available dial options( default: tr ))
.
- Outgoing Dial Options:
Advanced dial options for all outgoing calls
(E.g. Please see below for a detailed list of all available dial options( default: empty ))
.
Channels
- Incoming Limit:
Maximum number of incoming calls
(E.g. 2)
- Outgoing Limit:
Maxmimum number of outgoing calls
(E.g. 2)
- Notransfer:
Disable native IAX transfer
- Send ANI:
Should ANI (“super” Caller ID) be sent over this Provider
(E.g. Set ‘Yes’ to enable)
- Trunk:
Use IAX2 trunking with this host
(E.g. Set ‘Yes’ to enable)
.
Authentication

- Auth Method:
Authentication method required by the provider.
Available options:
- none
- plaintext
- md5
- rc4
- rsa
(E.g. md5)
.
Codecs
- Disallow:
Set the codecs extension to ‘not allowed’
(E.g. This field is very unique. In order to work properly, this setting is automatically set to ‘Disallow All’ and it cannot be modified)
- Allow:
Set the codecs extension is allowed to use
(E.g. Only the codecs set under ‘Settings: Server’ will be available to choose from)
.
Auto Provisioning

- Auto Provisioning:
Enable auto provisioning service for this particular model.
(E.g. Connect the UAD/Phone to PBXware without any hassle by providing the UAD/Phone MAC address (and optionally adding the Static UAD/Phone IP address and network details))
(Option buttons)
- DHCP (Dynamic Hosts Configuration Protocol):
Set whether the UAD/Phone is on a DHCP or a Static IP address
(E.g. Set DHCP = Yes if UAD/Phone is on dynamic or DHCP = No if UAD/Phone is on a static IP address. If on a static IP, you will have to provide more network details in the fields bellow).
.
Presence

- Presence
Presence enables UAD to subscribe to hints which are used for BLF.
(E.g. Yes, No, N/A)
- User Agent Auto Provisioning Template:
This option is used for providing additional config parameters for SIP, IAX, and MGCP configuration files. Values provided here will be written into these configuration files.
.
DAHDI
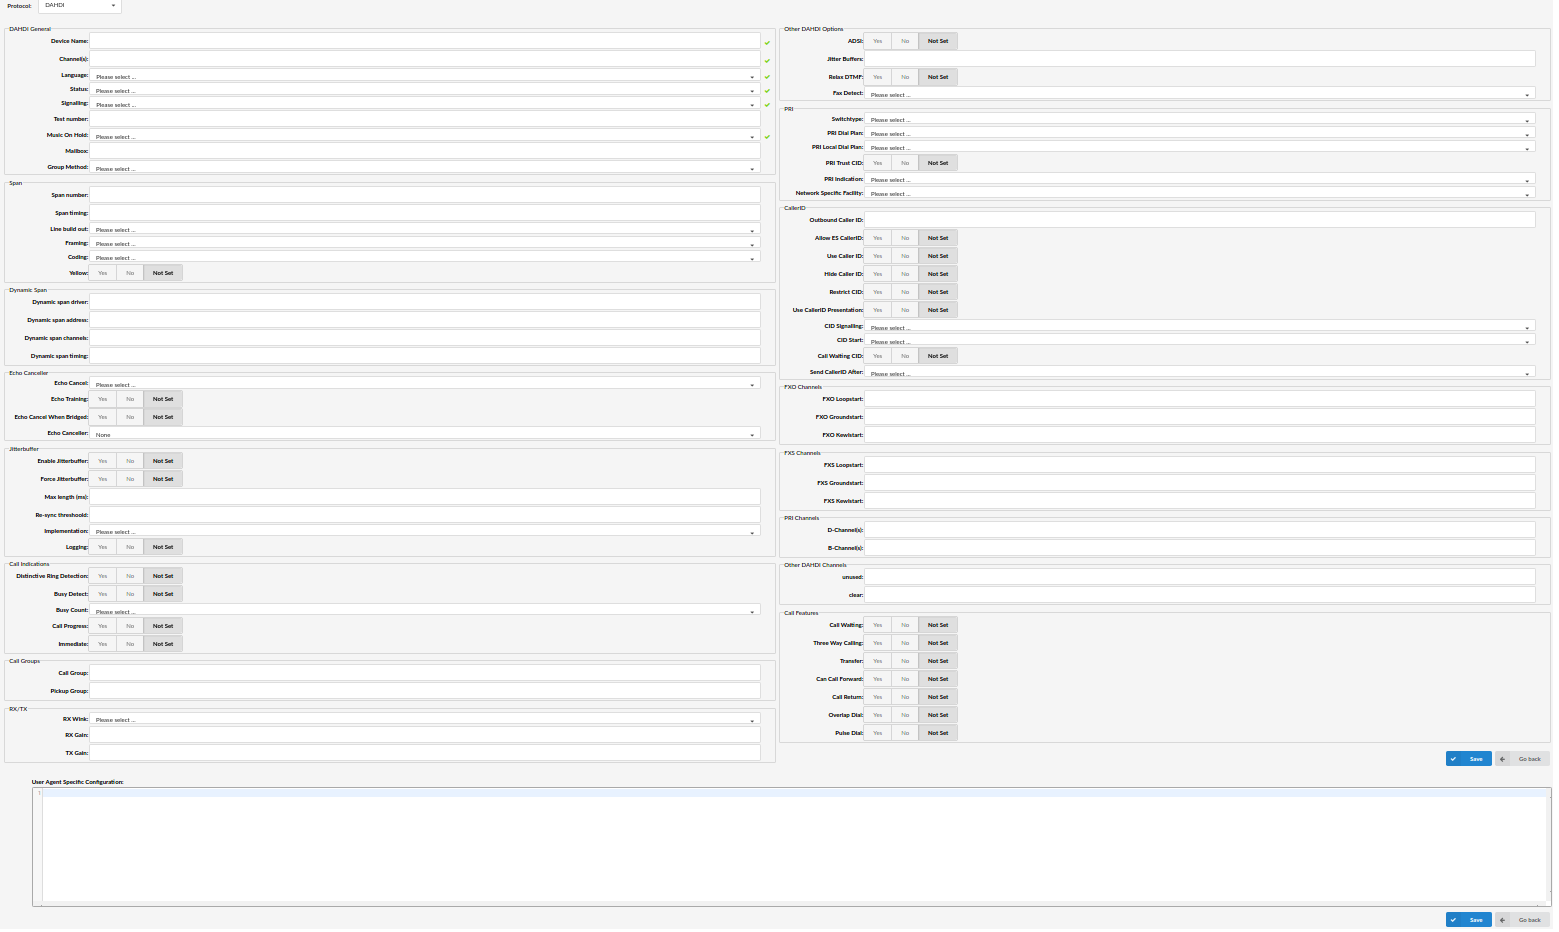
- Device Name:
Unique device name
(E.g. AASTRA 480i)
- Channels
Which card channels are used
(E.g. 1,4/1-4)
- Language:
Default language
- Status:
Extension status/presence on the network
(E.g. If this field is set to ‘Active’, this UAD/Phone will be available in the ‘UAD’ select box by default when adding new extensions)
- Signalling:
Signalling method
Example:
- default
- FXS Loopstart
- FXS Groundstart
- FXS Kewlstart
- FXO Loopstart
- FXO Groundstart
- FXO Kewlstart
- PRI CPE side
- PRI Network side
.
- Test Number:
This number is used for trunk monitoring in Monitor->Monitor Settings->Monitor Trunks.
- Music On Hold:
Select which class of music to use for music on hold. If not specified the ‘default’ will be used
(E.g. default)
- Mailbox:
Define a voicemail context
(E.g. 1234, 1234@context)
- Group Method:
It specifies which group to dial, and how to choose a channel to use in the specified group. The four possible options are:
- g: select the lowest-numbered non-busy DAHDI channel (aka. ascending sequential hunt group).
- G: select the highest-numbered non-busy DAHDI channel (aka. descending sequential hunt group).
- r: use a round-robin search, starting at the next highest channel than last time (aka. ascending rotary hunt group).
- R: use a round-robin search, starting at the next lowest channel than last time (aka. descending rotary hunt group).
.
PRI
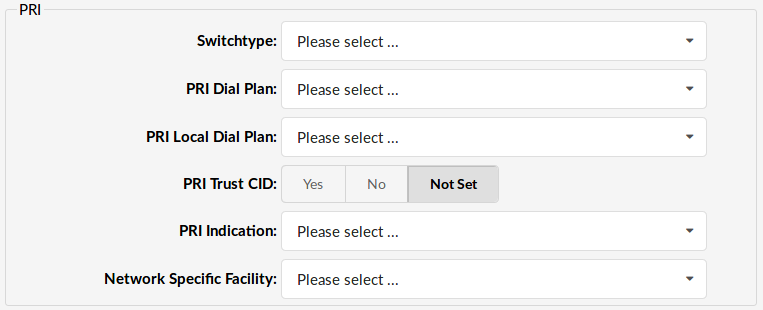
- Switchtype:
Set switch type
Example:
- National ISDN 2
- Nortel DMS100
- AT&T 4ESS
- Lucent 5ESS
- EuroISDN
- Old National ISDN 1
.
- PRI Dial Plan:
Set dial plan used by some switches
Example:
- Unknown
- Private ISDN
- Local ISDN
- National ISDN
- International ISDN
.
- PRI Local Dial Plan:
Set numbering dial plan for destinations called locally
- Unknown
- Private ISDN
- Local ISDN
- National ISDN
- International ISDN
.
- PRI Trust CID:
Trust provided caller id information
(E.g. Yes, No, N/A)
- PRI Indication:
How to report ‘busy’ and ‘congestion’ on a PRI
- outofband – Signal Busy/Congestion out of band with RELEASE/DISCONNECT
- inband – Signal Busy/Congestion using in-band tones
.
- Network Specific Facility:
If required by switch, select network specific facility
- none
- sdn
- megacom
- accunet
.
Caller ID
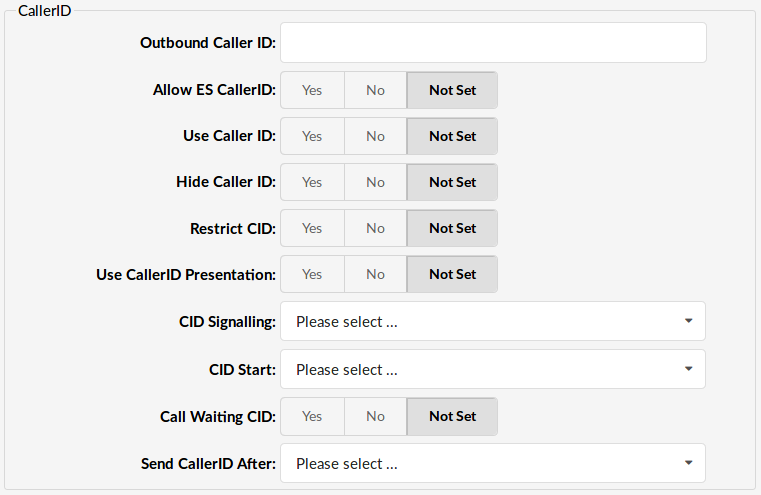
- Outbound Caller ID:
Caller ID set for all outbound calls where Caller ID is not set or supported by a device
(E.g. john@domain.com)
- Allow ES Caller ID:
CallerID can be set to ‘asreceived’ or a specific number if you want to override it.
(E.g. ‘asreceived’, 555648788)
NOTE: Caller ID can only be transmitted to the public phone network with supported hardware, such as a PRI. It is not possible to set external caller ID on analog lines.
- Use Caller ID:
Whether or not to use caller ID
(E.g. Yes, No, N/A)
- Hide Caller ID:
Whether or not to hide outgoing caller ID
(E.g. Yes, No, N/A)
- Restrict CID
Whether or not to use the caller ID presentation for the outgoing call that the calling switch is sending
(E.g. Yes, No, N/A)
- Use CallerID Presentation:
Whether or not to use the caller ID presentation from the Asterisk channel for outgoing calls.
- CID Signalling:
Set the type of caller ID signalling
Example:
- bell – US
- v23 – UK
- dtmf – Denmark, Sweden and Netherlands
.
- CID Start:
What signals the start of caller ID
Example:
- ring = a ring signals the start
- polarity = polarity reversal signals the start
.
- Call Waiting CID:
Whether or not to enable call waiting on FXO lines
(E.g. Yes, No, N/A)
- Send CallerID After:
Some countries, like UK, have different ring tones (ring-ring), which means the caller id needs to be set later on, and not just after the first ring, as per the default.
(E.g. Yes)
.
Echo Canceler
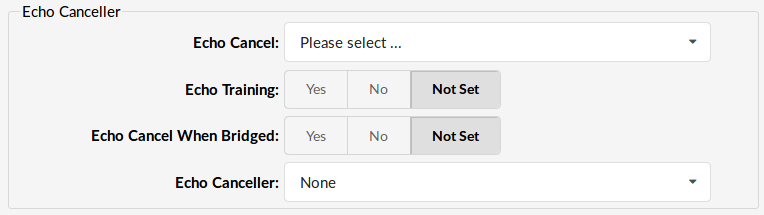
- Echo Cancel:
Enable echo cancellation
(Yes, No, N/A)
- Echo Training:
Mute the channel briefly, for 400ms, at the beginning of conversation, cancelling the echo. (Use this only if ‘Echo Cancel’ doesn’t work as expected)
(E.g. Yes, No, N/A)
- Echo Cancel When Bridged:
Enable echo cancellation when bridged. Generally not necessary, and in fact undesirable, to echo cancel when the circuit path is entirely TDM
(E.g. Yes, No, N/A)
- Echo Canceller:
Types of echo cancellers:
- mg2
- oslec
- kb1
.
Call Features
- Call Waiting:
Whether or not to enable call waiting on FXO lines
(E.g. Yes, No, N/A)
- Three Way Calling:
Support three-way calling. If enabled, call can be put on hold and you are able to make another call
(E.g. Yes, No, N/A)
- Transfer:
Support call transfer and also enable call parking (overrides the ‘canpark’ parameter). Requires ‘Three Way Calling’ = ‘Yes’.
(E.g. Yes, No, N/A)
- Can Call Forward:
Support call forwarding
(E.g. Yes, No, N/A)
- Call Return:
Whether or not to support Call Return ‘*69’. Dials last caller extension number
(E.g. Yes, No, N/A)
- Overlap Dial:
Enable overlap dialing mode (sends overlap digits)
(E.g. Yes, No, N/A)
- Pulse Dial:
Use pulse dial instead of DTMF. Used by FXO (FXS signalling) devices
(E.g. Yes, No, N/A)
.
Call Indications

- Distinctive Ring Detection:
Whether or not to do distinctive ring detection on FXO lines
(E.g. Yes, No, N/A)
- Busy Detect:
Enable listening for the beep-beep busy pattern
(E.g. Yes, No, N/A)
- Busy Count:
How many busy tones to wait before hanging up. Bigger settings lower the probability of random hangups. ‘Busy Detect’ has to be enabled
Example:
- 4
- 6
- 8
.
- Call Progress:
Easily detect false hangups
(E.g. Yes, No, N/A)
- Immediate:
Should channel be answered immediately or the simple switch should provide dialtone, read digits, etc
(E.g. Yes, No, N/A)
.
Call Groups
- Call Group:
Set the Call Group to which the extension belongs.
(E.g. Similar to ‘Context’ grouping, only this option sets to which call group extension belongs(Allowed range 0-63))
- Pickup Group:
Set groups extension as allowed to pickup.
(E.g. Similar to ‘Context’ grouping, only this option sets the Call Groups extension as allowed to pickup by dialing ‘*8’.)
.
RX/TX
- RX Wink:
Set timing parameters
Example:
- Pre-wink (50ms)
- Pre-flash (50ms)
- Wink (150ms)
- Receiver flashtime (250ms)
- Receiver wink (300ms)
- Debounce timing (600ms)
.
- RX Gain:
Receive signal decibel
(E.g. 2)
- TX Gain:
Transmit signal decibel
(E.g. 2)
.
Other DAHDI Options
- ADSI (Analog Display Services Interface):
Enable remote control of screen phone with softkeys. (Only if you have ADSI compatible CPE equipment)
(E.g. Yes, No, N/A)
(Option buttons)
- Jitter Buffers:
Configure jitter buffers. Each one is 20ms long
(E.g. 4)
([0-9])
- Relax DTMF:
If you are having trouble with DTMF detection, you can relax the DTMF detection parameters
(E.g. Yes, No, N/A)
(Option buttons)
- Fax Detect:
Enable fax detection
Example:
- both
- incoming
- outgoing
- no
(Select box)
Span


Span
- Span number:
Number of the span
(E.g. 1)
([0-9])
- Span timing:
How to synchronize the timing devices
Example:
- 0 – do not use this span as a sync source
- 1 – use as the primary sync source
- 2 – set as the secondary, and so forth
([a-z])
- Line build out:
Length of the last leg of the connection and is set to zero if the length is less than 133 feet
Example:
- 0 db (CSU) / 0-133 feet (DSX-1)
- 133-266 feet (DSX-1)
- 266-399 feet (DSX-1)
- 399-533 feet (DSX-1)
- 533-655 feet (DSX-1)
- -7.5db (CSU)
- -15db (CSU)
- -22.5db (CSU)
(Select box)
- Framing:
How to communicate with the hardware at the other end of the line
Example:
- For T1: Framing is one of d4 or esf.
- For E1: Framing in one of cas or ccs.
(Select box)
- Coding:
How to encode the communication with the other end of line hardware.
Example:
- For T1: coding is one of ami or b8zs
- For E1: coding is one of ami or hdb3 (E1 may also need crc)
(Select box)
- Yellow:
Whether the yellow alarm is transmitted when no channels are open.
(E.g. Yes, No, N/A)
(Option buttons)
Dynamic Span

Dynamic Span
- Dynamic span driver:
The name of the driver (e.g. eth)
([0-9][a-z])
- Dynamic span address:
Driver specific address (like a MAC for eth).
([0-9][a-z])
- Dynamic span channels:
Number of channels.
(6)
- Dynamic span timing:
Sets timing priority, like for a normal span. Use “0” in order not to use this as a timing source, or prioritize them as primary, secondary, etc.
(0)
FXO Channels

FXO Channels
- FXO Loopstart:
Channel(s) are signalled using FXO Loopstart protocol
([0-9])
- FXO Groundstart:
Channel(s) are signalled using FXO Groundstart protocol
([0-9])
- FXO Kewlstart:
Channel(s) are signalled using FXO Kewlstart protocol
([0-9])
Values for above fields are set as follows:
- 1 – for one card
- 1-2 – for two cards
- 1-3 – for three cards etc
- 2-3 (If your card has modules in this order FXS, FXO, FXO, FXS)
FXS Channels

FXS Channels
- FXS Loopstart:
Channel(s) are signalled using FXS Loopstart protocol
([0-9])
- FXS Groundstart:
Channel(s) are signalled using FXS Groundstart protocol
([0-9])
- FXS Kewlstart:
Channel(s) are signalled using FXS Kewlstart protocol
([0-9])
Values for the above fields are set as follows:
- 1 – for one card
- 1-2 – for two cards
- 1-3 – for three cards etc
- 2-3 (If your card has modules in this order FXS, FXO, FXO, FXS)
Jitter Buffer

Jitter Buffer
A jitter buffer temporarily stores arriving packets in order to minimize delay variations. If packets arrive too late then they are discarded. A jitter buffer may be mis-configured and be either too large or too small.
- Enable Jitterbuffer:
Enables the use of a jitterbuffer on the receiving side of a SIP channel. An enabled jitterbuffer will be used only if the sending side can create and the receiving side cannot accept jitter. The SIP channel can accept jitter, thus a jitterbuffer on the receive SIP side will be used only if it is forced and enabled.
(E.g. Yes, No, N/A)
(Option buttons)
- Force Jitterbuffer:
Should we force jitter buffer (default value 10)
(E.g. Jitter buffer is usually handled by the UADs/Phones. But in case these do this poorly , the jitter buffer can be enforced on PBXware side)
([0-9])
- Max length (ms):
Max length of the jitterbuffer in milliseconds.
(E.g. 300)
([0-9])
- Re-sync threshold:
Resync the threshold for noticing a change in delay measured
(E.g. 1000)
([0-9])
- Implementation:
Jitter buffer implementation used on a receiving side of a SIP channel. Defaults to “fixed”.
(E.g. adaptive)
(Select box)
- Target extra
- Logging:
Enables jitterbuffer frame logging. Defaults to “no”.
(E.g. Yes, No, N/A)
(Option buttons)
Other DAHDI Channels

Other DAHDI Channels
- Unused:
([0-9])
- Clear:
([0-9])
Access Codes
Access codes provide the master/tenant user with access to essential system or enhanced services
Master Tenant
Following options are available on Master Tenant only
Transfer
![]()
Access codes – Transfer
- Blind Transfer
Perform blind a transfer
(e.g. mobile phone) and transfer the call to it.
([0-9])
- Attended Transfer
Perform Attended Transfer
([0-9])
- Attended Transfer Abort
Dialing this access code aborts an attended transfer. Otherwise there is no way to abort an attended transfer.
([0-9])
- Attended Transfer Complete
Dialing this access code completes an attended transfer and drops out of the call without having to hang up.
([0-9])
Slave Tenants
Following options are available on Slave Tenants only
Voicemail

Access codes – Voicemail
- Voicemail
Voice inbox access code. This number is dialed to access extension voice inbox (extension PIN required)
(E.g. From extension 1000 dial ‘*123’ to access extension 1000 voice inbox. When asked for PIN, provide PIN set for this extension)
([0-9])
- General Voicemail
Access code for general voice mailbox. This number is used for checking your voice inbox from any system Extension
(E.g. Dial ‘*124’. Enter your Extension number and PIN when asked for it)
([0-9])
- Voicemail Transfer
Access code for transferring active calls to any system voice box
(E.g. During active conversation dial ‘*125 + $EXTENSION’ to transfer calling party to system $EXTENSION number voice box)
([0-9])
Agents

Access codes – Agents
- Agent Pause
When dialed, the agent is on pause and not receiving any calls.
(E.g. Dial ‘*204’ to pause agent).
([0-9])
- Agent Not Ready
When dialed, the agent is on pause and not receiving any calls and listening to MOH.
(E.g. Dial ‘*205’ to pause an agent and play MOH while paused).
([0-9])
- Agent Project Dial
When dialed, agent will make outbound call with Project Code
(E.g. *212 + $PROJECT_CODE + $NUMBER (*212*200*1000))
([0-9])
Enhanced Services

Access codes – Enhanced Services
- Last Caller
Access code for dialling the last Extension that was calling you
(E.g. If Extension ‘1000’ was the last extension calling you, dial ‘*149’ from your Extension. Message ‘The number to call your line was $EXTENSION. To call this number press 1’ will be played. Press ‘1’ dial this destination).
([0-9])
- Monitoring
Access code for monitoring active calls
(E.g. If Extensions ‘1000’ and ‘1001’ are in conversation, dial ‘*199 + 1000’ to listen the ongoing conversation)
([0-9])
Speakerphone Paging

Access codes – Speakerphone Paging
- Speakerphone Page
Access code for transmitting a message to multiple phones via their loudspeakers
(E.g. Dial ‘*399’ to speakerphone all Extensions defined under Enhanced Services)
([0-9])
- Single Speakerphone Page
Access code for transmitting a message to phone loudspeaker
(E.g. Dial ‘*400 + $EXTENSION’ to transmit a message to provided extension (phone) loudspeaker)
([0-9])
- Groups Speakerphone Page
Access code for transmitting a message to paging groups via their loudspeakers
(E.g. Dial ‘*600 + Paging Group’ to transmit a message over intercom to all the extensions added to Paging group)
([0-9])
PBXware brings a feature in form of Two Way Speakerphone Paging. In order to start two way communication with preferred extension on the system dial *400 + * + $EXTENSION. For example, if you would like to initiate two way speakerphone paging with extension 1038 you will dial: *400*1038.
Features

Access codes – Features
- Speed Dial
Speed Dial enables faster dialing by entering an access code and dual number speed dialing code. Speed Dialing Codes can be entered by clicking Settings: Servers and then clicking on Speed Dial button
(E.g. Dial ‘*130 + XX’ where XX represents speed dialing code associated to some extension)
([0-9])
- Other Networks
Access code for accessing other PBXware networks
(E.g. Dial ‘*188 + $NETWORK + $EXTENSION’ to dial number $EXTENSION or $NETWORK (e.g. ‘*188 8 1000’).
NOTE: ‘Trunk’ and ‘Other Network’ must already be set)
([0-9])
- Listen to CDR recordings
Access code used when you want to listen to the last 9 Call Recordings from CDRs
(E.g. Dial ‘*170’ access code followed by a number between 1 and 9, where 1 is most recent recorded conversation (excluding access code calls).
([1-9])
Call Forwarding

Access codes – Call Forwarding
- Enable Call Forwarding
Access code for enabling Call Forwarding Enhanced Service
(E.g. Dial ‘*71 + $EXTENSION’ to forward all calls to $EXTENSION number. This number can be local Extension or Proper/Mobile number (e.g. ‘*71 1001’ or ‘*71 55510205’))
([0-9])
- Disable Call Forwarding
Access code for disabling Call Forwarding Enhanced Service
(E.g. Dial ‘*72’ to disable this service (Extension number not required))
([0-9])
Group Hunt

Access codes – Group Hunt
- Toggle Do Not Disturb
Access Code for toggle “Do Not Disturb” Enhanced Service ON or OFF, the same as if user dialed *78/*79.
(*[0-9])
- Enable Do Not Disturb
Access Code for enabling “Do Not Disturb” Enhanced Service.
Dial *78 to enable “Do Not Disturb” and use set of rules defined for this service in extensions Enhanced Services.
(*[0-9])
- Disable Do Not Disturb
Access Code for disabling “Do Not Disturb” Enhanced Service.
Dial *79 to disable “Do Not Disturb” and use set of rules defined for this service in extensions Enhanced Services.
(*[0-9])
- Enable Group Hunt
Access Code for enabling “Group Hunt” Enhanced Service.
Dial *510 to enable “Group Hunt” and use set of rules defined for this service in extensions Enhanced Services.
(*[0-9])
- Disable Group Hunt
Access Code for enabling “Group Hunt” Enhanced Service.
Dial *511 to enable “Group Hunt” and use set of rules defined for this service in extensions Enhanced Services.
(*[0-9])
Caller ID

Access codes – Caller ID
- Block CallerID
Access code to block other users from seeing your CallerID
(E.g. Dial ‘*67’ to block displaying your CallerID)
([0-9])
- Block CallerID once
Access code for blocking only first next call from displaying CallerID
(E.g. Dial ‘*81’ to block only next call from seeing your CallerID)
([0-9])
- Unblock CallerID
Access code to unblock your CallerID after it has been blocked
(E.g. Dial ‘*68’ to unblock your CallerID)
([0-9])
- Call with CallerID list number
Access code for changing caller ID number
(E.g. Dial ‘*65 + CallerID Number + Number_You_Want_To_Dial’)
Call Parking

Access codes – Call Parking
- Call Park
Access code for parking active calls
(E.g. During active conversation dial ‘#700’. The call will be parked on first available Call Park Extension (e.g. 701). Parked call can be picked up from any system Extension by dialing parked Extension (‘701’) NOTE: Extensions must have call pickup enabled in Enhanced Services in order to be able to pick up parked calls.
([0-9])
- Call Park Start
Start Extension for call parking service
(E.g. If set to ‘701’ all calls will be parked on Extensions ‘701’ to ‘Call Park End’)
([0-9])
- Call Park End
End Extension for call parking service
(E.g. If set to ‘720’ all calls will be parked on Extensions ‘Call Park Start’ to ‘720’)
([0-9])
- Call Park Timeout (sec)
Default timeout for Call Park is 45 seconds which means that once call is parked it will stay at assigned parking lot for 45 seconds after which call will return to extension which it was parked from.
- Enhanced Call Park
Access code for parking calls and sending them to preset Announce Extension which can be set in Settings->Servers
(E.g. During active conversation dial ‘#800’. The call will be parked and Announce Extension will ring for Timeout seconds. After that period call will be directed to Timeout Extension)
([0-9])
- Call Pickup
NOTE: The Call Pickup access code will be applied to phones if auto provisioning is used.
([0-9])
- Call Pickup Asterisk
([0-9])
- Parked Calls Transfer
Set this feature as Disable (default setting) or Enable it for both sides or for the pickup side only.
- Parked Calls Recording
Set this feature as Disable (default setting) or Enable it for Caller only, Callee only or Both sides.
System Tests

Access codes – System Tests
- Music On Hold
Access code for playing Music On Hold sound files
(E.g. Dial ‘*388’ to play ‘default’ Music On Hold class sound files)
([0-9])
- Echo Audio Read
Access code for echo audio test.
(E.g. Dial ‘*398’ and talk. Everything you say is returned back so the server response time can be checked)
([0-9])
NOTE: Now user will be able to skip the audio prompt when doing Echo Test by pressing any DTMF, including “#”.
Greetings

Access codes – Greetings
- Record Greeting
Record greeting or any other sound file that can be used in PBXware
(E.g. Dial ‘*301’ and after the beep say the message that you want to record)
([0-9])
- Agent Greeting
Record the agent greeting which the caller will hear before being connected to an agent
(E.g. Dial *302 and then enter the agent number to record the agent greeting which the caller will hear before being connected to an agent)
([0-9])
- Change Greeting (greeting access code for specific destination types)
(e.g., Dial *303xxx where xxx is an IVR, Ring Group, Queue, etc. When dialed the user is prompted to record a new greeting. Once accepted, the greeting is set as the destination’s new greeting.)
- Overwrite Greeting (greeting access code for specific destination types)
(e.g., Dial *304xxx where xxx is an IVR, Ring Group, Queue, etc. When dialed the user is prompted to record a new greeting. Once accepted, the greeting is set as the destination’s new greeting and the old greeting, if it existed, will be deleted.)
Operation Times

Access Codes – Operation Times
- Open Operation Times
User will dial ‘*401’ to open systems operation times
(E.g. If operation times is open, but not explicitly closed, it is automatically closed at 12 AM)
([0-9])
- Close Operation Times
User will dial ‘*402’ to close systems operation times
(E.g. If user doesn’t close operation times, it will be closed automatically at 12 AM)
([0-9])
- Reset Operation Times
User will dial ‘*403’ to reset systems operation times and restore rules entered in settings.
- Midnight Reset
Users have the ability to set the operation times midnight reset option to Yes/No/Not Set.
By default this option is set to “Yes”, meaning that the access codes will be reset at midnight. If set to “No”, midnight reset will be skipped.
Operation Times BLFs

Access codes – Operation Times BLFs
- Open/Close: *404
Users can program a BLF key on their phone to *404 in order to monitor Operation Times status and to use it to enable or disable Operation Times rules.
For example, if a user stays in the office after the Operation Times rules activate for off hours, the BLF will notify the user of the changed state by turning on the BLF light or changing its color (behavior will depend on the device used). Once *404 is provisioned as BLF pressing the button will toggle Operation times ON or OFF, the same as if user dialed *401/*402.
([0-9])
- Close/reset: *405
To reset Operation Times rules, user will have to dial *405 manually.
([0-9])
NOTE: The System operation times ES has to be enabled for this to work.
Follow Me

Access codes – Follow Me
- Enable Follow Me
Access Code for enabling “Follow Me” Enhanced Service.
Dial *520 to enable “Follow Me” and use set of rules defined for this service in extensions Enhanced Services.
(*[0-9])
- Disable Follow Me
Access Code for disabling “Follow Me” Enhanced Service.
Dial *521 to disable “Follow Me” and use set of rules defined for this service in extensions Enhanced Services.
(*[0-9])
Hot Desking

Access codes – Hot Desking
- Hot Desking
Access code used for Hot Desking Login
([0-9])
Wake-Up Call

Access codes – Wake-Up Call
- Wake-Up Call
*411 – dial this access code to set up a wake-up call for your extension and set your preferred time for the wake-up call. Once triggered and the user picks up the call, they can choose to cancel the wake-up call or snooze for 5,10 or 15 minutes.
- Operator Wake-Up Call
*412 – operator will dial this code and then enter the extension number to set up the wake-up call for it.
Parking Lots

Parking Lots allows users to park a call to a specific parking lot.
- Parking Lot
Displays the name of a parking lot
(E.g. Test)
(Display)
- Parking Extension
Displays the number of a parking Extension
(E.g. 900)
(Display)
- Parking Positions
Displays the number range of parking positions in a form of XXX-XXX
(E.g. 920-940)
(Display)
- Last Destination
Displays the number of an Extension that represents the Last Destination
(E.g. 100)
(Display)
NOTE: In case no one picks up the parked call, the call will go to ‘Last Destination’ after the time specified in the ‘Timeout (sec)’ field exceeds.

Click this button to edit the configuration of a selected parking lot.
(Button)

Click this button to delete a selected parking lot.

NOTE: Upon clicking the button, the following warning message will appear: “Are you sure you want to remove XYZ*?”*. If users click the Cancel button, then the action will be abandoned. On the contrary, if OK is clicked, the selected parking lot will be deleted.
For more information, please refer to the screenshot.
(Button)

Click this button to add a parking lot.
(Button)
Add/Edit Parking Lot
Parking Lot

- Name
Set a name of the parking lot
(E.g. Test)
([a-z][0-9])
- Parking Extension
Set a number of the parking Extension
(E.g. 900)
([0-9])
NOTE: If a user wants to park the call, they will transfer the call to the Extension entered in this field.
- Parking Positions
Set a range of the parking positions that will be available
(E.g. 901-920)
([0-9])
NOTE: A user needs to dial one of the numbers listed here to pick up the parked call.
- Parked Calls Transfer
Select who can transfer the parked call
(E.g. ‘Disable’/’Enable (Both sides)/’Enable (Pickup only)’)
(Select box)
NOTE: Default is ‘Disable’.
- Parked Calls Recordings
Select who can start recording on the parked call
(E.g. ‘Disable’/’Enable (Both sides)/’Enable (Pickup only)’)
(Select box)
NOTE: Default is ‘Disable’.
- **Timeout (sec)**
Set the time in seconds and define how long the call should stay at the assigned parking lot after which the call will be redirected to the Timeout Destination
(E.g. 25)
([0-9])
- Timeout Destination
Set ‘Timeout Destination’ that should ring after the time set in the ‘Timeout (sec)’ field passes
(E.g. 100)
(Select box)
- Custom Ringtone
If users are directing calls to an Extension on which a supported UAD is registered, they can set a Custom Ringtone with which the phone will ring.
(E.g. )
([a-z][0-9])
NOTE: For more information, please refer to the following link: https://wiki.bicomsystems.com/HOWTO_Custom_Ring_Tones
- Caller ID Prefix
Set the Caller ID Prefix
(E.g. +)
NOTE: This Caller ID prefix will be set when the call is redirected to the Timeout Destination.
- Music on Hold
Select a MoH class that will be played to callers parked on this parking lot
(E.g. testclass)
(Select box)
Numbering Defaults
Numbering defaults sets the way PBXware will assign network numbers to Extensions, Conferences, etc.

Numbering Defaults
Fetch least unallocated number (default):
This option takes the least number on the system that is not used by the system and assigns it to a new Extension you’re trying to create, for example.
Fetch next unallocated number:
If the last allocated number was assigned to extension 2010, the next IVR that you’re trying to add, for example, will be given number 2011. The system will not try to give you an unallocated number 1022, for example.
Fetch random:
Use this option in case you want to assign numbers in a non-sequential order. If you create a new Queue, for example, PBXware will assign it a number 2350, for example. And if you try to create a new Extension right after that, PBXware might assign it a number 9838, for example.
Central Phone Book

There are two different types of contacts that can be added
- Global – sent to all phones and managed here
- Personal – sent to only one user together with global contacts and managed from the Extensions page
NOTE: Yealink, Cisco, and Polycom phones can work with Central Phone Book.
Central Phone Book list screen contains all global/personal contacts with following details:
- CSV Upload
Upload a predefined list of contacts to the contacts list
(Button)
Please refer to the example of a CSV file with 5 contacts:
| 1 | Chevy,,Yesipov,cyesipov0@example.com,Jacobi and Sons,mobile:50011,work:600111 |
| 2 | Jeanine,,Tiddeman,jtiddeman1@ihg.com,Walsh Group,mobile:50012,work:600112 |
| 3 | Erasmus,,Curlis,ecurlis2@sbwire.com,Nolan-Kris,mobile:50013,work:600113 |
| 4 | Caresa,,Bremmell,cbremmell3@php.net,Mayert Inc,mobile:50014,work:600114 |
| 5 | Romy,,Hedling,rhedling4@latimes.com,”Ankunding,Weissnat”,mobile:50015,work:600115 |
NOTE: If a value (first_name, last_name etc.) has a comma, it has to be put under quotes. In the example of a CSV file shown above, the 5th contact with its company name has a comma – “Ankunding, Weissnat”.
NOTE: In case the number type is not ‘Work’, ‘Mobile’, ‘Home’, or ‘Fax’, the number will be skipped. Also, the number type is case insensitive which means that all of these examples are acceptable – ‘Work’, ‘WORK’, and/or ‘wOrK’.

NOTE: Upon uploading a new CSV file, all existing contacts on the system will be deleted, which ensures that a user’s contact list stays up-to-date. However, in order to prevent any potential and unintentional data loss, upon uploading a new CSV file, the warning message will appear saying “CSV upload will delete existing records. Do you want to proceed?”. If a user presses ‘OK’, it will result in a new CSV file being uploaded and all previous contacts being deleted.
For more information, please refer to the screenshot.
- CSV Download
Download all the global/personal contacts as a CSV file
(Button)
- Download CSV Template
Download a CSV template which can be used to create a CSV file with contacts and upload it instead of adding contacts one by one
(Button)
- Search bar
Search contacts by entering specific information into the search bar
([0-9][+])
NOTE: Contacts can be searched by using the ‘+’ (plus) sign.
NOTE: On the Central Phone Book page, 1000 (one thousand) is the maximum number of contacts that can be displayed. To narrow down the range of contacts, the search bar should be used.
The Central Phone Book list contains all global/personal contacts with following details:
- First Name
Contact’s first name
(E.g. Abagail)
(Display)
- Last Name
Contact’s last name
(E.g. Finey)
(Display)
- Number
Contact’s number
(E.g 1805)
(Display)
Contact’s e-mail address
(E.g. mfineymd@narod.ru)
(Display)
- Company
Contact’s company
(Dazzlesphere)
(Display)
- Edit the configuration of the Contact.
(E.g. Click the ‘Edit’ button to edit the Contact’s configuration.)
(Button)
- Delete the Contact from the system.
(E.g. Click the ‘Delete’ button to delete the Contact from the system.)
(Button)
Add/Edit Contact

Add/Edit Central Phone Book
General
- First Name
Contact’s first name
(E.g. Abagail)
([a-z])
- Middle Name
Contact’s middle name
(E.g. Ann)
([a-z])
- Last Name
Contact’s last name
(E.g. Finey)
([a-z])
Contact’s e-mail address
(E.g. mfineymd@narod.ru)
([a-z][0-9])
- Company
Contact’s company
(E.g. Dazzlesphere)
([a-z])
Numbers
- Type
Number type
(E.g. Work)
(Select box)
- Number
Contact’s phone number
(E.g. 061111111)
([0-9])
NOTE: Central Phone Book accepts numbers starting with the ‘+’ (plus) sign.
gloCOM Features (6.6)

NOTE: Please note that this feature is part of the beta release and is only visible to beta testers. Once the stable version is released, it will be available for general use.
Select which gloCOM features should be enabled and available to users on a specific Tenant
(Checkbox)
Here you can refer to the list of gloCOM features:
- Message Info
- Delete messages
- Delete sessions
- Add participants to the group
- Create group
- Reply
- Voice message
- File message
- Text message
- Leave group
- Remove from group
- Typing
- Mute group
- Pin session
- Reorder pinned sessions
- Mark session unread
- Pin message
- Rename group
- Assign admin
Directory Sync Management

Directory Sync Management (DSM) is an application which allows users/clients to connect to the LDAP server in order to validate users by using LDAP, or Lightweight Directory Access Protocol. LDAP can be generally understood as ‘the communication language’ used by applications to communicate with various directories. In order to improve user experience, DSM enables them to sync Extensions in a faster way by using Extension Template and selecting generic configuration settings for Extensions. Users may also select personalized settings for certain Extensions and apply different changes if needed.
On PBXware, DSM configuration can be enabled on Slave Tenant.
Upon pressing the ‘Enable’ toggle button, this message will be displayed at the top of the page:

(Display)
Additionally, the ‘Test’ and ‘Sync’ buttons will be replaced with:

(Button)
NOTE: For DSM configuration to operate successfully, it is necessary to populate all required fields on the page and ‘Save’ settings.
All fields found in the ‘Configuration’ section are required. If one of the required fields is not populated, the warning message will pop up. Please refer to the screenshots below.
Configuration
- Enable: Clicking the toggle button will allow users to enable the DSM service for that specific Tenant. If Disabled, DSM will not sync any Extensions.
(E.g. Enable/Disable)
(Toggle button)

- Hostname: Enter Hostname/IP of the LDAP server.
In case ‘Hostname’ is used, there is no need to enter ldap:// or ldaps://. For instance, if the hostname is ldap.myserver.com, a user can just put that hostname in the field and does not need to set it as ldap://ldap.myserver.com. The protocol used (secure or not secure) is set in the ‘Encryption’ field.
(E.g. 10.1.0.111)
([0-9])
NOTE: In case the Extensions have been previously synced, the ‘Hostname’ and ‘Base DN’ fields will be disabled and cannot be changed due to security reasons and avoidance of any unfavorable changes. These fields will be re-enabled when all the synced Extensions are deleted from that server/Tenant. The synced Extensions cannot be deleted through the PBXware GUI, but have to be removed on the LDAP server. With the next sync executed, they will be removed from PBXware. This allows the users to have full control over the Extensions on the LDAP server without the need to enter the PBXware GUI.

- Port: Enter one of the default ports: 389 for LDAP or 636 for LDAPS. If ‘No Encryption (Insecure)’ or ‘STARTTLS’ is used, the port is usually 389, while ‘SSL/TLS’ uses 636.
As security is an important part of network protocols, it is necessary to mention that using LDAPS ensures a higher level of security since it provides the encryption of LDAP data.
(E.g. 389)
([0-9])
- Encryption: Select the type of ‘Encryption’ that will be used when communicating with the LDAP server. The options are SSL/TLS and STARTTLS. Using ‘Encryption’ is not obligatory, however it is highly recommended due to the fact that the ‘No Encryption (Insecure)’ field may result in transmission being exposed to attackers.
(E.g. SSL/TLS)
(Select box)

- Login DN: Enter login username/e-mail of an LDAP server administrator or a user with correct privileges.
(E.g. admin@mydomain.com)
([a-z][0-9])
NOTE: The account must have the permission to execute a SEARCH request on the LDAP server. Both ‘Login DN’ and ‘Password’ have to be valid credentials.

- Password: Enter the password used for authentication of the administrator’s account or a user with correct privileges.
(E.g. ******)
([a-z][0-9])

- Base DN: Represents the starting point on the LDAP server where the search for users will start. ‘DN’ in ‘Base DN’ stands for ‘Distinguished Name’. The following is an example of a Group Base DN.
(E.g. CN=Users,CN=Builtin,DC=MyDomain,DC=com)
([a-z][0-9])
NOTE: The string structure of the search query in LDAP may be composed of the following values:
- ‘DC’ stands for ‘ Domain Component’
- ‘OU’ stands for ‘Organizational Unit’
- ‘CN’ stands for ‘Common Name’.

- Sync Period (hours): Define the sync period for automatic sync (in hours). The sync is done periodically (or manually). For example, if the sync period is set to 6, it means that users will be synced from the LDAP server every six hours.
(E.g. 6)
([0-9])
The ‘Configuration’ section has three additional buttons: ‘Extension Template’, ‘Test’, and ‘Sync’.

Click this button to open a frame where you will be able to set a template for users who are to be synced.
(Button)

NOTE: ‘Extension Template’ is used to define the default Extension options that can not be managed through LDAP. The template will be used exclusively when adding a new user to PBXware. Setting the template will not affect the existing Extensions on the system, but it will have an effect on the new ones only. If editing an already existing synced user, it can be done through the user interface in the same way that any other Extension on the system would be edited.
As shown in the screenshot on the right, ‘Extension Number’, ‘Name’, and ‘E-mail’ fields are uneditable due to the fact that these fields are edited on the LDAP server. Extensions may not share the same ‘Extension Number’ or an ‘E-mail address’, therefore it is not possible to use these fields as generic settings for synced Extensions.
For more information on the fields found in the template, please refer to the Extensions page.

Click this button to run a test and check whether it is possible to connect to the LDAP server.
(Button)


NOTE: Providing that the administrator’s login credentials are valid and that the account has a permission to make a search request, the test will successfully pass and the approval message will be shown. However, in case that any of the mentioned criteria are not met, the test will fail and the warning message will be shown.
As ‘Test’ checks whether the connection with the LDAP server can be established or not, the warning message has detailed information regarding the error and as such, it points to the error related with the LDAP, not PBXware.

Click this button to start users’ sync manually.
(Button)


NOTE: Syncing will not restart the ‘Sync Period’. This means that if a user starts a sync 10 minutes before it would be automatically triggered, the automatic sync will not restart the timer to X hours again, but it will start the sync itself in 10 minutes.
Since syncing will apply major changes to the system, upon clicking the button, the warning message will be shown asking to confirm the action. If the action of syncing is confirmed, the interface will provide users with more information and the approval message will pop up.

Users will be able to see that ‘Sync is in progress’ and the button for stopping the Sync will be displayed. Please refer to the screenshot.
If users decide to ‘Stop Sync’ at any time, they may press the ‘Stop Sync’ button and the warning message will be shown asking for the confirmation of the action: “Are you sure you want to stop Directory Sync?”. If proceeded with ‘OK’, the approval message will pop up saying that “Directory Sync stopped”.
Summary E-mail

- Send E-mail: If ‘Yes’ is selected, users will receive a summary e-mail to the defined e-mail address. By default, the E-mail template includes the Date, number of Added/Edited/Deleted Extensions, and number of failed syncs. In case the number of failed syncs is larger than zero, the e-mail is sent together with an attachment containing the error message explaining why each sync failed.
The details regarding the ‘Summary E-mail’ can be defined on the E-mail Templates page. If there is an e-mail template on Slave Tenant, it will overwrite the one set on Master Tenant.
(E.g. Yes)
(Option button)
- Errors only: Send an e-mail if there are any errors (failed syncs).
NOTE: This field does not mean that only errors will be sent in the summary e-mail, but it means that the e-mails will be sent only if there are errors (failed syncs). Therefore, if set to ‘Yes’, then the notification e-mail will be sent only if there are failed syncs. If all syncs are completed successfully, the e-mail will not be sent.
(E.g. No)
(Option button)
- Notification E-mail: Enter the e-mail address to which the ‘Summary E-mail” will be sent.
(E.g. test@test.com)
([a-z)(0-9)]
Attributes

The ‘Attributes’ section allows users to uniquely define the characteristics of the object. Each object has a certain set of attributes which can be changed manually. Attributes are used for mapping the LDAP attributes with the Extensions options found on the system.
NOTE: The first three fields are the required ones. If one of the required fields is not populated, the warning message will pop up. Please refer to the screenshots below.

- Name: Define the Extension Name.
On LDAP servers, this attribute is usually the cn (Common Name) attribute, however any other attribute can be used for the Extension Name.
(E.g. cn)
([a-z][0-9])

- Login (E-mail): Define the name of the attribute used when users are authenticating via LDAP.
This attribute is also used when the synced users are logging into OSC (Online Self Care) and gloCOM application. The ‘userPrincipalName’ attribute, which is used as an example here, usually looks like an e-mail address.
NOTE: The e-mail provided has to be unique on the system.
1. First Case Scenario: There is an Extension on the system with the ‘test@test.com’ e-mail, and a user wants to sync a new Extension with the same e-mail. In this case, the sync will fail.
2. Second Case Scenario: There is an already synced Extension on the system with the ‘testing@testing.com’ e-mail, and a user wants to create a new one with the same e-mail. In this case, the Extension creation will fail.
(E.g. userPrincipalName)
([a-z][0-9])

- Unique ID: Define the name of the attribute which will have a unique value.
NOTE: In order for the application to work optimally, this attribute must be defined for each user and it should not be changed. It has to be defined as a unique value for each user. This is to ensure that all syncs are properly executed and it is possible to recognize when an Extension should be added/modified/deleted.
(E.g. For the Windows server: objectGUID -> This attribute is unique for each user and used to identify different users.)
([a-z][0-9])
- Sync: Define whether a user will be synced or not.
NOTE: All users from the ‘Base DN’ folder will be synced by default. Also, if the ‘Sync’ field is left undefined, then all users found on the LDAP server will be synced. If the value is defined, then a user who has the value of this attribute set to 1 will be synced. On the contrary, if the value of this attribute is not set or if it is not 1, then that user will not be synced.
| Sync Values | |
|---|---|
| 1 | A user is synced. |
| Other Values | A user is not synced. |
([0-9])
- Extension Number: The attribute that defines the Extension Number for a specific user. If not set, then the user will get the first available Extension number.
NOTE: It must be numerical and in the bounds of the Tenant’s Extension digit length. In case, the attribute is set, but the user does not have a set value or s(he) has an invalid value entered, then the sync will not happen. It will fail for this particular user. Also, if this field is populated with ‘extNumber’ and the ‘Sync’ button is pressed, this will not be successful. For this to be applied, after populating the field with ‘extNumber’, a user has to click ‘Save’ and then ‘Sync’.
([a-z][0-9])
- Status: The attribute that defines the Extension status.
Values for this attribute on the LDAP server should be one of the following:
| Status Values | |
|---|---|
| 0 | Not Active |
| 1 | Active |
| 2 | Suspended |
NOTE: The default value is 1.
([0-9])
- UAD: The attribute that defines the UAD that should be set on the Extension.
The value of this attribute has to be the UAD ID (the same usage as the API).
NOTE: Default value is 50 (Generic SIP).
([0-9])
- UAD Location: The attribute that sets the UAD Location.
Values for this attribute on the LDAP server should be one of the following:
| UAD Location Values | |
|---|---|
| 0 | Local |
| 1 | Remote |
NOTE: Default value is 0.
([0-9])
- MAC Address: The attribute that defines the Extension’s MAC Address.
The value of the attribute on the LDAP server must be a valid MAC address containing only numbers and letters.
| Not Allowed Characters | – | _ | : |
([0-9])
- Department: The attribute that defines the Extension’s Department.
The value of the attribute on the LDAP server must be a valid department ID otherwise the field will be ignored.
([a-z][0-9])
- Account Balance: The attribute that defines the initial ‘Account Balance’ for the synced user.
The balance will be set when the Extension is created and will not be updated if the value on the LDAP server changes.
NOTE: This attribute will be applied only if an Extension is added through DSM. Any modifications done to the Extension will not change the ‘Account Balance’ (even if the attribute is renamed to another one). The renamed one, however, will be applied to newly created Extensions.
([0-9])
Notifications

- E-mail Extension data to users: Select whether to receive an e-mail when creating an Extension.
(E.g. Not Set)
(Option button)
NOTE: If set to ‘Yes’, the synced users will receive an e-mail with their Extension details when the Extension is created. This is the same as the ‘Save & Email’ option on the ‘Extension’ section -> ‘Edit’.
E-mail Templates

Users can select a specific template for the e-mails sent by the system. By default, several macros are used and it is easy for users to modify the templates.
NOTE: The settings can be reset to default by clicking the ‘Reset’ button.

Clicking the toggle button to use Custom Template for a specific Tenant will overwrite the template set on Master Tenant.
(E.g. On/Off)
(Button)
- New Extension Templates

New Extension Templates
Set e-mail templates which are used to send basic information about a newly created Extension.
NOTE: After introducing PBXware 4, the system started providing users with an e-mail and user password used for gloCOM registration. However, in some cases, when phones were not auto-provisioned, users still required their desk phone registration details to be sent which was not possible at that moment.
For this reason, we have added variables for a SIP User ID – %USERNAME% and the Extension Secret – %SECRET% that can be used to add the information to the e-mail template if required. We have also introduced the variable %PROXY% to e-mail templates that reference the value of gloCOM SIP Proxy in Tenant Settings.
| New Extension Templates | |||||||||
|---|---|---|---|---|---|---|---|---|---|
| Variable | Meaning | ||||||||
| SUBJECT | %SERVER% | Server/Tenant Name | |||||||
| TEMPLATE | %FULLNAME% | Extension Name | |||||||
| %SERVICE_PLAN_HEADER% | Service Plan (Name) | ||||||||
| %NETWORK_NUMBER% | Extension Number | ||||||||
| %EMAIL% | E-mail of an Extension | ||||||||
| %PASSWORD% | User Password | ||||||||
| %PIN% | PIN | ||||||||
| %PBD_PIN% | PBD PIN | ||||||||
| %SERVICE_PLAN% | Service Plan of an Extension | ||||||||
| %DEVICE% | UAD | ||||||||
| %AUTOPROV% | Auto Provisioning | ||||||||
| %DETAILS% | Extension Details (E-mail, Password, Server) | ||||||||
| %SERVER_NAME% | Server/Tenant Name |
- Password Recovery Template (5.4 update)

Password Recovery Template
The ability to change the e-mail template for Forgot my password when users request a password change.
| Password Recovery Template | |||||||||
|---|---|---|---|---|---|---|---|---|---|
| Variable | Meaning | ||||||||
| TEMPLATE | %NAME% | Name | |||||||
| %URL% | URL for Password Recovery | ||||||||
| %DATETIME% | Date/Time of a Password Recovery Request | ||||||||
| %IP% | IP Address of a Request | ||||||||
| %USERAGENT% | User Agent Used for a Request |
- Voicemail E-mail Template

Voicemail E-mail Template
Set the e-mail template used for sending e-mails when a new voicemail is received.
| Voicemail E-mail Template | |||||||||
|---|---|---|---|---|---|---|---|---|---|
| Variable | Meaning | ||||||||
| SUBJECT | %VM_MSGNUM% | Number of a Voicemail Message | |||||||
| %VM_MAILBOX% | Voicemail Mailbox | ||||||||
| TEMPLATE | %VM_NAME% | Voicemail Name | |||||||
| %VM_DUR% | Duration of a Voicemail Message | ||||||||
| %VM_MSGNUM% | Number of a Voicemail Message | ||||||||
| %VM_MAILBOX% | Voicemail Mailbox | ||||||||
| %VM_CALLERID% | CallerID of a Voicemail Sender | ||||||||
| %VM_DATE% | Date of a Voicemail |
- Voicemail Blocked E-mail Template

Voicemail Blocked E-mail Template
Set the e-mail template used for sending e-mails when a new voicemail is blocked.
NOTE: Please note that emails regarding voicemail blocked notifications will be sent to all Administrators set under ‘Site Accounts’ > ‘Administrators’.
| Voicemail Blocked E-mail Template | |||||||||
|---|---|---|---|---|---|---|---|---|---|
| Variable | Meaning | ||||||||
| TEMPLATE | %EXT% | Extension Number | |||||||
| %DATE% | Date of a Blocking Voicemail | ||||||||
| %ATTEMPTS% | Number of Attempts | ||||||||
| %MAXATTEMPTS% | Number of Max. Attempts | ||||||||
| %TENANT_CODE% | Tenant Code |
- E-mail to Fax Template

E-mail to Fax Template
Set the e-mail template used for sending e-mails when a new e-mail to fax is sent.
| E-mail to Fax Template | |||||||||
|---|---|---|---|---|---|---|---|---|---|
| Variable | Meaning | ||||||||
| TEMPLATE | %STATUS% | Sent Fax Status | |||||||
| %NUMBER% | Extension number to which the fax was sent | ||||||||
| %DATE% | Date | ||||||||
| %FILE% | File to be sent |
- Meeting E-mail Templates

Meeting E-mail Template
Set the e-mail template used for sending e-mails when a new meeting is created, updated, or canceled.
NOTE: %DURATION% represents the meeting’s time duration. %DIDS% shows DIDs to dial, if joining the meeting’s audio conference only. %DID_LINKS% is similar to DIDs, but formatted as a tel:// link. The link contains the appropriate user information which the dialing client can use to send DTMF signals i.e. ‘Meeting Number’ and ‘Participant Number’ so that the user does not have to type them.
- Meeting E-mail Templates
Meeting E-mail Template
Set the e-mail template used for sending e-mails when a new meeting is created, updated, or canceled.
NOTE: %DURATION% represents the meeting’s time duration. %DIDS% shows DIDs to dial, if joining the meeting’s audio conference only. %DID_LINKS% is similar to DIDs, but formatted as a tel:// link. The link contains the appropriate user information which the dialing client can use to send DTMF signals i.e. ‘Meeting Number’ and ‘Participant Number’ so that the user does not have to type them.
- Meeting Daily E-mails
Meeting Daily E-mails
Set the e-mail template used for sending daily meeting e-mails containing information on any scheduled meetings for the day. For daily meetings, the Outline and Element templates work together to form an e-mail.
NOTE: The list of upcoming meetings for that day will get placed where the %ELEMENTS% tag is. The Element template describes a single entry in the list, which will get repeated accordingly.
| Meeting Daily E-mails | |||||||||
|---|---|---|---|---|---|---|---|---|---|
| Variable | Meaning | ||||||||
| OUTLINE | %ELEMENTS% | Elements of a Meeting | |||||||
| ELEMENT | %MEETINGNAME% | Meeting Name | |||||||
| %DATETIME% | Date/Time of a Meeting | ||||||||
| %ORGANISER% | Organiser of a Meeting | ||||||||
| %APPNAME% | Name of the application | ||||||||
| %ELEMENTS% | Elements of a Meeting | ||||||||
| %YEAR% | Current Year | ||||||||
| %MEETINGNUMBER% | Number of a Meeting | ||||||||
| %TIME% | Meeting Start Time | ||||||||
| %JOINLINK% | Link to web application meeting link |
- Meeting Invite E-mails

Meeting Invite E-mails
Set the e-mail template used for sending e-mails to participants when a new meeting is created.
| Meeting Invite E-mails | |||||||||
|---|---|---|---|---|---|---|---|---|---|
| Variable | Meaning | ||||||||
| SUBJECT | %MEETINGNAME% | Name of a Meeting That You Were Invited To | |||||||
| TEMPLATE | %MEETINGNAME% | Name of a Meeting That You Were Invited To | |||||||
| %DATETIME% | Start Time of a Meeting | ||||||||
| %MEETINGNUMBER% | Number of a Meeting | ||||||||
| %PARTICIPANTID% | Your Participant’s ID | ||||||||
| %APPNAME% | Name of the application | ||||||||
| %ORGANISER% | Meeting Organiser | ||||||||
| %JOINLINK% | Link to web application meeting link | ||||||||
| %DURATION% | Duration of the meeting | ||||||||
| %DID_LINKS% | Link to Call-in number | ||||||||
| %YEAR% | Current Year |
- Meeting Update E-mails

Meeting Update E-mails
Set the e-mail template used for sending e-mails to participants when the meeting has been updated.
| Meeting Update E-mails | |||||||||
|---|---|---|---|---|---|---|---|---|---|
| Variable | Meaning | ||||||||
| SUBJECT | %MEETINGNAME% | Name of a Meeting That Has Been Updated | |||||||
| TEMPLATE | %MEETINGNAME% | Name of a Meeting That Has Been Updated | |||||||
| %DATETIME% | New Start Time of a Meeting |
- Meeting Cancel E-mails

Meeting Cancel E-mails
Set the e-mail template used for sending e-mails to participants when the meeting has been canceled.
| Meeting Cancel E-mails | |||||||||
|---|---|---|---|---|---|---|---|---|---|
| Variable | Meaning | ||||||||
| SUBJECT | %MEETINGNAME% | Name of a Meeting That Has Been Canceled | |||||||
| TEMPLATE | %MEETINGNAME% | Name of a Meeting That Has Been Canceled | |||||||
| %DATETIME% | Start Time of a Canceled Meeting |
- DIDs Missed Calls Template

DID E-mail Template
Set the e-mail template to be generated for any missed calls on a DID.
| DIDs Missed Calls Template | |||||||||
|---|---|---|---|---|---|---|---|---|---|
| Variable | Meaning | ||||||||
| TEMPLATE | %ROWS% | Rows of All Missed DID Calls |
- Conference Recording Template

Conference Recording Template
Set the e-mail template used for sending e-mails when a new conference recording is created.
| Conference Recording Template | |||||||||
|---|---|---|---|---|---|---|---|---|---|
| Variable | Meaning | ||||||||
| TEMPLATE | %CONF_NAME% | Conference Name | |||||||
| %CONF_NUMBER% | Conference Number | ||||||||
| %DATE% | Date of a Conference Recording |
- Directory Sync Summary Template

Directory Sync Summary Template
Set the e-mail template to be generated for any changes, errors, or failed Extension syncs. The %ATTACHMENT_MESSAGE% variable refers to the .txt file that will be sent together with the e-mail. It contains further information about why the sync failed or the problem arose.
NOTE: *%SERVER% and %TENANT% variables can be added to the e-mail template. %SERVER% points to Master Tenant Name and %TENANT% points to the Tenant’s Number. These variables help differentiate the same e-mails sent for various Tenants.
| Directory Sync Summary Template | |||||||||
|---|---|---|---|---|---|---|---|---|---|
| Variable | Meaning | ||||||||
| TEMPLATE | %DATE% | Conference Name | |||||||
| %ADDED% | Added | ||||||||
| %MODIFIED% | Modified | ||||||||
| %DELETED% | Deleted | ||||||||
| %FAILED% | Failed | ||||||||
| %ATTACHMENT_MESSAGE% | Attachment Message |
Speed Dial

Speed Dial
Speed Dial is used with the *130 Access Code. When you dial *130XX, where XX is a Speed Dial Code, you will dial the extension associated with that code.
- CSV Upload
Click on this button to upload Speed Dial Code configuration from a csv file.
To see which fields need to be set download the CSV template by clicking on the “Download CSV Template” button.
(Button)
- CSV Download
Click on this button to download Speed Dial Code configuration as a csv file.
(Button)
- Download CSV Template
Download CSV Template button will present you with a file that already contains necessary headers which should help you create the CSV file easier.
(Button)
- Search
Search is performed by Code and Speed Dial Name
This screen contains information about all Speed Dial Codes on system with following infromation:
- Code (XXX)
Up to three digit code which is entered after the Speed Dial Access Code, *130 as default
(E.g. 22)
([Display)
- Speed Dial Name
Short description of the Destination to which this Code points.
(E.g. Sales-John)
(Display)
- Destination
Destination to which this Code is pointing.
(E.g. 1005)
(Display)
Click to edit Speed Dial Code configuration
(Bitton)
Click to delete Speed Dial Code from the system
(Button)
Add/Edit Special Dial Code

Add/Edit Speed Dial Code
- Code(XXX)
Code which is entered after the Speed Dial Access Code
(E.g. 2)
([0-9])
- Name
Short description of the Destination to which this Code points.
(E.g. Sales-John)
([a-z][0-9])
- Destination
Destination to which this Code is pointing.
(E.g. 1005)
([0-9])
CLI Routing

CLI Routing
This option allows adding rules which send the calls to different destinations based on Caller IDs. For example, if the caller’s ID begins with 203, you can send all those calls to the IVR, if the CallerID is specifically number 063456789 then send that call to extension 4444 etc…
- CSV Upload
Click on this button to upload CLI Routing configuration from csv file
(Button)
- CSV Download
Click on this button to download CLI Routing configuration to csv file
(Button)
- Download CSV Template
Download CSV Template button will present you with a file that already contains necessary headers which should help you create CSV file easier
(Button)
- Search
Search is performed by Caller ID
This screen shows all CLI Routing Rules configured on system with following options:
- Caller ID
The Caller ID which is matched in the rule.
(E.g. 063456789)
(Display)
- Destination
The type of destination to which the call will be directed.
(E.g. IVR)
(Display)
- Extension
Extension of the destination or selection where the call should go.
(E.g. 2222)
(Display)
- Match Type
How the Caller ID is matched.
(E.g. If we set Match explicitly to ‘yes’ here will be written ‘Explicit Match’. If we set this option to ‘No’ or ‘Not Set’ here will be written ‘Begins With’.)
(Display)
- Edit
Edits the CLI Routing configuration
(Button)
- Delete
Deletes CLI Routing Rule from the system
(Button)
Add/Edit CLI Routing Rule

Add/Edit CLI Routing Rule
- Caller ID
The Caller ID which is matched in the rule.
(E.g. 063456789)
([a-z][0-9])
- Destination
The type of destination to which the call will be directed.
(E.g. Queue)
(Select box)
- Extension
Value of the destination or selection where the call should go.
(Select box)
- Match Explicitly
Should the system match Caller ID explicitly or treat all calls that begin with it.
(E.g. Yes, No, Not Set)
(Option buttons)
About

Licence – Tenant
The About section provides detailed information on the system’s edition, current release version, including other licensing details found on Tenant.
- PBXware
This line shows information about the PBXware Edition, Release, and Asterisk running.
(E.g. Edition: Multi-Tenant Release: 6.0 (b99cec48) Running: 16.4.0-gc-ce38c557 PBXware Proxy v6.0.0-beta.2+build.1 (4192b49), API: 6, libmemcached version: 1.0.18)
(Display)
- Licence Details:
The ‘Licence details’ section displays all enabled features on the licence as follows:
- Conferences
- Extensions
- IVRs
- Meetings
- Queues
- Ring Groups
- Voicemails
(E.g. 7/555 Conferences, 64/111 Extensions, 7/444 IVRs…)
(Display)
SMS
SMS (Short Message Service) is a feature in PBXware that enables users to send and receive messages in order to achieve faster communication. It has become a globally accepted communication channel and an effective way to deliver information in a matter of seconds due to its simplicity and precision. SMS implementation in PBXware allows users to communicate efficiently and have their messages at their disposal at anytime.
SMS on Tenant Level
Numbers
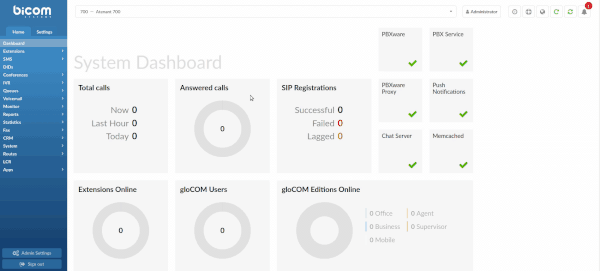
The Numbers section allows users to add numbers to the system and assign them to specific Extensions. From this section, it is possible to manage the configuration of numbers by editing or deleting it.
Numbers can be added in two ways:
- By uploading a CSV file that is either created by using the PBXware’s CSV template or the provider’s CSV template.
- By adding the numbers manually.
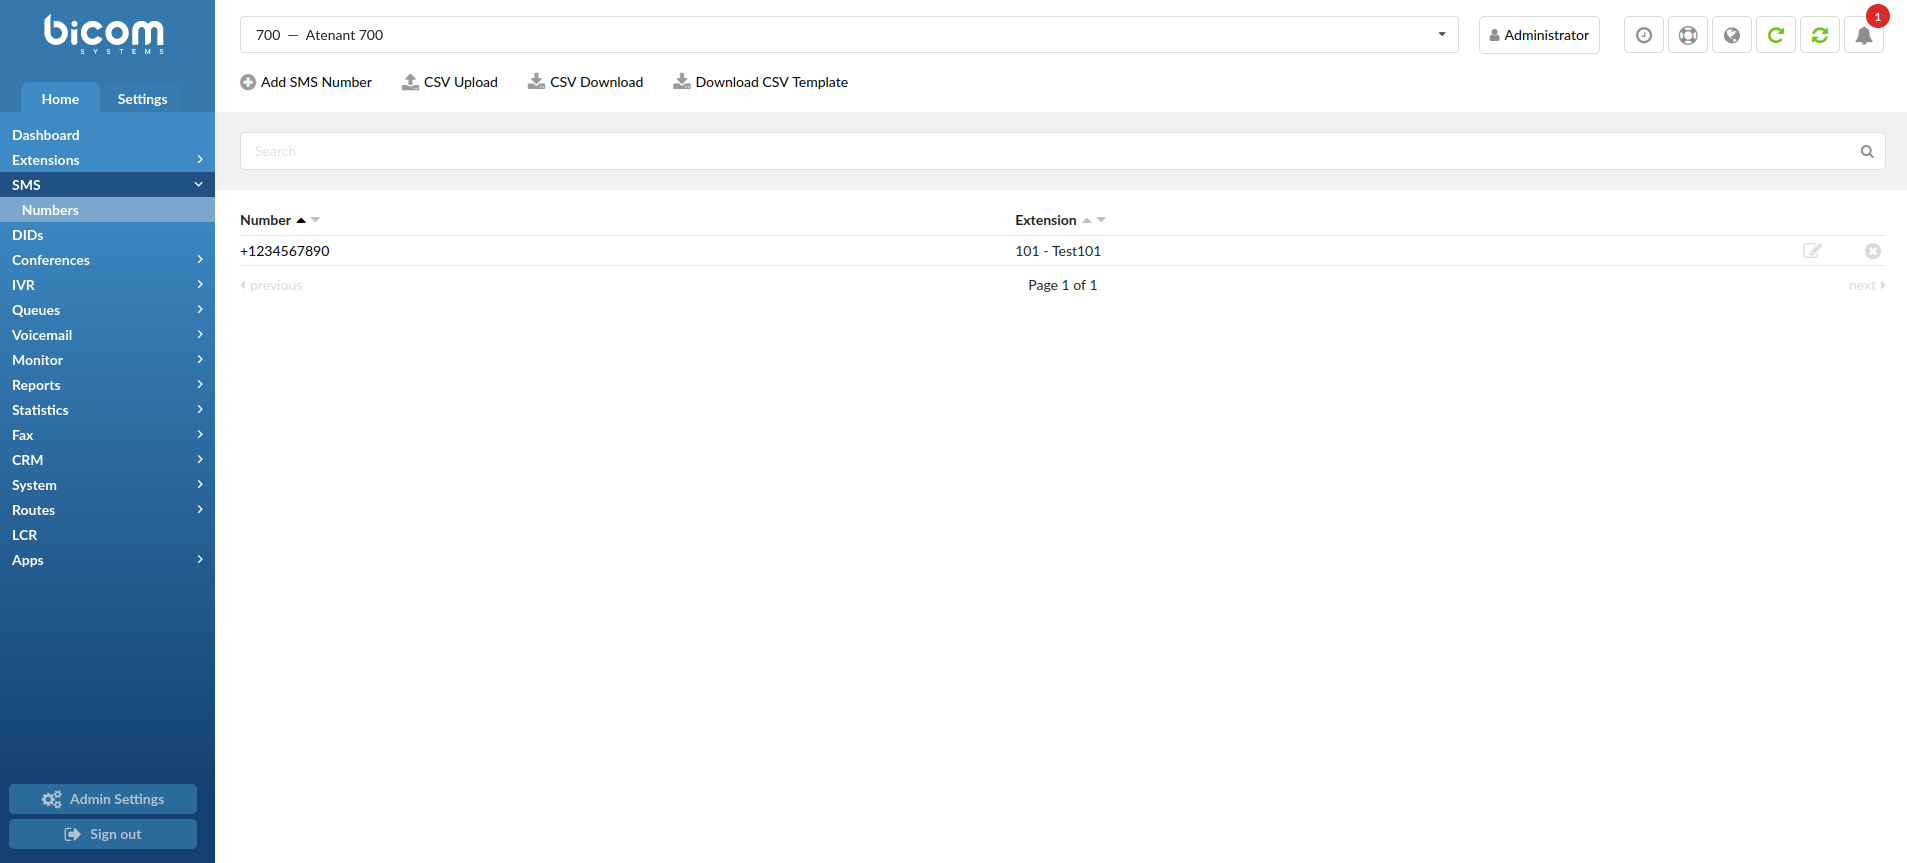

Click this button to add a new SMS number.
Click this button to upload a CSV file.
NOTE: CSV files can be uploaded by using one of the two following templates:
PBXware’s CSV Template: In order for this template to be successfully uploaded, a user needs to populate the following fields:
‘sms_number’ and ‘extension’.Provider’s CSV Template: If this template is used (e.g. Telnyx’s), the CSV file downloaded from the Telynx website already contains all the necessary data, so the next step would be just to upload the CSV file.
Additionally, since the SMS feature allows for various CSV upload methods, certain restrictions exist in order to ensure data protection and provide users with supplementary information regarding the software operations. Therefore, once a user uploads a desired CSV file, s(he) will be presented with one of the two possible messages regarding the upload procedure:

This CSV message will appear after the CSV file has been successfully uploaded to the system. The further explanation shows that there were three numbers in the CSV file and all three numbers were imported. Additionally, no numbers were skipped, which shows that these numbers are nowhere to be found on the system except on this Tenant.
In case the user accidentally adds the already existing number to this Tenant, the number that was previously on the system will be deleted and added again through this upload, which ensures no data loss.

This CSV message will appear after the CSV file has been successfully uploaded to the system. The further explanation shows that there were three numbers in the CSV file, however, only two of them were imported. The skipped number means that there is a number in this CSV file that existed on the system prior to the upload, specifically it was found on another Tenant. A single number cannot be added to two (or more) Tenants on the system.

Click this button to download a CSV file.
NOTE: This CSV file contains the data displayed on the Numbers list. It can be used for faster management of numbers and Extensions on the system.

Click this button to download a CSV template.
NOTE: In order to successfully manage the CSV file, the following should be done:
Download an empty CSV template
Populate the fields with specific information
Save the settings
Upload it by using the ‘CSV Upload’ button
Data is now displayed on the list.
- Search

Enter a piece of information and press Enter to have results filtered accordingly
(E.g. 101)
NOTE: Users can search entries by using Number, Extension, and Extension Name.
- Number
Displays a Number added to the system
(E.g. +1234567890)
NOTE: Hovering the mouse over the Number section and clicking it will prompt users to add SMS number. User cannot edit numbers from there, only Extensions.
- Extension
Displays an Extension and Extension Name to which the number has been previously assigned to
(E.g. 101 – Test101)

Click this button to edit the SMS Number configuration.
NOTE: Upon clicking this button, users will be prompted to the add SMS number window where they can edit Extensions accordingly. Please note that the numbers cannot be edited from here. For more information on this, click the link provided.
If a user decides to edit the configuration and assign the existing number to another Extension, the following warning message will appear: “Extension is already in use. Do you want to remove it from another number and assign it to this one?”. If users click the Cancel button, then the action will be abandoned. On the contrary, if OK is clicked, the number will be assigned to a different Extension and deleted from the old one. Please refer to the screenshot.

Click this button to delete the SMS Number configuration.
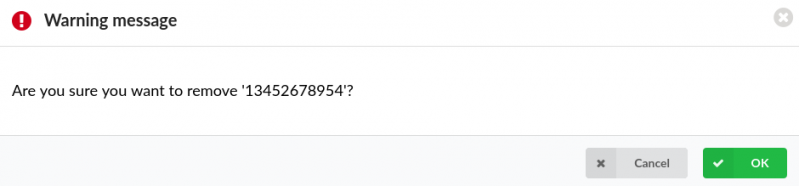
NOTE: Upon clicking the button, the following warning message will appear: “Are you sure you want to delete XXXXX?”*. If users click the Cancel button, then the action will be abandoned. On the contrary, if OK is clicked, the selected configuration will be deleted.
Add SMS Number
General
- Number
Enter the number to which SMS messages will be sent
(E.g. +1234567890)

NOTE: The ‘Number’ field is required and it has to be populated. Not defining this field will result in the warning messages being shown.

NOTE: If a user tries adding the number that already exists on the system, the following warning message will appear: “Number is already in use!”.
NOTE: Please note that the number has to be in the E.164 format.
- Extension
Assign this number to a specific Extension
(E.g. 101 – Test101)
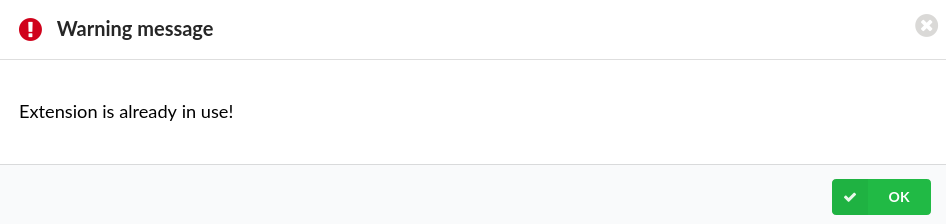
NOTE: Since this is not a required field, it can be left empty and seen in the list as such. In case a user tries selecting the Extension to which a number has been assigned previously, the following warning message will appear: “Extension is already in use!”. Please refer to the screenshot.
The example below represents how the configuration should look like after being completed and saved:
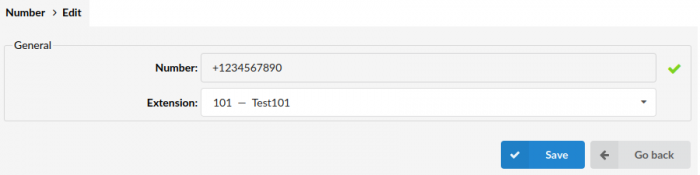
NOTE: Once users save the settings, editing a number is no longer possible. However, if there is an input mistake, the following has to be done:
- Click Go back
- Delete the configuration from the list by clicking Delete
- Add the number again
- Assign an Extension to the number and click Save.
The SMS feature allows for DIDs from PBXware to be entered in this field as well.
NOTE: These steps should be followed in case a user has already added a DID on the Master Tenant level, assigned it to a specific Tenant, and populated all other required fields. Once that is completed, a user should do the following:
- Go to the desired Tenant
- Go to the ‘DIDs’ section
- Find the DID to be used for SMS
- Hover over the DID and click it in order to be prompted to a different window
- Click ‘Show Advanced options’
- Assign a desired DID to a specific Extension
- Set the ‘Enabled SMS’ to ‘Yes’
- Click Save.
Assuming the user completed the procedure as described above, s(he) needs to do the following:
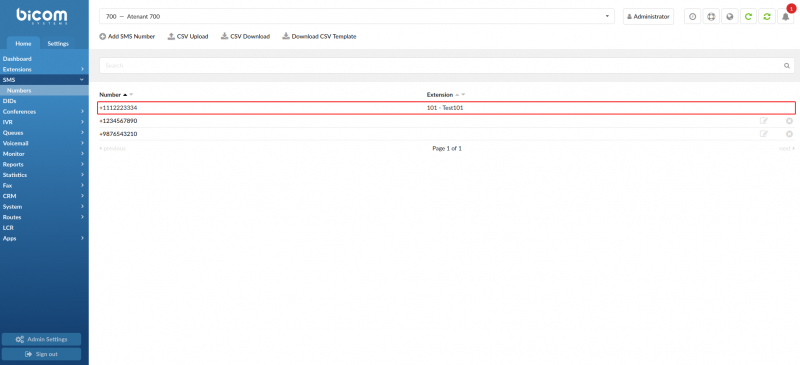
-
Go to Numbers section
-
Check whether configuration is set up correctly
After adding a DID from PBXware, this is how the list on the Numbers section should look like. As it can be seen, PBXware offers an easy way to monitor which DIDs have been added from the system. Such numbers have no Edit or Delete options due to the fact that they have been added to this list in a different way, (i.e. through the DIDs section on PBXware).
Bulk Messages
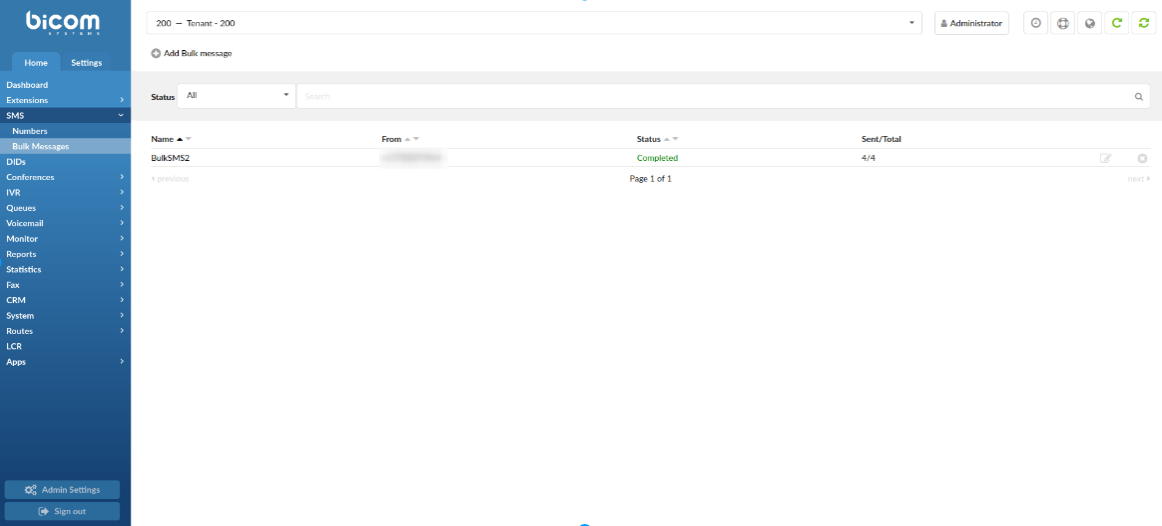
The ‘Bulk Messages’ section allows users to send bulk SMS messages. By using this feature, users can send important information to a larger number of people. Apart from adding Bulk SMS messages through the GUI, users can easily upload their data by using CSV files or filter their Bulk SMS messages by status. They can start new Bulk messages or stop the active ones. There is also a possibility to restart them.
Users can utilize the ‘Search’ option and filter their data accordingly. Please refer to the drop-down list:
- All
- Active
- Not Active
- Paused
- Stopped
- Completed
This page displays the following information:
- Name
Displays the name of the Bulk message
(E.g. BulkSMS2)
- From
Displays the number/alphanumeric the Bulk message was sent from
(E.g. +1234567890)
- Status
Displays the status
(E.g. Completed)
- Sent/Total
Displays the number of sent messages and the total amount of numbers that the message should be sent to
(E.g. 4/4)
NOTE: ‘Sent’ refers to the number of successfully sent messages. ‘Total’ refers to the total amount of numbers uploaded via CSV file. For example, ‘4/4’ means that there were four numbers in the CSV file and all four messages were successfully sent to these numbers.
Click this button to add a Bulk message.
Add Bulk Messages
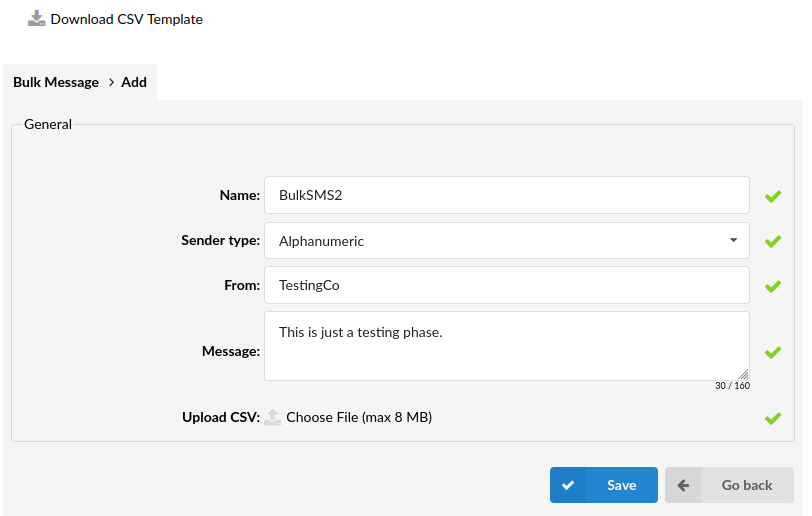
- Name
Enter a name of a Bulk message
(E.g. BulkSMS2)
NOTE: This is a required field. If it is not populated, the warning message will be displayed.

- Sender type
Select a sender type
(E.g. Number/Alphanumeric)
NOTE: This is a required field. If it is not populated, the warning message will be displayed.
- From
Populate the ‘From’ field with specific information
(E.g. TestingCo)
NOTE: This is a required field. If it is not populated, the warning message will be displayed. Please refer to the screenshot.

- Message
Populate the ‘Message’ field with specific information
(E.g. This is just a test.)
NOTE: This is a required field. If it is not populated, the warning message will be displayed. Please refer to the screenshot.

- Upload CSV
Click this button to upload a CSV file
(File Upload Button)
NOTE: This is a required field. If it is not uploaded properly, the warning message will be displayed. Please refer to the screenshot.
INFO: Users can upload CSV files in the following format:
CSV File Values
| HEADERS | | to_number,Name,LastName,Account | |
| EXAMPLE | | +1234567890,John,Smith,Basic+ | |
| EXAMPLE | | +1112223334,Ann,Doe,Pro+ | |Please note that name of the ‘to_number’ field is required, while other column names can be custom.
After uploading the CSV file, users can create a special message in the ‘Message’ field by using the values from the uploaded CSV file. Please refer to the example:

These are the examples of SMS delivered:
SMS Example 1
“Dear John Smith, with number +1234567890, we want to inform you that your Basic+ account has been activated.”
SMS Example 2
“Dear Ann Doe, with number +1112223334, we want to inform you that your Pro+ account has been activated.”
Statistics
Statistics
Statistics can be used to generate detailed information on the number of calls made during the hour, day, month etc. It can also be shown on the extension basis, meaning that when you enter all the desired search information, you will get a list with the number of calls per extension on the system. It also contains page for concurrent calls and advanced page with reports on Master Tenant.
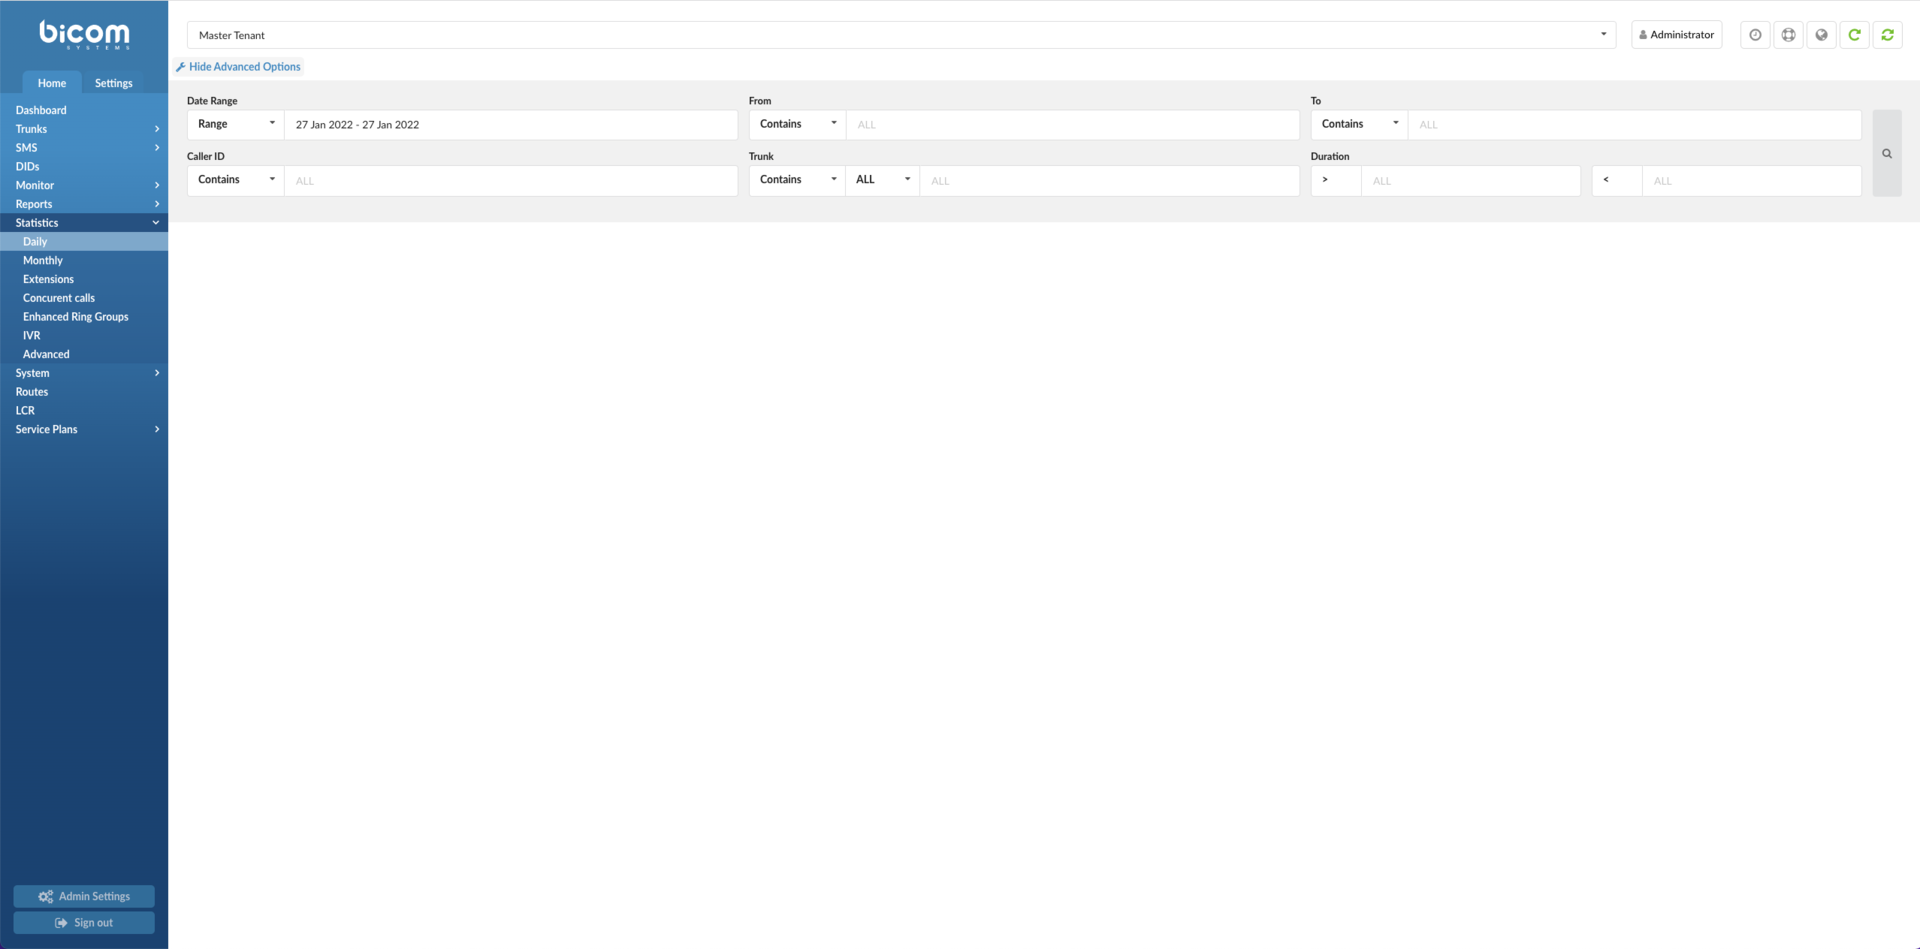
Daily

Daily statistics will list the number of calls on a daily basis. This will show a list of days with the number of calls that were made during those days with average call time and graphs.
Clicking on the “Show Advanced Options” will expand searching criteria and the following will be listed to users:
- Date range:
Users are given a drop-down list with the following options:
- Range:
Select a date range by clicking on a calendar or choose the following options:
- Today
- Yesterday
- Last 7 Days
- Last 30 Days
- This Month
After selecting, users will be introduced with the statistics which include only that range of time.
- From
In this field, users need to write a number from which the desired call is made. By default, the ‘ALL’ modifier will be in this field, meaning statistics will be made for all calls on the system which happened on the selected date range.
If users want to see statistics from a few particular numbers, they should write all desired numbers separated by commas.
(E.g. To display calls made from extension 104 and remote number 44207296666 user should type “104,44207296666”)
Also, users are given a drop-down list with the following options:
- Equals
Do a statistic only for a number which is equal to number/s written.
(E.g. John sets this option to ‘Equals’ and types number 101. Statistics will be shown only for calls made from number 101.)
- Begins with
Do a statistic for all numbers which begin with number/s written.
(E.g. John sets this option to ‘Begins with’ and types number 101. Let’s imagine that John made calls from numbers 1011 and 105. Statistics will be shown only for calls made from numbers that begin with number 101, in this case from numbers 101 and 1011.)
- Contains
Do a statistic for all numbers which contain number/s written.
(E.g. John sets this option to ‘Contains’ and types number 101. Let’s imagine that John made calls from numbers 1011, 2101 and 501. Statistics will be shown only for calls made from numbers that contain number 101, in this case from numbers 1011 and 2101.)
- Ends with
Do a statistic for all numbers which end with number/s written.
(E.g. John sets this option to ‘Ends with’ and types number 101. Let’s imagine that John made calls from numbers: 1101, 2101 and 501. Statistics will be shown only for calls made from numbers that end with number 101, in this case from numbers 1101 and 2101.)
- To
In this field users need to write the number to which the desired call is made. By default, the ‘ALL’ modifier will be in this field, meaning statistics will be made for all calls on the system which happened on the selected date range.
If users want to see statistics from a few particular numbers, they should write all desired numbers separated by commas.
(E.g. To display calls made to extension 104 and remote number 44207296666 user should type “104,44207296666”)
Also, users are given a drop-down list with the following options:
- Equals
Do a statistic only for a number which is equal to number/s written.
(E.g. John sets this option to ‘Equals’ and types number 101. Statistics will be shown only for calls made to number 101.)
- Begins with
Do a statistic for all numbers which begin with number/s written.
(E.g. John sets this option to ‘Begins with’ and types number 101. Let’s imagine that John made calls to numbers 1011 and 105. Statistics will be shown only for calls made to numbers that begin with number 101, in this case to numbers 101 and 1011.)
- Contains
Do a statistic for all numbers which contain number/s written.
(E.g. John sets this option to ‘Contains’ and types number 101. Let’s imagine that John made calls to numbers 1011, 2101 and 501. Statistics will be
shown only for calls made to numbers that contain number 101, in this case to numbers 1011 and 2101.)
- Ends with
Do a statistic for all numbers which end with number/s written.
(E.g. John sets this option to ‘Ends with’ and types number 101. Let’s imagine that John made calls to numbers: 1101, 2101 and 501. Statistics will be shown only for calls made to numbers that end with number 101, in this case to numbers 1101 and 2101.)
- CallerID
Filter statistics based on the CallerID.
Also, users are given a drop-down list with the following options:
- Equals
Do a statistics only for CallerID which is equal to CallerID written.
- Begins with
Do a statistics for all CallerID’s which beginning letters are the same as in CallerID written in the field beside.
(E.g. John chooses this option and types “Tech”. Statistic will be done for all CallerID’s that start with “Tech”, for example, “TechSupport”)
- Contains
Do a statistics for all CallerID’s which contain the same letters as in the field beside.
(E.g. John chooses this option and types “Tech”. Statistic will be done for all CallerID’s that start with “Tech”, for example, “TechSupport”, “TestTechDepartment”)
- Ends with
Do a statistic for all CallerID’s which ending letters are the same as CallerID written in the field beside.
(E.g. John chooses this option and types “Tech”. Statistic will be done for all CallerID’s that end with “Tech”, for example, “TestTech”)
- Trunk
Show the calls filtered on a trunk basis. Enter a trunk name or more trunk names separated by commas.
Also, users are given 2 drop-down lists with the following options:
First list:
- Equals
Do a statistic only for trunk whose name is equal to the name written.
- Begins with
Do a statistic for all trunks whose name begin with name written.
- Contains
Do a statistic for all trunks which contain name written.
- Ends with
Do a statistic for all trunk which end with the name written.
Second list:
Select the technology of the outgoing trunk:
- SIP
- IAX
- Local
- DAHDI
. - Duration
In these fields, you can set a range for the duration of the calls in seconds.
Both fields can be modified depending on selected equality signs:
- > (greater than)
- >= (greater than or equal to)
- == (equal to)
- <= (less than or equal to)
- < (less than)
(E.g. If the user wants to see statistics of calls that last more than 15, but less than 45 seconds, in the first field there will be “>” and “15” set, and in the second “<” and “45”.)
The Download CSV option is used to download a CSV formatted file with all of the statistics shown on this page.
Daily Statistics
This table will show the total number of calls per day in the date range selected in the search box.
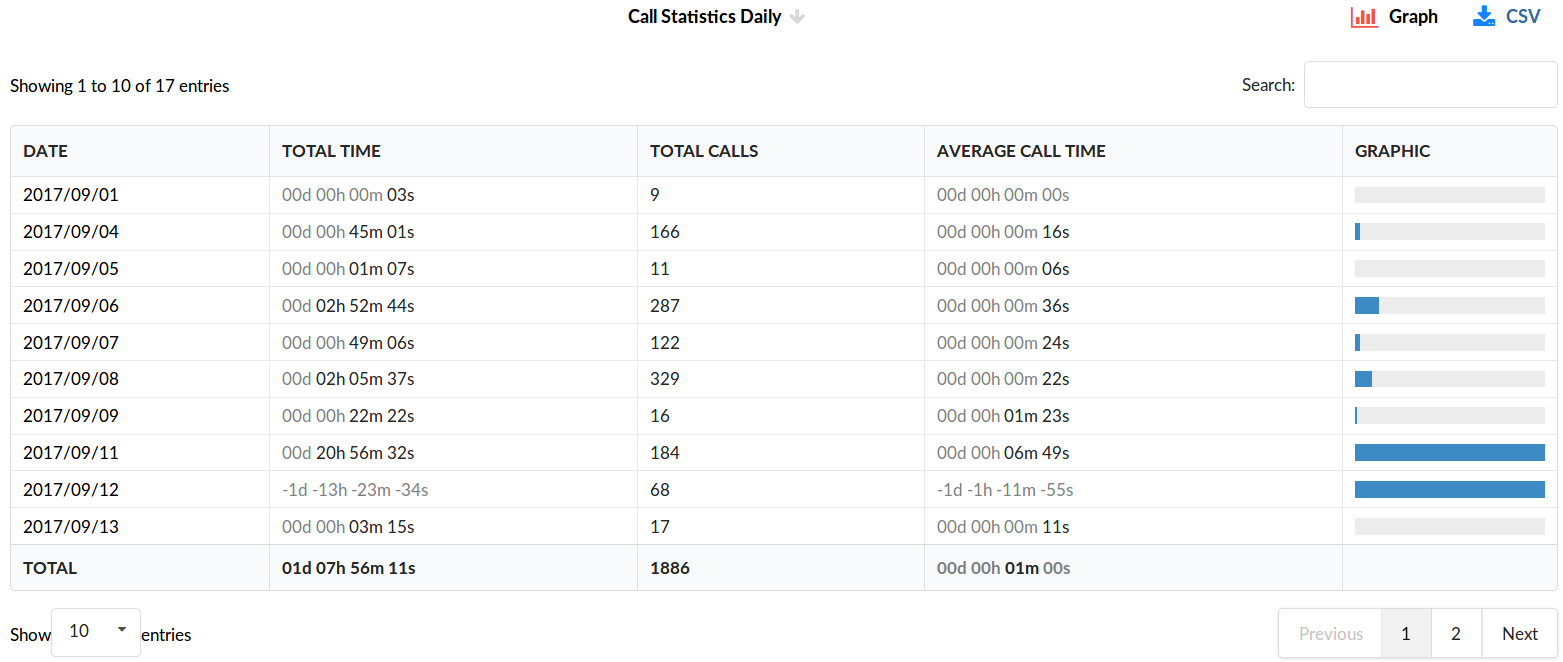
- DATE
Clickable date for which the total number of calls is shown
- TOTAL TIME
Total time of calls on that particular day
- TOTAL CALLS
Total number of calls made on that particular day
- AVERAGE CALL TIME
Average call time of the calls on that particular day
- GRAPHIC
This field shows the graphic representation of all calls on that day, relative to the day that had the biggest total call time. The day which had the biggest total call time will have a 100% bar filling this field and every other day will have a bar relative to this day.
TIP: The TOTAL line on the bottom of the table will show the total times of all calls in this date range, the total number of calls of all calls, and the average call time of all calls in this date range.
Daily Statistics Breakdown
Clicking on any day of daily statistics will bring up a new window with a breakdown of calls for that range.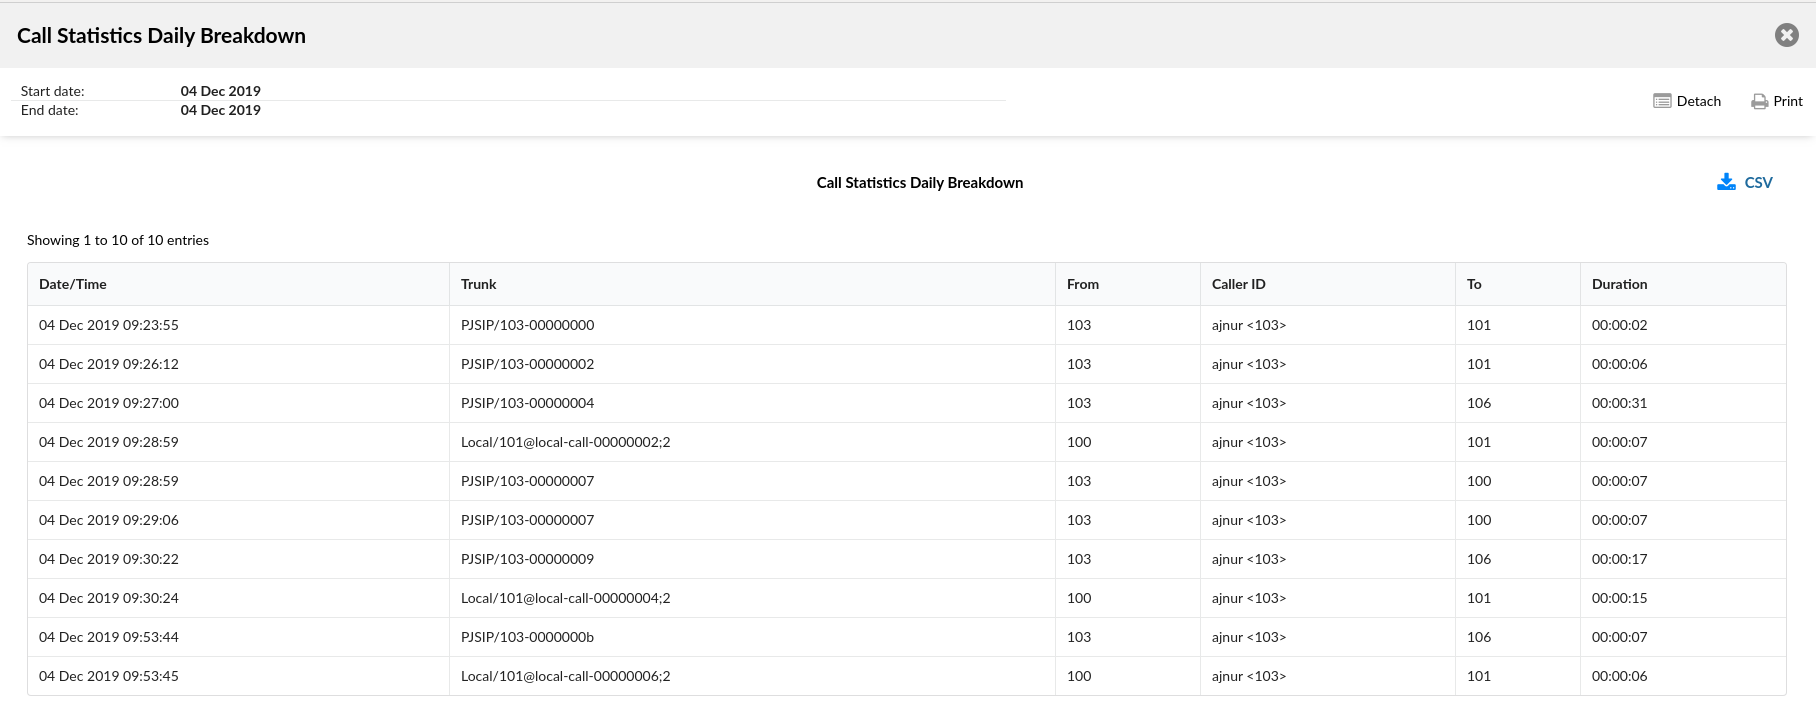
- Date/Time
Date and time when the call was made.
- Trunk
Name of the trunk which was used for the call.
- From
The extension number from which the call was made.
- CallerID
CallerID of the user who made the call.
- To
The extension/external number to which the call was made.
- Duration
Duration of the call
TIP: The Download CSV option is used to download the CSV formatted file with all calls in the breakdown.
Monthly


This will show a list of months with the number of calls that were made during the selected period.
Clicking on the “Advanced Search” button will expand the above search and give users more criteria to choose from:
- Date range:
Users are given a drop-down list with the following options:
- Range:
Select a date range by clicking on a calendar or choose the following options:
- Today
- Yesterday
- Last 7 Days
- Last 30 Days
- This Month
After selecting, users will be introduced with the statistics which include only that range of time.
- From
In this field, users need to write a number from which the desired call is made. By default, the ‘ALL’ modifier will be in this field, meaning statistics will be made for all calls on the system which happened on the selected date range.
If users want to see statistics from a few particular numbers, they should write all desired numbers separated by commas.
(E.g. To display calls made from extension 104 and remote number 44207296666 user should type “104,44207296666”)
Also, users are given a drop-down list with the following options:
- Equals
Do a statistic only for a number which is equal to number/s written.
(E.g. John sets this option to ‘Equals’ and types number 101. Statistics will be shown only for calls made from number 101.)
- Begins with
Do a statistic for all numbers which begin with number/s written.
(E.g. John sets this option to ‘Begins with’ and types number 101. Let’s imagine that John made calls from numbers 1011 and 105. Statistics will be shown only for calls made from numbers that begin with number 101, in this case from numbers 101 and 1011.)
- Contains
Do a statistic for all numbers which contain number/s written.
(E.g. John sets this option to ‘Contains’ and types number 101. Let’s imagine that John made calls from numbers 1011, 2101 and 501. Statistics will be shown only for calls made from numbers that contain number 101, in this case from numbers 1011 and 2101.)
- Ends with
Do a statistic for all numbers which end with number/s written.
(E.g. John sets this option to ‘Ends with’ and types number 101. Let’s imagine that John made calls from numbers: 1101, 2101 and 501. Statistics will be shown only for calls made from numbers that end with number 101, in this case from numbers 1101 and 2101.)
- To
In this field users need to write the number to which the desired call is made. By default, the ‘ALL’ modifier will be in this field, meaning statistics will be made for all calls on the system which happened on the selected date range.
If users want to see statistics from a few particular numbers, they should write all desired numbers separated by commas.
(E.g. To display calls made to extension 104 and remote number 44207296666 user should type “104,44207296666”)
Also, users are given a drop-down list with the following options:
- Equals
Do a statistic only for a number which is equal to number/s written.
(E.g. John sets this option to ‘Equals’ and types number 101. Statistics will be shown only for calls made to number 101.)
- Begins with
Do a statistic for all numbers which begin with number/s written.
(E.g. John sets this option to ‘Begins with’ and types number 101. Let’s imagine that John made calls to numbers 1011 and 105. Statistics will be shown only for calls made to numbers that begin with number 101, in this case to numbers 101 and 1011.)
- Contains
Do a statistic for all numbers which contain number/s written.
(E.g. John sets this option to ‘Contains’ and types number 101. Let’s imagine that John made calls to numbers 1011, 2101 and 501. Statistics will be
shown only for calls made to numbers that contain number 101, in this case to numbers 1011 and 2101.)
- Ends with
Do a statistic for all numbers which end with number/s written.
(E.g. John sets this option to ‘Ends with’ and types number 101. Let’s imagine that John made calls to numbers: 1101, 2101 and 501. Statistics will be shown only for calls made to numbers that end with number 101, in this case to numbers 1101 and 2101.)
- CallerID
Filter statistics based on the CallerID.
Also, users are given a drop-down list with the following options:
- Equals
Do statistics only for CallerID which is equal to CallerID written.
- Begins with
Do statistics for all CallerID’s which beginning letters are the same as in CallerID written in the field beside.
(E.g. John chooses this option and types “Tech”. Statistic will be done for all CallerID’s that start with “Tech”, for example, “TechSupport”)
- Contains
Do statistics for all CallerID’s which contain the same letters as in the field beside.
(E.g. John chooses this option and types “Tech”. Statistic will be done for all CallerID’s that start with “Tech”, for example, “TechSupport”, “TestTechDepartment”)
- Ends with
Do statistics for all CallerID’s which ending letters are the same as CallerID written in the field beside.
(E.g. John chooses this option and types “Tech”. Statistic will be done for all CallerID’s that end with “Tech”, for example, “TestTech”)
- Trunk
Show the calls filtered on a trunk basis. Enter a trunk name or more trunk names separated by commas.
Also, users are given 2 drop-down lists with the following options:
First list:
- Equals
Do a statistic only for trunk whose name is equal to the name written.
- Begins with
Do a statistic for all trunks whose name begin with a name written.
- Contains
Do a statistic for all trunks which contain name written.
- Ends with
Do a statistic for all trunk which end with the name written.
Second list:
Select the technology of the outgoing trunk:
- SIP
- IAX
- Local
- DAHDI
. - Duration
In these fields, you can set a range for the duration of the calls in seconds.
Both fields can be modified depending on selected equality signs:
- > (greater than)
- >= (greater than or equal to)
- == (equal to)
- <= (less than or equal to)
- < (less than)
(E.g. If the user wants to see statistics of calls that last more than 15, but less than 45 seconds, in the first field there will be “>” and “15” set, and in the second “<” and “45”.)
TIP: The Download CSV option is used to download the CSV formatted file with all the statistics shown on this page.
Monthly Statistics

This table will show the total number of calls per day in the date range selected in the search box.
- DATE
Clickable date for which the total number of calls is shown
- TOTAL TIME
Total time of calls on that particular day
- TOTAL CALLS
Total number of calls made on that particular day
- AVERAGE CALL TIME
Average call time of the calls on that particular day
- GRAPHIC
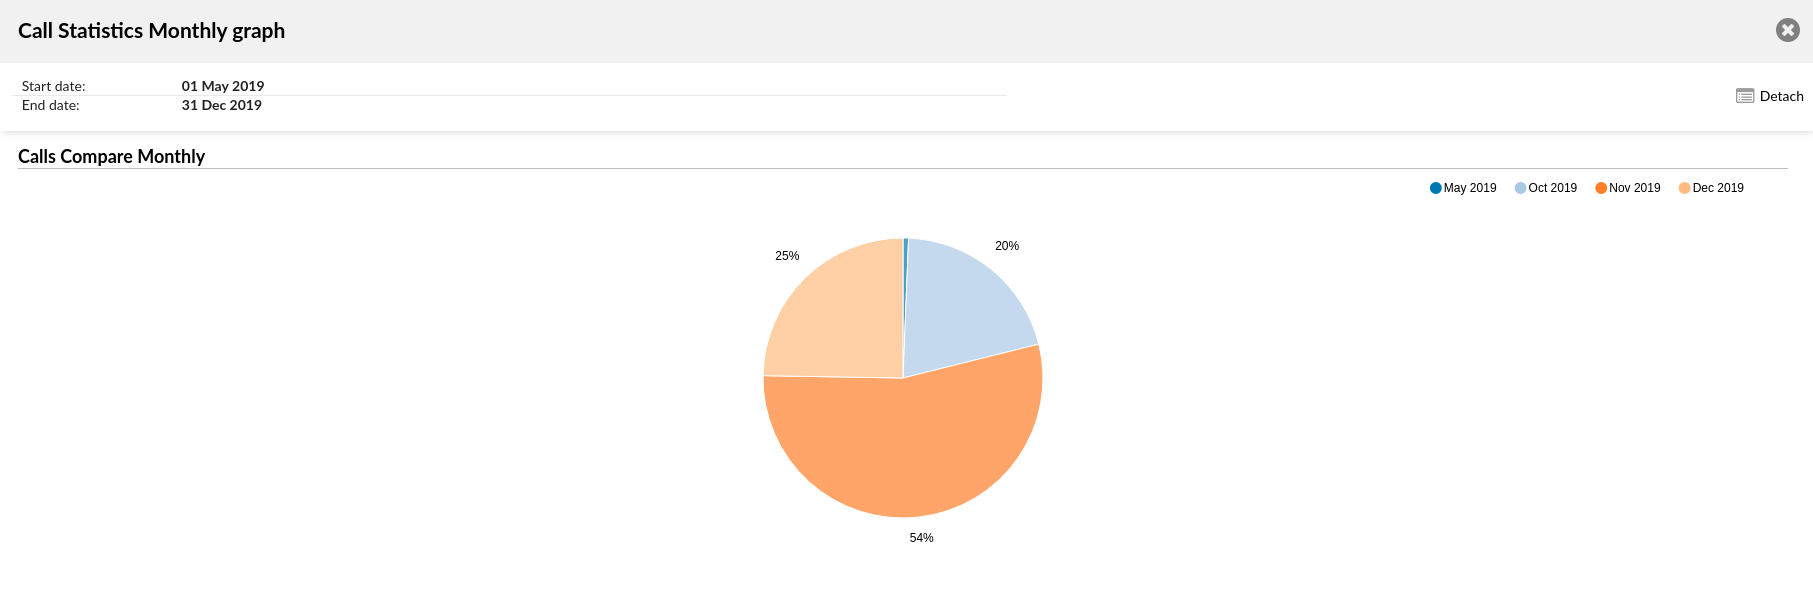
This field shows the graphic representation of all calls on that day, relative to the day that had the biggest total call time. The day which had the biggest total call time will have a 100% bar filling this field and every other day will have a bar relative to this day.
.
Monthly Statistics Breakdown
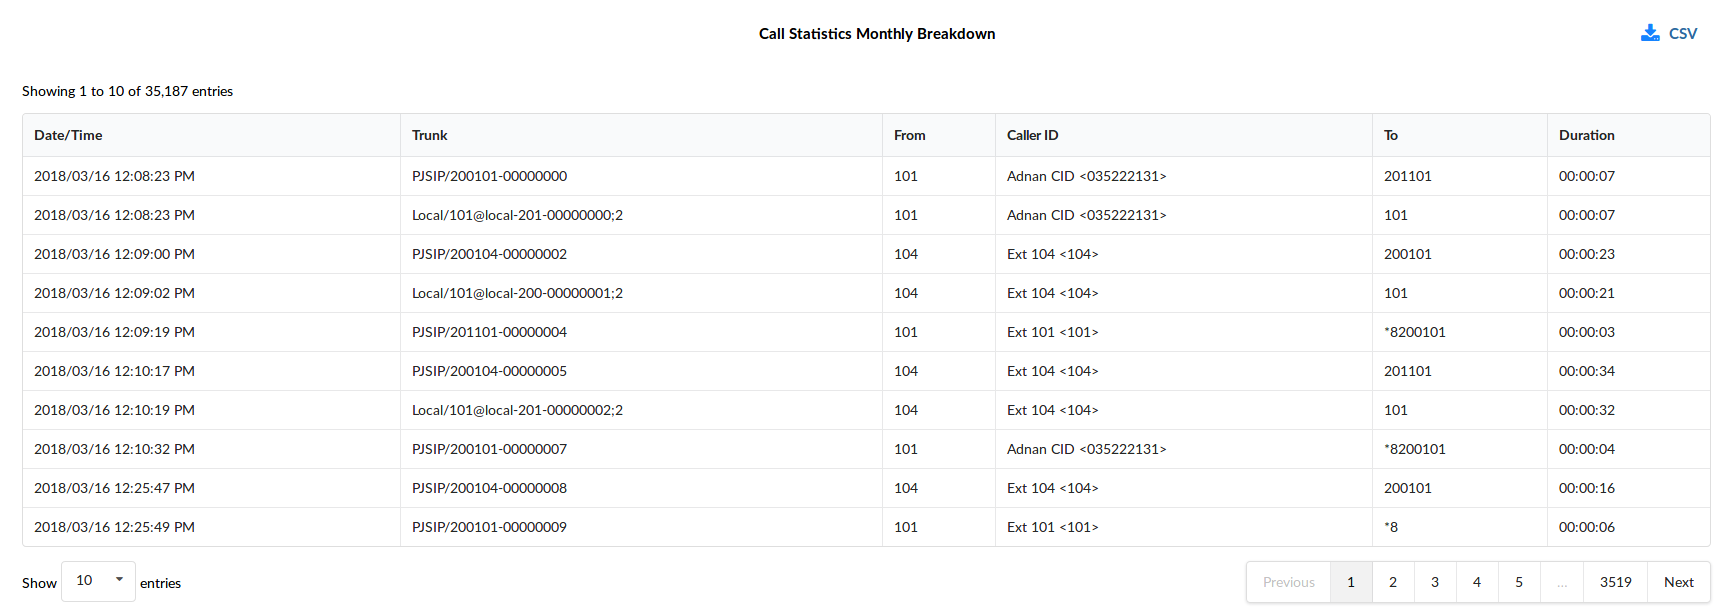
Clicking on “Call Statistics Monthly” will bring up a new window with a detailed breakdown of calls for every day of selected period.
- Date/Time
Date and time when the call was made.
- Trunk
Name of the trunk which was used for the call.
- From
The extension number from which the call was made.
- CallerID
CallerID of the user who made the call.
- To
The extension/external number to which the call was made.
- Duration
Duration of the call
TIP: The Download CSV option is used to download the CSV formatted file with all calls in the breakdown.
Extensions Statistics
NOTE: Extension statistics are present on Master tenant too, nothing is changed except the case where filter ‘Extensions’ is missing, and user can see statistics from all Tenants on the system.
This section gives users a preview of the reports table showing Extension statistics related to ‘All Answered Calls’, ‘All Calls’, ‘All Unanswered Calls’, ‘Calls Per Direction’, ‘Inbound Calls’, and ‘Internal Calls’.
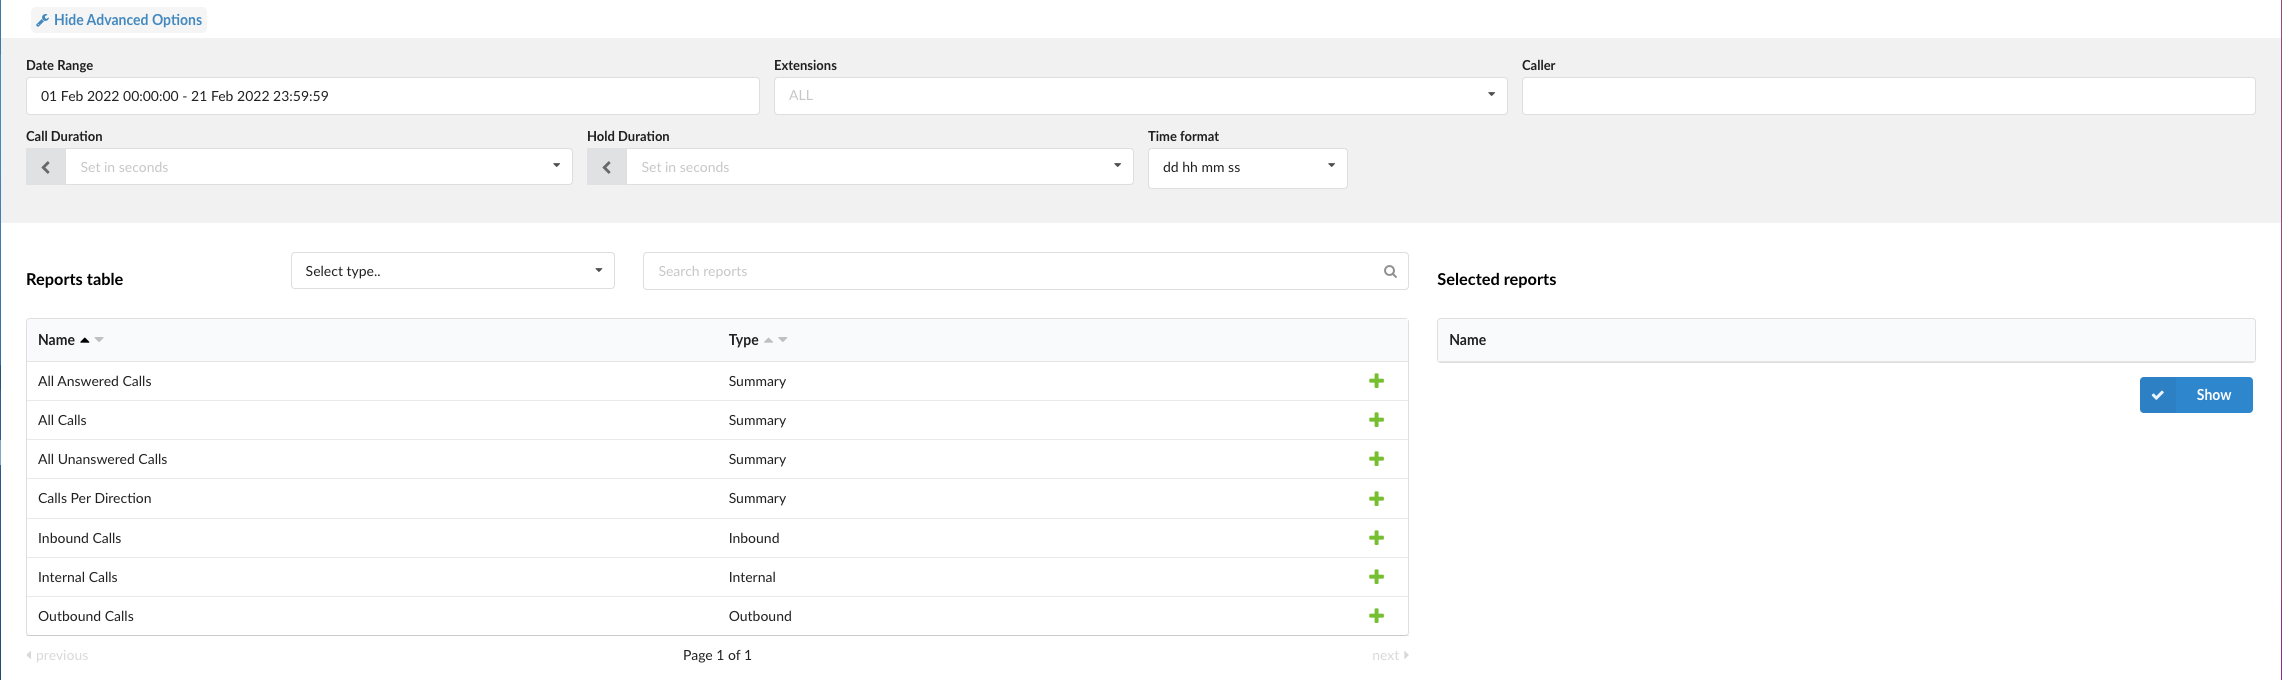
Clicking on the “Show Advanced Options” will expand the searching criteria and the following will be listed to users:
- Call Duration: Filters data by the call duration less or more than what number is set.
Default values are; 10, 20, 30, 60, 120. Users can set the random numbers too.
- Hold Duration: Filters data by holding duration less or more than what number is set.
Default values are; 10, 20, 30, 60, 120. Users can set the random numbers too.
- Time format: Filters data by the type of date format;’dd hh mm ss’,’dd:hh:mm:ss’, ‘Days’, ‘Hours’, ‘Minutes’, ‘Seconds’.
.
Filters
Users can filter reports using ‘Date Range’, ‘Extensions’, and ‘Caller’
- Date Range: Filters the data by date range, which means that the user can set a wished range for which data is to be shown. It can be a custom range or of the default pre-built ranges;
(‘Today’, ‘Yesterday’, ‘This Week’, ‘This Month’, ‘Last Month’, ‘This Year’).
- Extensions: Filters the data by extension or extensions that can be chosen from the dropdown menu.
- Caller: Filters the data by Caller.
- Select type..: From this dropdown user can choose the type of the report to be shown in the Reports table;(‘Summary’, ‘Outbound’, ‘Inbound’, ‘Internal’).
- Search reports: The user can type in the first letters of the report name to be filtered and shown in the Reports table.
To generate reports, users first need to select one or more reports by clicking the green plus sign. This report(s) will then be moved to the ‘Selected reports’ section. By clicking the ‘Show’ button, the selected reports will appear in a new window.
.
All Answered Calls
Users can access the ‘All Answered Calls’ report to gain information about all calls on the system that were answered.
All Answered Calls
- Calls – Contains one column; Answered: Sum of all answered calls.
- Talk time – Contains four columns; Total: Total duration of all answered calls Min: Minimum duration of a single answered call. Max: Maximum duration of a single answered call. Mean: Average talk time value for all answered calls.
- Hold Time – Contains four columns; Total: Total duration of hold time for all answered calls Min: Minimum hold time for a single answered call. Max: Maximum hold time for a single answered call. Mean: Average hold time for all answered calls.
All Calls
Users can access the ‘All Calls’ report to gain information about all calls on the system.
All Calls
- Talk time – Contains four columns; Total: Total talk time. Min: Minimum duration of a single call. Max: Maximum duration of a single call. Mean: Average talk time value for all calls.
- Hold Time – Contains four columns; Total: Total hold time Min: Minimum hold time duration of a single call. Max: Maximum hold time duration of a single call. Mean: Average hold time value for all calls.
All Calls dispositions
- Total – Sum of all calls.
- Answered – Sum of all answered calls.
- Percentage – Percentage of all answered calls.
- Unanswered – Sum of all unanswered calls.
- Percentage – Percentage of all unanswered calls.
.
All Unanswered Calls

Users can access the ‘All Unanswered Calls’ report to gain information about all calls on the system that were unanswered.
- Calls – Contains one column; Unanswered: Sum of all unanswered calls.
- Hold Time – Contains four columns; Total: Value of total hold time for all unanswered calls Min: Minimum hold time for all unanswered calls. Max: Maximum hold time for all unanswered calls. Mean: Average value of hold time for all unanswered calls.
.
Calls Per Direction
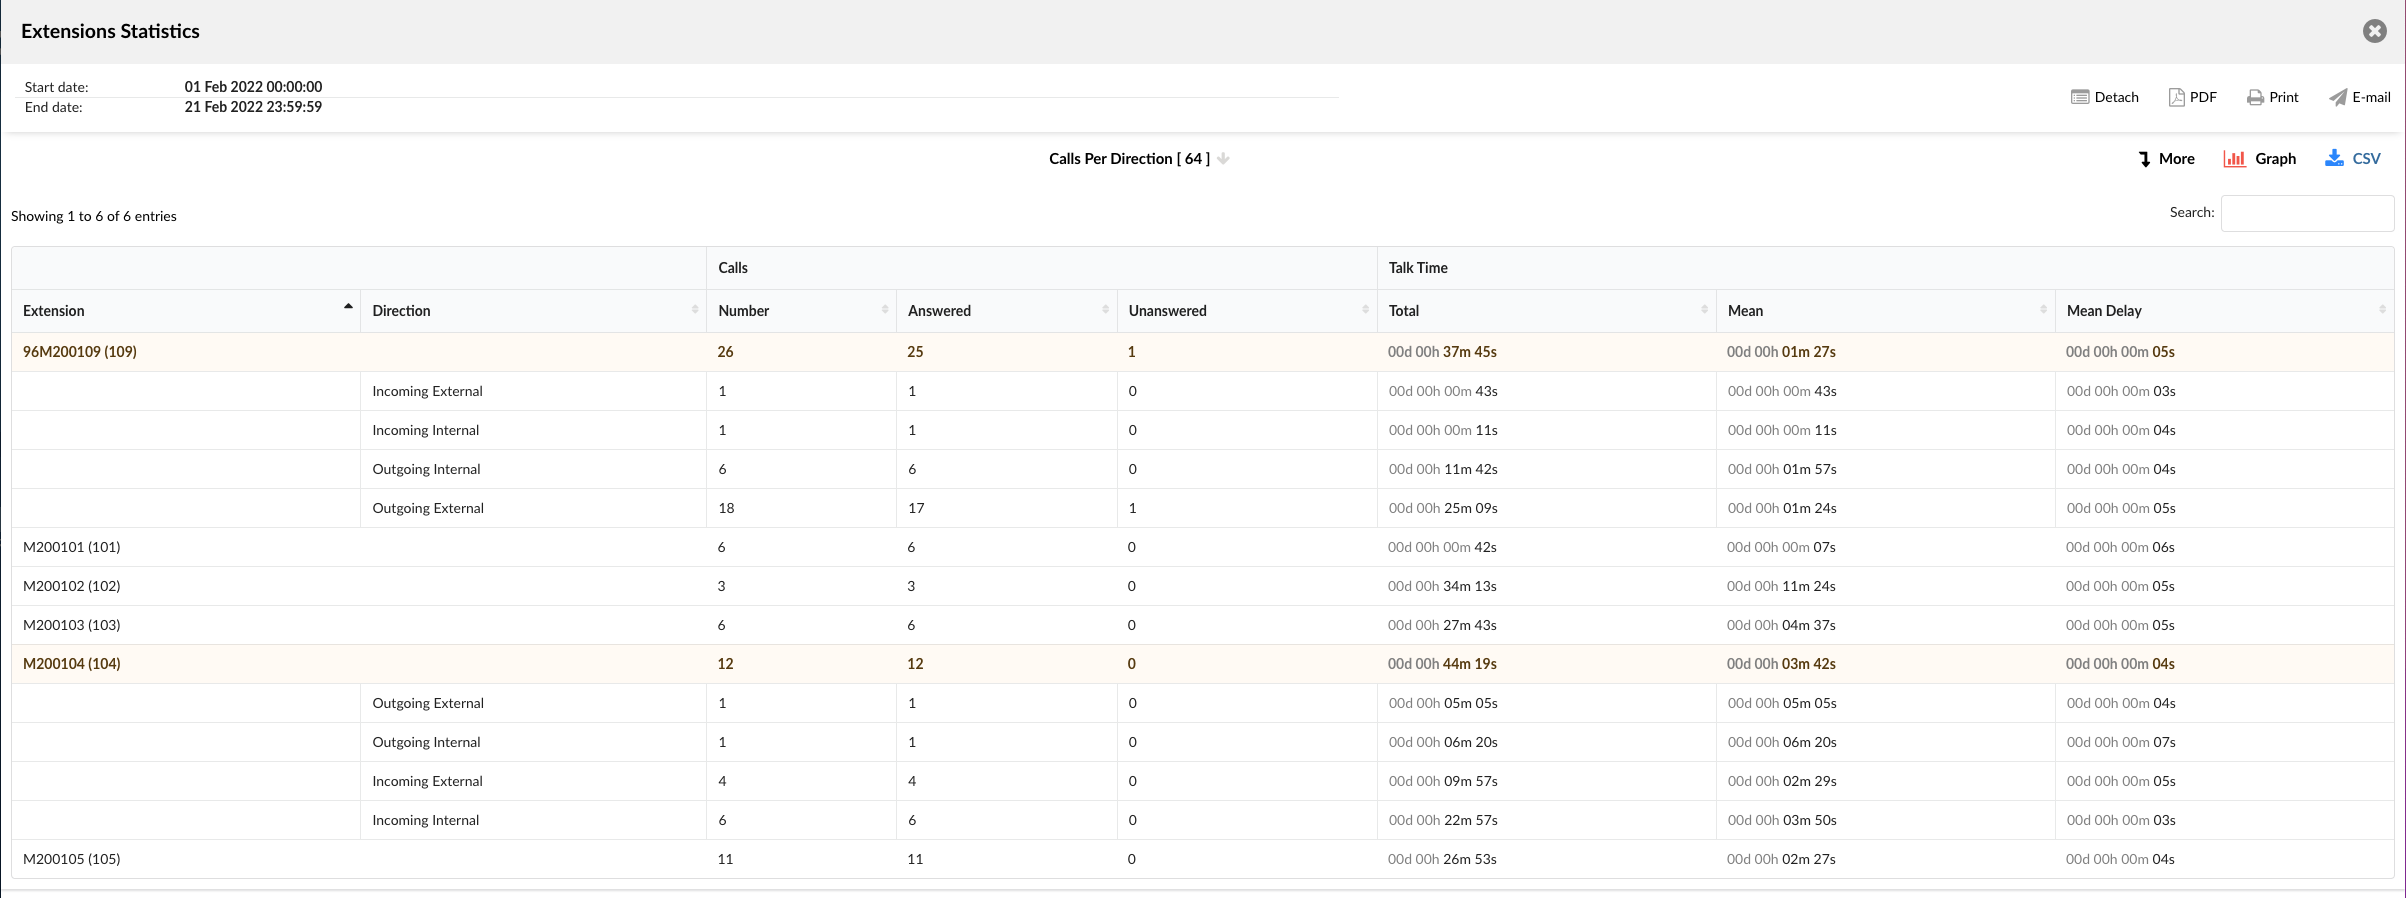
Calls Per Direction
- Extension – Name and number of the caller Extension.
- Direction – By clicking on the Extension field column Direction collapses where user can see number of type of calls by direction (‘Incoming External’, ‘Incoming Internal’, ‘Outgoing Internal’, ‘Outgoing External’)
- Calls – Divided in three columns; Number: Represents total number of calls per destination. Answered: Represents total answered calls per destination. Unanswered: Represents total unanswered calls.
- Talk time – Divided in three columns; Total: Represents total talk time. Mean: Average value of talk time per direction. Mean Delay: Average delay time for calls per direction.
Inbound Calls
Users can access the ‘Inbound Calls’ report to gain information about all Inbound calls on the system.
Inbound Calls
- Talk time – Contains four columns; Total: Total inbound talk time. Min: Minimum duration of a single inbound call. Max: Maximum duration of a single inbound call. Mean: Average talk time value for all inbound calls.
- Hold Time – Contains four columns; Total: Total inbound hold time Min: Minimum hold time duration of a single inbound call. Max: Maximum hold time duration of a single inbound call. Mean: Average hold time value for all inbound calls.
All Inbound Calls dispositions
- Total – Sum of all inbound calls.
- Answered – Sum of all answered inbound calls.
- Percentage – Percentage of all answered inbound calls.
- Unanswered – Sum of all unanswered inbound calls.
- Percentage – Percentage of all unanswered inbound calls.
Internal Calls
Users can access the ‘Internal Calls’ report to gain information about all Internal calls on the system.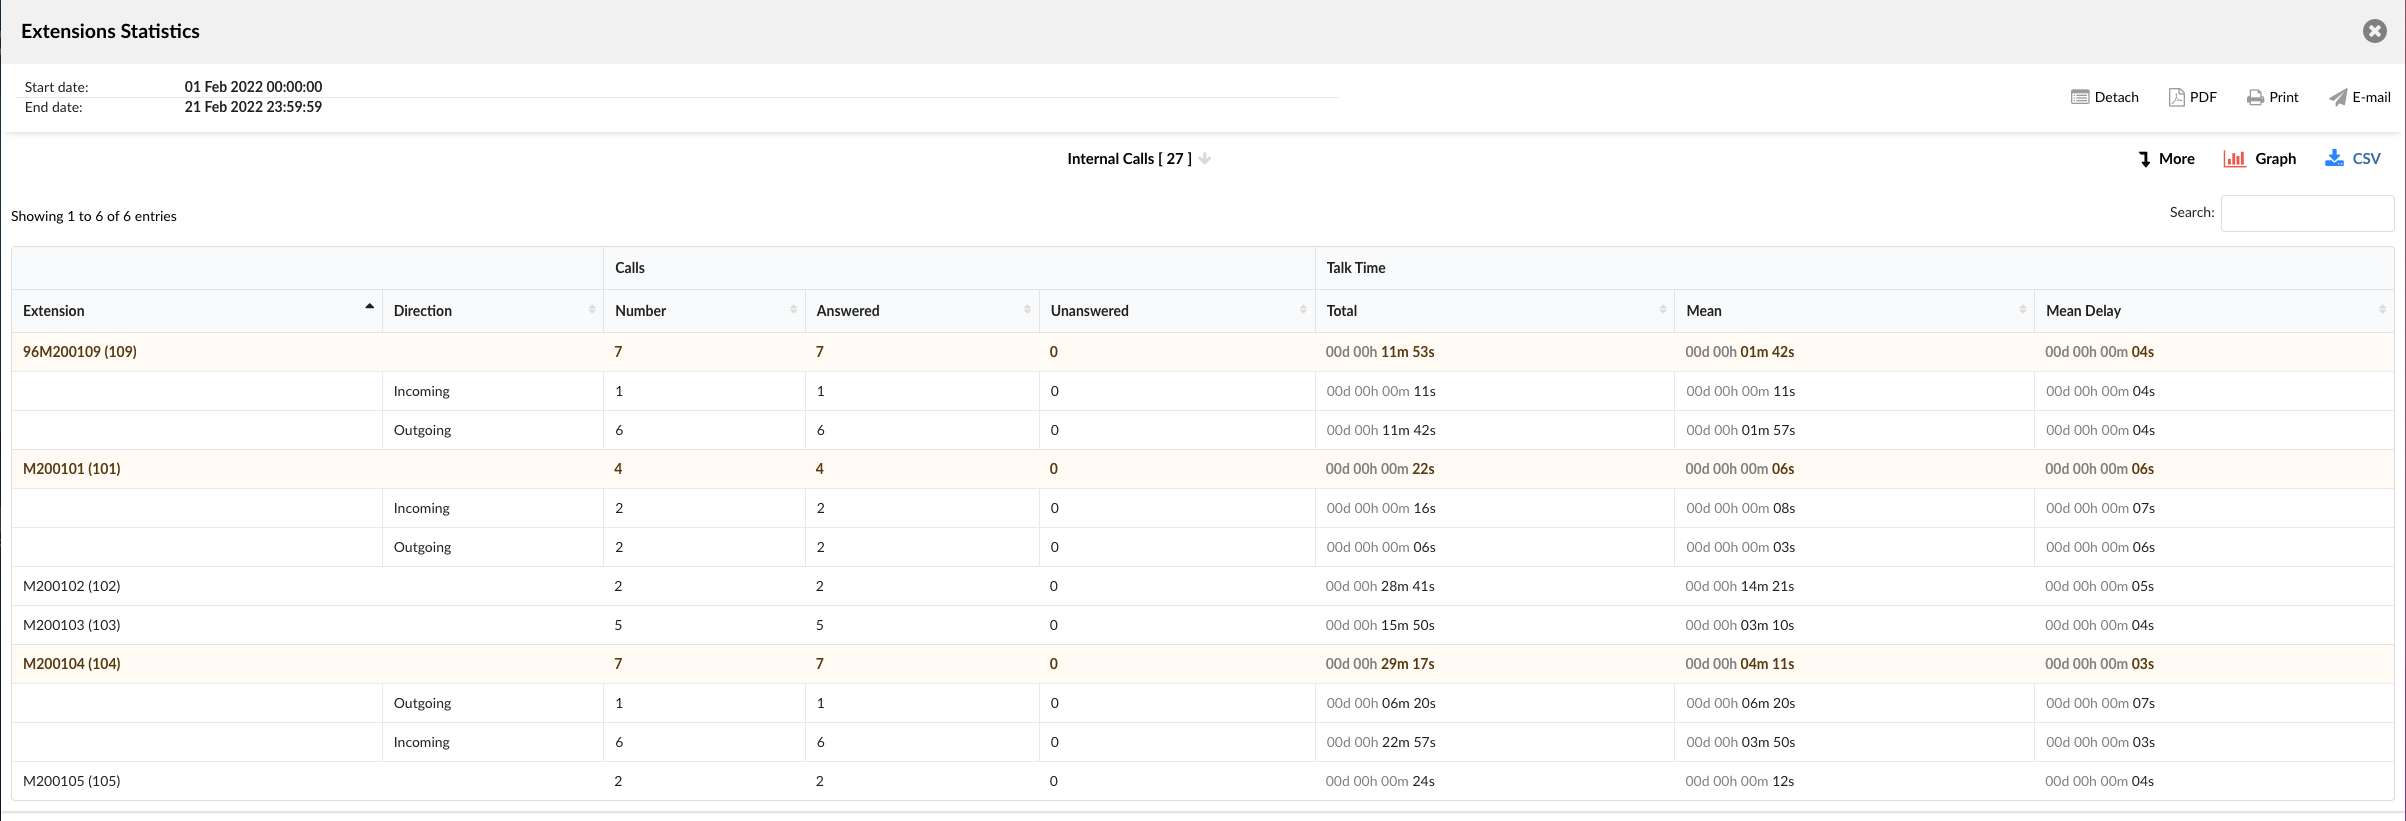
Internal Calls
- Extension – Name and number of the caller Extension.
- Direction – By clicking on the Extension field column Direction collapses where the user can see the number of type of calls by direction (‘Incoming’ or ‘Outgoing’)
- Calls – Divided into three columns; Number: Represents a total number of calls per destination. Answered: Represents total answered calls per destination. Unanswered: Represents total unanswered calls.
- Talk time – Divided into three columns; Total: Represents total internal calls talk time. Mean: Average value of internal calls talk time. Mean Delay: Average delay of internal calls talk time.
Outbound Calls
Users can access the ‘Outbound Calls’ report to gain information about all Outbound calls on the system.
Outbound Calls
- Talk time – Contains four columns; Total: Total outbound talk time. Min: Minimum duration of a single outbound call. Max: Maximum duration of a single outbound call. Mean: Average talk time value for all outbound calls.
- Hold Time – Contains four columns; Total: Total outbound hold time Min: Minimum hold time duration of a single outbound call. Max: Maximum hold time duration of a single outbound call. Mean: Average hold time value for all outbound calls.
All Outbound Calls dispositions
- Total – Sum of all outbound calls.
- Answered – Sum of all answered outbound calls.
- Percentage – Percentage of all answered outbound calls.
- Unanswered – Sum of all unanswered outbound calls.
- Percentage – Percentage of all unanswered outbound calls.
Breakdowns
By clicking the ‘Breakdown’ buttons, the selected reports will appear in a new window, with more details on the Extension statistics calls.

Breakdown shares a similar format for every report.
- Linked ID – Event ID.
- Date – Date when the event occurred.
- Extension – Name and number of the Extension from which the call was initiated.
- Remote Number – Destination number that was dialed.
- Wait time – Time caller waited for the call to be answered.
- Talk time – Time spent on call.
- Conference – This field represents info where the user can see if it was a Conference call or not. (If it was a Conference call this column will be populated with ‘Yes’ if it was a regular call this field will be empty.
- Call Type – The user can see the type of call in this column (Incoming Internal, Incoming External, Outgoing Internal, Outgoing External)
TIP: The Download CSV option is used to download the CSV formatted file with all calls in the breakdown.
.
ERG Statistics
NOTE: ERG statistics are present on Master tenant too, with a slight difference where in the column Enhanced Ring Group in statistics breakdown will be presented Tenant number in front of ERG name too.
(E.g. If it is Tenant number 200 and ERG name is ERG200; It will be presented as 200_ERG200) This section gives user a preview of the table that shows ERG Statistics related to ‘All answered calls’, ‘All calls’, ‘All unanswered calls’. ‘Member calls per Enhanced Ring Group’, ‘Member missed calls’, and ‘Repeated callers’.
NOTE: In order to see ERG statistics, ClickHouse needs to be set as a database. To set it up successfully, navigate to ‘Admin Settings’ -> ‘Statistics Database’.
NOTE: Please be notified that if Enhanced services are used with ERG (i.e. the ‘Disable Member Enhanced Services’ option is turned ON by default), statistics for those calls will not work.
Users can filter data by using the following filters:
- Date Range
Select the specific time period and generate data accordingly
- Enhanced Ring Group
Enter the name of the ERG
- Members
Enter the specific Member
- Call Duration
Set a specific call duration
- Hold Duration
Set a specific hold duration
- Caller
Search data by the caller
- Time format
Set a specific time format
Users can also select a specific type of a report: ‘Summary’, ‘Member’, and ‘Enhanced Ring Group’. After selecting the desired type, the list of available reports will be generated respectively.
All Answered Calls Report
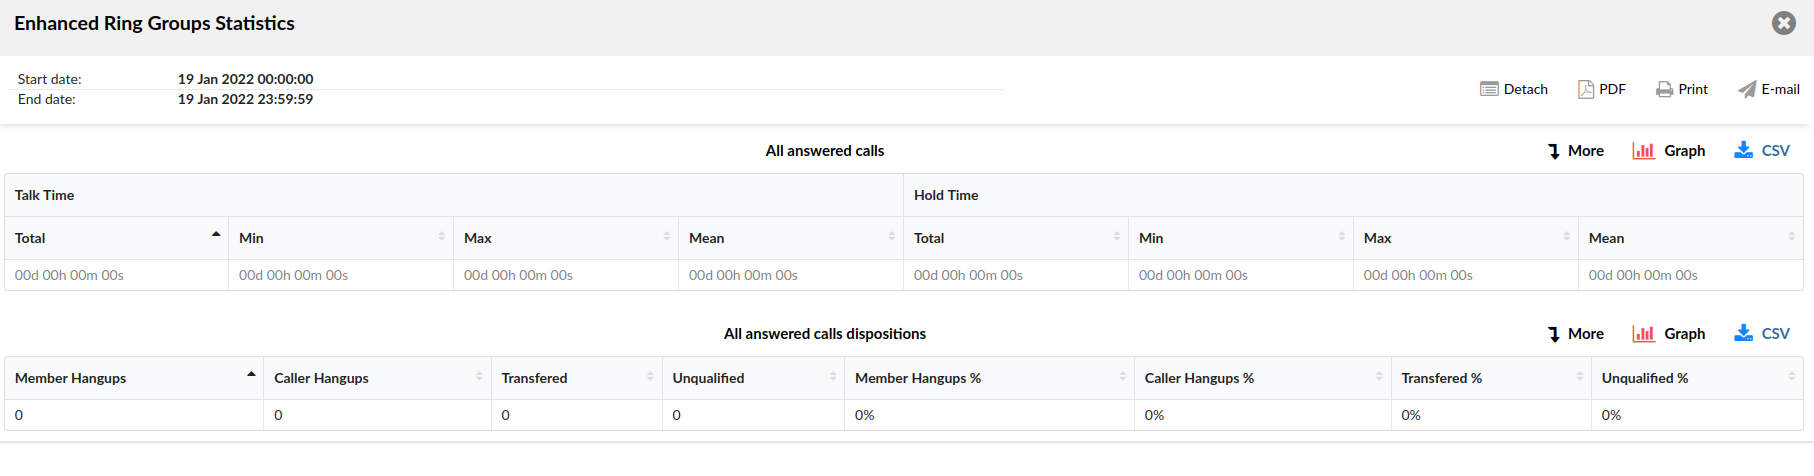
Users can access to the ‘All Answered Calls’ report to gain information about all calls on the system that were answered.
All Calls Report
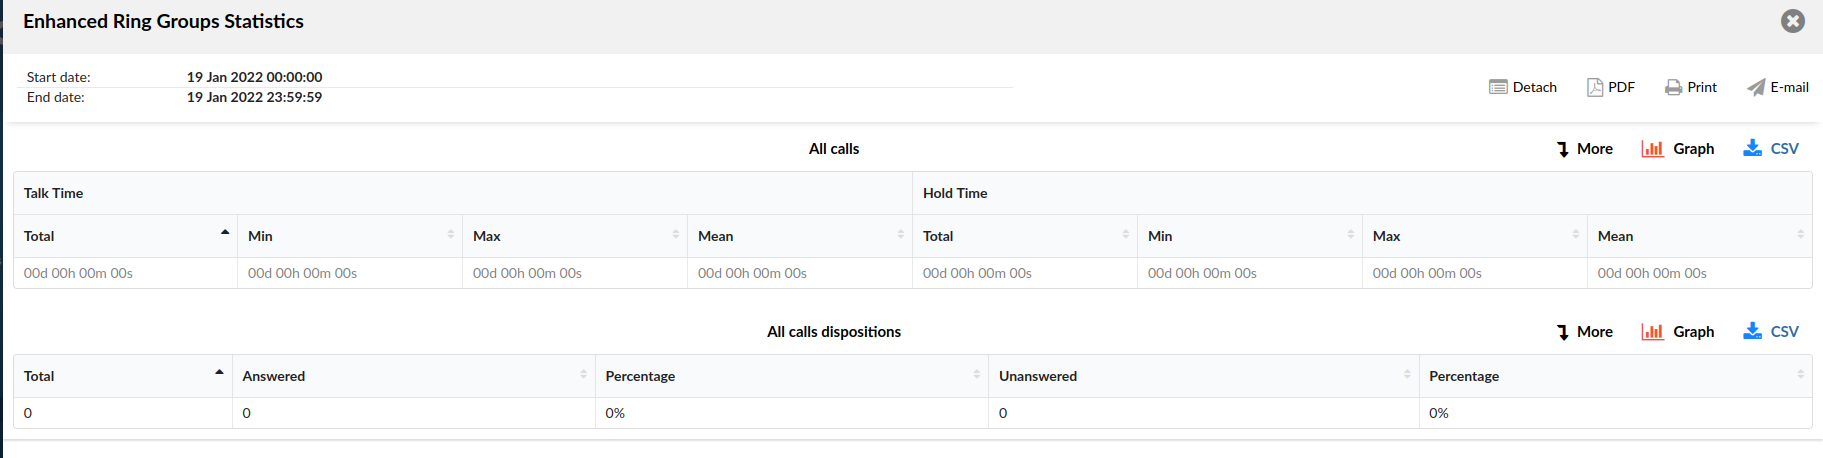
Users can access to the ‘All Calls’ report to gain information about all calls on the system.
All Unanswered Calls Report
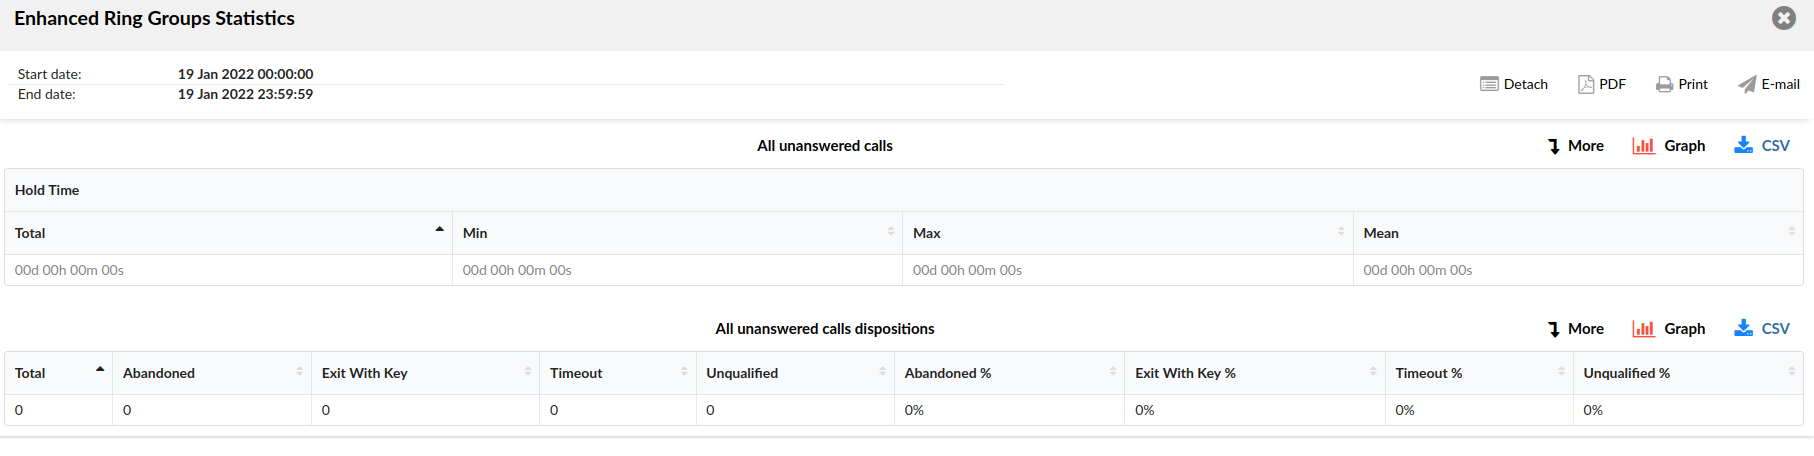
Users can access to the ‘All Unanswered Calls’ report to gain information about all calls on the system that were unanswered.
Member Calls Per Enhanced Ring Group Report

Users can access to the ‘Member Calls Per Enhanced Ring Group’ report to gain information about all member calls on the system per ERG.
Member Missed Calls Report

Users can access to the ‘Member Missed Calls’ report to gain information about all members’ missed calls on the system.
Repeated Callers Report

Users can access to the ‘Repeated Callers’ report to gain information about repeated callers on the system.
Recordings under ERG statistics
Users now can access call recordings through ERG statistics under; All answered calls details breakdown, All answered calls dispositions breakdown, All calls breakdown, All calls dispositions breakdown, Member calls per Enhanced Ring Group breakdown and Member missed calls breakdown. It can be done by clicking on Call ID which has a REC mark next to it. REC mark will be shown if the recording is available both locally or offloaded. After clicking on the wanted Call ID new window will be opened which will show a reports page for the given call. The report page for isolated call works just as the regular report page which shows if the recording is available locally or if the recording is offloaded and removed from the system. If the recording is offloaded it will be showing the icon representing the service used for archiving files inside Archiving feature.
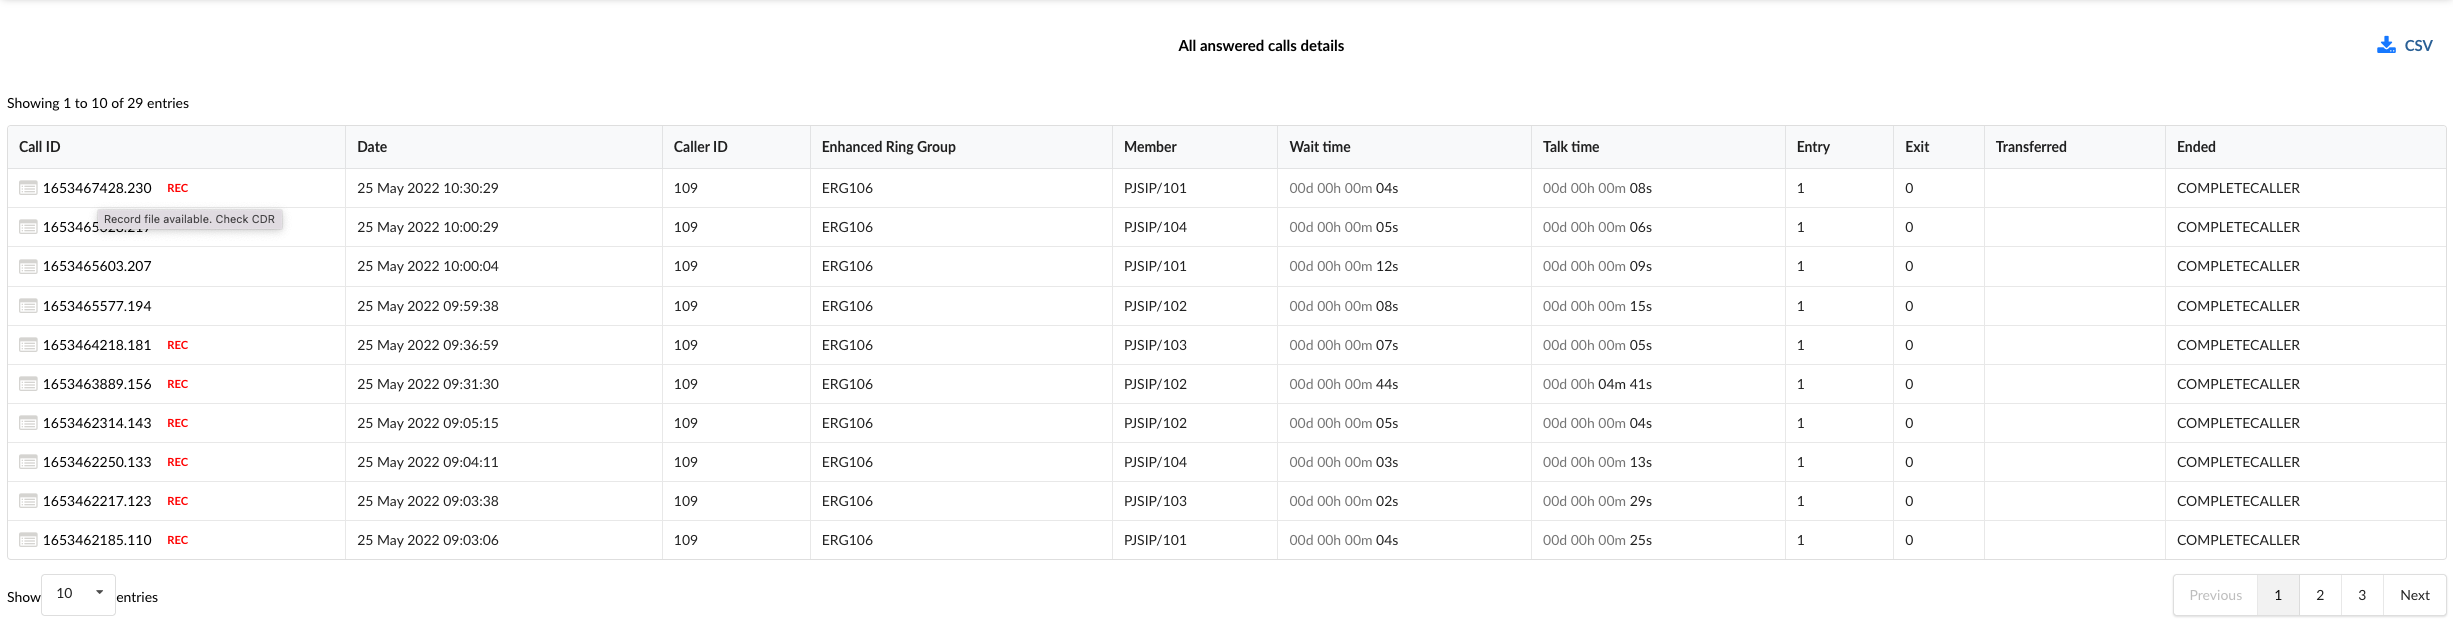
Breakdown page for each one of the report type shows REC mark next to Call ID. When hovered over Call ID message is shown in the alert dialog saying; “Record file available. Check CDR”. Users can also hover over Call IDs with no recordings where an alert dialog will be shown saying; “Check CDR” which will after being clicked on lead to a reports page in a new minimized window as in the case with the Caller ID with recordings on it.
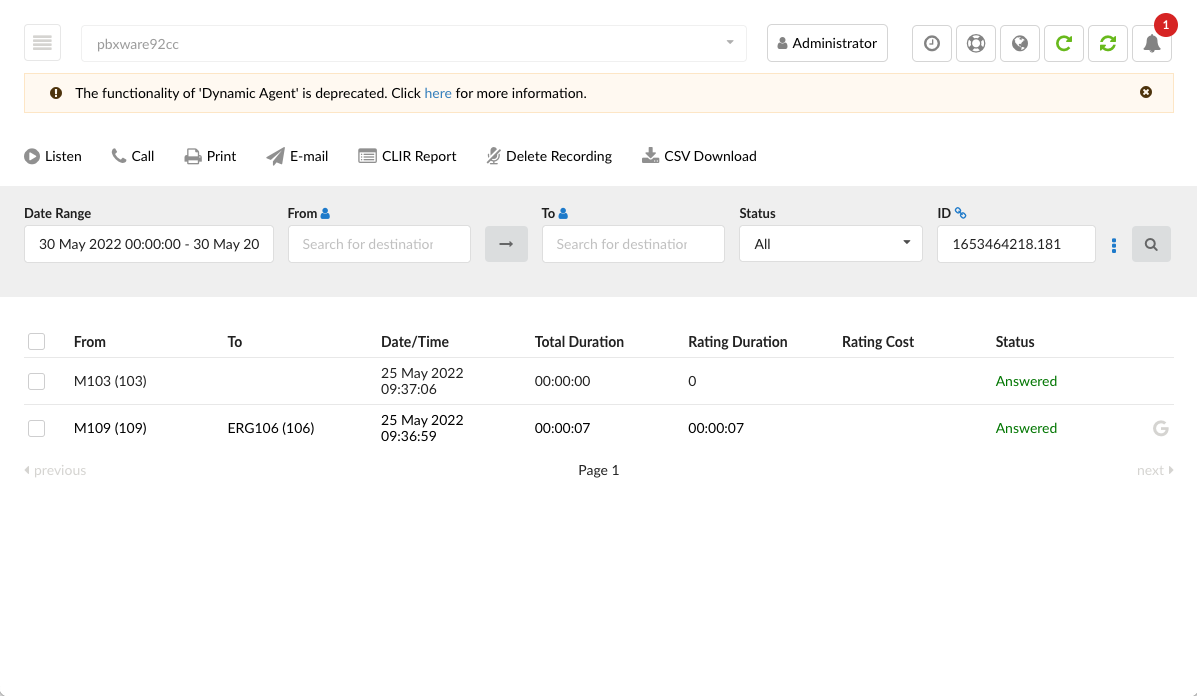
User can click on Caller ID which has a REC mark next to it and the new window will be opened where a report is shown. It is basically a reports page for that single call, and the recording can be played for both local and offloaded recordings. If the recording is still on the system Play button will be shown and if the recording is already offloaded and removed from the system icon correlating to the service used for archiving will be displayed.
IVR Statistics
NOTE: IVR statistics are present on Master tenant too, with a slight difference where in the column ‘IVR name’ in statistics breakdown will be presented Tenant number in front of IVR name too.
(E.g. If it is Tenant number 200 and IVR name is IVR200; It will be presented as 200_IVR200)
This section gives user a preview of the table that shows IVR Statistics related to ‘IVR Calls’, ‘IVR Calls per DID’, ‘IVR Calls per Original Caller ID’, ‘IVR Calls per option’.
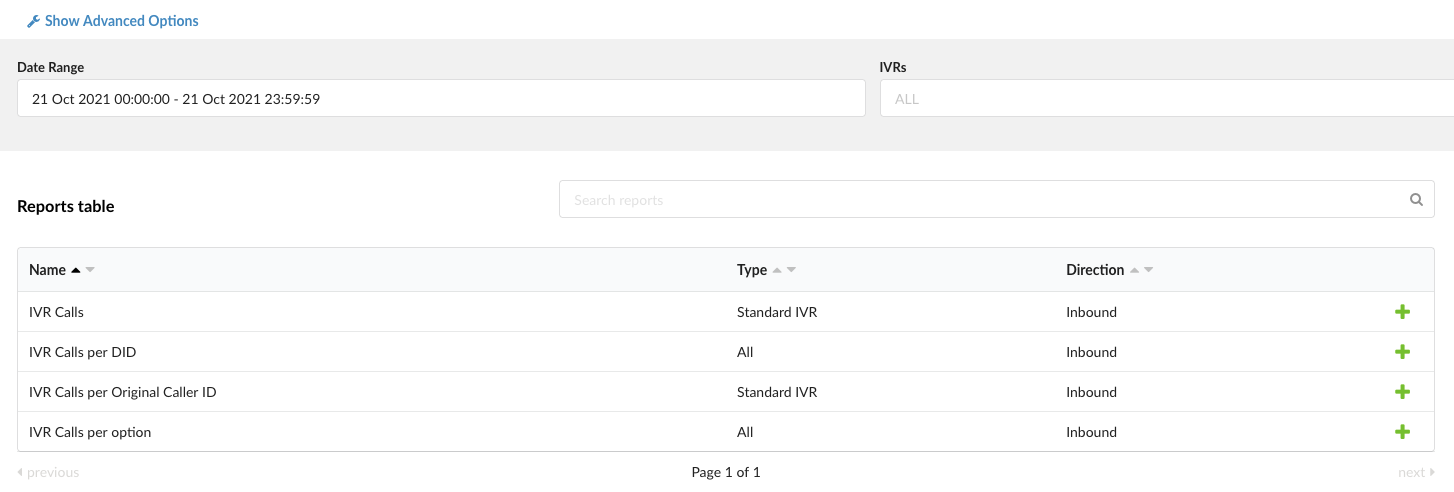
Clicking the ‘Show Advanced Options’ button will result in more filters being displayed:
‘Original Caller ID’: Filters data by the Original Caller ID provided ‘Caller ID’: Filters data by the Caller ID provided ‘Destination’: Filters data by the chosen Destination(s)
Filters
Users can filter reports by using ‘Date Range’ and ‘IVRs’. The ‘Date Range’ filter can have one of the pre-built ranges (‘Today’, ‘Yesterday’, ‘This Week’, ‘This Month’, ‘Last Month’, ‘This Year’) or any other custom date range.
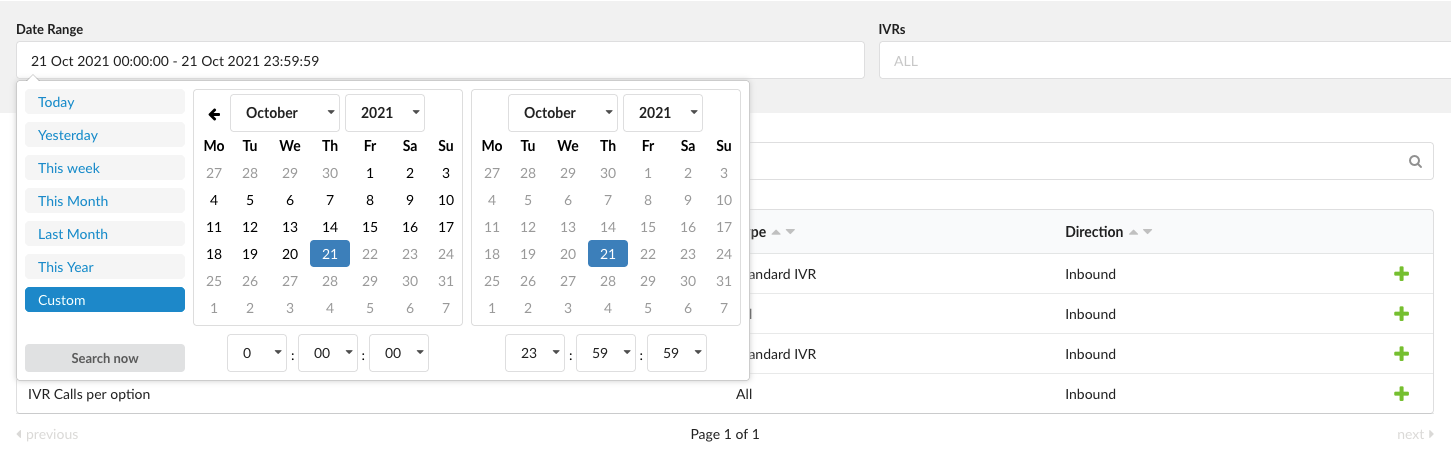
To generate reports, users first need to select one or more reports by clicking the green plus sign. This report(s) will then be moved to the ‘Selected reports’ section. By clicking the ‘Show’ button, the selected reports will appear in a new window.
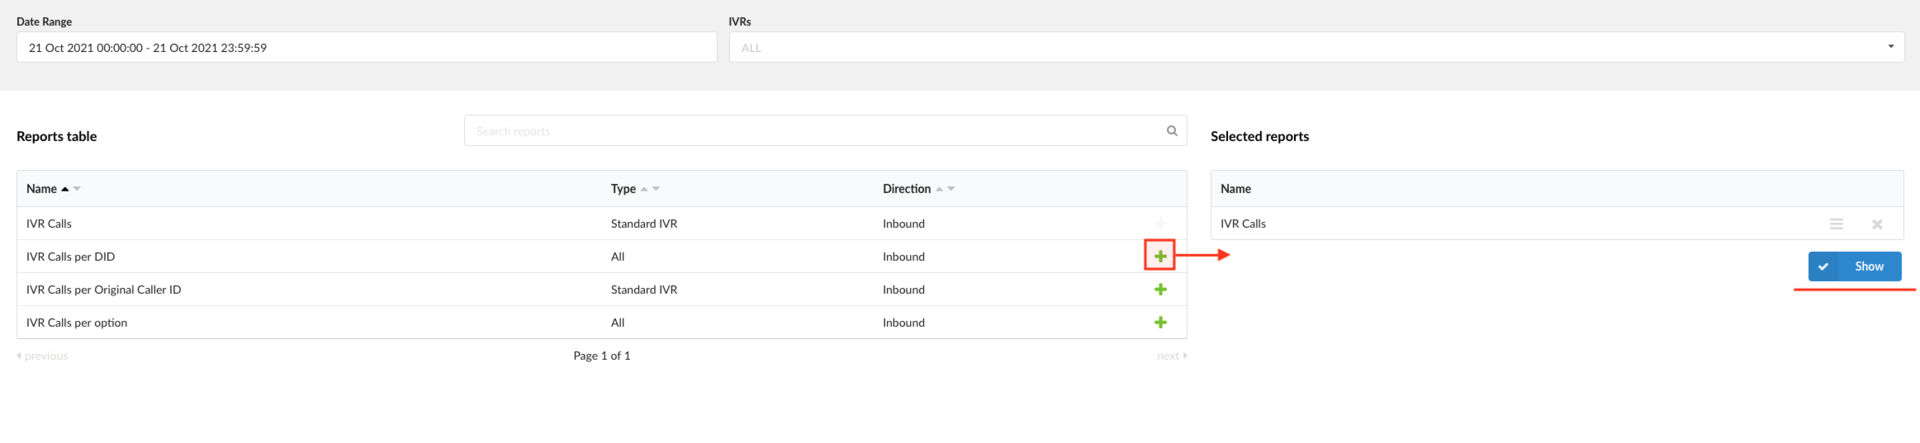
.
Report Details
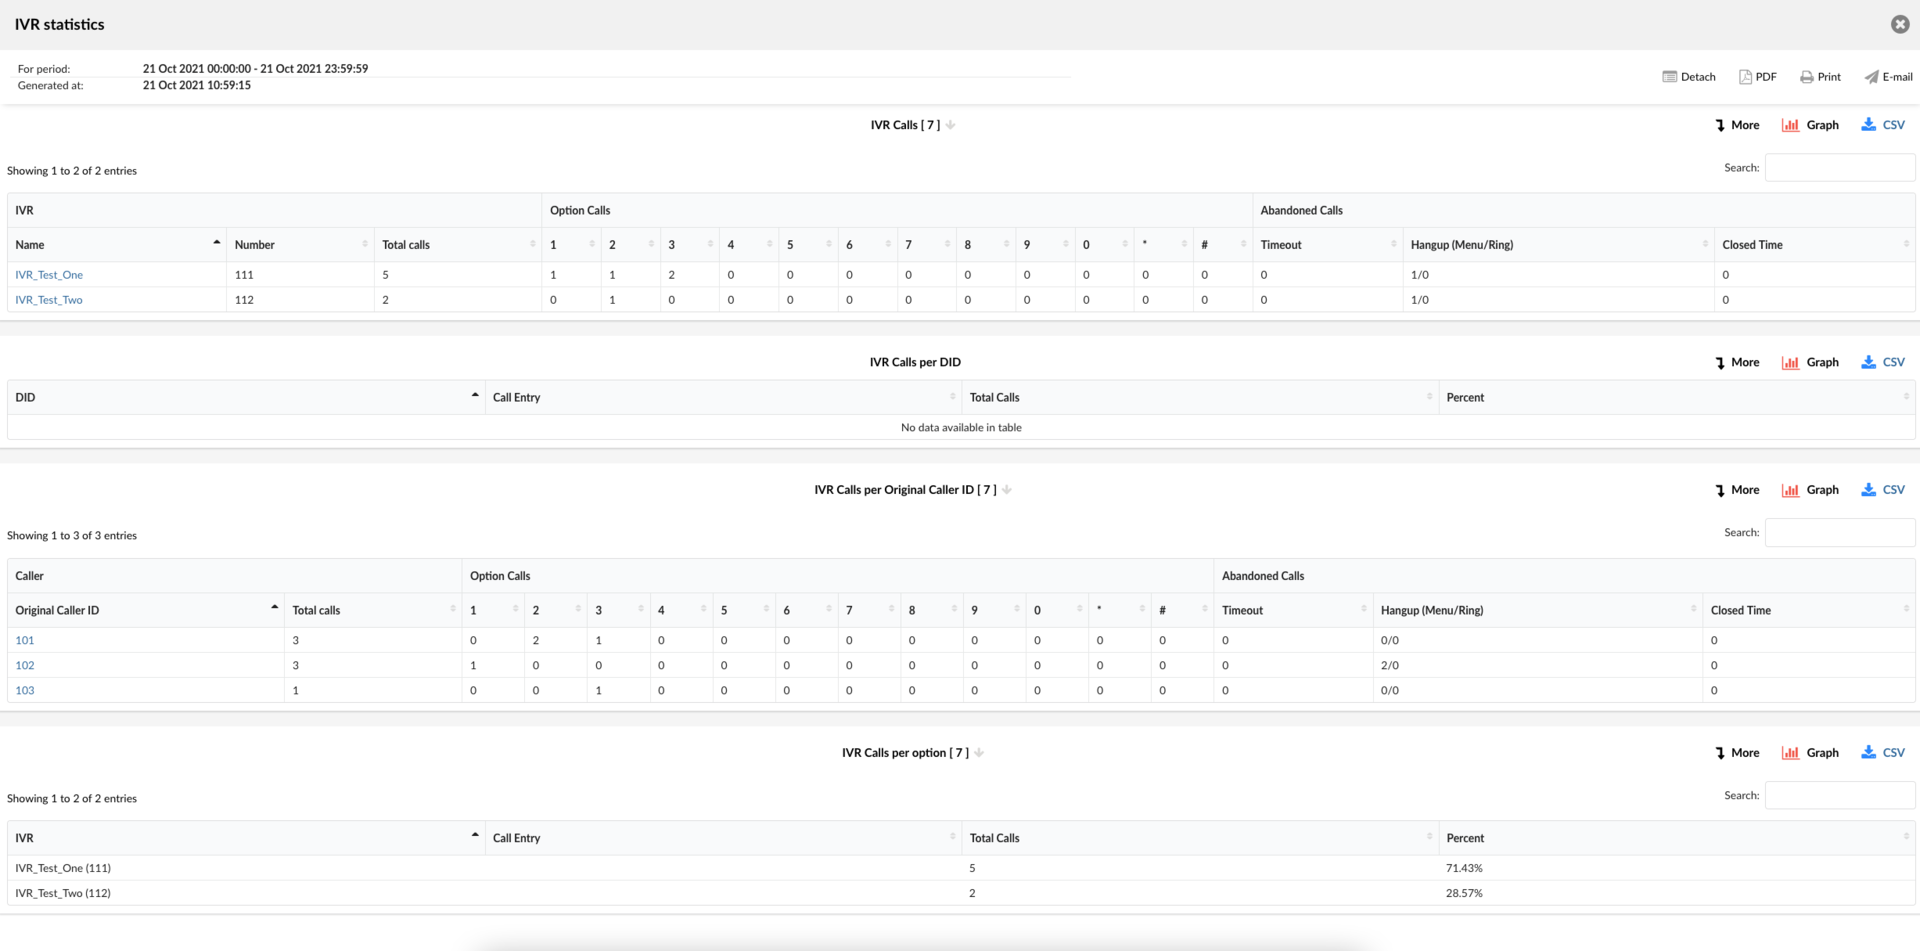
By clicking the ‘Show’ button, users will be prompted to a new page where all the additional report data and some other options are displayed. Hovering the mouse over the top left corner of the page will result in displaying all the filters that were applied during data generating.
From this page users can:
- Sort the data by any column.
- Search for any data in the table by typing the desired search option in the search bar, which will be applied automatically.
- View graphs, download CSV or PDF files, as well as print and e-mail reports.
NOTE: Upon clicking the ‘Show’ button, users will be able to see two rows, “For period” and “Generated at”, which relies on the system time. Other rows are changed depending on the chosen report template.
Report Types
The list of available reports is as follows:
- IVR Calls
- IVR Calls per DID
- IVR Calls per Original Caller ID
- IVR Calls per option
Report Fields’ Meanings
This is a list of fields used in report tables. Some special fields used in a particular report are explained within the report description.
All fields are explained as: Field name (Synonym name) – Description
Some fields can have more levels of information. This can be seen in tables which have one or two headers.
- Field
- Child field 1
- Child field 2
Fields:
-
IVR – IVR name and number in format: Name (Number)
- Name – IVR name
- Number – IVR number
- Total Calls – Number of calls for that particular IVR
-
Caller
- Original Caller ID – The original number of the caller who entered the IVR
- Total Calls – Number of calls from that particular Original Caller ID
-
Option Calls – Number of calls for each option
- 0-9 , ‘*’, ‘#’ – Number of calls for the option, where the number 0-9 or the symbol ‘*’ or ‘#’ represents the option.
-
Call Entry – Represents the caller entry when calling the IVR. It can either be an IVR option or any of the abandoned call types (Timeout, Hangup(Menu/Ring) or Closed Times).
-
Abandoned Calls – Number of abandoned calls
- Timeout – Number of calls that ended due to a timeout
- Hangup (Menu/Ring) – Number of calls that ended due to the caller hanging up in the IVR menu or while the call was still ringing. Represented in format: HangupInMenu / Hangupwhilering
- Closed Time – Number of calls that came during the closed hours of the IVR
Destination Types and Events
The ‘Destination Type’ field can have one of the following values:
- Extension
- Queue
- Conference
- IVR
- Voicemail
- Directory
- Remote Access
- Fax to Email
- External number
- Timeout Destination
The ‘Ended’ field that shows which event occurred can have the following values:
- Connected – Any IVR call that successfully connected the caller with the Destination
- Abandoned – Calls hanged up by the caller
- Timed Out – Calls ended by a timeout
- Closed Time – Calls which came during closed hours of the IVR
- Invalid Selection – Calls that had an invalid DTMF input by the caller (E.g. non-existing option number etc.)
Note: This will be available in future reports.
.
IVR Calls
Only calls for the Standard IVR type are included. It shows all calls per IVR, the number of Option calls, and Abandoned calls for each IVR. Users may also see a timeline in a form of a graph showing total, connected, and abandoned calls for all IVRs summarized and a total calls comparison per IVR. By filtering these reports for one IVR will result in the graphs showing total calls per option and a total number of abandoned calls for that particular IVR only.
.
IVR Calls per DID
This report shows the number of calls per IVR and the number of calls for each call entry or abandoned call per IVR. It shows data for all IVR types. Data is grouped by DID.
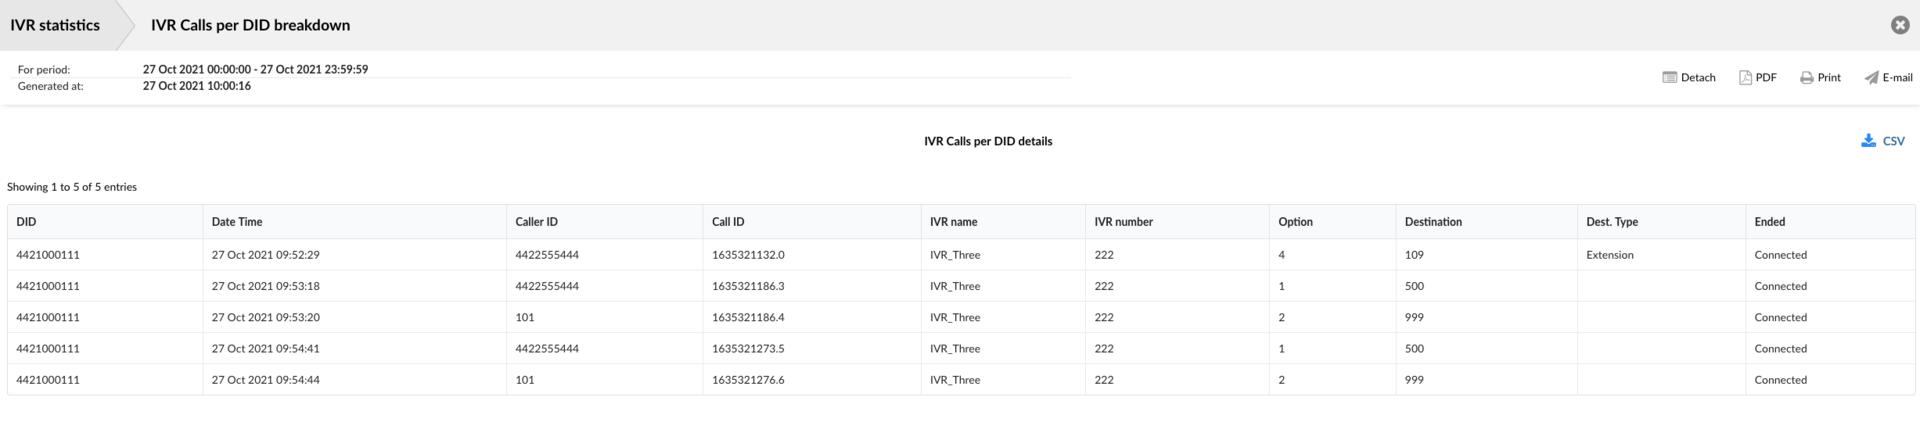
.
IVR Calls per Original Caller ID

Only calls for the Standard IVR type are included. It shows all calls per Original Caller ID, the number of Option calls, and Abandoned calls for each Original Caller ID. Users may also see a timeline of the total, connected, and abandoned calls for all Original Caller IDs summarized and a total calls comparison per Original Caller ID.
IVR Calls per Option
This report shows the number of calls per IVR and the number of calls for each option or abandoned calls per IVR. It shows data for all IVR types.

Breakdowns
By clicking the ‘Breakdown’ buttons, the selected reports will appear in a new window, with more details on the IVR Calls.
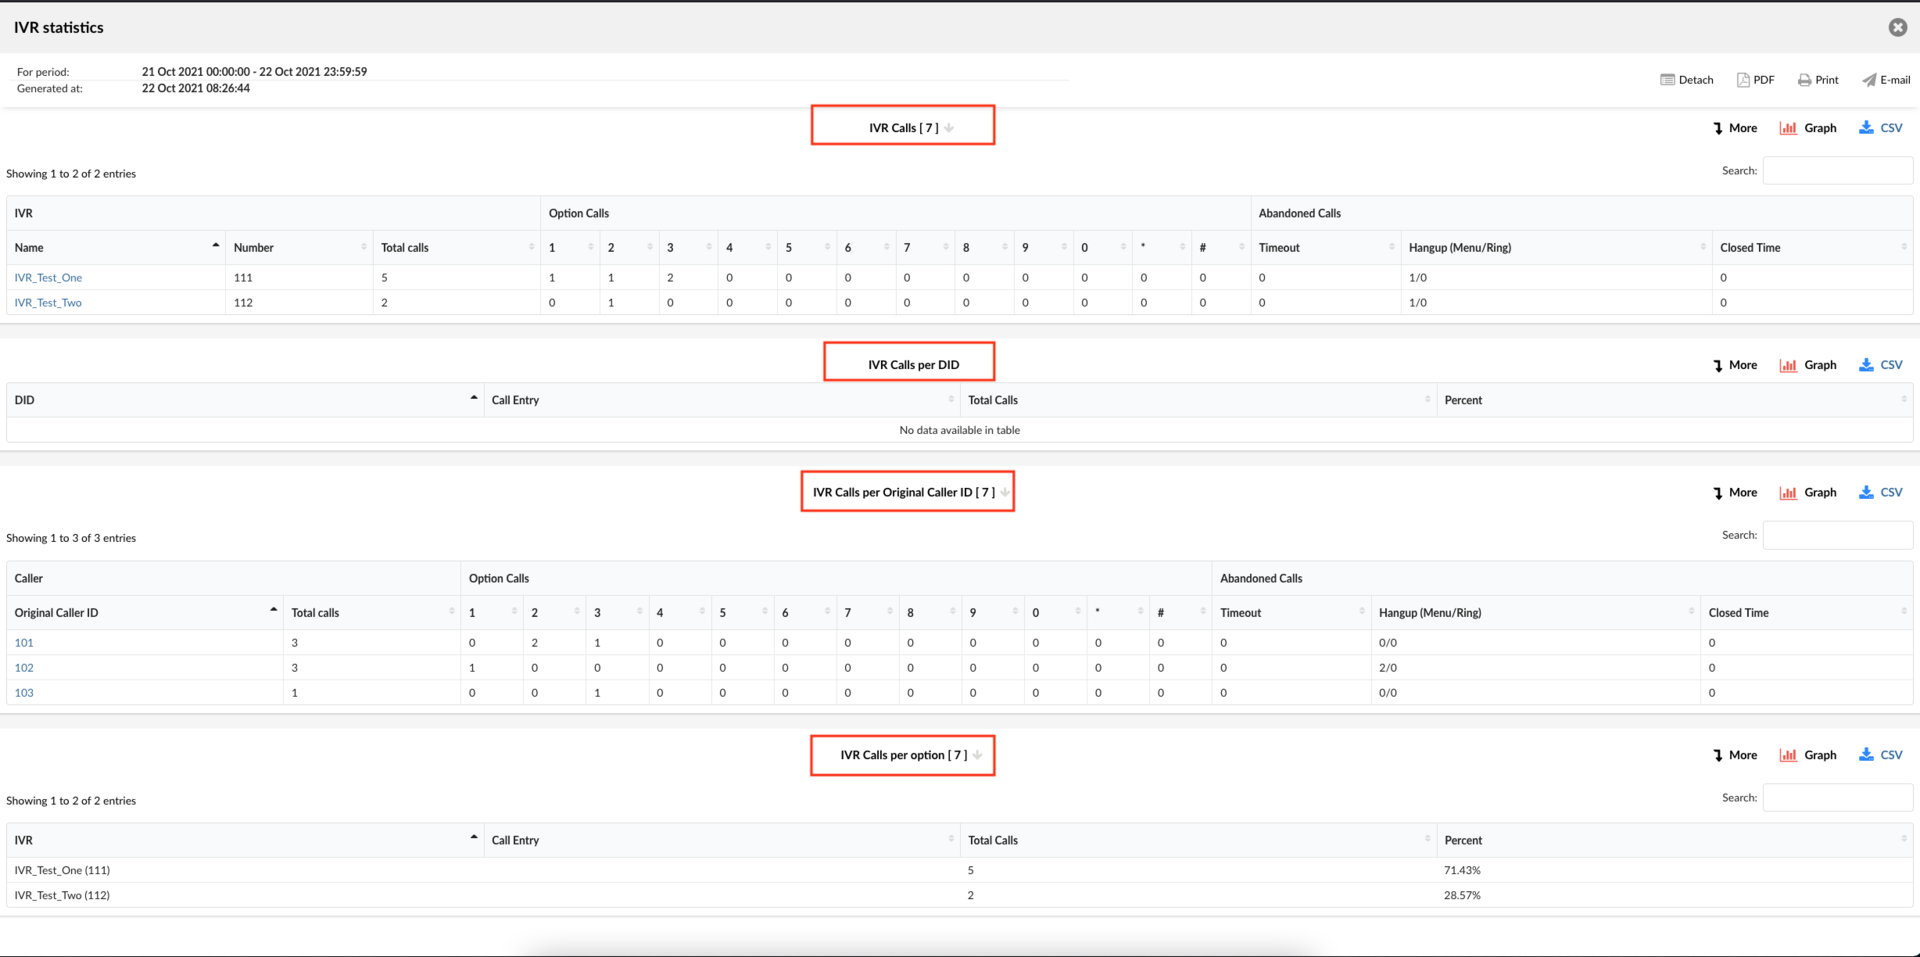
Breakdown shares a similar format for every report.

All fields are explained as Field name (Synonym name) – Description
Fields:
- CallID – Event ID
- Date time – Date when the event occurred
- Original Caller ID – Original number of the caller who entered the IVR
- CallerID – Caller’s Extension (can be same as or different from the Original Caller ID)
- IVR name – Name of the IVR where the call entered
- IVR number – Number of the IVR
- Option – Option number (empty for abandoned calls)
- Destination – Number of the Destination where the call proceeded from the IVR (empty for abandoned calls, except for timeout where the ‘Timeout Destination’ can be specified)
- Destination Type – Type of a Destination where the call proceeded from the IVR (empty for abandoned calls, except for timeout where it can be specified)
- Ended – Shows which event happened for that particular call
Concurent calls
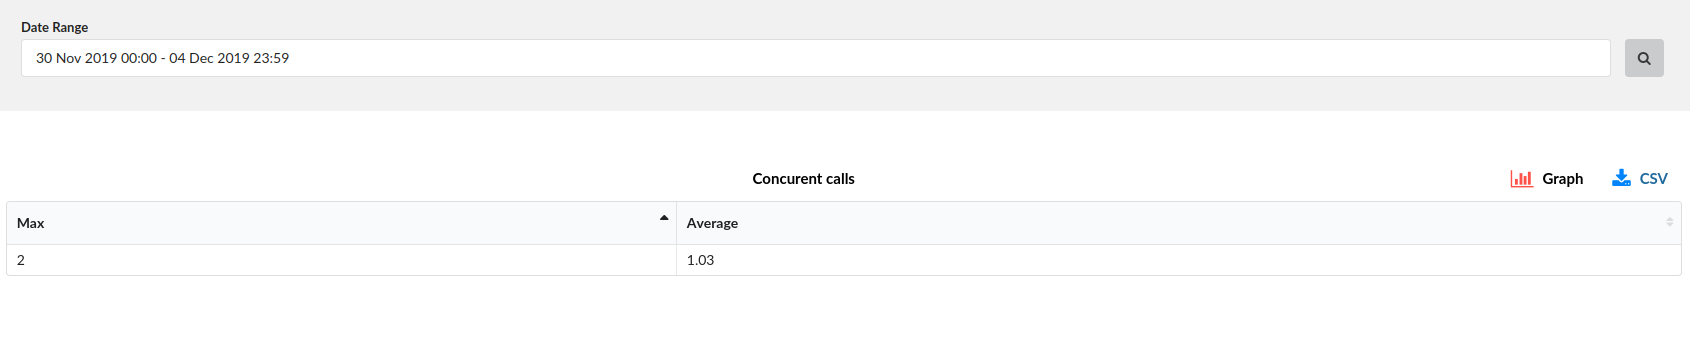
This section gives users a preview of calls that occur at the same time on the same line.
This page is only available on Master Tenant.
Concurent calls
- Tenant
Number(Name) of the tenant the call was made on.
- Max
Maximum of number concurent calls in selected period
- Average
Average number of concurent calls in selected period
We can here also use graph which will show graphically max calls
TIP: The Download CSV option is used to download the CSV formatted file.
Advanced
Advanced options for Statistics reports are available only on Master Tenant. This section enables creating a unique statistic report that fits the user’s needs.
Clicking on the “Show Advanced Options” will expand searching criteria and the following will be listed to users:
- Date range:
Users are given a drop-down list with the following options:
- Range:
Select a date range by clicking on a calendar or choose the following options:
- Today
- Yesterday
- Last 7 Days
- Last 30 Days
- This Month
After selecting, users will be introduced with the statistics which include only that range of time.
- From
In this field users need to write the number from which the desired call is made. By default, the ‘ALL’ modifier will be in this field, meaning statistics :will be made for all calls on the system which happened on the selected date range.
If users want to see statistics from a few particular numbers, they should write all desired numbers separated by commas.
(E.g. To display calls made from extension 104 and remote number 44207296666 user should type “104,44207296666”)
Also, users are given a drop-down list with the following options:
- Equals
Do a statistic only for the number which is equal to number/s written.
(E.g. John sets this option to ‘Equals’ and types number 101. Statistics will be shown only for calls made from number 101.)
- Begins with
Do a statistic for all numbers which begin with number/s written.
(E.g. John sets this option to ‘Begins with’ and types number 101. Let’s imagine that John made calls from numbers 1011 and 105. Statistics will be shown only for calls made from numbers that begin with number 101, in this case from numbers 101 and 1011.)
- Contains
Do a statistic for all numbers which contain number/s written.
(E.g. John sets this option to ‘Contains’ and types number 101. Let’s imagine that John made calls from numbers 1011, 2101 and 501. Statistics will be shown only for calls made from numbers that contain number 101, in this case from numbers 1011 and 2101.)
- Ends with
Do a statistic for all numbers which end with number/s written.
(E.g. John sets this option to ‘Ends with’ and types number 101. Let’s imagine that John made calls from numbers: 1101, 2101 and 501. Statistics will be shown only for calls made from numbers that end with number 101, in this case from numbers 1101 and 2101.)
- To
In this field users need to write the number to which the desired call is made. By default, the ‘ALL’ modifier will be in this field, meaning statistics will be made for all calls on the system which happened on the selected date range.
If users want to see statistics from a few particular numbers, they should write all desired numbers separated by commas.
(E.g. To display calls made to extension 104 and remote number 44207296666 user should type “104,44207296666”)
Also, users are given a drop-down list with the following options:
- Equals
Do a statistic only for the number which is equal to number/s written.
(E.g. John sets this option to ‘Equals’ and types number 101. Statistics will be shown only for calls made to number 101.)
- Begins with
Do a statistic for all numbers which begin with number/s written.
(E.g. John sets this option to ‘Begins with’ and types number 101. Let’s imagine that John made calls to numbers 1011 and 105. Statistics will be shown only for calls made to numbers that begin with number 101, in this case to numbers 101 and 1011.)
- Contains
Do a statistic for all numbers which contain number/s written.
(E.g. John sets this option to ‘Contains’ and types number 101. Let’s imagine that John made calls to numbers 1011, 2101 and 501. Statistics will be
shown only for calls made to numbers that contain number 101, in this case to numbers 1011 and 2101.)
- Ends with
Do a statistic for all numbers which end with number/s written.
(E.g. John sets this option to ‘Ends with’ and types number 101. Let’s imagine that John made calls to numbers: 1101, 2101 and 501. Statistics will be shown only for calls made to numbers that end with number 101, in this case to numbers 1101 and 2101.)
- Duration
In these fields, you can set a range for the duration of the calls in seconds.
Both fields can be modified depending on selected equality signs:
- > (greater than)
- >= (greater than or equal to)
- == (equal to)
- <= (less than or equal to)
- < (less than)
(E.g. If the user wants to see statistics of calls that last more than 15, but less than 45 seconds, in the first field there will be “>” and “15” set, and in the second “<” and “45”.)
([0-9])
- Trunk
User is given a drop-down list with all trunks on the system.
- DID
User is given a drop-down list with all DID-s on the system.
Reports table:

There are 3 kinds of reports available to choose in this section :
- Outgoing calls per Trunk
This report shows the duration and number of calls (answered and unanswered) that came through a particular trunk in the selected range of time.
This report can also be represented as a pie chart, which can be modified by clicking colored circles above the chart. This way, users are able to include or exclude Trunks that they want from the chart.
- Incoming calls per DID
This report shows the duration and number of inbound calls (answered and unanswered) per DID.
This report can also be represented as a pie chart, which can be modified by clicking colored circles above the chart. This way, users are able to include or exclude DIDs which they want from the chart.
- Calls per direction
This report shows the total number of calls (incoming and outgoing) on the system that happened in the selected range of time.
This report can also be represented as a pie chart, which can be modified by clicking colored circles above the chart.
TIP: The Download CSV option is used to download the CSV formatted file.
Voicemail
PBXware voicemail is an advanced answering machine. Although each extension is equipped with a voice mailbox, voice mailboxes can be created on their own as well from this location. This page can be only found on Slave Tenant.
Mailboxes
NOTE: We have introduced a new lockout feature for Voicemails. It is directly related to the ‘Max login attempts’ option meaning that if a user fails to enter their voicemail PIN correctly after E.g., 3 tries, that voicemail will be blocked until an administrator unblocks it.

This screen lists all system mailboxes with the following details:
- Name:
Full name of the voice mailbox user/extension name.
(E.g. Peter Doyle)
- Mailbox:
Voice mailbox extension number.
(E.g. 1006)
- Domain:
Domain/Context voice to which the mailbox belongs.
(E.g. default)
Edits the voice mailbox configuration.
(Click to edit the voice mailbox configuration)
NOTE Edit command will be disabled for users with the system extension. Their voicemail settings are edited via self care or by editing their extension.
Deletes a voice mailbox account from the system.
(E.g. Click to delete a voice mailbox from the system)
Transfer to voicemail between tenants
Users from different tenants can now leave a voicemail to each other.
Simply dial *125XXXYYY (XXX denotes the tenant number and YYY the extension number)
To listen to your voicemail go to Voicemail -> Messages -> Select Mailbox. After selecting a mailbox from the desired extension, select the voice message you would like to hear and click ‘Listen’.
Voice Mailbox Access
In order to access custom voice mailboxes from any PBXware extension, dial *124.
After you hear the “Comedian mail mailbox” message, enter $VOICE_MAILBOX_NUMBER’, then you will be prompted to enter the PIN for that extension (PIN can be found in Extension -> Edit -> Authentication -> PIN) or a Mailbox in case you have created mailbox on its own (Voicemail -> Mailboxes -> Edit -> PIN).
After typing PIN number you will hear and you will be offered the following:
“You have x new/old messages” (x is replaced with the number of new or old messages)
Press 1 for new/old messages
(Gives the information about time, date and from which number the voicemail was sent.)
Press 2 to change folders
If you press 2 you will be presented with further options to:
- Press 0 for new messages,
- Press 1 for old messages,
- Press 2 for work messages,
- Press 3 for family messages,
- Press 4 for friends messages,
- Press ‘#’ to cancel
.
Press 3 for advanced options
If you press 3 you will be presented with further options to:
- Press 4 to place an outgoing call,
- Press 5 to leave a message,
- Press ‘*’ to return to the main menu
.
Press 0 for mailbox options
If you press 0 you will be presented with further options to:
- Press 1 to record your unavailable message,
- Press 2 to record busy your message,
- Press 3 to record your name,
- Press 4 to record your temporary greeting,
- Press 5 to change your password,
- Press ‘*’ to return to the main menu
.
Press ‘*’ for help
(Repeats the whole menu again.)
- Press ‘#’ to exit
Search

This option enables searching and finding desired mailboxes in a short amount of time.
Clicking on the ‘Search’ field users will be given the ability to type a search phrase.
Search can be done by entering:
- Extension name
- Extension number / Mailbox
- E-mail of the extension and by the Email of the mailbox user
CSV upload
This option enables users to add a number of mailboxes real quick. Segments in the .csv file need to be comma-separated and in the following order: Mailbox number,name,PIN,E-mail.
Download CSV Template
This option gives users the ability to download the CSV file template which makes creating a number of mailboxes even faster and easier.
Add/Edit Voicemail
General
Clicking on ‘Add Voicemail/Edit Voicemail’ will open the voicemail screen shown below.
- Mailbox:
Unique network voice mailbox extension number.
(E.g. Set this field to 5001, for example. Now, in order to dial into this voice mailbox, simply dial 5001 from any PBXware extension)
- Name:
Full name of the voice mailbox owner.
(E.g. John Smith)
- PIN (Personal Identification Number):
Four-digit number used for voice mailbox authentication.
(E.g. Each voice mailbox has a unique PIN. In order to login to your voice mailbox, provide this number when asked for it by the operator e.g. 1947)
- Email:
Email address associated with the voice inbox. This email is used for a new voice message notification and audio file attachments.
(E.g. If ‘john@domain.com’ is set here, once this mailbox receives a new message, notification and the attached voice message (depending on if this option is enabled) will be sent to this email address)
- Password:
This password will be used for OSC Voicemail login.
Password has to meet the following criteria:
-
At least 8 characters long
-
At least 1 uppercase letter
-
At least 1 lowercase letter
-
At least 1 digit
-
At least 1 special character (! % * _ -)
Allowed characters are: a-z, A-Z, 0-9, ! % * _ -.
- Language:
If you installed additional language sound files on the system, you can choose a different language to be used for sound files related to voicemail.
(E.g. If you installed French language files in the sounds/fr folder, put ‘fr’ here to play French sound files when answering voicemail)
- Send E-mail:
Whether or not to send an e-mail to the address given above.
- Transcribe content:
Voicemail transcription is a service that converts audio voicemail messages into text format, which is then sent to the user via email or text message. It is sometimes referred to as ‘speech to text’, ‘voice to text’ or ‘voicemail to text’.
- Carbon Copy E-mails:
Add additional E-mail addresses to which you want voice inbox to be associated with.
- Pager e-mail:
Provide the pager e-mail address here.
(E.g. If ‘john@pager.com’ is set here, once this mailbox receives a new message, a notification is sent to this pager email address)
- Greeting message:
Greeting message played to users before they are transferred to the voice mailbox to leave a message.
(E.g.Mailbox user may choose between a ‘Busy’ and ‘Unavailable’ message)
- Unavailable/Busy message:
Upload the custom unavailable message. The unavailable message supports: WAV, wav, and gsm files only.
(E.g. If the default unavailable message does not suit your needs, click the ‘Browse’ button, upload a custom message, and select it under ‘greeting message’)
- Skip instructions:
Skip the instructions telling users how to leave a voice message.
(E.g.Once the caller reaches the voice mailbox, instructions on how to leave voice message are played. You are encouraged to set this option to ‘Yes’ all the time)
- Attach:
Whether the voice message should be attached and sent along with the notification email.
(E.g. A caller leaves a voice message for John. With this option set to ‘Yes’, E-mail which notifies John about the voice message also has that voice message attached to it, so John can listen to the message without having to sign into his voice mailbox.)
- Delete After E-mailing:
Whether the voice message sound file should be deleted from the filesystem after sending it as an attachment to the user’s email address.
(E.g.The caller leaves a voice message to John. With this option set to ‘Yes’, the voice message will be deleted after sending it as an attachment to John’s email address)
NOTE: In order for this option to be available, you need to set ‘Attach’ option to ‘Yes’ which will enable sending voice message as an attachment in mail.
- Say CallerID:
Whether the extension number which left the voice message should be announced to the mailbox owner.
(E.g. With this option set to ‘Yes’, John will hear ‘… from phone number 1004…’ when checking his mailbox, for example).
NOTE: If you leave this option as ‘Not Set’, by default CallerID will be announced to the mailbox owner.
- Allow Review mode:
Allow the user to review his voice message before committing it permanently to the voice mailbox.
After a caller leaves a voice message and presses ‘#’, additional options will be offered:
-
Press 1 to accept this recording
-
Press 2 to listen to it
-
Press 3 to re-record your message
-
Press 4 to mark this message as urgent.
. -
Allow Operator:
Allow the caller to reach the operator from the voice inbox by pressing ‘0’. Once the user leaves a voice message and presses ‘#’, additional option ‘…press 0 to reach an Operator’, will be heard.
If no ‘Operator Extension’ in the field below is written, by pressing 0 call will be finished.
NOTE: Voice message recorded before pressing 0 will be deleted from the system.
- Operator Extension:
If ‘Allow Operator’ option in the field above is set to ‘Yes’, the caller will be given an option to press 0 to reach an operator.
Choose the Operator Extension from dropdown here.
(E.g. Once the caller leaves a voice message to John and presses ‘0’ to reach the Operator, the extension number provided here (e.g. 1001) will be dialed)
NOTE: Voice message recorded before pressing 0 will be deleted from the system.
- Play Envelope Message:
Announces the date and time when the voice message was left in the inbox.
(E.g. With this option enabled, John will hear ‘First message, 11:52, 02 Feb 2007’, for example, when checking his voice mailbox)
NOTE: If you leave this option as ‘Not Set’, by default date and time when the voice message was left in the inbox will be announced to a mailbox owner.
- Hide from directory:
This option will allow you to hide your voicemail extension from the directory list.
(E.g. Yes, No, Not Set)
- Rings to answer:
Number of rings played to the caller before the call enters Voicemail.
TIP: Rather than just ‘falling’ into Voicemail, it is recommended to set the number of ring sounds played to the caller.
NOTE: By default, this field is empty which means that there will be no ringing. The caller will ‘fall’ into Voicemail immediately after calling.
- Voicemail Delay (sec):
The time delay in seconds before the Busy/Unavailable message is played to the caller. This solves the ‘half-played’ file problem. Keep this value between 1-3.
(E.g. The caller is leaving a voice message to John. It hears ‘…not at home right now…’. Adding ‘1’ to this field will add a one-second pause before the message is played. So, now the caller will hear the greeting message without the first part being cut off ‘I am not at home right now…’).
- Timezone:
Set the correct date and time format for the message envelope. Timezones are taken from the ‘/usr/share/zoneinfo’ system directory.
- Allow OSC Access for Extensions:
A list of extensions that will be allowed to view this mailbox from their OSC in the Voicemail section.
Call Notifications
- Enable:
If this specific inbox should use call notifications or not.
(E.g. Yes, No, N/A)
NOTE: This option is mutually exclusive with the delete after E-mailing options.
- Notify Destinations:
Extensions to be called when a voicemail is received. Choose the Notify Destination from dropdown here.
- Ring Type:
You can choose here ALL or SINGLE. It indicates how many extensions are rung at a time.
- Ring Time:
How long to ring each target (default 32).
- Retry Count:
How many times to retry if none accepts on the first try (default 0).
- Retry Delay (min):
How many minutes to wait for the next retry after the last one failed (default 1).
Groups
Voicemail groups are used to group voicemail inboxes. Once a voice message is left to group 2002, for example, all destinations that belong to that voicemail group will receive the same voice message. This screen lists all system voicemail groups with the following details:

- Group Name:
Voicemail group name/identifier.
(E.g. Lobby)
- Group number:
Voicemail group number. Once dialed, the voicemail message will be left to all ‘Destinations’ of the voice boxes in this group
(E.g. 2002)
- Mailboxes:
Numbers of Mailboxes assigned to a Voicemail Group.
(E.g. 1001, 1002, 1003)
(Display)
Edits the voicemail group configuration.
(E.g. Click to edit the voicemail group configuration)
Deletes a voicemail group from the system.
(E.g. Click to delete a voicemail group from the system)
Add/Edit Voicemail Group
- Voicemail Group Name:
Voice mailbox network name.
(E.g. Create a voicemail group, ‘Lobby’, for example)
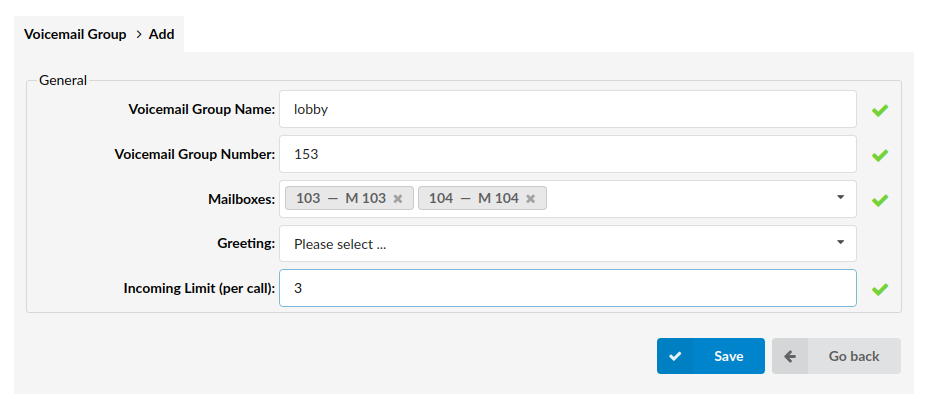
- Voicemail Group Number:
Voicemail Group number.
To leave a message to this group mailbox, callers will have to dial the extension number set here, e.g. 2002)
- Mailboxes:
A list of mailboxes that belong to this voicemail group is set here.
To assign extensions to this voicemail group, provide their extension numbers separated by a comma ‘,’ here. For example, 1001,1002,1003…)
- Greeting:
The greeting which is played when calling this Voicemail group.
NOTE: When uploading a greeting for the Voicemail group, the name of the sound file must start with ‘vm-greeting’.
- Incoming Limit (per call)
The maximum number of times each call can enter the Voicemail group. Entering a value in this field will prevent eventual infinite loops that might be accidentally set up on the system.
Messages
This section gives users a preview of all of their Voicemail. Users first need to select the desired Mailbox and then they will be introduced with Voicemails that Mailbox contains.
Following information is given:
Check Box
Check box allows users to choose which Voicemail they want to work with. There is an option to choose one, multiple or all Voicemails.
After choosing, users can manipulate voicemails with the following options that can be found above the Voicemail list:
- Move
- Forward
- Listen
- Download
- Delete
MSG
Gives users the information about the position of Voicemail in Mailbox. Lower the number the older it is.
Caller
Information about the caller. If the caller has set the Caller ID users will see “CallerID <Extension number>”. If the CallerID is not set the user will see “Extension name <Extension number>”.
Date
Date and time when the Voicemail was sent.
Duration
The length of a Voicemail.
Search Voicemail
Mailbox name
By clicking on this field, the drop-down menu will be presented to users allowing them to decide which Mailbox they want to see. Users will only see Voicemails that belong to the chosen Mailbox.
This field allows users to search Voicemails by folders in Mailboxes.
.
Voicemail options
After selecting desired Voicemails users have the ability to manipulate them with the following options:
- Move
Moves Voicemail to the desired folder. This option enables faster search and a more organized Mailbox.
- Forward
Forwarding Voicemail to another extension. After choosing Voicemail and clicking Forward users will be asked to enter the extension number of an extension to which they want to forward a Voicemail.
- Listen
By clicking on this field, users will have the ability to listen to Voicemail recordings.
- Download
After selecting Voicemail, click here to download the recording.
- Delete
After selecting Voicemail, click here to delete the recording.
